HP LASERJET
|
|
|
- Erica Randall
- 5 years ago
- Views:
Transcription


 HP")
")
1 HP LASERJET TONER CARTRIDGE REMANUFACTURING INSTRUCTIONS HP LASERJET 4200 TONER CARTRIDGE (Q1338A) HP LASERJET 4300 TONER CARTRIDGE (Q1339A)


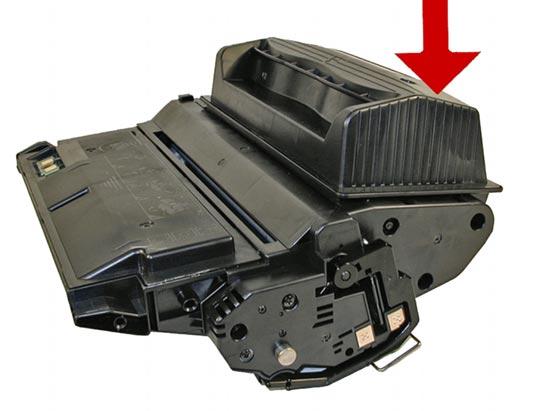
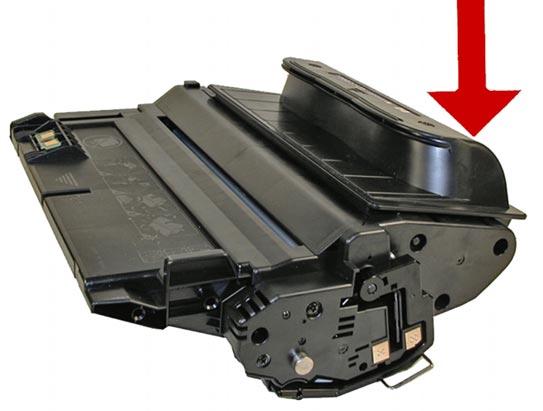
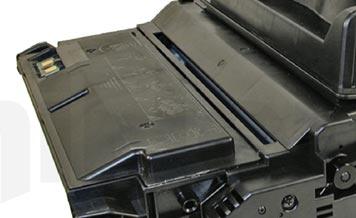
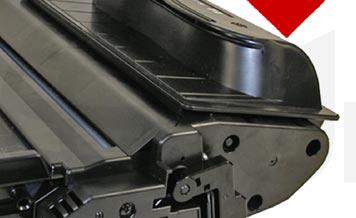
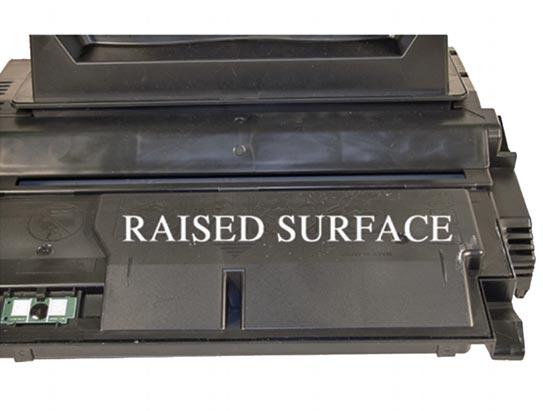
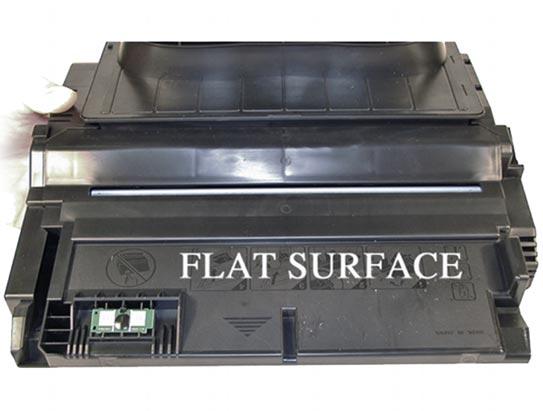
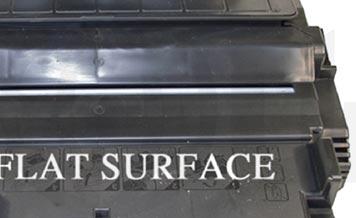
2 REMANUFACTURING HP LASERJET 4200/4300 TONER CARTRIDGES By Mike Josiah and the Technical Staff at UniNet First introduced in November 2002, the HP LaserJet 4200 engine is a 35-ppm, 1200-DPI engine. The HP LaserJet 4300 is a 45-ppm, 1200-DPI engine. Both engines are made by Canon. The Q1338A cartridge (4200), is rated for 12,000 pages at 5%, the Q1339A (4300) cartridge is rated for 18,000 pages at 5%. As with the HP 4100, the chip is mainly controlling the toner low functions, and of course the HP/non-HP cartridge message. These new chips are physically different in that they use physical contacts to talk to the printer (see image). The HP 4100 chips use RF (radio frequency) technology, where no physical contact is needed. These newer chips are also very noticeable, being placed on the top leading edge of the cartridge, and bright green in color. HP apparently is not making any effort to disguise the use of these chips. The chips themselves are held in place by double-sided tape. In our tests, the OEM cartridges did not meet their stated yields. The 4200 cartridges yielded 11,060 pages (vs. 12,000), and the 4300 cartridges yielded 16,009 pages (vs. 18,000). The densities for both were on the dark side with the 4200 averaging 1.54, and the 4300 averaging This higher than normal density probably accounts for the low yield. These instructions cover both the 4200 and 4300 cartridges. Although they are not interchangeable, the procedure to remanufacture them is for the most part, identical. The only major exception is removing the wiper blade on the 4300 cartridge. The first noticeable difference between the two cartridges is the height of the hopper, but there are many more subtle differences. The following images show the differences between the two cartridges...
3

4


.")

, it is not known if the toner low function will work if")
5 As you can see, HP and Canon seem to have gone out of their way to design these cartridgs, so that they cannot be made interchangeable. We would have thought that having a low yield cartridge as well as a high yield cartridge, would be the way to go, especially when you consider past history. Apparently the engineers at HP/Canon thought otherwise. The machines themselves also look very similar, as they both have the same footprint, and what appear to be the same cases (except for the lids). The next set of images show the display panel, when a cartridge is inserted into the machine in various states. Basically, it seems that the functions of this chip are the same as the The cartridge will work without a chip, but the error message must be cleared first. At the time of writing this article (December 2002), it is not known if the toner low function will work if the chip is removed. We are still in the initial stages of testing these cartridges. By the time you read this, we should have this, as well as other questions answered. New HP cartridge New HP cartridge, seal left in

 Full")

 Full cartridge,")
6 HP cartridge, low toner (this starts at about 2,000 pages) Full cartridge, used chip Full cartridge, used chip (after pressing "?") Full cartridge, no chip (screen 1)
")
")
7 Full cartridge, no chip (screen 2) Full cartridge, no chip (screen 3) Full cartridge, no chip (screen 4) Full cartridge, no chip (screen 5)

8 Full cartridge, no chip (screen 6) Full cartridge, no chip (after pressing "check" button) The following images show the Supplies Status Pages and their respective states. Note that as far as the Supplies Status Page is concerned, an empty cartridge is the same as a full one with a used chip...
9 New full cartridge
10 Empty, used cartridge

11 Full, used chip
12 Full, no chip


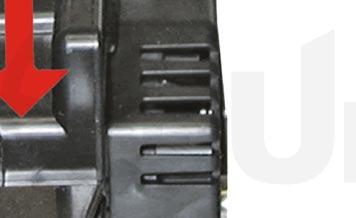
13 Printer usage, as well as some common printer/cartridge problems will be covered at the end of this article. REQUIRED TOOLS 1. Toner approved vacuum 2. A small common screwdriver 3. A Phillips head screwdriver 4. Needle nose pliers 5. Dremel tool for removing wiper blade shelf on HP 4300 cartridges REQUIRED SUPPLIES g replacement polyester-based toner for use in HP 4200 / 1,100g for use in HP Replacement drum 3. Wiper blade 4. Doctor blade 5. PCR 6. Magnetic roller sleeve 7. Conductive grease 8. Tube of silicon for sealing wiper blade gap 1. Place the cartridge with the toner hopper facing up and away from you. This will orient the cartridge for right and left sides. 3. Open the drum cover towards the back of the cartridge. Remove the left side metal bar. 2. Remove the four screws on the left side end cap (shown).


14 4. Carefully pry off the drum cover plastic arm. The spring will probably pop off, take care not to lose it. We will go over the installation at the end of this article. 5. Remove the metal bar from the right side, and remove the entire drum cover assembly. Make sure you put the spring in a safe place. 6. Remove the two screws from the right side end cap. Do not remove the screw that is holding the recessed metal drum axle pin. The rest of the right side end cap is held in place by three melted plastic posts. Although there are tools to aid in removing this end cap, we have found it not necessary. After removing and replacing the waste chamber a few times, a technician will be much faster than going through the trouble to remove the end cap.


15 7. Remove the left side end cap from the cartridge. 8. Carefully work the waste chamber loose from the right side end cap. Press in on the metal drum axle pin to help free it. 9. Remove the metal drum axle pin screw and the axle pin. 10. Remove the drum.


.")

16 11. Remove the PCR. 12. Remove the two screws from the wiper blade. 13. With a razor knife, carefully lift up the seal foam and cut away. This is very sticky stuff, the best way to remove it is to cut and lift. The wiper blade can be resealed with a good quality silicon caulk. Make sure you use the type that never dries (cannot be painted). This foam seal is apparently a cheaper way to seal the cartridge instead of using a foam gasket. Although it is a real pain to remove, replacing it with silicon will allow you to easily peel it off the next cycle.


 with your standard PCR")
17 14. Note the difference between the 4100 wiper blade and the At first glance they look very similar, but they are not. The tab behind the screw holes is a different size, and the alignment holes are on opposite sides. Due to the high speed and page counts of these cartridges, we recommend that they be replaced. It should be noted that the 4300 (39A) cartridge has a plastic shelf across the wiper blade that prevents it from being removed and replaced. This shelf is best removed by a Dremel-type tool with a grinding bit, or a circular blade bit. We do not recommend that a knife be used as it is easy to slip and cut yourself. 15. Clean the primary charge roller (PCR) with your standard PCR cleaner. 16. Install the wiper blade and two screws. 17. Seal the back edge of the wiper blade with a good quality silicon caulk. Use the type that never dries (cannot be painted). Let the caulk dry for a few hours before doing anything else.


18 18. Install the cleaned PCR. Place a small amount of conductive grease on the black PCR saddle. Remember, when using conductive grease, more is not better! DRUM GEAR CHANGE UPDATE: If you are replacing the drum, the gears will need to be changed over from the OEM to the new. There are two methods of removing the gears from OPC drums: The first and easiest method is to place the drum in a metal vice approximately 2" back from the gear, and slowly tighten the vice. The gear should pop out easily. This is the only method you can use on the OPC drums, which have a weighted slug in the center. If you use this method go on to step #3. The other method is as follows. REQUIRED TOOLS AND MATERIALS 1. A 1/4" x 15" metal rod 2. A 1" x 15" wooden dowel 3. A tube of super glue 4. A small piece of emery-cloth or sand paper Step #1: Removing the drive gear The drive gear is the gear that has no metal electrical contacts in it. These gears are usually larger than the contact gear. A. Carefully insert the 1/4" metal rod into the center of the gear that has the contacts, or the contact gear. B. Angle the rod so that the rod presses against the edge of the opposite gear. The rod should be touching both the inside of the OPC Drum and the edge of the gear. C. Tap the end of the rod with a hammer, working the rod around the entire edge of the gear, until the gear comes loose. NOTE: Gently heating the ends of the drum with a hair dryer or heat gun on low may cause the glue to soften and ease in the removal process. Just be careful not to use too much heat and melt the gear!
19 Step #2: Removing the "contact" gear A. Insert the 1" wooden Dowel into the gearless end of the drum. B. Tap the dowel with a hammer until the gear comes loose. Step #3: Removing any old adhesive from the gears, straightening out any damage done to the contact gears' metal contacts. A. Removing the adhesive can be done with a small sharp common screwdriver. The glue comes off easily. Step #4: Install the gears on the new replacement drum A. Inspect the metal contacts on the contact gear. Make sure that the contacts will make proper contact with the inside of the OPC drum. B. Locate the side of the drum on which you are going to place the contact gear. On some OPC drums, this is critical. See individual instructions for more information. C. Lightly sand the INSIDE of the OPC where the metal parts of the contact gear will meet. This will insure a good electrical contact. D. Dry-fit the contact gear in the OPC drum and check for a good contact with an Ohmmeter. The reading should be a direct short, or no more than 1 or 2 Ohms. NOTE: When checking the contact, place one lead on the drum axle contact and the other on the edge of the drum. This way, you will not have to pierce the coating that is on the OPC surface. A retail electronics store, such as Radio Shack carries cheap Ohmmeters for less than $10.00 USD, and a sales person would normally be glad to show you how to use it. E. Using the super glue, place a few (3-4) small drops of glue strategically around the inside edge of the OPC drum. Make sure you leave a blank area for the metal contacts! F. Insert the contact gear. G. Check for continuity again with the Ohmmeter. H. Repeat steps E and F for the drive gear. NOTE: Be very careful not to place the metal contacts in direct contact with the glue, as this will interfere with the proper grounding of the drum, and the cartridge will not print properly, (solid black pages). It is also very important to NOT put any glue on the gear, as the chances of it dripping out onto the drum surface and ruining it are high. Placing the glue inside the drum tube works much better.


 cover, and")


20 19. Install the drum, the drum axle pin, and screws. Make sure that the plastic pin is centered in the oblong hole of the metal axle pin (just like the HP 4000 cartridges). 20. Carefully pry up the magnetic roller sleeve (MRS) cover, and remove. 21. Remove the small metal pin from the magnetic roller sleeve holder. 22. Remove the magnetic roller sleeve drive gear.


21 23. Note the location of the spring that sits between the magnetic roller sleeve holder and the hopper. Remove the screw, the spring, and the holder. 24. Remove the magnetic roller sleeve assembly.


22 25. Remove the two doctor blade screws and the doctor blade. Note the clear spacer that fits in between the blade and the white plastic spacer. Do not lose this spacer, or light print will occur. 26. Clean out all the remaining toner in the supply hopper. 27. Note the magnetic seals on the magnetic roller sleeve and the doctor blade sealing foam. Make sure both are clean. 28. Note also the new style magnetic roller contact. There are two copper fingers that fit top and bottom on the magnetic roller. These, when combined with the new larger diameter of the roller, allow the cartridge to run at the higher speeds that both machines are capable of.


23 29. There are three separate mixing blades in the toner hopper. The largest is on the bottom, with the smallest on the top. Each is driven by its own separate drive gear. 30. The entire upper half of the toner hopper is different, in that is floats on a series of foam seals. The upper half can be removed from the hopper, but some of the seals will be destroyed. This may become necessary in order to seal the cartridge. We will keep you informed as our testing continues. 31. Fill with 690g of replacement polyester-based toner for use in HP 4200, or 1,100g for use in HP 4300 cartridge. 32. Install the doctor blade and two screws. Make sure that all the spacers (both clear and white) are seated correctly!


24 33. On the magnetic roller sleeve, there is a small hub that is keyed into its holder. Align and install the hub with its slot, as well as the entire magnetic roller sleeve assembly. 34. The opposite side holder is also keyed. Align the remaining hub and install into the holder. 35. Install the holder and spring.


25 36. Install the screw and the small metal pin. 37. Install the magnetic roller sleeve drive gear. 38. Install the keyed magnetic roller sleeve cover. Make sure that the keyed hole in the cover matches the keyed end of the magnet in the magnetic roller sleeve assembly. 39. Install the waste section into the fixed end cap on the supply hopper. This is a tricky process the first few times, but gets much easier. The best way to do it is to carefully pull the end cap out, and slide the waste up and in, until everything aligns. For the first few times, this is definitely easier said than done, but you will get the hang of it.


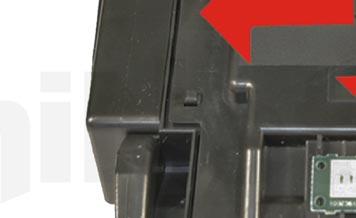
26 40. Install the two screws into the end cap. 41. Install the left side end cap. 42. Install the four screws. 43. Install the metal bars from the drum cover on both sides of the cartridge. You will have to turn the bars so that the flattened end of the bars fit into the keyed slots.


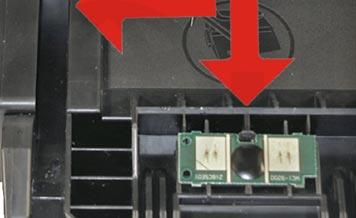
27 44. Install the spring into the drum cover arm as shown. Pull the upper tail of the spring until it fits into the notch in the arm hub. 45. Install the arm onto the cartridge. Release the spring from the notch so that the tail fits as shown. 46. Replace the chip on the top of the cartridge. Replacing this chip will enable the toner low functions of both the cartridge, and the machine again.
28 COMMON CARTRIDGE PROBLEMS Repetitive Defect Chart: OPC drum: 95 mm Magnetic roller sleeve: 63 mm PCR: 36 mm HP LASERJET TONER CARTRIDGE REMANUFACTURING INSTRUCTIONS Dirty or bad primary charge roller (PCR): A bad PCR will normally cause a gray background or ghosting. Small defects from the PCR will repeat every 36 mm. Dirty PCR connection: This will show as horizontal dark black bars across the page, or as shading throughout the page. Scratched drum: This is shown by a very thin, perfectly straight line that runs from the top to the bottom of the test page. Chipped drum: This will show as a dot or series of dots that repeat three times per page or every 95 mm. Any drum defects will repeat three times per page (95 mm). Light damaged drum: This will show up as a shaded area on the test print that should be white. Again this will repeat three times per page. Tire tracks: This is normally caused by a bad drum, they normally show up on the right edge of the page. Damaged magnetic roller sleeve: A damaged magnetic roller sleeve will leave a mark that repeats every 63 mm. RUNNING THE CLEANING PAGE 1. Press the SELECT button 2. Press the DOWN ARROW until CONFIGURE DEVICE appears 3. Press the SELECT button 4. Press the DOWN ARROW until PRINT QUALITY appears 5. Press the SELECT Button 6. Press the DOWN ARROW until CREATE CLEANING PAGE appears 7. Press the SELECT button 8. Follow the instructions on the cleaning page to complete. RUNNING TEST PAGES 1. Press the SELECT button 2. Press the DOWN ARROW until INFORMATION appears 3. Press the SELECT button 4. Press the DOWN ARROW until either of the folowing page selections appear: MENU MAP CONFIGURATION PAGE SUPPLIES STATUS PAGE PS or PCL FONT LIST 5. Choose the page(s) desired, and press the SELECT button PRINTER ERROR CODES These codes will be listed as soon as HP releases the service manuals for these machines (time of this writing).
IMAGECLASS MF7200 SERIES (EP105) TONER CARTRIDGE REMANUFACTURING INSTRUCTIONS
 TONER CARTRIDGE REMANUFACTURING INSTRUCTIONS") CANON IMAGECLASS MF7200 SERIES (EP105) TONER CARTRIDGE REMANUFACTURING INSTRUCTIONS CANON EP105 TONER CARTRIDGE REMANUFACTURING THE CANON IMAGECLASS MF7200 SERIES EP105 TONER CARTRIDGE By Mike Josiah and
CANON IMAGECLASS MF7200 SERIES (EP105) TONER CARTRIDGE REMANUFACTURING INSTRUCTIONS CANON EP105 TONER CARTRIDGE REMANUFACTURING THE CANON IMAGECLASS MF7200 SERIES EP105 TONER CARTRIDGE By Mike Josiah and
TONER CARTRIDGE REMANUFACTURING INSTRUCTIONS LASERJET P1505 SERIES TONER CARTRIDGE
 HP LASERJET P1505 TONER CARTRIDGE REMANUFACTURING INSTRUCTIONS HP LASERJET P1505 SERIES TONER CARTRIDGE 2010 UniNet Imaging Inc. All trademark names and artwork are property of their respective owners.
TONER CARTRIDGE REMANUFACTURING INSTRUCTIONS XEROX PHASER 3320 TONER CARTRIDGE
 XEROX PHASER 3320 TONER CARTRIDGE REMANUFACTURING INSTRUCTIONS XEROX PHASER 3320 TONER CARTRIDGE REMANUFACTURING THE XEROX PHASER 3320 TONER CARTRIDGE By Mike Josiah and the Technical Staff at UniNet First
XEROX PHASER 3635 MFP
 XEROX PHASER 3635 MFP TONER CARTRIDGE REMANUFACTURING INSTRUCTIONS XEROX PHASER 3635 TONER CARTRIDGE REMANUFACTURING THE XEROX PHASER 3635 MFP TONER CARTRIDGE By Mike Josiah and the Technical Staff at
ML-3712 MLT-D205 TONER CARTRIDGE REMANUFACTURING INSTRUCTIONS
 SAMSUNG ML-3712 MLT-D205 TONER CARTRIDGE REMANUFACTURING INSTRUCTIONS SAMSUNG MLT-D205 TONER CARTRIDGE CHANGES TO THE SAMSUNG MLT-D205 DRUM & CARTRIDGE By Mike Josiah and the Technical Staff at UniNet
HP ENTERPRISE 600 M651/M680 SERIES TONER CARTRIDGE REMANUFACTURING INSTRUCTIONS
 HP ENTERPRISE 600 M651/M680 SERIES TONER CARTRIDGE REMANUFACTURING INSTRUCTIONS HP 652A TONER CARTRIDGE RREMANUFACTURING THE HP COLOR ENTERPRISE 600 M651/M680 SERIES TONER CARTRIDGES By Mike Josiah and
TONER CARTRIDGE REMANUFACTURING INSTRUCTIONS OKIDATA B710/720/730 SERIES TONER CARTRIDGE
 OKIDATA B710/720/730 SERIES TONER CARTRIDGE REMANUFACTURING INSTRUCTIONS OKIDATA B710/720/730 SERIES TONER CARTRIDGE REMANUFACTURING THE OKIDATA B710/720/730 SERIES TONER CARTRIDGE By Mike Josiah and the
Technical Document. Panafax UF-890 (actually revisiting the Panafax UF-550)
") Technical Document Disassembly Instructions SUMMIT Laser Products 95 Orville Drive Bohemia, New York 11716 Tel: 631-218-8376 Fax: 631-218-3275 Panafax UF-890 (actually revisiting the Panafax UF-550) Toner
Technical Document Disassembly Instructions SUMMIT Laser Products 95 Orville Drive Bohemia, New York 11716 Tel: 631-218-8376 Fax: 631-218-3275 Panafax UF-890 (actually revisiting the Panafax UF-550) Toner
THE ML-3471 TONER CARTRIDGE
 SAMSUNG ML-3471 TONER CARTRIDGE REMANUFACTURING INSTRUCTIONS THE ML-3471 TONER CARTRIDGE DOC# 0438 By Mike Josiah and the technical staff at Summit Technologies a distributor of Summit and Uninet Products.
XEROX WORKCENTRE 4150
 XEROX WORKCENTRE 4150 TONER CARTRIDGE REMANUFACTURING INSTRUCTIONS 013R00623 DRUM UNIT REMANUFACTURING THE XEROX WORKCENTRE 4150 DRUM UNIT By Enrique E. Estura, Daniel Reyes, and the Technical Staff at
LEXMARK C780 CARTRIDGE REMANUFACTURING INSTRUCTIONS LEXMARK C780 TONER CARTRIDGE
 LEXMARK C780 CARTRIDGE REMANUFACTURING INSTRUCTIONS LEXMARK C780 TONER CARTRIDGE REMANUFACTURING THE LEXMARK C780 BLACK & COLOR TONER CARTRIDGES First released in April 2008, the Lexmark C780 is based
1320 TO P2015 TONER CARTRIDGE CONVERSION INSTRUCTIONS
 HP 1320 TO P2015 TONER CARTRIDGE CONVERSION INSTRUCTIONS HP 1320 TO P2015 CONVERSION KIT (UNINET PART #1114) HP 1320 TO P2015 TONER CARTRIDGE CONVERSION INSTRUCTIONS By Javier Gonzalez and the Technical
HP 5500 COLOR LASER PRINTER W/TONER CARTRIDGES
 AbsoluteCOLOR AbsoluteBLACK UniDrums UniRollers UniParts UniCoatings AbsoluteCOLOR AbsoluteBLACK UniDrums UniRollers UniParts UniCoatings HP 5500 CARTRIDGE REMANUFACTURING INSTRUCTIONS HP 5500 COLOR LASER
KONICA MINOLTA MAGICOLOR
 KONICA MINOLTA MAGICOLOR 5430 5440 5450 TONER CARTRIDGE REMANUFACTURING INSTRUCTIONS KONICA MINOLTA MAGICOLOR 5430 TONER CARTRIDGE REMANUFACTURING THE KONICA MINOLTA MAGICOLOR 5430/5440/5450 TONER CARTRIDGES
MINOLTA MAGICOLOR 5430/5440/5450 CARTRIDGE REMANUFACTURING INSTRUCTIONS
 MINOLTA MAGICOLOR 5430/5440/5450 CARTRIDGE REMANUFACTURING INSTRUCTIONS MINOLTA MAGICOLOR 5430 Color Laser Printer with Toner Cartridge MINOLTA MAGICOLOR 5430 TONER CARTRIDGE SIDE VIEW WITH END CAP SHOWN
TPE CC1997CRS HP M252/MFP M277 X TONER HOPPER 60GRMS FILL(WITH SEAL) OEM HP M252/MFP M277 (CF400A-CF403A
 OEM HP M252/MFP M277 (CF400A-CF403A") Installation Instructions for TPE CC1997CRS HP M252/MFP M277 X TONER HOPPER 60GRMS FILL(WITH SEAL) OEM HP M252/MFP M277 (CF400A-CF403A or CF400X-CF403X) Cartridge T.P.E. CC1997CRS HP M252/MFP M277 X TONER
Installation Instructions for TPE CC1997CRS HP M252/MFP M277 X TONER HOPPER 60GRMS FILL(WITH SEAL) OEM HP M252/MFP M277 (CF400A-CF403A or CF400X-CF403X) Cartridge T.P.E. CC1997CRS HP M252/MFP M277 X TONER
Sharp AR-160 OPC Cartridges DOC-0270
 Home New Arrivals! Company Info Publications Special Features Contact Us Overview Tools Required Supplies Needed Disassembly Recommended Supplies Sharp AR-160 OPC Cartridges DOC-0270 OVERVIEW The Sharp
Primus Wind Power. AIR Circuit Replacement Instructions
 Primus Wind Power AIR Circuit Replacement Instructions Items included with this kit: (see Exploded View p. 3) ITEM ITEM NAME QUANTITY 1 SCREW - SOCKET HEAD - 10-24 X 1-1/2" 4 includes 1 spare 2 O-RING
Conversion Kit for HP1200 Cartridge
 OEM HP1200 (C7115A) Cartridge Conversion Using T.P.E. CC1197 Canon EP26/EP27/X25/U Type Conversion Kit for HP1200 Cartridge OEM HP1200 (C7115A) T.P.E. CC1197 Canon EP26/EP27/X25/U Type Conversion Kit for
The Magazine For Slot Car Enthusiasts
 The Magazine For Slot Car Enthusiasts Building the Tomy Super G+ By Milt Surratt Tomy Super G+ slot cars have been around in the current form for about 12 years. Out of the package, the Tomy HO slot car
DRUM UNIT REMANUFACTURING INSTRUCTIONS
 Absolute COLOR Absolute BLACK Unidrums Unirollers Uniparts Unicoatings EPSON ACULASER C2600 DRUM UNIT REMANUFACTURING INSTRUCTIONS EPSON ACULASER C2600 COLOUR LASER PRINTER EPSON ACULASER C2600 DRUM UNIT
Moddit. How to Install an OS Giken Differential into a
 Moddit How to Install an OS Giken Differential into a Subaru BRZ This guide goes over the steps necessary to remove and install the OS Giken Limited Slip Differential into a Subaru BRZ. This guide may
Repair of warped dial scale - Sony CRF-5090.
 Repair of warped dial scale - Sony CRF-5090. Apparently this is quite a common problem with this series of receivers. This one was bought on a local auction site where it was clearly advertised as having
SHARK UPPER WINDSHIELD FRAME & WINDSHIELD REPLACEMENT. Text and Photos by TOM BENFORD
 Text and Photos by TOM BENFORD I purchased a fathom green 69 big-block tri-power T-top coupe with only 42,000 original miles on it recently. I'm the third owner of the car, and I got it for a very good
Prerequisites: Shop Manual (recommended) pages 3-9 through 3-13.
 pages 3-9 through 3-13.") Prerequisites: Order your gaskets average about $25.00 bucks X 2 so $50.00 4NK-11193-00-00 Obtain a shim kit (Should have several 265 and 270s) (Some dealers will exchange) Obtain a Valve Bucket Tool YM-33961
Prerequisites: Order your gaskets average about $25.00 bucks X 2 so $50.00 4NK-11193-00-00 Obtain a shim kit (Should have several 265 and 270s) (Some dealers will exchange) Obtain a Valve Bucket Tool YM-33961
How I installed new brake pads on my i with Sport Package (should be fine for other E39 s) By Robert B.
 By Robert B.") How I installed new brake pads on my 1999 528i with Sport Package (should be fine for other E39 s) How I installed new brake pads on my 1999 528i with Sport Package (should be fine for other E39 s) By
How I installed new brake pads on my 1999 528i with Sport Package (should be fine for other E39 s) How I installed new brake pads on my 1999 528i with Sport Package (should be fine for other E39 s) By
TOYOTA SUPRA JZA80 HEADLIGHT LENS TUTORIAL
 TOYOTA SUPRA JZA80 HEADLIGHT LENS TUTORIAL Disclaimer: Original Motorsports takes no responsibility for any errors which may occur in your DIY project. This is simply a guide. If you are not confident
5 Removal and replacement
 5 Removal and replacement This chapter describes the removal and replacement of field-replaceable units (FRUs) only. Removal and replacement strategy User-replaceable parts Covers Internal assemblies ENWW
Mercedes E63/CLS AMG Carbon Turbo Intake System Instructions
 Mercedes E63/CLS AMG Carbon Turbo Intake System Instructions The goal of Alpha Performance is to provide the highest quality, best performing products available. By utilizing research and development,
Re-Energy.ca - Solar Electricity - Build Your Own Solar Car
 Backgrounder Build Your Own Solar Car Back to Page 1 Build It! These step-by-step instructions provide you with a plan for making a basic solar car. If you can think of ways to improve the design of your
DELL C 5100 TONER CARTRIDGE REMANUFACTURING INSTRUCTIONS
 DELL C 5100 REMANUFACTURING INSTRUCTIONS DELL C 5100 LASER PRINTER DELL C 5100 REMOVING THE GEARLESS END CAP 1. Remove the gearless end cap (shown) to access the toner fill cap. Using a small flathead
Adjusting Carbs For Re-Jetting (Procedure written for an Intruder 1500 LC) NEWLY UPDATED: APRIL 2003
 NEWLY UPDATED: APRIL 2003") SECTION ONE: Get Prepared - Tools Adjusting Carbs For Re-Jetting (Procedure written for an Intruder 1500 LC) NEWLY UPDATED: APRIL 2003 Courtesy of: Half-Crazy Get a manual impact driver (the kind you hit
SECTION ONE: Get Prepared - Tools Adjusting Carbs For Re-Jetting (Procedure written for an Intruder 1500 LC) NEWLY UPDATED: APRIL 2003 Courtesy of: Half-Crazy Get a manual impact driver (the kind you hit
Optima K Badge Removal & Installation Tutorial
 P.1 2014-2015 BADGE INSTALLATION & REMOVAL HOOD, TRUNK, AND STEERING WHEEL ***Modification to the rear K Badge emblem of 2011-2013 Optima models as directed in this tutorial is not necessary*** Tools and
Maintenance Information
 Form 16575334 Edition 1 April 2005 Electric Screwdrivers EL, EP and ET 34V DC Series Maintenance Information Save These Instructions WARNING Maintenance procedures have the potential for severe shock hazard
Repairing a Loose Headlight Reflector Volvo V70XC ? Mark Pilant
 Repairing a Loose Headlight Reflector Volvo V70XC 2001 200? Mark Pilant If you find yourself in a position where the headlight adjusters do not change the aiming of your headlight, it is possible one of
Installation Manual TWM Performance Short Shifter 2008 Mitsubishi Lancer
 Page 1 Installation Manual TWM Performance Short Shifter 2008 Mitsubishi Lancer Please Note: It is preferable to park on a flat surface, as you will have to engage and disengage the hand brake and shift
Quick user guide for the DM dispenser
 Quick user guide for the DM dispenser READ FIRST! Use the shortest/thickest USB cable possible, if the screen dims too much during operation (to the point where it s hard to read the text) your cable or
DIY Bi-Metallic Strip
 DIY Bi-Metallic Strip An introduction to the applications of thermal expansion and two-way switching. Written By: Mahaaveer BN 2018 Page 1 of 14 INTRODUCTION A bi-metallic strip is used to convert a temperature
Ford Mustang V6 OEM-Style Fog Light Kit Parts List: Quantity: Tool List:
 2015-2017 Ford Mustang V6 OEM-Style Fog Light Kit Parts List: Quantity: Tool List: LED Foglights/ Bezels 2 Flat head & Phillips screwdriver (if you ordered part#3600) Ratchet & Socket set OR Wiring harness
Aamir_bt The legend..
 Aamir_bt The legend.. How to do timing on a 4XE1-W (DOHC) engine. well i decided to to a write up for DOHC timing since there was only the SOHC written up, and i had to do a timing belt on my stylus anyways,
Maintenance Information
 Form 04584058 Edition 1 November 2004 Air Impactool 2141P and 2141PSP Maintenance Information Save These Instructions Disassembly General Instructions 1. Do not disassemble the tool any further than necessary
354 CHAPTER EIGHT WATER PUMP
 354 CHAPTER EIGHT 33 Shift handle F : Forward N : Neutral R : Reverse proper alignment of the water tube to the water pump opening during each installation attempt. Make sure the locating pins enter the
INSTALLATION GUIDE. KTM RFS Husaberg Polaris 450/525 Outlaw KTM 450/525 XC ATV Manual Revision:
 REKLUSE MOTOR SPORTS The z-start Pro Clutch INSTALLATION GUIDE KTM RFS 03-07 Husaberg Polaris 450/525 Outlaw KTM 450/525 XC ATV 191-833 Manual Revision: 010615 2002 Rekluse Motor Sports Rekluse Motor Sports,
Southwest Windpower Instruction Sheet AIR-X Circuit Replacement Kit
 Southwest Windpower Instruction Sheet AIR-X Circuit Replacement Kit Tools Required 5 / 32 Hex key 5 / 16 Hex key 7 / 64 Hex key Standard screwdriver Pair of external snap ring pliers Rubber mallet Hammer
DrVanos.com Stage II Installation Instructions. Tool rental is available with the purchase of a vanos kit *See website for more info*
 DrVanos.com Stage II Installation Instructions Special Tools Needed: Camshaft locking tool TDC Crank pin Sprocket turning tool Tool rental is available with the purchase of a vanos kit *See website for
Maintenance Information
 45530136 Edition 1 July 2008 Electric Screwdrivers EL 24V DC Series Maintenance Information Save These Instructions WARNING Always wear eye protection when operating or performing maintenance on this tool.
RHINO SUSPENSION SYSTEM INSTALLATION INSTRUCTIONS
 PARTS INCLUDED: 2 FRONT UPPER A-ARMS 2 FRONT LOWER A-ARMS 2 UNI-BALL JOINTS 2 UNI-BALL JOINT STUDS 2 UNI-BALL JOINT CAPS 2 RETAINING RINGS 1 FRONT SHOCK ASSEM. 2 DELRON STEERING STOPS 2 SHOCK MOUNT SPACERS
Caution Improper installation could result in tape failure, mounting hardware, and reader. Please read instructions before installing!
 Elgo Sensor Mounting Motion High Speed Landing/Positioning System The encoded tape used for the landing system is suspended between two mounting brackets that attach to the car rail using forged clips
#TL T EA888 GEN 3 FUELING SYSTEM/ INSTALLATION INSTRUCTIONS
 #TL100069 2.0T EA888 GEN 3 FUELING SYSTEM/ INSTALLATION INSTRUCTIONS Notes: These instructions were written for a North American specification MkVII GTI. Other models, like the Golf R, are similar. When
1986 Rear Disk Brake Upgrade. All hard lines mounted to the rear axle with mounting screws. 1/4" fittings
 1986 Rear Disk Brake Upgrade Being well prepared for a project of this size is the key to success. I thought I was well prepared by doing a lot of research and getting all of the required parts before
J & D Machine / Hyperdrive / MSA 3711 Moon Bend Rd. Chapel Hill, TN 37034
 J & D Machine / Hyperdrive / MSA 3711 Moon Bend Rd. Chapel Hill, TN 37034 www.hyperdriveracing.com 1 You now own a state of the art 1/10 scale oval race car. The Hyperdrive Assault has gone through months
Note: Please read through the entire guide before attempting any kind of installation.
 KIT-RSNSb Installation Guide Version 1.3 Auber Instruments, 730 Culworth Manor, Alpharetta, GA 30022 e-mail: info@auberins.com Tel: 770-569-8420 www.auberins.com This is a PID controller kit installation
Contents. Preparing the motor Winding the rotating secondary Winding the primary... 8
 120732-130389 Propeller Clock Construction Notes Revision E, December 2, 2013 Contents Preparing the motor... 2 Winding the rotating secondary... 5 Winding the primary... 8 UltiProp Clock (Elektor Dec.
Remove the 3-11mm nuts holding mirror on. Don t drop the nuts!
 2005-2012 Ford Mustang Puddle Lamp Kit Parts List: Quantity: Tool List: LED Lamps 2 Flat head screwdriver Seals 2 Ratchet & Socket set OR Nuts 2 Adjustable Wrench Wiring harness 1 Drill & 11/16 th bit
Maintenance Information
 Form 16573321 Edition 1 July 2004 Air Grinder Series 61H Maintenance Information Save These Instructions Always wear eye protection when operating or performing maintenance on this tool. Always turn off
INSTALLATION INSTRUCTIONS REPAIR SEAL KIT PowerSurvivor 40E
 INSTALLATION INSTRUCTIONS REPAIR SEAL KIT PowerSurvivor 40E PURPOSE OF THE KIT The Repair Seal Kit should be installed after 1000 hours of operation. It should be installed regardless of whether or not
Depress each tab as you pull the bezel off. The bezels are tight. L.H. shown.
 2013-2014 Ford Mustang V6 & Boss 302 Lower Valance Fog Light Kit Parts List: Quantity: Tool List: Fog light & bulb with bracket 2 Flat head & Phillips screwdriver Black bezels 2 Ratchet & Socket set OR
INSTALLATION GUIDE CRF150R Manual Revision:
 REKLUSE MOTOR SPORTS The z-start Pro Clutch INSTALLATION GUIDE CRF150R 191-810 Manual Revision: 032508 2002 Rekluse Motor Sports Rekluse Motor Sports, Inc. 110 E. 43rd Street Boise, Idaho 83714 208-426-0659
DM-ST (English) Dealer's Manual. Dual control lever ST-9001 ST-9000 ST-6800 ST-5800 ST-4700 ST-4703
 Dealer's Manual. Dual control lever ST-9001 ST-9000 ST-6800 ST-5800 ST-4700 ST-4703") (English) DM-ST0002-05 Dealer's Manual Dual control lever ST-9001 ST-9000 ST-6800 ST-5800 ST-4700 ST-4703 CONTENTS IMPORTANT NOTICE... 3 TO ENSURE SAFETY... 4 INSTALLATION... 6 List of tools to be used...6
(English) DM-ST0002-05 Dealer's Manual Dual control lever ST-9001 ST-9000 ST-6800 ST-5800 ST-4700 ST-4703 CONTENTS IMPORTANT NOTICE... 3 TO ENSURE SAFETY... 4 INSTALLATION... 6 List of tools to be used...6
Installation Manual TWM Performance Short throw shifter 2001 and up Hyundai Accent
 Installation Manual TWM Performance Short throw shifter 2001 and up Hyundai Accent 1. Place the vehicle on a flat surface with blocks in front and behind the wheels preventing unwanted movement. The car
HOW TO MAKE YOUR OWN BATTERIES
 HOW TO MAKE YOUR OWN BATTERIES 1 Page TABLE OF CONTENTS Introduction....3 Usage....4 Aluminum Can Batteries/Cells....8 A Long Lasting, Yet Powerful Battery....10 PVC Pipe Batteries...13 Lab Notes....17
JEEVES. JEEVES Installation Manual. Installation Manual The Easiest Do-It-Yourself Dumbwaiter on the Market
 1 888-323-8755 www.nwlifts.com JEEVES Installation Manual The Easiest Do-It-Yourself Dumbwaiter on the Market This manual will cover the installation procedure step-by-step. The installation of this dumbwaiter
SERVICE MANUAL L130B / L4130 Series Logstacker Drive Axle With Bolt-On Stub End Retainer
 SERVICE MANUAL L130B / L4130 Series Logstacker Drive Axle With Bolt-On Stub End Retainer Page 1 Allied Form #80-930 Rev 07/2009 SERVICE MANUAL LOG STACKER DA202 DRIVE AXLE TABLE OF CONTENTS PROCEDURE FOR
Change Your Tail Wheel Bearings (and Races)
") Change Your Tail Wheel Bearings (and Races) Note: You must have the approval of a certified aircraft mechanic (A&P) to perform this procedure. This procedure worked with my tail wheel but yours may differ.
Change Your Tail Wheel Bearings (and Races) Note: You must have the approval of a certified aircraft mechanic (A&P) to perform this procedure. This procedure worked with my tail wheel but yours may differ.
Maintenance Information
 16575219 Edition 4 October 2013 Air Screwdrivers QP1P, QP1S and QP1T Series Maintenance Information Save These Instructions Product Safety Information WARNING Failure to observe the following warnings,
Curt Mfg. Trailer Hitch and Hoppy Wiring Kit Installation Instructions
 Curt Mfg. Trailer Hitch and Hoppy Wiring Kit Installation Instructions The Curt trailer hitch replaces the stock rear cross member in the Touareg. It attaches with 8 bolts just like the factory VW hitch.
GruvenParts.com BRASS GM Power Folding Mirror Gear Replacement Instructions. Updated 8/25/2017 Additional Pictures / Tips Posted!
 Page 1 GruvenParts.com BRASS GM Power Folding Mirror Gear Replacement Instructions Updated 8/25/2017 Additional Pictures / Tips Posted! ** Latest Design is uses an ALL BRASS SPUR GEAR!!! ** ** If you don
How to install the Barnett clutch and the stronger Oil Pump Drive Gear
 How to install the Barnett clutch and the stronger Oil Pump Drive Gear Written by WildFred I m from Germany so please excuse my English and the spelling. The following procedure is a combination of the
Installation Manual TWM Performance Short Shift Kit Stage 1 and Stage 2 MazdaSpeed 6
 Page 1 Installation Manual TWM Performance Short Shift Kit Stage 1 and Stage 2 MazdaSpeed 6 Please Note: It is preferable to park on a flat surface, as you will have to engage and disengage the hand brake
Maintenance Information
 16572679 Edition 2 May 2014 Air Drill QP Series Maintenance Information Save These Instructions Product Safety Information WARNING Failure to observe the following warnings, and to avoid these potentially
CAUTION. 2. Remove the wheel cover or nut covers, as required. Remove the wheel and tire assembly.
 Стр. 1 из 16 REAR DRUM BRAKES CAUTION Brake shoes may contain asbestos, which has been determined to be a cancer causing agent. Never clean the brake surfaces with compressed air! Avoid inhaling any dust
GP1-R FULL EXHAUST SUZUKI GSX-R600 / GSX-R
 THIS EXHAUST SYSTEM IS DESIGNED FOR USE IN CLOSED COURSE RACING ONLY, AND IS NOT INTENDED FOR PUBLIC HIGHWAY USE. IN THE STATE OF CALIFORNIA, IT IS ILLEGAL TO MODIFY THE EMISSION CONTROL SYSTEM ON ANY
Slave Cylinder Weep Hole Drilling Procedure
 Slave Cylinder Weep Hole Drilling Procedure Tools Required: T20 Torx Driver T25 Torx Driver T25 Torx Bit with ¼ Ratchet Wrench 4mm Hex Key (Allen wrench) 5mm Hex Key 6mm Hex Key 8mm Hex Key 12mm Hex Key
C15C C15C. Page 1 of 20
 2 x Lid Front Hinge 1135 8 x M8 Bolt 8 x M8 Washer (3mm Thick) 4 x M6 Large washers 4 x M6 Spring washers 4 x M6 x 40mm Bolts 6 x M6 20mm Bolts 6 x M6 Washers 20 x Screws 2 x Lid mount gas strut bracket
Gearbox Assembly 101. Introduction. Before Beginning. By Mark Schutzer 4/13/06
 Gearbox Assembly 101 By Mark Schutzer 4/13/06 Introduction If you are planning to re-motor an old brass locomotive you may want to upgrade to a new gearbox at the same time. The early 60 s and 70 s gearboxes
FlexJet - Flex Cable Replacement
 P/N: 109515R0 14140 NE 200th St. Woodinville, WA. 98072 PH: (425) 398-8282 FX: (425) 398-8383 FlexJet - Flex Cable Replacement Notices: Warning! Ensure that all AC power cables are removed from the printer
LPE C5 Battery Relocation Kit
 LPE C5 Battery Relocation Kit The LPE C5 Corvette battery relocation kit improves vehicle weight distribution by moving weight to the rear of the vehicle. The improved weight distribution increases traction
Instruction Manual book
 book Item code:bh131 SPECIFICATION Wingspan : 3,000 mm 118.1 in. Length : 1,600 mm 62.99 in. Weight : 2.2 kg 4.84 Lbs. Radio : 05 channels. Servo : 06 mini servos. Electric Motor: BOOST 40 Battery : 3celIs
Written By: Sam Lionheart
 iphone 5s Volume Controls Replacement Replace the volume buttons and ringer switch in your iphone 5s. Written By: Sam Lionheart ifixit CC BY-NC-SA www.ifixit.com Page 1 of 26 INTRODUCTION Use this guide
Instruction Manual book
 Instruction Manual book ITEM CODE:BH118. SPECIFICATION Wingspan : 1,050 mm 41.34 inches. Length : 950mm 37.4 inches. Weight : 1 kg 2.2 lbs. Radio : 04 channels. Servo : 4 mini servos. Motor : BL2215/20
Top Down Rollstar Shade Installation Instructions
 Top Down Rollstar Shade Installation Instructions Thank you for purchasing your new Rollstar shade. It has been custom-made from the highest quality materials to the dimensions you specified. With proper
Instruction Manual book
 Instruction Manual book ITEM CODE:BH118. SPECIFICATION Wingspan : 1,050 mm 41.34 inches. Length : 950mm 37.4 inches. Weight : 1 kg 2.2 lbs. Radio : 04 channels. Servo : 4 mini servos. Motor : KMS 2814/05
PARTS LIST: 8581 DODGE LONG ARM BRACKETS 03-13
 SYNERGY MFG. 870 INDUSTRIAL WAY, SAN LUIS OBISPO, CA (805) 242-0397 8580 03-12 DODGE 2500/3500 4X4, 06-08 1500 MEGACAB 4X4 LONG ARM SUSPENSION KIT V3.0 GENERAL NOTES: These instructions are also available
Bag 1. Bag 1. Center Pivot. Center Pivot
 8 00734 01901 5 Center Pivot Bag 1 3374 - Center Pivot Socket 4019 - Alum Pivot ball 3254-2-56 Button Head *Note - Sometimes it is helpful to slightly over-tighten the top clamp screws, then work the ball
FlexJet Carriage Circuit Board (PCB) Replacement
 Replacement") P/N: 111484 R0 14140 NE 200th St. Woodinville, WA. 98072 PH: (425) 398-8282 FX: (425) 398-8383 ioline.com FlexJet Carriage Circuit Board (PCB) Replacement Notices: Warning! Ensure that all AC power cables
P/N: 111484 R0 14140 NE 200th St. Woodinville, WA. 98072 PH: (425) 398-8282 FX: (425) 398-8383 ioline.com FlexJet Carriage Circuit Board (PCB) Replacement Notices: Warning! Ensure that all AC power cables
Safe-T-element Installation Instructions
 Safe-T-element Installation Instructions For: PTI STEZA (2x2 Burner Configuration) & PTI STEZB (3x1 Burner Configuration) Revision K (May. 3 2012) TABLE OF CONTENTS 1. PREPARATION... 3 1.1 General Safety
INSTALL/REMOVAL INSTRUCTIONS: WINDOW LIFT MOTOR
 REMOVAL/INSTALL OF WINDOW REGULATOR (742-269) Ford Mustang 1996 2004 General Tech Tips: Use painter s tape rather than duct tape to secure window. It will not damage paint or leave sticky residue. A plastic
Installation Instructions
 Preparing your vehicle to install your brake system upgrade 1. Rack the vehicle. 2. If you don t have a rack, then you must take extra safety precautions. 3. Choose a firmly packed and level ground to
THE SERIES-E POWR Slider
 C.R. LAURENCE CO., INC. PATENT NO. 4,920,698 THE SERIES-E POWR Slider MODEL: EPC814S 2014+ CHEVY/GMC SILVERADO/SIERRA 1500 NAGS: DY90122PK5 ELECTRIC SLIDING REAR WINDOW 2014 + CHEVY/GMC SILVERADO/SIERRA
$1.00 FOR THE TQIO/RCIO
 $1.00 FOR THE TQIO/RCIO m mm HDBBYSHOP Champion Jay Halsey has an impressive track record. One of Jay's advantages is a whisper smooth tranny thanks to his dad, Jim. Now you can build a Halsey transmission!
Note: Please read through the entire guide before attempting any kind of installation.
 KIT-RSRTD Installation Guide Version 1.5 Auber Instruments, 730 Culworth Manor, Alpharetta, GA 30022 e-mail: info@auberins.com Tel: 770-569-8420 www.auberins.com This is a PID controller kit installation
X-Type w/ non-premium sound amplifier installation instructions
 X-Type w/ non-premium sound amplifier installation instructions 1. Pull radio from dash (see Radio Removal Instructions ) 2. Disconnect wiring harness from back of radio by pushing in tab on plug and pulling
Step #1 From your spool of 18 gauge primary wire, cut between 11 and 21 three inch strips of wire. You will only need 11 for the ROV, but it is good t
 How to make a ROV! Step #1 From your spool of 18 gauge primary wire, cut between 11 and 21 three inch strips of wire. You will only need 11 for the ROV, but it is good to have extras. Using the wire cutter,
EXPRESS/SAVANNA 155 WHEELBASE. Installation Instructions Van: VNGM96EXSV65 TOOLS REQUIRED 1996-CURRENT. follow us : CHEVROLET & GMC
 Installation Instructions Van: VNGM96EXSV65 CHEVROLET & GMC EXPRESS/SAVANNA 155 WHEELBASE 1996-CURRENT TOOLS REQUIRED Adjustable wrench (that opens to about 1 ), 1/2 open end wrench, Phillips screwdriver,
Walthers/Life-Like USRA Steam Locomotive
 North Raleigh Model Railroad Club Installing Decoders in N Scale Locomotives Detailed Instructions Walthers/Life-Like USRA 2-8-8-2 Steam Locomotive by David Derway May 17, 2010 Table of Contents Introduction...
Bachmann. Climax. Phoenix Sound Systems, Inc West Liberty Road Ann Arbor MI
 Bachmann Climax Phoenix Sound Systems, Inc. 3514 West Liberty Road Ann Arbor MI 48103 www.phoenixsound.com phone: 800-651-2444 fax: 734-662-0809 e-mail: phoenixsound@phoenixsound.com 2004-2007 Phoenix
EDGE The Laser Printer Tech Quarterly from Liberty Parts Team Summer 2014
 SERVICE EDGE The Laser Printer Tech Quarterly from Liberty Parts Team Summer 2014 THIS ISSUE: P4015 Transfer Block Replacement Replacing the M600 Fuser Drive P3005 Formatter and Ribbon Cables Three new
Rollstar Shade Installation Instructions
 Rollstar Shade Installation Instructions All Lifting Systems Inside or Outside Mount Thank you for purchasing your new Rollstar shade. It has been custom-made from the highest quality materials to the
How to Replace the Main Axle Gear on the Bachmann Spectrum GScale using the NWSL # upgrade gear.
 How to Replace the Main Axle Gear on the Bachmann Spectrum GScale 4-4-0 and 2-6-0 Mogul (2001era), using the NWSL #2223-6 upgrade gear. By Paul M. Newitt (all text and photos Copyright Paul M. Newitt,
Car. 1/4 Lane guide Track 1-5/8. Figure 1. Car and lane guides.
 1.0 Introduction Building a fast Pinewood Derby car My son s first year in scouting we set about building a Pinewood Derby car with no previous experince. We found a dizzying amount of information on the