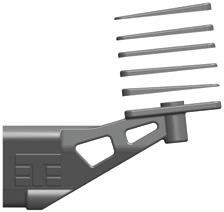
Introduction. Thread Lock icons Thread lock is always used when a screw is inserted into any metal part. (Included with kit)
|
|
|
- Molly Sparks
- 5 years ago
- Views:
Transcription
1
2 Introduction Thank you for purchasing the Tekno RC ET410 1/10th Scale 4WD Competition Electric Truggy kit. We are always working on new projects, so please check our website regularly at or visit us on Facebook at for all the latest news, parts, and kits. Take your time! When you work your way through these building instructions, keep an eye out for the following important indicators below: RED TEXT - This indicates important areas of the build process that should be observed. icons lock is always used when a screw is inserted into any metal part. (Included with kit) Grease icons Grease Grease is usually used on areas with movement and for sealing. (Included with kit) YOUTUBE - We also have many useful build videos on Youtube, so be sure to check these out! Additional equipment and parts needed: 2 Channel radio and receiver 1/10th scale ESC Motors: 540 size turn OR 540 size 4-pole kv (550 size motors not recommended) Standard size high torque steering servo (at least 200 oz/in) * Running less than the recommended rating will increase the chance of premature servo failure. 2S (2 cell, 7.4v) shorty LiPo battery, 5000 mah or higher recommended Paint for body and CA Glue for wheels/tires 1/10th scale Associated offset stadium truck OR Traxxas Slash SC offset wheels & tires (Losi offset is NOT COMPATIBLE) 32 pitch pinion 10 tooth - 25 tooth (see gearing recommendations on page 20 or 26 for more guidance) Tools needed: Hex drivers 1.5mm (TKR1104), 2.0mm (TKR1105), 2.5mm (TKR1106) Nut drivers 5.5mm (TKR1108), 7.0mm (TKR1109) Hobby knife Needle-nose pliers Shock tool (TKR1115) OR adjustable (Crescent) wrench (for shock assembly) 4mm turnbuckle wrench (TKR1103) AND 5.5/7.0 two sided wrench (TKR1119) 1/16th (or 1.6mm) drill bit for shock cap emulsion hole Body reamer Disclaimer: Tekno RC is not responsible or liable for any property or personal damage, loss, or injury incurred as a result of using this product. This kit is meant for use by persons 14 years of age or older and in the strict confines of a legally permitted RC track or facility. Warnings: Always double-check that your radio gear is working properly before operating vehicle. Never operate the vehicle indoors (unless the RC track is an indoor facility). Use caution while operating vehicle so as not to collide with people who may be turn marshalling or who might otherwise not be aware that a fast moving RC vehicle is in the vicinity. Warranty: We warrant that the parts included in this kit are free from defects. If you find a defective part in your kit, please contact info@teknorc.com and we will help you to resolve the issue. We do not warranty parts that may be broken during operation of the vehicle or otherwise. Refer to the end of this instruction manual for a listing of spare/replacement and option parts. All spare parts and other info are available on our website ( and through our network of domestic and international dealers and distributors.


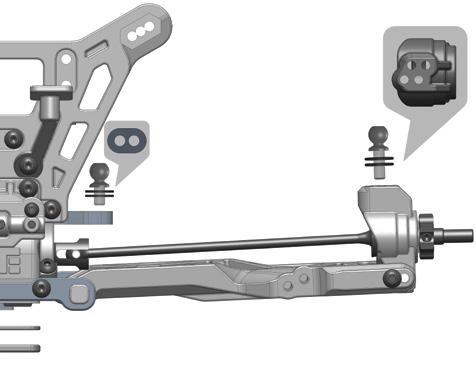
3 Bag A Center Differential (overview) TKR6550 TKR5144 TKR6514 TKR6511 TKR6514 TKR6515 TKR6514 TKR6513X TKR6550 TKR6517 TKR6514 TKR1303 TKR7253 A-1 TKR6514 TKR6550 TKR6517 A-2 TKR6550 TKR5144 TKR6513X Grease TKR5113 Note: Apply grease to the recess inside TKR5113, where the o-ring is placed as well as the o-ring itself. TKR6514 A-3 Grease Note: Apply grease to the groove in the outdrive. A-4 TKR7253 Grease TKR1303 Note: These screws only need to be snug. Do not over-tighten or the internal gears may bind up. Diff Oil TKR1303 M2.5x10mm Flat Head Screw Fill Level TKR5144 Grease TKR6517 TKR5144 Differential 0-rings TKR6515 TKR6517 Differential Shims (5x14mm) Fill with #30,000 CST oil to 1mm below full DO NOT OVER FILL 3

4 Bag B Front and Rear Differential (overview) TKR6550 TKR5144 TKR6514 TKR6511 TKR6514 TKR6515 TKR6514 TKR6513X TKR6550 TKR6517 TKR7221 TKR6514 TKR1303 B-1 TKR6550 B-2 Repeat for rear diff TKR6514 TKR6517 Repeat for rear diff TKR6550 TKR5144 TKR6513X Grease TKR5113 Note: Apply grease to the recess inside TKR5113, where the o-ring is placed as well as the o-ring itself. TKR6514 Grease Note: Apply grease to the groove in the outdrive. B-4 Repeat for rear diff Grease TKR1303 B-3 Repeat for rear diff Diff Oil TKR7221 x8 TKR1303 M2.5x10mm Flat Head Screw Fill Level TKR5144 Grease TKR6517 TKR5144 Differential 0-rings TKR6515 TKR6517 Differential Shims (5x14mm) Fill FRONT with #30,000 CST oil Fill REAR with #10,000 CST oil to 1mm below full DO NOT OVER FILL 4


5 Bag C Steering Assembly (overview) TKR6526B TKR6627 TKR6627 TKR6526B TKRBB TKRBB TKR6207 TKR6208 TKR6526B TKR6526B *TKR6560A TKRBB TKR1402 TKRBB TKR1402 C-1 TKR6207 TKR6208 TKR6208 TKR6526B *TKR6560A TKR1402 M3x8mm Button Head Screw x1 TKR6207 M3x6mm Ball Stud C-2 TKR6526B TKR6627 Note: Push these steering rack bushings hard into place until they click into the bellcranks. TKRBB TKR6526B TKRBB TKR6208 M3x8mm Ball Stud TKRBB TKRBB TKRBB Ball Bearing (4x7.5) TKR1402 Note: These screws only needs to be snug. Do not overtighten. 5
 TKRBB10154 TKR1402 TKR6597 TKRBB05114 TKR6519B")


6 Bag C Front Bulkhead Assembly (overview) TKR1602 (assembly from previous page) TKRBB10154 TKR1402 TKR6597 TKRBB05114 TKR6519B TKRBB05114 TKR7222 TKRBB10154 TKR1301 TKR6547 C-3 TKR1602 C-4 TKRBB TKR6597 TKRBB05114 TKR6629 Note: Use a 5.5mm nut driver to install steering posts. TKRBB TKR6519B TKRBB05114 TKR7222 TKR1301 M2.5x6mm Flat Head Screw TKR1402 M3x8mm Button Head Screw C-5 TKRBB10154 TKR6519B Note: Screw the TKR1402 s all the way down, then back off 1/4 turn. x1 TKR1602 M4mm Set Screw Grease TKR1402 TKRBB Ball Bearing (4x7.5) TKR1402 C-6 TKRBB05114 Ball Bearing (5x11) TKRBB10154 TKR6547 TKRBB10154 Ball Bearing (10x15) TKR1301 6


7 Bag D Rear Bulkhead/ Wing Mount Assembly (overview) TKR1201 TKR1602 TKR6597 TKR1403 TKR6210 TKR1221 TKR6665 TKR6538 TKR7210 TKRBB10154 TKR1405 TKR7281 *TKR7282C TKRBB05114 TKR6519B TKR6547 TKR1301 TKR7222 TKR1402 4pcs TKR1403 TKR1405pcs TKR6546 TKR1411 TKR1221 M3x8mm Washer x12 TKR1201 M3 nut Black TKR1602 TKR6597 TKRBB05114 D-1 TKR7222 D-2 TKR1221 x 6pcs per side TKR1403 TKR6210 TKR1301 M2.5x6mm Flat Head Screw TKR6519B TKRBB05114 TKR6665 TKR1402 M3x8mm Button Head Screw D-3 Note: Screw the TKR1402 s all the way down, then back off 1/4 turn. TKRBB10154 TKR1402 TKR1403 M3x10mm Button Head Screw TKR1405 M3x14mm Button Head Screw Grease TKR1402 TKR6519B D-4 TKR1405 TKR6546 TKR7210 TKR6546 TKR1411 M35mm Button Head Screw TKR7281 *TKR7282C x1 TKR1602 M4mm Set Screw TKR6210 M3x10mm Ball Stud D-5 TKRBB10154 CA Glue Build Tip: Apply a bit of CA glue to help keep these nuts in place during maintenance and rebuilds. TKR1405 D-6 TKR6538 TKRBB05114 Ball Bearing (5x11) TKR6547 TKR1201 TKRBB10154 Ball Bearing (10x15) TKR1411 TKR1403 TKR1301 7


8 Bag E Rear End Assembly E-1 TKR mm Below options sold separately. *TKR mm *TKR mm *TKR mm *TKR mm *TKR mm *TKR mm *TKR mm *TKR mm *TKR mm TKR6547 Note: Do not over-tighten. ( C Block) E-2 Stock Position Note: With these center dot inserts, Anti-Squat = 2 TKR1405 TKR6544 TKR6542 TKR1463 TKR6544 TKR6253 TKR6206 TKR6555 TKR6547 TKR1463 ( D Block) E-3 Stock Position Note: With these center dot inserts, Rear Toe = 1.5 per side TKR6543 TKR1405 TKR1405 M3x14mm Button Head Screw TKR6544 TKR1463 M2.5x6mm Button Head Screw x5 M3mm Set Screw TKR1611 Note: Refer to page 25 for setting droop. TKR6544 TKR1611 M4x8mm Set Screw TKR6206 M3x6mm Ball Stud Wheelbase Shims front 2mm large 1mm small.5mm rear 0mm all shims go toward the front TKR6544 TKR7224 TKR6523 8
 *TKR1654 (+1mm) Rear F-2 TKR1229 6x10x0.")
9 Bag F Rear Hub/CVA Assembly F-1 TKR7272 TKR6856 Grease TKR6856 TKR6270R TKR6545 TKR1609 Note: These screws only need to be snug. Do not over-tighten. TKRBB10154 TKR6856 Left Rear Hub Orientation Front Right TKRBB06124 TKR1229 TKR5571M *TKR5571A *TKR5571 *TKR1654X (+1mm) *TKR1654 (+1mm) Rear F-2 TKR1229 6x10x0.2mm Shim TKR1400 M3mm Button Head Screw M3mm Set Screw TKR1609 M3x3mm Set Screw TKRBB06124 Ball Bearing (6x12) TKR6566 TKRBB10154 Ball Bearing (10x15) Note: These screws only need to be snug. Do not over-tighten. TKR1400 Note: These screws only need to be snug. Do not over-tighten. 9

10 Bag F Rear Camber Links F-3 TKR6253 TKR7250 Left/Right x 2pcs TKR6253 Build Tip: Use some grease or Chapstick on the threads to help prevent pop-off when adjustments are being made. Build Note: Hold the turnbuckle stationary with pliers and push the rod end hard onto the turnbuckle while turning at the same time. Keep in mind that one end of the turnbuckle has normal threads and the other has reverse threads. Start the rod end straight and it will thread on straight. Note: Notch always goes on left side of vehicle mm Actual Size F-4 TKR6208 Note: Always press on with T logo visible. A B C D 1 2 TKR6208 M3x8mm Ball Stud WASHERS 0 6 WASHERS Stock position is 2/B 10

 Stock Position Note: With these center/upper dot inserts, Arm Sweep = 0 TKR1405 TKR1405 M3x14mm Button Head Screw TKR6540B TKR6544 TKR1409 M30mm Button Head")
11 Bag G Front End Assembly G-1 TKR mm Below options sold separately. *TKR mm *TKR mm *TKR mm *TKR mm *TKR mm *TKR mm *TKR mm *TKR mm *TKR mm TKR6547 Note: Do not over-tighten. G-2 ( B Block) TKR1409 TKR6541B Stock Position TKR6544 Note: With these center/lower dot inserts, Kick Up is: 11 For reference: With center dot inserts, Kick Up = 10 TKR1463 TKR6544 TKR6253 TKR6548 TKR6555 TKR6547 TKR1463 G-3 ( A Block) Stock Position Note: With these center/upper dot inserts, Arm Sweep = 0 TKR1405 TKR1405 M3x14mm Button Head Screw TKR6540B TKR6544 TKR1409 M30mm Button Head Screw TKR6523 TKR1463 M2.5x6mm Button Head Screw TKR1611 Note: Refer to page 25 for setting droop. TKR6544 x5 TKR7225 M3mm Set Screw Wheelbase Shims TKR1611 M4x8mm Set Screw front 2mm large 1mm small.5mm rear 0mm all shims go toward the front TKR

 *TKR1654 (+1mm) x12 TKR1221 M3x8mm Washer H-3")

 TKR6210 TKR6208 TKRBB10154 Ball Bearing (10x15) TKR6208 M3x8mm Ball Stud TKR1221 X 4pcs H-5 TKR1201 Note: This screw is")
12 Bag H Front CVA / Spindle & Carrier Assembly Grease H-1 Repeat for both sides DO NOT SKIP THIS STEP! Note: These are steering stop screws. They provide a mechanical limit to the steering throw and make the car easier to drive by greatly improving the consistency of the steering. TKR1221 TKR1400 H-2 TKR7272 TKR6856 TKR6270R TKR6856 TKR1609 Note: This screw only needs to be snug. Do not over-tighten. TKR6856 TKR1201 M3 Nut Black TKRBB10154 TKR6553 TKRBB06124 TKR1229 TKR5571M *TKR5571A *TKR5571 *TKR1654X (+1mm) *TKR1654 (+1mm) x12 TKR1221 M3x8mm Washer H-3 TKR6596 TKR6552 TKR1229 6x10x0.2mm Shim TKR1400 M3mm Button Head Screw TKR6596 Note: These screws only need to be snug. Do not over-tighten. x6 M3mm Set Screw TKR1609 M3x3mm Set Screw H-4 Note: These screws only need to be snug. Do not over-tighten. TKR6565 TKR1400 Note: These screws only need to be snug. Do not over-tighten. TKRBB06124 Ball Bearing (6x12) TKR6210 TKR6208 TKRBB10154 Ball Bearing (10x15) TKR6208 M3x8mm Ball Stud TKR1221 X 4pcs H-5 TKR1201 Note: This screw is included to keep the hole from deforming. Install before TKR6208. TKR6210 TKR1221 x 4pcs TKR6208 Note: This screw is included to keep the hole from deforming. Install before TKR6208. TKR6210 M3x10mm Ball Stud TKR

13 Bag I Front Camber Links & Steering Links TKR6253 TKR6250 Left Right TKR6253 TKR6250 TKR6253 I-1 TKR6253 Build Tip: Use some grease or Chapstick on the threads to help prevent pop-off when adjustments are being made. Left TKR6250 TKR6253 TKR6250 Right TKR6253 TKR6253 Build Note: Hold the turnbuckle stationary with pliers and push the rod end hard onto the turnbuckle while turning at the same time. Keep in mind that one end of the turnbuckle has normal threads and the other has reverse threads. Start the rod end straight and it will thread on straight. TKR6253 Front Camber Links Note: Notch always goes on left side of vehicle. Actual Size Steering Links Note: Notch always goes on left side of vehicle. Actual Size 30.00mm 31.50mm I-2 Note: Always press on with T logo visible. I-3 Note: Always press on with T logo visible. Left TKR1201 M3 Nut Black TKR6208 Right TKR1201 TKR6208 M3x8mm Ball Stud TKR6208 TKR6664 TKR


14 Bag I Front Tower Assembly TKR1405 TKR7281 *TKR7281C TKR1405 TKR7210 I-4 TKR7210 I-5 Note: Always press on with T logo visible. TKR1409 TKR1403 Note: These screws only need to be snug. Do not over-tighten. A B TKR1403 M3x10mm Button Head Screw TKR1405 M3x14mm Button Head Screw 1 2 WASHERS 0 TKR1409 M30mm Button Head Screw Stock position is 1/A 14


15 Bag J Front/Center Assembly J-1 A Block Inset CHASSIS A BLOCK A BLOCK CHASSIS TKR6501B Note: It is nessesary to slightly loosen both screws holding the A block in place before attaching the front clip to the chassis. This is due to the fact that the A block is now keyed into the front of the chassis. This feature helps secure the front clip and improves durability. TKR1323 TKR1322 TKR6538 J-2 TKR6546 TKR6586 TKR1401 TKR1323 J-3 TKR6530 TKR6634 TKR1322 M3x8mm Flat Head Screw x10 TKR1323 M3x10mm Flat Head Screw TKR1401 M3x6mm Button Head Screw TKR


16 Bag J Center/Rear Assembly TKR6634 TKR6634 TKR1402 J-4 TKRBB10154 TKRBB10154 TKR6634 *TKR6635C TKR6600 J-5 J-6 Install with hole on top, like this. TKR1211 x1 Note: Use both rear braces for the least chassis flex. Use just the long rear for meduim flex and short rear for the most flex. More flex is best suited for bumpy tracks. TKR6538 TKR1409 TKR1211 M3 Nut Flange Black x8 TKR1323 M3x10mm Flat Head Screw J-7 TKR1402 M3x8mm Button Head Screw TKR6599 x1 TKR1409 M30mm Button Head Screw TKRBB Ball Bearing(10x15mm) TKR1323 x 8pcs 16


17 Bag K Front Shock Assembly K-2 K-3 K-4 K-1 TKR1245 Note: Do not over-tighten Refer to filling instructions on page 19 during this step. Note: 1.7mm piston with writing up. TKR6705 *TKR6731 *TKR6732 *TKR6735 TKR6704 *TKR6704T #550 cst shock oil TKR6712 *TKR6712A TKR6712 TKR6708 TKR6709 TKR6708 Note: Use green slime or oil on shock shaft threads AND O-rings to prevent tearing and leaking. #550 TKR7235 *TKR7233 *TKR7234 *TKR7236 *TKR7237 TKR6709 TKR6712 TKR mm TKR6711 TKR6548 TKR1604 TKR6719A Note: Screw rod end on until distance measures 28mm at full extension. TKR6701 TKR1211 M3 Nut Flange Black K-5 TKR1211 TKR6712 TKR6527 TKR1211 TKR1240 M3x18mm Shock Mnt Screw Note: Slot in spring perch should face outside of car. TKR1245 M2x5mm Piston Screw TKR1240 Note: Black screw is RH threaded. It goes on the left side of the car. TKR1248 M2mm Emulsion Screw Silver screw is LH threaded. It goes on the right side of the car. TKR1604 M3x8mm Set Screw Stock shock position is outside hole on the arm and middle hole on the tower (2/B) Shock length (droop) is 88mm Stock front ride height is 27mm with ST tires/31mm with SC tires 17


18 Bag L Rear Shock Assembly L-2 L-3 L-4 L-1 TKR1245 Note: Do not over-tighten Refer to filling instructions on page 19 during this step. Note: 1.8mm piston with writing up. TKR6705 *TKR6731 *TKR6732 *TKR6735 TKR6757 *TKR6757T #350 cst shock oil TKR6712 *TKR6712A TKR6712 TKR6708 TKR6709 Note: Use green slime or oil on shock shaft threads AND O-rings to prevent tearing and leaking. #350 TKR7245 *TKR7243 *TKR7244 *TKR7246 *TKR7247 TKR6708 TKR6709 TKR6712 TKR mm TKR6756 TKR6548 TKR1604 TKR6719A Note: Screw rod end on until distance measures 38mm at full extension. TKR6701 TKR6712 TKR6527 TKR1211 TKR1211 M3 Nut Flange Black L-5 TKR1211 TKR1240 M3x18mm Shock Mnt Screw TKR1245 M2x5mm Piston Screw Note: Slot in spring perch should face outside of car. TKR1240 Note: Black screw is RH threaded. It goes on the right side of the car. Silver screw is LH threaded. It goes on the left side of the car. TKR1248 M2mm Emulsion Screw TKR1604 M3x8mm Set Screw Stock shock position is inside hole on the arm and middle hole on the tower (2/A) Shock length (droop) is 108mm Stock rear ride height is 27mm with ST tires/31mm with SC tires 18


. Be careful to not cross-thread the caps.")
. Wipe off excess oil before moving on to step 5.")
19 Shock Filling Instructions For both front and rear shocks We've found it's easiest to complete steps 1 & 2 on each shock before moving on to step 3. By the time you've finished step 2 on the last shock, the first one will be ready for step Start by drilling out the emulsion hole. Use a 1/16th (or 1.6mm) drill bit to drill all the way through and clear any flashing created by this. Insert the four larger o-rings into the emulsion caps and set aside. Install the small o-rings onto the small emulsion screws by placing the o-rings on a pit mat or towel and pressing the screws into the o-rings (add 1 small drop of oil onto the seal to help make the screw slide in easier). 2. Fill shock with oil all the way to the top and pump the shock shaft up and down 3-5 times. 3. Screw on the cap all the way tight (shock tool TKR1115 is helpful for holding the shock body). Be careful to not cross-thread the caps. Start by turning in the oposite direction before tightening. 4. With the shock at about a 45 angle, push and hold the shock shaft to the top of the stroke and insert the prepared emulsion screw/seal. Oil should leak out during this process. If it does not, add more oil. Tighten the screw until snug (do not over-tighten). Wipe off excess oil before moving on to step Pump the shock shaft up and down about 20 times vigorously. This emulsifies the oil. 6. With the shock shaft fully extended, remove the emulsion screw from the cap to do the final bleed. 7. With the shock at about a 45 angle, push and hold the shock shaft to the top and insert the prepared emulsion screw/seal again. Oil will leak out during this process. Finish by tightening the screw until snug (do not over-tighten) TKR6712 1/16th Drill Bit Note: Do not over-tighten Note: Do not over-tighten TKR6714 TKR1248 TKR6714 Prepare caps by drilling emulsion hole AND inserting seals AND Fill with oil, Pump up and down 3-5 times, Then screw on cap Push shaft up to bleed air out THEN Insert screw snug (do not over-tighten) Pump up and down times Pull shaft down, remove screw THEN Push shaft up to bleed air, insert screw snug (do not over-tighten) Push smaller screws into small o-rings 19


 Motor 540 2-Pole or 540 4-Pole Small Track (pinion) Large Track (pinion) (50-80 ft Straight) (80-150 ft Straight) 6.5T 16 tooth 17 tooth 7.5T 17 tooth 18 tooth 8.")
20 Bag M Final Assembly TKR1403 IMPORTANT RADIO SETUP TIPS, MUST READ: The Tekno RC ET410 is highly tunable, but can be very aggressive depending on track conditions and tires used. To help with this, we recommend that you are well informed about setting up your Steering EPA, Servo Speed, Dual Rate, and Exponential Curves. PLEASE READ PAGE 27 FOR MORE DETAILS. Steering servo (not included) Note: We recommend using a full size servo with at least 200 oz/in torque and metal gears. Running less than our recommended rating will increase the chance of premature servo failure. TKR6586 TKR1221 M-1 TKR1409 TKR1409 M-2 TKR1221 TKR1221 TKR6586 TKR6685 TKR1323 TKR1323 TKR1221 M3X8mm Washer x6 TKR1323 M3x10mm Flat Head Screw Gearing Recommendations Vehicle ET410 (2 cell) Motor Pole or Pole Small Track (pinion) Large Track (pinion) (50-80 ft Straight) ( ft Straight) 6.5T 16 tooth 17 tooth 7.5T 17 tooth 18 tooth 8.5T 18 tooth 19 tooth 4600kv 16 tooth 17 tooth 4000kv 17 tooth 18 tooth Motor (not included) M-3 TKR1403 M3x10mm Button Head Screw TKR1409 M30mm Button Head Screw TKR1522 TKR1522 M3x8mm Cap Head Screw TKR

 TKR6586 TKR1221 M3X8mm Washer M-6 TKR6685 TKR1321 M3x6mm Flat Head Screw x3 TKR1323 M3x10mm Flat Head Screw TKR1523")
21 Bag M Final Assembly TKR1523 TKR1221 TKR1523 TKR1221 M-4 Pinion/Set screw (not included) Note: MESH SHOULD BE AS TIGHT AS POSSIBLE WITHOUT BINDING. Note: Refer to page 20 or 26 for a recommended pinion chart to best suit your motor. M-5 Mount ESC, receiver & transponder during this step. (not included) TKR6586 TKR1321 Fan (not included) 25mm and 30mm fans compatible. Screws (not included) TKR6586 TKR1221 M3X8mm Washer M-6 TKR6685 TKR1321 M3x6mm Flat Head Screw x3 TKR1323 M3x10mm Flat Head Screw TKR1523 M3x10mm Cap Head Screw TKR1323 TKR


22 Bag M Final Assembly Actual Size 3.00mm M-8 TKR6526B *TKR6563A Note: Servo horn orientation. TKR6207 Note: Always press on with T logo visible. TKR6253 M-7 TKR5230 TKR6253 Note: Rod end orientation. M-9 TKR5126 Cap Head Screw (not included) M-10 SERVO HORN ALIGNMENT Note: Servo horn should be positioned after trim and sub-trim have been zero d out. It should be positioned about 4 degrees off parallel from the steering bellcranks. Steering bellcranks should be perfectly parallel from front to rear of the chassis. x1 M3mm Set Screw x1 TKR5230 M3x18 ed Rod x1 TKR6207 M3x6mm Ball Stud 22


23 Bag N Final Assembly TKR1403 TKR1403 TKR1402 TKR6634 *TKR6598C TKR5230 TKR6634 *TKR6635C N-1 TKR1402 M3x8mm Button Head Screw 8mm x6 TKR1403 M3x10mm Button Head Screw x1 TKR5230 M3x18 ed Rod Note: Screw in TKR5230 until 8mm of threads are still visible. Bag O Wing O-1 TKR6605 *TKR6605X TKR1323 TKR1323 Shim/Direction DOWNFORCE OPTIONS Total Wing Angle Note: Stock hole position is in the rear of the wing. Wing forward creates LESS rear downforce. Wing rearward creates MORE rear downforce. TKR6546 Note: Stock downforce is 6 Note: More downforce will give more rear traction everywhere, will jump more nose up, have less steering into a turn, and have slightly less top speed. Less downforce will have less rear traction everywhere, will jump more level or nose down, have more steering into a turn, and have a slightly higher top speed. TKR1323 M3x10mm Flat Head Screw 23


24 Bag O Body/Tires TKR6686 TKR6686 O-2 TKR6686 TKR6686 Thumb Screw Assembly O-3 TKR6280 TKR6586 *TKR6503C TKR5125 BATTERY INSTALLATION Wheels/Tires (not included) Note: Use either Associated offset staduim truck OR Traxxas Slash SC offset wheels/tires. TKR1213 TKR1213 O-4 TKR7201 HOOK AND LOOP NOTE: Please note that there is a slight handling difference between using body clips and using the hook and loop tape to secure the body. Using only body clips to fasten the body will allow more flex and be easier to drive in rougher conditions. Using the hook and loop tape, with or without the body clips, will result in a stiffer chassis that is better suited for smoother tracks. Note: For hook and loop tape placement. Look for indentations on the side walls of the body. TKR1235 TKR1235 TKR1235 Body Clip TKR1235 TKR1235 TKR1213 M4 Alum Nut Flange Black 24


25 Setup Information The purpose of making adjustments is to make the car go faster around the track, or to make it more controllable, or both if possible. A car that's easier to drive should produce lower, more consistent lap times. It will also inspire more confidence in the driver, which is always good when nerves start getting the best of you. Before you start thinking about changing your car's setup, consider these two things: First, is the car in perfect working order? Be sure that all of the suspension components operate freely without excessive play, and that the car isn't tweaked. Binding and worn out parts will result in poor performance and inconsistent handling. Second, always consider tires before making other adjustments. Time spent trying to get the vehicle to work with the wrong tires mounted will be wasted time. Without the right tires, even a great setup won t be a winning setup. Ride Height MEASUREMENT Ride height is the distance from the bottom of the chassis to the running surface. Ride height should only be checked and adjusted with your vehicle ready to run (i.e. with battery installed/body on). Ride height is the first adjustment to be made and should be set with a ride height measurement tool. Measurements should be taken from the flat parts of the chassis, front and rear. Be sure to measure the front ride height at a point before the kick up in the chassis starts. To measure ride height, first make sure the suspension is completely free, then simultaneously compress the front and rear all the way down and let the vehicle settle. Take your measurement from that position. Use the shock spring adjustment collars to raise or lower the ride height to your desired setting. 27mm front and rear is a good starting point. Camber CAMBER Static camber affects the car s side to side traction. More negative camber front and rear quickens rotation in corners. Less negative camber will make the vehicle easier to drive but you may give up some responsiveness (i.e. steering). To set your static camber have your vehicle at ride height (see above) and adjust the camber links until desired angle is achieved. Please note that a large adjustment of front camber will affect front toe and you may have to readjust the toe and then re-check front camber again. A good starting measurement for camber is 1-2 degrees in the front and degrees in the rear. Front Toe OUT IN IN OUT Front toe is used to describe the angle in which the front wheels point when looking down at them from the top of a vehicle. You will always use some amount of toe out. Toe-out will affect how your vehicle enters and exits corners. More toe out will result in more off-power steering and less on-power steering and less toe out will have the opposite results. To set your front toe, have your vehicle at ride height (see above) and adjust the steering links until desired angle is achieved. Please note that a large adjustment of front toe will affect front camber and you may have to readjust the camber and then re-check front toe again. A good starting point is approximately degree of toe out per side. Ackermann Effect LESS MORE Think of Ackermann as active toe when the steering moves from left to right. More ackermann effect makes more toe out at full turn and produces more steering off-power. Less ackermann effect makes less toe out at full turn and produces more steering on-power. A good starting point is 0 washers behind the ball stud. Bumpsteer LESS bump out MORE bump out Think of bump steer as active toe when the suspension compresses or rebounds. To adjust bump steer you have to change the angle of the steering link. This is accomplished by adding or removing washers under the ball stud on the steering spindles. Anytime you change camber link locations, front arm pills, front arm spacers, or Ackermann you will need to check and possibly adjust your bumpsteer. It's best to start with zero bumpsteer or slight bump out. Droop ADJUST HERE DROOP MEASUREMENT Droop is the measured amount of down travel in the suspension. It is measured from the shock mounting points while the vehicle is up on a stand allowing the arms to hang freely and is adjusted by turning the droop screw located in the suspension arms front/rear. This screw limits the suspension travel by providing a stopping point against the chassis. Left and right sides should always be equal, however the front and rear of the vehicle can have different values. Droop affects all aspects of chassis performance, including braking, acceleration, jumping, traction, and bump handling. A good starting droop measurement is 88mm front, and 108mm rear. 25


26 Setup Information (continued) Differentials Front: Changing front diff oil affects overall steering response. Thinner can increase off-power steering but the vehicle may be twitchy and harder to drive. Thicker can increase on power steering and stability. We recommend 30k in the front diff. Center: Changing center diff oil affects the front-to-rear drive balance. Thicker will reduce off-power steering and on-power rear traction but increases on-power steering and acceleration if traction is available. Thinner will increase off-power steering and on-power rear traction but reduce on-power steering and acceleration. We recommend 30k in the center diff. Rear: Thinner rear diff oil increases off-power steering and reduces traction into a corner. It also reduces on-power steering and increases traction out of a corner. Going too thin will make your vehicle inconsistent, however. Thicker rear oil will have opposite effects, and once again, going too thick will make the vehicle inconsistent. We recommend 5k to 10k in the rear diff. Wheelbase Adjustments FORWARD BACKWARD FORWARD BACKWARD Front Arm Rear Arm Changes to wheelbase can affect the overall handling of your vehicle, since it adjusts the distribution of weight on the wheels as well as the angle of the driveshafts. Shortening the wheelbase at the rear will give you more steering into a turn and off power, less steering out of a turn and on power. Lengthening the wheelbase at the rear will yield the opposite results. Shortening the wheelbase in the front will land jumps a little better and lengthening it will be better through small bumps. In general a longer wheelbase is better on open and/or bumpy tracks and a shorter wheelbase is better on tighter technical tracks. Springs LENGTH WIRE DIA. COILS PART#/COLOR F / R WIRE DIA. COILS LENGTH TKR7233 Front mm TKR7234 Front mm TKR7235 Front mm TKR7236 Front mm TKR7237 Front mm TKR7243 TKR7244 TKR7245 TKR7246 TKR7247 Rear Rear Rear Rear Rear mm 63mm 63mm 63mm 63mm RATE Softer springs will increase traction through the turns by allowing more roll, slow down the responsiveness of the vehicle, and can be better in the bumps. Stiffer springs will increase corner speed if traction is available and will also tend to jump and land better. Once you find a set of springs you like you will typically only change them for tracks with dramatically different conditions. Pistons Pistons with smaller holes work well for smoother tracks with large jumps and pistons with larger holes work well for rougher tracks with less jumps. Smaller hole pistons will typically use thinner oil than larger hole pistons. Shock oil is also affected by the ambient temperature so a change in viscosity might be necessary with a change of 5 C or ~10 F. Sway Bars Part# F / R Size TKR6623 Front 1.0mm TKR6623 Front 1.1mm TKR6623 Front 1.2mm TKR6623 Front 1.3mm TKR6623 Front 1.4mm TKR6624 Front 1.5mm TKR6624 Front 1.6mm TKR6624 Front 1.7mm TKR6624 Front 1.8mm TKR6624 Front 1.9mm TKR6611 Rear 1.0mm TKR6611 Rear 1.1mm TKR6611 Rear 1.2mm TKR6611 Rear 1.3mm TKR6611 Rear 1.4mm TKR6610 Rear 1.5mm TKR6610 Rear 1.6mm TKR6610 Rear 1.7mm TKR6610 Rear 1.8mm TKR6610 Rear 1.9mm Sway bars are used to adjust a vehicle's lateral grip by resisting chassis roll. A thicker bar decreases roll more than a thinner bar will. More roll means more grip and less roll means less grip. The front sway bar affects mainly off-power steering at corner entry. The rear sway bar affects mainly on-power steering and stability in mid-corner and at corner exit. Bearing Chart TKRBB Ball Bearings (4x7.5mm, sold in pack of 4pcs) Bearings for the bellcrank/ackerman plate. 8pcs required in kit. TKRBB05114 Ball Bearings (5x11, 4pcs) Diff pinion support bearings for the front/rear transmission housings. 4pcs required in kit. TKRBB06124 Ball Bearings (6x12mm, 4pcs) Bearings for outside of steering blocks and outer rear hub carriers. 4pcs required in kit. TKRBB10154 Ball Bearings (10x15mm, sold in pack of 4pcs) Bearings for all three diffs. Also inner front steering blocks/rear hub carriers. 10pcs required in kit. * For bearing maintenance, please refer to page 28. Gearing Recommendations Vehicle ET410 (2 cell) Motor Pole or Pole Small Track (pinion) Large Track (pinion) (50-80 ft Straight) ( ft Straight) 6.5T 16 tooth 17 tooth 7.5T 17 tooth 18 tooth 8.5T 18 tooth 19 tooth 4600kv 16 tooth 17 tooth 4000kv 17 tooth 18 tooth This chart shows the recommended starting ratios for the common motor types. Please consult the motor/esc manufacturers recommended settings to ensure you start with the best final drive ratio (FDR) for your equipment. When setting your mesh you want have it set as tight as possible, without any binding. Tekno RC is not responsible for damage done to your electronic equipment or gears due to improper gearing or mesh. 26
27 Radio Information Please read thoroughly The Tekno RC ET410 is highly tunable, but can be very aggressive depending on track conditions and tires used. To help with this, we recommend that you are well informed about setting up your Steering End Points (EPA), Dual Rate (D/R), Exponential Curves, and Servo Speed. Start by setting your EPA such that the vehicle can reach full lock while on the ground. Be careful not to go too far with this setting as it may damage your servo. Drive the vehicle around the track. If you are turning into pipes or losing traction out of a corner, you probably have too much overall steering throw. The simplest way to reduce this is with Dual Rate. Reducing Dual Rate will turn down both the left and right side EPA proportionately without having to adjust the EPA settings independently. D/R is usually pre-assigned to one of the trim buttons on most mid-to-high level radios. The next setting is Expo or Curve. Expo does not change your EPA or D/R, it simply turns the wheels less around center and ramps up to the end points as you reach full lock on the steering wheel. We would suggest starting at -15%. If you re vehicle still feels twitchy around center, dial in more negative expo to continue smoothing everything out. If it starts to feel too numb around center, dial some back out. Another valuable and often overlooked radio adjustment is Servo Speed. Servo Speed allows you to slow the steering servo down from the transmitter resulting in reduced twitchiness. We like to set this at around -40 to start. If you find that it s too lazy, increase the servo speed slightly and run a few more laps. Repeat as necessary until the steering response feels natural without delay. After setting the servo speed you might find that you need to go back and adjust the expo setting. This is normal, it might take a few adjustments of each to achieve the proper steering feel to suit your driving style and track conditions. With these four settings, you should be able to make your vehicle consistent and easy to drive lap after lap assuming the rest of the setup is close for your particular track. Of course there are many other factors and setup options to tune for more or less steering, but sometimes all your vehicle needs is a small radio adjustment to keep you headed in the right direction. Notes: 27
28 Maintenance: Performing regular maintenance will greatly improve your on track consistency and also extend the life of your vehicle. Going through critical areas of the vehicle regularly will also allow you to find possible issues before they become a problem that may cost you a race. Follow the guidelines below for maximum performance. Bearing Maintenance: Bearings should always be smooth and free in order to preform their function. We recommend inspecting and cleaning each bearing on a regular basis. It will be necessary to break down parts of the vehicle in order to inspect them properly. The procedures below should be done every couple of weeks or prior to an important race. 1. Inspect the outer seals for any visible damage and check the rolling resistance of each bearing. 2. If any bearing does not spin freely, then take the following steps to clean them. 3. Spray the bearing with motor spray and spin it again to remove any debris trapped inside. Repeat if necessary. If the bearing does not start to spin freely after cleaning, then they may need to be replaced. 4. Allow the clean bearing to dry or blow into the bearing with compressed air to speed up the drying process. 5. Oil each bearing with a proper bearing lubricant. One or two drops is enough. Shock Maintenance: When comparing the left and right shocks of the front end, they should feel identical. Same goes for the rears. The procedures below should be done every race day to make sure they are leak free and operating correctly. 1. After removing the shocks from the vehicle, remove the springs and inspect each shock for visible leaks (build up of debris at the bottom of the shock shaft or visible oil). 2. If the shock binds when pushing the shaft through its stroke, then the shaft may be bent and will need to be replaced. 3. If the shocks from left to right do not feel consistent when compared to each other, or have built up too much air inside (feel empty when pushing the shaft through its stroke), then you will need to rebuild them following the steps outlined on page 19 of this manual. Hinge Point & Drive Line Maintenance: Checking the hinge points while the shocks are removed from the vehicle is the best time to inspect these parts. The other items to inspect are the camber links, steering links and drive shafts. Follow the steps below every couple of weeks in order to keep the vehicle preforming at the maximum level. 1. With the shocks off the vehicle, check the movement of the arms, hubs, and spindle carriers. They should move freely. If there is a bind, then the inner or outer hinge pin may be bent and would need to be replaced. The arms should not have any play when twisted or moved in any direction against the hinge points. If there is excessive slop present, then the arms or hubs may be worn and will need to be replaced. 2. Remove the camber links, steering links and servo link from the vehicle. Check the movement of the spindles to see if they turn freely. If they don t, then check the kingpin shoulder screws to see if they are tightened down too far. Also, check for slop. If there is excessive slop present, then the spindle carriers may need to be replaced. 3. Check the steering rack to make sure it moves freely. If it binds, then the screws holding the Ackermann or the steering posts could be too tight. If they still bind, then check the bearings and follow the steps above to clean them. 4. After re-installing the camber links, steering links and servo link, check the movement of the rod ends on the ball studs. If they have excessive slop or are binding, then they may need to be replaced. 5. Check the drive shafts by rotating them. Look for any wobbles. If they are bent, replace them immediately. 6. With the drive shafts removed, check for slop in the CV area. If it is present, then reposition the CV pin to another fresh hole, re-lubricate and install back into the vehicle. Differential Maintenance: Properly maintained differentials are essential for a smooth operating vehicle. Check all three diffs regularly to make sure they are filled and operating as designed. 1. Remove each diff and verify the differential action is happening and is smooth. If there is any notchy feel to them, follow the steps below to rebuild them. 2. Open the diff and pour out the oil. Remove the gears and pins to release the outdrives, then remove the seals. Inspect everything to make sure there are no damaged parts. If the seals are old or show any signs of degradation, replace them immediately. Re-lubricate the seals and outdrives, then rebuild the diff following the steps on page 3 and 4. 28
29 TKR ET410 1/10th 4WD Competiton Electric Truggy Kit Parts List TKR O-Ring (ESC tray, 3pcs) TKR Antenna tube (universal, w/ caps, 5pcs) TKR Steering linkage (M3x18mm threaded rod, 10pcs) TKR5571M - Wheel Hexes (12mm, steel, lightened, 4pcs) TKR Ball Stud (5.5mm, short neck, 6mm thread, 4pcs) TKR Ball Stud (5.5mm, long neck, 6mm thread, 4pcs) TKR Ball Stud (5.5mm, short neck, 8mm thread, 4pcs) TKR Ball Stud (5.5mm, short neck, 10mm thread, 4pcs) TKR Turnbuckle (M3 thread, 55mm length, 4mm adjustment, 2pcs) TKR Rod End Set (turnbuckles, sway bar, steering, EB410) TKR6270R - Stub Axles (EB410 rear, ET410 F/R, hardened steel, 2pcs) TKR Battery Strap Thumb Screw (EB410) TKR6501B - Chassis (EB410/ET410, requires TKR6540B/TKR6541B) TKR6519B - Bulkhead Set (revised, f/r, EB410) TKR Hinge Pins (inner, front/rear, super hard, EB410, 2pcs) TKR6526B - Bell Cranks, Ackerman Plate, Servo Horns (EB410) TKR Shock Standoffs (EB410, 2pcs) TKR Motor Mount Base (CNC, 7075, EB410) TKR Chassis Brace, Body Mount Set (EB410) TKR Motor Mount Insert (CNC, 7075, EB410) TKR6540B - Hinge Pin Brace (CNC, 7075, EB410, A Block) TKR6541B - Hinge Pin Brace (CNC, 7075, EB410, B Block) TKR Hinge Pin Brace (CNC, 7075, EB410, C Block) TKR Hinge Pin Brace (CNC, 7075, EB410, D Block) TKR Hinge Pin Inserts, Wheelbase Shims (EB410) TKR Rear Hubs (l/r, EB410) TKR Wing Mount and Bumper (EB410) TKR Sway Bar and Bulkhead Acc. (EB410) TKR Pivot Balls (5.5mm, flanged, 4pcs) TKR Spindle Carriers (l/r, EB410) TKR Spindles (15, l/r, EB410) TKR Stabilizer Balls (5.5mm, sway bars, aluminum, 4pcs) TKR Hinge Pins (outer, front, EB410, 2pcs) TKR Hinge Pins (outer, rear, EB410, 2pcs) TKR Side Guard, Servo Mount, Battery Acc. (EB410) TKR Kingpin Shoulder Screws (EB410, 4pcs) TKR Diff Coupler (f/r, lightened, hardened steel, EB410) TKR Tapered Driveshaft (center, rear, 7075, black ano, EB410) TKR Tapered Driveshaft (center, front, 7075, black ano, EB410) TKR Wing (lexan, pre-cut, EB410) TKR Sway Bar Set (rear, 1.5, 1.6, 1.7, 1.8, 1.9mm, EB410) TKR Sway Bar Set (front, 1.5, 1.6, 1.7, 1.8, 1.9mm, EB410/ET410) TKR Steering Rack Bushings (aluminum, EB410, 2pcs) TKR Steering Posts (steel, EB410, 2pcs) TKR Center Diff Support, Top Braces (EB410) TKR Front Camber Link Plate (aluminum, EB410) TKR Rear Camber Link Plate (aluminum, EB410) TKR Rear Body Mount Panels (EB410, 2pcs) TKR Body Mount Hook and Loop Tape Set (EB410, 4pcs) TKR CV Rebuild kit (f/r, for 2 axles) TKR Body (ET410) TKR Body Mount Set (ET410) TKR Decal Sheet (ET410) TKR Suspension Arms (rear, ET410) TKR Suspension Arms (front, ET410) TKR Turnbuckle (M3 thread, 78mm length, 4mm adjustment, 2pcs) TKR Driveshaft (f/r, hardened steel, ET410, 2pcs) TKR Shock Tower Set (f/r, ET410) Differential List TKR Differential O-Rings (6pcs) TKR Differential Case (f/c/r, 3pcs, EB410) TKR6513X - Differential Cross Pins (composite, 3pcs, EB410) TKR Differential Outdrives (f/r/c, lightened, EB410) TKR Differential Seals (3pcs, EB410) TKR Differential Shims (5x14mm, hardened, 6pcs, EB410) TKR Differential Gear Set (internal gears only, EB410) TKR Differential Ring Gear (40t, ET410, use with TKR7222) TKR Diff Pinion (10t, ET410, use with TKR7221) TKR Spur Gear (53t, 32 pitch, composite, black, EB/ET410) Bearings List TKRBB Ball Bearing (4x7.5mm, 4pcs) TKRBB Ball Bearing (5x11, 4pcs) TKRBB Ball Bearing (6x12, 4pcs) TKRBB Ball Bearing (10x15, 4pcs) Shocks List TKR ing Shock Rod End and Spring Perch Set (13mm shocks) TKR Shock Shafts (EB410 front/et410 rear, steel, 2pcs) TKR Shock Piston Set (2x1.7, 2x1.8, flat/flat, 13mm, 4pcs) TKR Shock Cartridge Guide Set (CNC, Delrin, 8pcs, EB410/ET410) TKR Shock X-rings (8pcs, EB410) TKR Shock Body (EB410 front/et410 rear, aluminum, hard ano, 2pcs) TKR Shock/Cartridge Cap & Bushing Set (4pcs each, EB410) TKR Emulsion O-ring Set (4x cap seals, 8x emulsion o-rings, for 13mm shocks) TKR6719A - Shock Adjustment Collars (aluminum, EB410, 2pcs) TKR Shock Body (rear, aluminum, hard ano, ET410, 2pcs) TKR Shock Shafts (rear, steel, ET410, 2pcs) TKR Shock Spring Set (front, 1.4x9.375, 4.00lb/in, 50mm, yellow) TKR Shock Spring Set (rear, 1.3x9.875, 2.82lb/in, 63mm, yellow) Hardware List TKR M3 nuts (black, 10pcs) TKR M3 nuts (flanged, black, 10pcs) TKR M4 nuts (aluminum, flanged, GM ano, serrated, 4pcs) TKR M3x8mm Washer (black, 10pcs) TKR1229-6x10x.2 Shims (10pcs) TKR Body Clips (angled, 10pcs) TKR Lower Shock Mount Screws (2 CW thread, 2 CCW thread) TKR Shock Piston Retainer Screw (4pcs) TKR M2mm Cap Head Screws (black, 10pcs) TKR M2.5x6mm Flat Head Screws (black, 10pcs) TKR M2.5x10mm Flat Head Screws (black, 10pcs) TKR M3x6mm Flat Head Screws (black, 10pcs) TKR M3x8mm Flat Head Screws (black, 10pcs) TKR M3x10mm Flat Head Screws (black, 10pcs) TKR M30mm Flat Head Screws (black, 10pcs) TKR M3mm Button Head Screws (black, 10pcs) TKR M3x6mm Button Head Screws (black, 10pcs) TKR M3x8mm Button Head Screws (black, 10pcs) TKR M3x10mm Button Head Screws (black, 10pcs) TKR M3x14mm Button Head Screws (black, 10pcs) TKR M30mm Button Head Screws (black, 10pcs) TKR M35mm Button Head Screws (black, 10pcs) TKR M2.5x6mm Button Head Screws (black, 10pcs) TKR M3x8mm Cap Head Screws (black, 10pcs) TKR M3x10mm Cap Head Screws (black, 10pcs) - M3mm Set Screws (black, 10pcs) TKR M4mm Set Screws (black, 10pcs) TKR M3x8mm Set Screws (black, 10pcs) TKR M3x3mm Set Screws (black, 10pcs) TKR M4x8mm Set Screws (black, 10pcs) Option Parts TKR Turnbuckle Wrench (4mm, 5mm, hardened steel) TKR Pivot Ball and Shock Multi-tool (aluminum) TKR mm / 7.0mm Wrench (hardened steel) TKR Composite 12mm Hex Adapters (+1mm, 4pcs) TKR1654X - 12mm Aluminum Hex Adapters (+1mm, aluminum, 4pcs) TKR Composite Wheel Hexes (12mm, 4pcs) TKR5571A - Wheel Hexes (SCT410, 12mm, aluminum, 4pcs) TKR6503C - Battery Strap (carbon fiber, EB410) TKR6560A - Aluminum Ackerman Plate (CNC 7075 black ano, EB410/ET410) TKR6563A - Aluminum Servo Horn (25T, standard, low profile, M3 clamp, EB410) TKR6598C - Steering Top Plate (carbon fiber, EB410) TKR6605X - Wing (lightweight, lexan, pre-cut, EB410) TKR Sway Bar Set (rear, bars only, 1.0, 1.1, 1.2, 1.3, 1.4mm, EB410/ET410) TKR Sway Bar Kit (complete front, 1.0, 1.1, 1.2, 1.3, 1.4mm, EB410) TKR6635C - Center Diff Top Plate and Fan Mount (carbon fiber, EB410) TKR6704T - Shock Shafts (EB410 rear/et410 front, steel, TiNi coated, 2pcs) TKR6712A - Shock Caps (7075, emulsion, black ano, 2pcs TKR Shock Pistons (CNC, 2x1.7, 2pcs) TKR Shock Pistons (CNC, 2x1.8, 2pcs) TKR Shock Piston Blanks (CNC, flat/flat, 13mm, 4pcs) TKR6757T - Shock Shafts (rear, steel, TiNi coated, ET410, 2pcs) TKR Shock Spring Set (front, 1.4x10.125, 3.61lb/in, 50mm, pink) TKR Shock Spring Set (front, 1.4x9.75, 3.81lb/in, 50mm, green) TKR Shock Spring Set (front, 1.4x9.0, 4.21lb/in, 50mm, orange) TKR Shock Spring Set (front, 1.4x8.75, 4.37lb/in, 50mm, red) TKR Shock Spring Set (rear, 1.3x11.25, 2.4lb/in, 63mm, pink) TKR Shock Spring Set (rear, 1.3x10.5, 2.61lb/in, 63mm, green) TKR Shock Spring Set (rear, 1.3x9.375, 3.01lb/in, 63mm, orange) TKR Shock Spring Set (rear, 1.3x8.875, 3.22lb/in, 63mm, red) TKR7281C - Shock Tower (front, carbon fiber, ET410) TKR7282C - Shock Tower (rear, carbon fiber, ET410) 29
30 Box Setup (starting point) mm 27mm Stock Stock Yellow Yellow out (per side) in (per side) Emul Emul mm STOCK STOCK 30K 30K 10K 2mm mm 2mm 53 0mm
31
32 Tekno RC Scripps Poway Pkwy #598 San Diego CA USA
Additional equipment and parts needed: Tools needed: Disclaimer: Warnings: Warranty:
 Introduction Thank you for purchasing the Tekno RC SCT410 1/10th Scale Electric 4WD Competition Short Course Truck. The SCT410 represents the state-of-the-art in 1/10th Electric Short Course technology.
Additional equipment and parts needed: Tools needed: Disclaimer: Warnings: Warranty:
 Introduction Thank you for purchasing the Tekno RC SCT410.3 1/10th Scale Electric 4WD Competition Short Course Truck. The SCT410.3 is an improved version of the already great SCT410. We are always working
Additional equipment and parts needed: Tools needed: Disclaimer: Warnings: Warranty:
 Introduction Thank you for purchasing the Tekno RC NT48.3 1/8th 4WD Nitro Competition Truggy. The NT48.3 represents the state-of-the-art in 1/8th nitro truggy technology. We hope you have as much fun driving
Additional equipment and parts needed: Tools needed: Disclaimer: Warnings: Warranty:
 Introduction Thank you for purchasing the Tekno RC NB48.3 1/8th 4WD Nitro Competition Buggy. The NB48.3 represents the state-of-the-art in 1/8th nitro buggy technology. We hope you have as much fun driving
ROLL CENTER You can adjust the front and rear roll centers of the XB8 by changing the mounting locations of various components.
 Your XRAY XB8 luxury nitro buggy is a top competition, precision racing machine that features multiple adjustments that allow you to set up for any track condition. The XB8 includes innovative set-up features
#0980 Intimidator 7 Direct Drive Racing Kit
 #0980 Intimidator 7 Direct Drive Racing Kit 1 Thank you for purchasing the Intimidator 7! Within this kit you will find a race winning car with over 30 years of Custom Works design and quality. The latest
.050 Allen key 1.5mm Allen key 1/16 Allen key 5/64 Allen key 3/32 Allen key Turnbuckle & 3/16 wrench
 1 Thank you for purchasing the Outlaw 4 Sprint Car! The Outlaw sprint car platform has been developed for loose dirt buggy tire racing. In this kit you will find the 4 th evolution of the car which features
:: Additional Features Your new TC6 comes unassembled and requires the following items for completion. (refer to catalog section for suggestions):
:") 8/10 2 :: Introduction Thank you for purchasing this Team Associated product. This assembly manual contains instructions and tips for building and maintaining your new RC10TC6. Please take a moment to
8/10 2 :: Introduction Thank you for purchasing this Team Associated product. This assembly manual contains instructions and tips for building and maintaining your new RC10TC6. Please take a moment to
Bag 1. Bag 1. Center Pivot. Center Pivot
 8 00734 01901 5 Center Pivot Bag 1 3374 - Center Pivot Socket 4019 - Alum Pivot ball 3254-2-56 Button Head *Note - Sometimes it is helpful to slightly over-tighten the top clamp screws, then work the ball
along with standard XT2 Instruction Manual and also XT2 18 Supplementary Sheet.
 Use this XT2 Dirt Conversion Supplementary Sheet along with standard XT2 Instruction Manual and also XT2 18 Supplementary Sheet. Parts included in Bag 8: 303141 SHIM 3x5x1.0MM (10) 322111 XT2 COMPOSITE
Assembly Manual. 1/10th Formula 1 Car
 Assembly Manual 1/10th Formula 1 Car Center Pivot Bag 1 3374 - Center Pivot Socket 40194 - Hard Anodized Alum Pivot ball 3254-2-56 *Note - Sometimes it is helpful to slightly over-tighten the top clamp
3.0 Tuning Tips. To Shut Off the Engine: Use the included pipe plug or simply bump the flywheel with a wrench or plastic handled tool.
 TM 8IGHT 3.0 Tuning Tips Before you start making changes on your 8IGHT 3.0 Off-Road Racing buggy, you need to make a few decisions. First of all, tires, and how they are setup, have a tremendous impact
ASSOCIATED 1:10 SCALE ELECTRIC BUGGY INSTRUCTION MANUAL FOR THE TEAM ASSOCIATED RC10B Associated Electrics, Inc. RS-1
 ASSOCIATED 1:10 SCALE ELECTRIC BUGGY INSTRUCTION MANUAL FOR THE TEAM ASSOCIATED RC10B4 TT RS-1 2003-2006 Associated Electrics, Inc. FINAL ADJUSTMENTS RADIO ADJUSTMENTS Use the following
A7741 Truggy Wheel, Yellow
 STEP H-01 Tire Mounting BAG H 1 2 A7780B XTT Tire, Blue Truggy Foam Insert Only sold with Tires A7741 Truggy Wheel, Yellow STEP H-02 Tire Gluing The Tires need to be glued to the wheels. This can be done
RJS2021 LTO SPORT OVAL RACER LESS ELECTRICS
 RJS2021 LTO SPORT OVAL RACER LESS ELECTRICS THANKS FOR BUYING THE RJ SPEED 1/10 LTO SPORT KIT FOR OVAL RACING. THE ASSEMBLY WILL NOT BE DIFFICULT IF YOU READ THE TEXT, LOOK AT THE PICTURES, AND THE EXPLODED
R R11 Eccentric Hub-Alu (4) R R11 Eccentric Hub-Alu (4) NOTICE. Pulley cover direction NOTICE BAG 01 NOTICE BAG 01
 R R11 Eccentric Hub-Alu (4) NOTICE. Pulley cover direction NOTICE BAG 01 NOTICE BAG 01") BAG BAG R Spool Axle Alu RA Front Spool Pulley Set 8T (4pcs) R Diff Gears (with Axle) Trim any excess flashing from the diff gear axle at the mold injection point. (pcs) (4pcs) R Spool Outdrive (pcs) R6
BAG BAG R Spool Axle Alu RA Front Spool Pulley Set 8T (4pcs) R Diff Gears (with Axle) Trim any excess flashing from the diff gear axle at the mold injection point. (pcs) (4pcs) R Spool Outdrive (pcs) R6
Assembly Manual. 1/10th World GT car
 Assembly Manual 1/10th World GT car Center Pivot Bag 1 3374 - Center Pivot Socket 40194 - Hard Anodized Alum Pivot ball 3254-2-56 Button Head *Note - Sometimes it is helpful to slightly over-tighten the
Make these adjustments before racing
 FINAL ADJUSTMENTS ADJUSTING CAMBER To set the camber we recommend using our supplied #1719 camber/rear toe-in gauge. When adjusting camber you need to have the car ready to run with no body. Make these
PREBUIL UILT ASSEMBLY AND OPERATION MANUAL
 PREBUIL UILT Length: 15.2" [385mm] Width: 13" [330mm] Height: 5.8" [147mm] Weight: 3.3 lb [1500g] Wheelbase: 11.6" [295mm] Technical Support Information For technical assistance, contact: DuraTrax Product
Use this NT Supplementary Instruction Sheet along with the standard NT1 Instruction Manual included in the kit.
 INSTRUCTION MANUAL SUPPLEMENTARY SHEET Use this NT1 2013 Supplementary Instruction Sheet along with the standard NT1 Instruction Manual included in the kit. New and Improved Parts All of these parts are
OWNER'S MANUAL Magnolia Ave., Chino, CA phone: (909) fax: (909)
 fax: (909)") OWNER'S MANUAL Carefully read through all instructions to familiarize yourself with the parts, construction techniques, and tuning tips outlined in this manual. Being able to grasp the overall design of
OWNER'S MANUAL Carefully read through all instructions to familiarize yourself with the parts, construction techniques, and tuning tips outlined in this manual. Being able to grasp the overall design of
BEFORE YOU START CUSTOMER SUPPORT
 BEFORE YOU START The X10 is a high-quality, 1/10-pan car intended for persons aged 16 years and older with previous experience building and operating RC model racing cars. This is not a toy; it is a precision
New Generation Rear Wheel Drive
 New Generation Rear Wheel Drive ABC HOBBY ORIGINAL RADIO CONTROL CAR Instruction Manual Study the instructions thoroughly before assembly. REAR 2 WHEEL DRIVE REAR MOUNTED MOTOR BELT DRIVE DOUBLE DECK CHASSIS
RHINO SUSPENSION SYSTEM INSTALLATION INSTRUCTIONS
 PARTS INCLUDED: 2 FRONT UPPER A-ARMS 2 FRONT LOWER A-ARMS 2 UNI-BALL JOINTS 2 UNI-BALL JOINT STUDS 2 UNI-BALL JOINT CAPS 2 RETAINING RINGS 1 FRONT SHOCK ASSEM. 2 DELRON STEERING STOPS 2 SHOCK MOUNT SPACERS
RJS2020 SPORT 3.2 1/10 PAN CAR KIT LESS ELECTRICS
 RJS2020 SPORT 3.2 1/10 PAN CAR KIT LESS ELECTRICS THANKS FOR BUYING THE RJ SPEED 1/10 SPORT 3.2 KIT. THE ASSEMBLY WILL NOT BE DIFFICULT IF YOU READ THE TEXT, LOOK AT THE PICTURES, AND THE EXPLODED VIEW
BEFORE YOU START. XRAY Europe K Výstavisku 6992, Trenčín Slovakia EUROPE. XRAY USA RC America, 2030 Century Center Blvd #15 Irving, TX USA
 BEFORE YOU START The X12 is a high-quality, 1/12-pan car intended for persons aged 16 years and older with previous experience building and operating RC model racing cars. This is not a toy; it is a precision
OWNER'S MANUAL 2000 & ROAR National Champion
 2000 & 2001 ROAR National Champion OWNER'S MANUAL Carefully read through all instructions to familiarize yourself with the parts, construction techniques, and tuning tips outlined in this manual. Being
ABC HOBBY ORIGINAL RADIO CONTROL CAR
 ABC HOBBY ORIGINAL RADIO CONTROL CAR Instruction Manual Study the instructions thoroughly before assembly. FRONT WHEEL DRIVE NEW STYLE STRUT SUSPENSION BATHTUB CHASSIS 4 BEVEL GEAR DIFFERENTIAL FULL ADJUSTABLE
Item Number Item Name MSRP MAP
 Kits and RTRs 4021 RC12R6-FT KIT $439.99 $285.99 7063 ProSC 4x4 RTR $529.99 $334.99 7063C ProSC 4X4 RTR LiPo Combo $599.99 $379.99 8023 RC10F6 Factory Team Kit $499.99 $339.99 20150 SC28 RTR LUCAS OIL
J & D Machine / Hyperdrive / MSA 3711 Moon Bend Rd. Chapel Hill, TN 37034
 J & D Machine / Hyperdrive / MSA 3711 Moon Bend Rd. Chapel Hill, TN 37034 www.hyperdriveracing.com 1 You now own a state of the art 1/10 scale oval race car. The Hyperdrive Assault has gone through months
=Apply Thread lock adhesive. =Apply CA Glue =Apply Grease NOTE : BAG 01 BAG 01 BAG mm. When track High Traction or want to reduce steering
 NOTE : =Apply Thread lock adhesive R80059 One Way Cup () R8009 One Way R80 Pulley Set- R80004 Alu-Bulkhead-L BAG 0 CA GE =Apply CA Glue =Apply Grease R8000 Upper Arm Bracket Base R8004 One Way Plastic
KSKT RACING PRODUCTS
 KSKT RACING PRODUCTS ''KSK-B'' SPEC RACING CHASSIS ASSEMBLY INSTRUCTIONS 'The Leader in SK Racing' 1 CHASSIS KIT FEATURES Black Carbon Fiber Chassis Components 2.5 mm Thick Main Chassis Battery mounting
Shown with optional GFR-1017R Body Posts. J & D Machine / Hyperdrive / MSA 3711 Moon Bend Rd. Chapel Hill, TN
 Shown with optional GFR-1017R Body Posts J & D Machine / Hyperdrive / MSA 3711 Moon Bend Rd. Chapel Hill, TN 37034 www.hyperdriveracing.com 1 You now own a state of the art 1/10 scale oval race car. The
BEFORE YOU START. XRAY USA RCAmerica, 167 Turtle Creek Boulevard Suite C Dallas, Texas 75207, USA
 BEFORE YOU START The X12 is a high-quality, 1/12-pan car intended for persons aged 16 years and older with previous experience building and operating RC model racing cars. This is not a toy; it is a precision
BAG F STEP F-01 STEP F-02 STEP F-03. Front and Rear Clip Installation
 q STEP F-01 BAG F Front and Rear Clip Installation The Servo Link installed in Step B-03 was set to an approximate length. The correct length will vary depending on the type of servo used, the radio settings,
E Thank you for purchasing VBC Racing product. COMPETITION GRADE HIGH PERFORMANCE RADIO CONTROL RACING CAR CHASSIS KIT INSTRUCTIONS MANUAL
 COMPETITION GRADE HIGH PERFORMANCE RADIO CONTROL RACING CAR CHASSIS KIT 1/10 SCALE ELECTRIC COMPETITION FORMULA CAR KIT INSTRUCTIONS MANUAL E Thank you for purchasing VBC Racing product. Things that we
Pan Car Setup and Troubleshooting
 Pan Car Setup and Troubleshooting Problems can come up in the midst of competition. Either the car is not handling properly on the track or there are problems with equipment. Troubleshooting problems should
DIFFERENTIAL STEERING RACK
 BAG-A DIFFERENTIAL (2 Sets) +Driver Cap Screw Diff Ball Nylon Nut Thrust Washer Thrust Ball Diff Joint Cup A Allen Wrench 850 Bearing Diff Ring Diff Spring Nylon Nut 850 Bearing Diff Ring Diff Ball Ball
TIPS TO FINAL ASSEMBLY Radio installation. The Electronic speed control (ESC) and the receiver need to be mounted onto the chassis, using double sided
 and the receiver need to be mounted onto the chassis, using double sided") TIPS TO FINAL ASSEMBLY Radio installation. The Electronic speed control (ESC) and the receiver need to be mounted onto the chassis, using double sided tape (not supplied.) Mount the ESC first on the chassis
TIPS TO FINAL ASSEMBLY Radio installation. The Electronic speed control (ESC) and the receiver need to be mounted onto the chassis, using double sided tape (not supplied.) Mount the ESC first on the chassis
Contents. Symbols Used. Equipment Required L=R. Page. Apply Thread Lock. Apply. Silicone Oil. 30mm Fan
 Contents Content Page Content Page Content Page 0. Tool and Accessories 1.Filing the Edges of the Chassis 2.Bulkhead Installation 3.Spur Gear Assembly 4.Front Spool Assembly 5.Gear Differential Assembly
2103 NITRO RAIL DRAGSTER KIT
 203 NITRO RAIL DRAGSTER KIT THANKS FOR BUYING RJ SPEED S NITRO DRAG KIT. IT IS A LITEWEIGHT CAR MADE FOR STRAIGHT LINE DRAG RACING AND CAN BE BROKEN IF RUN INTO SOLID OBJECTS AT HIGH SPEED. YOU WILL NEED
$1.00 FOR THE TQIO/RCIO
 $1.00 FOR THE TQIO/RCIO m mm HDBBYSHOP Champion Jay Halsey has an impressive track record. One of Jay's advantages is a whisper smooth tranny thanks to his dad, Jim. Now you can build a Halsey transmission!
BIND ST-TRIM TH-TRIM ST-D/R
 4 4 4 4 BIND ST-TRIM TH-TRIM ST-D/R 1. Put the battery in the car. 2. Install the battery. 3. Turn on the transmitter. Connect firmly. 4. Turn on the electronic speed controller. ON OFF AX80084 UV Joint
INSTRUCTION MANUAL AX90053-I001
 INSTRUCTION MANUAL AX90053-I001 2 3 AX80018 Hardware Parts Tree AX80006 Servo Set x3 AX31301 10mm Shock Caps Parts Tree (Blue) AX80069 AX31300 10mm Shock Parts Tree 2 (Blue) AX31114 WB8 Driveshaft AX80033
RJS WB ELECTRIC T/F DRAGSTER KIT LESS ELECTRICS
 RJS2006 30 WB ELECTRIC T/F DRAGSTER KIT LESS ELECTRICS THANKS FOR BUYING THIS RJ SPEED DRAGSTER KIT. IT IS MADE FOR STRAIGHT LINE DRAG RACING AND MAY BE BROKEN IF RUN INTO SOLID OBJECTS REPEATEDLY AT HIGH
Contents. # HUDY Caster Clip Remover Tool. # HUDY Chassis Balancing Tool. # HUDY 3mm Turnbuckle Tool
 Contents Introduction 2 Radio Adjustments 3 Speed Control (ESC) Adjustments 3 Connecting the Motor 3 Motor Gearing 3 Rollout 5 Differential Adjustment 5 Tightening the Differentials 6 Loosening the Differentials
ASSEMBLY AND OPERATION MANUAL
 ASSEMBLY AND OPERATION MANUAL www.duratrax.com ITEMS INCLUDED The following items are included with your Vendetta Rally. Chassis Transmitter Body Decal Sheet Instruction Manual Exploded View/Parts Listing
INSTALLATION GUIDE Bolt-On Drag-Race Strut Clip Chevy II
 INSTALLATION GUIDE 7702 Bolt-On Drag-Race Strut Clip 1962-67 Chevy II Description: STRUT CLIP 4130 BOLT ON 62-67 CHEVY II, INCLUDES 4130 ROUND TUBE FRAME CLIP, DOUBLE-ADJUSTABLE STRUTS, ADJUSTABLE-HEIGHT
INSTRUCTION MANUAL INSTRUCTION MANUAL
 INSTRUCTION MANUAL INSTRUCTION MANUAL Thank you for purchasing Pro-Line s PRO-Fusion SC 4 4! For Over 35 years, Pro-Line has designed and manufactured the best RC products in the world. This 1:10 scale
INSTRUCTIONS MANUAL COMPETITION GRADE HIGH PERFORMANCE RADIO CONTROL RACING CAR CHASSIS KIT 1/12 SCALE ELECTRIC COMPETITION CAR KIT
 COMPETITION GRADE HIGH PERFORMANCE RADIO CONTROL RACING CAR CHASSIS KIT 1/12 SCALE ELECTRIC COMPETITION CAR KIT INSTRUCTIONS MANUAL E Thank you for purchasing VBC Racing product. Things that we should
Calandra Racing Concepts
 Calandra Racing Concepts Carpet Knifeä Version 3 Assembly and Setup Manual Congratulations! You now own the best 1/12th scale car on the market today, the Carpet Knifeä Version 3. This completely new car
General Building Tips: A Good Dealer Is Extremely Important!! 1 Additional Items Needed For Operation. Tools Supplied
 Owner s Manual Thank you for choosing the Team Magic E4JR. The E4JR includes a large selection of the important specialty parts when compared to the previous versions. Before you start building your new
Index. Page Number Section
 S H O C K S Index Page Number Section 1-4 GM Front Coil Over Installation 5-7 Front Smooth Body Shock Installation 7-8 Rear Smooth Body Shock Installation 8-11 Custom Coil Over Installation 12 Tuning and
Rustler 4X4 (Model ) Parts List
 Parts List") Parts shown in bold are optional accessories. Part categories and individual part listings are arranged alphabetically. Rustler 4X4 (Model 67064-1) Parts List Bearings & Bushings 4607 Ball bearings (5x11x4mm)
Parts shown in bold are optional accessories. Part categories and individual part listings are arranged alphabetically. Rustler 4X4 (Model 67064-1) Parts List Bearings & Bushings 4607 Ball bearings (5x11x4mm)
INSTRUCTIONS MANUAL COMPETITION GRADE HIGH PERFORMANCE RADIO CONTROL RACING CAR CHASSIS KIT 1/10 SCALE ELECTRIC COMPETITION CAR KIT
 COMPETITION GRADE HIGH PERFORMANCE RADIO CONTROL RACING CAR CHASSIS KIT 1/10 SCALE ELECTRIC COMPETITION CAR KIT INSTRUCTIONS MANUAL E Thank you for purchasing VBC Racing product. Things that we should
CONTENTS. All texts and images contained within this set-up book are copyright by XRAY. All rights reserved. XRAY
 CONTENTS Setting up the XRAY T3 3 Downstops 6 Ride Height 8 Droop 10 Track Width 12 Steering Throw Symmetry 13 Camber 14 Caster 16 Bump Steer 17 Ackermann 17 Toe 18 Tweak 20 Roll Center 24 Chassis Flex
carbon fiber before assembly. Sand glue to the edges and
 chassis and carbon fiber give you a before assembly. Sand glue to the edges and 5 BAG MARKED CA BAG MARKED M3x6 Flathead 4 03 4 05 BAG MARKED 2 10 13 Installing Steering System Shock Assembly M4x28
Commander SUSPENSION SYSTEM INSTALLATION INSTRUCTIONS
 PARTS INCLUDED: 2 - FRONT UPPER A-ARMS 2 - FRONT LOWER A-ARMS 4 - COTTER PINS 2-12MM JAM NUTS 2 - TIE ROD EXTENDERS 8- FLANGED DELRON BUSHINGS 4- DELRON CASTER SPACERS 6 - GREASE FITTINGS 3 - BEARING REMOVAL
Sportwerks Raven RTR Assembly and Operation Manual
 Sportwerks Raven RTR Assembly and Operation Manual Specifications: Scale.............. 1/10 Length............. 16 in (406mm) Front Track.......... 12.75 in (324mm) Rear Track.......... 12.5 in (318mm)
Bag 1. Bag 1. Center Pivot. 3 Center Pivot Cap. Center Pivot
 Battle Axe 2.0 1:10th Oval Weapon from Team CRC Assembly Manual 0 2. e Ax s tle Win s! t rd Ba s + bi C. ow CR T.Q Sn 0 20 servo and saver not included Part # 100 Calandra Racing Concepts 6785 Martin Street
7207 FRONT BULKHEAD, nylon FRONT BULKHEAD ALUMINUM SUPPORT HINGE PIN, inner, with clips, 1.675" pr GT RACING FRONT
 RC10GT & RTR GT MC 9 McCOY GLOW PLUG 1 3.9 2661 CLUTCH NUT CLIPS 6.7 3216 WASHER, #4 12 1.00 3719 NYLON WIRE TIES, 6" heavy duty 12 2.00 3720 NYLON TIES, 8", light duty for receiver 12 2.00 3721 SELF-TAPPING
1:8 SCALE CATALOG 1:8 GAS KITS RC500 FRONT END BODY ACCESSORIES
 1:8 SCALE CATALOG Stock is extremely limited. Parts listing as of 7/2001. Sale prices apply to orders direct from Associated only. Items available while supplies last. Items marked Not available or are
TUNING SECTION ABOUT ADJUSTMENTS
 TUNING SECTION ABOUT ADJUSTMENTS R/C race cars, in general, are some of the most adjustable racing machines of any scale. What s really amazing is just how easy and quick it is to make all of our changes:
TP02C. 1:10 Scale Radio Controlled Electric Powered 2WD Racing Buggy. Dimensions. Length 410mm Width 250mm Height 150mm
 TP02C 1:10 Scale Radio Controlled Electric Powered 2WD Racing Buggy Dimensions Length 410mm Width 250mm Height 150mm Transmitter Preparation Power Switch Antenna 27MHzTransmitter Crystal T 27MHz ON Extend
INTRODUCTION INSTRUCTIONS. plastic parts CONTENTS
 INTRODUCTION Thank you very much for selecting this Serpent rc car and thus become a member of the ever growing worldwide Serpent racing family. Serpent started in 980 and has been growing its product-line
Z-CAR ZMXT-8 RTR RTR NITRO OFF-ROAD
 TEST DRIVE EXCLUSIVE! Z-CAR ZMXT-8 RTR RTR NITRO OFF-ROAD THIS TRUGGY BREAKS THE MOLD WORDS KEVIN HETMANSKI kevinh@airage.com PHOTOS JOSEPH ARTHUR Z-CAR, A DIVISION OF SH ENGINES, is distributed exclusively
Pinion Gear and Setscrew
 XRAY T1 Factory Kit 2005 The new XRAY T1 Factory Kit '05 (T1FK'05) is the 5th generation of XRAY's extremely successful T1 family of 1/10-scale on -road electric touring cars. The T1FK'05 is a large evolutionary
Telluride 4X4 (Model ) Parts List
 Parts List") Telluride 4X4 (Model 67044-1) Parts List Parts shown in bold are optional accessories. Part categories and individual part listings are arranged alphabetically. Prices are shown in US Dollars. Bearings
Telluride 4X4 (Model 67044-1) Parts List Parts shown in bold are optional accessories. Part categories and individual part listings are arranged alphabetically. Prices are shown in US Dollars. Bearings
I n s t r u c t i o n M a n u a l. Instruction Manual SPECIFICATION
 I n s t r u c t i o n M a n u a l Instruction Manual SPECIFICATION - Wingspan: 3200mm (125,9 in) - Length: 1650mm (64,9 in) - Flying weight: 3000gr 3200gr - Wing area: 64.5 dm2 - Wing loading: 46g/dm2
Bigfoot (Model ) Parts List
 Parts List") Parts shown in bold are optional accessories. Part categories and individual part listings are arranged alphabetically. Bigfoot (Model 36084-1) Parts List Bearings & Bushings 4607 Ball bearings (5x11x4mm)
Parts shown in bold are optional accessories. Part categories and individual part listings are arranged alphabetically. Bigfoot (Model 36084-1) Parts List Bearings & Bushings 4607 Ball bearings (5x11x4mm)
KIT # CSS-C SUSPENSION LIFT KIT
 14385 Veterans Way Moreno Valley, CA 92553 Phone: (951) 571-0212 Fax: (951) 571-0215 2001-2010 CHEVROLET SILVERADO 1500 AND 2500 HD 4WD AND 2WD PICK-UP 1999-2010 CHEVY 2500 4WD PICK-UPS 2001-2010 2500
X-Wide Body Red Standard 78T Big Shot Red Standard Trim inside corners of Foam inserts.
 SUPER DIALED SETUP! KIT SETUP 0 24mm, Arms level -1 30 No 27.5wt. #56 Orange None Bottom Narrow Rack None 3-B, 1-Ball Stud Washer 3-Middle Short Yes, on Tower 3 Pivot, 0 Hubs 2 23mm, Dogbones just under
2030 OUTLAW SPRINTER HARDWARE I.D. BUTTON HD. CAP SCREW BAG H1 CHASSIS KIT BAG H3 HARDWARE BAG L2 REAR AXLE PARTS BAG L4 FRONT TIRES
 THANKS FOR BUYING THE RJ SPEED OUTLAW SPRINTER KIT. IT IS COMPLETE LESS ELECTRICS, AND MADE FOR CARPET OR PAVEMENT RACING. IT REQUIRES A 540 OR 550 SIZE MOTOR, 4 OR 6 CELL BATTERY PACK, TWO CHANNEL RADIO
NOTE: Using hot modified motors exceed the capacity of the electronic speed control and voids any warranty.
 OWNER'S MANUAL NOTE: Using hot modified motors exceed the capacity of the electronic speed control and voids any warranty. Carefully read through all instructions to familiarize yourself with the parts,
for the B3 Sport kit #9013
 All kit versions include: 2.40:1 transmission for effortless power handling. Molded composite chassis for better rigidity and Lexan B3 racing body. Quadra-symmetric suspension for greater stability and
X 6 SQUARED X 6 SQUARED KIT K 021 KIT INSTRUCTION MANUAL. Version 1.0. K021 Instructions v1.0 First Things Page 1
 X 6 SQUARED K 021 KIT INSTRUCTION MANUAL Version 1.0 X 6 SQUARED KIT K021 Instructions v1.0 First Things Page 1 CONTENTS First Things.. 3 A Front Arms & Hubs 5 B Complete The Front End. 12 C Differential.
ON ROAD SETUP GUIDE PART ONE
 PART ONE Ride height is adjusted by the preload of the spring collars. Winding them down will raise the ride height, while winding them up will decrease the ride height. It is important to note that adjusting
Slash VXL (Model ) Parts List
 Parts List") Parts shown in bold are optional accessories. Part categories and individual part listings are arranged alphabetically. Slash VXL (Model 58076-3) Parts List Bearings & Bushings 4607 Ball bearings (5x11x4mm)
Parts shown in bold are optional accessories. Part categories and individual part listings are arranged alphabetically. Slash VXL (Model 58076-3) Parts List Bearings & Bushings 4607 Ball bearings (5x11x4mm)
 SUSPENSION PARTS LOSB2002 F/R Suspension Arms (pr)(lst2)... $10.00 LOSB2102 Steering Bell Cranks, Shafts, & Chassis Braces (LST/2)... $7.00 LOSB2104 Front Spindles & Carriers (LST2)... $7.00 LOSB2106 Rear
RJS2001 PRO STOCK KIT LESS ELECTRICS
 RJS2001 PRO STOCK KIT LESS ELECTRICS THANKS FOR BUYING RJ SPEED S PRO STOCK DRAG KIT. IT IS MADE FOR STRAIGHT LINE DRAG RACING AND CAN BE BROKEN IF RUN INTO SOLID OBJECTS REPEATEDLY AT HIGH SPEED. IT REQUIRES
Installation Manual TWM Performance Short Shifter Cobalt SS/SC, SS/TC, HHR SS, Ion Redline and Saab 9-3
 Page 1 Installation Manual TWM Performance Short Shifter Cobalt SS/SC, SS/TC, HHR SS, Ion Redline and Saab 9-3 Please Note: It is preferable to park on a flat surface, as you will have to engage and disengage
SOARSEIKI.Co.,Ltd
 SOARSEIKI.Co.,Ltd info@soarseiki.com 1 2 3 4 BAGS A1 FRONT AND REAR DIFF 5 BAGS A2 CENTER DIFF 5 BAGS B1 FRONT TRANSMISSION STEP B1-1 Apply a thiin layer of lubricant on the gear. GR160003 BE050110040
The following items are needed to install your Speed Kit. Phillips head screw driver 3/16" nut driver 1.5mm hex wrench
 BRUSHLESS SPEED KIT INSTALLATION INSTRUCTIONS REQUIRED TOOLS The following items are needed to install your Speed Kit. Phillips head screw driver 3/16" nut driver 1.5mm hex wrench 1. REMOVE STEERING LINKAGE
2011+ Adjustable Tie-rod Ends (Mm5TR-2)
") 3430 Sacramento Dr., Unit D San Luis Obispo, CA 93401 Telephone: 805/544-8748 Fax: 805/544-8645 www.maximummotorsports.com 2011+ Adjustable Tie-rod Ends (Mm5TR-2) Instructions 1. Set the parking brake
3430 Sacramento Dr., Unit D San Luis Obispo, CA 93401 Telephone: 805/544-8748 Fax: 805/544-8645 www.maximummotorsports.com 2011+ Adjustable Tie-rod Ends (Mm5TR-2) Instructions 1. Set the parking brake
Global West Suspension 655 South Lincoln Ave San Bernardino Ca Phone Fax Web address globalwest.
 Global West Suspension 655 South Lincoln Ave San Bernardino Ca. 92408 Phone 877-470-2975 Fax 909-890-0703 Web address globalwest.net Mustang coilover instruction sheets for 64-66 Kit includes the following
MM Adjustable IRS Tie-Rod (MMIRSTR-2)
") 3430 Sacramento Dr., Unit D San Luis Obispo, CA 93401 Telephone: 805/544-8748 Fax: 805/544-8645 www.maximummotorsports.com MM Adjustable IRS Tie-Rod (MMIRSTR-2) Sample Bumpsteer Curve: Read all instructions
3430 Sacramento Dr., Unit D San Luis Obispo, CA 93401 Telephone: 805/544-8748 Fax: 805/544-8645 www.maximummotorsports.com MM Adjustable IRS Tie-Rod (MMIRSTR-2) Sample Bumpsteer Curve: Read all instructions
Slash (Model 58024) Parts List
 Parts List") Parts shown in bold are optional accessories. Part categories and individual part listings are arranged alphabetically. Slash (Model 58024) Parts List Bearings & Bushings 4607 Ball bearings (5x11x4mm)
Parts shown in bold are optional accessories. Part categories and individual part listings are arranged alphabetically. Slash (Model 58024) Parts List Bearings & Bushings 4607 Ball bearings (5x11x4mm)
Team Associated RC10B4 Tuning Guide
 Team Associated RC10B4 Tuning Guide This document is a compilation of released pages from Associated Electric made for PetitRC, all credits must go to Associated Electric. Complete Tuning Guide: B4 Front
RJS2017 SPORTSMAN RACER KIT LESS ELECTRICS
 RJS2017 SPORTSMAN RACER KIT LESS ELECTRICS THANKS FOR BUYING THE RJ SPEED 1/10 SPORTSMAN RACER KIT FOR OVAL RACING, DRAG RACING OR JUST FUN STREET BASHING. THE ASSEMBLY WILL NOT BE DIFFICULT IF YOU READ
Slash (Model ) Parts List
 Parts List") Parts shown in bold are optional accessories. Part categories and individual part listings are arranged alphabetically. Slash (Model 58034-2) Parts List Bearings & Bushings 4607 Ball bearings (5x11x4mm)
Parts shown in bold are optional accessories. Part categories and individual part listings are arranged alphabetically. Slash (Model 58034-2) Parts List Bearings & Bushings 4607 Ball bearings (5x11x4mm)
RECOMMENDED MOTOR AND BATTERY SET UP
 SPECIFICATION - Wingspan: 6000mm (236.2 in) - Length: 2873mm (113.1 in) - Flying weight: 14-18 kg - Wing area: 219.4 dm2 - Wing loading: 64g/dm2 - Wing type: HQ airfoils - Covering type: Genuine ORACOVER
*1557BAG12* 1557BAG F /5 /6 LIFT KIT G THANK YOU FOR CHOOSING ROUGH COUNTRY FOR YOUR SUSPENSION NEEDS.
 2015-18 F-150 4 /5 /6 LIFT KIT THANK YOU FOR CHOOSING ROUGH COUNTRY FOR YOUR SUSPENSION NEEDS. 92155700G *1557BAG12* 1557BAG12 Rough Country recommends a certified technician install this system. In addition
Install steering rack assembly to chassis using x 3/8 stainless flat head socket screws and 2-6.4mm x 1.1mm blue aluminum spacers as shown.
 Install steering rack assembly to chassis using 2-4-40 x 3/8 stainless flat head socket screws and 2-6.4mm x 1.1mm blue aluminum spacers as Qty 2, 4-40 x 3/8 fhcs Qty 2, 6.4mm x 1.1mm blue aluminum spacer
Installation Notes: #86000-R Race Series +3.5 L/T Kit
 159 North Maple St. Unit J, CORONA CA 92880 P. 951-737-9682 F. 951-737-9006 WWW.CHAOSFAB.COM Installation Notes: #86000-R Race Series +3.5 L/T Kit Factory manual is recommended for removal and re-installation
En Instruction Manual De Bauanleitung. Fr Manuel de montage
 En Instruction Manual De Bauanleitung Fr Manuel de montage RTR Trophy Truggy Flux En De Fr Jp Vol.1 101875 Chassis Maintenance Chassis Wartung Entretien du châssis シャーシのメンテナンス 1 Gear Differential 101087
McDominator Team Kit Owner's Manual
 McDominator Team Kit Owner's Manual Thank you for purchasing the McPappy Racing McDominator Team Kit. This manual will guide you through the assembly process. It is possible to take a kit and throw it
X-Maxx (Model ) Parts List
 Parts List") X-Maxx (Model 77076-4) Parts List Parts shown in bold are optional accessories. Part categories and individual part listings are arranged alphabetically. Prices are shown in US Dollars. Bearings & Bushings
X-Maxx (Model 77076-4) Parts List Parts shown in bold are optional accessories. Part categories and individual part listings are arranged alphabetically. Prices are shown in US Dollars. Bearings & Bushings
Chevy Nova Pro-Touring Front Suspension Installation Instructions
 1962-1967 Chevy Nova Pro-Touring Front Suspension Installation Instructions 1-800-984-6259 www.totalcostinvolved.com 1 Pro-Touring Clip A-Arm Assembly Sway Bar Assembly Fender Panel Kit 8 7/16-20 * 1 ¼
PPM-8023 / PPM-8043 JEEP JK SYNERGY STAGE 3 SUSPENSION SYSTEM Version 1
 SYNERGY MFG. 870 INDUSTRIAL WAY, SAN LUIS OBISPO, CA (805) 242-0397 PPM-8023 / PPM-8043 JEEP JK SYNERGY STAGE 3 SUSPENSION SYSTEM Version 1 GENERAL NOTES: These instructions are also available on our website;
ASSEMBLY AND OPERATION MANUAL
 Length: 9.5" [240mm] Width: 7.4" [185mm] Height: 4.7" [120mm] Ground Clearance: 1.25" [32mm] Weight: 25 oz [725g] approx. running weight with battery/motor/esc Technical Support Information For technical