RS2 Turbo Disassembly by twoqu (Robin on the S2Forum) with some additional info by UrS4boy (Dave F.)
|
|
|
- Hector Bruce
- 6 years ago
- Views:
Transcription
.")
1 RS2 Turbo Disassembly by twoqu (Robin on the S2Forum) with some additional info by UrS4boy (Dave F.) I, UrS4boy, have just copied the text and the photos from the thread. I made some minor spelling corrections flagged by WORD and skipped some minor dialogue in the thread. However, I have included some important discussion points by others (to which twoqu replied). I have added a diagram and a link to a RS2 Parts pdf at the end of this document. Before going to twoqu s write-up, for reference I (UrS4boy) am adding these two diagrams: This one shows schematically, the inner workings of a KKK Journal Bearing turbo
2 The second one shows an exploded view of the parts that twoqu discovers as he opens up a damaged RS2 K turbo: Now onto twoqu s write-up. Note that except where specifically noted, all photos were provided by twoqu to support his write-up.

3 I (twoqu) thought it might be interesting to share some photos of the disassembly of an RS2 turbo. I have tried to keep the procedure in order so that each picture reveals a little more of the components that are hidden away. I have skipped the compressor housing removal. Primarily I wanted to see what if anything was different on the RS compared to its more mundane sister the K26. I have noticed differences. I'll discuss what I find later on. First, a bit of information. Yes indeed, the RS2 shaft has a left hand thread, that is to say you remove the nut clockwise not anticlockwise. Secondly, there is only one seal at the compressor end. Thirdly, it does not have what I would call a 360 degree thrust bearing. Looks like a regular 270 degree to me. The following pictures should give you an idea of how an RS2 turbo in particular and turbos in general are constructed. This picture shows the turbo with the compressor housing removed. The next picture shows the seal plate and its 4 bolt attachment to the centre housing. These bolts are M6 torx I believe. You can just make out the flinger sleeve between the shaft and the seal plate. This serves not only to mount the compressor piston ring seal but also acts as a thrust piece for the compressor wheel to revolve upon.


4 Compared to a normal K26, the seal plate has a machined recess where the compressor wheel sits. This picture shows what s beneath the seal plate. The first component is what some describe as a "flinger sleeve". The compressor seal, imagine a small piston ring, sits around this and when compressed in the seal plate provides a mechanical seal. I will have to check but its looks like a 14mm seal rather than the 19.3mm seal of a normal K26. The O ring seals the centre housing to the seal plate.


5 This picture shows the underneath of the seal plate This picture shows what appears to be a flat washer like spacer. Underneath this spacer is another distance spacer sleeve which had stuck to the bottom. You can see all the individual components in a later post.


6 This picture shows the oil deflector. The tang of the oil deflector projects into the oil return galley. The deflector is located either side by two tangs which sit inside the hollow pins that locate the turbo thrust bearing. This picture shows the actual turbo thrust bearing. It is located on two pins, one either side. As you can see, the bearing has a segment missing where the oil gallery is. So it is a 270 degree bearing. A 360 degree bearing would have virtually a full circle of bearing material. I believe that 360 degree bearing are available for this family of turbos. So that s something to investigate before rebuild.

7 This picture shows another flat washer that sits behind the turbo thrust bearing. You can clearly see one of the pins that locate the bearing in the housing. Presumably the circular hole is an oil supply gallery. This picture shows the top of the shaft poking through. You can see how the shaft is waisted. Difficult to be accurate but I have measured the shaft diameter in the bearing housing at 9.94mm and the waisted shaft section at 7.0mm. The normal K26 shaft has those dimensions and the RS2 compressor wheel is a snug fit on it.
 I dismantle the turbo further.")
8 This picture shows the individual components in the order they were removed. Top first, bottom last. Note the spacer sleeve that was stuck to the bottom of the first flat spacer washer. So as I suspected, despite the K24 designation, the RS2 owes more to its K26 sister. I will be able to show some of the differences at a later point when (if) I dismantle the turbo further. The RS2 shaft appears to be undercut before the thread unlike the regular K26. Not entirely sure why, but ARP also does this with their studs. It appears that this permits greater clamp loadings if I understand it correctly. Although I can't see why that be necessary. As for the left handed shaft, I believe that this is to prevent the compressor wheel unwinding the nut when stalled. Please note that this is for information only. I have only dismantled this turbo to try and salvage the compressor side as it has already suffered damage to the turbine wheel. The plan is to try and duplicate the "small" RS2 turbo that several of the German tuners used in their conversions and to stop Paul N bringing the subject up every few months hybrid. I think I have a suitable turbine and shaft from an AET I hope I have illustrated that a turbocharger is a relatively simple bit of machinery. It certainly would be possible to replace the bearings and seals yourself providing there were no other issues. The only problems being the availability of such parts and basic information relating to the torque of the critical nut and the issue of balancing. Looking at the back of the RS2 compressor wheel, I would guess they are balanced to a certain tolerance as a separate unit. Usually when a turbo has been balanced by a specialist you can see the grinding marks on the back of the wheel, whereas the RS has a nicely machined recess. I get a pic later. So perhaps the rotating components are selected on tolerances. That would make more sense than individual balancing of assemblies. I can't see KKK dismantling and reassembling turbos to get them spot on. Anyway that s just an observation. If I feel up to, I'll try and dismantle the centre housing further and expose the turbo bearings in the housing and show the turbine piston ring seal. I can then compare the components better.

9 Originally Posted by SteveH Robin, nice write up I've never seen the inside of the kkk unit, are you planning on putting it back together yourself or having it rebuilt by one of the well known turbo suppliers? Steve, Well it depends. Ideally I would like to have it professionally assembled. Perhaps even looking at upgrades like the 360 degree thrust bearing. I have seen a K14 one and it looks like it is located on the same way on the two pins. Pretty sure they used to bolt them in on T3's etc. However, I guess they will turn their noses up at this because they will say every component is nacked and why don't I buy a new or reconned one from them. Errr.. well the last "hybrid" died before it had a chance to get its turbine shaft dirty thats why! Perhaps a compromise can be reached, without any warranty/guarantee. Need to cultivate someone. If I fook it up that fine. Apart from the balancing, I can't see why I could not atempt a rebuild subject to getting the parts and some basic technical information. Indeed o/s and u/s are available but this presumes some knowledge of what the shaft diameters and seal dimensions should be. Might look across the pond. They seem more relaxed about supply of spares/rebuild kits. Jamo commented: Quote: The 270 vs. 360 Bearing Dilemma Many conventional journal- bearing turbos use a 270-degree thrust-bearing washer (at left), while the new breed of conventional and ball-bearing turbos employ 360-degree thrust bearings. The advantages of a 360-degree bearing include a full circle of lubrication, six orifices on the washer instead of three for the 270-degree unit, and an updated pad strategy to better disperse oil where it's needed. Turbonetics uses 360-degree bearings on all of its T04B and T04E turbochargers. There isn't much of a dilemma here; if you have the opportunity to use a 360-degree bearing, jump at it. Back to twoqu s postings: Ok! It was a bit of a struggle but here is the rest of it. This is what greeted me once the centre housing was removed from the turbine housing.


10 The turbine housing and shaft. Look at how carbon has built up on the inside of the heat shield. Another angle of the carbon built up.

11 The turbine shaft. Completely shot! There will be no data from this!

12 The centre bearing housing after a quick wash off with some parts cleaner. You can just make out the circlip that secures the bearing in the housing. Circlip removed to expose the bearing

13 One of the two bearings removed. You can also see the other circlip in the housing. The bearings are sandwiched between two circlips.


14 Similiar procedure for the turbine end. Remove circlip to expose bearing.
15 Remove bearing. Again the other circlip can be seen.

16 Here is a comparsion between the RS2 shaft on the left and the ordinary K26 on the right. Notice the discolouration on the RS2 shaft, sort of straw coloured. I have not cleaned the other shaft. That s exactly how it came out. It wasn't in operation long enough to get any carbon deposited on it. Also you can see the two piston ring seals used at the turbine end.

17 Here is a closer shot of the shafts. You can see the slight differences. If you look closely you can see the lefthanded thread of the RS2 against the righthanded thread of the ordinary K26. The RS2 slopes from left to right, the K26 slopes from right to left. Notice how the RS2 is undercut. Another point is that the RS2 has I believe an M7 thread whilst the ordinary K26 has an M6 thread. The shaft dimensions appear to be the same.

18 This shot shows a comparison between the back of the RS2 compressor wheel and the compressor wheel from the hybrid. Notice that the RS2 one has had one machining operation performed on it. The hybrid wheel has had a few touches of the grinder applied to it. Another point of interest is that the RS2 compressor wheel is domed whilst the hybrid K26 is flat.

19 The seal plates are matched to the comp wheels. Notice the recess in the RS2 one. You can also see the difference in the size of the centre bore. The RS2 one is for the 14mm piston ring seal. The K26 is for the 19.3mm piston ring seal. Another difference is that the RS2 uses one seal at the comp end whilst the K26 uses two. So from what I have seen, In order to graft the RS2 cold side onto anything else you would need all the components, comp cover, comp wheel, seal plate and the matching internal parts from the centre housing that I have pictured earlier. We know the centre housings are common and the bearings themselves both the thrust and the sleeve.

20 Here is a picture of the sleeve bearings from the inside of the centre housing. Notice the heavy discolouration on the bearing from the turbine end.

21 Here is a picture of the turbine housing. This seems to have a different style of numbering than Paul N's one. The numbers are closer together and it is a lower case d.
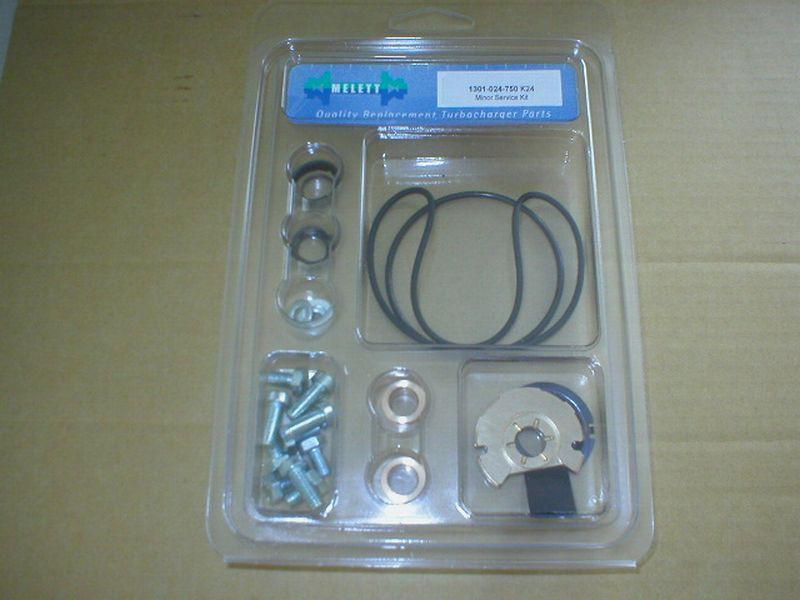
 Below is a pic of the repair kit from those nice people at Melett!( http://www.melett.com/turbochargercatalogues.php ).")
22 Here is a picture of one large crack. This runs from where the turbine scroll ends to nearly all the through the exit. There are eight further cracks around the inside of the turbine. Photo Courtesy of Paul N. (S2Central.net) Below is a pic of the repair kit from those nice people at Melett!( ). It includes all the parts needed to attempt a rebuild. You can just see the 360 degree bearing in the bottom righthand corner. I will take some comparsion shots later. Now before everyone starts ordering bits up, please think about it! Whilst I hope I have shown that a turbocharger is a relatively simple piece of engineering, unless you have a known undamaged turbo that you wanted to freshen up, there would be little point in attempting a rebuild. Any mechanical damage would need the attention of a specialist. At the very least you would need very accurate measuring equipment, better than I have really. I can only measure down to 1/100ths of a mm. The problem lies in the way turbos are rebuilt. In order to recover the various components they are machined. So centre housings are bored larger which means they need greater o/d bearings. Shafts are machined undersize which means that bearings with a smaller i/d are used. It's possible that the grooves that the piston rings sit in have been machined as well and there are different size seals to accommodate that too! I have measured as accurately as possible and by a process of elimination been able to work out that I am on std sizes. This was only possible through the patience of the guy at Melett who gave me the relevant dimensions. In fact I need to revise the shaft diameter. I had rather hurriedly measured it at 9.94mm when in fact it was 9.96mm! I was starting with a known good hotside. That is to say it was undamaged and was not leaking any oil into the turbine housing. Likewise the coldside form the RS2 showed no sign of leakage (unlike the hotside!). I had been patiently waiting for a good RS2 coldside to become available. So that s why I am attempting this. All I needed from the RS2 turbo was the compressor housing, wheel and seal plate. Although interestingly, I have noticed a slight difference in the centre housings. I ll explain later!
23

24 Ok, here s the money shot! The so called 360 degree bearing is on the left. Obviously it has a far greater area than the usual thrust surface of a regular one. It is a direct replacement. I was concerned that other modification might be necessary. I have heard that Garrett ones were bolted in. Another picture from the rear.

25 Here is a pic of a K14 with a 360 degree thrush bearing set up!


26 Right back to the plot! Can anyone spot the difference between the RS2 centre housing on the left and the regular housing on the right? And for those as impatient as me, the answer! The RS2 housing has an additional oil gallery to the rear. Presumably to aid lubrication of the turbine end. The screwdriver indicates the angle. I'll have to see if I think this housing is suitable to use. I was just going to use the other one as it had no history of leaking. However, I like things to be well lubricated!

27 This is getting to be a bit of an obsession. Looks like this one has a centre housing with a different casting designation on it! Quote: Originally Posted by ezveedub Trust me, the center housing is the exact same housing as a K26 off a 5000 Turbo. As a matter of fact there where several center sections for the K26, I have been checking the Borg Warner catalog and the RS2 turbo is K26 turbo, with a special K24 turbine and housing. But its dimensions make it a K26. They put a left hand threaded nut and turbine shaft on these RS2 turbos. They also made a specific K24 part number for the turbine housing, but if you look at the number cast on the hot housing, its a K26 series. There are many numbers on the parts, but they don't match the parts catalog. I found the cold side back plate has 4 ID numbers, and its a K26 series, yet the parts catalog rates this a K24 part number. I'm working on reworking some K26's with RS2 parts. Also, if you trash the hot side parts, you'll need to buy a new one, as the shaft and housing are not available from Borg Warner. But I did find some parts are interchangeable as listed by Borg Warner. Regards, Ezveedub
28 Hi! Thanks for the input. However clearly the centre sections are not the same on the RS2 and the 5000 or (200 in Europe) as that s what s I am making the comparison with! The other turbo picture also shows a housing with a different casting designation. I can only report what I have found. It appears the RS2 has an additional oil gallery and it has a different treatment around the body under the flange when compared to the normal K26 centre housing despite having the same casting numbers. The only external difference being the ribbing and the 5150 number. We have already established the shaft has a left-hand thread. We know the RS2 is all K26 despite what others have posted. I am assuming that as the K24 designation was in use at the time, KKK used that instead. I am interested in getting as much factual information on this thread as possible. So if you want to post the p/n's from the BW catalogue on here that would be useful. Twoqu (Robin) There is more but the level of detail dropped off. More discussion at: The complete S2Forum thread is at: Additional info (RS2 parts diagram) at Enjoy. Hope you approve Robin. UrS4boy Oct. 2012
Figure 1: Valve housing smooth vs. o-ring groove
 If you are driving an older Corvette, and by that I mean a C2 or C3, it will eventually get to a point where the Power Steering Control Valve (PSCV) will leak and require attention. In 2002, I had to repair
*Some speedometers have these additional electronic connections. If yours does, then remove the smaller slotted screws shown.
 www.odometergears.com 1981-1985 240 Cable-Driven Speedometers (NOT for 1986 and later electronic units) http://www.davebarton.com/240-odometer-repair.html For this set of instructions below, I will not
Disco 3 Clock Spring / Rotary Coupler replacement
 Disco 3 Clock Spring / Rotary Coupler replacement I recently had to change my Clock spring and thought some folks may find it helpful to see what it entailed. I did lots of reading around but couldn t
How To: Fix That Ugly Hanging E-Brake Cable A CFans Members Mod Project by dirtydawg
 How To: Fix That Ugly Hanging E-Brake Cable A CFans Members Mod Project by dirtydawg Skill Level: Easy Disclaimer: Please use caution and seek professional assistance when necessary. ColoradoFans.com,
Improving the gearshift feel in an SW20.
 Improving the gearshift feel in an SW20. Part one In 3 parts. The SW20 gearshift can be often be greatly improved by eliminating play in the shift linkages, and this article covers three areas that need
W123 Transmission Vacuum Modulator Adjustment DIY - measure it the 'right' way
 W123 Transmission Vacuum Modulator Adjustment DIY - measure it the 'right' way Why do you need to do this?: You need to do this to properly check the internal hydraulic pressure of the transmission, either
Air Compressor/Water Pump III - Making the Steam Valves
 Page 1 of 14 Air Compressor/Water Pump Part III Making the Steam Valves Nelson Riedel Nelson@NelsonsLocomotive.com Initial: 1/09/04 Last Revised: 0 The cylinders pistons and water valves were completed
Some tips and tricks I learned from getting clutch out of vehicle Skoda Octavia year 2000
 Some tips and tricks I learned from getting clutch out of vehicle Skoda Octavia year 2000 Last change 2013-Oct-11 I bought Haynes manual for a starter. That s something well worth it s cost I believe.
Photos of the repair by Tim Miller 1. Handles off
 35 Commander Shower drip solution By Tim Miller and Bruce Harkness Introduction: Some time ago Bruce Harkness posted that he was attacking the dreaded shower drip and replaced original plastic valve seats
Brake Caliper Rebuild - Part Numbers & Tips Per Jim Millet, 3/15/2005
 Per Jim Millet, 3/15/2005 Not too difficult a job. Rears are easier than fronts to access. You ll need the following gasket sets: Front caliper gasket set, P/N 34 11 1 157 037, MSRP $13.58 Rear caliper
"Top Ten" reasons to measure: 10. To Provide Proper Sheet Metal Fit
 Important Reasons why your collision shop needs to Measure. This is one of the most important functions of collision repair and it is a Must Do Process for the success of your business. by Tom Brandt Whether
This article, written by forum member Paulages in September 2008, is from the SOHC/4 Tips and Tricks Forum.
 This article, written by forum member Paulages in September 2008, is from the SOHC/4 Tips and Tricks Forum. When Honda produced the SOHC CB650, it was immediately following the end of the CB550 production,
Troubleshooting Guide for Okin Systems
 Troubleshooting Guide for Okin Systems More lift chair manufacturers use the Okin electronics system than any other system today, mainly because they re quiet running and usually very dependable. There
Air Compressor/Water Pump IV - Pilot Valve Stem, Test & Installation
 Page 1 of 8 Air Compressor/Water Pump Part IV Pilot Valve Stem, Test & Installation Nelson Riedel Nelson@NelsonsLocomotive.com Initial: 1/13/04 Last Revised: 0 Valve Test: I decided to test the steam valves
Door Panel Removal & Window Stop Adjustment
 Door Panel Removal & Window Stop Adjustment By: Jeff Wolford Disclaimer: This is simply an article of how I fixed my car. I m not responsible if you break, scratch, or mess up anything following my example.
RV8 boot lid lock and boot light switch
 Godfrey Dennis has some useful pictures of the lock on the boot lid on his RV8 which he feels should help to clarify the metal tab which acts as the switch mechanism for the interior boot lamp, particularly
upper and lower ball joints ( I went with Moog from rockauto.com): two K80026 and two K8607T
: two K80026 and two K8607T") Parts required: two 5C3Z*4A322*AA = hub / steering knuckle o-ring two AC3Z*1S175*A = updated axle shaft "dust seal" two 5C3Z*3254*A = steering knuckle / axle shaft seal upper and lower ball joints ( I
Parts required: two 5C3Z*4A322*AA = hub / steering knuckle o-ring two AC3Z*1S175*A = updated axle shaft "dust seal" two 5C3Z*3254*A = steering knuckle / axle shaft seal upper and lower ball joints ( I
Shay - Painting The Trucks & Frames
 Shay - Painting The Trucks & Frames Nelson Riedel Nelson@NelsonsLocomotive.com Initial:2/23/04 Last Revised: 06/06/2004 Painting of the locomotive trucks and frame are described in this page. The tender
Brake lever removed. Not too much corrosion on this one. The circlip retaining the plunger can be seen more clearly after cleaning with WD40
 Genuine Suzuki Kits to re-furbish your Master Cylinder are available from your regular Kettle parts supplier Part No. 59600-45811 and should cost about 20. The Kits contain all of the parts that you need
Installing the Wireless Charging upgrade kit in a 2018 XT5 (Platinum version)
") Installing the Wireless Charging upgrade kit in a 2018 XT5 (Platinum version) September 2, 2018 Tools needed: Wireless charger upgrade kit Plastic trim tools 7 mm nut driver Background: I purchased the
Installing the Wireless Charging upgrade kit in a 2018 XT5 (Platinum version) September 2, 2018 Tools needed: Wireless charger upgrade kit Plastic trim tools 7 mm nut driver Background: I purchased the
Re-building a Caliper
 Re-building a Caliper by Leslie Henson The pistons in the calipers on the 90 are in very poor condition, and although the brakes work ok, it plays on our mind that the pistons are badly corroded, and it
M3 Design Product Teardown Kobalt Double-Drive Screwdriver
 19 Jun, 2013 Why do the product teardowns? M3 Design Product Teardown Kobalt Double-Drive Screwdriver Part of the product development process is to apply knowledge gained from prior experience during the
Troubleshooting Guide for Limoss Systems
 Troubleshooting Guide for Limoss Systems NOTE: Limoss is a manufacturer and importer of linear actuators (motors) hand controls, power supplies, and cables for motion furniture. They are quickly becoming
THE TORQUE GENERATOR OF WILLIAM F. SKINNER
 THE TORQUE GENERATOR OF WILLIAM F. SKINNER IN 1939, WHICH WAS THE START OF WORLD WAR TWO, WILLIAM SKINNER OF MIAMI IN FLORIDA DEMONSTRATED HIS FIFTH-GENERATION SYSTEM WHICH WAS POWERED BY SPINNING WEIGHTS.
Toyota CT26 Type Turbos
 Type Turbos Dynamic & Carbon Seal Common Service Parts Oversize Service Parts Major Service Parts (Shaft & Wheels, Compressor Wheels) Turbine Housing Type Dynamic Seal Component Parts Common Dynamic Seal
The Ford Model A Water Pump
 The Ford Model A Water Pump George Washington Chapter, Inc. 3903 Old Lee Highway Fairfax, VA 22030 1 Table of Contents Introduction/Specifications.. 3 1. Water Pump Inspection and Removal. 4 a. Removal..
Connecting the rear fog light on the A4 Jetta, while keeping the 5 Light Mod
 Connecting the rear fog light on the A4 Jetta, while keeping the 5 Light Mod DISCLAIMER: I'm human and make mistakes. If you spot one in this how to, tell me and I'll fix it This was done on my 99.5 Jetta.
Porsche 928 with 16v LH-Jetronic Fuel System
 Porsche 928 with 16v LH-Jetronic Fuel System Toll-Free Tech Hot Line: 877-FOR-928M 877-367-9286 Please do not copy this manual and give copies to your friends. Our ability to bring you this supercharger
The Definative 'How to fit a T28' guide
 The Definative 'How to fit a T28' guide Morning all, Looking for bits of info on adapting a t28 for a Rover i found only dribs and drabs of information in a fiew scattered thread, and alot of 'i think'
M1A1 Thompson Upgrade
 M1A1 Thompson Upgrade If you are mechanically inclined at all. This should be no problem. I'll start off with a list of things you will need. Thompson M1A1 Whisky Cigarettes Tools: Flat screwdriver No.
Steering Damper for FLH Harley-Davidson Bikes/Trikes
 Steering Damper for FLH Harley-Davidson Bikes/Trikes I have spoken with several HD Touring model trikers, who are looking for increased feel in the steering department. Some want to cure a slight wobble
Audi A8 Transmission Service By Barry Lenoble and Paul Waterloo
 Page 1 of 18 Technical & Maintenance Upgrades & Style Used A8 Buyer's Checklist Marketplace On Track Gallery Links Contact Home Audi A8 Transmission Service By Barry Lenoble and Paul Waterloo Background
BMW 528i E39 Sunroof Repair
 These instructions will help guide you through the repair process for broken sunroof control rails on an E39 chassis. Before I get started, I want to give a shout-out to a couple people who also posted
JRSC + BBK Install on SVTF. Neil A. Shah medicnas on focaljet September 2006
 JRSC + BBK Install on SVTF Neil A. Shah medicnas on focaljet September 2006 ECU up here. When removing make sure the smaller bundles of wires don t get wrapped around the bottom edge and break - this almost
DISCUSSION PAPER Possible Options for Installing a Raymarine Linear Drive in a Hunter 356 Ken Archer
 DISCUSSION PAPER Possible Options for Installing a Raymarine Linear Drive in a Hunter 356 Ken Archer This is a summary of what I have found/deduced so far in relation to installing a Raymarine Linear Drive
Plumbing Part VI - Blowdown Valve Nelson Riedel Initial: 9/28/03 Last Revised: 04/24/2006
 Page 1 of 8 Plumbing Part VI - Blowdown Valve Nelson Riedel Nelson@NelsonsLocomotive.com Initial: 9/28/03 Last Revised: 0 When I started to think about the blowdown I realized that I'd never seen the actual
Brake System Rebuilding the brake calipers
 Page 1 of 39 Brake System Rebuilding the brake calipers Written by the backyard hack mechanic Sean750 Document history: # 14 Jan 2004 added pictures of rear caliper rebuild kit # 13 Nov 2004 added more
Converting a Chevy Non-positraction rear-end to a positraction rear using an Eaton posi unit.
 Converting a 56-62 Chevy Non-positraction rear-end to a positraction rear using an Eaton posi unit. Tom Parsons Non-posi unit Posi unit 1 Converting a 56-62 Chevy Non-positraction rear-end to a positraction
Днепр) Russian Motorcycle Carburetors Part 2B: PZ-24 and PZ-28 Carburetor Assembly and Jet Drilling
 Russian Motorcycle Carburetors Part 2B: PZ-24 and PZ-28 Carburetor Assembly and Jet Drilling") Ural (Урал( Урал) - Dnepr (Днепр( Днепр) Russian Motorcycle Carburetors Part 2B: PZ-24 and PZ-28 Carburetor Assembly and Jet Drilling (applies also to K-37 K and K-38 K carbs) Ernie Franke eafranke@tampabay.rr.com
Ural (Урал( Урал) - Dnepr (Днепр( Днепр) Russian Motorcycle Carburetors Part 2B: PZ-24 and PZ-28 Carburetor Assembly and Jet Drilling (applies also to K-37 K and K-38 K carbs) Ernie Franke eafranke@tampabay.rr.com
RAFIG IDLE TUNING PROCESS
 RAFIG IDLE TUNING PROCESS I decided to PDF this process and bring everything I found into one document as when I went to idle tune it was in bits and pieces so I have gathered SSpdmon s info and put it
A short explanation of the modifications made in a poor quality ECU remap
 HDI-Tuning Limited A short explanation of the modifications made in a poor quality ECU remap Steven Lewis 12 Introduction This document has been written to educate those planning on using a poor quality
Wench With a Wrench. By Gail Wagner. A Shocking Discussion. Should I or Shouldn t I? That is The Question
 By Gail Wagner Wench With a Wrench A Shocking Discussion There are lots of things you want out of your Miata driving experience and one of them is a smooth ride. A key factor that contributes to this experience
U-Score U-Score AAC Rank AAC Rank Vocabulary Vocabulary
 go 1 927 you 2 7600 i 3 4443 more 4 2160 help 5 659 it 6 9386 want 7 586 in 8 19004 that 9 10184 like 10 1810 what 11 2560 make 12 1264 is 13 10257 on 14 6674 out 15 2350 do 16 2102 here 17 655 eat 18
Door panel removal F07 5 GT
 Things needed Decent plastic trim removal tools Torx 30 Spare door clips 07147145753 I got away with a set of 5 but if I did it again I d be cautious and get 10. From prior experience if they are damaged
FITTING OIL TEMP AND PRESSURE GUAGES
 FITTING OIL TEMP AND PRESSURE GUAGES this guide is of reference to fitting an oil temp and pressure sender/ sensor into a sandwich plate- not the sump plug temp sensor (although it wouldn't be much different
The Life of a Lifter, Part 2
 Basics Series: The Life of a Lifter, Part 2 -Greg McConiga Last time we looked at some complicated dynamics and compared flats to rollers. Now for the hands-on. 6 FEATURE This off-the-shelf hydraulic lifter
CLEVOR ENGINE BUILDS
 CLEVOR ENGINE BUILDS The most popular, low-buck heads for making power from a small-block Ford are the 351W versions with a nice port job, which makes for a snappy 289/302 without selling the farm. But
Converting an A to 12v and Adding Turn Signals Bill Lee
 Converting an A to 12v and Adding Turn Signals Bill Lee Bill@WRLee.com When I bought my 1929 Tudor, it had been restored about 20 years earlier. It had halogens and had been converted to 12v negative ground,
There is hence three things you can do - add oil, adjust the temp that the clutch begins to engage, or do both.
 As most of you may be aware, I have been doing a lot of research lately on our cooling system in the 80's including the fact that we have a dead spot on the OEM temp gauge which prompted me to not rely
I cannot believe it has been so long since my last update. A lot has happened and I will try to bring everyone up to speed. First of all, I had my
 I cannot believe it has been so long since my last update. A lot has happened and I will try to bring everyone up to speed. First of all, I had my left knee replaced about 5 weeks ago. Needless to say
Actual CFM = VE Theoretical CFM
 Here is a brief discussion of turbo sizing for a 2.0 liter engine, for example, the 3-SGTE found in the 91-95 Toyota MR2 Turbo. This discussion will compare some compressor maps from the two main suppliers
 Installing Seat Belts in my Tudor August 2009 My '29 Tudor was restored about 25 years ago by my brother-in-law. He restored it to close to original, but made a few changes that many will claim are for
283 CI Engine Build for Harmonic Balancer, Water Pump, Generator Pulleys & Brackets Rich Mozzetta
 283 CI Engine Build for Harmonic Balancer, Water Pump, Generator Pulleys & Brackets Rich Mozzetta Link to CF thread I built a parts buck to show a stock 1959-1961 to help clear up confusion about brackets
Table of Contents. 4. Before a New Turbocharger is Installed
 Table of Contents 1. Turbocharger Overview ------------------------------------------------------------------ 1.1. Definition -----------------------------------------------------------------------------
PYRTE. Building The Front Axle, Fork and Steering
 PYRTE Building The Front Axle, Fork and Steering The front axle on this traction engine is a very simple affair, in that it is a rectangular steel rod, sat on edge, with a pivot in the centre, which is
Brake master cylinder replacement
 Brake master cylinder replacement 8-25-2010 I had replaced the front brake master cylinder a few years ago when it developed a bad leak, at that time, I ordered a new master cylinder from Spartan, very
Roehrig Engineering, Inc.
 Roehrig Engineering, Inc. Home Contact Us Roehrig News New Products Products Software Downloads Technical Info Forums What Is a Shock Dynamometer? by Paul Haney, Sept. 9, 2004 Racers are beginning to realize
1. Find the entire rear e-brake/hub assembly of a 330 and transplant it, which is expensive and not worth it imo.
 E46 330 Rear Brake Conversion DIY After completing the front brake conversion it was time for the rear ones. Good upgrade but no as simple or straightforward as the front one. Researching, I came to the
Strange DINKY Made in Bulgaria Posted by RVREVO - 27 Apr :27
 Strange DINKY Made in Bulgaria Posted by RVREVO - 27 Apr 2012 02:27 This was a Matchbox Mercedes 350SL in a former life. Not only was it reinvented to be Made In Bulgaria... its now also a DINKY. 1/9 Posted
TRAILING ARM CHEVY PICK-UP
 TRAILING ARM 1947 1954 CHEVY PICK-UP Congrats on choosing the best riding and handling rear suspension for your Chevy. Trailing arm suspension can be tricky to install correctly, so please follow our recommendations,
3 Living with a 700/900 Series
 3 Living with a 700/900 Series will you get along together? There aren t so many rear-wheel drive cars produced today, although, they do have their advantages. As well as being a general preference for
How To: Fit an enclosed induction kit to the V6
 How To: Fit an enclosed induction kit to the V6 As a couple have done this I thought I'd have a go, but do a write up at the same time. Here's a quick summary of the equipment you'll be needing: 1 x Universal
At Mark's suggestion I thought I'd write this up so future Coupe lovers can have as much fun* as I did with this job.
 At Mark's suggestion I thought I'd write this up so future Coupe lovers can have as much fun* as I did with this job. My enormous thanks to forum members, particularly glorfindel, for their advice when
2001 V70 T5 ETM Removal and Cleaning Directions
 2001 V70 T5 ETM Removal and Cleaning Directions Howard Cheng howardc64@gmail.com 10/24/05 Version 1.4 Read this before you start I performed this ETM cleaning because I had gotten 2 reduced performance
8-VALVE GUZZI ENGINES: ADJUSTING VALVE CLEARANCE
 8-VALVE GUZZI ENGINES: ADJUSTING VALVE CLEARANCE Posted on the Guzzitech.com forum by Pete Roper: December 2008: Pic 1: Pry off the stupid little badge. Be careful, they wash off with a steam cleaner so
928 Motorsports Supercharger Installation Copyright 2007, 928 Motorsports, LLC All Rights Reserved
 For Porsche 928 equipped with K-Jetronic (CIS) Fuel System Toll-Free Tech Hot Line: 877-FOR-928M 877-367-9286 Please do not copy this manual and give copies to your friends. Our ability to bring you this
The Holly Buddy. 2.5cc Model Diesel - Compression Ignition engine.
 The Holly Buddy 2.5cc Model Diesel - Compression Ignition engine. Firstly I want to dedicate this engine to David Owen. I didn t know David for very long, but his influence on me and my affection for these
Version 7.0. Mitsubishi. TD04 Type Turbos
 Mitsubishi TD04 Type Turbos Component Parts Common qty in Turbo 1401-404-750 1401-404-751 1401-404-752 1401-404-753 1401-404-754 1401-404-770 1401-404-771 TD04 Type Repair Parts & Service Kits All parts
CHAPTER 2: HEAD, BARREL, SUMP, BIGENDS, ALTERNATOR
 CHAPTER 2: HEAD, BARREL, SUMP, BIGENDS, ALTERNATOR Posted on the Wildguzzi forum by Pete Roper: December 10, 2005: Contents: Head, barrel and sump off, bigend bearings, alternator off Pic 2-01: Note that
We all put our heads together to try and determine what the facts were. They were as follows:
 VWvortex Forums > Eos > How to solve (or prevent) Eos Roof leaks As many of you know, I don t own an Eos. This makes it difficult to provide practical advice based on my own experience with the car, as
Using your Digital Multimeter
 Using your Digital Multimeter The multimeter is a precision instrument and must be used correctly. The rotary switch should not be turned unnecessarily. To measure Volts, Milliamps or resistance, the black
VW 1998 Jetta GLX or VR6 GTI PCV valve Modification
 Disclaimer: This is how I ended up modifying my stock PCV so I did not have to buy a complete intake hose (+/- $150). Don t blame me if this does not work or if it makes it worse You are doing this at
Timing the 9N/2N Steering Sector Gears
 Timing the 9N/2N Steering Sector Gears by John Korschot - www.johnsoldiron.com (May 2010) The procedure for timing a set of steering gears in the 9/2n tractors is published in the I&T FO4 shop manual.
1.6 HDI or TDCI (up to 2010) Turbo and injector upgrade
 Turbo and injector upgrade") 1.6 HDI or TDCI (up to 2010) Turbo and injector upgrade The 1.6 90 and 110 16v engines are the same apart from the turbo charger and the injectors. The injectors both use the same body however the 110
1.6 HDI or TDCI (up to 2010) Turbo and injector upgrade The 1.6 90 and 110 16v engines are the same apart from the turbo charger and the injectors. The injectors both use the same body however the 110
Winter Project Dec-Jan Peter Kitching Rear Axle Rebuild: Rolls-Royce 25/ GRM23 Reg. AV8692
 Winter Project Dec-Jan 2009-2010 Peter Kitching Rear Axle Rebuild: Rolls-Royce 25/30 1936 - GRM23 Reg. AV8692 During the past two years I noticed that oil was running from the central wheel nut locking
Replace C1U-H47 Carburator on Homelite
 Replace C1U-H47 Carburator on Homelite Weed Whacker It's cheaper, quicker, and more reliable to replace your carburetor with a new one, rather than rebuilding it. Written By: Gil ifixit CC BY-NC-SA www.ifixit.com
How I installed new brake pads on my i with Sport Package (should be fine for other E39 s) By Robert B.
 By Robert B.") How I installed new brake pads on my 1999 528i with Sport Package (should be fine for other E39 s) How I installed new brake pads on my 1999 528i with Sport Package (should be fine for other E39 s) By
How I installed new brake pads on my 1999 528i with Sport Package (should be fine for other E39 s) How I installed new brake pads on my 1999 528i with Sport Package (should be fine for other E39 s) By
Problems with the MP Transfer Case
 Problems with the MP Transfer Case The MP families of transfer cases were introduced in the 2007/2008 model years as a replacement for the NVG transfer cases. Built by Magna Powertrain (MP), the transfer
Instructions to install the early ( ) Limited Slip Differential in the Late-model ( ) G28 Transaxle
 Limited Slip Differential in the Late-model ( ) G28 Transaxle") Instructions to install the early (1978-83) Limited Slip Differential in the Late-model (1985-1995) G28 Transaxle BACKGROUND: Most 928 owners know about the improvements to the 5- speed transaxle that
Instructions to install the early (1978-83) Limited Slip Differential in the Late-model (1985-1995) G28 Transaxle BACKGROUND: Most 928 owners know about the improvements to the 5- speed transaxle that
E46 FUEL FILTER CHANGE Pics from CI
 1 of 10 5/3/2010 1:48 PM E46 FUEL FILTER CHANGE Pics from 2001 330CI Bellows Expansion Joints Metal Bellows Expansion Joints in Every Style from Flexicraft www.flexicraft.com/metal_bellows Ask a BMW Mechanic
CHAPTER 11: FLYWHEEL, CLUTCH AND ALTERNATOR BACK ON
 CHAPTER 11: FLYWHEEL, CLUTCH AND ALTERNATOR BACK ON Posted on the Wildguzzi forum by Pete Roper: January 17, 2006: Contents: Assembling the engine. Flywheel, clutch and alternator back on. Pic 11-1: To
2010 Toyota Prius Fog Light Retrofit
 2010 Toyota Prius Fog Light Retrofit A DIY prospective Last updated: Friday, December 25, 2009 *** Disclaimer Use this document and its contents at your own risk! *** Forward: This document was compiled
1986 Rear Disk Brake Upgrade. All hard lines mounted to the rear axle with mounting screws. 1/4" fittings
 1986 Rear Disk Brake Upgrade Being well prepared for a project of this size is the key to success. I thought I was well prepared by doing a lot of research and getting all of the required parts before
MERCEDES-BENZ E-CLASS OWNER'S BIBLE: BY BENTLEY PUBLISHERS
 MERCEDES-BENZ E-CLASS OWNER'S BIBLE: 1986-1995 BY BENTLEY PUBLISHERS DOWNLOAD EBOOK : MERCEDES-BENZ E-CLASS OWNER'S BIBLE: 1986-1995 BY BENTLEY PUBLISHERS PDF Click link bellow and free register to download
Jaguar Update. Adjustable Reaction Plate
 Jaguar Update Adjustable Reaction Plate Home January 7, 2008 I recently installed an adjustable reaction plate from CoolCat Express Corp. I've included some notes from that experience. I'm not affiliated
~~~~~~~~~~~~~~~~~~~~~~~~~~~~~~~~~~~~~~~~~~~~~~~~ ~~~~~~~~~~~~~~~~~~~~~~~~~~~~~~~~~~~~~~~~~~~~~~~~
 ~~~~~~~~~~~~~~~~~~~~~~~~~~~~~~~~~~~~~~~~~~~~~~~~ GSB Design Concepts Runnin' At Redline 7/9/17 ~~~~~~~~~~~~~~~~~~~~~~~~~~~~~~~~~~~~~~~~~~~~~~~~ Guest Shot: Gene Mills I've known Gene for a number of years,
How Much Does It Cost To Turn A Automatic Into A Manual
 How Much Does It Cost To Turn A Automatic Into A Manual The cost would be high enough it would make more sense to sell your auto car and purchase a manual Can you convert a firebird formula into a trans
 Page 1 of 8 membership rennlist gallery sponsors chat upload photo classifieds Rennlist Discussion Forums > Water Cooled Technical Discussion Areas > 928 Forum Differential adjusments Welcome, TheoJ. You
2008 Toyota Tundra 4WD Brake Job: A Quick Job and Even Quicker Write-Up.
 FRONT BRAKES: 2008 Toyota Tundra 4WD Brake Job: A Quick Job and Even Quicker Write-Up. 1. Remove this bolt holding brake line bracket to the suspension. 2. I had to replace all 4 rotors at 60K miles, so
The Body Slinger
 http://www.scaryguys.com/slinger.htm The Body Slinger The body slinger is a nifty animation that looks like a benign corpse in a coffin until its triggered, then leaps almost straight up over your head!
STEP #1: Remove the wheels from the truck. There are (6) 21mm lug nuts holding each wheel on... Remember Lefty Loosy, Righty Tighty.
 21mm lug nuts holding each wheel on... Remember Lefty Loosy, Righty Tighty.") - CustomTacos.com Page 1 of 36 How-To: Toytec Lift Install Read all of these install instructions prior to installing Toytec's suspension lift. I cannot be held responsible for any damages or personal
- CustomTacos.com Page 1 of 36 How-To: Toytec Lift Install Read all of these install instructions prior to installing Toytec's suspension lift. I cannot be held responsible for any damages or personal
what you need to do is hit the taper housing as hard as you can with your hammers AT THE SAME TIME and at a slight angle, what will happen is you
 first things first, get the car on axle stands and the wheels off. Open the bonnet to let more light through to the area in which you'll be working. The following guide shows the passenger side being done
AIRSTREAM LIFE'S (NEARLY) COMPLETE GUIDE TO AIRSTREAM MAINTENANCE BY RICH LUHR
 COMPLETE GUIDE TO AIRSTREAM MAINTENANCE BY RICH LUHR") Read Online and Download Ebook AIRSTREAM LIFE'S (NEARLY) COMPLETE GUIDE TO AIRSTREAM MAINTENANCE BY RICH LUHR DOWNLOAD EBOOK : Click link bellow and free register to download ebook: AIRSTREAM MAINTENANCE
Read Online and Download Ebook AIRSTREAM LIFE'S (NEARLY) COMPLETE GUIDE TO AIRSTREAM MAINTENANCE BY RICH LUHR DOWNLOAD EBOOK : Click link bellow and free register to download ebook: AIRSTREAM MAINTENANCE
Grade 8 Science. Unit 4: Systems in Action
 Grade 8 Science Unit 4: Systems in Action Machines That Turn Last class we looked at the idea of a boat winch, a wheel and axle used to get a boat out of the water, onto a trailer. You rotate the handle
Product Information. Installation Tips. Volkswagen - Adjustable Sway Bar End Links. Skill Level 1 - Easy
 Product Information Skill Level 1 - Easy Volkswagen - Adjustable Sway Bar End Links Installation Tips Rugged, reliable, red and black. Our ECS Tuning Volkswagen adjustable sway bar end links are built
Mustang Radiator Conversion DIY. By GearHeadPeter. January 27, 2011
 1964-1966 Mustang Radiator Conversion DIY By GearHeadPeter January 27, 2011 We all know that the radiators in our cars are not the best, especially if you have done any customization to the engine, which
Eurocompulsion Camshaft Installation
 Eurocompulsion Camshaft Installation Introduction, please read. The purpose of this article is too assist our customers with installation of a performance camshaft in the Fiat Multiair 1.4 Turbo. The operation
Squeaking in the center console??? - Page 7 - GreenHybrid - Hybrid Cars. Register FAQ Members List Today's Posts Search
 GreenHybrid - Hybrid Cars > Hybrid Cars > Toyota Camry Hybrid Squeaking in the center console??? User Name User Name Remember Me? Password Log in Register FAQ Members List Today's Posts Search Toyota Camry
Another CJ picture guide to replacing the key cylinder in a non-tilt steering column
 Another CJ picture guide to replacing the key cylinder in a non-tilt steering column by John Strenk Well I'm sure it's happened to all of us one time or another. You park your jeep and go to turn off your
Another CJ picture guide to
 Another CJ picture guide to replacing the key cylinder in a non-tilt steering column by John Strenk Well I'm sure it's happened to all of us one time or another. You park your jeep and go to turn off your