2006 Johnson T8000E(TM97) SERVICE MANUAL
|
|
|
- Arnold Kennedy
- 5 years ago
- Views:
Transcription

1 2006 Johnson T8000E(TM97) SERVICE MANUAL 1
2 TABLE OF CONTENTS SECTION 1: MAINTENANCE PROCEDURE MAINTENANCE CHECK LIST TENSIONING THE BELT PROCEDURE DECK RE-WAXING PROCEDURE CLEAN THE GROOVES PROCEDURE USE THE CARBON STICK TO CLEAN THE DC MOTOR SECTION 2: WIRING DIAGRAM INSTRUCTION T8000E(TM97) MCB WIRING 220V T8000E(TM97) MCB WIRING DEFINITION OF PIN 220V T8000E(TM97) ELECTRICAL BLOCK DIAGRAM FOR 220V SECTION 3: CONSOLE ENGINEER MODE OPERATION T8000E(TM97) Engineer mode SECTION 4: MCB LED INSTRUCTIONS MCB LED place and definition for 220V..23 SECTION 5: TROUBLESHOOTINGS No display on console Running speed is not stable Noises generated under motor cover Error Messages on the Console Error message 1 troubleshooting (1) Error message 1 troubleshooting (2) Error message 3,6 troubleshooting Error message 4 troubleshooting T8000E(TM97) maintenance lamp.. 32 SECTION 6: What is the difference between 2006 TM95 & 2006 TM
3 SECTION 1 MAINTENANCE PROCEDURE 3
4 MAINTENANCE CHECK LIST PREVENTIVE MAINTENANCE SCHEDULE 2006 Johnson T8000E TREADMILL Item Daily Weekly Monthly Quarterly Biannual Annual Console Mounting Bolts Inspect Frame Clean Inspect Carbon Brush Inspect Replace Power Cord Inspect Display Console Clean Inspect Handrail & Handlebar Clean Inspect Front Roller Clean Inspect Rear Roller Clean Inspect Emergency Button Test Running belt Tension Inspect V Belt Clean Inspect Deck Re-waxing Inspect & Rewaxing Running Belt Inspect Control Box Clean (Vacuum) Motor Clean 4

5 TENSIONING THE BELT PROCEDURE Frequency: Every 1 months Caution: Over-tightening of the roller will severely shorten the life of the belt and may cause further damage to other components. Running Belt: If when you plant your foot on the belt, you can feel a slipping sensation then the belt has stretched and is slipping across the rollers. This is a normal and common adjustment on a new treadmill. To eliminate this slipping, tension both the rear rollers Allen bolts 1/4 TURN as shown above. Try the treadmill again to check for slipping. Repeat if necessary, but NEVER TURN the roller bolts more than 1/4 turn at a time. Perfect Tension of Running Belt: 0.9~1.1 lbs 5
6 Drive Belt: If you have tensioned the running belt and are still experiencing a slipping, adjust the tension screw. Then try the treadmill again to check for slipping. 6
: 0.6 Use time : 1 Procedure: 1. Loosen the tension bolts at both ends. 2.")
7 DECK RE-WAXING PROCEDURE Frequency: Every 1 month Caution: If deck is not to periodical add the waxing, between the deck and running belt will produce great friction make the deck and running belt to burn up and cut down the motor life. Parts name: Silicon oil set Parts number: SZTM74SOS Price (USD): 0.6 Use time : 1 Procedure: 1. Loosen the tension bolts at both ends. 2. Pull the belt with your left hand and apply the silicon in the deck with your right hand. (The volume of silicon applied is about 40ml) 3. Tighten the tension bolts. 4. Start the treadmill. Step on the treadmill belt to walk the silicon in. Adjust the belt tension if necessary. 5. With the clamp-on meter, measure the current draw of the motor. (Clamp on either the red or the black wire.) The current should be less than 15Amps for 110V model. (less than 7.5Amps for 220V model.) 7

 The current should be less than 15Amps for 110V model.")
8 Use the clamp-on meter (DC current-meter): With the clamp-on meter, measure the current draw of the motor. (Clamp on either the red or the black wire.) The current should be less than 15Amps for 110V model. (less than 7.5Amps for 220V model.) current limit : 8
9 CLEAN THE GROOVES PROCEDURE Frequency: Every 3 months Caution: If dirty grooves in the drive belt, motor and roller pulley, there will be noises while running. Procedure: 1.Remove the drive belt and check the grooves in belt for dirt or dust and clean it. 2.Check the grooves in motor pulley for dirt or dust and clean it 3Check the grooves in roller pulley for dirt or dust and clean it. 9

10 Use the carbon stick to clean the DC motor Frequency: Every 3 month Caution: If the treadmill with DC motor makes noise or running speed isn t stable. You can use the carbon stick to clean the motor Parts number : MTOOL Box 10 pcs Price : USD


11 Carbon stick use Step : Step 1. Take off the motor cover. Step 2. Take off the motor carbon brush cover. Step 3. Press Start key to run in the middle speed. Step 4. Put the carbon stick to clean the motor dust inside. 11
12 SECTION 2 WIRING DIAGRAM INSTRUCTION 12
13 T8000E (TM97) MCB WIRING(220V) MTR2 P2 J1 MTR1 J2 P4 P1 P3 L2 L1 13

14 T8000E(TM97) MCB WIRING DEFINITION OF PIN(220V) P2:Elevation cable(6pin/amp ) JP1 Pin Name ELVR_+5V ELVR_POT ELVR_GND UP DOWN COM Definition Incline place signal test power Incline place signal Incline place signal test ground Incline motor does move to up Incline motor does move to down Incline motor does turn on power 14
15 P3: 8-pin console cable 1 8 J3 Pin Name PWM RPM DOWN UP ELVR_+5 ELVR_GND ELVR_POT SGND Definition Console for MCB of the PWM signal Speed sensor provide signal Console provide for incline motor DOWN signal Console provide for incline motor UP signal Incline place signal test power Incline place signal test ground Incline place signal Console ground P4: 6-pin console cable 1 6 J1 Pin Name Definition 1,2,3 +12 Console power 4,5,6 SGND Console ground 15
16 T8000E(TM97) Electrical block diagram for 220V Lout L-Return R-Return Rout GND 16
17 SECTION 3 CONSOLE ENGINEER MODE 17
18 T8000E OPERATION MANUAL- Engineer mode How to enter into the engineering mode? 1. Press & Hold both ELEVATION and SPEED at the same time for 3-5 sec. Then, the display will show MANAGER MENU. 2. Press the SPEED or " to select you want and press the ENTER" key enter. 18

19 The list manager s custom setting 19
20 20
21 21
22 SECTION 4 MCB LED INSTRUCTIONS 22
23 T8000E(TM97) MCB LED PLACE AND DEFINITION FOR 220V UP DOWN MTR_SHRT MOTOR MTR_AC V_CON SPD_SENSR PWM +18 I_LIMIT MCB Power indicator light V_CON Indicates if Console Voltage Supply is present. PWM------Console PWM signal light UP----- Indicates if the upper console is commanding Elevation UP DOWN---- Indicates if the upper console is commanding Elevation DOWN. SPD_SENSR--- Indicates the motor is moving via the encoder's feedback by blinking. I_LIMIT---- Over the 16A current limit time-out for 3 s has occurred. MTR_AC----MOTOR power indicator light. MOTOR---- MOTOR running light. MTR_SHRT---- MCB damage. 23
24 SECTION 5 TROUBLESHOOTINGS 24
25 Possible causes: 1. Breaker is damaged. 2. ON/OFF switch is damaged. 3. MCB is damaged 4. 6-pin console cable is damaged 5. PCB is damaged Fix: No display on console 1. Inspect the circuit breaker to see if it has tripped off. (If it is tripped off.like diagram B, reset the breaker. And check which part is short-circuited. Then replace the short-circuited part.) A B 2. The switch is turned to the "ON" position. ( If the switch light isn't lit, replace the switch.) 2-1 Verify wire connection L1 & L2 on the MCB. (Please refer the MCB WIRING page 13) 3. Verify the MCB whether supply the +12VDC for console. (Please refer the MCB LED V_CON have light page 23) 4. Replace low console cable or up console cable. 5. Replace TV 25
26 Possible causes: 1. AC power voltage is too low. Running speed is not stable 2. Tension of drive belt or running belt is too loose. 3. MCB is damaged. 4. Motor is damaged. Fix: 1. Check the power voltage by using voltage-meter to see if it is within 120V 15% or 230V 15%. If the power voltage isn't within the range, look for a qualified electrician for help. 2. Open the motor cover, if the belt has stretched and is slipping across the rollers when running. Adjust the belt tension (Please refer the TENSIONING THE BELT PROCEDURE. Page5-6). 2. Replace new MCB. 3. Replace new Motor. 26
27 Possible causes: Fix: Noises generated under motor cover 1. The running belt tension is adjusted too tight. 2. The bearing of front roller is not installed correctly. 3. Dirty grooves of drive belt. 4. The motor is damaged. 1. Adjust the belt tension so that the belt does not start slipping and then check if the noise has disappeared. Let the treadmill run, without using it, for at least 5 days because sometimes the bearing will settle and become quiet then check if the noise has disappeared. 2. Replace the front roller with a new one to see if the noise disappear. 3. Remove drive-belt and check the grooves in belt for dirt or dust and clean if necessary. Clean also the motor pulley and the roller pulley grooves and check if the noise has disappeared. 4. The motor bearing is damaged. (Please refer the Use the carbon stick to clean the DC motor page 10-11) Replace the motor. 27
 Check the connector MCB and Speed sensor cable [Symptom 1 of treadmill will have start ] Press start and after 10 sec.")
28 Error Messages on the Console engineer mode-error LOG Error E1 E3 E4 E6 Definition Treadmill will not start Incline motor not to movement RPM Detect the mistake (Only occur on Auto Check) Incline motor the signal not answer Error message 1 troubleshooting (1) Check the connector MCB and Speed sensor cable [Symptom 1 of treadmill will have start ] Press start and after 10 sec. the maintenance lamp will light RED, when the ERROR Log- ERROR 1 will show the 01. [Cause] The speed sensor can t sense the speed Speed sensor Magnet [Solution] 1. Check the connector condition of the speed sensor cable. 2. Replace the speed sensor. 3. Check the magnet on the front roller if it s too far away from the speed sensor 28
![Error message 1 troubleshooting(2) [Symptom 2 of treadmill will not start ] Press start and after 10 sec. the maintenance lamp will light RED, when the ERROR Log- ERROR 1 will show the 01. [Cause] 1.](/docs-images/89/99982355/images/29-0.jpg "MCB is damaged. 2. 8-pin console cable is damaged. 3. PCB is damaged. 4. Motor is damaged. [Solution] 1.")
29 Error message 1 troubleshooting(2) [Symptom 2 of treadmill will not start ] Press start and after 10 sec. the maintenance lamp will light RED, when the ERROR Log- ERROR 1 will show the 01. [Cause] 1. MCB is damaged pin console cable is damaged. 3. PCB is damaged. 4. Motor is damaged. [Solution] 1. Open motor cover, verify wire connection BL [Motor wire (black)] and RED [Motor wire (red)] on the MCB then plug in the power cord and turn on the power switch. Then press START button. 2. Open MCB cover, connect all cable to MCB again turn on the power, verify the LED indicator of +18 LED is to glitter. (If that +18 LED is not glitter, replace MCB) 3. Press Start key, verify the LED indicator of PWM LED is to lit. (If that PWM LED is not lit, replace console cable. If PWM LED is still not lit, replace PCB. ) 4. Replace Motor. PWM 29
![[Symptom] Press start then maintenance lamp will light RED, when the ERROR Log- ERROR 3 or 6 will show the 01. [Cause] 1. The 8-pin console cable is damaged. 2. Incline motor is damaged. 3. TV is damaged.](/docs-images/89/99982355/images/30-0.jpg "4. MCB is damaged. Error message 3,6 troubleshooting 5. The incline setting is not correct. [Solution] 1. Please check the incline motor cable whether to inset MCB. 2.")
30 [Symptom] Press start then maintenance lamp will light RED, when the ERROR Log- ERROR 3 or 6 will show the 01. [Cause] 1. The 8-pin console cable is damaged. 2. Incline motor is damaged. 3. TV is damaged. 4. MCB is damaged. Error message 3,6 troubleshooting 5. The incline setting is not correct. [Solution] 1. Please check the incline motor cable whether to inset MCB. 2. Check the console signal whether transmission to MCB, you can refer to MCB LED UP and DOWN. If LED not light please check the console cable and console. If LED have light please replace the incline motor 3. If ERROR Log- ERROR 3 or 6 still show the 01, please replace the incline motor. 4. If ERROR Log- ERROR 3 or 6 still show the 01, please replace the TV. 5. If ERROR Log- ERROR 3 or 6 still show the 01, please replace the MCB. 6. Enter Engineering Mode to renew the Auto-calibration( Engineer mode P15). MCB LED UP and DOWN LED whether have light. 30
31 Error message 4 troubleshooting [Symptom] Running the Auto check can t finish, then maintenance lamp will light RED, when the ERROR Log- ERROR 4 will show the 01. [Cause] 1. Check the connector condition of the speed sensor cable. 2. Replace the speed sensor. 3. Check the magnet on the front roller if it s too far away from the speed sensor [Solution] 1. Check the connector MCB and Speed sensor cable 2. Speed sensor 3. Magnet 31
32 Johnson T8000E(TM97) maintenance lamp Maintenance lamp 1. When the distance accumulate to 5000KM the lamp will be lighted in blue. 2. There has to do some maintenance 2.1 Test the running belt if loose or not? 2.2 Lubricate the running belt 2.3 Remove the motor cover and clean the dust inside 2.4 Clean the frame 2.5 Check the running belt is in the center or not. 3. There can hold ELEVATION and SPEED Key for 3 seconds to turn off the light 32
33 SECTION 6 What is the difference between 2006 T8000(TM95) & 2006 T8000E(TM97) 33
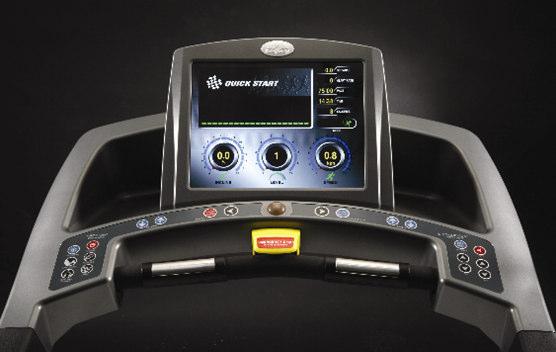
Console is 7 LCD")
34 T8000E(TM97) Console is 15 TFT TV T8000 (TM95)Console is 7 LCD 34
 002934-F(SAP) Item")
 T8000E Control overlay Item number :")
")
35 T8000 Upgrade Control overlay Item number : N12 Parts number : MC F(IE) F(SAP) Item number : AY1 Parts number : MC F(IE) F(SAP) T8000E Control overlay Item number : N12 Parts number : MC B(IE) B(SAP) Item number : AY1 Parts number : MC A(IE) A(SAP) 35
LS8.0T Service Manual
 LS8.0T Service Manual 1 TABLE OF CONTENTS CHAPTER 1: SERIAL NUMBER LOCATION...3 CHAPTER 2: PREVENTATIVE MAINTENANCE 2.1 Preventative Maintenance. 4 2.2 Tension and Centering the Running Belt....6 CHAPTER
MX-T3x(TM94E) AC SYSTEM SERVICE MANUAL
 AC SYSTEM SERVICE MANUAL") MX-T3x(TM94E) AC SYSTEM SERVICE MANUAL 1 TABLE OF CONTENTS SECTION 1:SERIAL NUMBER LOCATION SECTION 2:MOVING THE UNIT SECTION 3:IMPORTANT SAFETY INSTRUCTIONS SECTION 4:PREVENTATIVE MAINTENANCE 4.1 Maintenance
MX-T3x(TM94E) AC SYSTEM SERVICE MANUAL 1 TABLE OF CONTENTS SECTION 1:SERIAL NUMBER LOCATION SECTION 2:MOVING THE UNIT SECTION 3:IMPORTANT SAFETY INSTRUCTIONS SECTION 4:PREVENTATIVE MAINTENANCE 4.1 Maintenance
2013 Elite T4000 (TM461C) Service Manual
 Service Manual") 2013 Elite T4000 (TM461C) Service Manual 1 TABLE OF CONTENTS CHAPTER 1: SERIAL NUMBER LOCATION...3 CHAPTER 2: PREVENTATIVE MAINTENANCE 2.1 Preventative Maintenance. 4 2.2 Tension and Centering the Running
2013 Elite T4000 (TM461C) Service Manual 1 TABLE OF CONTENTS CHAPTER 1: SERIAL NUMBER LOCATION...3 CHAPTER 2: PREVENTATIVE MAINTENANCE 2.1 Preventative Maintenance. 4 2.2 Tension and Centering the Running
LS10.0T Service Manual
 LS10.0T Service Manual 1 TABLE OF CONTENTS CHAPTER 1: SERIAL NUMBER LOCATION...3 CHAPTER 2: PREVENTATIVE MAINTENANCE 2.1 Preventative Maintenance. 4 2.2 Tension and Centering the Running Belt....6 CHAPTER
JOHNSON T8000. Treadmill. Service Manual
 JOHNSON T8000 Treadmill Service Manual Make by JearyCheng, KevinChang Aug.25.2004 TABLE OF CONTENTS SECTION 1: LIMITED WARRANTY..1-1 SECTION 2: EXPLODED DIAGRAM.2-1 SECTION 3: WIRING DIAGRAM 3-1 SECTION
Symptom Possible Cause Test Procedure Repair
 Troubleshooting Guide: E2 Error/Erratic Speed Prepared by: Regina Templeton Date Prepared: 12/07/2015 E2 error on a unit with an analog speed sensor (The analog speed encoder signal indicates speed is
T & T Service Manual
 T101-04 & T202-03 Service Manual 1 2 3 Contents CHAPTER 1: SERIAL NUMBER LOCATION... 6 CHAPTER 2: PREVENTATIVE MAINTENANCE 2.1 Preventative Maintenance... 8 2.2 Tension and Centering the Running Belt...
TROUBLESHOOTING TROUBLESHOOTING
 FOR 2007 TREADMILLS: (T9200 SIMPLE, T9500 SIMPLE, T9600 SIMPLE, T9250 SIMPLE, T9450 SIMPLE) (T9200 DELUXE, T9500 DELUXE, T9600 DELUXE, T9250 DELUXE, T9450 DELUXE) (T9200 PREMIER, T9500 PREMIER, T9600 PREMIER,
Horizon Fitness Treadmill Service Manual
 Horizon Fitness 2003-2004 Treadmill Service Manual Horizon Series Treadmill Models T40, T30, T20 If you have any questions, please call the Horizon Fitness Service Hotline at 1-888-993-3199 TABLE OF CONTENTS
WALKING TREADMILL SF-T1407M USER MANUAL
 WALKING TREADMILL SF-T1407M USER MANUAL IMPORTANT! Please retain owner s manual for maintenance and adjustment instructions. Your satisfaction is very important to us, PLEASE DO NOT RETURN UNTIL YOU HAVE
WARNING: ALWAYS UNPLUG THE TREADMILL FROM THE ELECTRICAL OUTLET BEFORE SERVICING THE UNIT.
 Z700-A82 / 120V Treadmill WARNING: ALWAYS UNPLUG THE TREADMILL FROM THE ELECTRICAL OUTLET BEFORE SERVICING THE UNIT. Table of Contents TABLE OF CONTENTS Table of Contents...1 Table of Figures...3 Description...4
ESSENTIAL TIPS. Official Guide MAINTENANCE GUIDE XM-PRO II & XM-PRO III XM-PRO II & III. LIVE LONGER! LOOK AFTER YOUR TREADMILL & SAVE s
 TREADMILL MAINTENANCE GUIDE ESSENTIAL TIPS XM-PRO II & XM-PRO III Official Guide TREADMILL COMPONENTS? UNDERSTAND YOUR TREADMILL XM-PRO II & III MAINTENANCE SCHEDULE LIVE LONGER! LOOK AFTER YOUR TREADMILL
True Fitness Service Manual. 455 Pediatric Treadmill
 True Fitness Service Manual 455 Pediatric Treadmill True fitness technology, Inc. makes no representations or warranties regarding the contents of this manual. We reserve the right to revise this document
WARNING: ALWAYS UNPLUG THE TREADMILL FROM THE ELECTRICAL OUTLET BEFORE SERVICING THE UNIT.
 Z100-A81 CE Treadmill WARNING: ALWAYS UNPLUG THE TREADMILL FROM THE ELECTRICAL OUTLET BEFORE SERVICING THE UNIT. Table of Contents TABLE OF CONTENTS Table of Contents...1 Table of Figures...3 Description...4
Sears Canada Service Manual
 Sears Canada Service Manual Treadmills Models 30750, 30727 Table of Contents >> Table of Contents Section One Section Two Safety Instructions 3 Horizon Fitness 5-Step Diagnostic Process 13 Recommended
How to Keep your Treadmill Running
 How to Keep your Treadmill Running Buying a treadmill is hard enough. Choosing the best out of many treadmills in the market is nigh impossible. But once you ve got the treadmill you ve always wanted,
CARE AND MAINTENANCE INSTRUCTIONS
 STRONG. SMART. BEAUTIFUL. CARE AND MAINTENANCE INSTRUCTIONS In order to maximize life span, and minimize down time, all MATRIX equipment requires regular cleaning, and maintenance items performed on a
T 3 x T r e a d m i l l S e r V i C e m a N U a l
 T3x-05 Treadmill SERVICE MANUAl Table of Contents CHAPTER 1: Serial number location... 1 CHAPTER 2: Important Safety instructions 2.1 Before Getting Started... 2 2.2 Read and Save These Instructions...
PREVENTIVE MAINTENANCE
 PREVENTIVE MAINTENANCE Overview Preventive maintenance (PM) is a schedule of planned maintenance actions aimed at the prevention of failures. PM is the best way to preserve and enhance equipment reliability
T 1 x T r e a d m i l l S e r V i C e m a N U a l
 T1x-04 Treadmill SERVICE MANUAl Table of contents CHAPTER 1: Serial number location... 1 CHAPTER 2: Important Safety instructions 2.1 Before Getting Started... 2 2.2 Read and Save These Instructions...
SPACE SAVING FOLDING TREADMILL SF-T7632 USER MANUAL
 SPACE SAVING FOLDING TREADMILL SF-T7632 USER MANUAL IMPORTANT: Read all instructions carefully before using this product. Retain owner s manual for future reference. For customer service, please contact:
StairMaster. HIITMill / HIITMill X. Install Manual
 StairMaster HIITMill / HIITMill X Install Manual TABLE OF CONTENTS INTRODUCTION... 01 Product Specifications... 02 ASSEMBLY INSTRUCTIONS...03 INSTALL CHECKLIST... 05 CORRECTIVE PROCEDURES... Belt Sticking
Section Five - Troubleshooting Procedures
 Section Five - Troubleshooting Procedures Note: This section contains troubleshooting procedures specific to the C96X family of treadmills. Please refer to the troubleshooting procedures in the commercial
The Walkstation. Care & Maintenance. FitWork Walkstation
 The Walkstation Care & Maintenance FitWork Walkstation Treadbelt Adjustment: Your treadmill s running belt has been properly aligned at the factory. However, when the treadmill is used on an uneven surface,
Cybex Arc Trainer Owner s & Service Manual. 7 - Service
 7 - Service Table of Contents......... iii Warnings/Cautions All warnings and cautions listed in this chapter are as follows:! WARNING: All maintenance activities shall be performed by qualified personnel.
EASY ASSEMBLY FOLDING TREADMILL SF-T7610 USER MANUAL
 EASY ASSEMBLY FOLDING TREADMILL SF-T7610 USER MANUAL IMPORTANT! Please retain owner s manual for maintenance and adjustment instructions. Your satisfaction is very important to us, PLEASE DO NOT RETURN
PRODUCT INFORMATION BULLETIN #3365 DIGITAL MOTOR CONTROL PLATTER SYSTEMS For Serial Number and After
 PRODUCT INFORMATION BULLETIN #3365 DIGITAL MOTOR CONTROL PLATTER SYSTEMS For Serial Number 28640996 and After Record Platter System Identification Numbers Here: Model # Serial # Table of Contents Program
S-Drive Performance Trainer
 S-Drive Performance Trainer SERVICE MANUAl Table of contents CHAPTER 1: Serial number location... 1 CHAPTER 2: Important Safety instructions 2.1 Read and Save These Instructions... 2 2.2 Before Getting
Check the wires going to the back of the computer, if the wires are secure and console will not start see step b.
 ELECTRONIC TROUBLESHOOTING 1. PROBLEM: Console LED's will not light, console will not power up The bike must be pedaled at greater than 50 RPM while Check the wires going to the back of the computer, if
C966 Treadmill. C966 Treadmill
 C966 Treadmill Warning: This service manual is for use by Precor trained service providers only. If you are not a Precor Trained Servicer, you must not attempt to service any Precor Product; Call your
Reproduction or other use of this Manual, without the express written consent of Vulcan, is prohibited.
 SERVICE MANUAL ELECTRIC BRAISING PANS (30 & 40 GALLON) VE30 VE40 ML-126849 ML-126850 VE40 SHOWN - NOTICE - This Manual is prepared for the use of trained Vulcan Service Technicians and should not be used
C954, C956 Treadmill
 C954, C956 Treadmill Warning: This service manual is for use by Precor trained service providers only. If you are not a Precor Trained Servicer, you must not attempt to service any Precor Product; Call
TR22F Repair Manual (Electronics)
") TR22F Repair Manual (Electronics) Table of Contents 1-1-1. Product Picture - TR22F 1-2-1. Overlay - TR22F 1-3-1. Component Placement - TR22F Display Board 1-3-2. Component Placement - TR22F Lower Compartment
TR22F Repair Manual (Electronics) Table of Contents 1-1-1. Product Picture - TR22F 1-2-1. Overlay - TR22F 1-3-1. Component Placement - TR22F Display Board 1-3-2. Component Placement - TR22F Lower Compartment
SF-T7610 TREADMILL USER MANUAL
 SF-T7610 TREADMILL USER MANUAL IMPORTANT: Read all instructions carefully before using this product. Retain owner s manual for future reference. For customer service, please contact: support@sunnyhealthfitness.com
T611 Repair Manual (Electronics)
") T611 Repair Manual (Electronics) Table of Contents 1-1-1. Product Picture T611 1-2-1. Overlay T611 1-3-1. Component Placement T611 Display Board 1-3-2. Component Placement T611 Lower Compartment 1-4-1.
T611 Repair Manual (Electronics) Table of Contents 1-1-1. Product Picture T611 1-2-1. Overlay T611 1-3-1. Component Placement T611 Display Board 1-3-2. Component Placement T611 Lower Compartment 1-4-1.
9.33, 9.35 Treadmill
 9.33, 9.35 Treadmill Warning: This service manual is for use by Precor trained service providers only. If you are not a Precor Trained Servicer, you must not attempt to service any Precor Product; Call
C944 Treadmill. C944 Treadmill
 C944 Treadmill Warning: This service manual is for use by Precor trained service providers only. If you are not a Precor Trained Servicer, you must not attempt to service any Precor Product; Call your
9.45, 9.45i Treadmill
 9.45, 9.45i Treadmill Warning: This service manual is for use by Precor trained service providers only. If you are not a Precor Trained Servicer, you must not attempt to service any Precor Product; Call
C960, C962, C964 Treadmill
 C960, C962, C964 Treadmill Warning: This service manual is for use by Precor trained service providers only. If you are not a Precor Trained Servicer, you must not attempt to service any Precor Product;
C954, C956 Treadmill
 C954, C956 Treadmill Warning: This service manual is for use by Precor trained service providers only. If you are not a Precor Trained Servicer, you must not attempt to service any Precor Product; Call
TC1000 Service Manual SALES: CUSTOMER SERVICE:
 TC1000 Service Manual SALES: 800-278-3933 CUSTOMER SERVICE: 800-745-1373 Table of Contents Section Page I. Overview 2 II. Troubleshooting Tables 3 III. Maintenance Procedures Procedure 1 Removal and Reinstallation
N1233 Series Troubleshooting Guide for N Alternator
 N1233 Series Troubleshooting Guide for N1233-2 Alternator Hazard Definitions These terms are used to bring attention to presence of hazards of various risk levels or to important information concerning
N1240/N1243 Series Troubleshooting Guide for N1240-3/N Alternators
 N1240/N1243 Series Troubleshooting Guide for N1240-3/N1243-2 Alternators Hazard Definitions These terms are used to bring attention to presence of hazards of various risk levels or to important information
9.57 Treadmill Warning:
 9.57 Treadmill Warning: This service manual is for use by Precor trained service providers only. If you are not a Precor Trained Servicer, you must not attempt to service any Precor Product; Call your
9.17, 9.17si Treadmill
 9.17, 917si Treadmill 9.17, 9.17si Treadmill Warning: This service manual is for use by Precor trained service providers only. If you are not a Precor Trained Servicer, you must not attempt to service
T621 Repair Manual (Electronics)
") T621 Repair Manual (Electronics) Table of Contents 1-1-1. Product Picture-T621 1-2-1. Display-T621 1-3-1. Component Placement-T621 Display 1-3-2. Component Placement-T621 Drive Board Area 1-4-1. Block
T621 Repair Manual (Electronics) Table of Contents 1-1-1. Product Picture-T621 1-2-1. Display-T621 1-3-1. Component Placement-T621 Display 1-3-2. Component Placement-T621 Drive Board Area 1-4-1. Block
RH800 & 2000 MAINTENANCE GUIDE
 RH800 & 2000 MAINTENANCE GUIDE PICTOGRAMS Each Signifier displayed here is specific to this User Manual. Menu Previous Advance Note Tip Example Rotary Heads Drum & Frame In-Line Filter Control Panels Gearmotors
COMPAK PRODUCTS QUEENSLAND M2S TO M310
 COMPAK PRODUCTS QUEENSLAND AUSTRALIAN MADE AND OWNED MODEL M2S TO M310 SALES AND SERVICES SINCE 1956 COMPAK PRODUCTS QUEENSLAND 999 IPSWICH ROAD MOOROOKA QUEENSLAND 4105 PHONE (07) 3892 5433 FAX (07) 3848
L7/L8/L9 Treadmill 90 Series Service Manual
 L7/L8/L9 Treadmill 90 Series Service Manual Safety Information Safety Information DANGER DANGER DANGER WARNING To reduce the risk of electric shock: always unplug the treadmill from the electrical outlet
9.33i, 9.35i Treadmill
 9.33i, 9.35i Treadmill Warning: This service manual is for use by Precor trained service providers only. If you are not a Precor Trained Servicer, you must not attempt to service any Precor Product; Call
C966 Treadmill Warning:
 C966 Treadmill Warning: This service manual is for use by Precor trained service providers only. If you are not a Precor Trained Servicer, you must not attempt to service any Precor Product; Call your
T652 Repair Manual (Electronics)
") T652 Repair Manual (Electronics) Table of Contents 1-1-1. Product Illustration T652 1-2-1. Display T652 1-3-1. Component Placement T652 Display 1-3-2. Component Placement T652 Drive Compartment 1-4-1.
T652 Repair Manual (Electronics) Table of Contents 1-1-1. Product Illustration T652 1-2-1. Display T652 1-3-1. Component Placement T652 Display 1-3-2. Component Placement T652 Drive Compartment 1-4-1.
9.2, 9.2s, 9.20, 9.20s Treadmill
 9.2, 9.2s, 9.20, 9.20s Treadmill Warning: This service manual is for use by Precor trained service providers only. If you are not a Precor Trained Servicer, you must not attempt to service any Precor Product;
ERROR CODES BIKES CROSS TRAINING
 BIKES ERROR CODES 3610, 3670, 3710, 3770, The BIKE and SEMI System stall System will not calibrate Belt worn, broken or off flywheel X Large red X displayed Replace display or send in for repair 3900,
TRM10/ GEN06 TREADMILL BASE
 Service Manual TRM10/ GEN06 TREADMILL BASE 20039-165 REV A03 PRECOR CUSTOMER SUPPORT Precor Incorporated, Unauthorized Reproduction and Distribution Prohibited by Law Page 1 Contents Section 1 - Introduction
INSTALLER MANUAL USER MANUAL. Contents
 Installation & user manual two way Contents INSTALLER MANUAL Important information General 1. Technical data 2. Description Installation: 1. Positioning the unit 2. Connection. 3. Parts description. 4.
IT ALL STARTS WITH A VISION IT ALL STARTS WITH A VISION FITNESS U 6 0 B I K E S E R V I C E M A N U A L
 IT ALL STARTS WITH A VISION IT ALL STARTS WITH A VISION FITNESS U 6 0 B I K E S E R V I C E M A N U A L TABLE OF CONTENTS CHAPTER 1: SERIAL NUMBER LOCATION... 1 CHAPTER 2: IMPORTANT SAFETY INSTRUCTIONS
Alternator Removal and Installation Instructions
 Alternator Removal and Installation Instructions Removal CAUTION: Always use care when working on your vehicle! Do NOT disconnect any electrical cables or wiring while the engine is running! Make sure
TTG TREADMILL T9E T9E-0XXX-02
 TTG TREADMILL T9E T9E-0XXX-02 Customer Support Services PARTS MANUAL rev. 01 June 2012 TREADMILL T9E T9E-0 _ -02 DOCUMENTATION Touch-Up Paint Color Container 0017-00008-0204 Arctic Silver Spray Can 0017-00008-0205
Treadmill OWNER S MANUAL
 Treadmill 1030.10-082917 OWNER S MANUAL PLEASE DO NOT RETURN THIS PRODUCT TO THE STORE. STOP. Contact customer service if you have any questions regarding assembly or proper operation of the machine. Email
9.31, 9.33, 9.35 Treadmill
 9.31, 9.33, 9.35 Treadmill Warning: This service manual is for use by Precor trained service providers only. If you are not a Precor Trained Servicer, you must not attempt to service any Precor Product;
SX1000 Service Manual SALES: CUSTOMER SERVICE:
 SX1000 Service Manual SALES: 800-278-3933 CUSTOMER SERVICE: 800-745-1373 Revision: August 1999 Table of Contents Section Page I. Overview 2 II. Troubleshooting Tables 3 III. Maintenance Procedures Procedure
C956i, C966i Treadmill
 C956i, C966i Treadmill Warning: This service manual is for use by Precor trained service providers only. If you are not a Precor Trained Servicer, you must not attempt to service any Precor Product; Call
SERVICE MANUAL. XT 200 (With DCI electronics) XT 600 (With DCI electronics) XT 800 (With DCI electronics)
 XT 600 (With DCI electronics) XT 800 (With DCI electronics)") SERVICE MANUAL XT 200 (With DCI electronics) XT 600 (With DCI electronics) XT 800 (With DCI electronics) Table of Contents Troubleshooting Guide Electronic System.3 Mechanical System...4 Repair Procedures
SERVICE MANUAL XT 200 (With DCI electronics) XT 600 (With DCI electronics) XT 800 (With DCI electronics) Table of Contents Troubleshooting Guide Electronic System.3 Mechanical System...4 Repair Procedures
Service Manual ISO7000R Recumbent Bike
 Service Manual ISO7000R Recumbent Bike Before Using this product, read this manual and follow all safety rules and operating instructions. Maintenance The ISO7000R is virtually maintenance free. After
Uninterruptible Power System
 USER'S MANUAL Emergency Backup Power Supply For Use With Computer Loads Only Power Surge/Noise Protection Intelligent Auto-Shutdown Software Internet Line Protection Cost Efficiency UPS 1 st Edition Uninterruptible
Maintenance Adjustments
 4 Maintenance and Adjustments Chapter Contents Cleaning the Printer and Paper Handling Accessories..... 158 Cleaning the HP Digital Copier....................... 161 Cleaning ADF and Glass............................
WS2H/ WS3 Error Codes
 WS2H & WS3 Troubleshooting Page 1 WS2H/ WS3 Error Codes Possible Errors Code Description 1001 No Encoder Pulses 1002 Unexpected Stall, Main Drive 1003 Run Time To Long, Main Drive 14001 Message Queue Full
5002/5005 Bike Repair Guide Version 2; Date:
 5002/5005 Bike Repair Guide Version 2; Date: 10-26-04 5002 recumbent bike 5005 upright bike Note: Electronics in 5002 and 5005 are basically the same, but displays differ. Unique Technical Features of
9.31, 9.33, 9.35 Treadmill
 9.31, 9.33, 9.35 Treadmill Warning: This service manual is for use by Precor trained service providers only. If you are not a Precor Trained Servicer, you must not attempt to service any Precor Product;
Model Voltage Wattage Length Width Height Width Length 7J J
 Please read and save these instructions. Read carefully before attempting to operate or maintain the product described. Protect yourself and others by observing all safety information. Failure to comply
9.33i, 9.35i Treadmill
 9.33i, 9.35i Treadmill Warning: This service manual is for use by Precor trained service providers only. If you are not a Precor Trained Servicer, you must not attempt to service any Precor Product; Call
Roll Up Door Operator
 INSTRUCTIONS & OWNERS MANUAL Roll Up Door Operator 2 INDEX Preparation before installation 4. Terms and definitions 5. Pictures & names of parts 6. Mounting the weight bar 7. Installing the operator 7.
True Fitness Service Manual. Treadmills. Models
 True Fitness Service Manual Treadmills Models 350-750 True fitness technology, Inc. makes no representations or warranties regarding the contents of this manual. We reserve the right to revise this document
Property of American Airlines
 Date Maintenance Check list The inspection and preventive maintenance schedule of the Power Stow Rollertrack is as follows: Daily (10 hrs), Weekly (50 hrs.), every 6 months ( hrs.), yearly (1 hrs.) and
Customer Name. Instruction for Operation. Single Head Sleever
 Customer Name Instruction for Operation Single Head Sleever Content Reload of Sleeve Roll (page 3~5) Sleeve Feeding (Page 6~7) Sleeve Sensor Positioning (Page 8~10) Holder Installation (Page 11~13) Splice
User s Manual. Automatic Switch-Mode Battery Charger
 User s Manual Automatic Switch-Mode Battery Charger IMPORTANT Read, understand, and follow these safety rules and operating instructions before using this battery charger. Only authorized and trained service
9100, 9500HR, 9700HR,
 Models 9100, 9500HR, 9700HR, and 9700HR w/decline Treadmills Customer Support Services SERVICE MANUAL INTRODUCTION HOW TO USE SERVICE MANUAL AND CONTACT CUSTOMER SUPPORT SERVICES This service manual is
Pro Stepper Service Manual
 Pro Stepper Service Manual Table of Contents Table of Contents... 0 Display Panel... 1 Preventive Maintenance... 2 Preventive Maintenance Cont d... 3 Settings - Maintenance Mode... 4 Settings - Maintenance
ADJUSTABLE TENSION MAGNETIC TREADMILL
 ADJUSTABLE TENSION MAGNETIC TREADMILL SF-T7614 USER MANUAL IMPORTANT : Read all instructions carefully before using this product. Retain this manual for future reference. For customer service, contact
C802/C802D/C802TD/C820 Alternators Troubleshooting Guide
 C802/C802D/C802TD/C820 Alternators Troubleshooting Guide Hazard Definitions These terms are used to bring attention to presence of hazards of various risk levels or to important information concerning
Troubleshooting Guide for N1225-1/N1237-1/N Alternators
 Troubleshooting Guide for N1225-1/N1237-1/N1505-1 Alternators Hazard Definitions These terms are used to bring attention to presence of hazards of various risk levels or to important information concerning
EXERPEUTIC TF2000 Fitness Walking and Rehab Treadmill
 hh EXERPEUTIC TF2000 Fitness Walking and Rehab Treadmill IMPORTANT: Read all instructions carefully before assembling and/or using this product. Retain this owner s manual for future reference. The specifications
Perfmaster Air V3. Serial Number. Date
 Perfmaster Air V3 12-2015 Serial Number Date TABLE OF CONTENTS SPECIFICATIONS.3 SAFETY PROCEDURES/CARE & MAINTENANCE..4 COMPONENT IDENTIFICATION 5 DELIVERY TRAY ASSEMBLY.6 PAPER STOP ASSEMBLIES..7 MACHINE
IMPORTANT! DO NOT THROW AWAY THE SHIPPING CARTON AND PACKING MATERIAL
 Operator s Manual IMPORTANT! DO NOT THROW AWAY THE SHIPPING CARTON AND PACKING MATERIAL ii Table of Contents Operator Safety... 1 Introduction... 2 Unpacking and Setup... 3 Unpacking... 3 Setup... 4 ROCKET
AIR COMPRESSOR OPERATING INSTRUCTION AND PARTS LIST
 AIR COMPRESSOR OPERATING INSTRUCTION AND PARTS LIST BELT TYPE IMPORTANT PLEASE MAKE CERTAIN THAT THE PERSON WHO IS TO USE THIS EQUIPMENT CAREFULLY READS AND UNDERSTANDS THESE INSTRUCTIONS BEFORE STARTING
T630 Treadmill Repair Manual SPORTS ART INDUSTRIAL CO., LTD.
 T630 Treadmill Repair Manual SPORTS ART INDUSTRIAL CO., LTD. Table of Contents 1. Unit Components 1-1-1. T630 Product Picture 1-1-2. T630 Treadmill Components (1) Display Area 1-1-3. T630 Treadmill Components
ACCORD ELLIPTICAL TRAINER ITEM NO: 93470
 ACCORD ELLIPTICAL TRAINER ITEM NO: 93470 OWNER S MANUAL IMPORTANT: Read all instructions carefully before using this product. Retain this owner s manual for future reference. The specifications of this
S23T Treadmill. Customer Support Services Service manual
 S23T Treadmill Customer Support Services Service manual General Contents 1. Introduction 2. Component identification 3. Parts manual 4. Assembly instructions < 2 > 1. Introduction Please check special
OPERATING & SERVICE PARTS MANUAL 700ES ENERGY SMART WRAPPER SERIES B
 OPERATING & SERVICE PARTS MANUAL 700ES ENERGY SMART WRAPPER SERIES B READ ALL INSTRUCTIONS CAREFULLY BEFORE OPERATING EQUIPMENT TABLE OF CONTENTS Machine Components & Electrical Requirement... 3 Preliminary
T790 Treadmill. 1dmill. Customer Support Services SERVICE MANUAL
 1dmill Customer Support Services SERVICE MANUAL INTRODUCTION HOW TO USE SERVICE MANUAL AND CONTACT CUSTOMER SUPPORT SERVICES This service manual is applicable to Treadmill T790. Note: Information represents
R 3 X B I K E S E R V I C E M A N U A L
 R 3 X - 0 2 B I K E S E R V I C E M A N U A L TABLE OF CONTENTS CHAPTER 1: SERIAL NUMBER LOCATION... 1 CHAPTER 2: IMPORTANT SAFETY INSTRUCTIONS 2.1 Read and Save These Instructions... 2 2.2 Electrical
The POWER. In PRESENTATION PRODUCTS. Instruction Book for COSMOPOLITAN ELECTROL For Sizes Up To 9'x12' DA-LITE SCREEN COMPANY, INC.
 The POWER In PRESENTATION PRODUCTS Instruction Book for COSMOPOLITAN ELECTROL For Sizes Up To 9'x12' DA-LITE SCREEN COMPANY, INC. 3100 North Detroit Street Post Office Box 137 Warsaw, Indiana 46581-0137
1. OVERVIEW DRAWING 2
 1 1. OVERVIEW DRAWING 2 2. IMPORTANT SAFETY INSTRUCTIONS When using an electrical appliance, basic precautions should always be followed, including the followings: Read all instructions before using the
Retro Fitness Treadmill CLST RF
 Retro Fitness Treadmill Customer Support Services PARTS MANUAL rev 03 Mar 2011 Contents S/N CLST320000-399999 Miscellaneous...3 Rear End Caps and Cup Holders...4 Scuff Pad and Frame Tag Board... 5 Console
9.25, 9.25i Treadmill
 9.25, 9.25i Treadmill Warning: This service manual is for use by Precor trained service providers only. If you are not a Precor Trained Servicer, you must not attempt to service any Precor Product; Call
AUTOMATIC FOODSERVICE EQUIPMENT. AUTOMATIC ELECTRIC BROILER MODELS 952E, 932E and 922E OWNER S MANUAL
 AUTOMATIC FOODSERVICE EQUIPMENT AUTOMATIC ELECTRIC BROILER MODELS 952E, 932E and 922E OWNER S MANUAL IMPORTANT: RETAIN THIS MANUAL IN A SAFE PLACE FOR FUTURE REFERENCE. FOR YOUR SAFETY: Do not store or
Section 1: Introduction
 Section 1: Introduction Welcome to the world of STAR TRAC. In your hands is the STAR TRAC TR 4500 Service Manual. This manual is designed to be easy to use, providing detailed instructions on how to service
SERVICE MANUAL. Pro Tread AC
 SERVICE MANUAL Pro Tread AC 76 77 X Star Trac Fitness 1441 Myford Road Irvine, California 9266 8-53-1221 Tel 714-669-166 Tel 714-669-739 Fax X http://support.startrac.com email: support@startrac.com INTRODUCTION
Customer Name: Serial Number: Y-Axis Stall
 Technician Name: Date: Technician Name: Date: Customer Name: Serial Number: Y-Axis Stall Issue Explanation and Background Each drive motor on the machine (the x, y and z axes motors) has a sensor called