OPERATING & SERVICE PARTS MANUAL 700ES ENERGY SMART WRAPPER SERIES B
|
|
|
- Miranda McBride
- 5 years ago
- Views:
Transcription
1 OPERATING & SERVICE PARTS MANUAL 700ES ENERGY SMART WRAPPER SERIES B READ ALL INSTRUCTIONS CAREFULLY BEFORE OPERATING EQUIPMENT
2 TABLE OF CONTENTS Machine Components & Electrical Requirement... 3 Preliminary Setup... 5 Recommended Maintenance... 6 Troubleshooting Guide... 7 Hot Rod Circuit Board Test Service Parts Information Notes
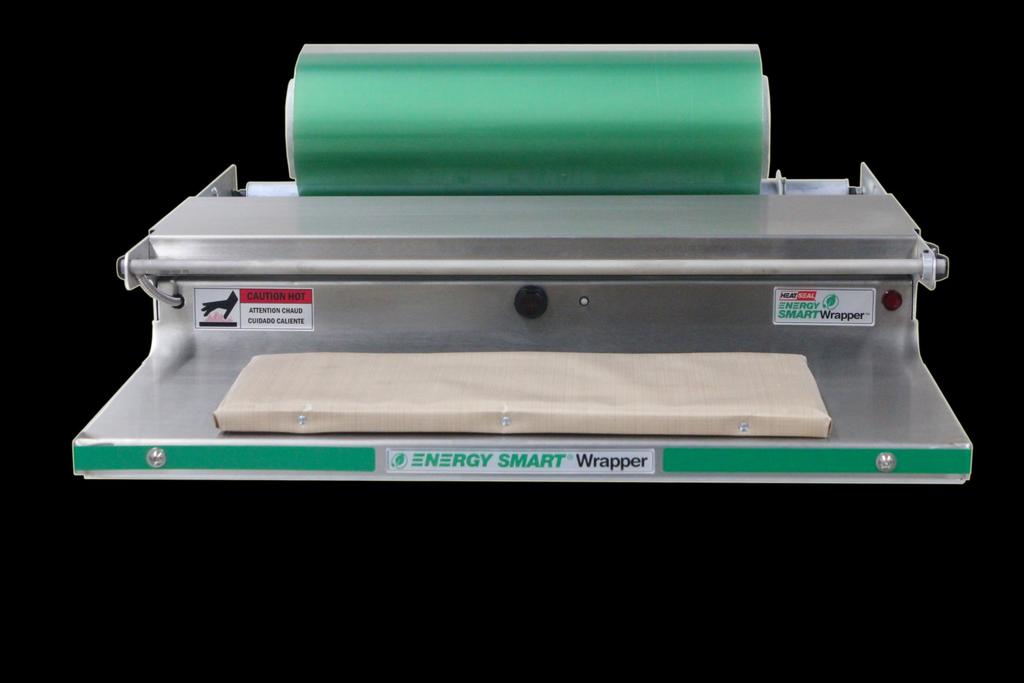
3 MACHINE TECHNOLOGY & COMPONENTS ENERGY SMART TECHNOLOGY The Energy Smart Wrapper is an innovative system that incorporates an Instant On seal plate with the ability to go from ambient to sealing temperature in a matter of seconds. The high speed seal plate, in combination with a photoeye actuator, allows the operator to seal a product on demand and to save energy when the wrapper is not in use. As a part of our quality procedures, the seal plate has been tested. Note: You may see a wavy or wrinkling affect on the surface of the stainless steel plate under the replaceable Non-stick cover. This waviness is caused by the differential thermal expansion of the materials that are used to construct the layered seal plate; wrinkling will be observed as the wrapper is used daily and the seal plate settles in. HOT ROD HEAT UP With the film properly mounted and threaded, the wrapper is ready to be powered up. After plugging the power cord into an electrical outlet, toggle the power switch (1) located on the back of the electrical box to the ON position. The hot rod (2) will require a 5-10 minute warm up period before it reaches a cutting temperature of 275 F. CAUTION: As long as the wrapper is powered on, the rod will be hot and skin contact should be avoided. PHOTOEYE ACTUATED HEATER The seal plate of the wrapper is actuated by a photoeye that is engaged when a package is placed on the plate (3). This feature ensures that the seal plate will consume energy only when there is a demand by the operator. DO NOT USE THE SEAL PLATE AS A CUTTING SURFACE, AS THIS WILL DAMAGE THE SEAL PLATE AND NON- STICK COVER PLATE. SEAL PLATE DAMAGE VOIDS THE WARRANTY. 1 ELECTRICAL REQUIREMENT The Model 700ES requires 115 volts, 15A Circuit

4 MACHINE TECHNOLOGY & COMPONENTS STAINLESS STEEL BRIDGE The wrapper comes with a stainless steel bridge (1) that is used for wrapping a package. The stainless steel bridge is not recommended as a cutting surface and should not be used as one. 1 OPERATOR INDICATOR LIGHT Since the seal plate is only activated when a load is applied, the small LED heating light near the center of the unit is used to indicate seal plate status. The heat light (2) will turn yellow while the plate is heating and will then turn red when the plate reaches sealing temperature. 2 GFCI To maintain circuit protection and integrity, a GFCI (3) is installed in the accessory outlet located midway up on the back left side of the frame. The GFCI may need to be reset if the wrapper gets wet or other ground faults arise. Do not reset the GFCI, if visible seal plate damage is present. 3 THERMISTOR TEMPERATURE CONTROL Due to the rapid response of the seal plate and residual heat that can remain from previous cycles, a thermistor is incorporated as a temperature control device. The seal cycle can be shorter than 3 seconds when residual heat is present in the seal plate. The thermistor, located within the seal plate, regulates the temperature of the seal plate to ensure that the temperature peaks at 350 F. 4


5 PRELIMINARY SETUP FILM THREADING Film threading is very important on the 700ES cradle style wrappers to achieve proper film tensioning. Proper film tensioning allows for the easiest cutting of film. Facing the tension knob (1) side of the machine, the film should come off the roll counter-clockwise and route down and between the two rollers it sits on. The film will then continue under the wrapping bridge and rest on top of the vinyl retainer rod. The black tension knob can be adjusted for loose (rotate counter clockwise) or tight (rotate clockwise) tension on the film. See threading diagram below and also located on the 700ES under film tension knob. ADJUSTING FOR DIFFERENT WIDTH FILMS Slide the white film guides (2) and squeeze the tensioning devices (3) (one on each side of film roll) and secure it near the film roll on both sides. This will help maintain the roll in the center of the machine
6 RECOMMENDED MAINTENANCE MAKE SURE TO TURN OFF THE UNIT, UNPLUG AND LET THE MACHINE COOL DOWN BEFORE CLEANING * NON-STICK COVER & SEAL PLATE Due to the advancement of this new technology, it is extremely important to maintain the Non-stick cover in good condition. It is recommended to replace the Non-stick cover at least once every three months to protect the seal plate and maintain a sanitary surface. The seal plate should not be used as a cutting surface; any punctures will render the seal plate ineffective and will void the warranty. The seal plate has been designed to provide long life performance when it is properly maintained. The Non-stick cover is used to create a sanitary, stick free surface to seal film with the seal plate. Non-stick covers are porous, meaning liquids or moisture can permeate the cover, get to the surface of the seal plate, and burn off on the seal plate. It is recommended that the Non-stick cover be replaced every three months or as needed depending on the level of daily wear and tear. The Non-stick cover should be changed if holes, punctures, excessive wear, or damage are present or if the surface is soiled. The seal plate can be cleaned, as needed, with a mild spray degreaser. This should be applied to a soft cloth or paper towel and then wiped on the plate while cold. DO NOT WASH DOWN SEAL PLATE OR SPRAY ANY LIQUIDS DIRECTLY ONTO THE PLATE. CUT OFF ROD Make sure that the unit is turned off and the cut off rod is cold to the touch. The film cut off rod can be cleaned, as needed. Cover the unit surfaces with paper towels to protect them from over spray and debris. Spray and coat the cut-off rod generously with an FDA approved Degreaser product. After soaking for a few minutes, lightly scrub the surface of the Cut-off rod with a Scour Pad (Scotch-Brite type pad). Wipe the surface clean of debris and residue with clean paper towels or cloths. CLEANING THE UNIT The 700ES can be completely wiped down using mild cleaning detergent and a soft cloth or paper towels. DO NOT HOSE DOWN OR SUBMERSE THE UNIT. 6
 Remove Non-Stick Cover and inspect the Seal Plate for the following defects: Punctures or cuts. Burn marks. Extreme discoloration (blue/black or gold).")
7 TROUBLESHOOTING Symptom No power to the unit. Possible Solution Verify the unit is plugged into a 15 Amp, circuit and the Power Switch is set to the ON position. First, is the GFCI circuit breaker tripped? 1) Remove Non-Stick Cover and inspect the Seal Plate for the following defects: Punctures or cuts. Burn marks. Extreme discoloration (blue/black or gold). If these defects are present, replace seal plate. 2) If seal plate is in good condition, reset GFCI. If GFCI cannot be reset, replace. 3) Reset new GFCI. Red Power Light at right front of unit SHOULD glow. 4) If GFCI trips, seal plate may have moisture inside. Allow 1-2 days to dry out and then retry. Figure 1 700ES Electrical Box Pictured 7
8 TROUBLESHOOTING Symptom Unit has power but the Seal Plate does not work Possible Solution Verify power. Does the Cycle Light turn ON when the unit is cycled? 1) If neither the Heat Light nor Seal Plate work, verify that the 20 Amp Circuit Breaker is not tripped. 2) If the Circuit Breaker is tripped, verify there are no shorts to ground in the unit by checking wiring and connections (see Figure 1). Reset Circuit Breaker. 3) Replace Circuit Breaker if it cannot be reset. Next, verify the Photo eye is working properly. 1) With the Power ON, there should be a Green Light illuminated on the back of the Photo Eye. When the Photoeye is triggered a separate Yellow Light will illuminate. 2) If Green Light is ON and Yellow Light DOES NOT illuminate when the Photo Eye is blocked, replace the Photo Eye. 3) If Green Light is NOT illuminated when unit power is ON, check Control Board determine if Photo Eye or Control Board is faulty. Next, verify the control board is working properly. 1) Check the voltage on Pin 1 of the Control Board using a multimeter. If not 120vac, a wiring issue exists. Find and repair. 2) Check voltage on Pin 4 & 5, Brown & Blue Wires. This voltage should be 10 to 30vdc If NO voltage present, replace Control Board. If voltage present, replace Photo Eye. Next, verify seal plate. If the plate does not heat at all or is only slightly warm to the touch, replace the Seal Plate. Film Cut-off Rod does not work at all. Film cuts too slowly Verify the unit is plugged into a 15 Amp circuit and the Power Switch is set to the ON position. Verify that the 1 Amp circuit breaker is not tripped. If the circuit breaker is tripped, then reset (then proceed to Page 10), verify there are no shorts to ground in the unit by checking wiring and connections. Clean Cut-off Rod surface and verify it is not bent. See Cut-Off Rod Maintenance. 8
9 HEATER CONTROL BOARD ASSEMBLY 120V NEUTRAL HEATER OUT 24V COMMON PHOTOEYE WHITE PHOTOEYE BLACK (+) THERMISTOR (-) THERMISTOR 9


10 4 POWER IN TO HOT ROD BLACK WIRES TO HOT ROD POWER IN TO HOT ROD RED WIRES TO HOT ROD 10
 Cutoff Rod, TEC100, 22 1/2 LG, (1) Cutoff Rod Collar, 3/4OD, 25/64 ID, 1/4 THK, 8/32 Hole, (1) Set Screw in Hot Rod Collar, (1) Split")
11 SERVICE PARTS INFORMATION BILL OF MATERIALS FOR MAJOR SUB-ASSEMBLIES ITEM QTY PART NUMBER DESCRIPTION Non-stick Cover, 6 x Replacement 6 x 15 Seal Plate Kit Hot Rod Replacement Kit Includes: (1) Cutoff Rod, TEC100, 22 1/2 LG, (1) Cutoff Rod Collar, 3/4OD, 25/64 ID, 1/4 THK, 8/32 Hole, (1) Set Screw in Hot Rod Collar, (1) Split Electrical Bushing, 3/8 dia, mtg hole. 4 Electrical Box Assemblies (See Page 12) Bridge Replacement Kit Includes: (1) Stainless Steel Wrapping Bridge, (2) Black Plastic Retainer Shaft, 5/16 dia, (1) Stainless Steel Film Retainer Rod Tensioning Roller Kit Tensioning Knob Idle Roller Kit Film Centering Device Kit Stainless Steel Film Retainer Rod Replacement Cap Kit Includes: (2) Black Plastic Shaft Retainer, 5/16 dia, Vinyl Replacement Kit Includes: (1) Film Retainer, (2) Black Plastic Shaft Retainer, 5/16 dia, 11
 Strain Relief, Straight Thru,.425.")
12 ELECTRICAL BOX & HOT PLATE PARTS BILL OF MATERIALS FOR ELECTRICAL BOX ITEM QTY PART NUMBER DESCRIPTION Circuit Board Assembly, Energy Smart Wrapper Cut off Element Circuit Control Board, 120V A Circuit Breaker A Circuit Breaker Power Cord Replacement Kit Includes: (1) Strain Relief, Straight Thru, ID, (1) Power Cord, 16/3 W/NEMA 5-15P Hot Rod Board Mounting Kit Includes: (4) Clip type plastic Stand-Off, A Rocker Switch Blank GFCI, 20A/125V Terminal Block 12
13 NOTES 13


14 14
OPERATING & SERVICE PARTS MANUAL SM20ES ENERGY SMART WRAPPER
 OPERATING & SERVICE PARTS MANUAL SM20ES ENERGY SMART WRAPPER Series B Model SM20ESC6 Cradle Mount Model SM20ESC6 Cradle Mount Shown with Optional Left & Right Wings Model SM20ESC6 Cradle Mount Shown with
OPERATING & SERVICE PARTS MANUAL 625ES ENERGY SMART WRAPPER
 OPERATING & SERVICE PARTS MANUAL 625ES ENERGY SMART WRAPPER READ ALL INSTRUCTIONS CAREFULLY BEFORE OPERATING EQUIPMENT TABLE OF CONTENTS Machine Components & Electrical Requirements... 3 Preliminary Setup...
AXLE MOUNT MODELS: FILM ROLLER MODELS: OPERATING & SERVICE PARTS MANUAL TABLE TOP OVERWRAPPERS MODEL 625A MODEL 625A MINI MODEL 825A MODEL 875A
 OPERATING & SERVICE PARTS MANUAL TABLE TOP OVERWRAPPERS Model 625A AXLE MOUNT MODELS: MODEL 625A SINGLE ROLL WITH MOUNTING AXLES MODEL 625A MINI COMPACT SINGLE ROLL WITH MOUNTING AXLES MODEL 825A DUAL
ENERGY SMART TROUBLESHOOTING
 ENERGY SMART TROUBLESHOOTING Symptom No power to the unit. Possible Solution Verify the unit is plugged into a 20 Amp, GFCI circuit and the Power Switch is set to the ON position. Is the GFCI circuit breaker
NILFISK BA 500 Service Manual
 NILFISK BA 500 Service Manual Model 66324400 12/94 Form Number 043023 TABLE OF CONTENTS Batteries...21 Brush Drive Belt Adjustment Or Replacement...7 Brush Drive Motor - Carbon brush Inspection... 8 Brush
1 2 3a 3b THREADING CARD 9 10 ABC Office
 1 2 3a 3b 4 5 6 7 8 9 10 THREADING CARD Important Safety instructions YOUR SAFETY AS WELL AS THE SAFETY OF OTHERS IS IMPORTANT TO GBC. IN THIS INSTRUCTION MANUAL AND ON THE PRODUCT ARE IMPORTANT SAFETY
Checker Unload Checkstand Installation Instructions
 Front-End Checkouts Commercial Refrigeration Equipment Display Merchandisers Store Fixtures Checker Unload Checkstand Installation Instructions Attention Store Manager: Please find enclosed in this packet
The POWER. In PRESENTATION PRODUCTS. Instruction Book for BOARDROOM ELECTROL DA-LITE SCREEN COMPANY, INC.
 The POWER In PRESENTATION PRODUCTS Instruction Book for BOARDROOM ELECTROL DA-LITE SCREEN COMPANY, INC. 3100 North Detroit Street Post Office Box 137 Warsaw, Indiana 46581-0137 Phone: 574-267-8101 800-622-3737
LS100L Battery-powered Punch Driver
 OPERATION MANUAL Serial Number GATOR LS100L Battery-powered Driver Read and understand all of the instructions and safety information in this manual before operating or servicing this tool. Register this
K-SERIES SERVICE MANUAL
 MARCH 2011 III. R MAINTENANCE AND REPAIR MAINTENANCE egular maintenance of the Ricon KlearVue Series platform wheelchair lift is required to help optimize its performance and reduce the need for repairs.
Owner and Operating Manual for
 Owner and Operating Manual for 120VAC Manual Control 12VDC Solar Battery Manual Control 120VAC Remote Control 12VDC Solar Battery Remote Control GEN2 Remote Versions Only Boat Lifts Please read this manual
QuickBoost Instruction Manual
 Sheet 1 of 12 QuickBoost Instruction Manual MobilePower, LLC. Bluffton, SC 29910 www. Mobilepower-us.com Office: (800) 708-8550 support@mobilepower-us.com customerservice@mobilepower-us.com Sheet 2 of
Gold Standard Toaster
 Tall Bun Feeder Shown Gold Standard Toaster Model GST-3V owner s manual Manufacturing Numbers: 9210876 and 9210878 www.antunes.com P/N 1011240 Rev. G 02/18 TABLE OF CONTENTS Table of Contents 2 Warranty
COOKSON OWNER'S MANUAL
 COOKSON OWNER'S MANUAL FDO-A10 INDUSTRIAL DUTY FIRE DOOR OPERATOR R L I S T E D 3040233 US CONTROL PANEL SERIAL# OPERATOR SERIAL# 9001.DWG ECN 0959 REV 4 SPECIFICATIONS MOTOR TYPE:...INTERMITTENT HORSEPOWER:...1/8
T21 Thermal Differential Switch
 T21 Thermal Differential Switch General Instructions The T21 Point Level Switch is a state-of-the-art in liquid level and interface measurement and control. Level detection is accomplished by using a high-resolution
Little Buddy II Conveyor Dryer
 Little Buddy II Conveyor Dryer 18 wide by 5 long conveyor dryer Document # 16-437 Assembly and Operating Instructions Please review all of these instructions prior to assembly. **If you have ordered the
PAGE Both power cords must be connected & powered to operate the E-TES SD 120 volt unit.
 PAGE 1 This document outlines questions to ask and components to check during E-TES SD 120 volt troubleshooting. More detailed troubleshooting procedures are available in the E-TES SD 120 volt Troubleshooting
Cruising Charger Series OWNER S MANUAL
 R Cruising Charger Series OWNER S MANUAL ON BOARD BATTERY CHARGERS Models DC Amperage No. Of Banks Volts 2614A 5,10 Amps 2 Bank 12/12 2614A-230 2621A 5,5,10 Amps 3 Banks 12/12/12 2621A-230 2622A 10,10
INSTALLATION INSTRUCTIONS
 INSTALLATION INSTRUCTIONS Universal Air Series!! NOTE!! Covers the following model: 6000 Series 85-0100B-AZ Rev 0 5/07 To ensure that the system is installed properly, provide your electrician with these
Regular maintenance of the RICON S-Series Transit Use Wheelchair Lift will help optimize its
 IV. MAINTENANCE AND REPAIR Regular maintenance of the RICON S-Series Transit Use Wheelchair Lift will help optimize its performance and reduce the need for repairs. This chapter contains cleaning and lubrication
CAUTION CAUTION MAINTENANCE AND REPAIR A. LUBRICATION
 III. R MAINTENANCE AND REPAIR egular maintenance of the Ricon KlearVue Series platform wheelchair lift is required to help optimize its performance and reduce the need for repairs. This chapter contains
Portable Lighting Equipment Operating Instructions Table of Contents
 Portable Lighting Equipment Operating Instructions Table of Generac Magnum Ingersoll Rand TEREX AMIDA TEREX GENIE Model: MLT3060 Model: LIGHTSOURCE Model: Amida AL4000 series Model: TML4000N Generac Magnum
Water Dispenser Owner s Manual 100 Series
 TM Water Dispenser Owner s Manual 100 Series IMPORTANT: This manual includes important safety material; please read all instructions before plugging power supply cord into receptacle. 1 2 3 Load water
Service Manual Gulf Stream Electronic Full Wall Slide Systems
 Service Manual Gulf Stream Electronic Full Wall Slide Systems CONTENTS Page Before you operate the slide system 2 Operating Instructions 3 Preventive maintenance 3 Manually overriding your slide system
Marsh Shipping Supply Co. LLC. Marsh TD2100 Electric Taper Technical Manual
 Marsh Shipping Supply Co. LLC Marsh TD2100 Electric Taper Technical Manual 2 A wall-socket must be close to the product and readily accessible. The overall system is protected against overload by the branch
SHORTENING FILTER. Operating Instructions INSPECT CARTON SPECIFICATIONS PARTS. MODEL NO'S 102 & 107 CE Series
 Operating Instructions SHORTENING FILTER INSPECT CARTON MODEL NO'S 102 & 107 CE Series Remove product from carton... If damaged : Notify carrier Save carton and packing material Contact your Dealer, Distributor
Heavy Duty Sprayer Owners Manual Model MS-O
 Heavy Duty Sprayer Owners Manual Model MS-O Table of Contents Warranty 4 Warning 5 Assembly and Preparation 6 Operation 7 Cleaning and Storage 7 Standard Spray Gun & Parts List 8 Trigger Style Spray Gun
Cleaning the Broiler. STOP Important Symbols. Meat Guides - P/N Tools. Instructions. Tools Needed. Instructions
 Cleaning the Broiler Needed No-Scratch Pad Soft Bristle Brush Towel Small Orifice Brush Degreaser Large Orifice Brush Heat Resistant Gloves Utility Knife Shaft Cleaning Tool STOP Important Symbols 6. 4.
OPERATION and SERVICE MANUAL EC TRANS. CHAIR
 OPERATION and SERVICE MANUAL EC TRANS. CHAIR MODEL 900EC THE SERIAL NUMBER WILL BE FOUND ON THE LOWER FRAME AT THE HEAD END. RECORD THE NUMBER BELOW: SERIAL NUMBER: DATE OF PURCHASE ConvaQuip Ind., Inc.
CAUTION. Start & Stop Procedures. Section 4-2. Engine Oil Level
 Section 4-2 Start & Stop Procedures Before operating this machine, the operator must have: received operator training, a familiarity with this manual, and a complete understanding of all the procedures
12 amp RMS Battery Charger
 12 amp RMS Battery Charger 83-5000-12 If faults cannot be remedied, contact the Helpline on 020 8391 6767 helpline@hilka.co.uk Manufactured under license by Hilka Pro Imports GUARANTEE This product is
OPERATOR S MANUAL StudPro LiteXI Pin Welder Stud Welding Products, Inc
 OPERATOR S MANUAL StudPro LiteXI Pin Welder CONTENTS Description Pages Safety 2 Specifications and Features 3 Product Components 4-5 Screen Operation 6-8 Setup and Welding 9-11 CD Gun Exploded View 12
CAUTION. Start & Stop Procedures. Section 1-2. Engine Oil Level
 Section 1-2 Start & Stop Procedures Before operating this machine, the operator must have: received operator training, a familiarity with this manual, and a complete understanding of all the procedures
Model Voltage Wattage Length Width Height Width Length 7J J
 Please read and save these instructions. Read carefully before attempting to operate or maintain the product described. Protect yourself and others by observing all safety information. Failure to comply
OPERATION MANUAL MODELS TWE-250 TWE-321 TWE-375 TRU WELD EQUIPMENT COMPANY 6400 N. HONEYTOWN ROAD SMITHVILLE, OHIO (330)
") OPERATION MANUAL MODELS TWE-250 TWE-321 TWE-375 TRU WELD EQUIPMENT COMPANY 6400 N. HONEYTOWN ROAD SMITHVILLE, OHIO 44677 (330) 669 2773 CONTENTS Section Description Pages 1 Introduction 3 2 External Features
OPERATION MANUAL MODELS TWE-250 TWE-321 TWE-375 TRU WELD EQUIPMENT COMPANY 6400 N. HONEYTOWN ROAD SMITHVILLE, OHIO 44677 (330) 669 2773 CONTENTS Section Description Pages 1 Introduction 3 2 External Features
COOKSON OWNER'S MANUAL
 COOKSON OWNER'S MANUAL FD-2A AUTOMATIC RESETTING FIRE DOOR HOIST OPERATOR R US RECOGNIZED COMPONENT CONFORMS TO UL 325 3040233 9045.DWG ECN 0986 REV 2 PROTECTED BY ONE OR MORE OF THE FOLLOWING PATENTS:
ALWAYS DISCONNECT DISPENSER FROM WATER SOURCE WHEN DISPENSER IS NOT IN USE.
 1060GAPRF With dilution selector 1060GAP OVERVIEW DEMA S MPD is a multiple product and dilution dispenser designed for use with SafeLink closed loop inserts. With its innovative patent pending QuickDock
The Da-Lite Difference.
 The Da-Lite Difference. Instruction Book for Large Advantage Electrol DA-LITE SCREEN COMPANY, INC. 3100 North Detroit Street Post Office Box 137 Warsaw, Indiana 46581-0137 Phone: 574-267-8101 800-622-3737
FD 342 Document Folder
 FD 342 Document Folder 6/2010 OPERATOR MANUAL FIRST EDITION TABLE OF CONTENTS SUBJECT PAGE DESCRIPTION 1 SPECIFICATIONS 1 UNPACKING 2 SETUP 2 CONTROL PANEL 3 OPERATION 4 SETTING CUSTOM FOLDS 5 BATCH COUNTING
CRD600 Automatic Fitting Inserter
 CRD600 Automatic Fitting Inserter OPERATIONS MANUAL VERSION 2.3 LAST EDITED 12.07.2018 cleanroomdevices.com 1 Table of Contents Title Page.. 1 Table of Contents. 2 1.0 General Product & Safety Information...3
CLEAN ROOM DEVICES, LLC "WHERE TUBING AND FITTINGS COME TOGETHER"
 CLEAN ROOM DEVICES, LLC "WHERE TUBING AND FITTINGS COME TOGETHER" CRD600 Automatic Fitting Inserter OPERATIONS MANUAL VERSION 2.1 LAST EDITED 7.25.14 DOCUMENT NUMBER 001 cleanroomdevices.com 1 Table of
The POWER. In PRESENTATION PRODUCTS. Instruction Book for COSMOPOLITAN ELECTROL For Sizes Up To 9'x12' DA-LITE SCREEN COMPANY, INC.
 The POWER In PRESENTATION PRODUCTS Instruction Book for COSMOPOLITAN ELECTROL For Sizes Up To 9'x12' DA-LITE SCREEN COMPANY, INC. 3100 North Detroit Street Post Office Box 137 Warsaw, Indiana 46581-0137
Level One Electric Vehicle Charging Station Wall Mount Product Guide
 Level One Electric Vehicle Charging Station Wall Mount Product Guide Model # WU-120 ShorePower Technologies 2351 NW York St. Portland, OR 98664 503-892-7345 info@shorepower.com www.shorepower.com 2 Table
Pay For Water System DU 1A046A
 Pay For Water System DU 1A046A Serial Number: Owner s Manual #0822 012913 Installation Date: Please read and understand this manual. Store in safe location for future reference. Everyone who operates this
BBAIR V Conveyor Dryer
 BBAIR-08-0V Conveyor Dryer wide by 8 long conveyor dryer with forced air and infrared Document # 6- Assembly and Operating Instructions Please review all these instructions prior to assembly. The Big Buddy-Air
Motion System Components Diagram. Note: #2 Mirror Cover and X-Axis Motor Cover have been removed for visibility. Maintenance.
 Professional Laser System PLS3.75, PLS4.75, PLS6.75 and PLS6.150D Keeping the laser system clean will ensure the highest quality engraving. A clean laser system is the best performing laser system. The
OPERATION MANUAL MODELS TWE-250 TWE-321 TWE-375 TRU WELD EQUIPMENT COMPANY 6400 N. HONEYTOWN ROAD SMITHVILLE, OHIO (330)
") OPERATION MANUAL MODELS TWE-250 TWE-321 TWE-375 TRU WELD EQUIPMENT COMPANY 6400 N. HONEYTOWN ROAD SMITHVILLE, OHIO 44677 (330) 669 2773 Version 1.3 Date 10/20/2010 TRU WELD EQUIPMENT LIMITED WARRANTY All
OPERATION MANUAL MODELS TWE-250 TWE-321 TWE-375 TRU WELD EQUIPMENT COMPANY 6400 N. HONEYTOWN ROAD SMITHVILLE, OHIO 44677 (330) 669 2773 Version 1.3 Date 10/20/2010 TRU WELD EQUIPMENT LIMITED WARRANTY All
CLEAN ROOM DEVICES, LLC "WHERE TUBING AND FITTINGS COME TOGETHER"
 CLEAN ROOM DEVICES, LLC "WHERE TUBING AND FITTINGS COME TOGETHER" CRD600AF Automatic Fitting Inserter With Auto Feed OPERATIONS MANUAL (Shown with optional alcohol dispenser) 1 VERSION 1.1 LAST EDITED
Level One Electric Vehicle Charging Station FREE STANDING Product Guide
 Level One Electric Vehicle Charging Station FREE STANDING Product Guide Model # SC2-120 Shorepower Technologies 2351 NW York St. Portland, OR 98664 503-892-7345 info@shorepower.com www.shorepower.com 2
Electric Trolling Motor
 Electric Trolling Motor L Series User s Manual Please read and retain this manual before using product REACH RoHS TABLE OF CONTENTS Contents GENERAL INFORMATION 4 SPECIFICATIONS 4 WIRING AND BATTERY RECOMMENDATIONS
OPERATOR S MANUAL STUDPRO SERIES
 OPERATOR S MANUAL STUDPRO SERIES Capacitor Discharge Stud Welder MODELS: StudPro 2500XI StudPro 2500XIP StudPro 3125XI StudPro 3750XI CONTENTS Description Pages Safety 2 Specifications and Features 3 Product
SPH General Manual 400 Series
 Operations & Maintenance Manual SPH General Manual 400 Series (SPH-415,416,425,426,4U6,4U5,4B5,4B6) Filename: Quatro/SPH-400 General 12/28/04 R6 ------------------------------------------------------------------------Engineering
WARNING TABLE 3-1: DAILY SAFETY CHECK
 III. T PSL-10 MAINTENANCE his chapter contains maintenance information for the Ricon PSL-10. The information consists of a maintenance schedule, component descriptions, electrical diagrams, fuse locations,
180 Lake Ave North Paynesville, MN Phone: (320) MASTER MANUFACTURING MASTER GARDNER
 MASTER MANUFACTURING MASTER GARDNER") 180 Lake Ave North Paynesville, MN 56362 Phone: (320) 340-6464 www.master-mfg.com MASTER MANUFACTURING MASTER GARDNER Part Number PCD-E3-009B-MM July 2017 Note: Do not return product to the distributor/dealer
180 Lake Ave North Paynesville, MN 56362 Phone: (320) 340-6464 www.master-mfg.com MASTER MANUFACTURING MASTER GARDNER Part Number PCD-E3-009B-MM July 2017 Note: Do not return product to the distributor/dealer
MP V 8A Electronic Smart Charger. Instruction and Information Manual
 MP7428 12V 8A Electronic Smart Charger Instruction and Information Manual In order to ensure correct and safe usage of your battery charger, you should read these instructions carefully. Please retain
CABINET REEL OPERATING INSTRUCTIONS
 CABINET REEL OPERATING INSTRUCTIONS MODELS 15, 25, 40 & 60 SERIES RAPID-AIR CORPORATION 4601 KISHWAUKEE ST. ROCKFORD, IL 61109-2925 Phone: (815) 397-2578 Fax: (815) 398-3887 Web Site: www.rapidair.com
OPERATOR S MANUAL ACE - P100
 OPERATOR S MANUAL ACE - P100 Pin Welder TRU-WELD EQUIPMENT COMPANY www.truweldstudwelding.com (330) 725-7744 CONTENTS Description Pages Warranty Information 1 Safety 2 Specifications and Features 3 Product
Reproduction or other use of this Manual, without the express written consent of Vulcan, is prohibited.
 SERVICE MANUAL ELECTRIC BRAISING PANS (30 & 40 GALLON) VE30 VE40 ML-126849 ML-126850 VE40 SHOWN - NOTICE - This Manual is prepared for the use of trained Vulcan Service Technicians and should not be used
INSPECTOR LINE LOAD SIMULATOR INSTRUCTION MANUAL TASCO, INC.
 INSPECTOR LINE LOAD SIMULATOR INSTRUCTION MANUAL INS120P TASCO, INC. THIS TESTER IS DESIGNED FOR USE ONLY BY QUALIFIED ELECTRICIANS. IMPORTANT SAFETY WARNINGS mwarning Read and understand this material
SELECT DIAGNOSTIC GUIDE. INST028 Doc 3.02
 SELECT DIAGNOSTIC GUIDE INST028 Doc 3.02 CONTENTS General Information...2 Select Call-Outs...3 Wire Diagram and Legend...4 Diagnostics...6 Excessive Voltage Drop Diagnostics...6 Static Diagnostics...7
SE-600-P Eco-Series. Operation & Parts Manual
 SE-600-P Eco-Series Operation & Parts Manual SE 600 PC & PS SERIES OWNERS MANUAL Table of Contents 1. Set-up instructions 2. Bridge-Tramming Procedure 3. Operation instructions 4. Cleaning 5. Troubleshooting
READ ALL INSTRUCTIONS CONTAINED IN THIS
 Operations Manual Eagle R2B2 Stretch Wrapper READ ALL INSTRUCTIONS CONTAINED IN THIS MANUAL PRIOR TO MACHINE INSTALLATION! - 1 - Contents page 1. General Information 1.1 Installation Notes 2 1.2 Operational
Product Data Sheet : LIGHTHAWK 6 CELL
 Specifications Power Source: Lithium-Ion, 6600mAH, 7.8V Lamp: XPR12, PN 20356 Lamp Life: 100 hrs Light Output: 264 lumens Burn Time: up to 4 hrs. 4.5 Hour Charging Time Weight: 2.1 lbs Unit Dimensions:
INSTALLATION INSTRUCTIONS HIGH OUTPUT 2 SPEED RAD FAN ASSEMBLY
 INSTALLATION INSTRUCTIONS HIGH OUTPUT 2 SPD RAD FAN ASSMBLY PART # 66818, 66819, 66820, 66821, 66822, 66823, 66827 & 66828 Please read these instructions completely before beginning installation FAN SHROUD
Installation Guide for EcoBrite EndLite LED Light Fixtures
 Installation Guide for EcoBrite EndLite LED Light Fixtures BEFORE YOU BEGIN INSTALLATION Read these instructions carefully. Failure to follow these instructions will invalidate the warranty on this product.
ELECTRICAL SYSTEM UPGRADE
 NEW CONTROLLER & ELECTRICAL SYSTEM UPGRADE FOR DAIRY TECH, INCORPORATED 10, 30 & 60G PASTEURIZERS Parts to Include 2 Wire ties (Nuts) 2 sticky wire mount pads Large Rubber Grommet (for bottom of electric
Car Battery Charger Instructions for Use
 BATTERY CHARGER 12Volt 4Amp FOR INDOOR USE ONLY Power Details: Input: 230-240Vac; 50Hz; 52W Output: 12V DC; 2.8A Maximum Charge Rate: 4A RMS Read these instructions before operating this car battery charger
 Operation and Maintenance Manual Model.75,, 3, 5, 8, 0, 0, 5, 35, 50 http://www.torsionx.com Use the MaxDrv Series Square Drive Torque Wrench Model.75,, 3, 5, 8, 0, 0, 5, 35, 50 to install and remove threaded
Service Manual. For the SCV2832E, SCV2426, Automatic Scrubbers For: Training Troubleshooting
 Service Manual For the SCV2832E, SCV2426, SCV280000 & ES2832 Automatic Scrubbers For: Training Troubleshooting Adjustments Contents 1 Cautions ----------------------------------------------------------------------
BIOACTIVE SOLUTIONS AC DRAIN STATION
 BIOACTIVE SOLUTIONS AC DRAIN STATION 98488-00 Overview The BioActive Solutions Drain Station is a chemical dispenser with a programmable timer designed primarily for dispensing chemicals into drains. Its
EAGLETRON II REMOTE CONTROL OPERATOR and MAINTENANCE. Remote Control Procedure
 EAGLETRON II REMOTE CONTROL OPERATOR and MAINTENANCE Remote Control Procedure WARNING! DO NOT OPERATE REMOTE CONTROL UNLESS YOU HAVE A CLEAR VIEW OF THE REAR OF THE TRAILER. WARNING! THE OPERATOR IS REQUIRED
Hose Reel Kit for Workman 200 Spray Systems. Installation Instructions. Form No Rev A. Model No Serial No.
 Hose Reel Kit for Workman 00 Spray Systems Model No. 097 Serial No. 000000 and Up Form No. 5- Rev A Installation Instructions Installation Important You will need to purchase Teflon tape before installing
PART # US Patent
 Please read these instructions completely before beginning installation KIT CONTNTS QTY. DSCRIPTION 1 PWM Fan Controller 1 PWM Cover 3 #8 Lock Washers 2 #6 Lock Washers 3 #8 Nuts 2 #6 Nuts 2 Allen Head
Owner s Manual. LTS Hide-A-Way Truck Side Gate
 Owner s Manual LTS Hide-A-Way Truck Side Gate 10900 Kenwood Road Cincinnati, OH 45242 Ph: 513-891-6210 Toll-Free: 866-539-6261 Fax: 513-891-4901 www.leymanlift.com sales@leymanlift.com LML00410-11/6/15
MODEL 2602A-12 3 STAGE AUTOMATIC BATTERY CHARGER OWNER S MANUAL SAVE THESE INSTRUCTIONS
 R A Valley Forge Company MODEL 2602A-12 3 STAGE AUTOMATIC BATTERY CHARGER OWNER S MANUAL SAVE THESE INSTRUCTIONS 1. INTRODUCING THE CHARGER The 2602A-12 is a 3-stage electronic battery charger. Rainproof,
OPERATION AND MAINTENANCE MANUAL
 WREN IBT SERIES HYDRAULIC TORQUE WRENCHES IBT SQUARE DRIVE SERIES OPERATION AND MAINTENANCE MANUAL FOR WREN Products: POINT 75, 1IBT, 3IBT, 5IBT, 8IBT, 10IBT, 20IBT, 25IBT, 35IBT, 50IBT SQUARE DRIVE HYDRAULIC
Roller Door Operator
 INSTALLATION INSTRUCTIONS AND OWNERS MANUAL Roller Door Operator IMPORTANT PLEASE READ THESE INSTRUCTIONS CAREFULLY PRIOR TO COMMENCING THE INSTALLATION OF THE OPERATOR UNIT CAUTION This Automatic Opener
SERVICE MANUAL (DOMESTIC & INTERNATIONAL)
") SERVICE MANUAL (DOMESTIC & INTERNATIONAL) DUAL TECHNOLOGY FINISHER MODEL 1960 & 1980 SERIES Lincoln Foodservice Products, LLC 1111 North Hadley Road Fort Wayne, Indiana 46804 United States of America Telephone:
SERVICE MANUAL (DOMESTIC & INTERNATIONAL) DUAL TECHNOLOGY FINISHER MODEL 1960 & 1980 SERIES Lincoln Foodservice Products, LLC 1111 North Hadley Road Fort Wayne, Indiana 46804 United States of America Telephone:
Cincinnati, OH USA
 Part No. 87630PE Revised November 2007 Hot Dog Roller Grills Non-Stick Instruction Manual Model #8023PE, Model #8024PE and Model #8025PE Model #8023SLPE, Model #8024SLPE and Model #8025SLPE Model #8023PE
OPERATOR S MANUAL. TW-i SERIES. Capacitor Discharge Stud Welder. MODELS: TW-i 250 TW-i 250CP TW-i 321 TW-i 375
 OPERATOR S MANUAL TW-i SERIES Capacitor Discharge Stud Welder MODELS: TW-i 250 TW-i 250CP TW-i 321 TW-i 375 TRU-WELD EQUIPMENT COMPANY www.truweldstudwelding.com (330) 725-7744 CONTENTS Description Pages
AGRI-COVERTM SWITCH CONTROL INSTRUCTIONS
 AGRI-COVERTM SWITCH CONTROL INSTRUCTIONS Use these instructions in place of the rocker switch and solenoid sections in your roll tarp or ROLTECTM Electric Hopper Conversion instructions. Some installs
Coil Inserter Module
 Coil Inserter Module 1) Installation Instructions: Diagram 4 Procedure to attach the coil inserter onto the OD 4012 punch Unplug the main power cord from the OD 4012. Remove the two safety screws (3/32
D Instructions/Parts. Siphon Feed Detail Spray Gun D
 Instructions/Parts D-5-55 Siphon Feed Detail Spray Gun FOR PRODUCT INFORMATION CALL: 1-800-742-7731 309991D Important Safety Instructions Read all warnings and instructions in this manual. Save these instructions.
Low Profile Wrenches Operation and Maintenance Manual
 Low Profile Wrenches Operation and Maintenance Manual http://www.torquetoolsinc.com Use the HEXPRO Series Low Profile Wrenches Model 2HP 4HP 8HP 14HP 30HP to install and remove large bolts that have minimal
 Operation and Maintenance Manual http://www.torsionx.eu Use the MaxDrv Series Square Drive Torque Wrench Model.75, 1, 3, 5, 8, 10, 20, 25, 35, 50 to install and remove threaded fasteners requiring precise
BL7000 SYSTEM OPERATING MANUAL
 BL7000 SYSTEM OPERATING MANUAL REV 2.0 208 / 230V COPYRIGHT 1995 Xenotech, Inc. PAGE 1 POWER INPUT CONNECTOR WIRING INSTRUCTIONS THE INPUT POWER REQUIREMENTS FOR A 7 KW POWER SUPPLY ARE AS FOLLOWS. VOLTAGE
JBI Docupunch P33 Automatic Punch
 JBI Docupunch P33 Automatic Punch Instruction Manual Provided By http://www.mybinding.com http://www.mybindingblog.com TABLE OF CONTENTS SECTION I: INSTALLATION & TESTING: 1) Uncrating, Inspection & removal
This chapter describes how to perform periodic inspection and maintenance to ensure the long operating life of the chamber.
 Basic guide Chapter 5 Inspection and maintenance Air to Air Thermal Shock Chamber Chapter 5 Inspection and maintenance This chapter describes how to perform periodic inspection and maintenance to ensure
MGFHVLP. Instructions/Parts. Mini Gravity Feed System E. Part No Includes MGFHVLP Mini Gravity Feed Spray Gun and MGC 125 Gravity Cup.
 Instructions/Parts MGFHVLP Mini Gravity Feed System FOR PRODUCT INFORMATION CALL: 1-800-742-7731 309989E For gravity feed spraying of automotive colors and clears. Ideal for touch-up and detail work. Important
BX88175 Installation Instructions ToadStop II Vacuum Brake System
 BX88175 Installation Instructions ToadStop II Vacuum Brake System Serial No. Customer supplied tools & supplies Utility knife, 12VDC tester, drill & bits: (1/8", 1/4", 5/8 ), ¼ socket drive bit, punch,
Sure-Feed Engineering Inc. PLACER STANDARD HOPPER. Operation & Parts Manual PLACER-STD_1
 Engineering Inc. PLACER STANDARD HOPPER Operation & Parts Manual PLACER-STD_1 Engineering Inc SECTION 2 PLACER OWNERS MANUAL Table of Contents 1. Installation guide 2. Set-up/operation instructions 3.
Self-Recovery Winch WARNING. General Safety Precautions
 1 Self-Recovery Winch Thank you for purchasing a Winch. This manual covers operation and maintenance of the winch. All information in this publication is based on the latest production information available
Lumina 28 Traction Drive Model: Battery Burnisher M28036TDQP OPERATION SERVICE PARTS CARE
 Lumina 28 Traction Drive Model: Battery Burnisher M28036TDQP OPERATION SERVICE PARTS CARE Table of Contents IMPORTANT SAFETY INSTRUCTIONS...1 OPERATING INSTRUCTIONS...2 INSPECTION...2 ELECTRICAL...2 BATTERIES...2
Maintenance Adjustments
 4 Maintenance and Adjustments Chapter Contents Cleaning the Printer and Paper Handling Accessories..... 158 Cleaning the HP Digital Copier....................... 161 Cleaning ADF and Glass............................
DEMA SQUIRT DRAIN UNIT
 DEMA SQUIRT DRAIN UNIT Overview The Squirt is a chemical dispenser with a programmable timer designed primarily for dispensing chemicals into drains. Its most clear intended use is for drain applications
AUTO CHARGE D PUMP PLUS
 INSTRUCTION MANUAL AUTO CHARGE D PUMP PLUS AUTOMATIC DUAL OUTPUT BATTERY CHARGER Designed Specifically for Vehicles with DDEC ENGINES MODEL #: 091-9-DPP INPUT: 120 Volt, 60 Hz, 8 Amps OUTPUT VEHICLE BATTERY:
RapidLED Oceanic BioCube 8 Retrofit Contents
 RapidLED Oceanic BioCube 8 Retrofit Contents Foreword... 2 Outline... 2 Hood Preparation... 2 Attaching LEDs to Heatsink and Wiring LEDs Together... 6 Thermal Grease... 6 Soldering Notes... 7 Tinning Wire
Operations Manual Eagle 1000 Series Stretch Wrapper
 Operations Manual Eagle 1000 Series Stretch Wrapper Models A & B - 1 - READ ALL INSTRUCTIONS CONTAINED IN THIS MANUAL PRIOR TO MACHINE INSTALLATION! - 2 - Contents page 1. Machine Safety Information 1.1
Kaleidoscope smart shelter transit shelter solar lighting system installation and maintenance manual. September 6, 2017
 Kaleidoscope smart shelter transit shelter solar lighting system installation and maintenance manual September 6, 2017 table of contents Introduction 2 How It Works 2 Understanding Your Product 2 Installing
BATTERY SAVER LOW RIPPLE HO
 INSTRUCTION MANUAL BATTERY SAVER LOW RIPPLE HO LOW RIPPLE POWER SUPPLY / AUTOMATIC LOAD SWITCH FOR 12VDC VEHICLE SYSTEMS MODEL #: 091-195-12 INPUT: 120 Volt, 50/60 Hz, 4.5 Amps RMS OUTPUT: 13.2 Volts DC,