Headlight Removal & Installation: BMW E36
|
|
|
- Hugo Shaw
- 5 years ago
- Views:
Transcription
1 Headlight Removal & Installation: BMW E36 Disclaimer: Buyer assumes any and all risk and liability from the installation and use of this product. Seller, author, or any of their affiliates assume no liability for injury, loss, incidental or consequential damages deriving from installation and/or use of this product. Tools Required: 3/8" or 1/4" drive socket wrench 3/8" or 1/4" socket extension (6" length) 8mm or 5/16" socket Flathead Screwdriver Phillips Screwdriver Special Tips Must Read When installing our DEPO Headlights, it is recommended that you heat up the tabs on the headlights with either a heat gun or blow dryer to slightly heat the tabs to make them moldable/pliable with your corner lights. Do NOT overheat it this is due to the plastic on the corner lights (whether stock or aftermarket) being made of stiff plastic that can easily break the tabs off the headlight during installation. Therefore, heating the tabs, just slightly enough to mold them, will help make room for both the headlights and corner lights for proper installation and usage. Pushing the corner light straight in might or might not work, but it certainly might break the tabs and please note broken tabs are NOT considered manufacturer defect. Therefore, it is recommended to follow our tips here to install.

 one is located towards the inside of the grill (for each headlight; shown in Figure 2) and one is located")
2 1. You will first need to remove your headlights. Start by first removing the plastic cover piece in order to remove the headlights. The 4 screws/nuts must be removed, as shown below. 2. Once the plastic cover is removed, you will have to remove 4 nuts/screws from the headlight to get the headlight out of its housing. The nuts/screws are shown below (Figure 1) one is located towards the inside of the grill (for each headlight; shown in Figure 2) and one is located behind the headlight shown in step 3). You will have to remove the corner light to get to the 4 th screw in the back of the headlight. Figure 1


3 Figure 2 3. Before removing the 4 th screw, gently pull out the corner light from its railing. This will make removing the headlight much easier. Disconnect the 2 light bulb plugs and carefully pull out the corner light by removing the bulb from the corner light and only pulling out the corner light housing. Remove the remaining 4 th screw from here now (shown below).
 and 9006 (Gray Connector) and 4 different color wires on the NEW headlight.")
4 4. Begin to pull out headlight carefully. It may be helpful to pull slightly upwards to help the headlight clear the bracket beneath it. 5. Once the headlight is removed, you will see 2 connectors 9005 (Black Connector) and 9006 (Gray Connector) and 4 different color wires on the NEW headlight. Please follow the wire color configuration from the new headlight correctly in order to connect the proper functions properly: Yellow = Low Beam (Positive) White = High Beam (Positive) Gray = Parking Light / Angel Eye (Positive) Brown = Ground wire (Negative)
 (one for parking light and one for turn signal) and 1 negative (-).")
5 6. You will now need to power your angel eye rings. Be sure to use a wiretap (T-tap) to borrow power from your parking light to power your angel eye rings. You will use the GRAY wire coming from the headlight for this function. The US models have 3 wires 2 positive (+) (one for parking light and one for turn signal) and 1 negative (-). You must use your parking light feature (GRAY wire with YELLOW Strip) and NOT your turn signal light feature (blue wire with brown strip) here (or your angel eyes will blink when turned on). You may need to test each positive wire to ensure you are tapping into the proper one. So, basically you use tap splices to tap the GRAY wire from headlight to GRAY with YELLOW strip from the corner light. 7. *Remember to test connections and lights before fully reinstalling your headlights* Once everything is working correctly, you may reinstall by reversing steps. Push headlight back in, CAREFULLY reinstall and push in the corner light, connect wires properly, replace plastic cover, etc.

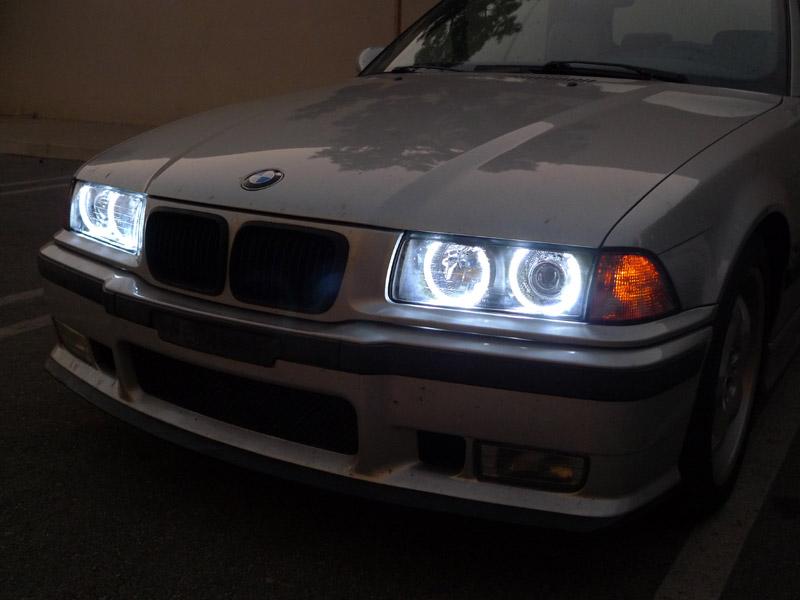
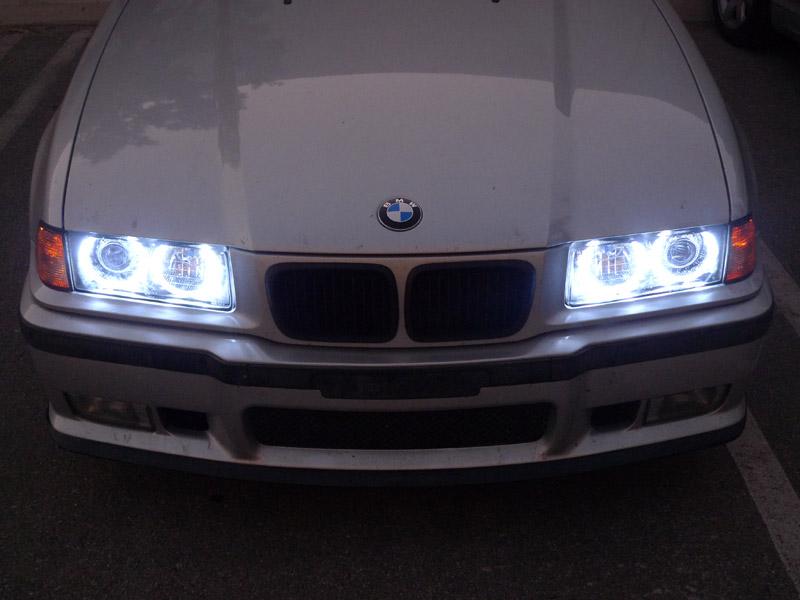
6 8. Enjoy your NEW headlights!!

7
Headlight Removal & Installation: BMW E39
 Headlight Removal & Installation: 97-03 BMW E39 Disclaimer: Buyer assumes any and all risk and liability from the installation and use of this product. Seller, author, or any of their affiliates assume
Headlight Removal & Installation: VW Jetta Mk.4 / Bora
 Headlight Removal & Installation: 99-04 VW Jetta Mk.4 / Bora Disclaimer: Buyer assumes any and all risk and liability from the installation and use of this product. Seller, author, or any of their affiliates
Headlight Removal & Installation: Mercedes W203 C Class
 Headlight Removal & Installation: 01-07 Mercedes W203 C Class Disclaimer: Buyer assumes any and all risk and liability from the installation and use of this product. Seller, author, or any of their affiliates
06-08 BMW Pre-LCI E90/E91 Angel Eye Halo Ring Install on OEM Headlight
 06-08 BMW Pre-LCI E90/E91 Angel Eye Halo Ring Install on OEM Headlight Disclaimer: Buyer assumes any and all risk and liability from the installation and use of this product. Seller, author, or any of
Performance Air Intake, 2015+
 PARTS LIST AND PARTS LIST 1PC ALUMINUM INTAKE PIPE 1PC HIGH-FLOW, OILED AIR FILTER 1PC SILICONE INDUCTION HOSE 1PC AIRBOX 1PC 1/16 RUBBER STRIPPING, 9 LENGTH 1PC 1/16 RUBBER STRIPPING, 8.5 LENGTH 1PC WORM-GEAR
Reference Guide for DEPO Lexus GS Tail Light Resistor Installation
 Reference Guide for DEPO Lexus GS Tail Light Resistor Installation Disclaimer: Buyer assumes any and all risk and liability from the installation and use of this product. Seller, author, or any of their
T u n i n g. Professional Install
 DDM INSTALL GUIDE H1 HID Low Beams (35W or 55W) ddm T u n i n g TOOLS NEEDED: - Standard or metric socket set. Depending on the vehicle. - A drill and either a uni-bit or a 7/8 drill bit. - A Dremel with
Ford Mustang V6 OEM-Style Fog Light Kit Parts List: Quantity: Tool List:
 2015-2017 Ford Mustang V6 OEM-Style Fog Light Kit Parts List: Quantity: Tool List: LED Foglights/ Bezels 2 Flat head & Phillips screwdriver (if you ordered part#3600) Ratchet & Socket set OR Wiring harness
2010+ VW Mk6 2.0T Vent Boost Gauge Kit INSTALLATION GUIDE
 INSTALLATION GUIDE 2010+ VW Mk6 2.0T Vent Boost Gauge Kit Congratulations on your purchase of the AWE Tuning Vent Boost Gauge Kit for the 2010+ VW Mk6 2.0T. Exquisite build quality with industry leading
Luminator Low-Rise Headlight. Designed and built by Radioflyer Innovations
 Luminator Low-Rise Headlight system for C5 Corvette Designed and built by Radioflyer Innovations 1 Tools Required Phillips head screwdriver Flathead screwdriver Torx 15 screwdriver Torx 20 screwdriver
INSTALLATION INSTRUCTIONS
 INSTALLATION INSTRUCTIONS Accessory Application Publications No. S 1998 CIVIC 2/3/4-DOOR All 18767 Issue Date SEP 1997 PARTS LIST Fog Light Kit: P/N 08V31-S01-100 Right fog light (marked R ) Fuse label
Installation Manual TWM Performance 2010 Mazda 3 short shifter 5 and 6 speed non-mazdaspeed
 Installation Manual TWM Performance 2010 Mazda 3 short shifter 5 and 6 speed non-mazdaspeed Begin the installation by parking on a flat surface, as you will have to engage and disengage the hand brake
Rapid Flow Induction Dodge Cummins 5.9L 52101
 INSTALLATION Manual Rapid Flow Induction Vehicle Application Part Number 03-07 Dodge Cummins 5.9L 52101 TROUBLESHOOTING: If you have questions during the installation of this product, please visit www.bullydog.com/product_updates.php.
Depress each tab as you pull the bezel off. The bezels are tight. L.H. shown.
 2013-2014 Ford Mustang V6 & Boss 302 Lower Valance Fog Light Kit Parts List: Quantity: Tool List: Fog light & bulb with bracket 2 Flat head & Phillips screwdriver Black bezels 2 Ratchet & Socket set OR
White / Amber LED Angel Eye DIY Guide Turn Signal Method
 White / Amber LED Angel Eye DIY Guide Turn Signal Method Remove rubber trim surrounding the headlight. Remove corner light. Usually 2000-2001 e46s will have a slide in style where you press in the tab
Instructions for Front Midrange / Tweeter Installation in BMW 3 Series/M3 (E36)
") Disclaimer: Bavarian Soundwerks highly recommends professional installation of the products we sell. We provide these installation instructions free of charge as a guide to assist those customers who choose
Disclaimer: Bavarian Soundwerks highly recommends professional installation of the products we sell. We provide these installation instructions free of charge as a guide to assist those customers who choose
2007 Mazda 6 Door Speaker Replacement
 2007 Mazda 6 Door Speaker Replacement This guide will show you how to replace your Mazda 6 car door speaker by removing the door paneling, and switching out the speakers. Written By: Micki Williams ifixit
Installation Manual TWM Performance Short Shifter Nissan 350Z, 370Z Infiniti G35, G37
 Installation Manual TWM Performance Short Shifter Nissan 350Z, 370Z Infiniti G35, G37 It is preferable to park on a flat surface, as you will have to engage and disengage the hand brake and shift from
Illuminated Cup Holders Hyundai Elantra (GLS, Limited, Coupe)
") Illuminated Cup Holders 2011-2015 Hyundai Elantra (GLS, Limited, Coupe) Thanks for purchasing this Cup Holder Illumination Install Kit! If you have any questions or feedback please email me direct at info@accentglowled.com
Illuminated Cup Holders 2011-2015 Hyundai Elantra (GLS, Limited, Coupe) Thanks for purchasing this Cup Holder Illumination Install Kit! If you have any questions or feedback please email me direct at info@accentglowled.com
Push Start Ignition (05-10 All) Installation
 Installation") Tools Required: Phillips head screwdriver Flat head screwdriver Ratchet 7mm Socket Torx T20 bit Wire strippers/cutters Hand file Needle nose pliers Installation Instructions: Push Start Ignition (05-10
Tools Required: Phillips head screwdriver Flat head screwdriver Ratchet 7mm Socket Torx T20 bit Wire strippers/cutters Hand file Needle nose pliers Installation Instructions: Push Start Ignition (05-10
ProjectorZ II Xenon Headlight Installation Guide
 ProjectorZ II Xenon Headlight Installation Guide Written exclusively for Umnitza s ProjectorZ II Product This step-by-step guide is designed to be used in together with other available documentation including
Ford Mustang GT-Style Fog Light Kit Parts List: Quantity: Tool List:
 2013-2014 Ford Mustang GT-Style Fog Light Kit Parts List: Quantity: Tool List: Fog light (Left& Right) 2 Flat head & Phillips screwdriver Upper grille with surround 1 Ratchet & Socket set OR Lower grille
Installation Manual TWM Performance Short Shifter 2008 Mitsubishi Lancer
 Page 1 Installation Manual TWM Performance Short Shifter 2008 Mitsubishi Lancer Please Note: It is preferable to park on a flat surface, as you will have to engage and disengage the hand brake and shift
INSTALLATION INSTRUCTIONS
 INSTALLATION INSTRUCTIONS Accessory S (L4) Application 2008 ACCORD 4-DOOR Publications No. AII 35357 Issue Date AUG 2007 PARTS LIST Left bracket C Fog Light Kit P/N 08V31-TA0-100 Left fog light Right bracket
EXPANSION TANK PARTS LIST AND INSTALLATION GUIDE
 PARTS LIST AND INSTALLATION GUIDE PARTS LIST 1 PC MISHIMOTO RADIATOR 2 PC CAST THERMOSTAT HOUSINGS 1 PC MAGNETIC DRAIN PLUG W/ DOWTY OIL SEAL 4 PC RUBBER BUSHINGS AND METAL COLLARS 3 PC HARDWARE PACKETS
Air-Boss VP Intake Plenum
 Installation Manual P/N 98502-ABIP 98.5-02 DODGE CUMMINS Air-Boss VP Intake Plenum Installation Instructions P/N 98502-ABIP GDP Air-Boss VP Plenum Installation PLEASE READ ALL INSTRUCTIONS BEFORE BEGINNING
HYUNDAI VELOSTER COLD AIR 1.6T INTAKE
 HYUNDAI VELOSTER COLD AIR 1.6T INTAKE INSTALLATION INSTRUCTIONS Tools needed: 1/4 or 3/8 drive ratchet 12 extension (shorter ones work, but will be difficult to reach some bolts) 10mm socket (deep well)
PARTS LIST INSTALLATION INSTRUCTIONS PARTS LIST AND INSTALLATION GUIDE INSTALL TIME: 2 HOURS INSTALL DIFFICULTY: 3/5
 PARTS LIST AND PARTS LIST 1PC MISHIMOTO INTERCOOLER 1PC M6 X 1.0 X 20MM FLANGE BOLT 1PC M4 X 0.7 X 12MM BUTTON-HEAD BOLT 1PC M4 LOCK WASHER 1PC MAP SENSOR O-RING 2. Remove the eight pop clips that hold
INSTALLATION INSTRUCTIONS
 INSTALLATION INSTRUCTIONS Accessory Application Publications No. ACCORD AII 24050 4-DOOR P/N 08V31-SDA-100 Issue Date AUG 2002 NOTE: The outside temperature gauge cannot be installed in a vehicle with
INSTALLATION INSTRUCTIONS
 INSTALLATION INSTRUCTIONS Accessory Application Publications No. KIT 08V31-SEC-201 2004 TSX BII 24805 Issue Date APRIL 2003 PARTS LIST 16 Wire ties Left fog light Right fog light Relay Right fog light
Installation Instructions for Lingenfelter GM 2500 Suburban & Yukon XL Auxiliary Fan System (with AC clutch controlled fan output)
") Installation Instructions for Lingenfelter 2007-2013 GM 2500 Suburban & Yukon XL Auxiliary Fan System (with AC clutch controlled fan output) PN L300080607 Revision - 1.1 Lingenfelter Performance Engineering
Installation Instructions for Lingenfelter 2007-2013 GM 2500 Suburban & Yukon XL Auxiliary Fan System (with AC clutch controlled fan output) PN L300080607 Revision - 1.1 Lingenfelter Performance Engineering
V8 Gen. V Ford Mustang 2010 Update
 V8 Gen. V Ford Mustang 2010 Update There were several updates to the Ford Mustang in the 2010 model year. This document outlines the differences between the installation steps necessary for the 2010 Mustang
IE Audi 3.0T Crank Pulley Upgrade Install Guide IEBAVJ3
 IE Audi 3.0T Crank Pulley Upgrade Install Guide IEBAVJ3 Thank you for purchasing your IE 3.0T crankshaft pulley upgrade! This instruction guide is used for installation of IE s lower overdrive pulley for
IPSCO STS (Short Throw Shifter) Installation Instructions (GEN II) Dodge Viper WARNING
 Installation Instructions (GEN II) Dodge Viper WARNING") WARNING Modification of your vehicle with the parts identified above may alter its stock performance; the buyer hereby expressly assumes all risks associated with any such modification. DISCLAIMER OF WARRANTY
WARNING Modification of your vehicle with the parts identified above may alter its stock performance; the buyer hereby expressly assumes all risks associated with any such modification. DISCLAIMER OF WARRANTY
HYUNDAI VELOSTER SHORT RAM 1.6T INTAKE INSTALLATION INSTRUCTIONS
 Installation: HYUNDAI VELOSTER SHORT RAM 1.6T INTAKE INSTALLATION INSTRUCTIONS Tools needed: 1/4 or 3/8 drive ratchet 12 extension (shorter ones work, but will be difficult to reach some bolts) 10mm socket
Subaru Front Mount Intercooler Kit STI Subaru Front Mount Intercooler Kit STI
 Subaru Front Mount Intercooler Kit STI 2008-2014 715500 Subaru Front Mount Intercooler Kit STI 2008-2014 Congratulations on your purchase of the Subaru Front Mount Intercooler Kit STI 2008-2014. The following
AT-38 On-Demand. For Driving Safety and Convenience. Installation & Operation Manual for AT-38OD Unit
 The Leader in Heated Washer Systems AT-38 On-Demand For Driving Safety and Convenience Installation & Operation Manual for AT-38OD Unit Our Warmest Congratulations! You are now the Owner of a Heated Washer
Installation Instructions for Recon Turn Signals with Amber LEDs (07-17 Wrangler JK)
") Installation Instructions for Recon Turn Signals with Amber LEDs (07-17 Wrangler JK) Installation Time: 1-2 Hours Tools Required: Phillips Head Screwdriver Flat Head Screwdriver Electrical tape Pliers
Installation Instructions for Recon Turn Signals with Amber LEDs (07-17 Wrangler JK) Installation Time: 1-2 Hours Tools Required: Phillips Head Screwdriver Flat Head Screwdriver Electrical tape Pliers
Equipped with AEM Dryflow Filter No Oil Required! INSTALLATION INSTRUCTIONS PART NUMBER C (GUN METAL GRAY FINISH) NISSAN SENTRA 1.
 NISSAN SENTRA 1.") Equipped with AEM Dryflow Filter No Oil Required! INSTALLATION INSTRUCTIONS PART NUMBER 21-799C (GUN METAL GRAY FINISH) 2014-16 NISSAN SENTRA 1.8L 1 ITEM NO. PART NUMBER DESCRIPTION QTY. 1 21-2157D AIR
Equipped with AEM Dryflow Filter No Oil Required! INSTALLATION INSTRUCTIONS PART NUMBER 21-799C (GUN METAL GRAY FINISH) 2014-16 NISSAN SENTRA 1.8L 1 ITEM NO. PART NUMBER DESCRIPTION QTY. 1 21-2157D AIR
Toggle Button Kit. Installation Instructions MK5 / MK6 Golf, MK5 Jetta
 Toggle Button Kit Installation Instructions MK5 / MK6 Golf, MK5 Jetta Thank you for choosing the Double Apex Toggle Button kit. If you have any questions about the installation please do not hesitate to
Backside License Plate Mount for Jeep JK Wrangler
 REQUIRED TOOLS 10mm SOCKET 13mm SOCKET 4mm HEX KEY WIRE CRIMPS WIRE STRIPPERS ELECTICAL TAPE SCREW DRIVER KIT CONTAINS BACKSIDE MOUNT LICENSE PLATE BRACKET WITH LEDS PLASTIC PASS-THROUGH GROMMET STAINLESS
Small knife. Remove black panel shown. Save 6 retaining pins for re-install later.
 2005-2009 Ford Mustang V6 Fog Light Wiring Kit Parts List: Quantity: Tools Required: Wiring harness 1 Flat head screwdriver PB-3425 Parts Bag 1 Ratchet & Socket set OR Ford OEM Switch (if you 1 Adjustable
Installation Manual TWM Performance Short throw shifter 2001 and up Hyundai Accent
 Installation Manual TWM Performance Short throw shifter 2001 and up Hyundai Accent 1. Place the vehicle on a flat surface with blocks in front and behind the wheels preventing unwanted movement. The car
INSTALLATION INSTRUCTIONS
 INSTALLATION INSTRUCTIONS Accessory Application Publications No. All 26124 CR-V Issue Date SEP 2003 P/N 08V31-S9A-112 PARTS LIST 4 Washer-bolts, 6 x 20 mm Left fog light 2 Small spring nuts Right fog light
Installation of Auto Meter Cobalt Boost/Vacuum Gauge:
 Installation of Auto Meter Cobalt Boost/Vacuum Gauge: Fitment: All 79-14 models. This installation was completed on a 2004 Mustang GT, and should be identical for all 1999-2004 model Mustangs. Time needed:
INSTALLATION INSTRUCTIONS PART NUMBER:
 Equipped with AEM Dryflow Filter No Oil Required! INSTALLATION INSTRUCTIONS PART NUMBER: 21-469B (Blue Finish) 21-469C (Gun Metal Grey Finish) 21-469P (Vacuum Metalized Chrome-VMC) 21-469R (Red Finish)
Contents. TCS/ Driver Mod Installation Manual
 Contents Introduction... 1 TCS Packing List... 3 Tools Needed for Installation... 4 How to Properly Solder... 5 Soldering Standard Butt Connection... 5 Soldering T Connection... 6 How to Properly Crimp...
Installation Manual TWM Performance Short Shifter Subaru STi 2008+
 - 1 - Installation Manual TWM Performance Short Shifter Subaru STi 2008+ Please Note: It is preferable to park on a flat surface, as you will have to engage and disengage the hand brake and shift from
RACE PPE Manifolds and Up-Pipes
 RACE ONLY High-Flow Exhaust Manifolds with Up-pipes GM DURAMAX 6.6L 2001-2015 DISCLAIMER OF LIABILITY This is a performance product which increases horsepower above factory specifications. Additional horsepower
INSTALLATION INSTRUCTIONS
 INSTALLATION INSTRUCTIONS Accessory Application Publications No. AII 23086 SYSTEM CR-V Issue Date NOV 2001 PARTS LIST Security System P/N 08E51-EP4-100 Security System Attachment P/N 08E55-S9A-100 Security
8436, 8437, 8438, 8439, 8442, 27480, 27780, 28028, & ISOLATION MODULE ELECTRICAL SYSTEM
 September 11, 2003 Lit. No. 27808 8436, 8437, 8438, 8439, 8442, 27480, 27780, 28028, & 28400 ISOLATION MODULE ELECTRICAL SYSTEM Installation Instructions Read this document before installing the snowplow.
80703 & Backside License Plate Mount for Jeep JK Wrangler (80707) & 10+ (80703)
 & 10+ (80703)") 80703 Backside Mount 80707 Backside Mount REQUIRED TOOLS 10mm SOCKET 13mm SOCKET 4mm HEX KEY WIRE CRIMPS WIRE STRIPPERS ELECTICAL TAPE SCREW DRIVER KIT CONTAINS BACKSIDE MOUNT LICENSE PLATE BRACKET WITH
80703 Backside Mount 80707 Backside Mount REQUIRED TOOLS 10mm SOCKET 13mm SOCKET 4mm HEX KEY WIRE CRIMPS WIRE STRIPPERS ELECTICAL TAPE SCREW DRIVER KIT CONTAINS BACKSIDE MOUNT LICENSE PLATE BRACKET WITH
Installation Manual TWM Performance Short Shift Kit Stage 1 and Stage 2 MazdaSpeed 6
 Page 1 Installation Manual TWM Performance Short Shift Kit Stage 1 and Stage 2 MazdaSpeed 6 Please Note: It is preferable to park on a flat surface, as you will have to engage and disengage the hand brake
*70200BAG1* 70200BAG FORD F150 GRILLE LIGHT MOUNT
 927020000 *70200BAG1* 70200BAG1 2015-2018 FORD F150 GRILLE LIGHT MOUNT PRIOR TO INSTALLATION Make sure the kit is complete and you have read these instructions thoroughly before beginning installation.
IE Audi B9 S4, S5, A4, A5, Allroad FDS Intercooler Install Guide IETPCK1
 IE Audi B9 S4, S5, A4, A5, Allroad FDS Intercooler Install Guide IETPCK1 Thank you for purchasing the best performing intercooler on the market! This instruction guide is used for installation of IE s
Instructions for Front Midrange Installation in BMW 3 Series/M3 Coupe, Cabrio without Harman Kardon Audio System (E46)
") Disclaimer: Bavarian Soundwerks highly recommends professional installation of the products we sell. We provide these installation instructions free of charge as a guide to assist those customers who choose
Disclaimer: Bavarian Soundwerks highly recommends professional installation of the products we sell. We provide these installation instructions free of charge as a guide to assist those customers who choose
Audi Mk1 TT Vent Boost Gauge Kit
 2000-05 Audi Mk1 TT Vent Boost Gauge Kit Congratulations on your purchase of the A.W.E. Tuning Center Vent Boost Gauge for your Audi TT. While the install is fairly straight forward, please review these
HP PSC 2410 Photosmart All In One Printer Printer Carriage Replacement
 HP PSC 2410 Photosmart All In One Printer Printer Carriage Replacement With this guide you will remove the old printer carriage and replace it with a new one. Written By: Cody Long ifixit CC BY-NC-SA www.ifixit.com
INSTALLATION INSTRUCTIONS
 INSTALLATION INSTRUCTIONS Accessory P/N 08E10-TA0-100 Application 2008 ACCORD 2-AND 4-DOOR Publications No. AII 35358 Issue Date AUG 2007 PARTS LIST Ambient Light Kit 2 Ambient lights Fuse label Washer
Latest Revision:
 400 W. Artesia Blvd. Compton, CA 90220 Fax: (310) 747-3912 Ph: 1-800-776-0767 E-Mail: info@procompusa.com Website: www.procompusa.com Latest Revision: PRO COMP SUSPENSION 76402P 2007-2017 Jeep JK/TJ/CJ
INSTALLATION INSTRUCTIONS
 Equipped with AEM Dryflow Filter No Oil Required! INSTALLATION INSTRUCTIONS PART NUMBER 21-802C (GUN METAL GRAY FINISH) 2015-16 AUDI A3 2.0T 2016-18 VOLKSWAGEN GTI / Golf R 2.0T 2017-18 VOLKSWAGEN GTI
Installation Manual TWM Performance Short Shifter Cobalt SS/SC, SS/TC, HHR SS, Ion Redline and Saab 9-3
 Page 1 Installation Manual TWM Performance Short Shifter Cobalt SS/SC, SS/TC, HHR SS, Ion Redline and Saab 9-3 Please Note: It is preferable to park on a flat surface, as you will have to engage and disengage
ECLIPSE CCFL ANGEL EYES FITTING GUIDE COURTESY OF CHROMELINE DESIGN
 ECLIPSE CCFL ANGEL EYES FITTING GUIDE COURTESY OF BEN @ CHROMELINE DESIGN Page 1 of 8 : Thank you for purchasing Eclipse Lights for your BMW E36. Please read through these instructions carefully before
How To: HID installation guide
 How To: HID installation guide Please check your local regulations to determine the suitability and legality of this installation for your vehicle. It should be noted that some HID aftermarket kits may
INSTALLATION GUIDE: CAT Fuel Filter Adapter Dodge 5.9L Cummins
 INSTALLATION GUIDE: CAT Fuel Filter Adapter 004.5 007 Dodge 5.9L Cummins ! DISCLAIMER ) By installing this product onto your vehicle, you assume all risk and liability associated with its use. ) It is
INSTALLATION INSTRUCTIONS
 INSTALLATION INSTRUCTIONS Accessory Application Publications No. 2004 S2000 AII 26323-31611 Issue Date DEC 2005 PARTS LIST Rear defroster switch Hardtop 3-Pin subharness (If equipped, not used) 4-Pin subharness
Amp & Speaker Upgrade Install Instructions for Batwing Fairing
 Amp & Speaker Upgrade Install Instructions for Batwing Fairing Tools Needed: 1/2 inch Socket Wire Cutters 7/16 inch Socket Wire Strippers 10 mm Socket Phillips Screwdriver 1/2 inch Ratchet Wrench T25 Torx
Audio System Upgrade Package Dodge Magnum, Chrysler 300C, Dodge Charger Jeep Commander (Premium Audio Only)
") 2005-2006 Dodge Magnum, Chrysler 300C, Dodge Charger 2005-2006 Jeep Commander (Premium Audio Only) 2005-2006 Dodge Ram (Regular Cab, Quad Cab, Mega Cab) 2005-2007 Jeep Grand Cherokee (Premium sound) TOOLS
2005-2006 Dodge Magnum, Chrysler 300C, Dodge Charger 2005-2006 Jeep Commander (Premium Audio Only) 2005-2006 Dodge Ram (Regular Cab, Quad Cab, Mega Cab) 2005-2007 Jeep Grand Cherokee (Premium sound) TOOLS
INSTALLATION INSTRUCTIONS
 INSTALLATION INSTRUCTIONS Accessory P/N 08U89-TK6-111 Application 2012 FIT Publications No. AII 45981 Issue Date AUG 2011 PARTS LIST Armrest console Armrest cover Bolt cover Floor bracket Washer bolt,
Power Edge Juice Module Ford 6.0 Powerstroke Diesel
 Power Edge Juice Module Ford 6.0 Powerstroke Diesel 2004, Edge Products Incorporated All rights reserved. Edge Products Incorporated 1080 South Depot Dr. Ogden, UT 84404 (801) 476-3343 www.edgeproducts.com
Installation Manual TWM Performance Kia Forte Short Shifter
 Installation Manual TWM Performance Kia Forte 2009+ Short Shifter Begin the installation by parking on a flat surface, as you will have to engage and disengage the hand brake and shift from gears to neutral.
INSTALLATION INSTRUCTIONS
 THANK YOU FOR CHOOSING KURYAKYN! Protect yourself and others from possible injury and property damage or loss. Pay close attention to all instructions, warnings, cautions, and notices regarding the installation,
Remove black panel shown. Save 6 retaining pins for re-install later. Pry up on center part of pin first. Then pry out entire retaining pin.
 2005-2009 Ford Mustang V6 Fog Light Wiring Kit Parts List: Quantity: Tools Required: Wiring harness 1 Flat head screwdriver Supplemental wire leads 2 Ratchet & Socket set OR Wire tap red 2 Adjustable Wrench
IPSCO STS (Short Throw Shifter) Installation Instructions Dodge Viper WARNING
 Installation Instructions Dodge Viper WARNING") WARNING Modification of your vehicle with the parts identified above may alter its stock performance; the buyer hereby expressly assumes all risks associated with any such modification. DISCLAIMER OF WARRANTY
WARNING Modification of your vehicle with the parts identified above may alter its stock performance; the buyer hereby expressly assumes all risks associated with any such modification. DISCLAIMER OF WARRANTY
INSTALLATION INSTRUCTIONS
 Equipped with AEM Dryflow Filter No Oil Required! INSTALLATION INSTRUCTIONS PART NUMBER AEM-21-805C (GUN METAL GRAY FINISH) 2016.5-19 CHEVROLET CRUZE 1.4T 1 ITEM NO. PART NUMBER DESCRIPTION QTY. 1 21-2038DK
RFB MK6 Jetta Fog Light Kit Wiles Rd.Coral Springs, FL
 What s Included: Tools Required: (2) Fog Lights (2) Front Grills Wire Harness Headlight Switch Hardware Kit T25 Torx Wire Cutters 10mm Socket and Rachet Headlight Switch Composite Wedge Tool 01 1. Remove
MK7 Installation Instructions
 MK7 Installation Instructions Thank you for choosing the Double Apex Garage Control. If you have any questions about the installation please do not hesitate to email us at support@doubleapex.co. A PDF
STANDARD AND GROUND SWITCHED APPLICATIONS
 SNOWDOGG LIGHT REFERENCE STANDARD AND GROUND SWITCHED APPLICATIONS GENERAL REFERENCE SNOWDOGG LIGHT REFERENCE GENERAL REFERENCE 3 TROUBLESHOOTING GUIDES/PROCEDURES 6 CONNECTOR REFERENCE 12 ADAPTER HARNESS
SR Performance Twin 62mm Throttle Body for GT
 Required Tools: SR Performance Twin 62mm Throttle Body for 2005-2010 GT Flat-head screwdriver Ratchet Small extension 10mm socket 8mm socket T20 Torx bit Needle nose pliers 5mm allen wrench Recommended
Installation MKIV Headlight Housings with Fog Lamps (Procedures apply to both MKIV Jetta and Golf)
") Page 1 This tutorial is provided as a courtesy by ECS Tuning. Service Procedure Installation Proper service and repair procedures are vital to the safe, reliable operation of all motor vehicles as well
Page 1 This tutorial is provided as a courtesy by ECS Tuning. Service Procedure Installation Proper service and repair procedures are vital to the safe, reliable operation of all motor vehicles as well
INSTALLATION INSTRUCTIONS
 INSTALLATION INSTRUCTIONS Accessory S P/N 08E10-TP6-100 Application 2010 ACCORD CROSSTOUR Publications No. AII 41935 Issue Date NOV 2009 PARTS LIST TOOLS AND SUPPLIES REQUIRED Ambient Light Kit Ambient
Fabricating and Installing Headlight Relays. Mike Graham
 Fabricating and Installing Headlight Relays Mike Graham For some time I had been reading about the benefits of installing headlight relays. As I understand it, there are two principal benefits: the load
LiteDOT Installation Document
 LiteDOT Installation Document This document designed to aid in installation of LiteDOT s on Jeep TJ models, other models are similar. NOTE: Installing LiteDOT s on a Jeep where the 2 necessary mounting
Installation Instructions
 Installation Instructions Thank you very much for purchasing PIAA product. Please read this entire manual before installation and use of this product. For Installers Please give this Installation Manual
Trail Rocker Installation Instructions
 Trail Rocker Installation Instructions Trail Rocker - Genesis Bracket For Installing Painless Part Number: 57200 Manual # 90591 To be used with Painless Kit # s: 57000-57005 Painless Performance Products
BMW E61 Hydraulic Pump replacement instructions
 BMW E61 Hydraulic Pump replacement instructions This DIY will guide you through the tasks needed to successfully replace your defective tailgate hydraulic pump Difficulty 3 of 10. The most difficult part
Integrated Engineering MK7/MQB TSI GEN 3 FDS Intercooler Install. Part Number IETPCI1
 Integrated Engineering MK7/MQB TSI GEN 3 FDS Intercooler Install Part Number IETPCI1 Thank you for purchasing another high quality Integrated Engineering product! This instruction guide is used for installation
INSTALLATION INSTRUCTIONS
 INSTALLATION INSTRUCTIONS Accessory S Application 2014 ODYSSEY Publications No. AII 49550 Issue Date JUNE 2013 PARTS LIST Fog Light Kit P/N 08V31-TK8-100A 16 Wire ties (Some may not be used) Left fog light
INSTALLATION INSTRUCTIONS
 INSTALLATION INSTRUCTIONS Accessory Application Publications No. AII 24664-25319 SYSTEM 2003 CR-V Issue Date MAY 2003 PARTS LIST Security System (sold separately) P/N 08E51-EP4-100 Security System Attachment
INSTALLATION INSTRUCTIONS
 INSTALLATION INSTRUCTIONS Accessory Application Publications No. AUTOMATIC AII 27160 2005 CR-V Issue Date ATTACHMENT KIT SEP 2004 PARTS LIST Automatic Day/Night Mirror Attachment Kit (sold separately)
INSTALLATION INSTRUCTIONS
 INSTALLATION INSTRUCTIONS Accessory Application Publications No. P/N 08V31-SDA-102 2007 ACCORD 4-DOOR AII 32672 Issue Date JULY 2006 NOTE: Fog lights can be installed in a vehicle equipped with a factory
MSD SB6 Programmable Ignition for the Kawasaki ZX-14 PN 4219
 INSTALLATION INSTRUCTIONS MSD SB6 Programmable Ignition for the Kawasaki ZX-14 PN 4219 Parts Included: 1 - Ignition 1 - Wiring Harness 1 - Parts Bag 1 - CD ROM WARNING: When installing the SB6, disconnect
INSTALLATION INSTRUCTIONS
 INSTALLATION INSTRUCTIONS Accessory Application Publications No. P/N 08V31-SDN-100 2004 ACCORD 2-DOOR AII 25735 Issue Date SEP 2003 NOTE: The outside temperature gauge can not be installed in a vehicle
SAFETY. Injury hazard
 SAFETY Your safety and the safety of others is very important. In order to help you make informed decisions about safety, we have provided installation instructions and other information. These instructions
INSTALLATION INSTRUCTIONS
 INSTALLATION INSTRUCTIONS Accessory Application Publications No. P/N 08V31-SDA-102 2007 ACCORD HYBRID AII 32762 Issue Date JULY 2006 NOTE: The outside temperature gauge cannot be installed in a vehicle
INSTALLATION INSTRUCTIONS
 INSTALLATION INSTRUCTIONS Accessory Application Publications No. All 27176 2005 CR-V Issue Date P/N 08V31-S9A-114 SEP 2004 PARTS LIST 25 Wire ties Left fog light 6 Washer-bolts Right fog light 6 Spring
MKV Jetta OEM Fog Installation Instructions
 Installation Procedures MKV Jetta OEM Fog This tutorial is provided as a courtesy by. Proper service and repair procedures are vital to the safe, reliable operation of all motor vehicles as well as the
Installation instructions for Pantera Rear Deck Lid Lift Support Kit
 Installation instructions for Pantera Rear Deck Lid Lift Support Kit WARNING Modification of your vehicle with the parts identified above may alter its stock performance; the buyer hereby expressly assumes
LGT-306L / LB Club Car Precedent LED Light Bar Bumper Kit Installation Instructions
 LGT-306L / LB Club Car Precedent LED Light Bar Bumper Kit Installation Instructions Caution: Please read through the instructions carefully. Before starting this project, remove the system s positive and
E24-E28 M88 & S38 Mass Air Flow Conversion System Instruction Manual
 E24-E28 M88 & S38 Mass Air Flow Conversion System Instruction Manual Miller Performance Ltd. Tel 855.BMW.TUNER 2009 Abbotsford Way, Abbotsford BC, V2S 6Y5 Millerperformancecars.com Table of Contents: 1.