Headlight Removal & Installation: BMW E39
|
|
|
- Leo Daniel
- 5 years ago
- Views:
Transcription


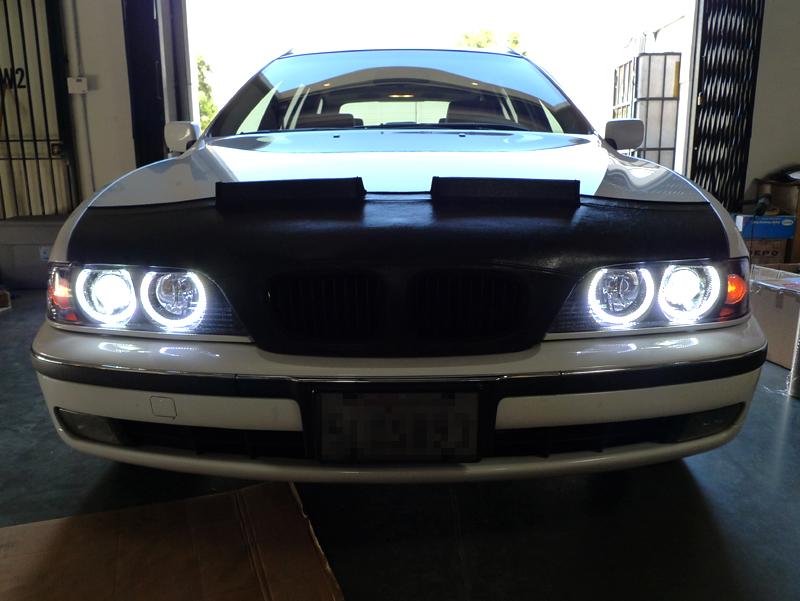
1 Headlight Removal & Installation: BMW E39 Disclaimer: Buyer assumes any and all risk and liability from the installation and use of this product. Seller, author, or any of their affiliates assume no liability for injury, loss, incidental or consequential damages deriving from installation and/or use of this product. Tools Required: 3/8" or 1/4" drive socket wrench 3/8" or 1/4" socket extension (6" length) 8mm or 5/16" socket Flathead Screwdriver Phillips Screwdriver Special Tips Must Read This Installation Guide was made specifically for BMW 5 Series. If you have a BMW 5 Series and have bought a Plug and Play headlight setup from us, then you are able to follow this guide with the exception of the Angel Eye wiring being a tap-splice to a wiring harness. Instead, the BMW 5 Series headlights will just have an OEM Angel Eyes Plug for it to be able to plug and play without the wiring harness. Secondly if you have purchased our Plug and Play BMW 5 Series headlight, then the corner light's socket and wiring will not be a direct fit. You will need to purchase the corner light socket and wiring from the dealership or us in order to properly complete the install. IF you already have purchased or acquired a corner light socket and wiring, you may reference the hyperlink linked directly below to see how it is installed: BMW 5 Series Corner Light Socket Connection Guide

 from")

.")
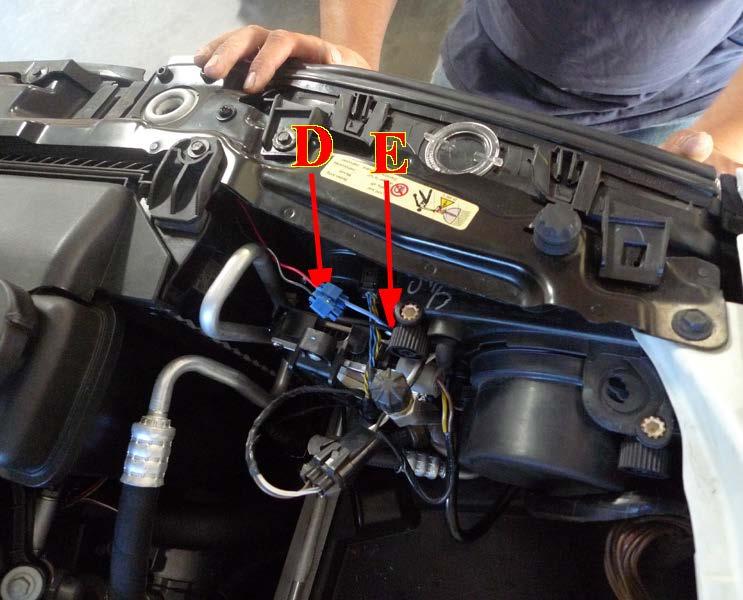
2 1. Disconnect all plugs and unplug the Corner Light socket from the Headlight. You will be disconnecting three factory vehicle plugs (shown in Example A) from both your headlights. Next you will disconnect your vehicle's Corner Light Socket and Angel Eye Wiring tap/butt splices (shown in Example C & D). Example A Example C Example B Example D
 and two lower (shown in Example F).")

3 2. You must remove "four" screws in total in order to remove the Headlight. There are two screws on top (shown in Example E) and two lower (shown in Example F). Once you have removed the two Example E Example F 3. When removing your headlights please do not dismount the mounting bracket (shown in Example F and in Example G). Leaving the mounting bracket in place will help make an easier re-install. Example G


. Example H Example I 6.")

4 4. Once you have unplugged/disconnected necessary adapters you may remove Headlight. 5. When re-installing your headlight you must make sure that the pins on the mounting bracket (shown in Example H) align with the slots under your headlights (shown in Example I). Example H Example I 6. Once you have made sure to align the pins to its proper slot, then go ahead and slide the headlight back into position as shown in Example J. Example J


5 7. Once you have positioned your headlight back into its mounting bracket you may plug/connect all of your adapters and wires (shown in Example K). *Wiring the Angel Eye Relay Wiring Harness is discussed further down below in Step Re-plug your corner light socket into your headlight (as shown in Example L) and secure your headlight by tightening back the four screws as shown in Example M & N (A,B,C,&D). Example L Example M
6 Example N


7 Angel Eye Relay Wiring Harness Install: BMW E39 V6 Version ONLY 9. You will need to start by clamping down the "positive" relay wiring battery hook to your battery post. The negative can be grounded on a metal contact (vehicle's chassis) in your engine compartment. The location for the battery post can be instanced below in Example O. Example O 10. Once you have secured the Red-Positive and Black-Negative battery hooks from your relay harness, you will need to run your wire around your engine compartment so that they can reach your headlight's Angel Eye Halo wires. Example P below gives an example of a possible layout for your Angel Eye relay harness. Example P
 pulled through the location of the ECU box in your 97-00 BMW 5 Series. Example Q 12.")

8 11. Next, you must tap the trigger wire into the ignition wire that is inside of your ECU box in order for your Angel Eye Halos to perform as Day-time Running Lights (DRL). Example Q below shows the trigger wire (circled) pulled through the location of the ECU box in your BMW 5 Series. Example Q 12. When looking at your relay harness the trigger wire will be the thinner RED with WHITE stripe wire that also has a flat metal pin. You will notice two trigger wires once you have unraveled the harness. The shorter trigger wire that splits off of one side of the harness is the correct wire. The second trigger wire that stems off of the center (near the fuse and relay of the harness) is the secondary trigger wire. This wire is optional and can be tapped into the driver's foot-well lights for an extra light-on feature for the Angel Eye Halos. An instance of how this trigger wire looks can be seen below in Example R. Example R


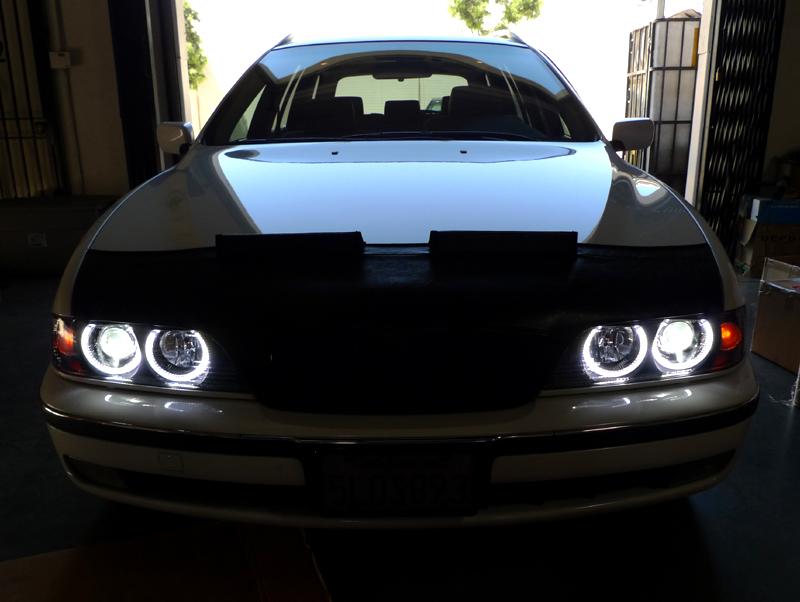
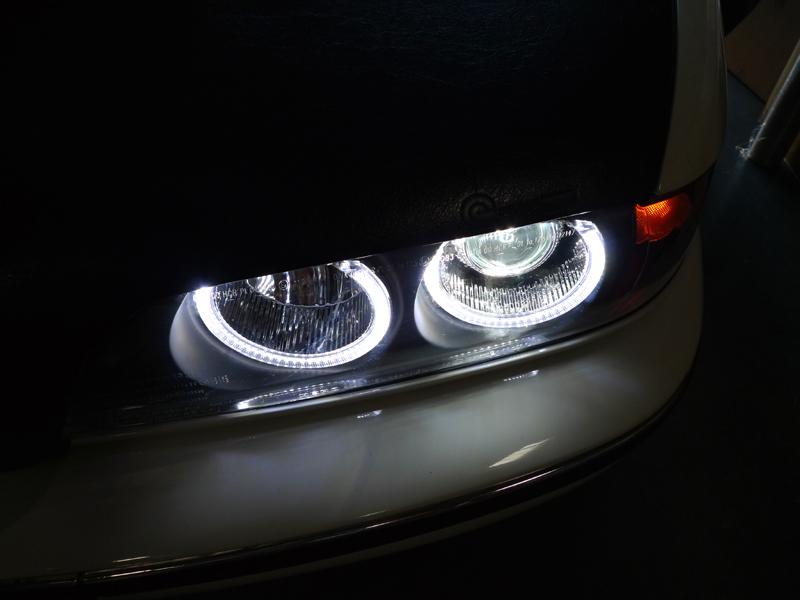
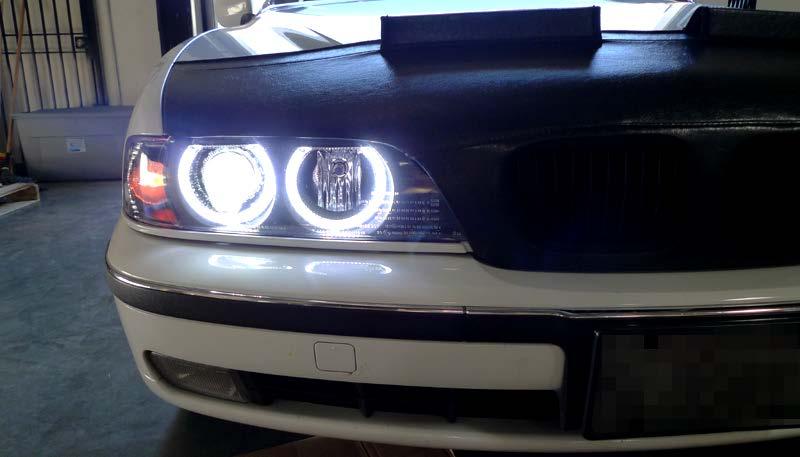
9 13. Once you have located the ECU box (Example Q) you will need to open it and look for the snake-like RED and Yellow-striped wire. The snake-like wire will be your DRL/Ignition Wire. As shown below in Example S, you must tap the trigger wire to the DRL/Ignition Wire. Example Q 14. Enjoy your new headlights!
10
11
Headlight Removal & Installation: BMW E36
 Headlight Removal & Installation: BMW E36 Disclaimer: Buyer assumes any and all risk and liability from the installation and use of this product. Seller, author, or any of their affiliates assume no liability
Headlight Removal & Installation: VW Jetta Mk.4 / Bora
 Headlight Removal & Installation: 99-04 VW Jetta Mk.4 / Bora Disclaimer: Buyer assumes any and all risk and liability from the installation and use of this product. Seller, author, or any of their affiliates
06-08 BMW Pre-LCI E90/E91 Angel Eye Halo Ring Install on OEM Headlight
 06-08 BMW Pre-LCI E90/E91 Angel Eye Halo Ring Install on OEM Headlight Disclaimer: Buyer assumes any and all risk and liability from the installation and use of this product. Seller, author, or any of
Headlight Removal & Installation: Mercedes W203 C Class
 Headlight Removal & Installation: 01-07 Mercedes W203 C Class Disclaimer: Buyer assumes any and all risk and liability from the installation and use of this product. Seller, author, or any of their affiliates
Infinitybox, LLC Addendum to Factory Five 818 Configuration Sheet Installation Guide Table of Contents
 Infinitybox, LLC Addendum to Factory Five 818 Configuration Sheet Installation Guide Table of Contents Overview... 2 Wiring Ignition Input to MASTERCELL... 3 Wiring Ignition Outputs to POWERCELLs... 4
Reference Guide for DEPO Lexus GS Tail Light Resistor Installation
 Reference Guide for DEPO Lexus GS Tail Light Resistor Installation Disclaimer: Buyer assumes any and all risk and liability from the installation and use of this product. Seller, author, or any of their
White / Amber LED Angel Eye DIY Guide Turn Signal Method
 White / Amber LED Angel Eye DIY Guide Turn Signal Method Remove rubber trim surrounding the headlight. Remove corner light. Usually 2000-2001 e46s will have a slide in style where you press in the tab
Amp & Speaker Upgrade Install Instructions for Victory Cross Country
 Amp & Speaker Upgrade Install Instructions for Victory Cross Country Tools Needed: 13mm Socket 4mm Ball Head Allen Socket 5mm Allen Wrench 10mm Wrench Wire Cutters Wire Strippers Phillips Screwdriver Pocket
SAFETY. Injury hazard
 SAFETY Your safety and the safety of others is very important. In order to help you make informed decisions about safety, we have provided installation instructions and other information. These instructions
SAFETY. Injury hazard
 SAFETY Your safety and the safety of others is very important. In order to help you make informed decisions about safety, we have provided installation instructions and other information. These instructions
TOYOTA PRIUS FOG LIGHT (Halogen or LED)
") Part Number: TPR-413 / TPR-813 Kit Contents Item # Quantity Reqd. Description 1 2 Fog Lamps 2 1 Lower Grill 3 1 Switch Assembly 4 1 Fog Light Operation guide 5 1 Harness Bag Hardware Bag Contents Item
Part Number: TPR-413 / TPR-813 Kit Contents Item # Quantity Reqd. Description 1 2 Fog Lamps 2 1 Lower Grill 3 1 Switch Assembly 4 1 Fog Light Operation guide 5 1 Harness Bag Hardware Bag Contents Item
LGT-306L / LB Club Car Precedent LED Light Bar Bumper Kit Installation Instructions
 LGT-306L / LB Club Car Precedent LED Light Bar Bumper Kit Installation Instructions Caution: Please read through the instructions carefully. Before starting this project, remove the system s positive and
Projector39/Umnitza BMW Headlight & Re-Installation for E39s Predator Angel Eyes, and Lamin-X Installation
 Projector39/Umnitza BMW Headlight & Re-Installation for E39s Predator Angel Eyes, and Lamin-X Installation Now it is time to remove the headlights! Obviously you have to open the hood to do this. 100_3630.jpg
Trail Rocker Installation
 Trail Rocker Installation Instructions Customizable Trail Rocker Control System For Installing Painless Part Number: 57100 Manual #90616 Painless Performance Products recommends you, the installer, read
AT-38 On-Demand. For Driving Safety and Convenience. Installation & Operation Manual for AT-38OD Unit
 The Leader in Heated Washer Systems AT-38 On-Demand For Driving Safety and Convenience Installation & Operation Manual for AT-38OD Unit Our Warmest Congratulations! You are now the Owner of a Heated Washer
ADDICTIVE DESERT DESIGNS
 Preparation: Disconnect the negative battery terminal. Park the vehicle on level ground and set the emergency brake. We recommend reading through the installation instructions in whole before performing
Install Guide A Throttle Position Sensor
 1879-A Throttle Position Sensor Install Guide Applications: 2002-2006 Acura RSX Type S 2002-2005 Honda Civic Si 2002-2006 JDM Honda Integra Type R Rev 1.0 www.acuityinstruments.com INSTALLATION NOTES:
Trail Rocker Installation Instructions
 Trail Rocker Installation Instructions Manual #90581 For Installing Painless Part Numbers: 57002 Painless Performance Products recommends you, the installer, read this installation manual from front to
RFB MK6 Jetta Fog Light Kit Wiles Rd.Coral Springs, FL
 What s Included: Tools Required: (2) Fog Lights (2) Front Grills Wire Harness Headlight Switch Hardware Kit T25 Torx Wire Cutters 10mm Socket and Rachet Headlight Switch Composite Wedge Tool 01 1. Remove
STREET SCENE EQUIPMENT,INC. CONNECTING STREET SCENE SIGNAL MIRRORS
 STREET SCENE EQUIPMENT,INC. CONNECTING 365 McCormick Avenue STREET SCENE SIGNAL MIRRORS Phone (714) 426-0590 Fax (714) 426-0591 1993-2001 CONNECTING STREET SCENE SIGNAL MIRRORS INSTRUCTIONS FOR PART NUMBERS
Ford Mustang V6 OEM-Style Fog Light Kit Parts List: Quantity: Tool List:
 2015-2017 Ford Mustang V6 OEM-Style Fog Light Kit Parts List: Quantity: Tool List: LED Foglights/ Bezels 2 Flat head & Phillips screwdriver (if you ordered part#3600) Ratchet & Socket set OR Wiring harness
MSD 6AL Ignition Module w/ Rev Control - Installation Instructions
 MSD 6AL Ignition Module w/ Rev Control - Installation Instructions The below installation instructions work for the following products: MSD 6AL Ignition Module w/ Rev Control Please read through the instructions
HYUNDAI VELOSTER SHORT RAM 1.6T INTAKE INSTALLATION INSTRUCTIONS
 Installation: HYUNDAI VELOSTER SHORT RAM 1.6T INTAKE INSTALLATION INSTRUCTIONS Tools needed: 1/4 or 3/8 drive ratchet 12 extension (shorter ones work, but will be difficult to reach some bolts) 10mm socket
Addictive Desert Designs
 Preparation: Disconnect the negative battery terminal. Park the vehicle on level ground and set the emergency brake. We recommend reading through the installation instructions in whole before performing
Installation MKIV Headlight Housings with Fog Lamps (Procedures apply to both MKIV Jetta and Golf)
") Page 1 This tutorial is provided as a courtesy by ECS Tuning. Service Procedure Installation Proper service and repair procedures are vital to the safe, reliable operation of all motor vehicles as well
Page 1 This tutorial is provided as a courtesy by ECS Tuning. Service Procedure Installation Proper service and repair procedures are vital to the safe, reliable operation of all motor vehicles as well
8436, 8437, 8438, 8439, 8442, 27480, 27780, 28028, & ISOLATION MODULE ELECTRICAL SYSTEM
 September 11, 2003 Lit. No. 27808 8436, 8437, 8438, 8439, 8442, 27480, 27780, 28028, & 28400 ISOLATION MODULE ELECTRICAL SYSTEM Installation Instructions Read this document before installing the snowplow.
MAX FLOW FUEL KIT KIA FORTE SX HYUNDAI VELOSTER TURBO INSTALLATION INSTRUCTIONS
 MAX FLOW FUEL KIT KIA FORTE SX 2014+ HYUNDAI VELOSTER TURBO INSTALLATION INSTRUCTIONS Installation: Tools needed: 1/4 or 3/8 drive ratchet Different length extensions 8mm socket / 10mm socket / 12mm socket
INSTALLATION INSTRUCTIONS For 2007 and newer Jeep Wrangler JK
 7 LED sealed beam headlamp with switchback Halos and DRL INSTALLATION INSTRUCTIONS For 2007 and newer Jeep Wrangler JK SB7250XX-BLK, SB7250XX-CHR, SB7050BA-BLK, SB7060XX-BLK, SB7060XX-CHR, SB7160XX-CHR,
Installation Instructions
 Installation Instructions AMP RESEARCH Power Step by Bestop Automatic Retracting Running Board Vehicle Application Nissan Titan King Cab 2004 and newer (5 ft.) Part Number: 75106-01 Nissan Titan Crew Cab
MKV Jetta OEM Fog Installation Instructions
 Installation Procedures MKV Jetta OEM Fog This tutorial is provided as a courtesy by. Proper service and repair procedures are vital to the safe, reliable operation of all motor vehicles as well as the
ProjectorZ II Xenon Headlight Installation Guide
 ProjectorZ II Xenon Headlight Installation Guide Written exclusively for Umnitza s ProjectorZ II Product This step-by-step guide is designed to be used in together with other available documentation including
SAFETY. Injury hazard
 SAFETY Your safety and the safety of others is very important. In order to help you make informed decisions about safety, we have provided installation instructions and other information. These instructions
Installation. Instructions ES416. VW MKIV Golf/Jetta/GLI 337/20AE. to activate integral fog lights in Jetta GLX, E-Code, and HID Lighting Systems
 Installation Instructions to activate integral fog lights in Jetta GLX, E-Code, and HID Lighting Systems This tutorial is provided as a courtesy by ECS Tuning. VW MKIV Golf/Jetta/GLI 337/20AE best viewed
Optional Wiring. This section deals with some of the optional wiring that may be needed depending on how you choose to construct your car.
 CHAPTER 23 Optional Wiring This section deals with some of the optional wiring that may be needed depending on how you choose to construct your car. OEM Tail light connections to Fiero harness The following
HYUNDAI VELOSTER COLD AIR 1.6T INTAKE
 HYUNDAI VELOSTER COLD AIR 1.6T INTAKE INSTALLATION INSTRUCTIONS Tools needed: 1/4 or 3/8 drive ratchet 12 extension (shorter ones work, but will be difficult to reach some bolts) 10mm socket (deep well)
Installation of Halo CCFL Rings edited by
 Installation of Halo CCFL Rings edited by www.motorcyclehidlights.com Please use the below installation as an example for your project. Installation is done on a CBR600 however the same procedure will
Honda Pioneer 1000 Turn Indicator Kit
 Honda Pioneer 1000 Turn Indicator Kit Thank you for purchasing XTC Power Products Turn Signal System. Our Turn System is unique from the other kits on the market. Our Kit is plug and play with only power
ISIS Power Manual and Installation Guide Race Car Replicas- Superlite Coupe
 ISIS Power Manual and Installation Guide Race Car Replicas- Superlite Coupe Table of Contents Overview... 2 System Details... 3 Kit Includes... 3 Technical Specifications... 3 Harness Descriptions... 4
INSTALLATION INSTRUCTIONS
 THANK YOU FOR CHOOSING KURYAKYN! Protect yourself and others from possible injury and property damage or loss. Pay close attention to all instructions, warnings, cautions, and notices regarding the installation,
SAP Simulator Installation
 SAP Simulator Installation Disclaimer The SAP Simulator is for off-road use only, not intended for highway vehicles. This modification is not a factory approved modification, and engine damage may occur.
USB Charge Port Installation Instructions
 USB Charge Port Installation Instructions Lifetime Technical Support support@logolites.com 770-476-7322 www.logolites.com Manual 100-0014C Thank you for purchasing a Logo Lites USB Charge Port! USB Charge
Installation Instructions for Lingenfelter GM 2500 Suburban & Yukon XL Auxiliary Fan System (with ECM controlled fan output)
") Installation Instructions for Lingenfelter 2007-2013 GM 2500 Suburban & Yukon XL Auxiliary Fan System (with ECM controlled fan output) PN L300090607 Revision - 1.1 Lingenfelter Performance Engineering
Installation Instructions for Lingenfelter 2007-2013 GM 2500 Suburban & Yukon XL Auxiliary Fan System (with ECM controlled fan output) PN L300090607 Revision - 1.1 Lingenfelter Performance Engineering
ECS R32 Exhaust Flap Manual Override Installation Instructions
 Installation Procedures This tutorial is provided as a courtesy by. Proper service and repair procedures are vital to the safe, reliable operation of all motor vehicles as well as the personal safety of
INSTALLATION INSTRUCTIONS
 INSTALLATION INSTRUCTIONS FUEL SURGE TANK INSTALLATION KIT 1999-2006 BMW E46 COUPE Document# 19-0056 Support: info@radiumauto.com Note: This kit was designed for a standard single pump Radium Engineering
Push Start Ignition (05-10 All) Installation
 Installation") Tools Required: Phillips head screwdriver Flat head screwdriver Ratchet 7mm Socket Torx T20 bit Wire strippers/cutters Hand file Needle nose pliers Installation Instructions: Push Start Ignition (05-10
Tools Required: Phillips head screwdriver Flat head screwdriver Ratchet 7mm Socket Torx T20 bit Wire strippers/cutters Hand file Needle nose pliers Installation Instructions: Push Start Ignition (05-10
30140 F5 Dual Fan Controller
 30140 F5 Dual Fan Controller 1 2501 Ludelle Street Fort Worth, Texas 76105 817-244-6212 Phone 817-244-4024 Fax 888-350-6588 Sales 800-423-9696 Tech E-mail: painless@painlessperformance.com Web: www.painlessperformance.com
Ford 7.3L SuperDuty Cold Air Intake
 999.5-2003 Ford 7.3L SuperDuty Cold Air Intake ! DISCLAIMER ) By installing this product onto your vehicle, you assume all risk and liability associated with its use. 2) It is your responsibility to make
OEM Wiring Harness Installation BMW X5/X5M X6/X6M (E70/E71) All models and trim levels
 All models and trim levels") OEM Wiring Harness Installation BMW X5/X5M X6/X6M (E70/E71) All models and trim levels Hardware supplied OEM Hitch Wiring Harness, including: 7-PIN ROUND TRAILER RECEPTACLE ADAPTER FROM 7-PIN ROUND TO
OEM Wiring Harness Installation BMW X5/X5M X6/X6M (E70/E71) All models and trim levels Hardware supplied OEM Hitch Wiring Harness, including: 7-PIN ROUND TRAILER RECEPTACLE ADAPTER FROM 7-PIN ROUND TO
Depress each tab as you pull the bezel off. The bezels are tight. L.H. shown.
 2013-2014 Ford Mustang V6 & Boss 302 Lower Valance Fog Light Kit Parts List: Quantity: Tool List: Fog light & bulb with bracket 2 Flat head & Phillips screwdriver Black bezels 2 Ratchet & Socket set OR
Amp & Speaker Upgrade Install Instructions for Batwing Fairing
 Amp & Speaker Upgrade Install Instructions for Batwing Fairing Tools Needed: 1/2 inch Socket Wire Cutters 7/16 inch Socket Wire Strippers 10 mm Socket Phillips Screwdriver 1/2 inch Ratchet Wrench T25 Torx
TOYOTA RAV FOG LIGHT KIT Preparation
 Preparation Part Number: PT413-42163 Kit Contents Item # Quantity Reqd. Description 1 7 7 Wire Tie 2 4 #10-16 Cross Pan-Washer Head Screws 3 1 Switch 4 1 Relay 5 1 LH Fog Light Bezel 6 1 RH Fog Light Bezel
Trail Rocker Installation Instructions
 Trail Rocker Installation Instructions Manual #90580 For Installing Painless Part Numbers: 57000 and 57001 Painless Performance Products recommends you, the installer, read this installation manual from
INSTALLATION INSTRUCTIONS
 THANK YOU FOR CHOOSING KURYAKYN! Protect yourself and others from possible injury and property damage or loss. Pay close attention to all instructions, warnings, cautions, and notices regarding the installation,
Luminator Low-Rise Headlight. Designed and built by Radioflyer Innovations
 Luminator Low-Rise Headlight system for C5 Corvette Designed and built by Radioflyer Innovations 1 Tools Required Phillips head screwdriver Flathead screwdriver Torx 15 screwdriver Torx 20 screwdriver
INSTALLATION INSTRUCTIONS FUEL SURGE TANK KIT
 INSTALLATION INSTRUCTIONS FUEL SURGE TANK KIT BMW E46 3-Series, Excl Convertible Document: 19-0056 Support: info@radiumauto.com Relieve fuel pressure in vehicle before beginingthe installation. Disconnect
AEROMOTIVE Part # INSTALLATION INSTRUCTIONS
 AEROMOTIVE Part # 16303 INSTALLATION INSTRUCTIONS CAUTION: Installation of this product requires detailed knowledge of automotive systems and repair procedures. We recommend that this installation be carried
Conflicts - Fog Lights
 TOYOTA CAMRY 2013 - BLACKOUT LED DRL Part Number: 00016-32270 Accessory Code: LDBO10 Conflicts - Fog Lights Kit Contents Item # Quantity Reqd. Description 1 2 DRL Housing 2 2 DRL s bezels 3 1 Driver Box
DIGIGAUGE P R E S S U R E D I S P L A Y S Y S T E M I N S T R U C T I O N M A N U A L
 DIGIGAUGE P R E S S U R E D I S P L A Y S Y S T E M I N S T R U C T I O N M A N U A L Thank you for purchasing DigiGauge by ZAETECH Disclaimer DigiGauge is for show and off road use only. By using this
Thank You For Choosing. INSTALLATION INSTRUCTIONS Deluxe Plug and Play Turn Signal Kit Polaris General. Need help with your installation?
 2753 Michigan Road Madison, Indiana 47250 855-743-3427 INSTALLATION INSTRUCTIONS Deluxe Plug and Play Turn Signal Kit Polaris General Flasher Wiring Harness Horn Hose Clamp 1x Indicator Light 6x 10x Wire
Installation Instructions
 Installation Instructions Automatic Retracting Running Board Vehicle Application Ford F150 Supercrew 2001-2003 (2004 Heritage) Part Number: 75111-01 www.bestop.com - We re here to help! Visit our web site
SAFETY THIS PRODUCT IS FOR OFFROAD USE ONLY. ALL LIABILITY FOR INSTALLATION AND USE RESTS WITH THE OWNER.
 SAFETY Your safety and the safety of others is very important. In order to help you make informed decisions about safety, we have provided installation instructions and other information. These instructions
INSTALLATION INSTRUCTIONS
 INSTALLATION INSTRUCTIONS FUEL SURGE TANK INSTALLATION KIT 1999-2006 BMW E46 COUPE Document# 19-0056 Support: info@radiumauto.com Note: This kit wasn t designed for a FST-R, but can be accomplished. 1.
TJ Hood Mount Light Bar Mounting Brackets
 TJ Hood Mount Light Bar Mounting Brackets For 97-06 Wrangler TJ and Unlimited Vehicles: # 97109.2001 Passenger Driver *Hardware included with lightbar. PARTS LIST: Hood Light Mounting Brackets - QTY 2
Trail Rocker Installation Instructions
 Trail Rocker Installation Instructions Trail Rocker - Genesis Bracket For Installing Painless Part Number: 57200 Manual # 90591 To be used with Painless Kit # s: 57000-57005 Painless Performance Products
INSTALLATION INSTRUCTIONS
 INSTALLATION INSTRUCTIONS Accessory Application Publications No. S 1998 CIVIC 2/3/4-DOOR All 18767 Issue Date SEP 1997 PARTS LIST Fog Light Kit: P/N 08V31-S01-100 Right fog light (marked R ) Fuse label
INSTALLATION INSTRUCTIONS
 INSTALLATION INSTRUCTIONS Accessory S Application 2010 PILOT (LX ONLY) Publications No. AII 41642 Issue Date MAY 2009 PARTS LIST TOOLS AND SUPPLIES REQUIRED Fog Lights Kit P/N 08V31-SZA-100B Flat-tip screwdriver
SP Switch Programmable Switch Panel Power System. Parts Included
 SP8100 8-Switch Programmable Switch Panel Power System Parts Included 1 Switch Panel 1 100 amp Power Module 1 Power Module Harness 1 Power Module Mounting Plate 1 Battery Cable w/100a MIDI fuse (Littlefuse
AEROMOTIVE Part # INSTALLATION INSTRUCTIONS
 AEROMOTIVE Part # 16306 INSTALLATION INSTRUCTIONS CAUTION: Installation of this product requires detailed knowledge of automotive systems and repair procedures. We recommend that this installation be carried
How to Install a 997, Boxster, & Cayman Radio
 How to Install a 997, Boxster, & Cayman Radio Step-by-step instructions for a 997.1, Boxster, & Cayman Radio Installation. *Credit to CAI- Store.com for this Guide* Written By: Danielle 2017 guides.drivediy.com
ADDICTIVE DESERT DESIGNS
 Preparation: Disconnect the negative battery terminal. Park the vehicle on level ground and set the emergency brake. We recommend reading through the installation instructions in whole before performing
2006+ Toyota Yaris Remote Start Wiring Guide
 2006+ Toyota Yaris Remote Start Wiring Guide Note: This guide assumes that the user has a good working knowledge of automotive electrical systems. The user assumes all liability for any damage resulting
Adjustable Fan Controller for the Mazda6
 Adjustable Fan Controller for the Mazda6 Scott Burton January 2008 With technical advice provided by ShaDrag and DJQuick of Mazda6Club The Mazda6 engine management computer is tuned to optimize the operation
TOYOTA YARIS HATCHBACK TVIP V3 (RS3200) Preparation
 Preparation") Preparation Part Number: 08586-53810 Kit Contents Item # Quantity Reqd. Description 1 1 V3 ECU 2 1 Piezo Buzzer 3 1 Wire Harness 4 1 ECU Mounting Bracket 5 2 Remote Control Transmitter 6 1 Butyl Tape 7
Preparation Part Number: 08586-53810 Kit Contents Item # Quantity Reqd. Description 1 1 V3 ECU 2 1 Piezo Buzzer 3 1 Wire Harness 4 1 ECU Mounting Bracket 5 2 Remote Control Transmitter 6 1 Butyl Tape 7
 INSTALLATION INSTRUCTIONS Accessory S Application 2009 PILOT (LX ONLY) Publications No. AII 39396 Issue Date MAY 2008 PARTS LIST Fog Lights Kit P/N 08V31-SZA-100B Left fog light Ground bolt Relay Right
AEROMOTIVE Part # INSTALLATION INSTRUCTIONS
 AEROMOTIVE Part # 16302 INSTALLATION INSTRUCTIONS CAUTION: Installation of this product requires detailed knowledge of automotive systems and repair procedures. We recommend that this installation be carried
UNIVERSAL GAUGE WIRE HARNESS
 2650-1797-00 UNIVERSAL GAUGE WIRE HARNESS For Installing Auto Meter Electric Speedometer, Tachometer, And Short Sweep Electric Oil Pressure, Water Temperature, Fuel Level, and Volt Meter Gauges. This harness
In This DIY We Will Show You How To Install Recon Backup Lamps (part # To Run On A Separate Switch & In Reverse.
 In This DIY We Will Show You How To Install Recon Backup Lamps (part # 264150 To Run On A Separate Switch & In Reverse. Please Note, There Are Many Ways of Installing These Lights, Including Wiring Methods,
Conflicts. TOYOTA Prius Foglights. Part Number: Accessory Code: LF1. Factory Fog Lights
 TOYOTA Prius 2011- Foglights Part Number: 00016-47401 Accessory Code: LF1 Conflicts Factory Fog Lights Item # Quantity Reqd. Description 1 2 Fog Lamps 2 2 Fog Lamp s bezels 3 1 Switch Assembly 4 1 Fog
Accessory Fuse Block. Please read this entire manual before proceeding with installation.
 Accessory Fuse Block Please read this entire manual before proceeding with installation. Kit Components: (1) Fuse Block Assembly (1) Harness (1) Positive power cable (1) Negative power cable (5) Pigtails
Notepad V-LT Universal Computer Mount will accomodate computers 8.2" to 11.8" in width, 7.58" to 9.3" in depth and up to 1.50" thick.
 INSTALLATION INSTRUCTIONS Product Revision Form Notepad V-LT Universal Cradle & Accessories Rev. A INST-562 7160-0402 Notepad V-LT Universal Cradle 7160-0251 Screen Support Assembly 7160-0252 LED Light
GVW AGM Auxiliary Battery Kit for Air-cooled Westfalia Campers and all Vanagon NON-campers
 GVW-253-701AGM Auxiliary Battery Kit for 1980-1983 Air-cooled Westfalia Campers and all Vanagon NON-campers The purpose of this kit is to add an Interstate SLA1161 battery as an auxiliary battery under
TravelPilot RNS 149 US
 Radio/Navigation TravelPilot RNS 149 US Installation instructions Safety information Faulty installation or servicing of this equipment may result in malfunctions in the vehicle s electronic systems. To
AEROMOTIVE Part # A2000 Fuel Pump Kit INSTALLATION INSTRUCTIONS
 AEROMOTIVE Part # 17202 A2000 Fuel Pump Kit INSTALLATION INSTRUCTIONS CAUTION: Installation of this product requires detailed knowledge of automotive systems and repair procedures. We recommend that this
Installation Instructions
 Installation Instructions Jeep JK 2-Door (2011 Present) Mounting Bracket and Air Line System Kit for ARB On-Board Twin Air Compressor (CKMTA12) Made in the USA Kit Contents: 1 Flat Bracket 1 Formed Bracket
Installation instruction BMW E36 Convertible remote roof module
 Installation instruction BMW E36 Convertible remote roof module Before the Installation: Please read this guide carefully and take your time with the installation. Incorrect installation of this module
Remove black panel shown. Save 6 retaining pins for re-install later. Pry up on center part of pin first. Then pry out entire retaining pin.
 2005-2009 Ford Mustang V6 Fog Light Wiring Kit Parts List: Quantity: Tools Required: Wiring harness 1 Flat head screwdriver Supplemental wire leads 2 Ratchet & Socket set OR Wire tap red 2 Adjustable Wrench
Thank you for purchasing the Craven Speed FlexPod Complete Gauge Pod Kit
 Thank you for purchasing the Craven Speed FlexPod Complete Gauge Pod Kit Before You Start Please read instructions completely before installing. These instructions contain the information required to install
AEROMOTIVE Part # & Generic Fuel System Kit INSTALLATION INSTRUCTIONS
 AEROMOTIVE Part # 17135 & 17136 Generic Fuel System Kit INSTALLATION INSTRUCTIONS CAUTION: Installation of this product requires detailed knowledge of automotive systems and repair procedures. We recommend
INSTALLATION INSTRUCTIONS
 INSTALLATION INSTRUCTIONS Accessory HARNESS P/N 08L91-SJC-100C Application 2009 RIDGELINE Publications No. AII 40322 Issue Date AUG 2008 PARTS LIST 3 Riv nuts, 6 mm Trailer socket harness Subharness kit
#GL18006-L2 Honda Gold Wing 1800 & F6B models - All Years Lower Cowl LED Driving Lights INSTALLATION INSTRUCTIONS
 #GL18006-L2 Honda Gold Wing 1800 & F6B models - All Years Lower Cowl LED Driving Lights INSTALLATION INSTRUCTIONS 1. Lay out and familiarize yourself with the parts included in the set. Remove the left
INSTALLATION INSTRUCTIONS
 INSTALLATION INSTRUCTIONS Accessory Application Publications No. All 28632 TRAILER HITCH 2006 RIDGELINE Issue Date FEB 2005 PARTS LIST Receiver cover Trailer Hitch Kit: P/N 08L92-SJC-100 Trailer hitch
INSTALLATION INSTRUCTIONS FOR THE TOMAHAWK ELECTRIC REVERSE
 INSTALLATION INSTRUCTIONS FOR THE TOMAHAWK ELECTRIC REVERSE LAST UPDATED: April 2018 Thank you for choosing the Motor Trike Electric Reverse. We ask that you read the directions before you start and follow
AEROMOTIVE Part # Street Rod Fuel Pump System INSTALLATION INSTRUCTIONS
 AEROMOTIVE Part # 17201 Street Rod Fuel Pump System INSTALLATION INSTRUCTIONS CAUTION: Installation of this product requires detailed knowledge of automotive systems and repair procedures. We recommend
Jeep Wrangler (TJ)
") INSTALLATION GUIDE APPLICATION MODEL YR PART # Bestop PART # Jeep Wrangler (TJ) 2003 2006 10-03315-10 751-01 INSTALLATION TIME 3:00 hrs SKILL LEVEL 1 2 3 4 4= Experienced TOOLS REQUIRED Safety goggles
INSTALLATION GUIDE APPLICATION MODEL YR PART # Bestop PART # Jeep Wrangler (TJ) 2003 2006 10-03315-10 751-01 INSTALLATION TIME 3:00 hrs SKILL LEVEL 1 2 3 4 4= Experienced TOOLS REQUIRED Safety goggles
Installation Instructions
 Installation Instructions Jeep JK Unlimited (2007 Present) Mounting Bracket and Air Line System Kit for ARB On-Board Twin Air Compressor (CKMTA12) Made in the USA Kit Contents: 1 Bracket for ARB Compressor
Installation Guide and User s Manual
 Installation Guide and User s Manual Version 1 Table of Contents 1. Introduction...1 1.1 Notes and warnings...1 2. Installation/Setup...2 2.1 LCD monitor...2 2.2 Monitor inputs...2 3. Monitor wiring harness...3
Installation Instructions for the Lingenfelter Fan and Pump Manual Override Kit
 Installation Instructions for the Lingenfelter Fan and Pump Manual Override Kit PN: L300180000 v1.1 Lingenfelter Performance Engineering 1557 Winchester Road Decatur, IN 46733 (260) 724-2552 (260) 724-8761
TOYOTA PRIUS V LED DRL Black-Out
 TOYOTA PRIUS V 2012 - LED DRL Black-Out Part Number: 00016-47021 Accessory Code:LDBO10 Conflicts Fog Lights Kit Contents Item # Quantity Reqd. Description 1 2 DRL Housing 2 2 DRL s bezels 3 1 Driver Box
Installation Tips for your Remote Start system (for RS4LX>GMBP for GM vehicles)
") Installation Tips for your Remote Start system (for RS4LX>GMBP for GM vehicles) Thank you for purchasing your remote start from MyPushcart.com - an industry leader in providing remote starts to doit-yourself
Installation Tips for your Remote Start system (for RS4LX>GMBP for GM vehicles) Thank you for purchasing your remote start from MyPushcart.com - an industry leader in providing remote starts to doit-yourself
INSTALLATION INSTRUCTIONS
 INSTALLATION INSTRUCTIONS Product Notepad V - Universal Cradle & Accessories Rev. F INST-479 7160-0250 Notepad V Universal Cradle 7160-0250-01 Notepad V Universal Cradle w/tall Side Clips 7160-0250-02