Kre 8. Solar Powered Racer V4d
|
|
|
- Toby Cross
- 6 years ago
- Views:
Transcription
 Use on a smooth flat surface. Can be steered by adjusting the front wheels.")
 Introduction Page SAFETY The model is safe but requires basic common sense using snips or scissors. Artificial Sun If a powerful lamp (e.g. 500Watts halogen) is used it must be used under ADULT SUPERVISION as there are SAFETY issues relating to mains electricity used and the heat produced by the lamp.")
 Race against a friends vehicle b) Make changes to see how much you can improve it. c) Devise a way to measure speed over a distance.")
1 Solar Powered Racer V4d (OR Battery Powered Car) 1 Solar (sun powered) Racer OR battery powered racer This electric powered racer can be powered using direct sunlight (using the solar panel) * OR a battery placed in the battery holder provided (AA battery required) Use on a smooth flat surface. Can be steered by adjusting the front wheels. If no sun is available the sun can be simulated using a portable builders type 500 halogen lamp or similar. (see safety issues) Introduction Page SAFETY The model is safe but requires basic common sense using snips or scissors. Artificial Sun If a powerful lamp (e.g. 500Watts halogen) is used it must be used under ADULT SUPERVISION as there are SAFETY issues relating to mains electricity used and the heat produced by the lamp. Activity Tip - Also see video a) Assemble the solar car b) Test in sunshine (direct sunshine) on a smooth surface. c) improve making by any adjustments necessary. Or use alternative battery power if no sunshine Competition Idea a) Race against a friends vehicle b) Make changes to see how much you can improve it. c) Devise a way to measure speed over a distance. Size 20cm long x 11cm high adjustable angle With different solar panel adjustable steering Keywords / Knowledge Electricity, energy conversion, kinetic energy, solar power, aerodynamics, rolling resistance, friction, testing, efficiency, power, voltage, current, speed and safety.


")
 Electric Parts 1 x AA battery holder 14")
 1 x electric motor")
2 Cut out for solar car top fold roll bar up Solar scissors punch R Solar Powered Racer Parts V5 2 2 x Kre8 blue connector 4 x Kre8 green connector Paper Insert with web link 2 x Kre8 band long 60mm 2 x Kre8 blue collars 4 x Kre8 grey collars 4 x Kre8 28mm wheels 2 x Kre8 40mm wheels 4 x Kre8 end caps 2 x washers 4mm Tools you may need can use to round ends of tube 4 x Kre8 5mm dia. dark blue tubes 20cm long 1 x Kre8 3.9mm grey tube 20cm 1 x spacer straw 1/2 length of 4mm grey snap rod 1 x foam double sided adhesive tape 10cm long (supplied wrapped round green connector) abrasive paper to make assembly easier Not Supplied snips or scissors Solar Racer Top V4 1 x orange tube (pulley) Electric Parts 1 x AA battery holder 14 pencil screwdriver ruler To make the edge joint tighter fit you can fold clear tape over edge 1 x abrasive paper (small piece) 1 x electric motor (larger type) 1 x solar panel 68 x 48mm (type may differ) paper punch


3 Solar Powered Racer 3 rear axle unit Solar Panel or Battery back support top cover Solar main frame front axle unit


 Use a metric")
 For EASY assembly")


4 Making 1 - The Main Frame 4 MAKING NOTES ALL SIZES METRIC 1) ONLY cut up connectors as needed 2) Use a metric ruler for measuring 3) For EASY assembly - Round the end of the tubes with abrasive paper then push and twist rods into place 4) Protect table from damage. 5cm rubber band 3 Insert the 5cm long blue tube leave gap for band about 6cm 18cm 18cm rod length 18cm rod length 3 cm COMPLETED FRAME NEXT Make Front Axle Unit then joint together


5 Making 2 - Front Axle Unit 5 4cm Front Wheels cm 9cm 9cm grey tube cut 9cm from 20cm grey tube (keep the 2nd piece for later) cm spacer tube 2.5cm 2.5cm spacer tube 2.5cm 12 main frame See Next page for Rear Axle Unit x 2 Join front axle to main frame then check wheels spin


6 3snap rod R 13 Making 3 - Rear Axle Unit 6 V shape in centre x 2 3cm x 2 x 2 10cm grey tube 10cm 28mm pulley x 2 Then join to main frame


7 5cm 5cm R Making 4 - The Back Support cm cm 5cm Add 22 Add back support to main frame 24A Aligning pulley with motor Adjust pulley so it is in line with the motor as shown to avoid the rubber band drive falling off when it rotates. Note Final adjustment is best made later 24B Adjust motor position so spindle part is below the main frame as shown. IMPORTANT The rubber band only just needs to grip the motor pulley to get best result. motor Side View of motor


8 Adding the Top Making 4 - Adding the Solar Panel and the racer cover TOP added Cut out TOP shape and punch (see page 11) 29 3cm FOAM PADS x2 Adding Solar Panel Option Can thicken fixing points with clear tape at fixing points Peel top covering off to reveal adhesive Note When testing it is easier to leave top off Carefully place solar panel in place. 32 Connecting wires to motor To ensure motor rotates the correct way connect the black wire to connector with indent. Place wires through the in the connector and then bend over tightly. Note The plastic wire covering can be stripped back to reveal more bare wire Back of Electric Motor Red wire Black wire indent


 Testing the circuit TIPS Pen Mark")


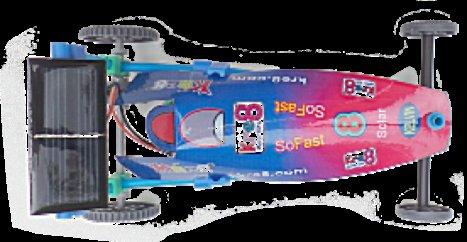
9 Making 5 - Adding Battery (and Tips) Alternative to adding solar panel 9 Adding a Battery Holder Switch Idea FOAM PADS x2 A simple switch can be made using a piece of plastic. (e.g. from yoghurt lid) placed at end of battery as shown. (remove it to turn on) Testing the circuit TIPS Pen Mark Wheels off the ground motor solar panel motor pen A motor is shown connected to the solar panel. The meter reading reads over 1.08V which is enough to power the motor. (photo taken in autumn sunshine) To see the motor spindle rotate you can mark the orange tube with a black pen as shown. Raising the back wheels off the ground can be useful during testing and makes it easy to make adjustments.


10 Solar Powered Racer More Views 10 Left and Right Side Views Top and Underneath View Back View 3D View

 Remove back from punch.")
 Look through cutting and line up card.")


 If the pulley just spins adjust the two grey collars so they")
11 Extra Help 11 Cutting up Kre8 Connectors Making accurate s with a punch ONLY cut connectors when needed because not all connectors may need cutting. punch After cutting it is good practice to also trim any sharp edges Use Good scissors, safety snips or side cutters. 1) Remove back from punch. (do this over a waste bin to catch any old old cuttings) 2) Use punch upside down. 3) Look through cutting and line up card. 4) Punch in card punch upside down close up SUN This solar model racer works in good direct sunshine. It will probably not work on cloudy days even if it seems a bright day. To best catch the sun adjust the solar panel angle. FLOOR Smooth flat surface is required. Use a table if floor too rough. Possible Problems FRICTION Make sure the front wheels and rear wheels spin easily. (Remove rubber band to test rear wheels) If the pulley just spins adjust the two grey collars so they grip the pulley. The rubber band must only have enough tension to turn the wheels. (If too tight it will stop it working) PULLEY The drive V part of the pulley needs to be lined up properly with the motor. PLAN B If there is no direct sunshine available you can use a battery to power the model instead, as shown on page 9.


12 Solar R Cut out for solar car top fold roll bar up Solar Car Top punch scissors R Solar Car R Top about 16cm long To make the edge joint tighter fit you can fold clear tape over edge Cut out for solar car top fold roll bar up Solar Car Top Solar Solar To make the edge joint tighter fit you can fold clear tape over edge about 16cm long scissors punch fold roll bar up Cut out for solar car top To make the edge joint tighter fit you can fold clear tape over edge about 16cm long scissors punch
Re-Energy.ca - Solar Electricity - Build Your Own Solar Car
 Backgrounder Build Your Own Solar Car Back to Page 1 Build It! These step-by-step instructions provide you with a plan for making a basic solar car. If you can think of ways to improve the design of your
SOLAR MODEL CAR. 1-Q Car Assembly Guide UNDERSIDE OF PV FRONT WHEEL PLATE & STRAW. 1 small 3:1 gear.
 . Inventory of components COLLECTOR SIDE OF SOLAR CELL SOLAR MOTOR MOTOR PLATE & MOTOR HOLDER -Q Car Assembly Guide. Identify the three speed gearbox components PLUGGING into the sun SOLAR MODEL CAR NEGATIVE
A S S E M B L Y G U I D E
 MODEL SOLAR ELECTRIC POWER BOAT PLUGGING into the sun! SEND US YOUR COMMENTS A S S E M B L Y G U I D E Flexible solar cell turns sunlight into electricity resulting in a forwards force on the boat allowing
Solar Trike w i t h A C C U b a t t e r y d r i v e a n d LED lighting
 1.693 Solar Trike w i t h A C C U b a t t e r y d r i v e a n d LED lighting Necessary materials Fretsaw with metalworking blade drills. dia. 3,, 6, 7, Machine vice with soft jaws Soldering iron, solder
DIY Bi-Metallic Strip
 DIY Bi-Metallic Strip An introduction to the applications of thermal expansion and two-way switching. Written By: Mahaaveer BN 2018 Page 1 of 14 INTRODUCTION A bi-metallic strip is used to convert a temperature
Circuit Training. A Selection of Simple, Fun Electronic Projects using the Electricity Box provided with the Heather's Hut project
 Circuit Training A Selection of Simple, Fun Electronic Projects using the Electricity Box provided with the Heather's Hut project Contents Introduction... 3 Notes...3 1. Steady Hand Game... 5 2. Light
YOU MUST WEAR SAFETY GLASSES DURING EACH STEP OF THESE INSTRUCTIONS
 Machine Racer: Rally Preparation 1. Print the Working Drawing of the design you created and simulated in the Mousetrap Car 2.0 STEM Application. You can find your Working Drawing in the "Outputs" tab of
Rocket Races. Rocket Activity. Objective Students investigate Newton s third law of motion by designing and constructing rocketpowered
 Rocket Activity Rocket Races Objective Students investigate Newton s third law of motion by designing and constructing rocketpowered racing cars. National Science Content Standards Unifying Concepts and
BRING YOUR IDEA TO LIFE HOW TO CREATE YOUR OWN BATTERY POWERED MODEL RACING CAR
 BRING YOUR IDEA TO LIFE HOW TO CREATE YOUR OWN BATTERY POWERED MODEL RACING CAR WHAT YOU WILL NEED TO MAKE YOUR MASTERPIECE... Here s a basic set of components and tools that you will need to bring your
GENUINE PARTS INSTALLATION INSTRUCTIONS
 GENUINE PARTS INSTALLATION INSTRUCTIONS 1. 2. 3. 4. DESCRIPTION: APPLICATION: PART NUMBER: KIT CONTENTS: Accent light Kit Versa Note 999F3 4Z000 - Accent Lighting Kit. 999Q9 AY000 - Accessory Service Connector
Experimental Procedure
 1 of 14 9/11/2018, 3:22 PM https://www.sciencebuddies.org/science-fair-projects/project-ideas/robotics_p026/robotics/build-a-solar-powered-bristlebot (http://www.sciencebuddies.org/science-fairprojects/project-ideas/robotics_p026/robotics/build-a-solar-powered-bristlebot)
The Gallery System DIRECTIONS. Components of the System
 The Gallery System Components of the System DIRECTIONS NOTE: The Gallery Lighting System now includes a sophisticated Junction Box with circuit breakers which will automatically switch the system off if
Lightning Ball Tools Required: ø 2 ø 3,5 ø 4 Pencil. Drill. Ruler. Fretsaw. Handsaw with Metal Saw Blade. Hot Glue Gun.
 113.185 Tools Required: ø 2 ø 3,5 ø 4 Pencil Ruler Drill Fretsaw Handsaw with Metal Saw Blade Sandpaper Hot Glue Gun Soldering Iron Please note: The OPITEC handicraft packs are not toys in a typical off-the-shelf
C15C C15C. Page 1 of 20
 2 x Lid Front Hinge 1135 8 x M8 Bolt 8 x M8 Washer (3mm Thick) 4 x M6 Large washers 4 x M6 Spring washers 4 x M6 x 40mm Bolts 6 x M6 20mm Bolts 6 x M6 Washers 20 x Screws 2 x Lid mount gas strut bracket
Installation instructions, accessories - Rear Seat Entertainment
 XC90 Section Group Weight(Kg/Pounds) Year Month 3 39 2004 10 XC90 2003, XC90 2004, XC90 2005, XC90 2006, XC90 2007, XC90 2008 Replaces issue: 2003 12 J3904620 Page 1 of 18 Required tools A0000162 A0000163
TOYOTA VENZA 2009 TRAILER WIRE HARNESS Procedure
 Part Number: PT791-0T099 Kit Contents Item # Quantity Reqd. Description 1 1 Trailer Wire Harness Module 2 1 4-Flat Harness 3 1 Battery Power Wire Harness 4 1 Mounting Bracket, 4-Flat 5 2 Screw #10-24 6
Recreational Kick Scooters, Warnings, Specifications & Instructions
 MODEL NUMBER ASSEMBLY NUMBER RAILZ SCOOTER MODELS COVERED BY THESE INSTRUCTIONS UPC 18-001 100-00018-001 793573890191 18-004 100-00018-004 040232562433 20-001 100-00020-001 793573234520 20-004 100-00020-004
MGB V8 Roadster restoration project Report 138
 24th May 2017. FITTING THE CARPETS - continued I have included quite a lot of detail and photographs on the carpet and trim fitting, as it may help those who decide to do this job on their own car. The
A S S E M B L Y G U I D E
 MODEL SOLAR ELECTRIC POWER BOAT PLUGGING into the sun DRAFT COPY ONLY - SEND US YOUR COMMENTS A S S E M B L Y G U I D E Two flexible solar cells turn sunlight into electricity that flows through the solar
Installation Instructions Supertop for Truck
 Installation Instructions Supertop for Truck US Patent 6827391 Vehicle Application: Ford F150 1987-1996 (8 ft.) Part Number: 76315 Ford F250 1987-1998 (8 ft.) Part Number: 76315 Ford F350 1987-1998 (8
Written By: Sam Lionheart
 iphone 5s Volume Controls Replacement Replace the volume buttons and ringer switch in your iphone 5s. Written By: Sam Lionheart ifixit CC BY-NC-SA www.ifixit.com Page 1 of 26 INTRODUCTION Use this guide
Written By: Sam Lionheart
 iphone 5s Battery Replacement Replace the battery in your iphone 5s. Written By: Sam Lionheart ifixit CC BY-NC-SA www.ifixit.com Page 1 of 23 INTRODUCTION Use this guide to bring life back to your iphone
Bugatronics Kit Directions
 Bugatronics Kit Directions The Bugatronics kit comes with everything you need to make a picture that teaches circuitry. The circuit pattern suggestion included in the kit is a parallel circuit but you
BASE KIT. Tickle Machine Prank Hand Shake The Night Rider Flashlight Art Bot Doorbell Lil Breezy Three Wheeler. littlebits.
 BASE KIT Tickle Machine Prank Hand Shake The Night Rider Flashlight Art Bot Doorbell Lil Breezy Three Wheeler littlebits.cc/projects base kit, deluxe kit How can electronics help spread laughs? TICKLE
Written By: Sam Lionheart
 iphone SE Battery Replacement Replace the battery in your iphone SE. Written By: Sam Lionheart ifixit CC BY-NC-SA www.ifixit.com Page 1 of 24 INTRODUCTION Use this guide to bring life back to an iphone
GENUINE PARTS INSTALLATION INSTRUCTIONS
 GENUINE PARTS INSTALLATION INSTRUCTIONS 1. 2. 3. DESCRIPTION: APPLICATION: PART NUMBER: Accent light Kit Cube (MY2013+) 999F3 AW000 - Universal Accent Lighting Kit. 4. KIT CONTENTS: Item QTY Description
GENUINE PARTS INSTALLATION INSTRUCTIONS
 GENUINE PARTS INSTALLATION INSTRUCTIONS 1. 2. 3. 4. DESCRIPTION: Security Light Kit APPLICATION: Altima Coupe and Sedan (2011+) PART NUMBER: 999F4 AX008 - Universal Security Lighting Kit. KIT CONTENTS:
GENUINE PARTS INSTALLATION INSTRUCTIONS
 GENUINE PARTS INSTALLATION INSTRUCTIONS 1. 2. 3. 4. DESCRIPTION: Security Light Kit APPLICATION: Altima Sedan (2013+) PART NUMBER: 999F4 AX010 - Universal Security Lighting Kit. KIT CONTENTS: Item QTY
TAKE-A-LABEL Power Dr. Nunica, MI Phone: (616) Fax: (616)
 Fax: (616)") OPERATIONS MANUAL MODEL TAL-3100T TAMP APPLICATOR TAKE-A-LABEL 16900 Power Dr. Nunica, MI 49448 Phone: (616) 837-9300 Fax: (616) 937-9301 http://www.take-a-label.com E-Mail sales@take-a-label.com Page
OPERATIONS MANUAL MODEL TAL-3100T TAMP APPLICATOR TAKE-A-LABEL 16900 Power Dr. Nunica, MI 49448 Phone: (616) 837-9300 Fax: (616) 937-9301 http://www.take-a-label.com E-Mail sales@take-a-label.com Page
H15P. Toyota Hilux A-DECK Dual Cab
 Toyota Hilux A-DECK Dual Cab Page 1 of 14 Fitting Instructions Part Number H15 Toyota Hilux A-DECK Dual Cab 2015+ To suit Sports Bars Check contents of kit before commencing fitment and report any discrepancies
TOYOTA VENZA 2009 TRAILER WIRE HARNESS Procedure
 Part Number: PT791-0T099 Kit Contents Item # Quantity Reqd. Description 1 1 Trailer Wire Harness Module 2 1 4-Flat Harness 3 1 Battery Power Wire Harness 4 1 Mounting Bracket, 4-Flat 5 2 Screw #10-24 6
iphone 5s Upper Component Cable Replacement
 iphone 5s Upper Component Cable Replacement Use this guide to replace the upper component cable containing the flash, microphone and sleep/power button cable. Written By: Sam Lionheart ifixit CC BY-NC-SA
Build your own THUNDERBIRD 2
 PACK 11 PAGE 67 Pod 4 ramp tracks and Jet Air Transporter 224 68 Left rear booster and Alan s Racing Car 227 69 Right rear booster and Alan s Racing Car 230 70 Left booster speaker 233 71 Right rear booster
Adult Car Plans. A comprehensive guide to help you build an official Soap Box Derby Adult Car
 Adult Car Plans A comprehensive guide to help you build an official Soap Box Derby Adult Car 1 Table Of Contents Introduction...Page 3 Adult Car Floorboard...Page 4 Step One Steering Stop Installation...Page
GENUINE PARTS INSTALLATION INSTRUCTIONS
 GENUINE PARTS INSTALLATION INSTRUCTIONS 1. 2. 3. 4. DESCRIPTION: Accent light Kit APPLICATION: Versa (2012) PART NUMBER: 999F3 AW008 - Universal Accent Lighting Kit. KIT CONTENTS: Item QTY Description
GENUINE PARTS INSTALLATION INSTRUCTIONS
 GENUINE PARTS INSTALLATION INSTRUCTIONS 1. 2. 3. 4. DESCRIPTION: Accent light Kit APPLICATION: R42H (2011) PART NUMBER: 999F3 AW000 - Universal Accent Lighting Kit. KIT CONTENTS: Item QTY Description Service
MAXIMA WITH BOSE AUDIO; REAR PARCEL SHELF RATTLE/BUZZ NOISE
 Classification: Reference: Date: BT01-030A NTB01-051A October 18, 2001 2000-2001 MAXIMA WITH BOSE AUDIO; REAR PARCEL SHELF RATTLE/BUZZ NOISE ATTENTION: This bulletin Amends the Service Information and
Working Stirling-Motor
 PARTS LIST 113.174 Working Stirling-Motor Please Note The OPITEC range of projects is not intended as play toys for young children.they are teaching aids for young people learning the skills of Craft,
ATTENTION. Custom Dynamics UTV Turn Signal Kit Installation Instructions
 Custom Dynamics UTV Kit Installation Instructions We thank you for purchasing the Custom Dynamics UTV LED Kit. Our products utilize the latest technology and high quality components to ensure you the most
TOYOTA AVALON EC REARVIEW MIRROR
 Section I - Installation Preparation Part Number: PT732-07000 Section I - Installation Preparation Kit Contents Item # Quantity Reqd. Description 1 1 Full Mirror Assembly, Compass 2 1 Hardware Bag 3 1
2002 Convertible Cloth Sleeve Convertible Cloth Attachment
 2002 Glass Convertible Top on 2000-2001 Frame Submitted by Clovis, North Texas S2000 Owners Club So what s the difference? Honestly, not much. The 2000 soft top cloth has attachment points for each of
INSTALLATION GUIDES OUTDOOR LIVING
 S OUTDOOR LIVING TABLE OF CONTENTS 12 Volt 12 Watt DC Transformer Page 2 12 Volt 50 Watt DC Smart Transformer Page 3 12 Volt 50 Watt Smart Transformer Control Page 4-5 Waterproof Dimmer For 12W Transformer
SUT-450-I ASSEMBLY REQUIREMENTS
 SUT-450-I Torque wrench, carpenters square, wire cutters, Phillips screwdriver, 7/16, 9/16, and 3/4 combination wrenches, ratchet, 9/16,3/4,13/16, and 7/8 sockets. ASSEMBLY REQUIREMENTS *Torque all T-bolt
THE WAHTZ WAH (K-985)
") THE WAHTZ WAH (K-985) Output Jack Unplug from the Wahtz input jack (other side) when not in use to save battery life. 9 VDC CENTER (-) ADAPTER Use these instructions to learn: How to build a wah-wah pedal
THE WAHTZ WAH (K-985) Output Jack Unplug from the Wahtz input jack (other side) when not in use to save battery life. 9 VDC CENTER (-) ADAPTER Use these instructions to learn: How to build a wah-wah pedal
Math Geometry circle diameter Measurement length
 Topic Simple machines Key Question What simple machines are found in an internal combustion engine? Learning Goals Students will: construct a working model of an internal combustion engine that has a piston,
SUPPLIES In addition to the parts included in the kit you will also need: ASSEMBLY TIP FLYING MODEL ROCKET KIT INSTRUCTIONS EST 2055/1246
 FLYING MODEL ROCKET KIT INSTRUCTIONS www.estesrockets.com Estes Industries 1295 H Street Penrose, CO 81240 PRINTED IN CHINA MOUNT Keep for Future Reference EST 2055/1246 ASSEMBLY TIP Read all instructions
Front Bucket Seat Upholstery
 Specter Off-Road, Inc. 21600 Nordhoff St. Chatsworth, CA 91311 USA www.sor.com, (818)882-1238, Fax: (818) 882-7144 sor@sor.com Luxury Seat Upholstery Installation Instructions Front Bucket Seat Upholstery
GENUINE PARTS INSTALLATION INSTRUCTIONS
 GENUINE PARTS INSTALLATION INSTRUCTIONS 1. 2. 3. 4. DESCRIPTION: APPLICATION: PART NUMBER: KIT CONTENTS: Security light Kit Maxima 999F4 AX009 - Universal Security Lighting Kit. Item QTY Description Service
Installing a genuine HoodLift on a Jeep JK with an AEV hood
 Installing a genuine HoodLift on a Jeep JK with an AEV hood (to print a full-color version of these instructions go to www.hoodlift.com/products.html. Scroll down to the JK HoodLift and click on the AEV
GENUINE PARTS INSTALLATION INSTRUCTIONS
 GENUINE PARTS INSTALLATION INSTRUCTIONS 1. 2. 3. 4. DESCRIPTION: Illuminated Kick Plate Kit APPLICATION: Murano PART NUMBER: 999G6 C2000, 999G6 C2100, 999G6 C2200 999Q9 AY001 - Accessory Service Connector
Installation Instructions Supertop for Truck
 Installation Instructions Supertop for Truck US Patent 6827391 Vehicle Application: Toyota Tacoma Double Cab 2005-2011 (5 ft.) Part Number: 76308 INSTALLATION TIME SKILL LEVEL 1-1/2 Hours 2 - Moderately
FITTING INSTRUCTIONS FOR VE COMMODORE BOOT POWER SOCKET KIT Part No
 Part No. 92186334 TOOLS REQUIRED: Small flat bladed screwdriver, Knife, Trim release tool, 10mm socket, Ratchet and side cutters. FITTING INSTRUCTIONS: Open the rear luggage compartment and remove the
BMW E46 Convertible Hydraulic Line #23 Replacement Guide Created by taylor192 of E46Fanatics.com
 BMW E46 Convertible Hydraulic Line #23 Replacement Guide Created by taylor192 of E46Fanatics.com BMW E46 Line #23 Replacment Guide, page 1 of 23 Background: Line #23 runs from the valve block on the driver's
MONGOOSE. Introduction. < blueroomelectronics > Assembly Instructions. Mongoose was designed as an introduction to Mechatronics.
 MONGOOSE Assembly Instructions Introduction Mongoose was designed as an introduction to Mechatronics Page 1 of 12 Before you start The Mongoose is a complex kit and skipping instructions is not advised,
3D PRINTER. Pack 09. Anything you can imagine, you can make! 3D technology is now available for you at home! BUILD YOUR OWN
 BUILD YOUR OWN Pack 09 Anything you can imagine, you can make! 3D PRINTER Compatible with Windows 7 & 8 Mac OS X 3D technology is now available for you at home! www.model-space.com BUILD YOUR OWN 3D PRINTER
INSTALLATION INSTRUCTIONS
 Rear Vision System Tailgate Emblem Camera Mirror Display 2009-Current Ford F-150 and 2010-Current Super Duty (Kit part number 1008-9527) Kit Contents: Mirror Tailgate Emblem Mount with Camera Interior
Important notes for this presentation:
 Important notes for this presentation: At the end of the presentation are four slides (# s 63-66)explaining how to use simple math to calculate the speed of the cars, given a few parameters, like the motor
Written By: Evan Noronha
 iphone 6s Plus Battery Replacement Replace the battery in an iphone 6s Plus. Written By: Evan Noronha ifixit CC BY-NC-SA www.ifixit.com Page 1 of 18 INTRODUCTION Use this guide to bring life back to your
Installation Instructions QUICKSILVER CONSOLE SHIFTER Fits: Chevelle / El Camino
 WORK SAFELY! For maximum safety, perform this installation on a clean, level surface and with the engine turned off. Place blocks or wedges in front of and behind both rear wheels to prevent movement in
E E VDC COOLEDGE TILE INTERIOR INSTALLATION INSTRUCTIONS. Caution: Observe precautions for handling electrostatic sensitive devices.
 5 YEAR WARRANTY 5 YEAR WARRANTY COOLEDGE TILE INTERIOR INSTALLATION INSTRUCTIONS E354088 LISTED AC E354088 58VDC E354088 E354088 5 5 YEAR WARRANTY 5 YEAR WARRANTY E354088 Caution: Observe precautions for
MARACANA ASSEMBLY INSTRUCTION .40 ARF LOW WING TRAINER RADIO CONTROL MODEL. Every body can fly
 RADIO CONTROL MODEL ASSEMBLY INSTRUCTION MARACANA.40 ARF LOW WING TRAINER Every body can fly VQA085 EP GP You can use both Gas or Electric power Wingspan: 59in.(1520mm) Fuselage length: 48in.(1220mm) Engine:
Side panel, replacing
 "VCC147307 EN 20110211" 1(23) Side panel, replacing As the illustrations in this service information are used for different model years and / or models, some variation may occur. However, the essential
Hornby 08 Diesel Shunter EM Finescale Conversion.
 Hornby 08 Diesel Shunter EM Finescale Conversion. Before you start, it is a good idea to have some small containers or snap top poly bags to put screws and components in for safe keeping...much better
Lesson Plan 11 Electric Experiments
 Lesson Plan 11 Electric Experiments Brief description Students experiment with aluminium foil, batteries and cheap, readily availably low voltage light bulbs* to construct a simple conductivity tester.
Installation Instructions. Door Pockets Porsche
 Installation Instructions Door Pockets Porsche 911 69-73 Before you begin The installation of your door pockets in itself is relatively straight forward. However to get a perfect fit some (time-consuming)
Walthers/Life-Like USRA Steam Locomotive
 North Raleigh Model Railroad Club Installing Decoders in N Scale Locomotives Detailed Instructions Walthers/Life-Like USRA 2-8-8-2 Steam Locomotive by David Derway May 17, 2010 Table of Contents Introduction...
DIY Speaker Release: 1.3 [minor] DIY Speaker. Written By: Kailash NR Page 1 of 14
![DIY Speaker Release: 1.3 [minor] DIY Speaker. Written By: Kailash NR Page 1 of 14](/thumbs/90/104479984.jpg "DIY Speaker Release: 1.3 [minor] DIY Speaker. Written By: Kailash NR Page 1 of 14") DIY Speaker Written By: Kailash NR 2018 Page 1 of 14 INTRODUCTION Using paper cups/aluminum can, some insulated wire and a magnet, create a wonderful speaker that produces sound! TOOLS: Scissor (1) Glue
DIY Speaker Written By: Kailash NR 2018 Page 1 of 14 INTRODUCTION Using paper cups/aluminum can, some insulated wire and a magnet, create a wonderful speaker that produces sound! TOOLS: Scissor (1) Glue
ASSEMBLY MANUAL 9GU - COMMERCIAL UPRIGHT BIKE
 ASSEMBLY MANUAL 9GU - COMMERCIAL UPRIGHT BIKE IMPORTANT SAFETY INSTRUCTIONS Read this Owner s Manual and follow it s instructions carefully before using the machine. Make sure that it is properly assembled
Slide on the heat shrink tubing and connect the wire to the color matched cable on the Junction Box, making sure to line up the cable properly
 Manual Routing Di2 Frame Wires Down Tube E-wire Remove the Battery Cover and Hidden Battery compartment from the frame and put aside (Figure 1). Using electrical tape, attach the end of the Down Tube E-wire
WARNING TAKE NOTE OF THE FOLLOWING: THIS PRODUCT MUST BE INSTALLED EXACTLY AS PER THESE INSTRUCTIONS USING ONLY THE HARDWARE SUPPLIED.
 ARB WINCH/NONWINCH BUMPER TO SUIT TOYOTA HJ100 IFS PRODUCT No. 3913140 5100050 Top Tube Kit 5100160 Buffer Kit With hole (required when fitting Top Tube) 5100170 Buffer Kit With no hole Fitting Kit No.
CBT25, 50 & 100 driveshaft
 CBT25, 50 & 100 driveshaft replacement 2 CBT driveshaft REPLACEMENT Revision History rev. level 01_03.13.2014 NOTE: due to the fact that a new machine (never exposed to seed treatment) was used to demonstrate
WARNING: CHOCKING HAZARD
 Hover Racer WARNING: CHOCKING HAZARD - Small parts. Not for Children under 3 years. To Parents: Please read all instructions before giving guidance to your children. A. SAFETY MESSAGES 1. This kit is intended
Written By: Evan Noronha
 iphone 6s Battery Replacement Replace the battery in an iphone 6s. Written By: Evan Noronha ifixit CC BY-NC-SA www.ifixit.com Page 1 of 18 INTRODUCTION Use this guide to bring life back to your iphone
SolarSheat Wall Installation Manual
 SolarSheat Wall Installation Manual Version 3.2 December 15, 2015 Copyright 2015 Your Solar Home, All Rights Reserved SolarSheat products must be installed in accordance to all local building, plumbing,
MLGW 2018 A-BLAZING MODEL SOLAR CAR RACE RULES AND VEHICLE SPECIFICATIONS
 MLGW 2018 A-BLAZING MODEL SOLAR CAR RACE RULES AND VEHICLE SPECIFICATIONS The object of the MLGW A-BLAZING MODEL SOLAR CAR RACE is to design and build a vehicle that will complete a race in the shortest
B Polyethylene Tape. B Splicing Covering. Holster
 Splicing Materials B Polyethylene Tape Translucent 8-mil polyethylene tape made from electrical grade base material. Intended for use in restoring the dielectric strength between the core and sheath at
FIST-GSS2 FIST-GSS3. Fist Generic Splicing Shelf. Contents. 1 Introduction. 2 General. 3 Installation of the shelf. 5 Termination of the pigtails
 FIST-GSS2 FIST-GSS3 I N S T A L L A T I O N I N S T R U C T I O N Fist Generic Splicing Shelf Contents 1 Introduction 2 General 2.1 Kit content 2.2 Tools 3 Installation of the shelf 3.1 Mounting the shelf
GENUINE PARTS INSTALLATION INSTRUCTIONS
 GENUINE PARTS INSTALLATION INSTRUCTIONS 1. 2. 3. 4. DESCRIPTION: APPLICATION: PART NUMBER: KIT CONTENTS: Accent light Kit Pathfinder 999F3 XZ000 - Accent Lighting Kit. Item QTY Description Service Part
SJOF-BS604A Fiber Optic Splice Closure User Manual Rev.0
 Fiber Optic Splice Closure VISSEM 1. Introduction 1.1 General VISSEM s SJOF-BS604A protects fiber optic splicing point in various installation conditions such as aerial, manholes, ducts, wall and direct
3M Overhaul Service Kit
 SERVICE INSTRUCTIONS FOR 3M 12,000 RPM 5 in. (127 mm) and 6 in. (150 mm) RANDOM ORBITAL SANDERS 3M Overhaul Service Kit The part number 20347, 3M Overhaul Service Kit, contains all the replacement parts
3M Overhaul Service Kit
 SERVICE INSTRUCTIONS FOR 3M 12,000 RPM 3 in. (77 mm) RANDOM ORBITAL SANDERS 3M Overhaul Service Kit The part number 20346, 3M Overhaul Service Kit, contains all the replacement parts that naturally wear
TOYOTA TUNDRA COLD AIR INTAKE Preparation SEQUOIA
 Preparation SEQUOIA 2008 - Part Number: PTR03-34070 (5.7L) PTR03-34072 (4.7L) Kit Contents: 5.7L Item # Quantity Reqd. Description 1 1 Lid: Air Filter 2 1 Inlet Pipe: 5.7L 3 1 Air Filter: TRD Conical 4
394: Handsfree, Bluetooth Handsfree, Bluetooth
 394: Handsfree, Bluetooth S80 (07-), 2008, B8444S, TF-80SC AWD, L.H.D, YV1AH852881073834, 073834 4/1/2013 PRINT 394: Handsfree, Bluetooth Handsfree, Bluetooth Installation instruction: 31310098 INTRODUCTION
25-4. Key No. Part No. Description Key No. Part No. Description WASHER,.31X.58X x97 BOLT, CARRIAGE 5/16-18
 ENGINE 2 19 23 20 6 25-2 22 27 16 25-5 25-1 25-3 8 22 22 24 5 10 18 24 25-4 12 26 14 25-2 Ref. Drive Page 25-2 3 Ref. Auger Housing Page Key No. Part No. Description Key No. Part No. Description 2 - -
Written By: Walter Galan
 iphone 6 Battery Replacement Replace the battery in your iphone 6. Written By: Walter Galan ifixit CC BY-NC-SA www.ifixit.com Page 1 of 20 INTRODUCTION Use this guide to bring life back to your iphone
Front seats. j a t CAUTION! Before beginning repairs on the electrical system: Obtain the anti-theft radio security code. Switch the ignition off.
 j a t Front seats 72-1 CAUTION! Before beginning repairs on the electrical system: Obtain the anti-theft radio security code. Switch the ignition off. Search Advanced Search Disconnect the battery Ground
Solar Dolly. Assembly Manual
 Solar Dolly Assembly Manual Components and Hardware 5 5 4 4 7 7 6. 1. Battery Box 2. Stabilizer Legs (R,L) 3. Uprights (R, L) 4. Adjustable Angle Brackets 5. Panel Brackets (R,L) 6. Controller Mounting
RAV4 TNS310 (Traffic) Plus
 Plus") TNS310 (Traffic) Plus RHD installation instructions Model year: 005 Vehicle code: **A3***-*****W Part number TNS310 Plus: Sub wire harness No 1: 08673-64801 Sub wire harness No : 08673-64800 Part number
TNS310 (Traffic) Plus RHD installation instructions Model year: 005 Vehicle code: **A3***-*****W Part number TNS310 Plus: Sub wire harness No 1: 08673-64801 Sub wire harness No : 08673-64800 Part number
FLYING MODEL ROCKET KIT INSTRUCTIONS KEEP FOR FUTURE REFERENCE. TEST-FIT ALL PARTS TOGETHER BEFORE APPLYING ANY GLUE!
 www.estesrockets.com ESTES INDUSTRIES 1295 H Street Penrose, CO 81240 PRINTED IN CHINA EST 1247/2053 FLYING MODEL ROCKET KIT INSTRUCTIONS KEEP FOR FUTURE REFERENCE. ASSEMBLY TIP: Read all instructions
MEMO. No.4341 Specification: Wing Span: 29.1 (740mm) Length: 36.6 (930mm) 2. Warranty
 Length: 36.6 (930mm) 2. Warranty") MEMO No.4341 Specification: Wing Span: 29.1 (740mm) Length: 36.6 (930mm) 2 Wing Area: 299 sq.in. (19.29 dm ) Weight: 18.9oz. (536.5g) 2 Wing loading: 0.58 oz./sq.ft (27.8g/dm ) Motor: OBL 29/27-07A Warranty
MEMO No.4341 Specification: Wing Span: 29.1 (740mm) Length: 36.6 (930mm) 2 Wing Area: 299 sq.in. (19.29 dm ) Weight: 18.9oz. (536.5g) 2 Wing loading: 0.58 oz./sq.ft (27.8g/dm ) Motor: OBL 29/27-07A Warranty
Installation Instructions For The O.CT S4 Boost Gauge
 Installation Instructions For The O.CT S4 Boost Gauge The ultimate power display FROM AND Stratmosphere 28 Boulder Creek Drive Rush, NY 14543 585-533-1777 O.CT Tuning Oberscheider O.CT-Tuning, Reichsstr.
Bachmann GWR Earl (Dukedog) EM Finescale Conversion
 EM Finescale Conversion") Bachmann GWR Earl (Dukedog) EM Finescale Conversion Before you start, it is a good idea to have some small containers or snap top poly bags to put screws and components in for safe keeping...much better
Bachmann GWR Earl (Dukedog) EM Finescale Conversion Before you start, it is a good idea to have some small containers or snap top poly bags to put screws and components in for safe keeping...much better
R-SE JK 4 DOOR Step Slider Install Instructions. *If any parts listed are missing or damages please call prior to install.
 R-SE JK 4 DOOR Step Slider Install Instructions Parts List: 1 Divers side slider assembly 1 Passenger side slider assembly 1 wiring harness 1 control box 2 spacers 2 LED lights (optional) 10 SS Button
Q15P. Mitsubishi MQ Triton Dual Cab
 Mitsubishi MQ Triton Dual Cab Page 1 of 12 Fitting Instructions Part Number Mitsubishi MQ Triton Dual Cab 2015+ To suit Sports Bars Check contents of kit before commencing fitment and report any discrepancies
Solar Matters III Teacher Page
 Solar Matters III Teacher Page Junior Solar Sprint Wheels, Axles & Bearing Student Objective The student: given a scenario of a design with wheels, will be able to predict how the design will function
Prusa i3 Printer Assembly Guide
 Prusa i3 Printer Assembly Guide Special thanks to Carlos Sanchez and Miguel Sanchez for the graphics. All graphics captured from their great animation: http://www.carlos-sanchez.com/ Prusa3/ For copyright
GENUINE PARTS INSTALLATION INSTRUCTIONS
 GENUINE PARTS INSTALLATION INSTRUCTIONS DESCRIPTION: APPLICATION: PART NUMBER: Hood Bug Deflector Pathfinder T99D5 9PJ0A KIT CONTENTS: Item Qty. A 2 Inner Clip A B 2 Outer Clip B C 2 Wing Clip C D 1 Hood
INSTALLATION INSTRUCTIONS
 INSTALLATION INSTRUCTIONS 6523 & 6524 C-NOTCH KIT 07&UP CHEVROLET SILVERADO / GMC SIERRA 1500 REQUIRES MODIFIED EXHAUST Thank you for being selective enough to choose our high quality BELLTECH PRODUCT.
GENERAL AND PLANNING INFORMATION
 SOLAR CAR NO SOLDER CONTENTS: Section 1: General and Planning Information Section 2: Components and Material Required Section 3: Construction Section 4: Wiring Section 5: Testing Section 6: Theory DESCRIPTION
This is the Unpacking Guide for the Optibike Pioneer Allroad electric bicycle. The Guide provides information required to remove the Allroad from the
 This is the Unpacking Guide for the Optibike Pioneer Allroad electric bicycle. The Guide provides information required to remove the Allroad from the box and assemble it. If you have not assembled a bicycle