RainbowAstro Co., Ltd.
|
|
|
- Claire Stephens
- 5 years ago
- Views:
Transcription

1 RainbowAstro Co., Ltd.
2 Table of Contents 1. About the Product Features... 오류! 책갈피가정의되어있지않습니다 Specifications Configuration and Components Configuration Names of Components Caution Installation and Basic Usage Installing the Pier (tripod) and Equatorial Mount Installing the Counterweight and Counterweight Bar Connecting the Cable Installing the Main Scope Tube and Setting the Balance Polar Alignment Adjusting the Worm Gear Backlash Description Reducing the Backlash Increasing the Backlash A/S Policy RainbowAstro Co., Ltd.
3 1. About the Product 1.1 Features Mechanical Part Duralumin hub-embedded worm wheels made through the use of private hoppers were utilized, securing high stiffness and precision compared with the gross weight. Three taper roller bearings were assigned per axis to maintain stiffness against the distortion of axis and load. Products were made using domestic technologies, and satisfactory technical support and after-sales service are provided. All parts are processed through MCT and CNC lathe; stiffness and precision are superior to those of products made through casting or diecasting. The drive system of the DEC axis was positioned at the bottom of the axis to maximize weight on-board considering utility wherein less counterweights are required. The equipment is composed of detachable RA and DEC units considering mobility. A free after-sales service is provided for 1 year, covering the mechanical and electronic systems. 3 RainbowAstro Co., Ltd.
4 1.1.2 Hubo-I Telescope Control System The power supply shutting location is designated as the parking position, enabling precise automatic introduction and tracking again at any time. This is the most remarkable and advanced function for building remote observatories. Furthermore, users can directly designate various parking positions. This system converges users synchronization and input errors when a number of stars are synchronized, precisely controlling the automatic introduction function. These errors include the error range of polar axis adjustment, error range of the DC motor, and error ranges of worm wheels and warm gears. This guarantees precise automatic introduction and tracking during stationary observation semipermanently. Users can maintain the weight balance by measuring the micro-amperage of the DC motor. Users can schedule the objects to be observed or photographed. This can be used to decide the order of observation or to take mosaic photographs of heavenly bodies. Users can set up the introduction speed. You can select the speed through the simple manipulation of the keypad. The display shows the current speed. This function is designed for astronomical photographers; you can move the telescope toward east even before reaching culmination. This is a German-style equatorial mount that enables greater exposure when taking pictures. Since an electronic clock using ultra-high precision gear is embedded, precise automatic introduction is possible even after several months. High-performance, low-power CPU is used to reduce power consumption to the minimum. 4 RainbowAstro Co., Ltd.
5 To resolve the inconvenience of connecting the PC through the use of RS232, fast interface of USB 2.0 is used. The case made using a high-precision extruder has greater stiffness than that of ordinary plastic products. In addition, rubber band was used to promote durability to protect the system from side impacts. Silicon was used for the keypad to protect it from dew and to maximize the sense of touch. Furthermore, visibility is excellent even during dark nights because a red light-emitting keypad is used. A mini-lantern using a red LED is installed on the back of the controller. 5 RainbowAstro Co., Ltd.
 / DEC 197mm (280 screw thread) 70kg from steady point and 50kg at")
6 1.2 Specifications MorningCalm 500GE Model German-style equatorial mount (RA and DEC motor-embedded) Worm gear Weight on-board Automatic introduction speed Available latitude 20 ~ 60 Automatic introduction method Operating voltage Power consumption Body weight Motor performance After-sales service RA 228mm (324 screw thread) / DEC 197mm (280 screw thread) 70kg from steady point and 50kg at 15cm above the steady point 800 times sidereal time (may be adjusted by the user) Hand controller, PC control (interlocking with astronomical programs) DC 12~16V ~3A 43kg DC 12V, Rated=250gf.cm, 1/50, No Load=10,000rpm 1 year 6 RainbowAstro Co., Ltd.
 / DEC 228mm (324 screw thread) 100kg from steady point and 70kg at 20cm above the")
7 1.2.2 MorningCalm 700GE Model German-style equatorial mount (RA and DEC motor-embedded) Worm gear Weight on-board Automatic introduction speed Available latitude 20 ~ 60 Automatic introduction method Operating voltage Power consumption Body weight Motor performance After-sales service RA 290mm (360 screw thread) / DEC 228mm (324 screw thread) 100kg from steady point and 70kg at 20cm above the steady point 600 times sidereal time (may be adjusted by the user) Hand controller, PC control (interlocking with astronomical programs) DC 12~16V ~3A 57kg DC 12V, Rated=250gf.cm, 1/50, No Load=10,000rpm 1 year 7 RainbowAstro Co., Ltd.
8 2. Configuration and Components 2.1 Configuration MorningCalm RA mount: 1 ea MorningCalm DEC mount: 1 ea Counterweight bar: 1 ea Hubo-i controller: 1 ea Hubo-i controller equatorial mount connecting cable: 1 ea Hubo-i controller PC connecting USB cable: 1 ea RA motor connecting cable: 1 ea DEC motor connecting cable: 1 ea Equatorial mount power supply cable (crocodile clip): 1 ea 8 RainbowAstro Co., Ltd.

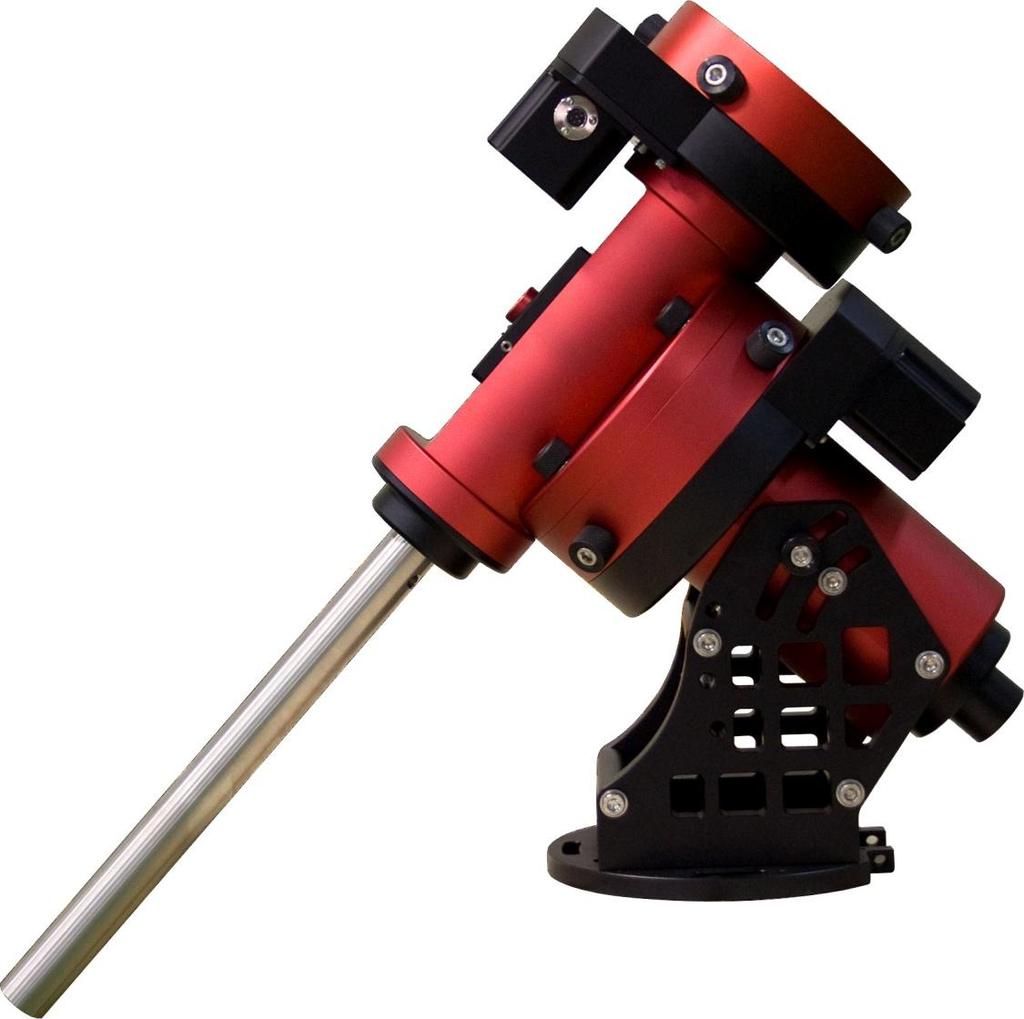
9 2.2 Names of Components Right Side RA axis DEC axis RA motor unit Azimuth controller RA clamp bolts 9 RainbowAstro Co., Ltd.

10 2.2.2 Left Side DEC clamp bolt RA motor terminal RA motor terminal Polar axis telescope Azimuth controller 10 RainbowAstro Co., Ltd.

11 2.2.3 Front Polar axis telescope cover Lighting switch RA/DEC assembly bolt Altitude controller 11 RainbowAstro Co., Ltd.
12 3. Caution Read this instruction manual carefully before using the equatorial mount. Inappropriate use may cause malfunction. When the main scope tube is installed on the equatorial mount, do not remove the counterweight, this may cause main scope tube damage. Take care not to allow the main scope tube to collide with the tripod or pier, this may cause gear and motor damage. Use the product after verifying that the equatorial mount is properly connected to the pier or tripod to prevent the equatorial mount from falling. Do not exceed the recommended weight on-board, this may cause the deterioration of equatorial mount performance or cause damage to the equipment. In a cold environment, wear gloves prior to operating the equatorial mount to prevent frostbite or other injuries. Verify the polarity prior to connecting power supply to the equatorial mount to prevent damage to the electronic systems. Do not disassemble the equatorial mount arbitrarily. 12 RainbowAstro Co., Ltd.

13 4. Installation and Basic Usage 4.1 Installing the Pier (tripod) and Equatorial Mount ➀ Install a pier on solid, flat ground. One of the pier legs should face north. ➁ After installing the pier, put the equatorial mount on the pier. At this time, the counterweight bar should be aligned with the north side leg of the pier. ➂ Tighten the 2 wrench bolts on top of the pier by manually turning them; finally, tighten one of the knob bolts firmly. 4 Bring the equatorial mount into a horizontal position by adjusting the socket set screws of the pier legs. tip. If the ground of the installation site is not solid, the level of the pier will be distorted over time after installation, and the function of automatic introduction and automatic guiding will deteriorate. 13 RainbowAstro Co., Ltd.

14 4.2 Installing the Counterweight and Counterweight Bar ➀ Connect the counterweight bar to the bottom of the RA axis by turning the weight bar clockwise. ➁ Unfasten the anti-fall bolt installed on the edge of the counterweight bar by turning it counterclockwise and connect the weight to the weight bar. ➂ Lock the weight anchor bolt by turning it clockwise and the anti-fall bolt to the edge of the weight bar by turning clockwise. 14 RainbowAstro Co., Ltd.


15 4.3 Connecting the Cable ➀ Using the cable, connect the DEC motor terminal to the DEC terminal of the control box. ➁ Using the cable, connect the RA motor terminal to the RA terminal of the control box. ➂ Using the cable, connect the motor control box and the HUBO-i controller. 4 Connect the power supply cable to the motor control box and to the battery or other DC power supply system, paying particular attention to polarity. tip. For the motor connecting cable, the long cable is for DEC and the short one is for RA. tip. The inside of the power supply terminal has +polarity, and the outside has - polarity. 15 RainbowAstro Co., Ltd.

16 4.4 Installing the Main Scope Tube and Setting the Balance ➀ Connect the main scope tube to the equatorial mount head. ➁ Unfasten the RA axis clamp bolts to loosen the RA axis. Turn the RA axis to maintain the level between the weight and the main scope tube, and then lock the RA axis clamp bolt again. ➂ Unfasten the DEC axis clamp bolts to loosen the DEC axis. Adjust the position of the main scope tube and lock the DEC axis clamp bolts again to obtain the weight balance between the front side and the rear side of the main scope tube. ➃ Unfasten the RA axis clamp bolts to loosen the RA axis. Adjust the position of the weight so that the weight balance is maintained between the weight and the main scope tube, and then lock the RA axis clamp bolts again. ➄ Repeat the process described in steps 3 and 4 if necessary to set the balance accurately. tip. Turn the RA/DEC clamp bolts clockwise to lock them and counterclockwise to loosen them. 16 RainbowAstro Co., Ltd.
17 tip. The more accurately you set the balance, the better the performance of automatic introduction and automatic guide becomes. tip. The HUBO-i controller provides additional functions for accurate balance adjustment. 17 RainbowAstro Co., Ltd.


18 4.5 Polar Alignment ➀ Move the longitude reference line of the polar axis telescope by as much as the longitude difference of the surveyed area based on longitude 135 E. Move toward W by 8.5 for Seoul and toward W by 5.5 for Busan. 2 Turn the eyepiece of the polar axis telescope and set the date ring and the time ring to the current date and time, respectively. One graduation of the date ring indicates 2 days. The photo shows the date and time set as of 0 o clock (12:00 at night) on January RainbowAstro Co., Ltd.

19 3 Turn the RA axis and make adjustments so that the level mounted on the polar axis telescope becomes level. 4 Turn on the lighting system of the polar axis telescope and introduce Polaris into the field of vision of the polar axis telescope through the use of the equatorial mount s altitude controller and the azimuth controller. Since the position of Polaris changes slightly every year according to precessional motion, position it according to year. 19 RainbowAstro Co., Ltd.

20 5. Adjusting the Worm Gear Backlash The RA axis and the DEC axis of the equatorial mount consist of the warm gear and operate in normal condition when there is an appropriate level of backlash. Since the level of backlash may change according to the atmospheric temperature variation, make the appropriate adjustment in case the level of backlash is excessively high or low. If the level of backlash is excessively low, the precision of automatic introduction decreases, and the performance of the guide deteriorates; thus leading to possible gear damage. Pay due attention. 5.1 Description 1 Pulling bolt: Tighten clockwise to increase the backlash. 2 Pushing bolt: Tighten clockwise to reduce the backlash. 20 RainbowAstro Co., Ltd.
21 5.2 Reducing the Backlash 1) Loosen the No. 1 bolt counterclockwise. 2) Tighten the No. 2 bolt clockwise at an appropriate level. 3) Tighten the No. 1 bolt completely. tip. Repeat the process in Nos. 1) and 2) while loosening and tightening the bolts gradually. For best results, adjust the bolts at a level less than 1/10 turn in one operation. 5.3 Increasing the Backlash 1) Loosen the No. 2 bolt counterclockwise. 2) Tighten the No. 1 bolt clockwise at an appropriate level. 3) Tighten the No. 2 bolt completely. tip. Repeat the process in Nos. 1) and 2) while loosening and tightening the bolts gradually. For best results, adjust the bolts at a level less than 1/4 turn in one operation. 21 RainbowAstro Co., Ltd.
22 6. A/S Policy A free after-sales service is provided for 1 year. If the extension of the after-sales period is additionally purchased, the added after-sales period shall be followed. If equipment malfunction occurs due to the users negligence during the free after-sales period, a charged after-sales service shall be provided based on actual expenses. If the product is arbitrarily disassembled, no free after-sales service shall be provided. For information on after-sales service, contact the place of purchase. 22 RainbowAstro Co., Ltd.
Quick Start Guide. CEM60 Center Balanced GoTo Equatorial Mount Models: #7200, #7201
 Quick Start Guide CEM60 Center Balanced GoTo Equatorial Mount Models: #7200, #7201 PACKAGE CONTENTS 1 Telescope Mount with GPS, and AccuAlign TM dark field illuminated Polar Scope Hand Controller (HC)
Quick Start Guide. CEM60 Center Balanced GoTo Equatorial Mount Models: #7200, #7201
 Quick Start Guide CEM60 Center Balanced GoTo Equatorial Mount Models: #7200, #7201 PACKAGE CONTENTS 1 Telescope mount with GPS, and AccuAlign TM dark field illuminated Polar Scope Hand controller (HC)
ASTRO-PHYSICS 600E GERMAN EQUATORIAL MOUNT (600HDA) WITH DUAL AXIS STEPPER MOTORS AND 8010 CONTROLLER
 WITH DUAL AXIS STEPPER MOTORS AND 8010 CONTROLLER") ASTRO-PHYSICS 600E GERMAN EQUATORIAL MOUNT (600HDA) WITH DUAL AXIS STEPPER MOTORS AND 8010 CONTROLLER MODEL 600HDA (600E) PARTS LIST 1pc. 600E HDA Equatorial Head with stepper motors on right ascension
ASTRO-PHYSICS 600E GERMAN EQUATORIAL MOUNT (600HDA) WITH DUAL AXIS STEPPER MOTORS AND 8010 CONTROLLER MODEL 600HDA (600E) PARTS LIST 1pc. 600E HDA Equatorial Head with stepper motors on right ascension
Instruction Manual for. Altazimuth Mount
 Instruction Manual for Altazimuth Mount PREFACE Thank you for your purchase of a Vixen APZ altazimuth mount or a Vixen product from the APZ series of mount packages. This instruction manual is prepared
Quick Start Guide. CEM120 Center Balanced GoTo Equatorial Mount Models: #7300, #7301, #7302
 Quick Start Guide CEM120 Center Balanced GoTo Equatorial Mount Models: #7300, #7301, #7302 PACKAGE CONTENTS 1 1X Telescope mount 1X Hand controller (HC) Go2Nova #8407 1X Counterweight (10 kg/22 lbs) 1X
CDK700 TELESCOPE INSTALLATION MANUAL
 CDK700 TELESCOPE INSTALLATION MANUAL (310) 639-1662 www.planewave.com Release 2/20/16 1. UNPACKING AND STAGING 1.1. OVERVIEW The CDK700 ships in 3 crates. The largest crate contains the fork mount, and
Quick Start Guide. AZ Mount Pro Level and Go Altazimuth Mount Models: #8900, #8920
 Quick Start Guide AZ Mount Pro Level and Go Altazimuth Mount Models: #8900, #8920 PACKAGE CONTENTS 1 Telescope mount with built in GPS, WIFI and rechargeable battery (11.1V, 4400mAh) Hand controller (HC)
Don Peckham s Two Cylinder Equatorial Platform with Floating South Mount 19-March-2004 Page 1 / 7
 19-March-2004 Page 1 / 7 Go to HTML version http://dbpeckham.com/ep/don-ep.htm Return to home dbpeckham.com Here is an overview of my equatorial platform. If you are already familiar with the theory behind
ARTICEL Drywall Panel Hoist
 Operation Manual ARTICEL 50790 51289 Drywall Panel Hoist Read and follow the operating instructions and safety information before using for the first time. Technical changes reserved! Due to further developments,
Recommended Installation Procedure (31 MARCH 2010) ATech Timing Belt Tensioner (979004) EA T 20 Valve Longitudinal Engine
 ATech Timing Belt Tensioner (979004) EA T 20 Valve Longitudinal Engine") Caution: The procedure to access the timing belt tensioner and all other timing driven components must be done according to the car manufacturer s guidelines. Engine temperature: 1. The tensioner must
Caution: The procedure to access the timing belt tensioner and all other timing driven components must be done according to the car manufacturer s guidelines. Engine temperature: 1. The tensioner must
1 MECHANICAL FUEL METER
 1 MECHANICAL FUEL METER USER S MANUAL WARNING: Read carefully and understand all INSTRUCTIONS before operating. Failure to follow the safety rules and other basic safety precautions may result in serious
COOPER POWER SERIES. 200 A Fused Loadbreak Elbow Connector Replacement Fuse Installation Instructions. Fusing Equipment MN132021EN
 Fusing Equipment MN132021EN Effective November 2016 Supersedes June 2011 (S240-97-1) COOPER POWER SERIES Installation Instructions DISCLAIMER OF WARRANTIES AND LIMITATION OF LIABILITY The information,
instruction Manual #7817
 instruction Manual Orion SkyView Pro GoTo System #7817 Providing Exceptional Consumer Optical Products Since 1975 Customer Support: www.oriontelescopes.com/contactus Corporate Offices: 89 Hangar Way, Watsonville
EX Series. Electric Actuators for Ball and Butterfly Valves
 EX Series Electric Actuators for Ball and Butterfly Valves Next-Generation Electric Actuator Realization of Upgraded General-Purpose Actuators The modularization and adoption of the common parts have brought
SPEED CONTROLLERS WITH QUICK FITTINGS
 SPEED CONTROLLERS WITH QUICK FITTINGS Union Straight Type Fittings for controlling the speed of actuators, such as cylinders. Superior flow rate characteristics and fine tuning adjustments in the low flow
Performance Air Intake, 2015+
 PARTS LIST AND PARTS LIST 1PC ALUMINUM INTAKE PIPE 1PC HIGH-FLOW, OILED AIR FILTER 1PC SILICONE INDUCTION HOSE 1PC AIRBOX 1PC 1/16 RUBBER STRIPPING, 9 LENGTH 1PC 1/16 RUBBER STRIPPING, 8.5 LENGTH 1PC WORM-GEAR
Effective November 2016 Supersedes February 2012 (S )
") Fusing Equipment MN132033EN Effective November 2016 Supersedes February 2012 (S240-97-2) 200 A Fused Loadbreak Elbow Connector Shorting Bar (solid link) Installation Instructions COOPER POWER SERIES Pulling
Fusing Equipment MN132033EN Effective November 2016 Supersedes February 2012 (S240-97-2) 200 A Fused Loadbreak Elbow Connector Shorting Bar (solid link) Installation Instructions COOPER POWER SERIES Pulling
BX-308 BAM-1020 SERVICE TOOL KIT MANUAL
 BX-308 BAM-1020 SERVICE TOOL KIT MANUAL Met One Instruments, Inc 1600 Washington Blvd. Grants Pass, Oregon 97526 Telephone 541-471-7111 Fax: 541-471-7116 BX-308-9800 Copyright 2008 Met One Instruments,
AZIMUTH TRACKING ERROR FRICTIONAL DRAG & MOTOR LOAD
 AZIMUTH TRACKING ERROR - - - FRICTIONAL DRAG & MOTOR LOAD Motor loading and friction drag caused by bushing slop and poorly fitted unpolished parts has been found and identified in 8 places within the
TITAN V3: assembly and calibration manual
 TITAN V3: assembly and calibration manual Please read quickstart guide included in the kit before starting installation process. Please note that this is beta version of manual. The full version of manual
Note: the numbers in parenthesis refer to the components in the exploded view of page 3 for UT-0 thru UT-6.5 and page 4 for UT-7 and UT-8.
 Note: the numbers in parenthesis refer to the components in the exploded view of page 3 for UT-0 thru UT-6.5 and page 4 for UT-7 and UT-8. CAUTION: Remove dust from the actuator that may cause sparks;
OPERATIONS & MAINTENANCE MANUAL KENNETH WALKER OBSERVATORY AT DEMIGUEL ELEMENTARY SCHOOL
 OPERATIONS & MAINTENANCE MANUAL KENNETH WALKER OBSERVATORY AT DEMIGUEL ELEMENTARY SCHOOL Department of Mechanical Engineering April 23, 2010 1 TABLE OF CONTENTS Dome Rotation Overview... 3 Maintenance...
3-in-1 Electric Jack, Impact Wrench & Air Compressor
 Item No. : 7010 3-in-1 Electric Jack, Impact Wrench & Air Compressor User s Manual We are constantly improving our products so specifications are subject to change without notice. Visit our website for
EX Series. Electric Actuators for Ball and Butterfly Valves
 EX Series Electric Actuators for Ball and Butterfly Valves Next-Generation Electric Actuator Realization of Upgraded General-Purpose Actuators The modularization and adoption of the common parts have brought
Lunette: A Global Network of Small Lunar Landers
 Lunette: A Global Network of Small Lunar Landers Leon Alkalai and John O. Elliott Jet Propulsion Laboratory California Institute of Technology LEAG/ILEWG 2008 October 30, 2008 Baseline Mission Initial
MUELLER GAS. Shur StopTM Unit 812 PE Line Stopping. System 8" 12" SDR Reliable Connections. General Information 2
 operating Instructions manual MUELLER GAS TAble of contents PAGE TM Unit 812 PE Line Stopping General Information 2 Equipment, Parts and Dimensions 3-5 Operating Instructions 6-12 Troubleshooting and Storage
Restoration of an Al Novak Equatorial Mount
 Restoration of an Al Novak Equatorial Mount By: Jeff Beish In 1975 I acquired a 6 f/4 from a member of the Southern Cross Astronomical Society in Miami, Florida and for a few years would use it at star
Installation and Operational Instructions for EAS - HTL housed overload clutch Sizes 01 3 Type 490._24.0
 Please read these Operational Instructions carefully and follow them accordingly! Ignoring these Instructions may lead to malfunctions or to clutch failure, resulting in damage to other parts. Contents:
Manual Height Adjustable Desk Frame
 Manual Height Adjustable Desk Frame Instruction Manual SKU: DESK-V101M Scan the QR code with your mobile device or follow the link for helpful videos and specifications related to this product. https://vivo-us.com/products/desk-v101m
Instruction Manual Omegon MiniTrack LX2
 Instruction Manual Omegon MiniTrack LX2 English Version 2.2018 Rev. A, Art.-Nr. 55040, 56106 The Omegon MiniTrack LX2 Congratulations on the purchase of one of the new Omegon MiniTrack LX2. This mechanical
RapidFire Assembly and Operation Instructions
 RapidFire Assembly and Operation Instructions Congratulations and thank you for your purchase. This guide provides all operational and safety information necessary to use your new machine. Please familiarise
Lone Star Field Products
 537 Easy Street, Garland, Texas 75042 www.lonestarfieldproducts.com 972-276-3110 Lone Star Field Products Spec-Rest Sportsman Field & Modular Sniper Optimization Platform MODSOP User s Manual Copyright
Driver Drowsy Warning System
 Driver Drowsy Warning System Another Sense for Safety CM-DW100 USER MANUAL TABLE OF CONTENTS 01 ㅣ Getting Started 1. Prior to Using This Product 2. Guidelines and Cautions Prior to Use 3. Cautions for
DWHOIST. Drywall Hoist Assembly & Operating Instructions
 DWHOIST Drywall Hoist Assembly & Operating Instructions READ ALL INSTRUCTIONS AND WARNINGS BEFORE USING THIS PRODUCT. SAVE THESE INSTRUCTIONS FOR FUTURE REFERENCE. This manual provides important information
INSTALLER AND USER S MANUAL. v4.0 REV. 01/2019
 MBM6 -BARRIER INSTALLER AND USER S MANUAL v4.0 REV. 01/2019 00. CONTT INDEX 01. SAFETY INSTRUCTIONS STANDARDS TO FOLLOW 01. SAFETY INSTRUCTIONS STANDARDS TO FOLLOW 02. PACKAGE INSIDE PACKAGE 03. OPERATOR
Alternating Current Revolution per minute Protective Earth Ground. Protected from dripping water Fuse Attention, Consult Accompanying Document
 GLOSSARY OF SYMBOLS: (Symbols and descriptions) Alternating Current Revolution per minute Protective Earth Ground Direct Current On (Power connection Off (power to the mains) disconnection from the mains)
Model DFRP Rotary Actuator
 Features Rugged Long Lasting Construction Dyna-Flo s expert CNC machining process and superior quality parts come together to make DFRP actuators a rugged, long lasting product. DFRP actuators are manufactured
EX Series. Electric Actuators for Ball and Butterfly Valves
 EX Series Electric Actuators for Ball and Butterfly Valves Next Generation Electrical Actuator Realization of Upgraded General-Purpose Actuators The modularization and the adoption of common parts have
For customers Please forward this manual to the next owner.
 Installation Manual for LED Performance Bulbs (Type HB3/HB4) Thank you very much for purchasing PIAA product. Read this instruction manual thoroughly for proper use of the product. After completing your
2006 MINI Cooper SUSPENSION Wheels & Tires - Repair Instructions - Cooper (1.6L) R50/W10 & Cooper S
 R50/W10 & Cooper S") WHEELS 2002-05 SUSPENSION Wheels & Tires - Repair Instructions - Cooper (1.6L) R50/W10 & Cooper S 36 10 300 REMOVING OR INSTALLING FRONT OR REAR WHEEL NOTE: For Special Tool identification, see WHEEL AND
WHEELS 2002-05 SUSPENSION Wheels & Tires - Repair Instructions - Cooper (1.6L) R50/W10 & Cooper S 36 10 300 REMOVING OR INSTALLING FRONT OR REAR WHEEL NOTE: For Special Tool identification, see WHEEL AND
**DO NOT EXCEED RECOMMENDED VEHICLE TOWING WEIGHT!**
 60660 SUBKIT 7/8/0 **DO NOT EXCEED RECOMMENDED VEHICLE TOWING WEIGHT!** DODGE 500 / 3500 SHORT AND LONG BED PAGE OF 5 WARNING!! BRAKE, FUEL, AND ELECTRICAL LINES MAY NEED TO BE LOOSENED OR REPOSITIONED
Peristaltic Pump Operating Instructions
 Peristaltic Pump Operating Model 410 IMPORTANT Pump is water resistant but not waterproof. Do not submerge in water. Pumping rates will decrease as the amount of lift increases. Remove tubing when stored.
How to Fix the Altitude Clutch Problem in the Meade DS Mount By John Zimmerman September 2005
 How to Fix the Altitude Clutch Problem in the Meade DS Mount By John Zimmerman September 2005 Note: I claim no personal credit for the solution described here. Other DSX owners, whose real names I do not
CNCTRK AZ/EL Positioning Unit Assembly Instructions. Rev
 CNCTRK AZ/EL Positioning Unit Assembly Instructions Rev4 016-01-05 Introduction/Overiview The AZ/EL Positioner Unit, RAZEL, consists of two stages of identical gearboxes joined together with a Configuration
Operating Manual & Safety Instructions ProTorc Hydraulic Torque Wrench Model # PTLC - Please read in full before operating ProTorc Torque Wrench -
 Operating Manual & Safety Instructions ProTorc Hydraulic Torque Wrench Model # PTLC - Please read in full before operating ProTorc Torque Wrench - ProTorc Important Safety Instructions READ ALL INSTRUCTIONS
Models Affected: Certain 2014 Model Year Vision Buses Equipped with Ford 6.8L Propane Engines ISSUE
 R E C A L L C A M P A I G N ----R 1 3 W G -- Adjustment Inspection ISSUE CORRECTIVE ACTION ---- Models Affected: Certain 2014 Model Year Vision Buses Equipped with Ford 6.8L Propane Engines On affected
Step-by-Step Instructions for ieq45 R.A. Worm Installation/Replacing September 2013
 Step-by-Step Instructions for ieq45 R.A. Worm Installation/Replacing September 2013 These instructions serve to explain how to Replace a R.A. worm; Adjust a RA worm/wheel meshing; Inspect and clean a RA
MINI WRAP INSTALLATION MANUAL Part # WRAPMHYD[... ]01 WRAPMELE[... ]01 FOR COTTON CLOTH, STAR FOAM or C-CHANNEL FOAM BRUSHES
![MINI WRAP INSTALLATION MANUAL Part # WRAPMHYD[... ]01 WRAPMELE[... ]01 FOR COTTON CLOTH, STAR FOAM or C-CHANNEL FOAM BRUSHES](/thumbs/90/104454538.jpg "MINI WRAP INSTALLATION MANUAL Part # WRAPMHYD[... ]01 WRAPMELE[... ]01 FOR COTTON CLOTH, STAR FOAM or C-CHANNEL FOAM BRUSHES") MINI WRAP INSTALLATION MANUAL Part # WRAPMHYD[..... ]01 WRAPMELE[..... ]01 FOR COTTON CLOTH, STAR FOAM or C-CHANNEL FOAM BRUSHES TABLE OF CONTENTS Equipment Utilities Page: 1 Equipment Specifications Page:
MINI WRAP INSTALLATION MANUAL Part # WRAPMHYD[..... ]01 WRAPMELE[..... ]01 FOR COTTON CLOTH, STAR FOAM or C-CHANNEL FOAM BRUSHES TABLE OF CONTENTS Equipment Utilities Page: 1 Equipment Specifications Page:
Butterfly Valve Type 57P
 Butterfly Valve Type 57P Contents Lever Type: 50-200 mm (2-8 ) Body Material: CPVC Gear Type: 50-200mm (2-8 ) Body Material: CPVC (1) Be sure to read the following warranty clauses of our product 1 (2)
PARTS TOOLS. Set Screw. Washer (2) Blue Bushing (2) Black Bushing (2) B&M Short Throw Shifter. Jam Nut Grease. Retaining Ring (2) Insert (2)
 Blue Bushing (2) Black Bushing (2) B&M Short Throw Shifter. Jam Nut Grease. Retaining Ring (2) Insert (2)") Installation Instructions SHORT THROW SHIFTER Fits: Porsche Boxter, Boxter S, 911, 996 Cayman & Cayman S models See Application Guide for specific year ranges and engine sizes Catalog # 45135 WORK SAFELY!
Installation Instructions SHORT THROW SHIFTER Fits: Porsche Boxter, Boxter S, 911, 996 Cayman & Cayman S models See Application Guide for specific year ranges and engine sizes Catalog # 45135 WORK SAFELY!
Product design: Mechanical systems
 Product design: Mechanical systems Recall Mechanisms can: change direction of movement, e.g. from clockwise to anticlockwise or from horizontal to vertical; change type of movement, e.g. from rotating
Doc #: 2100-AD Revision: A. 4M Mayall Maintenance Manual. Author(s): Larry Reddell
: Larry Reddell") Doc #: 2100-AD-015-0003 Revision: A 4M Mayall Maintenance Manual Author(s): Larry Reddell 2100-AD-015-0003.DOCX 2 Revision Description Date Name --- Original: 2100-AD-015-0001 4/12/2014 Larry Reddell 2100-AD-015-0003.DOCX
Doc #: 2100-AD-015-0003 Revision: A 4M Mayall Maintenance Manual Author(s): Larry Reddell 2100-AD-015-0003.DOCX 2 Revision Description Date Name --- Original: 2100-AD-015-0001 4/12/2014 Larry Reddell 2100-AD-015-0003.DOCX
DR Series Radial Diaphragm Valves
 DR Series Radial Valves Service Instructions Valves with Plastic Actuators (1/2 through 1 inch) Valves with Aluminum Actuators (1/2 through 2 inch) Manual model Pneumatic model Manual model Pneumatic model
66 CHAPTER FOUR. Spark Plug Removal Refer to Figure 28 for spark plug wive routing according to engine.
 66 CHAPTER FOUR IGNITION SYSTEM A mechanical contact breaker point ignition system is used on all engines covered in this manual. The ignition system may use a Delco-Remy, Autolite, Mallory or Prestolite
INSTALL INSTRUCTIONS: Blend Door Repair Kit
 Dorman Products A/C Blend Door Repair Tool For 2006 Chevrolet Equinox / Pontiac Torrent 902-600 Installation Instructions Parts Included 1. Plastic Replacement Sleeve 2. Mounting Plate 3. Saw 4. Drill
120 LED DUAL HEAD SOLAR MOTION LIGHT
 Version 1.2 120 LED DUAL HEAD SOLAR MOTION LIGHT Instruction Manual Item# 23401 Thank you very much for choosing a Nature Power Product! For future reference, please complete the owner record below: Model:
Technical Specifications
 Technical Specifications Overview RollerDrive CNC The answer for a CNC rotary axis Pure Motion By Zero-Backlash Technology TM The RollerDrive CNC, a CNC rotary table, is designed to fulfill the demands
Installation and Operating Instructions for EAS -NC clutch Type 45_. _. _ Sizes 02 and 03
 Table of contents: Please read and observe this Operating Instruction carefully! A possible malfunction or failure of the clutch and any damage may be caused by not observing it. Page 1: - Table of contents
User Manual. Please read this user manual before use Edition
 User Manual Please read this user manual before use. 2015.7.9 Edition Information on how to use GT Roller Flex3 GT Roller Flex3 is a new type trainer that has unique structure and characters. Read this
Audi A8 ( ) MMI swivelling unit repair manual
 MMI swivelling unit repair manual") Audi A8 (2003-2007) MMI swivelling unit repair manual Tools which you will need: two pcs screwdriver (any kind, for vent removing ) (you can cover the metal part with any tape to prevent making scratches
Audi A8 (2003-2007) MMI swivelling unit repair manual Tools which you will need: two pcs screwdriver (any kind, for vent removing ) (you can cover the metal part with any tape to prevent making scratches
Wheeler Mfg. Div Rex Intl USA Inc Jefferson Road Ashtabula, OH Tel: Fax:
 Wheeler Mfg. Div Rex Intl USA Inc. 3744 Jefferson Road Ashtabula, OH 44004 Tel: 800-321-7950 Fax: 440-992-2925 wheeler@wheelerrex.com www.wheelerrex.com Some Operating Hints...... 2 The 68115 features
Operating instructions
 R Millikan Unit 09070.00 PHYWE Systeme GmbH & Co. KG Robert-Bosch-Breite 0 D-37079 Göttingen Telefon +49 (0) 55 604-0 Fax +49 (0) 55 604-07 E-mail info@phywe.de Internet www.phywe.de 4 5 4 3 6 Operating
MTAB. MACHINING CENTERS
 MTAB www.mtabcnc.com MACHINING CENTERS OVERVIEW MTAB's Vertical Machining Center is designed to flex with the customers' manufacturing demands and requirements. The machines are high performance systems,
GRSM17 Pneumatic Center Punch Tool Owner s Manual and Operating Instructions
 Owner s Manual and Operating Instructions Table of Contents Page Information 2 Safety Guidelines and Warranty 3 Overview and Installation 4 Air System Requirements 5 Setting Controls 6 Installing Clamps
Better Bagger TM. Service Manual. 10-March
 Better Bagger TM 900e Service Manual 10-March-2005 www.betterpackages.com CONTENTS Parts list with reorder numbers. Page 1 Parts Identification Photographs Pages 2-4 Service Instruction Pages 5-10 The
SLM - Sealing Liquid Monitor INSTRUCTIONS FOR USE
 INSTRUCTIONS FOR USE 1/8 1 INSTALLATION SLM - Sealing Liquid Monitor INSTRUCTIONS FOR USE 1.1 Mounting The SLM has a mounting plate for simple installation. The SML can be mounted using a bolt already
Doc #: 2100 AD Revision:
 Doc #: 2100 AD 015 0031 Revision: 4m Dec Axis Counterweight Removal, Disassembly, Maintenance, & Reinstallation Procedure Author(s): Matthew John Evatt Contents 1. Contents... 2 2. Revision History...
TPMS TP200 USER S MANUAL
 TPMS TP200 USER S MANUAL V6.03.21 CONTENTS Packing List... 2 Standard Tools and Accessories... 3 Display Power On... 4 Installation of tire sensors... 5 Driving checking... 6 USB charging Socket... 6 Display
INSTALLATION GUIDE. Kawasaki KLR Manual Revision:
 REKLUSE MOTOR SPORTS The z-start Pro Clutch INSTALLATION GUIDE Kawasaki KLR650 191-640 Manual Revision: 030308 2007 Rekluse Motor Sports Rekluse Motor Sports, Inc. 110 E. 43rd Street Boise, Idaho 83714
NOTE: DISCONNECT MAIN POWER LOCK OUT AND TAG BEFORE PERFORMING ANY PROCEDURES IN THIS SECTION.
 M E C H A N I C A L S E T U P & A D J U S T M E N T S NOTE: DISCONNECT MAIN POWER LOCK OUT AND TAG BEFORE PERFORMING ANY PROCEDURES IN THIS SECTION. NOTE: All adjustments should be made with the sealer
SRT Challenger/Hellcat Header-Back RACE ONLY Exhaust (w/ mufflers, w/ resonators, no/cats, no/tips AES valve delete) RHKR
 RHKR") 2014-16 SRT Challenger/Hellcat Header-Back RACE ONLY Exhaust (w/ mufflers, w/ resonators, no/cats, no/tips AES valve delete) 70502339-RHKR INSTALLATION INSTRUCTION WARNING! This product is not street legal
2014-16 SRT Challenger/Hellcat Header-Back RACE ONLY Exhaust (w/ mufflers, w/ resonators, no/cats, no/tips AES valve delete) 70502339-RHKR INSTALLATION INSTRUCTION WARNING! This product is not street legal
WAP disc brake technology. Assembly, operating and maintenance instructions
 WAP disc brake technology Assembly, operating and maintenance instructions Number MA-025 Date 22.07.2010 1 Please read this operating and service manual before starting the vehicle. It forms part of the
AUTOMECH MACHINES & TOOLS TRADING EST.
 1. CNC PLASMA CUTTING MACHINE Model: APM HPR 260XD------- Made In Turkey (brand new) Technical Specifications: Cutting Width Cutting Length : as per table size of actual requirement : as per table size
IB PowlVac ITE-HK Remote Racking Device
 IB-51802 PowlVac ITE-HK Remote Racking Device for use with ITE-HK 5kV & 15kV Circuit Breakers and PowlVac ITE-HK 5kV & 15kV Replacement Circuit Breakers Powered by Safety PowlVac ITE-HK Remote Racking
SM-1700 Secondary Shunt Trip Coil Assembly. Powered by Safety
 SM-1700 Secondary Shunt Trip Coil Assembly Powered by Safety SM-1700 Secondary Shunt Trip Coil Assembly SM-1700 Contact Information Powell Electrical Systems, Inc. www.powellind.com info@powellind.com
Sachs shock manual. ( ) 2 & 4 Stroke RR Enduro. ( ) RS Dual Sport
 2 & 4 Stroke RR Enduro. ( ) RS Dual Sport") Sachs shock manual (2013 2015) 2 & 4 Stroke RR Enduro (2014-2015) RS Dual Sport 1 Introduction The procedures in this manual must take place in a clean environment using professional tools and some specific,
Sachs shock manual (2013 2015) 2 & 4 Stroke RR Enduro (2014-2015) RS Dual Sport 1 Introduction The procedures in this manual must take place in a clean environment using professional tools and some specific,
Creation Date Last Mod Date Model Year Drawings Estimated Time. 5/22/2009 6/15/2009 S120/S90/E min.
 You are here: Service > Forks > 2008 > E100 > S120/S90/E100 50-hour Service Open the Specialized Business Online site in a new window... S120/S90/E100 50-hour Service Creation Date Last Mod Date Model
Tri-Spark Ignition System Installation Triple Cylinder TRI-0001
 Tri-Spark Ignition System Installation Triple Cylinder TRI-0001 There are potentially lethal high voltages produced at the ignition coils and spark plugs, therefore every precaution must be taken to prevent
J&M Stainless Steel Teflon Brake Lines - Front (94-98 Cobra)
") J&M Stainless Steel Teflon Brake Lines - Front (94-98 Cobra) Time Required: 30min-1 hour. Tools and Supplies Required: Jack Jack Stands Lug Wrench or 13/16 Socket 10mm Socket Socket Wrench Torque Wrench
J&M Stainless Steel Teflon Brake Lines - Front (94-98 Cobra) Time Required: 30min-1 hour. Tools and Supplies Required: Jack Jack Stands Lug Wrench or 13/16 Socket 10mm Socket Socket Wrench Torque Wrench
POWER GEAR SLIDE-OUT MANUAL
 POWER GEAR SLIDE-OUT MANUAL Operation Guide FLUSH FLOOR SLIDE-OUT SYSTEM FOR AMERICAN COACH PRODUCTS 82-S0220-01 Rev. 1 AMERICAN COACH SLIDE-OUT MANUAL FLUSH FLOOR SYSTEM TABLE OF CONTENTS SECTION PAGE
Combustible Gas Detector
 NGD8800 User s Manual 99 Washington Street Melrose, MA 02176 Phone 781-665-1400 Toll Free 1-800-517-8431 Visit us at www.testequipmentdepot.com Combustible Gas Detector INTRODUCTION This instrument detects
K-SERIES PUBLIC USE LIFT OPERATING INSTRUCTIONS
 -PRINT- II. T K-SERIES PUBLIC USE LIFT OPERATING INSTRUCTIONS -TABLE OF CONTENTS- his chapter contains safety precautions, daily safety check instructions, control and indicator descriptions, and operating
ASSEMBLY AND INSTALLATION INSTRUCTIONS
 ASSEMBLY AND INSTALLATION INSTRUCTIONS T0068 WARNING: BE SURE TO SHUT OFF POWER AT THE MAIN FUSE OR CIRCUIT BREAKER BOX BEFORE INSTALLING OR SERVICING THIS FIXTURE. NOTE: 1. Before installing, consult
Z3 QR20 (110) GENERAL
 GENERAL") (11) 175 18 8 Ø3 +.5 L.MAX=491 L.L.=481 ±2 L.MIN=371 426 55 ±2 TRAVEL 11 Ø3 15 2 -.1 +1 248.5 GENERAL The fork is sprung by a mechanical coil system and uses hydraulic rebound damping. Spring pre-load
(11) 175 18 8 Ø3 +.5 L.MAX=491 L.L.=481 ±2 L.MIN=371 426 55 ±2 TRAVEL 11 Ø3 15 2 -.1 +1 248.5 GENERAL The fork is sprung by a mechanical coil system and uses hydraulic rebound damping. Spring pre-load
INSTALLATION DATA MANUAL Model 510 Pressure Transmitter
 INSTALLATION DATA MANUAL Model 510 Pressure Transmitter 3829 Forest Parkway, Suite 500 Wheatfield, NY 14120 Toll Free: 1-800-688-0030 International: 1-716-629-3800 Fax: 716-693-9162 www.viatran.com solutions@viatran.com
JONES & SHIPMAN ULTRAMAT Touchscreen controlled, `Easy` or full CNC, Universal Cylindrical Grinders
 GRINDING JONES & SHIPMAN ULTRAMAT Touchscreen controlled, `Easy` or full CNC, Universal Cylindrical Grinders www.jonesshipman.com Touchscreen controlled Easy or full CNC cylindrical grinding machines ULTRAM
Big & Tall Chair Assembly Instructions
 Big & Tall Chair Assembly Instructions Model 48951-A / 48951-B LA-Z-BOY is a trademark of La-Z-Boy Incorporated and is used under license to L Products Pte Ltd. 400 lbs PARTS A B C D1 D D2 Casters Quantity:
Winch Mount Kit. For RZR 900 / RZR 1000 Assembly / Owner s Manual Part No
 Winch Mount Kit For RZR 900 / RZR 1000 Assembly / Owner s Manual Part No. 25-3360 1 OPERATING INSTRUCTIONS Congratulations! You ve just purchased the most durable accessory component in the industry. Our
Service Instructions. Centurion Qex CeramPress Qex Neytech Qex. DENTSPLY Ceramco Yucaipa, CA
 Service Instructions Centurion Qex CeramPress Qex Neytech Qex DENTSPLY Ceramco Yucaipa, CA Table of Content Chapter Title 1 General Information 1.1 Safety Information 1.2 Repair Devices and Tools 2 Repair
Models Affected: Certain 2013 Model Year Propane Vision Buses Equipped with Ford 6.8L Engines CORRECTIVE ACTION ---- PROCEDURE
 Models Affected: Certain 2013 Model Year Propane Vision Buses Equipped with Ford 6.8L Engines ISSUE Certain 2013 model year propane Vision buses equipped with Ford 6.8L engines may not have the service
MULTI FUNCTIONAL COUNT CHECKER MODEL Poka Patrol CNA-4mk3
 MULTI FUNCTIONAL COUNT CHECKER MODEL Poka Patrol CNA-4mk3 OPERATING INSTRUCTION Poka Patrol CNA-4mk3 Poka Patrol CNA-4mk3 To use this product properly and safely, please read this manual carefully before
Thank you for purchasing the CHP Assembly Tool. In order to ensure maximum
 High-presicion Torque Meter Instruction Manual Applicable Models: AP-2, AP-10, AP-50, AP-100, AP-300 Thank you for purchasing the CHP Assembly Tool. In order to ensure maximum performance and product life,
Please read and understand all instructions before attempting installation. Please pay attention to all Cautions and Notes within these instructions.
 Mustang Cluster Kit - INSTALLATION INSTRUCTIONS - For use with Ford Mustang (2005-2009) and Simco Kit Part # s 2046-7XX Revised: Sept. 29, 2008 Rev. B Please read and understand all instructions before
FACF AUTOMATIC CAPSULE FILLER SERIES USER MANUAL
 FACF AUTOMATIC CAPSULE FILLER SERIES USER MANUAL LFA Tablet Presses is a trading name of LFA Machines Oxford LTD All of the content in this document is covered by copyright CONTENTS Page 1. Introduction
Z3 Coil (80) GENERAL. BAM: Bomber Aerospace Material. Special alloy developed from aerospace material. Ø TRAVEL 80 55
 GENERAL. BAM: Bomber Aerospace Material. Special alloy developed from aerospace material. Ø TRAVEL 80 55") (8) 175 8 Ø3 +.5 L.MAX=461 L.L.=451 L.MIN=371 ±2 396 TRAVEL 8 55 18 Ø3 15 2 -.1 +1 248.5 GENERAL The fork is sprung by a mechanical coil system and uses hydraulic rebound damping. Spring pre-load adjustment
(8) 175 8 Ø3 +.5 L.MAX=461 L.L.=451 L.MIN=371 ±2 396 TRAVEL 8 55 18 Ø3 15 2 -.1 +1 248.5 GENERAL The fork is sprung by a mechanical coil system and uses hydraulic rebound damping. Spring pre-load adjustment
10A 10F 10B 10E 10A 10D 10B. Mr. T 10C Q R
 Q R 2 0 23 30 12 18 17 16 15 14 37 39 38 3 7 6 5 20 26 21 22 40 13 4 2 25 24 8 1 28 27 11 31 19 10A 10D 10B 10C 10 29 10A 10F 10B 10E 10 9 32 36 33 34 35 178 15 GENERAL 82 80 Ø28.6 ±0.1 Ø30 +0.05 0 348
Detroit Speed, Inc. Front Coilover Conversion Camaro/Firebird, A-Body P/N: , , &
 Detroit Speed, Inc. Front Coilover Conversion 1970-81 Camaro/Firebird, 1968-72 A-Body P/N: 030308, 030309, 030313 & 030314 The Detroit Speed, Inc. Front Coilover Conversion Kit is a direct bolt-in kit
Transmission Overhaul Procedures-Bench Service
 How to Assemble the Lower Reverse Idler Gear Assembly Special Instructions In 1996 Eaton changed the reverse idler system design. In the nut design, the reverse idler bearing was lubricated through a hole
Document Insertion Unit-J1 SERVICE MANUAL. September 17, 2009 Rev. 0. CANON Document Insertion Unit-J1 Rev. 0 PRINTED IN U.S.A.
 Document Insertion Unit-J1 SERVICE MANUAL September 17, 2009 Rev. 0 COPYRIGHT 2009 CANON INC. CANON Document Insertion Unit-J1 Rev. 0 PRINTED IN U.S.A. Application This manual has been issued by Canon
Maintenance Overview
 Maintenance Overview t h e P i o n e e r i n T r i m m i n g World Headquarters: 6801 State Route 60, Birmingham, OH 889 USA Toll-Free: 800-321-8763 Tel. 0-965-22 Fax: 0-328-535 quantum@bettcher.com www.bettcher.com/quantum