THANK YOU FOR CHOOSING BATHERBOX GETTING STARTED WHAT S IN THE BOX? N. Northview Ave Sioux Falls, SD 57107
|
|
|
- Isabel Manning
- 5 years ago
- Views:
Transcription
1 INSTRUCTION MANUAL
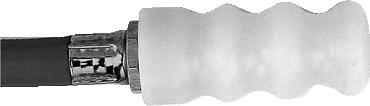
2 THANK YOU FOR CHOOSING BATHERBOX You are on your way to creating an unmatched bathing experience both for you and the lucky animal. The BatherBox is designed to save you hours of time and thousands of dollars! The recipient of the bath will be thoroughly cleaned, massaged, and spend less time in the tub! N. Northview Ave Sioux Falls, SD SUPPORT LINE Monday Friday 8am 5pm CST GETTING STARTED This instructional booklet is your guide to installing the BatherBox. Our goal is to make the installation process easy and painless. Just follow the step by step instructions and your new bathing system will be saving you time and money soon! WHAT S IN THE BOX? INDEX What s in the box? Unit Diagram Installation Warranty Maintenance QTY item A 2 14 vinyl pickup tubes B 4 foot valve strainer C 4 weights D 4 gallon caps E 4 screws F 4 wall anchors for mounting G 1 blue outlet hose H 1 blue inlet hose I 1 spray nozzle J 1 BatherBox unit

3 FOR OPTIMAL PERFORMANCE SHAMPOO & CONDITIONERS We recommend you use the BatherBox shampoo with the system. BatherBox shampoo was designed just for the BatherBox system to ensure best performance results. Each brand of shampoo has different viscosity levels and formulated differently. The thicker the shampoo, the harder the system has to work to pull it through. There is no guarantee that The BatherBox will perform as intended if you use another brand of shampoo/conditioner. ADD ON S The BatherBox comes with everything you need for it to work perfect. Do not add anything extra to the BatherBox system. Don t add any trigger sprayers to the system as it can cause back flow issues with the constant water pressure. Also you will not want to add any extra hoses to the system as that will interfere with the pressure of the system. WATER PRESSURE REQUIREMENTS The BatherBox requires 25 PSI (pounds per square inch) and 5 gallons of flow per minute from the specific water source you intend to use. This system will not work in most mobile grooming units due to the lack of water supply. J A H G I C B D E F 3

4 UNIT DIAGRAM


5 diagram key on next page INSTRUCTION MANUAL 5
 15 BTB3P003 Foot valve strainer 6 BTB3P017 Chemical pick-up barb (Female) 7 BTB3P004 Chemical pick-up")
6 UNIT DIAGRAM 1 BTB3P008 Inlet quick connect 11 BTB3P001 Check valve 2 BTB3P012 Flow (rinse) restrictor 3 BTB3P010 3-Way brass ball valve 4 BTB3P016 Manifold retainers 12 BTB3P002 4-Product selector valve 13 BTB3P013 Gallon cap w/ hole 14 BTB3P007 Ceramic weight 5 BTB3P018 Hose clamp (metal) 15 BTB3P003 Foot valve strainer 6 BTB3P017 Chemical pick-up barb (Female) 7 BTB3P004 Chemical pick-up barb (Male) 8 BTB3P006 1/4 ID pick-up tube 16 BTB3P011 Hose 1/2 x 6 blue 17 BTB3P015 Strainer washer 18 BTB3P019 Metering valve 9 BTB3P GPM eductor 19 BTB3P014 Spray nozzle 10 BTB3P009 Select valve harness 20 BTB3P020 Metering valve mountaing bracket Spare Parts Included BTB3P015 Strainer washer BTB3P002 4-Product selector valve BTB3P006 1/4 ID pick-up tube BTB3P013 (4) Gallon cap w/ hole BTB3P001 Check valve BTB3P003 Foot valve strainer 6


7 INSTRUCTION MANUAL looking on from the rear of the unit 7
8 BATHERBOX INSTALLATION 1 Using a Phillips screw driver, loosen and take out the screw attached to the black handle 2 Pull up on the black handle and remove it 3 Using your hand, turn the brass round nut counter clockwise until it has been removed. If you are having trouble, use a pliers 4 Press in the quick release buttons located on the left and right side of the unit. Lift up and remove the cover of the unit 5 Determine a mounting location within 5 feet of the water supply STOP When deciding where to place the BatherBox unit (J) make sure it is positioned slightly above the area where shampoo/ conditioner will be 6 Mark the wall for the 4 wall anchor (F) locations 7 Drill 4 holes using a 9/32 drill bit 8 Install the 4 wall anchors (F) 9 Position the BatherBox unit (J) lined up with the wall anchors (F) 10 Using a Flat Head screwdriver, screw the 4 screws (E) into the 4 wall anchors (F) 11 Then connect the blue inlet hose. This hose has a female quick connect on one end and a female connect with filter screen & black washer on the other 12 Pull down with two fingers on the outside of the female quick connect 13 While pulling down on the outside of the female quick connect, slide over the male quick connect (located at the bottom back of the unit) and let go. The two connections are now attached 14 Attach the female connect with filter screen & black washer to your water source 8
9 15 This hose has a female connect with a black washer on one side and a male connect for the spray nozzle on the other 16 With your hand, screw the female connect with black washer onto the male connect (located at the bottom front on the unit) until tight 17 Next install the spray nozzle on to the remaining blue hose until tight STOP Make sure that all the fittings you just put into place are water tight 18 Return the cover onto the bather box until the two quick release buttons snap back into place 19 Return the brass round nut which you removed earlier and turn clockwise until tight 20 Re-Install the black handle and screw you removed earlier and put them back on the unit 21 Make sure the handle is in the OFF position 22 Install one of the two 14 clear vinyl pickup tubes 23 Straighten the clear vinyl pickup tube, measure 7 (or applicable length) and cut STOP If 7 is too long, cut to suit your needs. We just do not want you to cut the tubes too short 24 You now have two 7 (or applicable length) tubes 25 Repeat with the other 14 clear vinyl pickup tubes 26 You now have four 7 (or applicable length) clear vinyl pickup tubes to go into your four products 27 Take those four 7 (or applicable length) clear vinyl pickup tubes and attach firmly over pickup barbs located on the left of the unit 28 Insert tube through 3/8 gallon cap, ceramic weight, followed by inserting foot valve strainer into the end of the clear tube 29 Repeat the steps above for the three remaining 7 (or applicable length) tubes 30 Remove cap(s) from your gallons of shampoo/ conditioner INSTRUCTION MANUAL 9
10 BATHERBOX INSTALLATION continued 31 Place your 7 (or applicable length) tubes (which now have a cap, weight and foot valve strainer) into your gallons of shampoo/ conditioner and screw cap on tightly STOP Make sure the tube(s) reach the bottom of the shampoo/conditioner 32 Insert the other end of your 7 (or applicable length) tubes onto the male barb fittings STOP Make sure handle is in the OFF position because we are about to turn the water on! 33 Turn on the water supply to the unit 34 Secure the blue outlet hose firmly, directing it away from yourself 35 Slowly turn the black handle to the RINSE position until fully opened. This will purge any air out of the unit 37 Turn the grey product selector handle to position 1 38 Turn the black handle to CLEAN position 39 Next turn all 4 metering valves to the open position. (All the way counter clockwise) 40 Run until you see the shampoo/conditioner fill the 7 (or applicable length) tube and you start to see sudsy water spraying through the spray nozzle. The time required for this process will vary depending on the shampoo and conditioner you use 41 Turn the grey product selector handle to position 2 and repeat process above 42 Turn the grey product selector handle to position 3 and repeat process above 36 Turn the black handle to OFF position 10
11 43 Turn the grey product selector handle to position 4 and repeat process above 44 Once all four shampoos/ conditioners are running through the system you are almost done! 45 Next you will have to adjust the 4 metering valves to desired dilution 46 Make sure you turn the black handle to OFF position. WARRANTY INFORMATION The BatherBox has a one year limited manufacturer s warranty. This warranty includes manufacturers defects on all components and freight associated with replacing those components within 365 days of purchase. The BatherBox components are designed to work as part of a complete bathing system. Components must be installed in the proper order, relative to each other as outlined in this instructional booklet. Important Information Please Read! The BatherBox one year limited manufacturer s warranty is valid ONLY when installed in the proper order, with ONLY components that come in the box. Any modifications to the system will result in a voided warranty. By signing this document, you are complying to the information above. You understand that if you do not comply with the information above, the BatherBox is operating without a warranty. When we receive this signed document, your one year limited manufacturer s warranty is active. To activate the warranty, sign this document. I agree to comply with all information above Print Name Sign Name Serial Number Return to us any of these ways Fax: sales@senproco.com Mail: Senproco 4401 N. Northview Ave. Sioux Falls, SD INSTRUCTION MANUAL 11
12 RECOMMENDED MAINTENANCE Weekly (or as necessary) 1 Make sure foot valve strainers (B) are free from hair and debris. 2 Check the blue inlet hose screen (H) located next to your water source 3 Unscrew the spray nozzle (I) and check for any build up. If applicable, remove buildup. Monthly (or as necessary) 1 Check for leaks and tighten necessary fittings. Replace hose washers if necessary. 2 If the product bottle collapses, poke a pin hole above the product level. 3 Place a few drops of household oil on the stem of the black handle. 4 Clean the spray nozzle by removing it from the hose. Push a paper clip through each hole and clean with a household lime and/ or calcium cleaner. Rinse thoroughly to make sure all debris is removed. 5 Use a toothbrush to clean the screen washer located in the blue inlet hose connected directly to the freshwater supply. Quarterly Foot valve strainer (how to clean) 1 The foot valve strainer is the blue screen located at the end of each clear tube 2 Remove each foot valve strainer from the clear tubes (you may need a pliers) 3 Once all 4 foot valves are removed from the tube, Insert in a bucket of hot water 4 Let the foot valve strainers to soak for approx. 15 minutes 5 Finally rinse the foot valve strainers off and re-insert on clear tubes 6 Before you attach them back on to the tubes, pull all hair out of the valves 7 Attach back to the hose 12
13 Quarterly 4 product selector valve (how to clean) 1 Clean the 4-Product Selector Valve (12 on parts diagram) 2 Remove the Bather Box cover (refer back to Installation steps 1,2,3 and 4) 3 Remove both retaining screws on the metering valve mounting bracket 4 Using a pliers, pinch one hose clamp and slide down tube. 5 Repeat with other 3 hose clamps 6 Slightly pull hoses away from center of the 4-Product Selector Valve without completely removing the hose(s) 7 Push down on locking collar (the lighter grey piece that has 3 nubs on each side) 8 Turn clockwise (right) 1/8 of a turn until it releases 9 Remove spring, white disk, locking collar and product selector knob 10 Rinse under warm water to remove any debris 11 With a wet towel, remove any debris from grey 5 hole surface and the area surrounding the 5 hole surface 12 Place collar on knob and turn knob until you hear a click. The knob is now positioned on a product selection STOP If the knob is not locked into one of the product selections, you will not be able to reassemble the 4-Product Selector Valve 13 Insert spring into product selector knob 14 Align flat section of the white disk with the flat section of the product selector knob STOP Make sure that the machined slot on the white disk is facing the 5 hole surface 15 Align the knob, collar, spring and white disk (which you just assembled) over the 5 hole section INSTRUCTION MANUAL 13
14 RECOMMENDED MAINTENANCE continued 16 Push towards unit and turn counter clockwise 1/8 turn. 17 Push hose(s) back toward the center of the 4-Product Selector Valve until secure 18 Using a pliers, pinch hose clamps and return to area over grey barbs 19 Next return the metering valve mounting bracket back into position 20 Insert both screws back into metering valve mounting bracket 21 Last, Place cover back on unit Quarterly Check valve (how to clean) 1 Remove the faceplate 2 Remove retaining screws for metering valve mounting bracket 3 Pull the metering valve mounting bracket up and out of the way without disconnecting the hoses 4 Remove the 4 product selector valve by pinching together opposing sides of the selector valve harness 5 Once 4 product selector valve is removed, unscrew (counterclockwise) the grey check valve 6 Once the check valve is removed, with two pliers (one holding the large rigged outside circular piece of the valve, the other grabbing the larger part of the jug shaped component) turn counterclockwise and unscrew the large rigged outside circular piece (threaded) from the jug shaped component (has the o ring) 7 Remove the nine holed washer from the jug shaped piece 8 Pop out with small screwdriver, a spring will come out 14
15 9 Inside is another needle looking component 10 Remove debris and/or hair from all (4) components 11 Reinsert needle looking component, followed by the spring and finally the nine holed washer 12 Screw the (2) halves back together 13 Notches do not have to line up, just make sure they are tight 14 Place Teflon thread tape over the male threads 15 Reinsert back onto brown eductor by hand (no pliers to tighten) 16 Reinsert 4 product selector valve 17 Insert both screws back into metering valve mounting bracket 18 Place faceplate back on the unit Replacement Instructions 3-way brass ball valve 1 Remove face plate, blue hoses and lower plastic retainer strap (sliding to the left). 2 Next remove the 2 retaining screws located on each side of the metering valve mounting bracket 3 Loosen and remove both female chrome garden hose fittings. 4 Remove entire right hand lower corner of plumbing fixture. 5 Remove rear fitting from valve. 6 Remove top fitting from valve using 10 mm hex wrench. 7 Remove bottom fitting (paying close attention to gray washer), remove washer from old valve and place into new valve. 8 Assemble unit in reverse order of removal. INSTRUCTION MANUAL 15
PROMAX INSTRUCTION MANUAL
 PROMAX INSTRUCTION MANUAL One Hand Activation Single Product [1 gpm (4l/m) models only] One Hand Activation 4 Product [1 gpm (4l/m) models only] Button Activation Single Product [1, 4, 8 gpm (4, 16, 30
DEMA BLEND CENTER MODELS: 633GAP INSTALLATION INSTRUCTIONS
 The 633GAP Series Blend Center modular design lets you easily couple together any number of stations to create a system that meets your specific needs. Mix and match both high and low flow units for filling
DEMA MODEL 692T FOAM STATION I INSTALLATION INSTRUCTION
 1. PARTS CHECKLIST: ITEM DESCRIPTION QTY. A. Foam Station Assembly 1 B. #10 Screw & Anchor Kit Set (Total: 4 Screws & 4 Anchors) 1 C. Ceramic Weight 1 D. ¼ ID Tubing & Foot Valve Assembly 1 E. Metering
Shower System. Dual Head INSTRUCTION GUIDE
 INSTRUCTION GUIDE Step-By-Step Illustrated Installation Instructions Jet Cleaning Instructions Proper Finish Care Limited Warranty Read these instructions carefully before installing your new shower system
3.1 DISPENSER BLACK SHADOW SERIES. Tools Needed for Mounting SCS Dispenser Hammer
 SCS 2 BLACK SHADOW SERIES 3.1 DISPENSER ALWAYS OBSERVE PRODUCT SAFETY AND HANDLING INSTRUCTIONS. ALWAYS DIRECT DISCHARGE AWAY FROM YOU or other persons. ALWAYS DISPENSE CLEANERS AND CHEMICALS AS DIRECTED
Tools Needed for Mounting Cleá Filling Station
 ALWAYS OBSERVE PRODUCT SAFETY AND HANDLING INSTRUCTIONS. ALWAYS DIRECT DISCHARGE AWAY FROM YOU or other persons. ALWAYS DISPENSE CLEANERS AND CHEMICALS AS DIRECTED ON THE LABEL. ALWAYS DISPENSE INTO APPROVED
PeroxiDraw Dispenser
 The PeroxiDraw Dispensing System is a locking dispensing system that allows the user to dispense Green Earth Peroxide Cleaner for up to six different dilutions and applications safely and effectively.
DEMA BLEND CENTER MODEL 681GAP-3 INSTALLATION INSTRUCTIONS
 1. PARTS CHECKLIST: A. Blend Center Assembly B. Vinyl Supply Tubing with Foot Valve Assembly C. Ceramic Weight D. Vinyl Outlet Tubing E. Screw and Anchor Kit F. Label Card G. Metering Tip Kit 2. INSTALLATION:
The 606T-2 unit is designed to be used as a spray or foam unit where up to two chemicals can be attached to the unit along with a clean water rinse.
 Overview The 606T-2 unit is designed to be used as a spray or foam unit where up to two chemicals can be attached to the unit along with a clean water rinse. The unit features three ball valves for control
DEMA MODEL 693T FOAM STATION II INSTALLATION INSTRUCTION
 1. PARTS CHECKLIST: 2. INSTALLATION: DEMA MODEL 93T FOAM STATION II ITEM DESCRIPTION QTY. A. Foam Station Assembly 1 B. ¼ ID Tubing & Foot Strainer 1 C. 3/ ID Tubing & Foot Strainer 1 D. Ceramic Weight
CHEMTROL TRIPLE SPACE SAVER CLEANING STATION #U16242 INSTALLATION INSTRUCTIONS
 CHEMTROL TRIPLE SPACE SAVER CLEANING STATION #U16242 INSTALLATION INSTRUCTIONS 1) PARTS INCLUDED: A. Cleaning Station. B. 3 ea. 3/8" OD x 8' long vinyl chemical supply tubing w/ cap adapter C. 1 ea. 3/4"
6-12 WIDESPREAD 6-12 W. Cleopatra Series INSTRUCTION GUIDE SAVE THIS INSTRUCTION GUIDE
 INSTRUCTION GUIDE STEP-BY-STEP ILLUSTRATED INSTALLATION INSTRUCTIONS TROUBLE SHOOTING & REPAIR TIPS 20 YEAR LIMITED WARRANTY PROPER FINISH CARE Read these instructions carefully before installing your
TABLE 1-1 GPM FLOW RATE PROPORTIONER, 1/4 I.D. TUBING Injection Rates For Viscosities Shown Metering Tip Color
 Blend Safe II Dispensing System is a modular, locking dispensing system that allows user to dispense chemicals safely, control dispenser inventory and has the flexibility in the field to meet changing
STAINLESS STEEL DETERGENT INJECTOR AW
 STAINLESS STEEL DETERGENT INJECTOR AW-8000-0001 OPERATING INSTRUCTIONS & PARTS LIST CAUTION RISK OF INJURY! READ ENTIRE MANUAL BEFORE OPERATING! THIS MANUAL IS AN IMPORTANT PART OF THE INJECTOR AND MUST
Service Manual Air Tech Second Stage
 Service Manual Air Tech Second Stage Copyright 2002, Cressi-sub Revised 3/2002 2 Air Tech Second Stage Service Manual Contents BEFORE STARTING... 3 DISASSEMBLY... 3 PARTS CLEANING AND LUBRICATION... 9
Intended Use: Explanation of Signal Word Consequences
 SAFETY INFORMATION & INSTRUCTION MANUAL Please read, understand, and follow all safety information contained in these instructions prior to the use of this device. Retain these instructions for future
DEMA SINGLE-FEED MODEL: 651GAP& 651GAP-1 INSTALLATION INSTRUCTIONS
 The Model 65GAP is designed to dispense one product into a kitchen sink with the turn of a ball valve. I. PARTS: ITEM DESCRIPTION QTY. A Dispenser Assembly B ½ ID X 6 Long Vinyl Outlet Tubing (For 4 GPM
Items # and #
 D I S P E N S E R T E C H N I C A L M A N U A L Items #91160-00 and #91161-00 1. System Description... 1 2. Equipment Included with the Green Earth II XL System... 2 3. Components Included with Green Earth
SB-1821-E. Instructions for Models: What You Need To Know: Tools: Required: Need Help? For additional assistance or service call: Helpful:
 Instructions for Models: SB-8 SB-8-E What You Need To Know: Tools: Required: *Adjustable Wrench *Groove Joint Pliers *Philips Screwdriver Important Notes: Be sure to read instructions thoroughly before
Technical Manual. Table of Contents
 Technical Manual Table of Contents Section Page 1. FASTDRAW System Description... 2 2. FASTDRAW Equipment Available... 3 3. FASTDRAW Equipment Packing Lists... 3 4. Parts Diagram... 4 5. Pre-Installation
SAFETY INFORMATION & INSTRUCTION MANUAL
 SAFETY INFORMATION & INSTRUCTION MANUAL Please read, understand, and follow all safety information contained in these instructions prior to the use of this device. Retain these instructions for future
665 Series Dispenser. Metering tip kit
 665 Series Dispenser Metering tip kit Box Contains Mounting hardware, template & key set Instruction sheet 665 series dispenser 4 SafeLink cap assemblies OR Bulk tubing, 4 ceramic weights and foot valves
DISCONTINUED. Installation. Aerada 900 Series Futura Faucet. With Accu-Zone (AZ) Infrared Control
 Infrared Control") Aerada 900 Series Futura Faucet With Accu-Zone (AZ) Infrared Control BRADLEY SC A S53-141 4" Centerset S53-148 4" Centerset, no Solenoid Valve S53-186 4" Centerset with 8" Trim Plate S53-285 Centershank
Aerada 900 Series Futura Faucet With Accu-Zone (AZ) Infrared Control BRADLEY SC A S53-141 4" Centerset S53-148 4" Centerset, no Solenoid Valve S53-186 4" Centerset with 8" Trim Plate S53-285 Centershank
(Airgap)
") 92174-00 91599-00 (Airgap) Technical Manual EQUIPMENT PACKING LIST FASTDRAW PRO Dispenser with attached 6 water inlet hose Keys (2) Hose Hook Technical Manual Operation Chart Wall Anchors (4) and Screws
92174-00 91599-00 (Airgap) Technical Manual EQUIPMENT PACKING LIST FASTDRAW PRO Dispenser with attached 6 water inlet hose Keys (2) Hose Hook Technical Manual Operation Chart Wall Anchors (4) and Screws
DEMA SPRAY STATION II MODEL 606T-2 INSTALLATION INSTRUCTIONS
 The 0T-2 Spray Station II Dispensers are used in any application where a chemical product must be sprayed or foamed without the use of compressed air or a high pressure pump. City water pressure and optional
OWNER S MANUAL Model: LG ( ) (15 Gallon Lawn & Garden Trailer Sprayer)
 (15 Gallon Lawn & Garden Trailer Sprayer)") OWNER S MANUAL Model: LG-1500-304 (5301439) (15 Gallon Lawn & Garden Trailer Sprayer) Technical Specifications 15 Gallon Corrosion-Resistant Polyethylene Tank 12 Volt Diaphragm Pump, 2.1 g.p.m. 60 psi
OWNER S MANUAL Model: LG-1500-304 (5301439) (15 Gallon Lawn & Garden Trailer Sprayer) Technical Specifications 15 Gallon Corrosion-Resistant Polyethylene Tank 12 Volt Diaphragm Pump, 2.1 g.p.m. 60 psi
Installation Instructions
 Instructions Aerada 900 Series Futura Faucet With Battery (BIR) Infrared Control S53-284 4" Centerset/Centershank S53-289 Centerset/Centershank w/plate Table of Contents Pre- Information............2 900
DEMA BLEND CENTER MODELS: 637GAP-1 and 637GAP-4 INSTALLATION INSTRUCTIONS
 1. PARTS CHECKLIST: ITEM DESCRIPTION QTY. A. Blend Center Assembly 1 B. ¼ ID X 8 Long Vinyl Supply Tubing & Foot Valve Assembly 4 C. Ceramic Weight 1 D. ½ ID X 6 Long Vinyl Outlet Tubing (For 1 GPM Station
BLACK SHADOW SERIES DISPENSER. Tools Needed for Mounting SCS Dispenser Hammer Drill with 1/4, 1/8, 9/32 and 5/32 Diameter Bits Pliers
 SCS BLACK SHADOW SERIES.. DISPENSER ALWAYS OBSERVE PRODUCT SAFETY AND HANDLING INSTRUCTIONS. ALWAYS DIRECT DISCHARGE AWAY FROM YOU or other persons. ALWAYS DISPENSE CLEANERS AND CHEMICALS AS DIRECTED ON
OWNER S MANUAL Model: LG ( ) (25 Gallon Lawn & Garden Trailer Sprayer)
 (25 Gallon Lawn & Garden Trailer Sprayer)") OWNER S MANUAL Model: LG-2500-304 (5301440) (25 Gallon Lawn & Garden Trailer Sprayer) Technical Specifications 25 Gallon Corrosion-Resistant Polyethylene Tank 12 Volt Diaphragm Pump, 2.1 g.p.m. 60 psi
OWNER S MANUAL Model: LG-2500-304 (5301440) (25 Gallon Lawn & Garden Trailer Sprayer) Technical Specifications 25 Gallon Corrosion-Resistant Polyethylene Tank 12 Volt Diaphragm Pump, 2.1 g.p.m. 60 psi
Installation For Service Only
 For Service Only IMPORTANT! Aerada 1100 Series Low Arc Faucet S53-302 Battery Infrared Metering Faucet (Center Shank with 4" Trimplate) THIS SIDE UP! Packing List Read this entire installation manual to
INSTRUCTIONS Refillable, reusable. Extra versatile. Pressurized by free air
 SURE SHOT SPRAYERS INSTRUCTIONS Refillable, reusable. Extra versatile. Pressurized by free air MODEL M 24 OZ. DIRECTIONS FOR OPERATING MODEL M SPRAYERS 1) ALWAYS DEPRESSURIZE SPRAYER BEFORE REMOVING ANY
OWNER S MANUAL. Model: UTV-65-BL ( ) (65 Gallon Lawn & Garden UTV Sprayer w/boomless Boom)
 (65 Gallon Lawn & Garden UTV Sprayer w/boomless Boom)") OWNER S MANUAL Model: UTV-65-BL (5302843) (65 Gallon Lawn & Garden UTV Sprayer w/boomless Boom) Technical Specifications 65 Gal. Corrosion-Resistant Polyethylene Tank Deluxe Pistol-Grip Handgun 25 Ft.
OWNER S MANUAL Model: UTV-65-BL (5302843) (65 Gallon Lawn & Garden UTV Sprayer w/boomless Boom) Technical Specifications 65 Gal. Corrosion-Resistant Polyethylene Tank Deluxe Pistol-Grip Handgun 25 Ft.
Service Manual Air Plus Second Stage
 Service Manual Air Plus Second Stage Includes XS Series Second Stage Copyright 2002, Cressi-sub Revised 3/2002 2 Air Plus Second Stage Service Manual Contents BEFORE STARTING... 3 DISASSEMBLY... 3 PARTS
DEMA SPRAY CLEAN DISPENSERS MODEL 605T INSTALLATION INSTRUCTION
 The 605T Spray Clean Dispenser is used in any application where a chemical product must be sprayed or foamed without the use of compressed air or a high pressure pump. City water pressure and optional
BEFORE BEGINNING INSTALLATION
 COMPLETE CHASSIS FUEL LINE KITS For 1996-2000 Honda Civic Equipped with B-Series Engine INSTALLATION INSTRUCTIONS PLEASE study these instructions carefully before beginning this installation. Most installations
180 Lake Ave North Paynesville, MN Phone: (320) MASTER MANUFACTURING MASTER GARDNER
 MASTER MANUFACTURING MASTER GARDNER") 180 Lake Ave North Paynesville, MN 56362 Phone: (320) 340-6464 www.master-mfg.com MASTER MANUFACTURING MASTER GARDNER Part Number PCD-E3-009B-MM July 2017 Note: Do not return product to the distributor/dealer
180 Lake Ave North Paynesville, MN 56362 Phone: (320) 340-6464 www.master-mfg.com MASTER MANUFACTURING MASTER GARDNER Part Number PCD-E3-009B-MM July 2017 Note: Do not return product to the distributor/dealer
Owner's Manual. Model: SK-61-4R ( ) (60 Gallon Skid Sprayer w/2.5 H.P. Engine, 4-Roller Pump, Deluxe Handgun) Technical Specifications
 (60 Gallon Skid Sprayer w/2.5 H.P. Engine, 4-Roller Pump, Deluxe Handgun) Technical Specifications") Owner's Manual Model: SK--R (0) (0 Gallon Skid Sprayer w/. H.P. Engine, -Roller Pump, Deluxe Handgun) Technical Specifications. H.P. Recoil Start Engine Roller Pump - G.P.M. Pressure Relief Valve Pressure
Owner's Manual Model: SK--R (0) (0 Gallon Skid Sprayer w/. H.P. Engine, -Roller Pump, Deluxe Handgun) Technical Specifications. H.P. Recoil Start Engine Roller Pump - G.P.M. Pressure Relief Valve Pressure
DEMA MODELS P203CTC.PI.1,.2,.3 INSTALLATION INSTRUCTIONS
 I. PARTS: A. 1 pc. Cyclone Portable Injector B. 1 pc. Foot Strainer & 1/4" I.D. Tubing. C. 1 pc. Ceramic Weight. D. 1 pc. Instruction Sheet D. 2 pc. 3 hose w/ female x female GHT fittings on both ends
INSTRUCTIONS DURA SHOT S SPRAYERS DIRECTIONS FOR OPERATING DURA SHOT S. 24 oz. DURA SURE SHOT S SPRAYER.
 DURA SHOT S SPRAYERS INSTRUCTIONS Refillable, reusable. Extra versatile. Pressurized by free air DURA SHOT S 24 oz. DIRECTIONS FOR OPERATING DURA SHOT S SPRAYERS 1) ALWAYS DEPRESSURIZE SPRAYER BEFORE REMOVING
DEMA 651AG SINGLE-FEED INSTALLATION INSTRUCTIONS
 I. PARTS: A. Dispenser assembly B. 1 pc. 9/16 in. I.D. X 6 ft. vinyl outlet tubing (4 GPM proportioner only). C. 1 pc. 3/8 in. O.D. X 8 ft. vinyl supply tubing, foot valve & ceramic weight. D. 4 pc. #10
I Button Chemical Dispenser. Overview. Installation Instructions
 4 Button Chemical Dispenser Overview The 4 Button Chemical Dispenser makes users more efficient, filling bottles and buckets with ease and quickness. Package Contains: Mounting Template Mounting hardware
1-BUTTON DISPENSER INSTALLATION INSTRUCTIONS
 R 1-BUTTON DISPENSER INSTALLATION INSTRUCTIONS Model: #91162-00 The Green Earth II 1-button dispenser allows you to dispense one product for mop buckets and automatic scrubbers. The modular design lets
Owner's Manual. Model: LS-PCO-100-GEM ( ) (100 Gallon Skid-Mounted High Pressure Sprayer) Technical Specifications. General Information
 (100 Gallon Skid-Mounted High Pressure Sprayer) Technical Specifications. General Information") Owner's Manual Model: LS-PCO-00-GEM (5302043) (00 Gallon Skid-Mounted High Pressure Sprayer) Technical Specifications 00 Gallon Corrosion-Resistant PCO Tank 5.5 HP Honda Engine 990-D403GRGI Pump: (Maximun
Owner's Manual Model: LS-PCO-00-GEM (5302043) (00 Gallon Skid-Mounted High Pressure Sprayer) Technical Specifications 00 Gallon Corrosion-Resistant PCO Tank 5.5 HP Honda Engine 990-D403GRGI Pump: (Maximun
Instructions. Certifications Chrome less spray Chrome with spray 10-K82-WNCH-AD-Z Chrome less spray 10-K82-WYCH-AD-Z Chrome with spray
 Instructions *Image may vary slightly from actual product Tools Required Adjustable Wrench Groove Joint Pliers Pipe Wrench Phillips Screwdriver Pipe Tape or pipe thread compound Safety Tips If you solder
23200 Navigator Dilution Control System 4 Button Model (NAV 4)
") 23200 Navigator Dilution Control System 4 Button Model (NAV 4) Overview The NAV 4 Chemical Dilution Control System accurately dilutes cleaning chemicals from cleaning concentrate product. It is a closed
23200 Navigator Dilution Control System 4 Button Model (NAV 4) Overview The NAV 4 Chemical Dilution Control System accurately dilutes cleaning chemicals from cleaning concentrate product. It is a closed
DEMA MODELS 606T INSTALLATION INSTRUCTIONS
 I. PARTS: A. Select-O-Spray Assembly B. 2 Pcs. Foot Strainers & 1/4" ID Tubing C. 4 Pcs. Mounting Screws & Anchors D. 1 Pc. 100-15K Metering Tip Kit TABLE 1 Hose I.D. 3/8" 1/2" 5/8" Max. Length 15 ft.
DEMA RAPID FIRE MODELS 6300, , , , 6310, 6300H 6300E, 6300EH, &6310E INSTRUCTION SHEET
 I-1002 Pg. 1 of 12 PURPOSE: The RAPID FIRE is a spray system designed with a single knob to control OFF, RINSE and up to two chemicals using a single chemically resistant plastic injector. There is full
OWNER S MANUAL. Model: LG-30-TRL ( ) (30 Gallon Lawn & Garden Trailer Sprayer)
 (30 Gallon Lawn & Garden Trailer Sprayer)") OWNER S MANUAL Model: LG-30-TRL (5302317) (30 Gallon Lawn & Garden Trailer Sprayer) Technical Specifications 30 Gal. Corrosion-Resistant Polyethylene Tank 12 Volt Diaphragm Pump, 2.1 g.p.m. 60 psi 15 Ft.
OWNER S MANUAL Model: LG-30-TRL (5302317) (30 Gallon Lawn & Garden Trailer Sprayer) Technical Specifications 30 Gal. Corrosion-Resistant Polyethylene Tank 12 Volt Diaphragm Pump, 2.1 g.p.m. 60 psi 15 Ft.
OWNER S MANUAL. Model: TR-40-GAS ( ) (40 Gallon Lawn & Garden Trailer Sprayer w/5-nozzle Boom Assembly) Technical Specifications
 (40 Gallon Lawn & Garden Trailer Sprayer w/5-nozzle Boom Assembly) Technical Specifications") OWNER S MANUAL Model: TR-40-GAS (5301339) (40 Gallon Lawn & Garden Trailer Sprayer w/5-nozzle Boom Assembly) Technical Specifications 40 Gal. Corrosion-Resistant Polyethylene Tank 5.5 HP Briggs & Stratton
OWNER S MANUAL Model: TR-40-GAS (5301339) (40 Gallon Lawn & Garden Trailer Sprayer w/5-nozzle Boom Assembly) Technical Specifications 40 Gal. Corrosion-Resistant Polyethylene Tank 5.5 HP Briggs & Stratton
DEMA 652 DUO-FEED INSTALLATION INSTRUCTIONS
 I. PARTS: A. Dispenser assembly B. 1 pc. ½ in I.D. X 6 ft. vinyl outlet tubing C. 1 pc. 9/16 in. I.D. X 6 ft. vinyl outlet tubing. D. 2 pc. 3/8 in. O.D. X 8 ft. vinyl supply tubing, foot valve & ceramic
Installation Instructions
 Instructions Aerada 90-75 Series Metering Faucet S53-053 90-75 Series Metering Faucet with 4" Centerset S53-082 90-75 Series Metering Faucet with 4" Centerset & 8" Trim Plate S53-058 90-75 Series Metering
Instructions. Certifications. Two Handle Kitchen Faucet. Tools Required. Maintenance. Safety Tips. Important Points. Things You May Need.
 116874 Chrome less 116864 PVD brushed nickel with 0-K8-CYCH-AD-Z Chrome with 0-K8-CYBN-AD-Z PVD brushed nickel with 0-K8-CNCH-AD-Z Chrome less 0-K8-CNBN-AD-Z PVD brushed nickel less *Image may vary slightly
Owner's Manual. Model: ( ) (150 Gallon, 5.5 HP Skid Sprayer) Technical Specifications. General Information. Warranty/Parts/Service
 (150 Gallon, 5.5 HP Skid Sprayer) Technical Specifications. General Information. Warranty/Parts/Service") Owner's Manual Model: -0 (00) (0 Gallon,. HP Skid Sprayer) Technical Specifications General Information Thank you for purchasing this product. The purpose of this manual is to assist you in operating and
Owner's Manual Model: -0 (00) (0 Gallon,. HP Skid Sprayer) Technical Specifications General Information Thank you for purchasing this product. The purpose of this manual is to assist you in operating and
INSTALLATION, OPERATING AND SERVICE MANUAL
 INSTALLATION, OPERATING AND SERVICE MANUAL ECONO-mist WATER SOFTENER Demand Regeneration 7-LMC56-75B 7-LM56-75B 7-LM56-100B 7-LM56-150B 7-LM56-200B Congratulations on purchasing your new Lancaster Water
Installation Manual v1.0: The Torque Pro Propane Injection System GM. Please read all instructions before installation.
 PRO66-INST Installation Manual v1.0: The Torque Pro Propane Injection System GM Please read all instructions before installation. Thank you for purchasing the ATS Torque Pro Propane Injection System. This
CAUTIONS AND WARNINGS
 FIREWALL FORWARD FUEL LINE KITS For 1996-2000 Honda Civic Equipped with B-Series Engine INSTALLATION INSTRUCTIONS PLEASE study these instructions carefully before beginning this installation. Most installations
Backpack Sprayer. Use and Care Manual
 Backpack Sprayer Use and Care Manual BACKPACK SPRAYER CAUTION: Read and follow all instructions Do Not Return This Backpack To The Store For Help, Information or Parts, Call : 1-800-311-9903 The Fountainhead
DEMA Model 294D Spray Foam INSTALLATION INSTRUCTIONS
 1. PARTS A. Foamer Assembly B. Plastic chemical supply tubing w/ foot valve and ceramic weight C. Metering tip kit D. Outlet hose 25 long (optional accessory) E. Shut-off valve (optional accessory) 2.
Owner's Manual. Model: ATVBK-3025 ( ) (Boomless Nozzle Kit for ATV Mounting) Technical Specifications. Assembly. General Information
 (Boomless Nozzle Kit for ATV Mounting) Technical Specifications. Assembly. General Information") Owner's Manual Model: ATVBK-305 (530484) (Boomless zzle Kit for ATV Mounting) Technical Specifications 30 Foot Spray Coverage w/boom Corrosion-Resistant zzles Caution: Always check the vehicle load rating
Owner's Manual Model: ATVBK-305 (530484) (Boomless zzle Kit for ATV Mounting) Technical Specifications 30 Foot Spray Coverage w/boom Corrosion-Resistant zzles Caution: Always check the vehicle load rating
ALWAYS DISCONNECT DISPENSER FROM WATER SOURCE WHEN DISPENSER IS NOT IN USE.
 1060GAPRF With dilution selector 1060GAP OVERVIEW DEMA S MPD is a multiple product and dilution dispenser designed for use with SafeLink closed loop inserts. With its innovative patent pending QuickDock
INSTALLATION INSTRUCTIONS DEMA BLEND CENTER MODEL B-GAP, T-GAP
 1. PARTS: ITEM DESCRIPTION QTY. A. Blend Center Assembly 1 B. ¼ ID X 8 Long Vinyl Supply Tubing & Foot Valve Assembly 1 C. Ceramic Weight 1 D. ½ ID X 6 Long Vinyl Outlet Tubing (For 4 GPM Station Only)
Hose Reel Kit for Multi-Pro 1200 and 1250 Sprayers. Installation Instructions. Form No Model No Serial No.
 Hose Reel Kit for Multi-Pro 00 and 50 Sprayers Model No. Serial No. 000000 and Up Form No. 9-8 Installation Instructions Installation Important You will need to purchase Teflon tape before installing this
DEMA MODEL 606T-WI INSTALLATION INSTRUCTIONS
 DEMA MODEL 606T-WI INSTALLATION INSTRUCTIONS I. PARTS: A. Select-O-Spray Assembly B. 2 Pcs. Foot Strainers & 1/4" ID Tubing C. 4 Pcs. Mounting Screws & Anchors D. 1 Pc. 100-15K Metering Tip Kit E. 1 Pc.
MicroCoat System Operating Manual MC4000 Series MC785M, MC785M-WF Spray Valves
 MicroCoat System Operating Manual MC Series MC785M, MC785M-WF Spray Valves A NORDSON COMPANY Introduction The MicroCoat System provides precise lubrication control for metal stamping operations. The MC
PowerFlo 20 Parts List/Assembly Instructions/Users Guide ***PLEASE READ ALL INSTRUCTIONS CAREFULLY AND THOROUGHLY***
 PowerFlo 20 Parts List/Assembly Instructions/Users Guide ***PLEASE READ ALL INSTRUCTIONS CAREFULLY AND THOROUGHLY*** Owners Manual (Please check to make sure to locate all parts before assembly.) 11/12/2008
INSTALLATION INSTRUCTIONS
 INSTALLATION INSTRUCTIONS Part# 69-0717 AIR IT UP 4 Tire On Board Installed Air Delivery System with Rear Mounted Controller (Requires External Air Source) For the most up-to-date instructions please visit
OWNER S MANUAL. Model: LG-25-BL-QR ( ) (25 Gallon ATV Dual Nozzle Sprayer) ***IMPORTANT REMINDER*** Technical Specifications
 (25 Gallon ATV Dual Nozzle Sprayer) ***IMPORTANT REMINDER*** Technical Specifications") OWNER S MANUAL Model: LG-25-BL-QR (5302323) (25 Gallon ATV Dual Nozzle Sprayer) Technical Specifications 25 Gal. Corrosion-Resistant Polyethylene Tank 12 Volt Diaphragm Pump, 3.8 g.p.m. 45 psi Deluxe Pistol
OWNER S MANUAL Model: LG-25-BL-QR (5302323) (25 Gallon ATV Dual Nozzle Sprayer) Technical Specifications 25 Gal. Corrosion-Resistant Polyethylene Tank 12 Volt Diaphragm Pump, 3.8 g.p.m. 45 psi Deluxe Pistol
3M V-Series Air Control Valves. Maintenance
 3M V-Series Air Control Valves Maintenance Next, let s look at the replacement parts for the continuous flow supplied air respirator system. A complete assembly consists of the following components: -
180 Lake Ave North Paynesville, MN Phone: MASTER MANUFACTURING MASTER GARDNER
 180 Lake Ave North Paynesville, MN 56362 Phone: 1-800-864-1649 www.master-mfg.com MASTER MANUFACTURING MASTER GARDNER Part Number PCD-E3-009B-MM Rev 2 Dec. 2012 Note: Do not return product to the distributor/dealer
MODEL NO GALLON H.P. SKID SPRAYER ASSEMBLY / OPERATION INSTRUCTIONS / PARTS
 5300431 MODEL NO. 9-150 150 GALLON - 5.5 H.P. SKID SPRAYER ASSEMBLY / OPERATION INSTRUCTIONS / PARTS Pressure Gauge - Adjustable Pressure Range Suction Line Filter Handgun With 25 Feet Of Handgun Hose
Part# JL AIR IT UP 4 Tire On Board Air Delivery System. (Requires External Air Source)
") Part# 18-1819 JL AIR IT UP 4 Tire On Board Air Delivery System (Requires External Air Source) The most up-to-date instructions always visit www.updownair.com www.updownair.com 833-226-4863 I M P O R T
Part# 18-1819 JL AIR IT UP 4 Tire On Board Air Delivery System (Requires External Air Source) The most up-to-date instructions always visit www.updownair.com www.updownair.com 833-226-4863 I M P O R T
Heavy Duty Sprayer Owners Manual Model MS-O
 Heavy Duty Sprayer Owners Manual Model MS-O Table of Contents Warranty 4 Warning 5 Assembly and Preparation 6 Operation 7 Cleaning and Storage 7 Standard Spray Gun & Parts List 8 Trigger Style Spray Gun
DAH Left Hand Hose Inlet Kit Instruction Sheet For Use with 700 SERIES DAH Dilution at Hand Blend Centers
 DAH Left Hand Hose Inlet Kit 98-54-1 Instruction Sheet For Use with 700 SERIES DAH Dilution at Hand Blend Centers BASIC KIT FUNCTION: The left hand hose inlet kit has two main functions. The kit can be
Spray & Foam Dispenser Item #
 Spray & Foam Dispenser Item #92364-00 Spray & Foam Dispenser Item #92364 Table of Contents Section Page 1. Spray & Foam Dispenser Description... 3 2. Spray & Foam Dispenser Installation... 4 3. Chemical
FRP SystemOne GELCOATER OPERATION MANUAL. MAGNUM VENUS PRODUCTS Operation Manual. Part No. M Revision
 1300-1-1 GELCOATER OPERATION MANUAL MAGNUM VENUS PRODUCTS Operation Manual Part No. M1300-1-1 Revision 04.26.01 Operation Manual Unit Information Unit # Type Of: Power Cylinder Metering Pump Gun Fluid
Remove utility bag from plastic and install onto pivot arm with attached straps. Install utility bag with zippers facing away from machine.
 Owner s Manual Packing List: C3XP Unit Spray gun w/ 2 settings 12-volt battery Telescoping handle Removable Cleaning Caddy Pivot arm Utility Bag 10 Gallon water reservoir (integral) 17 ft. discharge hose
PowerFlo 50 Parts List/Assembly Instructions/Users Guide ***PLEASE READ ALL INSTRUCTIONS CAREFULLY AND THOROUGHLY***
 PowerFlo 50 Parts List/Assembly Instructions/Users Guide ***PLEASE READ ALL INSTRUCTIONS CAREFULLY AND THOROUGHLY*** Owners Manual (Please check to make sure to locate all parts before assembly.) 11/12/2008
OWNER S MANUAL. Model: ATV ( ) ***IMPORTANT REMINDER*** Technical Specifications. Assembly Instructions. General Information
 ***IMPORTANT REMINDER*** Technical Specifications. Assembly Instructions. General Information") OWNER S MANUAL Technical Specifications 25 Gal. Corrosion-Resistant Polyethylene Tank 12 Volt Diaphragm Pump, 2.1 g.p.m. 60 psi 15 Ft. Handgun Hose (3/8 I.D.) 15 Ft. Vertical throw, 30 Ft. Horizontal Throw
OWNER S MANUAL Technical Specifications 25 Gal. Corrosion-Resistant Polyethylene Tank 12 Volt Diaphragm Pump, 2.1 g.p.m. 60 psi 15 Ft. Handgun Hose (3/8 I.D.) 15 Ft. Vertical throw, 30 Ft. Horizontal Throw
ALLSTAR DILUTION CONTROL SYSTEM MODEL 639AG-4-1ABC
 MODEL 639AG-4-1ABC 1. PARTS: A. Blend Center assembly B. 5 pc. 1/4 ID x 8 ft. long vinyl supply tubing, with foot valve & ceramic weight C. 1 pc. 1/2 ID x 6 ft. long vinyl outlet tubing D. 2 pc. #8 pan
MODEL NO. LG Volt Lawn & Garden Sprayer ASSEMBLY / OPERATION INSTRUCTIONS / PARTS
 5301065 MODEL NO. LG-2500-303 12 Volt Lawn & Garden Sprayer ASSEMBLY / OPERATION INSTRUCTIONS / PARTS 12 Volt Diaphragm Pump 2.1 G.P.M. Lever Handgun 15 Ft. of 3/8 Hose (Handgun) Pressure Gauge Adjustable
Service Handbook. High-Pressure Washer Pump
 Pump 629 9/28/01 3:22 PM Page 1 Service Handbook High-Pressure Washer Pump 3.532-629.0 10.00 Pump 629 9/28/01 3:22 PM Page 2 Pump 629 9/28/01 3:22 PM Page 3 TROUBLESHOOTING OVERVIEW How to Use This Manual
Remove the 3-11mm nuts holding mirror on. Don t drop the nuts!
 2005-2012 Ford Mustang Puddle Lamp Kit Parts List: Quantity: Tool List: LED Lamps 2 Flat head screwdriver Seals 2 Ratchet & Socket set OR Nuts 2 Adjustable Wrench Wiring harness 1 Drill & 11/16 th bit
Page 1 of 19. Part# /10/2006
 Part# 1002733-01 10/10/2006 This manual contains important information concerning the installation and operation of the gun washers listed above. Read manual thoroughly and keep for future reference INSTRUCTIONS
OWNER S MANUAL. Model: FSUTV-45-12V ( ) (45 Gallon Lawn & Garden UTV Sprayer, Boom Ready) Technical Specifications. Assembly Instructions
 (45 Gallon Lawn & Garden UTV Sprayer, Boom Ready) Technical Specifications. Assembly Instructions") OWNER S MANUAL Model: FSUTV-45-12V (5302903) (45 Gallon Lawn & Garden UTV Sprayer, Boom Ready) Technical Specifications 45 Gal. Corrosion-Resistant Polyethylene Tank Deluxe Pistol-Grip Handgun 25 Ft. Handgun
OWNER S MANUAL Model: FSUTV-45-12V (5302903) (45 Gallon Lawn & Garden UTV Sprayer, Boom Ready) Technical Specifications 45 Gal. Corrosion-Resistant Polyethylene Tank Deluxe Pistol-Grip Handgun 25 Ft. Handgun
OWNER S MANUAL Model: TR-40-EX ( ) (40 Gallon Lawn & Garden Trailer Sprayer w/5-nozzle Boom Assembly)
 (40 Gallon Lawn & Garden Trailer Sprayer w/5-nozzle Boom Assembly)") OWNER S MANUAL Model: TR-40-EX (5301338) (40 Gallon Lawn & Garden Trailer Sprayer w/5-nozzle Boom Assembly) Technical Specifications 40 Gal. Corrosion-Resistant Polyethylene Tank 12 Volt Diaphragm Pump,
OWNER S MANUAL Model: TR-40-EX (5301338) (40 Gallon Lawn & Garden Trailer Sprayer w/5-nozzle Boom Assembly) Technical Specifications 40 Gal. Corrosion-Resistant Polyethylene Tank 12 Volt Diaphragm Pump,
INSTRUCTIONS Refillable, reusable. Extra versatile. Pressurized by free air
 SURE SHOT SPRAYERS INSTRUCTIONS Refillable, reusable. Extra versatile. Pressurized by free air TOP LOAD WITH LIGHT LIQUIDS PRESSURIZE WITH AIR CHUCK SPRAY ANYWHERE MODEL A 32 OZ. DIRECTIONS FOR OPERATING
AIR SHOWER & TUB REP
 SHOWER & TUB REPAIR 02-2091 Price Pfister, Ball Joint, O-Ring, 403927 For Shower Head. 03-1251 403954 Fiberglass Shower Drain, Fits 2 Cast Iron, Steel, ABS, or PVC, Seals With Compression Gasket. 02-3027
Installation Instructions
 CLEAN FREESTANDING SINGLE CONTROL BATH FILLER Installation Instructions.9 Thank you for selecting American-Standard... the benchmark of fine quality for over 00 years. To ensure that your installation
PENTECH, INC. BD Spray Gun. Operating Manual Parts Manual May, 2008 Issue 1. Plural Component, Impingement Mixing, Mechanical Purge Spray Gun
 PENTECH, INC. Operating Manual Parts Manual May, 2008 Issue 1 Plural Component, Impingement Mixing, Mechanical Purge Spray Gun BD Spray Gun PENTECH, INC. 7256 21 st Street East Sarasota, FL 34243 Phone:
GTFLOW EXTENSION MANIFOLD ASSEMBLY INSTRUCTIONS
 Page 1 of 5 Step 1: ASSEMBLE THE MAIN MANIFOLD AND MANIFOLD EXTENSION KIT First and very important step is to properly connect the main manifold and the manifold extension kit together by using the two
INSTALLATION INSTRUCTIONS
 INSTALLATION INSTRUCTIONS Part # 751-FP2500 IMPORTANT INFORMATION This Jagg oil cooler must be installed following these instructions. Read the easy-to-follow instructions fully prior to starting the installation
INSTALLATION INSTRUCTIONS
 INSTALLATION INSTRUCTIONS Part# 22-7810 Add On Kit for Your ADS System Contents: Complete Install Kit for Your ARB CKMTA12V Compressor For the most up-to-date instructions please visit www.updownair.com
Spray Clean 606T-2 Installation Instruction
 Spray Clean 606T-2 Installation Instruction Overview The 606T-2 unit is designed to be used as a spray or foam unit where up to two chemicals can be attached to the unit along with a clean water rinse.
Owner's Manual. Model: ATVBK-710 ( ) (7-Nozzle Deluxe Boom Assembly w/connecting Fittings) Technical Specifications.
 (7-Nozzle Deluxe Boom Assembly w/connecting Fittings) Technical Specifications.") Owner's Manual Model: ATVBK-70 (5307) (7-Nozzle Deluxe Boom Assembly w/connecting Fittings) (Tank NOT Included with Boom Kit) Technical Specifications 7-Nozzle Boom Assembly (Diaphragm/Check Valve Nozzles)
Owner's Manual Model: ATVBK-70 (5307) (7-Nozzle Deluxe Boom Assembly w/connecting Fittings) (Tank NOT Included with Boom Kit) Technical Specifications 7-Nozzle Boom Assembly (Diaphragm/Check Valve Nozzles)
Installation and Maintenance Instructions
 Limited One Year Warranty T&S warrants to the original purchaser (other than for purposes of resale) that such product is free from defects in material and workmanship for a period of one (1) year from
Ford 6.7 EGR Delete Kit
 Fits: 2011 12 Powerstroke 6.7L Read instructions thoroughly before proceeding! ***This kit may void factory warranty please check with manufacturer.*** ***This kit is intended for off road use only.***
MODEL: ATVBK-710 BEFORE RETURNING THIS PRODUCT FOR ANY REASON, PLEASE CALL
 5307 MODEL: ATVBK-70 7 Nozzle boom assembly W/CONNECTING FITTINGS Assembly / Operation Instructions / Parts original sales slip, or other evidence of purchase date, to your distributor / dealer. TECHNICAL
Certo Chemical Dilution System
 Certo Chemical Dilution System Overview The Certo Chemical Dilution System accurately dilutes chemical concentrates with water and dispenses the diluted mixture at either a high flow rate to fill buckets
DEMA MODEL 603T-WI INSTALLATION INSTRUCTIONS
 DEMA MODEL 603T-WI I. PARTS: A. Select-O-Matic Assembly B. 2 Pcs. Foot Strainers & 1/4" ID Tubing C. 4 Pcs. Mounting Screws & Anchors D. 1 Pc. 100-15K Metering Tip Kit (603T Only) E. 1 Pc. Backflow Preventer