A Word to Mazda Owners
|
|
|
- Austen Pearson
- 6 years ago
- Views:
Transcription
1
2
3 A Word to Mazda Owners Thank you for choosing a Mazda. We at Mazda design and buid vehices with compete customer satisfaction in mind. To hep ensure enjoyabe and troube-free operation of your Mazda, read this manua carefuy and foow its recommendations. An Authorized Mazda Deaer knows your vehice best. So when maintenance or service is necessary, that's the pace to go. Our nationwide network of Mazda professionas is dedicated to providing you with the best possibe service. We assure you that a of us at Mazda have an ongoing interest in your motoring peasure and in your fu satisfaction with your Mazda product. Mazda Motor Corporation HIROSHIMA, JAPAN Important Notes About This Manua Keep this manua in the gove box as a handy reference for the safe and enjoyabe use of your Mazda. Shoud you rese the vehice, eave this manua with it for the next owner. A specifications and descriptions are accurate at the time of printing. Because improvement is a constant goa at Mazda, we reserve the right to make changes in specifications at any time without notice and without obigation. Event Data Recorder This vehice is equipped with an event data recorder. In the event of a crash, this device records data reated to vehice dynamics and safety systems for a short period of time. These data can hep provide a better understanding of the circumstances in which crashes and injuries occur and ead to the designing of safer vehices. Air Conditioning and the Environment Your Mazda's genuine air conditioner is fied with HFC134a (R134a), a refrigerant that has been found not to damage the earth's ozone ayer. If the air conditioner does not operate propery, consut an Authorized Mazda Deaer. Pease be aware that this manua appies to a modes, equipment and options. As a resut, you may find some expanations for equipment not instaed on your vehice Mazda Motor Corporation Printed in Japan June 2005(Print3)
4 How to Use This Manua We want to hep you get the most driving peasure from your vehice. Your owner's manua, when read from cover to cover, can do that in many ways. Iustrations compement the words of the manua to best expain how to enjoy your Mazda. By reading your manua, you can find out about the features, important safety information, and driving under various road conditions. The symbo beow in this manua means Do not do this or Do not et this happen. A provides information and sometimes suggests how to make better use of your vehice. The symbo beow, ocated on some parts of the vehice, indicates that this manua contains information reated to the part. Pease refer to the manua for a detaied expanation. Index: A good pace to start is the Index, an aphabetica isting of a information in your manua. You' find severa WARNINGs, CAUTIONs, and s in the manua. WARNING A WARNING indicates a situation in which serious injury or death coud resut if the warning is ignored. CAUTION A CAUTION indicates a situation in which bodiy injury or damage to your vehice, or both, coud resut if the caution is ignored.
5 Tabe of Contents Your Vehice at a Gance Interior, exterior views and part identification of your Mazda. Essentia Safety Equipment Use of safety equipment, incuding seats, seat bet system, SRS air bags and chid-restraint systems. Knowing Your Mazda Expanation of basic operations and contros; opening/cosing and adjustment of various parts. Before Driving Your Mazda Important information about driving your Mazda. Driving Your Mazda Expanation of instruments and contros. Interior Comfort Use of various features for drive comfort, incuding air-conditioning and audio system. In Case of an Emergency Hepfu information on what to do in an emergency. Maintenance and Care How to keep your Mazda in top condition. Customer Information and Reporting Safety Defects Important consumer information incuding warranties and add-on equipment. Specifications Technica information about your Mazda Index 11 Navigation System
6
7 1 Your Vehice at a Gance Interior, exterior views and part identification of your Mazda. Dashboard and Interior Overview Exterior Overview
8 Your Vehice at a Gance Dashboard and Interior Overview The equipment and instaation position varies according to mode and grade. 1-2
9 Your Vehice at a Gance Dashboard and Interior Overview Rear seat... page 2-5 Front seats... page 2-2 Seat bet... page 2-9 Air bags... page 2-38 Power door ock switch... page 3-8 Power window ock switch... page 3-18 Power window switches... page 3-17 Hood reease hande... page 3-20 Steering coumn reease ever... page 3-29 Outside mirror switch... page 3-29 Rearview mirror... page 3-30 Ignition switch... page 5-2 Parking brake... page 5-5 MT shift ever... page 5-9 AT shift ever (Sport AT)... page 5-11 Instrument custer... page 5-27 Lighting contro/turn signas... page 5-45 Fog ight switch... page 5-49 Wiper and washer ever... page 5-49 Hazard warning fasher switch... page 5-55 Cimate contro system... page 6-2 Audio system... page 6-10 Audio contro switch... page 6-34 Interior ight... page 6-38 Map ight... page 6-39 Gove box... page 6-45 Center consoe... page 6-46 Sunvisor... page 6-38 Vanity mirror... page 6-38 Lighter... page 6-43 Ashtray... page 6-43 Cup hoder... page 6-44 Information dispay... page
10 Your Vehice at a Gance Exterior Overview 4 Door The equipment and instaation position varies according to mode and grade. 1-4
11 Your Vehice at a Gance Exterior Overview Doors and keys... page 3-2 Chid safety ocks... page 3-9 Power windows... page 3-17 Hood... page 3-20 Trunk id... page 3-13 Fue-fier id... page 3-19 Moonroof... page 3-22 Outside mirror... page 3-29 Rear window defroster... page 5-53 Antenna... page 6-10 Windshied wiper bades... page 8-26 Tires... page 8-32 Light bubs... page
12 Your Vehice at a Gance Exterior Overview 5 Door The equipment and instaation position varies according to mode and grade. 1-6
13 Your Vehice at a Gance Exterior Overview Doors and keys... page 3-2 Chid safety ocks... page 3-9 Power windows... page 3-17 Hood... page 3-20 Fue-fier id... page 3-19 Moonroof... page 3-22 Liftgate... page 3-10 Outside mirror... page 3-29 Rear window defroster... page 5-53 Antenna... page 6-10 Windshied wiper bades... page 8-26 Rear wiper bade... page 8-27 Tires... page 8-32 Light bubs... page
14 1-8
15 2 Essentia Safety Equipment Use of safety equipment, incuding seats, seat bet system, SRS air bags and chid-restraint systems. Seats Front Seats Rear Seat Seat Bet Systems Seat Bet Precautions Seat Bet (Except Center-Rear Position) Front Seat Bet Pretensioner and Load Limiting Systems Center-Rear Position Seat Bet (3-Point Type) Seat Bet Extender Seat Bet Warning Light/Beep Chid Restraint Chid Restraint Precautions Instaing Chid-Restraint Systems LATCH Chid-Restraint Systems SRS Air Bags Suppementa Restraint Systems (SRS) Precautions Suppementa Restraint System Components How the Air Bags Work
16 Essentia Safety Equipment Seats Front Seats WARNING Modification of the Front Seats: Modifying or repacing the front seats such as repacing the uphostery or oosening any bots is dangerous. The front seats contain air bag components essentia to the suppementa restraint system. Such modifications coud damage the suppementa restraint system and resut in serious injury. Consut an Authorized Mazda Deaer if there is any need to remove or reinsta the front seats. Damaged Front Seats: Driving with damaged front seats is dangerous. A coision, even one not strong enough to infate the air bags, coud damage the front seats which contain essentia air bag components. If there was a subsequent coision, the air bag may not depoy which coud ead to injuries. Aways have an Authorized Mazda Deaer inspect the front seats, front seat bet pretensioners and air bags after a coision. Securing the Seats: Adjustabe seats and seatbacks that are not securey ocked are dangerous. In a sudden stop or coision, the seat or seatback coud move, causing injury. Make sure the adjustabe components of the seat are ocked in pace by attempting to side the seat forward and backward and rocking the seatback. qseat Side WARNING Driver's Seat Adjustment: Adjusting the driver's seat whie the vehice is moving is dangerous. The driver coud ose contro of the vehice and have an accident. Adjust the driver's seat ony when the vehice is stopped. To move a seat forward or backward, raise the ever and side the seat to the desired position and reease the ever. Make sure the ever returns to its origina position and the seat is ocked in pace by attempting to push it forward and backward. 2-2
17 Essentia Safety Equipment Seats qseat Recine WARNING Recining: Sitting in a recined position whie the vehice is moving is dangerous because you don't get the fu protection from seat bets. During sudden braking or a coision, you can side under the ap bet and suffer serious interna injuries. For maximum protection, sit we back and upright. Unocked Seatback: The seatback pays an important roe in your protection in a vehice. Leaving the seatback unocked is dangerous as it can aow passengers to be ejected or thrown around and baggage to strike occupants in a sudden stop or coision, resuting in severe injury. After adjusting the seatback at any time, even when there are no other passengers, rock the seatback to make sure it is ocked in pace. To change the seatback ange, ean forward sighty whie raising the ever. Then ean back to the desired position and reease the ever. Make sure the ever returns to its origina position and the seatback is ocked in pace by attempting to push it forward and backward. CAUTION When returning a rear-recined seatback to its upright position, make sure you hod onto the seatback with your other hand whie operating the ever. If the seatback is not supported, it wi fip forward suddeny and coud cause injury. 2-3
18 Essentia Safety Equipment Seats qheight Adjustment (Driver's Seat) í By moving the seat ever up or down, the seat bottom height can be adjusted. Up Down qlumbar Support Adjustment (Driver's Seat) í To adjust the umbar support, pu the ever forward. qhead Restraint WARNING Head Restraints Adjustment: Driving with the head restraints adjusted too ow or removed is dangerous. With no support behind your head, your neck coud be seriousy injured in a coision. Aways drive with the head restraints inserted when seats are being used and make sure they are propery adjusted. To raise a head restraint, pu it up to the desired position. To ower the head restraint, press the stopcatch reease, then push the head restraint down. Adjust the head restraint so that the top is even with the top of the passenger's ears, never the passenger's neck. 2-4 í Some modes.
19 Essentia Safety Equipment Seats qseat Warmer í The front seats are eectricay heated. The ignition switch must be in the ON position. Press the switch to turn the seat warmer on or off. When the switch is in the ON position, the indicator ight wi come on. The seat temperature is reguated automaticay by a thermostat. Other than turning it on or off, it cannot be adjusted. Rear Seat WARNING Stacking Cargo: Stacking uggage or other cargo higher than the seatbacks, and pacing artices on the rear package tray or on the uggage compartment cover is dangerous. During sudden braking or a coision, objects can fy around and become projecties that may hit and injure passengers. Don't stack cargo higher than the seatbacks or on the uggage compartment cover. Not Securing Luggage and Cargo: Not securing cargo whie driving is dangerous as it coud move or be crushed during sudden braking or a coision and cause injury. Make sure uggage and cargo is secured before driving. Securing Seats: Adjustabe seats that are not securey ocked are dangerous. In a sudden stop or coision, the seat or seatback coud move, causing injury. Make sure the adjustabe components of the seat are ocked in pace. í Some modes. 2-5
20 Essentia Safety Equipment Seats WARNING Unocked Seatback: The seatback pays an important roe in your protection in a vehice. Leaving the seatback unocked is dangerous as it can aow passengers to be ejected or thrown around and baggage to strike occupants in a sudden stop or coision, resuting in severe injury. After returning the seatback at any time, even when there are no other passengers, rock the seatback to make sure it is ocked in pace. Passenger on the Foded Seatback: Driving with a passenger on the foded seatback is dangerous. Aowing a chid to sit up on the foded seatback whie the vehice is moving is particuary dangerous. In a sudden stop or even a minor coision, a chid not in a proper seat or chid-restraint system and seat bet coud be thrown forward, back or even out of the vehice resuting in serious injuries or death. The chid in the baggage area coud be thrown into other occupants and cause serious injury. Never aow a passenger to sit or stand on the foded seatback whie the vehice is moving. Chidren and the Foding Rear Seats: Paying with the foding rear seats is dangerous. Do not give the car keys to chidren and do not aow them to pay in the vehice. When returning a rear seat to its origina position, aso repace the seat bet to its norma position. Verify that the seat bet pus out and retracts. qspit-foding Rear Seatback To fod the seatbacks CAUTION When operating the rear seatback knob, make sure you support the seatback with your hand. If the seatback is not supported with your hand, it wi fip forward suddeny and coud cause injury to the finger that pushes the rear seatback knob down. 1. Unfasten the ap portion of the centerrear seat bet (page 2-16). CAUTION Aways unfasten the ap portion of the bet before foding the rear-eft seatback. Leaving the ap portion of the bet fastened coud cause damage to the seat bet, bucke and seatback. 2. Position the outboard seat bets to the side when foding the seatbacks down. 3. Support the seatback with your hand. 2-6
21 Essentia Safety Equipment Seats 4. Push the rear seatback knob down. WARNING Seat Bets Caught Under Seatbacks: A seat bet caught under a seatback after the seatback is returned to its upright position is dangerous. In a coision or sudden stop, the seat bet cannot provide adequate protection. Aways make sure the seat bets are fuy pued out from under the seatbacks. To return the seatbacks to the upright position 1. Position the outboard seat bets to the side. 2. Lift the seatbacks upright. 3. Make sure the seat bets are fuy pued out from under the seatbacks. 4. Pu on the top of the seatbacks from inside the vehice to make sure they are ocked. 5. Fasten the center-rear ap/shouder bet and check that a seat bets are routed propery for passenger use (page 2-16). Returning Rear Seatbacks to the Upright Position: A rear seatback not fuy returned and ocked in the upright position is dangerous. Sudden stops or maneuvering coud cause a seatback to fip forward suddeny resuting in injury. If the red indicator is visibe on the back of the rear seatback knob, the seatback is not ocked in the upright position. When returning the seatback to the upright position, make sure there is no red indication. Locked position Unocked position Red indicator 2-7
22 Essentia Safety Equipment Seats qrear Seatback Lock (4 Door) To ock or unock a seatback, move the ever. Height adjustment To raise a head restraint, pu it up to the ocked position. To ower the head restraint, press the stopcatch reease, then push the head restraint down. The seatback ocks are part of the trunk security system (page 3-14). qhead Restraint WARNING Head Restraints Adjustment: Driving with the head restraints adjusted too ow or removed is dangerous. With no support behind your head, your neck coud be seriousy injured in a coision. Aways drive with the head restraints inserted when seats are being used and make sure they are propery adjusted. Adjust the head restraint so that the top is even with the top of the passenger's ears, never the passenger's neck. Remova To remove the head restraint, press the stop-catch reease, then pu up on the head restraint. 2-8
23 Essentia Safety Equipment Seat Bet Systems Seat Bet Precautions Seat bets hep to decrease the possibiity of severe injury during accidents and sudden stops. Mazda recommends that the driver and a passengers aways wear seat bets. A of the seat bet retractors are designed to keep the ap/shouder bets out of the way when not in use. The driver's seat bet has no provisions for chid-restraint systems and has ony an emergency ocking mode. The driver may wear it comfortaby, and it wi ock during a coision. However, the front passenger's seat ap/shouder bet retractors operate in two modes: emergency ocking mode, and for chid-restraint systems, automatic ocking mode. Whie we recommend you put a chidren in the rear seats, if you must use the front passenger seat for a chid, side the front passenger seat as far back as possibe and make sure any chid-restraint system is secured propery. WARNING Not Wearing Seat Bets: Not wearing a seat bet is extremey dangerous. During a coision, occupants not wearing seat bets coud hit someone or things inside the vehice or even be thrown out of the vehice. They coud be seriousy injured or even kied. In the same coision, occupants wearing seat bets woud be much safer. Aways wear your seat bet and make sure a occupants are propery restrained. Seat Bet Damaged During an Accident: Using a damaged seat bet is dangerous. An accident coud damage the bet webbing of the seat bet in use. A damaged seat bet cannot provide adequate protection in a coision. Front air bags and pretensioners work together, but whether a front seat was occupied or not, if any air bag depoyed and whether a seat bet pretensioner depoyed or not, a front seat bets and air bags must be inspected and repaced if necessary. Have an Authorized Mazda Deaer inspect a seat bet systems in use during an accident before they are used again. Twisted Seat Bets: Twisted seat bets are dangerous. In a coision, the fu width of the bet isn't avaiabe to absorb the impact. This puts more force on the bones beneath the bet, which coud cause serious injury or death. Don't wear twisted seat bets. 2-9
24 Essentia Safety Equipment Seat Bet Systems WARNING One Bet, One Passenger: Using one seat bet for more than one person at a time is dangerous. A seat bet used in this way can't spread the impact forces propery and the two passengers coud be crushed together and seriousy injured or even kied. Never use one bet for more than one person at a time and aways operate the vehice with each occupant propery restrained. CAUTION Bet retraction may become difficut if the bets and rings are soied, so try to keep them cean. qpregnant Women and Persons with Serious Medica Conditions Pregnant women shoud wear seat bets. Ask your doctor for specific recommendations. The ap bet shoud be worn SNUGLY AND AS LOW AS POSSIBLE OVER THE HIPS. The shouder bet shoud be worn across your shouder propery, but never across the stomach area. Persons with serious medica conditions aso shoud wear seat bets. Check with your doctor for any specia instructions regarding specific medica conditions. 2-10
25 Essentia Safety Equipment Seat Bet Systems qemergency Locking Mode In the emergency ocking mode, the bet remains comfortabe on the occupant and the retractor wi ock in position during a coision. When the seat bet is retracted, it wi aways be in the emergency ocking mode unti it is switched to automatic ocking mode by puing it a the way out to its fu ength. If the bet fees tight and hinders comfortabe movement whie the vehice is stopped or in motion, it may be in the automatic ocking mode because the bet has been pued too far out. To return to the bet more comfortabe emergency ocking mode, wait unti the vehice has stopped in a safe, eve area, retract the bet fuy to convert it back to emergency ocking mode and then extend it around you again. qautomatic Locking Mode Aways use the automatic ocking mode to keep the chid-restraint system from shifting to an unsafe position in the event of an accident. To enabe seat bet automatic ocking mode, pu it a the way out and connect it as instructed on the chid-restraint system. It wi retract down to the chid-restraint system and stay ocked on it. See the section on chid restraint (page 2-21). 2-11
26 Essentia Safety Equipment Seat Bet Systems Seat Bet (Except Center- Rear Position) When using the center-rear seat bet, refer to Center-Rear Position Seat Bet (page 2-16). qfastening the Seat Bets 1. Grasp the tongue. 2. Sowy pu out the ap/shouder bet. WARNING Positioning the Shouder Portion of the Seat Bet: Improper positioning of the shouder portion of the seat bet is dangerous. Aways make sure the shouder portion of the seat bet is positioned across your shouder and near your neck, but never under your arm, on your neck, or on your upper arm. 4. Make sure the shouder bet is snugy fitted against your body. Bet Tongue Keep ow on hip bone Take up sack Too high 3. Insert the tongue into the bucke unti you hear a cick. Bucke Tongue WARNING Positioning the Lap Portion of the Seat Bet: The ap portion of the seat bet worn too high is dangerous. In a coision, this woud concentrate the impact force directy on the abdomina area, causing serious injury. Wear the ap portion of the bet snugy and as ow as possibe. 2-12
27 Essentia Safety Equipment Seat Bet Systems qunfastening the Seat Bets Depress the button on the bucke. WARNING Positioning the Shouder Portion of the Seat Bet: Improper positioning of the shouder portion of the seat bet is dangerous. Aways make sure the shouder portion of the seat bet is positioned across your shouder and near your neck, but never under your arm, on your neck, or on your upper arm. Button If a bet does not fuy retract, inspect it for kinks and twists. If it is sti not retracting propery, have it inspected at an Authorized Mazda Deaer. qshouder Bet Adjuster Adjust the height of the shouder bet if the seat bet touches your neck, or if it crosses your arm instead of your shouder. To raise the shouder bet adjuster, push the adjuster up. To ower the shouder bet adjuster, pu the button and side it down. Make sure the adjuster is ocked. 2-13
28 Essentia Safety Equipment Seat Bet Systems Front Seat Bet Pretensioner and Load Limiting Systems For optimum protection, the driver and front passenger seat bets are equipped with pretensioner and oad imiting systems. In moderate or greater fronta or nearfronta accidents, the front air bag and pretensioner systems depoy simutaneousy. The pretensioners take up sack in the front seat bets as the air bags are expanding. The seat bet pretensioner system cannot provide adequate protection in an accident if the seat bet is not fastened propery. The oad imiting system reeases bet webbing in a controed manner to reduce bet force on the occupant's chest. WARNING Incorrect Positioning of the Driver and Front Passenger Seat Bets: Incorrect positioning of the driver and passenger seat bets is dangerous. Without proper positioning, the pretensioner and oad imiting systems cannot provide adequate protection in an accident and this coud resut in serious injury. Wear seat bets ony as recommended in this owner's manua (page 2-12). WARNING Expended Seat Bet Pretensioners: One or both front air bags may depoy, and the corresponding pretensioner(s) wi aso depoy at the same time. Use of front seat bets with the pretensioner system expended is dangerous. Like the air bags, the seat bet pretensioners wi ony function once. After they are expended, they wi not function again and must be repaced immediatey. If the seat bet pretensioners are not repaced, the risk of injury in a coision wi increase. Aways have an Authorized Mazda Deaer inspect the seat bet pretensioners and air bags after any coision. Expended seat bet pretensioners and air bags must be repaced after any coision which caused them to depoy Additionay, the oad imiter wi ony imit oads on the chest once in a coision and is another reason to have the front seat bets inspected. Modification or Testing of the Pretensioner System: Modifying the components or wiring of the pretensioner system, incuding the use of eectronic testing devices is dangerous. You coud accidentay activate it or make it inoperabe which woud prevent it from activating in an accident. The occupants or repairers coud be seriousy injured. Never modify the components or wiring, or use eectronic testing devices on the pretensioner system. 2-14
29 Essentia Safety Equipment Seat Bet Systems WARNING Pretensioner System Disposa: Improper disposa of the pretensioner system or a vehice with nondeactivated pretensioners is dangerous. Uness a safety procedures are foowed, injury coud resut. Ask an Authorized Mazda Deaer how to safey dispose of the pretensioner system or how to scrap a pretensioner-equipped vehice. The pretensioner system wi ony activate in a moderate or greater fronta or near-fronta coision. It wi not activate in most roovers, side or rear impacts. Some smoke (non-toxic gas) wi be reeased when the air bags and pretensioners depoy. This does not indicate a fire. This gas normay has no effect on occupants, however, those with sensitive skin may experience ight skin irritation. If residue from the depoyment of the air bags or the front pretensioner system gets on the skin or in the eyes, wash it off as soon as possibe. qair Bag/Front Seat Bet Pretensioner System Warning Light If the air bag/front seat bet pretensioner system is norma, the warning ight iuminates when the ignition switch is turned to the ON position or after the engine is cranked. After about 6 seconds it goes out. A system mafunction is indicated when the warning ight constanty iuminates or doesn't iuminate at a when the ignition switch is turned to the ON position. If any of these occur, consut an Authorized Mazda Deaer as soon as possibe. The system may not work in an accident. WARNING Sef-Servicing the Air Bag/ Pretensioner Systems: Sef-servicing or tampering with the systems is dangerous. An air bag/ pretensioner coud accidentay activate or become disabed. This coud cause serious injuries. Never tamper with the systems and aways have an Authorized Mazda Deaer perform a servicing and repairs. 2-15
30 Essentia Safety Equipment Seat Bet Systems qair Bag/Front Seat Bet Pretensioner System Warning Beep If a mafunction is detected in the air bag/ front seat bet pretensioner systems and the warning ight, a warning beep sound wi be heard for about 5 seconds every minute. The air bag and seat bet pretensioner system warning beep sound wi continue to be heard for approximatey 35 minutes. Have your vehice inspected at an Authorized Mazda Deaer as soon as possibe. Center-Rear Position Seat Bet (3-Point Type) Before using the center-rear ap/shouder bet make sure tongue (A) and anchor bucke (B) are fastened. (A) (B) WARNING Air Bag/Front Seat Bet Pretensioner System Warning Beep: Driving the vehice with the air bag/ front seat bet pretensioner system warning beep sounding is dangerous. In a coision, the air bags and the front seat bet pretensioner system wi not depoy and this coud resut in death or serious injury. Do not drive the vehice with the air bag/front seat bet pretensioner system warning beep sounding. Contact an Authorized Mazda Deaer to have the vehice inspected as soon as possibe. qfastening the Seat Bet 1. Grasp the tongue (C). 2. Sowy pu out the ap/shouder bet. 3. Insert the tongue (C) into the bucke (D) unti you hear a cick. (C) (A) (D) (B) 2-16
31 Essentia Safety Equipment Seat Bet Systems WARNING Fastening the Center-Rear Seat Bet with Ony One Bucke: Fastening the center-rear seat bet with ony one bucke is dangerous. If ony one pair of seat bet tongue and bucke, either tongue (A) and anchor bucke (B) or tongue (C) and anchor bucke (D), is fastened, the seat bet cannot provide fu protection. In a sudden stop or coision, the user coud side under the bet and suffer serious injuries. Aways make sure that both pairs of seat bet tongues and buckes are fastened propery. Positioning the Shouder Portion of the Seat Bet: Improper positioning of the shouder portion of the seat bet is dangerous. Aways make sure the shouder portion of the seat bet is positioned across your shouder and near your neck, but never under your arm, on your neck, or on your upper arm. qunfastening the Seat Bet Depress the button on the bucke. Button qunfastening the Lap Portion of the Seat Bet Insert a sma object such as a key in the anchor bucke (B) sot. (A) (B) 4. Make sure the shouder bet is snugy fitted against your body. WARNING Positioning the Lap Portion of the Seat Bet: The ap portion of the seat bet worn too high is dangerous. In a coision, this woud concentrate the impact force directy on the abdomina area, causing serious injury. Wear the ap portion of the bet snugy and as ow as possibe. CAUTION Aways unfasten the ap portion of the bet before foding the eft-rear seatback. Leaving the ap portion of the bet fastened coud cause damage to the seat bet, bucke and seatback. 2-17
32 Essentia Safety Equipment Seat Bet Systems To encourage rear seat passengers to wear their seat bets, we suggest eaving the center-rear ap position of the bet fastened at a times except when foding the rear seat forward. qfastening the Lap Portion of the Seat Bet Grasp tongue (A) and insert it into the anchor bucke (B) unti you hear a cick. It is now secure for passenger use. After returning the eft-rear seatback to its upright position, fasten the ap portion of the bet. Seat Bet Extender If your seat bet is not ong enough, even when fuy extended, a seat bet extender may be avaiabe to you at no charge from your Authorized Mazda Deaer. This extender wi be ony for you and for the particuar vehice and seat. Even if it pugs into other seat bets, it may not hod in the critica moment of a crash. When ordering an extender, ony order one that provides the necessary additiona ength to fasten the seat bet propery. Pease contact your Authorized Mazda Deaer for more information. WARNING Unnecessary Use of an Extender: Using a seat bet extender when not necessary is dangerous. The seat bet wi be too ong and not fit propery. In an accident, the seat bet wi not provide adequate protection and you coud be seriousy injured. Ony use the extender when it is required to fasten the seat bet propery. Using an Improper Extender: Using a seat bet extender that is for another person or a different vehice or seat is dangerous. The seat bet wi not provide adequate protection and the user coud be seriousy injured in an accident. Ony use the extender provided for you and for the particuar vehice and seat. NEVER use the extender in a different vehice or seat. 2-18
33 Essentia Safety Equipment Seat Bet Systems WARNING Using an Extender That is Too Long: Using an extender that is too ong is dangerous. The seat bet wi not fit propery. In an accident, the seat bet wi not provide adequate protection and you coud be seriousy injured. Don't use the extender or choose one shorter in ength if the distance between the extender's bucke and the center of the user's body is ess than 15cm (6 in). When not in use, remove the seat bet extender and store it in the vehice. If the seat bet extender is eft connected, the seat bet extender might get damaged as it wi not retract with the rest of the seat bet and can easiy fa out of the door when not in use and be damaged the seat bet warning ight wi not iuminate and function propery. Seat Bet Warning Light/ Beep The seat bet warning ight iuminates and a beep sound wi be heard if the driver's seat bet is not fastened when the ignition switch is turned to the ON position. Conditions of operation Condition The driver's seat bet is not fastened when the ignition switch is turned to the ON position. The driver's seat bet is fastened whie the warning ight and the beep sound are activated. The driver's seat bet is fastened before the ignition switch is turned to the ON position. Resut The warning ight iuminates for about 1 minute and a beep sound wi be heard for about 6 seconds. The warning ight turns off and the beep sound stops. The warning ight wi not iuminate and the beep sound wi not be heard. 2-19
34 Essentia Safety Equipment Seat Bet Systems qbet Minder The bet minder is a suppementa warning to the seat bet warning function. This feature provides additiona reminders to the driver that the driver's seat bet is not fastened by intermittenty sounding a beep sound and fashing the seat bet warning ight in the instrument custer. Condition The driver's seat bet is not fastened when the vehice speed reaches 8 km/h (5 mph) and about 1 minute has eapsed since the ignition switch was turned to the ON position. The driver's seat bet is fastened whie the warning ight and the beep sound are activated. The driver's seat bet is fastened before the ignition switch is turned to the ON position. Resut The warning ight fashes and the beep sound wi be heard for about 6 seconds every 30 seconds, for a period of about 5 minutes. The warning ight turns off and the beep sound stops. The warning ight wi not iuminate and the beep sound wi not be heard. The bet minder can be deactivated by the foowing methods. (Temporary deactivation) To temporariy deactivate the bet minder, turn the ignition switch to the ON position, fasten the driver's seat bet for about 2 seconds or onger, and then unfasten it within 20 seconds. The bet minder wi be deactivated unti the ignition switch is turned to the ON position again. (Long-term deactivation) To deactivate the bet minder over the ong term, consut an Authorized Mazda Deaer. If the bet minder is ong-term deactivated, the bet minder wi not activate unti it is restored at the Authorized Mazda Deaer. 2-20
35 Essentia Safety Equipment Chid Restraint Chid Restraint Precautions Mazda strongy urges the use of chid-restraint systems for chidren sma enough to use them. You are required by aw to use a chid-restraint system for chidren in the U.S. and Canada. Check your oca and state or provincia aws for specific requirements regarding the safety of chidren riding in your vehice. Whatever chid-restraint system you consider, pease pick the appropriate one for the age and size of the chid, obey the aw and foow the instructions that come with the individua chid-restraint system. A chid who has outgrown chid-restraint systems shoud sit in the rear and use seat bets, both ap and shouder. If the shouder bet crosses the neck or face, move the chid coser to the center of the vehice in the outboard seats, and towards the bucke on the right if the chid is seated on the center seat. Statistics confirm that the rear seat is the best pace for a chidren up to 12 years of age, and more so with a suppementa restraint system (air bags). A rear-facing chid-restraint system shoud NEVER be used on the front seat with the air bag system activated. The front passenger's seat is aso the east preferred seat for other chid-restraint systems. To reduce the chance of injuries caused by depoyment of the front passenger air bag, the front passenger seat weight sensors work as a part of the suppementa restraint system. This system deactivates the front passenger front and side air bags and aso the front passenger seat bet pretensioner system when the tota seated weight on the front passenger seat is ess than approximatey 30 kg (66 b). When an infant or sma chid sits on the front passenger seat, the system shuts off the front passenger front and side air bags and seat bet pretensioner system, so make sure the front passenger air bag deactivation indicator ight iuminates. Even if the front passenger air bag is shut off, Mazda strongy recommends that chidren be propery restrained and chid-restraint systems of a kinds are propery secured on the rear seats which are the best pace for chidren. For more detais, refer to Front passenger seat weight sensors (page 2-45). 2-21
36 Essentia Safety Equipment Chid Restraint WARNING Proper Size of Chid-Restraint System: For effective protection in vehice accidents and sudden stops, a chid must be propery restrained using a seat bet or chid-restraint system depending on age and size. If not, the chid coud be seriousy injured or even kied in an accident. Foow the Manufacturer's Instructions and Aways Keep the Chid-Restraint System Bucked Down: An unsecured chid-restraint system is dangerous. In a sudden stop or a coision it coud move causing serious injury or death to the chid or other occupants. Make sure any chid-restraint system is propery secured in pace according to the chid-restraint system manufacturer's instructions. When not in use, remove it from the vehice or fasten it with a seat bet, or atch it down to BOTH LATCH ower anchors for LATCH chid-restraint systems and the corresponding tether anchor. Hoding a Chid Whie the Vehice is Moving: Hoding a chid in your arms whie the vehice is moving is extremey dangerous. No matter how strong the person may be, he or she cannot hod onto a chid in a sudden stop or coision and it coud resut in serious injury or death to the chid or other occupants. Even in a moderate accident, the chid may be exposed to air bag forces that coud resut in serious injury or death to the chid, or the chid may be sammed into the adut, injuring the adut. Aways secure a chid in a proper chid-restraint system. Rear-Facing Chid-Restraint System: Rear-facing chid-restraint systems on the front seat are particuary dangerous. The chid-restraint system can be hit by a depoying air bag and moved vioenty backward resuting in serious injury or death to the chid. Even though you may fee assured that a front passenger air bag wi not depoy based on the fact that the front passenger air bag deactivation indicator ight iuminates, NEVER use a rear-facing chid-restraint system in the front seat with an air bag that coud depoy even in a moderate coision. 2-22
37 Essentia Safety Equipment Chid Restraint WARNING Seating Chidren in a Chid-Restraint System on the Front Passenger Seat: If your vehice is equipped with front passenger seat weight sensors, the vehice is aso equipped with an air bag deactivation indicator ight (page 2-30). Even with the front passenger seat weight sensors, if you must use the front passenger seat for chidren, seating a chid in a chid-restraint system on the front passenger seat under the foowing conditions increases the danger of the front passenger air bag depoying and coud resut in serious injury or death to the chid. The tota seated weight of the chid with the chid-restraint system on the front passenger seat is approximatey 30 kg (66 b) or more with a chid in the chidrestraint system. Luggage or other items are paced on the seat with the chid in the chid-restraint system. A rear passenger or uggage push or pu down on the front passenger seatback. A rear passenger puts their feet on the front seat rais. Luggage or other items are paced on the seatback or hung on the head restraint. The seat is washed. Liquids are spied on the seat. The front passenger seat is moved backward, pushing into uggage or other items paced behind it. The front passenger seatback contacts the rear seat. Luggage or other items are paced between the front passenger seat and driver seat. Any accessories which might increase the tota seated weight on the front passenger seat are attached to the front passenger seat. The designated positions with seat bets on the rear seats are the safest paces for chidren. Aways use seat bets and chid restraints. Chidren and Seating Position with Side and Curtain Air Bags: Aowing anyone to ean over or against the side window, the area of the front passenger seat, front and rear window piars and the roof edge aong both sides from which the side and curtain air bags depoy, even if a chid-restraint system is used, is dangerous. If the vehice is equipped with side and curtain air bags, the impact of infation coud cause serious injury or death to the chid. Furthermore, eaning over or against the front door coud bock the side and curtain air bags and eiminate the advantages of suppementa protection. With the front air bag and the additiona side air bag that comes out of the front seat, the rear seat is aways a better ocation for chidren. Do not aow a chid to ean over or against the side window, even if the chid is seated in a chid-restraint system. 2-23
38 Essentia Safety Equipment Chid Restraint WARNING One Bet, One Passenger: Using one seat bet for more than one person at a time is dangerous. A seat bet used in this way can't spread the impact forces propery and the two passengers coud be crushed together and seriousy injured or even kied. Never use one bet for more than one person at a time and aways operate the vehice with each occupant propery restrained. CAUTION A seat bet or chid-restraint system can become very hot in a cosed vehice during warm weather. To avoid burning yoursef or a chid, check them before you or your chid touches them. Your Mazda is equipped with LATCH ower anchors for attachment of speciay designed LATCH chid-restraint systems in the rear seat. When using these anchors to secure a chid-restraint system, refer to LATCH Chid-Restraint Systems (page 2-33). 2-24
39 Essentia Safety Equipment Chid Restraint Instaing Chid-Restraint Systems Accident statistics revea that a chid is safer in the rear seat. The front passenger's seat is ceary the worst choice for any chid under 12, and with rear-facing chidrestraint systems it is ceary unsafe due to air bags. Some chid-restraint systems now come with tethers and therefore must be instaed on the seats that take tethers to be effective. In your Mazda, tethered chid-restraint systems can ony be accommodated in the three positions on the rear seat. Some chid-restraint systems aso empoy speciay designed LATCH attachments; refer to LATCH Chid-Restraint Systems (page 2-33). WARNING Tethered Chid-Restraint Systems Work Ony on Tether-Equipped Rear Seats: Instaation of a tether equipped chidrestraint system in the front passenger's seat defeats the safety design of the system and wi resut in an increased chance of serious injury if the chid-restraint system goes forward without benefit of being tethered. Pace tether equipped chid-restraint systems where there are tether anchors. qrear Seat Chid-Restraint System Instaation Foow these instructions when using a chid-restraint system, uness you are attaching a LATCH-equipped chidrestraint system to the rear LATCH ower anchors. Refer to LATCH Chid- Restraint Systems (page 2-33). Foow the chid-restraint system manufacturer's instructions carefuy. If you are not sure whether you have a LATCH system or tether, check in the chid-restraint system manufacturer's instructions and foow them accordingy. Depending on the type of chid-restraint system, it may not empoy seat bets which are in automatic ocking mode. 1. Make sure the seatback is securey atched by pushing it back unti it is fuy ocked. 2. Secure the chid-restraint system with the ap portion of the ap/shouder bet. See the manufacturer's instructions on the chid-restraint system for bet routing instructions. 2-25
40 Essentia Safety Equipment Chid Restraint 3. To get the retractor into the automatic ocking mode, pu the shouder bet portion of the seat bet unti the entire ength of the bet is out of the retractor. 4. Push the chid-restraint system firmy into the vehice seat. Be sure the bet retracts as snugy as possibe. Cicking from the retractor wi be heard during retraction if the system is in the automatic ocking mode. If the bet does not ock the seat down tight, repeat this step. Inspect this function before each use of the chid-restraint system. You shoud not be abe to pu the shouder bet out of the retractor whie the system is in the automatic ocking mode. When you remove the chid-restraint system, be sure the bet fuy retracts to return the system to emergency ocking mode before occupants use the seat bets. 5. If your chid-restraint system requires the use of a tether strap, hook and tighten the tether strap after raising the head restraint (except center position) by foowing the manufacturer's instructions. Anchor bracket ocation (4 Door) Anchor bracket 2-26
41 Essentia Safety Equipment Chid Restraint Tether strap position (4 Door) Anchor bracket ocation (5 Door center position) Tether strap Anchor bracket Anchor bracket ocation (5 Door outboard position) Tether strap position (5 Door center position) Tether strap Tether strap position (5 Door outboard position) Tether strap 2-27
42 Essentia Safety Equipment Chid Restraint WARNING Chid-Restraint Tether Usage: Using the tether or tether anchor to secure anything but a chid-restraint system is dangerous. This coud weaken or damage the tether or tether anchor and resut in injury. Use the tether and tether anchor ony for a chid-restraint system. Incorrect Attachment of the Tether Strap (Except center position): Routing the tether strap on top of the head restraint is dangerous. In a coision, the tether strap coud side off the head restraint, and oosen the chid-restraint system. The chidrestraint system coud move which may resut in death or injury to the chid. Aways route the tether strap between the head restraint posts. qif You Must Use the Front Seat for Chidren If you cannot put a chidren in the rear seat, at east put the smaest chidren in the rear and be sure the argest chid up front uses the shouder bet over the shouder. NEVER put a rear-facing chid-restraint system on the front passenger seat, even with a seat weight sensor equipped vehice. This seat is aso not set up for tethered chid-restraint systems, put them in one of the rear seat positions set up with tether anchors. Likewise the LATCH chid-restraint system cannot be secured in the front passenger's seat and shoud be used in the rear seat. Don't aow anyone to seep against the side window if you have an optiona side and curtain air bag, it coud cause serious injuries to an out of position occupant. As chidren more often seep in cars, it is better to put them in the rear seat. If instaing the chid-restraint system on the front seat is unavoidabe, foow these instructions when using a front-facing chid-restraint system in the front passenger's seat. 2-28
43 Essentia Safety Equipment Chid Restraint To check if your front seats have side air bags: Every Mazda side air bag wi have a SRS AIRBAG tag on the outboard shouder of the front seats. To check if your vehice has curtain air bags: Every Mazda curtain air bag wi have an SRS AIRBAG marking on the front and rear window piars aong the roof edge. WARNING Front Passenger's Seat Position: As your vehice has front air bags and douby so if your vehice has side air bags, a front-facing chid-restraint system shoud be put on the front seat ony when it is unavoidabe. Even if the front passenger air bag deactivation indicator ight iuminates, aways move the seat as far back as possibe, because the force of a depoying air bag coud cause serious injury or death to the chid. WARNING Rear-Facing Chid-Restraint System: Rear-facing chid-restraint systems on the front seat are particuary dangerous. The chid-restraint system can be hit by a depoying air bag and moved vioenty backward resuting in serious injury or death to the chid. Even though you may fee assured that the front passenger air bag wi not depoy based on the fact that the front passenger air bag deactivation indicator ight iuminates, NEVER use a rear-facing chid-restraint system in the front seat with an air bag that coud depoy even in a moderate coision. 2-29
44 Essentia Safety Equipment Chid Restraint WARNING Chidren and Seating Position with Side and Curtain Air Bags: Aowing anyone to ean over or against the side window, the area of the front passenger seat, front and rear window piars and the roof edge aong both sides from which the side and curtain air bags depoy, even if a chid-restraint system is used, is dangerous. If the vehice is equipped with side and curtain air bags, the impact of infation coud cause serious injury or death to the chid. Furthermore, eaning over or against the front door coud bock the side and curtain air bags and eiminate the advantages of suppementa protection. With the front air bag and the additiona side air bag that comes out of the front seat, the rear seat is aways a better ocation for chidren. Do not aow a chid to ean over or against the side window, even if the chid is seated in a chid-restraint system. qfront Passenger's Seat Chid- Restraint System Instaation 1. Side the seat as far back as possibe. 2. Secure the chid-restraint system with the ap portion of the ap/shouder bet. See the manufacturer's instructions on the chid-restraint system for bet routing instructions. 3. To get the retractor into the automatic ocking mode, pu the shouder bet portion of the seat bet unti the entire ength of the bet is out of the retractor. 4. Push the chid-restraint system firmy into the vehice seat. Be sure the bet retracts as snugy as possibe. Cicking from the retractor wi be heard during retraction if the system is in automatic ocking mode. If the bet does not ock the seat down tight, repeat the previous step and aso this one. 2-30
45 Essentia Safety Equipment Chid Restraint Without seat warmer Inspect this function before each use of the chid-restraint system. You shoud not be abe to pu the shouder bet out of the retractor whie the system is in the automatic ocking mode. When you remove the chid-restraint system, be sure the bet fuy retracts to return the system to emergency ocking mode before occupants use the seat bets. Foow the chid-restraint system manufacturer's instructions carefuy. Depending on the type of chidrestraint system, it may not empoy seat bets which are in automatic ocking mode. 5. Make sure the front passenger air bag deactivation indicator ight iuminates after instaing a chid-restraint system on the front passenger seat. Refer to Front passenger air bag deactivation indicator ight on page With seat warmer 2-31
46 Essentia Safety Equipment Chid Restraint WARNING Seating a Chid in a Chid-Restraint System on the Front Passenger Seat With the Front Passenger Air Bag Deactivation Indicator Light Not Iuminated: Seating a chid in a chid-restraint system instaed on the front passenger seat with the front passenger air bag deactivation indicator ight not iuminated is dangerous. If this indicator ight does not iuminate even when the tota seated weight is ess than approximatey 30 kg (66 b), this means that the front passenger front and side air bags, and seat bet pretensioner are ready for depoyment. If an accident were to depoy an air bag, a chid sitting in the front passenger seat coud be seriousy injured or kied. If the indicator ight does not iuminate after instaing a chid-restraint system on the front passenger seat, insta the chidrestraint system on the rear seat and consut an Authorized Mazda Deaer as soon as possibe. Whie it is aways better to insta any chid-restraint system on the rear seat, it is essentia to do so if the front passenger air bag deactivation indicator ight does not iuminate (page 2-45). 2-32
47 Essentia Safety Equipment Chid Restraint LATCH Chid-Restraint Systems Your Mazda is equipped with LATCH ower anchors for attachment of speciay designed LATCH chid-restraint systems in the rear outboard seats that side through the passenger seat when it is in the fuy rearward position. Both anchors must be used, otherwise the seat wi bounce around and put the chid in danger. Most LATCH chid-restraint systems must aso be used in conjunction with a tether to be effective. If they have a tether you must use it to better assure your chid's safety. WARNING Manufacturer's Instructions for Chid-Restraint System: An unsecured chid-restraint system is dangerous. In a sudden stop or a coision it coud move causing serious injury or death to the chid or other occupants. Make sure the chid-restraint system is propery secured in pace according to the chid-restraint system manufacturer's instructions. Attaching Two Chid-Restraint Systems to the Same LATCH Lower Anchor: Attaching two chid-restraint systems to the same LATCH ower anchor is dangerous. In a coision, one anchor may not be strong enough to hod two chid-restraint system attachments and may break, causing serious injury or death. If you use the seat position for another chid-restraint system when an outboard LATCH position is occupied, use the center seat bets instead, and the tether if tether-equipped. Unsecured Chid-Restraint System: An unsecured chid-restraint system is dangerous. In a sudden stop or a coision it coud move causing serious injury or death to the chid or other occupants. Foow the chid-restraint system manufacturer's instructions on bet routing to secure the seat just as you woud with a chid in it so that nobody is tempted to put a chid in an impropery secured seat ater on. When not in use, remove it from the vehice or fasten it with a seat bet, or atch it down to BOTH LATCH ower anchors for LATCH chidrestraint systems. LATCH Chid-Restraint Systems: Not foowing the chid-restraint system manufacturer's instructions when instaing the chid-restraint system is dangerous. If seat bets or a foreign object prevent the chid-restraint system from being securey attached to the LATCH ower anchors and the chid-restraint system is instaed impropery, the chid-restraint system coud move in a sudden stop or coision causing serious injury or death to the chid or other occupants. When instaing the chid-restraint system, make sure there are no seat bets or foreign objects near or around the LATCH ower anchors. Aways foow the chid-restraint system manufacturer's instructions. 2-33
48 Essentia Safety Equipment Chid Restraint qchid-restraint System Instaation Procedure (Rear Outboard Seats) 1. Make sure the seatback is securey atched by pushing it back unti it is fuy ocked. 2. Expand the area between the seat bottom and the seatback sighty to verify the ocations of the LATCH ower anchors. Anchor bracket ocation (4 Door) Anchor bracket Tether strap position (4 Door) Tether strap The markings above the LATCH ower anchors indicate the ocations of LATCH ower anchors for the attachment of a chid-restraint system. Anchor bracket Anchor bracket ocation (5 Door) 3. Secure the chid-restraint system using BOTH LATCH ower anchors, foowing the chid-restraint system manufacturer's instruction. 4. If your chid-restraint system came equipped with a tether, that probaby means it is very important to propery secure the tether for chid safety, pease carefuy foow the chid-restraint system manufacturer's instructions when instaing tethers. 2-34
49 Essentia Safety Equipment Chid Restraint Tether strap position (5 Door) Tether strap WARNING Chid-Restraint Tether Usage: Using the tether or tether anchor to secure anything but a chid-restraint system is dangerous. This coud weaken or damage the tether or tether anchor and resut in injury. Use the tether and tether anchor ony for a chid-restraint system. Incorrect Attachment of the Tether Strap: Routing the tether strap on top of the head restraint is dangerous. In a coision, the tether strap coud side off the head restraint, and oosen the chid-restraint system. The chidrestraint system coud move which may resut in death or injury to the chid. Aways route the tether strap between the head restraint posts. qchid-restraint System Instaation Procedure (Rear Center Seat) The LATCH ower anchors at the center of the rear seat are much further apart than the sets of LATCH ower anchors for chid-restraint system instaation at other seating positions. Chid-restraint systems with rigid LATCH attachments cannot be instaed on the center seating position. Some LATCH equipped chid-restraint systems can be paced in the center position and wi reach the nearest LATCH ower anchors which are 400 mm (15.75 in) apart. LATCH compatibe chid-restraint systems (with attachments on bet webbing) can be used at this seating position ony if the chid-restraint system manufacturer's instructions state that the chid-restraint system can be instaed to LATCH ower anchors that are 400 mm (15.75 in) apart. Do not attach two chid-restraint systems to the same LATCH ower anchor. If your chidrestraint system has a tether, it must aso be used for your chid's optimum safety. 1. Make sure the seatback is securey atched by pushing it back unti it is fuy ocked. 2-35
50 Essentia Safety Equipment Chid Restraint 2. Expand the area between the seat bottom and the seatback sighty to verify the ocations of the LATCH ower anchors. Anchor bracket ocation (4 Door) Anchor bracket Tether strap position (4 Door) The markings above the LATCH ower anchors indicate the ocations of LATCH ower anchors for the attachment of a chid-restraint system. 3. Secure the chid-restraint system using BOTH LATCH ower anchors, foowing the chid-restraint system manufacturer's instructions. 4. If your chid-restraint system came equipped with a tether, that probaby means it is very important to propery secure the tether for chid safety, pease carefuy foow the chid-restraint system manufacturer's instructions when instaing tethers. Anchor bracket Anchor bracket ocation (5 Door) Tether strap 2-36
51 Essentia Safety Equipment Chid Restraint Tether strap position (5 Door) Tether strap WARNING Chid-Restraint Tether Usage: Using the tether or tether anchor to secure anything but a chid-restraint system is dangerous. This coud weaken or damage the tether or tether anchor and resut in injury. Use the tether and tether anchor ony for a chid-restraint system. 2-37
52 Essentia Safety Equipment SRS Air Bags Suppementa Restraint Systems (SRS) Precautions The front and side suppementa restraint systems (SRS) incude up to 6 air bags (verify SRS AIRBAG ocation indicator marks). They are ocated in: The steering whee hub (driver air bag) The front passenger dashboard (front passenger air bag) The outboard sides of the front seatbacks (side air bags) í The front and rear window piars, and the roof edge aong both sides (curtain air bags) í These systems operate independenty depending on the type of accident encountered; if you have side and curtain air bags, the side and curtain air bags are not ikey to depoy on both sides in the same accident because a vehice is not often hit from both sides. The side and curtain air bags and the fronta air bag system wi not normay depoy during the same type of accident uness a combination of fronta and side impacts occur. The air bag suppementa restraint systems are designed to provide suppementa protection ony in the front seats in certain situations and the rear outside passenger positions ony in same-side coisions, so seat bets are aways important in the foowing ways: Without seat bet usage, the air bags cannot provide adequate protection during an accident. Seat bet usage is necessary to: Keep the occupant from being thrown into an infating air bag. Reduce the possibiity of injuries during an accident that is not designed for air bag infation, such as ro-over or rear impact. Reduce the possibiity of injuries in fronta or side coisions that are not severe enough to activate the air bags. Reduce the possibiity of being thrown from your vehice. Reduce the possibiity of injuries to ower body and egs during an accident because the air bags provide no protection to these parts of the body. Hod the driver in a position which aows better contro of the vehice. Sma chidren must be protected by a chid-restraint system as stipuated by aw in every state and province. In certain states and provinces, arger chidren must use a chid-restraint system (page 2-21). Carefuy consider which chid-restraint system is necessary for your chid and foow the instaation directions in this Owner's Manua as we as the chid-restraint system manufacturer's instructions í Some modes.
53 Essentia Safety Equipment SRS Air Bags WARNING Air Bags without Seat Bets: Depending ony on the air bags for protection during an accident is dangerous. Aone, air bags may not prevent serious injuries. The appropriate air bags can be expected to infate ony in the first coision with fronta, near fronta or side forces that are at east moderate. Vehice occupants shoud aways wear seat bets. Chid in the Front Seat: Pacing a chid, 12 years or under, in the front seat is dangerous. The chid coud be hit by a depoying air bag and be seriousy injured or even kied. Even if the front passenger air bag deactivation indicator ight iuminates, aways move the front passenger seat as far back as possibe. A seeping chid is more ikey to ean against the door and be hit by the side air bag in a moderate, right-side coision. Whenever possibe, aways secure a chid 12 years and under on the rear seat with an appropriate chid-restraint system for the chid's age and size. Rear-Facing Chid-Restraint System: Rear-facing chid-restraint systems on the front seat are particuary dangerous. The chid-restraint system can be hit by a depoying air bag and moved vioenty backward resuting in serious injury or death to the chid. Even though you may fee assured that a front passenger air bag wi not depoy based on the fact that the front passenger air bag deactivation indicator ight iuminates, NEVER use a rear-facing chid-restraint system in the front seat with an air bag that coud depoy even in a moderate coision. Seating Position with Front Air Bags: Sitting too cose to the air bag modues or pacing hands or feet on them is extremey dangerous. Front air bags infate with great force and speed. Serious injuries coud occur if someone is too cose. The driver shoud aways hod onto ony the rim of the steering whee. The front seat passenger shoud keep both feet on the foor. Front seat occupants shoud adjust their seats as far back as possibe and aways sit upright against the seatbacks with seat bets worn propery. 2-39
54 Essentia Safety Equipment SRS Air Bags WARNING Seating Position with Side and Curtain Air Bags: Sitting too cose to the side air bag modues or pacing hands on them is extremey dangerous. The side air bags infate with great force and speed directy out of the outboard side of the front seat and expand aong the front door on the side the car is hit. Serious injury coud occur if someone is sitting too cose to the door or eaning against a window, or if rear seat occupants grab the sides of the front seatbacks. Furthermore, seeping up against the door or hanging out the windows in the vehice coud bock the side and curtain air bags and eiminate the advantages of suppementa protection. Give the side and curtain air bags room to work by sitting in the center of the seat whie the vehice is moving with seat bets worn propery. Front Air Bag Modues Located in the Steering Whee Hub and the Dashboard: Attaching an object to the front air bag modues or pacing something in front of them is dangerous. In an accident, the object coud interfere with front air bag infation and injure the occupants. Aways keep the front air bag modues free of objects. Side Air Bag Modues: Attaching things to the front seat in such a way as to cover the outboard side of the seat in any way is dangerous. In an accident the object coud interfere with the side air bag, which infates from the outboard side of the front seats, impeding the added protection of the side air bag system or redirecting the air bag in a way that is dangerous. Furthermore, the bag coud be cut open spewing exhaust. Do not hang net bags, map pouches or backpacks with side straps on the front seats. Never use seat covers on the front seats. Aways keep the side air bag modues in your front seats free to depoy in the event of a side coision. Curtain Air Bag Modues: Attaching objects to the areas where the curtain air bag activates such as on the windshied gass, side door gass, front and rear window piars and aong the roof edge and assist grips is dangerous. In an accident the object coud interfere with the curtain air bag, which infates from the front and rear window piars and aong the roof edge, impeding the added protection of the curtain air bag system or redirecting the air bag in a way that is dangerous. Furthermore, the bag coud be cut open spewing exhaust. Do not pace hangers or any other objects on the assist grips. When hanging cothes, hang them on the coat hook directy. Aways keep the curtain air bag modues free to depoy in the event of a side coision. 2-40
55 Essentia Safety Equipment SRS Air Bags WARNING Hot Air Bag Infators: Hot air bag infators are dangerous. Immediatey after infation, the infators in the steering whee, dashboard, seatbacks, or the front and rear window piars and aong the roof edge are very hot. You coud get burned. Don't touch the interna components of the air bag modues after the bags have infated. Instaation of Front-End Equipment: Instaation of front-end equipment, such as fronta protection bar (kangaroo bar, bu bar, push bar, etc.), snowpow, or winches, is dangerous. The air bag crash sensor system coud be affected. This coud cause air bags to infate unexpectedy, or it coud prevent the air bags from infating during an accident. Front occupants coud be seriousy injured. Never insta any front-end equipment to your vehice. Suspension Adjustment: Adjusting the vehice suspension is dangerous. If the vehice's height or the suspension is changed, the vehice wi be unabe to accuratey detect a coision resuting in incorrect or unexpected air bag depoyment and the possibiity of serious injuries. Modification of the Suppementa Restraint System: Modifying the components or wiring of the suppementa restraint system is dangerous. You coud accidentay activate it or make it inoperabe. Don't make any modifications to the suppementa restraint system. This incudes instaing trim, badges, or anything ese over the air bag modues. It aso incudes instaing extra eectrica equipment on or near system components or wiring. An Authorized Mazda Deaer can provide the specia care needed in the remova and instaation of front seats. It is important to protect the air bag wiring and connections to assure that the bags do not accidentay depoy, the driver seat side position sensor and front passenger seat weight sensors are not damaged and that the seats retain an undamaged air bag connection. When an air bag depoys, a oud infation noise can be heard and some smoke wi be reeased. Neither is ikey to cause injury, however, the texture of the air bags may cause ight skin injuries on body parts not covered with cothing through friction. Shoud you se your Mazda, we urge you to te the new owner of its air bag systems and that famiiarization with a instructions about them, from the Owner's Manua, is important. 2-41
56 Essentia Safety Equipment SRS Air Bags Suppementa Restraint System Components The suppementa restraint systems (SRS) have two basic subsystems: The air bag system with infators and air bags. The eectrica system with crash sensors and diagnostic modue. The air bags are mounted in the foowing ocations: The steering whee hub The front passenger dashboard The outboard sides of the front seatbacks í The front and rear window piars, and the roof edge aong both sides í The air bags are out of sight unti activated í Some modes.
57 Essentia Safety Equipment SRS Air Bags qfront Air Bag System Components (4) (6) (1) (3) (8) (7) (2) (9) (5) (8) (1) Front dua stage infators and air bags (2) Crash sensors and diagnostic modue (SAS unit) (3) Front air bag sensor (4) Driver seat side position sensor (page 2-45) (5) Front passenger seat weight sensors (page 2-45) (6) Front seats (7) Driver and front passenger seat bet bucke switches (page 2-45) (8) Front seat bet pretensioner and oad imiting systems (page 2-14) (9) Front passenger air bag deactivation indicator ight (page 2-45) 2-43
58 Essentia Safety Equipment SRS Air Bags qside and Curtain Air Bag System Components í 4 Door (1) (4) (1) 5 Door (1) (2) (3) (4) (1) (2) (3) (1) Side and curtain infators and air bags (2) Side crash sensors (3) Crash sensors and diagnostic modue (SAS unit) (4) Front seats 2-44 í Some modes.
59 Essentia Safety Equipment SRS Air Bags qhow the Front Air Bags Work How the Air Bags Work When air bag crash sensors detect a fronta impact of greater than moderate force, an eectrica current is sent to the infators. Gases are produced to infate the front air bags and after the infation, the front air bags quicky defate. The front air bags wi function ony once. After that, the front air bags wi not work again and must be repaced. Ony an Authorized Mazda Deaer can repace the system components. The front, dua stage air bags contro air bag infation in two energy stages. During an impact of moderate severity the front air bags depoy with esser energy, whereas during more severe impacts, they depoy with more energy. Depoyment of the front air bags may differ between the driver and the front passenger depending on the driver seat position, front passenger weight and front seat bet usage, which aow for further controing of the system. The front air bags wi depoy ony in a fronta or fronta offset impact. Driver seat side position sensor Your vehice is equipped with a driver seat side sensor as a part of the suppementa restraint system. The sensor is ocated under the driver seat. The sensor determines whether the driver seat is fore or aft of a reference position and sends the seat position to the crash sensors and diagnostic modue (SAS unit). The sensor is aso designed to contro the depoyment of the driver air bag depending on how cose the driver seat is to the steering whee. The air bag/front seat bet pretensioner system warning ight fashes if the sensor has a possibe mafunction (page 2-53). 2-45
60 Essentia Safety Equipment SRS Air Bags Front passenger seat weight sensors If your vehice is equipped with front passenger seat weight sensors, a front passenger air bag deactivation indicator ight is aso equipped (page 2-30). These sensors are ocated under both of the front passenger seat rais. These sensors determine the tota seated weight on the front passenger seat. The sensors are aso designed to prevent the front passenger front and side air bags and seat bet pretensioner system from infating if the tota seated weight is ess than approximatey 30 kg (66 b). To reduce the chance of injuries caused by depoyment of the front passenger air bag, the system deactivates the front passenger front and side air bags and aso the seat bet pretensioner system when: There is no passenger in the front passenger seat. (The front passenger air bag deactivation indicator ight does not iuminate.) The tota seated weight on the front passenger seat is ess than approximatey 30 kg (66 b). (The front passenger air bag deactivation indicator ight iuminates.) This system shuts off the front passenger front and side air bags and seat bet pretensioner system, so make sure the front passenger air bag deactivation indicator ight iuminates according to the chart beow. The air bag/front seat bet pretensioner system warning ight fashes and the front passenger air bag deactivation indicator ight iuminates if the sensors have a possibe mafunction. If this happens, the front passenger front and side air bags and seat bet pretensioner system wi not depoy. Front passenger air bag deactivation indicator ight This indicator ight iuminates to remind you that the front passenger front and side air bags and seat bet pretensioner wi not depoy during a coision. Without seat warmer With seat warmer If the front passenger weight sensors are norma, the indicator ight iuminates when the ignition switch is turned to the ON position. After about 6 seconds it goes out. 2-46
61 Essentia Safety Equipment SRS Air Bags The front passenger air bag deactivation indicator ight iuminates or is off under the foowing conditions: Tota seated weight on the front passenger seat Front passenger air bag deactivation indicator ight Front passenger front and side air bags Front passenger seat bet pretensioner system Empty (Not occupied) * OFF OFF OFF Less than approx. 30 kg (66 b) ON OFF OFF Approx. 42 kg (93 b) or more OFF ON ON * If the front passenger seat bet is bucked, the front passenger air bag deactivation indicator ight iuminates, however this does not indicate a mafunction. If the front passenger air bag deactivation indicator ight does not iuminate when the ignition switch is turned to the ON position and does not iuminate as indicated in the above chart, do not aow a chid to sit in the front passenger seat and consut an Authorized Mazda Deaer as soon as possibe. The system may not work propery in an accident. WARNING Decreasing the Tota Seated Weight on the Front Passenger Seat: When an adut or arge chid sits on the front passenger seat, decreasing the tota seated weight on the front passenger seat from the tota seated weight of approximatey 42 kg (93 b) required for air bag depoyment is dangerous. The front passenger seat weight sensors wi detect the reduced tota seated weight condition and the front passenger front and side air bags and seat bet pretensioner system wi not depoy during an accident. The front passenger wi not have the suppementary protection of the air bag, which coud resut in serious injury. Decreasing the tota seated weight on the front passenger seat from the tota seated weight of approximatey 42 kg (93 b) coud resut in an air bag not depoying under the foowing conditions, for exampe: A rear passenger pushes up on the front passenger seat with the feet. Luggage or other items paced under the front passenger seat or between the front passenger seat and driver seat that push up the front passenger seat bottom. The front passenger seat occupant sits in a manner that does not pace the entire weight of the occupant on the seat such as by sitting too cose to the door, grasping the rim of the moonroof. The front passenger seatback contacts the rear seat. Any accessories which might decrease the tota seated weight on the front passenger seat are attached to the front passenger seat. The front passenger front and side air bags and seat bet pretensioner systems wi deactivate if the tota seated weight on the front passenger seat is cose to 30 kg (66 b) and they wi reactivate before the weight exceeds 42 kg (93 b). 2-47
62 Essentia Safety Equipment SRS Air Bags WARNING Increasing the Tota Seated Weight on the Front Passenger Seat: When an infant or sma chid sits on the front passenger seat, increasing the tota seated weight on the front passenger seat from the tota seated weight of approximatey 30 kg (66 b) is dangerous. The front passenger seat weight sensors wi detect the increased tota seated weight, which coud resut in the unexpected depoyment of the front passenger front and side air bags and seat bet pretensioner system in an accident and serious injury. Increasing the tota seated weight on the front passenger seat beyond the tota seated weight of approximatey 30 kg (66 b) coud resut in the front passenger front and side air bags and seat bet pretensioner system depoyment in an accident under the foowing conditions, for exampe: Luggage or other items are paced on the seat with the chid in the chid-restraint system. A rear passenger or uggage push or pu down on the front passenger seatback. A rear passenger steps on the front passenger seat rais with the feet. Luggage or other items are paced on the seatback or hung on the head restraint. The seat is washed. Liquids are spied on the seat. The front passenger seat is moved backward, pushing into uggage or other items paced behind it. The front passenger seatback contacts the rear seat. Luggage or other items are paced between the front passenger seat and driver seat. Any accessories which might increase the tota seated weight on the front passenger seat are attached to the front passenger seat. The front passenger front and side air bags and seat bet pretensioner systems wi deactivate if the tota seated weight on the front passenger seat is cose to 30 kg (66 b) and they wi reactivate before the weight exceeds 42 kg (93 b). CAUTION To assure proper depoyment of the front air bag and to prevent damage to the sensors in the front seat bottoms: Do not pace sharp objects on the front seat bottoms or eave heavy uggage on them. Do not spi any iquids on the front seats or under the front seats. To aow the sensors to function propery, aways perform the foowing: Adjust the front seats as far back as possibe and aways sit upright against the seatbacks with seat bets worn propery. If you pace your chid on the front passenger seat, secure the chid-restraint system propery and side the front passenger seat as far back as possibe (page 2-30). 2-48
63 Essentia Safety Equipment SRS Air Bags The system requires about 10 seconds to aternate between turning the front passenger front and side air bags and seat bet pretensioner system on or off. The front passenger air bag deactivation indicator ight may iuminate repeatedy if uggage or other items are put on the front passenger seat, or if the temperature of the vehice's interior changes suddeny. The front passenger air bag deactivation indicator ight may iuminate for 10 seconds if the tota seated weight on the front passenger seat changes. If the front passenger air bag deactivation indicator ight does not iuminate after instaing a chid-restraint system on the front passenger seat, insta the chid-restraint system on the rear seat and consut an Authorized Mazda Deaer as soon as possibe. Driver and front passenger bucke switches The bucke switches on the front seat bets detect whether or not the front seat bets are securey fastened and further contro the depoyment of the air bags. qhow the Side and Curtain Air Bags Work í When air bag crash sensors detect a side impact of greater than moderate force, an eectrica current is sent to the infators. Gases are produced to infate the side and curtain air bags and after the infation, the side and curtain air bags quicky defate. The side and curtain air bags wi function ony once. After that, the side and curtain air bags wi not work again and must be repaced. Ony an Authorized Mazda Deaer can repace the systems. The curtain air bag wi depoy ony on the side the vehice receives the force of the impact. The side air bag wi depoy ony on the side the vehice receives the force of the impact. í Some modes. 2-49
64 Essentia Safety Equipment SRS Air Bags WARNING Damaged Side and Curtain Air Bag Wiring under the Seats: Pacing uggage or other objects under the front seats is dangerous. The side and curtain air bag wiring coud be damaged, and in the event of a side coision, the side and curtain air bags may not depoy, which coud resut in death or serious injury. To prevent damage to the side and curtain air bag wiring, do not pace uggage or other objects under the front seats. qair Bag Activation/Deactivation If the front passenger seat weight sensors detect a tota seated weight on the front passenger seat is ess than approximatey 42 kg (93 b), the front passenger front and side air bags and seat bet pretensioner may not infate (page 2-45). Front air bag activation A greater than moderate impact wi cause the front air bags to infate in the foowing cases: Hitting a soid wa straight on at greater than about 22 km/h (14 mph). Landing hard or the vehice faing. Fronta impact within about a 30 degree range from head-on to the vehice. Hitting a curb, pavement edge or hard object. 2-50
65 Essentia Safety Equipment SRS Air Bags Driving into a big hoe or hitting the far side of a hoe. Rear-ending or running under a truck's tai gate may not provide the stopping force necessary for air bag depoyment. Limitations to front air bag activation Depending on the severity of impact, the front air bags may not infate in the foowing cases: Impacts invoving trees or poes cause severe cosmetic damage but may not have enough stopping force to activate the air bag. Non-activation of front air bags Front air bags wi not normay infate in the foowing cases: Coision from the rear. Impact to the side, but it may depoy the side and curtain air bags. Fronta offset impact to the vehice may not provide the stopping force necessary for air bag depoyment. Vehice ro-over, may depoy the side and curtain air bags but not the front air bags. 2-51
66 Essentia Safety Equipment SRS Air Bags Side and curtain air bag activation í Greater than moderate impact to one side of the vehice (driver or passenger side areas) wi cause the side and curtain air bags on that side to infate, but it wi not normay depoy the front air bags. Vehice ro-over may not provide enough side force to depoy the side and curtain air bags. Limitations to side and curtain air bag activation í Depending on the severity of impact, the side and curtain air bags may not infate in the foowing cases: Fronta offset impact may not provide enough side impact to depoy the side and curtain air bags. Side impacts with two-wheeed vehices may not provide enough force to depoy the side and curtain air bags. Non-activation of side and curtain air bag í The side and curtain air bags wi not normay infate in the foowing cases: Coision from the rear. Side impacts invoving trees or poes can cause severe cosmetic damage but may not have enough impact force to activate the side and curtain air bags. Coision from the front, but it may depoy the front air bags í Some modes.
67 Essentia Safety Equipment SRS Air Bags qconstant Monitoring The foowing components of the air bag systems are monitored by a diagnostic system: SAS unit Front air bag sensor Air bag modues Side crash sensors í Front seat bet pretensioners Reated wiring Driver seat side position sensor Front passenger seat weight sensors Driver and front passenger seat bet bucke switches The diagnostic modue continuousy monitors the system's readiness. This begins when the ignition switch is turned to the ON position and continues whie the vehice is being driven. qair Bag/Front Seat Bet Pretensioner System Warning Light If the air bag/front seat bet pretensioner system is norma, the warning ight iuminates when the ignition switch is turned to the ON position or after the engine is cranked. After about 6 seconds it goes out. A system mafunction is indicated when the warning ight constanty iuminates or doesn't iuminate at a when the ignition switch is turned to the ON position. If any of these occur, consut an Authorized Mazda Deaer as soon as possibe. The system may not work in an accident. WARNING Sef-Servicing the Air Bag/ Pretensioner Systems: Sef-servicing or tampering with the systems is dangerous. An air bag/ pretensioner coud accidentay activate or become disabed. This coud cause serious injuries. Never tamper with the systems and aways have an Authorized Mazda Deaer perform a servicing and repairs. qair Bag/Front Seat Bet Pretensioner System Warning Beep If a mafunction is detected in the air bag/ front seat bet pretensioner systems and the warning ight, a warning beep sound wi be heard for about 5 seconds every minute. The air bag and seat bet pretensioner system warning beep sound wi continue to be heard for approximatey 35 minutes. Have your vehice inspected at an Authorized Mazda Deaer as soon as possibe. í Some modes. 2-53
68 Essentia Safety Equipment SRS Air Bags WARNING Air Bag/Front Seat Bet Pretensioner System Warning Beep: Driving the vehice with the air bag/ front seat bet pretensioner system warning beep sounding is dangerous. In a coision, the air bags and the front seat bet pretensioner system wi not depoy and this coud resut in death or serious injury. Do not drive the vehice with the air bag/front seat bet pretensioner system warning beep sounding. Contact an Authorized Mazda Deaer to have the vehice inspected as soon as possibe. qmaintenance The air bag systems do not require reguar maintenance. But if any of the foowing occurs, take your vehice to an Authorized Mazda Deaer as soon as possibe: The air bag system warning ight fashes. The air bag system warning ight remains iuminated. The air bag system warning ight does not iuminate when the ignition switch is turned to the ON position. The air bags have depoyed. Front passenger air bag deactivation indicator ight does not iuminate when the ignition switch is turned to the ON position or does not iuminate as indicated in the chart. For more detais about this indicator ight and this chart, refer to Front passenger seat weight sensors (page 2-45). WARNING Damaged Air Bag/Seat Bet Pretensioner System Components: Expended or damaged air bag or seat bet pretensioner units must be repaced after any coision which caused them to depoy or damage them. Ony a trained Authorized Mazda Deaer can fuy evauate these systems to see that they wi work in the next accident. Driving with an expended or damaged air bag or pretensioner units wi provide you reduced protection in the next accident and you coud be injured or kied. Removing Interior Parts: Removing any components such as the front seats(if side air bags are equipped), front dashboard, the steering whee or parts on the front and rear window piars and aong the roof edge, containing air bag parts or sensors is dangerous. These parts contain essentia air bag components. The air bag coud accidentay activate and cause serious injuries. Aways have an Authorized Mazda Deaer remove these parts. Air Bag Disposa: Improper disposa of an air bag or a vehice with ive air bags in it can be extremey dangerous. Uness a safety procedures are foowed, injury can resut. Ask an Authorized Mazda Deaer how to safey dispose of an air bag or how to scrap an air bag equipped vehice. 2-54
69 Essentia Safety Equipment SRS Air Bags If it becomes necessary to have the components or wiring system for the suppementary restraint system modified to accommodate a person with certain medica conditions in accordance with a certified physician, contact an Authorized Mazda Deaer, refer to Customer Assistance (U.S.A.) (page 9-2). 2-55
70 2-56
71 3 Knowing Your Mazda Expanation of basic operations and contros; opening/cosing and adjustment of various parts. Doors and Locks Keys Keyess Entry System í Door Locks Liftgate (5 Door) Trunk Lid (4 Door) Inside Trunk Reease Lever (4Door) Power Windows í Fue-Fier Lid and Cap Hood Moonroof í Security System Immobiizer System Theft-Deterrent System í Steering Whee and Mirrors Steering Whee Mirrors í Some modes. 3-1
72 Knowing Your Mazda Doors and Locks Keys WARNING Keys and Chidren: Leaving chidren in a vehice with the key is dangerous. This coud resut in someone being bady injured or even kied. They coud pay with power windows or other contros, or even make the vehice move. Don't eave the keys in your vehice with chidren and keep them in a pace where your chidren wi not find or pay with them. A code number is stamped on the pate attached to the key set; detach this pate and store it in a safe pace (not in the vehice) for use if you need to make a repacement key. Write down the code number and keep it in a separate, safe and convenient pace, but not in the vehice. If your key is ost, consut your Authorized Mazda Deaer and have your code number ready. Refer to Immobiizer System (page 3-24) for information regarding keys and engine starting. (With theft-deterrent system) Refer to Theft-Deterrent System (page 3-27) for information regarding keys and the prevention of vehice and vehice contents theft. The keys operate a ocks. Key code number pate 3-2
73 Knowing Your Mazda Doors and Locks Keyess Entry System í This system remotey ocks and unocks the doors and the iftgate. It can aso hep you signa for attention. Press the button sowy and carefuy. CAUTION To avoid damage to the transmitter, do not: Drop it. Get it wet. Disassembe it. Expose it to heat or sunight. The keyess entry system is designed to operate up to about 2.5 m (8 ft) from the center of the vehice, but this may vary due to oca conditions. The system doesn't operate when the key is in the ignition switch. Doors cannot be ocked by pressing the ock button whie any other door is open. Aso, the hazard warning ights wi not fash. If the transmitter does not operate when pressing a button or the operation range becomes too sma, the battery may be dead. To insta a new battery, refer to Maintenance (page 3-5). Additiona transmitters can be obtained at an Authorized Mazda Deaer. Up to 3 transmitters can be used with the keyess entry system per vehice. Bring a transmitters to an Authorized Mazda Deaer when the eectronic codes need to be reset. í Some modes. 3-3
74 Knowing Your Mazda Doors and Locks qtransmitter Lock button To confirm that a doors and the iftgate have been ocked, press the ock button again within 5 seconds. If they are cosed and ocked, the horn wi sound. Unock button Panic button (U.S.A.) This device compies with Part 15 of the FCC Rues. Operation is subject to the foowing two conditions: (1) this device may not cause harmfu interference, and (2) this device must accept any interference received, incuding interference that may cause undesired operation. (CANADA) This device compies with RSS-210 of Industry CANADA. Operation is subject to the foowing two conditions: (1) this device may not cause interference, and (2) this device must accept any interference, incuding interference that may cause undesired operation of the device. Lock button To ock the doors and the iftgate, press the ock button and the hazard warning ights wi fash once. (Without theft-deterrent system) The hazard warning ights wi fash once to indicate that a doors and the iftgate are ocked. (With theft-deterrent system) The hazard warning ights wi not fash. The hazard warning ights ony fash when the theft deterrent system is armed, refer to the theft-deterrent system (page 3-27). A doors and the iftgate cannot be ocked when either front door is open and the key is in the ignition switch. Confirm that a doors and the iftgate are ocked visuay or audiby by use of the doube cick. Unock button To unock the driver's door, press the unock button and the hazard warning ights wi fash twice. To unock a doors and the iftgate, press the unock button again within 5 seconds. 3-4
75 Knowing Your Mazda Doors and Locks (Without theft-deterrent system) The hazard warning ights wi fash twice to indicate that a doors and the iftgate are unocked. (With theft-deterrent system) The hazard warning ights wi not fash. The hazard warning ights ony fash when the theft deterrent system is turned off, refer to the theft-deterrent system (page 3-27). After unocking with the transmitter, a doors and the iftgate wi automaticay ock if one of the doors or the iftgate is not opened within about 30 seconds. Panic button If you witness from a distance someone attempting to break into or damage your vehice, pressing the panic button wi activate the vehice's aarm. The panic button wi work whether any door or the iftgate is open or cosed. Turning off the aarm Press any button on the transmitter. qtransmitter Maintenance CAUTION Insta the battery with the positive poe ( ) facing up. Battery eakage coud occur if it is not instaed correcty. When repacing the battery, be carefu not to bend the eectrica terminas or get oi on them. Aso be carefu not to get dirt in the transmitter as it coud be damaged. There is the danger of exposion if the battery is not correcty repaced. Repace ony with the same type battery (CR2025 or equivaent). Dispose of used batteries according to the foowing instructions. Insuate the pus and minus terminas of the battery using ceophane or equivaent tape. Never disassembe. Never throw the battery into fire and/or water. Never deform or crush. Turning on the aarm Pressing the panic button once wi trigger the aarm for about 2 minutes and 30 seconds, and the foowing wi occur: The horn sounds intermittenty. The hazard warning ights fash. 3-5
76 Knowing Your Mazda Doors and Locks Repacing the transmitter battery 1. Insert a sma screwdriver into the sot and genty pry open the transmitter. Sot 3. Insta a new battery (CR2025 or equivaent) into the front portion of the hoder with the positive poe ( ) facing up. Press on the B portion of the battery to set the battery. Back cover Back cover B Front cover 2. Press the portion of the battery indicated by A and remove the battery. A Front of hoder 4. Aign the front and back covers and snap the transmitter shut. qservice If you have a probem with the keyess entry system, consut an Authorized Mazda Deaer. If your transmitter is ost or stoen, bring a remaining transmitters to an Authorized Mazda Deaer as soon as possibe for a repacement and to make the ost or stoen transmitter inoperative. CAUTION Changes or modifications not expressy approved by the party responsibe for compiance coud void the user's authority to operate the equipment. 3-6
77 Knowing Your Mazda Doors and Locks Door Locks WARNING Unattended Chidren and Pets: Leaving a chid or an anima unattended in a parked vehice is dangerous. In hot weather, temperatures inside a vehice can become high enough to cause brain damage or even death. Aways take a chidren and animas with you or eave a responsibe person with them. Keys and Chidren: Leaving chidren in a vehice with the key is dangerous. This coud resut in someone being bady injured or even kied. They coud pay with power windows or other contros, or even make the vehice move. Don't eave the keys in your vehice with chidren and keep them in a pace where your chidren wi not find or pay with them. Unocked Doors: Unocked doors in a moving vehice are dangerous. Passengers can fa out if a door is accidentay opened and can more easiy be thrown out in an accident. So keep a doors ocked when driving. WARNING Vehices Left Unocked: (Except sedan) Leaving your vehice unocked is dangerous as chidren coud ock themseves in a hot vehice, which coud resut in death. Aso, a vehice eft unocked becomes an easy target for thieves and intrudes. Aways cose a the windows, ock the doors and take the key with you when eaving your vehice unattended. (Sedan) Leaving your vehice unocked is dangerous as chidren coud ock themseves in a hot vehice, or become trapped by cimbing into the trunk, which coud resut in death. Aso, a vehice eft unocked becomes an easy target for thieves and intrudes. Aways cose a the windows, ock the doors and take the key with you when eaving your vehice unattended. qlocking, Unocking with Key The driver's door can be ocked/unocked with the key. Turn the key toward the front to unock, toward the back to ock. Unock Lock 3-7
78 Knowing Your Mazda Doors and Locks If your vehice is equipped with a front passenger door key sot, the door can be ocked/unocked with the key. qlocking, Unocking with Transmitter í The doors can be ocked/unocked by operating the keyess entry system transmitter, refer to Keyess Entry System (page 3-3). qlocking, Unocking with Door- Lock Knob To ock any door from the inside, push the door-ock knob. To unock, pu it out. This does not operate the other door ocks. Unock Lock To ock any door with the door-ock knob from the outside, push the door-ock knob to the ock position and cose the door. This does not operate the other door ocks. Door-ock knob (Lock position) When ocking the doors this way, be carefu not to eave the key inside the vehice. qpower Door Locks Vehice ock-out prevention The vehice ock-out prevention feature prevents you from ocking yoursef out of the vehice. With the key in the ignition switch, a doors and the iftgate wi automaticay unock if they are ocked using the power door ocks with either front door open. 3-8 í Some modes.
79 Knowing Your Mazda Doors and Locks Locking, unocking with key A doors and the iftgate ock automaticay when the driver's door is ocked with the key. A doors and the iftgate unock when the driver's door is unocked and the key is hed in the unock position for one second or onger. Locking, unocking with door-ock switch A doors and the iftgate ock automaticay when LOCK is pushed. They a unock when the unmarked part of the door-ock switch is pushed. Unock Lock Unock Lock Hoding the key in the unocked position in the driver's door ock for about a second unocks a doors and the iftgate. To unock ony the driver's door, insert the key into the driver's door ock and turn the key briefy to the unock position and then immediatey return it to the center position. qrear Door Chid Safety Locks These ocks are intended to hep prevent chidren from accidentay opening the rear doors. Use them both whenever a chid rides in the vehice. If you insert the key and turn the chid safety ock to the ock position before cosing that door, the door cannot be opened from the inside. The door can be opened ony by ifting the outside hande. Unock Lock 3-9
80 Knowing Your Mazda Doors and Locks Liftgate (5 Door) WARNING Open Liftgate and Exhaust Gas: Exhaust gas in the cabin of a vehice is dangerous. An open iftgate in a moving vehice wi cause exhaust gas to be drawn into the cabin. This gas contains CO (carbon monoxide), which is cooress, odoress, and highy poisonous, and it can cause oss of consciousness and death. Moreover, an open iftgate coud cause occupants to fa out in an accident. Do not drive with the iftgate open. qlocking, Unocking with Transmitter The iftgate can be ocked/unocked by operating the keyess entry system transmitter, refer to Keyess Entry System (page 3-3). qlocking, Unocking with Door- Lock Switch The iftgate can be ocked/unocked by operating the door-ock switch, refer to Power Door Locks (page 3-8). qopening and Cosing the Liftgate Opening the iftgate Pu the hande and ift up the iftgate. If the vehice battery is dead or there is a mafunction in the eectrica system and the iftgate cannot be unocked, perform the foowing procedure as an emergency measure to unock it: 1. Remove the cap on the interior surface of the iftgate with a fathead screwdriver. Cap 3-10
81 Knowing Your Mazda Doors and Locks 2. Turn the ever to the right to unock the iftgate. Lever After performing this emergency measure, have the vehice inspected at an Authorized Mazda Deaer as soon as possibe. Cosing the iftgate Use both hands to push the iftgate down unti the ock snaps shut. Do not sam it. Pu up on the iftgate to make sure it is securey atched. qluggage Compartment WARNING Pacing Cargo on the Cover: Pacing uggage or other cargo on top of the uggage compartment cover is dangerous. During sudden braking or a coision, the cargo coud become a projectie that coud hit and injure someone. The vehice has a ight weight uggage compartment cover to keep the contents of your uggage area out of sight; it wi not retain heavy objects that are not tied down in an accident ike a roover. Tie down a heavy objects, whether uggage or cargo, using the tie down hooks. Don't pace anything on top of the cover. Not Securing Luggage and Cargo: Not securing cargo whie driving is dangerous as it coud move or be crushed during sudden braking or a coision and cause injury. Make sure uggage and cargo is secured before driving. CAUTION Make sure the uggage compartment cover is firmy secured. If it is not firmy secured, it coud unexpectedy disengage resuting in injury. 3-11
82 Knowing Your Mazda Doors and Locks Luggage compartment cover strap The uggage compartment can be accessed by opening the iftgate when the straps are attached to the sides of the iftgate. Strap Luggage compartment cover The uggage compartment can be accessed by opening the uggage compartment cover from the inside of the vehice. CAUTION To prevent cargo from shifting whie driving or during sudden deceeration, be carefu of the foowing: Do not open the uggage compartment cover whie the vehice is moving. Do not overoad the uggage compartment so that the cover cannot be cosed. Do not aow cargo to interfere with the uggage compartment cover atch. This cover can be removed for more room. To do this, just unfasten the straps; then ift and pu it out. Latch Latch 3-12
83 Knowing Your Mazda Doors and Locks Trunk Lid (4 Door) WARNING Open Trunk and Exhaust Gas: Exhaust gas in the cabin of a vehice is dangerous. This gas contains CO (carbon monoxide), which is cooress, odoress, and highy poisonous. If inhaed, it can cause oss of consciousness and death. Because exhaust gas can get into the cabin through an open trunk, keep the trunk cosed when driving. qopening and Cosing the Trunk WARNING Open Trunk Lid and Chidren: Leaving the trunk id open or eaving chidren in the vehice with the keys is dangerous. Chidren coud open the trunk id and cimb inside resuting in possibe injury or death from heat exposure. Cose the trunk id, ock the rear seatbacks and do not aow chidren to pay inside the vehice. Unattended Chidren and Pets: Leaving chidren or animas unattended in a parked vehice is dangerous. Babies eft seeping and kids who ock themseves in cars or trunks can die very quicky from heat prostration. Don't eave your chidren or pets aone in a car at any time. Don't eave the car, the rear foding seats or the trunk unocked. Aways keep the car from being a tempting pace to pay by ocking rear seats, doors and the trunk, and keeping the keys where chidren won't pay with them. CAUTION For vehices equipped with a rear spoier, do not ift the trunk id by the spoier. Lifting up the trunk id by the rear spoier coud cause damage to the rear spoier and the trunk id. 3-13
84 Knowing Your Mazda Doors and Locks Opening the trunk id with the key Insert the key into the sot and turn it cockwise. qtrunk Security In some situations you may want to prevent the trunk from being opened with the remote trunk id reease ever. Give your key ony to someone you trust. Open To secure the trunk id, ock the rear seatbacks (page 2-8), push the trunk ock ever up, and cose the trunk. To cance the security feature, insert the key into the ock, turn the key cockwise, and pu the trunk ock ever down. Opening the trunk id with the remote reease ever Pu up the reease ever next to the driver's seat. Unock Lock Trunk ock ever Reease ever qtrunk Light The trunk ight is on when the id is open and off when it's cosed. Cosing the trunk id Use both hands to push the trunk id down unti the ock snaps shut. Do not sam it. Pu up on the trunk id to make sure it is secure. 3-14
85 Knowing Your Mazda Doors and Locks To prevent the battery from being discharged, do not eave the trunk open for a ong period when the engine is not running. Inside Trunk Reease Lever (4Door) Your vehice is equipped with an inside trunk reease ever that provides a means of escape for chidren and aduts in the event they become ocked inside the trunk. No matter how carefu aduts might be with keys and ocking their cars, parents shoud be aware that chidren may be tempted to pay around vehices and use the trunk as a hiding pace. Aduts are advised to famiiarize themseves with the operation and ocation of the inside trunk reease ever so that a chidren can be tod about it in an appropriate way, keeping in mind that most vehices don't have such evers. 3-15
86 Knowing Your Mazda Doors and Locks WARNING Open Trunk Lid and Chidren: Leaving the trunk id open or eaving chidren in the vehice with the keys is dangerous. Chidren coud open the trunk id and cimb inside resuting in possibe injury or death from heat exposure. Cose the trunk id, ock the rear seatbacks and do not aow chidren to pay inside the vehice. qopening the Trunk Lid from the Inside Side the inside trunk reease ever in the direction of the arrow. The ever is made of materia that wi gow for hours in the darkness of the trunk foowing a brief exposure to ambient ight. The inside trunk reease side ever is ocated on the inside of the trunk id. Unattended Chidren and Pets: Leaving chidren or animas unattended in a parked vehice is dangerous. Babies eft seeping and kids who ock themseves in cars or trunks can die very quicky from heat prostration. Don't eave your chidren or pets aone in a car at any time. Don't eave the car, the rear foding seats or the trunk unocked. Aways keep the car from being a tempting pace to pay by ocking rear seats, doors and the trunk, and keeping the keys where chidren won't pay with them. 3-16
87 Knowing Your Mazda Doors and Locks Power Windows í The ignition switch must be in the ON position for the power windows to operate. WARNING qoperating the Driver's Side Power Window Manua opening/cosing To open the window to the desired position, ighty hod down the switch. To cose the window to the desired position, ighty pu up the switch. Cosing Power Windows: Cosing power windows are dangerous. A person's hands, head, or even neck coud be caught by the window and resut in serious injury or even death. This warning appies especiay to chidren. Make sure the opening is cear before cosing a window. Left front window Cose Open Chidren and Power Windows: Leaving the power window switches unocked whie chidren are in the vehice is dangerous. Power window switches that are not ocked with the power window ock switch woud aow chidren to operate power windows unintentionay which coud resut in serious injury if a chid's hands, head or neck becomes caught by the window. Aways ock a passenger power windows with the power window ock switch on the driver's side whie chidren are in the vehice, and never aow chidren to pay with power window switches. Auto-opening To fuy open the window automaticay, press the switch competey down. To stop the window partway, ighty pu up the switch and then reease it. CAUTION To prevent burning out the fuse and damaging the power window system, don't open or cose more than three windows at once. í Some modes. 3-17
88 Knowing Your Mazda Doors and Locks qoperating the Passenger Power Windows The power windows may be operated when the power window ock switch on the driver's door is in the unocked position. The passenger windows may be opened or cosed by the power window master contro switches on the driver's door. Left rear window qpower Window Lock Switch With the ock switch in the unocked position, a power windows on each door can be operated. With the ock switch in the ocked position, ony the driver's side power window can be operated. Locked position Unocked position Right front window Right rear window Power window ock switch To open the window to the desired position, hod down the switch. To cose the window to the desired position, pu up the switch. Cose Open WARNING Unintentiona Window Operation: Unintentiona window operation is dangerous. A person's hands, head, or neck coud be caught by the window and resut in serious injury. Uness a passenger needs to operate a window, keep the power window ock switch in the ocked position. 3-18
89 Knowing Your Mazda Doors and Locks Fue-Fier Lid and Cap WARNING Fue Spray: Fue spray is dangerous. Fue can burn skin and eyes and cause iness if ingested. Fue spray is reeased when there is pressure in the fue tank and the fue cap is removed too quicky. When removing the fue cap, oosen the cap sighty and wait for any hissing to stop. Then remove it. Fue Vapor: Fue vapor is dangerous. It coud be ignited by sparks or fames causing serious burns and injuries. Before refueing, stop the engine, and aways keep sparks and fames away from the fier neck. Additionay, use of the incorrect fue fier cap or not using a fue fier cap may resut in fue eak, which coud resut in serious burns or death in an accident. qfue-fier Lid To open, pu up the remote fue-fier id reease. 4 Door Remote fue-fier id reease 5 Door Remote fue-fier id reease CAUTION Aways use ony a genuine Mazda fue cap or an approved equivaent, avaiabe at an Authorized Mazda Deaer. The wrong cap can resut in a serious mafunction of the fue and emission contro systems. It may aso cause the check engine ight in the instrument custer to iuminate. 3-19
90 Knowing Your Mazda Doors and Locks qfue-fier Cap To remove the fier cap, turn it countercockwise. To cose the fier cap, turn it cockwise unti it cicks. Open Cose Hood WARNING Cosed and Securey Locked Hood: A hood that is not cosed and securey ocked is dangerous as it coud fy open whie the vehice is moving and bock the driver's vision which coud resut in a serious accident. Aways check that the hood is cosed and securey ocked. qopening the Hood 1. With the vehice parked, pu the reease hande to unock the hood. CAUTION Make sure the fue-fier cap is tightened securey. The check engine ight may iuminate when the cap isn't tightened securey. If the ight remains on (even after you have tightened the cap securey, driven, and restarted the engine severa times), it may indicate a different probem. Contact an Authorized Mazda Deaer as soon as possibe. 2. Side the hood atch and ift the hood. 4 Door 3-20
91 Knowing Your Mazda Doors and Locks 5 Door qcosing the Hood 1. Check under the hood area to make certain a fier caps are in pace and a oose items (e.g. toos, oi containers, etc.) have been removed. 2. Insert the support rod in its cip whie hoding up the hood. Verify that the support rod is secured in the cip before cosing the hood. 3. Cose the hood so that it ocks securey. 3. Grasp the support rod in the padded area indicated by the arrow. Cip Pad Support rod 4. Secure the support rod in the stay hoe indicated by the arrow to hod the hood open. Cip Support rod 3-21
92 Knowing Your Mazda Doors and Locks Moonroof í The moonroof can be opened or cosed eectricay ony when the ignition switch is in the ON position. Side switch Tit switch WARNING After washing your Mazda or after a rain, wipe the water off the moonroof before operating it to avoid water penetration which coud cause rust and water damage to your headiner. qtit Operation The rear of the moonroof can be tited open to provide more ventiation. To fuy tit automaticay, push the rear of the tit switch. To stop titing partway, push any part of the tit or side switch. To cose to the desired position, push the front of the tit or side switch. Extending the Head or Arms Through the Moonroof: Extending the head, arms, or other parts of the body through the moonroof is dangerous. The head or arms coud hit something whie the vehice is moving. This coud cause death or serious injury. Don't et passengers stand up or extend anything through the open moonroof whie the vehice is moving. Cose Cose Tit up Cosing the Moonroof: A cosing moonroof is dangerous. The hands, head, or even neck of a person especiay a chid coud be caught in it as it coses, causing serious injury or even death. Make sure the opening is cear before cosing the moonroof. qside Operation To fuy open automaticay, push the rear of the side switch. To stop siding partway, push any part of the tit or side switch í Some modes.
93 Knowing Your Mazda Doors and Locks To cose to the desired position, push the front of the tit or side switch. Open Cose Cose qsunshade The sunshade can be opened and cosed by hand. The sunshade opens automaticay when the moonroof is opened, but must be cosed by hand. Sunshade CAUTION The sunshade doesn't tit. To avoid damaging the sunshade, don't push up on it. 3-23
94 Knowing Your Mazda Security System Immobiizer System The immobiizer system aows the engine to start ony with a key the system recognizes. If someone attempts to start the engine with an unrecognized key, the engine wi not start, thereby heping to prevent the theft of your vehice. CAUTION Changes or modifications not expressy approved by the party responsibe for compiance coud void the user's authority to operate the equipment. To avoid damage to the key, do not: Drop the key. Get the key wet. Expose the key to any kind of magnetic fied. Expose the key to high temperatures on paces such as the dashboard or hood, under direct sunight. CAUTION When starting the engine do not aow the foowing, as the engine may not start due to the eectronic signa from the ignition key not being transmitted correcty. A key ring rests on the key grip. Meta parts of other keys or meta objects touch the key grip. Spare keys or keys for other vehices equipped with an immobiizer system touch or come near the key grip. Devices for eectronic purchases, or security passage touch or come near the key. 3-24
95 Knowing Your Mazda Security System (U.S.A.) This device compies with Part 15 of the FCC Rues. Operation is subject to the foowing two conditions: (1) this device may not cause harmfu interference, and (2) this device must accept any interference received, incuding interference that may cause undesired operation. (CANADA) This device compies with RSS-210 of Industry CANADA. Operation is subject to the foowing two conditions: (1) this device may not cause interference, and (2) this device must accept any interference, incuding interference that may cause undesired operation of the device. qoperation Arming The system is armed when the ignition switch is turned from the ON to the ACC position. The security indicator ight in the instrument pane fashes every 2 seconds unti the system is disarmed. Disarming The system is disarmed when the ignition switch is turned to the ON position with the correct ignition key. The security indicator ight iuminates for about 3 seconds and goes out. If the engine doesn't start with the correct ignition key, and the security indicator ight keeps iuminating or fashing, the system may have a mafunction. Consut an Authorized Mazda Deaer. If the security indicator ight comes on and stays on when the ignition switch is turned to the ON position, the engine wi not start. Signas from a TV or radio station, or from a transceiver or a mobie teephone, coud interfere with your immobiizer system. If you are using the proper key and your engine fais to start, check the security indicator ight. If it is fashing, remove the ignition key and wait 2 seconds or more, then reinsert it and try starting the engine again. If it doesn't start after 3 or more tries, contact an Authorized Mazda Deaer. If the security indicator ight fashes continuousy whie you are driving, don't shut off the engine. Go to an Authorized Mazda Deaer and have it checked. If you shut off the engine whie the ight is fashing you won't be abe to restart it. 3-25
96 Knowing Your Mazda Security System Since the eectronic codes are reset when repairing the immobiizer system, the keys are needed. Bring a the existing keys to an Authorized Mazda Deaer. qmaintenance If you have a probem with the immobiizer system or the key, consut an Authorized Mazda Deaer. qmodification and Add-On Equipment Mazda cannot guarantee the immobiizer system's operation if the system has been modified or if any add-on equipment has been instaed to it. CAUTION To avoid damage to your vehice, do not modify the system or insta any add-on equipment to it. The keys carry a unique eectronic code. For this reason, and to assure your safety, obtaining repacement key requires some waiting time. They are ony avaiabe through an Authorized Mazda Deaer. Aways keep a spare key, in case one is ost. If a key is ost, contact an Authorized Mazda Deaer as soon as possibe. If you ose a key, an Authorized Mazda Deaer wi reset the eectronic codes of your remaining keys and immobiizer system. Bring a the remaining keys to an Authorized Mazda Deaer to reset. Starting the vehice with a key that has not been reset is not possibe. 3-26
97 Knowing Your Mazda Security System Theft-Deterrent System í The theft-deterrent system is designed to prevent your vehice or its contents from being stoen when a doors, hood, and trunk id/iftgate are ocked. If forcibe entry is attempted, the system sounds the horn and fashes the hazard warning ights. The theft-deterrent system operates with the key or the keyess entry system transmitter. The system wi not function uness it is propery armed. To propery secure the vehice, aways make sure a windows are competey cosed and a doors and the trunk id/ iftgate are ocked before eaving the vehice. Remember to take your key and transmitter. qoperation System triggering conditions The horn sounds intermittenty and the hazard warning ights fash for about 3 minutes when the system is triggered by any one of the foowing: Forcing open a door, the hood or the trunk id/iftgate. Opening a door, the hood or the trunk id by operating an inside door-ock knob, the hood reease hande or the trunk id reease ever. If the system is triggered again, the ights and horn wi activate unti a door or the trunk id is unocked with the key or with the transmitter. qhow to Arm the System 1. Remove the key from the ignition switch. 2. Make sure the hood is cosed. Cose and ock a doors and the iftgate/trunk id from the outside using the key. If you have the keyess entry system, press the ock button on the transmitter. The hazard warning ights wi fash once to indicate that the system is armed. The foowing method wi aso arm the theft-deterrent system: Cose the hood and the iftgate/trunk id. Press the area on the door-ock switch marked LOCK once. Cose a doors. Locking the doors with the inside doorock knob wi not arm the system. qto Turn off an Armed System An armed system can be turned off by any one of the foowing methods: Unock a door or the trunk id with the key. Press the unock button on the keyess entry system transmitter. Insert the key into the ignition switch and turn it to the ON position. qto Stop an Aarm A triggered aarm can be turned off by any one of the foowing methods: Unock a door or the trunk id with the key. í Some modes. 3-27
98 Knowing Your Mazda Security System Press the unock button on the keyess entry system transmitter. If you have any probem with the theftdeterrent system, consut an Authorized Mazda Deaer. qtheft-deterrent Labes A abe indicating that your vehice is equipped with a Theft-Deterrent System is in the gove box. Mazda recommends that you affix it to the ower rear corner of a front door window. 3-28
99 Knowing Your Mazda Steering Whee and Mirrors Steering Whee WARNING Adjusting the Steering Whee: Adjusting the steering whee whie the vehice is moving is dangerous. Moving it can very easiy cause the driver to abrupty turn to the eft or right. This can ead to oss of contro or an accident. Never adjust the steering whee whie the vehice is moving. qsteering Whee Adjustment To change the ange or ength of the steering whee: 1. Stop the vehice, pu down the ock reease ever under the steering coumn. Mirrors qoutside Mirrors Check the mirror anges before driving. WARNING Convex Mirror (Passenger Side): Changing anes without taking into account the actua distance of the vehice in the convex mirror is dangerous. You coud have a serious accident. What you see in the convex mirror is coser than it appears. Be sure to ook over your shouder before changing anes. Manua contro mirror To adjust, move the mirror's contro ever, just inside the door. Lock reease ever Contro ever 2. Tit the steering whee and/or adjust the steering coumn ength to the desired positions, push the ever up to ock the coumn. 3. Push the whee up and down to be certain it's ocked before driving. Power contro mirror The ignition switch must be in the ACC or ON position. 3-29
100 Knowing Your Mazda Steering Whee and Mirrors To adjust: 1. Move the seector switch to the eft or right to choose the eft or right side mirror. 2. Depress the mirror switch in the appropriate direction. Outside mirror Seector switch Mirror switch After adjusting the mirror, ock the contro by moving the seector switch to the midde position. Foding the mirror Fod the outside mirror rearward unti it is fush with the vehice. WARNING Driving with Mirrors Foded In: Driving with the outside mirrors foded in is dangerous. Your rear view wi be restricted, and you coud have an accident. Aways return the outside mirrors to the driving position before you start driving. Mirror defroster í To turn on the mirror defrosters, turn the ignition switch to the ON position and push the rear window defroster switch (page 5-53). qrearview Mirror Rearview mirror adjustment Before driving, adjust the rearview mirror to center on the scene through the rear window. Reducing gare from headights Do this with the day/night ever in the day position í Some modes.
101 Knowing Your Mazda Steering Whee and Mirrors Push the ever forward for day driving. Pu it back to reduce gare from headights. Day/Night ever Day Night WARNING Bocked View: Cargo stacked higher than the seatbacks is dangerous. It can bock your view in the rearview mirror, which might cause you to hit another car when changing anes. Don't stack things higher than the seatbacks. 3-31
102 3-32
103 4 Before Driving Your Mazda Important information about driving your Mazda. Fue and Engine Exhaust Precautions Fue Requirements Emission Contro System Engine Exhaust (Carbon Monoxide) Before Starting the Engine Before Getting In After Getting In Driving Tips Break-In Period Money-Saving Suggestions Hazardous Driving Rocking the Vehice Winter Driving Driving In Fooded Area Overoading Towing Traier Towing
104 Before Driving Your Mazda Fue and Engine Exhaust Precautions Fue Requirements Vehices with cataytic converters or oxygen sensors must use ONLY UNLEADED FUEL, which wi reduce exhaust emissions and keep spark pug fouing to a minimum. Your Mazda wi perform best with fue isted in the tabe. Fue Reguar uneaded fue Octane Rating * (Anti-knock index) 87 [ (R+M)/2 method] or above (91 RON or above) * U.S. federa aw requires that octane ratings be posted on gasoine station pumps. Fue with a rating ower than 87 octane (91 RON) coud cause the emission contro system to ose effectiveness. It coud aso cause engine knocking and serious engine damage. CAUTION USE ONLY UNLEADED FUEL. Leaded fue is harmfu to the cataytic converter or the oxygen sensor. The ead wi accumuate on the oxygen sensor and the catayst inside the converter. This wi resut in a mafunction of the emission contro system, causing poor performance. Your vehice can ony use oxygenated fues containing no more than 10% ethano by voume. Damage to your vehice may occur when ethano exceeds this recommendation, or if the gasoine contains any methano. Stop using gasoho of any kind if your vehice engine is performing poory. Never add fue system additives. Never add ceaning agents other than those specified by Mazda. Other ceaning agents and additives may damage the system. Consut an Authorized Mazda Deaer. Gasoine bended with oxygenates such as acoho or ether compounds are generay referred to as oxygenated fues. The common gasoine bend that can be used with your vehice is ethano bended at no more than 10%. Gasoine containing acoho, such as ethano or methano, may be marketed under the name Gasoho. Vehice damage and drivabiity probems resuting from the use of the foowing may not be covered by the Mazda warranty. Gasoho containing more than 10% ethano. Gasoine or gasoho containing methano. Leaded fue or eaded gasoho. 4-2
105 Before Driving Your Mazda Fue and Engine Exhaust Precautions Emission Contro System Your vehice is equipped with an emission contro system (the cataytic converter is part of this system) that enabes your vehice to compy with existing exhaust emissions requirements. WARNING Parking Over Fammabe Objects: Parking over or near anything fammabe, such as dry grass, is dangerous. Even with the engine turned off, the exhaust system coud ignite it because the exhaust system gets very hot during norma use. A resuting fire coud cause serious injury or death. Never park over or near anything fammabe. CAUTION Ignoring the foowing precautions coud cause ead to accumuate on the catayst inside the converter or cause the converter to get very hot. Either condition wi damage the converter and cause poor performance. USE ONLY UNLEADED FUEL. Don't drive your Mazda with any sign of engine mafunction. Don't coast with the ignition switch turned off. Don't descend steep grades in gear with the ignition switch turned off. Don't operate the engine at high ide for more than 5 minutes. Don't tamper with the emission contro system. A inspections and adjustments must be made by a quaified technician. Don't push-start or pu-start your vehice. Under U.S. federa aw, any modification to the origina-equipment emission contro system before the first sae and registration of a vehice is subject to penaties. In some states, such modification made on a used vehice is aso subject to penaties. 4-3
106 Before Driving Your Mazda Fue and Engine Exhaust Precautions After driving some distance and turning off the engine, the sound of a vave opening and cosing can be heard at the rear of the right side of the vehice, however this does not indicate an abnormaity. Your vehice has a sef-checking device and it operates after turning off the engine. 4-4
107 Before Driving Your Mazda Fue and Engine Exhaust Precautions Engine Exhaust (Carbon Monoxide) WARNING Carbon Monoxide: Engine exhaust gas is dangerous. This gas contains carbon monoxide (CO), which is cooress, odoress, and poisonous. When inhaed, it can cause oss of consciousness and death. If you sme exhaust gas inside your vehice, keep a windows fuy open and contact an Authorized Mazda Deaer immediatey. Exhaust Gas in Encosed Area: Running the engine inside an encosed area, such as a garage, is dangerous. Exhaust gas, which contains poisonous carbon monoxide, coud easiy enter the cabin. Loss of consciousness or even death coud occur. Don't run the engine when inside an encosed area. Iding with the Windows Cosed: Exhaust gas is dangerous. When your vehice is stopped with the windows cosed and the engine running for a ong time even in an open area, exhaust gas, which contains poisonous carbon monoxide, coud enter the cabin. Loss of consciousness or even death coud occur. Open the windows or adjust the heating or cooing system to draw fresh air. Snow Bocking the Exhaust Gas: Running the engine when a vehice is stopped in deep snow is dangerous. The exhaust pipe coud be bocked by the snow, aowing exhaust gas to enter the cabin. Because exhaust gas contains poisonous carbon monoxide, anyone in the cabin coud be injured or kied. Cear the snow from underneath and around your vehice, particuary the tai pipe, before starting the engine. 4-5
108 Before Driving Your Mazda Before Starting the Engine Before Getting In Be sure the windows, outside mirrors, and outside ights are cean. Inspect infation pressures and condition of tires. Look under the vehice for any sign of a eak. If you pan to back up, make sure nothing is in your way. Engine oi, engine cooant, brake/cutch fuid, washer fuid, and other fuid eves shoud be inspected. See Maintenance, Section 8. After Getting In Are a doors cosed and ocked? Is the seat adjusted propery? Are the inside and outside mirrors adjusted? Is everyone's seat bet fastened? Check a gauges. Check a warning ights when the ignition switch is turned to the ON position. Reease the parking brake and make sure the brake warning ight goes off. Aways be thoroughy famiiar with your Mazda. 4-6
109 Before Driving Your Mazda Driving Tips Break-In Period No specia break-in is necessary, but a few precautions in the first 1,000 km (600 mies) may add to the performance, economy, and ife of your Mazda. Don't race the engine. Don't maintain one constant speed, either sow or fast, for a ong period of time. Don't drive constanty at fu-throtte or high engine rpm for extended periods of time. Avoid unnecessary hard stops. Avoid fu-throtte starts. Money-Saving Suggestions How you operate your Mazda determines how far it wi trave on a tank of fue. Use these suggestions to hep save money on fue and repairs. Avoid ong warm-ups. Once the engine runs smoothy, begin driving. Avoid fast starts. Keep the engine tuned. Foow the maintenance schedue (page 8-3) and have an Authorized Mazda Deaer perform inspections and servicing. Use the air conditioner ony when necessary. Sow down on rough roads. Keep the tires propery infated. Don't carry unnecessary weight. Don't rest your foot on the brake peda whie driving. Keep the whees in correct aignment. Keep windows cosed at high speeds. Sow down when driving in crosswinds and headwinds. WARNING Coasting: Stopping the engine when going down a hi is dangerous. This causes the oss of power steering and power brake contro, and may cause damage to the drivetrain. Any oss of steering or braking contro coud cause an accident. Never stop the engine when going down a hi. 4-7
110 Before Driving Your Mazda Driving Tips Hazardous Driving WARNING Downshifting on Sippery Surfaces: Downshifting into ower gear whie driving on sippery surfaces is dangerous. The sudden change in tire speed coud cause the tires to skid. This coud ead to oss of vehice contro and an accident. If it is necessary to downshift on sippery surfaces, be very carefu. When driving on ice or in water, snow, mud, sand, or simiar hazard: Be cautious and aow extra distance for braking. Avoid sudden braking and quick steering. If your vehice is not equipped with ABS, brake with the peda by using a ight up-down motion. Don't hod the peda down constanty. If your vehice is equipped with ABS, don't pump the brakes. Continue to press down on the brake peda. If you get stuck, seect a ower gear and acceerate sowy. Don't spin the front whees. For more traction in starting on sippery surfaces such as ice or packed snow, use sand, rock sat, chains, carpeting, or other nonsip materia under the front whees. Rocking the Vehice WARNING Spinning the Whees: When the vehice is stuck, spinning the whees at high speed is dangerous. The spinning tire coud overheat and expode. This coud cause serious injuries. Don't spin the whees at more than 56 km/h (35 mph), and don't aow anyone to stand behind a whee when pushing the vehice. CAUTION Too much rocking may cause engine overheating, transaxe faiure, and tire damage. If you must rock the vehice to free it from snow, sand or mud, depress the acceerator sighty and sowy move the shift ever from 1 (D) to R. Use snow chains ony on the front whees. 4-8
111 Before Driving Your Mazda Driving Tips Winter Driving Carry emergency gear, incuding tire chains, window scraper, fares, a sma shove, jumper cabes, and a sma bag of sand or sat. Ask an Authorized Mazda Deaer to perform the foowing precautions: Have the proper ratio of antifreeze in the radiator. Inspect the battery and its cabes. Cod reduces battery capacity. Inspect the ignition system for damage and oose connections. Use washer fuid made with antifreeze but don't use engine cooant antifreeze for washer fuid (page 8-23). Don't use the parking brake in freezing weather as the parking brake may freeze. Instead, shift to P with an automatic transaxe and to 1 or R with a manua transaxe. Bock the rear whees. qsnow Tires Use snow tires on a four whees Don't go faster than 120 km/h (75 mph) whie driving with snow tires. Infate snow tires 30 kpa (0.3 kgf/cm 2, 4.3 psi) more than recommended on the tire pressure abe (driver's door), but never more than the maximum cod-tire pressure shown on the tires. Except Brazi Your vehice is originay equipped with a season radias designed to be used a year around. In some extreme cimates you may find it necessary to repace them with snow tires during the winter months to further improve traction on snow and ice covered roads. Brazi Your vehice is originay equipped with summer tires designed for optimum traction on wet and dry roads. If your vehice is to be used on snow and ice covered roads, Mazda recommends that you repace the tires originay equipped on your vehice with snow tires during the winter months. WARNING Mixing Tire Types: Using tires different in size or type is dangerous. Your vehice's handing coud be greaty affected and resut in an accident. Use ony the same size and type tires (snow, radia, or nonradia) on a four whees. CAUTION Check oca reguations before using studded tires. If your vehice is equipped with the tire pressure monitoring system, the system may not function correcty when using tires with stee wire reinforcement in the sidewas (page 5-24). 4-9
112 Before Driving Your Mazda Driving Tips qtire Chains Check oca reguations before using tire chains. CAUTION Chains may scratch or chip auminum whees. Insta tire chains on stee whees ony. Chains may affect handing. Don't go faster than 50 km/h (30 mph) or the chain manufacturer's recommended imit, whichever is ower. Drive carefuy and avoid bumps, hoes, and sharp turns. Avoid ocked-whee braking. Don't use chains on a temporary spare tire; it may resut in damage to the vehice and to the tire. Don't use chains on roads that are free of snow or ice. The tires and chains coud be damaged. Instaing the chains 1. Secure the chains on the front tires as tighty as possibe. Aways foow the chain manufacturer's instructions. 2. Retighten the chains after driving 1/2 1 km (1/4 1/2 mie). If your vehice is equipped with the tire pressure monitoring system, the system may not function correcty when using tire chains. Insta the chains on the front tires. Don't use chains on the rear tires. Use ony SAE Cass S chains, and make sure they fit. 4-10
113 Before Driving Your Mazda Driving Tips Driving In Fooded Area WARNING Driving with Wet Brakes: Driving with wet brakes is dangerous. Increased stopping distance or the vehice puing to one side when braking coud resut in a serious accident. Light braking wi indicate whether the brakes have been affected. Dry the brakes by driving very sowy and appying the brakes ighty unti brake performance returns to norma. CAUTION Make sure water does not enter the vehice interior or the engine area. Interior materias coud get mody, and many eectronic devices in the cabin and the engine coud be damaged. Overoading WARNING Vehice Load Weight: The gross axe weight rating (GAWR) and the gross vehice weight rating (GVWR) of your vehice are on the Motor Vehice Safety Standard Labe on the driver's door frame. Exceeding these ratings can cause an accident or vehice damage. You can estimate the weight of your oad by weighing the items (or peope) before putting them in the vehice. Be carefu not to overoad your vehice. 4-11
114 Before Driving Your Mazda Towing Traier Towing Never tow a traier with your Mazda. 4-12
115 5 Driving Your Mazda Expanation of instruments and contros. Starting and Driving Ignition Switch Starting the Engine Brake System Manua Transaxe Operation Automatic Transaxe Contros Power Steering Cruise Contro í Tire Pressure Monitoring System í Instrument Custer and Indicators Meters and Gauges Warning/Indicator Lights and Beep Sounds Warning/Indicator Lights Beep Sounds Switches and Contros Lighting Contro Turn and Lane-Change Signas Fog Lights í Windshied Wipers and Washer Rear Window Wiper and Washer (5 Door) Rear Window Defroster Horn Hazard Warning Fasher í Some modes. 5-1
116 Driving Your Mazda Starting and Driving Ignition Switch qignition Switch Positions Automatic transaxe To turn the key from the ACC to the LOCK position, the shift ever must be in the P position. LOCK The steering whee ocks to protect against theft. Ony in this position can the key be removed. Manua transaxe To turn the key from the ACC to the LOCK position, push the button when the key is at the ACC position, then turn the key to the LOCK position. Shift ever engaged in P (park) WARNING Removing the Key: It's dangerous to remove the key from the ignition switch whie the vehice is moving. Removing the key aows the steering whee to ock. You wi ose steering contro and a serious accident coud occur. Remove the key ony when the vehice is parked. Button Push the button Not Setting the Parking Brake: Leaving the driver's seat without setting the parking brake is dangerous. Unexpected vehice movement coud occur if the parking brake is not set. This coud cause an accident. Before eaving the driver's seat, aways set the parking brake and make sure the shift ever is in P with an automatic transaxe or in 1 or R with a manua transaxe. 5-2
117 Driving Your Mazda Starting and Driving If turning the key is difficut, jigge the steering whee from side to side. ACC (Accessory) The steering whee unocks and some eectrica accessories wi operate. ON This is the norma running position after the engine is started. The warning ights (except brakes) shoud be inspected before the engine is started (page 5-32). When the ignition switch is turned to the ON position, the sound of the fue pump motor operating near the fue tank can be heard. This does not indicate an abnormaity. START The engine is started in this position. It wi crank unti you reease the key; then it returns to the ON position. The brake warning ight can be checked after the engine is started (page 5-32). qignition Key Reminder If the ignition switch is in the LOCK or ACC position with the key inserted, a continuous beep sound wi be heard when the driver's door is opened. Starting the Engine Engine-starting is controed by the spark ignition system. This system meets a Canadian Interference-Causing Equipment Standard requirements reguating the impuse eectrica fied strength of radio noise. 1. Occupants shoud fasten their seat bets. 2. Make sure the parking brake is on. 3. Depress the brake peda. 4. (Manua transaxe) Depress the cutch peda a the way and shift into neutra. Keep the cutch peda depressed whie cranking the engine. (Automatic transaxe) Put the vehice in park (P). If you must restart the engine whie the vehice is moving, shift into neutra (N). (Manua transaxe) The starter wi not operate if the cutch peda is not depressed a the way. (Automatic transaxe) The starter wi not operate if the shift ever is not in P or N. 5. Turn the ignition switch to the START position and hod (up to 10 seconds at a time) unti the engine starts. 5-3
118 Driving Your Mazda Starting and Driving CAUTION Don't try the starter for more than 10 seconds at a time. If the engine stas or fais to start, wait 10 seconds before trying again. Otherwise, you may damage the starter and drain the battery. 6. After starting the engine, et it ide for about 10 seconds. In extremey cod weather, beow _ 18 C (0 F), or after the vehice has not been driven in severa days, et the engine warm up without operating the acceerator. Whether the engine is cod or warm, it shoud be started without use of the acceerator. qfoot Brake Brake System Your Mazda has power-assisted brakes that adjust automaticay through norma use. Shoud power-assist fai, you can stop by appying greater force than norma to the brake peda. But the distance required to stop wi be greater than usua. WARNING Coasting with the Engine Off: Continuing to coast when the engine is staed or turned off is dangerous. Braking wi require more effort, and the brake's power-assist coud be depeted if you pump the brake. This wi cause onger stopping distances or even an accident. Don't continue coasting when the engine is staed or turned off, find a safe pace to stop. Riding the Brakes: Driving with your foot continuousy on the brake peda or steadiy appying the brakes for ong distances is dangerous. This causes overheated brakes, resuting in onger stopping distances or even tota brake faiure. This coud cause oss of vehice contro and a serious accident. Avoid continuous appication of the brakes. Shift to a ower gear when going down steep his. 5-4
119 Driving Your Mazda Starting and Driving WARNING Driving with Wet Brakes: Driving with wet brakes is dangerous. Increased stopping distance or the vehice puing to one side when braking coud resut in a serious accident. Light braking wi indicate whether the brakes have been affected. Dry the brakes by driving very sowy and appying the brakes ighty unti brake performance is norma. Setting the parking brake Depress the brake peda and then firmy pu the parking brake ever fuy upwards with a greater amount of force than is required so that the vehice hods in the stationary position. qparking Brake WARNING Not Setting the Parking Brake: Leaving the driver's seat without setting the parking brake is dangerous. Unexpected vehice movement coud occur if the parking brake is not set. This coud cause an accident. Before eaving the driver's seat, aways set the parking brake and make sure the shift ever is in P with an automatic transaxe or in 1 or R with a manua transaxe. Reeasing the parking brake Depress the brake peda and pu the parking brake ever upwards, then press the reease button. Whie hoding the button, ower the parking brake ever a the way down to the reeased position. CAUTION Driving with the parking brake on wi cause excessive wear of the brake inings or pads. For parking in snow, refer to Winter Driving (page 4-9) regarding parking brake use. 5-5
120 Driving Your Mazda Starting and Driving qbrake System Warning Light This warning has the foowing functions: Parking brake warning The ight comes on when the parking brake is appied with the ignition switch in the START or ON position. It goes off when the parking brake is fuy reeased. Low brake fuid eve warning If the ight stays on after the parking brake is fuy reeased, you may have a brake probem. Drive to the side of the road and park off the right-of-way. You may notice that the peda is harder to push or that it may go coser to the foor. In either case, it wi take onger to stop the vehice. 1. With the engine stopped, check the brake fuid eve immediatey and add fuid as required (page 8-20). 2. After adding fuid, check the ight again. If the warning ight remains on, or if the brakes do not operate propery, do not drive the vehice. Have it towed to an Authorized Mazda Deaer. Having to add brake fuid is sometimes an indicator of eakage. Consut an Authorized Mazda Deaer as soon as possibe even if the brake ight is no onger iuminated. WARNING Brake Warning Light: Driving with the brake system warning ight on is dangerous. It indicates that your brakes may not work at a or that they coud competey fai at any time. If this ight remains on, after checking that the parking brake is fuy reeased, have the brakes inspected immediatey. Don't drive with this ight on, have the vehice towed to an Authorized Mazda Deaer to have the brakes inspected as soon as possibe. qanti-lock Brake System (ABS) í The ABS contro unit continuousy monitors the speed of each whee. If one is about to ock up, the ABS responds by automaticay reeasing and reappying that whee's brake. The driver wi fee a sight vibration in the brake peda and may hear a chattering noise from the brake system. This is norma when the ABS operates. Don't pump the brakes, continue to press down on the brake peda. Even if the ight goes out have your brake system inspected as soon as possibe by an Authorized Mazda Deaer. 5-6 í Some modes.
121 Driving Your Mazda Starting and Driving WARNING ABS: The ABS cannot compensate for unsafe and reckess driving, excessive speed, taigating (foowing another vehice too cosey), driving on ice and snow, and hydropaning (reduced tire friction and road contact because of water on the road surface). You can sti have an accident. So don't rey on ABS as a substitute for safe driving. Braking distances may be onger on oose surfaces (snow or grave, for exampe) which usuay have a hard foundation. A vehice with a norma braking system may require ess distance to stop under these conditions because the tires wi buid up a wedge of surface ayer when the whees skid. qabs Warning Light í The warning ight stays on for a few seconds when the ignition switch is turned to the ON position. If the ABS warning ight stays on whie you're driving, the ABS contro unit has detected a system mafunction. If this occurs, your brakes wi function normay as if the vehice had no ABS. Shoud this happen, consut an Authorized Mazda Deaer as soon as possibe. When the engine is jump-started to charge the battery, uneven rpm occurs and the ABS warning ight comes on. This is due to a weak battery, not a mafunction. Recharge the battery. qeectronic Brake Force Distribution System Warning í If the eectronic brake force distribution contro unit determines that some components are operating incorrecty, the contro unit may turn the brake system warning ight and the ABS warning ight on at the same time. The probem is ikey to be an eectronic brake force distribution system. í Some modes. 5-7
122 Driving Your Mazda Starting and Driving WARNING ABS Warning Light and Brake Warning Light on at the Same Time: Driving when the brake system warning ight and ABS warning ight are on at the same time is dangerous. When both ights are on, the rear whees coud ock more quicky in an emergency stop than under norma circumstances. Don't drive with both ights on, have the vehice towed to an Authorized Mazda Deaer to have the brakes inspected as soon as possibe. qbrake Assist í During emergency braking situations when it is necessary to depress the brake peda with greater force, the brake assist system provides braking assistance, thus enhancing braking performance. When the brake peda is depressed hard or depressed more quicky, the peda wi fee softer but the brakes wi appy more firmy. This is a norma effect of the brake assist operation and does not indicate an abnormaity. When the brake peda is depressed hard or depressed more quicky, a cicking noise from the brake booster may be heard. This is a norma effect of the brake assist and does not indicate an abnormaity. The brake assist equipment does not supersede the functionaity of the vehice's main braking system. When the brake peda is depressed hard or depressed more quicky, the brakes appy more firmy. 5-8 í Some modes.
123 Driving Your Mazda Starting and Driving Manua Transaxe Operation qmanua Transaxe Shift Pattern Neutra position CAUTION Keep your foot off the cutch peda except when shifting gears. Aso, don't use the cutch to hod the vehice on an upgrade. Riding the cutch wi cause needess cutch wear and damage. Make sure the vehice comes to a compete stop before shifting to R. Shifting to R whie the vehice is sti moving may damage the transaxe. The shift pattern of the transaxe is conventiona, as shown. Depress the cutch peda a the way down whie shifting; then reease it sowy. A safety feature prevents accidenta shifting from 5 to R (reverse). The shift ever must be put in neutra before being shifted to R. WARNING Sudden Engine-Braking: Shifting down whie driving on wet, snowy, or frozen roads, or whie driving at high speeds causes sudden engine braking, which is dangerous. The sudden change in tire speed coud cause the tires to skid. This coud ead to oss of vehice contro and an accident. Do not use sudden engine braking on sippery road surfaces or at high speeds. If shifting to R is difficut, shift back into neutra, reease the cutch peda, and try again. qrecommendations for Shifting Upshifting For norma acceeration, we recommend these shift points. Gear Vehice speed 1 to 2 21 km/h (13 mph) 2 to 3 39 km/h (24 mph) 3 to 4 55 km/h (34 mph) 4 to 5 78 km/h (49 mph) For cruising Gear Vehice speed 1 to 2 18 km/h (11 mph) 2 to 3 29 km/h (18 mph) 3 to 4 47 km/h (29 mph) 4 to 5 68 km/h (42 mph) 5-9
124 Driving Your Mazda Starting and Driving Downshifting When you must sow down in heavy traffic or on a steep upgrade, downshift before the engine starts to overwork. This reduces the chance of staing and gives better acceeration when you need more speed. On a steep downgrade, downshifting heps maintain safe speed and proongs brake ife. 5-10
125 Driving Your Mazda Starting and Driving Automatic Transaxe Contros Various Lockouts: Indicates that you must depress the brake peda to shift (The ignition switch must be in the ON position). Indicates the shift ever can be shifted freey into any position. qtransaxe Ranges The shift ever must be in P or N to operate the starter. P (Park) P ocks the transaxe and prevents the front whees from rotating. WARNING Hoding the Vehice with P: Ony setting the shift ever to the P position without using the parking brake to hod the vehice is dangerous. If P fais to hod, the vehice coud move and cause an accident. To hod the vehice, set the shift ever to P AND set the parking brake. CAUTION Shifting into P, N or R whie the vehice is moving can damage your transaxe. Shifting into a driving gear or reverse when the engine is running faster than ide can damage the transaxe. R (Reverse) In position R, the vehice moves ony backward. You must be at a compete stop before shifting to or from R, except under rare circumstances as expained in Rocking the Vehice (page 4-8). 5-11
126 Driving Your Mazda Starting and Driving N (Neutra) In N, the whees and transaxe are not ocked. The vehice wi ro freey even on the sightest incine uness the parking brake or brakes are on. WARNING Shifting from N or P: It's dangerous to shift from N or P into a driving gear when the engine is running faster than ide. If this is done, the vehice coud move suddeny, causing an accident or serious injury. If the engine is running faster than ide, don't shift from N or P into a driving gear. Shifting into N whie Driving: Shifting into N whie driving is dangerous. Engine braking cannot be appied when deceerating which coud ead to an accident or serious injury. Do not shift into N when driving the vehice. CAUTION Do not shift into N when driving the vehice. Doing so can cause transaxe damage. D (Drive) D is the norma driving position. From a stop, the transaxe wi automaticay shift through a 4-gear sequence. M (Manua) M is the manua shift mode position. Gears can be shifted up or down by operating the shift ever. Refer to Manua Shift Mode (page 5-13). qshift-lock System The shift-ock system prevents shifting out of P uness the brake peda is depressed. To shift from P: 1. Depress and hod the brake peda. 2. Start the engine. 3. Move the shift ever. When the ignition switch is in the ACC or LOCK position, the shift ever cannot be shifted from P. To be sure the vehice is in park, the ignition key cannot be removed uness the shift ever is in P. qshift-lock Override If the shift ever won't move from P using the proper shift procedure, continue to hod down the peda. 1. Remove the shift-ock override cover with a screwdriver. 5-12
127 Driving Your Mazda Starting and Driving 2. Insert a screwdriver and push it down. If you change to manua shift mode when the vehice is stopped, the gear wi shift to M1. If you shift up once when the vehice is stopped and the gear is at M1, the gear wi shift to M2. M2 is hepfu for starting on sippery surfaces. 3. Move the shift ever. 4. Take the vehice to an Authorized Mazda Deaer to have the system checked. qmanua Shift Mode This mode gives you the fee of driving a manua transaxe vehice by operating the shift ever and aows you to contro engine rpm and torque to the front whees much ike a manua transaxe when more contro is desired. To change to manua shift mode, shift the ever from D to M. Indicators Shift position indicator In manua shift mode, the M of the shift position indicator in the instrument pane iuminates. Gear position indicator The numera for the seected gear iuminates. Gear position indicator Shift position indicator If the gears cannot be shifted down when driving at higher speeds, the gear position indicator wi fash twice to signa that the gears cannot be shifted down. To return to automatic shift mode, shift the ever from M to D. 5-13
128 Driving Your Mazda Starting and Driving Shifting Manuay Shifting up (M1 M2 M3 M4) To shift up to a higher gear, tap the shift ever back ( ) once. Manuay Shifting down (M4 M3 M2 M1) To shift down to a ower gear, tap the shift ever forward ( ) once. When driving sowy, the gears may not shift up depending on vehice speed. In manua shift mode, gears do not shift up automaticay. Don't run the engine with the tachometer neede in the RED ZONE. If the tachometer neede enters the RED ZONE, you may fee engine-braking because the fue deivery wi be stopped to protect the engine. However, this does not indicate an abnormaity. When depressing the acceerator fuy, the transaxe wi shift to a ower gear, depending on vehice speed. WARNING Sudden Engine-Braking: Shifting down whie driving on wet, snowy, or frozen roads, or whie driving at high speeds causes sudden engine braking, which is dangerous. The sudden change in tire speed coud cause the tires to skid. This coud ead to oss of vehice contro and an accident. Do not use sudden engine braking on sippery road surfaces or at high speeds. 5-14
129 Driving Your Mazda Starting and Driving When driving at high speeds, the gear may not shift down depending on vehice speed. During deceeration, the gear may automaticay shift down depending on vehice speed. When depressing the acceerator fuy, the transaxe wi shift to a ower gear, depending on vehice speed. Shifting specification (2.0-iter engine mode) Shifting up If the vehice speed is ower than the speed specified for each gear, the gear cannot be shifted up to a higher gear. Gear M1 M2 M2 M3 M3 M4 Vehice speed You can shift up to M2 whether the vehice is stopped or moving. 20 km/h (12 mph) 40 km/h (24 mph) Shifting down If the vehice speed is higher than the speed specified for each gear, the gear cannot be shifted down to a ower gear. Gear M4 M3 M3 M2 M2 M1 Vehice speed 180 km/h (112 mph) 119 km/h (74 mph) 47 km/h (30 mph) During deceeration, the gears shift down automaticay when speed is reduced to the foowing: Gear M4 M3 M3 or M2 M1 Vehice speed 31 km/h (19 mph) 12 km/h (7 mph) If the vehice is driven at a ow speed from a standing start whie in M2, the gear may not shift down to M1 automaticay. If the vehice is kicked down at the foowing speeds or ower, the gears shift down automaticay: Gear M4 M3 M3 M2 Vehice speed 170 km/h (105 mph) 72 km/h (44 mph) Shifting specification (2.3-iter engine mode) Shifting up If the vehice speed is ower than the speed specified for each gear, the gear cannot be shifted up to a higher gear. Gear M1 M2 M2 M3 M3 M4 Vehice speed You can shift up to M2 whether the vehice is stopped or moving. 20 km/h (12 mph) 35 km/h (21 mph) Shifting down If the vehice speed is higher than the speed specified for each gear, the gear cannot be shifted down to a ower gear. Gear M4 M3 M3 M2 M2 M1 Vehice speed 142 km/h (89 mph) 100 km/h (63 mph) 40 km/h (25 mph) During deceeration, the gears shift down automaticay when speed is reduced to the foowing: Gear M4 M3 M3 or M2 M1 Vehice speed 31 km/h (19 mph) 12 km/h (7 mph) 5-15
130 Driving Your Mazda Starting and Driving If the vehice is driven at a ow speed from a standing start whie in M2, the gear may not shift down to M1 automaticay. If the vehice is kicked down at the foowing speeds or ower, the gears shift down automaticay: Gear M4 M3 M3 M2 Vehice speed 135 km/h (83 mph) 64 km/h (39 mph) Recommendations for shifting Upshifting For norma acceeration and cruising, we recommend these shift points. Cimbing steep grades from a stop To cimb a steep grade from a stopped position: 1. Depress the brake peda. 2. Shift to D or M1, depending on the oad weight and grade steepness. 3. Reease the brake peda whie graduay acceerating. Descending steep grades When descending a steep grade, shift to ower gears, depending on oad weight and grade steepness. Descend sowy, using the brakes ony occasionay to prevent them from overheating. Gear M1 to M2 M2 to M3 M3 to M4 Vehice speed 24 km/h (15 mph) 40 km/h (25 mph) 65 km/h (40 mph) Downshifting When you must sow down in heavy traffic or on a steep upgrade, downshift before the engine starts to overwork. This gives better acceeration when you need more speed. On a steep downgrade, downshifting heps maintain safe speed and proongs brake ife. qdriving Tips Passing For extra power when passing another vehice or cimbing steep grades, depress the acceerator fuy. The transaxe wi shift to a ower gear, depending on vehice speed. 5-16
131 Driving Your Mazda Starting and Driving Power Steering Power steering is ony operabe when the engine is running. If the engine is off or if the power steering system is inoperabe, you can sti steer, but it requires more physica effort. If the steering fees rigid during norma driving, consut an Authorized Mazda Deaer. CAUTION Never hod the steering whee to the extreme eft or right for more than 5 seconds with the engine running. This coud damage the power steering system. The ight iuminates to indicate that the power steering is inoperabe. If the ight iuminates, turn off the engine and restart it. If the ight does not iuminate after restarting the engine, this indicates that the power steering is restored and norma steering is possibe. If the ight remains iuminated, the power steering is sti inoperabe. Consut an Authorized Mazda Deaer. The power steering system is inoperabe when the power steering mafunction indicator ight iuminates. Steering is possibe, but requires more physica effort. qpower Steering Mafunction Indicator Light This indicator ight iuminates when the ignition switch is turned to the ON position and goes off when the engine is started. 5-17
132 Driving Your Mazda Starting and Driving Cruise Contro í With cruise contro, you can set and automaticay maintain any speed of more than about 30 km/h (19 mph). WARNING Cruise Contro Use: Using cruise contro in the foowing conditions coud cause you to ose contro of the vehice: Hiy terrain Steep incines Heavy or unsteady traffic Sippery or winding roads Simiar restrictions that require inconsistent speed Don't use cruise contro in these situations. qcruise Set Indicator Light This ight comes on when a cruising speed is set. qactivation/deactivation To activate the system, press the ON/OFF switch. The cruise main indicator ight iuminates. To deactivate the system, press the switch again. The cruise main indicator ight turns off. qcruise Main Indicator Light This ight comes on when the ON/OFF switch is pressed and the cruise contro system is activated í Some modes.
133 Driving Your Mazda Starting and Driving WARNING Cruise Main Switch: Leaving the ON/OFF switch on when not using the cruise contro is dangerous as it may be switched on accidentay. This coud resut in oss of vehice contro. Keep the ON/OFF switch off when cruise contro is not in use. qto Set Speed 1. Activate the cruise contro system by pressing the ON/OFF switch. 2. Acceerate to the desired speed, which must be more than 30 km/h (19 mph). 3. Press the SET/COAST button and reease it at the speed you want. Reease the acceerator at the same time. The SET function can't be activated unti about 2 seconds after the ON/ OFF switch has been engaged. On a steep grade, the vehice may momentariy sow down going up or speed up whie going down. qto Increase Cruising Speed Foow either of these procedures. Press the RES/ACCEL button and hod it. Your vehice wi acceerate. Reease the button at the speed you want. Don't continue to hod in the button. Unti you reease it, speed wi continue to drop (uness you continue to acceerate) and you' miss the desired speed. 5-19
134 Driving Your Mazda Starting and Driving Your vehice has a tap-up feature that aows you to increase your current speed in increments of 1.6 km/h (1 mph) by a momentary tap of the RES/ACCEL button. Mutipe taps wi increase your vehice speed 1.6 km/h (1 mph) for each tap. Acceerate to the desired speed. Press the SET/COAST button and reease it immediatey. qto Decrease Cruising Speed Press the SET/COAST button and hod it. The vehice wi graduay sow. Reease the button at the speed you want. Acceerate if you want to speed up temporariy when the cruise contro is on. Greater speed wi not interfere with it or change the set speed. Take your foot off the acceerator to return to the set speed. Your vehice has a tap-down feature that aows you to decrease your current speed in decrements of 1.6 km/h (1 mph) by a momentary tap of the SET/COAST button. Mutipe taps wi decrease your vehice speed 1.6 km/h (1 mph) for each tap. 5-20
135 Driving Your Mazda Starting and Driving qto Resume Cruising Speed at More Than 30 km/h (19 mph) If some other method besides the ON/ OFF switch was used to cance cruising speed and the system is sti activated, the most recent set speed wi automaticay resume when the RES/ACCEL button is pressed. If vehice speed is beow 30 km/h (19 mph), increase the vehice speed up to 30 km/h (19 mph) and press the RES/ ACCEL button. Press the CANCEL button. The system is off when the ignition is off. Cruise contro wi cance at about 15 km/h (9 mph) beow the preset speed or beow 30 km/h (19 mph). qto Cance To turn off the system, use one of these methods: Press the ON/OFF switch. Sighty depress the brake peda. Depress the cutch peda.(manua transaxe ony) 5-21
136 Driving Your Mazda Starting and Driving Tire Pressure Monitoring System í The tire pressure monitoring system (TPMS) monitors the pressure for each tire. If tire pressure is too ow in one or more tires, the system wi inform the driver via the warning ight in the instrument pane and by the warning beep sound. The tire pressure sensors instaed on each whee send tire pressure data by radio signa to the receiver unit in the vehice. Tire pressure sensors When the ambient temperature is ow due to seasona changes, tire temperatures are aso ower. If the tire temperature owers, the air pressure owers as we, and the TPMS warning ight iuminates more frequenty. Inspect the tire pressure daiy before driving, and check the tire pressures monthy with a tire pressure gauge. When checking the tire pressures, use of a digita tire pressure gauge is recommended. TPMS does not aeviate your need to check the pressure and condition of a four tires before you drive each day. CAUTION When the tire pressure monitoring system warning ight is it, one or more of your tires is significanty under-infated. You shoud stop and check your tires as soon as possibe, and infate them to the proper pressure as indicated on the vehice's tire information pacard. Driving on a significanty under-infated tire causes the tire to overheat and can ead to tire faiure. Under-infation aso reduces fue efficiency and tire tread ife, and may affect the vehice's handing and stopping abiity. Each tire, incuding the spare, shoud be checked monthy when cod and set to the recommended infation pressure as specified in the vehice pacard and owner's manua. To avoid fase readings, the system sampes for a itte whie before indicating a probem. As a resut it wi not instantaneousy register a rapid tire defation or bow out. This device compies with part 15 of the FCC Rues. Operation is subject to the foowing two conditions: (1) This device may not cause harmfu interference, and (2) this device must accept any interference received, incuding interference that may cause undesired operation í Some modes.
137 Driving Your Mazda Starting and Driving qtire Pressure Monitoring System Warning Light This warning ight iuminates for a few seconds when the ignition switch is turned to the ON position. Thereafter, the warning ight iuminates when tire pressure is too ow in one or more tires, and fashes when there is a system mafunction. WARNING Vehice Handing When Tire Pressure Monitoring System Warning Light Iuminates/Fashes: When the tire pressure monitoring system warning ight iuminates or fashes, or the tire pressure warning beep sound is heard, it is dangerous to drive the vehice at high speeds, or perform sudden maneuvering or braking. Vehice drivabiity coud worsen and resut in an accident. When the tire pressure monitoring system warning ight iuminates or fashes, or the tire pressure warning beep sound is heard, decrease vehice speed immediatey and avoid sudden maneuvering and braking. Have the system and tires checked or perform the appropriate repair as soon as possibe by an Authorized Mazda Deaer. WARNING Ignoring the Warning Light: Ignoring the warning ight is dangerous, even if you know why it is iuminated. Have the probem taken care of as soon as possibe before it deveops into a more serious situation that coud ead to tire faiure and a dangerous accident. Warning ight iuminates/warning beep sounds When the warning ight iuminates, and the warning beep sound is heard (about 3 seconds), tire pressure is too ow in one or more tires. Adjust the tire pressure to the correct tire pressure at an Authorized Mazda Deaer or the nearest service station. Refer to the specification charts (page 10-7). CAUTION When repacing/repairing the tires or whees or both, have the work done by an Authorized Mazda Deaer, or the tire pressure sensors may be damaged. 5-23
138 Driving Your Mazda Starting and Driving Perform tire pressure adjustment when the tires are cod. Tire pressure wi vary according to the tire temperature, therefore et the vehice stand for 1 hour or ony drive it 1.6 km (1 mie) or ess before adjusting the tire pressures. When pressure is adjusted on hot tires to the cod infation pressure, the TPMS warning ight/beep may turn on after the tires coo and pressure drops beow specification. Aso, an iuminated TPMS warning ight, resuting from the tire air pressure dropping due to cod ambient temperature, may go out if the ambient temperature rises. In this case, it wi aso be necessary to adjust the tire air pressures. If the TPMS warning ight iuminates due to a drop in tire air pressure, make sure to check and adjust the tire air pressures. After adjusting the tire air pressures, it may require some time for the TPMS warning ight to go out. If the TPMS warning ight remains iuminated, drive the vehice at a speed of at east 25 km/h (16 mph) for 10 minutes, and then verify that it goes out. If the warning ight iuminates again even after the tire pressures are adjusted, there may be a tire puncture. Repace the punctured tire with the temporary spare tire (page 7-6). A tire pressure sensor is not instaed to the temporary spare tire. The warning ight wi fash continuousy whie the temporary spare tire is being used. Warning ight fashes When the warning ight fashes, there may be a system mafunction. Consut an Authorized Mazda Deaer. qsystem Error Activation When the warning ight fashes, there may be a system mafunction. Consut an Authorized Mazda Deaer. A system error activation may occur in the foowing cases: When there is equipment or a device near the vehice using the same radio frequency as that of the tire pressure sensors. When a arge metaic object (e.g. a arge eectric househod appiance or a desk-top computer) is paced on the right side of the rear seat, which may bock radio signas from the tire pressure sensor to the receiver unit. When using the foowing devices in the vehice that may cause radio interference with the receiver unit. A digita device such as a persona computer. A current converter device such as a DC-AC converter. When excess snow or ice adheres to the vehice, especiay around the whees. When the tire pressure sensor batteries are exhausted. 5-24
139 Driving Your Mazda Starting and Driving When using a whee with no tire pressure sensor instaed. When using tires with stee wire reinforcement in the side was. When using tire chains. qtires and Whees CAUTION When inspecting or adjusting the tire air pressures, do not appy excessive force to the stem part of the whee unit. The stem part coud be damaged. Changing tires and whees The foowing procedure aows the TPMS to recognize a tire pressure sensor's unique ID signa code whenever tires or whees are changed, such as changing to and from winter tires. Each tire pressure sensor has a unique ID signa code. The signa code must be registered with the TPMS before it can work. The easiest way to do it is to have an Authorized Mazda Deaer change your tire and compete ID signa code registration. When changing tires yoursef If you or someone ese changes tires, you or someone ese can aso undertake the steps for the TPMS to compete the ID signa code registration. 1. After tires have been changed, turn the ignition switch to the ON position, then turn it back to the ACC or LOCK position. 2. Wait for about 15 minutes. 3. After about 15 minutes, drive the vehice at a speed of at east 25 km/h (16 mph) for 10 minutes and the tire pressure sensor ID signa code wi be registered automaticay. If the vehice is driven within about 15 minutes of changing tires, the tire pressure monitoring system warning ight wi fash because the sensor ID signa code woud not have been registered. If this happens, park the vehice for about 15 minutes, after which the sensor ID signa code wi register upon driving the vehice for 10 minutes. When having tires changed at an Authorized Mazda Deaer Tire pressure sensor ID signa code registration is competed when an Authorized Mazda Deaer changes your vehice's tires. 5-25
140 Driving Your Mazda Starting and Driving Repacing tires and whees CAUTION When repacing/repairing the tires or whees or both, have the work done by an Authorized Mazda Deaer, or the tire pressure sensors may be damaged. The whees equipped on your Mazda are speciay designed for instaation of the tire pressure sensors. Do not use non-genuine whees, otherwise it may not be possibe to insta the tire pressure sensors. The tire pressure sensor ID signa code must be registered when a new tire pressure sensor is purchased. For purchase of a tire pressure sensor and registration of the tire pressure sensor ID signa code, consut an Authorized Mazda Deaer. When reinstaing a previousy removed tire pressure sensor to a whee, repace the grommet for the tire pressure sensor. Be sure to have the tire pressure sensors instaed whenever tires or whees are repaced. When having a tire or whee or both repaced, the foowing types of tire pressure sensor instaation are possibe. The tire pressure sensor is removed from the od whee and instaed to the new one. The same tire pressure sensor is used with the same whee. Ony the tire is repaced. A new tire pressure sensor is instaed to a new whee. 5-26
141 Driving Your Mazda Instrument Custer and Indicators Meters and Gauges (Back-out meter) When the ignition switch is in the ON position, the dashboard gauges iuminate. Speedometer... page 5-28 Odometer, Trip Meter and Trip Meter Seector... page 5-28 Tachometer... page 5-30 Engine Cooant Temperature Gauge... page 5-30 Fue Gauge... page 5-30 Instrument Custer Dimmer Seect Button (Back-out meter)... page
142 Driving Your Mazda Instrument Custer and Indicators qspeedometer The speedometer indicates the speed of the vehice. qodometer, Trip Meter and Trip Meter Seector The dispay mode can be changed between trip meter A and trip meter B by pressing the seector whie one of them is dispayed. The seected mode wi be dispayed. Seector Trip meter A Odometer Press the seector Trip meter B Odometer Press the seector Trip meter Odometer 5-28
143 Driving Your Mazda Instrument Custer and Indicators (Standard meter) The odometer and trip meter can be dispayed as foows even when the ignition switch is in the ACC or LOCK position. Dispays for 10 minutes after the ignition switch is turned to the ACC or LOCK position from the ON position. Dispays for 10 minutes after the driver's door is opened. (Back-out meter) When the ignition switch is in the ACC or LOCK position, the odometer or trip meters cannot be dispayed, however, pressing the seector button can inadvertenty switch the trip meters or reset them during an approximate ten-minute period in the foowing cases: After the ignition switch is turned to the ACC or LOCK position from the ON position. After the driver's door is opened. When trip meter A is seected, pressing the seector again within one second wi change to trip meter B mode. When trip meter A is seected, TRIP A wi be dispayed. When trip meter B is seected, TRIP B wi be dispayed. The trip meter records the tota distance the vehice is driven unti the meter is again reset. Return it to 0.0 by hoding the seector depressed for more than 1 second. Use this meter to measure trip distances and to compute fue consumption. Ony the trip meters record tenths of kiometers (mies). The trip record wi be erased when: The power suppy is interrupted (bown fuse or the battery is disconnected). The vehice is driven over km (mie). Odometer The odometer records the tota distance the vehice has been driven. Trip meter The trip meter can record the tota distance of two trips. One is recorded in trip meter A, and the other is recorded in trip meter B. For instance, trip meter A can record the distance from the point of origin, and trip meter B can record the distance from where the fue tank is fied. 5-29
144 Driving Your Mazda Instrument Custer and Indicators qtachometer The tachometer shows engine speed in thousands of revoutions per minute (rpm). Red zone CAUTION Don't run the engine with the tachometer neede in the RED ZONE. This may cause severe engine damage. qengine Cooant Temperature Gauge The engine cooant temperature gauge shows the temperature of the engine cooant. If the neede is near H, it indicates overheating. CAUTION Driving with an overheated engine can cause serious engine damage (page 7-12). qfue Gauge The fue gauge shows approximatey how much fue is in the tank. We recommend keeping the tank over 1/4 fu. When the ow fue warning ight iuminates or when the neede is near E, refue as soon as possibe. Low fue warning ight The direction of the arrow ( ) shown next to the ow fue warning ight indicates that the fue-fier id is on the right side of the vehice. 5-30
145 Driving Your Mazda Instrument Custer and Indicators qdashboard Iumination When the exterior ights are on, rotate the thumb-whee to adjust the brightness of the dashboard ights. Bright Dim Back-out meter When the instrument custer dimmer is canceed, the instrument custer iumination intensity wi not change by rotating the thumb-whee. Adjusting the instrument custer iumination intensity (With exterior ights off) When the exterior ights are off, the instrument custer iumination can be adjusted to one of five eves by successivey pressing the instrument custer dimmer seect button. Canceing the instrument custer iumination dimmer (With exterior ights on) When the exterior ights are on, the instrument custer iumination dims. When driving on snowy or foggy roads, or in other situations when the instrument custer's visibiity is reduced due to gare from surrounding brightness, the instrument custer dimmer seect button increases the iumination intensity. Press the button to increase the intensity of the instrument custer iumination. Press the button again to return to the previous iumination intensity. qinstrument Custer Dimmer Seect Button (Back-out meter) The instrument custer dimmer seect button is operabe when the ignition switch is in the ON position. Instrument custer dimmer seect button 5-31
146 Driving Your Mazda Warning/Indicator Lights and Beep Sounds Warning/Indicator Lights Warning/Indicator ights wi appear in any of the highighted areas Signa Warning/Indicator Lights Page Brake System Warning Light 5-34 Charging System Warning Light 5-35 Engine Oi Pressure Warning Light 5-36 Check Engine Light 5-36 ABS Warning Light 5-34 Air Bag/Front Seat Bet Pretensioner System Warning Light 5-37 Low Fue Warning Light
147 Driving Your Mazda Warning/Indicator Lights and Beep Sounds Signa Warning/Indicator Lights Page Seat Bet Warning Light/Beep 5-37 Door-Ajar Warning Light 5-38 Low Washer Fuid Leve Warning Light 5-39 Automatic Transaxe Warning Light 5-39 Tire Pressure Monitoring System Warning Light 5-39 Security Indicator Light 5-41 Headight High-Beam Indicator Light 5-41 Shift Position Indicator Light 5-41 Cruise Main Indicator Light 5-42 Cruise Set Indicator Light 5-42 Light-On Indicator Light 5-42 Power Steering Mafunction Indicator Light 5-42 Turn Signa/Hazard Warning Indicator Lights
148 Driving Your Mazda Warning/Indicator Lights and Beep Sounds qbrake System Warning Light This warning has the foowing functions: Parking brake warning The ight comes on when the parking brake is appied with the ignition switch in the START or ON position. It goes off when the parking brake is fuy reeased. Low brake fuid eve warning If the ight stays on after the parking brake is fuy reeased, you may have a brake probem. Drive to the side of the road and park off the right-of-way. You may notice that the peda is harder to push or that it may go coser to the foor. In either case, it wi take onger to stop the vehice. 1. With the engine stopped, check the brake fuid eve immediatey and add fuid as required (page 8-20). 2. After adding fuid, check the ight again. If the warning ight remains on, or if the brakes do not operate propery, do not drive the vehice. Have it towed to an Authorized Mazda Deaer. Having to add brake fuid is sometimes an indicator of eakage. Consut an Authorized Mazda Deaer as soon as possibe even if the brake ight is no onger iuminated. WARNING Brake Warning Light: Driving with the brake system warning ight on is dangerous. It indicates that your brakes may not work at a or that they coud competey fai at any time. If this ight remains on, after checking that the parking brake is fuy reeased, have the brakes inspected immediatey. Don't drive with this ight on, have the vehice towed to an Authorized Mazda Deaer to have the brakes inspected as soon as possibe. qabs Warning Light í The warning ight stays on for a few seconds when the ignition switch is turned to the ON position. Even if the ight goes out have your brake system inspected as soon as possibe by an Authorized Mazda Deaer í Some modes.
149 Driving Your Mazda Warning/Indicator Lights and Beep Sounds If the ABS warning ight stays on whie you're driving, the ABS contro unit has detected a system mafunction. If this occurs, your brakes wi function normay as if the vehice had no ABS. Shoud this happen, consut an Authorized Mazda Deaer as soon as possibe. When the engine is jump-started to charge the battery, uneven rpm occurs and the ABS warning ight comes on. This is due to a weak battery, not a mafunction. Recharge the battery. qeectronic Brake Force Distribution System Warning WARNING ABS Warning Light and Brake Warning Light on at the Same Time: Driving when the brake system warning ight and ABS warning ight are on at the same time is dangerous. When both ights are on, the rear whees coud ock more quicky in an emergency stop than under norma circumstances. Don't drive with both ights on, have the vehice towed to an Authorized Mazda Deaer to have the brakes inspected as soon as possibe. qcharging System Warning Light If the eectronic brake force distribution contro unit determines that some components are operating incorrecty, the contro unit may turn the brake system warning ight and the ABS warning ight on at the same time. The probem is ikey to be an eectronic brake force distribution system. This warning ight iuminates when the ignition switch is turned to the ON position and turns off when the engine is started. If the warning ight iuminates whie driving, it indicates a mafunction of the aternator or of the charging system. Drive to the side of the road and park off the right-of-way. Consut an Authorized Mazda Deaer. 5-35
150 Driving Your Mazda Warning/Indicator Lights and Beep Sounds CAUTION Don't continue driving when the charging system warning ight is iuminated because the engine coud stop unexpectedy. qengine Oi Pressure Warning Light This warning ight iuminates when the ignition switch is turned to the ON position and turns off when the engine is started. This warning ight indicates ow engine oi pressure. If the ight iuminates whie driving: 1. Drive to the side of the road and park off the right-of-way on eve ground. 2. Turn off the engine and inspect the engine oi eve (page 8-15). If it's ow, add oi. 3. Check the ight. If the ight remains iuminated even after you add oi, have your vehice towed to an Authorized Mazda Deaer. qcheck Engine Light If this ight comes on whie driving, the vehice may have a probem. It is important to note the driving conditions when the ight came on and consut an Authorized Mazda Deaer. The check engine ight may come on in the foowing cases: The fue tank eve being very ow or approaching empty. The engine's eectrica system has a probem. The emission contro system has a probem. The fue-fier cap is missing or not tightened securey. If the check engine ight remains on or fashes continuousy, do not drive at high speeds and consut an Authorized Mazda Deaer as soon as possibe. CAUTION Don't run the engine if oi pressure is ow. It coud resut in extensive engine damage. 5-36
151 Driving Your Mazda Warning/Indicator Lights and Beep Sounds qair Bag/Front Seat Bet Pretensioner System Warning Light qlow Fue Warning Light Low fue warning ight If the air bag/front seat bet pretensioner system is norma, the warning ight iuminates when the ignition switch is turned to the ON position or after the engine is cranked. After about 6 seconds it goes out. A system mafunction is indicated when the warning ight constanty iuminates or doesn't iuminate at a when the ignition switch is turned to the ON position. If any of these occur, consut an Authorized Mazda Deaer as soon as possibe. The system may not work in an accident. WARNING Sef-Servicing the Air Bag/ Pretensioner Systems: Sef-servicing or tampering with the systems is dangerous. An air bag/ pretensioner coud accidentay activate or become disabed. This coud cause serious injuries. Never tamper with the systems and aways have an Authorized Mazda Deaer perform a servicing and repairs. This warning ight in the fue gauge signas that the fue tank wi soon be empty. Refue as soon as possibe. qseat Bet Warning Light/Beep The seat bet warning ight iuminates and a beep sound wi be heard if the driver's seat bet is not fastened when the ignition switch is turned to the ON position. Conditions of operation Condition The driver's seat bet is not fastened when the ignition switch is turned to the ON position. The driver's seat bet is fastened whie the warning ight and the beep sound are activated. The driver's seat bet is fastened before the ignition switch is turned to the ON position. Resut The warning ight iuminates for about 1 minute and a beep sound wi be heard for about 6 seconds. The warning ight turns off and the beep sound stops. The warning ight wi not iuminate and the beep sound wi not be heard. 5-37
152 Driving Your Mazda Warning/Indicator Lights and Beep Sounds Bet minder The bet minder is a suppementa warning to the seat bet warning function. This feature provides additiona reminders to the driver that the driver's seat bet is not fastened by intermittenty sounding a beep sound and fashing the seat bet warning ight in the instrument custer. Condition The driver's seat bet is not fastened when the vehice speed reaches 8 km/h (5 mph) and about 1 minute has eapsed since the ignition switch was turned to the ON position. The driver's seat bet is fastened whie the warning ight and the beep sound are activated. The driver's seat bet is fastened before the ignition switch is turned to the ON position. Resut The warning ight fashes and the beep sound wi be heard for about 6 seconds every 30 seconds, for a period of about 5 minutes. The warning ight turns off and the beep sound stops. The warning ight wi not iuminate and the beep sound wi not be heard. The bet minder can be deactivated by the foowing methods. (Temporary deactivation) To temporariy deactivate the bet minder, turn the ignition switch to the ON position, fasten the driver's seat bet for about 2 seconds or onger, and then unfasten it within 20 seconds. The bet minder wi be deactivated unti the ignition switch is turned to the ON position again. (Long-term deactivation) To deactivate the bet minder over the ong term, consut an Authorized Mazda Deaer. If the bet minder is ong-term deactivated, the bet minder wi not activate unti it is restored at the Authorized Mazda Deaer. qdoor-ajar Warning Light This warning ight comes on when any door isn't securey cosed. 5-38
153 Driving Your Mazda Warning/Indicator Lights and Beep Sounds qlow Washer Fuid Leve Warning Light í qtire Pressure Monitoring System Warning Light í This warning ight indicates that itte washer fuid remains. Add fuid (page 8-23). qautomatic Transaxe Warning Light This warning ight iuminates for a few seconds when the ignition switch is turned to the ON position. Thereafter, the warning ight iuminates when tire pressure is too ow in one or more tires, and fashes when there is a system mafunction. WARNING This warning ight stays on for a few seconds when the ignition switch is turned to the ON position. The ight iuminates when the transaxe has a probem. CAUTION If the automatic transaxe warning ight iuminates, the transaxe has an eectrica probem. Continuing to drive your Mazda in this condition coud cause damage to your transaxe. Consut an Authorized Mazda Deaer as soon as possibe. Vehice Handing When Tire Pressure Monitoring System Warning Light Iuminates/Fashes: When the tire pressure monitoring system warning ight iuminates or fashes, or the tire pressure warning beep sound is heard, it is dangerous to drive the vehice at high speeds, or perform sudden maneuvering or braking. Vehice drivabiity coud worsen and resut in an accident. When the tire pressure monitoring system warning ight iuminates or fashes, or the tire pressure warning beep sound is heard, decrease vehice speed immediatey and avoid sudden maneuvering and braking. Have the system and tires checked or perform the appropriate repair as soon as possibe by an Authorized Mazda Deaer. í Some modes. 5-39
154 Driving Your Mazda Warning/Indicator Lights and Beep Sounds WARNING Ignoring the Warning Light: Ignoring the warning ight is dangerous, even if you know why it is iuminated. Have the probem taken care of as soon as possibe before it deveops into a more serious situation that coud ead to tire faiure and a dangerous accident. Warning ight iuminates/warning beep sounds When the warning ight iuminates, and the warning beep sound is heard (about 3 seconds), tire pressure is too ow in one or more tires. Adjust the tire pressure to the correct tire pressure at an Authorized Mazda Deaer or the nearest service station. Refer to the specification charts (page 10-7). CAUTION When repacing/repairing the tires or whees or both, have the work done by an Authorized Mazda Deaer, or the tire pressure sensors may be damaged. Perform tire pressure adjustment when the tires are cod. Tire pressure wi vary according to the tire temperature, therefore et the vehice stand for 1 hour or ony drive it 1.6 km (1 mie) or ess before adjusting the tire pressures. When pressure is adjusted on hot tires to the cod infation pressure, the TPMS warning ight/beep may turn on after the tires coo and pressure drops beow specification. Aso, an iuminated TPMS warning ight, resuting from the tire air pressure dropping due to cod ambient temperature, may go out if the ambient temperature rises. In this case, it wi aso be necessary to adjust the tire air pressures. If the TPMS warning ight iuminates due to a drop in tire air pressure, make sure to check and adjust the tire air pressures. After adjusting the tire air pressures, it may require some time for the TPMS warning ight to go out. If the TPMS warning ight remains iuminated, drive the vehice at a speed of at east 25 km/h (16 mph) for 10 minutes, and then verify that it goes out. If the warning ight iuminates again even after the tire pressures are adjusted, there may be a tire puncture. Repace the punctured tire with the temporary spare tire (page 7-6). 5-40
155 Driving Your Mazda Warning/Indicator Lights and Beep Sounds A tire pressure sensor is not instaed to the temporary spare tire. The warning ight wi fash continuousy whie the temporary spare tire is being used. Warning ight fashes When the warning ight fashes, there may be a system mafunction. Consut an Authorized Mazda Deaer. qsecurity Indicator Light qheadight High-Beam Indicator Light This ight indicates one of two things: The high-beam headights are on. The turn signa ever is in the fash-topass position. qshift Position Indicator Light (Automatic Transaxe) This indicator ight starts fashing every 2 seconds when the ignition switch is turned from the ON to the ACC position and the immobiizer system is armed. This indicates the seected shift position when the ignition switch is in the ON position. The ight stops fashing when the ignition switch is turned to the ON position with the correct ignition key. At this time, the immobiizer system is disarmed and the ight iuminates for about 3 seconds and then goes out. If the engine doesn't start with the correct ignition key, and the security indicator ight keeps iuminating or fashing, the system may have a mafunction. Consut an Authorized Mazda Deaer. Gear position indicator 5-41
156 Driving Your Mazda Warning/Indicator Lights and Beep Sounds Gear position indicator When the shift ever is in the D or M position, the numera for the seected gear dispays. qpower Steering Mafunction Indicator Light qcruise Main Indicator Light í This ight comes on when the ON/OFF switch is pressed and the cruise contro system is activated. qcruise Set Indicator Light í This ight comes on when a cruising speed is set. qlight-on Indicator Light (Backout meter) This indicator ight iuminates when the ignition switch is turned to the ON position and goes off when the engine is started. The ight iuminates to indicate that the power steering is inoperabe. If the ight iuminates, turn off the engine and restart it. If the ight does not iuminate after restarting the engine, this indicates that the power steering is restored and norma steering is possibe. If the ight remains iuminated, the power steering is sti inoperabe. Consut an Authorized Mazda Deaer. The power steering system is inoperabe when the power steering mafunction indicator ight iuminates. Steering is possibe, but requires more physica effort. This indicator ight comes on when the exterior ights and dashboard iumination are on í Some modes.
157 Driving Your Mazda Warning/Indicator Lights and Beep Sounds qturn-signa/hazard Warning Indicator Lights When operating the turn signa ights, the eft or right turn signa indicator ight fashes to indicate which turn signa ight is operating (page 5-48). When operating the hazard warning ights, both turn signa indicator ights fash (page 5-55). If an indicator ight remains iuminated (does not fash) or if it fashes abnormay, one of the turn signa bubs may be burned out. Beep Sounds qair Bag/Front Seat Bet Pretensioner System Warning Beep If a mafunction is detected in the air bag/ front seat bet pretensioner systems and the warning ight, a warning beep sound wi be heard for about 5 seconds every minute. The air bag and seat bet pretensioner system warning beep sound wi continue to be heard for approximatey 35 minutes. Have your vehice inspected at an Authorized Mazda Deaer as soon as possibe. WARNING Air Bag/Front Seat Bet Pretensioner System Warning Beep: Driving the vehice with the air bag/ front seat bet pretensioner system warning beep sounding is dangerous. In a coision, the air bags and the front seat bet pretensioner system wi not depoy and this coud resut in death or serious injury. Do not drive the vehice with the air bag/front seat bet pretensioner system warning beep sounding. Contact an Authorized Mazda Deaer to have the vehice inspected as soon as possibe. 5-43
158 Driving Your Mazda Warning/Indicator Lights and Beep Sounds qseat Bet Warning Beep If the driver's seat bet is not fastened when the ignition switch is turned to the ON position, a beep sound wi be heard for about 6 seconds. The beep sound wi be heard again for about 6 seconds every 30 seconds, for a period of about 5 minutes if the driver's seat bet is not fastened afterwards. Refer to Seat Bet Warning Light/Beep (page 5-37). qignition Key Reminder If the ignition switch is in the LOCK or ACC position with the key inserted, a continuous beep sound wi be heard when the driver's door is opened. qlights-on Reminder If ights are on and the key is removed from the ignition switch, a continuous beep sound wi be heard when the driver's door is opened. qtire Infation Pressure Warning Beep í The warning beep sound wi be heard for about 3 seconds when there is any abnormaity in tire infation pressures (page 5-22) í Some modes.
159 Driving Your Mazda Switches and Contros Lighting Contro Type B (With AUTO position) qheadights Type A (Without AUTO position) Turn the headight switch to turn the headights, other exterior ights and dashboard iumination on or off. Turn the headight switch to turn the headights, other exterior ights and dashboard iumination on or off. Switch Position Headights Off Off On Taiights Parking ights License ights Side-marker ights Dashboard iumination Off On On To prevent discharging the battery, don't eave the ights on whie the engine is off uness safety requires them. Switch Position Headights Off Off On Taiights Parking ights License ights Side-marker Off On On ights Dashboard iumination Auto To prevent discharging the battery, don't eave the ights on whie the engine is off uness safety requires them. AUTO(Auto-ight contro) When the headight switch is in the AUTO position and the ignition switch is in the ON position, the ight sensor senses the surrounding ightness or darkness and automaticay turns on or off the headights, other exterior ights and dashboard iumination (see chart above). 5-45
160 Driving Your Mazda Switches and Contros CAUTION Do not shade the ight sensor by adhering a sticker or a abe on the windshied. Otherwise the ight sensor wi not operate correcty. Light sensor When the headight switch is in the AUTO position and the ignition switch is turned to the ACC or LOCK position, the headights, other exterior ights and dashboard iumination wi turn off. The timing for turning on the headights, other exterior ights and dashboard iumination can be deayed by adjusting the sensitivity of the ight sensor. Consut an Authorized Mazda Deaer regarding sensor adjustment. The ight sensor aso works as a rain sensor for the auto-wiper contro. When the wiper ever is in the AUTO position and the ignition switch is in the ON position, the wipers may move automaticay. Be carefu not to pinch hands or fingers as it may cause injury, or damage the wipers (page 5-50). Xenon fusion headight bubs í The ow-beam bubs of the headights have xenon fusion bubs that produce a bright white beam over a wide area. WARNING Xenon Fusion Bub Repacement: Repacing the xenon fusion bubs by yoursef is dangerous. Because the xenon fusion bubs require high votage, you coud receive an eectric shock if the bubs are handed incorrecty. Do not repace the xenon fusion bubs by yoursef. Consut an Authorized Mazda Deaer when the repacement is necessary. If the headights fash, or the brightness weakens, the bub-ife may be depeted and a repacement is necessary. Consut an Authorized Mazda Deaer í Some modes.
161 Driving Your Mazda Switches and Contros qlights-on Reminder If ights are on and the key is removed from the ignition switch, a continuous beep sound wi be heard when the driver's door is opened. qheadight High-Low Beam Push the ever forward for high beam. Pu it back for ow. qheadight Leveing í The number of riders and weight of cargo in the uggage compartment change the ange of the headights. The headight eveing switch adjusts this ange. High beam Low beam qfashing the Headights To fash the headights, pu the ever fuy toward you. The headight switch need not be on, and the ever wi return to the norma position when reeased. Seect the proper setting from the foowing chart. Front seat Rear Switch Load Driver Passenger seat Position : Yes :No qdaytime Running Lights (Canada) In Canada, vehices must be driven with the headights on during daytime operation. For that reason, the daytime running ights automaticay turn on when the ignition switch is turned to the ON position. í Some modes. 5-47
162 Driving Your Mazda Switches and Contros The Daytime Running Lights turn off when the parking brake is appied. Turn and Lane-Change Signas qturn Signa Move the signa ever down (for a eft turn) or up (for a right turn) to the stop position. The signa wi sef-cance after the turn is competed. If the indicator ight continues to fash after a turn, manuay return the ever to its origina position. OFF Right turn Right ane change Left ane change Left turn Green indicators on the dashboard show which signa is working. Lane-change signas Move the ever sighty toward the direction of the change unti the indicator fashes and hod it there. It wi return to the off position when reeased. If an indicator ight stays on without fashing or if it fashes abnormay, one of the turn signa bubs may be burned out. 5-48
163 Driving Your Mazda Switches and Contros Fog Lights í The fog ights hep you to see as we as to be seen. The headights must be turned on to turn on the front fog ights. To turn the front fog ights on, rotate the fog ight switch to the position. Fog ight switch To turn the front fog ights off, rotate the fog ight switch to the OFF position or turn the headights off. The fog ights wi turn off when the headights are set at high beam. (With auto-ight contro) If the headight switch is in the AUTO position, the front fog ights can be turned on when the headights, the exterior ights and dashboard iumination are on. Windshied Wipers and Washer The ignition switch must be in the ON position. WARNING Substitute Washer Fuid: Using radiator antifreeze as washer fuid is dangerous. If sprayed on the windshied, it wi dirty the windshied, affect your visibiity, and coud resut in an accident. Use ony windshied washer fuid or pain water in the reservoir. Frozen Washer Fuid: Using windshied washer fuid without anti-freeze protection in freezing temperatures is dangerous. The washer fuid coud freeze on the windshied and bock your vision. You coud have an accident. Don't use the washer without first warming the windshied and never use pain tap water. í Some modes. 5-49
164 Driving Your Mazda Switches and Contros Because heavy ice and snow can jam the wiper bades, the wiper motor is protected from motor breakdown, overheating and possibe fire by a circuit breaker. This mechanism wi automaticay stop operation of the bades, but ony for about 5 minutes. If this happens, turn off the wiper switch and park off the right-of-way, and remove the snow and ice. After 5 minutes, turn on the switch and the bades shoud operate normay. If they don't resume functioning, consut an Authorized Mazda Deaer as soon as possibe. Drive to the side of the road and park off the right-of-way. Wait unti the weather cears before trying to drive with the wipers inoperative. qwindshied Wipers Type A (With INT position) For a singe wiping cyce, push the ever up to. Type B (With AUTO position) Turn the wipers on by puing the ever down. Mist AUTO Auto contro 1 Low speed 2 High speed For a singe wiping cyce, push the ever up to. AUTO (Auto-wiper contro) When the wiper ever is in the AUTO position, the rain sensor senses the amount of rainfa on the windshied and turns the wiper on or off automaticay (off intermittent ow speed high speed). Turn the wipers on by puing the ever down. Mist INT Intermittent 1 Low speed 2 High speed 5-50
165 Driving Your Mazda Switches and Contros The sensitivity of the rain sensor can be adjusted by turning the switch on the wiper ever. From the center position (norma), turn the switch towards (+) for higher sensitivity (faster response) or turn the switch towards ( _ ) for ess sensitivity (sower response). Switch Less sensitivity Center position Higher sensitivity CAUTION Do not shade the rain sensor by adhering a sticker or a abe on the windshied. Otherwise the rain sensor wi not operate correcty. CAUTION When the wiper ever is in the AUTO position and the ignition switch is in the ON position, the wipers may move automaticay in the foowing cases: If the windshied above the rain sensor is touched. If the windshied above the rain sensor is wiped with a coth. If the windshied is struck with a hand or other object. If the rain sensor is struck with a hand or other object from inside the vehice. Be carefu not to pinch hands or fingers as it may cause injury, or damage the wipers. When washing or servicing your Mazda, make sure the wiper ever is in the OFF position. Rain sensor 5-51
166 Driving Your Mazda Switches and Contros The auto-wiper contro may not operate when the rain sensor temperature is about _ 10 C (14 F) or ower, or about 85 C (185 F) or higher. If the windshied is coated with water repeent, the rain sensor may not be abe to sense the amount of rainfa correcty and auto-wiper contro may not operate propery. If dirt or foreign matter (e.g. ice or matter containing sat water) adheres to the windshied above the rain sensor or if the windshied is iced, it coud cause the wipers to move automaticay. However, if the wipers cannot remove this ice, dirt or foreign matter, the auto-wiper contro wi stop operation. In this case, pu the wiper ever to the 1 or 2 position for manua operation, or remove the ice, dirt or foreign matter by hand to restore the auto-wiper operation. With the wiper ever in the OFF or INT (Type A)/AUTO (Type B) position, the wipers wi operate continuousy unti the ever is reeased. If the washer doesn't work, inspect the fuid eve (page 8-23). If it's OK, consut an Authorized Mazda Deaer. qwindshied Washer Pu the ever toward you and hod it to spray washer fuid. OFF Washer 5-52
167 Driving Your Mazda Switches and Contros Rear Window Wiper and Washer (5 Door) The ignition switch must be in the ON position. qrear Window Wiper Rear Window Defroster The rear window defroster cears frost, fog, and thin ice from the rear window. The ignition switch must be in the ON position. Press the switch to turn on the rear window defroster. The rear window defroster operates for about minutes and turns off automaticay. The indicator ight iuminates during operation. To turn off the rear window defroster before the minutes has eapsed, press the switch again. Turn the wiper on by turning the rear wiper/washer switch. ON Norma INT Intermittent qrear Window Washer To spray washer fuid, turn the rear wiper/ washer switch to the position. After the switch is reeased, the washer wi stop. There are two washer positions: up and down. In the down washer position, the wiper wi not be activated. If the washer doesn't work, inspect the fuid eve (page 8-23). If it's OK and the washer sti doesn't work, consut an Authorized Mazda Deaer. Indicator ight CAUTION Don't use sharp instruments or window ceaners with abrasives to cean the inside of the rear window surface. They may damage the defroster grid inside the window. 5-53
168 Driving Your Mazda Switches and Contros This defroster is not designed for meting snow. If there is an accumuation of snow on the rear window, remove it before using the defroster. Horn To sound the horn, press around the mark on the steering whee. 5-54
169 Driving Your Mazda Switches and Contros Hazard Warning Fasher The hazard warning ights shoud aways be used when you stop on or near a roadway. The hazard warning ights warn other drivers that your vehice is a traffic hazard and that they must take extreme caution when near it. Hazard warning fasher Depress the hazard warning fasher and a four turn signas wi fash. The turn signas don't work when the hazard warning ights are on. Check oca reguations about the use of hazard warning ights whie the vehice is being towed. They may forbid it. 5-55
170 5-56
171 6 Interior Comfort Use of various features for drive comfort, incuding air-conditioning and audio system. Cimate Contro System Operating Tips Vent Operation Contro Pane Audio System Antenna Operating Tips for Audio System Audio Set Audio Contro Switch Operation (Steering Whee) í Safety Certification Interior Equipment Sunvisors Interior Lights Information Dispay Lighter Ashtray Cup Hoder Botte Hoder Storage Compartments í Some modes. 6-1
172 Interior Comfort Cimate Contro System Operating Tips qoperating the Cimate Contro System Operate the cimate contro system with the engine running. To prevent the battery from being discharged, do not eave the fan contro dia on for a ong period of time with the ignition switch in the ACC position when the engine is not running. qcearing the Air Inet Cear a obstructions ike eaves, snow and ice from the hood and the air inet in the cow grie to improve the system efficiency. qfoggy Windows The windows may fog up easiy in humid weather. Use the cimate contro system to defog the windows. To hep defog the windows, operate the air conditioner to dehumidify the air. The air conditioner may be used aong with the heater to dehumidify the air. qoutside/recircuated Air Position Use the outside air position in norma conditions. The recircuated air position shoud be used ony when driving on dusty roads or for quick cooing of the interior. qparking in Direct Sunight If the vehice has been parked in direct sunight during hot weather, open the windows to et warm air escape, then run the cimate contro system. qnot Using for a Long Period Run the air conditioner about 10 minutes at east once a month to keep interna parts ubricated. qcheck the Refrigerant before the Weather Gets Hot Have the air conditioner checked before the weather gets hot. Lack of refrigerant may make the air conditioner ess efficient. Consut an Authorized Mazda Deaer for refrigerant inspection. The air conditioner is fied with HFC134a (R134a), a refrigerant that wi not damage the ozone ayer. If the air conditioner is ow on refrigerant or has a mafunction, consut an Authorized Mazda Deaer. qrepacement of the Cabin Air Fiter If your vehice is equipped with an air fiter for the air conditioner, it is necessary to change the fiter periodicay as indicated in schedued maintenance (page 8-3). Consut an Authorized Mazda Deaer for repacement of the cabin air fiter. 6-2
173 Interior Comfort Cimate Contro System Vent Operation Center vents Side vents qadjusting the Vents Directing airfow Side Vents To adjust the direction of airfow, open the vents and rotate them eft and right. Center Vents To adjust the direction of airfow, move the adjustment knob. push Knob When using the air conditioner, mist may come out from the vents. This is not a sign of troube but a resut of humid air being suddeny cooed. 6-3
174 Interior Comfort Cimate Contro System qseecting the Airfow Mode Dashboard Vents Defroster and Foor Vents Dashboard and Foor Vents Defroster Vents Foor Vents 6-4
175 Interior Comfort Cimate Contro System Contro Pane Mode seector dia Fan contro dia Temperature contro dia A/C Switch Air intake seector Rear window defroster switch Some modes. qcontro Switches Temperature contro dia Fan contro dia Cod Hot This dia contros temperature. Turn it cockwise for hot and countercockwise for cod. This dia aows variabe fan speeds. 0 Fan off 1 Low speed 2 Medium ow speed 3 Medium high speed 4 High speed 6-5
176 Interior Comfort Cimate Contro System Mode seector dia The air conditioner may not function when the outside temperature approaches 0 C (32 F). Air intake seector Turn the mode seector dia to seect airfow mode (page 6-4). If you want to sighty adjust the airfow amount, set the mode seector dia at. For exampe, when the mode seector dia is at the position between the and positions, airfow from the foor vent is ess than that of the position. A/C switch í Push the A/C switch to turn the air conditioner on. The indicator ight on the switch wi iuminate when the fan contro dia is set at position 1, 2, 3, or 4. Push the switch once again to turn the air conditioner off. This switch contros the source of air entering the vehice. Press the switch to aternate between the and positions. The indicator ight for the seected mode wi iuminate. It is recommended that under norma conditions the switch be kept in the outside air position. Outside air position ( ) Outside air is taken into the vehice. Use this position for norma ventiation and heating. Recircuated air position ( ) Outside air is shut off. Air within the vehice is recircuated. This position can be used when driving on a dusty road or in simiar conditions. It aso heps to provide quicker cooing of the interior. 6-6 í Some modes.
177 Interior Comfort Cimate Contro System WARNING The Recircuated Air Position: Using the position in cod or rainy weather wi cause the windows to fog up. Your vision wi be hampered, which coud ead to a serious accident. Do not use the position in cod or rainy weather. Rear window defroster switch When using the rear window defroster switch, refer to Rear Window Defroster (page 5-53). qheating 1. Set the mode seector dia to the position. 2. Set the temperature contro dia to the hot position. 3. Set the fan contro dia to the desired speed. If the windshied fogs up easiy, set the mode seector dia to the position. If cooer air is desired at face eve, set the mode seector dia at the position and adjust the temperature contro dia to maintain maximum comfort. The air to the foor is warmer than air to the face (except when the temperature contro dia is set at the extreme hot or cod position). In the,,or position, the air conditioner is automaticay turned on (however, the indicator ight does not iuminate) and the position is automaticay seected to defrost the windshied. In the or position, the position cannot be changed to the position. qcooing (With Air Conditioner) 1. Set the mode seector dia to the position. 2. Set the temperature contro dia to the cod position. 3. Set the fan contro dia to the desired speed. 4. Turn on the air conditioner by pressing the A/C switch. 5. Adjust the fan contro dia and temperature contro dia to maintain maximum comfort. 6-7
178 Interior Comfort Cimate Contro System CAUTION When using the air conditioner whie driving up ong his or in heavy traffic, cosey monitor the temperature gauge (page 5-30). The air conditioner may cause engine overheating. If the gauge indicates overheating, turn the air conditioner off (page 7-12). When maximum cooing is desired, set the temperature contro dia to the extreme cod position and set the air intake seector to the position, then set the fan contro dia to position 4. If warmer air is desired at foor eve, set the mode seector dia at the position and adjust the temperature contro dia to maintain maximum comfort. The air to the foor is warmer than air to the face (except when the temperature contro dia is set at the extreme hot or cod position). qventiation 1. Set the mode seector dia to the position. 2. Set the air intake seector to the position. 3. Set the temperature contro dia to the desired position. 4. Set the fan contro dia to the desired speed. qwindshied Defrosting and Defogging 1. Set the mode seector dia to the position. 2. Set the temperature contro dia to the desired position. 3. Set the fan contro dia to the desired speed. WARNING Foggy Windshied: Using the position with the temperature contro set to the cod position wi cause the outside of the windshied to fog up. Your vision wi be hampered, which coud ead to a serious accident. Set the temperature contro to the hot or warm position when using the position. For maximum defrosting, set the temperature contro dia to the extreme hot position and the fan contro dia to position 4. If warm air is desired at the foor, set the mode seector dia to the position. In the,,or position, the air conditioner is automaticay turned on (however, the indicator ight does not iuminate) and the position is automaticay seected to defrost the windshied. In the or position, the position cannot be changed to the position. 6-8
179 Interior Comfort Cimate Contro System qdehumidifying (With Air Conditioner) Operate the air conditioner in coo or cod weather to hep defog the windshied and side windows. 1. Set the mode seector dia to the desired position. 2. Set the air intake seector to the position. 3. Set the temperature contro dia to the desired position. 4. Set the fan contro dia to the desired speed. 5. Turn on the air conditioner by pressing the A/C switch. One of the functions of the air conditioner is dehumidifying the air and, to use this function, the temperature does not have to be set to cod. Therefore, set the temperature contro dia to the desired position (hot or cod) and turn on the air conditioner when you want to dehumidify the cabin air. 6-9
180 Interior Comfort Audio System Antenna qdetachabe Type To remove the antenna, turn it countercockwise. To insta the antenna, turn it cockwise. Make sure the antenna is securey instaed. Remove Insta CAUTION To prevent damage to the antenna, remove it before entering a car wash faciity or passing beneath a ow overhead cearance. When eaving your vehice unattended, we recommend that you remove the antenna and store it inside the vehice. Operating Tips for Audio System WARNING Do Not Adjust Audio Whie Driving the Vehice: Adjusting the audio whie driving the vehice is dangerous as it coud distract your attention from the vehice operation which coud ead to a serious accident. Aways adjust the audio whie the vehice is stopped. Even if the audio contro switches are equipped on the steering whee, earn to use the switches without ooking down at them so that you can keep your maximum attention on the road whie driving the vehice. CAUTION For the purposes of safe driving, adjust the audio voume to a eve that aows you to hear sounds outside of the vehice. Do not use the audio for ong periods of time whie the engine is off. Otherwise the battery coud go dead. If a digita ceuar phone or CB radio is used in or near the vehice, it coud cause noise to occur from the audio system, however, this does not indicate that the system has been damaged. 6-10
181 Interior Comfort Audio System qradio Reception AM characteristics AM signas bend around such things as buidings or mountains and bounce off the ionosphere. Therefore, they can reach onger distances than FM signas. Because of this, two stations may sometimes be picked up on the same frequency at the same time. Station 1 Ionosphere Station 2 FM characteristics An FM broadcast range is usuay about km (25 30 mies) from the source. Because of extra coding needed to break the sound into two channes, stereo FM has even ess range than monaura (non-stereo) FM. FM Station km (25 30 mies) Signas from an FM transmitter are simiar to beams of ight because they do not bend around corners, but they do refect. Unike AM signas, FM signas cannot trave beyond the horizon. Therefore, FM stations cannot be received at the great distances possibe with AM reception. FM wave FM wave Ionosphere AM wave km ( mies) Atmospheric conditions can aso affect FM reception. High humidity wi cause poor reception. However, coudy days may provide better reception than cear days. Mutipath noise Since FM signas can be refected by obstructions, it is possibe to receive both the direct signa and the refected signa at the same time. This causes a sight deay in reception and may be heard as a broken sound or a distortion. This probem may aso be encountered when in cose proximity to the transmitter. Direct Refected wave 6-11
182 Interior Comfort Audio System Futter/Skip noise Signas from an FM transmitter move in straight ines and become weak in vaeys between ta buidings, mountains, and other obstaces. When a vehice passes through such an area, the reception conditions may change suddeny, resuting in annoying noise. Strong signa noise This occurs very cose to a transmitter tower. The broadcast signas are extremey strong, so the resut is noise and sound breakup at the radio receiver. Weak signa noise In suburban areas, broadcast signas become weak because of distance from the transmitter. Reception in such fringe areas is characterized by sound breakup. Station drift noise When a vehice reaches the area of two strong stations broadcasting at simiar frequencies, the origina station may be temporariy ost and the second station picked up. At this time there wi be some noise from this disturbance. Station MHz Station MHz 6-12
183 Interior Comfort Audio System qoperating Tips for Cassette Tape Payer Ceaning the cassette tape payer The tape head, capstans, and pinch roers wi gather oxide residue from cassette tapes. This can cause weak or wavering sounds and damage to the cassette tapes and payer. Use a good quaity headceaning tape or a iquid ceaner cassette tape to remove it. Shoud the unit not operate normay, consut an Authorized Mazda Deaer. Never attempt to repair it or insert a screwdriver or anything ese. Handing the cassette tape payer The foowing precautions shoud be observed. Do not spi any iquid on the audio system. If the cassette tape is oose, it may produce poor sound or performance during payback. Use a penci or something simiar to remove any sack. Ony cassette tapes that pay no onger than 90 minutes shoud be used. Cassette tape exceeding 90 minutes are thin and may easiy break. Do not eave a cassette tape in the tape payer sot when not in use. Remove it competey to permit the sot door to cose and to protect the mechanism from dust. Store cassette tapes away from extreme heat, magnetic fieds, and direct sunight. Protect the exposed cassette tape from dirt and damage. Store cassette tapes in their origina cases or other protective cases. Do not insert any objects, other than cassette tape, into the sot. 6-13
184 Interior Comfort Audio System qoperating Tips for Mini Disc (MD) Payer The foowing precautions shoud be observed. Do not spi any iquid on the audio system. The MD payer can aso pay MDLPs that have been recorded in MDLP mode. (MDLPs bearing the identification ogo as shown beow). Do not insert any objects, other than MDs, into the sot. When inserting the MD, make sure the MD abe is facing up, and the MD is oriented to the insertion sot in the direction of the arrow. If not inserted correcty, the MD wi be ejected, or may remain stuck in the MD deck. The MD payer has been designed to pay MDs bearing the identification ogo as shown. No other MDs can be payed. Do not touch the interna part of the MD. If the MD shutter is sid open for no reason, it may be broken. Store MDs in their cases and away from direct sunight. 6-14
185 Interior Comfort Audio System qoperating Tips for CD Payer/In- Dash CD Changer Condensation phenomenon Immediatey after turning on the heater when the vehice is cod, the CD or optica components (prism and ens) in the CD payer/changer may become couded with condensation. At this time, the CD wi eject immediatey when paced in the unit. A couded CD can be corrected simpy by wiping it with a soft coth. Couded optica components wi cear naturay in about an hour. Wait for norma operation to return before attempting to use the unit. Handing the CD payer/in-dash CD changer The foowing precautions shoud be observed. Do not spi any iquid on the audio system. The CD revoves at high speed within the unit. Defective (cracked or bady bent) CDs shoud never be used. Do not use non-conventiona discs such as heart-shaped, octagona discs, etc. The CD payer/changer coud be damaged. Do not insert any objects, other than CDs, into the sot. A new CD may have rough edges on its inner and outer perimeters. If a disc with rough edges is used, proper setting wi not be possibe and the CD payer/changer wi not pay the CD. Remove the rough edges in advance by using a ba-point pen or penci as shown beow. To remove the rough edges, rub the side of the pen or penci against the inner and outer perimeter of the CD. 6-15
186 Interior Comfort Audio System When driving over uneven surfaces, the sound may jump. The CD payer/changer has been designed to pay CDs bearing the identification ogo as shown. No other discs can be payed. Be sure never to touch the signa surface when handing the CDs. Pick up a CD by grasping the outer edge or the edge of the hoe and the outer edge. Dust, finger smudges, and dirt can decrease the amount of ight refected from the signa surface, thus affecting sound quaity. If the CD shoud become soied, genty wipe it with a soft coth from the center of the CD to the edge. Do not use record sprays, antistatic agents, or househod spray ceaners. Voatie chemicas such as benzine and thinner can aso damage the surface of the CD and must not be used. Anything that can damage, warp, or fog pastic shoud never be used to cean CDs. CDs, ike traditiona audio records, are made of pastic. To avoid warping, keep the CDs in their cases and do not store them where they wi be exposed to direct sunight. The CD payer/changer ejects the CD if the CD is inserted upside down. Aso dirty and/or defective CDs may be ejected. 8 cm (3 in) CDs and CD accessories (e.g. 8 cm disc adapter) cannot be used in the CD payer/changer. Do not insert ceaning discs in the CD payer/changer. Do not insert any disc with a pee-off or sea on it. Do not stick paper or tape on the CD. Avoid scratching the reverse side (the side without a abe). 6-16
187 Interior Comfort Audio System Audio Set Audio information is dispayed on the information dispay. CD Payer In-Dash CD Changer Cassette Tape Payer Mini Disc (MD) Payer Iustration is of a representative audio unit. Power/Voume/Sound Contros... page 6-18 Operating the Radio... page 6-22 Operating the Cassette Tape Payer... page 6-24 Operating the Mini Disc (MD) Payer... page 6-26 Operating the Compact Disc (CD) Payer... page 6-28 Operating the In-Dash CD Changer... page 6-30 Error Indications... page
188 Interior Comfort Audio System qpower/voume/sound Contros Power/Voume dia Audio contro dia Power ON/OFF Turn the ignition switch to the ACC or ON position. Press the power/voume dia to turn the audio system on. Press the power/voume dia again to turn the audio system off. To prevent the battery from being discharged, do not eave the audio system on for a ong period of time when the engine is not running. Voume adjustment To adjust the voume, turn the power/ voume dia. Turn the power/voume dia to the right to increase voume, to the eft to decrease it. Audio sound adjustment 1. Press the audio contro dia to seect the function. The seected function wi be indicated. Standard audioequipped mode * * Depending on the mode seected, the indication changes. * * 6-18
189 Interior Comfort Audio System BOSE Sound System-equipped mode * BOSE Sound System-equipped mode Indication Turn Left Turn Right Seect mode * * Depending on the mode seected, the indication changes. 2. Turn the audio contro dia to adjust the seected functions as foows: Standard audio-equipped mode Indication Turn Left Turn Right Decrease bass Decrease mid-range Decrease trebe * Seect mode Increase bass Increase mid-range Increase trebe Shift the Shift the sound to the sound to the front rear Shift the Shift the sound to the sound to the eft right OFF OFF ON ON Decrease bass Decrease trebe Increase bass Increase trebe Shift the Shift the sound to the sound to the front rear Shift the Shift the sound to the sound to the eft right OFF OFF ON ON About 5 seconds after seecting any mode, the voume function wi be automaticay seected. To reset bass, mid-range, trebe, fade, and baance, press the audio contro dia for 2 seconds. The unit wi beep and CLEAR wi be dispayed. Automatic Leve Contro (ALC) The automatic eve contro is a feature that automaticay adjusts audio voume and sound quaity according to the vehice speed. The voume increases in accordance with the increase in vehice speed, and decreases as vehice speed decreases. 6-19
190 Interior Comfort Audio System The foowing four modes are avaiabe. Seect the desired mode. Mode Voume change No change Minimum Medium Maximum Turn the audio contro dia to seect the ALC OFF, ALC LEVEL1 3 mode. The seected mode wi be indicated. BEEP setting The beep-sound when operating the audio system can be set on or off. ILLM EFT setting (Iumination setting during operation) The audio system iumination during operation can be set on or off. 6-20
191 MEMO 6-21
192 Interior Comfort Audio System qoperating the Radio Band seector buttons Scan button Sateite button* Seek tuning buttons Channe preset buttons Manua tuning button/auto memory button/eectric seria number button* *For reception of optiona SIRIUS digita sateite radio. Used on vehices equipped with the separatey sod SIRIUS digita sateite radio unit. For information on use, read the manua accompanying the SIRIUS unit. Subscription of SIRIUS digita sateite radio service is avaiabe in the U.S. (Except Aaska and Hawaii). Radio ON Press a band seector button ( turn the radio on. )to Band seection Successivey pressing the band seector button ( ) switches the bands as foows: FM1 FM2 AM. The seected mode wi be indicated. If FM stereo is being received, ST wi be dispayed. If the FM broadcast signa becomes weak, reception automaticay changes from STEREO to MONO for reduced noise, and the ST indicator wi go out. Tuning The radio has the foowing tuning methods: Manua, Seek, Scan, Preset channe, and Auto memory tuning. The easiest way to tune stations is to set them on preset channes. If the power suppy is interrupted (fuse bows or the battery is disconnected), the preset channes wi be canceed. Manua tuning Turning the manua tuning dia wi change the frequency higher or ower. 6-22
193 Interior Comfort Audio System Seek tuning Pressing the seek tuning button (, ) wi cause the tuner to seek a higher or ower frequency automaticay. If you continue to press and hod the button, the frequency wi continue changing without stopping. Scan tuning Press the scan button ( )to automaticay sampe strong stations. Scanning stops at each station for about 5 seconds. To hod a station, press the scan button ( ) again during this interva. Preset channe tuning The 6 preset channes can be used to store 6 AM and 12 FM stations. 1. To set a channe first seect AM, FM1, or FM2. Tune to the desired station. 2. Depress a channe preset button for about 2 seconds unti a beep sound is heard. The preset channe number and station frequency wi be dispayed. The station is now hed in the memory. 3. Repeat this operation for the other stations and bands you want to store. To tune one in the memory, seect AM, FM1, or FM2 and then press its channe preset button. The station frequency and the channe number wi be dispayed. Auto memory tuning This is especiay usefu when driving in an area where the oca stations are not known. Additiona AM/FM stations can be stored without disturbing the previousy set channes. Press and hod the auto memory button ( ) for about 2 seconds unti a beep sound is heard; the system wi automaticay scan and temporariy store up to 6 stations with the strongest frequencies in each seected band in that area. After scanning is competed, the station with the strongest frequency wi be tuned and its frequency dispayed. Press and reease the auto memory button ( ) to reca stations from the autostored stations. One stored station wi be seected each time; its frequency and channe number wi be dispayed. If no stations can be tuned after scanning operations, A wi be dispayed. If the power suppy is interrupted (fuse bows or the battery is disconnected), the preset channes wi be canceed. 6-23
194 Interior Comfort Audio System qoperating the Cassette Tape Payer í Repeat button Cassette tape pay button APC button: (next program) Fast-forward button (one being payed) Rewind button Program button Cassette tape sot Doby NR button Cassette tape eject button Cassette tape insert Insert the cassette tape into the sot, open edge to the right and cassette tape wi begin pay, and TAPE PLAY wi be dispayed. At the end of the cassette tape, the unit automaticay reverses cassette tape pay. When is it, the cassette tape's top side is paying. When is it, the bottom side is on. Paying Press the cassette tape pay button ( ) to start pay when a cassette tape is in the unit. If there isn't a cassette tape in the unit when the cassette tape pay button ( ) is pressed, NO TAPE wi fash on and off. Doby noise reduction When using a tape with Doby NR *, push the Doby NR button ( ). The symbo wi be dispayed. To pay a tape without Doby NR, push the button once again. * Noise reduction system manufactured under icense from Doby Laboratories Licensing Corporation. Doby and the doube-d symbo are trademarks of Doby Laboratories Licensing Corporation. Ejecting the cassette tape Press the cassette tape eject button ( eject the cassette tape. )to 6-24 í Some modes.
195 Interior Comfort Audio System The cassette tape can be ejected when the ignition switch is in the OFF position. Fast-forward/Rewind Press the fast-forward button ( )to fast-forward. Press the rewind button ( ) to rewind. To stop this operation and pay the cassette tape, press the button again. When the cassette tape ends during fastforward or rewind, it automaticay stops and starts paying. Reversing Press the program button ( )to change cassette tape-pay direction. When the cassette tape ends, the unit automaticay reverses pay. Automatic program contro (APC) APC is used to find the beginning of either the next program or the one being payed. APC may not operate propery if: A tape was recorded at a ow eve. A tape has ong, sient intervas. A tape is a ive recording. A tape has very short intervas of ess than 3 seconds. Repeat pay This operation makes it possibe to isten to a seection repeatedy. Press the repeat button ( ) during pay. The current seection paying wi be repeated ( RPT wi be dispayed). Press the repeat button ( ) once again to cance repeat pay. RPT may not operate propery if: A tape was recorded at a ow eve. A tape has ong, sient intervas. A tape is a ive recording. A tape has very short intervas of ess than 3 seconds. Press the APC button ( ) to the beginning of the next seection. Press the APC button ( ) to the beginning of the one being payed. To stop this operation and pay the cassette tape, press the button again. 6-25
196 Interior Comfort Audio System qoperating the Mini Disc (MD) Payer í Scan button Repeat button MD pay button Track up button Fast-forward button Track down button Reverse button Dispay button/ Dispay feed dia Random button MD eject button MD sot Inserting the MD Insert the MD, abe-side up with the arrow pointed to the sot. The autooading mechanism wi set the MD and begin pay. There wi be a short apse before pay begins whie the payer reads the digita signas on the MD. Paying Press the MD pay button ( )to start pay when a MD is in the unit. If there isn't a MD in the unit when the MD pay button ( ) is pressed, NO DISC wi fash on and off. Ejecting the MD Press the MD eject button ( MD. ) to eject the Fast-forward/Reverse Press and hod the fast-forward button ( ) to advance through a track at high speed. Press and hod the reverse button ( ) to reverse through a track at high speed. Track search Press the track up button ( ) once to skip forward to the beginning of the next track. Press the track down button ( )onceto skip back to the beginning of the current track. Music scan This feature heps to find a program by paying about the first 10 seconds of each track í Some modes.
197 Interior Comfort Audio System Press the scan button ( ) during pay to start scan pay operation (the track number wi fash). Press the scan button ( ) once again to cance scan pay. If the unit is eft in scan, norma pay wi resume where scan was seected. Repeat pay This feature makes it possibe to isten to a seection repeatedy. If there is no song or disc tite recorded on the MD, NO TITLE wi be dispayed. Long disc or song tites When ong disc or song tites cannot be competey dispayed, rotate the dispay feed dia ( ) to the right. The remainder of the tite wi proceed and appear on the dispay to the end of the tite. Press the repeat button ( ) during pay. The current seection wi be repeated ( RPT wi be dispayed). Press the repeat button ( ) once again to cance repeat pay. Random pay This feature aows the MD payer to randomy seect the order of the songs. Press the random button ( ) during pay. The next seection wi be randomy seected ( RDM wi be dispayed). Press the random button ( ) once again to cance random pay. Changing the dispay To change the dispay during MD pay, press the dispay button ( ) to advance through each of the foowing dispays: Song tite Disc tite No dispay 6-27
198 Interior Comfort Audio System qoperating the Compact Disc (CD) Payer í Scan button CD sot Load button Repeat button CD pay button CD eject button Track up button Track down button Random button Fast-forward button Reverse button Inserting the CD Insert the CD into the sot, abe-side up. The auto-oading mechanism wi set the CD and begin pay. There wi be a short apse before pay begins whie the payer reads the digita signas on the CD. Paying Press the CD pay button ( ) to start pay when a CD is in the unit. If there isn't a CD in the unit when the CD pay button ( ) is pressed, NO DISC wi fash on and off. When the oad button ( ) is pressed, the CD wi oad and pay even if the CD eject button ( ) had been previousy pressed. Ejecting the CD Press the CD eject button ( CD. ) to eject the Fast-forward/Reverse Press and hod the fast-forward button ( ) to advance through a track at high speed. Press and hod the reverse button ( ) to reverse through a track at high speed. Track search Press the track up button ( ) once to skip forward to the beginning of the next track. Press the track down button ( )onceto skip back to the beginning of the current track í Some modes.
199 Interior Comfort Audio System Music scan This feature heps to find a program by paying about the first 10 seconds of each track. Press the scan button ( ) during pay to start scan pay operation (the track number wi fash). Press the scan button ( ) once again to cance scan pay. If the unit is eft in scan, norma pay wi resume where scan was seected. Repeat pay This feature makes it possibe to isten to a seection repeatedy. Press the repeat button ( ) during pay. The current seection wi be repeated ( RPT wi be dispayed). Press the repeat button ( ) once again to cance repeat pay. Random pay This feature aows the CD payer to randomy seect the order of the songs. Press the random button ( ) during pay. The next seection wi be randomy seected ( RDM wi be dispayed). Press the random button ( ) once again to cance random pay. 6-29
200 Interior Comfort Audio System qoperating the In-Dash CD Changer í Scan button CD sot Load button Repeat button CD pay button CD eject button Track up button Disc up button Track down button Disc down button Random button Dispay button Fast-forward button Reverse button Inserting the CD The CD must be abe-side up when inserting. The auto-oading mechanism wi set the CD and begin pay. There wi be a short apse before pay begins whie the payer reads the digita signas on the CD. The disc number and the track number wi be dispayed. A CD cannot be inserted whie the dispay reads WAIT. A beeping sound can be heard during this waiting time. Simutaneousy pressing the power/voume dia and the oad button ( ) for about 2 seconds wi turn this beeping sound ON or OFF. Norma insertion 1. Press the oad button ( ). 2. When IN is dispayed, insert the CD. Inserting CDs into desired tray number 1. Press and hod the oad button ( ) for about 2 seconds unti a beep sound is heard. 2. Press the channe preset button for the desired tray number within 3 seconds after the beep sound is heard. 3. When IN is dispayed, insert the CD. The CD cannot be inserted to the desired tray number if the number is aready occupied í Some modes.
201 Interior Comfort Audio System Mutipe insertion 1. Press and hod the oad button ( ) for about 2 seconds unti a beep sound is heard. 2. Wait 3 seconds or press the oad button ( ) again within 3 seconds after the beep sound is heard. 3. When IN is dispayed, insert the CD. 4. When IN is dispayed again, insert the next CD. The first-inserted CD wi be payed automaticay when: No other CD is inserted within 15 seconds after IN is dispayed. The CD trays are fu. Dispaying the CD-inserted tray number When you want to know the number for a CD-inserted tray, press the dispay button ( ). The tray number wi be dispayed for 5 seconds. Ejecting the CD Norma ejection 1. Press the CD eject button ( ). The disc number and DISC OUT wi be dispayed. 2. Pu out the CD. When the CD is ejected during pay, the next CD wi be payed automaticay. Ejecting CDs from desired tray number 1. Press and hod the CD eject button ( ) for about 2 seconds unti a beep sound is heard. 2. Press the channe preset button for the desired CD number within 3 seconds after the beep sound is heard. 3. Pu out the CD. Mutipe ejection 1. Press and hod the CD eject button ( ) for about 2 seconds unti a beep sound is heard. 2. Wait 3 seconds or press the CD eject button ( ) again within 3 seconds after the beep sound is heard. 3. Pu out the CD, then the next CD wi be ejected. CDs wi be ejected starting with the one with the owest number. A CDs in the tray wi be ejected continuousy. CDs can be ejected when the ignition switch is off. Press and hod the CD eject button ( ) for about 2 seconds and a CDs wi eject. Paying Press the CD pay button ( ) to start pay when a CD is in the unit. If there isn't a CD in the unit when the CD pay button ( ) is pressed, NO DISC wi fash on and off. 6-31
202 Interior Comfort Audio System Fast-forward/Reverse Press and hod the fast-forward button ( ) to advance through a track at high speed. Press and hod the reverse button ( ) to reverse through a track at high speed. Track search Press the track up button ( ) once to skip forward to the beginning of the next track. Press the track down button ( )onceto skip back to the beginning of the current track. Disc search Press the disc up button ( ) to skip forward to the beginning of the next CD. Press the disc down button ( )to skip back to the beginning of the previous CD. Music scan This feature heps to find a program by paying about the first 10 seconds of each track. Press the repeat button ( ) during pay. The current seection wi be repeated ( RPT wi be dispayed). Press the repeat button ( ) once again to cance repeat pay. Random pay This feature aows the CD payer to randomy seect the order of the songs. Press the random button ( ) during pay. The next seection wi be randomy seected ( RDM wi be dispayed). Press the random button ( ) once again to cance random pay. Press the scan button ( ) during pay to start scan pay operation (the track number wi fash). Press the scan button ( ) once again to cance scan pay. If the unit is eft in scan, norma pay wi resume where scan was seected. Repeat pay This feature makes it possibe to isten to a seection repeatedy. 6-32
203 Interior Comfort Audio System qerror Indications If you see an error indication on the dispay, find the cause in the chart. If you cannot cear the error indication, take the vehice to an Authorized Mazda Deaer. Indication Cause Soution CHECK MD MD is inserted upside down Insert the MD propery. If the error indication does not disappear, consut an Authorized Mazda Deaer. MD is defective Insert another MD propery. If the error indication does not disappear, consut an Authorized Mazda Deaer. CHECK CD CD is inserted upside down Insert the CD propery. If the error indication does not disappear, consut an Authorized Mazda Deaer. CD is defective Insert another CD propery. If the error indication does not disappear, consut an Authorized Mazda Deaer. 6-33
204 Interior Comfort Audio System Audio Contro Switch Operation (Steering Whee) í When the audio unit is turned on, operation of the audio unit from the steering whee is possibe. Because the audio unit wi be turned off under the foowing conditions, the switches wi be inoperabe. When the ignition switch is turned to the LOCK position. When the power button on the audio unit is pressed and the audio unit is turned off. When a cassette tape/md/cd being payed is ejected. (For the In-dash CD changer, when a CDs are ejected.) Mazda has instaed this system to prevent distraction whie driving the vehice and using audio contros on the dashboard. Aways make safe driving your first priority. qadjusting the Voume To increase the voume, press the voume button ( ). To decrease the voume, press the voume button ( ) í Some modes.
205 Interior Comfort Audio System qchanging the Source Press the mode switch ( ) to change the audio source (FM1 radio> FM2 radio> AM radio> CD payer or CD changer> SIRIUS1> SIRIUS2> SIRIUS3> Cassette tape payer or MD payer> cycica). qseek Switch When istening to the radio Press the seek switch (, ), the radio switches to the next/previous stored station in the order that it was stored (1 6). Cassette tape, MD, CD, CD changer and SIRIUS digita sateite radio modes cannot be seected in the foowing cases: A cassette deck, MD, CD, CD changer, or SIRIUS digita sateite radio unit is not equipped on the audio system. A cassette tape, MD, or CD has not been inserted. Press the seek switch (, ) for about 2 seconds unti a beep sound is heard to seek a usabe stations at a higher or ower frequency whether programmed or not. When paying a cassette tape Press the seek switch ( ), reease, and it wi advance to the next seection. Press the seek switch ( ), reease, and it wi repeat the seection being payed. When paying a CD or MD Press the seek switch ( ) to skip to the next track. Press the seek switch ( ) to repeat the current track. 6-35
206 Interior Comfort Audio System qmute Switch Press the mute switch ( ) once to mute audio, press it again to resume audio output. 6-36
207 Interior Comfort Audio System Safety Certification This CD payer is made and tested to meet exacting safety standards. It meets FCC requirements and compies with safety performance standards of the U.S. Department of Heath and Human Services. CAUTION This CD payer shoud not be adjusted or repaired by anyone except quaified service personne. If servicing is required, contact an Authorized Mazda Deaer. Use of contros or adjustments or performance of procedures other than those specified herein may resut in hazardous aser exposure. Never operate the CD payer with the top case of the unit removed. Changes or modifications not expressy approved by the party responsibe for compiance coud void the user's authority to operate this equipment. For CD payer section: This device compies with part 15 of the FCC Rues. Operation is subject to the foowing two conditions: (1) This device may not cause harmfu interference, and (2) this device must accept any interference received, incuding interference that may cause undesired operation. This equipment has been tested and found to compy with the imits for a Cass B digita device, pursuant to part 15 of the FCC Rues. These imits are designed to provide reasonabe protection against harmfu interference in a residentia instaation. This equipment generates, uses, and can radiate radio frequency energy and, if not instaed and used in accordance with the instructions, may cause harmfu interference to radio communications. However, there is no guarantee that interference wi not occur in a particuar instaation. 6-37
208 Interior Comfort Interior Equipment Sunvisors When you need a sunvisor, ower it for use in front or swing it to the side. Sunvisor qvanity Mirrors To use the vanity mirror, ower the sunvisor. Interior Lights qiuminated Entry System í When the iuminated entry system operates, the overhead ight (switch is in the DOOR position) turns on for: About 30 seconds after the driver's door is unocked and the ignition key is removed. About 15 seconds after a doors are cosed. About 15 seconds after the key is removed from the ignition with a doors cosed. The ight aso turns off when: The ignition switch is turned to the ON position and a doors are cosed. The driver's door is ocked. Battery saver If any door is eft opened, the ight goes out after about 5 minutes to save the battery. The ight turns on again when the ignition switch is turned to the ON position, or when any door is opened after a doors have been cosed í Some modes.
209 Interior Comfort Interior Equipment qoverhead Lights í Rear Front With moonroof Without moonroof Switch Position Rear Overhead Lights Light off Light on when any door is open (With iuminated entry system) Light on or off when the iuminated entry system is on Light on qmap Lights í The map ights are switched on or off by pressing the switches. With moonroof Switch Position Front Overhead Lights Light off Light on when any door is open Switches (With iuminated entry system) Light on or off when the iuminated entry system is on í Some modes. 6-39
210 Interior Comfort Interior Equipment Without moonroof Switches qluggage Compartment Light (5 Door) OFF ON Switch Position Luggage Compartment Light Light off Light on when the iftgate is open 6-40
211 Interior Comfort Interior Equipment Information Dispay Cock Audio dispay qinformation Dispay Functions The information dispay has the foowing functions: Cock Audio Dispay 6-41
212 Interior Comfort Interior Equipment qcock When the ignition switch is in the ACC or ON position, the time is dispayed. 12:01 12:29 12:00 12:30 12:59 1:00 When the SET button is reeased, the seconds are reset to 00. qaudio Dispay The audio system status is dispayed. To operate the audio system, refer to Audio System (page 6-10). Time setting 1. Press the CLOCK button unti a beep sounds, and 12Hr and 24Hr wi be dispayed. 2. Press the SET button to switch between 12Hr and 24Hr dispays. The seected dispay wi fash. To seect the desired cock setting, press the CLOCK button again whie the preferred setting is fashing. 3. Hr. ADJUST wi be dispayed next, and the hour portion of the dispay wi fash. Press the SET button to set the hour, then press the CLOCK button. 4. Min. ADJUST wi be dispayed next, and the minutes portion of the dispay wi fash. Press the SET button to set the minutes, then press the CLOCK button. Time resetting Whie the cock is dispayed, press the SET button 1.5 seconds or more. When the button is reeased, a beep wi sound and the cock wi be reset as foows: (Exampe) 6-42
213 Interior Comfort Interior Equipment Lighter The ignition switch must be in the ACC or ON position. Press the ighter in and reease it. When ready for use, it automaticay pops out. Ashtray CAUTION Don't use the ashtray for trash. You might start a fire. To use, open the cover. CAUTION Don't touch the meta part of the ighter, you may burn yoursef. Don't hod the ighter in because it wi overheat. Don't use the ighter socket for pugin accessories such as shavers and coffee pots. They may damage it or cause eectrica faiure. Use ony a genuine Mazda ighter or the equivaent. If the ighter doesn't pop out within 30 seconds, remove it to prevent overheating. To remove, open the cover and pu up the ashtray. 6-43
214 Interior Comfort Interior Equipment Cup Hoder To use, open the cover. WARNING Using Cup Hoder: Using a cup hoder to hod hot iquids whie the vehice is moving is dangerous. If the contents spi, you coud be scaded. Never use a cup hoder to hod hot iquids whie the vehice is moving. Don't Put Anything Other Than Cups or Drink cans in Cup Hoder: Putting objects other than cups or drink cans in a cup hoder is dangerous. During sudden braking or maneuvering, occupants coud be hit and injured, or objects coud be thrown around the vehice, causing interference with the driver and the possibiity of an accident. Ony use a cup hoder for cups or drink cans. CAUTION To reduce the possibiity of injury in an accident or a sudden stop, keep cup hoders cosed when not in use. 6-44
215 Interior Comfort Interior Equipment Botte Hoder Botte hoders are on the inside of the doors. Storage Compartments WARNING Open Storage Boxes: Driving with the storage boxes open is dangerous. To reduce the possibiity of injury in an accident or a sudden stop, keep the storage boxes cosed when driving. Botte hoder CAUTION Don't use the botte hoders for containers without caps. The contents may spi when the door is opened or cosed. CAUTION Don't eave ighters or eyegasses in the storage boxes whie parked under the sun. A ighter coud expode or the pastic materia in eyegasses coud deform and crack from high temperature. qgove Box To open the gove box, pu the atch toward you. If the gove box has a ock, insert the key and turn it cockwise to ock, countercockwise to unock. Unock Lock 6-45
216 Interior Comfort Interior Equipment qcenter Consoe To open, pu the ower reease catch. Use the oops in the uggage compartment to secure cargo with a rope or net. The tensie strength of the oops is 196 N (20 kgf, 44 bf). Do not appy excessive force to the oops as it wi damage them. Sma items can be paced in the tray of the center consoe id. To open it, pu the upper reease catch. To secure cargo with a rope or net, the trunk board oops can be used in the same way as the cargo securing oops (page 6-47). qcargo Sub-Compartment (5 Door) qcargo Securing Loops (5 Door) WARNING Not Securing Luggage and Cargo: Not securing cargo whie driving is dangerous as it coud move or be crushed during sudden braking or a coision and cause injury. Make sure uggage and cargo is secured before driving. With fexibe foor board To use the cargo sub-compartment, partiay open or remove the trunk boards. Trunk board Cargo subcompartment 6-46
217 Interior Comfort Interior Equipment Without fexibe foor board To use the cargo sub-compartment, remove or ift the trunk board. Trunk board The trunk board oops can be used in the same way as the cargo securing oops. The tensie strength of the oops is 147 N (15 kgf, 33 bf). Do not appy excessive force to the trunk board oops as it wi damage them (page 6-46). Compartment divider oops Front trunk board Cargo subcompartment qfexibe Foor Board (5 Door) í The uggage compartment can be separated verticay and/or horizontay, using the trunk board and the trunk board oops. Rear trunk board To separate verticay Use the rear trunk board to separate the uggage compartment verticay. 1. Pu the trunk board oops out. CAUTION Make sure the trunk board is firmy secured when it is fitted into the trunk board oops. If it is not firmy secured, it coud unexpectedy disengage causing damage to the trunk board oops or the trunk board. Compartment divider oop í Some modes. 6-47
218 Interior Comfort Interior Equipment 2. Insert the trunk board oops into the trunk board sits. Trunk board Front To faciitate insertion of the trunk board oops into the trunk board sits, first insert the bottom of the rear trunk board into the groove of the uggage subcompartment. CAUTION Do not pace heavy objects on the trunk board or appy excessive force as they coud damage the trunk board. The permissibe weight is about 5 kg (11 b). Do not use the rear trunk board to separate the uggage compartment horizontay. The rear trunk board cannot be ocked to the trunk board oops and it coud move and cause injury whie the vehice is moving. 1. Pu the trunk board oops out. Compartment divider oop 2. Insert the trunk board oop into sit A. Cargo subcompartment Groove 3. Rock the trunk board to make sure the board is instaed securey. To separate horizontay Use the front trunk board to separate the uggage compartment horizontay. Sit A 6-48
219 Interior Comfort Interior Equipment 3. Insert the other trunk board oop into sit B unti a cick sound is heard. Sit B 4. Rock the trunk board to make sure the board is instaed securey. CAUTION Do not pace or remove uggage via the rear passenger seat area whie the vehice is moving. The trunk board or uggage coud move and cause injury. 6-49
220 6-50
221 7 In Case of an Emergency Hepfu information on what to do in an emergency. Parking in an Emergency Parking in an Emergency Fat Tire Spare Tire and Too Storage Changing a Fat Tire Overheating Overheating Emergency Starting Starting a Fooded Engine Jump-Starting Push-Starting Emergency Towing Towing Description Tiedown Hook Recreationa Towing
222 In Case of an Emergency Parking in an Emergency Parking in an Emergency The hazard warning ights shoud aways be used when you stop on or near a roadway. The hazard warning ights warn other drivers that your vehice is a traffic hazard and that they must take extreme caution when near it. Depress the hazard warning fasher and a four turn signas wi fash. The turn signas don't work when the hazard warning ights are on. Check oca reguations about the use of hazard warning ights whie the vehice is being towed. They may forbid it. 7-2
223 In Case of an Emergency Fat Tire Spare Tire and Too Storage Spare tire and toos are stored in the ocations iustrated in the diagram. 4 Door Spare tire Jack Lug wrench Jack hande Tiedown eyeet 5 Door Lug wrench Tiedown eyeet Jack Jack hande Spare tire 7-3
224 In Case of an Emergency Fat Tire qjack To remove the jack 1. Turn the knob and remove the cover. WARNING Driving with a Temporary Spare Tire on Ice or Snow: Driving with a spare tire on the front (driving) whees on ice or snow is dangerous. Handing wi be affected. You coud ose contro of the vehice and have an accident. Put the spare tire on the rear axe and move a reguar tire to the front. 2. Turn the wing bot countercockwise. To secure the jack Perform the remova procedure in reverse. qspare Tire Your Mazda has a temporary spare tire. The temporary spare tire is ighter and smaer than a conventiona tire, and is designed ony for emergency use and shoud be used ony for VERY short periods. Temporary spares shoud NEVER be used for ong drives or extended periods. CAUTION When using the temporary spare tire, driving stabiity may decrease compared to when using ony the conventiona tire. Drive carefuy. To avoid damage to the temporary spare or to the vehice, observe the foowing precautions: Don't exceed 80 km/h (50 mph). Avoid driving over obstaces. Aso, don't drive through an automatic car wash. This tire's diameter is smaer than a conventiona tire's, so the ground cearance is reduced about 25 mm (1 in). Don't use a tire chain on this tire because it won't fit propery. Don't use your temporary spare on any other vehice; it has been designed ony for your Mazda. Use ony one temporary spare tire on your vehice at the same time. 7-4
225 In Case of an Emergency Fat Tire (With Tire Pressure Monitoring System) A tire pressure sensor is not instaed to the temporary spare tire. The warning ight wi fash continuousy whie the temporary spare tire is being used (page 5-23). (5 Door) 1. Remove the trunk mat, trunk board and cargo sub-compartment. To remove the spare tire (4 Door) 1. Remove the trunk mat and trunk board. 2. Turn the tire hod-down bot countercockwise with the ug wrench. 2. Turn the tire hod-down bot countercockwise with the ug wrench. 7-5
226 In Case of an Emergency Fat Tire Changing a Fat Tire If the foowing occurs whie driving, it coud indicate a fat tire. Steering becomes difficut. The vehice begins to vibrate excessivey. The vehice pus in one direction. If you have a fat tire, drive sowy to a eve spot that is we off the road and out of the way of traffic to change the tire. Stopping in traffic or on the shouder of a busy road is dangerous. WARNING Jacking a Vehice: Changing a tire is dangerous if not done propery. The vehice can sip off the jack and seriousy injure someone. Be sure to foow the directions for changing a tire, and never get under a vehice that is supported ony by a jack. Passenger in Vehice Supported by a Jack: Aowing someone to remain in a vehice supported by a jack is dangerous. The occupant coud cause the vehice to fa resuting in serious injury. Never aow anyone inside a vehice supported by a jack. CAUTION (With Tire Pressure Monitoring System) The whees equipped on your Mazda are speciay designed for instaation of the tire pressure sensors. Do not use non-genuine whees, otherwise it may not be possibe to insta the tire pressure sensors. Make sure the jack is we ubricated before using it. (With Tire Pressure Monitoring System) Be sure to register the tire pressure sensor ID signa code whenever tires or whees are changed (page 5-25). 1. Park on a eve surface off the right-ofway and firmy set the parking brake. 2. Put a vehice with an automatic transaxe in Park (P), a manua transaxe in Reverse (R) or 1, and turn off the engine. 3. Turn on the hazard warning fasher. 4. Have everyone get out of the vehice and away from the vehice and traffic. 5. Remove the jack, too, and spare tire (page 7-3). 7-6
227 In Case of an Emergency Fat Tire 6. Bock the whee diagonay opposite the fat tire. When bocking a whee, pace a tire bock both in front and behind the tire. Force the end of the ug wrench firmy between whee and cover, or remova wi be difficut. CAUTION There is a vave-stem mark inside the whee cap. When instaing the whee cap, aign this mark with the tire's vave stem. Damage coud occur during instaation if the whee cover is not propery aigned. When bocking a tire, use rocks or wood bocks of sufficient size to hod the tire in pace. 2. Loosen the ug nuts by turning them countercockwise one turn each, but don't remove any ug nuts unti the tire has been raised off the ground. qremoving a Fat Tire 1. If your vehice is equipped with a whee cover, pry off the whee cover with the beveed end of the ug wrench. 7-7
228 In Case of an Emergency Fat Tire 3. Pace the jack under the jacking position cosest to the tire being changed. 4. Insert the jack hande into the jack. 5. Turn the jack hande cockwise and raise the vehice high enough so that the spare tire can be instaed. Before removing the ug nuts, make sure your Mazda is firmy in position and that it cannot sip or move. Jacking position WARNING Incorrect Jacking Position: Attempting to jack the vehice in positions other than those recommended in this manua is dangerous. The vehice coud sip off the jack and seriousy injure or even ki someone. Use ony the front and rear jacking positions recommended in this manua. 6. Remove the ug nuts by turning them countercockwise; then remove the whee and center cap. Improper Jack: Using a jack that isn't designed for your Mazda is dangerous. The vehice coud sip off the jack and seriousy injure someone. Use ony the jack provided with your Mazda. Pacing Objects Under the Jack: Jacking the vehice with an object under the jack is dangerous. The jack coud sip and someone coud be seriousy injured by the jack or the faing vehice. Never pace objects under the jack. 7-8
229 In Case of an Emergency Fat Tire qlocking Lug Nuts í If your vehice has optiona antitheft whee ug nuts, one on each whee wi ock the tires and you must use a specia key to unock them. This key is attached to the ug wrench and is stored with the spare tire. Register them with the ock manufacturer by fiing out the card provided in the gove box and maiing it in the accompanying enveope. If you ose this key, consut an Authorized Mazda Deaer or use the ock manufacturer's order form, which is with the registration card. qmounting the Spare Tire 1. Remove dirt and grime from the mounting surfaces of the whee and hub, incuding the hub bots, with a coth. Antitheft ug nut Specia key To remove an antitheft ug nut 1. Obtain the key for the antitheft ug nut. 2. Pace it on top of the nut, and be sure to hod the key square to it. If you hod the key at an ange, you may damage both key and nut. Don't use a power impact wrench. 3. Pace the ug wrench on top of the key and appy pressure. Turn the wrench countercockwise. To insta the nut 1. Pace the key on top of the nut. 2. Pace the ug wrench on top of the key, appy pressure, and turn it cockwise. WARNING Removing Dirt and Grime from Whees, Hubs and Hub Bots: When changing or repacing a tire, not removing dirt and grime from the mounting surfaces of the whee, hub and hub bots is dangerous. The ug nuts coud oosen whie driving and cause the tire to come off, resuting in an accident. Make sure the mounting surfaces of the whee, hub and ug nuts are cean before changing or repacing tires. 2. Mount the spare tire. í Some modes. 7-9
230 In Case of an Emergency Fat Tire 3. Insta the ug nuts with the beveed edge inward; tighten them by hand. 4. Turn the jack hande countercockwise and ower the vehice. Use the ug wrench to tighten the nuts in the order shown. WARNING Don't Appy Oi or Grease to Lug Nuts, Bots: Appying oi or grease to ug nuts and bots is dangerous. The ug nuts coud oosen whie driving and cause the tire to come off, resuting in an accident. In addition, ug nuts and bots coud be damaged if tightened more than necessary. Do not appy oi or grease to ug nuts and bots and do not tighten the ug nuts beyond the recommended tightening torque. If you're unsure of how tight the nuts shoud be, have them inspected at an Authorized Mazda Deaer. Nut tightening torque N m (kgf m, ft bf) (9 11, 65 93) 7-10
231 In Case of an Emergency Fat Tire WARNING Loose Lug Nuts: Impropery or oosey tightened ug nuts are dangerous. The whee coud wobbe or come off. This coud resut in oss of vehice contro and cause a serious accident. Aways securey and correcty tighten the ug nuts. Metric Studs and Lug Nuts: Because the whee studs and ug nuts on your Mazda have metric threads, using a non-metric nut is dangerous. On a metric stud, it woud not secure the whee and woud damage the stud, which coud cause the whee to sip off and cause an accident. Be sure to reinsta the same nuts you removed or repace them with metric nuts of the same configuration. 5. Store the damaged tire, using the tire hod-down bot to hod it in pace. Tire hod-down bot WARNING Incorrect Tire Air Pressure: Driving on tires with incorrect air pressure is dangerous. Tires with incorrect pressure coud affect handing and resut in an accident. Don't drive with any tires that have incorrect air pressure. When you check the reguar tires' air pressure, check the spare tire, too. (With Tire Pressure Monitoring System) A tire pressure sensor is not instaed to the temporary spare tire. The warning ight wi fash continuousy whie the temporary spare tire is being used (page 5-23). To prevent the jack and too from ratting, store them propery. Tire camp 6. Check the infation pressure. Refer to the specification charts on page Have the fat tire repaired or repaced as soon as possibe. 7-11
232 In Case of an Emergency Overheating Overheating If the temperature gauge indicates overheating, the vehice oses power, or you hear a oud knocking or pinging noise, the engine is probaby too hot. WARNING Cooing Fan and Engine Inspection: Inspecting the engine with the ignition switch in the ON position is dangerous. The cooing fan coud turn on unexpectedy even when the engine isn't running. You coud be seriousy injured by the fan. Turn the ignition switch off and remove the key from the ignition switch when you inspect the engine. Cooing System Cap: When the engine and radiator are hot, scading cooant and steam may shoot out under pressure and cause serious injury. Don't remove the cooing system cap when the engine and radiator are hot. Steam from Overheated Engine: Steam from an overheated engine is dangerous. The escaping steam coud seriousy burn you. Open the hood ONLY after steam is no onger escaping from the engine. If the temperature gauge indicates overheating: 1. Drive safey to the side of the road and park off the right-of-way. 2. Put a vehice with an automatic transaxe in park (P), a manua transaxe in neutra. Appy the parking brake. 3. Turn off the air conditioner. 4. Check whether cooant or steam is escaping from under the hood or from the engine compartment. If steam is coming from the engine compartment: Don't go near the front of the vehice. Stop the engine. Wait unti the steam dissipates, then open the hood and start the engine. If neither cooant nor steam is escaping: Open the hood and ide the engine unti it coos. CAUTION If the cooing fan does not operate whie the engine is running, the engine temperature wi increase. Stop the engine and ca an Authorized Mazda Deaer. 5. Make sure the cooing fan is operating, then turn off the engine after the temperature has decreased. 6. When coo, check the cooant eve. If it's ow, ook for cooant eaks from the radiator and hoses. 7-12
233 In Case of an Emergency Overheating If you find a eak or other damage, or if cooant is sti eaking: Stop the engine and ca an Authorized Mazda Deaer. If you find no probems, the engine is coo, and no eaks are obvious: Carefuy add cooant as required (page 8-17). CAUTION If the engine continues to overheat or frequenty overheats, have the cooing system inspected. The engine coud be seriousy damaged uness repairs are made. Consut an Authorized Mazda Deaer. 7-13
234 In Case of an Emergency Emergency Starting Starting a Fooded Engine If the engine fais to start, it may be fooded (excessive fue in the engine). Foow this procedure: 1. Depress the acceerator a the way and hod it there. 2. Turn the ignition switch to the START position and hod it there for up to 10 seconds. If the engine starts, reease the key and acceerator immediatey because the engine wi suddeny rev up. 3. If the engine fais to start, crank it without depressing the acceerator for up to 10 seconds. 7-14
235 In Case of an Emergency Emergency Starting Jump-Starting Jump-starting is dangerous if done incorrecty. So foow the procedure carefuy. If you fee unsure about jump-starting, we strongy recommend that you have a competent service technician do the work. WARNING Foow These Precautions Carefuy: To ensure safe and correct handing of the battery, read the foowing precautions carefuy before using the battery or inspecting it. Eye Protection: Working without eye protection is dangerous. Battery fuid contains SULFURIC ACID which coud cause bindness if spashed into your eyes. Aso, hydrogen gas produced during norma battery operation, coud ignite and cause the battery to expode. Aways wear eye protection when working near the battery. Spied Battery Fuid: Spied battery fuid is dangerous. Battery fuid contains SULFURIC ACID which coud cause serious injuries if it gets in eyes, skin or cothing. If this happens, immediatey fush your eyes with water for 15 minutes or wash your skin thoroughy and get medica attention. Wear eye protection and protective goves to prevent contact with battery fuid. Chidren and Batteries: Aowing chidren to pay near batteries is dangerous. Battery fuid coud cause serious injuries if it gets in the eyes or on the skin. Aways keep batteries out of the reach of chidren. 7-15
236 In Case of an Emergency Emergency Starting WARNING Keep Fames Away: Fames and sparks near open battery ces are dangerous. Hydrogen gas, produced during norma battery operation, coud ignite and cause the battery to expode. An expoding battery can cause serious burns and injuries. Keep a fames incuding cigarettes and sparks away from open battery ces. When working near a battery, do not aow meta toos to contact the positive ( ) or negative ( ) termina of the battery. Do not aow the positive ( ) termina to contact the vehice body. Battery-Reated Exposion: Fames and sparks near open battery ces are dangerous. Hydrogen gas, produced during norma battery operation, coud ignite and cause the battery to expode. An expoding battery can cause serious burns and injuries. Keep a fames, incuding cigarettes, and sparks away from open battery ces. Low Fuid Leve or Frozen Battery: Jump-starting a frozen battery or one with a ow fuid eve is dangerous. It may rupture or expode, causing serious injury. Don't jump-start a frozen battery or one with a ow fuid eve. Connecting to Negative Termina: Connecting the end of the second cabe to the negative ( ) termina of the discharged battery is dangerous. A spark coud cause the gas around the battery to expode and injure someone. Connect the negative cabe to a good ground point away from the battery. Connecting Jumper Cabe to Moving Parts: Connecting a jumper cabe near or to moving parts (cooing fans, bets) is dangerous. The cabe coud get caught when the engine starts and cause serious injury. Never connect a jumper cabe to or near any part that moves. CAUTION Use ony a 12 V booster system. You can damage a 12 V starter, ignition system, and other eectrica parts beyond repair with a 24 V power suppy (two 12 V batteries in series or a 24 V motor generator set). 7-16
237 In Case of an Emergency Emergency Starting Connect cabes in numerica order and disconnect in reverse order. Jumper cabes Discharged battery Booster battery 1. For vehices equipped with an engine cover, remove the engine cover. 2. Remove the battery cover from its front side. Battery cover 3. Make sure the booster battery is 12 V and that its negative termina is grounded. 4. If the booster battery is in another vehice, don't aow both vehices to touch. Turn off the engine of the vehice with the booster battery and a unnecessary eectrica oads in both vehices. 7-17
238 In Case of an Emergency Emergency Starting 5. Connect the jumper cabes in the exact sequence as in the iustration. Connect one end of a cabe to the positive termina on the discharged battery (1). Attach the other end to the positive termina on the booster battery (2). Connect one end of the other cabe to the negative termina of the booster battery (3). Connect the other end to a soid, stationary, exposed metaic point (for exampe, the right hand side engine mounting bot) away from the discharged battery (4). 6. Start the engine of the booster vehice and run it a few minutes. Then start the engine of the other vehice. 7. When finished, carefuy disconnect the cabes in the reverse order described in the iustration. Push-Starting WARNING Towing a Vehice to Start It: Towing a vehice to start it is dangerous. The vehice being towed coud surge forward when its engine starts, causing the two vehices to coide. The occupants coud be injured. Never tow a vehice to start it. You can't start a vehice with an automatic transaxe by pushing it. CAUTION Do not push-start a vehice that has a manua transaxe. It can damage the emission contro system. Verify that the covers are securey instaed. 7-18
239 In Case of an Emergency Emergency Towing Towing Description We recommend that towing be done ony by an Authorized Mazda Deaer or a commercia tow-truck service. Proper ifting and towing are necessary to prevent damage to the vehice. Government and oca aws must be foowed. CAUTION Don't tow the vehice pointed backward with driving whees on the ground. This may cause interna damage to the transaxe. A towed vehice usuay shoud have its front whees off the ground. If excessive damage or other conditions prevent this, use whee doies. Whee doies CAUTION Don't tow with sing-type equipment. This coud damage your vehice. Use whee-ift or fatbed equipment. When towing with the rear whees on the ground, reease the parking brake. 7-19
240 In Case of an Emergency Emergency Towing CAUTION Do not use the hooks under the rear bumper for towing and tying down, as they cannot hod the oad and it wi damage the bumper. Tiedown Hook CAUTION Don't use the tiedown hook under the rear for towing. It is designed ONLY for tying down the vehice when it's being transported. Using it for towing wi damage the bumper. Hooks When towing with chain or cabe, wrap the chain or cabe with a soft coth near the bumper to prevent damage to the bumper. qtiedown Hook-Front 1. Remove the tiedown eyeet and the ug wrench from the trunk (page 7-3). 2. Wrap a fathead screwdriver or simiar too with a soft coth to prevent damage to the bumper and open the cap ocated on the front bumper. 7-20
241 In Case of an Emergency Emergency Towing CAUTION The cap cannot be competey removed. Do not use excessive force as it may damage the cap or scratch the painted bumper surface. 3. Securey insta the tiedown eyeet using the ug wrench. CAUTION If the tiedown eyeet is not securey tightened, it may oosen or disengage from the bumper when tying down the vehice. Make sure that the tiedown eyeet is securey tightened to the bumper. 4. Hook the tying rope to the tiedown eyeet. 7-21
242 In Case of an Emergency Emergency Towing Recreationa Towing An exampe of recreationa towing is towing your vehice behind a motorhome. The transaxe is not designed for towing this vehice on a 4 whees. When doing recreationa towing refer to Towing Description (page 7-19) and Tiedown Hook (page 7-20) and carefuy foow the instructions. 7-22
243 8 Maintenance and Care How to keep your Mazda in top condition. Introduction Introduction Schedued Maintenance Schedued Maintenance (North America) Schedued Maintenance (Except North America) Owner Maintenance Owner Maintenance Schedue Owner Maintenance Precautions Engine Compartment Overview Engine Oi Engine Cooant Brake/Cutch Fuid Power Steering Fuid Automatic Transaxe Fuid (ATF) Washer Fuid Body Lubrication Air Fiter Wiper Bades Battery Tires Light Bubs Fuses Appearance Care How to Minimize Environmenta Paint Damage Exterior Care Interior Care
244 Maintenance and Care Introduction Introduction Be extremey carefu and prevent injury to yoursef and others or damage to your vehice when using this manua for inspection and maintenance. If you're unsure about any procedure it describes, we strongy urge you to have a reiabe and quaified service shop perform the work, preferaby an Authorized Mazda Deaer. Factory-trained Mazda technicians and genuine Mazda parts are best for your vehice. Without this expertise and the parts that have been designed and made especiay for your Mazda, inadequate, incompete, and insufficient servicing may resut in probems. This coud ead to vehice damage or an accident and injuries. For expert advice and quaity service, consut an Authorized Mazda Deaer. The owner shoud retain evidence that proper maintenance has been performed as prescribed. Caims against the warranty resuting from ack of maintenance, as opposed to defective materias or authorized Mazda workmanship, wi not be honored. Any auto repair shop using parts equivaent to your Mazda's origina equipment may perform maintenance. But we recommend that it aways be done by an Authorized Mazda Deaer using genuine Mazda parts. 8-2
245 Maintenance and Care Schedued Maintenance Schedued Maintenance (North America) Foow Schedue 1 if the vehice is operated mainy where none of the foowing conditions appy. If any do appy, foow Schedue 2 (Canada and Puerto Rico residents foow Schedue 2). Repeated short-distance driving Driving in dusty conditions Driving with extended use of brakes Driving in areas where sat or other corrosive materias are being used Driving on rough or muddy roads Extended periods of iding or ow-speed operation Driving for ong periods in cod temperatures or extremey humid cimates After the prescribed period, continue to foow the described maintenance at the recommended intervas. 8-3
246 Maintenance and Care Schedued Maintenance qschedue 1 Number of months or kiometers (mies), whichever comes first Maintenance Interva Months km mies ENGINE Engine vave cearance Audibe inspect every 120,000 km (75,000 mies), if noisy, adjust Drive bets (tension) I Engine oi R R R R R R R R Engine oi fiter R R R R R R R R COOLING SYSTEM Cooing system I I Engine cooant *1 Repace at first 192,000 km (120,000 mies) or 10 years ; FL22 type after that, every 96,000 km (60,000 mies) or 5 years Repace at first 96,000 km (60,000 mies) or 4 years ; Others after that, every 2 years FUEL SYSTEM Air fiter R Fue ines and hoses *2 I I Hoses and tubes for emission *2 I IGNITION SYSTEM Spark pugs Repace every 120,000 km (75,000 mies) CHASSIS and BODY Brake ines, hoses and connections I I Disc brakes I I I I Tire (rotation) Rotate every 12,000 km (7,500 mies) Steering operation and inkages I I Front and rear suspension and ba joints I I Driveshaft dust boots I I Exhaust system and heat shieds Inspect every 72,000 km (45,000 mies) or 60 months A ocks and hinges L L L L L L L L 8-4
247 Maintenance and Care Schedued Maintenance Number of months or kiometers (mies), whichever comes first Maintenance Interva Months km mies AIR CONDITIONER SYSTEM (if instaed) Cabin air fiter Repace every 40,000 km (25,000 mies) or 24 months Chart symbos I: Inspect and repair, cean, adjust, or repace if necessary. R: Repace L: Lubricate Remarks *1 Use FL22 type cooant in vehices with the inscription FL22 on the radiator cap itsef or the surrounding area. Use FL22 when repacing the cooant. *2 According to state/provincia and federa reguations, faiure to perform maintenance on these items wi not void your emissions warranties. However, Mazda recommends that a maintenance services be performed at the recommended time or mieage/kiometer period to ensure ong-term reiabiity. 8-5
248 Maintenance and Care Schedued Maintenance qschedue 2 Number of months or kiometers (mies), whichever comes first Maintenance Interva Months km mies ENGINE Engine vave cearance Audibe inspect every 120,000 km (75,000 mies), if noisy, adjust Drive bets (tension) I Engine oi Puerto Rico Repace every 5,000 km (3,000 mies) or 3 months Others R R R R R R R R R R R R Engine oi fiter R R R R R R R R R R R R COOLING SYSTEM Cooing system I I Engine cooant *1 Repace at first 192,000 km (120,000 mies) or 10 years ; FL22 type after that, every 96,000 km (60,000 mies) or 5 years Repace at first 96,000 km (60,000 mies) or 4 years ; Others after that, every 2 years Engine cooant eve I I I I I I I I I I I I FUEL SYSTEM Air fiter Puerto Rico R R Others R Fue ines and hoses *2 I I Hoses and tubes for emission *2 I IGNITION SYSTEM Spark pugs Repace every 120,000km (75,000mies) ELECTRICAL SYSTEM Function of a ights I I I I I I I I I I I I CHASSIS and BODY Brake ines, hoses and connections I I Brake and cutch fuid eve I I I I I I I I I I I I Disc brakes I I I I Tire (rotation) Rotate every 8,000km (5,000mies) Tire infation pressure and tire wear I I I I I I I I I I I I Steering operation and inkages I I Power steering fuid eve I I I I I I I I I I I I Front and rear suspension and ba joints I I Driveshaft dust boots I I Exhaust system and heat shieds Inspect every 72,000km (45,000mies) or 60 months A ocks and hinges L L L L L L L L L L L L Washer fuid eve I I I I I I I I I I I I 8-6
249 Maintenance and Care Schedued Maintenance Number of months or kiometers (mies), whichever comes first Maintenance Interva Months km mies AIR CONDITIONER SYSTEM (if instaed) Cabin air fiter Repace every 40,000km (25,000mies) or 24 months Chart symbos I: Inspect and repair, cean, adjust, or repace if necessary. R: Repace L: Lubricate Remarks *1 Use FL22 type cooant in vehices with the inscription FL22 on the radiator cap itsef or the surrounding area. Use FL22 when repacing the cooant. *2 According to state/provincia and federa reguations, faiure to perform maintenance on these items wi not void your emissions warranties. However, Mazda recommends that a maintenance services be performed at the recommended time or mieage/kiometer period to ensure ong-term reiabiity. 8-7
250 Maintenance and Care Schedued Maintenance Schedued Maintenance (Except North America) After the prescribed period, continue to foow the described maintenance at the recommended intervas. As the resut of visua examination or functiona measurement of a system's operation (performance), correct, cean, or repace as required. (Inspect, and if necessary repace the air fiter) Emission contro and reated systems The ignition and fue systems are highy important to the emission contro system and to efficient engine operation. Don't tamper with them. A inspections and adjustments must be made by an Authorized Mazda Deaer. 8-8
251 Maintenance and Care Schedued Maintenance qschedue Maintenance Interva Engine vave cearance Number of months or kiometers (mies), whichever comes first Months km mies Audibe inspect every 120,000 km (75,000 mies), if noisy, adjust Drive bets *1 I I I I I I I I I I I I I I I I Engine oi *2 R R R R R R R R R R R R R R R R Engine oi fiter *2 R R R R R R R R R R R R R R R R Cooing system I I I I I I I I FL22 Engine cooant type *3 R Others Repace every 2 years Air fiter *4 C C R C C R C C Iridium type Repace every 120,000 km (75,000 mies) Spark pugs *5 except Iridium R R R R type Ide speed (ZJ, ZY and Z6 engine) I I I I I I I I Fue fiter R R R R Fue ines and hoses I I I I I I I I Evaporative system (if instaed) I I I I I I I I Battery eectroyte eve and specific gravity I I I I I I I I Brake ines, hoses and connections I I I I I I I I Brake fuid *6 I I I R I I I R I I I R I I I R Parking brake I I I I I I I I I I I I I I I I Power brake unit (brake booster) and hoses I I I I I I I I Disc brakes I I I I I I I I I I I I I I I I Drum brakes (if instaed) I I I I I I I I Power steering fuid, ines, hoses and connections I I I I I I I I I I I I I I I I Steering operation and inkage I I I I I I I I Manua transaxe oi R Automatic transaxe fuid eve I I I I I I I I Front and rear suspension and ba joints I I I I Driveshaft dust boots I I I I 8-9
252 Maintenance and Care Schedued Maintenance Maintenance Interva Exhaust system and heat shieds Number of months or kiometers (mies), whichever comes first Months km mies Inspect every 80,000 km (50,000 mies) Bots and nuts on chassis and body T T T T T T T T A eectrica system *7 I I I I I I I I Body condition (for rust, corrosion and perforation) Inspect annuay Cabin air fiter (if instaed) R R R R R R R R Tires (incuding spare tire) (with infation pressure adjustment) I I I I I I I I Chart symbos I: Inspect: Inspect and cean, repair, adjust, or repace if necessary. R: Repace T: Tighten C: Cean Remarks *1 Aso inspect and adjust the power steering and air conditioner drive bets, if instaed. *2 If the vehice is operated under any of the foowing conditions, change the engine oi and oi fiter more often than recommended intervas. a) Driving in dusty conditions b) Extended periods of iding or ow speed operation. c) Driving for ong period in cod temperatures or driving reguary at short distance ony. *3 Use FL22 type cooant in vehices with the inscription FL22 on the radiator cap itsef or the surrounding area. Use FL22 when repacing the cooant. *4 If the vehice is operated in very dusty or sandy areas, cean and if necessary, repace the air fiter more often than the recommended intervas. *5 Verify the spark pug type from the spark pug itsef. Refer to specifications on page *6 If the brakes are used extensivey (for exampe, continuous hard driving or mountain driving) or if the vehice is operated in extremey humid cimates, change the brake fuid annuay. *7 This is a fu function check of eectrica systems such as ights, wiper and washer systems (incuding wiper bades), and power windows. 8-10
253 Maintenance and Care Owner Maintenance Owner Maintenance Schedue The owner or a quaified service technician shoud make these vehice inspections at the indicated intervas to ensure safe and dependabe operation. Bring any probem to the attention of an Authorized Mazda Deaer or quaified service technician as soon as possibe. qwhen Refueing Brake and cutch fuid eve (page 8-20) Engine cooant eve (page 8-17) Engine oi eve (page 8-15) Washer fuid eve (page 8-23) qat Least Monthy Tire infation pressures (page 8-32) qat Least Twice a Year (For Exampe, Every Spring and Fa) Automatic transaxe fuid eve (page 8-21) Power steering fuid eve (page 8-21) You can do the foowing schedued maintenance items if you have some mechanica abiity and a few basic toos and if you cosey foow the directions in this manua. Air fiter (page 8-24) Engine cooant (page 8-17) Engine oi (page 8-15) 8-11
254 Maintenance and Care Owner Maintenance Owner Maintenance Precautions Improper or incompete service may resut in probems. This section gives instructions ony for items that are easy to perform. As expained in the Introduction (page 8-2), severa procedures can be done ony by a quaified service technician with specia toos. Improper owner maintenance during the warranty period may affect warranty coverage. For detais, read the separate Mazda Warranty statement provided with the vehice. If you're unsure about any servicing or maintenance procedure, have it done by an Authorized Mazda Deaer. There are strict environmenta aws regarding the disposa of waste oi and fuids. Pease dispose of your waste propery and with due regard to the environment. We recommend that you entrust the oi and fuid changes of your vehice to an Authorized Mazda Deaer. WARNING Maintenance Procedures: Performing maintenance work on a vehice is dangerous if not done propery. You can be seriousy injured whie performing some maintenance procedures. If you ack sufficient knowedge and experience or the proper toos and equipment to do the work, have it done by a quaified technician. Running the Engine: Working under the hood with the engine running is dangerous. It becomes even more dangerous when you wear jewery or oose cothing. Either can become entanged in moving parts and resut in injury. Therefore, if you must run the engine whie working under the hood, make certain that you remove a jewery (especiay rings, braceets, watches, and neckaces) and a neckties, scarves, and simiar oose cothing before getting near the engine or cooing fan which may turn on unexpectedy. Eectrica Fan and Engine Inspection: Inspecting the engine with the ignition switch in the ON position is dangerous. The cooing fan coud come on unexpectedy even when the engine isn't running. You coud be seriousy injured by the fan. Turn the ignition switch off and remove the key from the ignition switch when you inspect the engine. 8-12
255 Maintenance and Care Owner Maintenance Engine Compartment Overview Engine cooant reservoir Engine oi-fier cap Brake/Cutch fuid reservoir Automatic transaxe fuid-eve dipstick (ony for automatic transaxe) Battery Main fuse Windshied washer fuid reservoir Power steering fuid reservoir Engine oi dipstick Air fiter Fuse bock 8-13
256 Maintenance and Care Owner Maintenance Engine Oi qrecommended Oi Use SAE 5W-20 engine oi. Oi container abes provide important information. A chief contribution this type of oi makes to fue economy is reducing the amount of fue necessary to overcome engine friction. U.S.A. and CANADA Ony use ois Certified For Gasoine Engines by the American Petroeum Institute (API). An oi with this trademark symbo conforms to the current engine and emission system protection standards and fue economy requirements of the Internationa Lubricant Standardization and Approva Committee (ILSAC), comprised of U.S. and Japanese automobie manufacturers W-20 (ILSAC) Except U.S.A. and CANADA (ILSAC) 8-14
257 Maintenance and Care Owner Maintenance The quaity designation SL, or ILSAC must be on the abe W qinspecting Engine Oi Leve Be sure the vehice is on a eve surface. 2. Warm up the engine to norma operating temperature. 3. Turn it off and wait at east 5 minutes for the oi to return to the oi pan. 4. Pu out the dipstick, wipe it cean, and reinsert it fuy. Type A Fu OK Low Type B Fu OK Low 5. Pu it out again and examine the eve. It's OK between MIN and MAX. But if it's near or beow MIN, add enough oi to bring the eve to MAX. CAUTION Don't add engine oi over MAX. This may cause engine damage. 6. Make sure the O-ring on the dipstick is positioned propery before reinserting the dipstick. The distance between MIN and MAX on the dipstick represents the foowing: Oi capacity L (US qt, Imp qt) 0.75 (0.79, 0.66) qchanging Engine Oi and Fiter Change engine oi and fiter according to Schedued Maintenance (page 8-3). Pease act responsiby protect the environment and take used oi to a recycing faciity. Ask your deaer or a service station for information. WARNING Handing Used Engine Oi: Continuous contact with used engine oi is dangerous. It coud cause skin cancer. Aways wash with soap and water immediatey after changing oi and fiter. CAUTION Remove any oi spatter from the exhaust manifod, the exhaust pipe and the shied. Oi eft on these areas wi smoke when the engine is running. 8-15
258 Maintenance and Care Owner Maintenance Changing engine oi WARNING Checking or Changing Engine Oi: Hot engine oi is dangerous. If the engine has been running, the engine oi becomes very hot. You coud be seriousy burned. Don't check or change the engine oi when the engine is hot. 1. Warm up the engine for a few minutes and turn it off. Remove the oi-fier cap. 2. Remove the drain pug and drain the oi into a suitabe container. 3. Repace the drain pug washer after the oi has thoroughy drained. 4. Reinsta the pug tighty. 5. Fi the engine with new oi to the MAX mark on the dipstick. 6. Securey reinsta the oi-fier cap. Check the oi eve and fi to the MAX mark if necessary. With oi fiter repacement Oi capacity (reference ony) L (US qt, Imp qt) 4.3 (4.5, 3.8) Without oi fiter repacement Oi capacity (reference ony) L (US qt, Imp qt) 3.9 (4.1, 3.4) The indicated engine oi capacities are for genera reference purposes ony. When adding or changing oi, verify the engine oi eve with the oi dipstick. Use ony specified engine oi (page 10-4). Changing oi fiter Because you need a specia too to retighten the fiter, an Authorized Mazda Deaer shoud do the work. Loosen Tighten Forward Drain pug 7. Start the engine and inspect around the drain pug for eaks. 8. Turn it off and wait 5 minutes for the oi to return to the oi pan. 8-16
259 Maintenance and Care Owner Maintenance Engine Cooant qinspecting Cooant Leve WARNING Hot Engine: A hot engine is dangerous. If the engine has been running, parts of the engine compartment can become very hot. You coud be burned. Carefuy inspect the engine cooant in the cooant reservoir, but do not open it. Do not use a match or ive fame in the engine compartment. DO NOT ADD COOLANT WHEN THE ENGINE IS HOT. Inspect the antifreeze protection and cooant eve in the cooant reservoir at east once a year at the beginning of the winter season and before traveing where temperatures may drop beow freezing. Inspect the condition and connections of a cooing system and heater hoses. Repace any that are swoen or deteriorated. The cooant shoud be at fu in the radiator and between the MAX and MIN marks on the cooant reservoir when the engine is coo. Cooing Fan and Engine Inspection: Inspecting the engine with the ignition switch in the ON position is dangerous. The cooing fan coud turn on unexpectedy even when the engine isn't running. You coud be seriousy injured by the fan. Turn the ignition switch off and remove the key from the ignition switch when you inspect the engine. Cooing System Cap: When the engine and radiator are hot, scading cooant and steam may shoot out under pressure and cause serious injury. Don't remove the cooing system cap when the engine and radiator are hot. If it's at or near MIN, add enough cooant to the cooant reservoir to provide freezing and corrosion protection and to bring the eve to MAX. CAUTION Radiator cooant wi damage paint. Rinse it off quicky if spied. If the cooant reservoir is empty or new cooant is required frequenty, consut an Authorized Mazda Deaer. 8-17
260 Maintenance and Care Owner Maintenance qchanging Cooant Change cooant according to Schedued Maintenance (page 8-3). CAUTION Use ony soft (demineraized) water in the cooant mixture. Water that contains mineras wi cut down on the cooant's effectiveness. Don't add ony water. Aways add a proper cooant mixture. The engine has auminum parts and must be protected by an ethyenegyco-based cooant to prevent corrosion and freezing. DO NOT USE cooants Containing Acoho, methano, Borate or Siicate. These cooants coud damage the cooing system. DO NOT MIX acoho or methano with the cooant. This coud damage the cooing system. Don't use a soution that contains more than 60% antifreeze. This woud reduce effectiveness. If the FL22 mark is shown on or near the cooing system cap, use FL22 type engine cooant. If engine cooant other than FL22 type is used, the engine cooant must be repaced earier than the specified repacement interva indicated in the schedued maintenance (page 8-3). Except FL22 type For mixture percentage: Protection Antifreeze soution Voume Demineraized water Above _ 16 C (3 F) 35% 65% Above _ 26 C ( _ 15 F) 45% 55% Above _ 40 C ( _ 40 F) 55% 45% FL22 type FL22 type engine cooant concentration is factory adjusted. Use the product as it is without diuting it. 8-18
261 Maintenance and Care Owner Maintenance To change cooant WARNING Removing the Cooing System Cap: Removing the cooing system cap whie the engine is running or hot is dangerous. This might ead to cooing system and engine damage and coud resut in serious injury from escaping hot cooant or steam. Turn off the engine and wait unti it's coo. Even then, be very carefu when removing the cap. Wrap a thick coth around the cap and sowy turn it countercockwise about two and a haf rotations. Step back whie the pressure escapes. When you're sure a the pressure has escaped, turn the cap countercockwise sti using a coth and remove the cap. 1. Make sure the engine is not running and it has cooed. 2. Remove the cooing system cap. 4. Fush out the system with running water. 5. Drain the system competey. Insert and tighten the pug. Add as much ethyene-gyco-based cooant mixture and water as necessary to provide freezing and corrosion protection. 6. In extremey cod cimates, add the mixture percentage recommended in the cooant mixture percentage tabe. 7. Run the engine at ide with the cooing system cap off. Sowy add additiona cooant if necessary. 8. At this point, wait unti the engine reaches norma operating temperature; then depress the acceerator two or three times. Add more cooant, if necessary, unti the system is fu. 9. Insta the cooing system cap. Inspect a connections for eaks. Inspect the eve in the cooant reservoir one more time and verify that the cooant eve is between the F and L marks. Loosen Tighten Tighten Loosen 3. Remove the radiator drain pug and drain the cooant into a suitabe container. Propery dispose of the used cooant. 8-19
262 Maintenance and Care Owner Maintenance Brake/Cutch Fuid qinspecting Brake/Cutch Fuid Leve The brakes and cutch draw fuid from the same reservoir. Inspect the fuid eve in the reservoir reguary. It shoud be kept at MAX. The eve normay drops with accumuated distance, a condition associated with wear of brake and cutch inings. If it is excessivey ow, have the brake/cutch system inspected by an Authorized Mazda Deaer. qadding Brake/Cutch Fuid WARNING Spied Brake Fuid: Spied brake fuid is dangerous. If it gets in your eyes, they coud be seriousy injured. If this happens, immediatey fush your eyes with water and get medica attention. Brake fuid spied on a hot engine coud cause a fire. Be carefu not to spi brake fuid on yoursef or on the engine. Low Brake/Cutch Fuid Leves: Low brake/cutch fuid eves are dangerous. Low eves coud signa brake ining wear or a brake system eak. Your brakes coud fai and cause an accident. If you find a ow fuid eve, have the brakes and cutch inspected. If the fuid eve is ow, add fuid unti it reaches MAX. Before adding fuid, thoroughy cean the area around the cap. CAUTION Brake and cutch fuid wi damage painted surfaces. If brake or cutch fuid does get on a painted surface, wipe it off immediatey. Using nonspecified brake and cutch fuids (page 10-4) wi damage the systems. Mixing different fuids wi aso damage them. If the brake/cutch system frequenty requires new fuid, consut an Authorized Mazda Deaer. 8-20
263 Maintenance and Care Owner Maintenance Power Steering Fuid qinspecting Power Steering Fuid Leve CAUTION To avoid damage to the power steering pump, don't operate the vehice for ong periods when the power steering fuid eve is ow. Use specified power steering fuid (page 10-4). Inspect the fuid eve in the reservoir at each engine oi change with the engine off and cod. Add fuid if necessary; it does not require periodic changing. Automatic Transaxe Fuid (ATF) qinspecting Automatic Transaxe Fuid Leve The automatic transaxe fuid eve shoud be inspected reguary. Measure it as described beow. The voume of fuid changes with the temperature. Fuid must be checked at ide without driving at norma operating temperature. CAUTION Low fuid eve causes transaxe sippage. Overfiing can cause foaming, oss of fuid, and transaxe mafunction. Use specified fuid (page 10-4). A nonspecified fuid coud resut in transaxe mafunction and faiure. 1. Park on a eve surface and set the parking brake firmy. 2. Start the engine and depress the brake peda. 3. Move the shift ever through a ranges and set it at P. The eve must be kept between MIN and MAX. Visuay examine the ines and hoses for eaks and damage. If new fuid is required frequenty, consut an Authorized Mazda Deaer. 8-21
264 Maintenance and Care Owner Maintenance WARNING Sudden Vehice Movement: Shifting the shift ever without first depressing the brake peda is dangerous. The vehice coud move suddeny and cause an accident. Make sure the brake peda is appied before shifting the shift ever. 4. With the engine sti iding, pu out the dipstick, wipe it cean, and put it back. 5. Pu it out again. The proper fuid eve is marked on the dipstick as foows. CAUTION Use the cod scae ony as a reference. If outside temperature is ower than about 20 C (70 F), start the engine and inspect the fuid eve after the engine reaches operating temperature. If the vehice has been driven for an extended period at high speeds or in city traffic in hot weather, inspect the eve ony after stopping the engine and aowing the fuid to coo for 30 minutes. Fu A Low Fu B Low Fuy insert the dipstick. When adding fuid, inspect with the dipstick to make sure it doesn't pass fu. Inspect the fuid on both sides of the dipstick in a we it area for an accurate reading. Fuid hot scae A When the vehice has been driven and the fuid is at norma operating temperature, about 65 C (150 F), the eve must be between Fu and Low. Fuid cod scae B When the engine has not been running and the outside temperature is about 20 C (70 F), the eve must be between Fu and Low. 8-22
265 Maintenance and Care Owner Maintenance Washer Fuid qinspecting Washer Fuid Leve Inspect fuid eve in the washer fuid reservoir; add fuid if necessary. WARNING Substitute Washer Fuid: Using radiator antifreeze as washer fuid is dangerous. If sprayed on the windshied, it wi dirty the windshied, affect your visibiity, and coud resut in an accident. Use ony windshied washer fuid or pain water in the reservoir. Using Washer Fuid Without Antifreeze Protection in Cod Weather: Operating your vehice in temperatures beow 4 degrees C (40 degrees F) using washer fuid without anti-freeze protection is dangerous as it coud cause impaired windshied vision and resut in an accident. In cod weather, aways use washer fuid with anti-freeze protection. State or oca reguations may restrict the use of voatie organic compounds (VOCs), which are commony used as anti-freeze agents in washer fuid. A washer fuid with imited VOC content shoud be used ony if it provides adequate freeze resistance for a regions and cimates in which the vehice wi be operated. To inspect the washer fuid eve in the front reservoir, pu off the cap. Then, hoding your thumb over the hoe in the center of the cap, ift it straight up. The fuid eve can be seen from the fuid coumn in the pipe. Add fuid if necessary. Use pain water if washer fuid is unavaiabe. But use ony washer fuid in cod weather to prevent it from freezing. Front and rear washer fuid is suppied from the same reservoir. 8-23
266 Maintenance and Care Owner Maintenance Body Lubrication A moving points of the body, such as door and hood hinges and ocks, shoud be ubricated each time the engine oi is changed. Use a nonfreezing ubricant on ocks during cod weather. Make sure the hood's secondary atch keeps the hood from opening when the primary atch is reeased. Air Fiter CAUTION Don't drive without an air fiter. This coud resut in excessive engine wear. This air fiter may be ceaned with compressed air and reused, or repaced, depending on its condition. Uness it is very dirty, simpy shake it to remove foreign partices. Each time you inspect it, wipe inside the air ceaner housing with a damp coth. qrepacing the Air Fiter If the vehice is operated in very dusty or sandy areas, repace the fiter more often than the recommended intervas. CAUTION Use a Mazda genuine air fiter. Use of other fiters coud damage the airfow sensor. 8-24
267 Maintenance and Care Owner Maintenance 1. Make sure the ignition switch is turned off. 2. Remove the battery cover and battery duct. Battery cover 5. Wipe inside the air ceaner housing with a damp coth. 6. Cean or repace the fiter. 7. Insta in the reverse order of remova. Repace the fiter according to the Schedued Maintenance (page 8-3). Battery duct 3. Unfasten the camps. 4. Lift off the air fiter cover and remove the fiter. Air fiter cover Air fiter 8-25
268 Maintenance and Care Owner Maintenance Wiper Bades CAUTION Hot waxes appied by automatic car washers have been known to affect the wiper's abiity to cean windows. To prevent damage to the wiper bades, don't use gasoine, kerosene, paint thinner, or other sovents on or near them. When the wiper ever is in the AUTO position and the ignition switch is in the ON position, the wipers may move automaticay in the foowing cases: If the windshied above the rain sensor is touched. If the windshied above the rain sensor is wiped with a coth. If the windshied is struck with a hand or other object. If the rain sensor is struck with a hand or other object from inside the vehice. Be carefu not to pinch hands or fingers as it may cause injury, or damage the wipers. When washing or servicing your Mazda, make sure the wiper ever is in the OFF position. Contamination of either the windshied or the bades with foreign matter can reduce wiper effectiveness. Common sources are insects, tree sap, and hot wax treatments used by some commercia car washes. If the bades are not wiping propery, cean the window and bades with a good ceaner or mid detergent; then rinse thoroughy with cean water. Repeat if necessary. qrepacing Windshied Wiper Bades When the wipers no onger cean we, the bades are probaby worn or cracked. Repace them. CAUTION To prevent damage to the wiper arms and other components, don't try to sweep the wiper arm by hand. 1. Raise the wiper arm and turn the bade assemby to expose the pastic ocking cip. Side the assemby downward; then ift it off the arm. Pastic ocking cip CAUTION To prevent damage to the windshied et the wiper arm down easiy, don't et it sap down on the windshied. 8-26
269 Maintenance and Care Owner Maintenance 2. Pu down the bade rubber and side it out of bade hoder. 3. Remove the meta stiffeners from the bade rubber and insta them in new bades. CAUTION Don't bend or discard the stiffeners. You need to use them again. If the meta stiffeners are switched, the bade's wiping efficiency coud be reduced. So don't use the driver's side meta stiffeners on the passenger's side, or vice versa. Be sure to reinsta the meta stiffeners in the new bade rubber so that the curve is the same as it was in the od bade rubber. 4. Carefuy insert the new bade rubber. Then insta the bade assemby in the reverse order of remova. qrepacing Rear Wiper Bade (5 Door) When the wiper no onger ceans we, the bade is probaby worn or cracked. Repace it. 8-27
270 Maintenance and Care Owner Maintenance CAUTION To prevent damage to the wiper arm and other components, don't try to sweep the wiper arm by hand. 3. Remove the meta stiffeners from the bade rubber and insta them in new bades. 1. Raise the wiper arm and rotate the wiper bade to the right unti it unocks, then remove the bade. CAUTION Don't bend or discard the stiffeners. You need to use them again. CAUTION To prevent damage to the rear window et the wiper arm down easiy, don't et it sap down on the rear window. 4. Carefuy insert the new bade rubber. Then insta the bade assemby in the reverse order of remova. 2. Pu down the bade rubber and side it out of the bade hoder. 8-28
271 Maintenance and Care Owner Maintenance Battery WARNING Battery-Reated Lead Materias: Battery posts, terminas and reated accessories contain ead and ead compounds, chemicas known to the State of Caifornia to cause cancer and reproductive harm. Wash hands after handing. Foow These Precautions Carefuy: To ensure safe and correct handing of the battery, read the foowing precautions carefuy before using the battery or inspecting it. Eye Protection: Working without eye protection is dangerous. Battery fuid contains SULFURIC ACID which coud cause bindness if spashed into your eyes. Aso, hydrogen gas produced during norma battery operation, coud ignite and cause the battery to expode. Aways wear eye protection when working near the battery. Spied Battery Fuid: Spied battery fuid is dangerous. Battery fuid contains SULFURIC ACID which coud cause serious injuries if it gets in eyes, skin or cothing. If this happens, immediatey fush your eyes with water for 15 minutes or wash your skin thoroughy and get medica attention. Wear eye protection and protective goves to prevent contact with battery fuid. Chidren and Batteries: Aowing chidren to pay near batteries is dangerous. Battery fuid coud cause serious injuries if it gets in the eyes or on the skin. Aways keep batteries out of the reach of chidren. 8-29
272 Maintenance and Care Owner Maintenance WARNING Keep Fames Away: Fames and sparks near open battery ces are dangerous. Hydrogen gas, produced during norma battery operation, coud ignite and cause the battery to expode. An expoding battery can cause serious burns and injuries. Keep a fames incuding cigarettes and sparks away from open battery ces. When working near a battery, do not aow meta toos to contact the positive ( ) or negative ( ) termina of the battery. Do not aow the positive ( ) termina to contact the vehice body. Battery-Reated Exposion: Fames and sparks near open battery ces are dangerous. Hydrogen gas, produced during norma battery operation, coud ignite and cause the battery to expode. An expoding battery can cause serious burns and injuries. Keep a fames, incuding cigarettes, and sparks away from open battery ces. 8-30
273 Maintenance and Care Owner Maintenance Remove the battery cover before performing battery maintenance. If the vehice wi not be used for an extended time, disconnect the battery cabes. qinspecting Eectroyte Leve A ow eve of eectroyte fuid wi cause the battery to discharge quicky. Upper eve qbattery Maintenance Lower eve Inspect the eectroyte eve at east once a week. If it's ow, remove the cap and add enough distied water to bring the eve between the upper and ower eve (iustration). To get the best service from a battery: Keep it securey mounted. Keep the top cean and dry. Keep terminas and connections cean, tight, and coated with petroeum jey or termina grease. Rinse off spied eectroyte immediatey with a soution of water and baking soda. Don't overfi. Examine the specific gravity of the eectroyte with a hydrometer, especiay during cod weather. If it's ow, recharge the battery. 8-31
274 Maintenance and Care Owner Maintenance Tires For reasons of proper performance, safety, and better fue economy, aways maintain recommended tire infation pressures and stay within the recommended oad imits and weight distribution. WARNING Using Different Tire Types: Driving your vehice with different types of tires is dangerous. It coud cause poor handing and poor braking; eading to oss of contro. Except for the imited use of the temporary spare tire, use ony the same type tires (radia, bias-beted, bias-type) on a four whees. Using Wrong-Sized Tires: Using any other tire size than what is specified for your Mazda (page 10-7) is dangerous. It coud seriousy affect ride, handing, ground cearance, tire cearance, and speedometer caibration. This coud cause you to have an accident. Use ony tires that are the correct size specified for your Mazda. qtire Infation Pressure WARNING Incorrect Tire Infation: Overinfation or underinfation of tires is dangerous. Adverse handing or unexpected tire faiure coud resut in a serious accident. Aways infate the tires to the correct pressure (page 10-7). The Tire Pressure Monitoring System í does not aeviate the need to check the tire condition every day, incuding whether the tires a ook infated propery. Inspect a tire pressure monthy (incuding the spare) when the tires are cod. Maintain recommended pressures for the best ride, top handing, and minimum tire wear. Refer to the specification charts (page 10-7) í Some modes.
275 Maintenance and Care Owner Maintenance Aways check tire pressure when tires are cod. Warm tires normay exceed recommended pressures. Don't reease air from warm tires to adjust the pressure. Underinfation can cause reduced fue economy and poor seaing of the tire bead, which wi deform the whee and cause separation of tire from rim. Overinfation can produce a harsh ride and a greater possibiity of damage from road hazards. Keep your tire pressure at the correct eves. If one frequenty needs infating, have it inspected. qtire Rotation To equaize tread wear, rotate the tires every 12,000 km (7,500 mies)/8,000 km * (5,000 mies) or sooner if irreguar wear deveops. During rotation, inspect them for correct baance. * Unique driving conditions for U.S.A., Canada and Puerto Rico Aso, inspect them for uneven wear and damage. Abnorma wear is usuay caused by one or a combination of the foowing: Incorrect tire pressure Improper whee aignment Out-of-baance whee Severe braking After rotation, infate a tire pressures to specification (page 10-7) and inspect the ug nuts for tightness. CAUTION Rotate unidirectiona tires and radia tires that have an asymmetrica tread pattern or studs ony from front to rear, not from side to side. Tire performance wi be weakened if rotated from side to side. qrepacing a Tire WARNING Worn Tires: Driving with worn tires is dangerous. Reduced braking, steering, and traction coud resut in an accident. Aways use tires that are in good condition. Forward Do not incude (TEMPORARY USE ONLY) spare tire in rotation. 8-33
276 Maintenance and Care Owner Maintenance CAUTION (With Tire Pressure Monitoring System) When repacing/repairing the tires or whees or both, have the work done by an Authorized Mazda Deaer, or the tire pressure sensors may be damaged. (With Tire Pressure Monitoring System) When tires with stee wire reinforcement in the sidewas are used, the system may not function correcty even with a genuine whee. Refer to System Error Activation on page Be sure to insta the tire pressure sensors whenever tires or whees are repaced. Refer to Tires and Whees on page If a tire wears eveny, a wear indicator wi appear as a soid band across the tread. Repace the tire when this happens. You shoud repace it before the band is across the entire tread. qtemporary Spare Tire Inspect the temporary spare tire at east monthy to make sure it's propery infated and stored. The temporary spare tire condition graduay deteriorates even if it has not been used. The temporary spare tire is easier to hande because of its construction. It is ighter and smaer than a conventiona tire and shoud be used ony for an emergency and ony for a short distance. Use the temporary ony unti the conventiona tire is repaired, which shoud be as soon as possibe. Maintain its pressure at 420 kpa (4.2 kgf/ cm 2 or bar, 60 psi). Tread wear indicator New tread Worn tread 8-34
277 Maintenance and Care Owner Maintenance CAUTION Don't use your temporary spare tire rim with a snow tire or a conventiona tire. Neither wi propery fit and coud damage both tire and rim. The temporary spare tire has a tread ife of ess than 5,000 km (3,000 mies). The tread ife may be shorter depending on driving conditions. The temporary spare tire is for imited use, however, if the tread wear soid-band indicator appears, repace the tire with the same type of temporary spare (page 8-33). qrepacing a Whee WARNING Using a Wrong-Sized Whee: Using a wrong-sized whee is dangerous. Braking and handing coud be affected, eading to oss of contro and an accident. Aways use whees of the correct size on your vehice. CAUTION A wrong-sized whee may adversey affect: Tire fit Whee and bearing ife Ground cearance Snow-chain cearance Speedometer caibration Headight aim Bumper height Tire Pressure Monitoring System (With Tire Pressure Monitoring System) When repacing/repairing the tires or whees or both, have the work done by an Authorized Mazda Deaer, or the tire pressure sensors may be damaged. The whees equipped on your Mazda are speciay designed for instaation of the tire pressure sensors. Do not use non-genuine whees, otherwise it may not be possibe to insta the tire pressure sensors. Be sure to insta the tire pressure sensors whenever tires or whees are repaced. Refer to Tires and Whees on page When repacing a whee, make sure the new one is the same as the origina factory whee in diameter, rim width, and offset. 8-35
278 Maintenance and Care Owner Maintenance Proper tire baancing provides the best riding comfort and heps reduce tread wear. Out-of-baance tires can cause vibration and uneven wear, such as cupping and fat spots. 8-36
279 Maintenance and Care Owner Maintenance Light Bubs 4 Door Overhead ight/map ights (Front) Headights (Low beam) Headights (High beam) License pate ight High-mount brake ight Trunk ight Overhead ight (Rear) Fog ights Front turn signa ights/side-marker ights Side turn signa ights Brake ights/taiights Rear turn signa ights Reverse ight 5 Door Overhead ight/map ights (Front) Headights (Low beam) Headights (High beam) License pate ight High-mount brake ight Overhead ight (Rear) Luggage compartment ight Fog ights Front turn signa ights/sidemarker ights Side turn signa ights Brake ights/taiights Rear turn signa ights Reverse ight Some modes. 8-37
280 Maintenance and Care Owner Maintenance WARNING Xenon Fusion Bub Repacement: Repacing the xenon fusion bubs yoursef is dangerous. Because the xenon fusion bubs require high votage, you coud receive an eectric shock if the bubs are handed incorrecty. Do not repace the xenon fusion bubs yoursef. Consut an Authorized Mazda Deaer when the repacement is necessary. Handing Haogen Bubs: When a haogen bub breaks, it is dangerous. These bubs contain pressurized gas. If one is broken, it wi expode and serious injuries coud be caused by the fying gass. If the gass portion is touched with bare hands, body oi coud cause the bub to overheat and expode when it. Never touch the gass portion of the bub with your bare hands and aways wear eye protection when handing or working around haogen bubs. 3. Do the foowing procedure when repacing the eft headight bub. Turn the screws countercockwise and remove them and the cover. 4. Find the high and ow beam bubs in the rear of the headight unit. The outboard bub is the LOW beam, and the inboard one is the HIGH beam. Refer to Light Bubs on page Chidren and Haogen Bubs: Paying with a haogen bub is dangerous. Serious injuries coud be caused by dropping a haogen bub or breaking it some other way. Aways keep haogen bubs out of the reach of chidren. qrepacing Exterior Light Bubs Repacing a headight bub 1. Make sure the ignition switch is turned off and the headight switch is off. 2. Lift the hood. 8-38
281 Maintenance and Care Owner Maintenance High-beam bub 1. Turn the socket and bub assemby countercockwise and remove it. Carefuy remove the headight bub from its socket in the refector by genty puing it straight backward out of the socket. 2. Disconnect the bub from the eectrica connector by pressing the tab on the connector with your finger and puing the bub upward. (Haogen bubs) 1. Detach the eectrica connector from the bub by puing it to the rear. 2. Pu off the seaing cover. 3. Unhook the bub retaining spring. 3. Insta the new bub in the reverse order of remova. To repace the bub, contact an Authorized Mazda Deaer. Use the protective cover and carton for the repacement bub to dispose of the od bub prompty and out of the reach of chidren. Low-beam bub (Xenon fusion bub) You cannot repace the ow beam bubs by yoursef. The bubs must be repaced at an Authorized Mazda Deaer. 4. Swing the retaining spring out and away to free the headight bub. 5. Carefuy remove the headight bub from the socket by puing it straight back. 6. Repace the bub. 7. Insta the new bub in the reverse order of remova. 8-39
282 Maintenance and Care Owner Maintenance To repace the bub, contact an Authorized Mazda Deaer. Use the protective cover and carton for the repacement bub to dispose of the od bub prompty and out of the reach of chidren. When reinstaing the seaing cover, make sure faces up. Repacing a fog ight bub í 1. Turn the screw countercockwise and remove it and partiay pee back the mudguard. 3. Disconnect the bub from the eectrica connector by pressing the tab on the connector with your finger and puing the bub upward. 4. Insta the new bub in the reverse order of remova. To repace the bub, contact an Authorized Mazda Deaer. 2. Turn the socket and bub assemby countercockwise and remove it. Carefuy remove the fog ight bub from its socket in the refector by genty puing it straight backward out of the socket. Front turn signa ights/side-marker ights Due to the compexity and difficuty of the procedure, the bubs shoud be repaced by an Authorized Mazda Deaer. Side turn signa ights 1. Side the unit as shown in the figure to remove it í Some modes.
283 Maintenance and Care Owner Maintenance 2. Detach the eectrica connector from the unit by puing it to the rear. 2. Pu the center of each pastic retainer and remove the retainers and partiay open the trunk side trim. Remova Instaation 3. Insta the new side turn signa unit in the reverse order of remova. Bub repacement is not possibe because it is buit into the unit. Repace the unit. Brake ights/taiights, Rear turn signa ights (4 Door) 1. Pu the center of each pastic retainer and remove the retainers and the trunk end trim. Remova Instaation 3. Turn the socket and bub assemby countercockwise and remove it. 4. Disconnect the bub from the socket. Brake ights/taiights Rear turn signa ights 5. Insta the new bub in the reverse order of remova. To repace the bub, contact an Authorized Mazda Deaer. 8-41
284 Maintenance and Care Owner Maintenance Brake ights/taiights(5 Door) With LED bub Due to the compexity and difficuty of the procedure, the LED bubs shoud be repaced by an Authorized Mazda Deaer. 3. Disconnect the bub from the socket. LED bub repacement is not possibe. The rear combination component must be repaced. With Non-LED bub 1. Remove the cover. Left side 4. Insta the new bub in the reverse order of remova. To repace the bub, contact an Authorized Mazda Deaer. Rear turn signa ights (5 Door) 1. Remove the cover. Left side Right side 2. Turn the socket and bub assemby countercockwise and remove it. 8-42
285 Maintenance and Care Owner Maintenance Right side Reverse ight 4 Door 1. Pu the center section of the pastic retainer and remove the retainers, then remove the trunk rear trim. Remova Instaation 2. Turn the socket and bub assemby countercockwise and remove it. 3. Disconnect the bub from the socket. 2. Turn the socket and bub assemby countercockwise and remove it. 3. Disconnect the bub from the socket. 4. Insta the new bub in the reverse order of remova. To repace the bub, contact an Authorized Mazda Deaer. 4. Insta the new bub in the reverse order of remova. To repace the bub, contact an Authorized Mazda Deaer. 8-43
286 Maintenance and Care Owner Maintenance 5 Door 1. Remove the cover. 2. Turn the socket and bub assemby countercockwise and remove it. 3. Disconnect the bub from the socket. High-mount brake ight 4 Door 1. Pu the center of each pastic retainer and remove the retainers and the trunk rear trim. Remova Instaation 4. Insta the new bub in the reverse order of remova. To repace the bub, contact an Authorized Mazda Deaer. 2. Disconnect the eectrica connector from the socket. 3. Turn the socket and bub assemby countercockwise and remove it. 4. Disconnect the bub from the socket. 5. Insta the new bub in the reverse order of remova. To repace the bub, contact an Authorized Mazda Deaer. 8-44
287 Maintenance and Care Owner Maintenance 5 Door 1. Remove the iftgate upper trim. License pate ights 1. Wrap a fathead screwdriver with a soft coth to prevent damage to the ens and remove the ens by carefuy prying on the edge of the ens with a fathead screwdriver. 2. Disconnect the bub by puing it out. 2. Disconnect the eectrica connector from the socket. 3. Turn the socket and bub assemby countercockwise and remove it. 4. Disconnect the bub from the socket. Edge 3. Insta the new bub in the reverse order of remova. qrepacing Interior Light Bubs Overhead ight/map ights (Front) í 1. Wrap a fathead screwdriver with a soft coth to prevent damage to the trim and genty insert it in the overhead ight as shown in the figure, and then remove the overhead ight unit. 5. Insta the new bub in the reverse order of remova. To repace the bub, contact an Authorized Mazda Deaer. í Some modes. 8-45
288 Maintenance and Care Owner Maintenance 2. Turn the socket and bub assemby countercockwise and remove it. 3. Disconnect the bub from the socket. Trunk ight (4 Door) 1. Press both sides of the ens cap to remove it. 2. Disconnect the bub by puing it out. 4. Insta the new bub in the reverse order of remova. Overhead ight (Rear) 1. Wrap a sma fathead screwdriver with a soft coth to prevent damage to the ens and remove the ens by carefuy prying on the edge of the ens with the fathead screwdriver. 2. Disconnect the bub by puing it out. 3. Insta the new bub in the reverse order of remova. Luggage compartment ight (5 Door) 1. Insert your finger as shown in the figure and remove the unit. Edge 3. Insta the new bub in the reverse order of remova. 2. Wrap a sma fathead screwdriver with a soft coth to prevent damage to the ens and remove the ens by carefuy prying on the edge of the ens with the fathead screwdriver. 8-46
289 Maintenance and Care Owner Maintenance 3. Disconnect the bub by puing it out. Fuses Your vehice's eectrica system is protected by fuses. If any ights, accessories, or contros don't work, inspect the appropriate circuit protector. If a fuse has bown, the inside eement wi be meted. 4. Insta the new bub in the reverse order of remova. If the same fuse bows again, avoid using that system and consut an Authorized Mazda Deaer as soon as possibe. qfuse Repacement Repacing the fuses on the front passenger's side beow the gove box If the eectrica system doesn't work, first inspect fuses on the front passenger's side beow the gove box. 1. Turn off the ignition switch and other switches. 2. Remove the cover. 8-47
290 Maintenance and Care Owner Maintenance 3. Turn the knobs countercockwise and ower the fuse bock. 6. Inspect it and repace if it's bown. Norma Bown 4. Locate the position of the suspected fuse by using the chart inside the fuse bock cover. 5. Pu the fuse straight out with the fuse puer provided on the inside of the engine compartment fuse bock cover. 7. Push in a new fuse of the same amperage rating, and make sure it fits tighty. If it doesn't, have an Authorized Mazda Deaer insta it. If you have no spare fuses, borrow one of the same rating from a circuit not essentia to vehice operation, such as the MIRROR or CIGAR circuit. CAUTION Aways repace a fuse with one of the same rating. Otherwise you may damage the eectric system. Repacing the fuses under the hood If the headights or other eectrica components don't work and the fuses in the cabin are OK, inspect the fuse bock under the hood. If a fuse is bown, it must be repaced. Foow these steps: 1. Turn off the ignition switch and a other switches. 8-48
291 Maintenance and Care Owner Maintenance 2. Remove the fuse bock cover. 3. If a fuse is bown, repace it with a new one of the same amperage rating. Norma Bown To repace the MAIN fuse, contact an Authorized Mazda Deaer. 8-49
292 Maintenance and Care Owner Maintenance qfuse Pane Description Fuse bock (Engine compartment) DESCRIP- TION FUSE RAT- ING PROTECTED COMPONENT 1 FAN 40 A Cooing fan 2 P/ST 80 A EHPAS 3 BTN 40 A For protection of various circuits 4 HEAD 40 A Headights 5 PTC 80 A 6 GLOW 60 A 7 ABS 1 30 A ABS í 8 ABS 2 20 A ABS í 9 ENGINE 30 A For protection of various circuits IG KEY 1 30 A Ignition switch 12 STARTER 20 A Starter cutch 13 IG KEY 2 30 A Ignition switch 14 DESCRIP- TION FUSE RAT- ING PROTECTED COMPONENT 15 HEATER 40 A Bower motor DEFOG 40 A Rear window defroster 18 AUDIO 30 A Audio system (BOSE Sound System-equipped mode) 19 ABS IG 10 A ABS í 20 FOG 15 A Fog ights í 21 HORN 15 A Horn H/CLEAN 20 A 24 F/PUMP 15 A Fue pump 25 P/ST IG 10 A Power steering 26 A/C MAG 10 A Air conditioner 27 ALT 10 A í Some modes.
293 Maintenance and Care Owner Maintenance DESCRIP- TION FUSE RAT- ING PROTECTED COMPONENT ENG +B 10 A PCM 31 ROOM 15 A Interior ights 32 ENG BAR 4 10 A O 2 heater 33 ENG BAR 3 10 A O 2 heater 34 EGI INJ 10 A Injector 35 ENG BAR 1 10 A Air fow sensor 36 ENG BAR 2 10 A EGR contro vave 8-51
294 Maintenance and Care Owner Maintenance Fuse bock (Passenger's side) DESCRIP- TION FUSE RAT- ING PROTECTED COMPONENT 37 D/LOCK 2 15 A Power door ock HEAD HIGH L 10 A Headight high beams (LH) 40 HEAD HIGH R 10 A Headight high beams (RH) CIGAR 15 A Lighter 44 RADIO 7.5 A Audio system 45 MIRROR 10 A Power contro mirror 46 TAIL R 7.5 A Taiight (RH), Parking ights (RH) License pate ights 47 OBD 10 A For protection of various circuits TR/LOCK 20 A 50 CPU PWR 10 A Contro unit DESCRIP- TION FUSE RAT- ING PROTECTED COMPONENT 51 HAZARD 15 A Turn signas, Hazard warning fashers 52 SUN ROOF 20 A Moonroof í 53 WASHER 20 A Front washer, Rear window wiper and washer P/WIND R 30 A 56 P/WIND L 30 A 57 ALARM 7.5 A 58 M/DEF 7.5 A Mirror Defroster HEAD LOW R HEAD LOW L 15 A Headight ow beams (RH), Headight eveing í 15 A Headight ow beams (LH) í Some modes.
295 Maintenance and Care Owner Maintenance DESCRIP- TION FUSE RAT- ING PROTECTED COMPONENT SAS 10 A Suppementa restraint system Instrument custer, 66 METER 10 A Immobiizer system, Shift ock system 67 IGNITION 20 A ABS í, EHPAS 68 WIPER 20 A Windshied wiper 69 ENGINE 20 A For protection of various circuits 70 IG SIG 10 A Auto wiper í 71 SAS A Suppementa restraint system SEAT WARM 20 A 75 D/LOCK 1 25 A Power door ock 76 A/C 10 A Air conditioner, Heater contro unit 77 P/WIND L 30 A Power window (LH) í 78 P/WIND R 30 A Power window (RH) í 79 BACK 10 A Reverse ights 80 SUN ROOF 7.5 A Moonroof í 81 TAIL L 7.5 A Taiights (LH), Parking ights (LH) 82 ILLUMI 7.5 A Iumination í Some modes. 8-53
296 Maintenance and Care Appearance Care How to Minimize Environmenta Paint Damage The paintwork on your Mazda represents the atest technica deveopments in composition and methods of appication. Environmenta hazards, however, can harm the paint's protective properties, if proper care is not taken. Here are some exampes of possibe damage, with tips on how to prevent them. qetching Caused by Acid Rain or Industria Faout Occurrence Industria poutants and vehice emissions drift into the air and mix with rain or dew to form acids. These acids can sette on a vehice's finish. As the water evaporates, the acid becomes concentrated and can damage the finish. And the onger the acid remains on the surface, the greater the chance is for damage. Prevention It is necessary to wash and wax your vehice to preserve its finish according to the instructions in this section. These steps shoud be taken immediatey after you suspect that acid rain has setted on your vehice's finish. qdamage Caused by Bird Dropping, Insects, or Tree Sap Occurrence Bird droppings contain acids. If these aren't removed they can eat away the cear and coor base coat of the vehice's paintwork. When insects stick to the paint surface and decompose, corrosive compounds form. These can erode the cear and coor base coat of the vehice's paintwork if they are not removed. Tree sap wi harden and adhere permanenty to the paint finish. If you scratch the sap off whie it is hard, some vehice paint coud come off with it. Prevention It is necessary to have your Mazda washed and waxed to preserve its finish according to the instructions in this section. This shoud be done as soon as possibe. Bird droppings can be removed with a soft sponge and water. If you are traveing and these are not avaiabe, a moistened tissue may aso take care of the probem. The ceaned area shoud be waxed according to the instructions in this section. Insects and tree sap are best removed with a soft sponge and water or a commerciay avaiabe chemica ceaner. Another method is to cover the affected area with dampened newspaper for one to two hours. After removing the newspaper, rinse off the oosened debris with water. 8-54
297 Maintenance and Care Appearance Care qwater Marks Occurrence Rain, fog, dew, and even tap water can contain harmfu mineras such as sat and ime. If moisture containing these mineras settes on the vehice and evaporates, the mineras wi concentrate and harden to form white rings. The rings can damage your vehice's finish. Prevention It is necessary to wash and wax your vehice to preserve its finish according to the instructions in this section. These steps shoud be taken immediatey after you find water marks on your vehice's finish. qpaint Chipping Occurrence Paint chipping occurs when grave thrown in the air by another vehice's tires hits your vehice. How to avoid paint chipping Keeping a safe distance between you and the vehice ahead reduces the chances of having your paint chipped by fying grave. The paint chipping zone varies with the speed of the vehice. For exampe, when traveing at 90 km/h (56 mph), the paint chipping zone is 50 m (164 ft). In ow temperatures a vehice's finish hardens. This increases the chance of paint chipping. Chipped paint can ead to rust forming on your Mazda. Before this happens, repair the damage by using Mazda touch-up paint according to the instructions in this section. Faiure to repair the affected area coud ead to serious rusting and expensive repairs. 8-55
298 Maintenance and Care Appearance Care Exterior Care Foow a abe and container directions when using a chemica ceaner or poish. Read a warnings and cautions. qmaintaining the Finish Washing CAUTION When the wiper ever is in the AUTO position and the ignition switch is in the ON position, the wipers may move automaticay in the foowing cases: If the windshied above the rain sensor is touched. If the windshied above the rain sensor is wiped with a coth. If the windshied is struck with a hand or other object. If the rain sensor is struck with a hand or other object from inside the vehice. Be carefu not to pinch hands or fingers as it may cause injury, or damage the wipers. When washing or servicing your Mazda, make sure the wiper ever is in the OFF position. To hep protect the finish from rust and deterioration, wash your Mazda thoroughy and frequenty, at east once a month, with ukewarm or cod water. If the vehice is washed impropery, the paint surface coud be scratched. Here are some exampes of how scratching coud occur. Scratches occur on the paint surface when: The vehice is washed without first rinsing off dirt and other foreign matter. The vehice is washed with a rough, dry, or dirty coth. The vehice is washed at a car wash that uses brushes that are dirty or too stiff. Ceansers or wax containing abrasives are used. Mazda is not responsibe for scratches caused by automatic car washes or improper washing. Scratches are more noticeabe on vehices with darker paint finishes. To minimize scratches on the vehice's paint finish: Rinse off any dirt or other foreign matter using ukewarm or cod water before washing. Use penty of ukewarm or cod water and a soft coth when washing the vehice. Do not use a nyon coth. Rub genty when washing or drying the vehice. Take your vehice ony to a car wash that keeps its brushes we maintained. Don't use abrasive ceansers or wax that contain abrasives. 8-56
299 Maintenance and Care Appearance Care CAUTION Don't use stee woo, abrasive ceaners, or strong detergents containing highy akaine or caustic agents on chrome-pated or anodized auminum parts. This may damage the protective coating; aso, ceaners and detergents may discoor or deteriorate the paint. To prevent damaging the antenna, remove it before entering a car wash faciity or passing beneath a ow overhead cearance. Pay specia attention to removing sat, dirt, mud, and other foreign materia from the underside of the fenders, and make sure the drain hoes in the ower edges of the doors and rocker panes are cean. Insects, tar, tree sap, bird droppings, industria faout, and simiar deposits can damage the finish if not removed immediatey. When prompt washing with pain water is ineffective, use a mid soap made for use on vehices. Thoroughy rinse off a soap with ukewarm or cod water. Don't aow soap to dry on the finish. After washing the vehice, dry it with a cean chamois to prevent water spots from forming. WARNING Driving with Wet Brakes: Driving with wet brakes is dangerous. Increased stopping distance or the vehice puing to one side when braking coud resut in a serious accident. Light braking wi indicate whether the brakes have been affected. Dry the brakes by driving very sowy and appying the brakes ighty unti brake performance is norma. Waxing Your vehice needs to be waxed when water no onger beads on the finish. Aways wash and dry the vehice before waxing it. In addition to the vehice body, wax the meta trim to maintain its uster. 1. Use wax which contains no abrasives. Waxes containing abrasive wi remove paint and coud damage bright meta parts. 2. Use a good grade of natura wax for metaic, mica, and soid coors. 3. When waxing, coat eveny with the sponge suppied or a soft coth. 4. Wipe off the wax with a soft coth. A spot remover to remove oi, tar, and simiar materias wi usuay aso take off the wax. Rewax these areas even if the rest of the vehice doesn't need it. 8-57
300 Maintenance and Care Appearance Care qrepairing Damage to the Finish Deep scratches or chips on the finish shoud be repaired prompty. Exposed meta quicky rusts and can ead to major repairs. CAUTION If your Mazda is damaged and needs meta parts repaired or repaced, make sure the body shop appies anticorrosion materias to a parts, both repaired and new. This wi prevent them from rusting. qbright-meta Maintenance Use tar remover to remove road tar and insects. Never do this with a knife or simiar too. To prevent corrosion on bright-meta surfaces, appy wax or chrome preservative and rub it to a high uster. During cod weather or in coasta areas, cover bright-meta parts with a coating of wax or preservative heavier than usua. It woud aso hep to coat them with noncorrosive petroeum jey or some other protective compound. CAUTION Don't use stee woo, abrasive ceaners, or strong detergents containing highy akaine or caustic agents on chromepated or anodized auminum parts. This may resut in damage to the protective coating and cause discooration or paint deterioration. qunderbody Maintenance Road chemicas and sat used for ice and snow remova and sovents used for dust contro may coect on the underbody. If not removed, they wi speed up rusting and deterioration of such underbody parts as fue ines, frame, foor pan, and exhaust system, even though these parts may be coated with anti-corrosive materia. Thoroughy fush the underbody and whee housings with ukewarm or cod water at the end of each winter. Try aso to do this every month. Pay specia attention to these areas because they easiy hide mud and dirt. It wi do more harm than good to wet down the road grime without removing it. The ower edges of doors, rocker panes, and frame members have drain hoes that shoud not be cogged. Water trapped there wi cause rusting. WARNING Driving with Wet Brakes: Driving with wet brakes is dangerous. Increased stopping distance or the vehice puing to one side when braking coud resut in a serious accident. Light braking wi indicate whether the brakes have been affected. Dry the brakes by driving very sowy and appying the brakes ighty unti brake performance is norma. 8-58
301 Maintenance and Care Appearance Care qauminum Whee Maintenance A protective coating is provided over the auminum whees. Specia care is needed to protect this coating. Don't use a wire brush or any abrasive ceaner, poishing compound, or sovent on auminum whees. They may damage the coating. Ony use a mid soap or neutra detergent and aways use a sponge or soft coth to cean the whees. Rinse thoroughy with ukewarm or cod water. Aso, be sure to cean the whees after driving on dusty or sated roads. This heps prevent corrosion. Avoid washing your vehice in an automatic car wash that uses highspeed or hard brushes. If your auminum whees ose uster, wax the whees. Interior Care qdashboard Precautions Prevent caustic soutions such as perfume and cosmetic ois from contacting the dashboard. They' damage and discoor it. If these soutions get on the dashboard, wipe them off immediatey. CAUTION Do not use gazing agents. Gazing agents contain ingredients which may cause discooration, wrinking, cracks and peeing. qceaning the Uphostery and Interior Trim Viny Remove dust and oose dirt from viny with a whisk broom or vacuum ceaner. Cean viny with a eather-and-viny ceaner. Leather í Rea eather isn't uniform and may have scars, scratches, and wrinkes. Cean it with a eather ceaner or mid soap. Wipe it with a damp soft coth; then dry and buff it with a dry soft coth. Fabric Remove dust and oose dirt from fabric with a whisk broom or vacuum ceaner. Cean it with a mid soap soution good for uphostery and carpets. Remove fresh spots immediatey with a fabric spot ceaner. í Some modes. 8-59
302 Maintenance and Care Appearance Care To keep the fabric ooking cean and fresh, take care of it. Otherwise its coor wi be affected, it can be stained easiy, and its fire-resistance may be reduced. CAUTION Use ony recommended ceaners and procedures. Others may affect appearance and fire-resistance. Piano back pane í The foowing parts are fitted with panes that have been treated with a specia coating that resists scratching. Instrument pane side garnish Steering whee (partia) When the pane needs to be ceaned, use a soft coth to wipe off dirt from the surface. Scratches or nicks on the panes resuting from the use of a hard brush or coth may not be repairabe. WARNING Damaged Seat Bet: Using damaged seat bets is dangerous. In a coision, damaged bets cannot provide adequate protection. Have an Authorized Mazda Deaer repace damaged bets immediatey. qceaning the Window Interiors If the windows become covered with an oiy, greasy, or waxy fim, cean them with gass ceaner. Foow the directions on the container. CAUTION Don't scrape or scratch the inside of the rear window. You may damage the rear window defroster grid. qceaning the Lap/Shouder Bet Webbing Cean the webbing with a mid soap soution recommended for uphostery or carpets. Foow instructions. Don't beach or dye the webbing; this may weaken it. After ceaning the bets, thoroughy dry the bet webbing and make sure there is no remaining moisture before retracting them í Some modes.
303 9 Customer Information and Reporting Safety Defects Important consumer information incuding warranties and add-on equipment. Customer Assistance Customer Assistance (U.S.A.) Customer Assistance (Canada) Customer Assistance (Puerto Rico) Mazda Importer/Distributors Importer/Distributor Distributor in Each Area Warranty Warranties for Your Mazda Outside the United States Outside Canada Registering Your Vehice in A Foreign Country (Except United States and Canada) Add-On Non-Genuine Parts and Accessories Ce Phones Ce Phones Warning Type Approva of Equipment Type Approva of Equipment Uniform Tire Quaity Grading System (UTQGS) Uniform Tire Quaity Grading System (UTQGS) Reporting Safety Defects Reporting Safety Defects (U.S.A.) Reporting Safety Defects (Canada) Service Pubications Service Pubications
304 Customer Information and Reporting Safety Defects Customer Assistance Customer Assistance (U.S.A.) Your compete and permanent satisfaction is our business. We are here to serve you. A Authorized Mazda Deaers have the knowedge and the toos to keep your Mazda vehice in top condition. If you have any questions or recommendations for improvement regarding the service of your Mazda vehice or servicing by Mazda Deaer personne, we recommend that you take the foowing steps: If it becomes necessary to have the components or wiring system for the suppementary restraint system modified to accommodate a person with certain medica conditions in accordance with a certified physician, contact an Authorized Mazda Deaer. qstep 1: Contact Your Mazda Deaer Discuss the matter with an Authorized Mazda Deaer. This is the quickest and best way to address the issue. If your concern has not been resoved by the CUSTOMER RELATIONS, SALES, SERVICE, or PARTS MANAGER, then pease contact the GENERAL MANAGER of the deaership or the OWNER. If it becomes necessary to have the components or wiring system for the suppementary restraint system modified to accommodate a person with certain medica conditions in accordance with a certified physician, go to STEP2. qstep 2: Contact Mazda North American Operations If for any reason you fee the need for further assistance after contacting your deaership management and it becomes necessary to have the components or wiring system for the suppementary restraint system modified to accommodate a person with certain medica conditions in accordance with a certified physician, you can reach Mazda North American Operations by one of the foowing ways. Log on: at Answers to many questions, incuding how to ocate or contact a oca Mazda deaership in the U.S., can be found here. E-mai: cick on Contact Us at the bottom of the page at By phone at:1 (800)
305 Customer Information and Reporting Safety Defects Customer Assistance By etter at: Attn: Customer Assistance Mazda North American Operations 7755 Irvine Center Drive Irvine, CA P.O. Box Irvine, CA In order to serve you efficienty and effectivey, pease hep us by providing the foowing information: 1. Your name, address, and teephone number 2. Year and mode of vehice 3. Vehice Identification Number (17 digits, noted on your registration or tite or ocated on the upper driver's side corner of the dash) 4. Purchase date and current mieage 5. Your deaer's name and ocation 6. Your question(s) If you ive outside the U.S.A., pease contact your nearest Mazda Distributor. 9-3
306 Customer Information and Reporting Safety Defects Customer Assistance qsatisfaction Review Process Customer Assistance (Canada) Your compete and permanent satisfaction is of primary concern to Mazda. A Authorized Mazda Deaers have both the knowedge and toos to keep your Mazda in top condition. In our experience, any questions, probems, or compaints regarding the operation of your Mazda or any other genera service transactions are most effectivey resoved by your deaer. If the cause of your dissatisfaction cannot adequatey be addressed by norma deaership procedures, we recommend that you take the foowing steps: qstep 1: Contact the Mazda Deaer Discuss the matter with a member of deaership management. If the Service Manager has aready reviewed your concerns, contact the owner of the deaership or its Genera Manager. qstep 2: Contact the Mazda Regiona Office If you fee that you sti require assistance, ask the deaer Service Manager to arrange for you to meet the oca Mazda Service Representative. If more expedient, contact Mazda Canada Inc.Regiona Office nearest you for such arrangements. Regiona Office address and phone numbers are shown (page 9-6). qstep 3: Contact the Mazda Customer Reations Department If sti not substantiay satisfied, contact the Customer Reations Department, Mazda Canada Inc., 55 Voge Road, Richmond Hi, Ontario, L4B 3K5 Canada TEL:1 (800) Provide the Department with the foowing information: 1. Your name, address and teephone number 2. Year and mode of vehice 3. Vehice Identification Number (VIN). Refer to the Vehice Identification Labes page of section 10 of this manua for the ocation of the VIN. 4. Purchase date 5. Present odometer reading 6. Your deaer's name and ocation 7. The nature of your probem and/or cause of dissatisfaction The Department, in cooperation with the oca Mazda Service Representative, wi review the case to determine if everything possibe has been done to ensure your satisfaction. 9-4
307 Customer Information and Reporting Safety Defects Customer Assistance Pease recognize that the resoution of service probems in most cases requires the use of your Mazda deaer's service faciities, personne and equipment. We urge you to foow the above three steps in sequence for most effective resuts. qmediation/arbitration Program Occasionay a customer concern cannot be resoved through Mazda's Customer Satisfaction Program. If after exhausting the procedures in this manua your concern is sti not resoved, you have another option. Mazda Canada Inc. participates in an arbitration program administered by the Canadian Motor Vehice Arbitration Pan (CAMVAP). CAMVAP wi advise you about how your concern may be reviewed and resoved by an independent third party through binding arbitration. Your compete satisfaction is the goa of Mazda Canada Inc. and our deaers. Mazda's participation in CAMVAP makes a vauabe contribution to our achieving that goa. There is no charge for using CAMVAP. CAMVAP resuts are fast, fair and fina as the award is binding on both you and Mazda Canada Inc. qcanadian Motor Vehice Arbitration Pan (CAMVAP) If a specific item of concern arises, where a soution cannot be reached between an owner, Mazda, and/or one of it's deaers (that a parties cannot agree upon), the owner may wish to use the services offered by the Canadian Motor Vehice Arbitration Pan (CAMVAP). CAMVAP uses the services of Provincia Administrators to assist consumers in scheduing and preparing for their arbitration hearings. However, before you can proceed with CAMVAP you must foow your Mazda dispute resoution process as outined previousy. 9-5
308 Customer Information and Reporting Safety Defects Customer Assistance CAMVAP is fuy impemented in a provinces and territories. Consumers wishing to obtain further information about the Program shoud contact the Provincia Administrator at 1 (800) , or by contacting the Canadian Motor Vehice Arbitration Pan Office at: Canadian Motor Vehice Arbitration Pan 235 Yorkand Bouevard, suite 300 North York, Ontario M2J 4Y8 Provincia Administrators may be reached ocay as isted beow: Province/Territory CAMVAP Number British Coumbia & Yukon Territories 1 (800) Aberta & Northwest Territories 1 (800) Saskatchewan 1 (800) Manitoba 1 (800) Ontario 1 (800) Atantic Canada 1 (800) Quebec 1 (800) qregiona Offices REGIONAL OFFICES MAZDA CANADA INC. WESTERN REGION 8171 ACKROYD ROAD SUITE 2000 RICHMOND B.C. V6X 3K1 (604) MAZDA CANADA INC. CENTRAL/ATLANTIC REGION 55 VOGELL ROAD, RICHMOND HILL, ONTARIO, L4B 3K5 (905) MAZDA CANADA INC. QUEBEC REGION 6111 ROUTE TRANS CANADIENNE POINTE CLAIRE, QUEBEC H9R 5A5 (514) AREAS COVERED ALBERTA, BRITISH COLUMBIA, MANITOBA, SASKATCHEWAN, YUKON ONTARIO QUEBEC, NEW BRUNSWICK, NOVA SCOTIA, PRINCE EDWARD ISLAND, NEWFOUNDLAND 9-6
309 Customer Information and Reporting Safety Defects Customer Assistance Customer Assistance (Puerto Rico) Your compete and permanent satisfaction is our business. That is why a Authorized Mazda Deaers have the knowedge and the toos to keep your Mazda vehice in top condition. If you have any questions or recommendations for improvement regarding the service of your Mazda vehice or servicing by Mazda Deaer personne, we recommend that you take the foowing steps: qstep 1 Discuss the matter with an Authorized Mazda Deaer. This is the quickest and best way to address the issue. If your concern has not been resoved by the CUSTOMER RELATIONS, SALES, SERVICE, or PARTS MANAGER, then pease contact the GENERAL MANAGER of the deaership or the OWNER. qstep 2 If, after foowing STEP 1, you fee the need for further assistance, pease contact your area's Mazda representative (Indicated on the next page). Pease hep us by providing the foowing information: 1. Your name, address, and teephone number 2. Year and mode of vehice 3. Vehice Identification Number (17 digits, noted on your registration or tite or ocated on the upper driver's side corner of the dash) 4. Purchase date and current mieage 5. Your deaer's name and ocation 6. Your question(s) 9-7
310 Customer Information and Reporting Safety Defects Mazda Importer/Distributors Importer/Distributor qu.s.a. Mazda North American Operations 7755 Irvine Center Drive Irvine, CA U.S.A. P.O. Box Irvine, CA U.S.A. TEL:1 (800) (in U.S.A.) (949) (outside U.S.A.) Distributor in Each Area qcanada Mazda Canada Inc. 55 Voge Road, Richmond Hi, Ontario, L4B 3K5 Canada TEL:1 (800) (in Canada) (905) (outside Canada) qpuerto RICO Paza Motors Corp. (Mazda de Puerto Rico) P.O. Box , San Juan, Puerto Rico TEL: (787) qguam Tripe J Motors 157 South Marine Drive, Tamuning, GUAM USA P.O. Box 6066 Tamuning, Guam TEL: (671) qsaipan Pacific Internationa Marianas, Inc. (d.b.a. Midway Motors) P.O. Box 887 Saipan, MP TEL: (670) Tripe J Saipan, Inc. (d.b.a. Tripe J Motors) P.O. Box Saipan, MP TEL: (670) /3051 qamerican SAMOA Poynesia Motors, Inc. P.O. Box 1120, Pago Pago, American Samoa TEL: (684)
311 Customer Information and Reporting Safety Defects Warranty Warranties for Your Mazda New Vehice Limited Warranty Distributor Major Component Limited Warranty (Canada ony) Safety Restraint System Limited Warranty Anti-perforation Limited Warranty Federa Emission Contro Warranty (U.S.A. ony) Emission Defect Warranty Emission Performance Warranty Caifornia Emission Contro Warranty (U.S.A. ony) Emission Contro Warranty (Canada ony) Repacement Parts and Accessories Limited Warranty Tire Warranty Detaied warranty information is provided with your Mazda. 9-9
312 Customer Information and Reporting Safety Defects Warranty Outside the United States Government reguations in the United States require that automobies meet specific emission reguations and safety standards. Therefore, vehices buit for use in the United States may differ from those sod in other countries. The differences may make it difficut or even impossibe for your vehice to receive satisfactory servicing in other countries. We strongy recommend that you NOT take your Mazda outside the United States. However, in the event that you are moving to Canada permanenty, Mazda vehices buit for use in the United States coud be eigibe for exportation to Canada with specific vehice modifications to compy with the Canadian Motor Vehice Safety requirements (CMVSS). The above is appicabe for a permanent import/export situation and not reated to traveers on vacation. You may have the foowing probems if you do take your vehice outside of the United States: Recommended fue may be unavaiabe. Any kind of eaded fue or ow-octane fue wi affect vehice performance and damage the emission contros and engine. Proper repair faciities, toos, testing equipment, and repacement parts may not be avaiabe. Pease refer to your Manufacturer's Warranty Booket for more information. 9-10
313 Customer Information and Reporting Safety Defects Warranty Outside Canada Government reguations in Canada require that automobies meet specific emission reguations and safety reguations. Therefore, vehices buit for use in Canada may differ from those sod in other countries. The differences may make it difficut or even impossibe for your vehice to receive satisfactory servicing in other countries. We strongy recommend that you NOT take your Mazda outside Canada. However, in the event that you are moving to the United States permanenty, Mazda vehices buit for use in Canada coud be eigibe for exportation to the United States with specific vehice modifications to compy with the United States Federa Motor Vehice Safety Standards (FMVSS). The above is appicabe for a permanent import/export situation and not reated to traveers on vacation. You may have the foowing probems if you do take your vehice outside of Canada: Recommended fue may be unavaiabe. Any kind of eaded fue or ow-octane fue wi affect vehice performance and damage the emission contros and engine. Proper repair faciities, toos, testing equipment, and repacement parts may not be avaiabe. Pease refer to your Manufacturer's Warranty Booket for more information. 9-11
314 Customer Information and Reporting Safety Defects Warranty Registering Your Vehice in A Foreign Country (Except United States and Canada) Government reguations in your country coud require that automobies meet specific emission and safety standards. Vehices buit for your country may differ from those buit for other countries. In addition to registration probems, satisfactory service may be difficut or even impossibe in another country. The fue specified for your vehice may be unavaiabe. Parts, servicing techniques, and toos necessary to maintain and repair your vehice may be unavaiabe. There might not be an Authorized Mazda Deaer in the country you pan to take your vehice. The Mazda warranty is vaid ony in certain countries. 9-12
315 Customer Information and Reporting Safety Defects Warranty Add-On Non-Genuine Parts and Accessories Non-genuine parts and accessories for Mazda vehices can be found in stores. These may fit your vehice, but they are not approved by Mazda for use with Mazda vehices. When you insta non-genuine parts or accessories, they coud affect your vehice's performance or safety system; the Mazda warranty doesn't cover this. Before you insta any non-genuine parts or accessories, consut an Authorized Mazda Deaer. WARNING Instaation of Non-Genuine Parts or Accessories: Instaation of non-genuine parts or accessories is dangerous. Impropery designed parts or accessories coud seriousy affect your vehice's performance or safety systems. This coud cause you to have an accident or increase your chances of injuries in an accident. Aways consut an Authorized Mazda Deaer before you insta nongenuine parts or accessories. Add-On Eectrica and Eectronic Equipment: Incorrecty choosing or instaing improper add-on equipment or choosing an improper instaer is dangerous. Essentia systems coud be damaged, causing engine staing, air-bag (SRS) activation, ABS inactivation, or a fire in the vehice. Be very carefu in choosing and instaing add-on eectrica equipment, such as mobie teephones, two-way radios, stereo systems, and car aarm systems. Mazda assumes no responsibiity for death, injury, or expenses that may resut from the instaation of add-on non-genuine parts or accessories. 9-13
316 Customer Information and Reporting Safety Defects Ce Phones Ce Phones Warning WARNING Use of Ce Phones and Other Devices by Driver: Use of any eectrica devices such as ce phones, computers, portabe radios, vehice navigation or other devices by the driver whie the vehice is moving is dangerous. Diaing a number on a ce phone whie driving aso ties-up the driver's hands. Use of these devices wi cause the driver to be distracted and coud ead to a serious accident. If a passenger is unabe to use the device, pu off the right-of-way to a safe area before use. If use of a ce phone is necessary despite this warning, use a hands-free system to at east eave the hands free to drive the vehice. Never use a ce phone or other eectrica devices whie the vehice is moving and, instead, concentrate on the fu-time job of driving. Pease compy with the ega reguations concerning the use of communication equipment in vehices in your country. 9-14
317 Customer Information and Reporting Safety Defects Type Approva of Equipment Type Approva of Equipment Immobiizer system 9-15
318 Customer Information and Reporting Safety Defects Uniform Tire Quaity Grading System (UTQGS) Uniform Tire Quaity Grading System (UTQGS) This information reates to the tire grading system deveoped by the U.S. Nationa Highway Traffic Safety Administration for grading tires by tread wear, traction, and temperature performance. qtread Wear The tread wear grade is a comparative rating based on the wear rate of the tire when tested under controed conditions on a specified government test course. For exampe, a tire graded 150 woud wear one-and-a-haf times as we on the government course as a tire graded 100. The reative performance of tires depends upon the actua conditions of their use, however, and may depart significanty from the norm because of variations in driving habits, service practices and differences in road characteristics and cimate. qtraction-aa, A, B, C The traction grades, from highest to owest, are AA, A, B, and C. These grades represent the tire's abiity to stop on wet pavement as measured under controed conditions on specified government test surfaces of asphat and concrete. A tire marked C may have poor traction performance. WARNING The traction grade assigned to this tire is based on braking (straight ahead) traction tests and does not incude acceeration cornering (turning), hydropaning, or peak traction characteristics. qtemperature-a, B, C The temperature grades A (the highest), B, and C, represent the tire's resistance to the generation of heat and its abiity to dissipate heat when tested under controed conditions on a specified indoor aboratory test whee. Sustained high temperature can cause the materia of the tire to degenerate and reduce tire ife, and excessive temperatures can ead to sudden tire faiure. Grade C corresponds to a eve of performance which a passenger vehice tires must meet under the Federa Motor Vehice Safety Standard No Grades B and A represent higher eves of performance on the aboratory test whee than the minimum required by aw. 9-16
319 Customer Information and Reporting Safety Defects Uniform Tire Quaity Grading System (UTQGS) WARNING The temperature grade for this tire is estabished for a tire that is propery infated and not overoaded. Excessive speed, underinfation, or excessive oading, either separatey or in combination, can cause heat buidup and possibe tire faiure. These grades wi be added to the sidewas of passenger vehice tires over the next severa years according to a schedue estabished by the NHTSA and the tire manufacturers. The grade of tires avaiabe as standard or optiona equipment on Mazda vehices may vary with respect to grade. ALL PASSENGER VEHICLE TIRES MUST CONFORM TO THESE GRADES AND TO ALL OTHER FEDERAL TIRE-SAFETY REQUIREMENTS. quniform Tire Quaity Grading Quaity grades can be found where appicabe on the tire sidewa between tread shouder and maximum section width. For exampe: Treadwear 200 Traction AA Temperature A UTQGS MARK (exampe) TREADWEAR 200 TRACTION AA TEMPERATURE A 9-17
320 Customer Information and Reporting Safety Defects Reporting Safety Defects Reporting Safety Defects (U.S.A.) If you beieve that your vehice has a defect which coud cause a crash or coud cause injury or death, you shoud immediatey inform the Nationa Highway Traffic Safety Administration (NHTSA) in addition to notifying Mazda Motor Corporation (Your Mazda Importer/Distributor). If NHTSA receives simiar compaints, it may open an investigation, and if it finds that a safety defect exists in a group of vehices, it may order a reca and remedy campaign. However, NHTSA cannot become invoved in individua probems between you, your deaer, or Mazda Motor Corporation (Your Mazda Importer/Distributor). To contact NHTSA, you may either ca the Auto Safety Hotine to-free at 1 (800) (or in Washington, D.C. area) or write to: NHTSA, U.S. Department of Transportation. Washington, D.C You can aso obtain other information about motor vehice safety from the Hotine. If you ive in the U.S.A., a correspondence to Mazda Motor Corporation shoud be forwarded to: Mazda North American Operations 7755 Irvine Center Drive Irvine, Caifornia P.O. Box Irvine, CA Customer Assistance Center or to free at 1 (800) If you ive outside of the U.S.A., pease contact the nearest Mazda Distributor shown (page 9-8) in this booket. 9-18
321 Customer Information and Reporting Safety Defects Reporting Safety Defects Reporting Safety Defects (Canada) Canadian customers who wish to report a safety-reated defect to Transport Canada, Defect Investigations and Recas, may teephone the to free hotine , or contact Transport Canada by mai at: Transport Canada, ASFAD, Pace de Vie Tower C, 330 Sparks Street, Ottawa ON K1A 0N5. For additiona road safety information, pease visit the Road Safety website at:
322 Customer Information and Reporting Safety Defects Service Pubications Service Pubications Factory-authorized Mazda service pubications are avaiabe for owners who wish to do some of their own maintenance and repair. When requesting any of our pubications through an Authorized Mazda Deaer, refer to the chart beow. If they don't have what you need in stock, they can order it for you. PUBLICATION ORDER NUMBER B G C-05 (U.S.A. ony) 9999-EC-038C-05 (Canada ony) 9999-PR-038C-05 (Puerto Rico ony) PUBLICATION DESCRIPTION 2005 WORKSHOP MANUAL (Engish) 2005 WIRING DIAGRAM (Engish) 2005 OWNER'S MANUAL 2005 OWNER'S MANUAL 2005 OWNER'S MANUAL qworkshop MANUAL: Covers recommended maintenance and repair procedures of the drive train, body and chassis. qwiring DIAGRAM: Provides eectrica schematics as we as component ocation for the entire eectrica system. qowner's MANUAL: This booket contains information regarding the proper care and operation of your vehice. This is not a technician's manua. 9-20
323 10 Specifications Technica information about your Mazda. Identification Numbers Vehice Information Labes Specifications Specifications
324 Identification Numbers Vehice Information Labes qchassis Number qvehice Identification Number The vehice identification number egay identifies your vehice. The number is on a pate attached the cow pane ocated on the eft corner of the dashboard. This pate can easiy be seen through the windshied. qvehice Emission Contro Information Labe qmotor Vehice Safety Standard Labe qtire Pressure Labe 10-2
325 Identification Numbers qengine Number Forward 10-3
326 Specifications Specifications qengine Item Mode 2.0-iter engine 2.3-iter engine Type DOHC-16V in-ine, 4-cyinder Bore Stroke mm ( in) mm ( in) Dispacement 1,999 m (1,999 cc, cu in) 2,261 m (2,261 cc, cu in) Compression ratio qeectrica System Item Cassification Battery 12V-40AH/5HR, 12V-52AH/5HR, 12V-55AH/5HR Aternator 12 V - 90 A Starter 2.0-iter engine 12 V kw 2.3-iter engine 12 V kw Spark-pug number L * Spark-pug gap mm ( in) * ex factory When ceaning the iridium pugs, do not use a wire brush. The fine particuate coating on the iridium aoy and patinum tips coud be damaged. qlubricant Quaity Lubricant Engine oi Any temperature Manua transaxe oi Above 10 C (50 F) Automatic transaxe fuid Power steering fuid Brake/Cutch fuid Cassification Refer to the recommended SAE viscosity numbers on page API Service GL-4 or GL-5 SAE 75W-90 API Service GL-4 or GL-5 SAE 80W-90 ATF M-V ATF M-III or equivaent (e.g. Dexron III) SAE J1703 or FMVSS116 DOT
327 Specifications qcapacities (Approximate Quantities) Item Unit L US qt Imp qt Engine oi With oi fiter repacement Without oi fiter repacement Cooant With heater Without heater Manua transaxe oi Automatic transaxe fuid Fue tank 55 Check oi and fuid eves with dipsticks or reservoir gauges. qdimensions 14.5 (US ga) 12.1 (Imp ga) Item Mode 4 Door 5 Door Overa ength (STD) 4,530 mm (178.3 in) (SAP) 4,540 mm (178.7 in) 4,485 mm (176.6 in) Overa width * 1,755 mm (69.1 in) 1,755 mm (69.1 in) Overa height 1,465 mm (57.7 in) 1,465 mm (57.7 in) Front tread 1,530 mm (60.2 in) 1,530 mm (60.2 in) Rear tread 1,515 mm (59.6 in) 1,515 mm (59.6 in) Wheebase 2,640 mm (103.9 in) 2,640 mm (103.9 in) * With side protector qweights 4 Door 2.0-iter engine Item GVWR (Gross Vehice Weight Rating) GAWR (Gross Axe Weight Rating) 1,721 kg (3,794 b), Weight Manua transaxe Automatic transaxe 1,702 kg (3,752 b), 1,708 kg (3,765 b) *1 1,727 kg (3,807 b) *1 Front 904 kg (1,993 b) 924 kg (2,037 b) Rear 798 kg (1,759 b), 797 kg (1,757 b), 804 kg (1,772 b) *1 803 kg (1,770 b) *1 *1 P-ZEV 10-5
328 Specifications 2.3-iter engine Weight Item Manua transaxe Automatic transaxe GVWR (Gross Vehice Weight Rating) 1,732 kg (3,818 b) 1,760 kg (3,880 b) Front 928 kg (2,046 b) 957 kg (2,110 b) GAWR (Gross Axe Weight Rating) Rear 804 kg (1,772 b) 803 kg (1,770 b) 5 Door Weight Item Manua transaxe Automatic transaxe GVWR (Gross Vehice Weight Rating) 1,743 kg (3,843 b) 1,771 kg (3,904 b) Front 930 kg (2,050 b) 960 kg (2,116 b) GAWR (Gross Axe Weight Rating) Rear 813 kg (1,793 b) 811 kg (1,788 b) qair Conditioner Gas compies with SAE J639 HFC134a (R-134a) Maximum operating charge 0.5 kg (17.55 oz) qlight Bubs Exterior ight Light bub Category Wattage ECE R SAE High beam 60 HB3 Headights Haogen 55 H7 Low beam Xenon fusion 35 D2S Front turn signa ights/side-marker ights 27/8 #1157NA Fog ights í 55 H11 Side turn signa ights *1 5 WY5W High-mount brake ight 18 W16W #921 Rear turn signa ights 21 W21W #7440 Brake ights/taiights With Non-LED bub 21/5 W21/5W #7443 With LED bub *2 4/0.8 Reverse ight 21 W21W #7440 License pate ight 5 W5W *1 Bub repacement is not possibe because it is buit into the unit. Repace the unit. *2 Bub repacement is not possibe. The rear combination component must be repaced í Some modes.
329 Specifications Interior ight Light bub Category Wattage ECE R Trunk ight (Sedan) W5W Luggage compartment ight (Hatchback) 5 Overhead ight/map ights (Front) í W5W Overhead ight (Rear) 10 qtires The tires have been optimay matched with the chassis of your vehice. When repacing tires, Mazda recommends that you repace tires of the same type originay fitted to your vehice. For detais, contact an Authorized Mazda Deaer. Check the tire pressure abe for tire size and infation pressure. Refer to Tire Infation Pressure on page Standard tire Tire size Infation pressure Front Rear 195/65R15 91V 220 kpa (2.2 kgf/cm 2, 32 psi or b/po 2 ) 220 kpa (2.2 kgf/cm 2, 32 psi or b/po 2 ) P195/65R15 89H 230 kpa (2.3 kgf/cm 2, 33 psi or b/po 2 ) 230 kpa (2.3 kgf/cm 2, 33 psi or b/po 2 ) 205/55R16 91V P205/55R16 89H 205/50R17 89V P205/50R17 88V Temporary spare tire 220 kpa (2.2 kgf/cm 2, 32 psi or b/po 2 ) 220 kpa (2.2 kgf/cm 2, 32 psi or b/po 2 ) Tire size Infation pressure T115/70D15 T125/70D kpa (4.2 kgf/cm 2 or bar, 60 psi) qfuses Refer to the fuse rating on page í Some modes. 10-7
330 10-8
331 11 Index 11-1
332 Index A Add-On Non-Genuine Parts and Accessories Air Bag Systems Air Fiter Antenna Anti-Lock Brake System (ABS) Warning ight Appearance Care Ashtray Audio System Audio contro switch Operating tips for audio system Safety certification Automatic Transaxe Driving tips Fuid Manua shift mode Shift-ock override Shift-ock system Transaxe ranges B Battery Emergency starting Maintenance Specifications Beep Sounds Ignition key reminder Beeps Lights-on reminder Seat bet warning beep Sounds Tire infation pressure warning beep Before Starting the Engine After getting in Before getting in B Body Lubrication Botte Hoder Brake/Cutch Fuid Brakes Anti-ock brake system (ABS) Brakes assist Foot brake Parking brake Warning ight Break-In Period Bub Repacement C Capacities Carbon Monoxide Cargo Securing Loops Cargo Sub-Compartment Cataytic Converter Ce Phones Center Consoe Chid Restraint Chid restraint precautions Instaing chid-restraint systems LATCH chid-restraint systems Chid Safety Locks for Rear Doors Cigarette Lighter Cimate Contro System Gas specifications Cock Cruise Contro Cup Hoder Customer Assistance
333 Index D Dashboard Iumination Daytime Running Lights Defroster Rear window Dimensions Door Locks Driving In Fooded Area Driving Tips Automatic transaxe Break-in period Driving in fooded area Hazardous driving Money-saving suggestions Rocking the vehice Winter driving E Emergency Starting Fooded engine Jump-starting Push-starting Emergency Towing Emission Contro System Engine Cooant Exhaust gas Hood reease Oi Overheating Starting Engine Compartment Overview Engine Cooant Overheating Engine Cooant Temperature Gauge Exhaust Gas Exterior Care F Fasher Hazard warning Headights Fat Tire Changing Spare tire and too storage Fexibe Foor Board Fuids Cassification Owner maintenance Fog Lights Foot Brake Front Seats Fue Fier id and cap Gauge Requirements Tank capacity Fuses Pane description Repacement G Gove Box H Hazard Warning Fasher Hazardous Driving Headights Contro Fashing High-ow beam Leveing On reminder Hood Reease Horn
334 Index I Ignition Keys Switch Iuminated Entry System Immobiizer System Indicator Lights Cruise main Cruise set Headight high-beam Power steering mafunction Security Shift position Turn-signa/hazard warning Information Dispay Audio dispay Cock Information dispay functions Inside Trunk Reease Lever Instrument Custer Instrument Custer Dimmer Seect Button Interior Care Interior Lights J Jump-Starting K Keyess Entry System Keys L Labe Information Lane-Change Signas L Liftgate Luggage compartment Light Bubs Repacement Specifications Lighter Lighting Contro Lubricant Quaity Luggage Compartment Light M Maintenance Introduction Owner maintenance precautions Owner maintenance schedue Schedued Manua Transaxe Operation Recommendations for shifting Map Lights Mirrors Outside mirrors Rearview mirror Money-Saving Suggestions Moonroof O Odometer and Trip Meter Outside Mirrors Overhead Lights Overheating Overoading P Paint Damage
335 Index P Parking Brake Parking in an Emergency Power Door Locks Power Steering Fuid Power steering mafunction indicator ight Power Windows Push-Starting R Rear Door Chid Safety Locks Rear Seat Rear Window Defroster Rear Window Washer Rear Window Wiper Rearview Mirror Recreationa Towing Registering Your Vehice in A Foreign Country Rocking the Vehice S Safety Defects, Reporting Seat Bet System Automatic ocking Bet minder Center-rear position Emergency ocking Except center-rear position Extender Pregnant women Pretensioner and oad imiting Seat bet precautions Warning ight/beep S Seats Front seat Rear seat Security System Immobiizer system Theft-deterrent system Service Pubications Spare Tire and Too Storage Specifications Speedometer SRS Air Bags How the Air Bags Work Suppementa restraint systems precautions Starting the Engine Steering Whee Horn Storage Compartments Cargo securing oops Cargo sub-compartment Center consoe Fexibe Foor Board Gove box Sunshade Sunvisors T Tachometer Temporary Spare Tire Theft-Deterrent System Tiedown Hook Tire Pressure Monitoring System System error activation Tire pressure monitoring system warning ight Tires and whees
336 Index T Tires Infation pressure Repacement Rotation Snow tires Spare tire and too storage Specifications Fat Tire Tire chains Uniform tire quaity grading system (UTQGS) Too Towing Description Emergency towing Recreationa towing Towing caravan and traiers (Europe) Traier towing Traier Towing Trip Meter Trunk Lid Trunk Light Turn and Lane-Change Signas V W Warning Lights ABS Air bag system Automatic transaxe Brake system Charging system Check engine Door-ajar Engine oi pressure Front seat bet pretensioner system Low fue Low washer fuid eve Seat bet Tire pressure monitoring system Warranty Washer Fuid Weights Whee Repacement Windows Power windows Windshied Washer Windshied Wipers Bades repacement Winter Driving Vanity Mirrors Vehice Information Labes
337 NAVIGATION SYSTEM
338 Contents, Accessories, and Laser Before Use Accessories Pease contact an Authorized Mazda Deaer if you are missing any of the foowing accessories. Map Disc Owner's Manua CAUTION: THIS PRODUCT IS A CLASS I LASER PRODUCT. HOWEVER THIS PRODUCT USES A VISIBLE/INVISIBLE LASER BEAM WHICH COULD CAUSE HAZARDOUS RADIATION EXPOSURE IF DIRECTED. BE SURE TO OPERATE THIS PRODUCT CORRECTLY AS INSTRUCTED. USE OF CONTROLS OR ADJUSTMENTS OR PERFORMANCE OF PROCEDURES OTHER THAN THOSE SPECIFIED HEREIN MAY RESULT IN HAZARDOUS RADIATION EXPOSURE. DO NOT OPEN COVERS AND DO NOT REPAIR YOURSELF. REFER SERVICING TO QUALIFIED PERSONNEL. Preparation Immediate use Laser products: Wave ength: 650 nm Laser power: No hazardous radiation is emitted with safety protection. Advanced use If necessary 2
339 Product Accessories Laser Product Contents Safety Information Introduction Names and Functions Before Use Direct Destination Input After Routing, Route Changes Activation Pop Up Menu System Operation Verification Screen Quaity Adjustment Map Dispay Changing the map Orientation/Scae Destination Entry and Route Search Destination by address Destination by intersection Destination by Point of Interest (POI) categories Destination by history Destination by a marked point Destination by the map Character Entry POI Icons on Maps / Zipcode Entry Route Search Canceation, Whoe Route dispay, Route guidance canceation Before Use Routing Marked Point 28 Marking Setup 30 User setting Precautions/System Performance Voice Guidance Automatic Distance Correction GPS Map Matching Positioning Accuracy Route Guide Route Search Troubeshooting Verification First Error Messages Maintenance As necessary 3
340 Safety Information Before Use Read this owner's manua for your Navigation System carefuy before using the system. They contain instructions about how to use the system in a safe and effective manner. Mazda assumes no responsibiity for any probems resuting from faiure to observe the instructions given in this manua. This manua uses pictographs to show you how to use the product safey and to aert you to potentia dangers resuting from improper connections and operation. The meanings of the pictographs are expained beow. It is important that you fuy understand the pictographs and expanations in order to use this manua and the system propery. Warning Warning The presence of this Warning symbo in the text is intended to aert you to the importance of heeding the operation instructions. Faiure to heed the instructions may resut in severe injury or death. Warnings Do not keep your eyes fixed on the monitor screen or operate the system whie driving. Do not change the settings and destination ocations whie driving. Minimize the time spent on viewing the monitor screen and istening to the voice guidance whie driving. Operating the system wi distract the driver from ooking ahead of the vehice and can cause accidents. Aways stop the vehice in a safe ocation and use the parking brake before operating the system. Aways obey oca traffic reguations. Your guided route may incude roads that are not open to vehices or are cosed due to traffic reguations. Compy with the oca traffic reguations and take another route. Do not use the unit when it is out of order. If the unit is out of order (no image, no sound) or in an abnorma state (has foreign matter in it, is exposed to water, is smoking, or smes), then turn it off immediatey and consut with an Authorized Mazda Deaer. Using the unit in out-of-order condition may ead to accidents, fires, or eectric shocks. Use the proper power suppy. This product is designed for operation with a negative grounded 12 V DC battery system. Leaving chidren in a vehice with the ignition key is dangerous. This coud resut in someone being bady injured or even kied. They coud pay with power windows or other contros, or even make the vehice move. Don t eave the keys in your vehice with chidren. 4
341 Warning Warning The presence of this Warning symbo in the text is intended to aert you to the importance of heeding the operation instructions. Faiure to heed the instructions may resut in severe injury or death. Do not disassembe. Do not disassembe the product or attempt to repair it yoursef. If the product needs to Warnings be repaired, take it to an Authorized Mazda Deaer. Never attempt to pay the map disc on an audio payer. Do not attempt to pay the map disc on other CD (DVD) payer. The oud sound produced may damage your hearing and your speakers. Before Use 5
342 Safety Information Caution Caution The presence of this Caution symbo in the text is intended to aert you to the importance of heeding the operation instructions. Faiure to heed the instructions may resut in injury or materia damage. Before Use Do not use the product where it is exposed to water, moisture, or dust. Exposure to water, moisture, or dust may ead to smoke, fire, or other damage to the unit. Cautions Make especiay sure that the unit does not get wet in car washes or on rainy days. Keep the voice guidance voume at an appropriate eve. Keep the voume eve ow enough to be aware of road and traffic conditions whie driving. Protect the Deck Mechanism. Do not insert any foreign objects into the sot of this unit. This navigation system is designed use for excusivey in automobies. This navigation system shoud ony be instaed in an automobie. Do not insta it in a ship, aircraft, or any other vehices except an automobie. Do not use it detached from the vehice. Do not insert or aow your hand or fingers to be caught in the unit. To prevent injury, do not get your hand or fingers caught in moving parts or in the disc sot. Especiay watch out for infants. Do not eave the siding front cover for the unit's disc insertion sot open. If it is eft open, foreign objects coud enter the unit and cause damage. 6
343 SOFTWARE (MAP DISC) LICENCE AGREEMENT PLEASE READ THIS AGREEMENT CAREFULLY BEFORE USING NAVTECH PRODUCT This software and data ( Software ) is provided for your persona, non-commercia use ony. Copyright and other Laws protect it. By using this Software you agree to the foowing terms and conditions. You agree to use this Software for soey persona use or, if appicabe, for use in your business interna operations, and not for service bureau, time-sharing or other simiar purposes. Except to save it on your hard drive, you may not copy or reproduce this Software, and may not distribute it in any form, for any purpose. You agree not to disassembe, decompie or otherwise reverse engineer the Software, except to the extent expressy permitted by mandatory aws. Further Restrictions. You may not use this Software with: (i) any positioning devices, incuding without imitation, any GPS receivers, compasses, whee sensors, or any other distance or direction sensors; or (ii) any products, systems or appications instaed in or otherwise connected to or in communication with vehices, or capabe of vehice navigation, positioning, dispatch, rea time route guidance, feet management or simiar appications; or (iii) any hand-hed computer devices, ce phones or simiar mobie devices. No warranty. This Software is provided to you as is, and you agree to use it at your own risk. Mazda and its suppiers and icencers make no guarantees, representations or warranties of any kind, express or impied, arising by aw or otherwise, incuding but not imited to, content, quaity, accuracy, competeness, effectiveness, reiabiity, fitness for a particuar purpose, usefuness, use or resuts to be obtained from this Software wi be uninterrupted or error-free. Discaimer of Warranty: Mazda AND ITS SUPPLIERS AND LICENSORS DISCLAIM ANY WARRANTIES, EXPRESS OR IMPLIED, OF QUALITY, PERFORMANCE, MERCHANTABILITY, FITNESS FOR A PARTICULAR PURPOSE OR NON-INFRINGEMENT. Some States, Territories and Countries do not aow certain warranty excusions, so to that extent the above excusion may not appy to you. Discaimer of Liabiity: Mazda AND ITS SUPPLIERS AND LICENSORS SHALL NOT BE LIABLE TO YOU: IN RESPECT OF ANY CLAIM, DEMAND OR ACTION, IRRESPECTIVE OF THE NATURE OF THE CAUSE OF THE CLAIM, DEMAND OR ACTION ALLEGING ANY LOSS, INJURY OR DAMAGES, DIRECT OR INDIRECT, WHICH MAY RESULT FROM THE USE OR POSSESSION OF THE SOFTWARE; OR FOR ANY LOSS OF PROFIT, REVENUE, CONTRACTS OR SAVINGS, OR ANY OTHER DIRECT, INDIRECT, INCIDENTAL, SPECIAL OR CONSEQUENTIAL DAMAGES ARISING OUT OF YOUR USE OF OR INABILITY TO USE THIS SOFTWARE, ANY DEFECT IN THE SOFTWARE, OR THE BREACH OF THESE TERMS OR CONDITIONS, WHETHER IN AN ACTION IN CONTRACT OR TORT OR BASED ON A WARRANTY, EVEN IF Panasonic OR ITS LICENSORS HAVE BEEN ADVISED OF THE POSSIBILITY OF SUCH DAMAGES. Some states, Territories and Countries do not aow certain iabiity excusions or damages imitations, so to that extent the above may not appy to you. Indemnity. You agree to indemnify and hod Mazda and its suppiers and icensors harmess from any iabiity or oss of any kind arising out of or in connection with any use by you of this Software. Export Contro. You agree not to export from anywhere any part of the Software provided to you or any direct product thereof except in compiance with appicabe export aws, rues and reguations. Governing Law. The above terms and conditions sha be governed by the aws of the Netherands, without giving effect to (i) its confict of aws provisions, or (ii) the United Nations Convention for contracts for the internationa Sae of Goods. Before Use 7
344 Introduction Before Use Features This DVD Navigation System combined with the NAVTECH's MAP Disc has foowing specia features: Detaied maps are used. Seected destinations wi be dispayed for easy viewing. Desired paces or faciities can be stored in the memory. Notes DVD audio and video wi not work by this unit. This unit does not support a Video CD and CD formats. Caution Map Disc This unit supports ony DVD-SDAL-formatted map disc (SEAMLESS) that NAVTECH has specificay designed for this unit. Mazda sha not be iabe for any damages caused by using other formatted discs. Make sure to use ony the discs specified for this product. Use This Product Safety Avoid excessive moisture Do not expose the product to water or excessive moisture. This coud cause eectrica shorts, fire or other damage. Extremey ow or high temperatures may interfere with norma operation The inside of the vehice can become very hot or cod when it is parked for extended periods in direct sunight or in cod paces with the engine turned off. The navigation system may not operate normay under such circumstances. Turn off the navigation system unti the inside of the vehice has cooed down or warmed up. If the system does not operate thereafter, consut an Authorized Mazda Deaer. Navigation System This navigation system utiizes GPS* sateite signas, Speed sensor and Gyrosensor to track and dispay your vehice's current position, and to guide you from your starting point to your destination aong a cacuated route. * : GPS (Goba Positioning System) is a position detecting system utiizing the signas from GPS sateites depoyed by the U.S. Defense Department. 8
. Latest map DVD Map content is constanty changing due to the addition of new roads, points of interest, traffic restrictions, etc.")
345 Map Reated Issues Customer Service If you need hep with the operation your Mazda navigation system, want to report a map database error or wish to obtain a new map DVD, pease ca NAV-MAPS ( ). Latest map DVD Map content is constanty changing due to the addition of new roads, points of interest, traffic restrictions, etc. Whie every effort is made to suppy the most accurate DVD map, it is not aways possibe for the DVD map to match the current roadways. Not a map areas are covered to the same eve of detai. Some areas that incude private roads may not be incuded on the database. Map DVD's are updated on a reguar basis to check avaiabiity, pease ca NAV-MAPS ( ). Before Use Notes Pease have the map and software version numbers avaiabe in advance. This information can be found by using the foowing procedure: Press Seect MENU on the remote contro. and press ENTER Use the remote contro joystick to scro through the menu options, seect and press ENTER Seect and press ENTER Map and software versions are now dispayed. For further assistance pease refer to pages 30 in the instruction book. 9
346 Names and Functions Before Use ENTER Joystick Seects items by titing it up, down, right, and eft. Scros map. RET RET key Returns to the previous screen. VOICE VOICE key Initiates voca guidance for route maneuvers. Adjusts screen quaity. ( page 16) 10
347 POS POS (Position) key Dispays your current position. ( page 18) Before Use ENTER MENU ENTER key Executes a seected item. Dispays pop up menu. ( page 14) MENU key Dispays menu. ZOOM ZOOM key Changes the map scae. ( page 19) DIM DIM key Switches the dispay to day mode or night mode. Switching the Dispay Mode When the headight switch is in the or position, the dispay switches to night mode. Press the DIM key to switch to day mode. To return to night mode, press the DIM key again. 11


348 OPEN TILT TILT OPEN Aways cose the siding front cover. If it is eft open, foreign objects coud enter the unit and cause damage. 12

349

 Stop route Search ( page 25) Rerouting Note Appears ony when the auto reroute function ( page 32)is inactivated.")
 Near POI (Point of Interest) search (within a radius of about 6 mie) ( page 24) Detour submenu Note This function is")
350 Before Use Pop Up Menu Pop Up menu appears when pressing ENTER. This function is mainy used during route searches. When route has been set or route in operation When scro map is dispayed Exampe : When Highighted is seected. Route change ( page 26) Route dispay ( page 25) Route ist dispay Marked point registration ( page 28) Map orientation change ( page 19) Stop route Search ( page 25) Rerouting Note Appears ony when the auto reroute function ( page 32)is inactivated. Change of routing Search method ( page 21) Change voume Deete Destination ( page 25) Direct destination input with the joystick ( page 24) Near POI (Point of Interest) search (within a radius of about 6 mie) ( page 24) Detour submenu Note This function is not avaiabe on intersection zoom maps. 14

351 Before Use System Operation Verification The mobie navigation system uses GPS data for distance correction automaticay. It must be propery caibrated for accurate operation. Perform caibration in any of the foowing circumstances: 1. When using the navigation system for the very first time after instaing the system. 2. When the navigation system is transferred to another vehice. 3. When the tire pressure is changed, tires are rotated, the spare tire is used, tire size, or whee diameter is changed. 4. When deeting the position correction earning resuts. Notes Automatic distance correction Start the driving after cosing the opening screen as much as possibe. The system is ready to start during opening screen. The vehice position indicator may disappear temporariy after the speed is increased depending on the vehice mode. This is a norma phenomenon indicating that the system is cacuating the distance correction. Resetting automatic distance correction Drive the vehice in an open area for approximatey 30-minutes at a speed over 20 kph (12.5 MPH) whie receiving GPS signas. Notes Make sure the GPS reception indicator is iuminated on the map screen. Before Use GPS reception indicator 15
352 Before Use VOICE Press and hod 1 Screen Quaity Adjustment 2 ENTER ENTER Before Use Screen quaity adjustment Open [Dispay Menu] Seect Seect Screen off Screen dispay turns off. Press any button to return to screen dispay. Seect / Day / Night mode seector headights OFF - DAY MODE headights ON - NIGHT MODE When the headights are on, daytime mode can aso be seected (if extra screen brightness is required under certain nighttime conditions). This seection can ony be done when the headights are on. Press ENTER to switch between day and night modes. 16

353 3 ENTER ENTER Before Use Adjust screen brightness. ENTER Adjust screen contrast. ENTER ENTER Returns screen to initia settings. 17
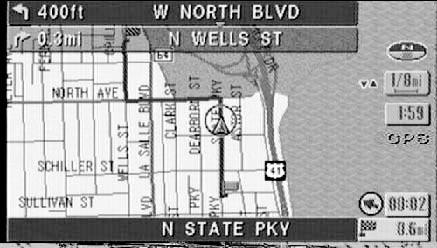
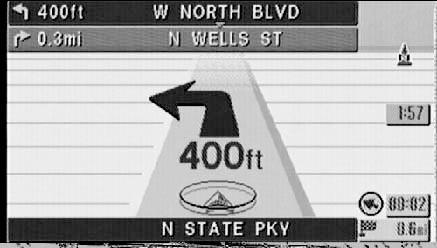
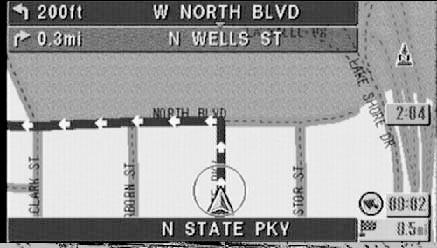

354


 Before Use Map")
355 Changing the Map Orientation/Scae Warning Do not keep your eyes fixed on the monitor screen or operate the system whie driving Do not change the settings and destination ocations whie driving. Minimize the time spent viewing the monitor screen and istening to the voice guidance whie driving. Operating the system wi distract the driver from ooking ahead of the vehice and may cause an accident. Aways stop the vehice in a safe ocation and use the parking brake before operating the system. 1 ENTER Open the pop up menu (whie in current position map) Before Use Map orientation ENTER Seect or 2 and press ENTER North Up : Geographic north is up. Head Up : The direction you are heading is up. 1 ZOOM The map can be dispayed in tweve steps with scaes from to. ZOOM OUT: Enarges the map. Map scae ZOOM ZOOM IN: Reduces the map. (more detai.) 19
![Destination Entry and Route Search If you woud ike to go back to your start point, seect the [History] in the [Seect Destination] Menu,](/docs-images/74/70210956/images/356-0.jpg "after that, seect a green fag icon as a destination.")
![ENTER ENTER 2 ENTER MENU seect ENTER 1 Destination by address Open the [Seect Destination] Menu Seect Seect Seect Routing Destination by](/docs-images/74/70210956/images/356-1.jpg "intersection Destination by intersection Destination by POI Destination by POI Defaut: North Centra USA Character entry ( page 22) To enter")
 Destination by history Open the [Seect Destination] Menu Seect Destination by history a marked point Seect Refer")
356 Destination Entry and Route Search If you woud ike to go back to your start point, seect the [History] in the [Seect Destination] Menu, after that, seect a green fag icon as a destination. ENTER ENTER 2 ENTER MENU seect ENTER 1 Destination by address Open the [Seect Destination] Menu Seect Seect Seect Routing Destination by intersection Destination by intersection Destination by POI Destination by POI Defaut: North Centra USA Character entry ( page 22) To enter the street name, city name, zip code, and other. Seect Seect a destination from the POI categories. POI icon chart ( page 23) Destination by history Open the [Seect Destination] Menu Seect Destination by history a marked point Seect Refer to page 28 for information about marked points. Destination by a Destination marked point by the map Destination by the map Seect 20

357 Do not keep your eyes fixed on the monitor screen or operate the system whie driving. Do not change the settings and destination ocations whie driving. Minimize the time spent viewing the monitor screen and istening to the voice guidance whie driving. Operating the Warnings system wi distract the driver from ooking ahead of the vehice and may cause an accident. Aways stop the vehice in a safe ocation before operating the system. Route searches with the navigation system can incude roads that you can not drive on and roads that you are prohibited from driving on due to traffic reguations. Pease compy with the traffic reguations. 3 Character entry or seection 4 ENTER ENTER ENTER ENTER ( page 22) Enter/Seect the Seect the street name. city name. Enter/Seect the city name.* 1 Enter/Seect the street Enter the name. Zipcode.* 2 * 1 The memory stores up to 10 cities visited recenty, and these city names can be seected. * 2 Depending on the area,zipcode search may not be possibe. Enter the name of the city where your target intersection is. Enter the target city name. Enter the target name. Enter the name of a street that is part of the intersection. Enter the target name. (The 20 cosest destinations to the current position appear (within a radius of about 30 mie.).) Seect the house number. Enter the other street name that makes up the intersection. Seect a desired destination from the ist. Search method This is the route that reaches the destination in the shortest time. This route reduces the use of highways (if there are highways on the way). You can designate a destination on the map. (Move the crosshair cursor to the destination.) The foowing menus wi be dispayed when ENTER is pressed on the map dispay. [Marked Point] [Destination] [Nearest POI] ( page 24) Routing Seect a destination from the ist of recent destinations. (Up to 50 points incuding the atest starting point are in the system memory.) Seect a destination from the ist of Marked points (Up to 100 points). Move the crosshair cursor to the destination and press ENTER. Seect Marks the destination resuting from the search. Note The resuts from the route search are not aways the shortest routes. You cannot aways avoid the highways even if the highway is set to [Avoid Highway]. For exampe, you wi be on the highway when your vehice is on the highway or when your destination exists on the highway. 21


358 Character Entry ENTER ENTER 1 2 ENTER ENTER Seect the first severa characters on the screen. Seect your target in the ist, and press ENTER Routing To enter the street name, city name, and other. : Move the cursor to the previous position and deete a character. Names of which speing starts with the entered character appear. If a desired name is not in the ist, go back to the step 1, and try fewer characters. Up to 10 characters can be entered. Entry of a street name Do not enter the type of street such as ST, AVE, PL, LN, Caution or RD as the search may not perform successfuy. Exampes Street : 33RD ST Enter by seecting characters: 3 : The ist appears. 3 R D To enter the zip code, house number, and other. ENTER ENTER ENTER ENTER 1 2 Seect the characters on the screen. : Space Seect and press ENTER : Move the cursor to the previous position and deete a character. 22
359 POI Icons on Maps / Zipcode Entry POI (Point of Interest) Icons The foowing are POI icons shown on maps. AUTO SERVICES LEISURE/ RECREATION NAMED PLACE AUTO REPAIR AUTOMOBILE ASSOCIATION AMUSEMENT PARK CASINO PUBLIC FACILITY CITY HALL GAS STATION GOLF COURSE COMMUNITY CENTER PARK & RIDE HISTORICAL MONUMENT COURT HOUSE PARKING GARAGE PARKING LOT RENTAL CAR FACILITY MARINA MUSEUM PARKS AND RECREATION EXHIBITION OR CONFERENCE CENTER LIBRARY SCHOOL REST AREA SKI RESORT UNIVERSITY OR COLLEGE STADIUM / ARENA BANKING ATM BANK THEATER TOURIST ATTRACTION TOURIST INFORMATI0N RESTAURANT SHOPPING GROCERY STORE Routing BORDER CROSSING WINERY SHOPPING CENTER BUSINESS FACILITY TRANS - PORTATION AIRPORT EMERGENCY BUS STATION HOSPITAL FERRY TERMINAL POLICE STATION LIGHT RAIL STATION HOTEL OR MOTEL TRAIN STATION 23
 You can determine whether or not to use a highway if there is a highway within a radius of about 300ft")
![from the crosshair cursor position. [Choose Highway] : Highway is used. : Highway is not used.](/docs-images/74/70210956/images/360-1.jpg "Notes A point near the crosshair cursor position can be a destination if there is not a destination point at the specified point.")
360 Direct destination input ENTER Position the cursor on your destination on the map Scro the map and change the map scae if necessary. ENTER ENTER Seect ENTER Routing Direct destination input Seect a route search method ( page 21) You can determine whether or not to use a highway if there is a highway within a radius of about 300ft from the crosshair cursor position. [Choose Highway] : Highway is used. : Highway is not used. Notes A point near the crosshair cursor position can be a destination if there is not a destination point at the specified point. A POI icon wi be a destination if there is a POI icon cose to the crosshair cursor. ENTER ENTER Seect ENTER Driving to the nearest POI (within a radius of about 6 mie) Seect the POI category Icon ist ( page 23) Seect an icon from the ist that you woud ike to go to. The 20 cosest destinations to your current position appear. page21) Seect a route search method ( Note When there is no POI that you woud ike to go to, then [POI Not Found] wi appear. 24

 ENTER ENTER Seect")
361 After routing During route search Route search canceation ENTER ENTER Seect ENTER Whoe route dispay (whie on current position map) After route search ENTER ENTER Seect ENTER Routing Deete destination (whie on current position map) ENTER ENTER Seect ENTER 25

 Avoid streets Routing Seect the first point that you woud ike to go by on")
362 Route Changes ENTER 1 2 This function aows you to search for aternative routes to the same destination. ENTER ENTER Aternative route search Open Pop up Menu (whie on current position map) Avoid streets Routing Seect the first point that you woud ike to go by on the way to your destination. Via point Detour distance 26

 appear.")
363 Warning Do not keep your eyes fixed on the monitor screen or operate the system whie driving Do not change the settings and destination ocations whie driving. Minimize the time spent viewing the monitor screen and istening to the voice guidance whie driving. Operating the system wi distract the driver from ooking ahead of the vehice and may cause an accident. Aways stop the vehice in a safe ocation and use the parking brake before operating the system. Seect a route Maximum 3 routes (incuding the current one) appear. Seect streets to avoid Streets to avoid become gray Routing Seect the second and foowing via points Deete a via point When adding a new point between the current position and the first point When adding a new point between the first point and the destination Use the point search and entry by foowing the same steps in"destination Entry and Route Search" ( page 20, 21) Seect a point that you woud ike to deete. Refer to page 32 for designating the detour distance. Notes The detour may be onger than the distance you specified. You can set up to five Via points. If you try to add a sixth point, then the [Deete] menu opens. It wi prompt you to deete a currenty seected point. If you add a Via point near your current position when adding points, then Avoid Highway may not be seected with the route search method in some cases. 27


364 Marked Point Up to 100 points can be stored. Each stored point is memorized with its name and icon, and shown on the map. POS ENTER 1 / 2 ENTER Marking your current position Press POS to dispay the current position Marking any point on the map Move ENTER to position the crosshair cursor on a point to be marked MENU ENTER seect 1 ENTER 2 ENTER ENTER Changing a marked point icon Open [Setup Menu] Marking Renaming a marked point (User POI) Seect Seect Deeting a marked point 28


365 3 ENTER ENTER Warning Stop your vehice before doing the foowing operations: Do not change the settings and destination ocations whie driving. Minimize the time spent viewing the monitor screen and istening to the voice guidance whie driving. Operating the system wi distract the driver from ooking ahead of the vehice and may cause an accident. Aways stop the vehice in a safe ocation and use the parking brake before operating the system. Note If the same point is stored in Marking Your Current Position, then it is registered with one oca name on the ist. If the same point is stored in different processes, for exampe, as in Marking Your Current Position and Marking Any Point on the Map, then two oca names, identica to each other, wi be shown on the ist. 3 ENTER ENTER Seect a marked point from the ist Seect an icon Enter a name Marking Information about the marked point appears. 29
366 Setup Warning The setting is a variabe to suit your preferences. Stop your vehice before the foowing operations Do not change the settings and destination ocations whie driving. Minimize the time spent viewing the monitor screen and istening to the voice guidance whie driving. Operating the system wi distract the driver from ooking ahead of the vehice and may cause an accident. Aways stop the vehice in a safe ocation and put the parking brake on before operating the system. 1 seect 2 MENU ENTER ENTER ENTER : Defaut Open [Setup Menu] Map setting ( page 31) Route setting ( page 32) ENTER System setting ( page 33) ( page 9) Map area, Map disc (DVD) version and software version appear. You can check your route from the starting point to the destination. This function is avaiabe after route setup is performed. ( page 28) ( page 28) You can change and deete marked points. On : Icons on a map. Off : No icon on a map. User setting Restoring defauts ENTER When the actua position of your vehice is different from the vehice position on a map Change the vehice position. ENTER ENTER Change the vehice direction. : Rotation in a cockwise direction by : Rotation in a countercockwise direction by
![Setup 1 2 Map MENU ENTER seect ENTER ENTER seect ENTER ENTER 3 ENTER : Defaut Open the [Map] screen Coor (daytime) Coor (nighttime) ENTER Map Direction North Up : Geographic north is aways up on the](/docs-images/74/70210956/images/367-1.jpg "map. Head Up : The direction you are going is aways up on the map. Vehice Position Center : The current vehice position indicator is dispayed in the center of the screen.")
367 Setup 1 2 Map MENU ENTER seect ENTER ENTER seect ENTER ENTER 3 ENTER : Defaut Open the [Map] screen Coor (daytime) Coor (nighttime) ENTER Map Direction North Up : Geographic north is aways up on the map. Head Up : The direction you are going is aways up on the map. Vehice Position Center : The current vehice position indicator is dispayed in the center of the screen. Off Ctr : The current vehice position indicator is dispayed at the bottom of the screen. POI Icon How to exit ENTER On : POI icons appear in their marked positions. Off : POI icons do not appear in their marked positions. Trace Mark On : The traced route is marked. Off : The traced route is not marked. User setting 31
![Setup 1 2 : Defaut Open the [Route] screen Route MENU ENTER seect ENTER ENTER seect ENTER ENTER 3 Detour (mie/km) The detouring distance is specified.](/docs-images/74/70210956/images/368-0.jpg "1 : 1 mie/km 10 : 10 mie/km 2 : 2 mie/km 20 : 20 mie/km 5 : 5 mie/km Auto Re-route ENTER On : Searching for another route is activated to go back to the origina route when you drive away from it.")
368 Setup 1 2 : Defaut Open the [Route] screen Route MENU ENTER seect ENTER ENTER seect ENTER ENTER 3 Detour (mie/km) The detouring distance is specified. 1 : 1 mie/km 10 : 10 mie/km 2 : 2 mie/km 20 : 20 mie/km 5 : 5 mie/km Auto Re-route ENTER On : Searching for another route is activated to go back to the origina route when you drive away from it. Off : No search takes pace. Usuay, this function shoud be set to [ON]. System Mode Map : The map mode Guide : The guide mode map Zoom On : The intersection zoom map appears automaticay when approaching an intersection. Off : The zoom function is not activated when approaching an intersection. Estimated Trave Time User setting On : The estimated trave time is announced by voice guidance, and dispayed on the current vehice map. Off : No announce How to exit ENTER 32
![Setup System MENU ENTER seect 1 2 ENTER seect ENTER 3 ENTER ENTER ENTER : Defaut Open the [System Setup] screen Voume contro (5 eves) Sets the voume for voice guidance and voice feedback*.](/docs-images/74/70210956/images/369-0.jpg "When the voume is set to 0, the voice is turned off. Beep ENTER On : Beep activated when pressing buttons in the remote contro. Off : Beep inactivated when pressing buttons in the remote contro.")
 How to exit ENTER On : Dayight saving time mode is enabed. (The navigation interna cock gains 1 hour).")
369 Setup System MENU ENTER seect 1 2 ENTER seect ENTER 3 ENTER ENTER ENTER : Defaut Open the [System Setup] screen Voume contro (5 eves) Sets the voume for voice guidance and voice feedback*. When the voume is set to 0, the voice is turned off. Beep ENTER On : Beep activated when pressing buttons in the remote contro. Off : Beep inactivated when pressing buttons in the remote contro. Voice Feedback* On : Activates voice feedback. Off : Cances voice feedback. Cock Language Changeover meter/mie Metric : Meters Engish : Mies Dayight Saving Time(Summer Time) How to exit ENTER On : Dayight saving time mode is enabed. (The navigation interna cock gains 1 hour). Off : Dayight saving time mode is disabed. * The operation status is announced by voice. (e.g. changing the map orientation, starting or terminating the route cacuation, staring or terminating the simuation, dispaying the maneuver ist.) User setting 33
A Word to Mazda Owners
 A Word to Mazda Owners Thank you for choosing a Mazda. We at Mazda design and buid vehices with compete customer satisfaction in mind. To hep ensure enjoyabe and troube-free operation of your Mazda, read
A Word to Mazda Owners
 A Word to Mazda Owners Thank you for choosing a Mazda. We at Mazda design and buid vehices with compete customer satisfaction in mind. To hep ensure enjoyabe and troube-free operation of your Mazda, read
A Word to Mazda Owners
 A Word to Mazda Owners Thank you for choosing a Mazda. We at Mazda design and buid vehices with compete customer satisfaction in mind. To hep ensure enjoyabe and troube-free operation of your Mazda, read
A Word to Mazda Owners
 A Word to Mazda Owners Thank you for choosing a Mazda. We at Mazda design and buid vehices with compete customer satisfaction in mind. To hep ensure enjoyabe and troube-free operation of your Mazda, read
Form No.8V88-EA-06G. Mazda5_8V88-EA-06G_Edition1 Page1 Monday, May :25 AM Black plate (1,1)
") Mazda5_8V88-EA-06G_Edition1 Page1 Monday, May 15 2006 9:25 AM Back pate (1,1) Mazda5_8V88-EA-06G_Edition1 Page2 Monday, May 15 2006 9:25 AM Back pate (2,1) Mazda5_8V88-EA-06G_Edition1 Page3 Monday, May
Mazda5_8V88-EA-06G_Edition1 Page1 Monday, May 15 2006 9:25 AM Back pate (1,1) Mazda5_8V88-EA-06G_Edition1 Page2 Monday, May 15 2006 9:25 AM Back pate (2,1) Mazda5_8V88-EA-06G_Edition1 Page3 Monday, May
Form No.8X72-EA-07C. CX-7_8X72-EA-07C_Edition1 Page1 Tuesday, February :16 AM Black plate (1,1)
") Form No.8X72-EA-07C CX-7_8X72-EA-07C_Edition1 Page1 Tuesday, February 6 2007 12:16 AM Back pate (1,1) Form No.8X72-EA-07C CX-7_8X72-EA-07C_Edition1 Page2 Tuesday, February 6 2007 12:16 AM Back pate (2,1)
Form No.8X72-EA-07C CX-7_8X72-EA-07C_Edition1 Page1 Tuesday, February 6 2007 12:16 AM Back pate (1,1) Form No.8X72-EA-07C CX-7_8X72-EA-07C_Edition1 Page2 Tuesday, February 6 2007 12:16 AM Back pate (2,1)
Form No.8T50-EA-04G. Mazda MPV_8T50-EA-04G_Edition1 Page1 Monday, June :58 PM Black plate (1,1)
") Mazda MPV_8T50-EA-04G_Edition1 Page1 Monday, June 28 2004 3:58 PM Back pate (1,1) Mazda MPV_8T50-EA-04G_Edition1 Page2 Monday, June 28 2004 3:58 PM Back pate (2,1) Mazda MPV_8T50-EA-04G_Edition1 Page3
Mazda MPV_8T50-EA-04G_Edition1 Page1 Monday, June 28 2004 3:58 PM Back pate (1,1) Mazda MPV_8T50-EA-04G_Edition1 Page2 Monday, June 28 2004 3:58 PM Back pate (2,1) Mazda MPV_8T50-EA-04G_Edition1 Page3
Form No.8T72-EA-04G. MX-5 Miata_8T72-EA-04G_Edition1 Page1 Wednesday, June :4 PM Black plate (1,1)
") MX-5 Miata_8T72-EA-04G_Edition1 Page1 Wednesday, June 9 2004 3:4 PM Back pate (1,1) MX-5 Miata_8T72-EA-04G_Edition1 Page2 Wednesday, June 9 2004 3:4 PM Back pate (2,1) MX-5 Miata_8T72-EA-04G_Edition1 Page3
MX-5 Miata_8T72-EA-04G_Edition1 Page1 Wednesday, June 9 2004 3:4 PM Back pate (1,1) MX-5 Miata_8T72-EA-04G_Edition1 Page2 Wednesday, June 9 2004 3:4 PM Back pate (2,1) MX-5 Miata_8T72-EA-04G_Edition1 Page3
A Word to Mazda Owners
 A Word to Mazda Owners Thank you for choosing a Mazda. We at Mazda design and build vehicles with complete customer satisfaction in mind. To help ensure enjoyable and trouble-free operation of your Mazda,
A Word to Mazda Owners
 A Word to Mazda Owners Thank you for choosing a Mazda. We at Mazda design and build vehicles with complete customer satisfaction in mind. To help ensure enjoyable and trouble-free operation of your Mazda,
Form No.8CL8-EC-12H. Mazda2_8CL8-EC-12H_Edition1 Page1 Thursday, June :15 AM Black plate (1,1)
") Mazda2_8CL8-EC-12H_Edition1 Page1 Thursday, June 21 2012 10:15 AM Black plate (1,1) Mazda2_8CL8-EC-12H_Edition1 Page2 Thursday, June 21 2012 10:15 AM Black plate (2,1) Mazda2_8CL8-EC-12H_Edition1 Page3
Mazda2_8CL8-EC-12H_Edition1 Page1 Thursday, June 21 2012 10:15 AM Black plate (1,1) Mazda2_8CL8-EC-12H_Edition1 Page2 Thursday, June 21 2012 10:15 AM Black plate (2,1) Mazda2_8CL8-EC-12H_Edition1 Page3
A Word to Mazda Owners
 A Word to Mazda Owners Thank you for choosing a Mazda. We at Mazda design and build vehicles with complete customer satisfaction in mind. To help ensure enjoyable and trouble-free operation of your Mazda,
A Word to Mazda Owners
 A Word to Mazda Owners Thank you for choosing a Mazda. We at Mazda design and build vehicles with complete customer satisfaction in mind. To help ensure enjoyable and trouble-free operation of your Mazda,
A Word to Mazda Owners
 A Word to Mazda Owners Thank you for choosing a Mazda. We at Mazda design and build vehicles with complete customer satisfaction in mind. To help ensure enjoyable and trouble-free operation of your Mazda,
Mazda MPV. Mazda MPV. Owner's Manual. Owner's Manual S06. Form No. 8S06-EA-03H (Part No C-04)
") Mazda MPV Owner's Manual Form No. 8S06-EA-03H (Part No. 9999-95-029C-04) 2004 8S06 2004 Mazda MPV Owner's Manual A Word to Mazda Owners Thank you for choosing a Mazda. We at Mazda design and build vehicles
Mazda MPV Owner's Manual Form No. 8S06-EA-03H (Part No. 9999-95-029C-04) 2004 8S06 2004 Mazda MPV Owner's Manual A Word to Mazda Owners Thank you for choosing a Mazda. We at Mazda design and build vehicles
Thank you for choosing a Mazda. We at Mazda design and build vehicles with complete customer satisfaction in mind.
 J54L_8R34_EE_02H.BOOK Page 1 Monday, July 15, 2002 9:03 AM A Word to Mazda Owners Thank you for choosing a Mazda. We at Mazda design and build vehicles with complete customer satisfaction in mind. To help
Form No.8CM4-EC-12F. MX-5_8CM4-EC-12F_Edition2 Page1 Wednesday, September :34 PM Black plate (1,1)
") MX-5_8CM4-EC-12F_Edition2 Page1 Wednesday, September 5 2012 1:34 PM Black plate (1,1) MX-5_8CM4-EC-12F_Edition2 Page2 Wednesday, September 5 2012 1:34 PM Black plate (2,1) MX-5_8CM4-EC-12F_Edition2 Page3
MX-5_8CM4-EC-12F_Edition2 Page1 Wednesday, September 5 2012 1:34 PM Black plate (1,1) MX-5_8CM4-EC-12F_Edition2 Page2 Wednesday, September 5 2012 1:34 PM Black plate (2,1) MX-5_8CM4-EC-12F_Edition2 Page3
A Word to Mazda Owners
 A Word to Mazda Owners Thank you for choosing a Mazda. We at Mazda design and build vehicles with complete customer satisfaction in mind. To help ensure enjoyable and trouble-free operation of your Mazda,
USER INSTRUCTIONS USER INSTRUCTIONS. Innovative Car Alarm. Thatcham M.I.R.R.C. Evaluation No: TC2-1065/0199
 USER INSTRUCTIONS USER INSTRUCTIONS Innovative Car Aarm Thatcham M.I.R.R.C. Evauation No: TC2-1065/0199 IMPORTANT WARNING The Cobra 7928/26/HF Aarm Immobiiser is a Category 1 MIRRC Thatcham isted security
Use the emergency flashers if the vehicle malfunctions or is involved in an accident. ITO51P101
 Emergency fashers Use the emergency fashers if the vehice mafunctions or is invoved in an accident. Press the switch to fash a the turn signa ights. To turn them off, press the switch once again. ITO51P101
A Word to Mazda Owners 001-1A1E
 A Word to Mazda Owners 001-1A1E Thank you for choosing a Mazda. We at Mazda design and build vehicles with complete customer satisfaction in mind. To help ensure enjoyable and trouble-free operation of
INSTRUCTION MANUAL LITHIUM-ION POLYMER MINI JUMP STARTER (KIT SET) SC POWER SCB22
 SC POWER SCB22") INSTRUCTION MANUAL LITHIUM-ION POLYMER MINI JUMP STARTER (KIT SET) Technica Specifications SCB22 Battery Type: Lithium-Ion Poymer Battery Capacity: 2200 mah (12V DC) Crancking Ampere: 220 A Peak Current:
INSTRUCTION MANUAL LITHIUM-ION POLYMER MINI JUMP STARTER (KIT SET) Technica Specifications SCB22 Battery Type: Lithium-Ion Poymer Battery Capacity: 2200 mah (12V DC) Crancking Ampere: 220 A Peak Current:
Seat, seatbelt and SRS airbags
 Front seats... 1-2 Manual seat (if equipped)... 1-3 Power seat (if equipped)... 1-4 Head restraint adjustment... 1-8 Seat heater (if equipped)... 1-8 Rear seats... 1-9 Reclining the seatback (Outback)...
Seat, seatbelt and SRS airbags
 Front seats... 1-2 Forward and backward adjustment... 1-3 Reclining the seatback... 1-4 Seat cushion height adjustment (driver s seat)... 1-4 Head restraint adjustment... 1-5 Seat heater (if equipped)...
Seat, seatbelt and SRS airbags
 Front seats... 1-2 Manual seat (if equipped)... 1-4 Power seat (if equipped)... 1-5 Head restraint adjustment... 1-8 Seat heater (if equipped)... 1-9 Front seat heater (if equipped)... 1-10 Rear seat heater
Correct driving posture
 Correct driving posture Drive with a good posture as follows: Sit upright and well back in the seat. Adjust the position of the seat forward or backward to ensure the pedals can be reached and easily depressed
Table of Contents. Specifications Index
 Table of Contents Your Vehicle at a Glance Essential Safety Equipment Knowing Your Mazda Protecting Your Mazda Including Information on Trailer Towing (page 4-18) Driving Your Mazda In Case of Emergency
SECTION 1 6 INSTRUMENTS AND CONTROLS. Comfort adjustment
 SECTION 1 6 INSTRUMENTS AND CONTROLS Comfort adjustment Front seats............................................... 54 Head restraints........................................... 57 Tilt and telescopic steering
Correct driving posture
 Correct driving posture Drive with a good posture as follows: Sit upright and well back in the seat. Adjust the position of the seat forward or backward to ensure the pedals can be reached and easily depressed
Correct driving posture
 Correct driving posture Drive in a good posture as follows: Sit upright and well back in the seat. ( P. 22) Adjust the position of the seat forward or backward to ensure the pedals can be reached and easily
Body Length: 21.5cm. Overall Height: 8.5cm. Main Rotor Dia: 19cm. Name Quantity Name Quantity. Helicopter 1 Remote Control!
 CONGRATULATIONS ON OWNING THE. SPEED master mini RIC HELICCPTERI THE ULTIMATE INDOOR OUTDOOR MINI HELICOPTER IMPORTANT: For ages 14+ ony! This product is not a toy. To ensure safety, this manua must be
SECTION 1 6 INSTRUMENTS AND CONTROLS. Comfort adjustment. Front seat... 42
 SECTION 1 6 INSTRUMENTS AND CONTROLS Comfort adjustment Front seat................................................ 42 Headrests............................................... 44 Tilt and telescopic steering
1-7. Safety information Correct driving posture. Drive with a good posture as follows:
 Correct driving posture Drive with a good posture as follows: Sit upright and well back in the seat. ( P. 53) Adjust the position of the seat forward or backward to ensure the pedals can be reached and
Operating instructions CI24RP.. CI30RP..
 Operating instructions en CI24RP.. CI30RP.. Tabe of Contents Congratuations.................................................................................. 3 Safety and warning information......................................................................
Fenix TK65R Flashlight
 BrightGuy.com is an authorized Fenix Distributor Fenix TK65R Fashight 1. Cataput action bet cip 2. Quick-reease button Technica Parameters ANSI/PLATO Genera Mode Fash Mode FL1 Turbo High Med Low Eco Strobe
2005 Saturn ION Owner Manual M
 2005 Saturn ION Owner Manual M Seats and Restraint Systems... 1-1 Front Seats... 1-2 Rear Seats... 1-9 Safety Belts... 1-10 Child Restraints... 1-30 Airbag System... 1-49 Restraint System Check... 1-59
2006 Chevrolet Equinox Owner Manual M
 2006 Chevrolet Equinox Owner Manual M Seats and Restraint Systems... 1-1 Front Seats... 1-2 Rear Seats... 1-10 Safety Belts... 1-12 Child Restraints... 1-30 Airbag System... 1-53 Restraint System Check...
SECTION 1 3 OPERATION OF INSTRUMENTS AND CONTROLS Occupant restraint systems
 OPERATION OF INSTRUMENTS AND CONTROLS Occupant restraint systems SECTION 1 3 Seats...................................................... 24 Front seats.................................................
SECTION 2 2 OPERATION OF INSTRUMENTS AND CONTROLS. Occupant restraint systems. Front seats Fold down rear seat Head restraints...
 OPERATION OF INSTRUMENTS AND CONTROLS Occupant restraint systems SECTION 2 2 Seats...................................................... 52 Front seats.................................................
Seat, seatbelt and SRS airbags
 Front seats... 1-2 Fore and aft adjustment... 1-3 Reclining the seatback... 1-4 Seat height adjustment (driver s seat)... 1-5 Lumbar support... 1-5 Head restraint adjustment... 1-6 Active head restraint...
2005 Chevrolet Malibu Owner Manual M
 2005 Chevrolet Malibu Owner Manual M Seats and Restraint Systems... 1-1 Front Seats... 1-2 Rear Seats... 1-8 Safety Belts... 1-10 Child Restraints... 1-33 Airbag System... 1-60 Restraint System Check...
&OPERATOR S MANUAL BCIOOO BAGGER CART. +-I HONDA DEALER: PLEASE GIVE THIS PUBLICATION TO YOUR CUSTOMERl-+- I I I I I I I I I I I I I I I I I I I I
 &OPERATOR S MANUAL BCIOOO BAGGER CART I I I I I I I I I I I I I I I I I I I I +-I HONDA DEALER: PLEASE GIVE THIS PUBLICATION TO YOUR CUSTOMER-+- -- A FEW WORDS ABOUT SAFETY Your safety and the safety
User Manual. 12 Volt Battery Charger THIS MANUAL CONTAINS IMPORTANT SAFETY AND OPERATING INSTRUCTIONS READ ENTIRE INSTRUCTION BEFORE USE
 User Manua 12 Vot Battery Charger Pus Battery maintainer and Rejuvenator THIS MANUAL CONTAINS IMPORTANT SAFETY AND OPERATING INSTRUCTIONS READ ENTIRE INSTRUCTION BEFORE USE Mode No. 60134 / 60138 1 WARNING
2006 Chevrolet Colorado Owner Manual M
 2006 Chevrolet Colorado Owner Manual M Seats and Restraint Systems... 1-1 Front Seats... 1-2 Rear Seats... 1-10 Safety Belts... 1-13 Child Restraints... 1-34 Airbag System... 1-63 Restraint System Check...
2006 Buick Allure Owner Manual M
 2006 Buick Allure Owner Manual M Seats and Restraint Systems... 1-1 Front Seats... 1-2 Rear Seats... 1-8 Safety Belts... 1-9 Child Restraints... 1-30 Airbag System... 1-53 Restraint System Check... 1-68
2006 Buick Lucerne Owner Manual M
 2006 Buick Lucerne Owner Manual M Seats and Restraint Systems... 1-1 Front Seats... 1-2 Rear Seats... 1-10 Safety Belts... 1-10 Child Restraints... 1-30 Airbag System... 1-52 Restraint System Check...
2005 Saturn VUE Owner Manual M
 2005 Saturn VUE Owner Manual M Seats and Restraint Systems... 1-1 Front Seats... 1-2 Rear Seats... 1-9 Safety Belts... 1-10 Child Restraints... 1-30 Airbag System... 1-48 Restraint System Check... 1-58
2006 Cadillac STS/STS-V Owner Manual M
 2006 Cadillac STS/STS-V Owner Manual M Seats and Restraint Systems... 1-1 Front Seats... 1-2 Rear Seats... 1-7 Safety Belts... 1-8 Child Restraints... 1-26 Airbag System... 1-48 Restraint System Check...
2006 Pontiac Grand Prix Owner Manual M
 2006 Pontiac Grand Prix Owner Manual M Seats and Restraint Systems... 1-1 Front Seats... 1-2 Rear Seats... 1-9 Safety Belts... 1-10 Child Restraints... 1-30 Airbag System... 1-54 Restraint System Check...
2005 Buick LeSabre Owner Manual M
 2005 Buick LeSabre Owner Manual M Seats and Restraint Systems... 1-1 Front Seats... 1-2 Safety Belts... 1-8 Child Restraints... 1-28 Airbag System... 1-47 Restraint System Check... 1-56 Features and Controls...
2005 Chevrolet Equinox Owner Manual M
 2005 Chevrolet Equinox Owner Manual M Seats and Restraint Systems... 1-1 Front Seats... 1-2 Rear Seats... 1-9 Safety Belts... 1-11 Child Restraints... 1-31 Air Bag System... 1-52 Restraint System Check...
SECTION 1 1 OPERATION OF INSTRUMENTS AND CONTROLS 00CAMRY CNG (L/O9908) Overview of instruments and controls
 Overview of instruments and controls") OPERATION OF INSTRUMENTS AND CONTROLS Overview of instruments and controls SECTION 1 1 Instrument panel overview..................................... 2 Instrument cluster overview....................................
OPERATION OF INSTRUMENTS AND CONTROLS Overview of instruments and controls SECTION 1 1 Instrument panel overview..................................... 2 Instrument cluster overview....................................
2007 Saturn AURA Owner Manual M
 2007 Saturn AURA Owner Manual M Seats and Restraint Systems... 7 Front Seats... 9 Rear Seats... 16 Safety Belts... 18 Child Restraints... 40 Airbag System... 69 Restraint System Check... 88 Features and
GODREJ & BOYCE MFG. CO. LTD.
 GODREJ & BOYCE MFG. CO. LTD. POCKET GUIDE FOR FORKLIFT TRUCK OPERATORS MATERIAL HANDLING EQUIPMENT DIVISION GODREJ & BOYCE MFG. CO. LTD. TO ALL FORKLIFT TRUCK OPERATORS Dear Friends, This booket is speciay
2007 Chevrolet Aveo Owner Manual M
 2007 Chevrolet Aveo Owner Manual M Seats and Restraint Systems... 7 Front Seats... 8 Rear Seats... 13 Safety Belts... 20 Child Restraints... 41 Airbag System... 68 Restraint System Check... 84 Features
2006 Buick LaCrosse Owner Manual M
 2006 Buick LaCrosse Owner Manual M Seats and Restraint Systems... 1-1 Front Seats... 1-2 Rear Seats... 1-7 Safety Belts... 1-8 Child Restraints... 1-28 Airbag System... 1-53 Restraint System Check... 1-67
Seat, seatbelt and SRS airbags
 Front seats... 1-2 Fore and aft adjustment... 1-3 Reclining the seatback... 1-4 Seat cushion height adjustment (driver s seat)... 1-5 Head restraint adjustment (if equipped)... 1-5 Active head restraint
2005 Chevrolet Express Owner Manual M
 2005 Chevrolet Express Owner Manual M Seats and Restraint Systems... 1-1 Front Seats... 1-3 Rear Seats... 1-6 Safety Belts... 1-10 Child Restraints... 1-31 Airbag System... 1-59 Restraint System Check...
2007 GMC Canyon Owner Manual M
 2007 GMC Canyon Owner Manual M Seats and Restraint Systems... 7 Front Seats... 9 Rear Seats... 17 Safety Belts... 20 Child Restraints... 43 Airbag System... 76 Restraint System Check... 94 Features and
2006 Chevrolet Express Owner Manual M
 2006 Chevrolet Express Owner Manual M Seats and Restraint Systems... 1-1 Front Seats... 1-2 Rear Seats... 1-5 Safety Belts... 1-9 Child Restraints... 1-30 Airbag System... 1-65 Restraint System Check...
2005 Pontiac Grand Prix Owner Manual M
 2005 Pontiac Grand Prix Owner Manual M Seats and Restraint Systems... 1-1 Front Seats... 1-2 Rear Seats... 1-8 Safety Belts... 1-10 Child Restraints... 1-29 Airbag System... 1-48 Restraint System Check...
Seat belts Seat belt precautions
 ! CAUTION Use control for persons who are mentioned below in the use of the seat heater because it may make them feel too hot or cause burns at low temperatures (erythema, varicella). Baby, small child,
ANTILOCK BRAKE SYSTEM
 SECTION 4F ANTILOCK BRAKE SYSTEM Caution: Disconnect the negative battery cabe before removing or instaing any eectrica unit or when a too or equipment coud easiy come in contact with exposed eectrica
Airbags SAFETY INFORMATION. Your vehicle is equipped with several types of airbags: front airbags, side airbags, and side curtain airbags.
 Airbags Your vehicle is equipped with several types of airbags: front airbags, side airbags, and side curtain airbags. Front Airbags (SRS) The front SRS airbags inflate in a moderate-to-severe frontal
2007 Chevrolet Equinox Owner Manual M
 2007 Chevrolet Equinox Owner Manual M Seats and Restraint Systems... 7 Front Seats... 8 Rear Seats... 17 Safety Belts... 19 Child Restraints... 43 Airbag System... 72 Restraint System Check... 90 Features
2006 Buick Terraza Owner Manual M
 2006 Buick Terraza Owner Manual M Seats and Restraint Systems... 1-1 Front Seats... 1-2 Rear Seats... 1-6 Safety Belts... 1-14 Child Restraints... 1-34 Airbag System... 1-57 Restraint System Check... 1-72
2006 Chevrolet Cobalt Owner Manual M
 2006 Chevrolet Cobalt Owner Manual M Seats and Restraint Systems... 1-1 Front Seats... 1-2 Rear Seats... 1-8 Safety Belts... 1-9 Child Restraints... 1-29 Airbag System... 1-51 Restraint System Check...
2005 Pontiac Grand Prix Owner Manual M
 2005 Pontiac Grand Prix Owner Manual M Seats and Restraint Systems... 1-1 Front Seats... 1-2 Rear Seats... 1-8 Safety Belts... 1-10 Child Restraints... 1-29 Airbag System... 1-48 Restraint System Check...
2004 Chevrolet Colorado Owner Manual M
 2004 Chevrolet Colorado Owner Manual M Seats and Restraint Systems... 1-1 Front Seats... 1-3 Rear Seats... 1-8 Safety Belts... 1-10 Child Restraints... 1-31 Air Bag Systems... 1-62 Restraint System Check...
2005 Pontiac Bonneville Owner Manual M
 2005 Pontiac Bonneville Owner Manual M Seats and Restraint Systems... 1-1 Front Seats... 1-2 Safety Belts... 1-7 Child Restraints... 1-28 Airbag System... 1-47 Restraint System Check... 1-56 Features and
2005 Chevrolet Colorado Owner Manual M
 2005 Chevrolet Colorado Owner Manual M Seats and Restraint Systems... 1-1 Front Seats... 1-3 Rear Seats... 1-8 Safety Belts... 1-11 Child Restraints... 1-32 Airbag System... 1-61 Restraint System Check...
2005 Chevrolet Cobalt Owner Manual M
 2005 Chevrolet Cobalt Owner Manual M Seats and Restraint Systems... 1-1 Front Seats... 1-2 Rear Seats... 1-8 Safety Belts... 1-9 Child Restraints... 1-29 Airbag System... 1-48 Restraint System Check...
Chevrolet Equinox Fuel Cell Owner Manual M
 Chevrolet Equinox Fuel Cell Owner Manual M Seats and Restraint Systems... 1-1 Front Seats... 1-2 Rear Seats... 1-10 Safety Belts... 1-12 Child Restraints... 1-32 Airbag System... 1-54 Restraint System
2006 Chevrolet Uplander Owner Manual M
 2006 Chevrolet Uplander Owner Manual M Seats and Restraint Systems... 1-1 Front Seats... 1-2 Rear Seats... 1-6 Safety Belts... 1-21 Child Restraints... 1-40 Airbag System... 1-74 Restraint System Check...
TK35UE 2018 Flashlight
 TK35UE 2018 Fashight Technica Parameters ANSI/PLATO FL1 Genera Mode Fash Mode Turbo High Med Low Eco Strobe SOS Output Tactica Mode Outdoor Mode 3200 2000 1000 350 100 20 3200 100 1h 30min 2h 3h 40min
2007 GMC Savana Owner Manual M
 2007 GMC Savana Owner Manual M Seats and Restraint Systems... 7 Front Seats... 9 Rear Seats... 13 Safety Belts... 17 Child Restraints... 41 Airbag System... 78 Restraint System Check... 98 Features and
TANK - S ELECTRICAL SYSTEM
 TANK - S ELECTRICAL SYSTEM Mode Year 2009 TANK - S ELECTRICAL SYSTEM TABLE OF CONTENTS: PAGE 3 ) PIMARY WIRE COLOR DESIGNATION: Red. Green. Orange. Yeow. Bue. PRIMARY COMPONENTS: Battery. Fuses. Seat Switch.
2006 HUMMER H2 Owner Manual M
 2006 HUMMER H2 Owner Manual M Seats and Restraint Systems... 1-1 Front Seats... 1-2 Rear Seats... 1-6 Safety Belts... 1-16 Child Restraints... 1-34 Airbag System... 1-61 Restraint System Check... 1-72
Airbags SAFETY INFORMATION
 Airbags Your vehicle is equipped with several types of airbags: front airbags, front knee airbags, side airbags, and side curtain airbags. Front Airbags (SRS) The front SRS airbags inflate in a moderate-to-severe
2005 Chevrolet Kodiak Owner Manual M
 2005 Chevrolet Kodiak Owner Manual M Seats and Restraint Systems... 1-1 Front Seats... 1-2 Rear Seats... 1-8 Safety Belts... 1-9 Child Restraints... 1-27 Airbag System... 1-48 Restraint System Check...
2006 Buick Rendezvous Owner Manual M
 2006 Buick Rendezvous Owner Manual M Seats and Restraint Systems... 1-1 Front Seats... 1-3 Rear Seats... 1-8 Safety Belts... 1-22 Child Restraints... 1-45 Airbag System... 1-72 Restraint System Check...
2005 Chevrolet Blazer Owner Manual M
 2005 Chevrolet Blazer Owner Manual M Seats and Restraint Systems... 1-1 Front Seats... 1-2 Rear Seats... 1-6 Safety Belts... 1-8 Child Restraints... 1-29 Airbag System... 1-50 Restraint System Check...
2006 GMC Yukon Denali, Yukon XL Denali M
 2006 GMC Yukon Denali, Yukon XL Denali M Seats and Restraint Systems... 1-1 Front Seats... 1-2 Rear Seats... 1-7 Safety Belts... 1-27 Child Restraints... 1-48 Airbag System... 1-74 Restraint System Check...
2006 Cadillac DTS Owner Manual M
 2006 Cadillac DTS Owner Manual M Seats and Restraint Systems... 1-1 Front Seats... 1-2 Rear Seats... 1-8 Safety Belts... 1-10 Child Restraints... 1-32 Airbag System... 1-55 Restraint System Check... 1-71
2006 Chevrolet Impala Owner Manual M
 2006 Chevrolet Impala Owner Manual M Seats and Restraint Systems... 1-1 Front Seats... 1-2 Rear Seats... 1-8 Safety Belts... 1-11 Child Restraints... 1-32 Airbag System... 1-54 Restraint System Check...
VS235XR / VS255XR. Rechargeable backup battery capability 3-channel transmitter With rolling code & code learning technology. STANDARD FEATURES l
 VS235XR / VS255XR Sef-Contained, RF Remote-Controed Vehice Security System Rechargeabe backup battery capabiity 3-channe transmitter With roing code & code earning technoogy CBA STANDARD FEATURES RF Remote
2005 HUMMER H2 Owner Manual M
 2005 HUMMER H2 Owner Manual M Seats and Restraint Systems... 1-1 Front Seats... 1-2 Rear Seats... 1-7 Safety Belts... 1-16 Child Restraints... 1-36 Airbag System... 1-58 Restraint System Check... 1-69
2004 Chevrolet Malibu Owner Manual M
 2004 Chevrolet Malibu Owner Manual M Seats and Restraint Systems... 1-1 Front Seats... 1-2 Rear Seats... 1-7 Safety Belts... 1-10 Child Restraints... 1-31 Air Bag Systems... 1-52 Restraint System Check...
2007 Pontiac G6 Owner Manual M
 2007 Pontiac G6 Owner Manual M Seats and Restraint Systems... 7 Front Seats... 9 Rear Seats... 20 Safety Belts... 22 Child Restraints... 46 Airbag System... 78 Restraint System Check... 97 Features and
2004 Chevrolet Optra Owner Manual M
 2004 Chevrolet Optra Owner Manual M Seats and Restraint Systems... 1-1 Front Seats... 1-2 Rear Seats... 1-8 Safety Belts... 1-10 Child Restraints... 1-29 Air Bag Systems... 1-51 Restraint System Check...
2006 Pontiac G6 Owner Manual M
 2006 Pontiac G6 Owner Manual M Seats and Restraint Systems... 1-1 Front Seats... 1-2 Rear Seats... 1-12 Safety Belts... 1-14 Child Restraints... 1-34 Airbag System... 1-62 Restraint System Check... 1-77
30 Electric ding. IMPORTANT: Read and save these instructions. ALL RANGES CAN TIP INJURY TO PERSONS COULD RESULT SEE INSTALLATION INSTRUCTIONS
 Part No. 9752387 ALL RANGES CAN TIP INJURY TO PERSONS COULD RESULT INSTALL ANTI-TIP DEVICE PACKED WITH RANGE SEE INSTALLATION INSTRUCTIONS 30 Eectric ding IMPORTANT: Read and save these instructions. IMPORTANT:
2006 Chevrolet Kodiak Owner Manual M
 2006 Chevrolet Kodiak Owner Manual M Seats and Restraint Systems... 1-1 Front Seats... 1-2 Rear Seats... 1-8 Safety Belts... 1-9 Child Restraints... 1-28 Airbag System... 1-50 Restraint System Check...
2005 Buick Terraza Owner Manual M
 2005 Buick Terraza Owner Manual M Seats and Restraint Systems... 1-1 Front Seats... 1-3 Rear Seats... 1-7 Safety Belts... 1-16 Child Restraints... 1-34 Airbag System... 1-54 Restraint System Check... 1-67
Spirit TM from Peugeot and Allied Fleet Driving for Perfection. Peugeot Spirit TM
 Spirit TM from Peugeot and Aied Feet Driving for Perfection Peugeot Spirit TM 2 Fuy automatic interna ift Spacious rear compartment High quaity restraint system Passenger comfort Space and Fexibiity Avaiabe
Part 1 OPERATION OF INSTRUMENTS AND CONTROLS
 Part 1 OPERATION OF INSTRUMENTS AND CONTROLS Chapter 1 1 Overview of instruments and controls Instrument panel overview Instrument cluster overview Indicator symbols on the instrument panel 1 Instrument
expandable booster Instruction Manual US Version
 expandable booster Instruction Manual US Version product: monterey XT expandable booster model series: 108000 mfg. by: Diono US 14810 Puyallup Street E Suite 200 Sumner, WA 98390 Customer Care Tel: 1 855
CENTRAL PARK - 4 Leg Swing Set
 CENTRAL PARK - 4 Leg Swing Set Mode #: 94444 Assembed dimensions are 134" x 93" x 74". Aow 6-12 ft of cearance around the perimeter of the swing set area when fuy assembed. OWNER'S MANUAL, ASSEMBLY INSTRUCTIONS,
2004 HUMMER H2 Owner Manual M
 2004 HUMMER H2 Owner Manual M Seats and Restraint Systems... 1-1 Front Seats... 1-2 Rear Seats... 1-6 Safety Belts... 1-16 Child Restraints... 1-37 Air Bag System... 1-60 Restraint System Check... 1-71
FOREWORD WARNING. of your vehicle.
 FOREWORD Your INFINITI represents a new way of thinking about vehicle design. It integrates advanced engineering and superior craftsmanship with a simple, refined aesthetic sensitivity associated with