NNG-Honda 3. Navigation interface for New Honda Accord/Odyssey NTV-KIT555/584 NTV-DOC225
|
|
|
- Derek Williams
- 6 years ago
- Views:
Transcription


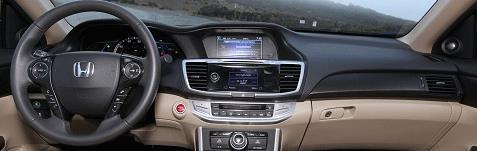


1 3950 NW 120 th Ave, Coral Springs, FL TEL FAX NNG-Honda 3 Navigation interface for New Honda Accord/Odyssey NTV-KIT555/584 NTV-DOC225
2 This is a NEW VERSION (HONDA 3) for Honda Accord and Odyssey. Please pay attention to this installation guide as MOST COMPONENTS HAVE CHANGED. DO NOT MIX WITH COMPONENTS FROM PREVIOUS VERSION AS DAMAGES MIGHT OCCUR. WARRANTY DISCLAIMER NOTICE! Radio removal, disassembly, installation of Navigation Electronics, and Radio re-assembly / re-installation is the responsibility of the installer. It is recommended that you contact a professional installer that is experienced with proper work methods involving electronics and knowledgeable of specific procedures for radio disassembly, Navigation Electronics installation, and reassembly / re-installation of the Radio Head Unit in the vehicle. INSTALLATION DAMAGE TO THE VEHICLE RADIO HEAD UNIT IS EXPRESSLY NOT COVERED UNDER THE PRODUCT WARRANTY. To avoid dangerous distractions that may lead to an accident, the driver should never operate the system while the vehicle is in motion. Before installing the product, the seller should inform the end-user of proper use and compliance with the proper instructions and all states and federal laws. Before beginning your installation, familiarize yourself with the installation instructions and the Navigation system components. CAUTION: It is advisable to disconnect the negative battery cable for 3 minutes before beginning installation, to avoid unintended air bag deployment. Note and record any anti-theft radio codes prior to disconnecting. Honda Navigation Add-on System General Note 1. This is a newer version (HONDA 3) for Accord and Odyssey, please check with application list for confirmed vehicle before any work. 2. Touch panel part numbers: Accord #TSACC919 Odyssey #TSODY Only one (1) video connection to the side of the factory LCD screen. DO NOT BE CONFUSED WITH THE PREVIOUS VERSION. Power connector is connected to Radio 20-pins plug. 4. There are OPTIONAL camera input and camera power for aftermarket camera. 5. Reverse trigger wire is NOT USED for this kit. 6. AD-Key and 3.5mm Audio Out wires are NOT USED. 7. Honda factory display screen is NOT A TOUCH SCREEN. Installer needs to remove the factory clear panel for completing the installation. 1 P a g e

3 Review the overall wire connections in the figure above HONDA-3 Component list 1. GPS Module 2. Main Harness HONDA3-20PIN ** 3. Touch Panel with TP-IN see touch panel part number for accord / odyssey 4. Display Y Cable GVIF Audio Switch Box 6. Video Switch Box 7. LCD Cable 8. GPS Antenna 9. Lane Departure Warning Module (optional) ** Please see the connection diagram in next page for extra NOT USED wires ** 2 P a g e
 3 P a")
4 or - (not used) 3 P a g e
 Connect Display Y Cable at the side of screen")

 3.")
5 Connect HONDA3-20PIN main T-harness to radio (DO NOT CONNECT DISPLAY Y CABLE HERE) Connect Display Y Cable at the side of screen See instruction below for dip switch settings DIP Switch Settings 1. DIP switches 1 6 are OFF by default 2. Turn DIP switch 5 to ON if the vehicle has NO side camera (Lane Watch Camera) 3. Turn DIP switch 6 to ON while system is power on for touch screen calibration 4 P a g e


6 Accord Touch Panel Installation (*beware of the differences from Odyssey) Remove factory clear lens FIRST, do not reinstall! Lift clips on top and bottom of the screen housing to remove display screen Align the supplied touch panel to the top of screen as indicated Notice the touch panel ribbon cable for Accord is at the TOP of screen. Using the screen housing to secure the panel (Do not use adhesive tape or glue) 5 P a g e

 Remove factory")

 the display")


7 Odyssey Touch Panel Installation (*beware of the differences from Accord) Remove factory clear lens FIRST, do not reinstall! Remove screws from top (2) and behind (4) the display screen to remove screen housing Remove the frame from screen Place touch panel as indicated Orient the touch panel as indicated Reinstall the frame and center the panel Route cable as shown between components Secure the cable at the back of display screen 6 P a g e


8 GPS Audio Integration for Factory Equipped External Amp By default, this system is wired for factory radio with internal amp (non-touch screen radio). If you are installing this system to premium sound radio with touch screen, you will have to do the following modification to the wiring in order to avoid pop and overly amplified GPS audio. 1. Located the factory external amp For Accord and Odyssey, the external amp is normally located at the upper side of the PASSENGER kick panel For Accord Hybrid, the external amp is normally located at the upper side of the DRIVER kick panel behind the fuse box 2. Cut the 4-pin wire from main harness and leave about minimum 2 wires for future connections 3. Connect wires as indicated below. Connect the plug with open wires to the Audio Switch Box 4. Locate the stereo amp connector (18-pin), cut PIN 6 (pink) and PIN 13 (light green) wires with minimum 2 from the plug 5. Connect wires as indicated below 7 P a g e
9 (Or) 'BACK-DET' (Or) Right Turn Signal ACC+ (Black) Trigger + (Red) Right Turn Signal - (Green) BACK-DET (Or) 8 P a g e


10 Honda Crosstour LDW and Reverse wires CROSSTOUR reverse wire at dash fuse box CROSSTOUR right turn wire in steering column Honda Odyssey LDW and Reverse wires ODYSSEY reverse wire at dash fuse box ODYSSEY right turn wire in steering column 9 P a g e
11 Trouble Shooting Please follow all the steps in this installation manual, failure to do so might void the product warranty and damage the factory radio Power Display Navigation system should have (2) led lights on the module box for indication of power and data connections. No Display 1. There are two led lights at the GPS module to indicate data and power. If led lights are OFF and radio is ON, check the power fuse inside the black box from the main harness 2. Check all wiring connectors for any loose connection 3. Check all wiring shielding for any damage during the installation process 4. Check all wiring for any type of damage 5. Check display Y cables for loose, misalignment, or damage No Touch Response 1. Check NAV mode ONLY for touch responses 2. Check led lights for power and data indications 3. Check Display Switch Box connections for any loose connection, or damage No GPS software loaded, touch screen alignment screen occurred Sound 1. Check map SD card at GPS module, see any sign of missing, loose, pop-out, misalignment, or damage 2. Turn on DIP switch 6 to activate touch panel calibration and check for improvement 1. Check all cable for connections to Audio Box for loose, or damage 2. Check software volume settings, ensure volume is not muted 3. Check connections at radio for loose, damaged wires 10 P a g e
* Premium Audio equipped vehicles will require additional part # DP-HD0822P audio interface NOTICE OF INTENDED INSTALLATION AND USE
 * Premium Audio equipped vehicles will require additional part # DP-HD0822P audio interface NOTICE OF INTENDED INSTALLATION AND USE THE ROSEN MULTI-MEDIA NAVIGATION SYSTEMS CONTAIN AN INTERNAL VIDEO PLAYER,
For additional technical tips, please visit
 NOTICE OF INTENDED INSTALLATION AND USE THE ROSEN MULTI-MEDIA NAVIGATION SYSTEMS CONTAIN AN INTERNAL VIDEO PLAYER, WHICH IS NOT INTENDED FOR VIEWING BY THE DRIVER. THE VIDEO PLAYER IS DISABLED WHEN THE
For additional technical tips, please visit
 NOTICE OF INTENDED INSTALLATION AND USE THE ROSEN MULTI-MEDIA NAVIGATION SYSTEMS CONTAIN AN INTERNAL VIDEO PLAYER, WHICH IS NOT INTENDED FOR VIEWING BY THE DRIVER. THE VIDEO PLAYER IS DISABLED WHEN THE
PCM3.1 XG-CAM NTV-KIT375/383/384/385
 3950 NW 120 th Ave, Coral Springs, FL 33065 TEL 561-955-9770 FAX 561-955-9760 www.nav-tv.com info@nav-tv.com PCM3.1 XG-CAM NTV-KIT375/383/384/385 Overview The PCM3.1 XG-CAM integrates an aftermarket camera
* JBL Audio equipped vehicles will require additional part # DP-TYJBL1 audio interface NOTICE OF INTENDED INSTALLATION AND USE
 * JBL Audio equipped vehicles will require additional part # DP-TYJBL1 audio interface NOTICE OF INTENDED INSTALLATION AND USE THE ROSEN MULTI-MEDIA NAVIGATION SYSTEMS CONTAIN AN INTERNAL VIDEO PLAYER,
PCM3.1 XG-CAM NTV-KIT375/383/384/385
 3950 NW 120 th Ave, Coral Springs, FL 33065 TEL 561-955-9770 FAX 561-955-9760 www.nav-tv.com info@nav-tv.com PCM3.1 XG-CAM NTV-KIT375/383/384/385 Overview The PCM3.1 XG-CAM integrates an aftermarket camera
Mazda-CAM 2. Reverse camera kit for select Mazda NTV-KIT812 BHM 04/06/17 NTV-DOC294
 3950 NW 120 th Ave, Coral Springs, FL 33065 TEL 561-955-9770 FAX 561-955-9760 Mazda-CAM 2 Reverse camera kit for select Mazda NTV-KIT812 BHM Overview The Mazda-CAM 2 integrates a single reverse camera
 INSTALLATION INSTRUCTIONS Accessory Application Publications No. All 38163 XM SATELLITE RADIO SYSTEM 2008 ODYSSEY Issue Date OCT 2007 PARTS LIST XM Radio Attachment (sold separately): P/N 08B15-SHJ-100A
PK-SIEN11 Toyota Sienna Piranha System
 Toyota Sienna Installation Guide NOTICE OF INTENDED INSTALLATION AND USE PK-SIEN11 Toyota Sienna Piranha System THE ROSEN MULTI-MEDIA NAVIGATION SYSTEMS CONTAIN AN INTERNAL VIDEO PLAYER, WHICH IS NOT INTENDED
RECOMMENDED SEQUENCE OF APPLICATION
 TOYOTA CAMRY 2012- PART NUMBER: 250-8402 REARSIGHT KIT CONTENTS ITEM QTY DESCRIPTION 1 1 INTERFACE ADAPTER HARNESS 2 1 REAR CAMERA ASSEMBLY 3 1 CAMERA EXTENSION HARNESS 4 1 SACK PARTS COLOR APPLICABILITY/TRIM
VX7010. DVD / NAV / SiriusXM-Ready / Built-in Bluetooth / Pandora Link Compatible with iphone /Compatible with ipod / USB / Aux In INSTALLATION GUIDE
 VX7010 DVD / NAV / SiriusXM-Ready / Built-in Bluetooth / Pandora Link Compatible with iphone /Compatible with ipod / USB / Aux In INSTALLATION GUIDE What s in the Box The following items are supplied with
Tools Needed: 7mm Socket socket wrench socket extension interior removal tool wire cutter electical tape Wrangler Raxiom Navigation
 2007-2010 Wrangler Raxiom Navigation Contents: (1) - Raxiom Head Unit (1) - Headphone Jack With Wire (A) (1) - GPS Antennae With Wire (B) (1) - Amplifier Pre-Outs Wire Harness (C) (1) - External Microphone
INSTALLATION GUIDE 8" FLOATING MULTIMEDIA DISPLAY SYSTEM MODEL NUMBER: UN1880. Copyright 2018 StingerElectronics.com
 INSTALLATION GUIDE 8" FLOATING MULTIMEDIA DISPLAY SYSTEM MODEL NUMBER: UN1880 Copyright 2018 StingerElectronics.com MODEL NUMBER: UN1880 INSTALLATION GUIDE CONTENTS Precautions...2 Parts List...3 Mounting
INSTALLATION INSTRUCTIONS
 INSTALLATION INSTRUCTIONS Accessory S P/N 08E10-TP6-100 Application 2010 ACCORD CROSSTOUR Publications No. AII 41935 Issue Date NOV 2009 PARTS LIST TOOLS AND SUPPLIES REQUIRED Ambient Light Kit Ambient
RECOMMENDED SEQUENCE OF APPLICATION
 TOYOTA TACOMA 2010- PART NUMBER: 250-8403 REARSIGHT KIT CONTENTS ITEM QTY DESCRIPTION 1 1 INTERFACE ADAPTER HARNESS 2 1 REAR CAMERA ASSEMBLY 3 1 CAMERA INTERFACE HARNESS 4 1 SACK PARTS COLOR APPLICABILITY/TRIM
VX4010 INSTALLATION GUIDE. WARNING! Never install this unit where operation and viewing could interfere with safe driving conditions.
 Installation Guide VX4010 INSTALLATION GUIDE What s in the Box The following items are supplied with the VX4010: VX4010 Head Unit Trim Ring Hardware Bag Power/Speaker Output Harness Remote Control External
INSTALLATION INSTRUCTIONS
 INSTALLATION INSTRUCTIONS Accessory Application Publications No. XM RADIO SYSTEM (EXCEPT LX) 2006 ODYSSEY All 30392 Issue Date AUG 2005 PARTS LIST XM Radio Attachment (sold separately): P/N 08B15-SHJ-100
Conflicts NOTE: XLE, LE, AND SE MODELS
 TOYOTA SIENNA 2011- REARSIGHT Part Number: 00016-00085 Accessory Code: MC9 Conflicts NOTE: XLE, LE, AND SE MODELS KIT CONTENTS ITEM QTY DESCRIPTION 1 1 MIRROR/MONITOR 2 1 REAR CAMERA ASSEMBLY 3 1 CAMERA
Conflicts. TOYOTA 4Runner REARSIGHT. Part Number: Code: MC90 KIT CONTENTS ADDITIONAL ITEMS REQUIRED FOR INSTALL RECOMMENDED TOOLS
 TOYOTA 4Runner 2010 - REARSIGHT Part Number: 00016-00085 Code: MC90 Conflicts KIT CONTENTS ITEM QTY DESCRIPTION 1 1 MIRROR/MONITOR 2 1 REAR CAMERA ASSEMBLY 3 1 CAMERA EXTENSION HARNESS 4 1 SACK PARTS 5
MOST-H.U.R. MB/MB-S. Mercedes Head Unit Replacement Interface NTV-KIT421/501. DS, BM 11/10/14 NTV-DOC141 rb8
 3950 NW 120 th Ave, Coral Springs, FL 33065 TEL 561-955-9770 FAX 561-955-9760 MOST-H.U.R. MB/MB-S Mercedes Head Unit Replacement Interface NTV-KIT421/501 DS, BM 11/10/14 Overview NAV-TV s OPTI-1 is a radio
MOST-H.U.R. MB/MB-S. Mercedes Head Unit Replacement Interface NTV-KIT421/501. DS, BM 10/18/18 NTV-DOC141 rb10
 3950 NW 120 th Ave, Coral Springs, FL 33065 TEL 561-955-9770 FAX 561-955-9760 MOST-H.U.R. MB/MB-S Mercedes Head Unit Replacement Interface NTV-KIT421/501 DS, BM rb10 Overview NAV-TV s OPTI-1 is a radio
AVH-2330NEX AVH-2300NEX AVH-1330NEX AVH-1300NEX
 AVH-2330NEX AVH-2300NEX AVH-1330NEX AVH-1300NEX DVD RDS AV RECEIVER Installation Manual Connection Precautions Your new product and this manual Do not operate this product, any applications, or the rear
Safety Information WARNING. English CAUTION: PLEASE FOLLOW THE LAWS AND REGULATIONS OF YOUR STATE, PROVINCE OR COUNTRY FOR INSTALLATION OF THE UNIT.
 1 Safety Information WARNING This installation information is designed for professional installers with knowledge of automobile electrical safety systems and is not intended for non-technical, doit-yourself
OE Style Touch Screen Navigation
 2010-2014 OE Style Touch Screen Navigation Step 1 Begin by removing the shift knob on manual transmission equipped vehicles or the shifter trim bezel on an automatic car. Step 2 Open the center console.
AVH-601EX AVH-600EX AVH-501EX AVH-500EX
 AVH-601EX AVH-600EX AVH-501EX AVH-500EX DVD RDS AV RECEIVER Installation Manual 2 Important safety information Rear visibility systems (backup cameras) are required in certain new vehicles sold in the
INSTALLATION GUIDE Car Show Dual DVD Headrest Replacement System
 INSTALLATION GUIDE Car Show Dual DVD Headrest Replacement System NOTICE OF INTENDED INSTALLATION AND USE CAR SHOW VIDEO PRODUCTS ARE NOT INTENDED FOR VIEWING BY THE DRIVER, AND ARE TO BE INSTALLED ONLY
INSTALLATION INSTRUCTIONS
 INSTALLATION INSTRUCTIONS Accessory S P/N 08E10-TK8-100 Application 2011 ODYSSEY Publications No. AII 43904 Issue Date SEP 2010 PARTS LIST 2 Ambient lights Illustration of the Ambient Lights Installed
Conflicts TOYOTA TACOMA HANDS FREE BLU TOOTH. Part Number: Accessory Code: BT4 ADDITIONAL ITEMS REQUIRED FOR INSTALL
 TOYOTA TACOMA 2011 - HANDS FREE BLU TOOTH Part Number: 00016-00401 Accessory Code: BT4 Conflicts Factory Bluetooth System & JBL Audio KIT CONTENTS ITEM QTY DESCRIPTION 1 1 INTERFACE MODULE 2 1 INTERFACE
Installation Guide. Author: Road Angel Group Date: April 2015 Version: Version 1.00 Page 1 of 6
 Installation Guide Author: Road Angel Group Date: April 2015 Version: 1.00 Version 1.00 Page 1 of 6 Contents INTRODUCTION... 3 SCOPE... 3 ITEMS REQUIRED FOR HARDWIRE INSTALLATION... 3 LOCATION... 4 LINE
AXi-MBEIRC-R INSTALLATION MANUAL
 Rev. 4.0 081915 AXi-MBEIRC-R INSTALLATION MANUAL PLEASE REVIEW THIS INSTALLATION MANUAL CAREFULLY BEFORE BEGINNING ANY WORK PLUG & PLAY WIRING HARNESS COMPATIBLE WITH AXi-RGB2 AXi-RGB3 Tech Support: 844-AXX-ESSI
Conflicts. TOYOTA Prius XM Satellite Radio. Part Number: Code: RX30. Vehicle Service Parts (May be required for reassembly)
") TOYOTA Prius 2013 - Part Number:00016-00076 Code: RX30 Conflicts 1. Entune 2. Vehicle s with factory XM radio Kit Contents Item # Qty Description 1 1 XM Module 2 1 XM Tuner Module 3 1 Wiring Harness 4
TOYOTA Prius 2013 - Part Number:00016-00076 Code: RX30 Conflicts 1. Entune 2. Vehicle s with factory XM radio Kit Contents Item # Qty Description 1 1 XM Module 2 1 XM Tuner Module 3 1 Wiring Harness 4
TOYOTA HIGHLANDE R REARSIGHT Part Number: Code: MC90 KIT CONTENTS ADDITIONAL ITEMS REQUIRED FOR INSTALL RECOMMENDED TOOLS
 TOYOTA HIGHLANDE R 2009- REARSIGHT Part Number: 00016-00085 Code: MC90 KIT CONTENTS ITEM QTY DESCRIPTION 1 1 MIRROR/MONITOR 2 1 REAR CAMERA ASSEMBLY 3 1 CAMERA EXTENSION HARNESS 4 1 SACK PARTS 5 1 OWNER
INSTALLATION INSTRUCTIONS
 INSTALLATION INSTRUCTIONS Accessory P/N 08E50-TK6-100 Application 2010 FIT (BASE MODEL) Publications No. AII 42212 Issue Date AUG 2009 The security system will only work if the vehicle is equipped with
AOM452 In-Car LCD Display System Package Installation Manual
 AOM452 In-Car LCD Display System Package Installation Manual Features: 4.5 TFT Color LCD Display Camera 1 input for Rearview camera Camera 2 input for Side view camera Navigation Input Cautions! The product
TOYOTA VENZA HANDS FREE BLU LOGIC Preparation
 TOYOTA VENZA 2009- HANDS FREE BLU LOGIC Preparation Part #: PT923-00111 Conflicts: JBL Audio NOTE: Part number of this accessory may not be the same as the part number shown. Kit Contents: For kits manufactured
Honda Accord 2013-up B
 Installation Instructions for 99-7804B REV. 3/17/2015 INST99-7804B KIT FEATURES ISO DIN radio provision with pocket DDIN radio provision Painted two tone to match factory Retains factory color screen Honda
INSTALLATION INSTRUCTIONS
 INSTALLATION INSTRUCTIONS Accessory NIGHT Application 2007 CR-V Publications No. Issue Date SEP. 2006 PARTS LIST Automatic Day/Night Mirror Attachment Kit P/N 08V03-SWA-300 Harness cover set Automatic
XM Adapter Cable (P/N: ) MUST be used for this vehicle.
 MUST be used for this vehicle.") TOYOTA 2013 - Part Number:00016-00076 Code: RX30 XM Adapter Cable (P/N: 00016-00076-10) MUST be used for this vehicle. Conflicts 1. Entune 2. Vehicle s with factory XM radio Kit Contents Item # Qty Description
TOYOTA 2013 - Part Number:00016-00076 Code: RX30 XM Adapter Cable (P/N: 00016-00076-10) MUST be used for this vehicle. Conflicts 1. Entune 2. Vehicle s with factory XM radio Kit Contents Item # Qty Description
Conflicts. TOYOTA Camry XM Satellite Radio. Part Number: Code: RX30. Vehicle Service Parts (May be required for reassembly)
") TOYOTA 2013 - Part Number:00016-00076 Code: RX30 Conflicts 1. Entune 2. Vehicle s with factory XM radio Kit Contents Item # Qty Description 1 1 XM Module 2 1 XM Tuner Module 3 1 Wiring Harness 4 1 Hardware
TOYOTA 2013 - Part Number:00016-00076 Code: RX30 Conflicts 1. Entune 2. Vehicle s with factory XM radio Kit Contents Item # Qty Description 1 1 XM Module 2 1 XM Tuner Module 3 1 Wiring Harness 4 1 Hardware
RECOMMENDED SEQUENCE OF APPLICATION
 2007-2008 TOYOTA TUNDRA CAMERA KIT PART NUMBER: 250-8045 KIT CONTENTS ITEM QTY DESCRIPTION 1 1 CAMERA ASSEMBLY 2 1 TRUCK EXTENSION HARNESS 3 1 TAILGATE EXTENSION HARNESS 4 1 POWER HARNESS 5 1 HARDWARE
AXi-GM2-R INSTALLATION MANUAL
 Rev. 4.0 081915 AXi-GM2-R INSTALLATION MANUAL PLEASE REVIEW THIS INSTALLATION MANUAL PLUG & PLAY WIRING HARNESS COMPATIBLE WITH AXi-RGB1 AXi-RGB2 AXi-RGB3 Tech Support: 844-AXX-ESSI WWW.AXXESSINTERFACES.COM
Installation Guide. Before Starting. Package Contents. Cautions On Installation. English
 Before Starting Car battery. This set is exclusively for use in cars with a negative ground, V power supply.. Read these instructions carefully.. Be sure to disconnect the battery terminal before starting.
AXi-MBCIRC-R INSTALLATION MANUAL
 Rev. 4.0 081915 AXi-MBCIRC-R INSTALLATION MANUAL PLEASE REVIEW THIS INSTALLATION MANUAL CAREFULLY BEFORE BEGINNING ANY WORK PLUG & PLAY WIRING HARNESS COMPATIBLE WITH AXi-RGB2 AXi-RGB3 Tech Support: 844-AXX-ESSI
2010 FORD TRANSIT ELECTRONIC CRUISE KIT Part Number:
 General Applicability Recommended Tools Item # Qty. Description 1. 250-2758 1 Cruise Control Module 2. 250-2760 1 Switch Harness 3. 250-2759 1 Main Wiring Harness 4. 250-2771 1 Pedal Interface Harness
MY-CUE VIM. Video in Motion for MyLink/CUE NTV-KIT495 BHM 06/28/17 NTV-DOC181
 3950 NW 120 th Ave, Coral Springs, FL 33065 TEL 561-955-9770 FAX 561-955-9760 MY-CUE VIM Video in Motion for MyLink/CUE NTV-KIT495 BHM Overview The MY-CUE VIM enables video in motion, navigation destination
FD6209B LIABILITY DISCLAIMER
 VEHICLE CONFIGURATION SETTINGS CHART Use the chart below to navigate through the different settings the Setup touch button has to offer. Also use the chart to see the different configuration settings offered
TOYOTA tc HANDS FREE BLU LOGIC Preparation
 TOYOTA tc 2011- HANDS FREE BLU LOGIC Preparation Part #: PT923-00111 Conflicts: JBL Audio, Factory Navigation NOTE: Part number of this accessory may not be the same as the part number shown. Kit Contents:
INSTALLATION INSTRUCTIONS
 INSTALLATION INSTRUCTIONS Accessory Application Publications No. AII 26042-26353 XM INTERFACE ODYSSEY EXCEPT EX-L WITH NAVI/RES Issue Date FEB 2004 PARTS LIST 8 Wire ties XM Radio Attachment P/N 08B15-S0X-100
INSTALLATION GUIDE. AV8900H Dual Multimedia Headrest Replacement System
 INSTALLATION GUIDE AV8900H Dual Multimedia Headrest Replacement System NOTICE OF INTENDED INSTALLATION AND USE AV8900H VIDEO PRODUCTS ARE NOT INTENDED FOR VIEWING BY THE DRIVER, AND ARE TO BE INSTALLED
INSTALLATION INSTRUCTIONS
 INSTALLATION INSTRUCTIONS Accessory Application Publications No. AII 27363 ODYSSEY Issue Date SEP 2004 PARTS LIST Compact Subwoofer Kit: P/N 08A39-5E1-010 4 Flange bolt, 6 x 12 mm Subwoofer 3 Cushion tapes
AXi-RGB1 INSTALLATION MANUAL
 AXi-RGB1 INSTALLATION MANUAL PLEASE REVIEW THIS INSTALLATION MANUAL CAREFULLY BEFORE BEGINNING ANY WORK COMPATIBLE PLUG & PLAY WIRING HARNESSES AXi-BMW18-R AXi-CRVT-R AXi-FL24-R AXi-GM1-R AXi-GM2-R AXi-GMTOUCH-R
Upgrade Options. Installation Guide WARNING
 Panasonic POWER BS G-CODE CY-V700U Panasonic XMD 000 L/C 44XXXXXX INTELLIGENT SYSTEM XM RADIO ID : XXXXXXXX Upgrade Options Installation Guide 5.-channel Surround System This unit has a built-in 4-channel
AXi-HON1-R INSTALLATION MANUAL
 Rev. 4.0 081915 AXi-HON1-R INSTALLATION MANUAL PLEASE REVIEW THIS INSTALLATION MANUAL CAREFULLY BEFORE BEGINNING ANY WORK PLUG & PLAY WIRING HARNESS COMPATIBLE WITH AXi-RGB1 AXi-RGB2 AXi-RGB3 Tech Support:
INSTALLATION INSTRUCTIONS
 INSTALLATION INSTRUCTIONS Accessory XM RADIO SYSTEM Application 2011 CIVIC 2-AND 4-DOOR (EX, EX-L) Publications No. AII 44350 Issue Date AUG 2010 PARTS LIST XM Radio Attachment (sold separately): P/N 08B15-SNA-100A
INSTALLATION GUIDE AV7900 Dual Multimedia Headrest Replacement System
 INSTALLATION GUIDE AV7900 Dual Multimedia Headrest Replacement System NOTICE OF INTENDED INSTALLATION AND USE AV7900 VIDEO PRODUCTS ARE NOT INTENDED FOR VIEWING BY THE DRIVER, AND ARE TO BE INSTALLED ONLY
INSTALLATION INSTRUCTIONS
 INSTALLATION INSTRUCTIONS Accessory NIGHT Application CR-V Publications No. AII 32951 Issue Date SEP 2006 PARTS LIST Automatic Day/Night Mirror Attachment Kit P/N 08V03-SWA-100 Harness cover set Automatic
TOYOTA TACOMA HANDS FREE BLU LOGIC Preparation. Item 5 Item 6 Item 7 Item 8. Item 4. General Applicability Note: Recommended Tools
 TOYOTA TACOMA 2008- HANDS FREE BLU LOGIC Preparation Part #: PT923-00098 Conflicts: JBL Audio, Factory Navigation Kit Contents: NOTE: Part number of this accessory may not be the same as the part number
Document: PIO / DIO Rev.A 08/04/08 Toyota Solara Rear Sight RECOMMENDED SEQUENCE OF APPLICATION
 Document: 13.15.00 PIO / DIO Rev.A 08/04/08 Toyota 2008 - Rear Sight Part Number: 00016-00040 Code: MC1 Item # Quantity Reqd. Description 1 1 MIRROR/MONITOR 2 1 REVERSE MINI-CAMERA 3 1 EXTENSION HARNESS
REARSIGHT PART NUMBER: Code: MC1 RECOMMENDED SEQUENCE OF APPLICATION
 Document # 3848 REVISION A 1/26/06 2006 TOYOTA TACOMA REARSIGHT PART NUMBER: 00016-00050 Code: MC1 RE V I S I O N A KIT CONTENTS ITEM QTY DESCRIPTION 1 1 MIRROR/MONITOR 2 1 REAR CAMERA ASSEMBLY 3 1 CAMERA
WARNING WARNING WARNING CAUTION
 English Quick start guide Symbol Identification This manual uses symbols and icons to indicate safety precautions and concerns during the installation procedure. Be sure to carefully read and understand
Installation Example and Guide
 Installation Example and Guide Author: Road Angel Group Date: May 2016 Version: 1.00 Version 1.00 Page 1 of 12 Contents CONTENTS... 2 INTRODUCTION... 3 SCOPE... 3 ITEMS REQUIRED FOR HARDWIRE INSTALLATION...
MY-CUE VIM Video in Motion for MyLink/CUE NTV-KIT495
 3950 NW 120 th Ave, Coral Springs, FL 33065 TEL 561-955-9770 FAX 561-955-9760 MY-CUE VIM Video in Motion for MyLink/CUE NTV-KIT495 BHM Overview The MY-CUE VIM enables video in motion in select 2013+ GM
CHTO-02 Chrysler/Dodge Amplified Data Interface
 M4 M5 M3 ISO 6 2.5 1.5 INSTALLATION INSTRUCTIONS FOR PART CHTO-02 CHTO-02 Chrysler/Dodge Amplified Data Interface 2004-2007 APPLICATIONS See inside front cover KIT FEATURES Provides accessory (12-volt
B. Ford Fusion 2013-up
 99-5841B INSTALLATION INSTRUCTIONS Ford Fusion 2013-up KIT FEATURES ISO DIN radio provision with pocket ISO DDIN radio provision Integrated controls for info center Painted black Note: Does not support
DATA & DISPLAY RETENTION INTERFACE
 1 DDR-VW02AR DATA & DISPLAY RETENTION INTERFACE Volkswagen 2015-UP Golf APPLICATION GUIDE FEATURES The Scosche DDR interface for Volkswagen vehicles retains settings and parking sensor information to be
WARNING WARNING WARNING. EnglishEnglish Quick start guide CAUTION CAUTION. Installation Precautions
 Symobol Identification This manual uses symbols and icons to indicate safety precautions and concerns during the installation procedure. Be sure to carefully read and understand each precaution prior to
Nissan Rogue. Installation Manual: Nissan Rogue. Power Lift Gate System. Page 1 of 13
 Nissan Rogue Installation Manual: Nissan Rogue Power Lift Gate System Page 1 of 13 NOTE: Installation Precaution 1. It is recommended to have this product installed by a professional to avoid damage caused
AXi-FL24-R INSTALLATION MANUAL
 Rev. 4.0 081915 AXi-FL24-R INSTALLATION MANUAL PLEASE REVIEW THIS INSTALLATION MANUAL CAREFULLY BEFORE BEGINNING ANY WORK PLUG & PLAY WIRING HARNESS COMPATIBLE WITH AXi-RGB1 AXi-RGB2 AXi-RGB3 Tech Support:
PWRA215. Designed for 2015 and newer Jeep Wrangler two door with base audio. T-TAP x2 10MM BOLT FUSE WIRE TIES x6 SUBWOOFER ASSEMBLY
 PWRA215 Designed for 2015 and newer Jeep Wrangler two door with base audio T-TAP x2 10MM BOLT FUSE WIRE TIES x6 SUBWOOFER ASSEMBLY 200 WATT AMP BRACKET ASSEMBLY POWER HARNESS 2015 Stillwater Designs PWRA215
INSTALLATION INSTRUCTIONS
 INSTALLATION INSTRUCTIONS Accessory Application Publications No. SYSTEM P/N 08E60-SLN-100 2007 FIT AII 31719 Issue Date MAR 2006 PARTS LIST Fuse label B Keyless entry harness User s information Fuse label
INSTALLATION INSTRUCTIONS
 INSTALLATION INSTRUCTIONS Accessory REMOTE CONTROL Application 2011 ODYSSEY (EXCEPT LX) Publications No. AII 43923 Issue Date SEP 2010 PARTS LIST Remote Control Engine Starter Unit Kit P/N 08E91-E22-101A
Nissan Maxima (with Technology Package) Nissan Maxima (with NAV) 2009 KIT FEATURES. ISO DIN radio provision with pocket...
 Nissan Maxima (with NAV) 2009 KIT FEATURES. ISO DIN radio provision with pocket...") 99-7633 INSTALLATION INSTRUCTIONS KIT FEATURES ISO DIN radio provision with pocket ISO DDIN radio provision Painted high gloss black KIT COMPONENTS A) Radio trim panel with climate controls B) Radio brackets
99-7633 INSTALLATION INSTRUCTIONS KIT FEATURES ISO DIN radio provision with pocket ISO DDIN radio provision Painted high gloss black KIT COMPONENTS A) Radio trim panel with climate controls B) Radio brackets
WARNING WARNING WARNING. English Quick start guide CAUTION CAUTION. Installation Precautions
 English Quick start guide Symbol Identification This manual uses symbols and icons to indicate safety precautions and concerns during the installation procedure. Be sure to carefully read and understand
Toyota 4-Runner (Excluding Limited) Toyota Highlander
 Toyota Highlander") INSTALLATION INSTRUCTIONS FOR PART 99-8206 APPLICATIONS Toyota 4-Runner (Excluding Limited) 2003-2009 Toyota Highlander 2001-2007 99-8206 KIT FEATURES DIN head unit provision with pocket ISO DIN head unit
INSTALLATION INSTRUCTIONS FOR PART 99-8206 APPLICATIONS Toyota 4-Runner (Excluding Limited) 2003-2009 Toyota Highlander 2001-2007 99-8206 KIT FEATURES DIN head unit provision with pocket ISO DIN head unit
Jeep Wrangler X209-WRA X209-WRASXM 9 Restyle In-dash system Installation Manual Model: Wrangler Model Year:
 WRANGLER 1/16 Jeep Wrangler X209-WRA X209-WRASXM 9 Restyle In-dash system Installation Manual Model: Wrangler Model Year: 2011-2017 Jeep Model Year Wrangler 2011-2017 * The specified vehicles have been
B. Ford Fusion 2013-up* *Visit metraonline.com for up-to-date vehicle specific applications.
 99-5841B INSTALLATION INSTRUCTIONS Ford Fusion 2013-up* *Visit metraonline.com for up-to-date vehicle specific applications. KIT FEATURES ISO DIN radio provision with pocket ISO DDIN radio provision Integrated
PFSDC12. Designed for 2012 and newer Ford F250/F350 Super Crew vehicles Stillwater Designs PFSDC12-A Subwoofer Enclosure
 PFSDC12 Designed for 2012 and newer Ford F250/F350 Super Crew vehicles Subwoofer Enclosure Amplifier/Bracket Assembly Subwoofer Power Harness Amplifier Harness Subwoofer Harness Amplifier Power Harness
Introduction. Note. To Ensure Safe Use, Always Follow These Precautions
 SGS-CH0 / Jeep Wrangler SGS-CH0 Factory Radio Camera Interface with Active Guideline system Installation Manual Model: Wrangler Model Year: 20-208 Model Year Active Guidlines Static Guidelines Jeep Wrangler
AXi-NI1-R INSTALLATION MANUAL
 Rev. 4.0 081915 AXi-NI1-R INSTALLATION MANUAL PLEASE REVIEW THIS INSTALLATION MANUAL CAREFULLY BEFORE BEGINNING ANY WORK PLUG & PLAY WIRING HARNESS COMPATIBLE WITH AXi-RGB1 AXi-RGB2 AXi-RGB3 Tech Support:
AXi-GMBOX1 INSTALLATION MANUAL
 AXi-GMBOX1 INSTALLATION MANUAL PLEASE REVIEW THIS INSTALLATION MANUAL CAREFULLY BEFORE BEGINNING ANY WORK COMPATIBLE PLUG & PLAY WIRING HARNESSES AXI-GM1-C AXI-GMMLX-C AXI-GMQUAD1-C AXI-GMDTS-C AXI-GMSTS-C
INSTALLATION INSTRUCTIONS
 INSTALLATION INSTRUCTIONS Accessory REMOTE CONTROL Application 2012 ODYSSEY (EXCEPT LX) Publications No. AII 46745 Issue Date SEP 2011 PARTS LIST Remote Control Engine Starter Unit Kit P/N 08E91-E22-101A
Nissan Pathfinder (without NAV) (with color screen) HG
 (with color screen) HG") Installation instructions for part 99-7627HG Nissan Pathfinder 2013-2016 (without NAV) (with color screen) 99-7627HG KIT FEATURES ISO DIN radio provision with pocket ISO DDIN radio provision Painted to
Installation instructions for part 99-7627HG Nissan Pathfinder 2013-2016 (without NAV) (with color screen) 99-7627HG KIT FEATURES ISO DIN radio provision with pocket ISO DDIN radio provision Painted to
INSTALLATION INSTRUCTIONS
 INSTALLATION INSTRUCTIONS Accessory S P/N 08E12-SZT-100 Application CR-Z Publications No. AII 50501 Issue Date SEP 2013 PARTS LIST Left illuminated door sill trim Right illuminated door sill trim Illumination
CH. Ford Mustang
 99-5839CH INSTALLATION INSTRUCTIONS Ford Mustang 2010-2014 KIT FEATURES ISO DIN radio provision with pocket ISO DDIN radio provision Painted charcoal with a matte black center Touchscreen interface for
SCION TC HANDS FREE BLU LOGIC Preparation
 SCION TC 2008- HANDS FREE BLU LOGIC Preparation Part #: PT923-00099 Conflicts: JBL Audio NOTE: Part number of this accessory may not be the same as the part number shown. Kit Contents: For kits manufactured
AXi-HA16P-R INSTALLATION MANUAL
 Rev. 4.0 081915 AXi-HA16P-R INSTALLATION MANUAL PLEASE REVIEW THIS INSTALLATION MANUAL CAREFULLY BEFORE BEGINNING ANY WORK PLUG & PLAY WIRING HARNESS COMPATIBLE WITH AXi-RGB2 AXi-RGB3 Tech Support: 844-AXX-ESSI
Chevy Sonic 2012-up G
 INSTALLATION INSTRUCTIONS FOR PART 99-3012 APPLICATIONS Chevy Sonic 2012-up 99-3012G KIT FEATURES ISO DIN Head unit provision with pocket DDIN Head unit provisions Painted Gray to match factory finish
INSTALLATION INSTRUCTIONS
 INSTALLATION INSTRUCTIONS Accessory Application Publications No. AII 26031 2004 ODYSSEY Issue Date AUG 2003 NOTE: You cannot install the subwoofer in a vehicle equipped with both an under seat Navigation
INSTALLATION INSTRUCTIONS
 Rear Vision System Aftermarket Display 2007-Current Chevrolet Silverado, Silverado HD; GMC Sierra, Sierra HD (Kit part number 9002-9560) Kit Contents: Camera/Module/Bezel Assembly Chassis Harness with
General Applicability Note: Recommended Tools. Personal & Vehicle Protection Safety Goggles Seat Covers Floor Covers Special Tools. Installation Tools
 TOYOTA HIGHLANDER/HIGHLANDER HV 2008- Preparation Part #: PT923-00111 Conflicts: JBL Audio, Factory Navigation NOTE: Part number of this accessory may not be the same as the part number shown. Kit Contents:
INSTALLATION INSTRUCTIONS
 INSTALLATION INSTRUCTIONS Accessory Application Publications No. SYSTEM 2005 ACCORD All 27511 (DX, LX) 2-AND 4-DOOR Issue Date AUG 2004 PARTS LIST Security System Attachment (LX): P/N 08E55-SDA-100A Unit
INSTALLATION INSTRUCTIONS
 INSTALLATION INSTRUCTIONS Accessory XM RADIO SYSTEM Application 2009 CIVIC 2-AND 4-DOOR (Si) Publications No. AII 40186 Issue Date AUG 2008 PARTS LIST XM Radio Attachment (sold separately): P/N 08B15-SNA-100B
TOYOTA TUNDRA HANDS FREE BLU LOGIC Preparation
 TOYOTA TUNDRA 2008- HANDS FREE BLU LOGIC Preparation Part #: PT923-00111 Conflicts: JBL Audio NOTE: Part number of this accessory may not be the same as the part number shown. Kit Contents: For kits manufactured
Installation Manual: Jeep Cherokee Power Lift Gate System
 Installation Manual: Jeep Cherokee Power Lift Gate System Page 1 of 11 NOTE: Installation Precaution 1. It is recommended to have this product installed by a professional to avoid damage caused by improper
GM IOH-PRG/IOM-PRG NTV-KIT628/KIT722
 3950 NW 120 th Ave, Coral Springs, FL 33065 TEL 561-955-9770 FAX 561-955-9760 GM IOH-PRG/IOM-PRG Reverse camera programmer for select GM vehicles equipped with MyLink IOH or IOM Radio IOH = IO5/IO6 (8
INSTALLATION INSTRUCTIONS
 INSTALLATION INSTRUCTIONS Accessory Application Publications No. CD CHANGER ATTACHMENT KIT ODYSSEY AII 22030 Issue Date AUG 2000 PARTS LIST CD Changer Attachment Kit: P/N 08B12-S0X-100 Right side rail
INSTALLATION INSTRUCTIONS
 INSTALLATION INSTRUCTIONS Accessory Application 2012 ZDX Publications No. BII 47089 Issue Date SEP 2011 PARTS LIST Tailgate spoiler 2 Brackets 4 Nuts 4 Bolts TOOLS AND SUPPLIES REQUIRED Phillips screwdriver
Acura TSX 2009-up CH
 INSTALLATION INSTRUCTIONS FOR PART KIT FEATURES ISO Double DIN radio provision Painted charcoal gray APPLICATIONS Acura TSX 2009-up Table of Contents Acura TSX 2009-up...2-5 Kit Assembly ISO Double DIN
INSTALLATION INSTRUCTIONS
 INSTALLATION INSTRUCTIONS Accessory P/N 08E10-TA0-100 Application 2008 ACCORD 2-AND 4-DOOR Publications No. AII 35358 Issue Date AUG 2007 PARTS LIST Ambient Light Kit 2 Ambient lights Fuse label Washer