MOST-H.U.R. MB/MB-S. Mercedes Head Unit Replacement Interface NTV-KIT421/501. DS, BM 10/18/18 NTV-DOC141 rb10
|
|
|
- Louisa Long
- 5 years ago
- Views:
Transcription


1 3950 NW 120 th Ave, Coral Springs, FL TEL FAX MOST-H.U.R. MB/MB-S Mercedes Head Unit Replacement Interface NTV-KIT421/501 DS, BM rb10


.")


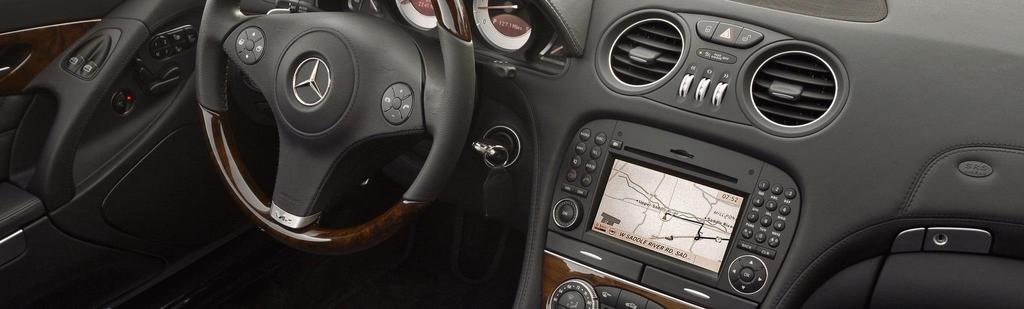
2 Overview NAV-TV s OPTI-1 is a radio replacement interface for compatible Mercedes Benz vehicles equipped with an external M.O.S.T. fiber optic amplifier. The module allows the factory amplifier, speakers and sound quality to be retained when adding a modern aftermarket radio. Other components in the factory system, such as a CD changer, satellite radio, telephone module, DVD player, or any other factory component in the M.O.S.T loop, will not function after the installation. Kit Content MOST Fiber Optic Connector NTV-CON Antenna extension & Antenna adapter optional Power/Signal Harness NTV-HAR012 Vehicle Compatibility CLS/SL/SLK, E, S, CL vehicles with MOST amplifier: To confirm compatibility, remove the radio. With a CD playing in the radio, NOT in an external changer, remove the M.O.S.T fiber optic cable from the radio harness (see pictures below). If all sound goes away completely and the model and year is listed above, the vehicle is compatible with the OPTI-1. It is important to properly validate the vehicle prior to installation, especially in SLK vehicles. OPTI-1 Interface pin outs OPTI-1 Interface NTV-ASY149 USB Cable (updates) NTV-CAB009 Pin # Description Color 1 12v (+) Constant IN Red 2 12v Remote (+) IN Blue 3 [Common] Audio Shield Gray 7 Ground IN (-) Black 8 Right Audio IN (+) -- 9 Left Audio IN (+) -- Wire Side 2 P a g e
 c. Be certain the MUTE function is not enabled d.")


 and plug the completed new assembly into the fiber optic input of the OPTI-1.")
3 OPTI-1 Installation 1. ALL VEHICLES: Base-line the factory COMAND radio: a. Adjust the volume to a comfortable listening level b. Tune the radio to an AM station (otherwise you may lose AM tuning ability) c. Be certain the MUTE function is not enabled d. Center the balance and fade, center the bass and treble e. Be certain there are no other problems with the factory MOST system before installing this unit. 2. Remove the COMAND radio, and any other aftermarket MOST components (if existing) from vehicle even if they are NAV-TV MOST components. 3. Disconnect the power harness from the back of the COMAND and remove the optic cable inner plug by gently prying the retaining clip back with a pick tool (see FIG 1 & 2 below) 4. Insert the optic cable inner plug into the provided M.O.S.T. outer coupler (see FIG 3 & 4 below) and plug the completed new assembly into the fiber optic input of the OPTI-1. FIG 1: CLS, E, SLK Factory MOST Plug FIG 2: CL, S, SL Factory MOST Plug FIG 3: Fiber cable removed from factory plug FIG 4: Optics installed in the provided coupler 3 P a g e
4 5. Connect the following wires from the provided Power/Signal Harness: Pin #, Color Description Connect to: 7 Black Ground (-) Ground Radio Harness 1 Red Constant 12v (+) 12v (+) Constant Power 2 Blue Remote in 12v (+) Remote OUT from radio (blue/white) 6. Connect a full range RCA output from the aftermarket radio and connect it to the RCA inputs of the OPTI-1. Note: A short RCA cable is sometimes needed in order to position the OPTI-1 in a location that does not hinder the depth of the radio opening. 7. Plug the OPTI-1 power harness in the unit and proceed to the next section Radio & antenna connections Radio & Antenna connections 1. Refer to the installation guide from the aftermarket head unit for wiring information. 2. The constant power from the aftermarket head unit (Usually yellow) must be connected to a circuit that can supply the radio with sufficient current (check the specifications in the radio installation manual. Usually the demand does not exceed 10 to 15 AMPS.) Suggested connection points are the driver s side dash fuse box on E, CLS and SLK vehicles, the front or rear fuse box on S and CL vehicles and from the rear fuse and distribution block on the SL (There are two clips on the false door cover that will allow access to the fuse and distribution block on the SL). MAKE SURE THAT YOU FUSE THE CONSTANT POWER CONNECTION PROPERLY! 3. Connect the accessory wire from the aftermarket deck (usually red) to the front cigarette lighter accessory power (black or red with a stripe). Use a multi meter to verify accessory at this location prior to making a connection. 4. Connect the ground (usually black) from the aftermarket radio harness to the ground (brown) wire at the front cigarette lighter. 5. Connect the illumination or dimmer wire from the aftermarket power harness (usually orange or orange/white) to the illumination wire at the front cigarette lighter (grey with a blue stripe). Use a multi meter to verify the wire is illumination prior to making a connection. 6. The AM/FM antenna is located at the audio gateway (AGW). To interface with the factory AM/FM antenna you must use an antenna adapter and antenna extension (not provided) which must be run from the AGW to the front of the vehicle and into the antenna input of the aftermarket radio. The location of the AGW varies in each vehicle. 4 P a g e
5 The AGW in the SL is located behind the driver s seat in the side panel. On the E & CLS class it is in the driver s side of the trunk behind the carpet and sandwiched between the outer skin and trunk support. On the S & CL class the AGW is located in the driver s side trunk behind the carpet and on the door. The AGW in the SLK is located in the front of the vehicle below the passenger foot well. Dash Kits, radio mounting and not included accessories NAV-TV recommends professional installation of this product using MECP accepted practices. Dash kits, either pre-made or custom fabricated, as well as the required and optional non included accessories, are available through specialty aftermarket professionals world-wide. For a recommended dealer in your area please call our sales and support team at (toll free USA and Canada) or (international and locally). NAV-TV does not cover technical support for dash kits and or custom mounting options, please consult with your local recommended specialist. FAQs Q1: The OPTI-1 works fine on AM/FM but as soon as I put a CD or DVD in the unit all sound goes away. A1: Some aftermarket head units have an amplifier turn on wire as well as a power antenna wire. Normally, an amplifier turn on wire is blue/white and a power antenna remote wire is blue. The power antenna remote wire only outputs voltage when on Am or FM modes. The solution is to connect the blue wire from the OPTI-1 to a wire that outputs 12 volts + in every mode from the aftermarket head unit (blue/white) Q2: I installed the unit and I have lost all bass response in the vehicle. All the speakers are playing but I have no low end. A2: Some aftermarket head units have cross-overs built into them that limit either low frequency or high frequency response. Refer to the owners guide of the aftermarket head unit and turn on any high or low pass electronic crossover in the head unit to ensure a full range output. Q3: I installed the unit and all I hear is bass but not high frequencies. A3: Refer to answer 2. Also, make sure that you did not attach the RCA inputs of the OPTI-1 to the subwoofer output from the aftermarket deck. Q4: The OPTI-1 works and sounds great but I can only get balance left and right to function and not front to back fade. A4: The OPTI-1 does not support front to back fade due to the lack of any available aftermarket head unit with a communication network. Balance will function but fade will not. Q5: Will the OPTI-1 work with any aftermarket head unit? A5: Yes, as long as the unit is capable of a full range RCA pre-amplified audio output and a remote amplifier turn on. 5 P a g e
6 Q6: I purchased an aftermarket steering wheel control interface and cannot get it to work. A6: Steering wheel controls in every compatible vehicle are on the CAN network. CAN High is brown/red and CAN low is brown in a twisted pair at the audio gateway. Please contact the manufacturer of the device for support. Q7: Will the OPTI-1 work with any vehicle that is not listed as being compatible? A7: No, the OPTI-1 is only compatible with the listed model and year vehicles. Q8: My climate control adjusts with the volume of the aftermarket radio (or other similar issue). A8: You need to flash the HUR module with MB-S software (NTV-KIT501). Q9: The HUR does not turn on. The proper harness, software and connections have been verified, and the OEM radio works fine if re-installed. A9: Make certain there are no other aftermarket MOST fiber components installed already, even if they are NAV-TV MOST components. If there are, there is a chance something is being blocked in the fiber signal. Q10: After reading the installation manual owner and over I am still having problems. What should I do? A10: Our highly trained technical support staff can be reached Monday through Friday, 9 A.M. to 6 P.M. EST, at x 2 (Toll free USA and Canada) or x 2 (local and international). 6 P a g e
MOST-H.U.R. MB/MB-S. Mercedes Head Unit Replacement Interface NTV-KIT421/501. DS, BM 11/10/14 NTV-DOC141 rb8
 3950 NW 120 th Ave, Coral Springs, FL 33065 TEL 561-955-9770 FAX 561-955-9760 MOST-H.U.R. MB/MB-S Mercedes Head Unit Replacement Interface NTV-KIT421/501 DS, BM 11/10/14 Overview NAV-TV s OPTI-1 is a radio
M.O.S.T HUR MB OPTI-1 NTV-KIT421 Mercedes Benz Head Unit Replacment Interface
 M.O.S.T HUR MB OPTI-1 NTV-KIT421 Mercedes Benz Head Unit Replacment Interface Brendon Martell January 15,2013 Included Parts: OPTI-1 INTERFACE Needed Tools: Power, RCA input and remote turn on harness
PCM3.1 XG-CAM NTV-KIT375/383/384/385
 3950 NW 120 th Ave, Coral Springs, FL 33065 TEL 561-955-9770 FAX 561-955-9760 www.nav-tv.com info@nav-tv.com PCM3.1 XG-CAM NTV-KIT375/383/384/385 Overview The PCM3.1 XG-CAM integrates an aftermarket camera
PCM3.1 XG-CAM NTV-KIT375/383/384/385
 3950 NW 120 th Ave, Coral Springs, FL 33065 TEL 561-955-9770 FAX 561-955-9760 www.nav-tv.com info@nav-tv.com PCM3.1 XG-CAM NTV-KIT375/383/384/385 Overview The PCM3.1 XG-CAM integrates an aftermarket camera
MY-CUE VIM. Video in Motion for MyLink/CUE NTV-KIT495 BHM 06/28/17 NTV-DOC181
 3950 NW 120 th Ave, Coral Springs, FL 33065 TEL 561-955-9770 FAX 561-955-9760 MY-CUE VIM Video in Motion for MyLink/CUE NTV-KIT495 BHM Overview The MY-CUE VIM enables video in motion, navigation destination
Mazda-CAM 2. Reverse camera kit for select Mazda NTV-KIT812 BHM 04/06/17 NTV-DOC294
 3950 NW 120 th Ave, Coral Springs, FL 33065 TEL 561-955-9770 FAX 561-955-9760 Mazda-CAM 2 Reverse camera kit for select Mazda NTV-KIT812 BHM Overview The Mazda-CAM 2 integrates a single reverse camera
MY-CUE VIM Video in Motion for MyLink/CUE NTV-KIT495
 3950 NW 120 th Ave, Coral Springs, FL 33065 TEL 561-955-9770 FAX 561-955-9760 MY-CUE VIM Video in Motion for MyLink/CUE NTV-KIT495 BHM Overview The MY-CUE VIM enables video in motion in select 2013+ GM
BEN-HUR Bentley head unit replacement kit (INSTALLATION MANUAL)
") JH (rev 1.4) 31-03-17 BEN-HUR Bentley head unit replacement kit (INSTALLATION MANUAL) DO NOT ATTEMPT TO FIT THE BEN-HUR UNTIL YOU HAVE READ THE INSTALL MANUAL Overview The BEN-HUR allows you to install
JH (rev 1.4) 31-03-17 BEN-HUR Bentley head unit replacement kit (INSTALLATION MANUAL) DO NOT ATTEMPT TO FIT THE BEN-HUR UNTIL YOU HAVE READ THE INSTALL MANUAL Overview The BEN-HUR allows you to install
AFSI-02 SYNC INTERFACE INSTALLATION INSTRUCTIONS FORD SYNC INTERFACE * READ IMPORTANT WARNING ON PAGE 1 BEFORE ATTEMPTING ANY INSTALLATION
 FORD SYNC INTERFACE SYNC INTERFACE INSTALLATION INSTRUCTIONS * READ IMPORTANT WARNING ON PAGE 1 BEFORE ATTEMPTING ANY INSTALLATION The is designed to retain the features of the Ford Sync system allowing
CHTO-02 Chrysler/Dodge Amplified Data Interface
 M4 M5 M3 ISO 6 2.5 1.5 INSTALLATION INSTRUCTIONS FOR PART CHTO-02 CHTO-02 Chrysler/Dodge Amplified Data Interface 2004-2007 APPLICATIONS See inside front cover KIT FEATURES Provides accessory (12-volt
How to Install a 997, Boxster, & Cayman Radio
 How to Install a 997, Boxster, & Cayman Radio Step-by-step instructions for a 997.1, Boxster, & Cayman Radio Installation. *Credit to CAI- Store.com for this Guide* Written By: Danielle 2017 guides.drivediy.com
Chevy Equinox / GMC Terrain 2013-up (with color display) G
 G") INSTALLATION INSTRUCTIONS FOR PART 99-3308G Chevy Equinox / GMC Terrain 2013-up (with color display) 99-3308G KIT FEATURES ISO DIN radio provision with pocket ISO DDIN radio provision Painted gray to match
INSTALLATION INSTRUCTIONS FOR PART 99-3308G Chevy Equinox / GMC Terrain 2013-up (with color display) 99-3308G KIT FEATURES ISO DIN radio provision with pocket ISO DDIN radio provision Painted gray to match
OE Style Touch Screen Navigation
 2010-2014 OE Style Touch Screen Navigation Step 1 Begin by removing the shift knob on manual transmission equipped vehicles or the shifter trim bezel on an automatic car. Step 2 Open the center console.
Jeep Cherokee Latitude/Limited 2014-up
 Installation instructions for part 99-6526 REV. 5/23/2017 INST99-6526 KIT FEATURES ISO DDIN radio provision Included interface shows climate and menu info on the aftermarket radio screen. Painted scratch-resistant
AX-LR904. Land Rover LR2 (with NAV, with M.O.S.T. 25 amplifier) Data Interface with SWC & Factory Display Retention
 Data Interface with SWC & Factory Display Retention") AX-LR904 INSTALLATION INSTRUCTIONS Land Rover LR2 (with NAV, with M.O.S.T. 25 amplifier) Data Interface with SWC & Factory Display Retention 2008-2012 INTERFACE FEATURES Provides accessory power Retains
AX-LR904 INSTALLATION INSTRUCTIONS Land Rover LR2 (with NAV, with M.O.S.T. 25 amplifier) Data Interface with SWC & Factory Display Retention 2008-2012 INTERFACE FEATURES Provides accessory power Retains
GM IOH-PRG/IOM-PRG NTV-KIT628/KIT722
 3950 NW 120 th Ave, Coral Springs, FL 33065 TEL 561-955-9770 FAX 561-955-9760 GM IOH-PRG/IOM-PRG Reverse camera programmer for select GM vehicles equipped with MyLink IOH or IOM Radio IOH = IO5/IO6 (8
Retains OnStar/OE Bluetooth Adjustable volume for chimes and OnStar Retains satellite radio Retains balance and fade Micro B USB updatable
 GMOS-LAN-034 INSTALLATION INSTRUCTIONS INTERFACE FEATURES Provides accessory power (12-volt 10-amp) Maintains the retained accessory power (R.A.P.) feature Can be used in non-amplified, or amplified models
Ford RSE/SYNC/THX retention interface 2007-up
 INSTALLATION INSTRUCTIONS FOR PART AX-ADFD100 AX-ADFD100 Ford RSE/SYNC/THX retention interface 2007-up FEATURES Provides accessory (12-volt 10-amp) Retains R.A.P. (retained accessory power) Used in amplified,
AFSI-01 SYNC INTERFACE INSTALLATION INSTRUCTIONS FORD SYNC INTERFACE * READ IMPORTANT WARNING ON PAGE 1 BEFORE ATTEMPTING ANY INSTALLATION
 FORD SYNC INTERFACE AFSI-01 SYNC INTERFACE INSTALLATION INSTRUCTIONS * READ IMPORTANT WARNING ON PAGE 1 BEFORE ATTEMPTING ANY INSTALLATION The AFSI-01 is designed to retain the features of the Ford Sync
CH. Ford Explorer (with 4.2 screen)
") 99-5847CH INSTALLATION INSTRUCTIONS Ford Explorer (with 4.2 screen) 2011-2015 KIT FEATURES ISO DIN radio provision with pocket ISO DDIN radio provision Touchscreen display for climate and personalization
99-5847CH INSTALLATION INSTRUCTIONS Ford Explorer (with 4.2 screen) 2011-2015 KIT FEATURES ISO DIN radio provision with pocket ISO DDIN radio provision Touchscreen display for climate and personalization
t o A T tio llo firs ... tic tib try rfa fib (in r): lis BAU ... ALM ith ilitie tio lis ts c a x d n itin
: lis BAU ... ALM ith ilitie tio lis ts c a x d n itin") www.soundgate.com Be Sure To Ask Your Autosound Specialist About These Other Exciting SoundGate Products... Competition-Grade Interfaces for adding amplifiers Remote audio control interfaces that let you
www.soundgate.com Be Sure To Ask Your Autosound Specialist About These Other Exciting SoundGate Products... Competition-Grade Interfaces for adding amplifiers Remote audio control interfaces that let you
CH. Ford Mustang
 99-5839CH INSTALLATION INSTRUCTIONS Ford Mustang 2010-2014 KIT FEATURES ISO DIN radio provision with pocket ISO DDIN radio provision Painted charcoal with a matte black center Touchscreen interface for
CH. Ford Edge (with 4.2 screen)
") 99-5848CH INSTALLATION INSTRUCTIONS Ford Edge (with 4.2 screen) 2011-2014 KIT FEATURES ISO DIN radio provision with pocket ISO DDIN radio provision Touchscreen display for climate and personalization features
99-5848CH INSTALLATION INSTRUCTIONS Ford Edge (with 4.2 screen) 2011-2014 KIT FEATURES ISO DIN radio provision with pocket ISO DDIN radio provision Touchscreen display for climate and personalization features
B. TABLE OF CONTENTS Dash Disassembly...2 Kit Preparation...3 Kit Assembly...4 Axxess Interface Installation...5 Final Assembly...
 95-9322B INSTALLATION INSTRUCTIONS BMW X5 (with MOST Amp) 2007-2013 Visit MetraOnline.com for more detailed information about the product and up-to-date vehicle specific applications KIT FEATURES ISO DDIN
AX-HYKIA2-SWC. Hyundai Data Interface with SWC
 AX-HYKIA2-SWC INSTALLATION INSTRUCTIONS Hyundai Data Interface with SWC 2012-2016 INTERFACE FEATURES Provides NAV outputs (parking brake, reverse, speed sense) Retains audio controls on the steering wheel
Ford Flex (without NAV) TABLE OF CONTENTS Dash Disassembly Kit Preparation...4 Kit Assembly KIT FEATURES
 TABLE OF CONTENTS Dash Disassembly Kit Preparation...4 Kit Assembly KIT FEATURES") 99-5842 INSTALLATION INSTRUCTIONS KIT FEATURES ISO DIN radio provision with pocket ISO DDIN radio provision Touchscreen display for climate and personalization features Center panel painted silver with
99-5842 INSTALLATION INSTRUCTIONS KIT FEATURES ISO DIN radio provision with pocket ISO DDIN radio provision Touchscreen display for climate and personalization features Center panel painted silver with
HG. Chrysler Pacifica 2017-up* *Visit MetraOnline.com for up-to-date vehicle specific applications.
 99-6543HG INSTALLATION INSTRUCTIONS KIT FEATURES ISO DIN radio provision with pocket ISO DDIN radio provision Touchscreen display for climate and personalization features Painted high gloss black Note:
GMOS-LAN-034 GM LAN-11 OnStar interface
 Installation instructions for GMOS-LAN-034 GMOS-LAN-034 GM LAN-11 OnStar interface 2006-2012 Provides accessory power (12-volt 10-amp) Retains R.A.P. (retained accessory power) Can be used in non-amplified,
AX-MAZ1-SWC. Mazda Data Interface with SWC
 AX-MAZ1-SWC INSTALLATION INSTRUCTIONS Mazda Data Interface with SWC 2007-2015 INTERFACE FEATURES Provides NAV outputs (parking brake, reverse, speed sense) Retains audio controls on the steering wheel
B. Ford Fusion 2013-up* *Visit metraonline.com for up-to-date vehicle specific applications.
 99-5841B INSTALLATION INSTRUCTIONS Ford Fusion 2013-up* *Visit metraonline.com for up-to-date vehicle specific applications. KIT FEATURES ISO DIN radio provision with pocket ISO DDIN radio provision Integrated
P-945W AM/FM/MPX RADIO WITH DETACHABLE FRONT PANEL, CD PLAYER, CD CHANGER CONTROLS, AND QUARTZ CLOCK
 INSTALLATION MANUAL VOL VOL TUNE/ SKIP/ TRACK MP3 ST PTY ME/CR EON LOC TAPE IN SW LOUD AF TA TP MONO REC CDP CLAS POP ROCK LEVEL METER P-945W AM/FM/MPX WITH DETACHABLE FRONT PANEL, CD PLAYER, CD CHANGER
C1-NTG2. Compatible with Mercedes Benz Comand APS NTG1 and Comand APS NTG2 navigation systems
 c.logic lite-interface Compatible with Mercedes Benz Comand APS NTG1 and Comand APS NTG2 navigation systems Product features full plug and play multimedia interface 1 AV-input with separate IR-control
AX-VW901. Volkswagen Data Interface with SWC & Factory Display Retention
 AX-VW901 INSTALLATION INSTRUCTIONS Volkswagen Data Interface with SWC & Factory Display Retention 2008-2016 INTERFACE FEATURES Provides accessory power Retains R.A.P. (retained accessory power) Designed
Nissan Maxima (with Technology Package) Nissan Maxima (with NAV) 2009 KIT FEATURES. ISO DIN radio provision with pocket...
 Nissan Maxima (with NAV) 2009 KIT FEATURES. ISO DIN radio provision with pocket...") 99-7633 INSTALLATION INSTRUCTIONS KIT FEATURES ISO DIN radio provision with pocket ISO DDIN radio provision Painted high gloss black KIT COMPONENTS A) Radio trim panel with climate controls B) Radio brackets
99-7633 INSTALLATION INSTRUCTIONS KIT FEATURES ISO DIN radio provision with pocket ISO DDIN radio provision Painted high gloss black KIT COMPONENTS A) Radio trim panel with climate controls B) Radio brackets
AX-LR903. Land Rover Range Rover Evoque (with M.O.S.T. 25 amplifier) Data Interface with SWC & Factory Display Retention
 Data Interface with SWC & Factory Display Retention") AX-LR903 INSTALLATION INSTRUCTIONS Land Rover Range Rover Evoque (with M.O.S.T. 25 amplifier) Data Interface with SWC & Factory Display Retention 2012-2014 INTERFACE FEATURES Provides accessory power Retains
AX-LR903 INSTALLATION INSTRUCTIONS Land Rover Range Rover Evoque (with M.O.S.T. 25 amplifier) Data Interface with SWC & Factory Display Retention 2012-2014 INTERFACE FEATURES Provides accessory power Retains
AX-ADGM01. GM Data Interface 2006-up* *Visit AxxessInterfaces.com for up-to-date vehicle specific applications.
 AX-ADGM01 INSTALLATION INSTRUCTIONS INTERFACE FEATURES Provides accessory power (12-volt 10-amp) Maintains the retained accessory power (R.A.P.) feature Provides NAV outputs (parking brake, reverse, speed
FORD F-150 CREW CAB. Vehicle Specific Subwoofer Enclosure. Made in the USA
 FORD F-150 CREW CAB Vehicle Specific Subwoofer Enclosure Made in the USA READ ALL DIRECTIONS CAREFULLY BEFORE BEGINNING MOUNTING LOCATION: The enclosure mounts under the rear seat on drivers side of Ford
GMOS-LAN-012. GM LAN-29 Data Interface 2006-up* *Visit AxxessInterfaces.com for up-to-date vehicle specific applications.
 GMOS-LAN-012 INSTALLATION INSTRUCTIONS INTERFACE FEATURES Provides accessory power (12-volt 10-amp) Maintains the retained accessory power (R.A.P.) feature Can be used in non-amplified, or analog/digital
B. Ford Fusion 2013-up
 99-5841B INSTALLATION INSTRUCTIONS Ford Fusion 2013-up KIT FEATURES ISO DIN radio provision with pocket ISO DDIN radio provision Integrated controls for info center Painted black Note: Does not support
NNG-Honda 3. Navigation interface for New Honda Accord/Odyssey NTV-KIT555/584 NTV-DOC225
 3950 NW 120 th Ave, Coral Springs, FL 33065 TEL 561-955-9770 FAX 561-955-9760 NNG-Honda 3 Navigation interface for New Honda Accord/Odyssey NTV-KIT555/584 NTV-DOC225 This is a NEW VERSION (HONDA 3) for
Ram 1500/2500/ up (with 8 touchscreen) B
 B") INSTALLATION INSTRUCTIONS FOR PART 99-6527B Ram 1500/2500/3500 2013-up (with 8 touchscreen) 99-6527B KIT FEATURES ISO DIN radio provision with pocket ISO DDIN radio provision Touchscreen display for climate
INSTALLATION INSTRUCTIONS FOR PART 99-6527B Ram 1500/2500/3500 2013-up (with 8 touchscreen) 99-6527B KIT FEATURES ISO DIN radio provision with pocket ISO DDIN radio provision Touchscreen display for climate
I want to try my hand here at doing a TacoBill write up so here it goes.
 Here is part 3 of my tutorial for the conversion of my Shaker 1000 to the Kenwood DNX7100 Navigation / Head Unit. With the 7100, my new system will include the Kenwood I-pod Adapter (P.I.E. KNW/USB-AV),
Conflicts: JBL Audio, Factory Navigation, Accessory XM Satellite Radio, and Accessory Sirius Satellite Radio
 TOYOTA YARIS SEDAN 2008- HANDS FREE BLU LOGIC Preparation Part #: PT923-00111 NOTE: Part number of this accessory may not be the same as the part number shown. Conflicts: JBL Audio, Factory Navigation,
GMOS-LAN-02 GM LAN 29 Amplified OnStar Interface 2006-up
 M4 M5 M3 ISO 6 2.5 1.5 INSTALLATION INSTRUCTIONS FOR PART INSTGMOS-LAN-02 GMOS-LAN-02 GM LAN 29 Amplified OnStar Interface 2006-up APPLICATIONS See inside front cover KIT FEATURES Provides accessory (12-volt
Ford F up CH
 INSTALLATION INSTRUCTIONS FOR PART 99-5834CH KIT FEATURES ISO DIN radio provision with pocket ISO DDIN radio provision Painted Charcoal Touchscreen display for climate and personalization features Ford
Nissan Pathfinder (without NAV) (with color screen) HG
 (with color screen) HG") Installation instructions for part 99-7627HG Nissan Pathfinder 2013-2016 (without NAV) (with color screen) 99-7627HG KIT FEATURES ISO DIN radio provision with pocket ISO DDIN radio provision Painted to
Installation instructions for part 99-7627HG Nissan Pathfinder 2013-2016 (without NAV) (with color screen) 99-7627HG KIT FEATURES ISO DIN radio provision with pocket ISO DDIN radio provision Painted to
B. Ford Focus (with 4.2 screen) 2015-up* *Visit MetraOnline.com for up-to-date vehicle specific applications.
 2015-up* *Visit MetraOnline.com for up-to-date vehicle specific applications.") 99-5843B INSTALLATION INSTRUCTIONS KIT FEATURES ISO DIN radio provision with pocket ISO DDIN radio provision Integrated controls for info center Includes Axxess interface and wiring Painted matte black
99-5843B INSTALLATION INSTRUCTIONS KIT FEATURES ISO DIN radio provision with pocket ISO DDIN radio provision Integrated controls for info center Includes Axxess interface and wiring Painted matte black
INSTALLATION GUIDE 8" FLOATING MULTIMEDIA DISPLAY SYSTEM MODEL NUMBER: UN1880. Copyright 2018 StingerElectronics.com
 INSTALLATION GUIDE 8" FLOATING MULTIMEDIA DISPLAY SYSTEM MODEL NUMBER: UN1880 Copyright 2018 StingerElectronics.com MODEL NUMBER: UN1880 INSTALLATION GUIDE CONTENTS Precautions...2 Parts List...3 Mounting
AX-JP901. Jeep Renegade Data Interface with SWC & Factory Display Retention 2015
 AX-JP901 INSTALLATION INSTRUCTIONS Jeep Renegade Data Interface with SWC & Factory Display Retention 2015 INTERFACE FEATURES Provides accessory power Designed for non-amplified models Provides NAV outputs
AX-CH5-SWC. Chrysler Data Interface with SWC 2013-up* *Visit AxxessInterfaces.com for up-to-date vehicle specific applications.
 AX-CH5-SWC INSTALLATION INSTRUCTIONS Chrysler Data Interface with SWC 2013-up* *Visit AxxessInterfaces.com for up-to-date vehicle specific applications. INTERFACE FEATURES Provides accessory power (12-volt
AX-LR902. Land Rover Range Rover Evoque Data Interface with SWC & Factory Display Retention 2014* * For models with rear parking sensors
 AX-LR902 INSTALLATION INSTRUCTIONS Land Rover Range Rover Evoque Data Interface with SWC & Factory Display Retention 2014* * For models with rear parking sensors INTERFACE FEATURES Provides accessory power
B. Ford F-150 (with 4.2 screen)
") 99-5846B INSTALLATION INSTRUCTIONS KIT FEATURES ISO DIN radio provision with pocket ISO DDIN radio provision Touchscreen display for climate and personalization features Integrated hazard button and passenger
99-5846B INSTALLATION INSTRUCTIONS KIT FEATURES ISO DIN radio provision with pocket ISO DDIN radio provision Touchscreen display for climate and personalization features Integrated hazard button and passenger
Amp & Speaker Upgrade Install Instructions for Victory Cross Country
 Amp & Speaker Upgrade Install Instructions for Victory Cross Country Tools Needed: 13mm Socket 4mm Ball Head Allen Socket 5mm Allen Wrench 10mm Wrench Wire Cutters Wire Strippers Phillips Screwdriver Pocket
AVH-2330NEX AVH-2300NEX AVH-1330NEX AVH-1300NEX
 AVH-2330NEX AVH-2300NEX AVH-1330NEX AVH-1300NEX DVD RDS AV RECEIVER Installation Manual Connection Precautions Your new product and this manual Do not operate this product, any applications, or the rear
GMOS-06 INSTALLATION INSTRUCTIONS
 CADILLAC ONSTAR CLASS II DATA BUS INTERFACE GMOS-06 INSTALLATION INSTRUCTIONS * READ IMPORTANT WARNING ON PAGE 1 BEFORE ATTEMPTING ANY INSTALLATION The GMOS-06 is designed to be used in Cadillacs equipped
Honda Accord 2013-up B
 Installation Instructions for 99-7804B REV. 3/17/2015 INST99-7804B KIT FEATURES ISO DIN radio provision with pocket DDIN radio provision Painted two tone to match factory Retains factory color screen Honda
AX-VL Volvo XC90 Data Interface with SWC * * For models with rear parking sensors
 AX-VL90042 INSTALLATION INSTRUCTIONS Volvo XC90 Data Interface with SWC 2004-2014* * For models with rear parking sensors INTERFACE FEATURES Provides accessory power Retains R.A.P. (retained accessory
INSTALLATION INSTRUCTIONS FOR PART INSTGMOS-LAN-03. GMOS-LAN-03 GM LAN 11 Non-amplified OnStar APPLICATIONS. See inside front cover KIT FEATURES
 M4 M3 M5 ISO 6 2.5 1.5 INSTALLATION INSTRUCTIONS FOR PART INSTGMOSLAN03 GMOSLAN03 GM LAN 11 Nonamplified OnStar Interface 2006up APPLICATIONS See inside front cover KIT FEATURES Provides accessory (12volt
TV-Free TF-NTG1. compatible with Mercedes Benz NTG1 and Comand APS DVD navigation systems
 TV-Free Video-in-motion Interface compatible with Mercedes Benz NTG1 and Comand APS DVD navigation systems Legal Information By law, watching moving pictures while driving is prohibited, the driver must
B. TABLE OF CONTENTS Dash Disassembly...2 Kit Preparation...3 Kit Assembly...4 Axxess Interface Installation...5 Final Assembly...
 95-9317B INSTALLATION INSTRUCTIONS BMW 3 & 4 Series* (with NBT idrive, without MOST Amp) 2014-2016 F30, F31, F32, F33, F34, F36, F80, F82, F83 Visit MetraOnline.com for more detailed information about
KD-DV7206/KD-DV7205 Installation/Connection Manual
 GET0375-006A [U/UT] KD-DV7206/KD-DV7205 Installation/Connection Manual 0106DTSMDTJEIN EN, CT 2006 Victor Company of Japan, Limited ENGLISH This unit is designed to operate on 12 V DC, NEGATIVE ground electrical
AVH-601EX AVH-600EX AVH-501EX AVH-500EX
 AVH-601EX AVH-600EX AVH-501EX AVH-500EX DVD RDS AV RECEIVER Installation Manual 2 Important safety information Rear visibility systems (backup cameras) are required in certain new vehicles sold in the
AX-ADVW01. Volkswagen Data Interface
 AX-ADVW01 INSTALLATION INSTRUCTIONS INTERFACE FEATURES Provides accessory power (12-volt 10-amp) Maintains the retained accessory power (R.A.P.) feature Provides NAV outputs (parking brake, reverse, speed
BAK1500 INSTALLATION/OWNER'S MANUAL Compact Amplified Subwoofer
 BAK1500 INSTALLATION/OWNER'S MANUAL Compact Amplified Subwoofer PREPARATION Getting Started Thank you for purchasing the Dual BAK1500 compact amplified subwoofer. Although Dual has attempted to ensure
16-pin harness with stripped leads Female 3.5mm connector with stripped leads
 AX-FD1-SWC INSTALLATION INSTRUCTIONS Ford Data Interface with SWC 2007-up* *Visit AxxessInterfaces.com for up-to-date vehicle specific applications. INTERFACE FEATURES Provides accessory power (12-volt
AXi-MBEIRC-R INSTALLATION MANUAL
 Rev. 4.0 081915 AXi-MBEIRC-R INSTALLATION MANUAL PLEASE REVIEW THIS INSTALLATION MANUAL CAREFULLY BEFORE BEGINNING ANY WORK PLUG & PLAY WIRING HARNESS COMPATIBLE WITH AXi-RGB2 AXi-RGB3 Tech Support: 844-AXX-ESSI
Jeep Wrangler PSS-20WRA Sound System Installation Manual Model: Wrangler Unlimited Model Year:
 UNLIMITED 1/20 Jeep Wrangler PSS-20WRA Sound System Installation Manual Model: Wrangler Unlimited Model Year: 2007 2014 *Not compatible with factory amplified systems Jeep Model Year Wrangler Unlimited
CVO - with ipod Amp & Speaker Upgrade Install Instructions for Batwing Fairing
 CVO - with ipod Amp & Speaker Upgrade Install Instructions for Batwing Fairing Tools Needed: 1/2 inch Socket Wire Cutters 7/16 inch Socket Wire Strippers 5/16 inch Socket Phillips Screwdriver 1/2 inch
Low Profile 8 150watt Amplified Subwoofer Installation Instructions
 Low Profile 8 150watt Amplified Subwoofer Installation Instructions Radio Engineering Industries, Inc. www.radioeng.com Rev A 5/12/14 Thank you for purchasing the 150Watt Amplified Subwoofer from REI.
Designed for 2015 Ford F150 Super-Cab and Super-Crew vehicles (Compatible in vehicles with or without Sony System. M6 Bolt X 2
 SF150SC15 Designed for 2015 Ford F150 Super-Cab and Super-Crew vehicles (Compatible in vehicles with or without Sony System Subwoofer Assembly Amplifier Relocation Bracket (not used on non Sony trucks)
DirectWire Vehicle Information 2016 Kia Soul - North America. Page 1 of 5. Wiring Information. Page 1 of 5
 Page 1 of 5 Wiring Information 12 Volts red (40A) + ignition switch, black 6 pin plug, pin 1 Second 12 Volts black (40A) + ignition switch, black 6 pin plug, pin 5 Starter green + ignition switch, black
Amp & Speaker Upgrade Install Instructions for Road Glide
 Amp & Speaker Upgrade Install Instructions for Road Glide Tools Needed: 1/2 inch Socket Wire Cutters 7/16 inch Socket Wire Strippers 10 mm Socket Phillips Screwdriver 1/2 inch Ratchet Wrench T25 Torx driver
Installation Instructions Harley-Davidson Saddlebag Lids
 Installation Instructions Harley-Davidson Saddlebag Lids Thank you for your purchase of Bagger Audio Saddlebag Lids for your Harley- Davidson motorcycle. We have carefully engineered these products to
VOH681A Drop Down Video Monitor VOH682A Drop Down TV / Video Monitor OPEN. Installation Guide
 VOH681A Drop Down Video Monitor VOH682A Drop Down TV / Video Monitor ON OFF AUTO OPEN Installation Guide Important Notice It is unlawful in most jurisdictions for a person to drive a motor vehicle which
E90 AVIN Non-iDrive Head Unit Install with Logic 7 Integration
 E90 AVIN Non-iDrive Head Unit Install with Logic 7 Integration Option 1: If you prefer to go an easier route you can order our BMW MOST interface. It would make the install a lot easier and will not require
TBX10A INSTALLATION/OWNER'S MANUAL 10" Sealed Enclosure with Built-in Amplifier
 TBX10A INSTALLATION/OWNER'S MANUAL 10" Sealed Enclosure with Built-in Amplifier Getting Started Thank you for purchasing the Dual TBX10A 10" ported enclosure with built-in amplifier. Although Dual has
Interface 2000-up. GMOS-04 GM amplified OnStar Class II Data Bus
 INSTALLATION INSTRUCTIONS FOR PART GMOS-04 GMOS-04 GM amplified OnStar Class II Data Bus Interface 2000-up INTERFACE COMPONENTS GMOS-04 interface 16-pin harness with stripped leads 18-pin harness to 12-
VRX925VD 1. BEFORE STARTING 2. PACKAGE CONTENTS. English. Contents
 VRX925VD Installation and Wire Contents 1. BEFORE STARTING... 65 2. PACKAGE CONTENTS... 65 3. GENERAL CAUTIONS... 66 4. CAUTIONS ON INSTALLATION... 66 5. INSTALLING THE MAIN UNIT... 67 6. REMOVING THE
2004 Scion xa. PARKING LIGHTS (+) GREEN At Harness On Top Of Fuse Box DOOR TRIGGER (-) RED/WHITE In 9-Pin On Top Of Fuse Box
 GREEN At Harness On Top Of Fuse Box DOOR TRIGGER (-) RED/WHITE In 9-Pin On Top Of Fuse Box") ALARM REMOTE START WIRING WIRE COLOR LOCATION 12V CONSTANT WIRE WHITE/BLUE and Ignition Harness WHITE/RED STARTER WIRE BLACK Ignition Harness 12V IGNITION WIRE BLACK/RED Ignition Harness SECOND IGNITION
ALARM REMOTE START WIRING WIRE COLOR LOCATION 12V CONSTANT WIRE WHITE/BLUE and Ignition Harness WHITE/RED STARTER WIRE BLACK Ignition Harness 12V IGNITION WIRE BLACK/RED Ignition Harness SECOND IGNITION
GT-BassPro12. powered automotive subwoofer. Owner s Manual
 GT-BassPro12 powered automotive subwoofer Owner s Manual Introduction Thank you for choosing the JBL GT-BassPro12 powered automotive subwoofer. The GT-BassPro12 has been designed to deliver great bass
IMPORTANT. Tools Needed: (depending upon vehicle) Phillips Screwdriver. Drill & Bit Set. Wire Stripper/ Crimp Tool
 Phillips Screwdriver. Drill & Bit Set. Wire Stripper/ Crimp Tool") Revision 3/14/05 Amplifier Installation Guide IMPORTANT Before starting, compare items on your invoice with items received. Carefully check through packaging material. If any item is missing, please call:
Revision 3/14/05 Amplifier Installation Guide IMPORTANT Before starting, compare items on your invoice with items received. Carefully check through packaging material. If any item is missing, please call:
FD6209B LIABILITY DISCLAIMER
 VEHICLE CONFIGURATION SETTINGS CHART Use the chart below to navigate through the different settings the Setup touch button has to offer. Also use the chart to see the different configuration settings offered
* JBL Audio equipped vehicles will require additional part # DP-TYJBL1 audio interface NOTICE OF INTENDED INSTALLATION AND USE
 * JBL Audio equipped vehicles will require additional part # DP-TYJBL1 audio interface NOTICE OF INTENDED INSTALLATION AND USE THE ROSEN MULTI-MEDIA NAVIGATION SYSTEMS CONTAIN AN INTERNAL VIDEO PLAYER,
AX-BM9112. BMW Mini (R53) (with Harmon Kardon amplifier)
 (with Harmon Kardon amplifier)") AX-BM9112 INSTALLATION INSTRUCTIONS BMW Mini (R53) (with Harmon Kardon amplifier) 2001-2006 INTERFACE FEATURES Provides accessory power Retains audio controls on the steering wheel Retains phone buttons
AX-BM9112 INSTALLATION INSTRUCTIONS BMW Mini (R53) (with Harmon Kardon amplifier) 2001-2006 INTERFACE FEATURES Provides accessory power Retains audio controls on the steering wheel Retains phone buttons
GM ONSTAR CLASS II DATA BUS INTERFACE GMOS-04. Installation Instructions SEE APPLICATIONS LIST INSIDE TOOLS REQUIRED FOR INSTALLATION
 GM ONSTAR CLASS II DATA BUS INTERFACE GMOS-04 Installation Instructions * READ IMPORTANT WARNING ON PAGE 2 BEFORE ATTEMPTING ANY INSTALLATION THE GMOS-04 IS DESIGNED TO BE USED WITH VEHICLES THAT HAVE
Chevy Sonic 2012-up G
 INSTALLATION INSTRUCTIONS FOR PART 99-3012 APPLICATIONS Chevy Sonic 2012-up 99-3012G KIT FEATURES ISO DIN Head unit provision with pocket DDIN Head unit provisions Painted Gray to match factory finish
Mazda S
 INSTALLATION INSTRUCTIONS FOR PART 99-7523S KIT FEATURES Double DIN radio provision ISO DIN radio provision with pocket Painted silver Pre-wired ASWC-1 harness included (ASWC-1 sold separately) APPLICATIONS
PK-SIEN11 Toyota Sienna Piranha System
 Toyota Sienna Installation Guide NOTICE OF INTENDED INSTALLATION AND USE PK-SIEN11 Toyota Sienna Piranha System THE ROSEN MULTI-MEDIA NAVIGATION SYSTEMS CONTAIN AN INTERNAL VIDEO PLAYER, WHICH IS NOT INTENDED
AUDIO SYSTEM 8F - 1 AUDIO SYSTEM TABLE OF CONTENTS
 PL AUDIO SYSTEM 8F - 1 AUDIO SYSTEM TABLE OF CONTENTS page GENERAL INFORMATION INTRODUCTION...1 DESCRIPTION AND OPERATION INTERFERENCE ELIMINATION...1 DIAGNOSIS AND TESTING AUDIO DIAGNOSTIC TEST PROCEDURES...1
SOS Mute Trigger. Front Right Outputs to Safety Connect. Rear Right Outputs. Rear Left Speakers. Rear Right Speakers
 I Technical Bulletin Overview: (SOS) is a subscription based service provided for select Lexus / Toyota models. Verify the vehicle is equipped with / Lexus Enform (there will be an SOS button in the overhead
INTERFACE PART NUMBER NOTES
 2004 Pontiac GTO ALARM REMOTE START WIRING WIRE COLOR LOCATION 12V CONSTANT WIRE Must go to battery for 12V Battery STARTER WIRE PURPLE Ignition harness IGNITION WIRE ORANGE Ignition harness ACCESSORY
* JBL Audio equipped vehicles will require additional part # DP-TYJBL1 audio interface NOTICE OF INTENDED INSTALLATION AND USE
 * JBL Audio equipped vehicles will require additional part # DP-TYJBL1 audio interface NOTICE OF INTENDED INSTALLATION AND USE THE ROSEN MULTI-MEDIA NAVIGATION SYSTEMS CONTAIN AN INTERNAL VIDEO PLAYER,
JAMP-500HR06-RCRP. Installation and Operation Instructions. 500W 4-CH Amplifier Kit For Harley Road Glide Fairing with Rear Speakers
 500W 4-CH Amplifier Kit For 2006-2013 Harley Road Glide Fairing with Rear Speakers # JAMP-500HR06-RCRP 2013 J&M Corporation. All rights reserved. 5/13 Installation and Operation Instructions Product Description
GMOS-05 Installation Instructions
 GM ONSTAR CLASS II DATA BUS INTERFACE GMOS-05 Installation Instructions The GMOS-05 is designed to be used in vehicles listed below to retain Onstar and the warning chimes that are lost when the OEM radio
B. Land Rover LR Visit MetraOnline.com for more detailed information about the product and up-to-date vehicle specific applications
 95-9405B INSTALLATION INSTRUCTIONS Land Rover LR4 2010-2016 Visit MetraOnline.com for more detailed information about the product and up-to-date vehicle specific applications KIT FEATURES ISO DDIN radio
TOYOTA TACOMA HANDS FREE BLU LOGIC Preparation. Item 5 Item 6 Item 7 Item 8. Item 4. General Applicability Note: Recommended Tools
 TOYOTA TACOMA 2008- HANDS FREE BLU LOGIC Preparation Part #: PT923-00098 Conflicts: JBL Audio, Factory Navigation Kit Contents: NOTE: Part number of this accessory may not be the same as the part number
RS4-7/PS4-7 + (2) + SPDT T3015, T3053
 + SPDT T3015, T3053") TIP SHEET Installation Tips for your RS4-7/PS4-7 + Honda-SL3 (2) + SPDT T3015, T3053 v1.3 4/25/14 Honda: ( 98-02 Accord), ( 98-01 CRV), ( 98-04 Odyssey), ( 03-04 Pilot) Acura: ( 98-99 EL), ( 98-03 CL),
TIP SHEET Installation Tips for your RS4-7/PS4-7 + Honda-SL3 (2) + SPDT T3015, T3053 v1.3 4/25/14 Honda: ( 98-02 Accord), ( 98-01 CRV), ( 98-04 Odyssey), ( 03-04 Pilot) Acura: ( 98-99 EL), ( 98-03 CL),
GMOS-11 Installation Instructions
 GM ONSTAR INTERFACE GMOS-11 Installation Instructions * Retains ONSTAR system when installing an aftermarket radio. * READ IMPORTANT WARNING ON PAGE 1 BEFORE ATTEMPTING ANY INSTALLATION APPLICATIONS CADILLAC
GM ONSTAR CLASS II DATA BUS INTERFACE GMOS-04. Installation Instructions SEE APPLICATIONS LIST INSIDE TOOLS REQUIRED FOR INSTALLATION
 GM ONSTAR CLASS II DATA BUS INTERFACE GMOS-04 Installation Instructions * READ IMPORTANT WARNING ON PAGE 2 BEFORE ATTEMPTING ANY INSTALLATION THE GMOS-04 IS DESIGNED TO BE USED WITH VEHICLES THAT HAVE
NISSAN BLUETOOTH/INFORMATION DISPLAY RETENTION INTERFACE NIRD-01. Installation Instructions. Applications. Nissan Maxima/Nissan Sentra
 NISSAN BLUETOOTH/INFORMATION DISPLAY RETENTION INTERFACE NIRD-01 Installation Instructions * READ IMPORTANT WARNING ON PAGE 1 BEFORE ATTEMPTING ANY INSTALLATION When installing an aftermarket radio into