MOM FRIENDLY. DAD READY.
|
|
|
- Harry Daniels
- 6 years ago
- Views:
Transcription


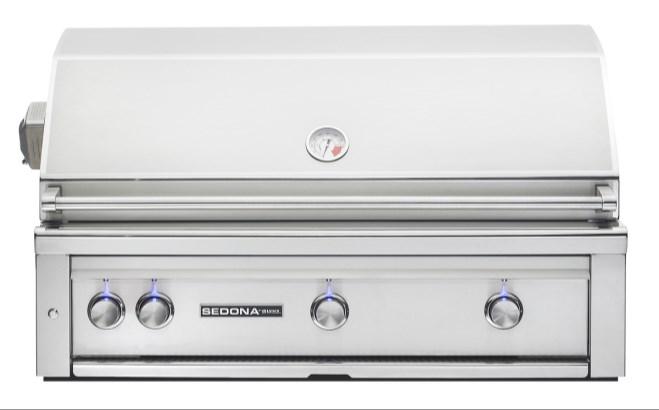
1 MOM FRIENDLY. DAD READY. SEDONA READY TO FINISH ISLAND ASSEMBLY INSTRUCTIONS


2 IMPORTANT SAFEGUARDS WARNING Two to three people are needed to set up the island. Failure to do so may result in injury. WARNING Do not store or use gasoline or other flammable liquids in the vicinity of this or any other appliance. Do not store an extra LP bottle in the interior of the island. CAUTION Never attempt to lift the island by the counter top as serious damage may occur. Plan your island location prior to beginning any set up. The island must be installed and leveled in its final location. Moving the island once complete is not advised as damage may occur. Ready to Finish Island Orientation Configurations 2 SEDONA by LYNX Ready to Finish Island Assembly Instructions

3 Congratulations on your purchase of the SEDONA by LYNX Ready to Finish Island. The prefabricated unfinished island can be assembled in no time at all. No tools are necessary for assembly. The island comes ready for you to add your own personal touch in components, finishes and countertops. Multiple openings are provided for a variety of SEDONA by LYNX accessories. Before you begin the island installation you will need to plan ahead. Some things to consider: Power Supply and Venting: The Ready to Finish Island is not pre drilled or cut for power and venting access. You will have to cut through the rear panel to create access points where required. When venting, cut vents in your grill island that are at least 4 x 14 every 4-6 of island. The vents should be near the top for natural gas: closer to the bottom if using LP gas. Cover vents with louvered stainless steel covers if desired. Island Orientation: While you have the option of a left hand or right hand orientation, it is important for proper operation that wind does not blow directly into the rear of the grill. Consider positioning the island to take advantage of natural wind breaks. Leveling the Island: If the base is not level, adjust the legs before any of the panels are installed. If the island is not leveled correctly the panels could be misaligned and cannot be adjusted once assembly is complete. Once fully assembled, the island is difficult to move. Assembling the Island: You will need assistance holding panels in place while assembling. The panels are large and heavy, therefore we recommend two people to avoid any injuries during assembly. If you have any questions or comments please contact Lynx Customer Care: Lynx Professional Grills 7300 Flores Street. Downey CA Lynx Customer Care SEDONA by LYNX Ready to Finish Island Assembly Instructions

4 Ready to Finish Island Components 4 SEDONA by LYNX Ready to Finish Island Assembly Instructions
5 Parts List 5 SEDONA by LYNX Ready to Finish Island Assembly Instructions


 We recommend 2 to 3 people perform setup operations.")


6 Step 1 Unpacking the Box Remove the staples and binding straps from the outside of the box. From inside the box, remove the foam and packing materials. Separate the island components from the box by Grill Island and Counter Island. Counter Island: 2 end panels, 1 back panel, 1 base panel, and 1 counter top panel (see component list on pg.4) Grill Island: 1 end panels, 1 back panel, 1 base panel, and 1 counter top panel (see component list on pg.4) We recommend 2 to 3 people perform setup operations. Step 2 Position and Level the Base Place the island base on a level surface in its final location and proceed to verify the island base is level it in all directions. The bottom panel has adjustable feet for this purpose. DO NOT OMIT THIS STEP. If the base is not leveled correctly the island will be misaligned. The base cannot be leveled and the island cannot be moved once the assembly complete. If you need to reposition the island you will have to disassemble the island and reassemble. (Level is not included) Remember to situate the base panels in relation to the orientation you have chosen for the island. Island Base Leveling Foot 6 SEDONA by LYNX Ready to Finish Island Assembly Instructions
 The grill")
.")
.")

")

7 Step 3 Assembling the Front, Rear and Side Panels of the Grill Island (Parts GF, GR, GB, GS) The grill island base panel (GB) is equipped with tabs which correspond to cut slits on the front panel (GF). Line up the 3 slit openings on the front panel (GF) with the 3 corresponding tabs on the base panel (GB). Slit Tab Assemble side (GS) and front panels (GF) together using 4 medium wing bolts to secure to the panels. Depending on your orientation (left or right side) you will attach the side panel (GS) on the grill island on the end that will be exposed. Turn until tight 7 SEDONA by LYNX Ready to Finish Island Assembly Instructions
 has a notch on each edge and also slides under the tabs on the floor base (GB).")

 has pre-attached bolts to fit into the pre-attached brackets on the front panel (CF).")
8 Step 3 Assembling the Front, Rear and Side Panels of the Grill Island (Parts GF, GR, GB, GS) - continued The rear panel (GR) has a notch on each edge and also slides under the tabs on the floor base (GB). Once in place attach rear panel (GR) to side panel with 4 medium wing bolts. Floor size of the grill island is 29x89 ½. Tab Turn until tight Notch Step 4 Assembling the Front, Rear and Side Panels of the Counter Island (Parts CF, CR, CB, CS1, CS2) To assemble the counter island slide the front panel (CF) under the tabs on the base panel (CB). The side panel (CS1) has pre-attached bolts to fit into the pre-attached brackets on the front panel (CF). 8 SEDONA by LYNX Ready to Finish Island Assembly Instructions
 and front panel (CF) using 2 wing nuts on the bolts.")
 with 2 wing nuts on the bolts of the side panel (CS1).")

.")
9 Step 4 Assembling the Front, Rear and Side Panels of the Counter Island (Parts CF, CR, CB, CS1, CS2) - Continued Secure the side panel (CS1) and front panel (CF) using 2 wing nuts on the bolts. Tab The rear panel (CR) has a notch on each edge and also slides under the tabs on the floor base (CB). Once in place attach to rear panel (CR) with 2 wing nuts on the bolts of the side panel (CS1). Notch Assemble the second side panel (CS2) to the front panel (CF) and the back panel (CR) using 2 wing nuts on each side. Base panel size of the counter island is 24 ¼ x 90 Step 5 Attaching the Grill and Counter Islands Together Secure the grill island to the counter island with the supplied attaching bracket (AB). Attach the bracket (AB) to the counter island frame by securing the medium wing bolts using 4 small hook brackets on the interior opening. 9 SEDONA by LYNX Ready to Finish Island Assembly Instructions


 Medium C Bracket (top) Large C Bracket")
 use 3")
 to the rear panel (GR) in 4 places")
10 Step 5 Attaching the Grill and Counter Islands Together - continued Connect the bracket to the front panel using 2 large C brackets with large wing bolts. To secure the bracket to the rear panel use 2 medium C brackets with Large wing bolts. Large C Bracket (top) Medium C Bracket (top) Large C Bracket (bottom) Medium C Bracket (bottom) Step 6 Attaching the Grill Island Top To secure top panel to the front panel (GT) use 3 step brackets with small wing nuts. Secure the top panel (GT) to the rear panel (GR) in 4 places using small angle brackets with Medium Large wing 10 SEDONA by LYNX Ready to Finish Island Assembly Instructions

11 Step 5 Attaching the Counter Island Top Attach the top counter (CT) to the front panel (CF) and rear panel (CR) using 8 small angle brackets with medium wing bolts. Grill island hardware: 4 small angles 3 step brackets 3 small wing bolts 4 Medium Large wing bolts Connector bracket hardware: 2 large C brackets 2 medium C brackets 2 X-large wing bolts 2 Large wing bolts Counter island hardware: 8 small angles 8 medium wing bolts 8 wing nuts 11 SEDONA by LYNX Ready to Finish Island Assembly Instructions


12 TM Sedona by Lynx Ready to Finish Island Grill and Accessory Package L500 L600 L700 LSB502 L16TWL LUD519 L18TC LSA530 LSA636 LSA742 L500REF 12 SEDONA by LYNX Ready to Finish Island Assembly Instructions


 L600 (RH) L700 Grill top with the side")

13 Converting the Counter Island Top Depending on your grill and cabinet size configuration, you may need to have panels and support bars removed for installation. Remove the screws on the side panels L500 L600 (LH) L600 (RH) L700 Grill top with the side panels removed (grill options labeled) Front grill panel with side panels removed 13 SEDONA by LYNX Ready to Finish Island Assembly Instructions
14 TM SEDONA by LYNX Ready to Finish Island Limited Warranty I. Limited Warranty Grill, Side-Burner, Doors, Drawers, and Refrigerator For the warranty on the individual stainless steel island components, please see the warranties in their product Care & Use Manuals. II. Limited Lifetime Warranty Island Frame Panels The base, sides and counter-top of the island are warranted to be free from defects in material and workmanship, when subjected to normal domestic use and service, for a Lifetime. This warranty is limited to the repair or replacement of the defective parts. III. Limitations & Exclusions 1.This Warranty shall apply to products purchased and located in the United States and Canada. Products must be purchased in the country where service is requested. 2. Warranty applies only to the original purchaser and may not be transferred. 3. Warranty is in lieu of all other warranties expressed or implied and all other obligations or liabilities related to the sale or use of its grill products. 4. Warranty shall not apply and Lynx is not responsible for damage resulting from misuse, abuse, alteration of or tampering with the appliance, accident, hostile environment, flare-up fires, improper installation, or installation not in accordance with the instructions contained in this manual, or the local codes. 5. Lynx shall not be liable for incidental, consequential, special or contingent damages resulting from its breach of this written warranty or any implied warranty. IV. What is not covered: Lynx shall not be responsible for and shall not pay for the following: 1. Installation or start-up, damages or problems caused by improper installation or use; 2. Service by an unauthorized service provider; 3. Damage or repair due to service by an unauthorized service provider or use of unauthorized parts; 4. Warranty does not apply to products installed in any commercial or non-residential application. Examples of excluded applications include, but are not limited to day care centers, schools, bed and breakfast centers, churches, private clubs, fire stations, club houses, common areas in multi-family dwellings, restaurants, hotels, nursing homes, food service locations and institutional food service locations. 5. To correct normal adjustments or settings, due to improper installation, commissioning or local gas supply properties; 6. Shipping and handling costs, export duties, installation, removal, or re-installation cost. 7. Display models are generally sold as is. If you have purchased a display model, please be advised that it is sold as is and that it is subject to the following warranty exclusions: any exterior or cosmetic damage is non-warrantable; any missing components will be replaced at consumers expense; major handling damage to manifold, valve and ignition system will be serviced at consumer s expense; all other warranty s (standard warranty) will remain in effect. 8. The cost of a service call to diagnose trouble. 6. Some states do not allow limitations on how long an implied warranty lasts, or the exclusions of or limitations on consequential damages. This warranty gives you specific legal rights and you may have other rights which vary from state to state. 7. No one has the authority to add to or vary Lynx s warranty, or to create for Lynx any other obligation or liability in connection with the sale or use of its products. 8. Limited to the replacement of defective parts with the owner paying all other costs including labor. 14 SEDONA by LYNX Ready to Finish Island Assembly Instructions

15 Lynx Grills, Inc Flores Street Downey, CA For more information, please call: or visit us at Lynx Grills, Inc. TM MOM FRIENDLY. DAD READY. P/N: 35870
Use/Installation Guide
 Use/Installation Guide 5 Series Outdoor Gas Grill Carts IMPORTANT: PLEASE READ AND FOLLOW 1. Before beginning, please read these instructions completely and carefully. 2. Do not remove permanently affixed
MANUAL. Use / Installation. Outdoor Access Doors, Dry Storage, and Storage Drawer
 Use / Installation MANUAL Outdoor Access Doors, Dry Storage, and Storage Drawer AD52820 / AD51320 / SD5300 / SD5360 / VDSA5420 CAD52820 / CAD51320 / CSD5300 / CSD5360 / CVDSA5420 IMPORTANT - Please Read
Installation Precautions. Use Precautions. Specifications
 Important Safety Information Safety Setup Operation Maintenance Read all safety warnings and instructions. Failure to follow the warnings and instructions may result in serious injury. Save all warnings
INSTALLATION INSTRUCTIONS SINGLE HORIZONTAL ACCESS DOOR PANTRY INSERT MANUAL
 INSTALLATION INSTRUCTIONS MODEL #88972 SINGLE HORIZONTAL ACCESS DOOR PANTRY INSERT MANUAL TABLE OF CONTENTS PAGE # INSTALLATION INSTRUCTIONS...................2 CABINET LOCATION GUIDELINES...2 REGULAR
Air Curtain. Installation, Operating and Maintenance Instructions
 Installation, Operating and Maintenance Instructions Save this manual for future reference. Air Curtain Model Numbers: ES026, ES036, ES042, ES048, ES060, ES072 READ THIS OWNER S MANUAL CAREFULLY BEFORE
Model AS-RC3260 TV Cart. Rolling Cart for Audio Mount System & Flat Panel TVs
 Model AS-RC3260 TV Cart Rolling Cart for Audio Mount System & Flat Panel TVs GETTING STARTED Introduction Congratulations on the purchase of your new Helios AS-RC3260 Rolling Cart. For maximum benefit,
(Special designed for Duro Gas Grill BI)
") DURO FAUX STONE BASE MODEL: 780-0644A (Special designed for Duro Gas Grill 740-3003BI) Installation and User Care Guide IMPORTANT: Save for electrical inspector s use. Installer: Leave installation instructions
DURO FAUX STONE BASE MODEL: 780-0644A (Special designed for Duro Gas Grill 740-3003BI) Installation and User Care Guide IMPORTANT: Save for electrical inspector s use. Installer: Leave installation instructions
RENEGADE SLATE BUMPER POOL TABLE ASSEMBLY INSTRUCTIONS
 RENEGADE SLATE BUMPER POOL TABLE ASSEMBLY INSTRUCTIONS NG2404PG THANK YOU! Thank you for purchasing this product. We work around the clock and around the globe to ensure that our products maintain the
16K and 19K Sidewinder TM Service Kit Instructions 86005
 86005 Equipment Required: Wrenches: 15/16, 1 1/8, Torque Wrench, Rubber Mallet Included Service Kit Items: 1 Qty. (1) Wear Plate 2 Qty. (6) 5/8 Conical Washer 3 Qty. (2) Wedge Bolt, 5/8-11 X 1 3/4 GRD
HUSTLER 7' & 8' POOL TABLE ASSEMBLY INSTRUCTIONS
 HUSTLER 7' & 8' POOL TABLE ASSEMBLY INSTRUCTIONS NG2515PB/NG2520PB THANK YOU! Thank you for purchasing this product. We work around the clock and around the globe to ensure that our products maintain the
BATHROOM ACCESSORIES
 BATHROOM ACCESSORIES ORCA HARDWARE WARRANTY Orca Hardware warrants its products manufactured to be free from defects in materials and workmanship for a period of ten (10) years from the date of purchase,
MAVERICK 7' POOL TABLE WITH TABLE TENNIS ASSEMBLY INSTRUCTIONS
 MAVERICK 7' POOL TABLE WITH ASSEMBLY INSTRUCTIONS NG1023 THANK YOU! Thank you for purchasing this product. We work around the clock and around the globe to ensure that our products maintain the highest
SIDEKICK TABLETOP SOCCER ASSEMBLY INSTRUCTIONS
 SIDEKICK TABLETOP SOCCER ASSEMBLY INSTRUCTIONS NG1028T3 THANK YOU! Thank you for purchasing this product. We work around the clock and around the globe to ensure that our products maintain the highest
Model AS-FM64 Wall Mount. Full Motion Television Wall Mount
 Model AS-FM64 Wall Mount Full Motion Television Wall Mount Getting Started Introduction Congratulations on the purchase of your new Audio Solutions AS-FM64 Television Wall Mount. For maximum benefit, please
Model T2642 Wall Mount. Television Wall Mount with Tilt Option
 Model T2642 Wall Mount Television Wall Mount with Tilt Option Getting Started Introduction Congratulations on the purchase of your new Audio Solutions T2642 Television Wall Mount. For maximum benefit,
WINDOW AIR CONDITIONER SUPPORT BRACKET
 WINDOW AIR CONDITIONER SUPPORT BRACKET INSTRUCTION MANUAL CATALOG NUMBER BAB-2438 (For Single, Double Hung Windows Only. Sizes 24-38 wide.) Requires No Drilling, Tools, Fasteners or Hardware Thank you
Woolich Racing. Bike Harness Installation Instructions Hayabusa Gen 2 (08+)
") Woolich Racing Bike Harness Installation Instructions Hayabusa Gen 2 (08+) 1) Introduction To connect your Woolich Racing product to the ECU ( Engine Control Unit or computer) in your bike you need to
Woolich Racing Bike Harness Installation Instructions Hayabusa Gen 2 (08+) 1) Introduction To connect your Woolich Racing product to the ECU ( Engine Control Unit or computer) in your bike you need to
Component Size Weight Capacity
 Specifications Component Size Weight Capacity Top Shelf 72 W x 19-1/2 L 1500 lb Drawer A (x3) 37-3/8 W x 19-1/2 L x 2-1/4 H 154 lb each Drawer B 37-3/8 W x 19-1/2 L x 5-1/4 H 220 lb Drawer C 37-3/8 W x
PLAYOFF 48" FOOSBALL TABLE ASSEMBLY INSTRUCTIONS
 PLAYOFF 48" FOOSBALL TABLE ASSEMBLY INSTRUCTIONS NG1031F THANK YOU! Thank you for purchasing this product. We work around the clock and around the globe to ensure that our products maintain the highest
TABLE OF CONTENTS. Important Safety Information 3. Parts List 4
 1 TABLE OF CONTENTS Important Safety Information 3 Parts List 4 Assembling THERACK 5 7 How To Unfold THERACK 8 How To Fold THERACK 9 THERACK Levels 10 Warranty 11 2 IMPORTANT SAFETY INFORMATION IMPORTANT:
5 th Airborne Sidewinder Service Kit Instructions 94316
 94316 Equipment Required: Wrenches: 15/16, Torque Wrench, Rubber Mallet 3 4 5 2 Included Service Kit Items: 1 Qty. (1) Wear Plate 2 Qty. (1) Wear Bushing 3 Qty. (1) Wear Disc 4 Qty. (4) 5/8-11x2 GRD8 Bolt
Cast Iron WARNING CAUTION. CAUTION Some parts may contain sharp edges especially as noted in manual. Wear protective gloves if necessary.
 Outdoor Fireplace 04201101 04501122 Cast Iron For Outdoor Use Only CAUTION THIS UNIT IS HEAVY! DO NOT assemble without a helper. CAUTION Some parts may contain sharp edges especially as noted in manual.
Kitchen Tech Series Air Curtain
 Installation, Operating, and Maintenance Instructions Save this manual for future reference. Kitchen Tech Series Air Curtain Model Numbers: KTECH026, KTECH036, KTECH042, KTECH048, KTECH060, KTECH072, KTECH084,
Safety Sentry Electronic Breakaway Switch
 Safety Sentry Electronic Breakaway Switch P-616-WE 819-0454 Installation Instructions An Altra Industrial Motion Company Parts List Mounting hardware included with the Safety Sentry Breakaway Switch kit:
Natural Gas Conversion Instructions for
 CONVERSION INSTRUCTIONS Natural Gas Conversion Instructions for WM16-GBC1405WV WARNING FOR YOUR SAFETY: For Outdoor Use Only (outside any enclosure) WARNING FOR YOUR SAFETY: 1. Improper installation, adjustment,
MLS KICK-OFF TABLETOP SOCCER TABLE ASSEMBLY INSTRUCTIONS
 MLS KICK-OFF TABLETOP SOCCER TABLE ASSEMBLY INSTRUCTIONS NGD1028 1 THANK YOU! Thank you for your purchase of this Harvil product. We work around the clock and around the globe to ensure that Harvil products
R24. Instruction manual
 R24 roller Instruction manual - 16570 Installer: read and understand this manual. Fully instruct and demonstrate the operation of this 5th wheel hitch to the end user. Include the importance of observing
Gooseneck Hitch Ball plate with 2-5/16" ball spins in/out 30,000 lb. rating. (5,000 lb. vertical load) Requires only one 3" hole in truck bed
 Requires only one 3 hole in truck bed") OWNER'S MANUAL 18,000 lb. rating (3,500 lb. vertical) No towing hardware in your bed when you don t need it. Easy on/off design No drilling into your truck frame Side-to-side pivot of 10 degrees Gooseneck
OWNER'S MANUAL 18,000 lb. rating (3,500 lb. vertical) No towing hardware in your bed when you don t need it. Easy on/off design No drilling into your truck frame Side-to-side pivot of 10 degrees Gooseneck
Woolich Racing. Bike Harness Installation Instructions Suzuki Harness Type 4a GSX1300R (Hayabusa)
") Woolich Racing Bike Harness Installation Instructions Suzuki Harness Type 4a 2013+ GSX1300R (Hayabusa) 1) Introduction To connect your Woolich Racing product to the ECU ( Engine Control Unit or computer)
Woolich Racing Bike Harness Installation Instructions Suzuki Harness Type 4a 2013+ GSX1300R (Hayabusa) 1) Introduction To connect your Woolich Racing product to the ECU ( Engine Control Unit or computer)
Installation Procedures Ford F150 2X4, 4X4, Flex Fuel & Eco boost SNS 42
 Installation Procedures 2009-2014 Ford F150 2X4, 4X4, Flex Fuel & Eco boost SNS 42 Warning: Please read directions completely before starting. If you have any questions please contact BMPP before beginning
CA 4051 Owner s Guide
 PROFESSIONAL SERIES CA 4051 Owner s Guide Remote Start System IMPORTANT NOTE: The operation of the Security and Convenience System as described in this manual is applicable to most vehicles. However, due
Instructions and Parts List 3M-Matic P/N Infeed/Exit Conveyor Attachment, 1.2 Meter
 Instructions and Parts List TM 3M-Matic P/N 78-8069-3971-2 Infeed/Exit Conveyor Attachment, 1.2 Meter Type 19100 The Infeed/Exit Conveyor, 1.2 Meter, has been designed and tested to be used only with 3M-Matic
Deluxe Hitch 3-Bike Rack Instructions for Part # BC-3581
 General Guidelines Deluxe Hitch 3-Bike Rack Instructions for Part # BC-3581 It is the user s responsibility to read and follow all instructions. Keep these instructions with the product at all times and
10 Ch Peak & Hold Injector Driver PN
 Installation Instructions 10 Ch Peak & Hold Injector Driver PN 30-2710 WARNING: installation is not for the electrically challenged! Use this product with extreme caution! If you are uncomfortable with
Model FM2642 Wall Mount. Full Motion Television Wall Mount
 Model FM2642 Wall Mount Full Motion Television Wall Mount Getting Started Introduction Congratulations on the purchase of your new Audio Solutions FM2642 Television Wall Mount. For maximum benefit, please
Installation Instructions Soft Top Replacement Hardware, Wrangler
 Installation Instructions Soft Top Replacement Hardware, 87-95 Wrangler IMPORTANT NOTICE: Carefully read instructions before attempting to install this product. Rampage is in no way responsible for any
BlinkerBeam Solar Controller
 Blinker Division Solar LED Solutions The Route To Safety, One Solution At A Time BlinkerBeam Solar Controller BlinkerSign, BlinkerBeacon or RRFB 2.0 with 55 W Solar Panel User Guide TAPCO Traffic & Parking
idrive Power Cord Extender Installation Instructions MODELS: 3960M/3961S (1) 25 POWER CORD DRILL WITH 3/32 DRILL BIT
 25 POWER CORD DRILL WITH 3/32 DRILL BIT") Wayne-Dalton Corp. P.O. Box 67 Mt. Hope, OH 44660 (888) 827-3667 www.wayne-dalton.com idrive Power Cord Extender Installation Instructions MODELS: 3960M/3961S The idrive Power Cord Extender is intended
Wayne-Dalton Corp. P.O. Box 67 Mt. Hope, OH 44660 (888) 827-3667 www.wayne-dalton.com idrive Power Cord Extender Installation Instructions MODELS: 3960M/3961S The idrive Power Cord Extender is intended
JET METER INSTRUCTIONS
 UNPACKING Please open and inspect your package upon receipt. Your package was packed with great care and all the necessary packing materials to arrive to you undamaged. If you do find an item that is broken
SIDE-WIND, A-FRAME TRAILER JACK. Model Due to continuing improvements, actual product may differ slightly from the product described herein.
 SIDE-WIND, A-FRAME TRAILER JACK Model 95157 Assembly And Operation Instructions Due to continuing improvements, actual product may differ slightly from the product described herein. 3491 Mission Oaks Blvd.,
PLEASE READ BEFORE RETURNING THIS PRODUCT FOR ANY REASON.
 MOBILE COOLER CART INSTRUCTION MANUAL CATALOG NUMBER BCC20W Thank you for choosing BLACK+DECKER! PLEASE READ BEFORE RETURNING THIS PRODUCT FOR ANY REASON. If you have a question or experience a problem
HURRICANE 54-IN FOOSBALL TABLE ASSEMBLY INSTRUCTIONS
 HURRICANE 54-IN FOOSBALL TABLE ASSEMBLY INSTRUCTIONS Please Do Not Hesitate to Contact Our Consumer Hotline at 800-759-0977 with Any Questions That May Arise During Assembly or Use of This Product! NG1033F
Nature s Generator Power Panel
 Nature s Generator Power Panel Nature s Generator Power Panel Contents Introduction - Unpack Your Nature's Generator Power Panel - Unpack Your Solar Panel Accessory Box - Assemble Your Solar Panel Cart
Owner s Guide ca4054 ca4554
 PROFESSIONAL SERIES Owner s Guide ca4054 ca4554 Remote Start System IMPORTANT NOTE: The operation of the Security and Convenience System as described in this manual is applicable to most vehicles. However,
Installation Instructions **THIS RAIL MOUNTING KIT USES 11 BOLTS**
 Installation Instructions CUSTOM QUICK INSTALL MOUNTING KIT FORD SUPER DUTY Part Numbers: 50074 WARNING:Under no circumstances do we recommend exceeding the towing vehicle manufacturers recommended vehicle
(KERNEL) SAND BLAST CABINET ( 220L ) ASSEMBLY & OPERATION INSTRUCTION
 SAND BLAST CABINET ( 220L ) ASSEMBLY & OPERATION INSTRUCTION") Model 272622 (KERNEL) SAND BLAST CABINET ( 220L ) ASSEMBLY & OPERATION INSTRUCTION (1 st version) October 2014 1 / 12 PRODUCT LIMITED WARRANTY The product is guaranteed for 12 months from date of manufacturer
Model 272622 (KERNEL) SAND BLAST CABINET ( 220L ) ASSEMBLY & OPERATION INSTRUCTION (1 st version) October 2014 1 / 12 PRODUCT LIMITED WARRANTY The product is guaranteed for 12 months from date of manufacturer
ASSEMBLY / OPERATION INSTRUCTIONS. Low Profile Motorcycle Dolly
 ASSEMBLY / OPERATION INSTRUCTIONS 1,500LB CAPACITY Low Profile Motorcycle Dolly Model: 03-CG1500-01(B1) WARNING BEFORE USE PLEASE READ ALL WARNINGS AND INSTRUCTIONS TO PREVENT SERIOUS INJURY Drop-Tail
MODEL 7400 STRUT SPRING COMPRESSOR
 MODEL 7400 STRUT SPRING COMPRESSOR Installation, Operation & Repair Parts Information Branick Industries, Inc. 4245 Main Avenue P.O. Box 1937 Fargo, North Dakota 58103 REV112712 P/N: 81-0103A TABLE OF
RENA AF371Feeder Operating Manual. Feeder. Operating Manual. Manual Part #: M AF371 Operations Rev
 Manual Part #: M-3022 Feeder AF371 Operations Rev. 3-16-04 1 RENA AF371 Feeder YOUR RENA AF371 IS DISTRIBUTED BY RENA SYSTEMS INC. SERVICE AND SUPPORT FOR THIS PRODUCT IS PROVIDED BY YOUR RENA DEALER.
OUTDOOR TABLE TENNIS TABLE ASSEMBLY INSTRUCTIONS
 OUTDOOR TABLE TENNIS TABLE ASSEMBLY INSTRUCTIONS Please Do Not Hesitate to Contact Our Consumer Hotline at 800-759-0977 with Any Questions That May Arise During Assembly or Use of This Product! NG2336P
COVER PAGE CUSTOM QUICK INSTALL MOUNTING KIT NOTE!
 COVER PAGE NOTE! Prior to installing product, please visit one of our websites to assure your kit contains the most recent revision to installation instruction and verify vehicle application. www.reeseproduct.com
Owner s Guide ca4053 ca4553
 PROFESSIONAL SERIES Owner s Guide ca4053 ca4553 Remote Start System IMPORTANT NOTE: The operation of the Security and Convenience System as described in this manual is applicable to most vehicles. However,
AURORA TABLE TENNIS. Replacement Parts
 AURORA TABLE TENNIS Replacement Parts Order direct at or call our Customer Service department at (800) 225-7593 8 am to 4:30 pm Central Standard Time July 2014 UPC Code 7-19265-51826-6 Staple your receipt
MODEL 7600 STRUT SPRING COMPRESSOR
 MODEL 7600 STRUT SPRING COMPRESSOR Installation, Operation & Repair Parts Information Branick Industries, Inc. 4245 Main Avenue P.O. Box 1937 Fargo, North Dakota 58103 REV6162014 P/N: 81-0246 TABLE OF
A S S E M B L Y I N S T R U C T I O N S
 A S S E M B L Y I N S T R U C T I O N S Please Do Not Return This Product to the Store! Contact Escalade Sports customer service department at: Phone: 1-888-USA-GOAL Toll-Free! Fax: 1-866-873-3536 Toll-Free!
PLEASE ENSURE THE JUMP STARTER IS FULLY CHARGED PRIOR TO FIRST USE.
 PLEASE ENSURE THE JUMP STARTER IS FULLY CHARGED PRIOR TO FIRST USE.. (1) RG1000 EMERGENCY JUMP STARTER PORTABLE POWER SUPPLY (1) 3-IN-1 USB CABLE (1) RG1000 EMERGENCY JUMP STARTER PORTABLE POWER SUPPLY
HARDWARE KIT INSTALLATION GLOVES
 COIL MOUNT STEEL DUCT MOUNT DUCTBOARD MOUNT CLAMP PLATE Z-BRACKET PCO BRACKET SHIELDED LAMP ASSEMBLY ALSO INCLUDED BALLAST TECH MANUAL HARDWARE KIT INSTALLATION GLOVES Rev 1 Issued: 09/03/2014 SERVICE
Owner s Guide CA 4555
 PROFESSIONAL SERIES Owner s Guide For Model: CA 4555 Vehicle Remote Start System with 2 Way Confirming Remote Control IMPORTANT NOTE: The operation of the Security and Convenience System as described in
FOLD N STORE. Table Tennis Table. Assembly Instructions Model DS, DS CONTACT INFO Hours.
 FOLD N STORE TM PATENT - www.eastpointsports.com Table Tennis Table Assembly Instructions Model 1-1-33525-DS, 1-1-33536-DS CONTACT INFO Hours Technical Support Monday to Friday (9am to 5pm EST) Email us
Electromagnetic Particle Brakes Model: PRB-H
 P-223-3 819-0370 Electromagnetic Particle Brakes Model: PRB-H Installation Instructions Table of Contents Introduction............................2 Installation Instructions....................3 Start
Swing Arm Magnifying Lamp
 Owner s Manual & Safety Instructions Save This Manual Keep this manual for the safety warnings and precautions, assembly, operating, inspection, maintenance and cleaning procedures. Write the product s
ROUSH Billet Upper Grille Kit
 ROUSH Billet Upper Grille Kit Part Number R03010141 Application: 2010-11 Mustang GT Installation Instructions Before installing your ROUSH Performance Product(s), read through the entire installation procedure
Installation Instructions
 Safe Operation Practices Set-Up Operation Maintenance Service Troubleshooting Warranty Installation Instructions RZT & Z-Force Light Kit Model 19B70032100 WARNING READ AND FOLLOW ALL SAFETY RULES AND INSTRUCTIONS
PUSH BUTTON KEY CABINET
 PUSH BUTTON KEY CABINET Model 95689 INSTALLATION And Operation Instructions Due to continuing improvements, actual product may differ slightly from the product described herein. 3491 Mission Oaks Blvd.,
 CUSTOMER SERVICE: 800-973-8374 Frame Assembly Instructions Headboard Installation E 1. Use the remote control to raise the head of the adjustable foundation in order to gain access to the foundation
Installation Instructions
 Installation Instructions Rock Crawler Roof Rack (Part # 76717) 07-Up Jeep Wrangler J/K 4Door For Technical Support/Warranty Information please call 310-762-9944 Smittybilt, 400 West Artesia Blvd, Compton,
Thermaltake Warranty / Support Information
 Thermaltake Warranty / Support Information Technical Support Thermaltake is committed to providing the highest quality, most reliable products for our valued customer. There are several ways you may contact
p.t.o. Slip clutch Read this material before using this product. Failure to do so can result in serious injury. Save this manual.
 p.t.o. Slip clutch 65517 Installation Instructions Distributed exclusively by Harbor Freight Tools. 3491 Mission Oaks Blvd., Camarillo, CA 93011 Visit our website at: http://www.harborfreight.com Read
Instruction Sheet SRSR SERIES. Rotating Sliding Rail System
 Instruction Sheet SRSR SERIES Rotating Sliding Rail System THANK YOU Thank you for purchasing the SRSR Series Rotating Sliding Rail System. Please read these instructions thoroughly before assembling this
RANGE HOODS USER INSTRUCTIONS
 RANGE HOODS USER INSTRUCTIONS Model: Advanta Pro III 30 & 36 IMPORTANT SAFETY INSTRUCTIONS Carefully read the following important information regarding installation safety and maintenance. Keep these instructions
INSTRUCTIONS PARTS LIST This manual contains important warnings and information. READ AND RETAIN FOR REFERENCE
 INSTRUCTIONS PARTS LIST 308 493 This manual contains important warnings and information. READ AND RETAIN FOR REFERENCE Rev. A Second Gun Hose Kit 100 psi (6.9 bar) Maximum Working Pressure These kits include
Proslide XT. Retracting Slider. Installation and User Manual. Thank you for purchasing the Proslide XT Retracting Slider.
 Proslide XT Retracting Slider Installation and User Manual Thank you for purchasing the Proslide XT Retracting Slider. Patent No. 5,575,140 Novae Please read before using. This manual will help you get
3-IN-1 POKER TABLE ASSEMBLY INSTRUCTIONS
 3-IN-1 POKER TABLE ASSEMBLY INSTRUCTIONS NG2351/NG2366 THANK YOU! Thank you for your purchase of our product. We work around the clock and around the globe to ensure that our products maintain the highest
9' & 12' CHALLENGER SHUFFLEBOARD TABLE ASSEMBLY INSTRUCTIONS
 9' & 12' CHALLENGER SHUFFLEBOARD TABLE ASSEMBLY INSTRUCTIONS NG1205 / NG1210 / NG1212 / NG1214 THANK YOU! Thank you for purchasing this product. We work around the clock and around the globe to ensure
c EDR /11. ShipShape OWNERS MANUAL. [ power foundations ]
![c EDR /11. ShipShape OWNERS MANUAL. [ power foundations ]](/thumbs/87/96491649.jpg "c EDR /11. ShipShape OWNERS MANUAL. [ power foundations ]") 99301115-c EDR11746 4/11 ShipShape OWNERS MANUAL [ power foundations ] contents Advisory... 4 Assembly... 6 Hand Control Function... 15 Accessories... 16 Troubleshooting... 17 1-2-Lifetime Warranty...
99301115-c EDR11746 4/11 ShipShape OWNERS MANUAL [ power foundations ] contents Advisory... 4 Assembly... 6 Hand Control Function... 15 Accessories... 16 Troubleshooting... 17 1-2-Lifetime Warranty...
Model:M5B/M5W/M5N. Installation Guide. Specifications Desktop Weight Capacity Keyboard Tray Weight Capacity Height Adjustable Range
 Model:M5B/M5W/M5N Installation Guide Website: www.flexispot.com Tel: 1-855-421-2808 Specifications Desktop Weight Capacity Keyboard Tray Weight Capacity Height Adjustable Range 33 Ibs (15 KG) 4.4 Ibs (2
Power Float Manifold. Installation and Operations Manual Module 11A
 Power Float Manifold Installation and Operations Manual Module 11A 2/14 Table of Contents 1 Features 3 2 Functional Purpose 3 3 4 Specifications System Installation 3 4 4.1 Hydraulic Connection 4 4.2 Electric
48 SUPER JUMPER KIDS TRAMPOLINE
 48 SUPER JUMPER KIDS TRAMPOLINE PRODUCT MANUAL - VERSION 01.18.07 FOR AGES: WEIGHT LIMIT: 100 Lbs 45 Kgs TO BUILD: 3-10 1 X TOOLS NEEDED: CUSTOMER SERVICE GQBrands.com CustomerService@GQBrands.com 1-866-498-5269
Pressurized oil drain for collection of used lubricants and anti-freeze.
 Instructions - Parts List 24-Gallon (90-Liter) Oil Ace 30864B Pressurized oil drain for collection of used lubricants and anti-freeze. Model 9577 Series A 8 psi (55 kpa,5 bar) Maximum Working Pressure
ABRASIVE BLAST CABINET
 Model 272635 (KERNEL) ABRASIVE BLAST CABINET ( 350L ) ASSEMBLY & OPERATION INSTRUCTION (2 nd version) Jan. 2016 1 / 9 PRODUCT LIMITED WARRANTY The product is guaranteed for 12 months from date of manufacturer
2019-ON RAM 1500 INSTALLATION INSTRUCTIONS
 2019-ON RAM 1500 INSTALLATION INSTRUCTIONS Thank you for purchasing ROCKSTARTM Splash Guard Mud Flaps. Agri-Cover, Inc. proudly manufactured these mud flaps using superior quality materials and workmanship.
Installation Instructions Receiver Rack (Part # 7700) Universal Application
 Universal Application") NOTE: Carefully read entire instructions thoroughly before attempting to install this part. Parts Included Qty Tools Needed 2 Draw Bar 1 Ratchet Racks 2 Socket Set Curved Support Bars 2 Wrench Set Connecting
NOTE: Carefully read entire instructions thoroughly before attempting to install this part. Parts Included Qty Tools Needed 2 Draw Bar 1 Ratchet Racks 2 Socket Set Curved Support Bars 2 Wrench Set Connecting
Rear Weight Kit M060
 Operator s Manual Rear Weight Kit 490-900-M060 WARNING READ AND FOLLOW ALL SAFETY RULES AND INSTRUCTIONS IN THIS MANUAL BEFORE ATTEMPTING TO OPERATE THIS MACHINE. FAILURE TO COMPLY WITH THESE INSTRUCTIONS
CT4880 Collaboration Huddle Table Assembly Instructions
 CT4880 Collaboration Huddle Table Assembly Instructions Monitor, monitor stand and chairs are not included. Thank you for choosing the CT4880 Collaboration Huddle Table from AmpliVox Portable Sound Systems.
Before installing your Roush Performance Product(s), read through the entire installation procedure and check to make sure all items are present.
, read through the entire installation procedure and check to make sure all items are present.") 2005-2006 Ford Mustang GT Legal / Stage 3 / Offroad Exhaust Kits for Roush Rear Valence Installation Instructions Application: 2005- Ford Mustang GT Model Must have Roush Rear Valence Kit #R03030061 Before
2005-2006 Ford Mustang GT Legal / Stage 3 / Offroad Exhaust Kits for Roush Rear Valence Installation Instructions Application: 2005- Ford Mustang GT Model Must have Roush Rear Valence Kit #R03030061 Before
OWNER S MANUAL: Model # JGSBSEAR Searing Burner Station
 JACKSON GRILLS INC. #106-2480 Mt. Lehman Rd. Abbotsford, BC V4X 2N3 TEL: 1(888) 287-3333 FAX: 1(877) 855-5373 SUPPORT: support@jacksongrills.com WEB SITE: www.jacksongrills.com OWNER S MANUAL: Model #
ESE Series Cast Iron Sewage Pumps
 Owner s Manual ESE Series Cast Iron Sewage Pumps TABLE OF CONTENTS General Safety.................... 2 Specifications..................... 3 Installation.................... 4 & 5 Troubleshooting...................
5 FOOT AIR HOCKEY TABLE ASSEMBLY INSTRUCTIONS
 5 FOOT AIR HOCKEY TABLE ASSEMBLY INSTRUCTIONS NG1009 H THANK YOU! Thank you for your purchase of our product. We work around the clock and around the globe to ensure that our products maintain the highest
RECHARGEABLE 24 LED WORK LIGHT
 RECHARGEABLE 24 LED WORK LIGHT MODEL 95181 ASSEMBLY AND OPERATING INSTRUCTIONS Due to continuing improvements; actual product may differ slightly from product described herein. 3491 Mission Oaks Blvd.
Instruction Sheet. SFR Series. Swing Frame rack
 Instruction Sheet SFR Series Swing Frame rack THANK YOU Thank you for purchasing the SFR Series Swing Frame Rack. Please read these instructions thoroughly before installing/assembling this product. PRODUCT
Quadratec 3 Add-A-Leaf Suspension Lift Kit
 Quadratec 3 Add-A-Leaf Suspension Lift Kit Installation Manual: for 1984-2001 Cherokee (XJ) # 16400.005X PARTS LIST: Front Coil Springs - QTY 2 Add-A-Leafs - QTY 2 5/16 x 3 Tie Bolts - QTY 2 5/16 Tie Bolt
Front HD Bumper. Part No. FHDB003TI. PARTS LIST: Qty Part Description Qty Part Description
 ` HD Bumper Part No. FHDB003TI Fits: 2015-2016 Chevrolet Silverado 2500/3500 ASSISTANCE IS RECOMMENDED. REMOVE CONTENTS FROM BOX. VERIFY ALL PARTS ARE PRESENT. 60-180 min Cutting Not Required Drilling
VICTORY TABLE TENNIS TABLE ASSEMBLY INSTRUCTIONS
 VICTORY TABLE TENNIS TABLE ASSEMBLY INSTRUCTIONS NG2322 THANK YOU! Thank you for your purchase of our product. We work around the clock and around the globe to ensure that our products maintain the highest
5 FOOT SOCCER TABLE ASSEMBLY INSTRUCTIONS
 5 FOOT SOCCER TABLE ASSEMBLY INSTRUCTIONS NG1035 THANK YOU! Thank you for your purchase of our product. We work around the clock and around the globe to ensure that our products maintain the highest possible
SAVE THESE INSTRUCTIONS WARNING
 Bariatric Assembly, Installation and Operating Instructions Model Nos. BARTRAP SAVE THESE INSTRUCTIONS NOTE: Check ALL parts for shipping damage. In case of shipping damage, DO NOT use. Contact Dealer/Carrier
Installation Instructions
 Installation Instructions CUSTOM QUICK INSTALL MOUNTING KIT 2011 & UP Ford Super Duty F-250/F-350/F-50 2011 & UP Part Number: 50073 WARNING: Under no circumstances do we recommend exceeding the towing
Installation Instructions
 Installation Instructions Application Fits 2012 + Toyota Prius V X7192 & X7193 2 & 1.25 EcoHitch Stealth 350 lbs. Tongue Weight/ 3,500 lbs. Towing Weight Torklift Central 315 Central Ave N Kent, WA 98032
ROUSH Billet Lower Grille Kit
 ROUSH Billet Lower Grille Kit Kit Part Number 1310R8200B Application: 2010 ROUSH Mustang w/roush Front Fascia Installation Instructions Before installing your ROUSH Performance Product(s), read through
LIBERATOR USER MANUAL
 LIBERATOR USER MANUAL TABLE OF CONTENTS Specifications... 1 Battery Installation... 3 Components... 4 Basic Functions... 5 Lockout/Ready Mode... 8 Momentary Mode... 8 Constant-On... 9 Cycle Control...
Installation Instructions
 Equipment Required: Installation Instructions Fastener Kit: F Wrenches: 8mm, 13mm, 3/4, 15/16 Drill Bits: 1/4 Other Tools: Drill, Reciprocating Saw, File WARNING: Under no circumstances do we recommend