MAKING YOUR DREAMS A REALITY FITTING INSTRUCTIONS. KAWASAKI ZXR250 Ninja Style Fairing Set BPFS-0071
|
|
|
- Easter Gordon
- 6 years ago
- Views:
Transcription


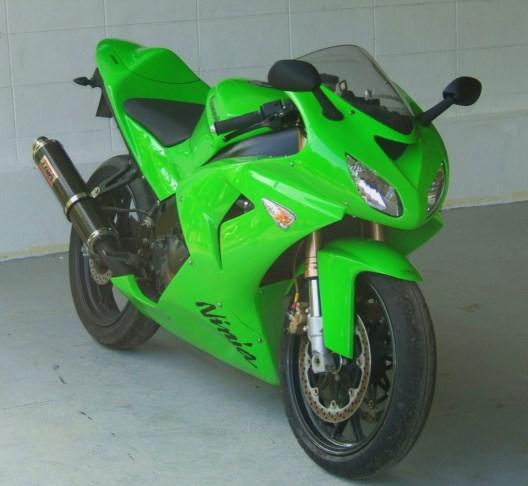


1 MAKING YOUR DREAMS A REALITY FITTING INSTRUCTIONS KAWASAKI ZXR250 Ninja Style Fairing Set BPFS-0071

2 Handy Hints for fitting our fairings: 1. We recommend trial fitting of our fairings before painting. It is much easier to mount the second time with prior experience. Also, if there are any minor issues, it will not be a drama at this stage to correct them. Once the bodywork is painted, it is difficult to make any small adjustments or trim edges etc. 2. Use masking tape to protect paintwork, screens and headlights. You can remove this later when everything has been properly secured. 3. If you fail to do the two above steps and make a minor scratch or need to trim an edge, use a permanent marker to cover over any bare fibre. If your bodywork is painted black inside, the black marker treatment along the edge will cover any trimming and leave little evidence. 4. Always leave stays loose until you are sure of the final position. You may need to loosen off tank too. Then make sure you secure all of them when you have settled on the best position. It would be a good idea to note all the slackened screws and fasteners so you can tick them off when you tighten them. 5. Always check that the meter stay is pointing exactly frontward. A cm out of centre line to left or right will play havoc with alignment of other components 6. Only drill when you are 100% sure of position. However, don't be afraid to redrill if you have to. Holes can easily be filled and once painted you will never see them 7. Try to stay patient. Nearly always there is a simple reason if the fit is not right. If you get stuck, before you get too stressed and end up breaking something and regret it, take a break, have a drink and come back to the job with a fresh outlook.if you need to, please mail us for more instructions or advice. 8. Try to remember throughout that you are doing this for fun and the end result will be worth the effort.


 ZXR250C Ninja Upper Cowling,")
 ZXR250C Ninja Tyga Eyes IV")

3 ZXR250 Ninja Style Fairing Set Before starting work on the bike, remove all the components from the box and familiarize yourself with each one. There are several dozen components in total if you count every nut bolt and washer! This does not include the other components which will need removal and replacing or repositioning. Contents Please refer to contents to make sure that you have received all necessary parts to assemble the Ninja Style ZXR250 fairing kit: BPFS-0071 Kit, Fairing Set (Street GRP), ZXR250 Ninja Style Code Model/ Product Name Qty. 1 BPFU-9028F 2 BPFU-9028L 3 BPFU-9028R 4 BPFL BPLT BPLT-0018L 7 BPLT-0018R 8 SCRE TYMR TYLY BPFX-9028 Upper Cowling, Front (GRP) ZXR250C Ninja Upper Cowling, Left (GRP) ZXR250C Ninja Upper Cowling, Right (GRP) ZXR250C Ninja Lower Cowling, Right (GRP) ZXR250C Ninja Tyga Eyes IV Headlight, Assy Front Left,Indicator, Ninja Style Front Right Indicator, Ninja Style Screen OEM, Ninja 250R, GP/Spark Mirrors (pair) ZXR250C Meter stay Tank Cover, (GRP) ZXR250C Ninja Style.
4 The kit comes with all necessary hardware needed for fitting of the fairing Specified below: Code Model/ Product Name Qty. 1 BPFU-9028F(P) 2 JTSB WPPC NTPC JTST WPSS-0400 Upper Cowling, Front (GRP) ZXR250C Ninja M6x10 JT Domehead Bolt Black, Washer Plastic M6x13x1.0 Nut Plastic M6 (PA) M4x15 JT Domehead Bolt M4 Washer 4 PCS. 8 PCS. 4 PCS. 1 BPFU-9028L(P) 2 JTST JTST WPSS WPSS JTST JTST JTST BPSY-0062 Upper Cowling, Left (GRP) ZXR250C Ninja M4x12 JT Domehead Bolt M6x12 JT Domehead Bolt M4 Washer M6 Washer M6 x15 JT Domehead Bolt M4x10 JT Domehead Bolt M5x10 JT Domehead Bolt Console Stay L, ZXR250C. 4 PCS. 1 BPFU-9028R(P) 2 JTST JTST WPSS WPSS JTST JTST JTST BPSY-0063 Upper Cowling, Right (GRP) ZXR250C Ninja M4x12 JT Domehead Bolt M6x12 JT Domehead Bolt M4 Washer M6 Washer M6 x15 JT Domehead Bolt M4x10 JT Domehead Bolt M5x10 JT Domehead Bolt Console Stay R, ZXR250C. 4 PCS. 1 BPFL-9028(P) 2 JTST WPSS-0600 Lower Cowling, (GRP) ZXR250C Ninja Style M6 x15 JT Domehead Bolt M6 Washer KVB-T01 2 BPLB JTST BPLT-0018L 1 BPLT-0018R JTST WPSS TYMR-0001L 2 TYMR-0001R 3 1 TYLY BPFX-9028 Head Light TE IV Bulb 25w M4x10 JT Domehead Bolt Left side indicator Right side indicator Screen OEM, Ninja 250R M6 x15 JT Domehead Bolt M6 Washer M6 Nut Left mirror Right mirror M10 Nut ZXR250 Ninja Style Meter Stay Tank Cover, (GRP) ZXR250C Ninja Style.
 Remove the fuel tank, and the air ducts and any fuel inside.")
5 Fitment of the Fairing The first job is to remove the following OEM parts: 1. mirrors 2. Complete fairing with headlights, turn signals etc 3. stock meter stay and instruments 4. radiator shrouds 5. side fairing stays 6. tank Fitting fuel tank cover (BPFX-9028) Remove the fuel tank, and the air ducts and any fuel inside. Ideally you need the tank free of gas because you will be grinding and there will be sparks which could cause an explosion. Refit the filler cap and make sure that there is no risk of fumes before beginning. You need to grind the two tubes projecting out the top of the fuel tank so they are flush with the top of the tank. You can test fit the cover by offering it up and grinding a little more if necessary. It would be a good idea to put a dab of primer on the bare end of the cut to prevent rust At this stage, we recommend all trial fitting before painting so only when you do the final fitting after painting, we recommend a dab of silicone sealant around the filler hole to stop moisture. The cover needs no fixtures because it clips into place, but extra sealant along bottom edge or double sided would also help to hold it in place. Apply the rubber beading along the rim of the gas tank (not the cover) and this will cover up any of the stock colour on the tank as well as give the tank a more finished look.


6 Fitting ZXR250 Ninja Style Meter Stay (TYLY-0045) Before any removal OEM meter stay, make a note (or take digital picture) of where all the standard cables, wires etc are routed as you will require these positions for the fitting of TYLY There are various nuts and bolts on the OEM stay which need to be swapped over to the TYGA stay so keep a hold of them. Fit meter assembly to meter stay using the original bolts. Don't tighten yet. Now fit the TYGA stay to the frame securing mounts with the supplied (longer) bolts and tighten up. You'll notice that there is a little up and down movement of the stay which will assist in alignment of the upper and lower cowling later. Test the steering on full lock to make sure that the instruments do not touch. If they do there are a few adjustments that can be made. Firstly, it is possible to slightly adjust the instruments where they mount to the stay and re tighten the bolts. Secondly, you can loosen the perches for the brake and clutch and rotate slightly or even move along the handlebar if that helps. Thirdly, you can adjust the bars back more by loosening them off on the pinch bolts and moving them to their furthest position back. Make sure you keep tank to bar clearance though. Reconnect the plugs and check routing of cables etc. Check for smooth throttle action. It must close under its own spring tension. Fitting ZXR250 Ninja Style Console Stays (BPSY-0062 and BPSY-0063) and console stays Replace the stock stays with BPSY-0062 and BPSY Offer up the stays into position. Locate the stays as shown in the photos below re-using the original radiator shroud stay bolts. Do not tighten fully so you can adjust later Fitting BPLT-0018 TYGA Eyes IV headlight Assembly The headlight assy. can be a little tricky to fit. Please note that it is a good idea to use masking tape over headlight lens to protect it, especially during trial fitting before painting to prevent damage. Also worth a mention that the headlight shape is not replicated by the holes molded in the upper cowling. The light comes up flush against the upper on the inside and will not go through the molded holes to project forward.
7 Slide the headlight in carefully with minimum contact with the fairing until it is in the correct position. First line up the top lugs on the left with its respective hole on the headlight. Thread the top M4 screw in loosely. Next do the same for the lower position. Check the alignment in relation to the headlight hole in the fairing and adjust before securing the screws into place. Repeat for other side. Once secured the masking tape can be removed from the lenses. Fitting ZXR250 Ninja Style Upper Fairing (BPFU-9028F, BPFU-9028L and BPFU-9028R) If you're fitting the Ninja style seat cowling as well as the fairing you will need the HRC overflow bottle, so fit it now. It can be done after but it's more fiddly It might also pay to put a cloth over the front fender before offering up the cowl, as you can use this to rest the cowl while connecting up the headlights etc. Secure the stock rubber bushes to the upper cowling where it fits the meter stay. You will be reusing the original Kawasaki bolts to. Before fitting the upper to the bike, fit the screen using the fasteners provided. Again, if this is just a trial fit, always use masking tape along the edge to protect it from scratches. Alternatively, the screen can be fitted as a final touch later depending on how small your hands are to get in to fit it! Once the front is nearly in position, connect the headlights and test they work. The upper fairing is fitted to the bike in six positions, the two underneath with the rubber bushes, the mirror positions and the console stays. Leave the console stays until after the side fairings are fitted but you can fit the mirrors now. Now turn your attention to the upper left and upper right fairings ( BPFU-9028L and BPFU-9028R) Fit the indicators to the panels. These are a tight fit. Don't be afraid to pull the inner edge of the panel out a little to allow the indicator to locate in position. Once in position, secure with the M4 and M5 screws provided. Now is a good time to check that the indicators function correctly. Move the upper sides into position. Be careful to get the flaps inside where the upper and sides join. If the panels are painted, we strongly recommend running masking tape along the painted area to prevent scratches. Secure the M6 where it fits in the recessed hole in the side fairing and goes into the side stay mouthed to the frame. Start putting the M4 screws into position where the side meets the upper. Do not tighten until all except the position. Note the position closest to the tank uses a longer screw which is inserted through both the upper and side before going in the clip that is attached to the console stay. Be careful to make sure the console stay is in the correct position and if not, now is the time to adjust it. Also be careful not to cross thread any of the screws especially the one that goes into the clip because it is quite fiddly.

 Fitting the lower cowl is fairly straightforward, but is definitely made easier by using a paddock stand, or even a paddock friend!")

8 Repeat for the other side fairing and connect the turn signal indicators and test they still work. Finally, note position of console stays, mark in correct position and drill to accept M4 bolts provided. This is quite difficult, but the stays are adjustable so you can make minor adjustments if necessary. Fitting ZXR250 Ninja Style Lower Cowling (BPFL-9028) Fitting the lower cowl is fairly straightforward, but is definitely made easier by using a paddock stand, or even a paddock friend! The lowers are mounted by sliding from left to right side. Turn steering on right lock to give you more space and put a piece of carpet or similar on ground to avoid scratches on lower as you slide it through. Put masking tape along the edges which might get damaged as you fit the lowers such as near the brake pedal. The front-most position can be a bit tricky to get started and make sure that when you tighten it that it does not get caught behind the side fairing and damage paint. Also, pay attention to the exhaust and make sure there is clearance or it will cause heat damage to panels and paint. If necessary, space out the lower rear right to prevent this happening. Now the fairing is fitted, we advise tightening off all mounting positions especially the meter stay and the console stays which still should be loose. This will involve removal of the side fairings but they will need to come off to be painted. Also make any adjustments to panels and edges at this stage before painting. Once the panels are painted, you will be able to fit them on the bike without any trouble having already trial fitted them already. Don't forget to attach the air duct mesh and sticker first. You are now ready to ride away!


9 Painted kits available at the website
FITTING INSTRUCTIONS
 MAKING YOUR DREAMS A REALITY FITTING INSTRUCTIONS APRILIA RS50 GP Style Fairing Sets BPFS-000 (GRP, street) BPFS-00 (GRP, race) BPFS-00 (Carbon, street) Aprilia RS50 GP Fairing Fitment of Aprilia RS50
FITTING INSTRUCTIONS
 MAKING YOUR DREAMS A REALITY FITTING INSTRUCTIONS MiniRacerXtreme MRX Bodywork kits BPFS-055 and BPFS-056 for nd gen Honda MSX5SF, Grom TRANSFORM the MSX5SF GROM to the: MRX MiniRacerXtreme Fitment of
MAKING YOUR DREAMS A REALITY FITTING INSTRUCTIONS
 MAKING YOUR DREAMS A REALITY FITTING INSTRUCTIONS Honda NC30 Two Seat, Street, BPFS-0078 Thank you for purchasing the TYGA NC30 Two Seat, Street kit. Please take a few minutes to read these instructions
MAKING YOUR DREAMS A REALITY FITTING INSTRUCTIONS. KTM RC series STEP KIT STAA-0024 (street) STAA-0124 ( race only)
 STAA-0124 ( race only)") MAKING YOUR DREAMS A REALITY FITTING INSTRUCTIONS KTM RC series STEP KIT STAA-0024 (street) STAA-0124 ( race only) KTM RC Series Step Kit Fitting Instructions, KTM RC Series Adjustable Step Kit STAA-0024,
MAKING YOUR DREAMS A REALITY FITTING INSTRUCTIONS KTM RC series STEP KIT STAA-0024 (street) STAA-0124 ( race only) KTM RC Series Step Kit Fitting Instructions, KTM RC Series Adjustable Step Kit STAA-0024,
MAKING YOUR DREAMS A REALITY. FITTING INSTRUCTIONS APRILIA RS125 Exhaust System EXCS-0019
 MAKING YOUR DREAMS A REALITY FITTING INSTRUCTIONS APRILIA RS125 Exhaust System EXCS-0019 The TYGA Performance Aprilia RS-125 Stainless Steel chamber, when used with a TYGA silencer, offers huge saving
Subaru Front Mount Intercooler Kit STI Subaru Front Mount Intercooler Kit STI
 Subaru Front Mount Intercooler Kit STI 2008-2014 715500 Subaru Front Mount Intercooler Kit STI 2008-2014 Congratulations on your purchase of the Subaru Front Mount Intercooler Kit STI 2008-2014. The following
Multistrada (MTS) Tank Installation Notes. Tools Required. Phase 1: Remove Fairings. Phase 2: Remove Fuel Tank
 Tank Installation Notes. Tools Required. Phase 1: Remove Fairings. Phase 2: Remove Fuel Tank") The California Cycleworks MTS tank provides an aftermarket alternative to the OEM nylon fuel tanks as used on aircooled Desmodue Ducati Multistrada 1100, 1000, and 620 models. This fuel tank is NOT for
The California Cycleworks MTS tank provides an aftermarket alternative to the OEM nylon fuel tanks as used on aircooled Desmodue Ducati Multistrada 1100, 1000, and 620 models. This fuel tank is NOT for
VRSC-DX Truck-Lite LED Headlight Installation Instructions
 VRSC-DX Truck-Lite LED Headlight Installation Instructions The following Instructions are for installing a 7 Truck-Lite LED headlight into a Harley Davidson VRSC-DX Night Rod Special fairing. Other 7 headlights
Installation instruction do88 performance Intercooler for Volvo S60/V60 T6 MY10-
 Installation instruction do88 performance Intercooler for Volvo S60/V60 T6 MY10-1. This instruction shows how to replace the OEM intercoolers with do88 performance intercoolers. At this type of installation
ZX-14 Stage I Turbo Kit
 62910 Peerless Ct. Bend, OR 97701 Phone 541.385.0706 Fax 541.382.9406 ZX-14 Stage I Turbo Kit WARNING: This turbo kit is for OFF-ROAD RACING use ONLY. Advisement: These instructions are written to be comprehensive
Prerequisites: Shop Manual (recommended) pages 3-9 through 3-13.
 pages 3-9 through 3-13.") Prerequisites: Order your gaskets average about $25.00 bucks X 2 so $50.00 4NK-11193-00-00 Obtain a shim kit (Should have several 265 and 270s) (Some dealers will exchange) Obtain a Valve Bucket Tool YM-33961
Prerequisites: Order your gaskets average about $25.00 bucks X 2 so $50.00 4NK-11193-00-00 Obtain a shim kit (Should have several 265 and 270s) (Some dealers will exchange) Obtain a Valve Bucket Tool YM-33961
2015+ EcoBoost F150 & Raptor Intercooler Install
 2015+ EcoBoost F150 & 2017+ Raptor Intercooler Install Note: This entire job can be performed with the truck on the ground - No need to raise the vehicle. The most difficult part is removing the grille
This advice was put together by Roger Butterfield for SJSC in June 2003 following the installation of a Walzendynamo 9501.
 This advice was put together by Roger Butterfield for SJSC in June 2003 following the installation of a Walzendynamo 9501. It consists of: advice about the selection of a dynamo advice on fitting the Walzendynamo
Tools Required. Metric Wrench Set Screwdriver Set Metric Socket Set Pliers Heavy duty hydraulic Jack and Car Stands Box knife or similar Hacksaw WD40
 Subaru 2004+ Legacy GT & Outback XT For JDM 2.0 twinscroll turbo and USDM 2.5 turbo models Front Mount Intercooler Fitting Instructions PN# LEG-1348-000 You are now the proud owner of a highly tested and
INSTALLATION INSTRUCTIONS FOR THE MOTOR TRIKE CROSS COUNTRY / CROSS ROADS / HARD BALL RAKE KIT
 INSTALLATION INSTRUCTIONS FOR THE MOTOR TRIKE CROSS COUNTRY / CROSS ROADS / HARD BALL RAKE KIT Thank you for choosing the Motor Trike Cross Country / Cross Roads / Hard Ball rake kit. We ask that you read
MAZDASPEED3 Intercooler Instructions
 MAZDASPEED3 Intercooler Instructions Congratulations on your purchase of the COBB Tuning Front Mount Intercooler System for your 2007-2009 Mazdaspeed3. The following instructions should assist you through
Current Range Rover Sport STRUT Collection Installation Manual
 2014 - Current Range Rover Sport STRUT Collection Installation Manual 1 1. Removing Main Grille and Lower Fascia 1.1 Run a line of low tack masking tape across the front of the bumper below the grille
»Product» Safety Warning
 #J9210 Installation Instructions 2007-13 Jeep Wrangler JK 2" Body Lift Kit Read and understand all instructions and warnings prior to installation of product and operation of vehicle. Zone Offroad Products
Mustang V-6 Cold Air Intake P/N: ( A600) Application: Ford Mustang 3.7L Manual or Automatic Transmission
 Application: Ford Mustang 3.7L Manual or Automatic Transmission") 2015-2017 Mustang V-6 Cold Air Intake P/N: 421828 (131537-9A600) Application: 2015-2017 Ford Mustang 3.7L Manual or Automatic Transmission Installation Instructions Before installing your ROUSH Performance
2015-2017 Mustang V-6 Cold Air Intake P/N: 421828 (131537-9A600) Application: 2015-2017 Ford Mustang 3.7L Manual or Automatic Transmission Installation Instructions Before installing your ROUSH Performance
Procharger Stage II Intercooled Supercharger System (11-14 GT)
") Procharger Stage II Intercooled Supercharger System (11-14 GT) Installation Time: Approximately one day. Installed on 2012 Mustang GT 5.0/Manual Required Tools 3/8 Socket Set (Standard and Metric) 1/2
Procharger Stage II Intercooled Supercharger System (11-14 GT) Installation Time: Approximately one day. Installed on 2012 Mustang GT 5.0/Manual Required Tools 3/8 Socket Set (Standard and Metric) 1/2
VW SCIROCCO TWINTERCOOLER INSTALLATION INSTRUCTIONS
 VW SCIROCCO TWINTERCOOLER INSTALLATION INSTRUCTIONS Tools needed: T25 torx driver Small flat head screwdriver 12mm & 13mm socket, with ratchet Dremel or similar with cut off disc Large Phillips screwdriver
Jass.Performance Low Profiles Installation Manual
 Jass.Performance Low Profiles Installation Manual The Jass.Performance Low Profiles are featuring: Fully reversible upgrade of the stock headlight bodies. Premium branded E-signed, TÜV aprooved Hella Headlights
Instructions for Lynx R Fairing - KTM EXC 500 Husqvarna 501
 Instructions for Lynx R Fairing - KTM EXC 500 Husqvarna 501 Thank you for purchasing the Lynx R fairing. The kit includes the following parts : 1 x Fairing and 1x Screen 2x 16mm M6 button head bolts 4x
SS1066HF Jeep JK Wrangler Left Hand Drive CRDI4 2.8Litre-I4 Diesel Engine and EGHV6 3.8Litre V6 Gasoline Engine
 SS1066HF Jeep JK Wrangler Left Hand Drive CRDI4 2.8Litre-I4 Diesel Engine and EGHV6 3.8Litre V6 Gasoline Engine Installation Guide Safari SS1066HF Page - 1 of 12 6/10/2009 ITEM PART NO DESCRIPTION QTY
Alignment Spec. Power Rack & Pinion: 5 degrees positive Camber 0 degrees Toe-In 1/32
 333-TCIE237 1967-1969 Chevy Camaro Front Suspension 1968-1972 Chevy Nova Front Suspension 1967-1969 Pontiac Firebird Front Suspension 1-800-984-6259 www.totalcostinvolved.com 1967-1969 Chevy Camaro Front
Remove the 3-11mm nuts holding mirror on. Don t drop the nuts!
 2005-2012 Ford Mustang Puddle Lamp Kit Parts List: Quantity: Tool List: LED Lamps 2 Flat head screwdriver Seals 2 Ratchet & Socket set OR Nuts 2 Adjustable Wrench Wiring harness 1 Drill & 11/16 th bit
AUSTIN HEALEY SPRITE MKI (FROG EYE) REBUILD CARRIED OUT DURING THE 1990s
 REBUILD CARRIED OUT DURING THE 1990s") AUSTIN HEALEY SPRITE MKI (FROG EYE) REBUILD CARRIED OUT DURING THE 1990s The car was owned by a friend who had it stored for a few years, when I first looked at it, the bonnet off and stored separate,
AUSTIN HEALEY SPRITE MKI (FROG EYE) REBUILD CARRIED OUT DURING THE 1990s The car was owned by a friend who had it stored for a few years, when I first looked at it, the bonnet off and stored separate,
INSTALLATION INSTRUCTIONS Horizon CCR HZ13054
 INSTALLATION INSTRUCTIONS Horizon CCR HZ13054 IMPORTANT: PLEASE GIVE CUSTOMER ENCLOSED INFORMATION! Thank you for your purchase of our HeliBars. They are designed to increase your long distance comfort
J&M Mustang Adjustable Panhard Rod (05-09) - Installation Instructions
 - Installation Instructions") J&M Mustang Adjustable Panhard Rod (05-09) - Installation Instructions The below installation instructions work for the following products: J&M Mustang Adjustable Panhard Rod (05-09) Please read through
J&M Mustang Adjustable Panhard Rod (05-09) - Installation Instructions The below installation instructions work for the following products: J&M Mustang Adjustable Panhard Rod (05-09) Please read through
VW SCIROCCO R TWINTERCOOLER INSTALLATION INSTRUCTIONS
 VW SCIROCCO R TWINTERCOOLER INSTALLATION INSTRUCTIONS Tools needed: T25 torx driver Small flat head screwdriver 12mm & 13mm socket, with ratchet Dremel or similar with cut off disc Large Phillips screwdriver
This is the Unpacking Guide for the Optibike Pioneer Allroad electric bicycle. The Guide provides information required to remove the Allroad from the
 This is the Unpacking Guide for the Optibike Pioneer Allroad electric bicycle. The Guide provides information required to remove the Allroad from the box and assemble it. If you have not assembled a bicycle
Installation instructions for Camaro/Firebird and Nova* Windshield Wiper Systems
 Installation instructions for 1967-69 Camaro/Firebird and 1968-74 Nova* Windshield Wiper Systems The Raingear 1967-69 Camaro/Firebird and 1964-74 Nova wiper system is designed for ease of installation
Cold Air Intake Installation Instructions
 BAVARIAN AUTOSPORT Cold Air Intake Installation Instructions PARTS LIST: PF BMWE36-4 PROCEDURE: 1. Using a flat-head screwdriver, loosen the hose clamp between the AFM and rubber boot leading to engine
95-98 CHEVY TRUCK INSTALLATION INSTRUCTIONS KIT #112 #113
 This body lift kit should only be installed on vehicles that are in good working condition. Before the installation begins, the vehicle should be thoroughly inspected for evidence of corrosion or deformation
A Fitting Guide for the Forge Motorsport Front Mounting Intercooler for the BMW Mini Cooper S Turbo R56 Models
 A Fitting Guide for the Forge Motorsport Front Mounting Intercooler for the BMW Mini Cooper S Turbo R56 Models (A copy of this guide is available online, in the media section of our website) A general
63162K 2015 Chevrolet Colorado 4WD Leveling Kit w/ 1 Rear Lift Kit
 PRO COMP SUSPENSION 63162K 2015 Chevrolet Colorado 4WD Leveling Kit w/ 1 Rear Lift Kit This document contains very important information that includes warranty information and instructions for resolving
Slingshot Rotrex Supercharger Kit
 Slingshot Rotrex Supercharger Kit This supercharger kit improves on the Slingshot by forcing more dense air into the engine and creating more power. Installation time of the supercharger depends on you
I. Before starting installation
 5. Park the vehicle on a clean, dry, flat, level surface and block the tires so the vehicle cannot roll in either direction. A. Disconnect battery cables 1. Disconnect the negative cable first, then the
2002 CHEVY AVALANCHE INSTALLATION INSTRUCTIONS - KIT #PA10073
 WARNING This body lift kit should only be installed on vehicles in good working condition. Before installation, the vehicle should be thoroughly inspected for evidence of corrosion or deformation of the
How to Change Front Brake Pads on a Toyota Corolla
 How to Change Front Brake Pads on a Toyota Corolla Link to this article on (All other links in this document are disabled) Follow this picture guide to change the front brake pads on a 2003-2008 Toyota
Superbike Kit
 Superbike Kit www.spieglerusa.com sales@spieglerusa.com Mounting Instructions & Safety Instructions for Honda CBR 1000 RR ABS model year 2017 - Attention Important Safety Instructions: Thank you for purchasing
FRONT FENDERS WITH FACTORY INNER FENDERS JEEP WRANGLER TJ/LJ/YJ/CJ7 INSTALLATION INSTRUCTIONS
 FRONT FENDERS WITH FACTORY INNER FENDERS JEEP WRANGLER TJ/LJ/YJ/CJ7 INSTALLATION INSTRUCTIONS TOOLS NEEDED 13mm socket 5/32 Allen head 5/16 wrench or socket 7/16 wrench or socket 7/32 Allen head 5/8 wrench
OIL COOLER KIT INSTALLATION INSTRUCTIONS D Application: , E89 Z4 sdrive 35i without stock oil cooler* PARTS LIST
 OIL COOLER KIT INSTALLATION INSTRUCTIONS D570-0891 Application: 2009-11, E89 Z4 sdrive 35i without stock oil cooler* PARTS LIST Qty Part No. Description 1 D573-0050 Oil Cooler + Frame Assy 1 D573-0044
Suzuki Samurai to Toyota Front Spring Swap Kit, with Missing Link Shackles (SKU#SSP-TSFM) Installation Instructions
 Installation Instructions") Suzuki Samurai to Toyota Front Spring Swap Kit, with Missing Link Shackles (SKU#SSP-TSFM) Installation Instructions CAUTION: Safety glasses should be worn at all times when working with vehicles and related
Suzuki Samurai to Toyota Front Spring Swap Kit, with Missing Link Shackles (SKU#SSP-TSFM) Installation Instructions CAUTION: Safety glasses should be worn at all times when working with vehicles and related
FORD SPORT TRAC 2&4WD 3 BODY LIFT KIT INSTALLATION INSTRUCTIONS KIT #70023
 3651 N Highway 89 Chino Valley, AZ 86323 (928) 636-7080 www.p-a-g.net FORD SPORT TRAC 2&4WD 3 BODY LIFT KIT INSTALLATION INSTRUCTIONS 2001-2002 KIT #70023 WARNING Installation of a Performance Accessories
92-00 Civic/ Integra/ Del Sol/ Accord/ CRX
 92-00 Civic/ 94-01 Integra/ 93-97 Del Sol/ 90-97 Accord/ 92-95 CRX Front Kit Part No. 75440 www.airliftperformance.com Please read these instructions completely before proceeding with installation MN-513
ADVANCE ADAPTERS INC. P/N: VORTEC GEN. III V8 SQ. BOLT TJ WRANGLER MOTOR MOUNTS (WITH A/C)
") Paso Robles, CA 93447 PAGE 1 OF 6 Telephone: (800) 350-2223 Fax: (805) 238-4201 Page Rev. Date: 04-16-14 KIT CONSISTS OF: No. Qty Part No. Description 1. 2 713092A BOLT SLEEVE 2. 4 713092B GEN 3 MOTOR
Paso Robles, CA 93447 PAGE 1 OF 6 Telephone: (800) 350-2223 Fax: (805) 238-4201 Page Rev. Date: 04-16-14 KIT CONSISTS OF: No. Qty Part No. Description 1. 2 713092A BOLT SLEEVE 2. 4 713092B GEN 3 MOTOR
OPR Replacement Foxbody Floor Pans Pair (79-93 All)
") OPR Replacement Foxbody Floor Pans Pair (79-93 All) Time Necessary: Approximately 40-hours Tools Required: Spot Weld Cutter Tool Corded Drill Center Punch MIG Welder (minimum recommended: 110VAC/135A)
OPR Replacement Foxbody Floor Pans Pair (79-93 All) Time Necessary: Approximately 40-hours Tools Required: Spot Weld Cutter Tool Corded Drill Center Punch MIG Welder (minimum recommended: 110VAC/135A)
INSTALLATION GUIDE Front Bumper. KL Cherokee (Trailhawk)
") INSTALLATION GUIDE Front Bumper KL Cherokee (Trailhawk) Included Hardware: Sample Sample Sample Skill Level: 5/5 stars (Professional install recommended) Disclaimer Expedition One is not responsible for
INSTALLATION GUIDE Front Bumper KL Cherokee (Trailhawk) Included Hardware: Sample Sample Sample Skill Level: 5/5 stars (Professional install recommended) Disclaimer Expedition One is not responsible for
Mustang Radiator Conversion DIY. By GearHeadPeter. January 27, 2011
 1964-1966 Mustang Radiator Conversion DIY By GearHeadPeter January 27, 2011 We all know that the radiators in our cars are not the best, especially if you have done any customization to the engine, which
Instant Chat off the main page of Or simply call our tech team at
 FRONT MOUNT INTERCOOLER 2008-13 STI 2014-04- 08 Thank you for purchasing this PERRIN product for your car! Installation of this product should only be performed by persons experienced with installation
Installation Instructions Jeep CJ-7
 Retrofit Steering Column Installation Instructions 1976-86 Jeep CJ-7 For Part # s 1520800010, 152800020, 1520800051 www.ididitinc.com 610 S. Maumee St., Tecumseh, MI 49286 (517) 424-0577 (517) 424-7293
OEM Cruise Control Installation in GMC/Chevy NBS trucks
 OEM Cruise Control Installation in 99-02 GMC/Chevy NBS trucks May 2008 ~ Rampage_Rick Having just installed factory cruise control in my 00 Sierra, I thought I d share the fun. I followed the steps outlined
SERIES A & AA ROLLER DOORS INSTALLATION GUIDE
 SERIES A & AA ROLLER DOORS INSTALLATION GUIDE THESE INSTRUCTIONS ARE PROVIDED FOR USE BY EXPERIENCED INSTALLERS OF GARAGE DOORS BY UNDER-TAKING THE INSTALLATION OF THIS DOOR, THE INSTALLER UNDERSTANDS
Retro it Steering Column
 Retro it Steering Column INSTALLATION INSTRUCTIONS for 1976-86 CJ5 & CJ7 FOR PART NUMBER S: 1520800010, 1520800020, 1520800051, 1526800010, 1526800020, 1526800051 S I NCE 1986 Instruction # 8000000010
Thermo-Bob 1 Installation Manual: Kawasaki Concours
 Thermo-Bob 1 Installation Manual: 1986-2006 Kawasaki Concours This is a basic guide for installing the Thermo-Bob 1 on a Kawasaki ZG-1000 Concours. The bike used in the following photos was a 1995 year
COLD AIR INTAKE INSTALLATION INSTRUCTIONS
 COLD AIR INTAKE INSTALLATION INSTRUCTIONS # D760-0030 Fits: 2007-10 135i (E82, E88; with N54 engine) 2007-08 335i/xi (E90) 2007-10 335i (E92, E93; with N54 engine) Congratulations for being selective enough
JEEP TJ & (XJ 84-01) ATLAS 2 SP.
 ATLAS 2 SP.") KIT CONSISTS OF: No. Qty Part No. Description 4320 Aerotech Center Way, Page 1 of 9 1 1 302051-RLE BASE- TWIN STICK MOUNT 42RLE 2 1 302080 STUD BOLT 1/2"-13 X 7 (XJ) 3 1 303120 SERRATED LOCK NUT 1/2" X
KIT CONSISTS OF: No. Qty Part No. Description 4320 Aerotech Center Way, Page 1 of 9 1 1 302051-RLE BASE- TWIN STICK MOUNT 42RLE 2 1 302080 STUD BOLT 1/2"-13 X 7 (XJ) 3 1 303120 SERRATED LOCK NUT 1/2" X
2000 DODGE DURANGO INSTALLATION INSTRUCTIONS KIT #60053
 WARNING This body lift kit should only be installed on vehicles in good working condition. Before installation, the vehicle should be thoroughly inspected for evidence of corrosion or deformation of the
Mercedes E63/CLS AMG Carbon Turbo Intake System Instructions
 Mercedes E63/CLS AMG Carbon Turbo Intake System Instructions The goal of Alpha Performance is to provide the highest quality, best performing products available. By utilizing research and development,
EVO 2 FAIRING Rev6 18/05/ :40:00 1
 EVO 2 FAIRING Rev6 18/05/2014 20:40:00 1 NOTE : BEFORE COMMENCING WORK ON THE CONVERSION, TAKE TIME TO READ THE INSTRUCTIONS CAREFULLY. ALL WORK CAN BE CARRIED OUT BY A COMPETENT MECHANIC, BUT IF YOU ARE
COLD AIR INTAKE INSTALLATION INSTRUCTIONS PART NUMBER D A. APPLICATION: E36/7 M-Roadster or M-Coupe 3.
 COLD AIR INTAKE INSTALLATION INSTRUCTIONS PART NUMBER D760-0323A APPLICATION: 1998-00 E36/7 M-Roadster or M-Coupe 3.2 Liter PARTS LIST Air Filter Assembly 3 1/2" Tube Intake Shield Silicone Hose Airflow
JEEP JK4 STEP SLIDER INSTALLATION BD-SS-100-JK4
 JEEP JK4 STEP SLIDER INSTALLATION BD-SS-100-JK4 PARTS LIST QTY DESCRIPTION 1 Drivers Side Slider Assembly 1 Passenger Side Slider Assembly 1 Wiring Harness and Fuse 1 Double Sided Sticky Squares and Alcohol
Tusk Pannier Racks. Instructions and information KLR
 1 Tusk Pannier Racks Instructions and information KLR650 2008 + Congratulations on your purchase of the Tusk Pannier Racks. These racks are made to handle extreme adventure riding, but work great for the
Page 1. File: Motolight caliper one-piece Harley Date: 8/15/2006
 Page 1 Harley-Davidson FL Caliper Mount Installation One-piece mounting brackets You should allow about two to three hours for installation. We suggest you use a well-lighted space for installation. PLEASE
Z1 Motorsports 300zx 2.5 Upgraded piping & BA SMIC Install Guide
 Z1 Motorsports 300zx 2.5 Upgraded piping & BA SMIC Install Guide Congratulations on your new upgraded piping and intercooler kit, this kit has proven to provide the lowest intake air temps to date on our
Installation instruction do88 performance Turbo intake hoses Porsche 911 TT (997.2)
") Installation instruction do88 performance Turbo intake hoses Porsche 911 TT (997.2) 2010-2012 3. 2. 4. 6. 7. 5. 1. This instruction shows how to replace the OEM turbo intake pipes for do88 performance
Installation instruction do88 performance Turbo intake hoses Porsche 911 TT (997.2) 2010-2012 3. 2. 4. 6. 7. 5. 1. This instruction shows how to replace the OEM turbo intake pipes for do88 performance
Replacing MK4 Golf/Jetta radiator mounts in-car
 Replacing MK4 Golf/Jetta radiator mounts in-car This is a guide to replacing the radiator mounts in a MK4 Golf/Jetta. This involves moving the core support to the service position which allows you to do
INSTALLATION INSTRUCTIONS
 COLD AIR INTAKE INSTALLATION INSTRUCTIONS PART NUMBER D760-0390C APPLICATION: 1999-2003 E39 M5 PARTS LIST 1 Left Aluminum Intake Tube 1 Air Pump Bracket (A) 1 Right Aluminum Intake Tube 1 Air Pump Bracket
Be sure to read and go over all pages before you start your installation
 Yamaha Gen-2 V-MaxV Holeshot Superbike Bars Installation Guide Pre-Installation Note Be sure to read and go over all pages before you start your installation Preparation for Installation A) It is recommended
ADVANCE ADAPTERS INC. P/N: JEEP TJ & (XJ 84-01) ATLAS 4 SPEED CABLE SHIFTER units built after 5/1/12
 ATLAS 4 SPEED CABLE SHIFTER units built after 5/1/12") Paso Robles, CA 93447 PAGE 1 OF 9 Telephone: (800) 350-2223 Fax: (805) 238-4201 Page Rev. Date: 05-12-15 KIT CONSISTS OF: No. Qty Part No. Description 1 1 302051 BASE- TWIN STICK MOUNT 2 1 302080 STUD
Paso Robles, CA 93447 PAGE 1 OF 9 Telephone: (800) 350-2223 Fax: (805) 238-4201 Page Rev. Date: 05-12-15 KIT CONSISTS OF: No. Qty Part No. Description 1 1 302051 BASE- TWIN STICK MOUNT 2 1 302080 STUD
INTERCOOLER UPGRADE INSTALLATION INSTRUCTIONS PART NUMBER D
 INTERCOOLER UPGRADE INSTALLATION INSTRUCTIONS PART NUMBER D330-0021 APPLICATION: 2014-16 F22 228i & xdrive coupe (see restrictions below) 2015-16 F23 228i & xdrive convertible 2012-16 F30 328i & xdrive
Honda Super Cub Etc. Frame & Forks
 Honda Super Cub Etc. Frame & Forks Introduction This section is all about how to strip, servioce and rebuild the frame and forks of the Honda Super Cub and other bikes using the same frames, plus all the
Sikky Oil Pan Install Guide
 Sikky Oil Pan Install Guide **If you have a double chain timing belt or after market oil pump setup then further modifications may need to be made in order for the pan to fit.** Remove starter Remove plastic
Porsche 928 with 16v LH-Jetronic Fuel System
 Porsche 928 with 16v LH-Jetronic Fuel System Toll-Free Tech Hot Line: 877-FOR-928M 877-367-9286 Please do not copy this manual and give copies to your friends. Our ability to bring you this supercharger
At Mark's suggestion I thought I'd write this up so future Coupe lovers can have as much fun* as I did with this job.
 At Mark's suggestion I thought I'd write this up so future Coupe lovers can have as much fun* as I did with this job. My enormous thanks to forum members, particularly glorfindel, for their advice when
JEEP WRANGLER (TJ), UNLIMITED (TJL), RUBICON MODELS BODY LIFT KIT INSTALLATION INSTRUCTIONS KIT# KIT# 973
, UNLIMITED (TJL), RUBICON MODELS BODY LIFT KIT INSTALLATION INSTRUCTIONS KIT# KIT# 973") JEEP WRANGLER (TJ), UNLIMITED (TJL), RUBICON MODELS BODY LIFT KIT INSTALLATION INSTRUCTIONS 1997-2006 2 KIT# 972 3 KIT# 973 WARNING Installation of a Performance Automotive Group body lift will change
JEEP WRANGLER (TJ), UNLIMITED (TJL), RUBICON MODELS BODY LIFT KIT INSTALLATION INSTRUCTIONS 1997-2006 2 KIT# 972 3 KIT# 973 WARNING Installation of a Performance Automotive Group body lift will change
INSTALLATION INSTRUCTIONS
 Accessory Application Publication No. INSTALLATION INSTRUCTIONS S ATTACHMENT KIT P/N 08T70-MJW-D90 After 15 CB500X/XA Honda Dealer: Please give a copy of these instructions to your customer. MII 15802
C15C C15C. Page 1 of 20
 2 x Lid Front Hinge 1135 8 x M8 Bolt 8 x M8 Washer (3mm Thick) 4 x M6 Large washers 4 x M6 Spring washers 4 x M6 x 40mm Bolts 6 x M6 20mm Bolts 6 x M6 Washers 20 x Screws 2 x Lid mount gas strut bracket
PARTS LIST: 8581 DODGE LONG ARM BRACKETS 03-13
 SYNERGY MFG. 870 INDUSTRIAL WAY, SAN LUIS OBISPO, CA (805) 242-0397 8580 03-12 DODGE 2500/3500 4X4, 06-08 1500 MEGACAB 4X4 LONG ARM SUSPENSION KIT V3.0 GENERAL NOTES: These instructions are also available
JEEP WRANGLER, RUBICON, UNLIMITED (TJ & TJL) 1 BODY LIFT KIT INSTALLATION INSTRUCTIONS KIT# 951
 1 BODY LIFT KIT INSTALLATION INSTRUCTIONS KIT# 951") 3651 N Highway 89 Chino Valley, AZ 86323 (928) 636-7080 www.p-a-g.net JEEP WRANGLER, RUBICON, UNLIMITED (TJ & TJL) 1 BODY LIFT KIT INSTALLATION INSTRUCTIONS 1997-2006 KIT# 951 Installation of a Performance
3651 N Highway 89 Chino Valley, AZ 86323 (928) 636-7080 www.p-a-g.net JEEP WRANGLER, RUBICON, UNLIMITED (TJ & TJL) 1 BODY LIFT KIT INSTALLATION INSTRUCTIONS 1997-2006 KIT# 951 Installation of a Performance
V1 Truck Manifold Turbo Kit for F-body
 V1 Truck Manifold Turbo Kit for 98-02 F-body Prep: -Remove all A/C Components, Alternator and brackets, tensioner, front bumper, front bumper foam, and front bumper support. Remove radiator and cooling
CHEVY AVALANCHE 1/2-TON ONLY 3 BODY LIFT KIT INSTALLATION INSTRUCTIONS KIT# 10173
 3651 N Highway 89 Chino Valley, AZ 86323 (928) 636-7080 www.p-a-g.net CHEVY AVALANCHE 1/2-TON ONLY 3 BODY LIFT KIT INSTALLATION INSTRUCTIONS 2003-2005 KIT# 10173 Installation of a Performance Automotive
INTERCOOLER UPGRADE INSTALLATION INSTRUCTIONS PART NUMBER D
 INTERCOOLER UPGRADE INSTALLATION INSTRUCTIONS PART NUMBER D330-0021 APPLICATION: 2014-16 F22 228i & xdrive coupe (see restrictions below) 2012-16 F30 328i & xdrive sedan 2014-16 F31 328i xdrive wagon 2014-16
2018 Mustang Ecoboost Cold Air Intake P/N: ( ) Application: 2018 Ford Mustang 2.3L Manual or Automatic Transmission
 Application: 2018 Ford Mustang 2.3L Manual or Automatic Transmission") 2018 Mustang Ecoboost Cold Air Intake P/N: 422087 (131823-9600) Application: 2018 Ford Mustang 2.3L Manual or Automatic Transmission Installation Instructions Before installing your ROUSH Performance Product(s),
2018 Mustang Ecoboost Cold Air Intake P/N: 422087 (131823-9600) Application: 2018 Ford Mustang 2.3L Manual or Automatic Transmission Installation Instructions Before installing your ROUSH Performance Product(s),
Raxiom Mustang Headlights (94-98) - Installation Instructions
 - Installation Instructions") Raxiom Mustang Headlights (94-98) - Installation Instructions The below installation instructions work for the following products: Dark Smoked Mustang Headlights (94-98) Raxiom Chrome Mustang Headlights
Raxiom Mustang Headlights (94-98) - Installation Instructions The below installation instructions work for the following products: Dark Smoked Mustang Headlights (94-98) Raxiom Chrome Mustang Headlights
2015+ SUBARU STI FRONT-MOUNT INTERCOOLER PARTS LIST AND INSTALLATION GUIDE INSTALL DIFFICULTY DISCLAIMER CAUTION INSTALL PROCEDURE TOOLS NEEDED
 PARTS LIST AND PARTS INCLUDED 1PC ALUMINUM INTAKE PIPE 1PC BAR-AND-PLATE INTERCOOLER 1PC STEEL CRASH BAR W/ MOUNTING HARDWARE 2PC HOT-SIDE INTERCOOLER PIPES 2PC COLD-SIDE INTERCOOLER PIPES 1PC BPV FLANGE
INSTRUCTION G-Comp Unser Edition Rear Suspension: Chevy Nova. Kit Contents:
 INSTRUCTION 350-400 G-Comp Unser Edition Rear Suspension: 62-67 Chevy Nova Speedway Motors, Inc. 2017 Kit Contents: 350003.1 G-Comp Chassis Brace 350003.2 G-Comp Front Support 350400.1 Chevy II Unser Rear
OIL COOLER KIT INSTALLATION INSTRUCTIONS PART NUMBER D
 OIL COOLER KIT INSTALLATION INSTRUCTIONS PART NUMBER D570-0904 APPLICATION: 2011-2012 E90 335i/xi (N55 engine) with BMW standard bumper and with stock oil cooler Congratulations for being selective enough
INSTALLATION INSTRUCTIONS
 Accessory Application Publication No. INSTALLATION INSTRUCTIONS ATTACHMENT P/N 08T70-MGZ-D80 CB500X/XA MII 14565 Issue Date May 2013 PARTS LIST KIT Sold separately (1) (2) (4) (2) (1) (3) BOOT (1 piece.)
INSTALLATION GUIDE NISSAN NAVARA INTERCOOLER KIT P/N PWI65094K
 INSTALLATION GUIDE NISSAN NAVARA INTERCOOLER KIT P/N PWI65094K ENGINEERING THE UNFAIR ADVANTAGE Contents CONDITIONAL MANUFACTURERS WARRANTY... 2 WARRANTY VOIDS... 2 WARRANTY DOES NOT COVER... 2 LIMIT OF
INSTALLATION INSTRUCTIONS
 Accessory Application Publication No. INSTALLATION INSTRUCTIONS HEATED GRIPS ATTACHMENT KIT P/N 08T70-MJL-D30 2014-2015 NC700X/XD Honda Dealer: Please give a copy of these instructions to your customer.
SS41HF Mitsubishi Pajero NS & NT V8/V9 Series 3.2 Litre Turbo Diesel (4M41 Engine) 3.8 Litre V6 Petrol (6G76 Engine)
 3.8 Litre V6 Petrol (6G76 Engine)") SS41HF Mitsubishi Pajero NS & NT V8/V9 Series 3.2 Litre Turbo Diesel (4M41 Engine) 3.8 Litre V6 Petrol (6G76 Engine) 21/7/2010 Parts List ITEM PART NO DESCRIPTION QTY 1 570-133-200 BODY - SNORKEL (SS41HF)
SS41HF Mitsubishi Pajero NS & NT V8/V9 Series 3.2 Litre Turbo Diesel (4M41 Engine) 3.8 Litre V6 Petrol (6G76 Engine) 21/7/2010 Parts List ITEM PART NO DESCRIPTION QTY 1 570-133-200 BODY - SNORKEL (SS41HF)
Mustang 5.0L Cold Air Intake Installation Instructions P/N:
 2015-2017 Mustang 5.0L Cold Air Intake Installation Instructions P/N: 421826 39555 Schoolcraft Rd, Plymouth MI, 48170 800.59.ROUSH 2015-2017 Mustang 5.0L Cold Air Intake Installation Instructions P/N:
GM F-Body Convertible 1404 Center X-Brace Installation Instructions
 1967-1969 GM F Body 1967-1969 GM F-Body Convertible 1404 Center X-Brace Installation Instructions Thank you for your purchase of this Hotchkis Performance product. Your X-Brace was designed with the performance
7C1550 COBB Tuning R35 GT-R Silicone Hose Kit Install Instructions
 7C1550 COBB Tuning R35 GT-R Silicone Hose Kit Install Instructions Nissan GT-R (R35) Silicone Hose Kit Congratulations on your purchase of the COBB GT-R Silicone Hose Kit for your Nissan GT-R. The following
Bachmann GWR Earl (Dukedog) EM Finescale Conversion
 EM Finescale Conversion") Bachmann GWR Earl (Dukedog) EM Finescale Conversion Before you start, it is a good idea to have some small containers or snap top poly bags to put screws and components in for safe keeping...much better
Bachmann GWR Earl (Dukedog) EM Finescale Conversion Before you start, it is a good idea to have some small containers or snap top poly bags to put screws and components in for safe keeping...much better
Fitting instructions for Lynx R Fairing CRF 250L
 Fitting instructions for Lynx R Fairing CRF 250L Thank you for purchasing the Lynx fairing. We hope the design features will extend the enjoyment of your CRF. Parts List 1 x Fairing and screen with two
INSTALLATION INSTRUCTIONS DODGE DAKOTA 2 KIT # 682 (2WD), 692 (4WD) 3 KIT # 683 (2WD), 693 (4WD)
, 692 (4WD) 3 KIT # 683 (2WD), 693 (4WD)") INSTALLATION INSTRUCTIONS 1997-1999 DODGE DAKOTA 2 KIT # 682 (2WD), 692 (4WD) 3 KIT # 683 (2WD), 693 (4WD) Installation of a Performance Accessories body lift kit will change the vehicle s center of gravity
INSTALLATION INSTRUCTIONS 1997-1999 DODGE DAKOTA 2 KIT # 682 (2WD), 692 (4WD) 3 KIT # 683 (2WD), 693 (4WD) Installation of a Performance Accessories body lift kit will change the vehicle s center of gravity
GrilleGuy.com, LLC. Installation Instructions and Care guide : Scion tc : Honda S2000 : Honda Civic
 Installation Instructions and Care guide : 2005 2009 Scion tc : 2000 2003 Honda S2000 : 2004 2005 Honda Civic Thanks again for purchasing your custom grille insert from the GrilleGuy. The following are