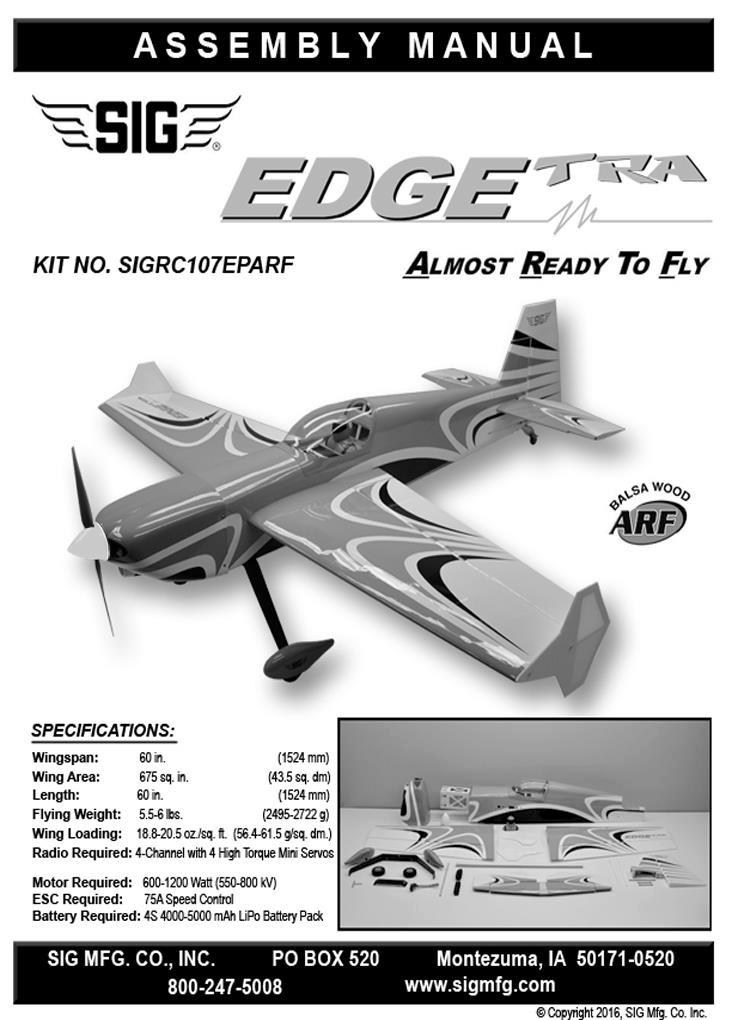
INTRODUCTION Congratulations on your purchase of the EDGEtra ARF. We hope you will enjoy this R/C sport aerobatic/3d model.
|
|
|
- Randall Davidson
- 6 years ago
- Views:
Transcription
1

2 60-80 amp ESC (Electronic Speed Control) We use the Castle Creations Phoenix EDGE 75 ESC or the Castle Creations Phoenix EDGE Lite 75 ESC (SIG Part# CSE ). We typically see an amp draw of 30 to 60 amps, depending on prop size. NOTE: The Castle Creations ESCs that we used, as well as many of the other ESC s on the market, have a BEC (Battery Eliminator Circuit) built in. BEC allows you to use the same battery pack to Power both your motor and your radio system, eliminating the normal radio battery pack. As the dual purpose battery runs down in flight, the BEC circuit in the ESC will shut down the motor and leave enough power to operate the radio while you land the model. Check the manual of your particular ESC to learn how to use the ESC. INTRODUCTION Congratulations on your purchase of the EDGEtra ARF. We hope you will enjoy this R/C sport aerobatic/3d model. Assembly of your EDGEtra is fast and simple when following the detailed instructions in this manual. We urge you to read this assembly manual completely before assembly. Familiarize yourself with the parts and the assembly sequences. The successful assembly and flying of this airplane is your responsibility. If you deviate from these instructions, you may wind-up with problems later on. Good luck with the EDGEtra. Let s get started! ADDITIONAL ITEMS YOU WILL NEED TO PURCHASE In addition to this kit, you will need the following items to complete your EDGEtra and make it flyable. RADIO SYSTEM The EDGEtra requires a standard 4-Channel radio system and four Mini sized High Torque servos. High Torque Mini servos typically have 70+ oz. of torque. In addition, you'll need two 6 long Servo Extension Cords and one Y-Harness Chord for connection of the two aileron servos to the receiver. (The length of extension wire you will need depends on how long the wires are coming off your servos. With Hitec High Torque mini servos we used 6 long extension wires. Check your servos and plan accordingly.) You will also need one 18 servo extension wire to connect the elevator servo to your receiver. In addition, you will need three (3) 1-1/2 servo arms for the elevator and aileron servos, and one (1) 3 dual arm servo for the pull-pull rudder servo. POWER RECOMMENDATIONS watt BRUSHLESS OUTRUNNER MOTOR There are many fine 600 to 1200 watt electric outrunner motors on the market that will fly the EDGEtra. We use the Himax HC (SIG Part# MXACC ) Brushless Outrunner Motor. Specs: Case diameter: 42mm Case length: 50mm Shaft diameter: 5.0mm Weight: 200g (7 oz.) Max Watts: 800 KV = 770 Rm =.02 Lo = 2.0 SIG EDGEtra Electric Combo (SIG Part# SIGRC107EPARFC) Himax motor (SIG Part# MXACC ) Castle Creations Phoenix Edge Lite 75 Amp ESC (SIG Part# CSE ) We recommend purchasing the above combo for the EDGEtra This package is available directly from SIG Manufacturing. 4 Cell mah LITHIUM-POLYMER BATTERY PACK With the Himax HC motor we use a 4 cell (4S1P) mah LiPo pack. We found that 4000mAh LiPo packs provide between 6 and 8 minutes of flight time, depending on propeller selection and other factors (quality of pack, throttle management, outside temperature, etc.). PROPELLER With the Himax motor and a 4-cell (4S1P) 14.8v LiPo pack, we recommend a 15 X 8E Wooden Propeller. Your propeller may vary due to other factors the specs of your individual motor and battery pack, etc. You may need to experiment with different props to find your best combination. BATTERY CHARGER FOR SAFETY AS WELL AS PERFORMANCE, CHARGE LIPO BATTERIES ONLY WITH A LIPO BATTERY CHARGER! In addition to providing the critical charging profile needed to safely charge LiPo batteries, a LiPo battery charger also includes the capability of "balancing" the available voltage in the cells, ensuring that the battery pack is at peak capacity at the end of the charge cycle. This translates to better flight times and a longer life from the battery pack. ARMING SWITCH (Optional) While not a requirement to get your EDGEtra in the air, an arming switch will help your aircraft be safer. SIG Mfg. offers the Maxx Arming Switch (SIG Part# MXACC6972). This switch is a Physical cut off between your flight battery and the ESC. With the removable plug disconnected, there is no way the motor can inadvertently start. 2
3 REQUIRED TOOLS For proper assembly, we suggest you have the following tools and materials available: A selection of glues - SIG Thin, Medium, & Thick CA Glue CA Accelerator CA De-bonder SIG 5 minute and 1-1/2 hour Epoxy Screwdriver Assortment Pliers - Needle Nose & Flat Nose Diagonal Wire Cutters Small Allen Wrench Assortment Pin Vise for Small Dia. Drill Bits Hobby Knife with Sharp #11 Blades Small Power Drill with Selection of Bits Dremel Tool with Selection of Sanding & Grinding Bits Scissors Sandpaper Covering Iron & Trim Seal Tool Masking Tape Paper Towels Alcohol and/or Acetone for Epoxy Clean-up RC-56 Canopy Glue Blue Thread Locking Compound COMPLETE KIT PARTS LIST The following is a complete list of all parts contained in this kit. Before beginning assembly, we suggest that you take the time to inventory the parts in your kit. Use the check-off boxes (q) provided in front of each part description. Control Horns, Etc. (5) Painted Fiberglass Horns; for ail(2); elev(1); rud(2) Pushrods (2) 3mm x 70mm dia. Steel Aileron Pushrods. (1) 3mm dia. x 140mm Steel Elevator Pushrod. (5) Metal R/C Links, elev(1), rud(4) (5) Ball Link pushrod connectors, ail(4), elev(1) (5) M3 x 16mm Machine Screws for Ball links (5) M3 Locking Nuts (2) Pull-Pull Rudder Parts Kit Miscellaneous (1) Aluminum Wing Joiner tube (4) 1/4-20 x 1-3/4" Nylon Wing Bolts (2 Per Wing Half) (2) Side Force Generators (SFG) (4) M3 x 16mm Button Head machine screws for SFG (4) 3mm Flat Washers for SFG (1) Balsa Tri Stock Stick (2) Hook n Loop Straps NOTE: PWA Screws are metal screws with a Phillips/washer style head. (1) Fuselage with Removable Battery Hatch (1) Right Wing Panel & Aileron, hinges not glued (1) Left Wing Panel & Aileron, hinges not glued (1) Horizontal Stabilizer & Elevator, hinges not glued (1) Vertical Fin & Rudder, hinges not glued (1) Cowling with (4) M3 x 10mm PWA Mounting Screws (1) Painted Pilot Figure (1) Painted Canopy Main Landing Gear (1) Formed Carbon Fiber Main Landing Gear (2) 2.5" dia. Main Wheels (1) Light Ply Landing Gear Cover (1) Right Fiberglass Wheel Pant (1) Left Fiberglass Wheel Pant (2) M4 x 48mm Axles with 2 M4 Nuts (4 M4 Nuts Total) (4) M3 x 10mm Mounting Bolts, for wheel pant mounting (3) M4 x 20mm Mounting Bolts, for landing gear mounting (3) M4 Flat Metal Washers, for landing gear mounting (4) 4mm Wheel Collars with Set Screws Tailwheel Assembly (1) Tail Wheel Assembly with Steering Arm & Tailwheel (1) 3-Arm Aluminum Rudder Steering Horn (2) M3 x 12mm Wood Screws, for Rudder Steering Horn (2) M3 x 12mm Mounting Bolts, for Tailwheel Assembly (2) M3 Split-ring washers for Tailwheel Mounting Bolts (2) Coil Steering Springs Spinner Assembly (1) 2-3/4" dia. White Spinner Cone (1) 2-3/4" dia. White Spinner Back-plate (2) M3 x 14mm Phillips-Head Screws COVERING MATERIAL Your EDGEtra ARF is covered with ORACOVER, a premium quality covering made in Germany, and sold in the U.S. by Hangar-9 as Ultracote. Colors Used On Your Airplane ORACOVER White (Ultracote #HANU870) ORACOVER Black (Ultracote #HANU874) ORACOVER Apple Green (Ultracote #HANU903) ORACOVER Light Gray (Ultracote #HANU882) If sometime in the future you need replacement covering or matching paint for repairs, they are available from your local hobby dealer or online from Hangar-9. How to Tighten Loose Covering After you open your EDGEtra ARF and take all the covered parts out of their plastic bags, the covering may begin to wrinkle. This is not unusual and is no cause for alarm. Your airplane was built and covered in a part of the world which has relatively high humidity and therefore, the wood was likely carrying a fair amount of moisture. When exposed to drier air, the wood typically loses this moisture, dimensionally "shrinking" in the process. In turn, this may cause some wrinkles. However, wrinkles are easy to remove by just using a hobby type heat iron. Caution: Trying to remove the wrinkles by hastily going over them with a heat gun can lead to more problems. You should take your time to carefully go over the entire model with a covering iron, as we will describe. We suggest using a model airplane covering iron for this process. Cover the iron's shoe with a thin cotton cloth, such as an old T-shirt, to prevent scratching the covering as you work. After covering your iron, the next step is to set the iron to the correct temperature. This is 3


4 critical for achieving a good result! The iron should be set to about 220 O F O F (104 O C O C) as measured on the bottom of the iron using a thermometer. If you do not have a thermometer, you can find the correct temperature by trial and error. Set your iron to a medium setting. Glide the iron over some of the covering that is over solid wood, such as the sheeted wing center section. Observe the covering to see if any bubbles appear. If bubbles appear, the covering is getting too hot! Turn down the temperature of the iron and repeat the test. If no bubbles appear, turn up the heat slightly and repeat the test. Keep adjusting until you zero in on the correct temperature. Find the temperature that will get the covering to stick down without forming bubbles or causing the seams to pull away. Once your iron is set to the correct temperature, go over the entire framework of the airplane, making sure that the covering is securely bonded to the structure everywhere the covering comes in contact with the wood underneath. This takes some time, but is worth the effort. After you have all the covering secured onto the solid areas, turn the temperature of the iron up to approximately 300 O F O F (149 O C O C). This is the correct temperature for shrinking the covering material. Use the iron to tighten up any wrinkles in the open areas of the model (no wood underneath the covering). Glide the iron over the wrinkle for a few seconds, then remove. Repeat until the covering is tight with no wrinkles. WING ASSEMBLY The wing is designed as a 2-piece system, with separate right and left wing panels joined by an aluminum tube wing joiner and four nylon wing bolts (Two nylon wing bolts per wing panel). To help protect your wings during the following steps we recommend that you cover your work surface with a soft cloth or piece of foam. INSTALLING THE AILERON SERVOS For the following steps you will need: (1) Right Wing Panel (1) Left Wing Panel (1) Aluminum Tube Wing Joiner (2) Servos with Mounting Screws (not furnished) (2) 6 Servo Extension Wires (not furnished) 1) Mount the aileron servos in the bottom of each wing panel. a) The servo bays are precut for you but you ll want to double check the covering around the cutout to make sure it is sealed down tight. b) Install the rubber grommets and brass eyelets (supplied with your radio system) into each aileron servo. c) Install a 1-1/2 servo arm on each of the two aileron servos. The arm should be at 90 degrees to the servo when the aileron control stick on the transmitter is in neutral and the transmitter trims are in neutral as well. d) Before installing the aileron servos in the wing panels you must attach a servo extension wire to the aileron servo wire. The typical combined length required is approximately 16. A 6 extension wire will usually provide sufficient length. Connect the servo plug to the extension wire and tape the connectors together for added security. If wrinkles keep coming back on the tail surfaces, you may need to ventilate the areas between the ribs. Otherwise the air that is sealed in those relatively small areas will expand when the heat is applied and actually cause the covering to stretch instead of shrink. Use a pin to poke a tiny hole in the covering between each rib, on the bottom of the part. That will let the expanding air escape and the covering to shrink properly. Caution When Using Heat Guns: You can also use a hobby-type heat gun to shrink the covering, but you must be careful around seams or color joints. Getting too much heat on the seams may cause them to "creep" or come loose. You must also be careful when using a heat gun when working around the windshield and side windows heat will distort the clear plastic material. e) A servo wire pull string has been pre-installed in the wing at the factory. Attach the string to the end of your servo extension wire, and carefully pull the servo extension wire through the wing. By that time, the servo itself should be next to the servo mount cutout and ready for mounting. Recommended Temperatures: To adhere the covering O F O F (104 O C O C) To shrink the covering O F O F (149 O C O C) NOTE: In this manual, any references to right or left, refer to your right or left as if you were seated in the cockpit of the airplane. 4


5 f) Fit the servo into the servo mount in the wing panel, (note that the servo is positioned so that the servo arm is at the forward end toward the wing leading edge). Take up any slack in the servo wire as you insert the servo in the mount. Use a pin vise and a small drill bit to drill small pilot holes in the servo mount for the servo mounting screws. Use the screws supplied with your radio system to mount the servo in place on the servo mount. Repeat this procedure to mount the servo in the opposite wing panel. quickly wicked into the slot as it penetrates both the wood and the hinge. We suggest using a fine tipped applicator on the glue bottle to better control the flow of glue. e) Turn the wing over and glue the other side of the hinge. Continue this process until you have glued both sides of all the hinges! Keep a rag handy to wipe off any excess thin CA glue. (If you get some glue smears on the plastic covering, don't worry about them right now. Once all the hinging is done, you can clean the smears off the covering with CA De-bonder. 2) Hinge the ailerons Note that the CA Hinges are installed, but not yet glued, in the ailerons and wing panels. The installation process for the hinges is the same for all of the control surfaces on this model. a) If you removed the ailerons and hinges from the wing panels when you tightened the covering material, reinstall them now. First insert the four CA Hinges into the slots in the aileron. Put two pins in the center of each hinge, up against the leading edge of the aileron, to keep the hinges centered during the next step. f) Let the glue dry minutes before flexing the hinges. At first you might notice a little stiffness in the joint. This will go away after the hinges have been flexed back and forth a few times. INSTALL AILERON CONTROL HORNS & PUSHRODS From the kit contents locate: (2) Painted Fiberglass Control Horns (2) 3mm x 70mm Steel Pushrods (4) M3 nuts for Pushrods (4) Nylon Ball Links and Aluminum Balls (4) M3 x 16 mm Machine Screws (4) M3 locking Nuts 3) Install the aileron control horns a) Remove the paint from the lower portion of the Control horn that will be inserted into the pre-cut slot in the aileron, and clean that portion with a cloth and some isopropyl alcohol. Mix up a small batch of 5-minute epoxy, and apply to the pre-cut slot and control horn. Before the epoxy sets, insert the control horn into the precut slot and clean up any excess epoxy using rubbing alcohol and a paper towel. b) Now carefully insert the exposed portion of the four hinges into the trailing edge of the wing. You will find it easiest to slide the hinges into the slots at angle, one hinge at a time, instead of trying to push straight into all the hinges at once. c) Adjust the aileron so that the tip of the aileron is 3/32 in from the wing tip. The ailerons should be tight against the pins in the hinges to minimize the gap between the wing and the aileron. The aileron is now in the proper position for permanently gluing them in place with thin CA glue. d) Flex the aileron down and hold it in this position. Remove the pins from one hinge and then carefully apply 3-4 drops of thin CA glue directly onto the hinge in the gap. You will notice that the glue is 5
 Turn an M3 nut and Ball Link onto each end of the 70 mm aileron pushrod, and adjust the center-to-center length of the pushrod to approximately 3-1/2.")
 Fuselage (1) Aluminum Wing Tube (2) Wings (4) Nylon Wing Bolts (1) Horizontal Stabilizer & Elevator set (1) Vertical Fin & Rudder Set 5)")

 Enlarge the hole in the servo arm to 3mm at a distance of 1-1/4 from the center of the servo arm. Then, snap the aluminum balls into the nylon links.")
6 4) Assemble and install the aileron pushrods. FUSELAGE ASSEMBLY a) Turn an M3 nut and Ball Link onto each end of the 70 mm aileron pushrod, and adjust the center-to-center length of the pushrod to approximately 3-1/2. You will most likely need to fine-tune this adjustment in the next steps, but this measurement will get the pushrod close to the correct length. TAIL INSTALLATION For the following steps you will need: (1) Fuselage (1) Aluminum Wing Tube (2) Wings (4) Nylon Wing Bolts (1) Horizontal Stabilizer & Elevator set (1) Vertical Fin & Rudder Set 5) Install the Horizontal Stabilizer and Elevator a) Remove the elevator and hinges from the horizontal stabilizer, and set them aside for now. Draw a center line on the stabilizer mount and on the horizontal stabilizer. Test fit the stabilizer on the fuselage. Notice that the covering has been removed from both the fuselage and horizontal stabilizer where they will epoxied together. b) Enlarge the hole in the servo arm to 3mm at a distance of 1-1/4 from the center of the servo arm. Then, snap the aluminum balls into the nylon links. With the servo arm centered and the aileron set at neutral, adjust and attach the pushrod s ball link ends to the control horn and servo arm using M3 x 16mm machine screws and M3 locking nuts. b) Slide the aluminum wing tube through the tube holder in the fuselage and install the wing halves to the fuselage with the nylon wing bolts provided, and set the horizontal stabilizer in place. Carefully check the alignment of the stabilizer to the wing. c) When the pushrod has been adjusted to the proper length, tighten the two M3 nuts against the ball links. c) First view the model from directly in front. Check to see if the stabilizer is level with the wing. You should find it to be very close. If necessary, use a sanding block to fine tune the stabilizer platform to level the stabilizer to the wing. d) Repeat steps 1 through 4c for the other wing half. 6
 Remove the joiner, and roughen the fiberglass that slides inside the slots using sandpaper.")

 Glue the elevator joiner into both halves of the elevator.")

 When the epoxy has cured, Install the CA hinges as you did for the ailerons.")
7 d) Next use a tape measure to measure the distance from each stab tip to the back edge of the wing the distance should be equal on both sides. Adjust if necessary. h) Remove the joiner, and roughen the fiberglass that slides inside the slots using sandpaper. For added bite, add grooves to the fiberglass with a sharp file or a Dremel tool. e) The horizontal stabilizer can now be glued permanently onto the rear of the fuselage. We suggest using slow curing epoxy glue for this job to allow time to position the stab accurately and make any final adjustments that might be needed. Apply epoxy to both sides and reset the stab in place. Use pins to hold it in place. Re-check the alignment. Wipe away any excess epoxy with rubbing alcohol and a soft paper towel. Allow the glue to cure completely. i) Glue the elevator joiner into both halves of the elevator. Use a stiff straight edge and the marks previously made to assure a straight assembly. We recommend SIG 1-1/2 Hour Epoxy for this step, which will allow plenty of working time for a correct alignment. f) Slightly round and sand the one side of the center section of the fiberglass elevator joiner. j) When the epoxy has cured, Install the CA hinges as you did for the ailerons. g) Slide the elevator joiner into the elevator halves with the rounded center section pointing to the trailing edges of the elevator halves, line the halves and joiner up using a straight edge, and mark where the joiner exits the halves of the elevator. k) Gently slide the CA hinges into the slots in the horizontal stabilizer. As the elevator halves get close to the stabilizer, the joiner will fall into place in open slot. (See Photo at top of Page 8) 7
 Using a hobby knife, carefully cut through the covering on the tail to expose the lowest hinge pocket, then carefully insert one side of the")

 When you are satisfied with the fit of the elevator to the horizontal stabilizer, glue the CA hinges in place using thin CA.")
 Glue the elevator and rudder control horns in place using the same techniques used on the aileron control horns in step 3.")


8 7) Now it's time to install the rudder. a) Using a hobby knife, carefully cut through the covering on the tail to expose the lowest hinge pocket, then carefully insert one side of the three CA hinges into the hinge slots in the rudder. using the same techniques you did for the ailerons back in Step 2 of this manual, install the rudder on to the fin. When you ve got the rudder fully installed, double check that the top of the rudder lines up with the top of the fin. l) When you are satisfied with the fit of the elevator to the horizontal stabilizer, glue the CA hinges in place using thin CA. b) Finish the rudder installation by gluing the CA Hinges in place with thin CA using the same technique you used for the ailerons. 8) Glue the elevator and rudder control horns in place using the same techniques used on the aileron control horns in step 3. 6) Install the Fin and Rudder a) Pull the fin and rudder apart set the rudder and hinges aside for now. Test fit the fin in place on top of the stabilizer. Check to see that the fin sits flush and perpendicular to the stabilizer. b) When satisfied with the fit, glue the fin in place using slow curing epoxy. Apply a coat of epoxy to the bottom of the fin and to the exposed wood on the stab. With the fin in place, sight the model from the front to make sure the fin is absolutely 90 degrees upright to the stab. If needed, use masking tape to hold it in alignment until the epoxy cures. Wipe off any excess glue with rubbing alcohol and a soft paper towel. Let the epoxy completely cure. INSTALL THE ELEVATOR AND RUDDER SERVOS AND LINKAGES 9) Elevator Servo and Pushrod a) Locate the opening for the elevator servo and remove the covering with a hobby knife. 8
 Pull the elevator servo wire through the fuselage, and install the servo using the same techniques as the aileron servos in step 1.")

 Loop the wire back through the crimp tube and pull the loops tight there s not much extra wire, so being conservative here will give you a little extra on the other end of the")
 Locate the pull-pull hardware bag, and lay out the parts. b) Thread an M3 nut and a metal clevis onto the brass rigging coupler. Do this step four times.")

9 b) Attach an 18 servo extension wire to the elevator servo, and secure it as you did for the aileron servo extension wires.. c) Pull the elevator servo wire through the fuselage, and install the servo using the same techniques as the aileron servos in step 1. d) Assemble the 3mm x 140mm elevator pushrod with a ball link and M3 nut at one end, and a metal clevis and M3 nut at the other end. After centering the servo and elevator, adjust the pushrod to the correct length and install l it. To better suit the angle between the servo arm and the elevator control horn, the ball link should be attached to the side of the elevator control horn closest to the fuselage. d) Loop the wire back through the crimp tube and pull the loops tight there s not much extra wire, so being conservative here will give you a little extra on the other end of the wire. Repeat steps c) and d) to make a second wire assembly. 10) Next we will install the rudder servo and pull-pull wires. a) Locate the pull-pull hardware bag, and lay out the parts. b) Thread an M3 nut and a metal clevis onto the brass rigging coupler. Do this step four times. e) Connect the two wire assemblies to the rudder control horns and insert other end into the pre-cut slots in the fuselage. Pull the wires into the fuselage and tape them to the sides of the fuselage within easy reach of the servo tray. c) Slide one of the crimp tubes onto the nylon coated braided steel wire, then thread the wire through the hole in the brass rigging coupler and back through the crimp tube. f) Install your rudder servo using the same techniques used on the elevator and aileron servos. After attaching a 3 double servo arm to the servo, secure the remaining two rigging coupler assemblies to the outer holes on the servo arm. (See Photo at top of Page 10) 9
 After crossing the wires once, slide a crimp tube onto one of the wires, thread the wire through the brass rigging coupler and pull the wire snug.")
 Slide the threaded portion of the axle into the large hole of the landing gear leg and secure it with an M4 nut on each side.")

 Remove the metal clevis from the rudder control horn and double servo arm this will allow you to pull the wire and rigging coupler forward enough to work with it inside the fuselage.")
10 NOTE: We suggest you use blue thread locking liquid (like Locktite ) on all bolts and nuts used in the assembly of the landing gear. 11) Assemble and install the main landing gear. g) After crossing the wires once, slide a crimp tube onto one of the wires, thread the wire through the brass rigging coupler and pull the wire snug. Using a needle-nosed pliers, pinch the wire against the rigging coupler to mark the wire. a) Slide the threaded portion of the axle into the large hole of the landing gear leg and secure it with an M4 nut on each side. Apply a drop of blue thread locking compound to each nut before tightening them. When tightening the nut, keep the flats of the hex nut on the axle side of the gear leg parallel to the front edge of the leg - see photo. This allows the hex nut to fit inside the narrow notch in the wheel pants when they are added later. h) Remove the metal clevis from the rudder control horn and double servo arm this will allow you to pull the wire and rigging coupler forward enough to work with it inside the fuselage. i) While keeping the wire located at the marked position, loop the wire through the crimp tube and secure it by crimping the tube. j) Repeat steps g) through i) for the second pull-pull wire. At this point, all four metal clevises can be connected two to the rudder control horns and two to the servo arm. The wires might be slightly loose, and can be tightened by turning the brass rigging couplers into the metal clevises. When the wires are tight (snug, but not like guitar strings), tighten the M3 nuts against the metal clevises on all four rigging couplers. b) Slide a 4mm wheel collar onto the axle shaft, leaving 1/16 space between the axle nut and the wheel collar. Tighten the wheel collar set screw securely. c) Slide the wheel on the axle and test to make sure it spins freely on the axle. If it does not turn freely, drill out the plastic hub of the wheel with an 11/64" or #17 drill bit. d) Slide a second wheel collar onto the axle and up to the wheel. Leave a small gap between it and the wheel, so the wheel will turn freely, and then tighten the wheel collar set screw. INSTALL THE LANDING GEAR In addition to the fuselage, locate the following parts from the kit contents: (1) Carbon Fiber Main Landing Gear (3) M4 x 20 mm Socket-Head Bolts (3) M4 Split-Ring Lock Washers (2) 2.5" dia. Main Wheels (2) M4 x 48 mm Axles (4) M4 Nuts; for axles (4) 4 mm ID Wheels Collars; for axles (1) Right Fiberglass Wheel Pant (1) Left Fiberglass Wheel Pant (4) M3 x 10 mm Socket-Head Bolts e) Check the orientation of the landing gear to make sure you know which way is forward. The two outer holes for mounting the gear to the fuselage go to the front. Then test fit the wheel pants over the wheels and line up the predrilled mounting holes. Secure the wheel pants in place with two M3 x 10mm button head machine screws for each pant. (You may need to clean a little paint out of the blind nuts inside the wheel pants in order to start the mounting bolts. A #11 hobby knife works well for this.) (See Photo at top of Page 11) 10


 Thread one of the M3.5 PWA screws into each of the holes, then remove the screw. Add a drop of thin CA to each hole to harden the threads.")
 Install the tailwheel assembly.")
 M3 x 12mm Wood Screws, for Rudder Steering Horn (2) M3 x 12mm Mounting Bolts, for Tailwheel Assembly (2) M3 Split-ring")

11 b) Using a 5/64 drill bit, drill a hole at each location you marked, making sure to keep the drill bit straight to the rudder - you do not want the drill bit to come out the side of the rudder. f) Attach the landing gear and landing gear cover to the bottom of the fuselage using three M4 x 20mm machine screws and three M4 Split-Ring lock washers. The machine screws will go through the landing gear cover first, then into the landing gear, and finally thread into the landing gear mount. c) Thread one of the M3.5 PWA screws into each of the holes, then remove the screw. Add a drop of thin CA to each hole to harden the threads. When the CA has dried, install the three armed steering horn to the bottom of the rudder with the two M3.5 screws. 12) Install the tailwheel assembly. For this section you will need the fuselage and the following: (1) Tail Wheel Assembly with Steering Arm & Tailwheel (1) 3-Arm Aluminum Rudder Steering Horn (2) M3 x 12mm Wood Screws, for Rudder Steering Horn (2) M3 x 12mm Mounting Bolts, for Tailwheel Assembly (2) M3 Split-ring washers for Tailwheel Mounting Bolts (2) Coil Steering Springs a) Begin by placing the three armed rudder steering horn on the bottom of the rudder. The front edge of the steering horn should be 3/8 back from the leading edge of the rudder. Mark the location of the two steering arm holes on the bottom edge of the rudder. d) Attach the pre-assembled tailwheel bracket to the fuselage using two M3 x 12mm machine screws and split-ring lock washers. Add a drop of thread locker to each of the M3 x 12mm machine screws before tightening them. Be Careful not to over-tighten the machine screws. This can crush the wood surrounding the tailwheel bracket. 11
 Subtract the measurement taken in the previous step b) from 8-5/8. The result is the distance you need to locate the front of the firewall from the front of the adjustable motor mount.")
 INSTALL THE POWER SYSTEM For this section you will need the Fuselage and: (1) Fiberglass Cowling (4) M3 x 10mm Screws (1) Balsa Triangle Stock (4) M4 x 20mm Socket-Head Bolts (4) M4 Split-Ring Lock")


12 e) Attach the steering springs to the three armed steering horn and the tailwheel horn. Make sure you keep the over-all length of the springs equal so the tailwheel and rudder are properly aligned. c) Subtract the measurement taken in the previous step b) from 8-5/8. The result is the distance you need to locate the front of the firewall from the front of the adjustable motor mount. (With the motor we are using in these photos, the motor measurement is 2-5/8. So 8-5/8 minus 2-5/8 = 6. Your result may be different depending on your motor.) INSTALL THE POWER SYSTEM For this section you will need the Fuselage and: (1) Fiberglass Cowling (4) M3 x 10mm Screws (1) Balsa Triangle Stock (4) M4 x 20mm Socket-Head Bolts (4) M4 Split-Ring Lock Washers (4) M4 Blind Nuts (1) Hook-&-Loop (Velcro ) Straps (1) Electric Motor, ESC, Prop, LiPo Battery (not furnished) 13) Install your Motor a) NOTE: The mounting of the electric motor in the EDGEtra assumes that your motor has a typical "X" or "cross" mounting plate on the back of the motor. Also note that the firewall portion of the laser-cut plywood Motor mount Is adjustable fore and aft to accommodate different length motors. In this step we will adjust the motor mount for your particular electric motor. For the EDGEtra we need a total distance from the front of the firewall to the motor s thrust washer to end up at exactly 8-5/8. This distance allows the cowl to fit properly. b) Assemble your motor according to the manufacturer's instructions. Then carefully measure thedistance from the back of the mounting plate to the front of the thrust washer *. * The thrust washer is the part of the prop adaptor where the back of the propeller will be located. d) Carefully measure and mark the distance determined in the previous step from the front of the firewall to the front of the adjustable motor mount. Do this alongside each of the adjustment slots on both sides of the box (four marks total). e) After you have all four slots marked, carefully align the front face of the adjustable mount to line up with the marks. Make sure you end up with the adjustable mount straight and square in the box. If it is not, recheck your marks and adjust as necessary. f) Tack glue the adjustable mount in place using thin CA. Recheck once more to make sure that the front of the firewall is at the correct distance from the back of the motor mount box. That distance plus the length of your motor must equal 5-3/8. When satisfied it is correct, glue the firewall securely to the rest of the motor mount box using medium CA DO NOT GLUE THE FRONT FACE OF THE MOTOR MOUNT BOX AT THIS TIME. g) Remove the X mount plate from the back of your motor and center it on the mount. Once you are sure it is properly located, mark the mounting holes with a pencil. Set the X mount aside and drill out the mounting holes with a 7/32" dia. drill. Install four M4 Blind Nuts in the holes, on the back side of the mount. Put a couple drops of Medium CA glue on the flanges of the blind nuts to secure them to the plywood, but be careful not to get any of the glue in the threads. 12
 Now route the ESC s servo wire into the fuselage, and temporarily connect it to the receiver. d) Connect the ESC's motor wires to the motor. Operate the motor and check the direction of rotation.")
 If you have not already re-attached the X mount plate to the back of your motor, do so now.")


13 h) A long stick of balsa Tri-Stock is provided to reinforce the motor mount. Measure, cut, and glue pieces of triangle stock in all the corner joints on the face of the mount box using medium CA. c) Now route the ESC s servo wire into the fuselage, and temporarily connect it to the receiver. d) Connect the ESC's motor wires to the motor. Operate the motor and check the direction of rotation. NEVER DO THIS WITH A PROPELLER INSTALLED! If you need to reverse the rotation, refer to the instructions that came with the motor and ESC. i) If you have not already re-attached the X mount plate to the back of your motor, do so now. Then use (4) M4 x 16mm Socket Head Mounting Bolts and Lock Washers to bolt your motor in place on the plywood motor mount box. SAFETY ISSUE: We strongly recommend the use of an arming switch for your motor installation. With an arming switch you can install y our battery pac k in t he airplane and hook up the wires without danger of the motor starting. The ar ming switch keeps the electricity away from the motor until you arm it when you are ready to takeoff. The most common arming switches are a simple external plug that puts a break in the positive battery lead to the motor, such as the A rming S witch (SIG Part# M XACC6972) shown below. There are also arming switches built into some of the advanced ESCs now on the market. 14) Install your Speed Control (ESC) and Battery a) Solder appropriate battery connectors (not supplied) to the battery leads of your ESC. b) Decide on a good location for the ESC in the nose of the airplane. The most likely location is on one side of the motor mount box. Mount it to the airframe s structure using a method of your choice like double-sided tape or Velcro (neither of these are provided). In this case, the Castle Phoenix Edge 75Amp ESC fit perfectly on the side of the motor box, and was attached with shortened servo screws, and a Zip Tie (Not furnished).) e) The battery will sit inside the motor mount box. Slip one or both of the Velcro straps through the slots in the motor mount box and attach the hook side to the loop side. It is also a good idea to add some adhesive-backed Velcro (Not Furnished) to the floor of the mount box and to your LiPo battery. This will help prevent the battery from shifting during flight. 13


 When you are satisfied with the cowl s placement, tape it in place using masking")
 Use a 1/16\" bit to drill holes in the firewall for the cowl mounting screws,")
 Mount a suitable propeller (not furnished) and the included spinner (optional) on")
 Remove the cowl and thread a M3 x 10mm screw into each of the four cowl mounting")
14 15) Install the Cowl, Propeller, and Spinner a) Install the battery hatch and test fit the cowling, propeller, and spinner on the fuselage. As you pass the cowl over the motor, make sure all the wires are out of the way. Carefully adjust the exact position of the cowling. Make sure you have adequate clearance between the front of the cowl and the back of the propeller, and that the prop shaft is centered in the hole. (No part of the spinner or propeller should come into contact with the cowl.) When you are satisfied with the cowl s placement, tape it in place using masking tape. e) The cowl can now be permanently mounted to the fuselage. b) Use a 1/16" bit to drill holes in the firewall for the cowl mounting screws, through the pre-drilled holes in the cowl. f) Mount a suitable propeller (not furnished) and the included spinner (optional) on your motor. Be sure to balance the propeller before installation. c) Remove the cowl and thread a M3 x 10mm screw into each of the four cowl mounting holes, then remove the screws. d) Apply a drop or two of thin CA to each of the four cowl mounting screw holes. This will harden the wood, and help to keep the screws from vibrating loose. 14


 to hold the canopy in place, plus paper towels and water to wipe off any excess glue.")

15 16) COOLING IS IMPORTANT! With a fully-cowled motor, it is very important to make sure your power system is getting proper cooling. Air flowing into the front of the cowling must have a place to exit. In fact it s best to have more air exit area than inlet area to create a positive air flow through the cowling - an actual suction effect drawing the heated air out so that more cool air can come in. This positive flow keeps your motor running cool. The EDGEtra cowling has two openings in the front to let air in, and there is a generous sized opening in the bottom of the fuselage to let the air exit. This should provide ample cooling for your motor, ESC, battery. 17) Install your Receiver side of the firewall, lower the rear end of the hatch onto the fuselage, and allow the hooks to catch. Now slide the hatch toward the rear of the fuselage, and the magnets will latch in place. Test fit the canopy onto the top hatch to familiarize yourself with how it fits. Then place a narrow bead of glue around the outside edge of the canopy where it will contact the hatch. Note: We recommend a flexible RC-56 type glue, sometimes called "canopy glue", for this job. You will also need to have on hand some low tack tape (masking tape) to hold the canopy in place, plus paper towels and water to wipe off any excess glue. c) Set the canopy back in place on the hatch, and tape it in place. Let the glue dry according to the instructions on the glue bottle. Clean up any excess glue before it dries, and be very careful not to glue the hatch to the fuselage. Choose a suitable location to mount your receiver and receiver s antennas. There is plenty of room inside the EDGEtra s fuselage, but a good location is under the fiberglass wing tube holder. This location offers an easy way to secure the receiver using adhesive-backed Velcro or a strap. 19) Install the Wings a) Slide the aluminum wing tube into the tube holder in the fuselage. 18) Install the Pilot and Canopy a) Attach the pilot figure to the floor of the battery hatch. The lower rear edge of the pilot figure will touch the hatch hooks. Roughen the bottom surface of the pilot, and use epoxy to glue the figure in place. b) Slide a wing panel onto the aluminum wing tube. Make sure that the aileron servo extension wire passes through the hole in the side of the fuselage. b) Before applying glue to the canopy, attach the hatch to the fuselage. There are two locating pins at the front, and two hooks at the rear. Slide the pins into the pin slots in the rear 15


16 c) Attach the wing panel to the fuselage with nylon wing bolts. There are two wing bolts per wing panel. After attaching both wing panels, connect the aileron servo wires to the receiver with a Y-Harness. Preliminary: All the parts and components that will be in the airplane in flight must be installed in their correct positions. This includes all the radio gear, the propeller, spinner, flight battery, etc. Every piece of essential equipment must be installed, ready for flight. Always balance an electric powered model with the battery pack in place. RECOMMENDED BALANCE POINT: 4-1/4 Behind the Leading Edge of the Wing This was found to be the optimum Center of Gravity (CG) for sport and 3D flight d) Install the Side Force Generators (SFG), if desired, using two M3 x 16mm button head machine screws and two 3mm flat washers. Be careful not to over-tighten the screws and damage the underlying wood. A drop of blue thread locker will help keep the screws tight without crushing the wood. CONGRATULATIONS! Your EDGEtra ARF is completely assembled. However, it is NOT ready for flight! There are a few very critical pre-flight tasks we must perform before flying. These are extremely important and should be approached with patience and care. Using a ruler, measure back from the leading edge of the wing and mark the balance point on the top of the wing, next to the fuselage. Make the same marks on both sides of the fuselage. Flip the aircraft upside down (inverted), and place your fingertips on the balance point on both sides of the airplane and carefully lift the plane. No part of the model should be touching anything except your fingertips! If the EDGEtra will sit on your fingertips in a level attitude, then it is properly balanced and ready to fly. If the airplane sits on your fingertips in an extreme nose down attitude, then it is nose heavy. You will have to add weight to the rear of the airplane to get it to balance. NOTE: Before adding additional weight to the model, try simply moving the battery pack to a further aft location. The battery pack is relatively heavy and therefore makes a good balancing tool. You might try switching places between the battery and receiver; or move the battery right in front of the servos. If you can t get your model balanced simply by re-locating the battery pack, then you will have to purchase lead weights from your hobby dealer and glue them into the tail end of the fuselage. If the airplane sits on your fingertips with the tail down, it is tail heavy. DO NOT ATTEMPT TO FLY IT! A tail heavy model is very dangerous and will most likely crash!! Weight will have to be added to the nose of the model to bring it into balance. If the battery pack is not enough weight, the weights can be glued to the front of the firewall. There are also spinner weights available for tail heavy models. Wherever you put the balancing weight, make sure it cannot come loose in flight! BALANCE YOUR AIRPLANE CONTROL SURFACE TRAVEL This may be the single most important step in preparing your airplane for flight. All airplanes, model or full-size, must be accurately balanced in order to fly successfully. An airplane that is not properly balanced will be unstable and will most likely crash. NOT ALL EDGEtras WILL BALANCE THE SAME It is impossible to produce a model airplane kit that will automatically have the correct balance point. Not everyone uses the same motor or radio gear - and all those items can vary in weight! You might be surprised to know electric motors in the same size class may vary in weight by as much as 1 to 2 ounces. In addition, LiPo batteries from different manufacturers might have the same capacity, but have different weights as well. There can even be as much as a 3/4 oz. difference in weight between different brands of propellers! So, that s why every model must be balanced before flying. Don t feel that whatever the balance point your model came out at is good enough. Check carefully and make whatever adjustments are required. Trying to fly an out of balance model is dangerous! Double check the alignment and movement of all the controls one more time! Adjust all of your pushrod linkages so that the control surfaces are in their neutral position when the transmitter sticks and trim levers are centered. Make sure the control surfaces move in the proper direction when you move the sticks. You d be amazed to know how many models have been destroyed on takeoff with one of the controls reversed. Don t let it happen to you! In fact, it s a good idea to get into the habit of checking for proper control response every time you get ready to fly. Adjust your pushrod linkages and/or transmitter EPA (End Point Adjustment) settings as necessary to provide the recommended amount of control surface travel. NOTE: ALL measurement are taken at the control surface s WIDEST point. Note: The following control surface data has been flight tested with the EDGEtra. However these numbers are only recommended as a starting point. Your flying style may dictate changes. 16
17 RECOMMENDED CONTROL SURFACE TRAVEL: Ailerons - Low Rate: 1 Up and Down Ailerons High Rate: 2 Up and Down Elevator Low Rate: Elevator High Rate: Rudder Low Rate: Rudder High Rate: 1 Up and Down 2 Up and Down 1-1/2 Left and Right 2-1/2 Left and Right 3D CONTROL SURFACE TRAVEL: MAXIMUM TRAVEL ON ALL SURFACES! A Note About High Rate Throws: High rate and 3D control throws are only meant for extreme aerobatics - not for normal flying. You should be competent and comfortable flying your EDGEtra with normal control throws before attempting high rates. A Note About Exponential: You will find lots of opinions about the proper amount of exponential travel to use on each control surface in both low and high rate settings. The best aerobatic pilots in the world agree that you will want more expo at high rates than at low rates. After test flying, adjust your settings as needed to obtain the control feel you want. Consult your radio manual to find out how to adjust the exponential settings of your transmitter. Cuban eights, and spins. As with any aircraft, getting consistently good results is a matter of practice. While still at altitude, throttle the engine back to idle. This will give you a good idea of the glide characteristics. While still at idle, steadily increase up elevator input to get a feel for the stall characteristics. With practice and a little rudder input, the EDGEtra will become your favorite 3D plane on the market! Stalls tend to be very gentle with one wingtip or the other dropping, followed almost immediately with resumed flight as soon as the elevator is neutralized. This is great information to have when setting up your first landings. With the control movements set at the high rate measurements provided in this manual, the airplane will be able to perform any 3D maneuver you can think of! Landing the EDGEtra is easy, due to the light wing loading and 3D nature. We suggest using a standard landing approach, beginning with a throttled back downwind leg and base turn to the final approach into the wind. During final approach, keep just a little power on until the airplane is exactly where you want it for touchdown. In crosswind situations, a little rudder input will likely be needed to keep the airplane lined up with the runway. The EDGEtra can be easily landed on either main wheels or in the three-point position. After landing, always remember to hold up elevator when taxiing to keep the tailwheel firmly to the ground. We sincerely hope that your EDGEtra will provide you with many enjoyable flights. Please operate your airplane in a safe, responsible manner with respect to other flyers, spectators, and property. Good luck and safe flying! FLYING When it comes to test flying a new model, we always advise modelers to choose a calm day with little or no wind. These conditions allow you to better evaluate and more accurately adjust the trim requirements for your airplane. As we ve mentioned before, a good running, reliable motor is a must for the ultimate success of your airplane. Take the time to solve any power system problems before you try to fly. Always make it part of your pre-flight routine to check each control on the airplane, making sure the surfaces are moving in the correct directions. Also check each control linkage to be sure they are secure and that nothing is loose. With all the controls checked, make a range check with your radio system, making sure everything is working perfectly. CUSTOMER SERVICE SIG MFG. CO., INC. is committed to your success in both assembling and flying the EDGEtra ARF. Should you encounter any problem building this kit or discover any missing or damaged parts, please feel free to contact us by , mail, or telephone. SIG MFG. CO., INC. P.O. Box South Front Street Montezuma, IA USA PHONE: FAX: SIG WEB SITE: Taxi the EDGEtra out to the take-off position on the flying field, (holding up elevator during the taxi will keep the tailwheel firmly to the ground). For takeoff, the airplane should be lined-up with the center of the field with the nose pointed directly into the wind. Hold a little up elevator and smoothly advance the throttle - do not slam the throttle full open all at once. As the EDGEtra begins moving forward, back off of the up elevator input and use the rudder, only as needed, to correct any engine torque and/or wind induced deviations from a straight take-off run. Allow the airplane to lift off, using ailerons to keep the wings level. Climb to a reasonable altitude before making any trim changes. With the control movements set at the low rate measurements provided in this manual, the airplane should exhibit smooth, predictable control. Try a few loops and rolls. You will find that the roll rate is not especially high at the initial aileron settings but they can be very axial with practice. Inverted flight is easy, requiring surprisingly little down elevator for level flight. The EDGEtra also performs nice inside and outside loops, snap rolls, Immelmann turns, stall turns, 17 SIG mail@sigmfg.com LIMIT OF LIABILITY The craftsmanship, attention to detail and actions of the builder/flyer of this model airplane kit will ultimately determine the airworthiness, flight performance, and safety of the finished model. SIG MFG. CO. s obligation shall be to replace those parts of the kit proven to be defective or missing. The user shall determine the suitability of the product for his or her intended use and shall assume all risk and liability in connection therewith this model airplane correctly according to the plans and instructions.

18 JOIN THE AMA The governing body for radio-control model airplanes in the United States is the ACADEMY OF MODEL AERONAUTICS, commonly called the AMA. The AMA SAFETY CODE provides guidelines for the safe operation of R/C model airplanes. While AMA membership is not necessarily mandatory, it is required by most R/C flying clubs in the U.S. and provides you with important liability insurance in case your R/C model should ever cause serious property damage or personal injury to someone else. For more information, contact: ACADEMY OF MODEL AERONAUTICS 5161 East Memorial Drive Muncie, IN Telephone: (765) AMA WEB SITE: WARNING! THIS IS NOT A TOY! Flying machines of any form, either model-size or full-size, are not toys! Because of the speeds that airplanes must achieve in order to fly, they are capable of causing serious bodily harm and property damage if they crash. IT IS YOUR RESPONSIBILITY AND YOURS ALONE to assemble this model airplane correctly according to the plans and instructions, to ground test the finished model before each flight to make sure it is completely airworthy, and to always fly your model in a safe location and in a safe manner. The first test flights should only be made by an experienced R/C flyer, familiar with high performance R/C aircraft. SIG Manufacturing highly recommends that you visit the informational website to learn about flying safely and responsibly, and following the new regulations put in place by the Federal Aviation Administration (FAA).
I n s t r u c t i o n M a n u a l. Instruction Manual SPECIFICATION
 I n s t r u c t i o n M a n u a l Instruction Manual SPECIFICATION - Wingspan: 3200mm (125,9 in) - Length: 1650mm (64,9 in) - Flying weight: 3000gr 3200gr - Wing area: 64.5 dm2 - Wing loading: 46g/dm2
RECOMMENDED MOTOR AND BATTERY SET UP
 SPECIFICATION - Wingspan: 6000mm (236.2 in) - Length: 2873mm (113.1 in) - Flying weight: 14-18 kg - Wing area: 219.4 dm2 - Wing loading: 64g/dm2 - Wing type: HQ airfoils - Covering type: Genuine ORACOVER
RECOMMENDED MOTOR AND BATTERY SET UP
 SPECIFICATION - Wingspan: 1404mm (55.3in) - Length: 1134mm (44. 6 in) - Flying weight: 3.2-3.4 kg - Covering type: Genuine ORACOVER - Spinner size: scale type (not included) - Radio: 4 channel minimum
51in Aerobatic Series Sukhoi SU-26M Almost-Ready-to-Fly. Instruction Manual. Specifications
 51in Aerobatic Series Sukhoi SU-26M Almost-Ready-to-Fly Instruction Manual Specifications Wingspan: 51.2 in (1300mm) Length: 51.2 in (1300mm) Wing Area: 581 sq in (37.5sq dm) Flying Weight: 3.5 lb (1600g)
ALMOST READY TO FLY. Wing Span in cm. 2
 ASSEMBLY MANUAL ALMOST READY TO FLY MS:X9 Specifications Wing Span --------------------------61.4 in ---------------------------156cm. 2 Wing Area --------------------------606.1 sq.in ------------------
RECOMMENDED MOTOR AND BATTERY SET UP
 SPECIFICATION - Wingspan: 2000mm (78.7in) - Length: 1544mm (60.7 in) - Flying weight: 3600-3800 gr - Wing area: 66 dm2 - Wing loading: 55g/dm2 - Wing type: Naca airfoils - Covering type: Genuine ORACOVER
SIZE.120 OR 30CC SCALE 1:5 ARF
 PC21 PILATUS MK2 SIZE.120 OR 30CC SCALE 1:5 ARF SPECIFICATION - Wingspan: 1772mm (69.72in) - Length: 2019mm (79.5 in) - Flying weight: 6.4-7.2 kg - Wing area: 57.6 dm2 - Wing loading: 113g/dm2 - Wing type:
RECOMMENDED MOTOR AND BATTERY SET UP
 SPECIFICATION - Wingspan: 1410mm (55.5 in) - Length: 1278mm (50.3 in) - Flying weight: 3.2-3.4 kg - Wing area: 41.3 dm2 - Wing loading: 75g/dm2 - Wing type: Naca airfoils - Covering type: Genuine ORACOVER
I/C FLIGHT GUIDELINES
 SPECIFICATION - Wingspan: 3500mm (137.8 in) - Length: 1650mm (64.96 in) - Flying weight: 3700-4000 gr - Wing area: 75 dm2 - Wing loading: 49g/dm2 - Wing type: HQ profile - Covering type: Genuine ORACOVER
SBACH SCALE 1:4 ½ ARF
 SPECIFICATION - Wingspan: 1663mm (65.5 in) - Length: 1638mm (64.5 in) - Flying weight: 4700-5200 gr - Wing area: 56 dm2 - Wing loading: 85g/dm2 - Wing type: Naca airfoils - Covering type: Genuine ORACOVER
RECOMMENDED MOTOR AND BATTERY SET UP
 SPECIFICATION - Wingspan: 1800mm (70.8 in) - Length: 1355mm (53.3 in) - Flying weight: 4100-4300 g - Wing area: 51 dm2 - Wing loading: 80g/dm2 - Wing type: Naca airfoils - Covering type: Genuine ORACOVER
to fly. Most hardware included and all replacement parts are available.
 Instruction Manual The Thunderbolt P47 was perhaps the greatest of world war II in terms of all round performance and capability Phoenix Model has recreated a 2C - 60 class engine (or 4c 91 class) It was
RECOMMENDED MOTOR AND BATTERY SET UP
 SPECIFICATION - Wingspan: 2190mm (86.2 in) - Length: 1907mm (75 in) - Flying weight: 9000-12000 gr - Wing area: 92 dm2 - Wing loading: 98g/dm2 - Wing type: Naca airfoils - Retract gear type: Air-retract
EXTRA 330LX. Specifications: Code: SEA274. Graphics and specifications may change without notice. ASSEMBLY MANUAL
 ASSEMBLY MANUAL EXTRA 330LX Code: SEA274 Graphics and specifications may change without notice. Specifications: Wingspan---------------82.0 in (208.2 cm). Wing area---------------1349.4 sq.in ( 87.1 sq.dm).
Instruction Manual. Wingspan : 1400 mm (55.12 inch) : 1480 mm (58.27 inch) : 5500gr gr. : 6-9 channel/ 8 servo high torque,1 standard
 : 1480 mm (58.27 inch) : 5500gr gr. : 6-9 channel/ 8 servo high torque,1 standard") Wingspan : 1400 mm (55.12 inch) g Length : 1480 mm (58.27 inch) Weight : 5500gr - 6000gr Radio : 6-9 channel/ 8 servo high torque,1 standard Engine : GT 22 OS KIT CONTENTS: We have organized the parts
Wingspan : 1400 mm (55.12 inch) g Length : 1480 mm (58.27 inch) Weight : 5500gr - 6000gr Radio : 6-9 channel/ 8 servo high torque,1 standard Engine : GT 22 OS KIT CONTENTS: We have organized the parts
Instruction Manual. Wingspan : 2270mm (89.37 inches) : 1870mm (73.62 inches) : 7400gr gr. : 4 channel - 6 standard servo.
 : 1870mm (73.62 inches) : 7400gr gr. : 4 channel - 6 standard servo.") Wingspan : 2270mm (89.37 inches) g Length : 1870mm (73.62 inches) Weight : 7400gr - 7600gr Radio : 4 channel - 6 standard servo Engine : 25cc-35cc KIT CONTENTS: We have organized the parts as they come
Wingspan : 2270mm (89.37 inches) g Length : 1870mm (73.62 inches) Weight : 7400gr - 7600gr Radio : 4 channel - 6 standard servo Engine : 25cc-35cc KIT CONTENTS: We have organized the parts as they come
the leading edge of the wing, at the fuselage - Length: 1540mm (60.6 in) 10% expo; High: 15mm up/down, 10% expo - Wing area: 40dm2
 10% expo; High: 15mm up/down, 10% expo - Wing area: 40dm2") SPECIFICATION - Gravity CG: 165-170 mm (6.5-6.7 in) Back from - Wingspan: 1400mm (55.1 in) the leading edge of the wing, at the fuselage - Length: 1540mm (60.6 in) - Control throw Ailerons: Low: 12mm up/down,
SPECIFICATION - Gravity CG: 165-170 mm (6.5-6.7 in) Back from - Wingspan: 1400mm (55.1 in) the leading edge of the wing, at the fuselage - Length: 1540mm (60.6 in) - Control throw Ailerons: Low: 12mm up/down,
Instruction Manual. Specification:
 Instruction Manual L O W Specification: Wingspan: 133 cm (52.3 inches) Length : 104 cm (40.9 inches) Weight : 1790gr Engine : 25-32 two stroke Radio : 4 channel - 4 servo W I N G KIT CONTENTS: We have
: 6 channel - 9 servo
 g Wingspan : 2005mm (78.94 inches) Length : 1640mm (64.57 inches) Weight : 6400g - 6600g Engine : 25cc - 35cc Radio : 6 channel - 9 servo KIT CONTENTS: We have organized the parts as they come out of
HERO 3D SCALE 1:6 ARF
 Instruction Manual SPECIFICATION - Wingspan: 1500mm(59 in) - Length: 1410mm (55.5 in) - Flying weight: 2100-2300 gr - Wing area: 58 dm2 - Wing loading: 39g/dm2 - Covering type: Genuine ORACOVER - Gear
1660mm (65.4 in) 1200mm (47.2 in) 2700gr gr 6 channel - 7 servo standard 46/ 2 stroke or 52/ 4 stroke
 1200mm (47.2 in) 2700gr gr 6 channel - 7 servo standard 46/ 2 stroke or 52/ 4 stroke") Instruction Manual CESSNA-46 1660mm (65.4 in) 1200mm (47.2 in) 2700gr - 3000gr 6 channel - 7 servo standard 46/ 2 stroke or 52/ 4 stroke KIT CONTENTS: We have organized the parts as they come out of the
Instruction Manual CESSNA-46 1660mm (65.4 in) 1200mm (47.2 in) 2700gr - 3000gr 6 channel - 7 servo standard 46/ 2 stroke or 52/ 4 stroke KIT CONTENTS: We have organized the parts as they come out of the
: 7 channel - 9 servo, Hi-Torque ( Minimum 6 kg ).
.") g Wingspan : 1820mm (71.65 inches) Length : 1625mm (63.98 inches) Weight : 6900gr Engine : 25cc - 35cc Radio : 7 channel - 9 servo, Hi-Torque ( Minimum 6 kg ). KIT CONTENTS: We have organized the parts
g Wingspan : 1820mm (71.65 inches) Length : 1625mm (63.98 inches) Weight : 6900gr Engine : 25cc - 35cc Radio : 7 channel - 9 servo, Hi-Torque ( Minimum 6 kg ). KIT CONTENTS: We have organized the parts
SIG MFG. CO., INC. PO Box 520 Montezuma, IA
 SPECIFICATIONS: Wing Span: 70 in. (1778 mm) Wing Area: 860 sq.in. (55.5 dm2) Length: 50 in. (1270 mm) Flying Weight: 7-7.8 lbs. (3175-3538 g) Wing Loading: 19-21 oz./sq.ft. (57-64 g/dm2) Radio Required:
RECOMMENDED MOTOR AND BATTERY SET UP
 SPECIFICATION - Wingspan: 1420mm (55.91 in) - Length: 1370mm (53.94 in) - Flying weight: 2600-2800 gr - Wing area: 41.6 dm2 - Wing loading: 65g/dm2 - Wing type: Naca airfoils - Covering type: Genuine ORACOVER
Turbinator-2 Build Manual
 Turbinator-2 Build Manual Thank you for your purchase of the Turbinator-2 sport jet by Boomerang RC Jets. This RC Jet IS NOT A TOY and should only be flown and operated by experienced RC Turbine Pilots.
YAK54 MK2. GP/EP size.120/20cc SCALE 1:4 ¾ ARF. Instruction Manual. version. version
 Instruction Manual GP EP version version GP/EP size.10/0cc SCALE 1:4 ¾ ARF SPECIFICATION - Wingspan: 168 (66.3 in) - Length: 1605mm (63.1 in) - Flying weight: 4700-500 gr - Wing area: 54.7 dm - Wing loading:
Table of Contents. Tail Wheel Assembly Installation.. page 01. Stabilizer Installation.. page 02. Fin Installation.. page 03
 Table of Contents Tail Wheel Assembly Installation.. page 01 Stabilizer Installation.. page 02 Fin Installation.. page 03 Elevator and Rudder Hinge Installation.. page 04 Rudder Controls.. page 05 Elevator
AVIATOR 25 ARF Almost Ready-to-Fly
 AVIATOR 25 ARF Almost Ready-to-Fly Instruction Manual Specifications Wingspan: 54.3 in (1380mm) Length: 45.2 in (1150mm) Wing Area: 438 sq in (34sq dm) Flying Weight: 3.8 b (1700g) Dear Customer, Congratulations
Instruction Manual book
 Instruction Manual book ITEM CODE:BH118. SPECIFICATION Wingspan : 1,050 mm 41.34 inches. Length : 950mm 37.4 inches. Weight : 1 kg 2.2 lbs. Radio : 04 channels. Servo : 4 mini servos. Motor : KMS 2814/05
96in Super Decathlon ARF
 96in Super Decathlon ARF Instruction Manual Specifications Wingspan: 96in (2438mm) Length: 63.5 in (1614mm) Weight: Approx. 13lbs (6.5kg) 1 Dear Customer, Congratulations on your purchase of Super Decathlon
SIG MFG. CO., INC. PO Box 520 Montezuma, IA
 KIT NO.: SIGRC44EGARFR - (red) SIGRC44EGARFY - (yellow) SPECIFICATIONS: Wing Span: 54 in. (1372 mm) Wing Area: 585 sq.in. (37.7 dm 2 ) Length: 47.5 in. (1206 mm) Flying Weight: 5-5.5 lbs. (2268-2495 g)
RECOMMENDED EDF AND BATTERY SET UP
 SPECIFICATION - Wingspan: 1150mm (45.3 in) - Length: 1587mm (62.5 in) - Flying weight: 5.0-5.3 kg - Wing area: 40dm2 - Wing loading: 125g/dm2 - Wing type: Naca airfoils - Covering type: Genuine ORACOVER
RECOMMENDED MOTOR AND BATTERY SET UP
 SPECIFICATION - Wingspan: 2567mm (101in) - Length: 2190mm (86.2 in) - Flying weight: 11-13 kg - Wing area: 101 dm2 - Wing loading: 99g/dm2 - Wing type: Naca airfoils - Covering type: Genuine ORACOVER -
SU-31 PROFILE ELECTRIC ARF ASSEMBLY MANUAL
 SU-31 PROFILE ELECTRIC ARF ASSEMBLY MANUAL 1 TABLE OF CONTENTS Page Aeroworks Contact Information... 3 Introduction.. 4 Kit Contents... 5 Items needed to complete 6 Wing Assembly. 7 Stab Assembly. 10 Flight
Instruction Manual. Wingspan : 1884 mm (74.17 in) Length. Weight. Engine. : 4 channels / 5 servo standard. : 1450 mm (57.
 Length. Weight. Engine. : 4 channels / 5 servo standard. : 1450 mm (57.") Wingspan : 1884 mm (74.17 in) Length : 1450 mm (57.09 in) Weight : 4000 gr Engine : 60 two strokes Radio : 4 channels / 5 servo standard KIT CONTENTS: We have organized the parts as they come out of the
Wingspan : 1884 mm (74.17 in) Length : 1450 mm (57.09 in) Weight : 4000 gr Engine : 60 two strokes Radio : 4 channels / 5 servo standard KIT CONTENTS: We have organized the parts as they come out of the
ALMOST READY TO FLY. Wing Span in cm. 2
 ASSEMBLY MANUAL ALMOST READY TO FLY MS: X12 A - B Graphics and specfications may change without notice. Kit features. Specifications Wing Span ------------------------------- 42.7 in ---------------------
F3P Instruction Manual
 Before use, please read the explanations carefully! F3P Instruction Manual Specifications Fuselage length: 884mm ( 34. Bin ) Wingspan : 845mm ( 33. 2in) Flying Weight : 135-160g (with battery) Additional
Instruction Manual book
 book Item code:bh131 SPECIFICATION Wingspan : 3,000 mm 118.1 in. Length : 1,600 mm 62.99 in. Weight : 2.2 kg 4.84 Lbs. Radio : 05 channels. Servo : 06 mini servos. Electric Motor: BOOST 40 Battery : 3celIs
Instruction Manual. Wingspan : 1400mm (55.12 in) : 1370mm (53.94 in) : 2600gr gr. : 4 channel / 5 servo. : / 2 stroke_52-71 / 4 stroke
 : 1370mm (53.94 in) : 2600gr gr. : 4 channel / 5 servo. : / 2 stroke_52-71 / 4 stroke") Instruction Manual 540 Wingspan : 1400mm (55.12 in) g Length : 1370mm (53.94 in) Weight : 2600gr - 2800gr Radio : 4 channel / 5 servo Engine : 46-52 / 2 stroke_52-71 / 4 stroke KIT CONTENTS: We have organized
Instruction Manual 540 Wingspan : 1400mm (55.12 in) g Length : 1370mm (53.94 in) Weight : 2600gr - 2800gr Radio : 4 channel / 5 servo Engine : 46-52 / 2 stroke_52-71 / 4 stroke KIT CONTENTS: We have organized
Assembly Manual For. Wingspan: 88 in Wing area: sp in Length: 78.8 in Engine: 50CC.
 Assembly Manual For Wingspan: 88 in Wing area: 1479.8 sp in Length: 78.8 in Engine: 50CC www.pilot-rc.com INTRODUCTION Thank you for purchasing our new 50 cc model. We strive to bring you the most complete
Gent EPP. Before use please read the explanations carefully
 Before use please read the explanations carefully Gent EPP Instruction Manual Specifications Fuselage length 900mm 35in Wingspan 820mm 32in Flying Weight 210 240g with battery Additional Required Equipment
Instruction Manual. Wingspan : 1694mm (66.69 in) : 1470mm (57.87 in) : 3200gr gr. : 61 two stroke/ 71 four stroke. : 6 channel / 7 servo
 : 1470mm (57.87 in) : 3200gr gr. : 61 two stroke/ 71 four stroke. : 6 channel / 7 servo") Wingspan : 1694mm (66.69 in) g Length : 1470mm (57.87 in) Weight : 3200gr - 3800gr Engine : 61 two stroke/ 71 four stroke Radio : 6 channel / 7 servo KIT CONTENTS: We have organized the parts as they
Wingspan : 1694mm (66.69 in) g Length : 1470mm (57.87 in) Weight : 3200gr - 3800gr Engine : 61 two stroke/ 71 four stroke Radio : 6 channel / 7 servo KIT CONTENTS: We have organized the parts as they
SIG MFG. CO., INC. PO Box 520 Montezuma, IA
 KIT NO.: SIGRC105EPARF SPECIFICATIONS: Wing Span: 50 in. (1270 mm) Wing Area: 500 sq.in. (32.2 dm 2 ) Length: 44.25 in. (1124 mm) Weight (no battery): 57-60 oz. (1616-1701 g) Weight RTF: 68-76 oz. (1928-2154
Instruction Manual book
 book ITEM CODE:BH 115. SPECIFICATION Wingspan : 6,000 mm 236,22 in. Length : 2,740 mm 107,87 in. Weight : 17.5kg 38.5Lbs. Radio : 08 channels. Servo : 07-08 HS-5685MH(HITEC) Battery : 2 Cells-Li-Po 7.4V
Lanier R/C F-4 Phantom
 Lanier R/C.40-.46 F-4 Phantom Almost Ready to Fly WARNING! THIS IS NOT A TOY! THIS IS NOT A BEGINNERS AIRPLANE This R/C kit and the model you will build from it is not a toy! It is capable of serious bodily
RECOMMENDED MOTOR AND BATTERY SET UP
 SPECIFICATION - Wingspan: 1669mm (65.7in) - Length: 1229mm (48.43 in) - Flying weight: 3300-3400 gr - Wing area: 44.2 dm2 - Wing loading: 67g/dm2 - Wing type: Naca airfoils - Covering type: Genuine ORACOVER
Aviator Pro 120 ARF. Instruction Manual. Specifications
 Aviator Pro 120 ARF Instruction Manual Specifications Wingspan: 110 in (2800 mm) Length: 74 in (1870 mm) Wing Area: 1581sq in (102 sq dm) Weight: 11.4-13.4 lbs (5190-6100 g) Dear Customer, Congratulations
RECOMMENDED MOTOR AND BATTERY SET UP
 Instruction Manual SPECIFICATION - Wingspan: 1418mm (55.8 in) - Length: 1314mm (51.7 in) - Flying weight: 2700-3200 gr - Wing area: 36.8 dm2 - Wing loading: 76g/dm2 - Wing type: Naca airfoils - Covering
8mm EPP Acrocub. Instruction Manual. Specifications
 8mm EPP Acrocub Instruction Manual Specifications Wingspan: 34.6 in (880mm) Length: 31.5 in (800mm) Wing Area: 213.9 sq in (13.8sq dm) Flying Weight: Approx. 9oz (270g) Dear Customer, www.valuehobby.com/8mm-epp-acrocub.html
RECOMMENDED MOTOR AND BATTERY SET UP
 SPECIFICATION - Wingspan: 1600mm (63 in) - Length: 1285mm (50.5 in) - Flying weight: 2800-3200 gr - Wing area: 40.1 dm2 - Wing loading: 78g/dm2 - Wing type: Naca airfoils - Covering type: Genuine ORACOVER
MXS-EXP. 64 Inch Electric ARF Assembly Manual
 MXS-EXP 64 Inch Electric ARF Assembly Manual 1 Please take a few moments to read this instruction manual before beginning assembly. We have outlined a fast, clear and easy method to assemble this aircraft
(Glider) ASSEMBLY MANUAL
 ASSEMBLY MANUAL") (Glider) MS:132 ASSEMBLY MANUAL Graphics and specifications may change without notice. Specifications: Wing span ------------------------------118.1in (300cm). Wing area ---------------------902.1sq.in
(Glider) MS:132 ASSEMBLY MANUAL Graphics and specifications may change without notice. Specifications: Wing span ------------------------------118.1in (300cm). Wing area ---------------------902.1sq.in
YAK-54 EXP. 48 inch Electric ARF
 YAK-54 EXP 48 inch Electric ARF 1 Greetings and congratulations on your purchase of the Extreme Flight RC Yak-54 EXP ARF! Like all of the EXP series, the YAK-54 excels at both 3D and precision maneuvers.
Instruction Manual book
 Instruction Manual book ITEM CODE:BH118. SPECIFICATION Wingspan : 1,050 mm 41.34 inches. Length : 950mm 37.4 inches. Weight : 1 kg 2.2 lbs. Radio : 04 channels. Servo : 4 mini servos. Motor : BL2215/20
RADIO CONTROL MODEL ASSEMBLY INSTRUCTIONS. Wasp
 RADIO CONTROL MODEL ASSEMBLY INSTRUCTIONS Wasp TRAINER Almost ready-to-fly Wingspan 1520mm Fuselage length 1105mm Engine: 40-46 2T / 52-60 4T Electric Motor: 600-700W Radio: 5 channel / 4-5 servo RC Functions:
HIGH WING MK2 GP/EP ARF SCALE
 SONIC HIGH WING MK2 GP/EP.25-.32 ARF SCALE 1:10 SPECIFICATION - Wingspan: 1340mm (52.7in) - Length: 1040mm (40.9 in) - Flying weight: 1800-2000 gr - Wing area: 27 dm2 - Wing loading: 79g/dm2 - Wing type:
MS:159 ASSEMBLY MANUAL. Graphics and specifications may change without notice.
 ASSEMBLY MANUAL MS:159 Graphics and specifications may change without notice. Specifications: Wing span ----------------------------61.8in (157cm). Wing area -----------------1100.5sq.in (71.0sq dm). Weight
Instruction Manual book
 Instruction Manual book Item code:bh133 SPECIFICATION Wingspan : 1,400 mm 55.12 in. Length : 1,350 mm 53.15 in. Weight : 3.7 kg 8.14 Lbs. Radio : 08-09 channels. Servo : 08-09 servos. EDF : Turingy SK3
PilotRC Trainer USER MANUAL
 PilotRC Trainer USER MANUAL Introduction Thank you for purchasing our Trainer plane. we strive to achieve a good quality quick build ARF aircraft. It requires the least amount of assembly of any ARF kit
Instruction Manual book
 book ITEM CODE:BH 145 SPECIFICATION Wingspan: 6,000mm 236.22 in. Length : 2,800 mm 110.24 in. Weight : 18.5 kg 40.7 Lbs. Parts listing required (not included). Radio : 07-08 channels. Servo : 09-10 standard
MS:176 ASSEMBLY MANUAL. Graphics and specifications may change without notice.
 ASSEMBLY MANUAL MS:176 Graphics and specifications may change without notice. Specifications: Wing span ------------------------------98.4in (250cm). Wing area ----------------1576.4sq.in (101.7sq dm).
Instruction Manual. Wingspan : 1670mm. : 3400gr gr. : 61/75 two stroke. : 5 servo + 1 servo retract / 6 channel
 Wingspan : 1670mm g Length Weight Engine Radio : 1350mm : 3400gr - 4000gr : 61/75 two stroke : 5 servo + 1 servo retract / 6 channel KIT CONTENTS: We have organized the parts as they come out of the box
ASSEMBLY MANUAL
 www.seagullmodels.com MS: X104 ASSEMBLY MANUAL Graphics and specifications may change without notice. Specifications: Wing span ----------------- 35.4in (90.0cm). Wing area ------------------392.2sq.in
RADIO CONTROL MODEL HURRICANE
 RADIO CONTROL MODEL VQAA040G VQAA040B HURRINE Almost ready to fly SPECIFITIONS Wingspan...63 in. / 161cm Length...50 in. / 129cm Engine...50~60 2T / 70~90 4T Or Electric equivalent. RC Functions: Motor
ASSEMBLY MANUAL. Graphics and specifications may change without notice.
 NEMESISMS: SEA 111 ASSEMBLY MANUAL Graphics and specifications may change without notice. Specifications Wing span------------------------------------- 55.9in ------------------------------- 142cm. Wing
Instruction Manual book
 book ITEM CODE:BH 139 SPECIFICATION Wingspan : 1,450mm 57.09 in. Length : 1,140 mm 44.88 in. Weight : 3.3kg 7.26 Lbs. Radio : 05 channels. Servo : 07 mini servos+ 3servos Retracts (FUTABA S3170G) EDF:
Instruction Manual book
 book SPECIFICATION Wingspan : 1,450 mm 57.09 in. Length : 1,200mm 47.24in. Weight : 3.1 kg 6.82 Lbs. Radio : 05 channels. Servo : 07 servos. Engine : 61-75 2 stroke. 91 4 stroke. Made in Vietnam. This
MX2 100CC & MXS-R 100CC Giant Scale Aerobatic Aircraft
 MX2 100CC & MXS-R 100CC Giant Scale Aerobatic Aircraft By the act of using the final assembled model, the purchaser/operator accepts all resulting liability. Included Features: Fuselage and Wing incorporate
40 EP Gee Bee Y Scale ARF V2 Instruction Manual Specs:
 40 EP Gee Bee Y Scale ARF V2 Instruction Manual Specs: Wing Span: 40" Overall length: 30" Wing area: 306 sq. in Ready to fly weight: 28~32 oz Motor/Engine: Electric: Uranus-28309 brushless outrunner motor,
Instruction Manual book
 book SPECIFICATION Wingspan : 2,080 mm 81.89 in. Length : 1,680 mm 66.14 in. Weight : 6.2 kg 13.64 Lbs. Radio : 06 channels. Servo : 06 servos. Engine : 30-35 CC Gas(FUJI IMVAC). Made in Vietnam. This
PANTERA Electric Prop Jet ARF
 PANTERA Electric Prop Jet ARF Copyright 2017 Extreme Flight 1 Greetings and congratulations on your purchase of the SPEED FREAK PANTERA! The PANTERA is the second release from SPEED FREAK and is built
ARF. Specifications: ASSEMBLY MANUAL MS: 193. Graphics and specifications may change without notice.
 ASSEMBLY MANUAL Graphics and specifications may change without notice. MS: 193 ARF Specifications: Wingspan---------------62.0 in (157.5 cm). Wing area----------------620 sq.in (40.0 sq.dm). Weight-------------------3.3-3.9
Instruction Manual book
 Instruction Manual book ITEM CODE:BH135 SPECIFICATION Wingspan : 4,200mm. 163.35 in. Length : 2,100 mm. 82.68 in. Weight : 7,6 kg. 16.72lbs Radio : 07 channels. Servo : 05 06 standard high torque servos,
SIG MFG. CO., INC. PO Box 520 Montezuma, IA
 Kit No. SIGRC67EGVARF Shown with optional Spinner (not supplied) DESIGNED FOR GLOW OR ELECTRIC POWER Wing Span: 70 in. (1778 mm) Wing Area: 900 sq.in. (58.1 dm2) Length: 57 in. (1447 mm) Flying Weight:
SBD DAUNTLESS GP/EP SIZE ARF SCALE 1:8. Instruction Manual
 GP/EP SIZE.46-.55 ARF SCALE 1:8 SPECIFICATION - Wingspan: 1440mm (56.7in) - Length: 1140mm (44.9 in) - Flying weight: 3000-3300 g - Wing area: 42 dm2 - Wing loading: 78g/dm2 - Wing type: Naca airfoils
Radio control model INSTRUCTION MANUAL PYLON RACING. Wingspan: 1148mm (45.2 ) Radio : 4 channels Engine : two-stroke
 Radio : 4 channels Engine : two-stroke") VQA038 VQA039 Radio control model INSTRUCTION MANUAL MAGIC PYLON RACING Wingspan: 1148mm (45.2 ) Radio : 4 channels Engine :.25 -.32 two-stroke WARNING! This radio control model is not a toy. If modified
VQA038 VQA039 Radio control model INSTRUCTION MANUAL MAGIC PYLON RACING Wingspan: 1148mm (45.2 ) Radio : 4 channels Engine :.25 -.32 two-stroke WARNING! This radio control model is not a toy. If modified
ARF TRAINER KIT ASSEMBLY MANUAL BOOMERANG EP. ALMOST READY TO FLY
 WWW.SEAGULLMODELS.COM ASSEMBLY MANUAL BOOMERANG EP ARF TRAINER KIT Graphics and specifications may change without notice. MS: 211 ALMOST READY TO FLY Specifications: Wingspan---------------56.0 in (142.2
INSTRUCTION MANUAL BOOK
 INSTRUCTION MANUAL BOOK ITEM CODE BH57. SPECIFICATION Wingspan: 1,470 mm. 57.87 in. Length : 1,180 mm. 46.46 in. Weight : 2.7 Kg. 5.94 Lbs. Engine : 46 cu.in 2 stroke. 52 cu.in 4 stroke. Radio : 4 channels.
Assembly Manual For. Wingspan: 88 in Wing area: sp in Length: 78.8 in Engine: 50CC.
 Assembly Manual For Wingspan: 88 in Wing area: 1479.8 sp in Length: 78.8 in Engine: 50CC www.pilot-rc.com INTRODUCTION Thank you for purchasing our new 50 cc model. We strive to bring you the most complete
MARACANA ASSEMBLY INSTRUCTION .40 ARF LOW WING TRAINER RADIO CONTROL MODEL. Every body can fly
 RADIO CONTROL MODEL ASSEMBLY INSTRUCTION MARACANA.40 ARF LOW WING TRAINER Every body can fly VQA085 EP GP You can use both Gas or Electric power Wingspan: 59in.(1520mm) Fuselage length: 48in.(1220mm) Engine:
ASSEMBLY MANUAL SIZE: 46-62
 SIZE: 46-62 MS:199 ASSEMBLY MANUAL Graphics and specifications may change without notice. Specifications: Wing span ------------------------------54.9 in ( 139.5cm). Wing area -----------------517.7 sq.in
ASSEMBLY MANUAL. Kit features. MS:76
 ASSEMBLY MANUAL MS:76 Graphics and specfications may change without notice. Specifications: Wingspan---------------------------------------------------- 82.8 in------------------------------------- 210.3cm.
F3D-30 ARF ASSEMBLY MANUAL
 F3D-30 ARF ASSEMBLY MANUAL This Manuel is the sole property of Kangke Industrial USA, Inc. Reproducing any part without the consent of Kangke Industrial USA, Inc. is a lawful violation. Kangke Industrial
MS:183 ASSEMBLY MANUAL. Graphics and specifications may change without notice.
 MS:183 ASSEMBLY MANUAL Graphics and specifications may change without notice. Specifications: Wing span ------------------------------79.9in (203cm). Wing area -----------------1165.6sq.in (75.2sq dm).
Instruction Manual book
 Instruction Manual book SPECIFICATION Wingspan : 1,800mm. 70.87 in. Length : 1,350 mm. 53.15in. Weight : 3.6kg. 7.92lbs. Parts Listing required (not included). Glow Engine : 55-61 2 stroke. 91 4 stroke.
TUCANO 60CC SCALE 1:4 ¼ ARF. Instruction Manual. version. version
 Instruction Manual GP EP version version SCALE 1: ¼ ARF SPECIFICATION - Wingspan: 567mm (101in) - Length: 190mm (86. in) - Flying weight: 11-13 kg - Wing area: 101 dm - Wing loading: 99g/dm - Wing type:
MEMO. No.4341 Specification: Wing Span: 29.1 (740mm) Length: 36.6 (930mm) 2. Warranty
 Length: 36.6 (930mm) 2. Warranty") MEMO No.4341 Specification: Wing Span: 29.1 (740mm) Length: 36.6 (930mm) 2 Wing Area: 299 sq.in. (19.29 dm ) Weight: 18.9oz. (536.5g) 2 Wing loading: 0.58 oz./sq.ft (27.8g/dm ) Motor: OBL 29/27-07A Warranty
MEMO No.4341 Specification: Wing Span: 29.1 (740mm) Length: 36.6 (930mm) 2 Wing Area: 299 sq.in. (19.29 dm ) Weight: 18.9oz. (536.5g) 2 Wing loading: 0.58 oz./sq.ft (27.8g/dm ) Motor: OBL 29/27-07A Warranty
Please read all instructions carefully before assembly and flight!
 Please read all instructions carefully before assembly and flight! Thank you for purchasing the Mig-15. This model is designed for the intermediate to advanced flyer. The model is receiver ready and includes
CAP 232 ASSEMBLY MANUAL
 CAP 232 MS: ASSEMBLY MANUAL SEA 91 Graphics and specfications may change without notice. Specifications Wingspan------------------------------------ 65 in --------------------------------- 165cm. Wing
48in Sbach-342. Instruction Manual. Specifications
 48in Sbach-342 Instruction Manual Specifications Wingspan: 48in (1219mm) Length: 46in (1163mm) Wing Area: 471sq in (30.4sq dm) Flying Weight: 1.8-2.0lb (800-900g) Dear Customer, www.valuehobby.com/48in-s342-arf.html
STORCH. Parts. Additional items needed to complete the Storch
 STORCH Parts Fuse with Greenhouse- (Attached) Left and right wing panel Horizontal and vertical stab 2 Wing center blocks 2 Carbon spares for wing 1 Undercarriage with wheels 2 Undercarriage shocks 2 Carbon
JUNKERS CL1 G-BUYU. Specifications: Code: SEA275. Graphics and specifications may change without notice. ASSEMBLY MANUAL
 ASSEMBLY MANUAL JUNKERS CL1 G-BUYU Code: SEA275 Graphics and specifications may change without notice. Specifications: Wingspan---------------68.9 in (175 cm). Wing area---------------776.6 sq.in ( 50.1
Instruction Manual book
 book SPECIFICATION Wingspan : 1.750mm 68.90 in. Length : 1.280 mm 50.39 in. Weight : 3.2-3.5 kg 7.04-7.7 Lbs. Radio : 06 channels. Servo : 07-09 mini servos +3 servos retracts (FUTABA,S3170G) Parts listing
29% KATANA ARF ASSEMBLY MANUAL
 29% KATANA ARF ASSEMBLY MANUAL Required but not included Aircraft Specifications: 4 channel radio and supporting equipment Wing Span 84 Engine 3.2-4.2 c.i. (50-60 c.c.) Wing Area 1270 Sq. in. Fuel Tank
ASSEMBLY MANUAL SIZE
 SIZE.75 -.91 ASSEMBLY MANUAL MS:123 Graphics and specifications may change without notice. Specifications: Wing span ----------------------------66.9in (170cm). Wing area -----------------761.1sq.in (49.1sq
Pitts Challenger m (100cc) MANUAL
 MANUAL") Pitts Challenger 87 2.20m (100cc) MANUAL 1- Introduction: WELCOME TO THE PILOT-RC TEAM! Thank you for choosing a Pilot-Rc plane as your next model. We hope that you enjoy many successful and exhilarating
Pitts Challenger 87 2.20m (100cc) MANUAL 1- Introduction: WELCOME TO THE PILOT-RC TEAM! Thank you for choosing a Pilot-Rc plane as your next model. We hope that you enjoy many successful and exhilarating
MS:136 ASSEMBLY MANUAL. Graphics and specifications may change without notice.
 ASSEMBLY MANUAL MS:136 Graphics and specifications may change without notice. Specifications: Wing span ----------------------------79.5in (202cm). Wing area -----------------965.7sq.in (62.3sq dm). Weight
LASER 200. Hand-made Almost Ready to Fly R/C Model Aircraft ASSEMBLY MANUAL
 LASER 200 Hand-made Almost Ready to Fly R/C Model Aircraft ASSEMBLY MANUAL SPECIFICATIONS: WING SPAN ----------------------------------------175CM -------------------------------- 68.75 in. WING AREA ------------------------------------------4746CM2
Instruction Manual book
 book SPECIFICATION Wingspan : 2,310 mm 90.94 in. Length : 1,750 mm 68.90 in. Weight : 8.4 kg 18.48 Lbs. Radio : 06 channels. Servo : 09 servos + 2 mini servos (elevator). Engine : 45-55CC gas. Made in
 WWW.SEAGULLMODELS.COM ASSEMBLY MANUAL Code: SEA238 Graphics and specifications may change without notice. Specifications: Wingspan---------------68.9 in (175 cm). Wing area---------------776.6 sq.in (