Utilimaster Vehicles Rev. A
|
|
|
- Melvin Crawford
- 6 years ago
- Views:
Transcription


1 Body Operator s Guide Utilimaster Vehicles Rev. A
2 Do not discard! This document contains important operation, safety, and maintenance information! Customer Service The information in this document is generic. Details in illustrations and procedures may differ from those in your vehicle. Because Utilimaster manufactures many different customized vehicle bodies, this document cannot list and illustrate every possible option for every vehicle. Nevertheless, the most common body options are described here. Use this information as a guideline where it applies. Refer also to the separate chassis operator s guide supplied by the chassis manufacturer.
3 Revision Control Rev. A September 2017 The latest updates and other information about Utilimaster products, parts, service, and warranty are available for viewing and downloading at Utilimaster s award-winning web site Important Notices Part Number: RY17EN 2017, Utilimaster. Printed in U.S.A. Title: Utilimaster Vehicles Body Operator s Guide Utilimaster Corporation attempts to provide information that is accurate, complete, and useful. All information contained in this manual is based on the latest product information available at the time of publication. However, because of the Utilimaster policy of continual product improvement, Utilimaster reserves the right to amend the information in this document at any time without prior notice. This material is confidential and the property of Utilimaster. It is shared with you for the sole purpose of helping you with the operation of the described equipment. Utilimaster makes no warranty of any kind with regard to this material, including, but not limited to, the implied warranties of merchantability and fitness for a particular purpose. Utilimaster shall not be liable for errors contained herein or for incidental or consequential damages in connection with the furnishing, performance, or use of this material. Utilimaster expressly disclaims all responsibility and liability for the installation, use, performance, maintenance, and support of third-party products. Customers are advised to make their independent evaluation of such products. No part of this document may be photocopied, reproduced, or translated to another language without the prior written consent of Utilimaster. Utilimaster, Aeromaster, Utilivan, and Metromaster are registered trademarks of Spartan Motors USA. All other products or name brands mentioned in this document are trademarks of their respective owners. Body Operator s Guide 3
4 Contents Sections marked with an asterisk (*) contain information pertaining only to Aeromaster walk-in vans. (See the Utilimaster Vehicles Overview section.) For equivalent features in other Utilimaster vehicles, see the relevant chassis operator s guide supplied by the chassis manufacturer. Revision Control... 3 Important Notices... 3 Introduction Welcome Please Note Notices, Cautions, and Warnings...11 Before You Go Inspection Checklist Utilimaster Vehicles Overview Aeromaster (Walk-in) Vans Parcel Delivery Vans (PDVs) Truck Bodies Typical Vehicle Features and Options Vehicle Orientation Features and Options Accessory Outlet and Lighter* Battery Access Battery Remote Jump Start Posts Block Heater Plug Dash Overview Air Louvers Dome and Cargo Light Fuse Panel Body Operator s Guide
5 Hazard Light Switch Headlights and Parking Lights Doors Bulkhead Door Types of Latches Nonlocking Doors Locking Doors Cab Sedan Doors* Cab Sliding Doors* Compartment Door Door Ajar Light* Door Keys Power Door Locks* Utilimaster Access System (UAS) RFID (Radio Frequency IDentification) Rear Cargo Doors Rear Roll-Up Door Master Security (Banana) Lock Slam Lock Rear Swing Door General Information Cam Lock Dead Bolt Slam Lock Fuel Fill Port Hood* Heating Ventilation Air Conditioning (HVAC) Electronic Controls* Intake Filter* Ventilation Fan* *Pertains only to Aeromaster walk-in vans. Body Operator s Guide 5
6 Vents Butterfly Hingeless Roof Lights Back-up Lights Brake and SHMSL Lights Daytime Running Lights* Dome and Cargo Lights Hazard Lights* Headlights and Parking Lights* License Plate Light Mirrors Adusting Auto-Defrost Rearview (Back-up) Camera System Safety Equipment Rocker Switches Seats and Seat Belts Adjusting the Driver s Seat* Suspension Seat Tether Belts* Passenger Seats Using the Seat Belt Seat Belt Overview Inspecting the Seat Belt Buckling the Seat Belt Standard 3-Point Harness Crew Cab Seat Belt Windshield Wiper/Washer *Pertains only to Aeromaster walk-in vans. 6 Body Operator s Guide
7 Operation Safety Considerations Important Tire Information Tire Labeling Markings on the Tire Tire Identification Number (TIN) Identifying Potential Recalls Tire Care Tire Inflation Guidelines Recommended Cold Tire Pressure Information Location Safety Consequences of Improper Inflation Measuring and Adjusting Inflation Pressure Glossary of Tire Terminology Vehicle Load Limits and Towing Capacity Locating and Understanding Load Limit Information Towing Capacity Calculating Cargo Load Capacities Determining Compatible Tire/Vehicle Load Capabilities Safety Consequences of Overloading Steps for Determining Correct Load Limit Safety Chains with Cruciform Slots Towing the Vehicle Emergency Repairs Reporting Safety Defects United States Only Canada Only Body Operator s Guide 7
8 Maintenance Information Maintenance Safety Considerations Cleaning General Tips Body Exterior Cargo Area Instrument Panel and Interior Plastic Components Seats Windows Tempered and Safety Glass LEXAN Windows Manufacturers Recommendations Engine/Heater Coolants Lubrication Maintenance Checklist Body Mounting Fasteners Bumpers Doors, General Doors, Power Locks* Doors, Roll-up Doors, Swing Grab Handles Heater Filter* Hood* Interior Driver Conveniences Mirrors Reflective Tape Seats and Belts* Tires Wipers* *Pertains only to Aeromaster walk-in vans. 8 Body Operator s Guide
9 VIN, Body Serial, and Work Order Numbers Ordering Parts How to Order Customizable Parts Order Form Returns Filing Warranty Claims More Information and Publications Aftermarket Parts Utilimaster Web Site Contacting Utilimaster Index *Pertains only to Aeromaster walk-in vans. The information in this document is generic. Details may differ from your vehicle. Use this information as a guideline where it applies. Body Operator s Guide 9
10 Introduction Welcome... Congratulations on operating a vehicle with a quality Utilimaster body. Utilimaster is dedicated to serving our customer s needs through the excellence of our products, services, and information. This Operator s Guide provides basic operating information for vehicle bodies built by Utilimaster Corporation. For information on the chassis and drive train, see the separate chassis operator s guide supplied by the chassis manufacturer. For additional technical (parts, service, wiring) documentation, see the references in the More Information and Publications section. This guide also describes how to maintain the vehicle body, avoid injury or vehicle damage, obtain parts and service manuals, order parts, file warranty claims, and perform other services. Please... Please read and follow the instructions in this document for safe and optimal operation and maintenance of this vehicle. Refer to the Contents pages for general information sections and the Index pages for particular (alphabetized) topics. Section locations can also be found in the Index. Please keep this important document in your vehicle for reference. If the vehicle is ever sold, please leave this document in the vehicle for the next owner. Note... All information, specifications, and illustrations contained in this manual are based on the latest product information available at the time of publication. However, because of Utilimaster s policy of continual product improvement, the information contained in this document is subject to change without notice. 10 Body Operator s Guide
11 Notices, Cautions, and Warnings As you read through the this document, you will encounter NOTES, CAUTIONS, and WARNINGS. Each has a specific purpose. WARNING indicates a hazardous situation which, if not avoided, could result in death or serious injury. CAUTION indicates a hazardous situation which, if not avoided, could result in minor or moderate injury. NOTICE is used to address practices NOT related to physical injury. Body Operator s Guide 11
12 Before You Go Inspection Checklist Before driving, you should inspect the vehicle for proper operation. Some important points to inspect are the following. Visually inspect the tires for possible underinflation or damage. See the Important Tire Information section under Operation Safety Considerations. At least weekly, test the tire inflation pressure with a quality pressure gauge. Check the washer fluid level. Check all lights. Exterior lights must illuminate properly to meet Federal Motor Vehicle Safety Standards for nighttime operation of the vehicle. Check the operation of all doors. Adjust the driver s seat position. Adjust all mirrors. Inspect, fasten, and adjust the seat belt. When starting the engine, check all warning lights on the instrument panel. Check the fuel gauge. Check the heater and defroster controls operation. Check the wiper operation. Check the washer operation and spray pattern. Check all switches on the dash and the steering column for proper operation. Check other options, such as a rear vision camera system. For items to be checked every three or four months, see the Maintenance Checklist section. For more detailed service instructions, see the More Information and Publications section. 12 Body Operator s Guide
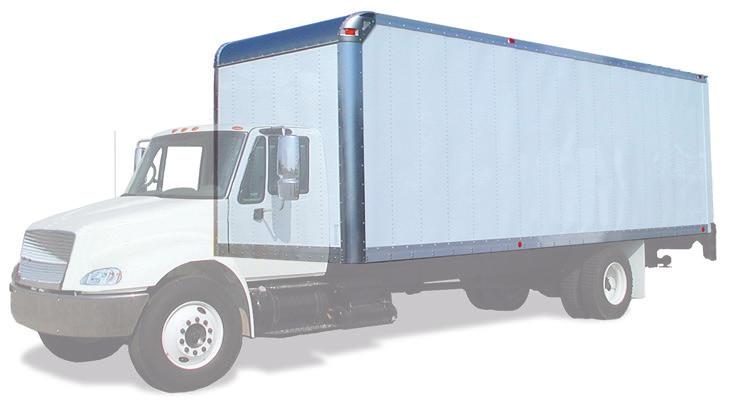
13 Utilimaster Vehicles Overview Aeromaster (Walk-in) Vans Also known as step vans, these custom-built bodies have walk-through doorways to custom-built cabs. From the outside, the driver steps up or walks into the extra tall cab of our Aeromaster. Once inside, the driver can access the cargo area without having to exit the vehicle. Many possible chassis and body combinations exist. Parcel Delivery Vans (PDVs) Also known as high cubes or cutaways, these custom-built bodies have (optional) walk-through doorways from the cargo area to the original van cabs. Drivers can (optionally) access the cargo area without having to exit the vehicle. Popular PDVs manufactured by Utilimaster include the compact and economical Metromaster, the larger-capacity Utilivan, and the tool-carrying Trademaster lines. Truck Bodies These are custom-built bodies with the original truck cabs. Bodies can be of DuraPlate, aluminum, or FRP construction. The custom bodies have rear swing or roll-up door options. Lift gates, side stepwell doors, translucent roofs, liners, ramps, and cabovers are among the many other options. Your type of vehicle and installed options determine the relevance of the various sections of this manual. Some sections have information common to most Utilimaster vehicles. Other sections pertain only to Aeromaster walk-in vans since PDVs and truck bodies have the original chassis cabs with original hoods, HVAC, wipers, and other cab-related equipment. The Aeromaster-specific sections have an asterisk (*) in the heading. Other sections (e.g., overhead vs. swing doors) depend on what options are installed in a particular vehicle. Body Operator s Guide 13


14 Strip Chassis and Aeromaster Walk-in Body Cutaway Chassis and PDV Body Cab Chassis and Truck Body Chassis Types and Respective Utilimaster Bodies 14 Body Operator s Guide
15 Typical Vehicle Features and Options These are some typical features and options. Most are explained in the alphabetized Features and Options section. Identification Lights Clearance Lights Supplemental High Mount Stop Light Rear Vision Camera Identification Lights Mirrors Grab Handle Hood Block Heater Plug (Front) Bumper Step Ring Headlight Turn Signal Hood Strap Stop/Tail/ Turn Light Back-up Light Safety Cable Latch Block Heater Plug (Rear) License Plate Lights Pull Strap Rear Roll-up Door Reflector Rear Bumper Sidewall Side Marker Light Rear Crosswalk Mirror Side Marker Light Cab Vent Cargo Vent Grab Handle Reflector Side Sliding Door Fuel Fill Door (or Fuel Fill Port) Rubrails Reflector Typical Aeromaster Body Features and Options The information in this document is generic. Details may differ from your vehicle. Use this information as a guideline where it applies. Body Operator s Guide 15
16 Vehicle Orientation Some features and options may be dependent on which side they are located Passenger s side (RH Right Hand), Driver s side (LH Left Hand) based upon the position of the driver while facing forward. In addition, other features and options are specific to the driver s cabin (Cab) area forward of the bulkhead wall or specific to the Cargo Area rear of the bulkhead ore front wall. Vehicle orientation To avoid colliding with another vehicle or obstacle, be sure you always have sufficient overhead and side clearance. Take extra care when backing up. 16 Body Operator s Guide
17 Features and Options Accessory Outlet and Lighter* Do NOT prevent the cigarette lighter from popping out after it is heated. The element may overheat, damaging the lighter and heating element. Connecting unauthorized devices to the vehicle s wiring can potentially cause vehicle malfunction, damage, fire, personal injury, and/or voiding of the warranty. Contact Utilimaster before connecting any devices to the vehicle s wiring other than plugging into a supplied accessory outlet (cigarette lighter). To use the optional accessory outlet for power, insert the plug of the desired device (e.g., cell phone charger, spotlight). To use the optional cigarette lighter, push in the lighter. Do NOT hold the lighter in this position. It will pop back out when it is hot. Your type of vehicle and installed options determine the relevance of the various sections of this manual. Some sections have information common to most Utilimaster vehicles. Other sections pertain only to Aeromaster walk-in vans since PDVs and truck bodies have the original chassis cabs with original hoods, HVAC, wipers, and other cab-related equipment. Aeromasterspecific sections have an asterisk (*) in the heading. Still other sections (e.g., overhead vs. swing doors) depend on what options are installed in a particular vehicle. The information in this document is generic. Details may differ from your vehicle. Use this information as a guideline where it applies. Body Operator s Guide 17

 as well as Aeromaster walk-ins on E-Series Ford chassis usually store the batteries under the hood.")

18 Battery Access Batteries that are improperly connected, jumped, or charged can potentially explode and spew acid, causing vehicle damage and personal injury. Carefully follow the chassis manufacturer s recommendations for those procedures. Battery posts and related accessories may contain lead and lead compounds. Wash hands after handling. Vehicles with original cabs (Truck Body and PDV styles) as well as Aeromaster walk-ins on E-Series Ford chassis usually store the batteries under the hood. Aeromaster walk-in vans on Freightliner and Ford F59 chassis store the batteries under the right-hand stepwell. The access cover is held in place by Utilimaster s MagFast hold-downs. This magnetic system eliminates rubber hold-down straps and thumbscrew fasteners. No tools needed, just lift firmly to access the batteries. Battery Under the Hood Magnetic Lid in Stepwell Battery Under the Stepwell Lid 18 Body Operator s Guide

19 Battery Remote Jump Start Posts Consult the chassis operator s guide supplied by the chassis manufacturer for instructions on connecting, jumping, and servicing the battery. Improper procedures may result in vehicle damage and personal injury. Your truck may be equipped with remote jump start terminals under the hood. Remote Jumpstart Posts Under the Hood Body Operator s Guide 19

20 Block Heater Plug Unplug the cable from the block heater plug before starting and driving the vehicle. An electrical port for the engine block heater may be provided at the back of the vehicle or near the hood. Be sure the port cover closes securely after removing the cable. Be sure to unplug the cable before starting and driving the vehicle. Block Heater Plug The information in this document is generic. Details may differ from your vehicle. Use this information as a guideline where it applies. 20 Body Operator s Guide
21 Dash Overview For vehicles with original cabs (Truck Body and PDV) styles see the chassis operator s guide supplied by the chassis manufacturer. The items featured in this section are found on dash panels of Aeromaster walk-in vans. For information about the instrument panel gages, indicator lights, transmission shifter, and steering column controls, see the chassis operator s guide. Air Louvers When the fan is on, you can direct the flow of air where you want by rotating circular vents on the dash panel. When the heater control lever is set to defrost, most of the air flow is directed through the defrost ducts near the window and only a small amount of air comes through the air louvers. As the floor control lever is moved to the right or left or the mode control knob is rotated, varying amounts of air will be directed through the louvers and the floor ducts. To direct even more air to the defrost or to the floor ducts, close the louvers by rotating them on their pivots approximately 90 degrees or by closing the movable vanes. Dome and Cargo Light The optional cargo switch is usually on the left side of the dash panel. A dome light control may be a separate rocker switch or part of the headlight switch. See also the Lights section. Fuse Panel The fuse panel is usually mounted on the lower left side of the dash panel. See the chassis operator s guide supplied by the chassis manufacturer for more details. Hazard Light Switch The hazard switch is typically located on the dash or the top of the steering column and controls the flashing of lights on the body. The hazard lights work with the engine on or off and with or without the ignition key. See the chassis operator s guide supplied by the chassis manufacturer for more details. Body Operator s Guide 21
22 Headlights and Parking Lights Halogen headlight bulbs operate at very high temperatures. Use gloves when handling halogen bulbs. Do NOT touch the bulb with your fingers. Oil residue from fingers can greatly shorten the life of the bulb and cause it to shatter during operation. If the bulb is touched, clean the bulb with isopropyl alcohol. See the Lights section. See also the chassis operator s guide supplied by the chassis manufacturer for more details. Always replace a light with one of the same size, shape, wattage, and color. 22 Body Operator s Guide


23 Doors Bulkhead Door Types of Latches The door allows you to enter the cargo area from the cab without having to exit the vehicle. Various types of bulkhead door latches exist, including plungers and sockets, finger pulls, and keyed locks. Operation of the bulkhead door varies with the vehicle options. Nonlocking Doors For doors held in open or shut position by a rubber plunger and socket, simply push the door the desired direction until it is secured by the latch. For doors with a finger pull or cable, pull down on the latch until the door is free to slide. For doors with lever handle latches, push the top of the handle in the direction you wish the door to travel. Bulkhead Door Finger-Pull Latch (Cab Side) Bulkhead Door Finger-Pull Latch (Cargo Side) Body Operator s Guide 23

. Bulkhead Door Lock (Cab Side) Cab Sedan Doors* Sedan doors are hinged at the front like standard automotive doors.")
24 Even though some bulkhead and rear doors lock automatically when they are fully closed, you cannot become accidentally locked inside the cargo area (Aeromasters and PDVs). From inside the cargo area, you can open the bulkhead and rear doors without a key. Locking Doors To open the door from the cab side, insert and turn the key in the lock and push the door open. To open the door from the cargo side, push the door latch lever and slide the door open. To close the door, slide the door closed until the latch catches. The door automatically locks (dependent on options). Bulkhead Door Lock (Cab Side) Cab Sedan Doors* Sedan doors are hinged at the front like standard automotive doors. To open the door (from the inside or outside) operate the handle and either pull from the outside or push from the inside. To close, merely swing the door closed firmly enough for the latch mechanism to catch. Bulkhead Door Lock (Cargo Side) To lock the door from the inside, locate the knob at the top of the interior latch and push down. To unlock the door, pull the knob up. 24 Body Operator s Guide
 unlock it and push the tip of the handle toward the rear of the vehicle.")

25 Cab Sliding Doors* Aeromaster handle and locking options vary. Some of the most common types are described here. The information in this document is generic. Details may differ from your vehicle. Use this information as a guideline where it applies. To open the door (from the inside or outside) unlock it and push the tip of the handle toward the rear of the vehicle. The handle unlatches the door so that you can slide the door toward the back of the vehicle. Once the door is completely open, the latch holds the door in position. To close the door, push the top of the handle toward the front of the vehicle and slide the door forward until the latch mechanism catches. To lock the doors from the inside, locate the pull lever below the interior handle on K-style handles and push up. Alternately, H-style handles, rotate the knob at the top to the left L position. To unlock the door, pull down on the lever or rotate the knob to the right U position. Exterior Side Door Handle and Locking Push-button Typically, when the interior lock is engaged, the key cannot open the lock from the outside. Interior Side Door Handle and Lock Body Operator s Guide 25

26 To maintain safety and security, do NOT drive with door(s) open. If you have this type of pushbutton lock, be sure you do not leave your keys inside the vehicle and lock yourself out. For some handles, to lock the doors from the outside, push in the lock button at the bottom of the handle. Alternately, insert the key and rotate the top of the key toward the rear of the vehicle. To unlock the door, insert the key and rotate the top of the key toward the front of the vehicle. For some handles, to lock the doors from the outside, insert the key, rotate it clockwise 45, push the button in, rotate it counterclockwise 45, and remove the key. To unlock, insert the key, rotate it clockwise 45, release the button, rotate the key counterclockwise 45, and remove the key. On the sliding door, the top window typically opens and closes by pressing the window latch and sliding the window to the desired position. On driver s side doorless panels, the window typically opens and closes by rotating a window crank. Sliding Door Window Latch With this type of lock, you cannot lock yourself out. For vehicles equipped with the keyless entry VACS (Vehicle Access Control System), see the separate operator s guide for instructions. The information in this document is generic. Details may differ from your vehicle. Use this information as a guideline where it applies. 26 Body Operator s Guide


27 Compartment Door Rotate the circular D-ring handle (either way) until it unlatches and pull the door open. Closing the door firmly will automatically latch the door. The keyed lock can be locked by inserting the key, rotating it clockwise 90, and removing it. Rotating the key counterclockwise 90 will unlock the door. Compartment Door Handles Door Ajar Light* Some vehicles are equipped with a door ajar light on the dash that illuminates when a door isn t completely closed. The keyless ignition option may also disable the vehicle from being started if all the doors are not properly closed. Door Ajar Light Body Operator s Guide 27

28 Door Keys Make a spare set of all keys and keep them in a secure place. Take the key from the ignition when leaving the vehicle. In Aeromasters, keys that open the doors are typically not the keys that start the engine. Even though some bulkhead and rear doors lock automatically when they are fully closed, you cannot become accidentally locked inside the cargo area (Aeromasters and PDVs). From inside the cargo area, you can open the bulkhead and rear doors without a key. Sample Cargo and Ignition Keys 28 Body Operator s Guide


29 Power Door Locks* Utilimaster offers various configurations of power lock systems. These instructions describe the most typical functions. Each system is supported by its own user s guide provided with each truck. Since many configurations are available, take time to become familiar with your system. The general principles are described here, but are highly dependent on a particular configuration. The power locks serve as dead bolts. Any keyed handle locks must also be unlocked to open the doors. The information in this document is generic. Details may differ from your vehicle. Use this information as a guideline where it applies Utilimaster Access System (UAS) The most common Utilimaster keyless entry and keyless ignition systems is based on the UAS platform. UAS typically uses a one-button transmitter (FOB) that performs different functions depending on the sequence of pressing the button. The different UAS versions have slightly differen FOB functions. Typically pressing the button once will unlock the cab doors for approximately eight seconds. For the keyless ignition option, pressing the button also sets the system in "READY" mode. Pressing the button twice in secession or holding the button down unlocks the other door depending on the specific proamming. Transmitter (FOB) Body Operator s Guide Keyless Ignition Switch on Dash 29

30 In some cases there is a push-button switch in the cargo area near the door to released the lock. All of the doors with an electronic latch can be opened by manually sliding the bolt back to prevent someone from being locked in. In addition, keyless systems include a manual key override on at least one of the doors. All doors automatically lock when closed or when the system times out after approximately eight seconds. Each keyless entry system is supported by its own user and service manuals. RFID (Radio Frequency IDentification) Utilimaster RFID keyless entry and ignition system uses a wristband style transmitter that when in proximity of a "reader" at each individual door unlocks only that specific door. The RFID system includes a manual key override at the rear roll-up door. All doors automatically lock when closed or when the system times out after approximately eight seconds. Each keyless entry system is supported by its own user and service manuals. RELEASE LATCH Sliding Door Latch Manual Key Override (Shown at the RH Cab Door) Wristband style RFID Reader 30 Body Operator s Guide

 Lock To unlatch the door, rotate the catch and then rotate the banana lock lever counterclockwise until it catches in the open position.")

31 Rear Cargo Doors Rear cargo doors come in various styles. Operation of the rear door varies by the manufacturer or the options chosen with your vehicle. To prevent damage to the cargo or vehicle, be sure that the rear door is closed and latched before driving the vehicle. A moving door can cause injury or death. Stand clear of the opening while the door is moving. Rear Roll-Up Door Master Security (Banana) Lock To unlatch the door, rotate the catch and then rotate the banana lock lever counterclockwise until it catches in the open position. Opening a Banana Lock Most doors with banana locks typically have no built-in keyed lock. The driver must supply a padlock to secure the door if desired. Optional Interior Banana Lock Release Although most banana locks have no means of releasing the latched door from inside the cargo area, if the vehicle has an optional interior release lever, rotate the catch release knob 90 and rotate the lock lever about 180 clockwise to unlatch the door. Closing a Banana Lock To latch the door (from the exterior), rotate the catch and then rotate the banana lock lever clockwise until it catches in the closed position. Body Operator s Guide 31
 by rotating the latch counterclockwise until you can pull the cable off the peg.")

32 Slam Lock Slam locks automatically lock when the door is completely closed. After closing the door, pull up on the handle to ensure the door is latched and not merely appearing to be fully closed. To enter the cargo area from outside the vehicle, disconnect the safety cable (if equipped) by rotating the latch counterclockwise until you can pull the cable off the peg. The safety cable prevents the door from accidentally opening while the vehicle is in motion. Insert and turn the key in the lock. While pressing down on the bottom handle to relieve tension on the door before opening, turn the handle. To close the door from the outside, push the door down until it locks. Place the safety cable (if equipped) in the safety cable latch by rotating the latch counterclockwise until you can slip the cable over the peg. To exit the cargo area from the inside, pull the ring in the lower corner of the door on the driver s side to unlatch the safety cable (if equipped) and then pull the door lever to the right to unlatch the door mechanism. Safety Cable Latch Roll-up Door Handle and Lock Even though the bulkhead and rear doors lock automatically when they are fully closed, you can open the bulkhead and rear doors without a key from the cargo area interior. 32 Body Operator s Guide


33 A roll-up door counterbalance spring is wound under high tension. Only qualified technicians should adjust this spring. Failure to secure cargo will increase the risk of injury in a collision or sudden stop. Interior Safety Cable Release Ring Do not use the rear door pull strap to support yourself when entering or exiting the rear. The strap can break or pull the door down upon you. Use the grab handles to aid getting in and out of the back. If the lock sticks, relieve the tension on the door by pressing down on the door while pulling the door lever. Interior Door Release Lever To prevent damage to the cargo or vehicle, be sure that the rear door is closed and latched before driving the vehicle. Body Operator s Guide 33
. 2.")
 cams are free from their catches and then pull the door open. To close and latch the door: 1. Push the door closed. 2. Engage the cams in their catches.")
34 Rear Swing Door General Information To prevent possible injury caused by wind blowing the door closed, ensure that open doors are securely latched or seated in their catches. Bi-folding swing doors may have one, two, three, or all four panels open and secured. Cam Lock To open the door: 1. Unlock and remove the padlock (if present). 2. Rotate the handle s upper latch up with one hand. 3. With the other hand, pull the handle up and away from the door. 4. Rotate the handle until the (upper and lower) cams are free from their catches and then pull the door open. To close and latch the door: 1. Push the door closed. 2. Engage the cams in their catches. 3. Rotate the lever back to its home position (while holding the handle s latch out of the way). 4. Tug on the door to confirm it is latched. Securing Open Swing Doors Bi-folding Swing Doors 34 Body Operator s Guide

. 2.")

35 Dead Bolt To open the door: 1. Unlock the keyed lock or remove the padlock (if appropriate). 2. From the home position, rotate the handle to the right. 3. Pull the door open. To close and latch the door: 1. Firmly push the door closed. 2. From the home position, rotate the handle to the left and then back down to the home position. 3. Tug on the handle to confirm it is latched. Slam Lock To open the door: 1. Insert and turn the key in the lock (if appropriate). 2. Rotate the handle to the right and pull open the door. To close and latch the door: 1. Firmly push the door closed. 2. Tug on the handle to confirm that it is latched. Cam Lock Handle Latch Unlatch Home Dead Bolt Handle Handle appearance and operation may differ from those shown in these illustrations. Slam Lock Handle Body Operator s Guide 35


36 Fuel Fill Port Be sure to use only the appropriate diesel or unleaded gasoline fuels. Always replace the cap after filling. If it has the optional locking door, use the key to access the cap. Be sure to use only the appropriate diesel or unleaded gasoline fuels. Always replace the cap after filling. Fuel Fill Port Hood* In vehicles where the right hood strut doesn t automatically lock, the hood support rod should always be engaged to avoid possible injury from the hood accidentally closing. Hold-Down Strap Some hood struts automatically lock in the opened position. Do NOT close the hood without first pressing the orange button on the passenger side gas strut to disengage the safety locking mechanism. Forcing a hood to close without releasing the lock will severely damage the hood and will not be covered under warranty. 36 Body Operator s Guide


37 To open the hood: 1. Release each of the hold-down straps securing the hood by pulling them away from the catches. These latches will be either at the front of the hood or on both sides. 2. Pull the hood completely open to secure the hood safety mechanism on the locking gas strut. If the hood does not have a locking strut, engage the hood prop rod. Hood Prop Rod Locking Hood Support Strut with Release Button To close the hood: 1. Return the hood prop rod to its original position or press the orange release button on the locking gas strut. 2. Lower the hood. 3. Engage the hold-down straps by pulling up and slipping the bulb over the front retaining clip or by engaging the side catches and snapping them tight. Body Operator s Guide 37

38 Heating Ventilation Air Conditioning (HVAC) Electronic Controls* The heating system is controlled by three knobs located on the dash panel. The top knob on the heater control face controls the fan speed. Turn the knob clockwise to increase the fan speed. Turn it counterclockwise to decrease the fan speed. For a warmer airflow, turn the middle temperature control clockwise (toward red). For a cooler airflow, turn the temperature control counterclockwise (toward blue). The bottom knob (mode control) directs the airflow to the defroster outlets, the floor ducts, or some combination of the two. Intake Filter* Aeromaster bodies have a removable air filter under the hood that reduces the airborne debris into the driver s cabin. Check and clean this filter every three to four months or more often in dusty conditions. HVAC Controls HVAC Filter 38 Body Operator s Guide


39 Ventilation Fan* The optional gimbal-mounted fan is mounted on the header shelf and operated by a switch on the dash. Adjust the tilt and direction of the fan as desired. The ignition switch must be on for the fan to run. Ventilation Fan Vents Positive Pressure Chamber Butterfly The vehicle may be equipped with butterfly vents in the cargo area. To open or close, slide the handle bar at the bottom of the vent s grille or rotate the louver. Drain Tube The information in this document is generic. Details may differ from your vehicle. Use this information as a guideline where it applies. Butterfly Vents Body Operator s Guide 39


40 Hingeless The vehicle may be equipped with two-way hingeless vents in the cab and/ or cargo area. To open, squeeze and move the handle bar toward the front or rear of the vehicle. Moving the handle toward the front of the vehicle opens the vent scoop into the moving air stream when the vehicle is moving. The handle mechanism has detents that allow the vent to catch at different angles. To close, move the handle to the center position. Roof In the cargo area, exhaust the hot air through the optional roof vent by manually rotating the baffles that cover the vent holes or by turning a crank that raises the vent s cap. Optional powered roof vents are controlled by a switch on the dash. Hingeless Vent Sample Cargo Roof Vent The information in this document is generic. Details may differ from your vehicle. Use this information as a guideline where it applies. 40 Body Operator s Guide
41 Lights To maintain safety and meet federal regulations, inspect the lights daily for correct operation. Back-up Lights Back-up lights turn on automatically when the transmission in placed in reverse. Brake and SHMSL Lights Brake lights are activated automatically when the brake pedal is pressed. According to Federal Motor Vehicles Safety Standards, vehicles that are 80" wide or wider must have clearance and identification lights on the front and rear. Such vehicles may also have the center rear identification light optionally function as a Supplemental High Mount Stop Light. When the brake pedal is pressed the SHMSL illuminates (or more brightly if the running lights are on) for enhanced visibility. Daytime Running Lights* With this option, headlights and running lights turn on automatically when the engine starts and is put into gear. They turn off with the engine. Clearance Light Identification Lights Clearance Light Center High Mount Stop Light (Optional) Supplemental High Mount Stop Light Width: 80" or wider Width: Less than 80" GVWR: Over 10,000 lb. Supplemental/Center High Mount Stop Lights, Clearance Lights, and Identification Lights Requirements Width: Less than 80" GVWR: 10,000 lb. or less Body Operator s Guide 41
 or rotate the headlight switch.")
42 Dome and Cargo Lights The cargo and dome light switch is typically on the left side of the dash panel. To turn the lights on, press the top half of the rocker switch (dependent on model) or rotate the headlight switch. Hazard Lights* The hazard switch, located on the top of the steering column or on the Hazard Switch dash, controls the flashing of exterior lights on the body. The hazard lights work with the engine on or off and with or without the ignition key. (See the chassis operator s guide supplied by the chassis manufacturer for more details.) Headlights and Parking Lights* The headlights, parking lights, and instrument panel lights are controlled by one or more switches that are typically on the left side of the instrument panel. To turn on the headlights and the parking lights on knob-type switches, pull the knob out all the way. To turn only the parking lights on, pull the knob out to the halfway position. This switch may also control the brightness of the instrument panel lights. To increase the brightness, rotate the knob counterclockwise. To decrease the brightness, rotate the knob clockwise. Optional daytime running lights turn on automatically when the engine is started. License Plate Light The license plate light is activated with the running lights. Location varies with chassis and other options. The information in this document is generic. Details may differ from your vehicle. Use this information as a guideline where it applies. 42 Body Operator s Guide
43 Mirrors A convex mirror can make things appear farther away than they are. Use these mirrors with care, especially when changing lanes and backing up. To prevent breakage and possible injury, do not push directly on the mirror s glass. Push on the mirror frames only. To receive maximum benefit from the outside mirrors, adjust the driver s side mirror so you can see the side of the vehicle and have someone assist you by adjusting the passenger-side, crosswalk and driver s side mirrors while you sit back in the driver s seat. Adusting To adjust a standard body mirror, you may need to loosen the nut until the mirror is just loose enough to turn. Then grab the outside edge of the mirror and gently pull in the desired direction. Retighten the nuts if you loosened them. If the vehicle is equipped with the power mirror option, press the appropriate switch to adjust the position of the side mirrors. Some exterior mirrors are convex. Convex crosswalk mirrors help you see people or obstructions behind or beside the vehicle. A convex mirror s surface is curved so more is visible from the driver s seat but obstructions are closer to the vehicle than they may appear. Use convex mirrors with care, especially when changing lanes and backing up. Auto-Defrost The optional mirror defrost switch is typically on the left side of the dash panel. Be sure to turn the switch off when heating is no longer needed. Body Operator s Guide 43
44 Rearview (Back-up) Camera System For safe operation, the entire back edge of the bumper must be visible at the bottom of the monitor s screen. If it is not, loosen the screws on the camera and adjust the camera for the best view. Tighten the screws and recheck the screen. Because of the variety of rearview vision brands and models, read and become familiar with the owner s manual provided with the vehicle. Some monitors remain on with the vehicle ignition, other monitors are designed to only come on when the vehicle is in reverse. 44 Body Operator s Guide


45 Safety Equipment A fire extinguisher and a reflector kit may be mounted somewhere in the vehicle. Follow the manufacturer s instructions for use, inspection, and maintenance. The information in this document is generic. Details may differ from your vehicle. Use this information as a guideline where it applies. Fire Extinguisher Under Jump Seat Reflector Kit Behind Driver s Seat Rocker Switches For most switches, to turn the circuit on, press the top half of the rocker switch. Press the lower half of the switch to turn the circuit off. Three-way rocker switches have more than one possible on state. Press the rocker up or down until the desired state is found. Some switches may have momentary positions, returning automatically to the previous switch position when released. Body Operator s Guide Typical Rocker Switch 45
 knob on the pedestal counterclockwise to loosen the seat. b. Remove the (2) pin (underneath the seat on the left side) by pulling on the ring. c. Lift the seat to align with the hole in the post nearest the desired height.")
46 Seats and Seat Belts Adjusting the Driver s Seat* Aeromaster driver s seats can be adjusted for your comfort. 1. Enter the vehicle and sit in the seat. 2. Adjust the seat height as follows: a. Turn the (1) knob on the pedestal counterclockwise to loosen the seat. b. Remove the (2) pin (underneath the seat on the left side) by pulling on the ring. c. Lift the seat to align with the hole in the post nearest the desired height. d. Replace the (2) pin in the hole. e. Turn the (1) knob clockwise to lock and secure the seat. 3. Adjust the distance between the driver and the steering wheel forward or backward using the (3) lever on the left side of the driver s seat. Pull the lever out to unlock the seat and move it to the correct position, then release the lever to lock the seat in position. 4. Try to move the seat with your body to make sure the seat is locked and secure. Driver s Seat Adjustments Do NOT adjust the seat while the vehicle is moving. The sudden movement could cause you to lose control of the vehicle. To tilt the driver s seat forward, press down on the lever (4) at the base of driver s seat pedestal. See also the Maintenance Information Cleaning Seats section for instructions on cleaning the seats. The information in this document is generic. Details may differ from your vehicle. Use this information as a guideline where it applies. 46 Body Operator s Guide
47 Suspension Seat Tether Belts* Failure to adjust tether belts properly may cause excessive movement of the seat in an accident. Tether belts should be adjusted so that they are taut when the seat is in its adjusted operating position. Tether belts on suspension seats are adjustable to allow the movement of the seat and still ensure maximum safety of the occupant in an accident. 1. Adjust the seat to the comfortable position. 2. Adjust the tether belts to the empty seat position. a. To lengthen the tether, turn the buckle to the right angle to the webbing, then pull the buckle. b. To shorten the tether, pull on the strap. c. Ensure the movement of the seat s suspension system is not restricted. Body Operator s Guide 47

48 Passenger Seats To avoid personal injury or death, passengers should NOT ride in the cargo area. Ride only in designated seating with seat belts fastened and properly adjusted. Aeromasters may also have a pedestal seat similar to the driver s seat or a nonadjustable jump seat on the passenger side. To sit on a jump seat, pull forward and down on the spring-loaded lower section. Aeromasters and PDVs may also have nonadjustable crew cab bench seats (behind the driver s seat). Using the Seat Belt Seat Belt Overview The driver and any passenger should wear a seat belt whenever the vehicle is moving. A seat belt provides added protection if there is a collision or if the driver suddenly has to maneuver to avoid an accident. Failure to wear a belt increases the risk and the severity of injury during an accident. Jump Seat On pedestal and jump seats, the seat belts have webbed belts with inertiasensitive restraints. The system is designed to lock (prevent belt travel) during sudden stops. However, the shoulder belt moves freely with the wearer during normal driving conditions. If the belt is jerked or pulled rapidly by hand, the belt may lock. If this occurs, let go of the belt and then pull it slowly and smoothly. 48 Body Operator s Guide
49 Inspecting the Seat Belt If there is any damage to the belt or retractor, always replace the entire assembly. Inspect the belt daily. Check for cuts, frays, and loose parts. Damaged parts must be replaced immediately. Do not disassemble or modify the seat belt assembly. A seat belt system should be replaced immediately if it shows any problems, such as: Cuts, fraying, abrasion, or other wear to the seat belt webbing. Significant discoloration due to ultraviolet exposure. Significant dirt. Damage to the buckle, latch plate, retractor, or hardware. Web cut, frayed, or worn at D-Loop guide Web cut, frayed, or worn at latch area Buckle cracked or broken Damaged strap Signs of Wear Body Operator s Guide 49
50 Buckling the Seat Belt Standard 3-Point Harness This seat belt system has a retracting shoulder harness for added comfort and safety. The shoulder belt allows unrestricted movement of the torso under normal conditions, and it locks in the event of an accident. 1. After adjusting the seat (see the Adjusting the Driver s Seat section), sit up straight in the seat and as far back as possible. 2. With the hand nearest the outside of the vehicle, grab the latch and slide it up the webbing while pulling forward with a slow steady motion. You should pull out enough webbing to go across your lap. If the retractor should stop the belt while you are doing this, let go of the belt and then pull more slowly and smoothly. Do not let the belt become twisted. 3. Pull the belt across your lap and push the latch into the buckle until it clicks into place. Check the belt by pulling on it to make sure the belt will hold you during a sudden stop. The lap part of the belt should be worn low and snug on the hips. 4. You may also adjust the height of the shoulder harness to fit your body. First pull down on the pillar height knob and then slide the knob up or down until you reach the desired position. Release the knob. The belt should be across your chest and centered over your shoulder. The belt should be away from your face and neck but not falling off your shoulder. Buckling Seat Belt 50 Body Operator s Guide
51 The lap belt should be worn snug and low across the hips. The shoulder belt should be across your chest and centered over your shoulder. The shoulder belt should be away from your face and neck but not falling off your shoulder. Do not wear the shoulder belt under your arm or in any position other than the one described here. Such misuse could increase the chance of severe injury in an accident. After inserting the latch in the buckle, make sure it is locked and the belt is not twisted. A twisted belt can increase the risk of serious injury. To release the belt: 1. Press the lap belt buckle release button and let the belt automatically retract. 2. If the belt does not retract smoothly, pull it out and check for kinks or twists. Pillar Height Adjustment Lever Seat Belt Pillar Height Adjustment Lever Body Operator s Guide 51
52 Belts must be inspected during every routine maintenance. Failure to properly inspect and maintain the seat belts can cause serious injury or loss of life. The seat belt has a finite life and must be replaced as needed throughout the life of the vehicle. Whenever a vehicle is involved in an accident, the entire seat belt system must be evaluated for replacement, even if there is no visible wear or damage to the seat belt system. Crew Cab Seat Belt In Aeromasters and PDVs, the seat belt for a bench-type seat (behind the driver s seat) may not have a shoulder belt or retractor. The lap belt is adjusted as described in the steps below. 1. If the belt is too short to reach across your hips, tilt the tongue of the latch down and pull the latch away from the anchored point of the webbing. 2. Pull the belt across your lap and push the latch into the buckle until it clicks into place. 3. After latching the buckle, pull on the free end of the webbing until the belt is low and snug across your hips. 4. To release the belt, press the buckle release button and pull the latch from the buckle. This seat belt should be inspected and maintained in the same manner as the driver s seat belt. Adjusting the Lap (Only) Belt 52 Body Operator s Guide
53 Windshield Wiper/Washer See the chassis operator s guide supplied by the chassis manufacturer for more details. Operation Safety Considerations Unauthorized alteration or improper maintenance or repair of the vehicle can result in possible dangerous driving conditions. Improperly inflated tires or an overloaded vehicle (or axle of a vehicle) can cause increased tire wear, poor handling, poor braking, overheating of tire, tire failure, or other mechanical failures. Sudden tire failure while driving could cause an accident resulting in serious injury or death. Keep tires at their recommended inflation pressure. When loading a vehicle do NOT exceed the GVWR or GAWR ratings. Do NOT release air from a HOT tire in order to reach the recommended COLD tire pressure. Normal driving causes tires to run hotter and air pressure to increase. If air is released from a hot tire, the tire may become dangerously underinflated. These vehicles are designed to meet certain specifications. Improper use or overloading can cause damage to equipment and void warranty. Do NOT drive a forklift into a vehicle with a GVWR under 14,000 pounds or an Aeromaster that does not have a reinforced floor designed to support fork lifts. Body Operator s Guide 53
54 Important Tire Information Tire Labeling See the chassis operator s guide supplied by the chassis manufacturer for additional information. Markings on the Tire In this example, LT stands for Light Truck, LT235/85R16 is the size designation for a metric light truck tire. 235 represents the width of the tire in millimeters; 85 is the ratio of height to width; R means radial; 16 is the nominal rim diameter code. A B in place of the R means the tire is belted bias construction. A D in place of the R means diagonal bias construction. Load Range M+S with the mountain/ Sample Tire Markings snowflake symbol is the designation that the tire meets the Rubber Manufacturer s Association definition for use in severe snow conditions. Load Range D identifies the load and inflation limits. LOAD RANGE MAXIMUM LOAD SINGLE 1190 RADIAL indicates that the tire has a radial construction. MAX LOAD SINGLE 1192 kg (2623 lbs) AT 1470 kpa (65 psi) COLD indicates the maximum load that can be carried by the individual tire and the corresponding cold inflation pressure for that load when used as a single (two total tires on the rear axle). MAX LOAD DUAL 1082 kg (2381 lbs) AT 1470 kpa (65 psi) COLD indicates the maximum load that can be carried by the individual tire and the lbs) kg (2623 kpa (65 LT235/85R16 D 2XXXXX CORD - RADIAL psi) COLD MAX LOAD DUAL 2 PLIES Max. Load & Inflation as Single Max. Load & Inflation as Dual 114/111Q M+S - TUBELESS SIDEWALL 1080 kg - DOT MAL9 ABC TIRE NAME 2XXXXX CORD (2381 LOAD RANGED Tire Ply Material Tire Identification Number MANUFACTURER lbs) - AT PLIES kpa - TREAD (65 psi) COLD - Load Range 54 Body Operator s Guide
55 corresponding cold inflation pressure when used in a dual configuration (four total tires on the rear axle). The letters DOT certify compliance with all applicable safety standards established by the Department of Transportation (DOT). After DOT is the tire identification number (TIN) or serial number. The sidewall also shows the type of cord and number of plies in the sidewall and under the tread. Tire Identification Number (TIN) After DOT, this serial number is a code with up to 12 digits that is a combination of numbers and letters. The last four digits identify the week and year of manufacture (e.g., 1505 means the fifteenth week of the year 2005). (Prior to the year 2000, two digits identified the week and only one digit identified the year.) Identifying Potential Recalls To identify if a tire is subject to a recall, check the Tire Identification Number on the tire and compare it with the recall information. Tire Care Important factors in tire care are: Proper tire inflation pressure (not underinflated or overinflated) Proper vehicle loading (not overloaded or unbalanced) Regular tire inspection for underinflation, excessive wear, cracks, cuts, gouges, abrasions, bulges, separations, objects wedged in tread grooves, or other irregularities. Good driving habits (observing speed limits, avoiding fast stops and turns, avoiding hitting curbs, potholes, and other objects on the road). See also the Measuring and Adjusting Inflation Pressure section above and the Vehicle Load Limits sections below. Body Operator s Guide 55

 or truck body, near the hinge, latch, or catch on a cab door or door post. Open the door to see it. Tire and Loading Information Vehicle Placard (Under 10,000 lb.")
56 Tire Inflation Guidelines Recommended Cold Tire Pressure Information Location Recommended cold tire pressure is found on the Federal Certification Label and, for vehicles under 10,000 lb. GVWR, the vehicle placard. For the location of the Federal Certification Label, see the VIN, Body Serial, and Work Order Numbers section. The vehicle placard, required (only) for vehicles with less than 10,000 lb. GVWR, is located: In an Aeromaster walk-in, on the driver s door post, between the quarter window and the door. In a PDV (cutaway) or truck body, near the hinge, latch, or catch on a cab door or door post. Open the door to see it. Tire and Loading Information Vehicle Placard (Under 10,000 lb. GVWR) Tire Information on the Federal Certification Label 56 Body Operator s Guide
57 Safety Consequences of Improper Inflation UNDERinflation of tires can cause poor handling, decreased fuel economy, increased tire wear, tire overheating, and possible tire failure. Sudden tire failure while driving could cause an accident resulting in serious injury or death. A tire can be underinflated without being obvious visually. OVERinflation of tires can cause increased tire wear, poor handling, rough ride, and possible tire failure. Sudden tire failure while driving could cause an accident resulting in serious injury or death. Measuring and Adjusting Inflation Pressure Tires must be regularly checked because: Under normal tire operation approximately a pound (7 kpa) of tire pressure may escape every month. Tire pressure may go up (in warm weather) or down (in cold weather) around a pound for every 10 Fahrenheit (6 C) of temperature change. Tire damage can rapidly accelerate pressure loss. Daily, before driving the vehicle, visually inspect the tires for obvious underinflation or damage (excessive wear, embedded objects, gouges, cuts, bulges, or other irregularities). Check also for missing valve caps. Weekly, use an accurate, quality pressure gauge to check the tires. Set the tires to the recommended pressures according to the tire placard. Do not rely on visual inspection alone. A tire can be underinflated without being obvious. To properly check the tires, use the following steps: 1. Check the air pressure when the tires are cold (the vehicle has been parked for at least three hours and driven no more than one mile). 2. Remove the valve cap on the first tire. (If a valve cap is missing, replace it because the cap keeps dirt and moisture out of the valve.) If you must drive a distance to get to an air pump, check and record the cold tire pressure before moving the vehicle. At the pump, measure the tire pressure again. Then inflate the warm tire to a level equal to the warm pressure plus the amount by which the cold tire was underinflated. Body Operator s Guide 57
58 Never release air from a hot tire in order to reach the recommended cold tire pressure. Normal driving causes tires to run hotter and air pressure to increase. If air is released from a hot tire, the tire may become dangerously underinflated. Follow the vehicle s recommended tire inflation pressure on the Federal Certification Label or vehicle placard, not the maximum tire pressure stamped on the sidewalls. 3. Firmly press an accurate tire gauge onto the valve. 4. If the tire is underinflated, add air from a pump to achieve recommended air pressure. 5. If the tire becomes overfilled, release air by pushing on the metal stem in the center of the valve and recheck the pressure. 6. Reinstall the valve cap. 7. Repeat with each tire, including the spare if included. 58 Body Operator s Guide
59 Glossary of Tire Terminology Air pressure see inflation pressure. Bead the part of the tire holding it to the rim. Cold inflation pressure the amount of air pressure in a tire before a tire has built up heat from driving; the vehicle has been parked for at least three hours and driven no more than one mile. Curb weight the weight of a motor vehicle with all permanently mounted equipment and the maximum capacity of fuel, oil, and coolant (but no passengers or cargo). DOT (Department of Transportation) markings the code molded into a tire s sidewall signifying that the tire is in compliance with the U.S. Department of Transportation motor vehicle safety standards. Federal Certification Label the label containing the vehicle manufacture date, VIN, body serial number, work order number, GVWR, GAWR, rim size, tire size, cold inflation pressure. GAWR (Gross Axle Weight Rating) this is the maximum weight rating that components of each axle are designed to support (i.e., tires, wheels, brakes, springs, axle). This is determined by the lowest design capacity of any component. In other words, if the wheels have the lowest design capacity of any component on that axle, installing tires with a higher load capacity does not increase the GAWR. This is shown on the Federal Certification Label. GCWR (Gross Combined Weight Rating) the maximum allowable total loaded weight rating of the motor vehicle and any trailer it can tow. (GCWR GVW = allowable weight of the towed vehicle.) GVW (Gross Vehicle Weight) the combination of curb weight, passengers, cargo, and (if present) tongue weight on a hitch. This total should never exceed the GVWR. GVWR (Gross Vehicle Weight Rating) the weight rating established by the chassis manufacturer as the maximum weight (including vehicle, cargo, liquids, passengers, etc.) that the components of the chassis are designed to support. This is shown on the Federal Certification Label. Body Operator s Guide 59
60 Inflation pressure the amount of air inside the tire pressing outward on each square inch measured in Pounds per Square Inch (PSI) or kilopascals (kpa); kpa equals 1 PSI. kpa (kilopascals) a metric unit of air pressure (1 kpa equals PSI). Maximum inflation pressure the maximum air pressure to which a cold tire may be inflated (found molded on the sidewall). Maximum load rating the load rating for a tire at the maximum permissible inflation pressure for that tire. Normal occupant weight 68 kilograms (150 pounds) times the number of occupants as shown in the vehicle placard. Occupant distribution means distribution of occupants in a vehicle as shown in the vehicle placard. Overinflation excessive tire pressure in relation to the tire size and load carried. PSI (Pounds per Square Inch) a standard (English) unit of air pressure. Recommended inflation pressure the optimal pressure for tire operation; the value is found on the Federal Certification Label, the vehicle placard, and/or tire inflation pressure label. See Cold inflation pressure. Rim a metal support (wheel) for a tire upon which the tire beads are seated. Sidewall the portion of the tire between the tread and the bead. Speed rating a code assigned to the tire indicating the maximum speed at which a tire can operate. TIN (Tire Identification Number) the tire s serial number, a code with up to 12 digits that is a combination of numbers and letters, containing information about the tire brand, manufacturing plant, tire size, and date of manufacture. Tire bead the area of the tire next to the rim. Tire inflation pressure label a label showing the original equipment tire sizes and recommended inflation pressures. See also vehicle placard. Tire and loading information placard see vehicle placard. 60 Body Operator s Guide
61 Tire pressure monitoring system a system that detects an underinflated vehicle tire and signals a warning to the driver. Tire sidewall the area between the bead area (next to the rim) and the tread. Tire tread the area along the perimeter of the tire that contacts the road when driven. Tread the portion of a tire that comes into contact with the road. Treadwear indicator narrow bands (sometimes called wear bars ) appearing across the tread pattern of the tire when approximately 1/16" of an inch of tread remains. Tires should be replaced before the tread wears down to the level of the wear bars. (On vehicles with GVWR over 10,000 pounds, federal regulations require that tires on the front axle be replaced when worn down to 1/8" depth.) Some commercial truck tires may not have treadwear indicators. Underinflation insufficient air pressure in a tire for the amount of load carried. Vehicle capacity weight the rated cargo load plus 150 lb. (68 kg) times the vehicle s designated seating capacity. Vehicle maximum load on the tire the load on an individual tire that is determined by distributing to each axle its share of the maximum loaded vehicle weight and dividing by the number of tires on the axle. Vehicle placard a metal or paper tag permanently affixed to a vehicle that indicates the seating capacity, maximum payload (including occupants), and appropriate tire size and inflation pressures for the vehicle. This placard is required (only) for vehicles with less than 10,000 lb. GVWR. Wear bars see treadwear indicator. Body Operator s Guide 61
62 Vehicle Load Limits and Towing Capacity Locating and Understanding Load Limit Information The Federal Certification Label lists the GVWR for the vehicle and the GAWR for each axle. The total weight of a loaded vehicle should never exceed the GVWR. Also the cargo should be distributed so that the weight on each axle does not exceed that axle s GAWR. If there is any question, the vehicle should be weighed. Seating capacity is dependent on the number of seats and seat belts provided. In vehicles under 10,000 lb. GVWR, seating capacity is found on the second line of the vehicle placard. Cargo capacity (payload) is the GVWR minus the curb weight of the fully fueled empty vehicle. The driver and any other occupants are considered part of the payload, and the weight of all the occupants must be included when calculating the total weight of cargo that can be carried. The cargo capacity of vehicles under 10,000 lb. GVWR is found on the third line of the vehicle placard. The maximum amount of cargo that can be carried inside a vehicle is reduced if a trailer will be towed. 62 Body Operator s Guide

63 Towing Capacity Do not tow unbraked vehicles if the combined weight of both vehicles is more than the sum of the gross axle weight ratings (GAWRs) of the towing vehicle. Otherwise brake capacity will be inadequate, which could result in personal injury or death. Use only a professionally installed hitch of the correct type and size, safety chains on the hitch, and appropriate lighting on the trailer. Towing capacity is the maximum weight of a trailer that can be towed behind the vehicle. As a general rule, the load in a trailer should be distributed so that 60% of the total weight of the trailer is between the trailer axle(s) and the tongue. The weight the tongue applies downward on the vehicle s hitch is the tongue weight and should usually be about 10 to 15% of the total weight of the trailer. The trailer s total weight and the tongue weight on the hitch must be determined by its manufacturer s specifications or by weighing. Because tongue weight applies force at the end of the vehicle, it increases the weight on the rear axle and decreases the weight on the front axle by percentages based on the wheelbase and length of the body. When towing a trailer, the weight on the rear (or any) axle of the vehicle must not exceed that axle s GAWR. If a vehicle is loaded enough for there to be any doubt about whether the GVWR and GAWRs of any axles might be exceeded, each axle of the vehicle must be weighed. A decal for the hitch gives a hitch rating or the maximum capacity of the HITCH by itself. It is NOT the towing capacity of the vehicle! A decal for the hitch gives a hitch rating or the maximum capacity of the HITCH by itself. It is NOT the towing capacity of the vehicle. Sample Hitch Decal Body Operator s Guide 63
64 Towing capacity is dependent on how loaded the vehicle is with other payload. A vehicle that is already loaded to its GVWR will not be able to pull a trailer at all. The maximum weight of a trailer that a vehicle can pull is determined by that vehicle s GCWR (Gross Combined Weight Rating, the maximum allowable total loaded weight rating of the motor vehicle and any trailer it is towing). The allowable weight of the towed vehicle equals the GVW (actual total weight of the loaded vehicle, including the tongue weight) subtracted from the GCWR (GCWR GVW = max. trailer weight.) GCWR is determined by chassis drive train capacity (engine, transmission, drive shaft, and differential), gearing, braking capacity, suspension, and axle loading. To determine the GCWR of a vehicle, consult the chassis operator s guide, chassis dealer, or chassis manufacturer. Calculating Cargo Load Capacities The total weight of the occupants must be included in determining the maximum amount of cargo that a vehicle can carry. For example, in a truck with a crew cab, four 150-pound people will reduce the total cargo that can be carried by 600 pounds. Occupants and cargo must be distributed so that the GAWR of any axle is not exceeded. Distribute the cargo items (by weight) evenly across the cargo area (right to left and front to back). Keep heavier items on or near the floor and keep them above or forward of the rear axle (do not have heaviest items at the very back of the vehicle). Lighter items can go on shelves or on top of heavier items (if the packaging has sufficient strength). Secure items by straps, as needed, to avoid shifting. If the vehicle is heavily loaded, weigh the fully fueled vehicle (including driver and other occupants) to ensure it does not exceed its GVWR or GAWR. 64 Body Operator s Guide
65 Determining Compatible Tire/Vehicle Load Capabilities Load ratings (A through N) for tires go up as the corresponding letter changes. Load range E tires have a heavier rating than load range D tires. Changing tire capacities may affect the GAWR and GVWR of your vehicle. Therefore, never replace tires with tires that have a lower rating. The Federal Certification Label specifies the size of tire that must be used on each axle. Never mix tire sizes and constructions on the same axle (except for temporary use as a spare tire). Load capabilities of tires change as the tire pressure is lowered. If a tire becomes underinflated, its load capacity may become greatly reduced. Body Operator s Guide 65
66 Safety Consequences of Overloading Overloading of tires can cause increased tire and suspension wear, poor handling, decreased stopping power, and possible tire failure. Sudden tire or braking failure while driving could cause an accident resulting in serious injury or death. Never exceed the GVWR or GAWR of the vehicle. Steps for Determining Correct Load Limit The wording of the following statement is required by Federal regulations for vehicles under 10,000 lbs. GVWR. Use the principles to apply to the specifics of your vehicle. 1. Locate the statement The combined weight of occupants and cargo should never exceed XXX kg or XXX lbs. on your vehicle s placard. 2. Determine the combined weight of the driver and passengers that will be riding in your vehicle. 3. Subtract the combined weight of the driver and passengers from XXX kg or XXX lbs. 4. The resulting figure equals the available amount of cargo and luggage load capacity. For example, if the XXX amount equals 1400 lbs. and there will be five 150 lb passengers in your vehicle, the amount of available cargo and luggage load capacity is 650 lbs. ( (5 x 150) = 650 lbs.) 5. Determine the combined weight of luggage and cargo being loaded on the vehicle. That weight may not safely exceed the available cargo and luggage load capacity calculated in Step If your vehicle will be towing a trailer, load from your trailer will be transferred to your vehicle. Consult this manual to determine how this reduces the available cargo and luggage load capacity of your vehicle. For example, a vehicle with a GVWR of 9600 pounds that weighs 6600 pounds would have a total payload of 3000 lbs. If one person weighing 150 lbs. drove 66 Body Operator s Guide
 2550 lbs.")
67 the vehicle, the vehicle could then carry ( =) 2850 lbs. of cargo. If two passengers, weighing a total of 300 lbs. were also in the vehicle, the total maximum amount of cargo would be reduced to ( =) 2550 lbs. The payload capacity listed on the vehicle placard is for the vehicle as built at the assembly plant. If aftermarket equipment has been installed on the vehicle, the weight of that equipment must be subtracted from the payload capacity. Safety Chains with Cruciform Slots Utilimaster cruciform slots are designed specifically for use with 3/8 safety chains. Make sure the safety chains match the size of the slots. Using smaller chains will NOT provide the structural integrity if needed. Cruciform slots are cross-shaped cutouts in the bumper for inserting tailer safety chains. Cruciform Slot in Rear Bumper Body Operator s Guide 67
68 Towing the Vehicle For towing your vehicle if it is disabled, see the separate chassis operator s guide supplied by the chassis manufacturer for more complete information. Utilimaster recommends the following: A wheel lift or flatbed equipment is the preferred method of towing. Unload the vehicle to reduce stress on the chassis during towing. Be sure to place the transmission in Neutral and fully release the parking brake if towing. For towing a trailer from a hitch installed on the rear of your vehicle, see the Vehicle Load Limits and Towing Capacity section in this manual, hitch decal, and chassis operator s guide for instructions. Emergency Repairs Problems with the Utilimaster body are unlikely to disable a vehicle enough to make it undrivable. See the separate chassis operator s guide and/or the engine service manual (supplied by the chassis manufacturer) for emergency information. 68 Body Operator s Guide
69 Reporting Safety Defects United States Only If you believe that your vehicle has a defect that could cause a crash, injury, or death, you should immediately inform the National Highway Traffic Safety Administration (NHTSA), in addition to notifying Utilimaster. If NHTSA receives similar complaints, it may open an investigation, and if it finds that a safety defect exists in a group of vehicles, it may order a recall and remedy campaign. However, NHTSA cannot become involved in individual problems between you, your dealer, or Utilimaster. To contact NHTSA, you may either call the Auto Safety Hotline toll-free at or file a complaint online at: or write to: U.S. Department of Transportation, National Highway Traffic Safety Administration 1200 New Jersey Avenue, SE Washington, DC You can also obtain other information about motor vehicle safety from the Hotline. Canada Only If you believe that your Canadian-registered vehicle has a defect that could cause a crash, injury, or death, you should immediately inform Transport Canada, in addition to notifying Utilimaster. To contact Transport Canada, call or file a complaint online at: English version: French version: or write to: Transport Canada Transports Canada 80 Noel Street 80, rue Noël Gatineau, Quebec Gatineau (Québec) J8Z 0A1 J8Z 0A1 Body Operator s Guide 69
70 Maintenance Information Maintenance Safety Considerations Avoid breathing AC refrigerant and lubricant vapor or mist. Utilimaster recommends that a licensed automotive air-conditioning specialist work on the vehicle s air-conditioning (HVAC) system. Operate the engine only in a well-ventilated area. Use safety stands and/or wheel blocks whenever you are underneath the vehicle. Always wear safety glasses and other protective equipment as appropriate to the process. Become familiar with all warning labels. Always maintain firm footing and control of tools. Be sure that the ignition switch is Off unless otherwise required by the procedure. Put the transmission in Park (if it is an automatic) and set the parking brake before working on the vehicle. Avoid contact with hot metal parts, such as the radiator or exhaust system. Do NOT smoke while working on the vehicle. Always remove rings, watches, hanging jewelry, and loose clothing before working on a vehicle. Tie long hair securely behind your head. Keep yourself and your clothing away from the radiator fan, belts, and any moving parts when the engine is running. Keep hands and other objects clear of the radiator fan blades. The electric fan can start at any time even though the ignition is Off. Disconnect the fan when working under the hood. 70 Body Operator s Guide
71 Cleaning General Tips Clean a stain as soon as you can (before it sets in the material). If you use a foam or solvent-based cleaner, always use in a well-ventilated area and follow directions on the can. Always wear safety glasses and other appropriate protective measures, such as chemical-resistant gloves and good ventilation, while using cleaning solutions on the vehicle. Body Exterior For a new vehicle, do NOT power-wash for the first 90 days. During the winter, wash off road salts frequently. Do NOT power-wash for the first 90 days. Wash and wax the body periodically to preserve the body finish, but avoid harsh cleaning solutions or high-pressure washes. Do not clean in the hot sun or at elevated temperatures. Body Operator s Guide 71
 Or squeeze bottom lip edges to release accumulation (from underneath vehicle) Clean the Duck-bill drains in the rear cargo floor")
72 Cargo Area Do NOT wash down wooden floors since this can cause the wood to warp. Sweep debris from floor surface. Clean rear threshold drains and drain troughs. Gently insert pointed tool through drain top (from inside cargo area) Or squeeze bottom lip edges to release accumulation (from underneath vehicle) Clean the Duck-bill drains in the rear cargo floor corners Cleaning a Duck-bill Drain Instrument Panel and Interior Plastic Components Wipe surfaces with a clean damp (mild soap and warm water only) cloth. Do not pour water onto the surfaces. Commercial cleaners may damage the surface finish. Commercial cleaners may damage plastic or metal surfaces. Wipe interior surfaces with a clean damp (mild soap and water only) cloth. Do not pour water onto the surfaces. 72 Body Operator s Guide
73 Seats 1. Gently brush or scrape excess dirt from material and vacuum to remove any loose dirt. 2. Using warm water and a clean damp cloth, rub the stained area. Repeat application until dirt is removed. 3. If a stain persists, automotive stores can provide vinyl/leather cleaners for vinyl seats or (foam or solvent) fabric cleaners for fabric seats. Use in a well-ventilated area and follow directions on the can. Keep seat belts clean and dry. Body Operator s Guide 73


74 Windows Use appropriate protective measures, such as chemicalresistant gloves, while using cleaning solutions on the vehicle. In the winter, establish adequate visibility by clearing ice from windows BEFORE driving the vehicle. Do NOT use an open flame to melt ice on windows or any other part of the vehicle body. Do NOT use razor blades or other sharp objects that could score the glass! Do NOT clean in the hot sun or at elevated temperatures. Step Ring on Front Bumper Grab Handle Tempered and Safety Glass Optional step rings on the front bumper and a center-mounted grab handle below the front windshield make it easier to reach the windshield. Wash windows with a mild soap or detergent, using a clean sponge or soft cloth. Rinse well with clean water. To prevent water spots, dry with a chamois or moist cellulose sponge. Fresh paint, grease, and smeared glazing compounds can be removed easily before drying by rubbing lightly with a grade of naphtha or isopropyl alcohol. Naphtha also works to remove labels and stickers. Butyl cellosolve works well for removal of dried paints and marking pen inks. After using any of these chemicals, do a final wash with warm water and a mild soap or detergent, then rinse thoroughly with clean water. 74 Body Operator s Guide
75 LEXAN Windows Some windows (not windshields) are made of LEXAN, which is significantly more impact-resistant than laminated or tempered safety glass. However, because it is also less scratch-resistant than glass, take care when cleaning this type of window. Do NOT scrape a LEXAN window with scrapers, razor blades, or other sharp objects! Do NOT scrub or use brushes. Do NOT clean in the hot sun or at elevated temperatures. Do NOT try to clean a LEXAN window with: Acetone Abrasive cleaners Benzene Highly alkaline cleaners Gasoline Carbon tetrachloride Wash the LEXAN window with a mild soap or detergent, using a clean sponge or soft cloth. Rinse well with clean water. To prevent water spots, dry with a chamois or moist cellulose sponge. Fresh paint splashes, grease, and smeared glazing compounds can be removed easily before drying by rubbing lightly with a grade of VM&P naphtha or isopropyl. Naphtha also works with labels and stickers. Butyl cellosolve works well for removal of paints and marking pen inks. Afterwards, a warm final wash should be made, using a mild soap or detergent solution and ending with a thorough rinsing with clean water. Scratches and minor abrasions can be minimized by using a mild automobile polish, such as Johnson Paste Wax. Be sure to follow the manufacturer s instructions. The following cleaning agents are compatible with LEXAN as long as the manufacturer s recommendations and instructions are followed: Joy Windex with Ammonia D Top Job VM&P grade naphtha Palmolive Liquid Body Operator s Guide 75
76 Manufacturers Recommendations Safety and application instructions provided with sealants, cleaners, and equipment should always supersede information provided by Utilimaster. Engine/Heater Coolants To avoid possible heater or engine damage, use only engine coolant(s) recommended by the chassis manufacturer. All deviations from the recommended coolant and all cooling system additives must be approved by the chassis manufacturer and Utilimaster Corporation. To avoid possible heater or engine damage, use only engine coolant(s) recommended by the chassis manufacturer. All deviations from the recommended coolant and all cooling system additives must be approved by the chassis manufacturer AND Utilimaster Corporation. Lubrication The engine is not the only part of your vehicle that needs lubrication. Hinges, latches, seals, and locks also require occasional lubrication. See the following Body Maintenance Checklist section and the Utilimaster service manuals for details on lubrication. Maintenance Checklist By design, the Utilimaster body is low-maintenance. However, Utilimaster recommends the items on the following pages should be checked every three to four months, unless otherwise stated. For more detailed service instructions, see the More Information and Publications section. See also the Maintenance Information Cleaning section. For a daily inspection checklist, see the Before You Go Operation Inspection section. 76 Body Operator s Guide

77 Body Mounting Fasteners Check the alignment of body mounting spacers and tighten mounting bolts after the first 30, 60, and 90 days of operation and every six months after that. See the Body Mounting Bolts section on the Utilimaster web site for more information. Check for loose fasteners underneath the chassis, particularly the bolts that mount the body to the chassis on the outside of the riser, on either side of the chassis rails, and the bolts on the crossmember. Long Sill Tie Rod with J Hook Mounting Oak (Wood) Chassis Frame Rail Truck Body Mounting Bolts U Bolt with Angle Bar Crossmember Riser Chassis Frame Rail Check for Loose Bolts on Aeromaster Chassis Body Operator s Guide 77
.")
78 Bumpers Check for loose bolts on the bumper and brackets. Check for damaged or bent components. If applicable, lubricate rear shock absorbing bumper fittings with #2 grease (one shot from a hand pump every three to six months, dependent on use and conditions). Doors, General Check operation of the windows and locks (including any manual overrides) at each door. Check interior and exterior handles for tightness. Check alignment of latches and catches. At least 1/8" of the sliding door latch tongue needs to engage the catch plate. Check for wear on the catch plates and latch tongue. Inspect and clean rubber seals around door edges. Lubricate the lock cylinders with a lightweight oil. For ABLOY locks, Exxon Hydraulic oil type NUTO 68 or equivalent is recommended for the lock cylinders. If the ABLOY lock cylinders become dirty, use ZEP 45 penetrating lubricant to clean the cylinders before applying the NUTO 68. Check Latch and Catch Alignment and Wear ABLOY Key Catch Plate 1/8" Latch Tongue ABLOY Square-cut Keys 78 Body Operator s Guide
79 Doors, Power Locks* See the Locks Power Door Locks section and the Technical Manuals on the Utilimaster Web Site for adjustment procedures for more information. Check that the doors open easily and close tightly. Check alignment of latches and catches. Check for wear on the bulkhead and rear door catch plates and latch tongue. LUBE NUTO 68 Check the operation of the locks. Check that the roll-up rear door is centered in the opening. Lubricate the door rollers to minimize drag. Clean lock cylinders using penetrating lubricant (ZEP 45 or equivalent). Lubricate locks with a lightweight oil (Hydraulic oil type NUTO 68 or equivalent.) Lubricate bulkhead or side door latch with LU 204 Dry Film Graphite Lubricant (or equivalent). Apply to each side of the slide bolt at six-month intervals or three-month intervals in hot, dusty conditions. Lubricate the rear door zerk fittings with (1) pump of #2 white lithium grease. Apply at six-month intervals or three-month intervals in hot, dusty conditions. CLEAN ZEP45 Lock cylinder lubrication (rear door shown) Side and bulkhead door lubrication points Rear door lubrication points Body Operator s Guide 79
80 Doors, Roll-up Check the condition of the door and strap: Check that the door opens easily and closes tightly. Check the condition of the pull-down strap for fraying or wear. Check the condition of the latch. Check for loose fasteners or other components. Check that the rear door is centered in the opening. See also the Doors, General and Doors, Power Locks sections. Lubricate the following rear roll-up door parts with a (Utilimaster P/N , or equivalent) light oil: Roller drums and shafts wipe off excess oil (#1, #3). Springs lubricate both springs along their entire length to prevent rusting (#2). Hinges (center and end) wipe off excess oil (#5). Rollers (#6, #7). Latches (NS). Clean and lubricate track (#4). 6 Roller Shaft Track 4 Counterbalance Shaft Do NOT use grease on roll-up doors. Do NOT get oil on rubber seals. Wipe up any drips immediately Spring Hinges Drum Roller 7 Roller Bracket Lubrication Points on Rear Roll-up Door 80 Body Operator s Guide
.")

 Rubber door catches/latches clean and check for loose fasteners.")

81 Doors, Swing Hinges lubricate the zerk fittings with #2 grease at six-month intervals (or three-month intervals in hot, dusty conditions). Metal door catches/latches use ZEP 45 penetrating lubricant to clean contact points and moving parts and then apply a lightweight oil. (Exxon Hydraulic oil type NUTO 68, or equivalent.) Rubber door catches/latches clean and check for loose fasteners. Do NOT use petroleum jelly on rubber door catches. It will attract dirt and become abrasive to the fittings. Grease Swing Door Hinges Lubricate Swing Door Catches Do NOT use petroleum jelly on rubber door catches. It will attract dirt and become abrasive to the fittings. Lubricate Rear Swing Door Mechanisms Clean Rubber Catches Body Operator s Guide 81
82 Grab Handles Check tightness of the grab handles mountings. Heater Filter* Check the heater intake filter under the hood. Hood* Check the hold-down straps for alignment and excessive wear. Check the hood guides for alignment and excessive wear. Check the hood struts and/or prop rod for proper operation. Interior Driver Conveniences Check the HVAC system for operation. Check all dash controls for operation. Check the cab fan for operation and secure mounting. Mirrors Check tightness of the mirror mounting bolts. Reflective Tape Check that all reflective tape is securely attached. Seats and Belts* Check tightness of the bolts for the seat belt and pedestal. Check the seat belt for operation and signs of fraying or wear. Tires Check pressure and condition of tires weekly. See the Important Tire Inflation Information section for more information. Wipers* Check tightness of the wiper linkage connections. Check that the blades wipe clean. 82 Body Operator s Guide
 that contains a variety of manufacturing information (including the VIN and Work Order Number).")
 or truck body, near the hinge, latch, or catch on a cab door or door post. Open the door to see it.")
83 VIN, Body Serial, and Work Order Numbers The 15-digit Utilimaster Body (or Unit) Serial Number is recorded on the Federal Certification Label. This label is a plastic decal (about 11" long and 2" high) that contains a variety of manufacturing information (including the VIN and Work Order Number). This label may be found in one of several locations: In an Aeromaster walk-in, on the driver s door post, between the quarter window and the door. In a PDV (cutaway) or truck body, near the hinge, latch, or catch on a cab door or door post. Open the door to see it. The 17-digit chassis Vehicle Identification Number (VIN) is the legal identifier for this vehicle and is the number recorded in the license plate registration. The VIN appears on a small metal plate in one of several locations: The plate may be mounted on the front corner of the dash on the driver s side. In an Aeromaster, it may be on the left-hand side of the instrument panel assembly facing the quarter-panel window. You can read the VIN if you look through the windshield or quarter-panel window. In vehicles over 10,000 lb. (4,536 kg.) GVWR, the plate may be mounted near the latch on the driver s door post or on the edge of the door. Open the door to see it. The number is also recorded on the Federal Certification Decal. On the Federal Certification Label, below the Body Serial Number, is the vehicle s 7-digit Work Order Number. This number (without the leading X) is also stamped (since 1999) on the left-hand base rail of truck bodies and PDVs. (Before 1999 the Body Serial Number was stamped on the base rail.) Either number can be used to identify the body if it is no longer mounted on the original chassis. VIN Plate on Aeromaster VIN Plate on PDV or Truck Body Body Operator s Guide 83


")

84 Federal Certification Label Label on Quarter-post (Aeromaster) Label on B-post (PDV or Truck Body) Body Number on Base Rail (PDV or Truck Body) 84 Body Operator s Guide
85 Ordering Parts How to Order To order parts for this vehicle, gather the following information: Model and Year of Vehicle (20xx-Customer name). Chassis VIN or Utilimaster Body Serial Number (see previous pages). Complete shipping address. Preferred method of shipping. Complete description of all the parts necessary (see the relevant Utilimaster body parts manual). Method of payment. Customer Service prefers payment by Visa, MasterCard, Discover, or American Express credit cards. Purchase Orders from customers with established open accounts are also accepted. Then contact Utilimaster Customer Service by one of the following methods: Call and ask for the Parts Department. your order with the above information to Visit from our parts web site at You may also mail or express service the order to the following address: Utilimaster Attn: Parts Department 603 Earthway Blvd. Bristol, IN , U.S.A. Customizable Parts Order Form You can also download a customizable form template file from the Utilimaster web site That template has a header that you can customize with your name and address. Then, to order parts, you only have to enter the specific information about the vehicle saving retyping the same address information repeatedly. After completing the form information, the file can be ed as an attachment. That form can also be used for mailing or faxing. Body Operator s Guide 85
86 Returns To return parts for credit, call the Customer Service Department for prior authorization. All returns must be shipped prepaid freight. A restocking fee will be charged to all returns. Special-order parts are not returnable. Filing Warranty Claims If a problem on the Utilimaster body is caused by a defect in materials or workmanship, it will be covered by our Limited Warranty. Chassis, engine, tires, battery, and third-party accessory failures are covered by the individual manufacturers. Claims must meet the requirements listed below. Failure to meet these requirements may result in a denied or delayed claim. Complete a repair order with the following information: Chassis VIN or Utilimaster Body Serial Number (see the VIN, Body Serial, and Work Order Numbers section). Year and model of vehicle. Owner s and/or service facility s name and complete address. Service center representative s signature (or name). Date vehicle was repaired. Mileage at time of failure. Itemized description of the problem, including complaint, cause of failure (if known), and correction (describe in detail). Service center labor rate and total time of repair. Total claim amount, including cost of parts (include Utilimaster P/Ns), labor, miscellaneous charges, and sales tax (if applicable). Your claim or repair order number. The claim or repair order number is whatever number you use to match Utilimaster s payment with your work done. We will reference the number on our payment. Utilimaster authorization number (repairs costing over $150 U.S. or for structural warranty require prior authorization from Utilimaster). 86 Body Operator s Guide
87 Other claim requirements: Any repairs over $150 U.S. or for structural warranty require prior authorization from Utilimaster, and that number must appear on the repair order. Contact the Warranty Department. Any claim that is not legible and complete will be returned for completion. All paint claims require pictures, estimates, and prior authorization. Shipping damage claims also require pictures, estimates, and prior authorization. The damage must also be noted on the Delivery Acceptance form. This form requires the signature of the carrier driver. Sublet work must have the sublet repair order attached to the service facility s repair order that is being submitted. Claims must be submitted within 30 days after the repair is completed. The claim can be mailed, faxed, ed, or performed on-line on our web site (assuming all required information is included): Warranty claims can be mailed to: Utilimaster Attn: Warranty Department 603 Earthway Blvd. Bristol, IN , U.S.A. Or you can your claim with the above information to Warranty@ Utilimaster.com. (You can download a customizable Warranty Claim Form template from the Utilimaster web site The template has a header that you can customize with your name and address. Then, to file a claim, you only have to enter the specific information about the vehicle saving retyping the same address information repeatedly. After completing the form information, the file can be ed as an attachment. This form can also be used for mailing or faxing.) Claims are paid semimonthly. Utilimaster generally does not pay sales tax on claims. If you do not have our tax exemption number on file, please call and ask for the accounting department to obtain the number. Before returning any parts, contact a Utilimaster warranty representative. Body Operator s Guide 87

 parts look up for all Utilimaster vehicles")


88 More Information and Publications Aftermarket Parts Utilimaster Introduces Online Parts Catalog and Ordering System Utilimaster is pleased to introduce an Electronic Parts Catalog and Ordering System that will save your team time and money by providing 24-hour access to your vehicle parts and the OEM Bill of Material. The parts website can be reached directly at The Electronic Parts Catalog and Ordering System provides: Vehicle Identification Number (VIN) parts look up for all Utilimaster vehicles manufactured from 1999 to present VIN look-up detailing the OEM Bills of Material to improve order accuracy, speed and efficiency 24-hour parts catalog and order access Fast parts look up Original equipment parts direct from the manufacturer Save your Favorite Truck for one-time VIN entry and easy reordering All orders reviewed by a Utilimaster Customer Service Representative to ensure accuracy Secure website to protect your information One-time registration Registering is easy! Go to the Login page: If you are a new customer, follow the prompts through our quick one-page registration. If you are an existing customer, have a copy of any invoice handy, select I have bought from Utilimaster on the phone before, but never online and follow the prompts. If you currently receive a discount, the pricing will change from retail pricing to your specific discounted price list once you have logged in. Pre-register by ing your team s contact names and addresses to tfalk@utilimaster.com or by calling We will enter you into the system, ensuring that your team receives accurate pricing. We have created two instruction guides that are useful introductory tools, one is text-based and one image-based. Both documents are available on the HELP area of the website. Locks Lighting HVAC Handles The parts website is live, and ready for your orders! Safety 88 Body Operator s Guide

89 Utilimaster Web Site Many support documents are downloadable (as Adobe Acrobat PDF files) from our web site at Click on the Technical Manuals button, to access the download page. To view the files you must have the Adobe Acrobat Reader version 4.0 or higher installed on your computer. Acrobat readers are available free for all leading computer operating systems on the Adobe web site ( Body Operator s Guide 89

90 Contacting Utilimaster Browse our web site for more information about Utilimaster and its products or contact Utilimaster Customer Service by using one of the following methods: Call to Mail to the following address: Utilimaster Attn: Customer Service Department 603 Earthway Blvd. Bristol, IN U.S.A. 90 Body Operator s Guide
Body Operator s Guide
 Intermediate Delivery Truck Body Operator s Guide Do not discard! This document contains important operation, safety, and maintenance information! Introduction This operator s guide provides basic operating
P-Series Installation
 Utilimaster Access System Introduction P-Series Installation This information describes installation of the Utilimaster Access System (UAS) P-Series (one-button FOB) designed to replace the existing ACE
ATTENTION: THIS IS NOT A RELEASED DOCUMENT. Labor Flat Rates DRAFT. Aeromaster and Truck Body
 Contents ATTENTION: THIS IS NOT A RELEASED DOCUMENT. Service Guide Labor Flat Rates Aeromaster and Truck Body Flat Rates and Labor Operation Codes...3 Door...3 Side Sliding...3 Swing...4 Bulkhead...4 Rear
Installation, Usage & Maintenance Guide
 3-Point Seat Belt Installation, Usage & Maintenance Guide For Fixed, Suspension & Bench Seats This guide should remain with the vehicle and passed on to subsequent vehicle owners to be kept for future
SECTION 1 6 INSTRUMENTS AND CONTROLS. Comfort adjustment. Front seat... 42
 SECTION 1 6 INSTRUMENTS AND CONTROLS Comfort adjustment Front seat................................................ 42 Headrests............................................... 44 Tilt and telescopic steering
Towing and Road Service Guide For Lexus GS 300 and GS 430. Quality and Education Services AAA Automotive 1000 AAA Drive Heathrow, FL 32746
 Towing and Road Service Guide For Lexus GS 300 and GS 430 Quality and Education Services AAA Automotive 1000 AAA Drive Heathrow, FL 32746 April 12, 2005 Index Equipment availability 3 General Towing Information
Index. Abbreviation list Alphabetical index What to do if
 Index Abbreviation list... 478 Alphabetical index... 479 What to do if...... 489 477 Abbreviation list Abbreviation/Acronym list ABBREVIATIONS ABS ACC ALR CRS DISP ECU EDR ELR GAWR GVWR I/M LATCH LED LSD
Index. Abbreviation list Alphabetical index What to do if
 Index Abbreviation list... 470 Alphabetical index... 471 What to do if...... 481 469 Abbreviation list Abbreviation/Acronym list ABBREVIATIONS ABS ACC ALR CRS DISP ECU EDR ELR GAWR GVWR I/M LATCH LED LSD
Rocket. Two Seat Bicycle Trailer. Model Number ACIS99ROCKTBLU
 Rocket Two Seat Bicycle Trailer Model Number ACIS99ROCKTBLU User s Manual This manual contains safety, assembly, use and maintenance instructions. Read these instructions carefully before use and keep
SEAT BELTS SECTION CONTENTS H RESTRAINTS SB-1
 H RESTRAINTS A SECTION SEAT BELTS B C D CONTENTS E PRECAUTIONS... 2 Precautions for Supplemental Restraint System (SRS) AIR BAG and SEAT BELT PRE-TEN- SIONER... 2 Precaution for Seat Belt Service... 2
6-2 Interior equipment
 Interior equipment Interior light... 6-2 Dome light... 6-2 Cargo area light (Station wagon)... 6-2 Map light... 6-2 Sun visors... 6-3 Sun visor extension plate... 6-3 Vanity mirror with light... 6-4 Storage
MODEL SST1 JOGGER/BIKE TRAILER. Owner s Manual should be kept for future reference
 PRODUCT REGISTRATION: MAKE SURE TO REGISTER YOUR PURCHASE AT http://allensportsusa.com/about/product-registration TO QUALIFY FOR PRODUCT WARRANTY AND TO RECEIVE IMPORTANT PRODUCT NOTIFICATIONS 1 MODEL
Star Mini Phantom. Interior Undercover Mini LED Light. PATENTS D530,029 and D632,421. ULB9LDC Series (Lineum LED Dual Color)
") Star Mini Phantom Interior Undercover Mini LED Light PATENTS D530,029 and D632,421 ULB9LDC Series (Lineum LED Dual Color) IMPORTANT: Please read all of the following instructions before installing your
Star Mini Phantom Interior Undercover Mini LED Light PATENTS D530,029 and D632,421 ULB9LDC Series (Lineum LED Dual Color) IMPORTANT: Please read all of the following instructions before installing your
Single Seat Bicycle Trailer
 Single Seat Bicycle Trailer User s Manual This manual contains safety, assembly, use and maintenance instructions. Read these instructions carefully before use and keep them for future reference. Your
Pre-Post Drive Procedures Lesson 1
 Parent In-Car Check-List Pre-Post Drive Procedures Lesson 1 The instructor should print this document and take it along during the In-Car training. This document will serve as both a training guide as
Two Seat Bicycle Trailer
 Two Seat Bicycle Trailer User s Manual This manual contains safety, assembly, use and maintenance instructions. Read these instructions carefully before use and keep them for future reference. Your child
SEAT BELT SECTION SB CONTENTS RESTRAINTS SB-1 PRECAUTION... 2 ON-VEHICLE REPAIR... 3
 RESTRAINTS SECTION SB A SEAT BELT B C D CONTENTS E PRECAUTION... 2 PRECAUTIONS... 2 Precaution for Supplemental Restraint System (SRS) "AIR BAG" and "SEAT BELT PRE-TEN- SIONER"...2 Precaution for Seat
Utilimaster Advantage
 Utilimaster Advantage Dedicated to Building Quality For more than 35 years, our experienced associates have been committed to building commercial vehicles. With unmatched quality and superior craftsmanship,
TABLE OF CONTENTS 1 INTRODUCTION THINGS TO KNOW BEFORE STARTING YOUR VEHICLE UNDERSTANDING THE FEATURES OF YOUR VEHICLE...
 SECTION TABLE OF CONTENTS PAGE 1 INTRODUCTION...3 2 THINGS TO KNOW BEFORE STARTING YOUR VEHICLE...5 3 UNDERSTANDING THE FEATURES OF YOUR VEHICLE... 19 4 UNDERSTANDING YOUR INSTRUMENT PANEL...25 5 STARTING
Spirit Trailer with stroller attachment
 Spirit Trailer with stroller attachment User s Manual This manual contains safety, assembly, use and maintenance instructions. Read these instructions carefully before use and keep them for future reference.
Towing and Road Service Guide For Lexus LS 600h L. Quality and Education Services AAA Automotive 1000 AAA Drive Heathrow, FL 32746
 Towing and Road Service Guide For Lexus LS 600h L Quality and Education Services AAA Automotive 1000 AAA Drive Heathrow, FL 32746 June 15, 2007 Index General Towing Information Special Precautions 3 Hybrid
Owner s Manual. (Keep in glove compartment for quick reference) Rollx Vans Power Door Vans v1.3
 Rollx Vans Power Door Vans v1.3") Owner s Manual (Keep in glove compartment for quick reference) Rollx Vans Power Door Vans v1.3 Table Of Contents Warranty Procedures.................. 4 Warranty Coverage.................... 5 Preventative
Owner s Manual (Keep in glove compartment for quick reference) Rollx Vans Power Door Vans v1.3 Table Of Contents Warranty Procedures.................. 4 Warranty Coverage.................... 5 Preventative
(1,1) Index 14 北米Model "A1330BE-B" EDITED: 2017/ 11/ 30
 Index 14 北米Model A1330BE-B EDITED: 2017/ 11/ 30") Index 14 14-2 Index A Abbreviation... 3 ABS (Anti-lock Brake System)... 7-33 Warning light... 3-20 Access key fob... 2-3 Warning light... 3-25 Accessories... 11-37 Accessory power outlet... 6-7 Air cleaner
Index 14 14-2 Index A Abbreviation... 3 ABS (Anti-lock Brake System)... 7-33 Warning light... 3-20 Access key fob... 2-3 Warning light... 3-25 Accessories... 11-37 Accessory power outlet... 6-7 Air cleaner
INSTALLATION INSTRUCTIONS AND OWNER S MANUAL
 INSTALLATION INSTRUCTIONS AND OWNER S MANUAL Thank you for purchasing the AlloyCover from WeatherTech. Manufactured with pride using superior quality materials and workmanship. With proper care, your cover
Interior equipment. Interior lights
 Interior lights... 6-2 S06 Map lights... 6-2 Dome light... 6-2 Cargo area light (5-door models)... 6-3 OFF delay timer... 6-3 Sun visors... 6-3 Sun visor extension plate (if equipped)... 6-4 Vanity mirror...
SEAT BELTS SECTION CONTENTS H RESTRAINTS SB-1
 H RESTRAINTS A SECTION SEAT BELTS B C D CONTENTS E PRECAUTIONS... 2 Precautions for Supplemental Restraint System (SRS) AIR BAG and SEAT BELT PRE-TEN- SIONER... 2 Precaution for Seat Belt Service... 2
CDL Series Pre-Trip Inspection AT-TC3TS T1-JA01. Pre-Trip Inspection Checklist
 Pre-Trip Inspection Checklist This checklist covers different parts of the vehicle you would check before a trip. Note that some specifications described in the following content may not be the same as
MODEL XLT-X2 BIKE TRAILER. Owner s Manual should be kept for future reference
 1 MODEL XLT-X2 BIKE TRAILER Owner s Manual should be kept for future reference 1. Completely read and understand Owner s Manual before assembling or operating this product. 2. This product should be assembled
INSTALLATION / OPERATING INSTRUCTIONS Reese Elite Series FIFTH WHEEL SLIDER HITCH
 INSTALLATION / OPERATING INSTRUCTIONS Reese Elite Series FIFTH WHEEL SLIDER HITCH DEALER/INSTALLER: (1) Provide this Manual to end user. (2) Physically demonstrate hitching and unhitching procedures in
Road Service Quick Reference Guide 2017 Land Rover Discovery. Quality and Education Services AAA Automotive 1000 AAA Drive Heathrow, FL 32746
 Road Service Quick Reference Guide 2017 Land Rover Discovery Quality and Education Services AAA Automotive 1000 AAA Drive Heathrow, FL 32746 March 31, 2017 Index Quick Specifications and Information 2
Star Mini Phantom. Interior Undercover Mini LED Light. PATENTS D530,029 and D632,421. ULB9E Series
 Star Mini Phantom Interior Undercover Mini LED Light PATENTS D530,029 and D632,421 ULB9E Series IMPORTANT: Please read all of the following instructions before installing your new light. CAUTION: Please
EZ Carrier 3. Owner s Manual. Keep instructions for future reference
 EZ Carrier vv Owner s Manual Keep instructions for future reference Introduction The EZ Carrier provides all the flexibility you may need to transport your mobility scooter. The features include: The capability
EMERGENCY RESPONSE GUIDE
 2012-2013 EMERGENCY RESPONSE GUIDE This guide is intended only for use by trained and certified rescuers and first responders. It assumes that readers have a comprehensive understanding of how safety systems
INSTALLATION INSTRUCTIONS
 INSTALLATION INSTRUCTIONS Thank you for purchasing a LOMAX TM Hard Tri-Fold or Professional Series Cover. Agri-Cover, Inc. proudly manufactured this cover using superior quality materials and workmanship.
Black plate (27,1) Index 14 北米Model "A3180BE-B" EDITED: 2014/ 2/ 7
 Index 14 北米Model A3180BE-B EDITED: 2014/ 2/ 7") Index 14 14-2 Index A Abbreviation... 3 ABS (Anti-lock Brake System)... 7-20 Warning light... 3-15, 7-21 Accessories... 5-2, 11-36 Accessory power outlet... 6-10 Active head restraint... 1-6 Air cleaner
Index 14 14-2 Index A Abbreviation... 3 ABS (Anti-lock Brake System)... 7-20 Warning light... 3-15, 7-21 Accessories... 5-2, 11-36 Accessory power outlet... 6-10 Active head restraint... 1-6 Air cleaner
QUICK REFERENCE GUIDE
 QUICK REFERENCE GUIDE 2005 350Z SHIFT_obsession NISSAN 350Z INSTRUMENT PANEL FEATURES STEERING WHEEL TILT ADJUSTMENT 05 AUDIO SYSTEM SOFT TOP OPERATING SWITCH (ROADSTER MODELS) 04 STORAGE POCKET OR NAVIGATION
Towing and Road Service Guide For The Lexus CT200h. Quality and Education Services AAA Automotive 1000 AAA Drive Heathrow, FL 32746
 Towing and Road Service Guide For The Lexus CT200h Quality and Education Services AAA Automotive 1000 AAA Drive Heathrow, FL 32746 January 4 th, 2011 1 Index General Vehicle Information Major Component
INSTALLATION INSTRUCTIONS AND OWNER S MANUAL
 INSTALLATION INSTRUCTIONS AND OWNER S MANUAL Thank you for purchasing the AlloyCover from WeatherTech. Manufactured with pride using superior quality materials and workmanship. With proper care, your cover
Search by illustration
 Pictorial index Search by illustration 1 AUTO ACCESS SEAT 2 Maintenance Information regarding the AUTO ACCESS SEAT, including usage procedure Checking fuses and replacing the battery of the wireless remote
Installation Instructions
 patent pending Portable Proportional Braking System Installation Instructions Part number 9400 Towing and Suspension Solutions ROADMASTER, Inc. 6110 NE 127th Ave. Vancouver, WA 98682 800-669-9690 Fax 360-735-9300
Phoenix Buggy User Instructions
 Phoenix Buggy User Instructions Issued 1 st March 2015 Introduction Welcome to the Phoenix Buggy User Guide. The Phoenix Buggy has been designed to provide a robust, transportable mobility solution for
Deicer Operating Instructions Table of Contents
 Deicer Operating Instructions Table of Contents FMC FMC FMC/Trump FMC Global Premier Trump Model: LA1000 Model: LMD-2000 Model: T2000 Model: TM1800 Model: 2100TE Model: HC29050 Model: D240 Contents FMC
9-2 In case of emergency
 In case of emergency If you park your vehicle in case of an emergency... 9-2 Temporary spare tire... 9-2 Maintenance tools... 9-3 Flat tires... 9-5 Changing a flat tire... 9-5 Tire pressure monitoring
Installation Instructions. QuickSilver Shifter. Fits: GM, Ford, Chrysler Transmissions See Application Guide for Specific Applications Part # 80683
 Installation Instructions QuickSilver Shifter Fits: GM, Ford, Chrysler Transmissions See Application Guide for Specific Applications Part # 80683 WORK SAFELY! For maximum safety, perform this installation
Towing and Road Service Guide For The Lexus ES300h. Quality and Education Services AAA Automotive 1000 AAA Drive Heathrow, FL 32746
 Towing and Road Service Guide For The Lexus ES300h Quality and Education Services AAA Automotive 1000 AAA Drive Heathrow, FL 32746 September 7, 2012 1 Index General Vehicle Information Major Component
OPERATIONS MANUAL LEVER CHAIN HOIST
 OPERATIONS MANUAL LEVER CHAIN HOIST IMPORTANT SAFETY INFORMATION Please read, understand and follow all safety information contained in these instructions prior to the use of this hoist. Retain these instructions
C>r>E: X EMERGENCY RESPONSE GUIDE
 2016 C>r>E: X EMERGENCY RESPONSE GUIDE This guide is intended only for use by trained and certified rescuers and first responders. It assumes that readers have a comprehensive understanding of how safety
FORD ECOSPORT Quick Reference Guide
 FORD ECOSPORT Quick Reference Guide About This Quick Reference Guide We have created this guide to help you get to know certain features of your vehicle quickly. It only contains basic instructions to
Heavy Duty Engine Cranes
 Heavy Duty Engine Cranes Operating Instructions & Parts Manual Model Number Atd-7484 Atd-7485 (Foldable Legs) Capacity 2 Ton 2 Ton Model Atd-7484 Model Atd-7485 Atd Tools Inc. 160 Enterprise Drive, Wentzville,
Owner s Instructions and Safety Manual. Double-Double series. Performance Bicycle Trailers
 Owner s Instructions and Safety Manual Double-Double series TM Performance Bicycle Trailers Contents 1. Trailer Components 2. Tow Bar and Hitch Components 3. Assembling Your Trailer 4. Attaching the Wheels
Part# Description Q'TY
 4 Bike Rack Carrier The 4 Bike Rack is to protect your bikes during transportation. This device is built for carrying up to 4 bikes at one time. This device also has a drop down feature so you can still
expandable booster Instruction Manual US Version
 expandable booster Instruction Manual US Version product: monterey expandable booster model series: 15000 mfg. by: Diono LLC 14810 Puyallup Avenue Sumner, WA 98390 Customer Care Tel: 1 (855) 463-4666 us.diono.com
FORD ECOSPORT Quick Reference Guide
 FORD ECOSPORT Quick Reference Guide About This Quick Reference Guide We have created this guide to help you get to know certain features of your vehicle quickly. It only contains basic instructions to
As a safety precaution, remove keys from the ignition while working under or around the vehicle.
 CAB AND CHASSIS As a safety precaution, remove keys from the ignition while working under or around the vehicle. 1. Approach Check the overall appearance of vehicle stance (not leaning). Check for signs
Light Truck MegaShifter
 Installation Instructions Light Truck MegaShifter The B&M Light Truck Megashifter shifter is designed to be used in most light trucks equipped with most popular three speed or four speed automatic transmissions.
SUBJECT: While In Bi-level Mode, Air Flow From Panel Vents Is Less Than That Of The Floor Vents
 NUMBER: GROUP: 24-20-99 Rev. A Heating & A/C DATE: Dec. 17, 1999 This bulletin is supplied as technical information only and is not an authorization for repair. No part of this publication may be reproduced,
Thank you for choosing a Mazda. We at Mazda design and build vehicles with complete customer satisfaction in mind.
 J54L_8R34_EE_02H.BOOK Page 1 Monday, July 15, 2002 9:03 AM A Word to Mazda Owners Thank you for choosing a Mazda. We at Mazda design and build vehicles with complete customer satisfaction in mind. To help
SUNROOF - SERVICE INFORMATION ADJUSTMENTS
 SUNROOF - SERVICE INFORMATION DESCRIPTION OPERATION DIAGNOSIS AND TESTING POWER TOP - SUNROOF SUNROOF ASSEMBLY-MODULE REMOVAL INSTALLATION CHANNEL-DRAIN REMOVAL INSTALLATION COVER-GUIDE MECHANISM REMOVAL
48" and 52" Hyflo Fans Installation and Operators Instruction Manual
 48" and 52" Hyflo Fans Installation and Operators Instruction Manual Thank You The employees of Chore-Time Equipment would like to thank your for your recent Chore-Time purchase. If a problem should arise,
Lift N Go [Model 210] Electric Carrier For use with power chairs & scooters Installation Guide & Owners Manual
![Lift N Go [Model 210] Electric Carrier For use with power chairs & scooters Installation Guide & Owners Manual](/thumbs/74/70316262.jpg "Lift N Go [Model 210] Electric Carrier For use with power chairs & scooters Installation Guide & Owners Manual") 203 Matzinger Road Toledo, OH 43612 Phone: 1-800-541-3213 Fax: (419) 478-4425 www.wheelchaircarrier.com E-mail: admin@wheelchaircarrier.com Lift N Go [Model 210] Electric Carrier For use with power chairs
203 Matzinger Road Toledo, OH 43612 Phone: 1-800-541-3213 Fax: (419) 478-4425 www.wheelchaircarrier.com E-mail: admin@wheelchaircarrier.com Lift N Go [Model 210] Electric Carrier For use with power chairs
DODGE DAKOTA 3 BODY LIFT INSTALLATION INSTRUCTIONS KIT # 60153
 DODGE DAKOTA 3 BODY LIFT INSTALLATION INSTRUCTIONS 2003-04 KIT # 60153 Installation of a Performance Automotive Group body lift kit will change the vehicle s center of gravity and handling characteristics
expandable booster Instruction Manual US Version
 expandable booster Instruction Manual US Version product: monterey XT expandable booster model series: 108000 mfg. by: Diono US 14810 Puyallup Street E Suite 200 Sumner, WA 98390 Customer Care Tel: 1 855
ARTICLE BEGINNING SERVICE PRECAUTIONS
 Page 1 of 96 ARTICLE BEGINNING SERVICE PRECAUTIONS WARNING: WARNING: CAUTION: When performing any inspection or service procedure on this vehicle, ensure following service precautions are followed to prevent
Enhanced Mini Phantom
 Enhanced Mini Phantom Undercover Interior Mini Enhanced LED Light DL086 DL451 GR152 (Single Head) (w/cig Plug) (Dual Head) (w/cig Plug) (Dual Head) (w/hard Wire) IMPORTANT: Please read all of the following
INSTALLATION INSTRUCTIONS
 INSTALLATION INSTRUCTIONS Thank you for purchasing TONNOSPORT Roll-Up Cover. Agri-Cover, Inc. proudly manufactured this cover using superior quality materials and workmanship. With proper care, your cover
Installation Instructions Pro Bandit Shifter Fits: GM Powerglide Automatic Transmissions
 Installation Instructions Pro Bandit Shifter Fits: 1962-1973 GM Powerglide Automatic Transmissions Part # 80793 WORK SAFELY! For maximum safety, perform this installation on a clean, level surface and
Child restraint Child restraint precautions
 In the following cases, contact your Toyota dealer as soon as possible: The SRS airbags have been inflated. The front part of the vehicle (shaded in the illustration) was involved in an accident not of
Single Seat Trailer. Owner s manual and safety instructions
 Single Seat Trailer Owner s manual and safety instructions Owner s Manual Every effort has been made to ensure your trailer is of top quality and proven safe design, ready to provide you with many years
TRUCKINGTRUTH.COM T T. Daniel B s Pre-Trip Inspection Checklist
 TRUCKINGTRUTH.COM T T Daniel B s Pre-Trip Inspection Checklist 1 My pre-trip begins as I approach the vehicle. I am looking for leaks, leaning one way or the other (which may indicate a low tire or bad
Road Service Quick Reference Guide 2016 Lincoln MKZ / MKZ Hybrid. Quality and Education Services AAA Automotive 1000 AAA Drive Heathrow, FL 32746
 Road Service Quick Reference Guide 2016 Lincoln MKZ / MKZ Hybrid Quality and Education Services AAA Automotive 1000 AAA Drive Heathrow, FL 32746 December 12, 2015 Index Towing, Loading and Transporting
Quick N EZ. Two Seat Bicycle Trailer with Stroller Attachment
 Quick N EZ Two Seat Bicycle Trailer with Stroller Attachment User s Manual This manual contains safety, assembly, use and maintenance instructions. Read these instructions carefully before use and keep
INSTALLATION INSTRUCTIONS DODGE DAKOTA 2 KIT # 682 (2WD), 692 (4WD) 3 KIT # 683 (2WD), 693 (4WD)
, 692 (4WD) 3 KIT # 683 (2WD), 693 (4WD)") INSTALLATION INSTRUCTIONS 1997-1999 DODGE DAKOTA 2 KIT # 682 (2WD), 692 (4WD) 3 KIT # 683 (2WD), 693 (4WD) Installation of a Performance Accessories body lift kit will change the vehicle s center of gravity
INSTALLATION INSTRUCTIONS 1997-1999 DODGE DAKOTA 2 KIT # 682 (2WD), 692 (4WD) 3 KIT # 683 (2WD), 693 (4WD) Installation of a Performance Accessories body lift kit will change the vehicle s center of gravity
SNUGRIDE SNUGLOCK EXTEND2FIT
 NWL0000706394A 1/18 SNUGRIDE SNUGLOCK EXTEND2FIT INFANT CAR SEAT BASE Read This Instruction Manual Do not install or use this child restraint until you read and understand the instructions in this manual.
B&W Trailer Hitches 1216 Hawaii Road / PO Box 186 Humboldt, KS P: F: " Split Lock Washers 8
 B&W Trailer Hitches 1216 Hawaii Road / PO Box 186 Humboldt, KS 66748 P:620.473.3664 F:620.869.9031 NOTE: We recommend reading instructions before beginning the installation. Companion Slider Hitch Installation
Road Service Quick Reference Guide 2016 Lincoln MKX. Quality and Education Services AAA Automotive 1000 AAA Drive Heathrow, FL 32746
 Road Service Quick Reference Guide 2016 Lincoln MKX Quality and Education Services AAA Automotive 1000 AAA Drive Heathrow, FL 32746 December 12, 2015 Index Towing, Loading and Transporting 2 Curb Weight
DUAL PURPOSE DIAGNOSTIC LEAK DETECTOR
 OPERATION MANUAL DUAL PURPOSE DIAGNOSTIC LEAK DETECTOR P/N 95-030 NIS -800-662-200 nissantechmate.com CONTENTS Specifications / Warranty... Functions...2-3 Accessories... 4 Set-Up... 5 Adaptor Installation...
Booster Car Seat User Guide
 Booster Car Seat User Guide For future use, STORE USER GUIDE in location on bottom of base. IS0133.E 2015 Artsana USA, Inc. If you have any problems with your Chicco Booster Seat, or any questions regarding
Remote Start System OWNER S MANUAL. Mazda CX-9
 Remote Start System OWNER S MANUAL Mazda CX-9 Introduction Congratulations on your purchase of a Mazda Remote Start System specifically engineered for Mazda featuring PowerCode Technology TM. This easy-to-use
TABLE OF CONTENTS Safe Use Checklist Registration & Recal Assistance Warnings Base Features Carrier Features Securing Child In Carrier
 TABLE OF CONTENTS Safe Use Checklist...4 Registration & Recall...5 Assistance...5 Warnings...6 Base Features Base Overview... Storage Compartment...3 Recline Adjustment...3 LATCH Removal & Storage...4
GPS AutoSteer System Installation Manual
 GPS AutoSteer System Installation Manual John Deere Track Supported Models 8295RT 8320RT 8345RT PN: 602-0255-01-A LEGAL DISCLAIMER Note: Read and follow ALL instructions in this manual carefully before
SECTION 1 2 INSTRUMENTS AND CONTROLS. Switches
 SECTION 1 2 INSTRUMENTS AND CONTROLS Switches Headlight and turn signal switch............................ 16 Fog light switch........................................... 17 Windshield wiper and washer
PRO RATCHET UNIVERSAL SHIFTER
 Installation Instructions PRO RATCHET UNIVERSAL SHIFTER Fits: GM, Ford and Chryslers w/automatic Transmission See Application Guide for Specific Vehicles Catalog # 80842 WORK SAFELY! For maximum safety,
Property of American Airlines
 Section 2: Operation 1. GENERAL INFORMATION Safety First! is the motto at Tesco; therefore, the first part of the Operation section begins with safety features and procedures. Operation of the Tesco CL80-20
User s Manual. Table of Contents CAUTION. Model No. MTSC20000
 Model No. MTSC20000 Table of Contents Important Precautions..........2 Limited Warranty..............2 Before You Begin.............3 How to Set Up and Fold the Scooter...............4 How to Operate the
2007 ARMADA QUICK REFERENCE GUIDE. Shift_scale
 2007 ARMADA QUICK REFERENCE GUIDE Shift_scale 07 HOOD RELEASE* 09 08 STEERING WHEEL TILT ADJUSTMENT* 10 09 CONTROL PANEL DISPLAY 05 06 11 12 10 AUDIO SYSTEM 13 07 08 11 FRONT-PASSENGER AIR BAG STATUS LIGHT
K-SERIES PUBLIC USE LIFT OPERATING INSTRUCTIONS
 -PRINT- II. T K-SERIES PUBLIC USE LIFT OPERATING INSTRUCTIONS -TABLE OF CONTENTS- his chapter contains safety precautions, daily safety check instructions, control and indicator descriptions, and operating
INSTALLATION INSTRUCTIONS
 INSTALLATION INSTRUCTIONS Thank you for purchasing VANISH Roll-Up Cover. Agri-Cover, Inc. proudly manufactured this cover using superior quality materials and workmanship. With proper care, your cover
Owner s Manual Enclosed Cargo
 Owner s Manual Enclosed Cargo 1 This manual contains safety information and instructions for your trailer. You must read this manual before loading or towing your trailer. You must follow all safety precautions
Please contact BrakeAway Products tech support for additional (503) or
 or") Congratulations on the purchase of your new BrakeAway Motorcycle Cruise Control. At BrakeAway Products, we are committed to your complete satisfaction. With proper installation, use, and periodic maintenance,
Congratulations on the purchase of your new BrakeAway Motorcycle Cruise Control. At BrakeAway Products, we are committed to your complete satisfaction. With proper installation, use, and periodic maintenance,
HOP-LP Portable Steel Dumping Hoppers Instruction Manual
 VESTIL MANUFACTURING CORP. 2999 North Wayne Street, P.O. Box 507, Angola, IN 46703 Telephone: (260) 665-7586 -or- Toll Free (800) 348-0868 Fax: (260) 665-1339 www.vestilmfg.com e-mail: sales@vestil.com
Instruction Manual. Canada English Version
 Instruction Manual Canada English Version Product: Monterey child booster seat Model: 15000 Mfg. by: Diono Canada, ULC 50 Northland Road, Suite 400 Waterloo, Ontario N2V 1N3 Customer Service Tel: 519-725-1700
SECTION 1 3 OPERATION OF INSTRUMENTS AND CONTROLS MR2 U. Seats, Seat belts, Steering wheel and Mirrors
 SECTION 1 3 OPERATION OF INSTRUMENTS AND CONTROLS Seats, Seat belts, Steering wheel and Mirrors Seats...................................................... 26 Seat belts...................................................
P-HOP-Series Portable Steel Hoppers Instruction Manual
 VESTIL MANUFACTURING CORP. 2999 North Wayne Street, P.O. Box 507, Angola, IN 46703 Telephone: (260) 665-7586 -or- Toll Free (800) 348-0868 Fax: (260) 665-1339 www.vestilmfg.com e-mail: sales@vestil.com
Installation Instructions Right Hand Drive Megashifter
 Installation Instructions Right Hand Drive Megashifter Part Number 80685 1995, 2001, 2006, 2010 by B&M Racing & Performance Products The B&M Right Hand Drive Megashifter is designed specifically for vehicles
INSTALLATION INSTRUCTIONS
 INSTALLATION INSTRUCTIONS [1] Description: Tow Hitch Wire Harness Kit [2] Application: Nissan Rogue Note: Tow Harness application is limited to specific vehicle option packages that include tow harness
Vehicle Security / Remote Start / Remote Access System Installation
 2011-2014 F-150 Vehicle Security/Remote Start/Remote Access Vehicle Security / Remote Start / Remote Access System Installation CONTENTS VEHICLE PREPARATION Hood Switch Installation VSS Module Installation
Mazda MPV. Mazda MPV. Owner's Manual. Owner's Manual S06. Form No. 8S06-EA-03H (Part No C-04)
") Mazda MPV Owner's Manual Form No. 8S06-EA-03H (Part No. 9999-95-029C-04) 2004 8S06 2004 Mazda MPV Owner's Manual A Word to Mazda Owners Thank you for choosing a Mazda. We at Mazda design and build vehicles
Mazda MPV Owner's Manual Form No. 8S06-EA-03H (Part No. 9999-95-029C-04) 2004 8S06 2004 Mazda MPV Owner's Manual A Word to Mazda Owners Thank you for choosing a Mazda. We at Mazda design and build vehicles
2015 Scion iq Quick Reference Guide
 2015 Scion iq Quick Reference Guide 2015 Scion iq This Quick Reference Guide is a summary of basic vehicle operations. It contains brief descriptions of fundamental operations so you can locate and use
EROAD Inspect DVIR. Addendum to the EROAD ELD User Manual
 EROAD Inspect DVIR Addendum to the EROAD ELD User Manual PREFACE This addendum is a supplement to the EROAD ELD User Manual, which may be updated at any time. See EROAD.com for the latest version of EROAD
OPTIMIZER TM OPERATOR MANUAL. Author: Labrie. Release Date: 1/31/07. Part #: 90320
 OPTIMIZER TM OPERATOR MANUAL Author: Labrie Release Date: 1/31/07 Part #: 90320 Table of Contents Introduction Introducing the Optimizer TM... 1 Product Overview... 1 Contacting Labrie Environmental Group...