Hydraulic Chute USAGE INSTRUCTIONS
|
|
|
- Noel Chase
- 5 years ago
- Views:
Transcription
1


 extension cord.")


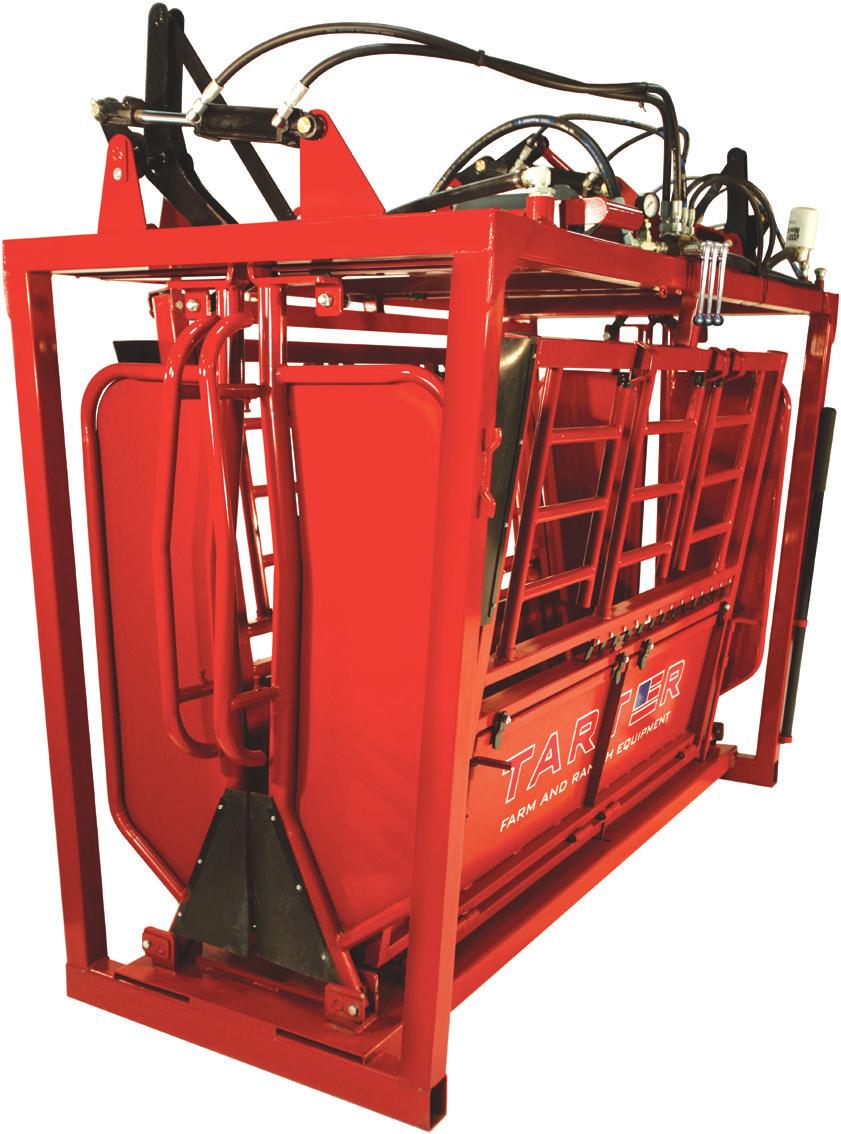
2 1. Before Using hute Place attlemaster hydraulic chute on level area. Grease all zerk fittings on chute. Spray aerosol oil on all latches, hinges and linkages. Unscrew and remove plastic shipping plug from hydraulic fluid chamber. Remove breather cap from plastic manual container on top of chute. Screw breather cap with dipstick into hydraulic fill port and hand-tighten. UTION: Do not over-tighten or use any tools to tighten breather cap. heck hydraulic fluid by unscrewing breather cap with dipstick. Fluid level should be at full mark on dipstick. If fluid level is low, add W-32 Premium Hydraulic Fluid. Remove control levers from shipping bracket (black L-shaped bracket) by unscrewing nuts on 2 small bolts located on black L-bracket. Discard small bolts. Unscrew the nuts on the 2 remaining long bolts located on the L-bracket. Discard the L-bracket. Move control lever panel to where the levers are facing downward on the outside edge of the frame. The hole on the lever panel should line up with the holes from where short bolts were removed. Place long bolts into the aligned holes and hand-tighten nuts. Tighten both bolts and nuts. 2. Pre-Operation heck Locate 110 volt electric cord on top of chute and plug into an outdoor, grounded, heavy-duty (10 or 12 gauge) extension cord. WRNING: Do not use a light-duty household or light-weight extension cord. Do not exceed 100 feet of extension cord. If gates or squeeze panels are sluggish or motor bogs down while attempting to operate, you do not have adequate power. This can be caused by and undersized extension cord or power outlet located too far from the main power supply. Make sure all cords and plugs are out of the way of people and animals. Plug chute into 110 volt outlet and let pump run a few minutes. Test all three cylinders by operating all levers (opening and closing doors and squeeze chute) before loading animals. 3. ontrol Levers Lever one (1) controls headgate operation Lever two (2) controls squeeze operation Lever three (3) controls tailgate operation ll levers work the same way. Push handle in to close gates or tighten squeeze panel. Pull handle out to open gates or release squeeze panel.


3 4. djusting Hydraulic Pressure. Locate the set screw situated to the left of the Hydraulic ontrol Valve leavers. B. Using a 9/16 open end wrench, remove the set screw cover, exposing the pressure adjustment screw. D B. Using a 9/16 open end wrench, loosen the jam nut and back it off allowing for modification of the pressure adjustment screw. E D.Using a standard flat-blade screwdriver, rotate the adjustment screw clockwise to increase pressure and counterclockwise to decrease pressure until the desired pressure is achieved. n optimum working pressure of psi is required while the pump is engaged and under a load. F E. Use 9/16 open end wrench to tighten the jam nut to prevent unwanted movement of the adjustment. Replace and tighten the set screw cover. 5. djusting Hydraulic ylinder rms The attlemaster hydraulic chute has 3 fully-adjustable hydraulic cylinder arms (located on top of chute) that can be adjusted (in or out) to fine-tune the operation of each cylinder s control independently.. To adjust hydraulic cylinder, pull cotter pin out from grooved slot on clevis bolt located in center of the cylinder control arm. B. Pull clevis bolt out of cylinder control arm.. Raise cylinder shaft upward, until it is free from control arm. D B E D. Loosen locking bolt located on top of the black end of the head piece on cylinder shaft. E. Grab black end of the cylinder head and turn. Threading out will make the doors come closer together and threading in will make the doors wider. F. When adjustment is completed, tighten locking bolt and lower cylinder shaft until clevis bolt fits back into center of cylinder head and control arm. G. Place cotter pin back into slot of clevis pin.


4 6. are and Maintenance There are 7 zerk grease fittings on the chute. These should be periodically checked and greased..each of the 3 hydraulic arms on top of the chute have a zerk fitting. See photos of chute on right for locations of fittings. B. t the base of each squeeze panel is an individual zerk fitting. See photos on right for locations of fittings. Nortrac Filter # B. heck filter seasonally for buildup and wear, replace filter after 5,000 hours of operation, or if chute behaves erratically. FRONT VIEW OF HUTE RER VIEW OF HUTE 7. Operation (atch). Starting Position Squeeze panel open. Front & real gates closed. D. Partially open front headgate to allow animal s head through. B. Open rear tailgate to allow animal to enter chute. E. lose front headgate to secure animal s neck.. lose rear tailgate to secure animal in chute. F. lose sides to tighten (squeeze) animal s body.


5 7. Operation (Release) G. Release pressure on squeeze panel when finished with animal. H. To release animal, open front headgate. lose front headgate and open rear tailgate for next animal to load. I. For oversized animals or for sorting, animals can be released from the control side of chute. To release animal, rotate locking mechanism on escape side and pull down on escape handle located on the control side. Escape door will swing open. To close door, just bring in squeeze panel and door will slam shut. 8. djusting Side Panels B. Push side of gate in or out as needed.. Pull up on pin lever until lever is free of slot on adjustable floor. djustable side panels can be moved in or out independently or in unison with opposite end. Both sides are adjustable.. Push lever down until it is securely locked into the selected slot on adjustable floor. D. If needed, repeat procedure on other end of chute.


6 9. ccess Features. Open individual side doors to access any part of the animal by releasing access lock on the top of desired door. Note: To remove door while opened, lift door up and out from chute frame. B. Dally Hooks (located on both sides of chute s exit) can be used to tie the animals head to the side.. Neck ccess rea Rubber flap is flexible, allowing easy access to neck and shoulder area of animal. D. To access lower part of animal, turn tabs above the desired split-bottom panel and fold panel downward. To close panel, raise panel upward and turn tab down to lock panel in place. Note: To remove door completely, open pan and slide to the side. E. Neck Extenders Designed to hold animal s head straight. Perfect for tagging ears and examining head. Loosen bolt at top and bottom of each extender to slide in or out to fit various size animals. an be removed. F. Blinders (located at the foot of the chute s exit) reduces the animal s want to lower their head. G. When the animal is in the chute and caught, insert backup bar in horizontal opening of chute. Once bar is secure in both sides, slide bar forward in ratchets until it is against back of animal. Backup bar is stored near chute s entrance. For further information regarding your attlemaster Series 12, call or go to
Rancher Hydraulic Chute Owner s Manual.
 Rancher Hydraulic Chute Owner s Manual www.powderriver.com Since 1938, we at Powder River have dedicated ourselves to making America s best livestock handling equipment. You have purchased just one of
H2000 Hydraulic Chute
 00-55000 H000 Hydraulic Chute Owner s Manual Powder River Inc. PROVO, UTAH www.powderriver.com 800-45-58 400-05 0/04 Safety Symbols POWDER RIVER DANGER WARNING DANGER indicates a hazardous situation which,
BELT DRIVE SYSTEM TROUBLESHOOTING CHART CAUSES CORRECTIVE ACTION ENGINE RUNS BUT PADDLES DO NOT TURN
 ELT DRIVE SYSTEM TROULESHOOTING HRT USES ORRETIVE TION ENGINE RUNS UT PDDLES DO NOT TURN elt jumps off the drive pulleys. Inspect the belt for damage. Replace belt if needed. heck belt alignment. Idler
CERTAIN MODEL YEAR FUSION AND ESCAPE VEHICLES EQUIPPED WITH A 6F35 TRANSMISSION SHIFTER CABLE BUSHING REPLACEMENT
 PAGE 1 OF 9 CERTAIN 2013-2016 MODEL YEAR FUSION AND 2013-2014 ESCAPE VEHICLES EQUIPPED WITH A 6F35 TRANSMISSION SHIFTER CABLE BUSHING REPLACEMENT OVERVIEW In some of the affected vehicles, the bushing
Cattle Equipment HYDRAULIC SQUEEZE CHUTE
 HYDRAULIC SQUEEZE CHUTE Hi-Hog's reliable, low-stress, parallel axis hydraulic squeeze chute is safe, easy to operate, and fully accessible. two fold-up panels for full foot access four fold-down panels
SAFETY INSTRUCTIONS. A) Unroll cover toward tailgate. B) Position header into header stops. Rotate header down and press to lock toggle into header.
 Unroll cover toward tailgate. B) Position header into header stops. Rotate header down and press to lock toggle into header.") STEP 7: operation While driving vehicle, Shur-ond VELCRO brand fasteners must be secured along entire length of cover to prevent wind lift. For best results, leave cover fastened to side rails while opening.
STEP 7: operation While driving vehicle, Shur-ond VELCRO brand fasteners must be secured along entire length of cover to prevent wind lift. For best results, leave cover fastened to side rails while opening.
It don t mean a thing If it ain t got the swing
 SWING CHUTE SAND/SALT SPREADER INSTALLATION AND OPERATING INSTRUCTIONS SWING CHUTE SPREADER MODELS: 7, 8, 9, 9.5 & 10 MANUAL FOR SPREADER SERIAL NUMBERS AFTER # 20000 It don t mean a thing If it ain t
1919A4 Single Round Belt Loader
 1919A4 Single Round Belt Loader Thank you for your purchase of the JJ Custom, LLC Single Round Belt Loader. The loader was designed as an economical solution to load cloth belts for the 1917/1919A4/M37
Tooling Assistance Center
 Safeguards are designed into this application equipment to protect operators and maintenance personnel from most hazards during equipment operation. However, certain safety precautions must be taken by
WHEEL HORSE LAWN TRACTOR
 FORM NO. 897 WHEEL HORSE LAWN TRACTOR FOR AND 8 MOWERS SET-UP INSTRUCTIONS Loose Parts Note: Use the chart below to verify all parts have been shipped. DESCRIPTION QTY. USE Front Wheel Shim Washer (as
Fisher 657 Diaphragm Actuator Sizes and 87
 Instruction Manual 657 Actuator (30-70 and 87) Fisher 657 Diaphragm Actuator Sizes 30 70 and 87 Contents Introduction... 1 Scope of Manual... 1 Description... 2 Specifications... 2 Installation... 3 Mounting
Installation Guide Philips MP90 VHM Wall Mount Kit
 Installation Guide Philips MP90 VHM Wall Mount Kit The purpose of this guide is to describe the procedures for installing the MP90 VHM Wall Mount Kit. Table of Contents Section 1.0: Mounting the VHM-Series
I-317. AWWA Check Valves WARNING INSTALLATION AND MAINTENANCE INSTRUCTIONS SERIES 317 WARNING
 Read and understand all instructions before attempting to install, remove, adjust, or perform maintenance on any Victaulic piping products Wear safety glasses, hardhat, and foot protection. Failure to
HYDRAULICS. TX420 & & lower. Hydraulic Tandem Pump Removal. 4. Remove the LH side panel (Fig. 0388).
.") TX420 & 425 240000299 & lower 4. Remove the LH side panel (Fig. 0388). Hydraulic Tandem Pump Removal Note: Cleanliness is a key factor in a successful repair of any hydraulic system. Thoroughly clean all
TX420 & 425 240000299 & lower 4. Remove the LH side panel (Fig. 0388). Hydraulic Tandem Pump Removal Note: Cleanliness is a key factor in a successful repair of any hydraulic system. Thoroughly clean all
CRUSH MAINTENANCE GUIDE & TROUBLESHOOTING
 1 CRUSH MAINTENANCE GUIDE & TROUBLESHOOTING LUBRICATION Parallel Squeeze Models Only always keep parallel squeeze well lubricated to prevent seizing of the pivot and bush. Grease can be pumped into these
 Manufacturers of Patented Truck Trailering Lifts 16 W. West Hill Road Barkhamsted, CT 06063. Ph. 860-379-7772 or 1-800-450-8659 Fax 860-738-2777 WWW.TRUHITCH.COM INFO@TRUHITCH.COM 1 Read All Instructions
Installation Guide. Stowe Cargo Management System. Table of Contents
 Installation Guide Stowe Cargo Management System Table of Contents 1. Pre-Installation (Page 2) a. Notes, Installation Kit contents & Tools needed 2. How to Install the Stowe Cargo Management System (Pages
WARNING Carefully Read These Instructions Before Use
 DO NOT RETURN THIS SPRAYER TO STORE Call: 1-800-950-4458 Backpack Sprayer Use and Care Manual Manufactured for Northern Tool + Equipment Co., Inc. WARNING Carefully Read These Instructions Before Use Model
Crestline Dampening System. Installation Instructions. A.B. Dick 350, 360, 375 Single & Dual Lever Machines. X /01 Rev-A
 Crestline Dampening System Installation Instructions A.B. Dick 350, 360, 375 Single & Dual Lever Machines X88-20 01/01 Rev-A GENERAL INFORMATION ATTENTION CRESTLINE DAMPENER OWNER! Accel Graphic Systems
Product Description. Product Numbers. Warning/Caution Notations. Required Tools. Wiring. Prerequisites
 Document No. 155-302N VE 598 Electronic Flowrite Valve Field Assembly Product Description The VE 598 Electronic Valve Assemblies consist of an electronic actuator, linkage kit, and a valve body assembly.
PremAire Cadet Escape Respirator: Second Stage Regulator
 PremAire Cadet Escape Respirator: Second Stage Regulator MAINTENANCE AND REPAIR MSA 115 (L) Rev. 1 MSA 2011 Prnt. Spec. 10000005389(I) Mat. 10110430 Doc. 10110430 Item P/N Description 1 697453 O-ring,
A B C D E F. Tools Required (supplied by others)
") Page 1 of 17 Parts List Below Deck Automatic Retractable Security Cover Kit (1) Tube End Bearing Plate (A) (1) Rope Reel and Cover Drum Motor Assembly (B) (1) Cover Drum (1) Pulley Support Channel (2)
Page 1 of 17 Parts List Below Deck Automatic Retractable Security Cover Kit (1) Tube End Bearing Plate (A) (1) Rope Reel and Cover Drum Motor Assembly (B) (1) Cover Drum (1) Pulley Support Channel (2)
Installation Instructions Supertop NX Twill
 Installation Instructions Supertop NX Twill Vehicle Application: Jeep Wrangler Unlimited 2007-current Part Number 54823 Installation Tips Before you begin installing your new Supertop NX Twill, please
Installation Instructions COMPETITION/PLUS SHIFTER Ford Mustang MT82 6-Speed Manual Transmission Catalog#
 Installation Instructions COMPETITION/PLUS SHIFTER 2015-2017 Ford Mustang MT82 6-Speed Manual Transmission Catalog# 3916037 Rev. 00 WORK SAFELY! For maximum safety, perform this installation on a clean,
HURST COMP/PLUS SHIFTER 2015 Ford Mustang (Getrag MT82 six-speed manual transmission) Catalog # by Hurst Performance
 Catalog # by Hurst Performance") FORM 159 0205 07/15 HURST COMP/PLUS SHIFTER 2015 Ford Mustang (Getrag MT82 six-speed manual transmission) Catalog #391 0205 2015 by Hurst Performance Thank you for purchasing the Hurst Comp/Plus Shifter.
FORM 159 0205 07/15 HURST COMP/PLUS SHIFTER 2015 Ford Mustang (Getrag MT82 six-speed manual transmission) Catalog #391 0205 2015 by Hurst Performance Thank you for purchasing the Hurst Comp/Plus Shifter.
Service Manual Air Tech Second Stage
 Service Manual Air Tech Second Stage Copyright 2002, Cressi-sub Revised 3/2002 2 Air Tech Second Stage Service Manual Contents BEFORE STARTING... 3 DISASSEMBLY... 3 PARTS CLEANING AND LUBRICATION... 9
TCI FastGate Shifter Installation Instructions
 151 INDUSTRIAL DRIVE ASHLAND, MISSISSIPPI 38603 http://www.tciauto.com TELEPHONE: 662-224-8972 FAX LINE: 662-224-8255 E-MAIL: tech@tciauto.com TCI 616541 FastGate Shifter Installation Instructions The
Installation Instructions Street Bandit Shifter
 Installation Instructions Street Bandit Shifter Part Number 80797 (see www.bmracing.com for the latest technical product information) 2006, 2000 by B&M Racing and Performance Products The B&M Street Bandit
Ausbinder V-3 User Manual. Ausbinder V-3 Care and Instruction Manual
 Care and Instruction Manual Ausbinder S2 Instruction Page 1 8/31/2010 STEP.1 Get familiar with the D. F. E. Observe these parts and positioning of the Ausbinder V-3 Handle should sit in the upright stowing
INSTALLATION INSTRUCTIONS FOR DSP9600/9100 WHEEL BALANCER
 Form 5063T, 06-05 Supersedes Form 5063T, 02-04 INSTALLATION INSTRUCTIONS FOR DSP9600/9100 WHEEL BALANCER This document provides the information needed to install the DSP9600/9100 Wheel Balancer. NOTE:
6 8 Deringer 20/30 Maintenance Instructions READ INSTRUCTIONS IN FULL BEFORE INSTALLATION. QUESTIONS? CALL M-F 8:00 AM 4:30 PM PST
 6 8 eringer 20/30 Maintenance Instructions RE INSTRUTIONS IN FULL EFORE INSTLLTION. QUESTIONS? LL 916-760-4524 M-F 8:00 M 4:30 PM PST t ackflow irect we are committed to making our products as easy to
AIRGO MISTING SYSTEM MAINTENANCE
 AIRGO MISTING SYSTEM MAINTENANCE WARNING: Disconnect the fan and misting pump from power before servicing. Service schedule Schedule Procedure 50 hours of operation Initial oil change 300 hours of operation,500
44 and 52 Twin Bagger 100 Series Z Master
 Form No. 7 87 and 5 Twin Bagger 00 Series Z Master Model No. 7855 Serial No. 000000 and Up Operator s Manual English (CE) Contents Page Introduction................................ Safety.....................................
Photo 1. Shift pattern gate plate
 Installation Instructions MAGNUM GRIP STREET BANDIT SHIFTER Fits: GM, Chrysler, and Ford Automatic Transmissions See Application Guide for Specific Vehicles Catalog # 81050 WORK SAFELY! For maximum safety,
Z-Gate Universal Shifter
 Installation Instructions Z-Gate Universal Shifter Fits: GM, Ford, Lincoln and Chrysler Transmissions See Application Guide for Specific Applications Part #80681 Rev 06/01/2018 WORK SAFELY! For maximum
G3 UHT TRANSMISSION. G3 UHT Transmission Replacement. G3 UHT Transmission Removal
 G3 UHT Transmission Replacement The following procedures cover replacing the left hand UHT Transmission. The same procedures can be followed to remove the right hand UHT Transmission. 5. Raise the seat
A B C D E F. b.tools Required (supplied by others) 3/16" Drill Bit 3/8" Wrench Phillips Head Screwdriver
 3/16 Drill Bit 3/8 Wrench Phillips Head Screwdriver") Page 1 of 13 5E.1 Parts List a. Below Deck Automatic Retractable Security Cover Kit (1) Tube End Bearing Plate (A) (1) Rope Reel with Motor Attached (B) (1) Rope Reel Cover (C) (1) Cover Drum (1) Cover
Page 1 of 13 5E.1 Parts List a. Below Deck Automatic Retractable Security Cover Kit (1) Tube End Bearing Plate (A) (1) Rope Reel with Motor Attached (B) (1) Rope Reel Cover (C) (1) Cover Drum (1) Cover
FD 342 Document Folder
 FD 342 Document Folder 6/2010 OPERATOR MANUAL FIRST EDITION TABLE OF CONTENTS SUBJECT PAGE DESCRIPTION 1 SPECIFICATIONS 1 UNPACKING 2 SETUP 2 CONTROL PANEL 3 OPERATION 4 SETTING CUSTOM FOLDS 5 BATCH COUNTING
Service Manual. Balanced Piston First Stage
 Service Manual Balanced Piston First Stage Copyright 2002, Cressi-sub Revised 3/2002 2 Balanced Piston First Stage Service Manual Contents BEFORE STARTING... 3 DISASSEMBLY... 3 PARTS CLEANING AND LUBRICATION...
Fast Master Products, Inc. P.O. Box 654, Katy Texas Tel: (281) Fax: (281)
 Fax: (281)") Fast Master Products, Inc. P.O. Box 654, Katy Texas 77492-0654 Tel: (281) 391-6750 Fax: (281) 391-6760 Email: info@cruiserlift.com Easy installation and removal from the pick-up bed. Compatible with all
Fast Master Products, Inc. P.O. Box 654, Katy Texas 77492-0654 Tel: (281) 391-6750 Fax: (281) 391-6760 Email: info@cruiserlift.com Easy installation and removal from the pick-up bed. Compatible with all
INSTALLATION INSTRUCTIONS
 TM WEIGHTLIFTER Tailgates By THIEMAN TWL 125, 16, 20 INSTALLATION INSTRUCTIONS! IMPORTANT! KEEP IN VEHICLE! PLEASE READ AND UNDERSTAND THE CONTENTS OF THIS MANUAL BEFORE OPERATING THE EQUIPMENT. NTEA T
JARVIS. Model 30CL-1 AND 30CL-3 Hock Cutter and Dehorner. 30CL-1 Hock Cutter
 Model 30CL-1 AND 30CL-3 Hock Cutter and Dehorner 30CL-1 Hock Cutter with Leg Grabber 30CL-1 Hock Cutter 30CL-3 Dehorner Equipment Selection 30CL-1 Sheep Head Dropper Order Number 30CL-1 Hock Cutter 30CL-1
TT-12 OWNERS MANUAL/PARTS LIST
 TOPLIFTER Tailgates By THIEMAN TT-12 OWNERS MANUAL/PARTS LIST SHOWN WITH OPTIONAL 2 PC. ALUMINUM PLATFORM! IMPORTANT! KEEP IN VEHICLE! PLEASE READ AND UNDERSTAND THE CONTENTS OF THIS MANUAL BEFORE OPERATING
Installation Instructions Series 78-B/FHA Hold Open
 Installation Instructions Series 78-B/FHA Hold Open Traditional Style Door Closers Read these instructions before proceeding with the installation. Make sure that the door opens the full angle desired
Installation Instructions Z-Gate Shifter
 Installation Instructions Z-Gate Shifter Part Number 80681 1998, 2001 by B&M Racing and Performance Products The B&M Z-Gate shifter can be used in vehicles equipped with most popular three speed automatic
TORQUE SPECIFICATIONS (ALPHABETICAL ORDER)
") POWER TRIN HYDROSTTI SPEIFITIONS SPEIFITIONS Transaxle: Type..............................................Tuff Torq K51 Transaxle xle Torque Output: Rated...............................................
POWER TRIN HYDROSTTI SPEIFITIONS SPEIFITIONS Transaxle: Type..............................................Tuff Torq K51 Transaxle xle Torque Output: Rated...............................................
5 Removal and replacement
 5 Removal and replacement This chapter describes the removal and replacement of field-replaceable units (FRUs) only. Removal and replacement strategy User-replaceable parts Covers Internal assemblies ENWW
Torqueflite Manual/Automatic Valve Body
 TCI 122400 Torqueflite Manual/Automatic Valve Body This valve body can be installed in a few hours by carefully following directions. Read all instructions first to familiarize yourself with the parts
1 Green Pressure Regulator Spring Automatic transmissions operate at temperatures between 150ºF and
 Installation Instructions for 603107 Valve Body Kit C-4 1970 & Later Tools Required Speed Handle or Ratchet 3/8 Drive 1/2 Socket 3/8 Drive 7/16 Socket 3/8 Drive 5/16 Socket 3/8 Drive Small Screwdriver
AmTryke Adult Recumbent Model HP1000 #50-HC-1000
 AmTryke Adult Recumbent Model HP1000 #50-HC-1000 TOOLS Needed for Assembly 5 mm Allen Wrench 8 mm Socket or Wrench 10 mm Socket or Wrench 14 mm Socket or Wrench 15 mm Socket or Wrench 22 mm Socket or Adjustable
Firehawk Second Stage Regulator Fire Service
 Firehawk Second Stage Regulator Fire Service MAINTENANCE AND REPAIR TAL 1701 (L) Rev. 2 MSA 2017 Prnt. Spec. 10000005389(I) Mat. 10147454 Doc. 10147454 TAL 1701 (L) Rev. 2-10147454 2 NON-CBRN FIREHAWK
OWNER'S MANUAL FOR 135LB STAINLESS STEEL SPREADER SNOWRATOR
 2017 OWNER'S MANUAL FOR 135LB STAINLESS STEEL SPREADER SNOWRATOR AES L. T. RICH PRODUCTS 11/16/2017 TABLE OF CONTENTS 1.0 SHIPPING CONTENTS... 2 2.0 IMPORTANT INFORMATION... 3 2.1 ABOUT THIS MANUAL...
Installation Instructions
 Roller & Roman Shades Lifting Systems Cassette and Sure-Lift EZ Lift Cordless EZ Pull Standard and Cassette R-Series Clutch SL-Series Clutch Spring Roller Fascias and Valances 3, 4 Flat and 4 Curved Fascia
PORTABLE Q-CATCH 86 SERIES CHUTE, ALLEY & TUB PRODUCT MANUAL arrowquip.com
 PORTABLE Q-CATCH 86 SERIES CHUTE, ALLEY & TUB PRODUCT MANUAL 1-877-275-6075 cs@arrowquip.com arrowquip.com CONTENTS Safety Precautions 1 Risk Assessment 2 Q-Catch 86 Series Head Gate Assembly 3 Operating
Rear Roll-up Door. W-Series
 Door, W-Series Rear Roll-up Rear Roll-up Door W-Series Service Guide Do NOT use the rear door pull strap to support yourself when entering or exiting the rear. The strap can break or pull the door down
OPERATION AND PARTS MANUAL
 OPERATION AND PARTS MANUAL MODEL NUMBER : PART NUMBER : GTL 1110 1900-0510 SERIAL NUMBER : BAYNE MACHINE WORKS, INC. PHONE: (864) 288-3877 910 FORK SHOALS ROAD TOLL FREE: (800) 535-2671 GREENVILLE S.C.,
Owner's Manual. Automatic Headgate Model AHG2011
 Owner's Manual utomatic Headgate Model HG2011 PBZ LLC 295 Wood Corner Rd Lititz P 17543 www.zimmermanequipment.com (717) 738-7365 Paul B Zimmerman Inc. Company Form OM0010 Rev. Date 8/11 Zimmerman Equipment
Universal Super Shield & Ultimate Aluminum w/electric Drive Conversion Kits , , Installation Instructions
 WLH 09/19/16 111-0215 & 112-0215 607-0026 For technical support call us at (800) 368-3075 or visit our website at PullTarps.com. TABLE OF CONTENTS ***Assembly*** Conversion Kit-Universal Super Shield ***Wiring,
SECTION G2: CABLE PROCESSOR MODULE MAINTENANCE
 SECTION G2: CABLE PROCESSOR MODULE MAINTENANCE Cable Processor Module overview WARNING! When tipping the Cable Processor Module back, (after removing the toggle arm pin), use extreme caution not to drop
Installation Instructions Pro Stick Shifter
 Installation Instructions Pro Stick Shifter Part Number 80701, 80702 & 80706 2012, 2010, 2008, 2001, 1998 by B&M Racing and Performance Products The B&M Pro Stick shifter #80701 and #80706 comes equipped
1989 Jeep Cherokee. STEERING COLUMN' '1989 STEERING Jeep Steering Columns STEERING COLUMN STEERING Jeep Steering Columns
 STEERING COLUMN 1989 STEERING Jeep Steering Columns DESCRIPTION All models use collapsible steering columns. All columns have integral ignition switch and locking device. Optional tilt wheel is available
TO BE USED ONLY BY AUTHORISED PERSONNEL
 SERVICE MANUAL for BOSTON (MG 3000 STD) SANTA FE (CALGARY, MG 3000 FLS) & ODESSA (PG 3000) GAS FIRES TO BE USED ONLY BY AUTHORISED PERSONNEL PART No 588402 Issue E Nov. 2001 CONTENTS TROUBLESHOOTING Page
Installation Instructions
 Quick-Mount Visual Instructions for Quick-Mount Visual Instructions 1. Rotate the damper to its failsafe position. If the shaft rotates counterclockwise, mount the CCW side of the actuator out. If it rotates
HD 7700 Setup & Operator Manual
 HD 7700 Setup & Operator Manual Issue 1 December, 01 Performance Design Inc. The Heavy Duty Ultima (HD 7700) electric punch has been designed to punch most any job that may pass through your bindery or
Range Road RR20T Firewood Processor. Crated Unit Assembly Manual
 Range Road RR20T Firewood Processor Crated Unit Assembly Manual Crated Unit 1.) Undo 8-18mm x 19mm Nuts and bolts, 2 on each leg of top frame 2.) Lift top of Metal crate off and move out of work area.
Maintenance Information
 Form 16575334 Edition 1 April 2005 Electric Screwdrivers EL, EP and ET 34V DC Series Maintenance Information Save These Instructions WARNING Maintenance procedures have the potential for severe shock hazard
READ AND FOLLOW ALL SAFETY INSTRUCTIONS SAVE THESE INSTRUCTIONS
 7.5 Swift Lock Ready Shape Tree (Patent Pending) Instructions IMPORTANT SAFETY INSTRUCTIONS When using electrical products, basic precautions should always be followed including the following: READ AND
Short Shifter Installation Instructions For Miata, 6-speed Manual Transmission
 Short Shifter Installation Instructions For 2006-15 Miata, 6-speed Manual Transmission PART# 994-060 Required tools: 10mm deep socket Long extension Ratchet Small flathead screwdriver Phillips-head screwdriver
LoD Offroad. Jeep JK Door Linked Rear Bumper with Tire Carrier Installation Instructions
 LoD Offroad Jeep JK Door Linked Rear Bumper with Tire Carrier Installation Instructions Please read through the instructions before beginning any part of the installation process. Packaging List: 1-Rear
Wheel Horse. 52 Mowers. Model No & Up Model No & Up. Operator s Manual
 FORM NO. 9-567 Wheel Horse 5 Mowers for Lawn & Garden Tractors Model No. 7880 890000 & Up Model No. 7885 890000 & Up Operator s Manual IMPORTANT: Read this manual carefully. It contains information about
Owner s Manual. (Keep in glove compartment for quick reference) Rollx Vans Power Door Vans v1.3
 Rollx Vans Power Door Vans v1.3") Owner s Manual (Keep in glove compartment for quick reference) Rollx Vans Power Door Vans v1.3 Table Of Contents Warranty Procedures.................. 4 Warranty Coverage.................... 5 Preventative
Owner s Manual (Keep in glove compartment for quick reference) Rollx Vans Power Door Vans v1.3 Table Of Contents Warranty Procedures.................. 4 Warranty Coverage.................... 5 Preventative
Multistrada (MTS) Tank Installation Notes. Tools Required. Phase 1: Remove Fairings. Phase 2: Remove Fuel Tank
 Tank Installation Notes. Tools Required. Phase 1: Remove Fairings. Phase 2: Remove Fuel Tank") The California Cycleworks MTS tank provides an aftermarket alternative to the OEM nylon fuel tanks as used on aircooled Desmodue Ducati Multistrada 1100, 1000, and 620 models. This fuel tank is NOT for
The California Cycleworks MTS tank provides an aftermarket alternative to the OEM nylon fuel tanks as used on aircooled Desmodue Ducati Multistrada 1100, 1000, and 620 models. This fuel tank is NOT for
Stowe Cargo Management System
 Installation Guide Stowe Cargo Management System Table of Contents 1. Pre-Installation (Page 2) a. Notes, Installation Kit contents & Tools needed 2. How to Install the Stowe Cargo Management System (Pages
JARVIS. Model 30CL-1 and 30CL-3 Hock Cutter and Dehorner
 Model 30CL-1 and 30CL-3 Hock Cutter and Dehorner 30CL--1 Hock Cutter 30CL--1 Pistol Grip 30CL--3 Dehorner EQUIPMENT SELECTION... Ordering No. 30CL--1 Hock Cutter... 4025013 30CL--1 Hock Cutter with Grabber
Reproduction. Not for. Dealer Setup & Adjustment Instructions. Evolution Series - 19HP, 20HP & 27HP - 36 & 48 Mower Deck
 Dealer Setup & djustment Instructions Ferris Evolution Series 19HP Kawasaki 20HP Kawasaki 27HP Kawasaki 36 Mower Deck 48 Mower Deck Evolution Series - 19HP, 20HP & 27HP - 36 & 48 Mower Deck This Dealer
READ AND FOLLOW ALL SAFETY INSTRUCTIONS SAVE THESE INSTRUCTIONS
 5 Swift Lock Ready Shape Tree (Patent Pending) Instructions IMPORTANT SAFETY INSTRUCTIONS When using electrical products, basic precautions should always be followed including the following: READ AND FOLLOW
Maintenance Information
 45530136 Edition 1 July 2008 Electric Screwdrivers EL 24V DC Series Maintenance Information Save These Instructions WARNING Always wear eye protection when operating or performing maintenance on this tool.
Troubleshooting Common Issues - Centrifugal Pumps and Controls
 roubleshooting ommon Issues - entrifugal Pumps and ontrols roubleshooting ommon Issues - entrifugal Pumps and ontrols his guide was developed to assist you in troubleshooting common centrifugal pump issues
Q-Catch 400 series Squeeze Chute Manual 2013
 Contents General Description of Product Warranty Safety Precautions Assembly of squeeze chute Assembling the Q-Catch Mechanism Customizing the dropdown Handle Operating headgate Recommended Maintenance
SD Bendix E-10PR Retarder Control Brake Valve DESCRIPTION. OPERATION - Refer to Figure 2
 SD-03-832 Bendix E-10PR Retarder Control Brake Valve MOUNTING PLATE SUPPLY 4 PORTS ELECTRICAL AUXILIARY DESCRIPTION TREADLE RETARDER CONTROL SECTION EXHAUST DELIVERY 4 PORTS FIGURE 1 - E-10PR RETARDER
: 1250 gpm in the deck mode : 800 gpm while operating in the ground base - Dual Inlet : 1000 gpm while operating in the ground base - Single Inlet
 APOLLO HI-RISER MONITOR STYLE 3433/3431 INSTALLATION, OPERATING, AND MAINTENANCE INSTRUCTIONS The following is intended to provide the basic instructions for installation, operation and maintenance of
HARD FOLDING TONNEAU COVER INSTALLATION GUIDE
 HARD FOLDING TONNEAU COVER INSTALLATION GUIDE GUIDE FOR FOLD-A-COVER FD3701, FD3702 TRUCK MODEL(S): 1998-2007 FORD F-150 NOTES TO INSTALLER: 70 F when installing. surface. Some trimming of bed liner may
4500 Series Electric Exit Devices Request to Exit (RX) Installation Instruction Grade 1 I-ED00368
 Installation Instruction Grade 1 I-ED00368") 4500 Series Electric Exit Devices Request to Exit (RX) Installation Instruction Grade 1 I-ED00368 DEVICES COVERED IN THESE INSTRUCTIONS: RX Request to Exit ELECTRICAL SPECIFICATIONS Note: SPDT mechanical
4500 Series Electric Exit Devices Request to Exit (RX) Installation Instruction Grade 1 I-ED00368 DEVICES COVERED IN THESE INSTRUCTIONS: RX Request to Exit ELECTRICAL SPECIFICATIONS Note: SPDT mechanical
Oreck Magnesium Series Service Manual. The Oreck Manufacturing Company
 Oreck Magnesium Series Service Manual The Oreck Manufacturing Company 08/2012 10/2011 The Oreck Manufacturing Company Contents Covering all Magnesium Upright Models Including: LW100, LW125, LW1000, AND
Service Manual Air Plus Second Stage
 Service Manual Air Plus Second Stage Includes XS Series Second Stage Copyright 2002, Cressi-sub Revised 3/2002 2 Air Plus Second Stage Service Manual Contents BEFORE STARTING... 3 DISASSEMBLY... 3 PARTS
EAVERLINE. Operator s Manual. Series 5 Feed Cart Models 521, 525, 531 & 537. Weaverline, LLC - Churchtown, PA 17555
 EAVERLINE Operator s Manual Series 5 Feed Cart Models 521, 525, 531 & 537 CAUTION: Drive at a speed slow enough to ensure safety and complete control at all times. CAUTION: Know the controls and how to
L/6.7L DODGE CUMMINS
 6/15/2016 #1050310D 2005-09 5.9/6.7 Dodge Cummins FlowMAX Lift Pump Kit (I-00170) - 1-2005-09 5.9L/6.7L DODGE CUMMINS BD FLOWMAX LIFT PUMP KIT Installation Instructions P/N # 1050310D PLEASE READ ALL INSTRUCTIONS
PLUGR AERATOR MANUAL including:
 by PLUGR is a registered trademark of SourceOne Inc., a subsidiary of IMSCORP, Lincoln, NE. 603 L Street Lincoln, NE 68508 (888) 418-9065 Fax (402) 474-6604 Web Site: www.plugr.com Email: plugr sales@sourceonex.com
TECHNICAL INFORMATION
 TECHNICAL INFORMATION Model No. Description SP6000 Plunge Cut Circular Saw 165mm (6-1/2") CONCEPT AND MAIN APPLICATIONS Model SP6000 is the first Makita plunge cut saw. Features great conveniences such
Installation Instructions For Motor Control Center (MCC) Units
 Units") s Page 1 of 8 Installation Instructions December, 2013 Installation Instructions For Motor Control Center (MCC) Units Hazardous voltage. Will cause death or serious injury. Always de-energize and ground
s Page 1 of 8 Installation Instructions December, 2013 Installation Instructions For Motor Control Center (MCC) Units Hazardous voltage. Will cause death or serious injury. Always de-energize and ground
SECTION 4 - FUEL SYSTEMS AND CARBURETION
 SECTION - FUEL SYSTEMS AND CARBURETION FUEL SYSTEMS - - - - - - - - - - - - - - - - - - - - - - - - - - - - - - - - - - - - - - - - - - - - - - - - - - - - - - - - - - - - - -62 FUEL PUMP - - - - - - -
INSTALLATION INSTRUCTIONS South Highway 11 Westminster, SC Toll Free (888) (864) FAX (864)
 (864) FAX (864)") These instructions apply to the servicing of the Lift Technologies MaxiMizer Integral Sideshifters Cylinder Head. WARNING! Unless the steps in the following Installation Instructions are properly followed
These instructions apply to the servicing of the Lift Technologies MaxiMizer Integral Sideshifters Cylinder Head. WARNING! Unless the steps in the following Installation Instructions are properly followed
Type 657 Diaphragm Actuator Sizes and 87
 Instruction Manual Form 1900 January 2000 Type 657-70 & 87 Type 657 Diaphragm Actuator Sizes 30-70 and 87 Contents Introduction............................... 1 Scope of Manual.............................
2 ½ 4 Deringer 40/50 Maintenance Instructions READ INSTRUCTIONS IN FULL BEFORE INSTALLATION. QUESTIONS? CALL M-F 8:00 AM 4:30 PM PST
 2 ½ 4 eringer 40/50 Maintenance Instructions RE INSTRUTIONS IN FULL EFORE INSTLLTION. QUESTIONS? LL 916-760-4524 M-F 8:00 M 4:30 PM PST t ackflow irect we are committed to making our products as easy to
Troubleshooting Common Issues - Centrifugal Pumps and Controls
 roubleshooting ommon Issues - entrifugal Pumps and ontrols roubleshooting ommon Issues - entrifugal Pumps and ontrols his guide was developed to assist you in troubleshooting common centrifugal pump issues
Recommended Maintenance Procedures for the Cutters Edge MULTI-CUT 2100 Series Fire Rescue Saw
 Recommended Maintenance Procedures for the Cutters Edge MULTI-CUT 2100 Series Fire Rescue Saw 2 Outer section Adjustment Knob Remove and Clean ToolLess Guard/Depth Gauge Unscrew Adjustment Knob, remove
Lifting height 5.5" - 72" with adapters " Height overall 165" Width between columns 122" Drive through 109" Width overall 151.
 Model Number TP12KC-D Capacity 12,000 lbs. Lifting height 5.5" - 72" with adapters 79.625" Height overall 165" Width between columns 122" Drive through 109" Width overall 151.125" Arm extension 37.5" -
INSTALLATION, OPERATION AND MAINTENANCE MANUAL
 INSTALLATION, OPERATION AND MAINTENANCE MANUAL LUDLOW SERIES FIGURE 350-W 3 to 24 Lever & Weight Air-Cushioned Swing Check Valves TABLE OF CONTENTS Introduction. 1 Description of Operation... 1 Receiving
B o d y S t r u c t u r e
 B o d y S t r u c t u r e Body Glass Glass replacement should meet standards in specification FMVSS 205 and 217. [Warning] When replacing broken or damaged glass, use extreme care at all times to prevent
PIKE DUAL AIR PICTORIAL INSTRUCTIONS. INSTRUCTIONS FOR INSTALLING ENDURO FORK SEALS AND CHANGING SEMI-BATH OIL in RockShox PIKE Dual Air Forks
 INSTRUCTIONS FOR INSTALLING ENDURO FORK SEALS AND CHANGING SEMI-BATH OIL in RockShox PIKE Dual Air Forks RECOMMENDED PARTS AND TOOLS -Bicycle work stand -Plastic bucket/drain pan -5mm Allen wrench -DH