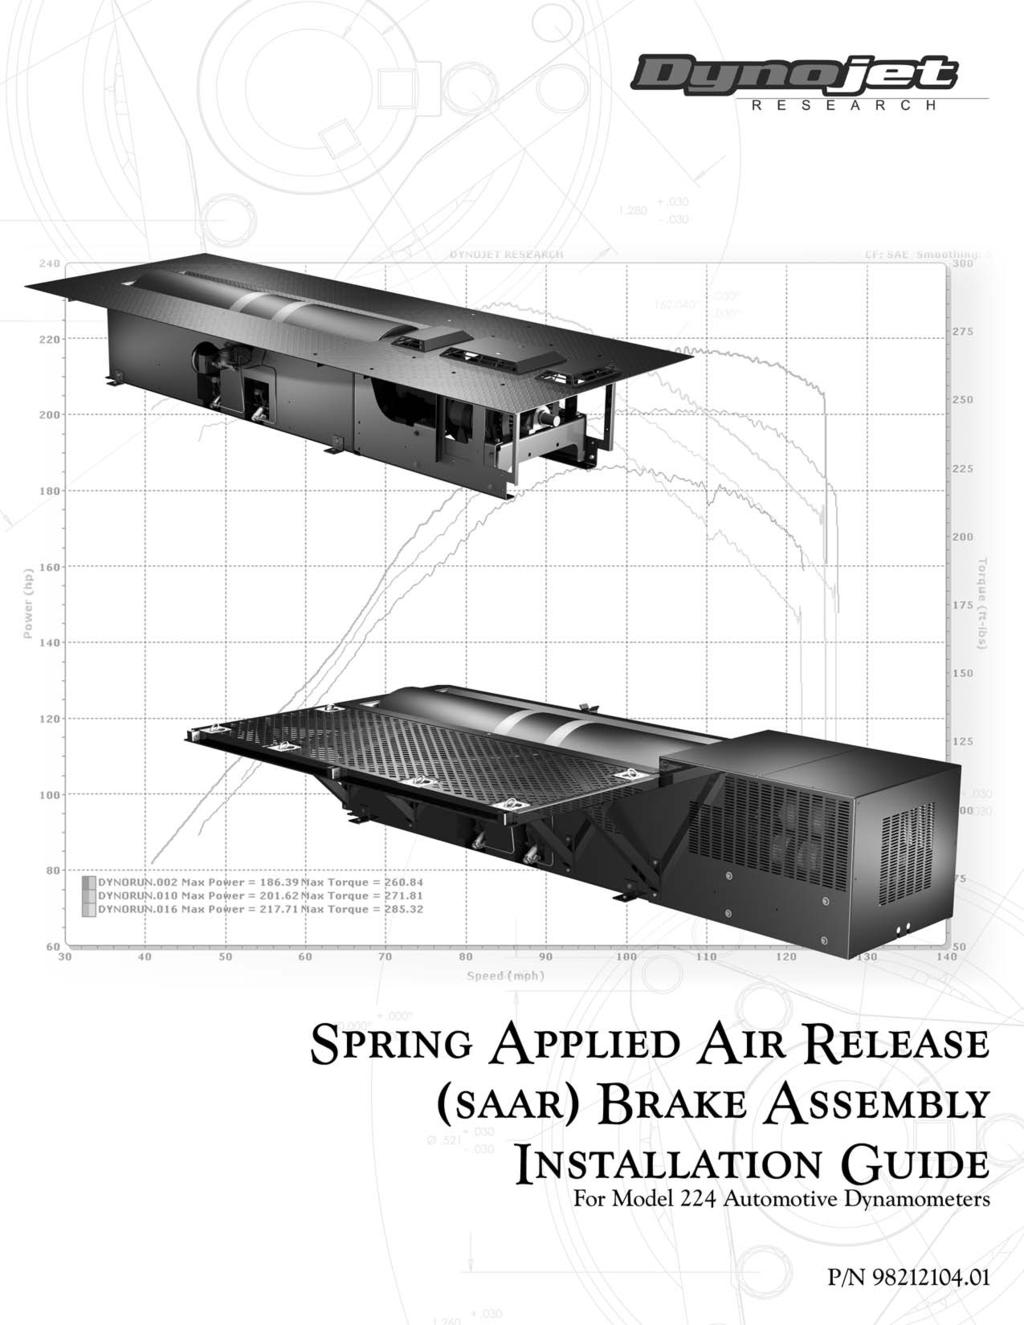
2006 Dynojet Research, Inc. All Rights Reserved. Spring Applied Air Release (SAAR) Brake Assembly Installation
|
|
|
- Catherine Beasley
- 5 years ago
- Views:
Transcription
1
2 2006 Dynojet Research, Inc. All Rights Reserved. This manual is copyrighted by Dynojet Research, Inc., hereafter referred to as Dynojet, and all rights are reserved. This manual, as well as the software described in it, is furnished under license and may only be used or copied in accordance with the terms of such license. This manual is furnished for informational use only, is subject to change without notice, and should not be construed as a commitment by Dynojet. Dynojet assumes no responsibility or liability for any error or inaccuracies that may appear in this manual. Except as permitted by such license, no part of this manual may be reproduced, stored in a retrieval system, or transmitted, in any form or by any means, electronic, mechanical, recording, or otherwise, without the prior written permission of Dynojet. The Dynojet logo is a trademark of Dynojet Research, Inc. Any trademarks, trade names, service marks, or service names owned or registered by any other company and used in this guide are the property of their respective companies. Dynojet Research, Inc., 2191 Mendenhall Drive, North Las Vegas, Nevada 89081, USA. Printed in USA. Part Number: Version 01 (06/06)
3 TABLE OF CONTENTS Spring Applied Air Release (SAAR) Brake Assembly Installation Introduction Technical Support The Hydraulic Brake Assembly Preparing to Remove the Hydraulic Brake Removing the Hydraulic Brake Assembly Installing the SAAR Brake Assembly Installing the Brake Weldment and Brake Shoes Installing the Air Can Mount and Tube Installing the Air Can Connecting to the Breakout Board Connecting to the Shop Air Fastening the Air Can Powering up and Testing Four Wheel Drive Dynos Upgrading the Moveable 224 Dyno Connecting the Movement Board and Shop Air i
4
. To ensure safety and accuracy in the procedures, perform the procedures as they are described.")
5 SPRING APPLIED AIR RELEASE (SAAR) BRAKE ASSEMBLY INSTALLATION This document provides instructions for installing the Spring Applied Air Release Brake Assembly (P/N ) as an upgrade to model 224 Automotive Dynamometers (dynos). To ensure safety and accuracy in the procedures, perform the procedures as they are described. Document Part Number: Version 1 Last Updated:
6 Introduction INTRODUCTION The Spring Applied Air Release (SAAR) Brake Assembly (P/N ) may be used to replace the hydraulic brake on model 224 dynamometers. This guide provides instructions for removing the hydraulic brake and installing the SAAR brake assembly. The SAAR brake provides braking to the dyno drum through the use of a spring applied brake mechanism. By default, the brake shoes are pressed against the dyno drum by the spring mechanism. Air applied to the SAAR brake moves the brake shoes away from the drum, releasing the brake. The SAAR brake provides the following advantages over the previous hydraulic brake: Vehicles are easier to load since the SAAR brake is applied when the dyno is idle The SAAR brake provides braking in the event of a loss of power or an air supply failure. Brake maintenance is reduced as the SAAR brake does not need the filling and bleeding required for hydraulic brakes. For more detailed information on the 224 dyno, refer to the Installation Guide for Model 224 Above Ground Automotive Dynamometers (P/N ) or the Installation Guide for In Ground Model 224 Automotive Dynamometers (P/N ). CONVENTIONS USED IN THIS MANUAL The conventions used in this manual are designed to protect both the user and the equipment. example of convention description The Warning icon indicates potential harm to the person performing a procedure and/or the dynamometer equipment. TECHNICAL SUPPORT For assistance, please contact Dynojet Technical Support at , or write to Dynojet Research at 2191 Mendenhall Drive, North Las Vegas, NV Visit us on the World Wide Web at where Dynojet provides state of the art technical support, on-line shopping and press releases about our latest product line. Do not repair or replace any part of the dynamometer or attempt any servicing unless specifically recommended in published user-repair instructions that you understand and have the skills to carry out. 2
7 Introduction Spring Applied Brake Upgrade, 224 Stock Code Description Quantity Mount, Air Can, Upgrade, Brake Arm, Brake Shoe Retainer, Brake Actuating Tube, Hairpin Cotter, 7/16"-3/4" Clevis Pin, 1/2" x 4-1/2" Air Canister, Type R Bolt, 3/8-16 x 1-1/2", Flange-Hex Brake Holder Weldment, Brake Solenoid Assembly, brake solenoid assembly 3/8-16 x 1-1/2" bolt air can mount air canister brake arm brake shoe retainer brake holder weldment hairpin cotter brake actuating tube AB090 clevis pin Figure 1: Spring Applied Brake Upgrade Version 1 3
8 The Hydraulic Brake Assembly THE HYDRAULIC BRAKE ASSEMBLY When upgrading to the SAAR Brake Assembly, you will remove the previously installed hydraulic braking system shown in Figure 2. In order to minimize your exposure to the fluid used in the hydraulic brake assembly, you will remove the major portion of the assembly as one piece. Follow manufacturer precautions for handling brake fluid used in the hydraulic braking system. Do not breathe vapors, mist, fume or dust. Do not get in eyes, on skin or clothing. Wear protective gloves or clothing if exposure conditions warrant. Wash thoroughly after handling. Launder contaminated clothing before reuse. Use only with adequate ventilation. air pressure regulator air can mounting bracket BR011 master cylinder hydraulic line solenoid assembly spring slave cylinder brake clevis pin slave cylinder Figure 2: Existing Hydraulic Braking System 4
9 The Hydraulic Brake Assembly PREPARING TO REMOVE THE HYDRAULIC BRAKE 1 Turn off the power and unplug the dyno electronics and observe all applicable safety procedures. 2 Shut off and release the air pressure to the air pressure regulator. 3 Remove covers as necessary to provide yourself good access to the braking components. Refer to your dyno manuals, if necessary, to review removing the covers. You can download copies of the manuals for your dyno from 4 Disconnect the 3/8-inch air hose from the fitting on the pressure regulator, or cut off the existing air hose close to the fitting on the pressure regulator. Note: Leave the air hose with the dyno as you will reconnect it to the new pressure regulator for the SAAR Brake Assembly. Version 1 5
10 The Hydraulic Brake Assembly 5 On standard dynos the brake control wiring is connected to the breakout board. The breakout board is located on the dyno as shown in Figure 3. Disconnect the two wires from the wiring block labeled BRAKE on the Breakout board, as shown in Figure 3. These two wires connect the brake solenoid. It should now be disconnected. Note: If you are installing the upgrade on a four-wheel drive dyno, see Four Wheel Drive Dynos on page 20 for the connections of the brake solenoid to the movement board. Never operate the dynamometer when the brake is not functioning. breakout board AD167 BRAKE disconnect brake assembly wiring Figure 3: Disconnect the Hydraulic Brake Control Wiring from the Breakout Board 6
11 The Hydraulic Brake Assembly REMOVING THE HYDRAULIC BRAKE ASSEMBLY 1 Remove the four springs holding the brake head pivot pin to the brake frame rail. disconnect air hose or cut air hose close to solenoid BR012 brake head pivot pin brake frame rail remove four springs Figure 4: Remove the Springs 2 Use a large flat blade screw driver or small pry bar to pry the brake shoe retainer out of the brake holder. pry the brake shoe retainer out of the brake holder brake holder BR019 Figure 5: Remove the Brake Shoe Retainer Version 1 7
12 The Hydraulic Brake Assembly 3 Remove the brake shoes from the assembly by sliding them to the outside. Set the brake shoes aside to be reused with the SAAR Brake Assembly. BR015 slide brake shoes toward the outside and remove Figure 6: Remove the Brake Shoes 4 Remove the cotter pin from the brake clevis pin on both brakes. cotter pin remove cotter pin slide brake clevis pin BR022 BR020 BR021 Figure 7: Remove the Cotter Pins Holding the Brake Hanger Pivots 8
13 The Hydraulic Brake Assembly 5 Slide the brake clevis pin into the square recesses provided. The brake clevis pin will only slide in one direction. You may need to slide your brake clevis pin opposite to the direction shown in Figure 8 if your brake clevis pin faces the other way. After you remove the hydraulic brake assembly, you will reach in to remove the pivot pins from inside the square recesses. BR016 slide brake clevis pin into square recess Figure 8: Slide the Brake Clevis Pin into the Square Recess Version 1 9
14 The Hydraulic Brake Assembly 6 Remove four lower bolts holding the slave cylinders and brake head assembly to the brake frame rail. 7 Remove the four bolts holding the master cylinder bracket to the dyno, supporting the hydraulic brake assembly during the final removal of the bolts. master cylinder bracket BR017 remove four bolts slave cylinder slave cylinder remove bolts and washers Figure 9: Remove Bolts 10
15 The Hydraulic Brake Assembly 8 The hydraulic brake assembly should now be completely free. Remove it from the dyno. 9 Extract the brake clevis pins from the square recesses and set them aside.. Note: You will reuse the brake shoes and the two clevis pins. The other parts can be appropriately discarded. BR018 remove hydraulic brake assembly Figure 10: Remove the Hydraulic Brake Assembly Version 1 11
16 Installing the SAAR Brake Assembly INSTALLING THE SAAR BRAKE ASSEMBLY The following instructions are for installing the Spring Applied Air Brake Assembly on a 224 above-ground or pit dyno. In the next steps you will: attach the brake holder weldment using the brake clevis pin you removed from the hydraulic brake assembly bolt the mounting bracket to the dyno slide the tube into place mount the air can assembly make the final connections Note: If you have a 4 wheel drive dyno model or , refer to additional instructions for Four Wheel Drive Dynos on page 20. INSTALLING THE BRAKE WELDMENT AND BRAKE SHOES 1 Slide the brake clevis pins into the square recesses as shown in Figure 11. Face the head end of the pivot toward the outside, so that the brake clevis pin is partially inside the recess and then slide the clevis pin partially into the mounting bracket. The hole on the end of the brake clevis pin, which is designed to accept the hairpin cotter, should be pointed toward the center of the dyno. Do not fully insert the brake clevis pin until after you slide the brake weldment into position 2 Position the brake weldment so that the holes on the arms are aligned to accept the brake clevis pin. slide brake clevis pin into position BR024 brake holder weldment brake arms Figure 11: Slide Brake Weldment into Position 12
17 Installing the SAAR Brake Assembly 3 Insert the brake clevis pin through the holes as shown in Figure Install the hairpin cotter. 5 Use the same method to install the remaining brake weldment with arms, pivot, and hairpin cotter. head end of brake clevis pin BR025 insert hairpin cotter Figure 12: Connect the Brake Weldment and Arms using the Brake Clevis Pin 6 Slide the brake shoe into position and thread the brake shoe retainer into position. (Now is a good time to check for wear and use new brake shoes if necessary, P/N ) brake shoe retainer brake shoe retainer installed brake shoe installed brake shoe BR031 Figure 13: Install the Brake Shoes Version 1 13
18 Installing the SAAR Brake Assembly INSTALLING THE AIR CAN MOUNT AND TUBE 1 Install the air can mount using the four 3/8"-16 x 1-1/2" flange bolts provided four 3/8"-16 x 1-1/2" flange bolts BR027 air can mount air can assembly Figure 14: Attach the Air Can Mount to the Dyno 14
19 Installing the SAAR Brake Assembly 2 Slide the tube through the brake arms. 3 Rotate the tube so that the center hole is oriented vertically. BR028 slide tube through arms orienting the hole vertically Figure 15: Slide the Tube into Place Version 1 15
20 Installing the SAAR Brake Assembly INSTALLING THE AIR CAN 1 Thread the pipe fitting which extends from the solenoid subassembly into the threaded hole on the top of the air can. Apply pipe thread sealer to the fitting if sealer is not already present. 2 Align the solenoid assembly so that it is parallel to the two bolts that extend from the bottom of the air can as shown in Figure 17. solenoid assembly AB093 threaded hole in air can threaded pipe fitting air can align solenoid assembly with these two studs Figure 16: Attach the Solenoid Subassembly to the Air Can 3 Remove and set aside the two 5/8" lockwashers and nuts for the air can. 4 Remove and set aside the 5/8" nut from the long threaded rod at the bottom of the air can. BR030 5/8" lockwashers and nuts 5/8" nut Figure 17: Prepare the Air Can Assembly 16
21 Installing the SAAR Brake Assembly 5 While lowering the air can through the hole in the tube, align the air can studs with the holes in the bracket. Note: The rod will not extend all of the way through the tube until the electronics are connected and air pressure is applied to the air can. 6 Loosely attach the air can to the bracket using the two 5/8" nuts and lockwashers removed earlier. Keeping the nuts loose will allow for adjustment while extending the air can rod the remaining distance through the tube. The power and air connections are necessary to finish connecting the brake assembly. air can studs washer and upper nut will be tightened down onto tube after lower nut is fastened use 5/8" lockwashers and nuts to attach air can to bracket insert air can rod into hole through tube BR029 Figure 18: Install the Air Can Version 1 17
22 Installing the SAAR Brake Assembly CONNECTING TO THE BREAKOUT BOARD 1 Connect the two black wires from the solenoid to the two terminals on the breakout board labelled BRAKE (one to each terminal). 2 If you have a 4 wheel drive dyno model or , refer to additional instructions for Four Wheel Drive Dynos on page 20. connect the two black wires from the brake solenoid to the breakout board BRAKE Figure 19: Connect the Brake Solenoid Wires to the Breakout Board CONNECTING TO THE SHOP AIR 1 Connect shop air to the fitting on the brake air can pressure regulator. See Figure 22 on page 21 if you are installing the brake on a four-wheel drive dyno. 2 Adjust the air pressure by pulling up on the regulator knob and turning counterclockwise to decrease the pressure to 30 psi (clockwise to increase). Note: The Spring Applied Brake should be operated at 100 psi, but you will start with the pressure lower while connecting the air can to aid in lining up the parts. pull up on regulator knob and adjust pressure to 30 psi 0 AB092 pressure gauge should read 30 psi Figure 20: Adjust the Air Pressure 18
23 Installing the SAAR Brake Assembly FASTENING THE AIR CAN 1 Check to make sure that the area is clear and that the dyno can be operated safely. 2 Power up the dyno electronics. Keep hands and fingers clear when operating dyno. 3 Use the pendant to turn the brake to the OFF position. This will apply air pressure to the brake s air can to extend the rod, allowing you to fit the rod through the bottom of the hole in the brake actuating tube. 4 Gradually increase the air pressure to 100 psi by pulling up on the regulator knob and turning it clockwise. As you are doing this, guide the air can rod through the hole in the brake actuating tube. 5 Torque the upper two nuts fastening the air can to the mounting bracket to 110 ft-lbs. 6 Adjust the nut on the bottom of the air can rod until the brake shoes are 6mm/.25" away from the dyno drum. 7 Tighten the upper nut on the air can rod down onto the brake actuating tube to sandwich the tube between the two nuts. 8 Torque the lower nut to 110 ft-lbs. Your brake should now be completely installed. connect the two black wires from the brake solenoid to the breakout board connect to shop air torque nuts to 110 ft-lbs air can rod upper nut BR032 torque lower nut to 110 ft-lbs Figure 21: Apply Air Pressure to Extend Air Can Rod into Brake Actuating Tube POWERING UP AND TESTING 1 Verify that the pressure gauge on the Spring Applied Air Brake shows 100 psi. 2 Use the pendant to turn the brake ON. 3 Ensure that the brake shoes are making contact with the dyno s drum and that the drum will not rotate. Adjust the brake if necessary using the nuts on the air can rod. Version 1 19
24 Four Wheel Drive Dynos FOUR WHEEL DRIVE DYNOS The instructions in the following sections describe the differences for installing the SAAR Brake Assembly on four-wheel drive dynos. The SAAR Brake Assembly may be used to upgrade the braking on model and four-wheel drive dynos. The dyno has a stationary 248 dyno and a moveable 224 dyno. When upgrading this model, you will leave the existing air applied brake on the stationary 248 dyno and only upgrade the moveable 224 dyno. The model dyno uses a stationary 224 dyno along with a moveable 224 dyno that can be positioned to accommodate for the wheelbase of the vehicle being tested.when upgrading a model , both 224 dynos must have the SAAR Brake Assembly upgrade. To upgrade the stationary dyno, follow the directions in the previous sections of the manual. UPGRADING THE MOVEABLE 224 DYNO Moveable 224 dynos use a control box containing the dyno movement board and other movement components. The wiring to the brake solenoid is connected to the movement board in the control box and not the breakout board, as in the standard installation instructions. In general, when installing a SAAR brake on a moveable 224 dyno, follow the instructions in the manual, except when disconnecting and connecting the brake control wiring and air. Use the steps that follow to connect the brake wiring to the movement board and to connect the air supply to the SAAR brake. CONNECTING THE MOVEMENT BOARD AND SHOP AIR The movement board is located inside the control box as shown in Figure Disconnect one black wire and one white wire from the movement board terminals labelled BRK2 that connect the existing brake solenoid. 2 Route the wires for the new brake solenoid through the opening in the control box and connect the two black wires to the terminals labelled BRK 2 on the movement board. (Connect one to each terminal, the order does not matter as the solenoid will operate correctly with either polarity.) 3 Connect the air hose to the solenoid, replacing the hose if necessary. 4 Continue the installation with step #2, Connecting to the Shop Air on page
25 Four Wheel Drive Dynos control box connect the two black wires from the brake solenoid to the terminals labelled BRK 2 on movement board connect air hose to solenoid, replace hose if needed BR033 RAIL OUT IN BRK 2 BRK 1 BRK IN +12V GNDCOM IN OUT -- PRES SW movement board Figure 22: Connect from Solenoid to the Movement Board in the Control Box Version 1 21
26
27
Maintenance Guide For Model 224, Model 224 with 4WD, Model 424x, and Model 248 Automotive Dynamometers.
 2004-2008 Dynojet Research, Inc. All Rights Reserved. Maintenance Guide For Model 224, Model 224 with 4WD, Model 424x, and Model 248 Automotive Dynamometers. This manual is copyrighted by Dynojet Research,
Dynojet Research, Inc. All Rights Reserved. Tire Temperature Sensor Installation Guide
 1998-2006 Dynojet Research, Inc. All Rights Reserved. This manual is copyrighted by Dynojet Research, Inc., hereafter referred to as Dynojet, and all rights are reserved. This manual, as well as the software
Power Carriage Installation Guide
 Power Carriage Installation Guide 1999-2002 Dynojet Research, Inc. All Rights Reserved. 020116SD Dynojet Research, Inc. 200 Arden Drive Belgrade, MT 59714 2191 Mendenhall Drive North Las Vegas, NV 89031
Torque Module Installation and User Guide for model 250i Motorcycle Dynamometers.
 2000-2005 Dynojet Research, Inc. All Rights Reserved. Torque Module Installation and User Guide for model 250i Motorcycle Dynamometers. This manual is copyrighted by Dynojet Research, Inc., hereafter referred
Torque Cell Installation Guide for Model 250i/250iP DynoWare RT Dynamometers.
 2015 Dynojet Research, Inc. All Rights Reserved. Torque Cell Installation Guide for Model 250i/250iP DynoWare RT Dynamometers. This manual is copyrighted by Dynojet Research, Inc., hereafter referred to
Dynojet Research, Inc. All Rights Reserved. Air Fuel Ratio Module Installation and User Guide.
 2014-2015 Dynojet Research, Inc. All Rights Reserved.. This manual is copyrighted by Dynojet Research, Inc., hereafter referred to as Dynojet, and all rights are reserved. This manual, as well as the software
Air Fuel Ratio Module and AFR-4 Pump Assembly Installation and User Guide.
 2007-2012 Dynojet Research, Inc. All Rights Reserved.. This manual is copyrighted by Dynojet Research, Inc., hereafter referred to as Dynojet, and all rights are reserved. This manual, as well as the software
Dynojet Research, Inc. All Rights Reserved. Optical RPM Sensor Installation Guide.
 1993-2001 Dynojet Research, Inc. All Rights Reserved.. This manual is copyrighted by Dynojet Research, Inc., hereafter referred to as Dynojet, and all rights are reserved. This manual, as well as the software
Control Panel Interface Upgrade Installation Guide For Model 200i and 250i Motorcycle Dynamometers Serial Number 202xxxx.
 2004 Dynojet Research, Inc. All Rights Reserved. Control Panel Interface Upgrade Installation Guide For Model 200i and 250i Motorcycle Dynamometers Serial Number 202xxxx. This manual is copyrighted by
Linx System with Atra Flex Installation for Model 424 Automotive Dynamometers
 2009-2018 Dynojet Research, Inc. All Rights Reserved. Linx System with Atra Flex Installation for Model 424 Automotive Dynamometers This manual is copyrighted by Dynojet Research, Inc., hereafter referred
INSTALLATION GUIDE. Dynojet Research 2191 Mendenhall Drive Suite 105, North Las Vegas NV,
 INSTALLATION GUIDE www.dynojetwb2.com Dynojet Research 2191 Mendenhall Drive Suite 105, North Las Vegas NV, 89081 1-800-992-4993 2008 Dynojet Research, Inc. All Rights Reserved. Wideband 2 Installation
Harley-Davidson and the Bar & Shield logo are among the trademarks of H-D Michigan, LLC.
 2010-2012 Dynojet Research, Inc. All Rights Reserved. Harley-Davidson JUMPSTART Intallation and User Guide This manual is copyrighted by Dynojet Research, Inc., hereafter referred to as Dynojet, and all
Sea Doo 4-Tec Supercharged 1500cc Watercraft (Throttle By Wire models) Dynojet CMDM-6212
 Dynojet CMDM-6212") 2009-2012 Sea Doo 4-Tec Supercharged 1500cc Watercraft (Throttle By Wire models) Dynojet CMDM-6212 2012 Dynojet Research, Inc. All Rights Reserved. 2009-2012 Sea Doo 4-Tec Supercharged 1500cc Watercraft
2009-2012 Sea Doo 4-Tec Supercharged 1500cc Watercraft (Throttle By Wire models) Dynojet CMDM-6212 2012 Dynojet Research, Inc. All Rights Reserved. 2009-2012 Sea Doo 4-Tec Supercharged 1500cc Watercraft
Installation Guide for Above Ground Model 224 Automotive Dynamometers.
 2005-2014 Dynojet Research, Inc. All Rights Reserved. Installation Guide for Above Ground Model 224 Automotive Dynamometers. This manual is copyrighted by Dynojet Research, Inc., hereafter referred to
Motorcycle Dynamometer Installation Guide
 Motorcycle Dynamometer Installation Guide 1993-2002 Dynojet Research, Inc. All Rights Reserved. 020329SD Dynojet Research, Inc. 200 Arden Drive Belgrade, MT 59714 2191 Mendenhall Drive North Las Vegas,
1. Install clean paper and/or shop towels between the electronic brake control module assembly (EBCM) and the inner fender.
 and the inner fender.") Electronic Brake Control Module (EBCM) Replacement Removal Procedure Caution: Refer to Brake Fluid Irritant Caution in Service Precautions. Notice: Refer to Brake Fluid Effects on Paint and Electrical
Electronic Brake Control Module (EBCM) Replacement Removal Procedure Caution: Refer to Brake Fluid Irritant Caution in Service Precautions. Notice: Refer to Brake Fluid Effects on Paint and Electrical
Installation Guide for In Ground Model 224 Automotive Dynamometers.
 2014-2015 Dynojet Research, Inc. All Rights Reserved. Installation Guide for In Ground Model 224 Automotive Dynamometers. This manual is copyrighted by Dynojet Research, Inc., hereafter referred to as
Eddy Current Brake Installation and User Guide For Model 224 Above Ground Automotive Dynamometers.
 2004-2008 Dynojet Research, Inc. All Rights Reserved. Eddy Current Brake Installation and User Guide For Model 224 Above Ground Automotive Dynamometers. This manual is copyrighted by Dynojet Research,
Eddy Current Brake Installation and User Guide For In Ground Model 224 Automotive Dynamometers.
 2004-2008 Dynojet Research, Inc. All Rights Reserved. Eddy Current Brake Installation and User Guide For In Ground Model 224 Automotive Dynamometers. This manual is copyrighted by Dynojet Research, Inc.,
Universal Splice Tray Installation Instructions
 Universal Splice Tray Installation Instructions Table of Contents General Product Information... 1.0 Safety Precautions... 2.0 Package Contents... 3.0 Installing the Product... 4.0 Tower Mounting... 5.0
2015+ Ford F-150 Off-Road Exhaust Kit
 2015+ Ford F-150 Off-Road Exhaust Kit Installation Instructions P/N: 421985 (1115-5E292ORR) Application: 2015+ Ford F-150 OFF-ROAD USE ONLY Important Note: Before installing the ROUSH Performance Product,
R O A D S M I T H TRIKE CONVERSIONS BY THE TRIKE SHOP
 R O A D S M I T H TRIKE CONVERSIONS BY THE TRIKE SHOP Please thoroughly review the instructions before and during installation. Keep in mind that this product was designed to be installed by trained dealer
INSTALLATION INSTRUCTIONS
 INSTALLATION INSTRUCTIONS Accessory Application Publications No. ELEMENT AII 33021 Issue Date JULY 2006 PARTS LIST Trailer Hitch Kit P/N 08L92-SCV-101 4 Bolts, 12 x 35 mm Trailer hitch U-bolt 2 Nuts, 8
Chevrolet Camaro (Gen6) Installation Guide PN 11920, 11921, 11924, 11925, 11926, 11927, 11930, 11931
 Installation Guide PN 11920, 11921, 11924, 11925, 11926, 11927, 11930, 11931") Installation Guide PN 11920, 11921, 11924, 11925, 11926, 11927, 11930, 11931 ***** Please compare the parts in the box with the bill of materials provided ***** (view the following pages) to assure that
Installation Guide PN 11920, 11921, 11924, 11925, 11926, 11927, 11930, 11931 ***** Please compare the parts in the box with the bill of materials provided ***** (view the following pages) to assure that
Ford F-150 Off Road Exhaust Kit
 2011-14 Ford F-150 Off Road Exhaust Kit P/N: 620092 (SLP1111-5E292) Application: 2011-14 Ford F-150 equipped with the following engine options: 3.5L Eco-Boost Engine with automatic transmission. 5.0L 4V
INSTALLATION INSTRUCTIONS
 INSTALLATION INSTRUCTIONS Accessory Application Publications No. AII 23092 KIT CR-V P/N 08A55-S9A-100 Issue Date NOV 2001 PARTS LIST 2 Tweeters INSTALLATION Customer Information: The information in this
Dynojet Research, Inc. All Rights Reserved. Installation Guide For the Kart and ATV Dynamometers.
 1993-2005 Dynojet Research, Inc. All Rights Reserved. Installation Guide For the Kart and ATV Dynamometers. This manual is copyrighted by Dynojet Research, Inc., hereafter referred to as Dynojet, and all
Instructions for Porsche PN s * and
 Instructions for Porsche 997.2 PN s-140711* and 140712 ***** Please compare the parts in the box with the bill of materials provided ***** to assure that you have all the parts necessary for this installation.
R O A D S M I T H TRIKE CONVERSIONS BY THE TRIKE SHOP
 R O A D S M I T H TRIKE CONVERSIONS BY THE TRIKE SHOP Please thoroughly review the instructions before and during installation. Keep in mind that this product was designed to be installed by trained dealer
Raptor "Race 1.5" Upper Control Arm Kit! Installation Guide! Rev 1B! Sales: ext 1! Tech Support: ext 2! Vista Grande!
 Raptor "Race 1.5" Upper Control Arm Kit Installation Guide Rev 1B Sales: 866-691-7750 ext 1 Tech Support: 866-691-7750 ext 2 23231 Vista Grande Laguna Hills, CA 92653 Install Videos: YouTube "Raptor Performance
Scion FR-S ZN6. GTX2867R Gen2 (Internal Wastegate) Installation Instructions GPP P/N #
 Installation Instructions GPP P/N #") TURBO KIT Scion FR-S ZN6 Subaru BRZ ZC6 GTX2867R Gen2 (Internal Wastegate) Installation Instructions GPP P/N # 11518000 Vehicle Type Chassis Code Engine Code Transmission Model Year Scion FR-S DBA-ZN6
TURBO KIT Scion FR-S ZN6 Subaru BRZ ZC6 GTX2867R Gen2 (Internal Wastegate) Installation Instructions GPP P/N # 11518000 Vehicle Type Chassis Code Engine Code Transmission Model Year Scion FR-S DBA-ZN6
Blow Off Valve Retrofit Kit
 Instruction Sheet P/N 37 56C low Off Valve Retrofit Kit WRNING: llow only qualified personnel to perform the following tasks. Follow the safety instructions in this document and all other related documentation..
PLEASE READ ALL DIRECTIONS BEFORE STARTING INSTALLATION
 PARTS LIST 2006-2007 Yamaha R6 Installation Instructions 1 Power Commander 1 USB Cable 1 Installation Guide 2 Power Commander Decals 2 Dynojet Decals 2 Velcro strips 1 Alcohol swab 1 Posi-tap THE IGNITION
Raptor Tie Rods Kit Installation Guide Rev X2
 Raptor Tie Rods Kit Installation Guide Rev X2 Sales: 949-212-7911 Tech Support: 949-444-3213 Install Videos: YouTube "Raptor Performance Group" COMPLETELY READ INSTALLATION INSTRUCTIONS PRIOR TO INSTALLING
INSTALLATION INSTRUCTIONS
 PART NO. 23100T PRODUCT DESCRIPTION: Front Winch Bumper, Center Section PRODUCT SAFETY & LEGAL DISCLAIMER IMPORTANT READ ALL INSTRUCTIONS CAREFULLY BEFORE INSTALLING, FAILURE TO DO SO MAY CAUSE PERSONAL
Loose Parts Note: Determine the left and right sides of the machine from the normal operating position.
 Brake Kit Dingo TX 0 & Compact Utility Loader Part No. 0 0 & 0 Loose Parts Note: Determine the left and right sides of the machine from the normal operating position. Description Qty. Use Drive wheel Brake
Do-It-Yourself Battery Pack
 Do-It-Yourself Battery Pack 1 Page D I S C L A I M E R O F L I A B I L I T Y A N D W A R R A N T Y This publication describes the author s opinions regarding the subject matter herein. The author and publisher
SPARK PLUG CLEANING KIT OPERATING MANUAL
 SPARK PLUG CLEANING KIT OPERATING MANUAL Spark Plugs - Tools & Accessories P/N 01.20.002 Rev. 08/2015 Copyright Copyright 2015 MOTORTECH GmbH. All rights reserved. Distribution and reproduction of this
PLEASE READ ALL DIRECTIONS BEFORE STARTING INSTALLATION
 PARTS LIST 2008-2009 Yamaha R6 Installation Instructions 1 Power Commander 1 USB Cable 1 CD-ROM 1 Installation Guide 2 Power Commander Decals 2 Dynojet Decals 2 Velcro 1 Alcohol swab 1 Posi-tap 1 O2 optimizer
INSTALLATION INSTRUCTIONS
 INSTALLATION INSTRUCTIONS Accessory TRIM Application 2009 ACCORD 4-DOOR Publications No. AII 40008 Issue Date JULY 2008 PARTS LIST Steering Wheel Trim (Without Navigation) P/N 08Z13-TA0-100 Right steering
Installation. Aerada 1200 Series CS Faucet S Battery-Operated Capacitive Sensing Gooseneck Faucet IMPORTANT
 Installation erada 1200 Series CS Faucet S53-325 Battery-Operated Capacitive Sensing Gooseneck Faucet Centershank with 4-inch Trim Plate (Optional: 8-inch or No Trim Plate) Table of Contents Supplies Required..................
INSTALLATION INSTRUCTIONS
 INSTALLATION INSTRUCTIONS Accessory Application Publications No. AII 27996 ATTACHMENT KIT 2005 CIVIC HYBRID Issue Date AUG 2004 PARTS LIST Changer Attachment Kit: P/N 08B26-S5B-100 4 Washer-screws, 4 x
Raptor Rear Frame Support, Air Bump and Leaf Spring Kit Installation Guide Rev 1C
 Raptor Rear Frame Support, Air Bump and Leaf Spring Kit Installation Guide Rev 1C Sales: 949-212-7911 Tech Support: 949-444-3213 Install Videos: YouTube "Raptor Performance Group" COMPLETELY READ INSTALLATION
SERVICE PROCEDURES FOR CLUTCH HYDRAULIC UNITS
 SERVICE PROCEDURES FOR CLUTCH HYDRAULIC UNITS SAFETY PROCEDURES Always follow the vehicle manufacturer's recommended safety procedures in your Shop and Owners Manual. REQUIRED TOOLS Flat blade screwdriver,
Model LA 4300 Time Delay OFF Controller
 ISIMET LA Series Model LA 4300 Time Delay OFF Controller Installation, Operation and Maintenance Manual Application: The Time Delay OFF Controller operates as a single output controller where the application
HONDA VTX 1800C HONDA VTX 1800R INSTALLATION INSTRUCTIONS
 2002-2004 HONDA VTX 1800C 2002-2003 HONDA VTX 1800R INSTALLATION INSTRUCTIONS PARTS LIST quantity description 1 power commander EX 1 USB cable 1 cd-rom 1 installation guide 1 power adapter 2 1 power wire
Ford Mustang GT Long Tube Header Installation
 2005-2006 Ford Mustang GT Long Tube Header Installation Precision manufactured using aircraft quality T-304 stainless steel; this system is designed to endure years of heavy use. Installing a Borla Performance
PRODIGY & PRO PLUS Skid Steer Snowplows
 Western Products, PO Box 245038, Milwaukee, WI 53224-9538 www.westernplows.com June 15, 2017 Lit. No. 78552, Rev. 01 PRODIGY & PRO PLUS Skid Steer Snowplows PRODIGY Blade Assembly 57700 PRO PLUS Blade
INSTALLATION INSTRUCTIONS
 INSTALLATION INSTRUCTIONS Accessory Application Publications No. AII 32664 TRUNK MOUNT 2007 ACCORD 4-DOOR Issue Date JULY 2006 PARTS LIST 17 Wire ties Attachment Kit (sold separately): P/N 08B26-SDA-100
Model LA 4400 Time Delay OFF Controller
 ISIMET LA Series Model LA 4400 Time Delay OFF Controller Installation, Operation and Maintenance Manual Application: The Time Delay OFF Controller with integral 24-hr. programmable time clock operates
INSTALLATION INSTRUCTIONS
 INSTALLATION INSTRUCTIONS Accessory Application Publications No. CIVIC All 30175-31616 2 AND 4-DOOR P/N 08E10-SNA-100 Issue Date DEC 2005 NOTE: The interior illumination lights cannot be installed on 2-door
INSTALLATION INSTRUCTIONS
 INSTALLATION INSTRUCTIONS Accessory Application Publications No. CD CHANGER ATTACHMENT KIT 2004 CR-V AII 26118 Issue Date SEP 2003 PARTS LIST CD Changer Attachment Kit (sold separately): P/N 08B26-S9A-100
 INSTALLATION INSTRUCTIONS Accessory Application Publications No. 2010 CIVIC All 42479 2- AND 4-DOOR P/N 08E10-SNA-110 Issue Date AUG 2009 NOTE: The interior illumination lights cannot be installed on 2-door
Model LA 4100 Time Delay OFF Controller
 ISIMET LA Series Model LA 4100 Time Delay OFF Controller Installation, Operation and Maintenance Manual Application: The Time Delay OFF Controller operates as a single output controller where the application
Eddy Current Brake Installation and User Guide For Model 224 Pit Automotive Dynamometers.
 2004-2005 Dynojet Research, Inc. All Rights Reserved. Eddy Current Brake Installation and User Guide For Model 224 Pit Automotive Dynamometers. This manual is copyrighted by Dynojet Research, Inc., hereafter
Gen 2 Raptor Adjustable Spring Perch Collar Installation Guide Rev X1
 Gen 2 Raptor Adjustable Spring Perch Collar Installation Guide Rev X1 Tech Support: 866-691-7750 ext 2 Install Videos: YouTube "Raptor Performance Group" COMPLETELY READ INSTALLATION INSTRUCTIONS PRIOR
INSTALLATION INSTRUCTIONS
 INSTALLATION INSTRUCTIONS Accessory Application Publications No. AII 26031 2004 ODYSSEY Issue Date AUG 2003 NOTE: You cannot install the subwoofer in a vehicle equipped with both an under seat Navigation
A/F/X Body GM Installation Instructions
 A/F/X Body GM Installation Instructions Power Disc Conversion 64-72 A Body / 67-69 F Body / 68-74 X Body 9 slimline booster pictured Your new disc brake conversion kit can be bolted up with standard hand
Models: 8500, 8501, 8513, 8514, 8500BL, 8501BL, 8513BL, 8514BL, 8540, 8541, 8550, 8551, 8540BL, 8541BL, 8550BL & 8551BL
 Standard Pump Ultra Mass High Viscosity Batch Control System Description Standard s Drum Pumps are designed to transfer a variety of materials from 55 gallon drums and tanks. Standard Pump offers several
Exhaust System Installation for Chevrolet Corvette C7 Stingray PN 11855, 11856
 Exhaust System Installation for Chevrolet Corvette C7 Stingray PN 11855, 11856 These instructions have been written to help you with the installation of your Borla Performance Exhaust System. Please read
F L Ecoboost V F L Ecoboost V6 Performance Pac Level 2 Installation Instructions P/N: (1115TT-PWRPK2)
") 2015-2016 F-150 3.5L Ecoboost V6 2015-2017 F-150 2.7L Ecoboost V6 Performance Pac Level 2 Installation Instructions P/N: 422007 (1115TT-PWRPK2) 39555 Schoolcraft Rd, Plymouth MI, 48170 800.59.ROUSH 2015-2016
2015-2016 F-150 3.5L Ecoboost V6 2015-2017 F-150 2.7L Ecoboost V6 Performance Pac Level 2 Installation Instructions P/N: 422007 (1115TT-PWRPK2) 39555 Schoolcraft Rd, Plymouth MI, 48170 800.59.ROUSH 2015-2016
Models 8100PP & 86110LP. Installation Instructions CAUTION. Read this document before installing the snowplow. CAUTION
 September 15, 2010 Lit. No. 48645, Rev. 02 POWER PLOW Snowplows Models 8100PP & 86110LP Installation Instructions Read this document before installing the snowplow. See your BLIZZARD outlet/web site for
Installation for Honda Accord PN s 11840, 11853, 11949
 Installation for Honda Accord PN s 11840, 11853, 11949 BORLA PERFORMANCE INDUSTRIES ***** Please compare the parts in the box with the bill of materials provided ***** to assure that you have all the parts
ADJUSTABLE ROTARY SCRAPER TOOL SCR USER S GUIDE
 ADJUSTABLE ROTARY SCRAPER TOOL SCR-090-225 USER S GUIDE The information in this publication is provided for reference only. While every effort has been made to ensure the reliability and accuracy of the
INSTALLATION INSTRUCTIONS
 INSTALLATION INSTRUCTIONS Accessory Application Publications No. CHANGER ATTACHMENT (TRUNK MOUNT) 2005 CIVIC 4-DOOR AII 27890 Issue Date AUG 2004 PARTS LIST Changer Attachment (sold separately) P/N 08B26-S5D-100
Installation instructions
 Installation instructions Akrapovič System: Evolution and Optional Front Link Pipe Set for the Porsche Cayenne Turbo (type 958) Porsche Cayenne Turbo S (type 958) www.akrapovic.com Installation instructions
18SP597 Series 60 Right-Side EGR Bolt-Together System to a Spherical Joint Tube-and-Shell Cooler with Pneumatic Actuator Valve
 18SP597 Series 60 Right-Side EGR Bolt-Together System to a Spherical Joint Tube-and-Shell Cooler with Pneumatic Actuator Valve Introduction There are two new kits for different orientations of the hot
Trike Conversion Installation Manual. All Models
 Trike Conversion Installation Manual For Honda VTX 1300 Motorcycles All Models Revision 4 Mar. 2011 CAUTION: Failure to follow these instructions can lead to serious personal injury and/or property damage
CAUTION. 2. Remove the wheel cover or nut covers, as required. Remove the wheel and tire assembly.
 Стр. 1 из 16 REAR DRUM BRAKES CAUTION Brake shoes may contain asbestos, which has been determined to be a cancer causing agent. Never clean the brake surfaces with compressed air! Avoid inhaling any dust
If there is additional labor or other costs above the 4 hrs labor you must call VMAC for approved coverage
 Installation Manual for the A500027 RAPTAIR MF Dual Air Filter Retrofit Kit Author: Brian Collings Date: 15/07/2014 1900997 - Manual, Installation (A500027) Systems or Parts Affected: D600005BETA01-D600005BETA59
Bucket Grease Pump ASSEMBLY AND OPERATING INSTRUCTIONS
 Bucket Grease Pump 9793 ASSEMBLY AND OPERATING INSTRUCTIONS 349 Mission Oaks Blvd., Camarillo, CA 930 Visit our Web site at http://www.harborfreight.com Copyright 2004 by Harbor Freight Tools. All rights
2014 GM Truck Level 1 Performance Pack
 2014 GM Truck Level 1 Performance Pack Installation Instructions P/N: 2414-PRFPC1-AA Application: 2014+ Chevy Silverado and GMC Sierra 5.3L and 6.2L Important Note: Before installing your Blackwing cold
6400 Series Horizontal Loading Valves
 Leading The Way in Fluid Handling Solutions Worldwide 6400 Series Horizontal Loading Valves Document No. H32310PA, Rev. 0 Issue Date: February 19, 2015 Supersedes: September 9, 2013 The OPW Horizontal
INSTALLATION INSTRUCTIONS
 INSTALLATION INSTRUCTIONS Accessory REMOTE CONTROL Application 2014 TSX (L4) Publications No. BII 50198 Issue Date SEPT 2013 PARTS LIST Remote Engine Starter Unit Kit P/N 08E91-TK4-200A Fuse label Transmitter
TOYOTA HIGHLANDER 2016 ON BOARD VACUUM CLEANER
 2016 Part Numbers: 00016-48017- (01, 02, 04) Accessory Code: SV1000 NOTE: Will not work in Highlander HV Kit Contents Item # Quantity Reqd. Description 1 1 Vacuum Assembly 2 1 Hose Assembly 3 1 Tool Kit
Assistant s Instrumentation T
 Instructions for Use Assistant s Instrumentation 85.2610.00 T Copyright 2015 A-dec Inc. All rights reserved. A-dec Inc. makes no warranty of any kind with regard to this material, including, but not limited
2016 POWERSPORTS DYNAMOMETER PRICELIST
 2016 POWERSPORTS DYNAMOMETER PRICELIST DYNAMOMETER AND DIAGNOSTIC TEST EQUIPMENT FEATURED DYNAMOMETER OF: Dynojet Research, Inc. 2191 Mendenhall Drive North Las Vegas, NV 89081 Tel (800) 992-3525 Int Tel
INSTALLATION INSTRUCTIONS
 INSTALLATION INSTRUCTIONS Accessory Application Publications No. P/N 08E49-S2A-100 2004 S2000 AII 26325 Issue Date OCT 2003 PARTS LIST Hood switch harness TOOLS AND SUPPLIES REQUIRED #2 Phillips screwdriver
To ensure this part number fits your specific model year, please visit our website for the latest model year listings at
 Exhaust System Installation for Ford Mustang GT, Shelby GT500, & Mustang V6 PN s 11789, 11790, 11791, 11792, 11793, 11796, 11797, 11798, 11799, 11836, 11837, & 11838 ***** Please compare the parts in the
INSTALLATION INSTRUCTIONS
 INSTALLATION INSTRUCTIONS Accessory Application Publications No. BII 24570 P/N 08U97-S3V-210A (BLACK) P/N 08U97-S3V-220A(SADDLE) 2003 MDX Issue Date OCT 2002 PARTS LIST Wood steering wheel 1. Make sure
1969 Camaro. Concourse Style Disc Brake Conversion Kit Instllation Instructions
 Concourse Style Disc Brake Conversion Kit Instllation Instructions 1969 Camaro (1970 Chevelle Kit Shown) This document contains our regular disc brake conversion instructions with the addition of GM assembly
INSTALLATION INSTRUCTIONS
 INSTALLATION INSTRUCTIONS Accessory Application Publications No. / IN-DASH (LX) 005 PILOT AII 806 Issue Date SEP 004 PARTS LIST Cassette Player (sold separately): P/N 08A03-5B-050 In-Dash CD Changer (sold
HD2 and HDX Skid Steer Snowplows
 Fisher Engineering 90750, 90800, 90850, 90900 93800, 93900, 97400 50 Gordon Drive, Rockland, Maine 04841 2139 www.fisherplows.com April 15, 2017 Lit. No. 57831, Rev. 01 HD2 and HDX Skid Steer Snowplows
PLEASE READ ALL DIRECTIONS BEFORE STARTING INSTALLATION
 PARTS LIST 2015 Yamaha FJ-09 Installation Instructions 1 Power Commander 1 USB Cable 1 Installation Guide 2 Power Commander Decals 2 Dynojet Decals 3 Velcro strips 1 Alcohol swab 1 Posi-tap 1 O2 Optimizer
B32207 UNDERCARRIAGE KIT. Parts List and Installation Instructions CAUTION. Read this document before installing the snowplow.
 April 1, 2008 Lit. No. B64116, Rev. 01 Jeep Liberty B32207 UNDERCARRIAGE KIT 2004 - Parts List and Installation Instructions Read this document before installing the snowplow. See your BLIZZARD outlet/web
2-1/4 Gallon Sprayer
 2-/4 Gallon Sprayer 94008 ASSEMBLY AND OPERATING INSTRUCTIONS 349 Mission Oaks Blvd., Camarillo, CA 930 Visit our Web site at http://www.harborfreight.com Copyright 2005 by Harbor Freight Tools. All rights
2015+ F-150 Active Exhaust Kit Installation Instructions P/N: (1117-5E292LITE)
") 2015+ F-150 Active Exhaust Kit Installation Instructions P/N: 422104 (1117-5E292LITE) 39555 Schoolcraft Rd, Plymouth MI, 48170 800.59.ROUSH 2015+ Ford F-150 Active Exhaust Kit Installation Instructions
2015+ F-150 Active Exhaust Kit Installation Instructions P/N: 422104 (1117-5E292LITE) 39555 Schoolcraft Rd, Plymouth MI, 48170 800.59.ROUSH 2015+ Ford F-150 Active Exhaust Kit Installation Instructions
INSTALLATION INSTRUCTIONS
 INSTALLATION INSTRUCTIONS Accessory Application Publications No. AII 24642 BODY SIDE CLADDING 2003 CR-V P/N 08P21-S9A-100 Issue Date OCT 2002 PARTS LIST Right rear bumper piece Right front fender piece
Mazda North American Operations Irvine, CA
 Service Bulletin Mazda North American Operations Irvine, CA 92618-2922 Subject: CRACK APPEARS IN CENTER OF DASHBOARD Bulletin No: 09-070/09 2004-2009 MAZDA3 - CRACK APPEARS IN CENTER OF DASHBOARD APPLICABLE
Please compare the parts in the box with the bill of materials provided to assure that you have all the parts necessary for this installation.
 Installation for Chevrolet Corvette C7 Stingray & ZO6 (Standard exhaust) PN s - 11862, 11863, 11868, 11869, 11877, 11878, 11880, 11881 (Optional NPP) PN s - 11874, 11855, 11875, 11856 ZO6 PN s - 11902,
Installation for Porsche 911 PN
 Installation for Porsche 911 PN-140523 These instructions have been written to help you with the installation of your Borla Performance Please read this document completely before beginning the installation
Brake System H TX, H2.0TXS [B475]; H TX [B466] Safety Precautions Maintenance and Repair
![Brake System H TX, H2.0TXS [B475]; H TX [B466] Safety Precautions Maintenance and Repair](/thumbs/86/93834005.jpg "Brake System H TX, H2.0TXS [B475]; H TX [B466] Safety Precautions Maintenance and Repair") HMM180001 Brake System H1.5-1.8TX, H2.0TXS [B475]; H2.5-3.5TX [B466] Safety Precautions Maintenance and Repair When lifting parts or assemblies, make sure all slings, chains, or cables are correctly fastened,
HMM180001 Brake System H1.5-1.8TX, H2.0TXS [B475]; H2.5-3.5TX [B466] Safety Precautions Maintenance and Repair When lifting parts or assemblies, make sure all slings, chains, or cables are correctly fastened,
1999 F-Super Duty Workshop Manual
 SECTION 308-02: Clutch Controls 1999 F-Super Duty 250-550 Workshop Manual REMOVAL AND INSTALLATION Procedure revision date: 01/2/2000 Clutch Master Cylinder and Reservoir Removal CAUTION: Remove the entire
INSTALLATION INSTRUCTIONS
 INSTALLATION INSTRUCTIONS Accessory Application Publications No. BII 25831-26975 P/N 08U97-S3V-210A (BLACK) P/N 08U97-S3V-220A(SADDLE) 2004 MDX Issue Date MARCH 2004 PARTS LIST Wood steering wheel 1. Make
TB-690 Conveyor/Stacker
 TB-690 Conveyor/Stacker ASSEMBLY AND OPERATIONS MANUAL Revised: 1-9-09 RENA SYSTEMS INC. 136 Green Tree Road STE 140 Oaks, PA 19456-1069 Phone: (610) 650-9170 Fax: (610) 650-9171 E-Mail: support@renausa.com
Thank you for purchasing a Borla Performance Stainless Steel Header.
 Thank you for purchasing a Borla Performance Stainless Steel Header. Precision manufactured using aircraft quality T-304 stainless steel; these headers are designed to endure years of heavy use. Installing
SPORT/UTILITY BLADE ASSEMBLY INSTRUCTIONS
 WESTERN PRODUCTS, P.O. BOX 245038, MILWAUKEE, WI 53224-9538 FORM NO. 13629 September 1, 1999 SPORT/UTILITY BLADE ASSEMBLY INSTRUCTIONS Sport/Utility Blade No. 61300 A, Q & L Box No. 61930 Hydraulics Box
A. Adapter A metal component that fastens the caliper to the knuckle. Some brake systems do not use adapters.
 BRAKES UNIT 5: DISC BRAKE DIAGNOSIS AND REPAIR LESSON 3: SERVICE DISC BRAKE CALIPERS I. Terms and definitions A. Adapter A metal component that fastens the caliper to the knuckle. Some brake systems do
ROUSH Active IO Exhaust. Installation Instructions P/N: (R LITE) Fastback GT Convertible GT V8
 Fastback GT Convertible GT V8") Installation Instructions P/N: 422128 (R1318-5231LITE) Fastback GT Convertible GT V8 39555 Schoolcraft Rd, Plymouth MI, 48170 800.59.ROUSH ROUSH Active IO Exhaust Installation Instructions P/N: 422128
Installation Instructions P/N: 422128 (R1318-5231LITE) Fastback GT Convertible GT V8 39555 Schoolcraft Rd, Plymouth MI, 48170 800.59.ROUSH ROUSH Active IO Exhaust Installation Instructions P/N: 422128
55-64 Full Size Chevy
 55-64 Full Size Chevy Installation Instructions Power Disc Conversion 9 slimline booster pictured Your new disc brake conversion kit can be bolted up with standard hand tools. The only tools you may not