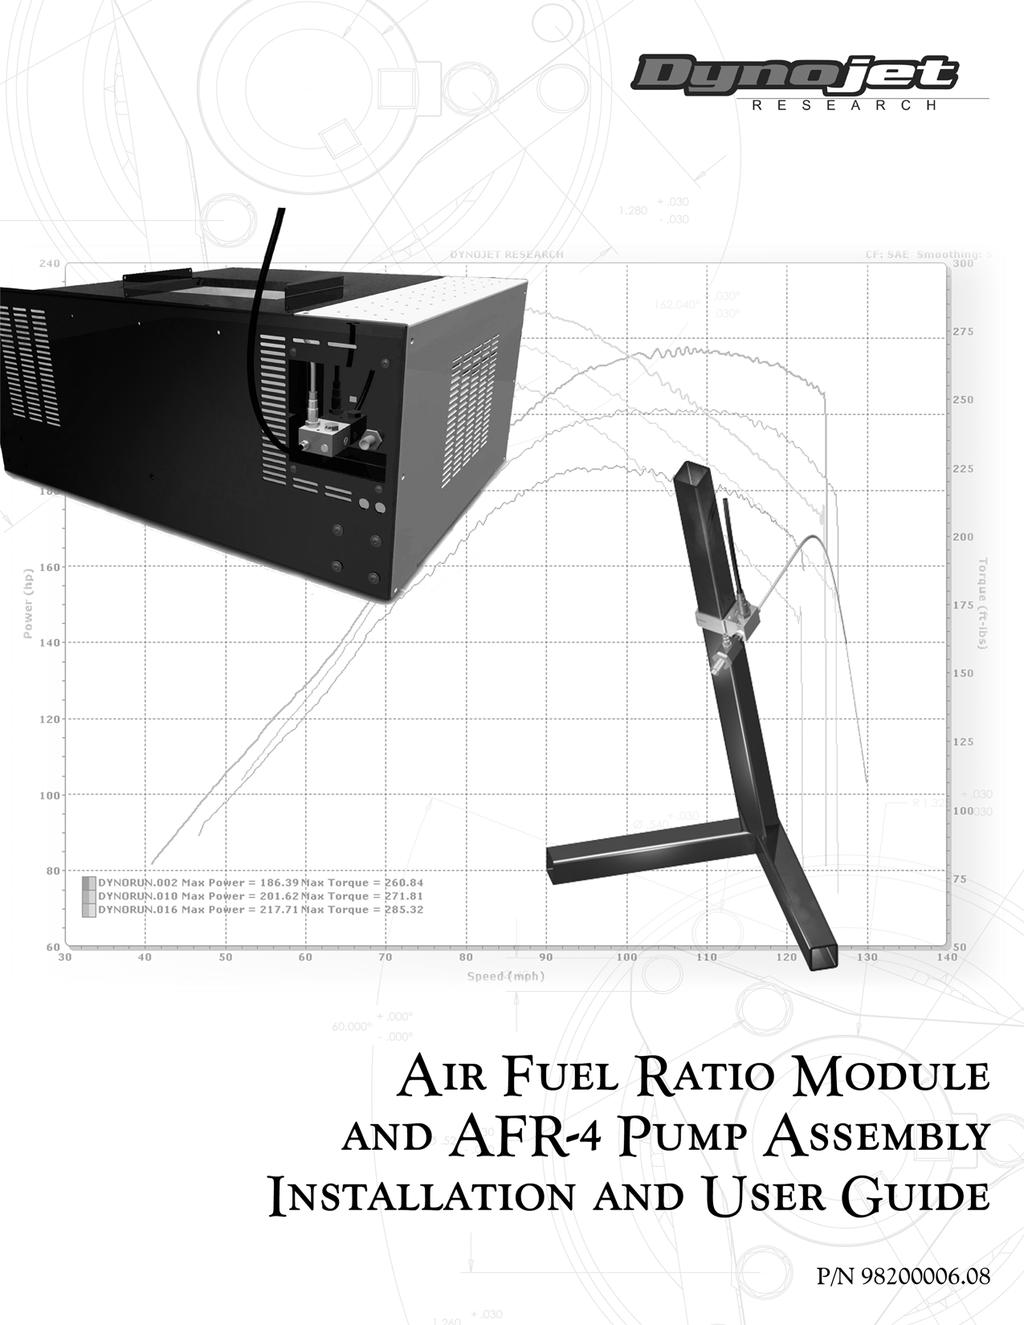
Air Fuel Ratio Module and AFR-4 Pump Assembly Installation and User Guide.
|
|
|
- Howard Parsons
- 5 years ago
- Views:
Transcription
1
2 Dynojet Research, Inc. All Rights Reserved.. This manual is copyrighted by Dynojet Research, Inc., hereafter referred to as Dynojet, and all rights are reserved. This manual, as well as the software described in it, is furnished under license and may only be used or copied in accordance with the terms of such license. This manual is furnished for informational use only, is subject to change without notice, and should not be construed as a commitment by Dynojet. Dynojet assumes no responsibility or liability for any error or inaccuracies that may appear in this manual. Except as permitted by such license, no part of this manual may be reproduced, stored in a retrieval system, or transmitted, in any form or by any means, electronic, mechanical, recording, or otherwise, without the prior written permission of Dynojet. The Dynojet logo is a trademark of Dynojet Research, Inc. Any trademarks, trade names, service marks, or service names owned or registered by any other company and used in this guide are the property of their respective companies. Dynojet Research, Inc., 2191 Mendenhall Drive, North Las Vegas, Nevada 89031, USA. Printed in USA. Part Number: Version 08 (12/2012)
3 TABLE OF CONTENTS Chapter 1 Chapter 2 Air Fuel Ratio Module and AFR-4 Pump Assembly Installation Introduction Warnings Conventions Used In This Manual Technical Support Air Fuel Ratio Module Installation Installing the Air Fuel Ratio Module Stand Alone AFR-4 Pump Assembly Compressed Air Requirements Setting Up the Stand Assembly Installing the Pump Assembly on the Stand Connecting the Solenoid Power i Series Dynos On Dyno Installation Compressed Air Requirements Installing the AFR-4 Pump Assembly on the Dyno Installing the Air Hose with the Air Brake Adjusting the Air Flow Adjusting the Air Flow Stand Alone Adjusting the Air Flow On Dyno Using the Air Fuel Ratio Module Module and Pump Set Up Sample and View Air Fuel Ratios Sampling Air Fuel Ratios Viewing and Graphing Air/Fuel Runs AFR-4 Pump Maintenance and Troubleshooting Sensor Information Correcting Lean Air Fuel Readings Pump Maintenance Stand Alone Pump Maintenance On Dyno i
4 TABLE OF CONTENTS Appendix A Connecting the Solenoid Power Non i Series Dynos Connecting the Solenoid Power A-2 ii
5 C HAPTER 1 AIR FUEL RATIO MODULE AND AFR-4 PUMP ASSEMBLY INSTALLATION This document provides instructions for installing and using the Air Fuel Ratio Module and the AFR-4 Pump Assembly with WinPEP 7. To ensure safety and accuracy in the procedures, perform the procedures as they are described. This manual will walk you through installation and set up procedures, sampling and viewing air fuel ratios, and how to maintain your air pump. Document Part Number: Version 8 Last Updated: This chapter is divided into the following categories: Introduction, page 1-2 Air Fuel Ratio Module Installation, page 1-4 Stand Alone AFR-4 Pump Assembly, page 1-8 On Dyno Installation, page 1-10 Adjusting the Air Flow, page
6 CHAPTER 1 Introduction INTRODUCTION WARNINGS The Air Fuel Ratio Module is designed to accurately sample air fuel ratios from engines burning petroleum based fuels. Be sure to read and follow all warnings found throughout this manual. The sensor and the copper sample tube are hot. Before touching the sensor or the sample tube, make sure it has cooled. Leaded racing fuels and two-stroke applications will contaminate the sensor and dramatically shorten its service life. The sensor is not covered by a warranty. Be sure to read and understand the Air Fuel Ratio Module and AFR-4 Pump Assembly Installation and User manual. Before turning the pump on, verify there is no water in the compressed air hose or the sample tube. Warm up the vehicle before placing the copper sample tube in the exhaust to avoid drawing excess water through the pump assembly. Keep the air pump assembly upright. Tipping the pump assembly may result in damage to the sensor. Leaks in the system will result in erroneous readings. Verify there are no cracks or holes in the hose. Verify the sensor is seated properly in the sensor block. To ensure accurate readings, pump maintenance should be performed every six months, or sooner, depending on usage. Refer to Pump Maintenance Stand Alone on page 2-8 and Pump Maintenance On Dyno on page 2-9 for more information. 1-2
7 AIR FUEL RATIO MODULE AND AFR-4 PUMP ASSEMBLY INSTALLATION Introduction CONVENTIONS USED IN THIS MANUAL The conventions used in this manual are designed to protect both the user and the equipment. example of convention Bold description The Caution icon indicates a potential hazard to the dynamometer equipment. Follow all procedures exactly as they are described and use care when performing all procedures. The Warning icon indicates potential harm to the person performing a procedure and/or the dynamometer equipment. Highlights items you can select on in the software interface, including buttons and menus. The arrow indicates a menu choice. For example, select File Open means select the File menu, then select the Open choice on the File menu. TECHNICAL SUPPORT For assistance, please contact Dynojet Technical Support at , or write to Dynojet at 2191 Mendenhall Drive, North Las Vegas, NV Visit us on the World Wide Web at and where Dynojet provides state of the art technical support, on-line shopping, product images, and press releases about our latest product line. Version 8 1-3
8 CHAPTER 1 Air Fuel Ratio Module Installation AIR FUEL RATIO MODULE INSTALLATION This section describes installation procedures for the Air Fuel Ratio Module. If the Air Fuel Ratio Module is already installed, skip to Stand Alone AFR-4 Pump Assembly on page 1-8. INSTALLING THE AIR FUEL RATIO MODULE 1 Verify the main dyno power is disconnected. 2 Turn off the main power switch on the CPU Module and unplug the power cord. 3 Remove the dust cover from the existing top module. dust cover power cord input power switch Figure 1-1: Remove the Dust Cover 1-4
9 AIR FUEL RATIO MODULE AND AFR-4 PUMP ASSEMBLY INSTALLATION Air Fuel Ratio Module Installation 4 Loosen the top right screw on the back of the existing top module. 5 Install the Air Fuel Ratio Module into the existing top module. Place the dust cover, removed in step 3, on the Air Fuel Ratio Module. air fuel ratio module Figure 1-2: Install the Air Fuel Ratio Module Version 8 1-5
10 CHAPTER 1 Air Fuel Ratio Module Installation 6 Secure the grounding strap on the back of the Air Fuel Ratio Module to the existing top module. 7 Secure the Air Fuel Ratio Module to the dyno electronics with the plastic tie straps (one on each side). grounding strap plastic tie strap Figure 1-3: Secure the Grounding Strap 1-6
11 AIR FUEL RATIO MODULE AND AFR-4 PUMP ASSEMBLY INSTALLATION Air Fuel Ratio Module Installation 8 Attach the 15-pin connector on the sensor cable to the front of the Air Fuel Ratio Module and tighten down the screws. 9 Attach the power cord to the dyno electronics, verify all the other cables are connected, and turn the power switch on. The green LED light on the Air Fuel Ratio Module should now be on. air fuel ratio module sensor cable and port green LED light power cord input power switch Figure 1-4: Attach the Sensor Cable Version 8 1-7
12 CHAPTER 1 Stand Alone AFR-4 Pump Assembly STAND ALONE AFR-4 PUMP ASSEMBLY This section describes how to set up the stand alone AFR-4 pump assembly. Refer to On Dyno Installation on page 1-10 for on dyno installation instructions. COMPRESSED AIR REQUIREMENTS The following requirements are needed for the AFR-4 pump assembly: Clean and dry air, 100 psi regulated, 5 CFM or better flow 1/4-inch NPT pipe thread connector (to attach air to the solenoid or pump ball valve) optional air regulator SETTING UP THE STAND ASSEMBLY Secure the upright to the base using three 1/4-20 x 5/8-inch pan-head torx screws. upright screw base Figure 1-5: Stand Assembly 1-8
13 AIR FUEL RATIO MODULE AND AFR-4 PUMP ASSEMBLY INSTALLATION Stand Alone AFR-4 Pump Assembly INSTALLING THE PUMP ASSEMBLY ON THE STAND Use the following instructions to install the pump assembly on the stand. Refer to On Dyno Installation on page 1-10 for on dyno installation instructions. 1 Open the toggle clamp and slide the pump assembly on the upright. 2 Close the toggle clamp to secure the pump in place. 3 Secure the sensor(s) to the pump assembly. Note: Make sure the sensor is on top. 4 Attach the compressed air line to the solenoid. Note: The compressed air must be clean and dry, 100 psi regulated. 5 Attach the silicone tube(s) to the sensor block. Note: The length of the silicone tube can be adjusted for your application. 6 Attach the copper sample tube(s) to the silicone tube(s). Note: If only one sensor and sample tube is being used, the second sensor hole and sample port must be plugged. upright sensor toggle clamp copper sample tube attach power cable silicone tube attach compressed air Figure 1-6: Installing the Pump Assembly on the Stand CONNECTING THE SOLENOID POWER I SERIES DYNOS Attach the power cable (P/N ) from PII in the CPI enclosure to the solenoid on the AFR-4 pump assembly. Version 8 1-9
14 CHAPTER 1 On Dyno Installation ON DYNO INSTALLATION This section describes how to install the AFR-4 pump assembly on your above ground motorcycle dynamometer. COMPRESSED AIR REQUIREMENTS The following requirements are needed for the on dyno AFR-4 pump assembly: Clean and dry air, 100 psi regulated, 5 CFM or better flow Fittings to hook your air system to a 3/8-inch inside diameter hose (if no air brake is present) optional air regulator INSTALLING THE AFR-4 PUMP ASSEMBLY ON THE DYNO 1 Remove the eight screws securing the drum module panel to the dyno. Set the screws and the panel aside. For more information on removing the panel, refer to your dyno installation guide. 2 Secure the pump housing to the dyno using four 1/4-20 torx screws. pump housing Figure 1-7: Install the Pump Housing 1-10
15 AIR FUEL RATIO MODULE AND AFR-4 PUMP ASSEMBLY INSTALLATION On Dyno Installation 3 Run the provided air hose from the air pump assembly to the front of your dyno. If your dyno is equipped with an air brake, refer to Installing the Air Hose with the Air Brake on page You will need to remove the carriage assembly and top center cover to route the air hose. Refer to your dyno installation guide for instruction on removing the top cover. 4 Route the air hose through the air access holes in the front of the dyno. 5 Attach the hose to your clean, dry, 100psi regulated air supply. 6 Thread the sensor into the sensor block. 7 Attach the silicone hose and copper sample tube to the sensor block. Note: If only one sensor and sample tube is being used, the second sensor hole and sample port must be plugged. 8 Attach the sensor cable to the corresponding cable from the inside back panel of the dyno. 9 Attach the connector from the pump solenoid to the cable on the inside back panel of the dyno. 10 Replace the top center cover and carriage assembly. 11 Replace the drum module panel using the screws removed earlier. copper sample tube silicon tube solenoid connector sensor attach air Figure 1-8: Installing the Sensor and Copper Sample Tube Version
16 CHAPTER 1 On Dyno Installation INSTALLING THE AIR HOSE WITH THE AIR BRAKE Use the following instructions to install the air hose when the air brake is installed. 1 Install the tee. 1a Cut the hose running from the air brake as shown in Figure b Slide a hose clamp over each piece of hose. 1c Insert the tee. 1d Secure the hose clamps. 2 Measure the distance from the tee to the air pump assembly and cut a piece of hose. 3 Attach the hose to the air pump assembly. This connection does not require a hose clamp. 4 Slide a hose clamp over the hose. Note: The hose clamp is only needed on the tee end. 5 Slide the hose over the tee. 6 Secure the hose clamp. air hose to the brake cut here air hose to the brake AP115 air hose to the pump air hose to the pump tee Figure 1-9: Installing the Air Hose with the Air Brake 1-12
17 AIR FUEL RATIO MODULE AND AFR-4 PUMP ASSEMBLY INSTALLATION Adjusting the Air Flow ADJUSTING THE AIR FLOW To ensure accurate readings, adjust the air flow as necessary to maintain 35L/min. If you are unable to adjust the air flow to 35L/min., clean the pump then try to adjust the air flow again. Refer to Pump Maintenance Stand Alone on page 2-8 or Pump Maintenance On Dyno on page 2-9 for more information. ADJUSTING THE AIR FLOW STAND ALONE Adjust the air flow at the end of each exhaust probe to 35 L/min. 1 Attach six inches of the silicon tubing from the top port on the flow meter to the copper sample tube. 2 Loosen the lock nut. Note: If two sensors and sample tubes are installed, plug or pinch the sample tube that the air flow meter is not attached to. 3 Turn the ball valve to the open position or turn on the air pump using the control panel. 4 Rotate the vacuum generator exhaust port until the flow meter reads 35 L/min. 5 Tighten the lock nut. Note: Make sure not to rotate the vacuum generator exhaust port when tightening the lock nut. 6 Remove the air flow meter and the six inches of silicon tube. Note: Periodically check the air flow and adjust as necessary to maintain 35 L/min. sensor vacuum generator exhaust port copper sample tube lock nut flow meter silicon tube Figure 1-10: Adjusting the Air Flow Stand Alone Version
18 CHAPTER 1 Adjusting the Air Flow ADJUSTING THE AIR FLOW ON DYNO Adjust the air flow at the end of the exhaust probe to 35 L/min. 1 Attach six inches of the silicon tubing from the top port on the flow meter to the copper sample tube. 2 Loosen the lock nut. Note: If two sensors and sample tubes are installed, plug or pinch the sample tube that the air flow meter is not attached to. 3 Turn on the air pump with the control panel. 4 Rotate the vacuum generator exhaust port until the flow meter reads 35 L/min. 5 Tighten the lock nut. Note: Make sure not to rotate the vacuum generator exhaust port when tightening the lock nut. 6 Remove the air flow meter and the six inches of silicon tube. Note: Periodically check the air flow and adjust as necessary to maintain 35 L/min. copper sample tube silicon tube flow meter sensor vacuum generator exhaust port and lock nut Figure 1-11: Adjusting the Air Flow On Dyno 1-14
19 C HAPTER 2 USING THE AIR FUEL RATIO MODULE This chapter will walk you through the set up procedures, sampling and viewing air fuel ratios, and how to maintain and troubleshoot your AFR-4 pump assembly. To ensure safety and accuracy in the procedures, perform the procedures as they are described. This chapter is divided into the following categories: Module and Pump Set Up, page 2-2 Sample and View Air Fuel Ratios, page 2-3 AFR-4 Pump Maintenance and Troubleshooting, page

20 CHAPTER 2 Module and Pump Set Up MODULE AND PUMP SET UP This section describes the set up procedures for the Air Fuel Ratio Module and AFR-4 pump assembly. 1 Run the vehicle and allow the vehicle to warm up. Excess condensed water is produced during warm up which can damage the AFR-4 pump assembly. Allowing the vehicle to warm up removes this excess water. 2 Place the copper sample tube(s) in the exhaust pipe(s) of the test vehicle. Note: The oxygen sensor can also be inserted into a bung in the exhaust if one is available. copper sample tube Figure 2-1: Sample Tube Placement 3 Turn on the dyno electronics power. Verify the Air Fuel Ratio Module power light is on. 4 Turn on the compressed air to the pump assembly. Depending on the dyno type, the air is turned on using one of the following three ways: press the A/F Ratio Pump button on the Control Panel release the dyno brakes with the pendant turning the manual valve Note: If the oxygen sensor is in a bung in the exhaust, the pump does not need to be run. 2-2

21 USING THE AIR FUEL RATIO MODULE Sample and View Air Fuel Ratios SAMPLE AND VIEW AIR FUEL RATIOS This section describes the procedures to sample and view air fuel ratios using WinPEP 7. Note: Allow the sensor to preheat before making a run. An orange LED light on the Air Fuel Ratio Module will light up continuously and the Air/Fuel gauge on the MakeRun screen will read 18 when the sensor is ready to make a run. SAMPLING AIR FUEL RATIOS 1 Verify you are in the MakeRun screen. 2 Click the MakeRun Configuration button. 3 In the MakeRun Configuration dialog box, verify the Air/Fuel Heater is on and click OK. The Air/Fuel Heater will be on by default when the Air Fuel Ratio Module is added to the dyno electronics. Note: To ensure repeatable and accurate measurements, the Air/Fuel Heater must be allowed to heat up to temperature. An orange LED light on the Air Fuel Ratio Module will light up continuously when the sensor is ready to make a run. 4 Select the Air/Fuel Type from the drop down list or enter a custom fuel type by clicking the Air Fuel Editor button. The default fuel type is gasoline, stoichiometric ratio 14.7:1. air/fuel heater must be on select air/fuel type Figure 2-2: MakeRun Configuration Window Air/Fuel Heater Version 8 2-3
 or the WinPEP 7 Online Help.")
22 CHAPTER 2 Sample and View Air Fuel Ratios 5 Verify the air pump assembly is on. 6 Press the green sample button on the pendent to begin recording data. Note: For more information on how to make a run, refer to the WinPEP 7 User Guide (on your WinPEP CD or at or the WinPEP 7 Online Help. 7 Press the sample button a second time to stop sampling. air/fuel gauge Figure 2-3: MakeRun Screen Sampling Be sure to turn the Air Fuel Heater off when not in use for long periods of time. 2-4
 or the WinPEP 7 Online Help. 1 Verify you are in the Graph screen. 2 Select File Open. 3 Browse the directory and select a run file.")
23 USING THE AIR FUEL RATIO MODULE Sample and View Air Fuel Ratios VIEWING AND GRAPHING AIR/FUEL RUNS For more information about graph functions and displays, refer to the WinPEP 7 User Guide (on your WinPEP CD or at or the WinPEP 7 Online Help. 1 Verify you are in the Graph screen. 2 Select File Open. 3 Browse the directory and select a run file. You may also select multiple run files. A preview of the graph will appear. The graph preview is configurable but not required to open the run file. 4 Once you have found the run and configured the graph preview (optional), click Open. browse directories run file graph preview Figure 2-4: Graph Screen Open Dialog Box Version 8 2-5

24 CHAPTER 2 Sample and View Air Fuel Ratios The run information is displayed in the ListView along with a graph of the run. 5 Click on the axis channel label and choose Air/Fuel from the list. Note: Available channels may differ depending on your dyno model and configuration. The graph will now display the run with air/fuel readings. axis channel label choose air/fuel from the list of options Figure 2-5: Main Graph Display with Air/Fuel 2-6
25 USING THE AIR FUEL RATIO MODULE AFR-4 Pump Maintenance and Troubleshooting AFR-4 PUMP MAINTENANCE AND TROUBLESHOOTING This section contains sensor information and describes the procedures for maintaining and troubleshooting the AFR-4 pump assembly. Make sure you are aware of the following items: Keep the air pump upright. Tipping the pump may result in damage to the sensor. Leaks in the system will result in erroneous readings. Verify there are no cracks or holes in the hoses. Verify the sensor is seated properly in the sensor block. SENSOR INFORMATION Under optimal conditions, the sensor life can exceed 1500 hours. When using leaded race fuel, 2.5 grams of lead per gallon of fuel will reduce the expected life of the sensor to less than 100 hours. The sensor is not covered by a warranty. Be sure to read and understand the Air Fuel Ratio Module and AFR-4 Pump Assembly Installation and User manual. CORRECTING LEAN AIR FUEL READINGS Refer to the instructions below if you are experiencing air fuel ratio readings that are leaner than you expected. 1 Verify the pump is on. 2 Check the system for restrictions in the air flow such as a kinked hose or dirty pump. 3 Verify the copper sample tube is not kinked or clogged and is inserted into the exhaust as far as possible. Refer to Figure Check for leaks in the system. 4a Verify all hoses are securely attached to the fittings. 4b Verify there are no cracks or holes in the hoses. 4c Verify the sensor is seated properly in the sensor block. Version 8 2-7
26 CHAPTER 2 AFR-4 Pump Maintenance and Troubleshooting PUMP MAINTENANCE STAND ALONE To ensure accurate readings, pump maintenance should be performed every six months, or sooner, depending on usage. Periodically check the air flow and adjust as necessary to maintain 35 L/min for each sample tube. If you are unable to adjust the air flow to 35 L/min, clean the pump. Use a solvent to clean all pump pieces very carefully. 1 Remove the ball valve or solenoid (for pumps using the control pod). 2 Loosen the lock nut. 3 Remove the vacuum generator exhaust port. 4 Remove the venturi body. 5 Remove the sensor(s) from the sensor block. 6 Remove the two screws securing the sensor block to the toggle clamp. 7 Use a solvent to carefully clean the vacuum generator exhaust port, venturi body, and sensor block. Note: Be careful not to damage the internal structure of the venturi body. 8 Install the sensor block using the two screws removed earlier. 9 Install the venturi body, vacuum generator exhaust port, and ball valve or solenoid. 10 Install the sensor(s). 11 Replace the silicon and copper tubing if necessary. 12 Re-calibrate the pump using the flow meter. Refer to page 1-13 for more information. vacuum generator exhaust port toggle clamp sensor copper sample tube lock nut venturi body sensor block silicon tube solenoid Figure 2-6: Pump Maintenance Stand Alone Pump 2-8
27 USING THE AIR FUEL RATIO MODULE AFR-4 Pump Maintenance and Troubleshooting PUMP MAINTENANCE ON DYNO To ensure accurate readings, pump maintenance should be performed every six months, or sooner, depending on usage. Periodically check the air flow and adjust as necessary to maintain 35 L/min for each sample tube. If you are unable to adjust the air flow to 35 L/min, clean the pump. Use a solvent to clean all pump pieces very carefully. 1 Remove the eight screws securing the drum module panel to the dyno. Set the screws and the panel aside. For more information on removing the panel, refer to your dyno installation guide. 2 Remove the hose connecting the sensor block and the venturi body. 3 Remove the two screws securing the sensor block to the pump housing. pump housing sensor block screws sensor block (not visible from this view) venturi body hose Figure 2-7: Remove the Screws Securing the Sensor Block Version 8 2-9
28 CHAPTER 2 AFR-4 Pump Maintenance and Troubleshooting 4 Remove the sensor(s) from the sensor block. 5 Remove the sensor block. 6 Remove the silicon tube from the sensor block. 7 Loosen the vacuum generator lock nut. 8 Remove the vacuum generator exhaust port and venturi body. 9 Unscrew the venturi body from the solenoid. 10 Use a solvent to carefully clean the vacuum generator exhaust port, venturi body, and sensor block. Note: Be careful not to damage the internal structure of the venturi body. 11 Secure the solenoid to the venturi body. 12 Install the vacuum generator exhaust port to the venturi body. 13 Secure the sensor block to the pump housing using the two screws removed earlier. 14 Install the sensor(s). 15 Replace the silicon tube between the sensor block and the venturi body. 16 Replace the silicon tube to the sensor block. 17 Re-calibrate the pump using the flow meter. Refer to page 1-14 for more information. sensor venturi body silicon tube solenoid sensor block vacuum generator exhaust port lock nut Figure 2-8: Pump Maintenance On Dyno Pump 2-10

29 A PPENDIX A CONNECTING THE SOLENOID POWER NON I SERIES DYNOS This appendix provides instructions for connecting the solenoid power on your 224 automotive dynamometer and/or non i series motorcycle dynamometer. To ensure safety and accuracy in the procedures, perform the procedures as they are described. A-1
30 APPENDIX A Connecting the Solenoid Power CONNECTING THE SOLENOID POWER Use the Stand Alone Breakout Board Controlled AFR-4 Pump Remote Kit (P/N ) to control the AFR-4 pump assembly using the dyno brakes. When the dyno brakes are released, the AFR-4 pump will activate; when the dyno brakes are applied, the AFR-4 pump will deactivate. Note: In order for the AFR-4 pump to operate as expected, the jumper settings must be set to digital brake or eddy current brake and digital brake. Refer to Figure A-1 on page A-3. If these jumper settings are not appropriate for your dyno application, you must use the manual ball valve (P/N ). If you use the Dynojet model 248 chassis dyno with Proportional air brake, unfortunately the kit (P/N ) will not work with the required jumpers settings so you must use the manual ball valve (P/N ). Note: Skip steps 1 and 2 if your AFR-4 pump assembly has the solenoid installed. 1 Remove the existing manual ball valve from the AFR-4 pump assembly. 2 Install the solenoid. A new fitting is included in the kit if needed. 3 Using an existing screw on the Breakout board/advanced Breakout board, secure the relay to the board. 4 Remove the brake solenoid wires from the BRAKE terminals on the Breakout board/advanced Breakout board. Note: Verify you have the correct wires by tracing the wires back to the brake solenoid. 5 Cut the ferrules off. Strip approximately 1/4-inch from each wire. 6 Attach the two butt connectors on the relay cable (P/N ) to the brake solenoid wires. Refer to Figure A-1 on page A-3. 7 Attach the two wires on the relay cable (P/N ) to the solenoid wire butt connectors on the AFR-4 pump assembly. Refer to Figure A-1 on page A-3. 8 Attach the two ferrules on the relay cable (P/N ) to the BRAKE terminal on the Breakout board/advanced Breakout board. 9 Verify your jumper settings. Refer to Figure A-1 on page A Plug the power supply into a 110/220V outlet. A-2
31 CONNECTING THE SOLENOID POWER NON I SERIES DYNOS Connecting the Solenoid Power secure the relay to one of the screws on the Breakout board/advanced Breakout board connect to the dyno brake solenoid wires verify you have the correct wires by tracing the wires back to the brake solenoid connect to the AFR-4 pump assembly solenoid wires connect to the BRAKE terminals on the Breakout board/advanced Breakout board Breakout board Advanced Breakout board remove brake solenoid wires only leave 4WD signal wires in place, if present BRAKE c AP123 J2 J1 eddy current brake and digital brake J2 J1 digital brake only Figure A-1: Routing Cables and Wiring the Breakout Board Version 8 A-3
32
33
Dynojet Research, Inc. All Rights Reserved. Air Fuel Ratio Module Installation and User Guide.
 2014-2015 Dynojet Research, Inc. All Rights Reserved.. This manual is copyrighted by Dynojet Research, Inc., hereafter referred to as Dynojet, and all rights are reserved. This manual, as well as the software
Torque Module Installation and User Guide for model 250i Motorcycle Dynamometers.
 2000-2005 Dynojet Research, Inc. All Rights Reserved. Torque Module Installation and User Guide for model 250i Motorcycle Dynamometers. This manual is copyrighted by Dynojet Research, Inc., hereafter referred
Torque Cell Installation Guide for Model 250i/250iP DynoWare RT Dynamometers.
 2015 Dynojet Research, Inc. All Rights Reserved. Torque Cell Installation Guide for Model 250i/250iP DynoWare RT Dynamometers. This manual is copyrighted by Dynojet Research, Inc., hereafter referred to
Dynojet Research, Inc. All Rights Reserved. Optical RPM Sensor Installation Guide.
 1993-2001 Dynojet Research, Inc. All Rights Reserved.. This manual is copyrighted by Dynojet Research, Inc., hereafter referred to as Dynojet, and all rights are reserved. This manual, as well as the software
Dynojet Research, Inc. All Rights Reserved. Tire Temperature Sensor Installation Guide
 1998-2006 Dynojet Research, Inc. All Rights Reserved. This manual is copyrighted by Dynojet Research, Inc., hereafter referred to as Dynojet, and all rights are reserved. This manual, as well as the software
Control Panel Interface Upgrade Installation Guide For Model 200i and 250i Motorcycle Dynamometers Serial Number 202xxxx.
 2004 Dynojet Research, Inc. All Rights Reserved. Control Panel Interface Upgrade Installation Guide For Model 200i and 250i Motorcycle Dynamometers Serial Number 202xxxx. This manual is copyrighted by
Power Carriage Installation Guide
 Power Carriage Installation Guide 1999-2002 Dynojet Research, Inc. All Rights Reserved. 020116SD Dynojet Research, Inc. 200 Arden Drive Belgrade, MT 59714 2191 Mendenhall Drive North Las Vegas, NV 89031
2006 Dynojet Research, Inc. All Rights Reserved. Spring Applied Air Release (SAAR) Brake Assembly Installation
 Brake Assembly Installation") 2006 Dynojet Research, Inc. All Rights Reserved. This manual is copyrighted by Dynojet Research, Inc., hereafter referred to as Dynojet, and all rights are reserved. This manual, as well as the software
2006 Dynojet Research, Inc. All Rights Reserved. This manual is copyrighted by Dynojet Research, Inc., hereafter referred to as Dynojet, and all rights are reserved. This manual, as well as the software
Maintenance Guide For Model 224, Model 224 with 4WD, Model 424x, and Model 248 Automotive Dynamometers.
 2004-2008 Dynojet Research, Inc. All Rights Reserved. Maintenance Guide For Model 224, Model 224 with 4WD, Model 424x, and Model 248 Automotive Dynamometers. This manual is copyrighted by Dynojet Research,
Linx System with Atra Flex Installation for Model 424 Automotive Dynamometers
 2009-2018 Dynojet Research, Inc. All Rights Reserved. Linx System with Atra Flex Installation for Model 424 Automotive Dynamometers This manual is copyrighted by Dynojet Research, Inc., hereafter referred
Eddy Current Brake Installation and User Guide For Model 224 Pit Automotive Dynamometers.
 2004-2005 Dynojet Research, Inc. All Rights Reserved. Eddy Current Brake Installation and User Guide For Model 224 Pit Automotive Dynamometers. This manual is copyrighted by Dynojet Research, Inc., hereafter
INSTALLATION GUIDE. Dynojet Research 2191 Mendenhall Drive Suite 105, North Las Vegas NV,
 INSTALLATION GUIDE www.dynojetwb2.com Dynojet Research 2191 Mendenhall Drive Suite 105, North Las Vegas NV, 89081 1-800-992-4993 2008 Dynojet Research, Inc. All Rights Reserved. Wideband 2 Installation
Eddy Current Brake Installation and User Guide For Model 224 Above Ground Automotive Dynamometers.
 2004-2008 Dynojet Research, Inc. All Rights Reserved. Eddy Current Brake Installation and User Guide For Model 224 Above Ground Automotive Dynamometers. This manual is copyrighted by Dynojet Research,
Eddy Current Brake Installation and User Guide For In Ground Model 224 Automotive Dynamometers.
 2004-2008 Dynojet Research, Inc. All Rights Reserved. Eddy Current Brake Installation and User Guide For In Ground Model 224 Automotive Dynamometers. This manual is copyrighted by Dynojet Research, Inc.,
Harley-Davidson and the Bar & Shield logo are among the trademarks of H-D Michigan, LLC.
 2010-2012 Dynojet Research, Inc. All Rights Reserved. Harley-Davidson JUMPSTART Intallation and User Guide This manual is copyrighted by Dynojet Research, Inc., hereafter referred to as Dynojet, and all
Motorcycle Dynamometer Installation Guide
 Motorcycle Dynamometer Installation Guide 1993-2002 Dynojet Research, Inc. All Rights Reserved. 020329SD Dynojet Research, Inc. 200 Arden Drive Belgrade, MT 59714 2191 Mendenhall Drive North Las Vegas,
Installation Guide For Model 248 Four Post Lift Automotive Dynamometers.
 1993-2005 Dynojet Research, Inc. All Rights Reserved. Installation Guide For Model 248 Four Post Lift Automotive Dynamometers. This manual is copyrighted by Dynojet Research, Inc., hereafter referred to
Installation Guide for Above Ground Model 224 Automotive Dynamometers.
 2005-2014 Dynojet Research, Inc. All Rights Reserved. Installation Guide for Above Ground Model 224 Automotive Dynamometers. This manual is copyrighted by Dynojet Research, Inc., hereafter referred to
Dynojet Research, Inc. All Rights Reserved. Installation Guide For the Kart and ATV Dynamometers.
 1993-2005 Dynojet Research, Inc. All Rights Reserved. Installation Guide For the Kart and ATV Dynamometers. This manual is copyrighted by Dynojet Research, Inc., hereafter referred to as Dynojet, and all
Installation Guide for In Ground Model 224 Automotive Dynamometers.
 2014-2015 Dynojet Research, Inc. All Rights Reserved. Installation Guide for In Ground Model 224 Automotive Dynamometers. This manual is copyrighted by Dynojet Research, Inc., hereafter referred to as
Sea Doo 4-Tec Supercharged 1500cc Watercraft (Throttle By Wire models) Dynojet CMDM-6212
 Dynojet CMDM-6212") 2009-2012 Sea Doo 4-Tec Supercharged 1500cc Watercraft (Throttle By Wire models) Dynojet CMDM-6212 2012 Dynojet Research, Inc. All Rights Reserved. 2009-2012 Sea Doo 4-Tec Supercharged 1500cc Watercraft
2009-2012 Sea Doo 4-Tec Supercharged 1500cc Watercraft (Throttle By Wire models) Dynojet CMDM-6212 2012 Dynojet Research, Inc. All Rights Reserved. 2009-2012 Sea Doo 4-Tec Supercharged 1500cc Watercraft
Version 1.0 Copyright DC-RPM-iBox User Manual
 Version 1.0 Copyright 2012 DC-RPM-iBox User Manual D Y N O C O M S E R I E S C H A S S I S D Y N A M O M E T E R S DC-RPM-iBox User Manual Copyright This manual is copyrighted by Dynocom Industries, Inc.,
Installation Instructions for: DT2-AF2 Dual Channel & DT2-AF1 Single Channel Wide Band O2 Sensor Controller for A/F (Lambda) Measurement
 Measurement") Installation Instructions for: DT2-AF2 Dual Channel & DT2-AF1 Single Channel Wide Band O2 Sensor Controller for A/F (Lambda) Measurement WARNING: This installation is not for the electrically or mechanically
Installation Instructions for: DT2-AF2 Dual Channel & DT2-AF1 Single Channel Wide Band O2 Sensor Controller for A/F (Lambda) Measurement WARNING: This installation is not for the electrically or mechanically
Model 200i Specifications Maximum Horsepower 750 HP. Drum Speed Accuracy : +/- 1/100th MPH
 The Model 200i continues the Dynojet tradition of providing a reliable, repeatable, consistent and easy to use chassis dyno for quick and accurate diagnosing of performance problems. The Model 200i offers
PLEASE READ ALL DIRECTIONS BEFORE STARTING INSTALLATION
 PARTS LIST 2006-2007 Yamaha R6 Installation Instructions 1 Power Commander 1 USB Cable 1 Installation Guide 2 Power Commander Decals 2 Dynojet Decals 2 Velcro strips 1 Alcohol swab 1 Posi-tap THE IGNITION
PLEASE READ ALL DIRECTIONS BEFORE STARTING INSTALLATION
 PARTS LIST 2009-2011 Yamaha R1 Installation Instructions 1 Power Commander 1 USB Cable 1 Installation Guide 2 Power Commander Decals 2 Dynojet Decals 2 Velcro strips 1 Dual Lock strip 1 Alcohol swab 1
Dynojet Research, Inc. All Rights Reserved. User Guide for AutoTune with the Power Vision.
 2012-2015 Dynojet Research, Inc. All Rights Reserved. User Guide for AutoTune with the Power Vision. This manual is copyrighted by Dynojet Research, Inc., hereafter referred to as Dynojet, and all rights
PLEASE READ ALL DIRECTIONS BEFORE STARTING INSTALLATION
 PARTS LIST 2015 Yamaha FJ-09 Installation Instructions 1 Power Commander 1 USB Cable 1 Installation Guide 2 Power Commander Decals 2 Dynojet Decals 3 Velcro strips 1 Alcohol swab 1 Posi-tap 1 O2 Optimizer
PLEASE READ ALL DIRECTIONS BEFORE STARTING INSTALLATION
 Parts List 2009-2010 BV300 / Vespa 300GTS Installation Instructions 1 Power Commander FC 1 USB Cable 1 Installation Guide 2 Dynojet Decals 2 Velcro strips 1 Alcohol swab THE IGNITION MUST BE TURNED OFF
DynoTune Wideband Gauge
 DISPLAY: RED GREEN BLUE DynoTune Wideband Gauge FACE: BLACK WHITE BEZEL: BLACK SILVER PACKAGE: ROUND SQUARE The DynoTune A/F Gauge will display the air/fuel ratio output from the LC-2 Wide- Band controller.
PLEASE READ ALL DIRECTIONS BEFORE STARTING INSTALLATION
 DYNOJET FUEL CONTROLLER PARTS LIST 1 Dynojet Fuel Controller 1 USB Cable 1 CD-ROM 1 Installation Guide 2 Dynojet Decals 2 Velcro 1 Alcohol swab 2008-2010 Honda SH125i/SH150i Installation Instructions PLEASE
*Shown with optional high pressure blowers
 *Shown with optional high pressure blowers SUPERFLOW CYCLEDYN WITH CYCLEDYN YOU CAN The SuperFlow CycleDyn is a chassis dynamometer system, which means that you can select the appropriate Run tests with
CAUTION: CAREFULLY READ INSTRUCTIONS BEFORE PROCEEDING
 Daytona Sensors LLC Engine Controls and Instrumentation Systems Installation Instructions for WEGO IIID Wide-Band Exhaust Gas Oxygen Sensor Interface (Automotive Version) CAUTION: CAREFULLY READ INSTRUCTIONS
Automotive. Powersports. Accessories
 Dynamometer Catalog Automotive Powersports Accessories Hardware Software and Tuning POWERSPORTS Inertia Only Dynamometers Inertia Only Dynamometers Dynojet s cutting-edge engineering delivers the precise
Deans Switch Microfluidics
 TRACE 1300 and TRACE 1310 Gas Chromatographs Deans Switch Microfluidics Installation Guide 31709740 Revision A June 2014 2014 Thermo Fisher Scientific Inc. All rights reserved. TRACE 1300, and TRACE 1310
PLEASE READ ALL DIRECTIONS BEFORE STARTING INSTALLATION
 PARTS LIST 2007 Harley Davidson Touring Models Installation Instructions 1 Power Commander 1 USB Cable 1 Installation Guide 2 Power Commander Decals 2 Dynojet Decals 2 Zip-ties 2 O2 Optimizers THE IGNITION
PLEASE READ ALL DIRECTIONS BEFORE STARTING INSTALLATION
 PARTS LIST FUEL AND IGNITION 2010-2012 Ducati Multistrada 1200 Installation Instructions 1 Power Commander 1 USB Cable 1 Installation Guide 2 Power Commander Decals 2 Dynojet Decals 2 Velcro strips 1 Alcohol
PLEASE READ ALL DIRECTIONS BEFORE STARTING INSTALLATION
 PARTS LIST 2008-2009 Yamaha R6 Installation Instructions 1 Power Commander 1 USB Cable 1 CD-ROM 1 Installation Guide 2 Power Commander Decals 2 Dynojet Decals 2 Velcro 1 Alcohol swab 1 Posi-tap 1 O2 optimizer
INSTALLATION MANUAL. Document revision: 1.3 Last revised: January 2, 2019
 INSTALLATION MANUAL Document revision: 1.3 Last revised: January 2, 2019 Recon SpreadSense Installation Manual 2017-19 Intelligent Agricultural Solutions. All Rights Reserved. Recon SpreadSense Installation
POWERSPORTS DYNAMOMETER HARDWARE AND SOFTWARE
 POWERSPORTS DYNAMOMETER HARDWARE AND SOFTWARE DYNOWARE RT DYNAMOMETER HARDWARE DYNOWARE RT THE NEXT GENERATION OF DYNOJET DYNAMOMETER ELECTRONICS AND SOFTWARE HAS ARRIVED. DynoWare RT is the next generation
Installation Instructions for: EMS P/N and U Honda S2000
 Installation Instructions for: EMS P/N 30-1052 and 30-1052U 00-04 Honda S2000! WARNING: This installation is not for the tuning novice nor the PC illiterate! Use this system with EXTREME caution! The AEM
2016 POWERSPORTS DYNAMOMETER PRICELIST
 2016 POWERSPORTS DYNAMOMETER PRICELIST DYNAMOMETER AND DIAGNOSTIC TEST EQUIPMENT FEATURED DYNAMOMETER OF: Dynojet Research, Inc. 2191 Mendenhall Drive North Las Vegas, NV 89081 Tel (800) 992-3525 Int Tel
Automotive. Accessories
 Dynamometer Catalog Automotive Powersports Accessories Hardware Software and Tuning POWERSPORTS Inertia Only Dynamometers Inertia Only Dynamometers Dynojet s cutting-edge engineering delivers the precise
PLEASE READ ALL DIRECTIONS BEFORE STARTING INSTALLATION
 PARTS LIST 2009-2011 Moto Guzzi Stelvio Installation Instructions 1 Power Commander 1 USB Cable 1 Installation Guide 2 Power Commander Decals 2 Dynojet Decals 1 O2 Optimizer 3 Velcro strips 1 Alcohol swab
PLEASE READ ALL DIRECTIONS BEFORE STARTING INSTALLATION
 Parts List 2008-2014 Honda CBR1000RR Installation Instructions 1 Power Commander FC 1 USB Cable 1 Installation Guide 2 Dynojet Decals 2 Velcro 1 Alcohol swab 1 O2 Optimizer THE IGNITION MUST BE TURNED
Caterpillar Electronic Engines Application User s Guide
 Caterpillar Electronic Engines Application User s Guide Pro-Link iq IDSC Holdings LLC retains all ownership rights to the Pro-Link iq and its documentation. The Pro-Link iq source code is a confidential
PLEASE READ ALL DIRECTIONS BEFORE STARTING INSTALLATION
 Parts List 2004-2014 Suzuki GSX-R600/GSX-R750 Installation Instructions 1 Power Commander FC 1 USB Cable 1 Installation Guide 2 Dynojet Decals 2 Velcro 1 Alcohol swab 1 O2 Optimizer THE IGNITION MUST BE
EasyStart 364 (ASY-364-X20-IP) Installation Instructions for the Coleman / Airxcel Air Conditioners
 Installation Instructions for the Coleman / Airxcel Air Conditioners") EasyStart 364 (ASY-364-X20-IP) Installation Instructions for the Coleman / Airxcel Air Conditioners using Installation Kit KIT-364-CM1 Contents Introduction... 2 Safety first... 2 Making a good crimp...
EasyStart 364 (ASY-364-X20-IP) Installation Instructions for the Coleman / Airxcel Air Conditioners using Installation Kit KIT-364-CM1 Contents Introduction... 2 Safety first... 2 Making a good crimp...
Installation Instructions for Gauge-Type UEGO Controller
 Installation Instructions for 30-4100 Gauge-Type UEGO Controller WARNING: This installation is not for the electrically or mechanically challenged! Use this sensor with EXTREME caution! If you are! uncomfortable
Installation Instructions for NS No Sensor Gauge-Type UEGO Controller
 Installation Instructions for 30-4110NS No Sensor Gauge-Type UEGO Controller WARNING: This installation is not for the electrically or mechanically challenged! Use this sensor with EXTREME caution! If
Wide Band Air Fuel Ratio meter (Bosch LSU 4.9 sensors)
") Wide Band Air Fuel Ratio meter (Bosch LSU 4.9 sensors) Overview- Air Fuel Ratio (AFR) meter & display Interfaces to DYNertia3 or data loggers, It can also be used as a rugged professional stand-alone unit.
Wide Band Air Fuel Ratio meter (Bosch LSU 4.9 sensors) Overview- Air Fuel Ratio (AFR) meter & display Interfaces to DYNertia3 or data loggers, It can also be used as a rugged professional stand-alone unit.
DynoTune Wideband Gauge
 DISPLAY: RED GREEN BLUE DynoTune Wideband Gauge FACE: BLACK WHITE BEZEL: BLACK SILVER PACKAGE: ROUND SQUARE The DynoTune A/F Gauge will display the air/fuel ratio output from the LC-1 Wide-Band controller.
PLEASE READ ALL DIRECTIONS BEFORE STARTING INSTALLATION
 Parts List 2008-2011 Yamaha TMax 500 Installation Instructions 1 Power Commander FC 1 USB Cable 1 Installation Guide 2 Dynojet Decals 2 Velcro 1 Alcohol swab THE IGNITION MUST BE TURNED OFF BEFORE INSTALLATION!
PLEASE READ ALL DIRECTIONS BEFORE STARTING INSTALLATION
 PARTS LIST 2014 Harley Davidson Sportster 1200 Installation Instructions 1 Power Commander 1 USB Cable 1 Installation Guide 2 Power Commander Decals 2 Dynojet Decals 2 Velcro strips 1 Alcohol swab 2 O2
EasyStart Installation Instructions for Dometic Family RV A/Cs
 EasyStart Installation Instructions for Dometic Family RV A/Cs DuoTherm Brisk Brisk II Penguin Penguin II Contents Introduction... 4 Safety first... 4 Making a good crimp... 4 Identifying Dometic AC Units...
PLEASE READ ALL DIRECTIONS BEFORE STARTING INSTALLATION
 PARTS LIST 2014 Harley Davidson Sportster 883 Installation Instructions 1 Power Commander 1 USB Cable 1 Installation Guide 2 Power Commander Decals 2 Dynojet Decals 2 Velcro strips 1 Alcohol swab 2 O2
PLEASE READ ALL DIRECTIONS BEFORE STARTING INSTALLATION
 PARTS LIST 2006-2011 Yamaha MT-03 Installation Instructions 1 Power Commander 1 USB Cable 1 Installation Guide 2 Power Commander Decals 2 Dynojet Decals 2 Velcro strips 1 Alcohol swab 1 O2 Optimizer THE
PLEASE READ ALL DIRECTIONS BEFORE STARTING INSTALLATION
 Parts List 2013-2014 Honda CBR600RR Installation Instructions 1 Power Commander FC 1 USB Cable 1 Installation Guide 2 Dynojet Decals 2 Velcro 1 Alcohol swab 1 O2 Optimizer THE IGNITION MUST BE TURNED OFF
PLEASE READ ALL DIRECTIONS BEFORE STARTING INSTALLATION
 PARTS LIST 2008-2013 Harley Davidson Touring Model Installation Instructions 1 Power Commander 1 USB Cable 1 Installation Guide 2 Power Commander Decals 2 Dynojet Decals 2 Velcro strips 1 Alcohol swab
PLEASE READ ALL DIRECTIONS BEFORE STARTING INSTALLATION
 Parts List 2004-2007 Honda CBR1000RR Installation Instructions 1 Power Commander FC 1 USB Cable 1 Installation Guide 2 Dynojet Decals 2 Velcro 1 Alcohol swab THE IGNITION MUST BE TURNED OFF BEFORE INSTALLATION!
CAUTION: CAREFULLY READ INSTRUCTIONS BEFORE PROCEEDING
 Daytona Sensors LLC Engine Controls and Instrumentation Systems Installation Instructions for Wide-Band Exhaust Gas Oxygen Sensor Interface CAUTION: CAREFULLY READ INSTRUCTIONS BEFORE PROCEEDING OVERVIEW
PLEASE READ ALL DIRECTIONS BEFORE STARTING INSTALLATION
 Parts List 2009-2014 Yamaha YFZ450 R/X Installation Instructions 1 Power Commander FC 1 USB Cable 1 Installation Guide 2 Dynojet Decals 2 Velcro 1 Alcohol swab THE IGNITION MUST BE TURNED OFF BEFORE INSTALLATION!
PLEASE READ ALL DIRECTIONS BEFORE STARTING INSTALLATION
 PARTS LIST 2010-2012 MV Agusta Brutale 1090 Installation Instructions 1 Power Commander 1 USB Cable 1 Installation Guide 2 Power Commander Decals 2 Dynojet Decals 2 Velcro strips 1 Dual Lock strip 1 Alcohol
PLEASE READ ALL DIRECTIONS BEFORE STARTING INSTALLATION
 PARTS LIST 2015 Harley Davidson Street 750 Installation Instructions 1 Power Commander 1 USB Cable 1 Installation Guide 2 Power Commander Decals 2 Dynojet Decals 2 Dual Lock Velcro strips 1 Alcohol swab
Valve Box and Valve Accessories G4315A, G4316A, G4317A
 Valve Box and Valve Accessories G4315A, G4316A, G4317A Installation Guide The G4315A, G4316A, and G4317A accessories consist of separate kits depending on the custom configuration ordered. These kits may
POWERSPORTS DYNAMOMETERS TEST EQUIPMENT
 DYNAMOMETER CATALOG POWERSPORTS DYNAMOMETERS TEST EQUIPMENT ACCESSORIES HARDWARE SOFTWARE AND TUNING Your Source For Professional Service Equipment PO Box 80897 Rancho Santa Margarita, CA 92688 Phone:
NTK2000 UEGO OPERATORS MANUAL
 NTK2000 UEGO OPERATORS MANUAL CONTENTS Introduction...page 1 Uego Sensor...page3 Installation...page4 Operation...page5 Software...page6 M&W LCD...page9 Kit Components...page10 Output Graphs...page11 Specifications...page16
PRSalpha Air Drill (Double Valve)
") 888-680-4466 ShopBotTools.com PRSalpha Air Drill (Double Valve) Copyright 2016 ShopBot Tools, Inc. page 1 Copyright 2016 ShopBot Tools, Inc. page 2 Table of Contents Overview...5 Spindle Mounting Plate...6
888-680-4466 ShopBotTools.com PRSalpha Air Drill (Double Valve) Copyright 2016 ShopBot Tools, Inc. page 1 Copyright 2016 ShopBot Tools, Inc. page 2 Table of Contents Overview...5 Spindle Mounting Plate...6
SmarTire TPMS Maintenance Hand Tool. Revision User Manual
 SmarTire TPMS Maintenance Hand Tool Revision 1.04 User Manual Page 2 Table of Contents FCC Compliance Label... 4 User Interface Illustration... 4 Introduction... 5 Testing Tire Sensors... 5 Main Menu...
Mustang Dynamometer. Quick Start Guide. Copyright Mustang Dynamometer 2300 Pinnacle Parkway Twinsburg, OH
 Mustang Dynamometer Copyright 2011 Mustang Dynamometer 2300 Pinnacle Parkway Twinsburg, OH 44087 www.mustangdyne.com For Tech Support, call: (330) 963-5400 or 1-888-468-7826 Table of Contents To bring
THE BENCHMARK FOR AN ENTIRE INDUSTRY
 Dynojet Research Inc. has established a reputation for manufacturing innovative leading edge dynamometers, THAT HAVE BECOME THE BENCHMARK FOR AN ENTIRE INDUSTRY. The Dynojet Dynamometer is a revolutionary
SmarTire TPMS Maintenance Hand Tool. Revision User Manual
 SmarTire TPMS Maintenance Hand Tool Revision 1.03 User Manual Page 2 Table of Contents FCC Compliance Label...4 User Interface Illustration...4 Introduction...5 Testing Tire Sensors...5 Main Menu...6 Main
2009 Harley Davidson Dyna Models
 Parts List 2009 Harley Davidson Dyna Models Installation Instructions 1 Power Commander 1 USB Cable 1 CD-ROM 1 Installation Guide 2 Power Commander Decals 2 Dynojet Decals 2 Velcro Strip 1 Alcohol Swab
CAUTION: CAREFULLY READ INSTRUCTIONS BEFORE PROCEEDING
 Daytona Sensors LLC Engine Controls and Instrumentation Systems Installation Instructions for Wide-Band Exhaust Gas Oxygen Sensor Interface CAUTION: CAREFULLY READ INSTRUCTIONS BEFORE PROCEEDING OVERVIEW
Jerome DOSIMETER POCKET PUMP OPERATOR S MANUAL
 Jerome DOSIMETER POCKET PUMP OPERATOR S MANUAL September 2011 Arizona Instrument LLC 3375 N Delaware Street Chandler, AZ 85225 (602) 470-1414 (800) 528-7411 http://www.azic.com e-mail: azi@azic.com - General
PLEASE READ ALL DIRECTIONS BEFORE STARTING INSTALLATION
 Parts List 2006-2014 Yamaha Stratoliner/Roadliner 2008-2013 Yamaha Raider Installation Instructions 1 Power Commander FC 1 USB Cable 1 Installation Guide 2 Dynojet Decals 2 Velcro 1 Alcohol swab 1 O2 Optimizer
2008 Harley Davidson Touring
 2008 Harley Davidson Touring Installation Instructions Parts List 1 Power Commander 1 USB Cable 1 CD-ROM 1 Installation Guide 1 Power Adapter 2 Power Commander Decals 2 Dynojet Decals 2 O2 eliminators
Harley Davidson Softail
 Parts List 2001-2006 Harley Davidson Softail Installation Instructions 1 Power Commander 1 USB Cable 1 CD-ROM 1 Installation Guide 2 Power Commander Decals 2 Dynojet Decals 3 Dual lock Velcro Strip 1 Zip
HONDA VTX 1800C HONDA VTX 1800R INSTALLATION INSTRUCTIONS
 2002-2004 HONDA VTX 1800C 2002-2003 HONDA VTX 1800R INSTALLATION INSTRUCTIONS PARTS LIST quantity description 1 power commander EX 1 USB cable 1 cd-rom 1 installation guide 1 power adapter 2 1 power wire
CAUTION: CAREFULLY READ INSTRUCTIONS BEFORE PROCEEDING
 Daytona Sensors LLC Engine Controls and Instrumentation Systems Installation Instructions for WEGO II Wide-Band Exhaust Gas Oxygen Sensor Interface Methanol Version CAUTION: CAREFULLY READ INSTRUCTIONS
CAUTION: CAREFULLY READ INSTRUCTIONS BEFORE PROCEEDING
 Daytona Sensors LLC Engine Controls and Instrumentation Systems Installation Instructions for Wide-Band Exhaust Gas Oxygen Sensor System CAUTION: CAREFULLY READ INSTRUCTIONS BEFORE PROCEEDING OVERVIEW
Part # for Sportster Models
 Part # 309-365 for Sportster Models Thank you for purchasing a ThunderMax ECM! Please read through the following instructions before beginning the installation procedure. Following these instructions will
PLEASE READ ALL DIRECTIONS BEFORE STARTING INSTALLATION
 PARTS LIST FUEL AND IGNITION 2008-2017 Royal Enfield All EFI Models Installation Instructions 1 Power Commander 1 USB Cable 1 Installation Guide 2 Power Commander Decals 2 Dynojet Decals 1 Alcohol swab
OPERATION AND MAINTENANCE
 Table of Contents GENERAL INFORMATION INTRODUCTION... 1 Operating Specifications... 1 FEATURES... 1 SAFETY PRECAUTIONS... 2 SET-UP... 2 OPERATION AND MAINTENANCE TESTING AN IGNITION MODULE OR IGNITION
Installing the CO 2 Cryogenic Oven Cooling Kit
 Installing the CO 2 Cryogenic Oven Cooling Kit Agilent 6850 Series II Network GC System Accessory G2625B This kit contains: Description Chassis 1 Chassis Cover 1 Ship kit: 1 Cooling coil 1 Coil bracket
Prodigy HDLV System Troubleshooting - Generation III
 Prodigy HDLV System Troubleshooting - Generation III Instruction Sheet P/N 1081071-05 Use the procedures listed in this document to isolate and correct common problems with Prodigy HDLV Systems. Refer
PLEASE READ ALL DIRECTIONS BEFORE STARTING INSTALLATION
 PARTS LIST 2009-2012 Harley Davidson XR1200 Installation Instructions 1 Power Commander 1 USB Cable 1 Installation Guide 2 Power Commander Decals 2 Dynojet Decals 2 Velcro strips 1 Alcohol swab 2 O2 Optimizers
PLEASE READ ALL DIRECTIONS BEFORE STARTING INSTALLATION
 PARTS LIST FUEL AND IGNITION 2014-2015 Yamaha Bolt 950 Installation Instructions 1 Power Commander 1 USB Cable 1 Installation Guide 2 Power Commander Decals 2 Dynojet Decals 2 Velcro strips 1 Alcohol swab
AIR CLEANER GENERAL REMOVAL. 1CAUTION Do not run engine without filter element in place. Debris could be drawn into the engine causing damage.
 AIR CLEANER GENERAL The air cleaner prevents foreign material from entering the carburetor and engine by trapping airborne dust and dirt in the filter element. Service air cleaner filter element every
PLEASE READ ALL DIRECTIONS BEFORE STARTING INSTALLATION
 PARTS LIST 2013-2014 Honda CB500 / CBR500R Installation Instructions 1 Power Commander 1 USB Cable 1 Installation Guide 2 Power Commander Decals 2 Dynojet Decals 2 Velcro strips 1 Alcohol swab 1 Posi-tap
Maintenance Adjustments
 4 Maintenance and Adjustments Chapter Contents Cleaning the Printer and Paper Handling Accessories..... 158 Cleaning the HP Digital Copier....................... 161 Cleaning ADF and Glass............................
Lingenfelter NCC-002 Nitrous Control Center Quick Setup Guide
 Introduction: Lingenfelter NCC-002 Nitrous Control Center Quick Setup Guide The NCC-002 is capable of controlling two stages of progressive nitrous and fuel. If the NCC-002 is configured only for nitrous,
PSB-1 User Manual. Warning!
 PSB-1 User Manual Warning! The Oxygen Sensor used in this device gets very hot in operation. Do not touch a hot sensor. Do not let a hot sensor touch a combustible surface. Do not use the sensor with or
PLEASE READ ALL DIRECTIONS BEFORE STARTING INSTALLATION
 PARTS LIST 1999-2001 Harley Davidson Touring Models Installation Instructions 1 Power Commander 1 USB Cable 1 Installation Guide 2 Power Commander Decals 2 Dynojet Decals 2 Velcro strips 1 Alcohol swab
CAUTION: CAREFULLY READ INSTRUCTIONS BEFORE PROCEEDING
 Twin Tec Installation Instructions for Wide-Band Exhaust Gas Oxygen Sensor System CAUTION: CAREFULLY READ INSTRUCTIONS BEFORE PROCEEDING OVERVIEW The is a complete air/fuel ratio (AFR) metering system
PLEASE READ ALL DIRECTIONS BEFORE STARTING INSTALLATION
 PARTS LIST 2014-2016 Can-Am Spyder RT & F3 Installation Instructions 1 Power Commander 1 USB Cable 1 Installation Guide 2 Power Commander Decals 2 Dynojet Decals 1 O2 Optimizer 2 Velcro strips 1 Alcohol
HDMD-200/300 Universal display
 Universal display I n s ta l l at i o n G u i d e Micro Display Kit 9 Mendenhall Drive North Las Vegas, NV 8908 www.dynojet.com -800-99-4993 www.dynojet.com Display unit Attachment Pegs Cable Harness Hex
PLEASE READ ALL DIRECTIONS BEFORE STARTING INSTALLATION
 PARTS LIST 2010 MV Agusta Brutale 1090 Installation Instructions 1 Power Commander 1 USB Cable 1 CD-ROM 1 Installation Guide 2 Power Commander Decals 2 Dynojet Decals 2 Velcro 1 Dual Velcro 1 Alcohol swab
EPAS Desktop Pro Software User Manual
 Software User Manual Issue 1.10 Contents 1 Introduction 4 1.1 What is EPAS Desktop Pro? 4 1.2 About This Manual 4 1.3 Typographical Conventions 5 1.4 Getting Technical Support 5 2 Getting Started 6 2.1
2011 Yamaha Apex Snowmobile
 PARTS LIST 2011 Yamaha Apex Snowmobile Installation Instructions quantity description 1 power commander 1 USB cable 1 cd-rom 1 installation guide 2 power commander decals 2 dynojet decals 2 velcro strip