Cleaning Systems Inc. 2 P Rev:03
|
|
|
- Ami Jordan
- 5 years ago
- Views:
Transcription
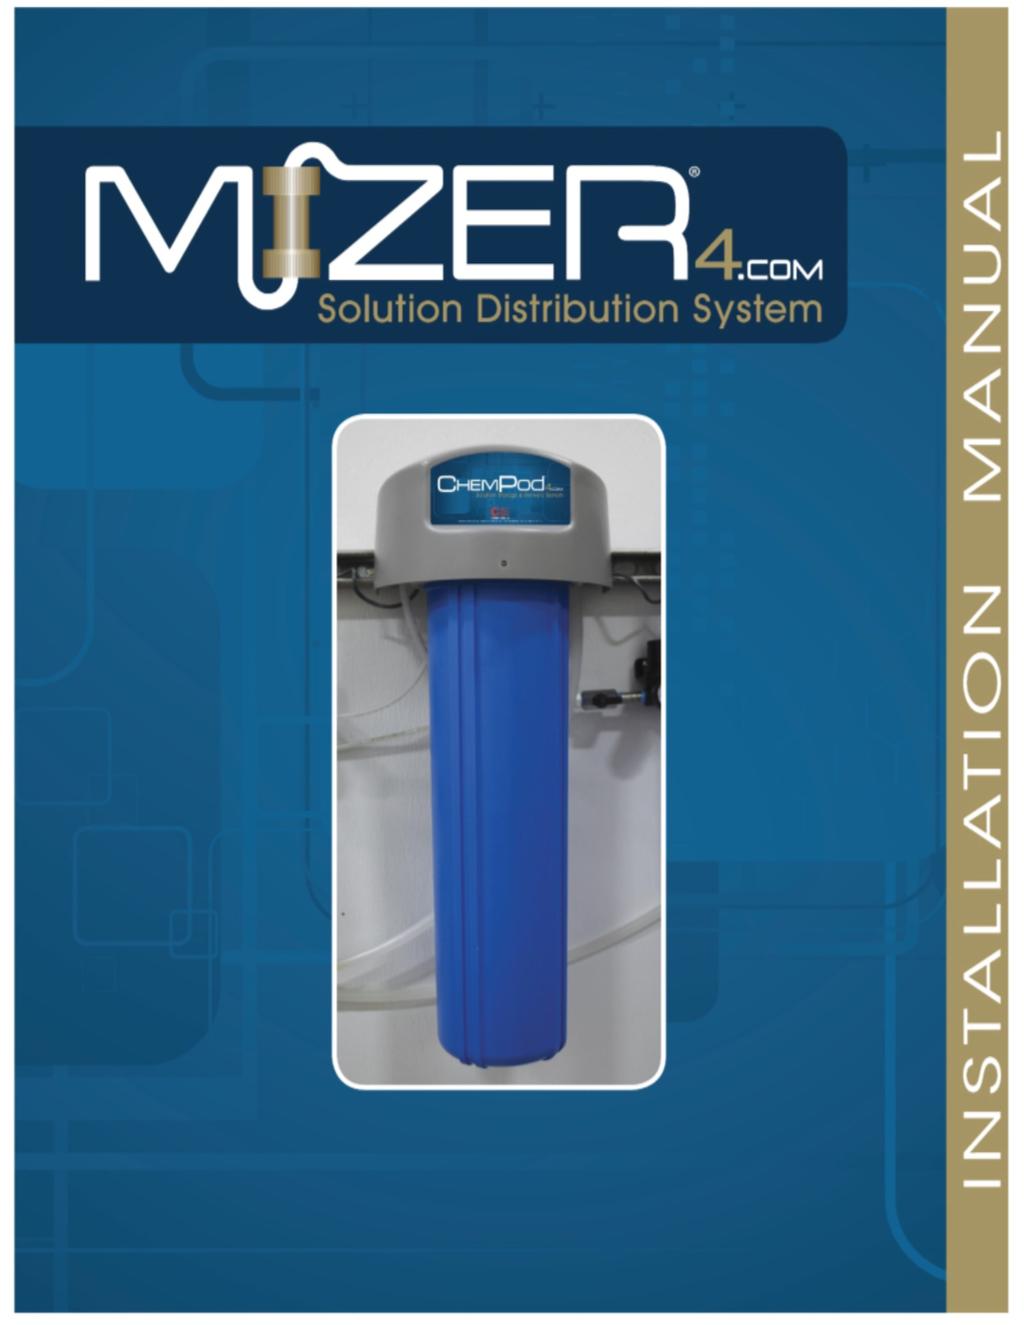
1 CHEMPOD
2 Table of Contents Overview... 3 Specifications... 3 Dimensions... 3 Weight... 3 Electrical Voltage... 3 Capacity... 3 Product Supply... 3 Pneumatic Supply... 3 Optional Installation Kits... 3 Locating and Mounting the ChemPod... 4 Air and Fluid Connections... 6 Application Plumbing with A Mizer... 7 Application Plumbing Other than a Mizer... 7 Hose Pressure Loss Chart... 8 Electrical Controller Diagram Controller Status Control Wiring Schematic ChemPod Wiring Diagram Schematic ChemPod To Mizer Wiring Diagram ChemPod Parts Diagram P ChemPod Parts Listing Application Examples Wheel Cleaner Application High Flow Application Hand Wand Application Self-Serve Bay Application ChemPod Accessories P ChemPod Mizer Install Kit P ChemPod Air Regulator Kit P Sump Wrench for Sump Housing P ChemPod Accessory 3/8" Valve Plumbing Troubleshooting ChemPod Controller/Float Switch Air Only, Exiting ChemPod Will Not Fill Overfilling Pressure Fluctuating Air Bleeding/Leaking Cleaning Systems Inc. 2 P Rev:03
3 Overview The ChemPod is a solution storage reservoir that holds a solution in a pre-charged, ready to apply state. It has its own control module and fluid level switch to maintain an operable fluid level while maintaining a consistent output pressure. The unit can be hooked up to multiple application devices. The ChemPod will provide a consistent fluid flow of product whether in diluted form or non-diluted form to the applicator creating even coverage allowing an economical application of product. The ChemPod can also be used to apply products that require air injection agitation of product at the applicator(s) providing extended coverage on surfaces using less product. Specifications Dimensions ChemPod assembly with cover: 11 wide x 26 tall x 8" deep Weight 8.0 pounds (empty) Electrical Voltage 24VAC 50/60Hz Capacity 1 Gallon Product Supply Maximum Product Temperature: 120 F Pneumatic Supply 60PSI 0.2SCFM per ChemPod Optional Installation Kits P ChemPod Mizer Install Kit. Kit includes fluid plumbing components to connect ChemPod to Mizer outlet and tubing to connect to an air source. P ChemPod Regulator Install Kit. Kit includes a pneumatic regulator and tube fittings to control the air pressure in the ChemPod(s). Cleaning Systems Inc. 3 P Rev:03
4 Locating and Mounting the ChemPod The ChemPod location is specific to where and how the product is to be applied. It can be mounted directly to or at the application mechanism, or out of customers view in an equipment room or some other controlled environment. Consideration to temperature is also a factor in colder or extremely warm environments. The ChemPod can handle temperatures between 32 to 120 F, but preferably around (room temperature) 70 F. The distance the supply lines run from the ChemPod to the applicator is one of the more important considerations. It is recommended to try to keep the length of the lines between the ChemPod and the applicator under 75 feet, although longer connections will work, the response time, pressure losses, and opportunity for larger product loss due to line bleed down become more prevalent in long connections. The height of the ChemPod and the amount of clearance under it should be reviewed before mounting. The ChemPod must be mounted with a minimum clearance of 22 to allow adequate room to remove the ChemPod sump for maintenance. The ChemPod must be mounted vertically. The ChemPod has provisions for two 3/8" diameter fasteners to mount the ChemPod head directly to a wall or structure. Typical methods for mounting are: Concrete anchors to masonry and block walls, anchoring mounting tracks (Unistrut, Kindorf, etc) horizontal or vertical to catch the mount holes or a fabricated bracket. See illustration on following page. Cleaning Systems Inc. 4 P Rev:03
5 ChemPod Mounting Example Cleaning Systems Inc. 5 P Rev:03
6 Air and Fluid Connections The air regulator used must be a relieving type that will relieve the back pressure within 10psi to maintain operational consistency of the ChemPod integral quick exhaust valve. View of Air Plumbing Cleaning Systems Inc. 6 P Rev:03
7 Top view of air and fluid connections. Cover is removed for clarity Application Plumbing with a Mizer The following illustration shows the ChemPod fluid connection to the Mizer using the parts included in ChemPod Mizer Install Kit P The check valve connects directly to the injector outlet on the Mizer (3/8NPT). 1/2" O.D. tube is supplied for the connection from the tee to the ChemPod. The connection port for the product application line is a ½ O.D. tube compression fitting. The line routed to the application device should be sized referring to line loss chart. The line sizes should be sized large enough to prevent less than 20PSI of system back pressure caused by the plumbing to the applicator. Too large of plumbing to the applicator will cause issues with the application start up delays and product waste due to system draining down after the application shuts off. Application Plumbing Other than a Mizer The plumbing will follow the same routing as a Mizer connection. An inline check valve will be required on the pressure end (filling device) to prevent back flow. Take note of the inline check valve and flow direction in the following illustration. The filling device will have to operate at a higher pressure then the ChemPod operating pressure. The pressure differential between the filling device and the ChemPod will determine refill rate (in time). The filling device should be operating at least 20PSI higher. Cleaning Systems Inc. 7 P Rev:03
8 3/8 NPT CONNECTION AT THE INJECTOR OUTLET. NOTE THE CHECK VALVE FLOW DIRECTION ½ O.D. TUBE TO APPLICATION ½ O.D. TUBE TO CHEMPOD INLET/OUTLET Mizer fluid connection. Mizer cover removed for clarity Hose Pressure Loss Chart The chart below shows the pressure drop in PSI per 100FT of hose with typical water flow rates. Example: A 100' long 3/8 hose flowing 3 gallons of water per minute has a 50PSI pressure loss. A 50 long piece of the same hose and flow would have a 25PSI pressure loss. Most installations use a hose or tube from the ChemPod to the applications, the pressure loss chart can be used as a reference to help size the proper size hose or tube. Note that if tubing is used, the chart would reference the inside diameter, as an example a standard ½ polyethylene tube will have a 3/8 inside diameter and the 3/8 column of the chart should be used. Try to keep the plumbing runs from the Mizer panel to the application as short as possible to prevent pressure loss, heat loss, and improve your reaction time on and off reducing waste. As an average, most plumbing distances from the Mizer panel to the applicator are less than 50 ft. runs. Cleaning Systems Inc. 8 P Rev:03

9 Pressure loss chart Cleaning Systems Inc. 9 P Rev:03
 - Fault indicator FLASHING - Controller in Fault.")
10 Controller Diagram Electrical K2.2 K2.1 IN1.1 IN1.2 IN2.1 IN2.2 L2 K1.2 K1.1 L1 P CONTROLLER DUAL I/O 24V CHEMPOD ITEM # DESCRIPTION NOTES/STATUS 1 24VAC power connections No polarity 2 LED (red) - Fault indicator FLASHING - Controller in Fault. Cycle power to reset 3 LED (green) - Upper float switch indicator ON - No fluid present OFF - fluid present 4 Upper float switch connections Normally closed switch 5 Lower float switch connections Normally closed switch 6 LED (green) - Lower float switch indicator ON - No fluid present OFF - fluid present 7 Relay output 2 connections Not used 8 LED (green) - Relay output 2 indicator Not used 9 LED (green) - Relay output 1 indicator ON - Chempod fill signal ON OFF - Chempod idle 10 Relay output 1 connections Normally Open contact P Controller Item Descriptions Cleaning Systems Inc. 10 P Rev:03
 - Fault Indicator LED will flash red to indicate the controller is in a fault state if either of the following conditions are met: 1.")
11 Controller Status The ChemPod controller P has LED s to visually indicate the state of the (2) inputs, (2) outputs, and if the controller is in a fault. See the controller diagram above for LED identification. LED (red) - Fault Indicator LED will flash red to indicate the controller is in a fault state if either of the following conditions are met: 1. Float switch error. The upper float switch is OFF (fluid present), and the lower float switch is ON (fluid not present). This state is not possible if all components are functioning properly and indicates there is an issue with the float switch or wiring. 2. The Chempod calls for a fill < 15 seconds after it finishes a fill cycle and reaches full. The ChemPod should not be draining quick enough to require a fill within 15 seconds of reaching full and shutting off. LED (green) - Upper Float Indicator LED is ON when fluid is not present. OFF when fluid is present. The float switch is a normally closed switch. LED (green) - Lower Float Indicator LED is ON when fluid is not present. OFF when fluid is present. The float switch is a normally closed switch. LED (green) - Relay Output 1 Indicator LED is ON when the normally open relay contact closes to send a signal to the filling control device to fill the ChemPod. OFF when the ChemPod is full or Idle. The relay contact is open when the LED is OFF. LED (green) - Relay Output 2 Indicator Not used for the ChemPod configuration. Control Wiring The ChemPod comes assembled with the control board and float switch wiring in place. The supplied wiring harness will connect to the right-hand side of the control board as shown in the following illustrations. IN1.1 - RED WIRE LOWER FLOAT SWITCH IN1.1 - BLK WIRE LOWER FLOAT SWITCH K1.2 - N.O. OUTPUT RED K1.1 - N.O. COMMON GREEN IN2.1 - GRN WIRE UPPER FLOAT SWITCH IN2.2 - WHT WIRE UPPER FLOAT SWITCH L1-24VAC PHASE POWER IN - BLACK L2-24VAC NEUTRAL POWER IN - WHITE Cleaning Systems Inc. 11 P Rev:03
12 Float switch and control module Cleaning Systems Inc. 12 P Rev:03
13 Schematic ChemPod Wiring Diagram Schematic ChemPod Connections Cleaning Systems Inc. 13 P Rev:03
14 Schematic ChemPod To Mizer Wiring Diagram Schematic Reference of ChemPod to Mizer Connection Cleaning Systems Inc. 14 P Rev:03

15 ChemPod Parts Diagram Cleaning Systems Inc. 15 P Rev:03
16 P ChemPod Parts Listing ITEM QTY NUMBER DESCRIPTION 1 1 P COVER CHEMPOD GRAY ABS 2 1 P BRACKET CHEMPOD-CONTROLLER ALUMINUM 3 1 P CHEMPOD HEAD WHITE 4 1 P CHEMPOD HEAD EXHAUST CAP 5 1 P SUMP 20" BLUE 6 1 P VALVE RELIEF 75PSI 1/4NPT BRASS 7 1 P TEE 1/4NPT FEMALExMALExFEMALE BRASS 8 1 P ADAPTOR.50TUBEx.50MPT 90DEG COMP PP 9 1 P ADAPTOR.375TUBEx.25MPT 90DEG COMP PP 10 1 P ADAPTOR.25TUBEx.25MPT 90DEG COMP PP 11 1 P ADAPTOR 1/2SLIP x 1/2MNPT SCH40 PVC WHITE 12 1 P O-RING.210x5.60ID SILICONE 70D ORANGE 13 1 P A DIAPHRAGM 1.96 ODx.060" SILICONE 70D RED 14 1 P B GASKET 1.96 IDx0.06"THK SILICONE 70D RED 15 1 P SWTCH FLOAT MULTIPOINT NC-3.0", NC-14.0" 16 1 P CONTROLLER DUAL I/O 24V CHEMPOD 17 1 P HARNESS CHEMPOD INTERFACE 15'LONG 18 4 P TERM DISC 22-16AWG FEM.250 FULL-INSU PK 19 1 P DECAL CHEMPOD 20 2 P DECAL CAUTION PRESSURIZED DEVICE 21 1 P DECAL CHEMPOD CONTROLLER DIAGRAM 22 1 P LABEL SPEC CHEMPOD 23 1 P LABEL SPEC ELECTRICAL CHEMPOD 24 1 P PIPE 1/2 SCH40 PVC WHITE 20"CUT LENGTH 25 6 P SCREW 8x3/8LG PHIL PAN THRD-FORMING SST 26 6 P SCREW 8x3/4LG PHIL PAN THRD-FORMING SST 27 3 P CABLE TIE 4.00x.100 NATURAL Cleaning Systems Inc. 16 P Rev:03
17 Application Examples Wheel Cleaner Application Cleaning Systems Inc. 17 P Rev:03
18 High Flow Application Cleaning Systems Inc. 18 P Rev:03
19 Hand Wand Application Cleaning Systems Inc. 19 P Rev:03
20 Self-Serve Bay Application Cleaning Systems Inc. 20 P Rev:03
21 ChemPod Accessories P ChemPod Mizer Install Kit ITEM QTY NUMBER DESCRIPTION 1 1 P VALVE CHECK.375FPTx.375FPT PP 125PSI 2 2 P ADAPTOR.50TUBEx.38MPT COMP PP 3 1 P TUBING.50x.375 LDPE NATURAL 15' LONG 4 1 P TUBING.25X.125 LDPE NATURAL 15' LONG 5 1 P ADAPTER TEE-BRANCH.50TUBEx.38MPTCOMP PP 6 1 P ADAPTER ELBOW 90DEG.50TUBEx.38FPT COMP PP P Part Listing Cleaning Systems Inc. 21 P Rev:03

22 P ChemPod Air Regulator Kit ITEM QTY NUMBER DESCRIPTION 1 1 P REGULATOR MINI 1/8&1/4NPT PORTS 0-60PSI 2 3 P ADAPTOR.25TUBEx.25MPT PP PUSHLOCK 3 1 P REGULATOR BRKT & NUT MINI PLATED-STEEL 4 1 P GAUGE DIA.125MPT CBM P Part Listing Cleaning Systems Inc. 22 P Rev:03

23 P Sump Wrench for Sump Housing Wrench P used to remove the sump Cleaning Systems Inc. 23 P Rev:03
24 P ChemPod Accessory 3/8" Valve Plumbing ITEM QTY NUMBER DESCRIPTION 1 3 P TUBING.50x.375 LDPE NATURAL, 10FEET 2 1 P VALVE SOLENOID.375FPT SST 24VAC SPADE 3 2 P VALVE BALL.25MPTx.25FPT PLSTC 4 1 P NIPPLE.38NPTx2.50"LONG SCH40 SST 5 1 P TEE.38FPTx.38FPTx.38FPT SST 6 1 P TEE.50T COMP PP 7 1 P PLUG.375MPT SST 302 SOCKET 8 2 P ADAPTOR.50TUBEx.38MPT COMP PP 9 2 P ADAPTER.50x.25MPT PP 10 1 P HARNESS SOLENOID SPADE 20-2 CABLE 6'LONG 11 1 P CLAMP HANGING 3/8&1/2"CONDUIT SST P Parts Listing This is an example. Each component can be purchased separately or as kit #P Cleaning Systems Inc. 24 P Rev:03

25 Troubleshooting ChemPod Controller/Float Switch The controller receives the fill signal from the float switch and closes the normally open contact (K1.2) to call for product to fill the ChemPod. The float switch has an upper and lower normally closed contact. When empty, the lower float contact is closed, calling for fill until the upper (normally closed) contact opens and stops the fill process. The switch must operate in that sequence or the controller will fault out and will need to be reset (by cycling the 24VAC power). It is important to keep in mind that whenever manually operating the float switches out of sequence, the controller must be reset because it has faulted out (indicated with a flashing red LED) and will not function until it is reset. To clear/reset the ChemPod controller, unplug or shut off the power source to the controller for at least 10 seconds. The power source is located on the lower right hand corner of the control module (black or white wire will disrupt power to controller). Test Float Switch: Remove the ChemPod sump to access and test the float switch. Use CAUTION and relieve any system pressure in the ChemPod before removing the sump. Check to ensure that the floats move freely. Test each float separately using an Ohm meter or continuity tester. The upper float uses the green and white wires and the lower float uses the red and black wires. They are normally closed circuits, so with the float at rest (down position) the circuit will be closed. Use P or a standard strap wrench to remove sump. Cleaning Systems Inc. 25 P Rev:03

26 Cleaning Systems Inc. 26 P Rev:03
27 Air Only, Exiting ChemPod: 1. ChemPod is empty. 2. Cracked or loose pick up tube inside ChemPod. 3. ChemPod is empty and not able to fill because air inlet pressure is higher than the pressure from the device filling the ChemPod. 4. Check to make sure that the device that is filling the ChemPod is operating properly. Will Not Fill: 1. ChemPod is in a fault. This is indicated with a flashing red LED. The controller must be reset by removing the 24VAC powering the controller for about 10 seconds. 2. Check to see if you have power to the controller. Check for 24VAC to the controller (at L1 and L2 on the controller) with a voltage meter. 3. Check to make sure that the device that is filling the ChemPod is operating properly. Check the controller output contact. 4. If the ChemPod is being filled by an injection system, check that the injector supplying product to the ChemPod is not clogged. Remove the injector and make sure you can see through the orifice. 5. Not enough pressure on the fill device to overcome the ChemPod operating pressure. 6. ChemPod level switch cannot be operated out of sequence. If so, the controller will time out and have to be reset by removing the 24VAC power supply for about 10 seconds. Sequence of switch: The fluid level switch must call for fill. The lower float (normally closed contact that opens when raised) will activate the fill device and when the upper level switch is satisfied, (upper float is a normally closed contact that opens when raised) it will deactivate the fill device. Overfilling: 1. Product is foaming up inside ChemPod. Verify that air is not getting mixed in from the device filling the ChemPod (i.e. An injector pulling air instead of solution). 2. Inlet valve from external filling device stuck open. 3. Fill device stuck on. 4. Float switch functioning incorrectly. Test switches: Ensure that the floats move freely and both switch contacts are opening when the switch is in the up position and closing in the down position using an Ohm meter or test light. 5. Controller failure. Pressure Fluctuating: 1. Regulator not relieving properly. When the ChemPod is filling, it should be exhausting air out of the exhaust port. Air regulator must be the relieving type for the exhaust valve to operate properly. 2. Exhaust valve not exhausting or leaking all the time. Disassemble, check for debris, and clean the sealing area of the diaphragm. Air Bleeding/Leaking: 1. Safety valve is leaking: a. Operating or system pressure set too high. Note: the safety valve is set to relieve at 75 PSI. 2. Check to see if the air regulator supplying the air is relieving properly. 3. Check to see if air is exhausting at exhaust port during fill up is normal. 4. Leaking steady at exhaust port: a. Dirty or defective diaphragm. Cleaning Systems Inc. 27 P Rev:03
MicroCoat System Operating Manual MC4000 Series MC785M, MC785M-WF Spray Valves
 MicroCoat System Operating Manual MC Series MC785M, MC785M-WF Spray Valves A NORDSON COMPANY Introduction The MicroCoat System provides precise lubrication control for metal stamping operations. The MC
MicroCoat. System Operating Manual MC2000 Series. MC785, MC785-WF Spray Valves. US: UK: Mexico:
 MicroCoat System Operating Manual MC2 Series MC785, MC785-WF Spray Valves A NORDSON COMPANY US: 8-498-8865 UK: 8 585733 Mexico: 1-8-556-3484 Introduction The MicroCoat System provides precise lubrication
Kit. Hydraulic Kit Installation A. Item Component Part Number Qty
 Hydraulic Kit Installation Item Component Part Number Qty 1. 2. 3. 4. Hose, 1/2 x 60-8F ORFS x -8F ORFS 90 Hose, 3/8 x 60-6F ORFS x -8F ORFS 90 Hose, 1/4 x 60-4F ORFS x -4F ORFS 45 Hose, 1/4 x 60-4F ORFS
Troubleshooting. This section outlines procedures for troubleshooting problems with the operation of the system:
 Troubleshooting This section outlines procedures for troubleshooting problems with the operation of the system: 4.1 System Error Messages... 4-2 4.2 Prep Station Troubleshooting... 4-6 4.2.1 Adapter Not
GLYCOL FEED SYSTEMS OPERATION & MAINTENANCE MANUAL
 GLYCOL FEED SYSTEMS OPERATION & MAINTENANCE MANUAL PLEASE RECORD THE FOLLOWING DATA (Information is located on the product label or packing slip) Model Number: Date Code: Installation Date: Installation
PORTABLE EXTRACTOR 500/500H ( ) 115V 230V
 115V 230V") PORTABLE EXTRACTOR 500/500H (78-003 78-004) 115V 230V 500/500H TOP VIEW 03-00030 4 RIVET 3/16 X 1/2 AL/AL BLK AND 03-00204 1 RIVET - 3/16 X 5/8 TRI FOLD AL/AL 03-01547 1 WASHER FLAT.203 ID X.734 OD X.06
PORTABLE EXTRACTOR 500/500H (78-003 78-004) 115V 230V 500/500H TOP VIEW 03-00030 4 RIVET 3/16 X 1/2 AL/AL BLK AND 03-00204 1 RIVET - 3/16 X 5/8 TRI FOLD AL/AL 03-01547 1 WASHER FLAT.203 ID X.734 OD X.06
6 Gauge Box Set IS0332
 Caution 6 Gauge Box Set IS0 Rev. A ecr 878 /0 Disconnect the battery during installation. Tighten nuts on the back clamp only slightly more than you can tighten with your fingers. Six inch-pounds of torque
MIDRISE MODEL SM60F_1 // SM60F_A 6,500 LB. CAPACITY
 INSTALLATION and OPERATION MANUAL READ THIS INSTRUCTION MANUAL THOROUGHLY BEFORE INSTALLING, OPERATING, SERVICING OR MAINTAINING THE LIFT. SAVE THIS MANUAL. NOV 2007 REV.B MIDRISE MODEL SM60F_1 // SM60F_A
GROUP 13C 13C-1 CONTENTS GENERAL DESCRIPTION... 13C-2 FUEL TANK... 13C-11 FUEL SUPPLY DIAGNOSIS... 13C-3 SPECIAL TOOLS... 13C-8
 13C-1 GROUP 13C CONTENTS GENERAL DESCRIPTION......... 13C-2 DIAGNOSIS....... 13C-3 INTRODUCTION TO DIAGNOSIS........................ 13C-3 TROUBOLESHOOTING STRATEGY..... 13C-3 SYMPTOM CHART...................
MODEL: ATVBK-710 BEFORE RETURNING THIS PRODUCT FOR ANY REASON, PLEASE CALL
 5307 MODEL: ATVBK-70 7 Nozzle boom assembly W/CONNECTING FITTINGS Assembly / Operation Instructions / Parts original sales slip, or other evidence of purchase date, to your distributor / dealer. TECHNICAL
LG-60-3PT-WP-309-BL-TSC
 55 Model No: LG-0-PT-WP-0-BL-TSC 0 Gallon Point Lawn & Garden Sprayer W/Pump & Coupler & Boomless Boom Assembly / Operation Instructions / Parts ASSEMBLY Most of the sprayer has been assembled at the factory..
Low Profile J Series Power Unit with Vane Pump
 Low Profile J Series Power Unit with Vane Pump READ ALL INSTRUCTIONS CAREFULLY BEFORE ATTEMPTING TO ASSEMBLE, INSTALL, OPERATE OR MAINTAIN THE PRODUCT DESCRIBED. PROTECT YOURSELF AND OTHERS BY OBSERVING
OWNER S MANUAL. Model: FSUTV-45-12V ( ) (45 Gallon Lawn & Garden UTV Sprayer, Boom Ready) Technical Specifications. Assembly Instructions
 (45 Gallon Lawn & Garden UTV Sprayer, Boom Ready) Technical Specifications. Assembly Instructions") OWNER S MANUAL Model: FSUTV-45-12V (5302903) (45 Gallon Lawn & Garden UTV Sprayer, Boom Ready) Technical Specifications 45 Gal. Corrosion-Resistant Polyethylene Tank Deluxe Pistol-Grip Handgun 25 Ft. Handgun
OWNER S MANUAL Model: FSUTV-45-12V (5302903) (45 Gallon Lawn & Garden UTV Sprayer, Boom Ready) Technical Specifications 45 Gal. Corrosion-Resistant Polyethylene Tank Deluxe Pistol-Grip Handgun 25 Ft. Handgun
Iron Gate Air Pump System Manual
 Iron Gate Air Pump System Manual Installation and Operating Instructions Iron Gate Iron Filter System Manufactured by: R.E Prescott Co., Inc. 10 Railroad Avenue Exeter, New Hampshire 03833 Phone: (603)
AQUA-LAB AX, BX, TX. CHEMICAL DISPENSING SYSTEM User Manual REV A reva0717
 AQUA-LAB AX, BX, TX CHEMICAL DISPENSING SYSTEM User Manual REV A 4000133 reva0717 Hydra-Flex, Hydra-Flex, Inc. 2017 Inc. 2017 TABLE OF CONTENTS Overview 1 Features 1 Specifications 1 Installation Instructions
Mizer Single Pump and Starter Box
 Mizer Single Pump and Starter Box Table of Contents Line Diagram... 2 Overview... 3 Booster Pump Specifications... 3 Water... 3 Electrical... 3 Models... 3 Mounting... 4 Electrical... 6 Motor Rotation...
Foam Generator Service Parts List One-Step CAFS
 Document Number Issue Date 4/17/15 Rev. Date 12/19/16 Foam Generator Service Parts List One-Step CAFS Index: Foam Generators Pressure Regulator PLC Cable Connections Component Double Generators See Pages
6 Gauge Box Set with Programmable Speedometer. Made in the USA. Caution. Speedometer Parts. Tachometer Parts. Fuel Level Gauge Parts.
 6 Gauge Box Set with Programmable Speedometer Caution Disconnect the battery during installation. Tighten nuts on the backclamp only slightly more than you can tighten with your fingers. Six inch-pounds
Installation Instructions Dual Perimeter Plate Nitrous System (#82185)
") Installation Instructions Dual Perimeter Plate Nitrous System (#82185) Thank you for choosing ZEX. If at any time you have questions regarding this or any of our products, please call our ZEXTEK support
Installation Instructions Dual Perimeter Plate Nitrous System (#82185) Thank you for choosing ZEX. If at any time you have questions regarding this or any of our products, please call our ZEXTEK support
Eclipse GEN 2.0 CAFSystem, Model 150-ECL CAFS PTO Kit Installation Instructions
 Eclipse GEN 2.0 CAFSystem, Model 150-ECL CAFS PTO Kit Installation Instructions Read Read through the the safety installation information instructions overhaul carefully instructions before carefully beginning
ALLSTAR DILUTION CONTROL SYSTEM MODEL 639AG-4-1ABC
 MODEL 639AG-4-1ABC 1. PARTS: A. Blend Center assembly B. 5 pc. 1/4 ID x 8 ft. long vinyl supply tubing, with foot valve & ceramic weight C. 1 pc. 1/2 ID x 6 ft. long vinyl outlet tubing D. 2 pc. #8 pan
MID RISE. INSTALLATION and OPERATION MANUAL MODEL 6000A // 6000E 6,000 LB. CAPACITY. READ and SAVE THIS INSTRUCTION MANUAL
 INSTALLATION and OPERATION MANUAL MID RISE MODEL 6000A // 6000E 6,000 LB. CAPACITY READ and SAVE THIS INSTRUCTION MANUAL AUGUST 2005 6-0944 6500 Millcreek Drive Mississauga, Ontario Canada L5N 2W6 1-800-268-7959
Owner's Manual. Model: ( ) (150 Gallon, 5.5 HP Skid Sprayer) Technical Specifications. General Information. Warranty/Parts/Service
 (150 Gallon, 5.5 HP Skid Sprayer) Technical Specifications. General Information. Warranty/Parts/Service") Owner's Manual Model: -0 (00) (0 Gallon,. HP Skid Sprayer) Technical Specifications General Information Thank you for purchasing this product. The purpose of this manual is to assist you in operating and
Owner's Manual Model: -0 (00) (0 Gallon,. HP Skid Sprayer) Technical Specifications General Information Thank you for purchasing this product. The purpose of this manual is to assist you in operating and
Installation & Operator s Manual
 Installation & Operator s Manual LS5 Liquid Spray System 2 x 10⁵ Gallon Tanks Installation Instructions 1. Position pump enclosure bracket (#3028485) 4 from rear gusset on driver side of hopper spreader,
INSTRUCTIONS. #82044 Race Diesel Nitrous System
 INSTRUCTIONS #82044 Race Diesel Nitrous System Thank you for choosing ZEX products; we are proud to be your manufacturer of choice. Kit Parts List Description Qty. Description Qty. Nitrous Solenoid 2.088
Kit. Hydraulic Kit Installation Guide REV A. Item Component Part Number Qty
 Hydraulic Kit Installation Guide Item Component Part Number Qty 1. HOSE ASSY. 3/8" X 110" -8F ORFS X -8F ORFS 90 DEG F451TC-JCJ9080806-110 1 2. HOSE ASSY. 3/8" X 110" -6F ORFS X -8F ORFS 90 DEG F451TC-JCJ9060806-110
PeroxiDraw Dispenser
 The PeroxiDraw Dispensing System is a locking dispensing system that allows the user to dispense Green Earth Peroxide Cleaner for up to six different dilutions and applications safely and effectively.
Kit. Hydraulic Kit Installation Guide REV B Table 1 Component List. Item Component Part Number Qty
 Hydraulic Kit Installation Guide Table 1 Component List Item Component Part Number Qty 1. Hose 5/8 X 36-8F X -12F 90 DEG ORFS F451TC-JSJ9081210-36 2 2. HOSE ASSY. 1/4" X 36" -4F X -6F ORFS F451TC-JCJC040604-36
ENGINE COOLING GROUP CONTENTS RADIATOR GENERAL DESCRIPTION SPECIAL TOOLS THERMOSTAT
 14-1 GROUP 14 CONTENTS GENERAL DESCRIPTION 14-2 SPECIAL TOOLS 14-3 DIAGNOSIS 14-3 INTRODUCTION 14-3 TROUBLESHOOTING STRATEGY 14-3 SYMPTOM CHART 14-4 SYMPTOM PROCEDURES 14-4 ON-VEHICLE SERVICE 14-17 ENGINE
INTAKE AND EXHAUST GROUP CONTENTS GENERAL INFORMATION SERVICE SPECIFICATION AIR CLEANER
 15-1 GROUP 15 INTAKE AND EXHAUST CONTENTS GENERAL INFORMATION 15-2 SERVICE SPECIFICATION 15-2 DIAGNOSIS 15-2 INTRODUCTION 15-2 TROUBLESHOOTING STRATEGY 15-2 SYMPTOM CHART 15-2 SYMPTOM PROCEDURES 15-3 SPECIAL
INSTALLATION and OPERATION INSTRUCTIONS
 Part Numbers: 54580 and 54580-2 Part Number 54580 Shown OUT IN INSTALLATION and OPERATION INSTRUCTIONS TABLE OF CONTENTS Section Page Warranty.... 2 General Information.... 3 Introduction..... 3 System
ONBOARD AIR SYSTEM FOR ALL VEHICLES APPLICATIONS
 ONBOARD SYSTEM FOR ALL VEHICLES APPLICATIONS Thank you and congratulations on the purchase of a Pacbrake onboard air system. Please read the manual prior to starting to ensure you can complete the installation
OWNER S MANUAL. Model: ATV ( ) ***IMPORTANT REMINDER*** Technical Specifications. Assembly Instructions. General Information
 ***IMPORTANT REMINDER*** Technical Specifications. Assembly Instructions. General Information") OWNER S MANUAL Technical Specifications 25 Gal. Corrosion-Resistant Polyethylene Tank 12 Volt Diaphragm Pump, 2.1 g.p.m. 60 psi 15 Ft. Handgun Hose (3/8 I.D.) 15 Ft. Vertical throw, 30 Ft. Horizontal Throw
OWNER S MANUAL Technical Specifications 25 Gal. Corrosion-Resistant Polyethylene Tank 12 Volt Diaphragm Pump, 2.1 g.p.m. 60 psi 15 Ft. Handgun Hose (3/8 I.D.) 15 Ft. Vertical throw, 30 Ft. Horizontal Throw
6 Gauge Box Set IS0333
 Caution 6 Gauge Box Set IS0 Rev. B ecr 882 9/202 Disconnect the battery during installation. Tighten nuts on the back clamp only slightly more than you can tighten with your fingers. Six inch-pounds of
OWNER S MANUAL. Model: UTV-65-BL ( ) (65 Gallon Lawn & Garden UTV Sprayer w/boomless Boom)
 (65 Gallon Lawn & Garden UTV Sprayer w/boomless Boom)") OWNER S MANUAL Model: UTV-65-BL (5302843) (65 Gallon Lawn & Garden UTV Sprayer w/boomless Boom) Technical Specifications 65 Gal. Corrosion-Resistant Polyethylene Tank Deluxe Pistol-Grip Handgun 25 Ft.
OWNER S MANUAL Model: UTV-65-BL (5302843) (65 Gallon Lawn & Garden UTV Sprayer w/boomless Boom) Technical Specifications 65 Gal. Corrosion-Resistant Polyethylene Tank Deluxe Pistol-Grip Handgun 25 Ft.
Purging Air From Divider Block Lubrication Systems
 FROST ENGINEERING SERVICE Purging Air From Lubrication Systems A D I V I S I O N O F G E C S E Y S A L E S & S E R V I C E DESCRIPTION Divider block lubrication systems operate correctly only when all
Xtrac PARTS LIST. Euroclean MODEL /05 revised 7/09 FORM NO
 Xtrac PARTS LIST Euroclean MODEL 56265301 6/05 revised 7/09 ACCESSORIES AVAILABLE BRUSH 56265340 Brush Assembly 12" ACCESSORY TOOLS 56314402 Wand Assembly w/soft and Hard Floor Tools 56265173 Wand Assembly
OWNER S MANUAL Model: LG ( ) (25 Gallon Lawn & Garden Trailer Sprayer)
 (25 Gallon Lawn & Garden Trailer Sprayer)") OWNER S MANUAL Model: LG-2500-304 (5301440) (25 Gallon Lawn & Garden Trailer Sprayer) Technical Specifications 25 Gallon Corrosion-Resistant Polyethylene Tank 12 Volt Diaphragm Pump, 2.1 g.p.m. 60 psi
OWNER S MANUAL Model: LG-2500-304 (5301440) (25 Gallon Lawn & Garden Trailer Sprayer) Technical Specifications 25 Gallon Corrosion-Resistant Polyethylene Tank 12 Volt Diaphragm Pump, 2.1 g.p.m. 60 psi
350 S. St. Charles St. Jasper, In Ph Fax
 350 S. St. Charles St. Jasper, In. 47546 Ph. 812.482.2932 Fax 812.634.6632 www.ridetech.com Part # 30154700 Big Red Analog Compressor Kit Components: 2 31920020 Thomas compressor 1 31915100 5 gallon aluminum
WRANGLER 1708CE, 2008CE
 WRANGLER 1708CE, 2008CE CONTROL PANEL ASSEMBLY ITEM PART NO. DESCRIPTION QTY. 101 5490161 FULLY INSULATED FEMALE TERMINAL 14-16 2 102 0693141 RUBBER SWITCH BOOT 2 103 0691851 1/2 INTERNAL STAR LOCK WASHER
VARNA Products 15 GPM (57 LPM) Prelube Kit for MTU 4000 Series Marine Engines
 Prelube Kit for MTU 4000 Series Marine Engines") VARNA Products 15 GPM (57 LPM) Prelube Kit for MTU 4000 Series Marine Engines Installation and Users Manual For the following Prelube Kits: VARNA Products P/N 6423 Kit for 208 VAC 3 Phase VARNA Products
VARNA Products 15 GPM (57 LPM) Prelube Kit for MTU 4000 Series Marine Engines Installation and Users Manual For the following Prelube Kits: VARNA Products P/N 6423 Kit for 208 VAC 3 Phase VARNA Products
Aquamatic Selectric PARTS LIST Advance MODEL ( Vac)
") Aquamatic Selectric PARTS LIST Advance MODEL 66907 (0-40Vac) This Parts List is for Machines After Serial No. 07797 11/9 revised 10/01 FORM NO. 604 revised /00 FORM NO. 604 TABLE OF CONTENTS DESCRIPTION
Aquamatic Selectric PARTS LIST Advance MODEL 66907 (0-40Vac) This Parts List is for Machines After Serial No. 07797 11/9 revised 10/01 FORM NO. 604 revised /00 FORM NO. 604 TABLE OF CONTENTS DESCRIPTION
348002K/348012K Manifold Block Style Service Manual 12/2000
 348002K/348012K Manifold Block Style Service Manual 12/2000 Service Manual 348002K/348012K Manifold Block Style Recovery/Recycling/Recharging Unit For R-12 or R-134a Only TABLE OF CONTENTS: Theory of Operation
RAIN BIRD - AQUAGATOR AQUAGATOR INSTALLATION & TROUBLESHOOTING MANUAL
 AQUAGATOR INSTALLATION & TROUBLESHOOTING MANUAL Cozz GT27069-A Revised July 2002 P/N 632360 AQUAGATOR TABLE of CONTENTS DESCRIPTION PAGE INTRODUCTION....... 1 SECTION 1 - PRE-INSTALLATION REQUIREMENTS.
Part # Galaxie Level 1 Complete Air Suspension System
 350 S. St. Charles St. Jasper, In. 47546 Ph. 812.482.2932 Fax 812.634.6632 www.ridetech.com Part # 12160199 60-64 Galaxie Level 1 Complete Air Suspension System Front Components: 1 12162409 Front RQ Series
TRIPLE FOAM INSTALLATION MANUAL Part # FOAMSTRMRTPL00X
 TRIPLE FOAM INSTALLATION MANUAL Part # FOAMSTRMRTPL00X TABLE OF CONTENTS Equipment Specifications Page: 1 Suggested Tools and Installation Materials Page: 2 Installation Instructions Page: 2 Initial Start-Up
Operators Manual ECO-AIR-IVS Internal Valve Actuation System
 2534-A Shell Road Georgetown, TX 78628 www.parafour.com 512-626-4099 Operators Manual ECO-AIR-IVS Internal Valve Actuation System Ver 1.0 Warnings:!! This device is electrically operated and should only
ILCS EDGE System Installation Manual
 ILCS EDGE System Installation Manual 0900885 Rev: A (12/06) Page 1 of 12 TABLE OF CONTENTS System Overview... 3 System Components... 3 System Diagram... 4 Pre-Installation... 5 Control Box & Power Supply
Part # Mopar LX Level 1 Air Suspension System
 Part # 13040199 05-14 Mopar LX Level 1 Air Suspension System Front Components: 1 1304409 Front RQ ShockWave Kit for Stock Lower Arms Rear Components: 1 13044099 Rear CoolRide Kit 1 13040709 RQ Series Rear
OWNER S MANUAL. Model: TR-40-GAS ( ) (40 Gallon Lawn & Garden Trailer Sprayer w/5-nozzle Boom Assembly) Technical Specifications
 (40 Gallon Lawn & Garden Trailer Sprayer w/5-nozzle Boom Assembly) Technical Specifications") OWNER S MANUAL Model: TR-40-GAS (5301339) (40 Gallon Lawn & Garden Trailer Sprayer w/5-nozzle Boom Assembly) Technical Specifications 40 Gal. Corrosion-Resistant Polyethylene Tank 5.5 HP Briggs & Stratton
OWNER S MANUAL Model: TR-40-GAS (5301339) (40 Gallon Lawn & Garden Trailer Sprayer w/5-nozzle Boom Assembly) Technical Specifications 40 Gal. Corrosion-Resistant Polyethylene Tank 5.5 HP Briggs & Stratton
OWNER S MANUAL. Model: UTL-60-12V ( ) (60 Gallon Lawn & Garden Utility Sprayer w/5-nozzle Boom)
 (60 Gallon Lawn & Garden Utility Sprayer w/5-nozzle Boom)") OWNER S MANUAL Model: UTL-60-12V (5301347) (60 Gallon Lawn & Garden Utility Sprayer w/5-nozzle Boom) Technical Specifications 60 Gal. Corrosion-Resistant Polyethylene Tank Deluxe Pistol-Grip Handgun w/25
OWNER S MANUAL Model: UTL-60-12V (5301347) (60 Gallon Lawn & Garden Utility Sprayer w/5-nozzle Boom) Technical Specifications 60 Gal. Corrosion-Resistant Polyethylene Tank Deluxe Pistol-Grip Handgun w/25
WORKHORSE. Assembly / Operation Instructions / Parts
 WORKHORSE S P R A Y E R S Assembly / Operation Instructions / Parts by, a Division of Green Leaf, Inc ATV 2522 MODEL # ATV 2522 DELUXE ATV 2 NOZZLE SPRAYER GENERAL INFORMATION WARRANTY / PARTS / SERVICE
Spray Clean 606T-2 Installation Instruction
 Spray Clean 606T-2 Installation Instruction Overview The 606T-2 unit is designed to be used as a spray or foam unit where up to two chemicals can be attached to the unit along with a clean water rinse.
Eclipse GEN 2.0 CAFSystem, Model 150-ESECL as used with TC20 Series PTO Installation Instructions
 Eclipse GEN 2.0 CAFSystem, Model 150-ESECL as used with TC20 Series PTO Installation Instructions Read Read through the the safety installation information instructions overhaul carefully instructions
Professional Series 1/2HP 2 YEAR WARRANTY CONVERTIBLE JET PUMP REPAIR PARTS
 Model T033 CONVERTIBLE JET PUMP /HP 900 GPH Suction lift Head of 5 (7.5m) in shallow well mode Professional Series YEAR WARRANTY Suction: /4 Discharge: NPT Maximum pressure: 85 PSI US GPH LPH 5 900 3400
SST Series Sand Media Filtration Systems
 SST Series Sand Media Filtration Systems Kits and Spare Parts Listing LS-695 (Rev. 6 / 07) Page 1 SST SAND FILTERS Installation Profile Automatic Systems WLS-594B(REV.11/03) Installation Configurations
Part # C-10 Level 1 Air Suspension System
 350 S. St. Charles St. Jasper, In. 47546 Part # 11330199 63-72 C-10 Level 1 Air Suspension System Front Components: 1 11331099 Front CoolRide Kit for Stock Lower Arms 1 11330509 RQ Series Front Shock Kit
FUEL SYSTEM. Table of Contents. Specifications. Section 3A Fuel Delivery System. Models 6/8/9.9/10/15 CARBURETOR SPECIFICATIONS
 FUEL SYSTEM Section 3A Fuel Delivery System Table of Contents Specifications............................. 3A-1 WMC Carburetor Specifications............. 3A-2 WMC Carburetor Specifications.............
ETP-5E & ETP-10E ECO-TECH PLUS ELECTRIC CONVECTION STEAMER PARTS AND SERVICE MANUAL
 ETP-5E & ETP-10E ECO-TECH PLUS ELECTRIC CONVECTION STEAMER PARTS AND SERVICE MANUAL EFFECTIVE JANUARY 10, 2018 Superseding All Previous Parts Lists. The Company reserves the right to make substitution
DEMA BLEND CENTER MODELS: 633GAP INSTALLATION INSTRUCTIONS
 The 633GAP Series Blend Center modular design lets you easily couple together any number of stations to create a system that meets your specific needs. Mix and match both high and low flow units for filling
(Airgap)
") 92174-00 91599-00 (Airgap) Technical Manual EQUIPMENT PACKING LIST FASTDRAW PRO Dispenser with attached 6 water inlet hose Keys (2) Hose Hook Technical Manual Operation Chart Wall Anchors (4) and Screws
92174-00 91599-00 (Airgap) Technical Manual EQUIPMENT PACKING LIST FASTDRAW PRO Dispenser with attached 6 water inlet hose Keys (2) Hose Hook Technical Manual Operation Chart Wall Anchors (4) and Screws
DEMA MODEL 693T FOAM STATION II INSTALLATION INSTRUCTION
 1. PARTS CHECKLIST: 2. INSTALLATION: DEMA MODEL 93T FOAM STATION II ITEM DESCRIPTION QTY. A. Foam Station Assembly 1 B. ¼ ID Tubing & Foot Strainer 1 C. 3/ ID Tubing & Foot Strainer 1 D. Ceramic Weight
PARTS LIST STALLION 8 SC
 PARTS LIST STALLION 8 SC DOME ASSEMBLY ITEM PART NO. PART DESCRIPTION QTY. 101 4894969 DOME ASSEMBLY - INCLUDES: 1 4894351 DOME 1 101A 4890121 DOME GASKET 1 101B 4890911 ADAPTOR - 1 1/2 MPT X 1 1/2 MSL
Model DE-3 Air Release Heads Parts List
 Issue/Rev. 0.0 (1/14) Smith Meter Air Eliminator Model DE-3 Air Release Heads Parts List Bulletin MN03021 Contents Section 1 Introduction... Page 2 Principle of Operation... Page 2 Section 2 Installation...
SNOWDOGG HYDRAULIC REFERENCE XP PLOWS /11 1/22
 SNOWDOGG 16153000 HYDRAULIC REFERENCE XP PLOWS 16992930 05/11 1/22 SNOWDOGG 16153000 HYDRAULIC REFERENCE GENERAL REFERENCE 3 GENERAL TROUBLESHOOTING 5 HARNESS REFERENCE 14 CONTROL REFERENCE 16 HPU DECAL
Part # Series RidePro 4 Way Compressor System 3 Gallon Tank Analog Gauges
 350 S. St. Charles St. Jasper, In. 47546 Ph. 812.482.2932 Fax 812.634.6632 www.ridetech.com Part # 30154000 4000 Series RidePro 4 Way Compressor System 3 Gallon Tank Analog Gauges Components: 1 31920020
ARC4000e 4 wheel compressor system w / 4 way Ride Pro controller
 350 S. St. Charles St. Jasper, In. 47546 Ph. 812.482.2932 Fax 812.634.6632 on the internet: www.ridetech.com ARC4000e 4 wheel compressor system w / 4 way Ride Pro controller 1 ARC5001 Compressor 1 CON6000
INSTALLATION INSTRUCTIONS
 INSTALLATION INSTRUCTIONS Universal Air Series!! NOTE!! Covers the following model: 6000 Series 85-0100B-AZ Rev 0 5/07 To ensure that the system is installed properly, provide your electrician with these
INSTALLATION, OPERATION, AND MAINTENANCE MANUAL
 INSTALLATION, OPERATION, AND MAINTENANCE MANUAL MODEL 4D-200 REDUCED PRESSURE PRINCIPLE (RPZ) & MODEL 4D-700 REDUCED PRESSURE DETECTOR ASSEMBLY (RPDA) BACKFLOW PREVENTERS 2 ½ 10 Conbraco Industries Inc.
Owner's Manual. Model: UTL-60-7-TSC ( ) (60 Gallon Utility Sprayer w/ 7-Nozzle Boom Assembly) Technical Specifications.
 (60 Gallon Utility Sprayer w/ 7-Nozzle Boom Assembly) Technical Specifications.") Owner's Manual Model: UTL-60-7-TSC (66) (60 Gallon Utility Sprayer w/ 7-zzle Boom Assembly) Technical Specifications 60 Gallon Corrosion-Resistant Polyethylene Tank Deluxe Pistol-Grip Handgun w/5 Ft. Hand
Owner's Manual Model: UTL-60-7-TSC (66) (60 Gallon Utility Sprayer w/ 7-zzle Boom Assembly) Technical Specifications 60 Gallon Corrosion-Resistant Polyethylene Tank Deluxe Pistol-Grip Handgun w/5 Ft. Hand
F479 HVE V PARTS LIST
 F479 HVE 3000 115V PARTS LIST PARTS LIST 03-00105 18 SCREW 1/4 20 X.375 HWH NYLOC ZP 03-00179 1 GROMMET -.75 ID X 1.375 OD RUBBER 03-00208 4 RIVET 1/4 X 1/4 STL/STL ZP 8-4 03-00209 11 SCREW 1/4 20 X.50
Information Sheet Polyethylene Tank Assemblies
 Information Sheet Polyethylene Tank Assemblies No. 27421 10 Gallon Tank Assembly Ultraviolet resistant, yellow polyethylene tank. Molded recesses for mounting of any LMI Series A, J, or P pump. Convenient
MODEL NO. UTL-60-7
 5301400 MODEL NO. UTL-60-7 12 Volt Skid Mounted Utility Sprayer ASSEMBLY / OPERATION INSTRUCTIONS / PARTS ASSEMBLY The sprayer is fully assembled at the factory. The only assembly necessary is to thread
OWNER S MANUAL. Model: ATV-20-2 ( ) ***IMPORTANT REMINDER*** Technical Specifications. Assembly Instructions. General Information
 ***IMPORTANT REMINDER*** Technical Specifications. Assembly Instructions. General Information") OWNER S MANUAL Model: ATV-20-2 (5301551) (20 Gallon Lawn & Garden/ATV Sprayer) Technical Specifications 20 Gal. Corrosion-Resistant Polyethylene Tank 12 Volt Diaphragm Pump, 2.1 g.p.m. 60 psi 15 Ft. Handgun
OWNER S MANUAL Model: ATV-20-2 (5301551) (20 Gallon Lawn & Garden/ATV Sprayer) Technical Specifications 20 Gal. Corrosion-Resistant Polyethylene Tank 12 Volt Diaphragm Pump, 2.1 g.p.m. 60 psi 15 Ft. Handgun
Thermo-Bob 1 Installation Manual: Kawasaki Concours
 Thermo-Bob 1 Installation Manual: 1986-2006 Kawasaki Concours This is a basic guide for installing the Thermo-Bob 1 on a Kawasaki ZG-1000 Concours. The bike used in the following photos was a 1995 year
Spare Parts List. ( , , ) Dominator 500 PSI-13 Gallon
 Dominator 500 PSI-13 Gallon") Spare Parts List (1.00-5.0, 1.00-.0, 1.00-9.0) Dominator 500 PSI-13 Gallon From Serial Number (Ref No. 1*) * See Serial Number page or call manufacturer 839900-D 12/05/1 How to Use this Spare Parts List
Spare Parts List (1.00-5.0, 1.00-.0, 1.00-9.0) Dominator 500 PSI-13 Gallon From Serial Number (Ref No. 1*) * See Serial Number page or call manufacturer 839900-D 12/05/1 How to Use this Spare Parts List
ALWAYS DISCONNECT DISPENSER FROM WATER SOURCE WHEN DISPENSER IS NOT IN USE.
 1060GAPRF With dilution selector 1060GAP OVERVIEW DEMA S MPD is a multiple product and dilution dispenser designed for use with SafeLink closed loop inserts. With its innovative patent pending QuickDock
Reverse Osmosis System
 Reverse Osmosis System Service Manual 5842 W 34th St, Houston, TX 77092 1.800.999.9878 1.713.683.9878 www.colemanhanna.com Find us on Facebook: /ColemanHannaCarwash HANNA REVERSE OSMOSIS SYSTEMS Table
OWNER S MANUAL. Model: FS-ATV-15 ( ) (15 Gallon Lawn & Garden/ATV Sprayer) Technical Specifications. Assembly Instructions. General Information
 (15 Gallon Lawn & Garden/ATV Sprayer) Technical Specifications. Assembly Instructions. General Information") OWNER S MANUAL Model: FS-ATV-15 (5301169) (15 Gallon Lawn & Garden/ATV Sprayer) Technical Specifications 15 Gal. Corrosion-Resistant Polyethylene Tank 12 Volt Diaphragm Pump, 1.8 g.p.m. 60 psi Spot Sprayer
OWNER S MANUAL Model: FS-ATV-15 (5301169) (15 Gallon Lawn & Garden/ATV Sprayer) Technical Specifications 15 Gal. Corrosion-Resistant Polyethylene Tank 12 Volt Diaphragm Pump, 1.8 g.p.m. 60 psi Spot Sprayer
TC Series Cooling Systems
 TC Series Cooling Systems Table of Contents Table of Contents...1 List of Figures...1 Safety...2 Introduction...2 General Specifications...2 Types of Coolant...2 Routine Maintenance...2 Surge Tank Coolant
OPERATOR S MANUAL HWH COMPUTER-CONTROLLED 2000 SERIES LEVELING SYSTEM. FEATURING: Single Step Touch Panel Control Air Leveling
 OPERATOR S MANUAL HWH COMPUTER-CONTROLLED 000 SERIES LEVELING SYSTEM R HWH CORPORATION R FEATURING: Single Step Touch Panel Control Air Leveling HWH COMPUTERIZED LEVELING LEVEL AIR EXCESS SLOPE MODE DUMP
Owner's Manual. (20 Gallon Lawn & Garden Trailer Sprayer) Technical Specifications. Assembly. General Information. Warranty/Parts/Service
 Technical Specifications. Assembly. General Information. Warranty/Parts/Service") Owner's Manual (0 Gallon Lawn & Garden Trailer Sprayer) Technical Specifications 0 Gal. Corrosion-Resistant Polyethylene Tank 1 Volt Diaphragm Pump,.1 g.p.m. - 60 p.s.i. - Amp Lever Handgun with 15 Ft.
Owner's Manual (0 Gallon Lawn & Garden Trailer Sprayer) Technical Specifications 0 Gal. Corrosion-Resistant Polyethylene Tank 1 Volt Diaphragm Pump,.1 g.p.m. - 60 p.s.i. - Amp Lever Handgun with 15 Ft.
AIR/HYDRAULIC INJECTION GUN MODEL INSTRUCTIONS
 I. OPERATION & DESCRIPTION The Air / Hydraulic Injection Gun is a high-pressure tool that should be used with caution and according to these instructions. IMPORTANT: The Gun is 0,000 psi rated. Do not
BASIC BRAKE SYSTEM GROUP 35A 35A-1 CONTENTS GENERAL DESCRIPTION... 35A-3 BASIC BRAKE SYSTEM DIAGNOSIS 35A-6
 35A-1 GROUP 35A BASIC BRAKE SYSTEM CONTENTS GENERAL DESCRIPTION......... 35A-3 DIAGNOSIS 35A-6 INTRODUCTION..................... 35A-6 DIAGNOSTIC TROUBLESHOOTING STRATEGY......................... 35A-6
PARTS LIST RALLY 1200 SAVE THESE INSTRUCTIONS
 PARTS LIST RALLY 1200 SAVE THESE INSTRUCTIONS OVERVIEW 120 VOLT OVERVIEW 120 VOLT ITEM PART NO. DESCRIPTION QTY 1 4099011 CORD WRAP, (SET FOR ONE CORD, FASTENERS NOT INCLUDED) 2 2 9120935 1/4 WASHER,.268
MODEL EVA PARTS MANUAL Rev.1.05
 MODEL EVA PARTS MANUAL Rev.1.05 CMA DISHMACHINES 12700 KNOTT AVENUE GARDEN GROVE, CALIFORNIA 92841 800-854-6417 FAX 714-895-2141 www.cmadishmachines.com TABLE OF CONTENTS MODEL EVA 1. PARTS MANUAL...3
Assembly / Operation Instructions / Parts
 Assembly / Operation Instructions / Parts TSU SKU# 0 VENDOR# ATV 0 CL GALLON DELUXE ATV SPRAYER - NOZZLE Polyethylene Tank Volt Diaphram Pump.0 G.P.M. Lever Handgun Ft. of / Hose (handgun) Pressure Gauge
ValveMate 7000 Controller Operating Manual
 A NORDSON COMPANY ValveMate 7000 Controller Operating Manual Steady Test Clear Time Set Fast Slow POWER RUN SETUP CYCLE A NORDSON COMPANY VALVEMATE 7000 Run Setup Purge Program Fast Slow Time Set Pressure
WORKHORSE. Assembly / Operation Instructions / Parts 15 GALLON TRAILER SPRAYER
 WORKHORSE S P R A Y E R S Assembly / Operation Instructions / Parts GALLON TRAILER SPRAYER by, a Division of Green Leaf, Inc MODELS #LGSTS & LGDTS GALLON TRAILER SPRAYER Compact Trailer and Tank Polyethylene
MODEL L-1C PARTS MANUAL
 MODEL L-1C PARTS MANUAL Rev 1.00A CMA DISHMACHINES 12700 KNOTT AVENUE GARDEN GROVE, CALIFORNIA 92841 800-854- 6417 FAX 714-895- 2141 www.cmadishmachines.com TABLE OF CONTENTS MODEL CMA-L-1C 1. PARTS MANUAL...
MODEL L-1C PARTS MANUAL. Rev 1.00A C M A D I S H M A C H I N E S K N O T T A V E N U E GARDEN GROVE, CALIFORNIA
 MODEL L-1C PARTS MANUAL Rev 1.00A C M A D I S H M A C H I N E S 1 2 7 0 0 K N O T T A V E N U E GARDEN GROVE, CALIFORNIA 92841 800-854- 6417 F A X 7 1 4-8 9 5-2141 www.cmadishmachines.com TABLE OF CONTENTS
WALKIE HIGH LIFT HYDRAULIC SYSTEM
 WALKIE HIGH LIFT HYDRAULIC SYSTEM W30-40ZA [B453]; W20-30ZR [B455]; W25-30-40ZC [B454] PART NO. 1524251 2000 SRM 1025 SAFETY PRECAUTIONS MAINTENANCE AND REPAIR When lifting parts or assemblies, make sure
Congratulations PRE-OPERATION SETUP
 Congratulations on the purchase of your new ProVac Industrial Pumpout Station. Your new ProVac has been manufactured with the best quality components to give you year after year of trouble free service.
Installation & Operator s Manual
 Installation & Operator s Manual LS7 Liquid Spray System for SCH Style Spreaders Installation Instructions 1. Position and weld Enclosure Bracket (#3028485) and Support (#3014077) to spreader as shown
HP COOL TECH, INC. COOLANT PUMP. PowerPump. INSTALLATION MANUAL HANWHA XD20 Series 10000/11000
 HP COOL TECH, INC. COOLANT PUMP PowerPump INSTALLATION MANUAL HANWHA XD20 Series 10000/11000 1 TABLE OF CONTENTS Page Topic 3 Introduction 3 Specifications 3 Warning 4 Safety 5, 6, 7 Installation 8 Use
C50254A PH3 AIR INTAKE SHUT-OFF VALVE DODGE 6.7L CUMMINS WITH POWERGUARD SMART OVERSPEED LIMITER
 AIR INTAKE EMERGENCY SHUT-OFF VALVE C50254A PH3 AIR INTAKE SHUT-OFF VALVE WITH POWERGUARD SMART OVERSPEED LIMITER 2013-2017 DODGE 6.7L CUMMINS www.powerhalt.com INSTALLATION REQUIREMENTS & RECOMMENDATIONS:
Subject Underhood G System Error Codes and Symptoms System or Parts affected
 System or Parts affected Index Underhood70G (V90Gxxx) System or Parts affected... 1 Overview... 1 Identifying your System... 1 Retrieving Logged Error Messages... 1 Error Messages... 3 Error Message Table...
M O D E L S E S T / E S T T A L L PARTS MANUAL Rev 1.08 C M A D I S H M A C H I N E S K N O T T S T R E E T GARDEN GROVE, CALIFORNIA 92841
 M O D E L S E S T / E S T T A L L PARTS MANUAL Rev 1.08 C M A D I S H M A C H I N E S 1 2 7 0 0 K N O T T S T R E E T GARDEN GROVE, CALIFORNIA 92841 800-8 54-6 4 1 7 FAX 714-895-2141 www.cmadishmachines.com
MODELS EAH / EC/E TALL/3-Door Parts Manual Revision 1.04A
 MODELS EAH / EC/E TALL/3-Door Parts Manual Revision 1.04A CMA DISHMACHINES 12700 KNOTT STREET GARDEN GROVE, CALIFORNIA 92841 800-854- 6417 FAX 714-895-2141 www.cmadishmachines.com TABLE OF CONTENTS PARTS
WORKHORSE PSE. Assembly / Operation Instructions / Parts
 WORKHORSE S P R A Y E R S Assembly / Operation Instructions / Parts by PSE, a Division of Green Leaf, Inc ATV 0 GALLON DELUXE ATV SPRAYER - NOZZLE Polyethylene Tank Volt Diaphram Pump. G.P.M. Lever Handgun