Side Window Deflector & Review
|
|
|
- Prudence Thomasina Townsend
- 5 years ago
- Views:
Transcription
1 GM Accessory Side Window Deflector & Splash Guard Review ADI Web- Ex Training Sessions 2/3/09 2/4/09 Presenter: Scott Semrau Design Release Engineer Exterior Trim Accessories 1
2 Agenda Background Application Tools Installation Steps Side Window Deflector Splash Guards Specific Vehicle Applications Top 3 Warranty Returns 900, Equinox, Impala Q & A 2
3 Background Side Window Deflectors Warranty Claim Descriptions Returns: Vent Shade Loose, Shade falling off Mis-alignment Lack of wet-out No mechanical attachments Don t get multiple attempts to locate Splashguards Typical installation uses 2-3 mechanical fasteners Adhesive tape added to improve fit to vehicle 3

 Adhesion")

4 Application Tools Vehicle Cleaning Solution Alcohol Wipe ( ) Adhesion Promoter ( ) For Rubber and Glass Surfaces Lint Free Rag 4
5 Installation Procedure (Vehicle prep.) Vehicle & parts need to be between F prior to installation Test fit & clean tape land areas removing all dirt & grease prior to installation Do not use petroleum based cleaning products. NOTE: If entire vehicle will be washed before returning to customer, make sure to wash before SWD installation 5
6 Installation Procedure (Vehicle Prep) Use the alcohol wipe to clean the tape land area 6
7 Installation Procedure (Vehicle Prep) When mounting to Rubber or Glass, apply Adhesion Promoter Tape off area to prevent Adhesion Promoter from contacting surrounding surfaces Allow the adhesion promoter to dry for a minimum of 5 minutes prior to install 7
8 Installation Procedure (tape liner prep) Expose ½ inch of tape from both ends Note: Do note remove entire tape liner at this time 8

9 Installation Procedure (Up/Down Alignment) Typically y up/down position located to door feature lines Trim or Door Surface to Mirror patch Up/Down Locators 9

10 Installation Procedure (Up/Down Alignment) Typically y up/down position located to door feature lines Trim or Door Surface to Mirror patch Trim or Door Surface to Door Applique Up/Down Locators 10


11 Installation Procedure (Fore/Aft Alignment) 1) Locate to Door Edge for fore/aft position Typically 3-4 mm forward of this edge 2) Press the exposed areas of tape against the trim and verify position Note: Does not apply to all applications (GMT900) 11
12 Installation Procedure (Liner Removal) Remove tape liner by pulling on the free ends 12

13 Installation Procedure (Final) Apply 20 to 30 pounds of pressure with a soft cloth 3-4 times 13
14 Questions about Side Window Deflector Installation? 14
15 Typical Splash Guard Package Adhesive tape Fasteners (primary locator) Installation Tips Slightly pull top edge of the Guard away from vehicle to start tape liner removal. 15
16 Typical Splash Guard Package Adhesive tape Fasteners Installation Tips Slightly pull top edge of the Guard away from vehicle to start tape liner removal. Push Guard up and rearward to maintain its position while removing tape liner. 16


17 Typical Splash Guard Package Adhesive tape Fasteners Installation Tips Slightly pull top edge of the Guard away from vehicle to start tape liner removal. Push Guard up and rearward to maintain its position while removing tape liner. Apply lbs of pressure to tape flange 17
18 Questions on Splash Guard Installation Process? 18
19 Specific Vehicle Applications GMT900 Equinox Impala 19


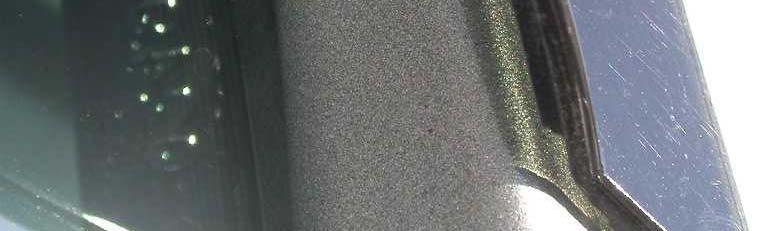
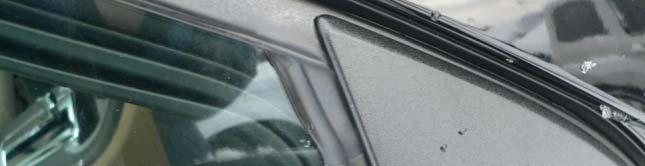
20 GMT900 Frt mounts directly to painted surface and mirror patch Rear mounts directly to painted surface Majority of warranty returns indicate mis-alignment 20
21 GMT900 Tape flange adheres to painted surface. Tape flange adheres to mirror base. 21
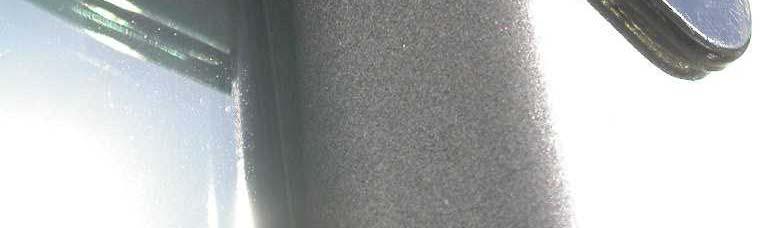
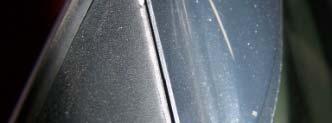
22 GMT 900 Front U/D Locator Depression in part is used for up/down positioning at front of part 22


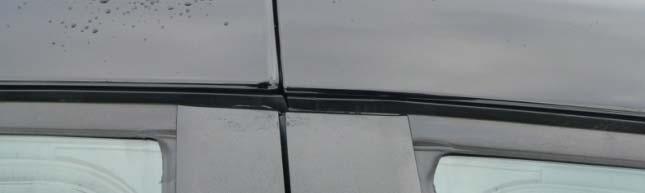
23 GMT 900 Use door frame for up/down postion towards rear 23


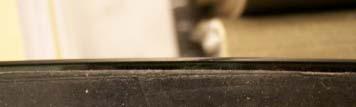
24 GMT 900 Rear Front Use thumb to ensure exposed rolled edge is consistent from front to rear. 24
 Rear")


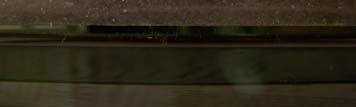
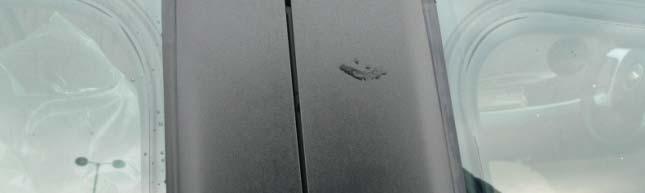
25 GMT 900 (Rear Deflector) Rear Deflector mounts entirely on painted surface Use front deflector to help align the rear deflector. Follow same locating guidelines referred to in previous slides. 25


26 GMT900 Warranty returns indicating mis-alignment Frt Middle Rear 50% Wetout 25% Wetout 5% Wetout 26

27 Equinox/Torrent Difficult alignment at mirror patch Mounts to rubber molding Requires Adhesion Promoter 27
28 Equinox/Torrent (Front) Mounts to Mirror Patch & Rubber Molding 28


29 Equinox/Torrent (Front) Ensure SWD is positioned over corner of Mirror patch 29

30 Equinox/Torrent Mirror Patch Gap Gap at Mirror Patch 30

31 Equinox/Torrent (B/pillar) Mounts to Mirror Rubber Molding & Pillar Applique 31


32 Equinox/Torrent (Rear) Mounts to Rubber Molding 32


33 Impala Attaches to Chrome Molding, Mirror Patch & B/Pillar applique Top edge of SWD locates above Chrome Edge Confusion about how to align SWD Chrome Trim Edge or Door Applique Feature Line 33
")

34 Impala (Front) Locate up/down to feature line 34
")

35 Impala (Front) Locate up/down to feature line 35
36 Impala Feature Line Feature Line Don t locate up/down to chrome trim Locate up/down to door applique Feature line 36
37 Wrap Up (Top 5 things to remember) Ensure vehicle/parts are F Properly clean surface prior to installation Alcohol wipes Adhesion promoter (rubber & glass surface) Trial fit parts before e tape liner removal Don t remove entire liner before installing parts Apply sufficient i pressure to tape flange Wash vehicle prior to installing parts 37
Installation Instructions. Ventvisor Deflector
 Installation Instructions Important Safety Information Ventvisor Deflector For proper installation and best possible fit, please read all instructions BEFORE you begin. CAUTION - Before driving, ensure
GENUINE PARTS INSTALLATION INSTRUCTIONS
 GENUINE PRTS INSTLLTION INSTRUCTIONS DESCRIPTION: PPLICTION: PRT NUMBER: KIT CONTENTS: Side Window Deflector Quest (2011) H0800 1J00 Item Qty. 1 B 1 C 1 D 1 E 4 F 4 G 1 Part Description Side Window Deflector
Wheel Arch Trim Set. Installation Manual. This section covers installation of the wheel arch trim set.
 Wheel Arch Trim Set FORESTER Wheel Arch Trim Set EN PART # E20SSG000 This section covers installation of the wheel arch trim set. Installation Manual Note: Before performing installation, be sure to read
Ground Effects, P/N: (V6), (V8)
, (V8)") , P/N: 92248596 (V6), 92248560 (V8) 3. Open trunk and remove 3 scrivets per side. Retain. Remove LH and RH tail lamp access cover. Retain. Refer to Figure 1. NOTE: Installation is made easier with the
, P/N: 92248596 (V6), 92248560 (V8) 3. Open trunk and remove 3 scrivets per side. Retain. Remove LH and RH tail lamp access cover. Retain. Refer to Figure 1. NOTE: Installation is made easier with the
GENUINE PARTS INSTALLATION INSTRUCTIONS
 GENUINE PARTS INSTALLATION INSTRUCTIONS 1. DESCRIPTION: Body Side Molding 2. APPLICATION: Sentra 3. PART NUMBER: 999G2 Lxxxx01 LH (xxxx Designates model year and color) 999G2 Lxxxx02 RH (xxxx Designates
Bolt-On/Rugged Fender Flares Nissan Titan (04-15) Please read instructions entirely before installing this product.
 Please read instructions entirely before installing this product.") Please read instructions entirely before installing this product. Hardware Included QTY FUEL DOOR CLIP 1 Bolt Kit Included QTY ALCOHOL TOWELETTE 4 M4 SCREW 1 ALLEN KEY BOLT 42 CLIP.9MM 2 ABRASIVE RESISTANT
Please read instructions entirely before installing this product. Hardware Included QTY FUEL DOOR CLIP 1 Bolt Kit Included QTY ALCOHOL TOWELETTE 4 M4 SCREW 1 ALLEN KEY BOLT 42 CLIP.9MM 2 ABRASIVE RESISTANT
Included in Hardware Kit. Rear Corners 2-Door. Jeep JK Trail Armor. Set Part #14009 Rev STEP 1 - PRIOR TO INSTALLATION
 Jeep JK Trail Armor Set Part #14009 Rev-2 02-23-11 A) B) C) STEP 1 - PRIOR TO INSTALLATION Bushwacker only approves installing the trail armor according to these written instructions with the hardware
Bolt-On/Rugged Fender Flares Dodge Ram 1500/2500/3500 (09-12) Please read instructions entirely before installing this product.
 Please read instructions entirely before installing this product.") Please read instructions entirely before installing this product. Hardware Included QTY Hardware Included QTY Bolt Kit Included QTY EXTRUSION 29.0ft ALCOHOL TOWELETTE 4 ALLEN KEY BOLT 42 NUT 42 Ensure
Please read instructions entirely before installing this product. Hardware Included QTY Hardware Included QTY Bolt Kit Included QTY EXTRUSION 29.0ft ALCOHOL TOWELETTE 4 ALLEN KEY BOLT 42 NUT 42 Ensure
INSTALLATION INSTRUCTIONS
 INSTALLATION INSTRUCTIONS Accessory MOON P/N 08R01-T2A-100 Application 2014 ACCORD 2 AND 4-DOOR Publications No. AII 49981 Issue Date AUG 2013 PARTS LIST Moonroof visor 2 Front brackets 2 Side brackets
 Page 1 of 29 2003 Ford Thunderbird 3.9L Eng WATER LEAKS - REMOVABLE ROOF AND CONVERTIBLE TOP - SERVICE TIPS TECHNICAL SERVICE BULLETIN Reference Number(s): 04-9-5, Date of Issue: May 17, 2004 FORD: 2002-2005
Roush Side Rocker Panel Splitters (10-13 All)
") Required tools: Jack stands (2) Floor jack (1 is required but 2 is preferred) Pliers Small Phillips screw driver Drill ¼ Drill bit T15 Torx bit (for some models of vehicle) Hacksaw (for some models of
Required tools: Jack stands (2) Floor jack (1 is required but 2 is preferred) Pliers Small Phillips screw driver Drill ¼ Drill bit T15 Torx bit (for some models of vehicle) Hacksaw (for some models of
REMOVAL AND INSTALLATION
 501-11-1 Glass, Frames and Mechanisms 501-11-1 REMOVAL AND INSTALLATION Windshield Glass Special Tool(s) Rotunda Pneumatic Knife with Offset Blade 107-R1511 or equivalent The Pumper 164-R2459 or equivalent
ITEM PART NO. DESCRIPTION QTY BODY - SNORKEL (SS89HF) ½" AIR RAM ASSEMBLY BRACKET - UPPER MOUNTING 1
 ½ AIR RAM ASSEMBLY BRACKET - UPPER MOUNTING 1") SS89HF SAFARI V-SPEC SNORKEL Toyota Land Cruiser 200 Series (MY16 Face Lift) 1VD-FTV 4.5Litre-V8 Intercooled Twin Turbo Diesel (Does not suit GX model) 22/03/2016 Parts List ITEM PART NO. DESCRIPTION QTY
SS89HF SAFARI V-SPEC SNORKEL Toyota Land Cruiser 200 Series (MY16 Face Lift) 1VD-FTV 4.5Litre-V8 Intercooled Twin Turbo Diesel (Does not suit GX model) 22/03/2016 Parts List ITEM PART NO. DESCRIPTION QTY
Vehicle and all installation material temperatures must be within the following range before and during installation: 60 F [15 C] and 100 F [43 C].
![Vehicle and all installation material temperatures must be within the following range before and during installation: 60 F [15 C] and 100 F [43 C].](/thumbs/90/101815149.jpg "Vehicle and all installation material temperatures must be within the following range before and during installation: 60 F [15 C] and 100 F [43 C].") INSTALLATION INSTRUCTIONS DESCRIPTION: BODY SIDE MOLDING KIT, DEALER Vehicle and all installation material temperatures must be within the following range before and during installation: 60 F [15 C] and
INSTALLATION INSTRUCTIONS DESCRIPTION: BODY SIDE MOLDING KIT, DEALER Vehicle and all installation material temperatures must be within the following range before and during installation: 60 F [15 C] and
GENUINE PARTS INSTALLATION INSTRUCTIONS
 GENUINE PARTS INSTALLATION INSTRUCTIONS DESCRIPTION: APPLICATION: PART NUMBER: KIT-CARBON FIBER REAR SPOILER INFINITI Q50 T99J1 J5000 KIT CONTENTS: Item A B C D Qty. 1 4 1 1 Part Description Spoiler Assembly
Rev TOOLS & MATERIALS REQUIRED QTY 3D PART NO. DESCRIPTION
 Rev. 04-10 QTY 3D PART NO. DESCRIPTION 1 691609 FRONT BUMPER REPLACEMENT 1 691610 RIGHT SIDE SKIRT 1 691611 LEFT SIDE SKIRT 1 691612 REAR LOWER SKIRT 4 3M 94 3M ADHESION PROMOTER 16 #8 X ¾ SELF DRILLING
GENUINE PARTS INSTALLATION INSTRUCTIONS
 GENUINE PARTS INSTALLATION INSTRUCTIONS 1. 2. 3. 4. DESCRIPTION: Front Protector Kit APPLICATION: G Sedan Sports PART NUMBER: K6010-1NH** (XX Designates color) KIT CONTENTS: Item Qty. Description Part
INSTALLATION INSTRUCTIONS PARTS LIST. SUPPLIES REQUIRED Isopropyl alcohol Shop towel Masking tape Tape measure. Door visor (front left) INSTALLATION
 INSTALLATION") INSTALLATION INSTRUCTIONS Accessory Application Publications No. All 13348 2013 RIDGELINE P/N 08R04-SJC-100 Issue Date SEP 2012 PARTS LIST Door visor (front left) SUPPLIES REQUIRED Isopropyl alcohol Shop
INSTALLATION INSTRUCTIONS Accessory Application Publications No. All 13348 2013 RIDGELINE P/N 08R04-SJC-100 Issue Date SEP 2012 PARTS LIST Door visor (front left) SUPPLIES REQUIRED Isopropyl alcohol Shop
GENUINE PARTS INSTALLATION INSTRUCTIONS
 GENUINE PARTS INSTALLATION INSTRUCTIONS DESCRIPTION: APPLICATION: Moonroof Wind Deflector Nissan Altima PART NUMBER: 999D UZ000 KIT CONTENTS: Item Qty. Description Service Part Number A B C D E F G H 1
Installation instructions Mustang Window Tint
 Installation instructions Mustang Window Tint Tools Required: Supplied Tool Kit Heat Gun Spray Bottle Prep: Fill spray bottle with water, mixing in a few drops of baby shampoo. This helps with lubricity
2006 Saturn Ion ACCESSORIES & EQUIPMENT Doors - Ion
 POWER DOOR LOCK SWITCH REPLACEMENT Removal Procedure Fig. 28: View Of Power Door Lock Switch 1. Using a flat-bladed tool, pry the switch from the door trim panel enough to expose the locking tabs. 2. Press
QTY 3D PART NO. DESCRIPTION
 QTY 3D PART NO. DESCRIPTION 1 691032 V6 FRONT AIR DAM 1 691023 SIDE SKIRT RIGHT 1 691024 SIDE SKIRT LEFT 1 691566 V6 DUAL EXHAUST REAR LOWER SKIRT- 8 3M 94 3M ADHESION PROMOTER 24 #8 X ¾ SELF DRILLING
V6 Spring Belt Tensioner
 Dodgerunner s V6 Spring Belt Tensioner Installation Guide Dodgerunner 2007 The bracket consists of two pieces of 1/8" steel bolted together. The main piece is flat plate with welded-on alternator mounting
Sunroof Repair. Sunroof Repair TSB. The sunroof repair kit available for the J30 is part number Y20. See images at bottom of document.
 Sunroof Repair This document is the text/images from the TSB (technical service bulletin) issued by Infiniti concerning the repair procedure for sunroof issues. Be advised that this is a LARGE, TIME-CONSUMING
GENUINE PARTS INSTALLATION INSTRUCTIONS
 GENUINE PARTS INSTALLATION INSTRUCTIONS 1. DESCRIPTION: SIDE WINDOW DEFLECTOR 2. APPLICATION: FRONTIER KING CAB/CREW CAB 3. PART NUMBER: 999D3 BT000KC, 999D3 BT001CC 4. KIT CONTENTS Item No. Qty Description
SCION xb SIRIUS SATELLITE RADIO TUNER Preparation
 Preparation Part Number: PTS3-52050 NOTE: Part number of this accessory may not be the same as the part number shown. Kit Contents Item # Quantity Reqd. Description Antenna, Exterior 2 Wire Harness 3 Bracket,
TOYOTA PRIUS CONSOLE APPLIQUES Preparation
 Preparation Part Number: PT948-47160-02 Kit Contents Item # Quantity Reqd. Description 1 1 Console Applique 2 1 Front Face Cover Applique 3 Hardware Bag Contents Item # Quantity Reqd. Description 1 2 3
Preparation Part Number: PT Kit Contents Item # Quantity Reqd. Description 1 1 Rear Spoiler 2 1 Hardware Kit. Hardware Bag Contents
 Preparation Part Number: PT478-11170-09 Kit Contents 1 1 Rear Spoiler 2 1 Hardware Kit Hardware Bag Contents 1 4 M5 Nut 2 4 Clip 3 4 Hole Plug Additional Items Required For Installation 1 1 Outer Drill
SECTION 9L GLASS AND MIRRORS
 SECTION 9L GLASS AND MIRRORS CAUTION: Disconnect the negative battery cable before removing or installing any electrical unit or when a tool or equipment could easily come in contact with exposed electrical
SCION xb DASH APPLIQUÉ Section I Installation Preparation
 Section I Installation Preparation Part Number: PTS10-52031 Section I Installation Preparation Kit Contents Item # Quantity Reqd. Description 1 1 Driver Side Front Door 2 1 Passenger Side Front Door 3
STAR Case. Case Number: S Release Date: 3/26/14. Symptom/Vehicle Issue: Diagnosis: Customer Complaint Of Damp Carpet And/Or Waterleak
 STAR Case Case Number: S1323000012 Release Date: 3/26/14 Symptom/Vehicle Issue: Customer Complaint Of Damp Carpet And/Or Waterleak Diagnosis: This case is broken out by possible leak location and provides
TOYOTA CAMRY BODY SIDE MOLDING Installation Preparation
 Installation Preparation Part Number: PT29A-00140-XX Kit Contents 1 1 Molding, LH Front Door 2 1 Molding, LH Rear Door 3 1 Molding, RH Front Door 4 1 Molding, RH Rear Door Hardware Bag Contents 1 2 Additional
Appendix B Day of Event Check List
 Appendix B Day of Event Check List Page 38 of 68 Note: I firstly dust the car down with a California Duster and then follow with Meguiar s Final Inspection. I avoid spraying anything direct on the car.
Windshields and Bonded Glass. WARNING: Use rubber gloves and any appropriate breathing apparatus as recommended by the manufacturer of the kit.
 Service Guide Windshields and Bonded Glass Windshield/Quarter Window Tools and Materials WARNING: Use rubber gloves and any appropriate breathing apparatus as recommended by the manufacturer of the kit.
JK8 Body Kit KIT CONTENTS 1 K
 JK8 Body Kit KIT CONTENTS A B C 1 K6861352 D E G F H 2 K6861352 I M N J K L O P Q R S 3 K6861352 T U V W X Y CALL OUT PART NUMBER DESCRIPTION QUANTITY A P5156021 HARDTOP 1 B P5155997 BULKHEAD 1 C 1PH98/9TZZAE
LEXUS LS 460 & 600h REAR BUMPER APPLIQUE Preparation
 LEXUS LS 460 & 600h 203 - REAR BUMPER APPLIQUE Preparation Part Number: PT747-5030 Kit Contents Applique, RR Bumper Hardware Bag Contents Additional Items Required For Installation Conflicts Recommended
GENUINE PARTS INSTALLATION INSTRUCTIONS
 GENUINE PARTS INSTALLATION INSTRUCTIONS DESCRIPTION: APPLICATION: PART NUMBER: SIDE WINDOW DEFLECTOR Nissan Rogue (2008) 999D3 GX000 KIT CONTENTS: Item Qty. Part Description Service Part Number A 1 Side
INSTALLATION INSTRUCTIONS
 INSTALLATION INSTRUCTIONS Accessory Application Publications No. BII 44686 2011 RL P/N 08R04-SJA-201 Issue Date DEC 2010 PARTS LIST INSTALLATION NOTE: Door visor (front left) These instructions show the
ACCESSORY HOOD DODGE RAM. Call Out Description Parts Quantity 1 Hood Supplied in kit 1 2 Bezel Supplied in kit 2 3 Foam tape supplied in kit 1
 ACCESSORY HOOD 1 DODGE RAM Call Out Description Parts Quantity 1 Hood Supplied in kit 1 2 Bezel Supplied in kit 2 3 Foam tape supplied in kit 1 2 PROCEDURE STEPS: 1. Disconnect the washer fluid hose (1)
GENUINE MUD FLAP (FRONT)
") GENUINE MUD FLAP (FRONT) INSTALLATION AND USER S INSTRUCTIONS Thank you for purchasing a Genuine Mazda Accessory. Before removal and installation, be sure to thoroughly read these instructions. Please
GENUINE MUD FLAP (FRONT) INSTALLATION AND USER S INSTRUCTIONS Thank you for purchasing a Genuine Mazda Accessory. Before removal and installation, be sure to thoroughly read these instructions. Please
SS89HP SAFARI ARMAX SNORKEL Toyota Land Cruiser 200 Series (MY16 Face Lift) 1VD-FTV 4.5Litre-V8 Intercooled Twin Turbo Diesel (Does not suit GX model)
 1VD-FTV 4.5Litre-V8 Intercooled Twin Turbo Diesel (Does not suit GX model)") SS89HP SAFARI ARMAX SNORKEL Toyota Land Cruiser 200 Series (MY16 Face Lift) 1VD-FTV 4.5Litre-V8 Intercooled Twin Turbo Diesel (Does not suit GX model) Parts List 01/12/2016 ITEM PART NO. DESCRIPTION QTY
SS89HP SAFARI ARMAX SNORKEL Toyota Land Cruiser 200 Series (MY16 Face Lift) 1VD-FTV 4.5Litre-V8 Intercooled Twin Turbo Diesel (Does not suit GX model) Parts List 01/12/2016 ITEM PART NO. DESCRIPTION QTY
Installation Instructions Bolt-On Fender Flares Ford F150 (09-12) Part #17394
 Part #17394") Please read instructions entirely before installing this product. Hardware Included QTY Hardware Included QTY Bolt Kit Included QTY EXTRUSION 29.5ft ALCOHOL TOWELETTE 4 BLACK HEX BOLT 42 RETAINING CLIP.9mm
Please read instructions entirely before installing this product. Hardware Included QTY Hardware Included QTY Bolt Kit Included QTY EXTRUSION 29.5ft ALCOHOL TOWELETTE 4 BLACK HEX BOLT 42 RETAINING CLIP.9mm
Webasto Products N.A. Inc.
 Webasto Products N.A. Inc. Hollandia 300 Large Hollandia 300 Large Sliding Shade INSTALLATION MANUAL (SECTION - 1) CONTENTS OF THE WEBASTO 300 LARGE INSTALLATION & SERVICE MANUAL SECTION SUBJECT PAGE NUMBER
REV READ BEFORE INSTALLATION OF KIT:
 REV. 05-08 QTY 3D PN. FCS PART NUMBER DESCRIPTION 1 691509 A7EDG-7820049-AAPLN EDGE BODY KIT- V6 B PCS & EXH TIPS 1 691256 A 7 E D G - 7 8 20049-BAPLN EDGE BODY KIT- V6 8PCS & EXH TIPS W/HITCH 1 691501
TOYOTA YARIS REAR BUMPER APPLIQUE Preparation
 Preparation Part Number: PT747-5250 Kit Contents Applique, RR Bumper Hardware Bag Contents Additional Items Required For Installation Conflicts Recommended Tools Personal & Vehicle Protection None Special
GENUINE ILLUMINATED SCUFF PLATE
 GENUINE ILLUMINATED SCUFF PLATE INSTALLATION AND USER S INSTRUCTIONS Thank you for purchasing a Genuine Mazda Accessory. Before removal and installation, please thoroughly read these instructions. For
LEXUS GS 350/450h REAR BUMPER APPLIQUE GS-F Preparation
 Preparation Part Number: PT747-3020 Kit Contents Applique, RR Bumper Hardware Bag Contents Additional Items Required For Installation Conflicts None Recommended Tools Personal & Vehicle Protection None
RAM Extend-A-Fender Fender Flares Set of 4
 RAM Extend-A-Fender Fender Flares Set of 4 STEP 1 PRIOR TO INSTALLATION A) Bushwacker only approves installing the fl ares according to these written instructions with the hardware provided. WARNING: Failure
Double-check to ensure that all of the parts are included in your shipment. Please immediately contact 3dCarbon if you are missing any part.
 5 Pc. Kit Includes QTY 3D PN. DESCRIPTION 1 691815 CRUZE FRONT AIR DAM POLYURETHANE PRE-PRIMERED 1 691816 CRUZE SIDE SKIRT RH POLYURETHANE PRE-PRIMERED 1 691819 CRUZE SIDE SKIRT LH POLYURETHANE PRE-PRIMERED
INSTALLATION INSTRUCTIONS
 INSTALLATION INSTRUCTIONS Accessory S P/N 08P20-STX-200A Application 2010 MDX Publications No. BII 42020 Issue Date JAN 2010 PARTS LIST Door edge film LF Door edge film RF Door edge film LR Door edge film
SS77HFZ Toyota Land Cruiser 70 series (Wide Nose) Suits: 4.2L 6cyl Diesel (1HZ engine) Replaces Factory Toyota Raised Air Intake (Genuine Snorkel)
 Suits: 4.2L 6cyl Diesel (1HZ engine) Replaces Factory Toyota Raised Air Intake (Genuine Snorkel)") SS77HFZ Toyota Land Cruiser 70 series (Wide Nose) Suits: 4.2L 6cyl Diesel (1HZ engine) Replaces Factory Toyota Raised Air Intake (Genuine Snorkel) Parts List 15/02/2011 ITEM PART NO DESCRIPTION QTY 1 330-133-700
SS77HFZ Toyota Land Cruiser 70 series (Wide Nose) Suits: 4.2L 6cyl Diesel (1HZ engine) Replaces Factory Toyota Raised Air Intake (Genuine Snorkel) Parts List 15/02/2011 ITEM PART NO DESCRIPTION QTY 1 330-133-700
Please read and understand all instructions before attempting installation. Please pay attention to all Cautions and Notes within these instructions.
 Mustang Cluster Kit - INSTALLATION INSTRUCTIONS - For use with Ford Mustang (2005-2009) and Simco Kit Part # s 2046-7XX Revised: Sept. 29, 2008 Rev. B Please read and understand all instructions before
TOYOTA CAMRY REAR BUMPER APPLIQUE Preparation
 Preparation Part Number: PT747-0350 Kit Contents Applique, RR Bumper Hardware Bag Contents Additional Items Required For Installation Conflicts Recommended Tools Personal & Vehicle Protection None Special
TOYOTA YARIS XM SATELLITE RADIO Preparation (Sedan & Hatchback)
") Preparation (Sedan & Hatchback) Part Number: Mounting Kit PT546-52096 Tuner Assy 86180-0W031 Tuner Assy Kit Contents (86180-0W031) Item # Quantity Reqd. Description 1 1 Tuner Assy, Stereo Component Mounting
Preparation (Sedan & Hatchback) Part Number: Mounting Kit PT546-52096 Tuner Assy 86180-0W031 Tuner Assy Kit Contents (86180-0W031) Item # Quantity Reqd. Description 1 1 Tuner Assy, Stereo Component Mounting
Stowe Cargo Management System
 Installation Guide Stowe Cargo Management System Table of Contents 1. Pre-Installation (Page 2) a. Notes, Installation Kit contents & Tools needed 2. How to Install the Stowe Cargo Management System (Pages
100mm. Part# AA Rev CUSTOMER SUPPORT: Wash truck bed.
 Wash truck bed. 1 2 TRI-FOLD TONNEAU INSTALLATION GUIDE Sold exclusively at AutoAnything.com Please contact 800-874-8888 with any questions, to claim your warranty, or to discuss a return. You can also
GENUINE MUD FLAP (FRONT)
") GENUINE MUD FLAP (FRONT) INSTALLATION AND USER S INSTRUCTIONS Thank you for purchasing a genuine Mazda accessory. Before removal and installation, be sure to thoroughly read these instructions. Please
GENUINE MUD FLAP (FRONT) INSTALLATION AND USER S INSTRUCTIONS Thank you for purchasing a genuine Mazda accessory. Before removal and installation, be sure to thoroughly read these instructions. Please
Rear Spoiler Installation Instructions
 Rear Spoiler Installation Instructions Guidelines For complete instructions in color, please go to our website at www.ivsauto.com If your Camaro did not come with an OEM spoiler, IVS kit # 9006-1013-01
GENUINE REAR SPOILER
 GENUINE REAR SPOILER IMPORTANT POINTS IN PAINTING PART NAME: REAR SPOILER PART NUMBER: 0000-8Y-H50/GHK1 V4 920/G44B V4 920 VEHICLE: MAZDA6 1 PAINT AREAS SURFACE TREATMENT a : Paint same as body color b
2005+ Roll Bar (Mm5RB-20.1 to -20.6) Recommended Center punch 1/8" pilot drill 1-3/4" Hole saw 2" Hole saw
 Recommended Center punch 1/8 pilot drill 1-3/4 Hole saw 2 Hole saw") 3430 Sacramento Dr., Unit D San Luis Obispo, CA 93401 Telephone: 805/544-8748 Fax: 805/544-8645 www.maximummotorsports.com 2005+ Roll Bar (Mm5RB-20.1 to -20.6) Recommended Center punch 1/8" pilot drill
3430 Sacramento Dr., Unit D San Luis Obispo, CA 93401 Telephone: 805/544-8748 Fax: 805/544-8645 www.maximummotorsports.com 2005+ Roll Bar (Mm5RB-20.1 to -20.6) Recommended Center punch 1/8" pilot drill
DODGE SuperRail Mounting Kit #0848
 DODGE SuperRail Mounting Kit #0848 #1200 Super 5 th (16K) #0800 Super 5 th (20.5K) Gross Trailer Weight (Maximum) Vertical Load Weight (Max. Pin Weight) 16,000 lbs. 4,000 lbs. Gross Trailer Weight (Maximum)
TOYOTA RAV DOOR SILL PROTECTORS Preparation
 Preparation Part Number: PT747-4230 Kit Contents 2 Front Door Sill Protector 2 2 Rear Door Sill Protector Hardware Bag Contents Additional Items Required For Installation Conflicts Recommended Tools Personal
QTY 3D PART NO. FORD SERVICE PN DESCRIPTION VAA6Z A FIESTA 5 DOOR (4) PC. KIT
 PC. KIT") Rev. 08-4 - 2010 QTY 3D PART NO. FORD SERVICE PN DESCRIPTION 1 691620 VAA6Z-5820049-A 2011- FIESTA 5 DOOR (4) PC. KIT HARDWARE SUPPLIED 12 #8 X ¾ SELF DRILLING SCREWS 220 / 18.5 3M VHB DOUBLE FACE TAPE
Rev. 08-4 - 2010 QTY 3D PART NO. FORD SERVICE PN DESCRIPTION 1 691620 VAA6Z-5820049-A 2011- FIESTA 5 DOOR (4) PC. KIT HARDWARE SUPPLIED 12 #8 X ¾ SELF DRILLING SCREWS 220 / 18.5 3M VHB DOUBLE FACE TAPE
DISASSEMBLY REASSEMBLY
 4 EXTERIOR FRONT BUMPER DISASSEMBLY 1. REMOVE HOOD TO FRONT END PANEL SEAL (a) Using a clip remover, detach the 8 clips and remove the panel seal. 2. REMOVE FRONT BUMPER REINFORCEMENT (a) Using a clip
Side Rocker Installation Instructions
 Side Rocker Installation Instructions Guidelines + Trial fit all parts prior to painting + Do not use the side rockers as an attachment point for tie downs + Every 3-6 months, make sure all fasteners are
Remove 4 circled pins. Route wiring along dashed line. Remove the 2 9mm nuts and black retaining plate that secure extractor.
 2015 Ford Mustang Turn Signal Hood Kit Parts List: Quantity: Tool List: Bracket & pre-installed lamp 2 Flat head screwdriver Wiring harness 1 Phillips screwdriver PB-3660 Parts Bag 1 Ratchet & Socket set
INSTALLATION INSTRUCTIONS
 INSTALLATION INSTRUCTIONS Accessory MOON P/N 08R01-SZA-101 Application 2014 PILOT Publications No. AII 50258 Issue Date AUG 2013 PARTS LIST TOOLS AND SUPPLIES REQUIRED Phillips screwdriver 10 mm Combination
Most dust and water leaks occur due to missing or mis-installed body sealer or components. The source of the leak is detected by:
 SECTION 501-00: Body System General Information 2009 Mustang Workshop Manual DIAGNOSIS AND TESTING Procedure revision date: 03/26/2010 Body System Material Seam Sealer TA-2 Item Silicone Gasket and Sealant
LightRider. Instructions for Power Link Helmet Light. Helmet Vertical Midline
 LightRider Instructions for Power Link Helmet Light Helmet Vertical Midline Look at the back of your helmet. Then imagine a vertical line that runs up the back and divides your helmet into right and left
Mustang Hood Scoop
 Installation Instructions P/N: 421858 421859 421860 421861 421862 421863 421864 421865 421866 421867 421868 422055 422056 422057 39555 Schoolcraft Rd, Plymouth MI, 48170 800.59.ROUSH 2015-2017 Mustang
Sunroof / Moonroof: Service and Repair Repair Procedures
 2011 Kia Truck Sportage 2WD L4-2.4L Copyright 2013, ALLDATA 10.52 Page 1 Sunroof / Moonroof: Service and Repair Repair Procedures Replacement Movable Glass Replacement 1. Remove the roof rack and roof
2-Way Remote Start and Door Lock Transmitter Package Installation (AP3)
") Document ID: 2197450 http://gsi.xw.gm.com/si/showdoc.do?docsyskey=2197450&pubcellsyskey=176302&pu... Page 1 of 5 11/12/2009 Accessories Document ID: 2197450 2-Way Remote Start and Door Lock Transmitter
Document ID: 2197450 http://gsi.xw.gm.com/si/showdoc.do?docsyskey=2197450&pubcellsyskey=176302&pu... Page 1 of 5 11/12/2009 Accessories Document ID: 2197450 2-Way Remote Start and Door Lock Transmitter
INSTALLATION & OWNER S MANUAL
 p. 1 of 13 INSTALLATION & OWNER S MANUAL Polaris Ranger 400-EV PathPro SS Cab (fits 2010 - current) (p/n: 1PRG400FS) The contents of this envelope are the property of the owner. Be sure to leave with the
INSTALLATION INSTRUCTIONS
 INSTALLATION INSTRUCTIONS Accessory Application Publications No. BII 41770 2010 RL P/N 08R04-SJA-201 Issue Date JUNE 2009 PARTS LIST INSTALLATION NOTE: Door visor (front left) These instructions show the
INSTALLATION & OWNER S MANUAL
 p. 1 of 15 INSTALLATION & OWNER S MANUAL Polaris Ranger 500-800 PathPro SS Cab (fits 2010 - current) (p/n: 1POLRFS1) The contents of this envelope are the property of the owner. Be sure to leave with the
SCION xb CARBON FIBER WINDOW TRIM Part Number: Accessory Code: YD2
 SCION xb 2008 - CARBON FIBER WINDOW TRIM Part Number: 00016-79855 Accessory Code: YD2 Base Kit Contents Item # Quantity Reqd. Description 1 1 Driver Side B-Pillar 2 1 Driver Side C-Pillar 3 1 Driver Side
SECTION 6 5 SERVICE PROCEDURES AND SPECIFICATIONS. Body
 SECTION 6 5 SERVICE PROCEDURES AND SPECIFICATIONS Body Specifications 236 Protecting your vehicle from corrosion 237 Washing and waxing 238 Cleaning the interior 239 235 SPECIFICATIONS DIMENSIONS AND WEIGHT
INSTALLATION INSTRUCTIONS
 INSTALLATION INSTRUCTIONS Accessory Application Publications No. 2004 S2000 AII 26323-31611 Issue Date DEC 2005 PARTS LIST Rear defroster switch Hardtop 3-Pin subharness (If equipped, not used) 4-Pin subharness
DODGE RAM WITHOUT FENDER FLARES FRONT MUD GUARD INSTALLATION INSTRUCTIONS
 DODGE RAM WITHOUT FENDER FLARES FRONT MUD GUARD INSTALLATION INSTRUCTIONS PART NO: 5817 Please read instructions thoroughly before installation. Tools Required Short Phillips screwdriver Center punch Drill
OVERVIEW: This bulletin involves removing and installing the deck lid spoiler.
 NUMBER: 23-041-05 GROUP: Body DATE: September 9, 2005 This bulletin is supplied as technical information only and is not an authorization for repair. No part of this publication may be reproduced, stored
GM G-BODY LSD INSTALLATION
 GM G-BODY 1979-1987 LSD INSTALLATION INSTALLATION INTRODUCTION 1. REMOVING THE FENDER AND DOORS FROM THE A-PILLAR AND DISCONNECTING THE WIRE HARNESS @ THE DOOR JAM 2. REMOVING THE EXISTING DOOR HINGES
INSTALLATION INSTRUCTIONS 2005 THRU 2007 C6 CORVETTE
 ` INSTALLATION INSTRUCTIONS 2005 THRU 2007 C6 CORVETTE Thank you for purchasing the finest Hardtop available on the market today. Skilled craftsmen using the highest quality materials and modern technology
Installation Instructions: HYPERION R-Lite SYSTEM
 Installation Instructions: HYPERION R-Lite SYSTEM READ THIS MANUAL BEFORE PROCEEDING WITH THE INSTALLATION. FAILURE TO FOLLOW THE INSTALLATION INSTRUCTIONS WILL VOID YOUR WARRANTY! INSTALLATION TIPS Read
Instruction No Version Part. No , , , , , , , ,
 Instruction No Version Part. No. 30744180 1.2 30794160, 30794013, 30794026, 30794039, 31213192, 30794102, 30794138, 30794151, 30794075 Body kit IMG-256183 Page 1 / 13 Equipment A0000162 A0000163 IMG-239940
1. Open front door (20124) and support using Rotunda Flexi-Work Table or equivalent.
 and support using Rotunda Flexi-Work Table or equivalent.") file://c:\tso\tsocache\vdtom_3244\svk~us~en~file=svk13002.htm~gen~ref.htm Page 1 of 6 Section 01-03: Doors and Liftgate REMOVAL AND INSTALLATION 1997 Aerostar, Ranger Workshop Manual Doors Front Doors
file://c:\tso\tsocache\vdtom_3244\svk~us~en~file=svk13002.htm~gen~ref.htm Page 1 of 6 Section 01-03: Doors and Liftgate REMOVAL AND INSTALLATION 1997 Aerostar, Ranger Workshop Manual Doors Front Doors
Windshield Replacement. Two-Piece Windshield Replacement, Argosy COE
 Replacement NOTE: Freightliner recommends Sika Ultrafast, Dow U-00HV, or Bostik 70-08 adhesive for windshield replacement. The procedure below specifies Dow adhesives and primers, though other manufacturers
INSTALLATION INSTRUCTIONS
 Accessory Application Publications No. INSTALLATION INSTRUCTIONS SIDE S 2013 TSX BII 13496 Issue Date SEP 2012 PARTS LIST 4 Screws Left side under spoiler Right side under spoiler 2 Clamps TOOLS AND SUPPLIES
DRAWING NO WI APPROVAL ISSUER: ENGINEERING: PRODUCTION/MATERIAL: QA APPROVAL: REV 2 DATE BAS BAS WRC
 Installation Instruction Tr/IPSNET Door Sensor DRAWING NO WI 005-184-501 APPROVAL ISSUER: ENGINEERING: PRODUCTION/MATERIAL: QA APPROVAL: REV 2 DATE BAS BAS WRC WRC REVISION HISTORY LTR DESCRIPTION DATE
Front Grille Replacement
 Document ID: 4298678 Page 1 of 1 2017 Cadillac XT5 XT5 Service Manual Europe, Korea, N America, Other IO 9325297 Document ID: 4298678 Front Grille Replacement Front Grille Replacement Preliminary Front
QTY 3D PN. FCS PART NUMBER DESCRIPTION
 QTY 3D PN. FCS PART NUMBER DESCRIPTION 1 691544 A8FOC-17B635-APL FOCUS FRONT AIR DAM 1 691549 A8FOC-17E957-APL FOCUS REAR LOWER 1 691548 A8FOC-10154-APL FOCUS RIGHT SIDE SKIRT 1 691547 A8FOC-10155-APL
Be sure to carry out the following before starting work
 Be sure to carry out the following before starting work If an older version of the CMU software is being used, the CarPlay/Android Auto-compatible USB hub may not be recognized. If the software version
INSTALLATION INSTRUCTIONS
 INSTRUCTIONS Accessory Application Publications No. 2011 CIVIC AII 44380 S 2-DOOR Issue Date AUG 2010 NOTE: The side under spoilers cannot be installed on a vehicle equipped with splash guards. PARTS LIST
TOYOTA COROLLA HATCHBACK REAR SPOILER Preparation
 Preparation Part Number: PT29A-12195-XX Kit Contents 1 1 Rear Spoiler 2 2 Hardware Bag Hardware Bag Contents 1 2 M6 Assembly Nuts 2 2 Grommet Inserts 3 1 Hole Plug Additional Items Required For Installation
GENUINE PARTS INSTALLATION INSTRUCTIONS
 GENUINE PARTS INSTALLATION INSTRUCTIONS 1. 2. 3. 4. DESCRIPTION: APPLICATION: PART NUMBER: KIT CONTENTS: Security light Kit Maxima 999F4 AX009 - Universal Security Lighting Kit. Item QTY Description Service
Flight Compartment. 1. General
 CIRRUS AIRPLANE MAINTENANCE MANUAL Flight Compartment CHAPTER 56-10: FLIGHT COMPARTMENT GENERAL 56-10: FLIGHT COMPARTMENT 1. General The windshield is manufactured of acrylic and is adhesive bonded to
# I: Headlamp, Tail Lamp, License Lamp or Fog/Driving Lamp Damage - (Feb 12, 2016)
") Page 1 of 5 Document ID: 4390397 #02-08-42-001I: Headlamp, Tail Lamp, License Lamp or Fog/Driving Lamp Damage - (Feb 12, 2016) Subject: Headlamp, Tail Lamp, License Lamp or Fog/Driving Lamp Damage Models:
Page 1 of 5 Document ID: 4390397 #02-08-42-001I: Headlamp, Tail Lamp, License Lamp or Fog/Driving Lamp Damage - (Feb 12, 2016) Subject: Headlamp, Tail Lamp, License Lamp or Fog/Driving Lamp Damage Models:
CERTAIN 2005 MODEL YEAR FIVE HUNDRED, MONTEGO AND CERTAIN 2005 AND 2006 MODEL YEAR FREESTYLE VEHICLES DOOR LATCH WATER PROTECTION
 CERTAIN 2005 MODEL YEAR FIVE HUNDRED, MONTEGO AND CERTAIN 2005 AND 2006 MODEL YEAR FREESTYLE VEHICLES LATCH WATER PROTECTION ATTACHMENT III PAGE 1 OF 9 OVERVIEW Depending on vehicle and build date, this
Aggressive Chin Spoiler CDC#
 Note: 2005-2009 Aggressive Chin Spoiler CDC# 110021 Read installation instructions before starting and test fit component before painting. Chin Spoiler is a molded Urethane part. To ensure the quality
Remove the 3-11mm nuts holding mirror on. Don t drop the nuts!
 2005-2012 Ford Mustang Puddle Lamp Kit Parts List: Quantity: Tool List: LED Lamps 2 Flat head screwdriver Seals 2 Ratchet & Socket set OR Nuts 2 Adjustable Wrench Wiring harness 1 Drill & 11/16 th bit
INSTALLATION INSTRUCTIONS
 INSTALLATION INSTRUCTIONS Accessory Application Publications No. AII 25852 PILOT Issue Date AUG 2003 PARTS LIST INSTALLATION NOTE: Door visor (Front left) These instructions show the left door visors being