INTRODUCTION / TABLE OF CONTENTS
|
|
|
- Margaret Ross
- 5 years ago
- Views:
Transcription


1 1


2 2
3 INTRODUCTION / TABLE OF CONTENTS Step One An ultrasonic sound wave is pulse eight times per second from the base of the transducer. The sound wave reflects against the process medium below and returns to the transducer. The microprocessor based electronics measure the time of flight between the sound generation and receipt, and translates this figure into the distance between the transducer and process medium below. Table of Contents Specifications... 4 Dimensions... 4 Components... 5 Sinking vs. Sourcing... 5 Safety Precautions... 6 Menu / Definitions... 7 Configuration... 9 Steps for Basic Configuration... 9 Selecting Units of Operation... 9 Configure Sensor s Current Range... 9 Configure Sensor s Relay Wiring Installation Mounting Guide Fitting Selection Tank Adapter Riser Flange Side Mount Fitting Stand Pipe Relay Examples Ex: High Alarm Ex: Automatic Fill Maintenance / Advanced Features Factory Settings and Reset Changing Display units Testing the transmitter Troubleshooting Solution Table Other Hints
 ±0.25% of range (air) 0.")

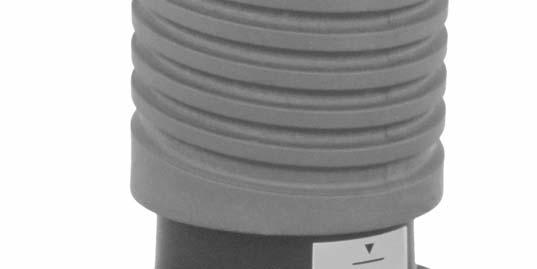
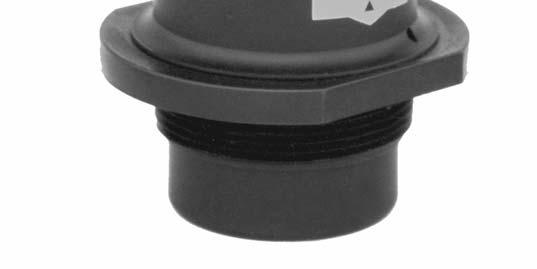
4 SPECIFICATIONS Step Two Range: Accuracy: Resolution: Frequency: Pulse Rate: Dead Band: Beam width: Configuration: Memory: Display Type: Display units: LED Indication: Supply Voltage: Consumption: Signal output: Signal invert: Current flow: Contact type: Contact rating: Contact logic: Contact fail safe: 0.5 to 24.5 feet (15cm to 7.4m) ±0.25% of range (air) (3mm) 50 khz 8 pulses per second 6 (15cm) 8 conical Push button Non volatile 4 segment LED Inch or cm Relay status VDC 200mA 4 20mA, three wire 4 20mA / 20 4mA Sourcing or sinking (1) SPDT relay, latching 250 VAC, 10A Single point: alarm Two point: latching Reverts to safe state during echo loss Process Temp.: F: 4 to 140 C: 20 to 60 Temp. Compensation: Automatic Ambient temp.: F: 40 to 140 C: 40 to 60 Pressure: Enclosure rating: Enclosure material: Conduit entrance: Cable length: Cable type: Cable jacket mat l: Transducer material: Process mount: Classification: Compliance: 30 psi (2 25 C., psi (.113 bar) per C. above 25 C. NEMA 4X (IP65) Polypropylene, U.L. 94VO Single, 1/2" NPT 9 (22cm) Power/signal: 3 conductor Relay: 3 conductor Vinyl Polyvinylidene Fluoride (PVDF) 2 NPT General Purpose CE LVU 301/ 303 Series Side View LVU 301/ 303 Series Cable View 4

 2 NPT Sourcing (1) LVU 301 24.5 (7.47 m) 6 (15.2cm) 2 NPT Sinking (1) Quick Start Guide Sinking vs.")


5 SPECIFICATIONS Step Two Components: LVU 301/ 303 Series is offered in different models. Depending on the model purchased, you may or may not have been shipped all the components shown below. P/N Max. Range Dead Band Thread Current Output Relay LVU (7.47 m) 6 (15.2cm) 2 NPT Sourcing (1) LVU (7.47 m) 6 (15.2cm) 2 NPT Sinking (1) Quick Start Guide Sinking vs. Sourcing: The LVU 301/ 303 Series is manufactured in two different outputs, sourcing and sinking. A sourcing transmitter uses the negative of the power supply as the reference for the entire system. When using a sourcing unit, make sure that the negative of the ground is the common for the entire system. A sinking transmitter uses the positive of the power supply as the reference for the entire system. When using a sinking unit, make sure the positive of the ground is the common for the entire system. Sourcing (LVU 303) Sinking (LVU 301) 5
6 SAFETY PRECAUTIONS Step Three About this Manual: PLEASE READ THE ENTIRE MANUAL PRIOR TO INSTALLING OR USING THIS PRODUCT. This manual includes information on the continuous ultrasonic level transmitter from OMEGA ENGINEERING; model LVU 301 or LVU 303. Please refer to the part number located on the sensor label to verify the exact model which you have purchased. User s Responsibility for Safety: OMEGA ENGINEERING manufactures a wide range of liquid level sensors and technologies. While each of these technologies are designed to operate in a wide variety of applications, it is the user s responsibility to select a technology that is appropriate for the application, install it properly, perform test of the installed system, and maintain all components. The failure to do so could result in property damage or serious injury. Proper Installation and Handling: Because this is an electrically operated device, only properly trained staff should install and/or repair this product. Use a proper sealant with all installations. Never over tighten the transmitter within the fitting. Always check for leaks prior to system start up. Wiring and Electrical: A supply voltage of VDC (200 ma minimum supply) is used to power the ultrasonic transmitter. The sensor system should never exceed a maximum of 36 VDC. Electrical wiring of the sensor should be performed in accordance with all applicable national, state, and local codes. Temperature and Pressure: The LVU 301/ 303 series is designed for use in application temperatures from 20 C ( 4 F) to 60 C (140 F), and for use at pressures up to 30 psi (2 25 C, psi (0113 bar) per C above 25 C. Material Compatibility: The continuous ultrasonic level transmitter is made of two materials. The enclosure is a Polypropylene (PP) and the transducer is made of Polyvinylidene Fluoride (PVDF). Make sure that the model which you have selected is chemically compatible with the application liquids. While the transmitter housing is liquid resistant when installed properly, it is not designed to be immersed. It should not be mounted in such a way that it does not normally come into contact with fluid. Flammable, Explosive and Hazardous Applications: The LVU 301/ 303 series level transmitter system should not be normally within flammable or explosive application. Make a Fail Safe System: Design a Fail Safe system that accommodates the possibility of transmitter or power failure. In critical application OMEGA ENGINEERING recommends the use of redundant backup systems and alarms in addition to the primary system. 6
.")
7 MENU / DEFINITIONS Step Four Getting around: LVU 301/ 303 Series is configured by the use of four push buttons (UP, DOWN, MENU and SET) and a LCD display. The display will always read the distance from the bottom of the sensor to the surface of the liquid (air gap). Main Menu: Holding down the MENU button will scroll down the main menu of the LVU 301/ 303 Series. Definitions: All measurement used for configuration of the LVU 301/ 303 Series are made from the bottom of the transmitter down. EC4: This is the 4 ma setting for the LVU 301/ 303 Series. The EC4 is the distance from the bottom of the transmitter to the 4 ma set point. Typically, the EC4 or 4mA setting is at the bottom of the tank. The further away from the sensor, the larger the number will be. This setting is measured in either inches or centimeters on the display. EC20: This is the 20 ma setting for the LVU 301/ 303 Series. The EC20 is the distance from the bottom of the transmitter to the 20 ma set point. Typically, the EC20 or 20 ma setting is at the top of the tank. The closer to the sensor, the smaller the number will be. This setting is measured in either inches or centimeters on the display. Reversing the 4 20 ma signal: Setting the EC4 at the bottom of the tank and EC20 at the top of the tank will create a 4 20 ma output that has 4 ma at empty and 20 ma at full. To reverse the 4 20 ma signal, set EC4 at the top of the tank and EC20 at the bottom of the tank. RLAY: Indicator for the next two modes. The 10A relay is latched between the HSET and LSET points. HEST & LSET: Sets the high point and low point for relay activation. Values are based upon the distance from the bottom of the sensor down towards the liquid. HSET: Internal relay will de energize when display value is less than the HSET value. LSET: Internal relay will energize when display value is greater than the LSET value. The HSET value is always less that the LSET value. To activate the relay from a single point, set HSET and LSET to the same value. 7
8 MENU / DEFINITIONS (continued) Step Four SAF1/SAF2: This is the fail safe setting for the LVU 301/ 303 Series. Use the SAF_ setting to determine a fail safe mode for the internal relay. When [SAF1] is set, the will de energize if the signal becomes LOST. When [SAF2] is set, the relay will energize if the signal becomes LOST. LOST: A LOST state will occur when the sensor does not receive a return sound pulse signal. When this occurs, the display will show LOST and the current output will default to the SAF_ setting. The sensor will remain in this condition until a valid signal is acquired. No values in the MENU can be changed until the LOST condition has been resolved. FAST/SLOW: FAST and SLOW sets the reaction time for the SAF1/2 setting when the sensor enters a LOST state. [FAST] is the typical setting for the sensor to operate. The time for the RELAY to default is 30 seconds for [FAST] mode and 2.5 minutes for [SLOW] mode. To change the FAST/SLOW setting, follow the steps below: 1. Hold [MENU] key until FAST or SLOW appears in the display. 2. Release [MENU] key and hold [SET] key to toggle between FAST and SLOW. 3. When desired setting is reached, release [SET] key. The last display setting will be locked into memory. ALIN: Use this mode as an aid to leveling the sensor installed in a self aligning or rotational bulk head fitting. Display will show the return signal strength in db s. For optimum alignment, first energize the unit and receive a valid return signal. Then select the ALIN mode and adjust the LVU 301/ 303 series until the display is maximized. Typical readings range between 2 and 60 db s. ON/OFF: This is the actual activation setting for ALIN mode. Default is [OFF]. Set to [ON] to view the ALIN readings. The ALIN mode must be turned [OFF] when alignment is completed. To ALIN a sensor, follow the steps below: 1. Hold [MENU] key until OFF appears in the display. a. OFF will appear right after ALIN 2. Release [MENU] key and immediately hold [SET] key to toggle from OFF to ON. 3. Release [SET] key. The LVU 301/ 303 series is now in ALIN mode. 4. Adjust the sensor so the display shows the largest value. a. When the highest value is shown, lock the sensor in place. 5. To exit ALIN mode, repeat steps 1 4 changing from ON to OFF. TANK: The TANK sets the maximum tank height and will filter out all returns greater that this value. Regardless of how the EC4 and EC20 are set, set TANK to the Empty tank distance or greater. (VALUE): The number after TANK shows the setting for TANK. This value is the actual TANK setting that can be changed for the application. The maximum distance is inches. 8
9 CONFIGURATION Step Five Steps for Basic Configuration: 1. Select and Set the units of operation. 2. Configure the Sensor s Current Range using the EC4 and EC20 settings in the main menu. a. The tank level does not need to be empty or full for this operation. 3. Configure the Relay level settings using the HSET and LSET settings in the main menu. a. The tank level does not need to be empty or full for this operation. 4. Set the Operational Range using the TANK settings in the main menu. a. The tank level does not need to be empty or full for this operation. 5. Select the Fail Safe setting using the SAF_ setting in the main menu. Selecting Units of Operation (Inches or CM): The default for the LVU 301/ 303 Series is to display in inches. If power is removed, the sensor will remain in the selected mode. This operation selects the units of operation for the configuration of the transmitter. This selection has no effect on the output of the sensor. The 4 20 ma output can be scaled to read in any engineering units. To change to centimeters To change to inches 1. Remove power to the sensor and wait 10 seconds. 2. Simultaneously press [ ] and [SET] while adding power to the transmitter. 3. The sensor will now read in centimeters. 1. Remove power to the sensor and wait 10 seconds. 2. Simultaneously press [ ] and [SET] while adding power to the transmitter. 3. The sensor will now read in inches. Configure the Sensor s Current Range using EC4 and EC20 EC4: All measurement used for configuration of the sensor are made from the bottom of the transmitter down. 1. Measure the distance from the bottom of the sensor to the desired EC4 set point. 2. Hold [MENU] key until EC4 appears in display. 3. Release [MENU] key and wait until a value appears. a. The value that appears is the current distance from the sensor to the surface of the liquid. 4. Immediately press the [ ] or [ ] keys to view the memory value for EC4. 5. Use the [ ] or [ ] keys to raise or lower the display to the desired value. a. If the keys remain untouched for more than 3 seconds, the sensor will exit the menu. 6. Press the [SET] key to enter this value as the new EC4 set point. EC20: All measurement used for configuration of the sensor are made from the bottom of the transmitter down. 1. Measure the distance from the bottom of the sensor to the desired EC20 set point. 2. Hold [MENU] key until EC20 appears in display. 3. Release [MENU] key and wait until a value appears. a. The value that appears is the current distance from the sensor to the surface of the liquid. 4. Immediately press the [ ] or [ ] keys to view the memory value for EC Use the [ ] or [ ] keys to raise or lower the display to the desired value. a. If the keys remain untouched for more than 3 seconds, the sensor will exit the menu. 6. Press the [SET] key to enter this value as the new EC20 set point. 9

![Release [MENU] key and wait until a value appears (this is the memory value for HSET). 4. Use the [ ] or [ ] keys to raise or lower the display to the desired value. a. If the keys remain untouched for more than 3 seconds, the sensor will exit the menu.](/docs-images/92/110032987/images/10-2.jpg "5. Press the [SET] key to enter this value as the new HSET set point. LSET: All measurement used for configuration of the sensor are made from the bottom of the transmitter down. 1.")
10 CONFIGURATION (continued) Step Five Set the RELAY using HSET and LSET HSET: All measurement used for configuration of the sensor are made from the bottom of the transmitter down. 1. Measure the distance from the bottom of the sensor to the desired HSET set point. 2. Hold [MENU] key until HSET appears in the display. 3. Release [MENU] key and wait until a value appears (this is the memory value for HSET). 4. Use the [ ] or [ ] keys to raise or lower the display to the desired value. a. If the keys remain untouched for more than 3 seconds, the sensor will exit the menu. 5. Press the [SET] key to enter this value as the new HSET set point. LSET: All measurement used for configuration of the sensor are made from the bottom of the transmitter down. 1. Measure the distance from the bottom of the sensor to the desired LSET set point. 2. Hold [MENU] key until HSET appears in the display. 3. Release [MENU] key and wait until a value appears (this is the memory value for LSET). 4. Use the [ ] or [ ] keys to raise or lower the display to the desired value. a. If the keys remain untouched for more than 3 seconds, the sensor will exit the menu. 5. Press the [SET] key to enter this value as the new LSET set point. Set Operational Range using TANK TANK: All measurement used for configuration of the sensor are made from the bottom of the transmitter down. 1. Measure the distance from the bottom of the sensor to the desired MAXR set point. 2. Hold [MENU] key until the value after MAXR appears in the display. a. This value is the current MAXR setting. 3. If this is acceptable, press [SET] to lock the value as the MAXR setting. If not, use the [ ] or [ ] keys to raise or lower the value to the desired setting. 4. Press the [SET] key to enter this value as the new MAXR setting. Select the Fail Safe Setting SAF_: 1. Hold [MENU] key until SAF1 or SAF2 appears in the display. 2. Release [MENU] key and hold [SET] key to toggle between SAF1 or SAF2. 3. When desired setting is reached, release [SET] key. The last display setting will be locked into memory. EC4 and EC20 Distances Shown Above HSET and LSET Distances Shown Above TANK Distances Shown Above 10


11 WIRING Step Six The LVU 301/ 303 Series requires VDC power with at least 200mA supply in order to operate. Wiring to Generic Loop Powered Display: Sourcing LVU 303 Sinking LVU 301 Wiring to Generic PLC: Sourcing LVU 303 Sinking LVU 301 Wiring to the LVCN 51 Series Level Controller: Note: Check LVCN 51 series manual regarding setting the LVCN 51 series to work with a Sourcing LVU 303 (JWB mode) or Sinking LVU 301 (JWA mode). 11


. Beam Angle: LVU 301/ 303 Series features an 8 beam angle. As the distance to the liquid increases, the beam will increase in size.")
12 INSTALLATION Step Seven The LVU 301/ 303 Series should always be mounted perpendicular to the liquid. Make sure that the fitting and transmitter threads are not damaged or worn. Always hand tighten the transmitter within the fitting. Perform an installed leak test under normal process conditions prior to system start up. Mounting Guide 1. Do not mount at an angle 2. Liquid should never enter the dead band 3. Side Wall Use the Beam Width data to find the closest the sensor can be to the side wall 4. Do not mount where obstacles will intrude on sensor s beam width 5. Do not mount in a vacuum 6. Avoid mounting in the center of a dome top tank. 7. In cone bottom tank, position the sensor over the deepest part of the tank. Do not install sensor at an angle Avoid Interference from side of tank Do not install with objects in the beam. Do not install in applications with vacuum. Installation in existing fittings: If the existing fitting is larger than the threads of the LVU 301/ 303 Series, select a reducer bushing such as LVU800 2N80 (3 thread x 2 thread) or LVU800 3N80 (4 thread x 2 thread). Beam Angle: LVU 301/ 303 Series features an 8 beam angle. As the distance to the liquid increases, the beam will increase in size. Keep any object that can interfere with the sound pulses (ex: side wall, ladders, mixing blades, etc.) outside of this beam angle. Use the data provided to size the footprint of the sound pulse. Depth Radius Radius Depth Radius Radius Depth Radius Radius cm cm cm cm cm cm cm cm cm cm cm cm cm cm cm cm cm cm cm cm cm cm cm cm cm 12
 styles and/or pipe stops forward of the installed transducer. a. For larger tank adapters, it is OK to use a reducer bushing such as the LVU800 2N80 (3 thread x 2 thread).")
")
 3 ~ (75mm) 4 ~ (100mm) 7 ~ (175mm) 5 ~ (125mm) 10 ~ (250mm) 6 ~ (150mm) 12 ~ (300mm) 7 ~ (175mm) 14 ~ (350mm) 8 ~ (200mm) 16 ~ (400mm)")
13 INSTALLATION Step Seven Fitting Selection: LVU 301/ 303 Series is commonly installed in tank adapters, flanges, brackets or standpipes. 1. Tank Adapter: Select a tank adapter fitting, such as the LVU800 2B for the LVU 301/ 303 series. a. Avoid tank adapter (thread x thread) styles and/or pipe stops forward of the installed transducer. a. For larger tank adapters, it is OK to use a reducer bushing such as the LVU800 2N80 (3 thread x 2 thread). 2 Tank Adapter Socket x Thread Tank Adapter Thread x Thread Do not use thread x thread 2. Riser: Installations with tall, narrow risers can impede the acoustic signal. a. 2 (5 cm) diameter risers should be no taller than 3 (7.6 cm). Larger diameter risers should be no taller than 12 (30.5 cm). Riser Specifications Inner Diameter Maximum Height 3 ~ (75mm) 3 ~ (75mm) 4 ~ (100mm) 7 ~ (175mm) 5 ~ (125mm) 10 ~ (250mm) 6 ~ (150mm) 12 ~ (300mm) 7 ~ (175mm) 14 ~ (350mm) 8 ~ (200mm) 16 ~ (400mm) Note: Do not exceed the dimensions listed above 3. Flange: If installing on a flange, select a flange with a thread that is equal to the thread of the LVU 301/ 303 Series. a. When using a flange with a riser, please observe the riser dimensional information above. b. If the size of the flange is larger than the thread of the sensor, use a reducer bushing to help mount the sensor. 13


14 INSTALLATION Step Seven 4. Side Mount Bracket: For installations in open tanks and sumps, use the LVM 30 series side mount bracket. a. Be aware of the 8 beam angle with the LVU 301/ 303 Series transmitter. b. Use the Beam Width data to avoid having the sensor s beam away from the side wall. 5. Stand Pipe: A standpipe maybe used to dampen turbulence or when foam is present in the application. a. Pipe can be made of any material. b. Select a minimum 2 ID pipe for the stand pipe. i. A larger diameter pipe can be used. c. Use a coupling and reducer bushing to attach the LVU 301/ 303 Series to the pipe. d. The pipe length should run the measurement span and the bottom of the pipe should remain submerged at all times to prevent foam from entering the pipe. e. The pipe must be a continuous length with no joints, couplings or extensions. f. Cut a 45 notch at the bottom of the pipe and drill a 1/4 pressure equalization hole in the dead band. i. The vent hole must be within the dead band of the LVU 301/ 303 Series. g. The pumps should not drive liquid past the open end of the stand pipe which causes the liquid in the pipe to oscillate. 14


15 RELAY EXAMPLES Step Eight Internal Relay: The LVU 301/ 303 series contains a 250 VAC, 10A internal relay. The relay is actuated by the HSET and LSET settings. While this manual offers some example and suggestions to help explain the operation of the relay, such examples are for information only and are not intended as a complete guide to installing any specific system. Ex: High Level Alarm: The goal is to make sure the liquid does not rise above a certain level in the tank. If it does, an alarm sounds alerting the operator to a high level condition. Wire a lead of the alarm to the Green NC relay wire. Power is wired to the Blue COM relay wire and to the other lead of the alarm to complete the loop. Please observe polarity with the alarm. Make sure the HSET and LSET settings are programmed correctly. Typically the values are set to the same distance away from the sensor. For High Alarms, set the HSET value first before setting the LSET value. In the normal operation state, the sensor s relay will remain energized, keeping the alarm circuit open. When the alarm level has been reached, the relay de energizes and activates the alarm. To change to a low level alarm, re wire the alarm from the Green NC wire to the Yellow NO wire and adjust the LSET and HSET to the required level in the tank. Ex: Automatic Fill: The goal is to fill the tank. A valve is opened (energized) when a low level is reached and closed (de energized) when a high level is reached. Wire a lead from the valve to the Yellow NO wire. Power is wired to the Blue COM relay wire and to the other lead of the valve to complete the loop. Please observe polarity with the valve. Make sure the HSET and LSET settings are programmed correctly. Typically they are set with the HSET as the value closest to the sensor and the LSET as the value farthest away. In a Fill operation, the HSET will always be the level where the fill stops and LSET will be the level where the fill starts. When the low level is reached, the system will start to fill the tank. The tank will continue to fill until the level reaches the high point. The system stops filling until the low level is reached again. A pump or solenoid can be substituted for the exact same operation. To change to an automatic empty application, re wire the system from the Yellow NO wire the Green NC wire and adjust the LSET and HSET to the required level in the tank. 15


16 MAINTENANCE / ADVANCED FEATURES Step Nine General: LVU 303/ 303 series sensor itself requires no periodic maintenance except cleaning as required. It is the responsibility of the user to determine the appropriate maintenance schedule, based on the specific characteristics of the application liquids. Cleaning Procedure: 1. Power: Make sure that all power to the sensor, controller and/or power supply is completely disconnected. 2. Sensor Removal: In all through wall installations, make sure that the tank is drained well below the sensor prior to removal. Carefully, remove the sensor from the installation. 3. Cleaning the Sensor: Use a soft bristle brush and mild detergent, carefully wash the sensor. Do not use harsh abrasives such as steel wool or sandpaper, which might damage the surface sensor. Do not use incompatible solvents which may damage the sensor s Polypropylene or PVDF plastic body. Factory Setting and Factory Reset: The LVU 303/ 303 series is preset at the factory. When powered up the transmitter the first time, the factory setting will be active. If at any time you need to return to these settings, remove power from the sensor and wait 10 seconds. Press the [SET] and [MENU] buttons simultaneously while powering up the transmitter. LEVL INCHES (cm) SAF_ SAF1 EC4 288 (731.2cm) FAST/SLOW FAST EC20 8 (20.3cm) ALIN N/A RLAY N/A OFF/ON OFF HSET 5 (12.6 cm) TANK N/A LSET 288 (731.2cm) Value 216 (548.6cm) Changing Display Units: The LVU 301/ 303 series comes preset to measure in inches. To change the unit to display centimeters, remove power to the sensor and wait 10 seconds. Press [ ] and [SET] simultaneously while powering up the transmitter. The sensor will now read in centimeters. To return to inches, remove power and wait 10 seconds. Press [ ] and [SET] simultaneously while powering up the transmitter. Testing the Transmitter Sourcing Transmitter (LVU 303 Series) 16 Sinking Transmitter (LVU 301 Series) 1. Connect a multimeter in series with the white wire to read the current output. a. Be sure to observe in the examples above where the other side of the multimeter is connected. 2. Verify that the current increases (tank filling) and decreases (tank emptying) appropriately in the calibrated span. If not, carefully observe and attempt to correlate any installation, level or application event for more specific troubleshooting direction.
17 TROUBLESHOOTING PROBLEM Transmitter indicates a current of 0 ma Transmitter jumps to a current reading between 19 and 20 ma Transmitter indicates a current over 20 ma Transmitter always jumps to LOST condition Output of transmitter is opposite of the level of liquid Output of the transmitter is always reading either 4mA or 20 ma SOLUTION Step Ten Check the wiring for an open circuit (specifically the White wire). An open circuit is the most common issue with a 0 ma signal Check the installation of the transmitter. Bad installation fittings will cause false signals near the top of the tank, which typically translates to a signal between 19 and 20 ma. Also look for interference just below the transmitter. If the transmitter is installed in a metal fitting, switch to a plastic fitting. Immediately check the wiring for a short circuit. The LVU 301/ 303 Series is current limited to 20 ma. Anything above 20 ma indicates a short circuit. A reading of LOST in the display of the sensor indicates the transmitter is not receiving a valid return signal. If LOST appears, please check the following troubleshooting items: 1. Beam cone interference such as the side wall, ladder, seams, rungs or pipes within the sensor s beam cone. 2. Proper installation such that the LVU 301/ 303 series is installed level and free from interference from the installation fitting or flange. 3. Sufficient power being supplied to the LVU 301/ 303 series. The sensor requires VDC power with a minimum supply 200mA. 4. Proper Programming of the TANK function. For best results, set the TANK function as the distance from the bottom of the tank to the bottom of the transmitter. 5. Make sure that the transmitter is not installed at an angle. Even a 5 degree offset can reduce the signal return strength greatly. Check the EC4 & EC20 Setting. For 4mA at empty tank and 20 ma at full tank, the EC4 must be the larger value and the EC20 to smaller value. For 20mA at empty tank and 4 ma at full tank, the EC20 must be the larger value and the EC4 to smaller value. Check the input settings (EC4 and EC20) for the transmitter. The display of the transmitter reads to the 1/10 th of an inch or cm. Example: a display of 1234 is and not
.")
18 TROUBLESHOOTING Step Ten PROBLEM The display on the transmitter does not match the display on the side of the tank Sensor appears to have reset itself Display reads CM8Q or CM8O SOLUTION The display for the LVU 301/ 303 Series will always show the distance from the liquid surface to the bottom of the sensor (in inches or cm). The 4 20 ma output can be scaled to read in any engineering units, thus the displays will never match unless the local display is configured to read the air gap in the tank. Check the settings for EC4 & EC20. Remember that the first value seen in EC4 & EC20 is the current distance from the sensor to the liquid. 1. To check EC4 setting: a. Press MENU until EC4 appears. b. Wait until a number appears. c. Immediately press the button & the EC4 setting will appear. 2. To check EC20 setting: a. Press MENU until EC20 appears. b. Wait until a number appears. c. Immediately press the button & the EC20 setting will appear. These are actually firmware codes for the sensor. The appearance of either code indicates that the sensor is stuck in a reboot stage due to the power flickering on and off. Check that the power being supplied is consistent and does not flicker off. Also check the wire connections at the terminals. Other Hints: Current must change with all level movement. Example: For the illustration shown, as level increases, the current output will increase. If the output of the LVU 301/ 303 series is always reading 4mA or 20mA, check the input values (EC4 and EC20) for the sensor. The display on the LVU 301/ 303 Series will always indicate the distance from the bottom of the sensor to the surface of the liquid (in units of either 1/10 inch or 1/10 cm). As the liquid level increases, the value on the display will decrease. As the liquid level decreases, the value on the display will increase. 18


19 19


20 20
CRICKET Alphasonic Level Transmitter Model LA12 Owner s Manual
 Warranty, Service and Repair To register your product with the manufacturer, fill out the enclosed warranty card and return it immediately to: FLOWLINE Inc. 10500 Humbolt Street Los Alamitos, CA 90720
Series ULS Small Tank Ultrasonic Transmitter, Switch and Controller Series ULSS, ULSM, ULSL Manual
 L ULS Series ULS Small Tank Ultrasonic Transmitter, Switch and Controller Series ULSS, ULSM, ULSL Manual Dwyer Instruments Inc. 102 Indiana Hwy. 212 (P.O. Box 373) Michigan City, IN 46360 (46361) USA www.dwyer
EchoSonic. LU23, LU27, LU28 & LU29 Series Manual. Ultrasonic Liquid Level Transmitter
 EchoSonic Ultrasonic Liquid Level Transmitter LU23, LU27, LU28 & LU29 Series Manual Flowline, Inc. 10500 Humbolt Street, Los Alamitos, CA 90720 p 562.598.3015 f 562.431.8507 w flowline.com MN300610 Rev
LA19 Series Ricochet Battery Powered Level Transmitter and Display
 Warranty, Service & Repair To register your product with the manufacturer, fill out the enclosed warranty card and return it immediately to: Flowline Inc. 10500 Humbolt Street Los Alamitos, CA 90720. If
Switch-Pak. AU13, AV13 & AZ13 Series Owner s Manual. w/ Compact Relay Controller
 Switch-Pak w/ Compact Relay Controller AU13, AV13 & AZ13 Series Owner s Manual Flowline, Inc.. 10500 Humbolt Street, Los Alamitos, CA 90720. p 562.598.3015. f 562.431.8507. w flowline.com MN301430 Rev
EchoPod. UG06 & UG12 Series Manual. Ultrasonic Level Transmitter
 EchoPod Ultrasonic Level Transmitter UG06 & UG12 Series Manual Flowline, Inc. 10500 Humbolt Street, Los Alamitos, CA 90720 p 562.598.3015 f 562.431.8507 w flowline.com MN310140 Rev A1 Introduction / Table
Switch Pro w/ Compact Junction Box A_1_ Series Owner s Manual
 Warranty, Service & Repair To register your product with the manufacturer, go to the Flowline website for on-line registration. The website address is as follows: www.flowline.com On-line Warranty Registration
EchoPod DL14, DL24 & DL34 Series Manual Revision A.3
 EchoPod DL14, DL24 & DL34 Series Manual Revision A.3 Flowline Inc. 10500 Humbolt Street Los Alamitos, CA 90720 Tel: (562) 598-3015 Fax: (562) 431-8507 www.flowline.com 31 MAR 11 EchoPod 1 of 29 Preface
INTRODUCTION / TABLE OF CONTENTS
 1 2 INTRODUCTION / TABLE OF CONTENTS Step One About Level Track Mounting Kit: Omega Engineering s Level Track Kit is an adjustable mounting system for installing multiple level sensors vertically within
EchoPod. UG06 & UG12 Series Quick Start Flowline, Inc. All Rights Reserved Made in USA. Ultrasonic Liquid Level Transmitter
 EchoPod Ultrasonic Liquid Level Transmitter UG06 & UG12 Series Quick Start 2017 Flowline, Inc. All Rights Reserved Made in USA Flowline, Inc. 10500 Humbolt Street, Los Alamitos, CA 90720 p 562.598.3015
XP88 & XP89 Series Quick Start
 Ultrasonic Liquid Level Transmitter XP88 & XP89 Series Quick Start 2016 Flowline, Inc. All Rights Reserved Made in USA Flowline, Inc. 10500 Humbolt Street, Los Alamitos, CA 90720 p 562.598.3015 f 562.431.8507
EchoPod. DL10, DL14, DL24, DL34, DS14, DX10 Series Manual. Ultrasonic Liquid Level Transmitter, Switch and/or Controller
 EchoPod Ultrasonic Liquid Level Transmitter, Switch and/or Controller DL10, DL14, DL24, DL34, DS14, DX10 Series Manual Flowline, Inc. 10500 Humbolt Street, Los Alamitos, CA 90720 p 562.598.3015 f 562.431.8507
Smart Trak. AU18, AU28, AU38, AU48, AV16, AV26, AV36, AV46, AZ18, AZ28, AZ38 & AZ48 Series Owner s Manual. w/ Compact Junction Box
 Smart Trak w/ Compact Junction Box AU18, AU28, AU38, AU48, AV16, AV26, AV36, AV46, AZ18, AZ28, AZ38 & AZ48 Series Owner s Manual Flowline, Inc.. 10500 Humbolt Street, Los Alamitos, CA 90720. p 562.598.3015.
Thermo Flo Thermal Dispersion Flow Switch FT10 & GT10 Series Manual
 Thermo Flo Thermal Dispersion Flow Switch FT10 & GT10 Series Manual Flowline Inc. 10500 Humbolt Street Los Alamitos, CA 90720 Tel: (562) 598 3015 Fax: (562) 431 8507 www.flowline.com Rev A FT900003 1 of
LU27 Series Quick Start
 Ultrasonic Liquid Level Transmitter LU27 Series Quick Start 2016 Flowline, Inc. All Rights Reserved Made in USA Flowline, Inc. 10500 Humbolt Street, Los Alamitos, CA 90720 p 562.598.3015 f 562.431.8507
LTX RF LEVEL SENSOR. Instruction Manual
 LTX RF LEVEL SENSOR Instruction Manual FOR MODELS LTX01, LTX02, LTX05 Intempco Document No: LTX - M01 Rev. 1 Issue Date: April 2005 LTX01 RF LEVEL SENSOR USER MANUAL Software Rev : Rev. Date : June 2004
User s Guide. LVU-90 Series. Ultrasonic Level Transmitter. Where Do I Find Everything I Need for Process Measurement and Control? OMEGA Of Course!
 Where Do I Find Everything I Need for Process Measurement and Control? OMEGA Of Course! TEMPERATURE Thermocouple, RTD & Thermistor Probes, Connectors, Panels & Assemblies Wire: Thermocouple, RTD & Thermistor
LU23, LU28 & LU29 Series Quick Start
 Ultrasonic Liquid Level Transmitter LU23, LU28 & LU29 Series Quick Start 2016 Flowline, Inc. All Rights Reserved Made in USA Flowline, Inc. 10500 Humbolt Street, Los Alamitos, CA 90720 p 562.598.3015 f
EchoPod. UG01 & UG03 Series Quick Start Flowline, Inc. All Rights Reserved Made in USA. Ultrasonic Liquid Level Switch, Controller & Transmitter
 EchoPod Ultrasonic Liquid Level Switch, Controller & Transmitter UG01 & UG03 Series Quick Start 2017 Flowline, Inc. All Rights Reserved Made in USA Flowline, Inc. 10500 Humbolt Street, Los Alamitos, CA
Smart -Trak. AU23, AV23, AZ23 Series Manual. With Compact Relay Controller
 Smart -Trak With Compact Relay Controller AU23, AV23, AZ23 Series Manual Flowline, Inc. 10500 Humbolt Street, Los Alamitos, CA 90720 p 562.598.3015 f 562.431.8507 w flowline.com MN301410 Rev A Introduction
EchoPod. DL10, DL14, DL24, DS14 & DX10 Series Quick Start. DL14-00 Shown Flowline, Inc. All Rights Reserved Made in USA
 EchoPod Ultrasonic Level Switch, Controller & Transmitter DL10, DL14, DL24, DS14 & DX10 Series Quick Start DL14-00 Shown 2016 Flowline, Inc. All Rights Reserved Made in USA Flowline, Inc. 10500 Humbolt
MAIN FUNCTION FEATURES. . D = v t /2
 ttp e-te com e-ma l o e-te com LT ASONIC LE EL MEAS EMENT Tel -2-22 Fa -2-22 2 INTRODUCTION The ultrasonic level Indicator is a low-cost, noncontact and easy-to-install measurement device. It is able to
Switch Pro Remote Level Controller LC40, LC41 & LC42 Series Manual
 Switch Pro Remote Level Controller LC40, LC41 & LC42 Series Manual Flowline Inc. 10500 Humbolt Street Los Alamitos, CA 90720 Tel: (562) 598 3015 Fax: (562) 431 8507 www.flowline.com Rev A MNC40100 1 of
1' to 10' deep and 1' to 25' deep
 ULTRASONIC ECHO-SCALE TM SCALE: INDICATOR: ECHO-SCALE TM NONE PROVIDED electronic sensors for vessels 1' to 10' deep and 1' to 25' deep INSTALLATION & OPERATION s/n 1-800-893-6723 Fax: 925-686-6713 www.forceflow.com
User Manual. T6 Tachometer. Online: Telephone: P.O. Box St. Petersburg, Florida 33736
 User Manual T6 Tachometer Online: www.phareselectronics.com Telephone: 727-623-0894 P.O. Box 67251 St. Petersburg, Florida 33736 Table of Contents Overview... 1 Description... 1 Wiring... 1 T6 Tachometer
2100 Turbine Flow Sensor
 200 Turbine Flow Sensor Description Engineered specifically for small pipe diameter applications, the Signet 200 Turbine Flow Sensor provides accurate readings in two flow ranges: 0.3 to 3.8 lpm and 3
32XR. 3 Phase Duplex Pump Control Panel (Level Transmitter Based) Quick Start Guide
 Quick Start Guide") 32XR 3 Phase Duplex Pump Control Panel (Level Transmitter Based) Quick Start Guide RED ALARM LIGHT LEVEL CONTROLLER H-O-A SWITCHES HORN SILENCE INNER DOOR MOTOR STARTERS WITH INTERCHANGEABLE OVERLOAD MODULES
32XR 3 Phase Duplex Pump Control Panel (Level Transmitter Based) Quick Start Guide RED ALARM LIGHT LEVEL CONTROLLER H-O-A SWITCHES HORN SILENCE INNER DOOR MOTOR STARTERS WITH INTERCHANGEABLE OVERLOAD MODULES
Configuring the Cost-Effective Ultrasonic Liquid Level Sensor
 June 11, 2013 Configuring the Cost-Effective Ultrasonic Liquid Level Sensor Overview The Flowline Ultrasonic Liquid Level Sensors are cost-effective sensors that can be used for small to medium capacity
NEW. Level Transmitter 2.1. Data sheet
 Data sheet Level Transmitter 2.1 NEW 1 ivision 1, D nsor Class e S d ve Appro GB 2.1 Shuttle 0708 We reserve the right to continuously improve our products and make any change in the stated specifications
MAIN FUNCTION FEATURES. . D = v t /2
 INTRODUCTION The ultrasonic level Indicator is a low-cost, noncontact and easy-to-install measurement device. It is able to meet the every-day needs of commercial production, as well serving a more specialized
User s Guide. LVU-19 Series. Battery Powered Level Transmitter & Display
 Where Do I Find Everything I Need for Process Measurement and Control? OMEGA Of Course! TEMPERATURE Thermocouple, RTD & Thermistor Probes, Connectors, Panels & Assemblies Wire: Thermocouple, RTD & Thermistor
KENCO ENGINEERING COMPANY
 KENCO ENGINEERING COMPANY P.O. BOX 470426 TULSA, OK 74147-0426 PHONE: (918) 663-4406 FAX: (918) 663-4480 www.kenco-eng.com e-mail: info@kenco-eng.com SERIES KTD THERMAL DIFFERENTIAL FLOW/LEVEL SWITCH INSTALLATION
Signet Pressure Transmitter
 Signet 8450 Pressure English 8450.090 8450.090 Rev. G /06 English CAUTION! Remove power to unit before wiring input and output connections. Follow instructions carefully to avoid personal injury. Contents
GE Sensing & Inspection Technologies
 GE Sensing & Inspection Technologies Modus Model RPM-1 Room Pressure Monitor Installation and Setup Guide 1. GENERAL The RPM-1 monitors either positive or negative room pressures (see the Datasheet for
Chapter Page. 1 Introduction Description 1
 Chapter Page 1 Introduction 1 1.1 Description 1 Table of Contents 2 Calibration 3 2.1 Wet Calibration 3 2.2 Calibration Procedure 4 2.3 Installing Optional Display Board 5 2.4 Display Board Range Adjustment
Signet Pressure Transmitter
 Signet 80 Pressure 80.090 80.090 Rev. J 0/ English CAUTION! Remove power to unit before wiring input and output connections. Follow instructions carefully to avoid personal injury. Contents. Installation.
MB A 12V/24V DC PROGRAMMABLE DUAL BATTERY ISOLATOR
 MB-3688 120A 12V/24V DC PROGRAMMABLE DUAL BATTERY ISOLATOR User Manual Warning and Precautions MB-3688 is built with corrosion resistant material and the main electronic assembly is well sealed inside
SmartBob AO. BinMaster: Division of Garner Industries 7201 N. 98th St., Lincoln, NE
 BinMaster: Division of Garner Industries 7201 N. 98th St., Lincoln, NE 68507 402-434-9102 email: info@binmaster.com www.binmaster.com OPERATING INSTRUCTIONS PLEASE READ CAREFULLY 925-0312 Rev B TABLE OF
CONTROLLERS & SPECIAL VALVES
 CONTROLLERS & SPECIAL VALVES G75-C 1, 2 & 4 Valve Controllers.... 70 G75-C-1W & 1W+ Window Controller... 72 G75-DP Differential Pressure Switch.....................................................................
ProMinent S i g m a / 3 Motor Diaphragm Metering Pumps
 pk_2_071 pk_2_104 Overview: Sigma/ 3 Sigma/ 3 Basic Type (S3Ba) Sigma/ 3 Control Type (S3Ca) Ideal for applications requiring automation, large turndown and/or feed verification (see page 133 for spare
Optic Level Switch LO10 Series Owner s Manual
 Warranty, Service & Repair To register your product with the manufacturer, fill out the enclosed warranty card and return it immediately to: Flowline Inc. 10500 Humbolt Street Los Alamitos, CA 90720. If
K10 Intrinsically Safe Electro-Pneumatic Positioner Operating Manual
 K0 Intrinsically Safe Electro-Pneumatic Positioner Operating Manual Pneumatic Connection Outlet Port Gauge Single Acting Actuator (Spring Return): For single acting actuators Outlet Port 2 is to be plugged.
INSTALLATION/OPERATING INSTRUCTIONS TSC
 INSTALLATION/OPERATING INSTRUCTIONS TSC Two-Stage Set Point Control with External Activation Two-Stage Heating (Rotation Included) Two-Stage Cooling (Rotation Included) Change-Over Control (Heat/Cool)
U00X ULTRASONIC LEVEL SWITCH. Ultrasonic Liquid Level Switches INSTALLATION AND OPERATIONS MANUAL. For Models: U002, U003 & U004
 U00X ULTRASONIC LEVEL SWITCH INSTALLATION AND OPERATIONS MANUAL Ultrasonic Liquid Level Switches For Non-Hazardous Locations For Models: U002, U003 & U004 READ THIS MANUAL PRIOR TO INSTALLATION This manual
Ultrasonic Non Contact Sensors
 3 Measuring Principle - An ultrasonic pulse is transmitted from the ABM sensor. The pulse 25-148 KHz travels to the surface being monitored and is reflected off this surface back to the sensor face. The
 CENTRIFLOW METER and ELECTRONICS WIRING and INSTALLATION MANUAL REV 01/16 ORIGINAL LANGUAGE Copyright 2016 Eastern Instrument Laboratories, Inc. All Rights Reserved. TABLE OF CONTENTS SAFETY Safe Operation...
UTM10 Series Ultrasonic Transit-time Flowmeters
 Page 1 of 5 TI-P197-01 MI Issue 1 UTM10 Series Ultrasonic Transit-time Flowmeters Description UTM10 ultrasonic flow and energy meters clamp onto the outside of pipes and do not make contact with the internal
ACSI MODEL 1406BB-04-AO POWER SUPPLY INSTALLATION INSTRUCTIONS
 II 1400-10 ACSI MODEL 1406BB-04-AO POWER SUPPLY INSTALLATION INSTRUCTIONS Features: Up to 1.95 Amps Load Capacity Class 2 Rated Outputs Overload, Over Voltage, and Short Circuit Protection Standby Battery
EchoPod. Technical Support. Model: DL14-(XX) Quick Start
 Quick Start") Technical Support For complete product documentation, video training, and technical support, go to www.flowline.com. For phone support, call 562-598-3015 from 8am to 5pm PST, Mon - Fri. (Please make sure
Technical Support For complete product documentation, video training, and technical support, go to www.flowline.com. For phone support, call 562-598-3015 from 8am to 5pm PST, Mon - Fri. (Please make sure
Application Engineering
 Application Engineering March 2011 Copeland Digital Compressor Controller Introduction The Digital Compressor Controller is the electronics interface between the Copeland Scroll Digital compressor or the
Application Engineering
 Application Engineering February, 2009 Copeland Digital Compressor Controller Introduction The Digital Compressor Controller is the electronics interface between the Copeland Scroll Digital Compressor
Electric Actuated Ball Valves 2-way Stainless Steel, Full Port 1/4 to 2 inch NPT
 Electric Actuated Ball Valves 2-way Stainless Steel, Full Port 1/4 to 2 inch NPT SERIES Features Full Port 16 Stainless Steel ball valve LED light gives continuous status indication IP67 weatherproof polyamide
Electric Actuated Ball Valves 2-way Stainless Steel, Full Port 1/4 to 2 inch NPT
 Electric Actuated Ball Valves 2-way Stainless Steel, Full Port 1/4 to 2 inch NPT SERIES Features Full Port 16 Stainless Steel ball valve LED light gives continuous status indication IP67 weatherproof polyamide
Electric Actuated Ball Valves 3-Piece Stainless Steel, Full Port 1/4 to 3 inch NPT
 Electric Actuated Ball Valves 3-Piece Stainless Steel, Full Port 1/4 to 3 inch NPT SERIES Features Direct mount Full Port 316 Stainless Steel ball valve 3-piece swing out body designed for easy maintenance
Signet Temperature Transmitter
 Signet 80 Temperature English 80.090 80.090 Rev. G /0 English CAUTION! Remove power to unit before wiring input and output connections. Follow instructions carefully to avoid personal injury. Contents.
A419 Series Electronic Temperature Controls with NEMA 1 or NEMA 4X Watertight Enclosures
 Installation Instructions Issue Date April 8, 2008 A419 Series Electronic Temperature Controls with NEMA 1 or NEMA 4X Watertight Enclosures Application IMPORTANT: The A419 Series Electronic Temperature
RESISTIVITY MONITOR/CONTROLLERS
 RESISTIVITY MONITOR/CONTROLLERS Installation Operation Maintenance User Manual for Models: 750, 752, 753, 762 2450 Impala Drive Carlsbad, CA 92010-7226 USA Tel: 1-760-438-2021 Fax: 1-800-869-7668 / 1-760-931-9189
AMI. American Magnetics, Inc. Excellence in Magnetics and Cryogenics
 Cryogenic Liquid Level Instruments Versatile Reliable Affordable AMI American Magnetics, Inc. Excellence in Magnetics and Cryogenics A Versatile Level Measurement System... A Variety of Liquids Nitrogen
WATER METERS OCTAVE ULTRASONIC WATER METER INSTALLATION & USER GUIDE
 WATER METERS OCTAVE ULTRASONIC WATER METER INSTALLATION & USER GUIDE OCTAVE ULTRASONIC WATER METER INSTALLATION & USER GUIDE TABLE OF CONTENTS General Information...4 Warranty...4 Included Items...4 Operation...5
Ultrasonic filling level sensor UFM 200 / 600 C2 / C4 / R / MD
 Ultrasonic filling level sensor UFM 200 / 600 C2 / C4 / R / MD Features UFM 600 up to 6 metres UFM 200 up to 2 metres for distance, volume and filling level measurement for containers, open basins or channels
Signet 2551 Magmeter Flow Sensor
 Signet 2551 Magmeter Flow Sensor Available in a variety of wetted materials and ideal for pipe sizes up to DN900 (36 in.) Features Test certificate included for -X0, -X1 Patented Magmeter technology No
A419ABG-3C Electronic Temperature Control
 Installation Instructions Issue Date June 16, 2003 A419ABG-3C Electronic Temperature Control Application IMPORTANT: Use this A419ABG-3C Electronic Temperature Control only as an operating control. Where
DIESEL Engine Fire Pump Controllers Features
 1-1 Printer / Recorder The industrial grade thermal printer is housed in a rugged steel enclosure within the controller. The on/off switch, feed and reset buttons are front accessible. A bi-color status
T21 Thermal Differential Switch
 T21 Thermal Differential Switch General Instructions The T21 Point Level Switch is a state-of-the-art in liquid level and interface measurement and control. Level detection is accomplished by using a high-resolution
Operating Instructions. TEK 678 Display Unit with remote and 10 bar display
 Operating Instructions TEK 678 Display Unit with remote and 10 bar display V1/072017 Contents 1 Introduction... 3 2 Contents of Package... 3 3 Fuel and Tank Types... 3 3 Preparing the Tank... 3 4 Define
Installation and Operation Instructions DLP Series
 Installation and Operation Instructions DLP Series PRECAUTIONS Figure 1: DLP Dimensions and Hardware REMOVE POWER BEFORE WIRING. NEVER CONNECT OR DISCONNECT WIRING WITH THE POWER APPLIED. DO NOT ALLOW
Sentry Battery Charger. Installation and Operations Manual Section 75
 Sentry Battery Charger Installation and Operations Manual 00-02-0616 03-03-08 Section 75 In order to consistently bring you the highest quality, full featured products, we reserve the right to change our
EchoWave. LG10 & LG11 Series Manual. Guided Wave Liquid Level Transmitter
 EchoWave Guided Wave Liquid Level Transmitter LG10 & LG11 Series Manual Flowline, Inc. 10500 Humbolt Street, Los Alamitos, CA 90720 p 562.598.3015 f 562.431.8507 w flowline.com MN300840 REV A8 Introduction
AV16, AV26, AV36, AV46, AV56, LH25, LH29, LH35, LV20, LV21, LV35 & LV36 Series Manual
 Switch-Tek Horizontal, Vertical & Float-Point Float Switches AV16, AV26, AV36, AV46, AV56, LH25, LH29, LH35, LV20, LV21, LV35 & LV36 Series Manual Flowline, Inc. 10500 Humbolt Street, Los Alamitos, CA
Lower maintenance costs: with no moving parts, there is nothing on the DFX to wear down. Wide measuring range: 0.15 to 30 FPS (0.05 to 9 MPS).
.") PRODUCT APPLICATIONS / APPLICATION QUALIFICATION DIMENSIONAL SPECIFICATIONS MECHANICAL DIMENSIONS: INCHES (mm) DOPPLER ULTRASONIC FLOW METER Carbonated liquids Mining slurry Drilling mud Coal-seam water
PRODUCT APPLICATIONS / APPLICATION QUALIFICATION DIMENSIONAL SPECIFICATIONS MECHANICAL DIMENSIONS: INCHES (mm) DOPPLER ULTRASONIC FLOW METER Carbonated liquids Mining slurry Drilling mud Coal-seam water
Pressure Transmitter. Informational & Installation Manual
 Pressure Transmitter Informational & Installation Manual February 24, 2011 M374 Rev. E JOWA USA, Inc. 59 Porter Road Littleton, MA 01460 Phone: 978-486-9800 Fax: 978-486-0170 Care and Handling Our submersible
PREMIER POWER PACK INSTRUCTION MANUAL EN54-4 POWER SUPPLY UNIT INSTRUCTION MANUAL. GLT.MAN-138 Issue: /05/2016 N.R.P.J.
 EN54-4 POWER SUPPLY UNIT INSTRUCTION MANUAL GLT.MAN-138 CONTENTS Introduction to the Premier Power Pack PSU... 2 Changes to EN54-4 (The Fire Alarm Equipment Power Supply Standard)... 3 Indications... 4
ZDM Positive Displacement Flow Meter User Instructions
 ZDM Positive Displacement Flow Meter User Instructions USA 1801 Parkway View Drive Pittsburgh, PA 15205 PH 412-788-2830 Canada 9A Aviation Point Claire, QC H9R 4Z2 PH 514-428-8090 www.koboldusa.com ZDM_manual_05/17
3P Rainforce 350H. Installation & Operating Manual
 3P Rainforce 350H Installation & Operating Manual 3P Rainforce 350H V1.50 Page 1 09/06/2016 Table of Contents Installation...4 Safety...4 Included Components...4 Layout...4 Control Panel Mounting...6 Mains
Special Specification 6058 Battery Back-Up System for Signal Cabinets
 Special Specification Battery Back-Up System for Signal Cabinets 1. DESCRIPTION 2. DEFINITIONS Install a Battery Back-Up System (BBU System) for traffic signals that will provide reliable emergency power
Observe all necessary safety precautions when controlling the soft starter remotely. Alert personnel that machinery may start without warning.
 Introduction OPERATING INSTRUCTIONS: MCD REMOTE OPERATOR Order Codes: 175G94 (for MCD 2) 175G361 + 175G9 (for MCD 5) 175G361 (for MCD 3) 1. Introduction 1.1. Important User Information Observe all necessary
Figure 1: WPR2 Dimensions and Hardware
 Installation and Operation Instructions WPR2 Series (Max. Line Pressure < 300 PSI) Wet to Wet Differential Pressure Ø0.200" 2.60" 4.47" 5.47" 5.28" 3.00" Precautions Figure 1: WPR2 Dimensions and Hardware
Model 124 Filter Minder & Model 124
 Installation & Maintenance Instructions Model 124 Filter Minder & Model 124 Indicating Differential Pressure Switch / Transmitter Reading Office Cutbush Park, Danehill, Lower Earley, Reading, Berkshire.
ECCII to ECCIII Upgrade Kit
 ECCII to ECCIII Upgrade Kit SUPERSEDES: Nothing FORM NO: M51SV-2TO300310 ECCII to ECCIII Upgrade Kit INTRODUCTION Older PoolPaks equipped with the ECCII control system can be upgraded to the ECCIII by
INSTALLATION GUIDE Table of Contents
 CT-3100 Automatic transmission remote engine starter systems. What s included..2 INSTALLATION GUIDE Table of Contents Door lock toggle mode..... 4 Notice...2 Installation points to remember. 2 Features..2
Model DFX Doppler ultrasonic flow meter
 Badger Meter Europa GmbH Nürtinger Str. 76 72639 Neuffen (Germany) Tel. +49-7025-9208-0 Fax +49-7025-9208-15 www.badgermeter.de badger@badgermeter.de Model DFX Doppler ultrasonic flow meter Features Badger
TC62D Installation Instructions
 TC62D Installation Instructions January 2007 This TC62D has a return water low temperature limit option. Using the low limit precludes using a room sensor because both sensors plug into the same port.
Paddle Wheel Turbine Flow Meters Installation, Operating & Maintenance Manual
 COMPANY Paddle Wheel Turbine Flow Meters Installation, Operating & Maintenance Manual Mechanical Specifications Flow Meter with Polypropylene Body (ES version) Maximum Operating Pressure: 150 PSIG Maximum
Electric Actuated Ball Valves 150 lb Flanged Stainless Steel, Full Port 1/2 to 4 inch Pipe Sizes
 Electric Actuated Ball Valves 150 lb Flanged Stainless Steel, Full Port 1/2 to 4 inch Pipe Sizes SERIES Features Direct mount Full Port 16 Stainless Steel ball valve 2-piece ANSI Class 150 flanged body
1100 Series Piston Type Differential Pressure Gauges
 1100 Series Piston Type Differential Pressure Gauges 1. Safety Before installing, check the Series Number and verify compatibility to the process media and temperature in contact with the wetted parts.
Guardian Battery Charger Series. Installation and Operations Manual Section 75
 Guardian Battery Charger Series Installation and Operations Manual 00-02-0615 02-29-08 Section 75 In order to consistently bring you the highest quality, full featured products, we reserve the right to
Paddle-wheel flow controller for On/Off control
 Paddle-wheel flow controller for On/Off control Type 8032 can be combined with... Indication, monitoring, transmitting and On/Off control in one device Programmable outputs (transistor or relay) Automatic-calibration:
Carbon Monoxide Transmitter
 Introduction The CO Transmitter uses an electrochemical sensor to monitor the CO level and outputs a 4-20 ma signal. The standard product features a 2- wire loop-powered output. Optionally, the device
MF /MS Series
 MF41-6153/MS41-6153 Series 24 Vac, Three-position/Modulating Non-spring Return Rotary Electronic Damper SmartX Actuators General Instructions Description The direct-coupled, 24 Vac, non-spring return electronic
P2050S-030, 1/2, Electronic Pressure Independent Valve Stainless Steel Ball and Stem, Female NPT Ends
 P2050S-030, 1/2, Electronic Pressure Independent Valve Stainless Steel Ball and Stem, Female NPT Ends Application Water-side control of heating and cooling systems for AHUs and water coils. Equal Percentage/
MATRIX LLC LEVEL CONTROL PANEL
 MATRIX LLC LEVEL CONTROL PANEL Installation Operation Maintenance Manual 1-26-09 REV-0.3 1 INDEX Introduction. 3 Product Configurations..... 4 I/O Descriptions. 8 Operation o Intercooler, Accumulator,
RADIO FREQUENCY SYSTEMS
 C14520.016-E.MU0 DOC.:10000008168-02 LAB4 DEHYDRATOR USER MANUAL 1 DRYING CHAMBER 2 HEATER 3 PUMP 4 AIR BACKWASHING HOLE 5 HUMIDITY PROBE 6 DIGITAL PRESSURE GAUGE 7 RELIEF VALVE 8 SHUT OFF VALVE 9 DRY
RF Point Level Control with Sensor Monitor
 The 681 Point Level Control utilizes DPDT relays to provide switching for peripheral devices (such as pumps) in level applications. A sensor attached to the control acts as an antenna to transmit the process
Troubleshooting Bosch Proportional Valves
 Troubleshooting Bosch Proportional Valves An Informative Webinar Developed by GPM Hydraulic Consulting, Inc. Instructed By Copyright, 2009 GPM Hydraulic Consulting, Inc. TABLE OF CONTENTS Bosch Valves
PF3100 TROUBLESHOOTING SOLUTIONS TO COMMON PROBLEMS. v1.1 Revised Nov 29, 2016
 PF3100 TROUBLESHOOTING SOLUTIONS TO COMMON PROBLEMS v1.1 Revised Table of Contents 1 Common Alarms and Warnings... 1 2 Common Issues... 6 2.1 Communication problems... 6 2.1.1 Controller communication
Product Guide: Series III Pump Control Board Set (RoHS)
") revised 04/08/10 Description: The Series III Pump Control Board Set provides motor drive and pump control for a wide assortment of pumps from Scientific Systems, Inc. The assembly consists of two circuit
revised 04/08/10 Description: The Series III Pump Control Board Set provides motor drive and pump control for a wide assortment of pumps from Scientific Systems, Inc. The assembly consists of two circuit
Series 10-ZSE40A(F)/10-ISE40A
/10-ISE40A") Series 10-ZSEA(F)/10-ISEA RoHS 2-Color Display High Precision Digital Pressure Switch How to Order For positive pressure Clean series For vacuum/ compound pressure 01 N01 W1 10 Rated pressure range ISEA
Series 10-ZSEA(F)/10-ISEA RoHS 2-Color Display High Precision Digital Pressure Switch How to Order For positive pressure Clean series For vacuum/ compound pressure 01 N01 W1 10 Rated pressure range ISEA
LF Series Spring Return Direct Coupled Actuator
 LF Series Spring Return Direct Coupled Actuator Minimum in-lb torque LF actuator For damper areas up to 8 sq-ft* Applications Cost effective quality and performance for a range of applications including:
Level Measurement Continuous level measurement Ultrasonic transmitters
 Siemens AG 2018 Overview Configuration ultrasonic level transmitter, ideal for level, volume, and volume flow measurements. It works with liquids, slurries, and bulk materials up to 12 m (0 ft). Benefits
PEAKTRONICS DMC-101 ADDITIONAL FEATURES. DC Motor Controller, 5A DMC-101
 PEAKTRONICS The Peaktronics DC Motor Controller is used for proportional positioning of actuators that use either DC motors or DC solenoids. The wide operating range of the (10 to 30 VDC and loads up to