Coro-Vane Maintenance CP471. and Disassembly
|
|
|
- Cornelia Alexander
- 5 years ago
- Views:
Transcription

1 Coro-Vane Maintenance CP471 and Disassembly

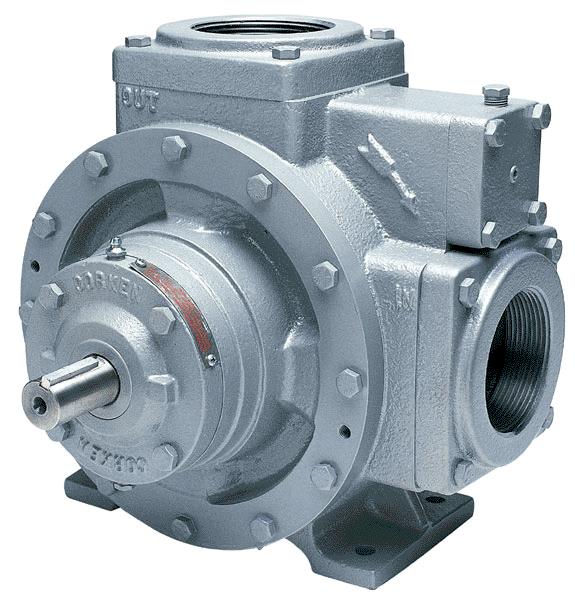
2 CoroVane Pumps Pumps all have discharge and suction pressure openings. The following slides depict a 1021, but all standard pumps are repaired the same.


3 Grease fittings Grease fittings are on both sides of the pump. Typical pump should be lubricated every 1 3 months depending on service A seal vent is located on the bottom of each head. All seals leak a small amount of vapor, this is normal. It should not leak liquid or excessive vapor. Lubricate the bearings only until the relief fitting pin moves. Do not over-grease!


4 Bearing Cap Removal Before any repairs, confirm all pressure has been relieved. Remove the bearing cap bolts and bearing cap. The grease should be cleaned from the bearing cap and the grease seal removed and replaced. The bearing housing may be removed with one or two screwdrivers using the groove on the diameter of the housing to pry out the housing. If the housing is difficult to remove the head may be removed and using a rubber hammer or piece or wood, drive the housing out from the back.


5 Seal Removal The inside of the head and the shaft should be cleaned before installing a new seal. The seal may be lubricated with a light oil or spray lubricant during assembly. Seals are precision parts and care must be taken during handling. KEEP HANDS CLEAN!

6 Seal Spring Alignment The seal spring has a notch that must align with the pin on the shaft. It is best to install the spring first, then install the carbon and O-ring. The seal may be lubricated with light oil or a spray lubricant. Seal are precision parts. Care should be taken handling the seal faces. KEEP HANDS CLEAN!


7 Seal Installation Seals are a precision machined part and care should be taken to maintain the surfaces clean. Light oil or spray lubricant may be applied to the surfaces. Clean the shaft surface were the O-ring seals prior to installing the spring When installing the seal it is easier to install the spring retainer first, watching the seal pin alignment. After the spring retainer is installed the carbon can be inserted into the spring, watching that the notches on the O.D. of the carbon align to the tabs on the retainer.


8 Installing Bearing Housing Install the seat in the seat adapter and carefully install the assembly over the shaft. Take care not to hit the seat against the shaft. Using a spray lubricant to rinse the faces will assure the surfaces are clean. When installing the bearing housing watch the pin to notch alignment. Install the grease O-ring prior to installing the housing.

9 If the seal pin is missed it may leave a mark on the back of the housing. This mark should be filed flat to assure proper surface contact and seat alignment CP471


10 Seal Assembly The seal assembly includes the seal parts along with the small grease seal O-ring. <<<< This is as far as one needs to go if only changing the seal assembly! >>>>


11 Seal Notes All mechanical seals have a small amount of leaking vapor. The seal utilizes the liquid to lubricate the seal faces, which causes a small amount of vapor leakage. This should not be dripping liquid or blowing vapor. One may note a bubble slowly growing if tested with soap. There are many possible causes of seal leaks. Typically operating dry or without liquid in the pump or foreign material such as rust, cause the majority of the seal leaks. Alignment is critical. Watch both alignment pins. This is an example of a dry or hot seal. Cracked seat from misalignment


12 Bearing Removal The main bearing can be removed by removing the spiral retainer ring and pressing the bearing out. A tool such as a socket or punch may be used to drive out the bearing. Both the inner and outer bearing should be changed together. The bearings may be pre-packed with grease during assembly, but it is not required.


13 Head Removal Remove the head bolts. There are threaded holes that may be used if needed to push the head off of the casing. If just changing a seal the head does not have to be removed.

14 Feeder channel toward the discharge.. The head may be removed and the O-ring area of the case and head should be cleaned before assembly. On the 1021 and 1521 the sideplate has a groove that must be directed toward the discharge side of the pump. If the plate is reversed it must move to the opposite side.


15 Sideplates Excessive wear due to improper feeder channel position. Scoring on sideplates may be caused by foreign materials such as rust, welding slag and other materials being pumped. Light scoring will not typically reduce pumping performance. Sideplates may be reversed or flipped over on all models except the F/T1521. Care should be taken to maintain the feeder channel toward the discharge side of the pump. The 1021 plates must change pump sides to be reversed.


16 The sideplate can now be removed using a head bolt to assist. This allows access to the inside of the pump for inspection of the blades and cam. CP471

17 Standard Blades / Vanes F1521 Blades 521 Blades 1021 Blades Standard 521/1021/F1521 pump blades are of solid design and may be reversed or flipped if any chipping or damage is noted. The blade should be changed when more of the blade is extended out of the rotor slot than is remaining in the slot.see the IOM manual for more dimensions.

18 CD / CP / Z / PZ Blades The leading edge of the blades must be toward the direction of rotation. CD/CP/Z/PZ Blades vary in design of the leading edges and notches.

19 Blade damaged from foreign material Blade damaged from dry running, and melted.


20 Blades should be inspected on both the back and the top that wears on the cam. The higher the differential the more the back wear on the blade. Note the foreign material embedded in the blade. It appears to have had welding slag or other material go through the pump Normal wear, operating with clean liquid. Excessive wear from dry running and foreign material.


21 Melted blades Dry Running Melted blade material in cam Inside diameter. If a pump operates dry for very long it is possible to melt the blades.

22 Cam Removal / Installation The cam may be removed by using a pieces of hardwood and tapping around the outer edge of the casting. The cam should be inspected for wear and scoring on the inside diameter. Small scratches seldom reduce pump efficiency, but if deep grooves are present the cam should be changed. Washboard type wear is usually caused by cavitation and the cam should be replaced.


23 Cam/Liner Cams or liners are marked for inlet and outlet or suction and discharge. They must be installed correctly or there will be a decrease in capacity and and increase in noise and wear. Typically the inlet will have more or larger openings.


24 Note feeder channel marks are towards the suction side of the cam. The above cam is severely worn due to the improper installation of the sideplates. The sideplates had been reversed, but had not changed sides placing the feeder channel towards the suction. This position maintains a low pressure behind the blades causing the blades to move back into the rotor slots instead of holding against the cam inside diameter.

25 Rotor Installation To install the rotor shaft assembly, install the cam, one head and sideplate. Then insert the rotor shaft assembly into the casing taking care not to hit the shaft on the sideplate. After the shaft is inserted, install the blades and sideplate before installing the second head.

26 Installing Rotor on CD/CP Models Insert the lower three blades and pins and support with lower hand during installation. Install the opposite head with bearing and sideplate, but with out the seal. Support the rotor and shaft with one hand and guide with the other hand. Insert three blades and the pins, then with the supporting hand hold the blades and pins in position. Once shaft is installed insert the remaining blades.


27 Inspect rotor outside diameter for scoring and wear. Wear in this area is typically caused by foreign material such as rust welding slag, etc. Inspect the side of the rotor and the shaft OD where the seal O-ring rests for scoring and pitting. The shaft can be polished if needed. A file should be used to remove any burrs.


28 Rotor Shaft Note taper on rotor Note taper on rotor The Rotor/Shaft assembly normally does not need to be changed. It usually is only damaged if foreign material is ran through the pump or if the bearings are not maintained. The rotor has a taper towards the outside diameter. If the taper can still be seen, the shaft is probably re-usable.
29 Internal Relief Valve The internal relief is a safety device and should not operate under normal operating conditions. It is preset from the factory at about 150 PSI depending on the pump model number.


30 Relief valve 521/1021 This areas should not be worn. If wear is noted, the pump has been operated at excessive pressures. The internal relief valve is a safety relief. It is not a bypass valve and should only open if excess pressure is created. This valve is pre-set from the factory at around 150 PSI differential. The valve should be inspected for wear or rust if the pump is rebuilt. If wear is noted, the external bypass setting should be checked. This valve should not open during normal operation. To field set this valve turn counter clockwise until completely solid, and turn back clockwise approximately turns.
31 For bolt torques refer to the specific pump IOM manual PUMP 521 / 1021 Series CPBN / CDBN Series PT Series PZ Series Z Series MANUAL # IC101 IP100 ID108 ID107 ID105 Go to for the latest version of a specific manual


32 Coro-Vane Pumps 521 Z4500 Be sure to rotate the pump to assure it turns freely. Grease the pump before putting it into service. ALWAYS PRESSURIZE LIQUIFIED GAS PUMPS USING VAPOR!
TECHNICAL SERVICE MANUAL HEAVY-DUTY BRACKET MOUNTED PUMPS SERIES 120 and SERIES 124 MODELS J, K, KK, L, LQ, LL AND LM
 TECHNICAL SERVICE MANUAL HEAVY-DUTY BRACKET MOUNTED PUMPS SERIES 120 and SERIES 124 MODELS J, K, KK, L, LQ, LL AND LM SECTION 3 BULLETIN TSM-120-124-V ISSUE B-2005 CONTENTS Special Information 2 Maintenance
Fluid-O-Tech ROTOFLOW ROTARY VANE PUMP REBUILD MANUAL
 Fluid-O-Tech PUMP TECHNOLOGY AT ITS BEST WWW.FLUID-O-TECH.COM Office: 161 Atwater St., Plantsville, CT 06479 Phone: (860) 276-9270 Fax: (860) 620-0193 ROTOFLOW ROTARY VANE PUMP REBUILD MANUAL 08/09 Ed.,
NOTE: Visit our website at for video repair procedures, under the Tools section.
 Repair Instructions Hypro Repair Tools: Tool Box No. 3010-0168 1/4" Allen Wrench No. 3020-0008 Support Bars (2) No. 3010-0064 Port Brush No. 3010-0066 1/16" Allen Wrench No. 3020-0009 Brush Holder No.
POWER STEERING PUMP REBUILDING SPK101 Read instructions completely before removal & disassembly
 POWER STEERING PUMP REBUILDING SPK101 Read instructions completely before removal & disassembly DISASSEMBLY: 1. Remove pump from car and allow to drain. 2. Remove pulley from front of pump. This requires
Solutions beyond products...
 ORIGINAL INSTRUCTIONS ID107E Installation, Operation & Maintenance Manual PZ-Series Sliding-Vane Truck Pumps for Refined Petroleum Products and Industrial Solvents PZ7 Model with Standard Bypass Valve
Corken Compressor Repair
 Corken Compressor Repair Click photo to make move Gauge Openings Inspection plate with model and serial #s Oil filter and oil pump assembly Crankcase breather vent Crankcase breather location. If excess
TECHNICAL SERVICE MANUAL GENERAL PURPOSE BRACKET MOUNTED PUMPS SERIES 115 MODELS G, GX2, H and HX4
 TECHNICAL SERVICE MANUAL GENERAL PURPOSE BRACKET MOUNTED PUMPS SERIES 115 MODELS G, GX2, H and HX4 SECTION 2 BULLETIN TSM-115-C ISSUE A CONTENTS Special Information 2 Maintenance 2 Packed Pump Breakdown
Service Manual #40. Installation and Service Instructions 4000 Series Pumps
 Installation and Service Instructions 4000 Series Pumps General Description 4100/4120 Models Tuthill's 4100 and 4120 pumps are available in five sizes each, with nominal capacities ranging from 0.5 to
TECHNICAL SERVICE MANUAL GENERAL PURPOSE JACKETED PUMPS SERIES 230 MODELS HX4, KK, LQ, Q, M, N
 CONTENTS TECHNICAL SERVICE MANUAL GENERAL PURPOSE JACKETED PUMPS SERIES 230 MODELS HX4, KK, LQ, Q, M, N SECTION 2 BULLETIN TSM-230-V ISSUE A Special Information 2 Maintenance 2 Packed Pump Breakdown Drawing
PRESSURE REGULATOR BACK PRESSURE TO ATMOSPHERE WITH OUTSIDE SUPPLY
 PRESSURE REGULATOR BACK PRESSURE TO ATMOSPHERE WITH OUTSIDE SUPPLY All Rights Reserved. All contents of this publication including illustrations are believed to be reliable. And while efforts have been
LOW PRESSURE BALANCED VALVE DIAPHRAGM BALANCED
 DIAPHRAGM BALANCED All Rights Reserved. All contents of this publication including illustrations are believed to be reliable. And while efforts have been made to ensure their accuracy, they are not to
INSTRUCTION MANUAL INTERNAL GEAR PUMP TITAN G-4124A SERIES=> FLANGED TITAN G-124A SERIES => FLANGED MODELS:
 INSTRUCTION MANUAL INTERNAL GEAR PUMP TITAN G-4124A SERIES=> FLANGED TITAN G-124A SERIES => FLANGED MODELS: G-H, G-HL, G-K, G-KK, G-L, G-LQ, G-LL, GLS, G-Q, G-QS 1 Contents Maintenance Thrust bearing adjustment
Operating & Maintenance Manual For Steam Conditioning Valve
 For Steam Conditioning Valve 1 Table of Contents 1.0 Introduction 3 2.0 Product description 3 3.0 Safety Instruction 4 4.0 Installation and Commissioning 5 5.0 Valve Disassembly 6 6.0 Maintenance 6 7.0
HYDRAULICS. TX420 & & lower. Hydraulic Tandem Pump Removal. 4. Remove the LH side panel (Fig. 0388).
.") TX420 & 425 240000299 & lower 4. Remove the LH side panel (Fig. 0388). Hydraulic Tandem Pump Removal Note: Cleanliness is a key factor in a successful repair of any hydraulic system. Thoroughly clean all
TX420 & 425 240000299 & lower 4. Remove the LH side panel (Fig. 0388). Hydraulic Tandem Pump Removal Note: Cleanliness is a key factor in a successful repair of any hydraulic system. Thoroughly clean all
CONTENTS. VIKING PUMP, INC. A Unit of IDEX Corporation Cedar Falls, IA USA SECTION TSM 710.1
 TECHNICAL SERVICE MANUAL industrial heavy duty motor speed pumps SERIES 4076 AND 4176 SIZES hle, ate and ale SECTION TSM 710.1 PAGE 1 of 8 ISSUE B CONTENTS Introduction....................... 1 Safety
MAINTENANCE MANUAL DI 16
 MAINTENANCE MANUAL DI 16 0.2-1.6% Press Ctrl + L for full screen 1 STANDARD INSTALLATION Inlet Outlet Optional accessories: Pressure regulator Solenoid valves Water meter Flow restrictor 200 Mesh/ 80 micron
METERING VALVE 2" STEM GUIDED
 2" STEM GUIDED All Rights Reserved. All contents of this publication including illustrations are believed to be reliable. And while efforts have been made to ensure their accuracy, they are not to be construed
3.2 DRIVE TORQUE HUB. Roll, Leak and Brake Testing SECTION 3 - CHASSIS & TURNTABLE. 3-2 JLG Lift
 3.2 DRIVE TORQUE HUB Roll, Leak and Brake Testing 10 LUG PATTERN Torque-Hub units should always be roll and leak tested before disassembly and after assembly to make sure that the unit's gears, bearings
HIGH PRESSURE CONTROL VALVE PISTON BALANCED
 PISTON BALANCED All Rights Reserved. All contents of this publication including illustrations are believed to be reliable. And while efforts have been made to ensure their accuracy, they are not to be
Wiper Transmission Repair Charles Bernhardt
 Wiper Transmission Repair Charles Bernhardt When I purchased this '59 Corvette most of the parts were in boxes. The wiper transmissions were one of the first parts that I decided to look at to see if they
TECHNICAL SERVICE MANUAL
 Electronic copies of the most current TSM issue can be found on the Viking Pump website at www.vikingpump.com TECHNICAL SERVICE MANUAL industrial heavy duty motor speed pumps SERIES 4076 AND 4176 SIZES
TECHNICAL SERVICE MANUAL HEAVY-DUTY PUMPS SERIES 332 AND 260 MODELS Q, M, N AND R
 TECHNICAL SERVICE MANUAL HEAVY-DUTY PUMPS SERIES 332 AND 260 MODELS Q, M, N AND R BULLETIN TSM-332-260-C PAGE 1 of 16 ISSUE A.11/2004 CONTENTS Special Information 2 Maintenance 2 Packed Pump Breakdown
Table of Contents Illustrations
 Principals of Operation Inspection & Troubleshooting Principles of Operation Inspection & Troubleshooting Form No. F 1031 Section 1000 Issue Date 09/19/94 Rev. Date 02/07/07 Table of Contents Illustrations
REPAIR PROCEDURES MANUAL
 REPAIR PROCEDURES MANUAL PVX Series Vane Pumps A Design Series Step-by-Step Guide to Troubleshooting and Repairing PVX Series Vane Pumps Introduction Thank you for choosing Continental Hydraulics PVX Vane
Maintenance Information
 Form 04584058 Edition 1 November 2004 Air Impactool 2141P and 2141PSP Maintenance Information Save These Instructions Disassembly General Instructions 1. Do not disassemble the tool any further than necessary
SERIES TRA10 PUMP MODELS
 the right alternative INSTALLATION AND MAINTENANCE MANUAL FOR SERIES TRA10 PUMP MODELS 0060 0180 0450 1300 0150 0300 0600 2200 0240 0340 0640 1340 2240 PARTS LISTS AND INSTRUCTIONS FOR NON-STANDARD FEATURES
Installation Instructions
 Preparing your vehicle to install your brake system upgrade 1. Rack the vehicle. 2. If you don t have a rack, then you must take extra safety precautions. 3. Choose a firmly packed and level ground to
Maintenance Information
 16573370 Edition 2 February 2014 Air Grinder 99V Series Maintenance Information Save These Instructions Product Safety Information WARNING Failure to observe the following warnings, and to avoid these
TECHNICAL SERVICE MANUAL
 Electronic copies of the most current TSM issue can be found on the Viking Pump website at www.vikingpump.com TECHNICAL SERVICE MANUAL HEAVY-DUTY Stainless steel BRACKET MOUNTED PUMPS SERIES 127 AND 4127
Maintenance Information
 16573347 Edition 2 February 2014 Air Grinder Series 88H Maintenance Information Save These Instructions Product Safety Information WARNING Failure to observe the following warnings, and to avoid these
MODELS: LGRL1.25, LGRLF1.25A, LGL1.25, LGLF1.25A, LGL1.5
 BLACKMER LIQUEFIED GAS PUMPS FOR LP-GAS AND NH3 SERVICE INSTALLATION, OPERATION, AND MAINTENANCE INSTRUCTIONS MODELS: LGRL1.25, LGRLF1.25A, LGL1.25, LGLF1.25A, LGL1.5 960409 INSTRUCTIONS NO. 501-B00 Page
3M Overhaul Service Kit
 SERVICE INSTRUCTIONS FOR 3M 12,000 RPM 5 in. (127 mm) and 6 in. (150 mm) RANDOM ORBITAL SANDERS 3M Overhaul Service Kit The part number 20347, 3M Overhaul Service Kit, contains all the replacement parts
BLACKMER POWER PUMPS MODELS: XL2B, XL3B, XL4B DISCONTINUED MODELS: XL(S)2A-N, XL(S)3A-N, XL4, XL4A SAFETY DATA NOTICE:
2A-N, XL(S)3A-N, XL4, XL4A SAFETY DATA NOTICE:") BLACKMER POWER PUMPS INSTALLATION OPERATION AND MAINTENANCE INSTRUCTIONS MODELS: XL2B, XL3B, XL4B DISCONTINUED MODELS: XL(S)2A-N, XL(S)3A-N, XL4, XL4A April 2008: This IOM covers discontinued models XL(S)2A-N,
BLACKMER POWER PUMPS INSTALLATION OPERATION AND MAINTENANCE INSTRUCTIONS MODELS: XL2B, XL3B, XL4B DISCONTINUED MODELS: XL(S)2A-N, XL(S)3A-N, XL4, XL4A April 2008: This IOM covers discontinued models XL(S)2A-N,
Service Manual #67. Installation and Service Instructions 6000, 7000 & 8000 Series Magnetically Coupled Pumps
 Service Manual #67 Installation and Service Instructions 6000, 7000 & 8000 Series Magnetically Coupled Pumps Table of Contents Section Description Page 1 General Description 4 2 The Pumping Principle 5
DP5 Pump. 5:1, Air-operated, Heavy Duty, Oil. General. Operation. Technical Data. Installation R1 09/10
 DP5 Pump 5:1, Air-operated, Heavy Duty, Oil General The DP5 Pump is a compressed air-operated reciprocating piston medium pressure pump. These pumps are suitable for distribution of all types of light
CRANKSHAFT & MAIN BEARINGS
 CRANKSHAFT & MAIN BEARINGS * PLEASE READ THIS FIRST * REMOVAL Ensure all main bearing caps are marked for location on cylinder block. Some main bearing caps have an arrow stamped on them. The arrow must
Industrial Pump Catalog
 Industrial Pump Catalog Contents Why Corken?........................................................................ i-5 About This Catalog...................................................................
Page 1 of 26 Oteco Inc. Houston, Texas
 Page 1 of 26 Page 2 of 26 1.0 OVERVIEW CONTENTS 2.0 INSTALLATION GUIDELINES 2.1 Preferred Valve Orientation 2.2 Pressure Rating and Orientation of Discharge line 2.3 Reaction Forces and Anchoring of Reset
Service Handbook. High-Pressure Washer Pump
 Pump 629 9/28/01 3:22 PM Page 1 Service Handbook High-Pressure Washer Pump 3.532-629.0 10.00 Pump 629 9/28/01 3:22 PM Page 2 Pump 629 9/28/01 3:22 PM Page 3 TROUBLESHOOTING OVERVIEW How to Use This Manual
Maintenance Information
 16575219 Edition 4 October 2013 Air Screwdrivers QP1P, QP1S and QP1T Series Maintenance Information Save These Instructions Product Safety Information WARNING Failure to observe the following warnings,
REPAIR MANUAL URW SERIES. URW-6, 8, 9, 10 & 12 Series Repair Manual
 REPAIR MANUAL URW SERIES URW-6, 8, 9, 10 & 12 Series Repair Manual Contents Page 1. Tools Needed for Repair 1 2. Disassembly and Reassembly of the Cam Casing 2-4 3. Disassembly and Reassembly of the Gear
Check Valve (Next Generation) A-180 and A-183 Series. Installation, Operation & Maintenance (IOM) Manual. P/N: A-180/A-183, Rev. 6.
 A-180 and A-183 Series. Installation, Operation & Maintenance (IOM) Manual. P/N: A-180/A-183, Rev. 6.") P/N: Issue Date: January 12, 2018 Supersedes: A-180/A-183, Rev. 6.1 Check Valve (Next Generation) A-180 and A-183 Series Installation, Operation & Maintenance (IOM) Manual Manual content is subject to
P/N: Issue Date: January 12, 2018 Supersedes: A-180/A-183, Rev. 6.1 Check Valve (Next Generation) A-180 and A-183 Series Installation, Operation & Maintenance (IOM) Manual Manual content is subject to
Installation and Service Instructions. ST Series Pumps
 Installation and Service Instructions ST Series Pumps! WARNING READ MANUAL before operating or working on a Tuthill ST Series pump. Page 2 of 24 4/24/03 Table of Contents Page 4 Page 5 Page 5 Page 6 Page
Installation Instructions
 Installation Instructions Rear Disc Brake Conversion Kit Item # RC2001, RC2001X Applications: Mopar 8-3/4 & 9-3/4 Rear Axles Thank you for choosing Leed Brakes for your automotive product needs. Before
These instructions are applicable to the following models: ARI 1118 ARI 1148
 INSPECTION & MAINTENANCE BULLETIN ARI 1118 & 1148 Safety Relief Valve These instructions are applicable to the following models: ARI 1118 ARI 1148 Only AAR class F facilities are certified to recondition,
These instructions are applicable to the following models: ARI 1108 ARI HP1108
 INSPECTION & MAINTENANCE BULLETIN ARI 1108 & HP1108 Safety Relief Valve These instructions are applicable to the following models: ARI 1108 ARI HP1108 Only AAR class F facilities are certified to recondition,
TECHNICAL SERVICE MANUAL
 TECHNICAL SERVICE MANUAL HEAVY-DUTY bracket mounted PUMPS SERIES 4193 AND 493 SIZES GG - AL SECTION TSM 154 PAGE 1 of 10 ISSUE C CONTENTS Introduction....................... 1 Special Information...................
COYOTE ENTERPRISES, INC. 9/10 BLAST WHEEL MAINTENANCE & ASSEMBLY MANUAL
 COYOTE ENTERPRISES, INC. 9/10 BLAST WHEEL MAINTENANCE & ASSEMBLY MANUAL Parts & Machinery for the Abrasive Blast Industry 27301 East 121st Street Coweta, Oklahoma 74429 (918) 486-8411 Fax (918) 486-8412
Seal Damage Analysis and Troubleshooting
 LIGHT VEHICLE TECHTIPS LV13 Seal Damage Analysis and Troubleshooting When attempting to diagnose seal damage and seal-related issues, ask these questions and then review the troubleshooting guide on the
INSTALLATION INSTRUCTIONS South Highway 11 Westminster, SC Toll Free (888) (864) FAX (864)
 (864) FAX (864)") These instructions apply to the servicing of the Lift Technologies MaxiMizer Integral Sideshifters Cylinder Head. WARNING! Unless the steps in the following Installation Instructions are properly followed
These instructions apply to the servicing of the Lift Technologies MaxiMizer Integral Sideshifters Cylinder Head. WARNING! Unless the steps in the following Installation Instructions are properly followed
Installation Instructions
 Installation Instructions Rear Disc Brake Conversion Kit Item # RC4001, RC4001X Applications: Mopar 7.25, 8.25, 9.25 Axles Thank you for choosing Leed Brakes for your automotive product needs. Before you
INSTALLATION AND SERVICE INSTRUCTIONS FOR 1008 AND 1010 SERIES PUMPS
 Service Instruction No. 11 INSTALLATION AND SERVICE INSTRUCTIONS FOR 1008 AND 1010 SERIES PUMPS GENERAL DESCRIPTION Pumping Principles Page 2 INSTALLATION Location Page 3 Proper Installation Page 3 Filter
Service Manual Air Tech Second Stage
 Service Manual Air Tech Second Stage Copyright 2002, Cressi-sub Revised 3/2002 2 Air Tech Second Stage Service Manual Contents BEFORE STARTING... 3 DISASSEMBLY... 3 PARTS CLEANING AND LUBRICATION... 9
Spring Brake Application
 Technical Tip Maxibrake I Series Spring Brakes Disassembly, Inspections and Reconditioning Instructions Maxibrake I Series spring brake products are mechanical devices and are subject to wear after extended
BETTIS SERVICE INSTRUCTIONS DISASSEMBLY AND REASSEMBLY FOR CB-SR-S SEISMIC SPRING RETURN SERIES PNEUMATIC ACTUATORS
 BETTIS SERVICE INSTRUCTIONS DISASSEMBLY AND REASSEMBLY FOR CB-SR-S SEISMIC SPRING RETURN SERIES PNEUMATIC ACTUATORS PART NUMBER: 102264 REVISION: "C" DATE: November 2000 Page 1 of 11 1.0 INTRODUCTION 1.1
3M Overhaul Service Kit
 SERVICE INSTRUCTIONS FOR 3M 12,000 RPM 3 in. (77 mm) RANDOM ORBITAL SANDERS 3M Overhaul Service Kit The part number 20346, 3M Overhaul Service Kit, contains all the replacement parts that naturally wear
ENGINE LUBRICATION SYSTEM
 B ENGINE SECTION LU A ENGINE LUBRICATION SYSTEM LU C D CONTENTS E QR25DE PRECAUTIONS... 2 Precautions for Liquid Gasket... 2 REMOVAL OF LIQUID GASKET... 2 LIQUID GASKET APPLICATION PROCEDURE... 2 PREPARATION...
Pressure Relief Valve Maintenance Manual
 Technical Manual 1098T Pressure Relief Valve Maintenance Manual Farris Engineering Division of Curtiss-Wright Flow Control Corporation TABLE OF CONTENTS - Manual Revision 0 Introduction & Safety Tips...
Vickers. Service Data. Vane Pumps. Quiet Intra-Vane Single Pumps. 25V(T)-35V(T)-45V(T) Series 20 Design 282/283 Series
-35V(T)-45V(T) Series 20 Design 282/283 Series") Service Data Vickers Vane Pumps Quiet Intra-Vane Single Pumps 5V(T)-35V(T)-5V(T) Series 0 Design 8/83 Series Reprinted 6//96 I-35-S Table of Contents Section Page I. Introduction A. Purpose of Manual....................................................................
Service Data Vickers Vane Pumps Quiet Intra-Vane Single Pumps 5V(T)-35V(T)-5V(T) Series 0 Design 8/83 Series Reprinted 6//96 I-35-S Table of Contents Section Page I. Introduction A. Purpose of Manual....................................................................
980 B Wheel Loader S/n 89P1 & Up Volume 1 of 2
 Caterpillar Service Manual 980 B Wheel Loader S/n 89P1 & Up Volume 1 of 2 Service Manual THIS IS A MANUAL PRODUCED BY JENSALES INC. WITHOUT THE AUTHORIZATION OF CATERPILLAR OR IT S SUCCESSORS. CATERPILLAR
OPERATION MANUAL INTERNAL GEAR PUMP. Models: NG-H, NG-HL, NG-K, NG-KK, NG-L, NG-LQ, NG-LL, NG-LS, NG-Q, NG-QS. Tel: Fax:
 OPERATION MANUAL INTERNAL GEAR PUMP Models: NG-H, NG-HL, NG-K, NG-KK, NG-L, NG-LQ, NG-LL, NG-LS, NG-Q, NG-QS. 1 Contents Pump Designation System Maintenance Thrust bearing adjustment Pressure Relief Valve
Ampco ZP1 Series. Positive Displacement Pumps Installation and Maintenance Manual
 Ampco ZP1 Series Positive Displacement Pumps Installation and Maintenance Manual Table of Contents Introduction... 3 Introduction... 3 Ampco Pump Company Warranty... 3 General Information... 3 Shipping
Instruction Manual for HSPA Take-Up Units
 Installation Instruction Manual for HSPA Take-Up Units Warning: To ensure the drive is not unexpectedly started, turn off and lockout the power source before proceeding. Failure to observe these precautions
Overhaul Instructions. S100 Series Centrifugal Fire Pumps. Table of Contents F /22/02 1/19/18
 S100 Series Centrifugal Fire Pumps Overhaul Instructions Form No. F-1031 Section 4219 Issue Date 02/22/02 Rev. Date 1/19/18 Table of Contents Section Page Introduction 4 Ordering Repair Parts 4 Pump Models
LJ20 Distributor - Disassembly Inspection Repair
 LJ20 Distributor - Disassembly Inspection Repair Old Codger New To Old Suzuki Jeeps The odometer on this 1972 LJ20 indicated the distributor had less than 10,000 miles of wear but during that time it had
SERVICE INSTRUCTIONS ASSEMBLY & DISASSEMBLY T50X DOUBLE ACTING HYDRAULIC SERIES ACTUATORS
 Page 1 of 7 SERVICE INSTRUCTIONS ASSEMBLY & DISASSEMBLY T50X DOUBLE ACTING HYDRAULIC SERIES ACTUATORS INTRODUCTION This service procedure is offered as a guide to enable general maintenance to be performed
FOR FUTURE REFERENCE SERIES 93HPS
 Hypro Series 93HPS Hydraulically Driven Wetseal Multistage Pumps Repair Manual KEEP FOR FUTURE REFERENCE Form L-1578R Rev. A SERIES 93HPS Hydraulically Driven Stainless Steel Multistage Centrifugal Pumps
INSTALLATION AND SERVICE INSTRUCTIONS C SERIES PUMPS
 Service Instruction No. 22 Rev. 2 10/03 INSTALLATION AND SERVICE INSTRUCTIONS C SERIES PUMPS Tuthill Pump Group 12500 South Pulaski Road Alsip, Illinois USA 60803 P: 708.389.2500 F: 708.388.0869 Email:
18000 Pump Series Technical Guide
 The Original Engine Cooling Pump Since 1921 www.sherwoodpumps.com 18000 Pump Series Technical Guide Identification G1801 and G1805 G1807 and G18071-01 G1804, G1806 and G18061-01 G1811-01 G1808, G18081-01,
Kimray reserves the right to modify or improve the designs or specifications of such products at any time without prior notice Kimray Inc.
 TREATER VALVE All Rights Reserved. All contents of this publication including illustrations are believed to be reliable. And while efforts have been made to ensure their accuracy, they are not to be construed
Industrial Turbo Meters, Sizes 2" through 6"
 Industrial Turbo Meters Sizes 2" through 6" TUR-UM-00530-EN-19 (October 2014) User Manual Industrial Turbo Meters, Sizes 2" through 6" User Manual CONTENTS Scope of the Manual 5 Specifications 5 Product
Centrifugal Pump Warranty Guide
 Centrifugal Pump Warranty Guide The purpose of this guide is to help identify pump problems, their cause, and suggest ways to prevent recurrence. Ace Pump Corporation is an ISO 9001:2000 certified company
This file is available for free download at
 This file is available for free download at http://www.iluvmyrx7.com This file is fully text-searchable select Edit and Find and type in what you re looking for. This file is intended more for online viewing
BLACKMER TRUCK PUMPS MODELS: TX, TXS, TXD, TXSD 1.5, 2A, 2.5A, 3E, 4A TXV 2.5B, 3B INSTALLATION, OPERATION, AND MAINTENANCE INSTRUCTIONS
 BLACKMER TRUCK PUMPS INSTALLATION, OPERATION, AND MAINTENANCE INSTRUCTIONS MODELS: TX, TXS, TXD, TXSD 1.5, 2A, 2.5A, 3E, 4A TXV 2.5B, 3B and Discontinued TX(S) 2, 2 1 /2, 3; TXV 2(A)(B), 2 1 /2(A), 3(A)
Maintenance Information
 16575243 Edition 2 October 2013 Air Screwdrivers 1R Series Maintenance Information Save These Instructions Product Safety Information WARNING Failure to observe the following warnings, and to avoid these
Service Handbook High-Pressure Washer Pump
 Service Handbook High-Pressure Washer Pump 9.120-014.0 2 A. Water Inlet Filter C. Nozzle Insert 1. Remove filter with a screwdriver. 2. Clean filter with warm water and mild soap. 3. Reinstall filter.
4.2 WATER PUMP (GEAR CASE MOUNTED AND LATER) (GCM)
 (GCM)") SERIES 60 SERVICE MANUAL 4.2 WATER PUMP (GEAR CASE MOUNTED - 1991 AND LATER) (GCM) The centrifugal-type water pump circulates the engine coolant through the cooling system. The pump is mounted on the rear
SERIES 60 SERVICE MANUAL 4.2 WATER PUMP (GEAR CASE MOUNTED - 1991 AND LATER) (GCM) The centrifugal-type water pump circulates the engine coolant through the cooling system. The pump is mounted on the rear
POWER STEERING SYSTEM
 SYSTEM 511 SYSTEM PRECAUTION 5105K01 1. HANDLING PRECAUTIONS ON STEERING SYSTEM (a) Care must be taken to when replacing parts. Incorrect replacement could affect the performance of the steering system
ENGINE LUBRICATION SYSTEM
 B ENGINE SECTION LU A ENGINE LUBRICATION SYSTEM LU C D CONTENTS E QR25DE PRECAUTIONS... 2 Precautions for Liquid Gasket... 2 REMOVAL OF LIQUID GASKET SEALING... 2 LIQUID GASKET APPLICATION PROCEDURE...
M x Series Valve Linkage Kits
 M9000-51x Series Valve Linkage Kits Installation Instructions M9000-51x Part No. 14-1201-13, Rev. G Issued October 16, 2008 Supersedes May 6, 2008 Applications Use the M9000-51x Series Valve Linkage Kits
** DO NOT EXCEED THE RECOMMENDED VEHICLE TOWING WEIGHT RATING ** DODGE RAM 1500
 10/3/2017 DODGE RAM 1500 WARNING!! BRAKE, FUEL, AND ELECTRICAL LINES MAY NEED TO BE LOOSENED OR REPOSITIONED TO PROVIDE CLEARANCE FOR NEW HARDWARE. ON SHORT BED MODELS, CHECK FOR ADEQUATE TURNING CLEARANCE
354 CHAPTER EIGHT WATER PUMP
 354 CHAPTER EIGHT 33 Shift handle F : Forward N : Neutral R : Reverse proper alignment of the water tube to the water pump opening during each installation attempt. Make sure the locating pins enter the
ENGINE LUBRICATION SYSTEM
 ENGINE LUBRICATION SYSTEM B ENGINE SECTION LU A ENGINE LUBRICATION SYSTEM LU C D CONTENTS E PRECAUTIONS... 2 Precautions for Liquid Gasket... 2 REMOVAL OF LIQUID GASKET SEALING... 2 LIQUID GASKET APPLICATION
4405-RA 4405-R 4405-RA 4405-R S
 ACCESSORIES Page 34 Master Parts Breakdowns Updated Feb. 1st 2006 Master Parts Breakdowns Updated Feb. 1st 2006 Page 35 This tool is designed to operate on 90 psig (6.2 bar) maximum air pressure with 1/4
Mandatory X Information Recommended Change. Series/Parts Affected: LS40D, LS40TD, LS50TD and LS60TD Concrete Pumps
 Service Bulletin No. CP20060428 Subject: Remix Shaft Coupler Retrofit Kit Model: LS40D, LS40TD, LS50TD & LS60TD Product Group: Concrete Pump Date: April 28, 2006 SERVICE BULLETIN Group: CP Mandatory X
Installation and Service Instructions 1012, 1014, 1015, & 1017 Size Pumps
 Installation and Service Instructions 1012, 1014, 1015, & 1017 Size Pumps Excellence at work. Excellence in life. Table of Contents General Description 3 The Pumping Principle 3 Location 3 Proper Installation
DEMOUNTING AND MOUNTING PROCEDURES FOR TRUCK/BUS TIRES
 DEMOUNTING AND MOUNTING PROCEDURES FOR TRUCK/BUS TIRES WARNING TIRE AND WHEEL SERVICING CAN BE DANGEROUS AND MUST BE DONE ONLY BY TRAINED PERSONNEL USING PROPER PROCEDURES AND TOOLS. FAILURE TO READ AND
SECTION 5B MANUAL TRANSMISSION TABLE OF CONTENTS
 SECTION 5B MANUAL TRANSMISSION TABLE OF CONTENTS General Description and Operation... 5B-2 Shift Lever... 5B-2 Transmission Assembly... 5B-2 Specifications... 5B-3 Diagnostic Information and Procedures...
Rebuilding the HE-120 Redrive
 Rebuilding the HE-120 Redrive Rick Cavallaro Disclaimer: I am NOT an expert mechanic. If something looks or sounds wrong in these directions, it probably is. I d be happy to receive any tips or feedback
BRAKE SYSTEM Return To Main Table of Contents
 BRAKE SYSTEM Return To Main Table of Contents GENERAL... 2 BRAKE PEDAL... 10 MASTER CYLINDER... 13 BRAKE BOOSTER... 16 BRAKE LINE... 18 PROPORTIONING VALVE... 19 FRONT DISC BRAKE... 20 REAR DRUM BRAKE...
Maintenance Information
 16584062 Edition 3 December 2013 High Torque Reversible Angle Screwdrivers and Angle Wrenches QA1L High Torque Series Maintenance Information Save These Instructions Product Safety Information WARNING
METERING/DOSING PUMP CLOSE-COUPLED B4015D, B4050D, B4100D, B4190D, B2400D, AND B4400D MODELS
 Section: METERING/DOSING PUMPS Page: 1 of 5 Date: July 2009 SERVICE MANUAL METERING/DOSING PUMP CLOSE-COUPLED B4015D, B4050D, B4100D, B4190D, B2400D, AND B4400D MODELS DESIGN FEATURES Suction Housing:
INSTALLATION & MAINTENANCE MODEL mm
 MODEL 65-25mm INSTALLATION INSTRUCTIONS CAUTION: Installation of Backflow Preventers must be performed by qualified, licensed personnel. The installer should be sure the proper device has been selected
Power Train. Chapter 5
 Chapter Power Train Spefications................................................................. -3 Test Spefications........................................................ -3 Repair Spefications.......................................................
18000 Pump Series Technical Guide
 The Original Engine Cooling Pump Since 1921 www.sherwoodpumps.com 18000 Pump Series Technical Guide Identification G1801 and G1805 G1807 and G18071-01 G1804, G1806 and G18061-01 G1808, G18081-01, G18082-01
Vickers. Overhaul Manual. Vane Pumps. Small and Large Series Combination Pumps VC(K)(S)-**-(*)*D*-6(1) VC(K)(S)-**-(*)-*-*D*-5(1)
(S)-**-(*)*D*-6(1) VC(K)(S)-**-(*)-*-*D*-5(1)") Overhaul Manual Vickers Vane Pumps Small and Large Series Combination Pumps VC(K)(S)-**-(*)*D*-6(1) VC(K)(S)-**-(*)-*-*D*-5(1) Revised 12/1/86 I-3150-S Table of Contents Section I. Introduction................................................................................
Overhaul Manual Vickers Vane Pumps Small and Large Series Combination Pumps VC(K)(S)-**-(*)*D*-6(1) VC(K)(S)-**-(*)-*-*D*-5(1) Revised 12/1/86 I-3150-S Table of Contents Section I. Introduction................................................................................
Sachs shock manual. ( ) 2 & 4 Stroke RR Enduro. ( ) RS Dual Sport
 2 & 4 Stroke RR Enduro. ( ) RS Dual Sport") Sachs shock manual (2013 2015) 2 & 4 Stroke RR Enduro (2014-2015) RS Dual Sport 1 Introduction The procedures in this manual must take place in a clean environment using professional tools and some specific,
Sachs shock manual (2013 2015) 2 & 4 Stroke RR Enduro (2014-2015) RS Dual Sport 1 Introduction The procedures in this manual must take place in a clean environment using professional tools and some specific,
Maintenance Information
 Form 16573321 Edition 1 July 2004 Air Grinder Series 61H Maintenance Information Save These Instructions Always wear eye protection when operating or performing maintenance on this tool. Always turn off
ACTUATORS GENERAL CATALOG
 CAD drawing data catalog is available. ACTUATORS GENERAL CATALOG ROTARY ACTUATORS VANE TYPE SERIES CONTENTS RAN (Standard Type) Basic Model and Configuration 259 Specifications 26 Order Codes 264 Dimensions
ENGINE LUBRICATION SYSTEM
 B ENGINE A SECTION ENGINE LUBRICATION SYSTEM LU C D CONTENTS E PRECAUTIONS... 2 Precautions for Liquid Gasket... 2 LIQUID GASKET APPLICATION PROCEDURE... 2 PREPARATION... 3 Special Service Tools... 3 Commercial