Instructions for Use. A-dec EA-53 Electric Motor
|
|
|
- Crystal Lang
- 6 years ago
- Views:
Transcription


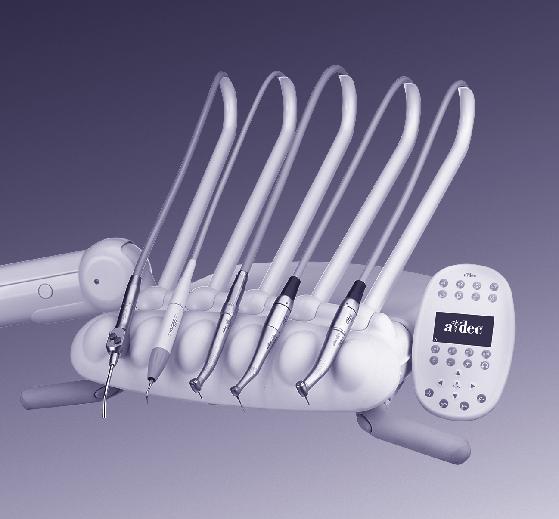

1 Instructions for Use A-dec EA-53 Electric Motor
2 A-dec EA-53 Electric Motor Instructions for Use Copyright 2014 A-dec Inc. All rights reserved. A-dec Inc. makes no warranty of any kind with regard to this material, including, but not limited to, the implied warranties of merchantability and fitness for a particular purpose. A-dec Inc. shall not be held liable for any errors contained herein or any consequential or other damages concerning the furnishing, performance or use of this material. The information in this document is subject to change without notice. If you find any problems in the documentation, please report them to us in writing. A-dec Inc. does not warrant that this document is error-free. No part of this document may be copied, reproduced, altered, or transmitted in any form or by any means, electronic or mechanical, including photocopying, recording, or by any information storage and retrieval system, without prior written permission from A-dec Inc. Trademarks and Additional Intellectual Property Rights A-dec, the A-dec logo, A-dec 500, and A-dec 300 are trademarks of A-dec Inc. and are registered in the United States and other countries. Reliablecreativesolutions is also a trademark of A-dec Inc. None of the trademarks or trade names in this document may be reproduced, copied, or manipulated in any manner without the express, written approval of the trademark owner. Abbreviations Used in This Document ANSI/AAMI American National Standards Institute/ Association for the Advancement of Medical Instrumentation EN European Standard IEC International Electrotechnical Commission ISO International Organization for Standardization USFDA United States Food and Drug Administration Responsibility of the Manufacturer and End User CAUTION The manufacturer can only accept responsibility for the safety, reliability, and performance of the motor and the handpiece tubing when it is used in compliance with the following directions: The motor and the handpiece tubing must be used in accordance with these instructions for use. The motor and handpiece tubing cannot be repaired by the end user. Assembly, modifications, or repairs must only be undertaken by A-dec or an authorized A-dec dealer. CAUTION The motor is intended for use only with A-dec handpiece tubing and the A-dec 300 or A-dec 500 delivery system, and must therefore only be used with A-dec products. Using other manufacturers systems or components could lead to unexpected performance or damage to the system. Regulatory Information The Regulatory Information and Specifications document is delivered with A-dec dental equipment as mandated by agency requirements. If you need this information, please go to the Document Library at Product Service Product service is available through your local authorized A-dec dealer. For service information, or to locate an authorized dealer, contact A-dec at in the USA and Canada or worldwide, or visit


3 Content Map Motor O-Rings 12 Motor Sheath 9 Optic Outlet 9 Motor Connection 5 Touchpad Controls (For touchpad functions, see the instructions for use that came with your delivery system.) Handpiece Tubing Terminal 5, 13 Notes, Cautions, and Warnings... 2 Operate / Adjust... 5 Clean / Maintain... 8 Specifications...15 Warranty Handpiece Tubing Coupling Rev A 1
4 A-dec EA-53 Electric Motor Instructions for Use Notes, Cautions, and Warnings Notes, Cautions, and Warnings Always consider the safety of the patient and please note the following before you use the A-dec EA-53 electric motor system. Introductory Notes Purpose Creating customer success is a key foundation to the A-dec quality policy. In support of that effort, this A-dec product has been developed, manufactured, and subjected to final inspection according to legal regulations, quality norms, and industry standards. For Your Safety and the Safety of Your Patients Prior to initial use, please read the instructions for use, which explain how to use your A-dec product to help ensure smooth and efficient operation. CAUTION Always follow the manufacturer s recommendations for the electric motor and attachment. Misuse may damage the motor, create risks, and pose hazards for patients, users, and others. Qualifications of the User We have based our development and design of the electric motor system (includes tubing, electric motor and control unit) on the dentists, dental hygienists, dental employees (prophylaxis) and dental assistants target group. Indications for Use The A-dec EA-53 electric motor system is comprised of a control unit that drives a direct current (DC) electric micromotor that is activated by means of a footswitch. It is intended for use in general dental applications such as: cutting a tooth for cavity preparation, crown preparation, crown finishing, inlay, filing, polishing, prophylaxis and endodontic treatment, with use of a straight, right-angle or contra-angle ISO E-type handpiece attachment of equal, gear-reducing, or gearincreasing speed. Skilled Application The motor and handpiece tubing are intended for use only by trained dental or medical practitioners for the purposes listed under the Indications for Use and in accordance with this document and the applicable health and safety regulations. The motor and handpiece tubing should be prepared for use and maintained by staff who are trained in procedures for infection control, personal safety, and patient safety. Improper use, (e.g., through poor hygiene and maintenance), non-compliance with our instructions, or the use of accessories and spare parts that are not approved by A-dec invalidates all claims under warranty and any other claims. 2
5 Operating Conditions and Environment Check that sufficient air and water coolants are supplied (see Specifications on page 15 for more details). Use only potable water and air from dental units for the supply. Use only non-contaminated, filtered, oil-free and dry compressed air to operate the motor and handpiece tubing. Danger Zones M and G WARNING In accordance with IEC /ANSI/AAMI ES , the motor is not suitable for use in potentially explosive atmospheres or with potentially explosive mixtures of anaesthetic substances containing oxygen or nitrous oxide where such gases may accumulate in concentration in a closed space. The motor and handpiece tubing are not suitable for use in oxygen-enriched atmospheres. NOTE Zone M is defined as medical environment and constitutes the part of a room in which potentially explosive atmospheres may form due to the use of anaesthetics or medical antiseptics and antibacterial soaps; such atmospheres are typically localized and temporary. Zone M comprises a truncated pyramid below the operating table which is tilted outwards at a 30 angle. Zone G, also known as an enclosed medical gas system, does not necessarily include areas enclosed around all sides, in which explosive mixtures are continuously or temporarily generated, directed or used in small quantities. Risks Due to Electromagnetic Fields WARNING Do not use any high frequency (HF) communication equipment (e.g. mobile telephones) during operation. These devices may affect electrical medical equipment. WARNING Implantable systems, such as cardiac pacemakers and ICDs (implantable cardioverter defibrillators) can be affected by electric, magnetic, and electromagnetic fields. This motor system emits electromagnetic fields, which means there are some potential risks. For instance, interference may occur and a malfunction of these devices is possible. A-dec recommends the following: Ask patients and users if they have an implanted device before using this product. Explain the circumstances to them. Weigh the risks and benefits. Keep this product away from implanted devices. Make appropriate emergency provisions and take immediate action if patients become ill. Symptoms including a raised heartbeat, irregular pulse, and dizziness may signal problems with a cardiac pacemaker or ICD Rev A 3
6 A-dec EA-53 Electric Motor Instructions for Use Notes, Cautions, and Warnings Safety Notes Before You Begin Hygiene and Maintenance Prior to Initial Use Ensure that the motor and handpiece tubing are in clean condition and sealed in polyethylene (PE) film when the product is first delivered. Disinfect the handpiece tubing prior to initial use. See Clean and Disinfect the Motor on page 9. Sterilize the motor prior to initial use. See Usage Notes for Electric Motor Sterilization on page 10. Final Equipment Checks Before using the motor and handpiece tubing for the first time, ensure that the operating conditions are met. Always ensure that adequate cooling is delivered (except in endodontic applications). In case of a coolant supply failure, the motor must be stopped immediately. Check the motor, handpiece tubing, and O-rings for damage, loose fit, and leaks prior to each use. Ensure that the handpiece tubing is not kinked. Do not use the motor if damage is detected. Service or replace as necessary. Perform a test run prior to each treatment. Usage Warnings WARNING Do not look directly into the optic outlet, which could lead to vision impairment. WARNING Operate the electric motor with care. Rapid deceleration of the bur, especially during high-speed procedures, can overload the torque limit and injure the patient s surrounding hard and soft tissue. The dental motor is designed for intermittent operation with an operating time of 2 minutes and an idle time of 3 minutes. 4

7 Operate / Adjust Install the Motor WARNING Do not touch the handpiece tubing terminal and patient at the same time. Patient shock or injury may occur. WARNING Never step on the foot control while installing or removing the motor. Damage may occur. To install the motor on the handpiece tubing: 1. Align the motor connection tubes with the connection openings on the handpiece tubing. 2. Screw the motor and the handpiece tubing coupling together. CAUTION Do not twist, kink, or squeeze the handpiece tubing, which may cause damage. 3. Visually inspect the connection to ensure that the motor is securely connected to the tubing. The motor and tubing coupling must sit flush to one another. NOTE If the motor fails to connect, carefully unscrew it from the tubing coupling, then repeat Steps 1-3. If it still fails to connect, contact your authorized A-dec dealer or A-dec customer service Rev A 5
 that conform with ISO standard 3964.")


8 A-dec EA-53 Electric Motor Instructions for Use Operate / Adjust Install the Attachment WARNING Do not install or remove the attachment while the motor is running. Product damage and/or injury can occur. CAUTION Only use E style attachments (20 mm diameter, gear driven) that conform with ISO standard IMPORTANT Follow the instructions for use that came with your attachments. To install the attachment on the motor: 1. Push the attachment onto the motor. If the attachment is fiber optic, be sure to correctly align the notch. 2. Verify that the attachment is properly connected and has a secure hold on the motor. The attachment should not come off with a gentle pull. Touchpad Controls The A-dec deluxe touchpad offers a standard mode and an endodontics mode for use with the A-dec EA-53 electric motor. For specific touchpad functions and settings, see the instructions for use that came with your delivery system. 6


9 Test the Electric Motor System WARNING Do not hold the motor and attachment at eye level when testing to avoid possible injury. WARNING Ensure that the motor and attachment are completely dry before operating. Moisture in the motor can lead to a malfunction. To test the complete electric motor system: 1. Verify that the attachment is properly connected and has a secure hold on the motor. The attachment should not come off with a gentle pull. 2. Step on the delivery system foot control disc. 3. If you observe problems, such as vibrations, unusual noise, overheating, smell, or leakage, stop the motor immediately and contact your authorized A-dec dealer or A-dec customer service Rev A 7
10 A-dec EA-53 Electric Motor Instructions for Use Clean / Maintain Clean / Maintain Please note the following before cleaning and disinfecting the A-dec EA 53 electric motor system. CAUTION The electric motor should be maintained according to these instructions and in line with infection control procedures for the safety and well-being of patients. Improper maintenance, non-compliance with the instructions, or the use of accessories and service parts that are not approved by A-dec invalidates all claims under warranty and any other claims. NOTE Clean and disinfect the motor and handpiece tubing immediately after each patient. Sterilize the motor following cleaning and disinfection. DANGER Failure to turn off the power before you perform maintenance can lead to electrical shock. WARNING Failure to turn off the power before you perform maintenance can lead to product damage and result in serious injury or death. Follow your local directives, standards, and guidelines for cleaning, disinfection, and sterilization. Wear protective clothing and personal protective equipment (PPE). Always turn off the power to the system before maintenance. Remove the attachment from the motor before maintenance. Do not remove the motor from the handpiece tubing for cleaning and disinfecting. Do not use disinfectants that contain chlorine or protein fixatives. Ensure that no liquid enters the motor during cleaning and disinfection. Do not use a thermal washer disinfector to clean the motor or handpiece tubing. Do not lubricate the motor, which is permanently lubricated. 8

11 Clean and Disinfect the Motor CAUTION Do not place the motor or handpiece tubing in liquid disinfectant or an ultrasonic bath. NOTE Use only disinfectants that are certified by officially recognized institutes and do not contain chlorine or protein fixatives. Follow the disinfectant manufacturer s specifications for proper use. 1. Disconnect the attachment from the motor. 2. Use disinfecting wipes or a soft cloth and commercially available surface disinfectants to carefully clean the exterior surfaces of the motor and handpiece tubing. 3. Wipe the optic outlet with cleaning/disinfectant fluid and a soft cloth. 4. Dry the optic outlet with an air syringe or soft cloth. CAUTION Clean the motor with care and avoid scratching the optic outlet. CAUTION Perform a visual inspection after each cleaning process. Do not use the motor if the optic outlet is damaged. NOTE Sterilize the motor after each patient. Follow the sterilization notes and instructions starting on page Rev A 9

12 A-dec EA-53 Electric Motor Instructions for Use Clean / Maintain Usage Notes for Electric Motor Sterilization Please note the following when sterilizing the motor: Follow your local directives, standards, and guidelines. Clean and disinfect before sterilizing. Do not sterilize the handpiece tubing. Sterilize the motor in a USFDA-cleared paper/foil laminate sterilization wrap, compliant to ISO Ensure that you only remove dry sterile goods from the sterilizer. Store sterile goods dust-free and dry. 10

13 Sterilize the Motor Prior to sterilization: 1. Purge the water lines with air. 2. Unscrew the motor from the handpiece tubing coupling and pull the motor straight out from the tubing terminal. CAUTION Do not twist, kink, or squeeze the handpiece tubing, which may cause damage. 3. Seal the motor in a USFDA-cleared paper/foil laminate sterilization wrap, compliant to ISO NOTE A-dec recommends sterilization according to ANSI/AAMI ST79 and EN (class B). Other sterilization methods may reduce the life span of your motor.* IMPORTANT Follow the manufacturer s instructions for use that came with your sterilizer. * For more information about sterilization standards, refer the medical device regulations specific to your location. 4. Sterilize the motor at 270 F (132 C) for the following times*: Dynamic-air-removal sterilizers: 4 minutes Gravity displacement sterilizers: 15 minutes WARNING Do not exceed 277 F (136 C) during sterilization. 5. Allow the load to dry for approximately minutes before removing from the sterilizer. Ensure that the motor is completely dry before using Rev A 11


14 A-dec EA-53 Electric Motor Instructions for Use Clean / Maintain Replace the Motor O-Rings CAUTION Replace leaking or damaged O-rings immediately. Do not use sharp instruments to remove the O-rings. To replace the motor O-rings: 1. Squeeze the O-ring together between your thumb and forefinger to form a loop. 2. Pull the O-ring off the motor. 3. Repeat steps 1 and 2 for the other two O-rings. 4. Slide on the new O-rings. NOTE Always replace all three O-rings to ensure a secure connection between the motor and attachment. Replace the Motor Gasket To replace the small gasket at the motor connection: 1. Lift up the gasket with a pair of tweezers and remove the gasket. 2. Carefully insert the new gasket. CAUTION Ensure that the gasket is properly positioned. 12


15 Replace the Handpiece Tubing O-Ring CAUTION Replace leaking or damaged O-rings immediately. Do not use sharp instruments to remove the O-rings. To replace the small O-ring on the handpiece tubing terminal: 1. Pull the damaged O-ring off of the tubing terminal. 2. Slide on the new O-ring. Common Service Parts Description O-Rings, EA-53 Motor (package of 3) Part Number Contact your authorized A-dec dealer for available A-dec EA-53 electric motor service parts. CAUTION Use only original A-dec service parts. Gasket, EA-53 Motor O-Ring, EA-53 Tubing Rev A 13
16 A-dec EA-53 Electric Motor Instructions for Use Clean / Maintain A Few Notes About Service CAUTION Regular servicing of the motor for function and safety, including the attachments, is necessary and should be carried out at least once every three years, unless shorter intervals are prescribed by law. This service should be performed by an authorized A-dec dealer or A-dec customer service. NOTE The ISO standard stipulates a durability of at least 250 sterilization cycles. We recommend that you have the EA-53 motor serviced after 500 sterilization cycles or one year, whichever comes first. 14
 Water coolant flow at 7 psi (0.")
 65 psi minimum (4.5 bar) 7 43 psi (0.5-3.0 bar) > 0.002 CFM (> 60 ml/min) 7 43 psi (0.5 3.")
17 Specifications EA-53 Electric Motor Item Required handpiece tubing Motor/attachment standard Operation mode, optional Speed range in standard mode Speed range in endo mode Maximum torque at the motor Adjustment cooling air Drive air pressure Air coolant pressure* (The air coolant pressure must be higher than the water coolant pressure) Water coolant flow at 7 psi (0.5 bar) Water coolant pressure* Ambient temperature maximum Value VE-10 ISO 3964, E-style forward / reverse rotation ,000 rpm 100 5,000 rpm 0.02 ft-lb (3 N cm) CFM (6 8 NL/min) 65 psi minimum (4.5 bar) 7 43 psi ( bar) > CFM (> 60 ml/min) 7 43 psi ( bar) F (10 33 C) Required voltage supply 24 VAC ±10% VE-10 Handpiece Tubing Item Handpiece tubing model Dental motor connection Air coolant at ~36 psi (250 kpa) Water coolant at ~29 psi (200 kpa) Internal handpiece tubings (maximum pressure) Environmental conditions: Temperature Relative humidity Value VE-10 EA-53 > 0.3 CFM (> 8 NL/min) > CFM (> 200 ml/min) 58 psi (400 kpa) -40 F up to +158 F ( C) between 15% and 80% NOTE Specifications are subject to change without notice. Requirements may vary depending on your location. For more information, contact your authorized A-dec dealer. * Adjust the actual pressure with an attachment in place. IMPORTANT For electrical specifications, identification of symbols, and other regulatory requirements, refer to the Regulatory Information and Specifications document (p/n ) included with your equipment Rev A 15
. The buyer shall have no other remedy.")
18 A-dec EA-53 Electric Motor Instructions for Use Warranty / Warranty Warranty A-dec warrants all products against defects in materials or workmanship for one year from time of delivery. A-dec s sole obligation under the warranty is to provide parts for the repair, or at its option, to provide the replacement product (excluding labor). The buyer shall have no other remedy. All special, incidental, and coincidental damages are excluded. Written notice of breach of warranty must be given to A dec within the warranty period. The warranty does not cover damage resulting from improper installation or maintenance, accident or misuse. The warranty does not cover damage resulting from the use of cleaning, disinfecting or sterilization chemicals and processes. The warranty also does not cover light bulbs. Failure to follow instructions provided in the A-dec Instructions for Use (operation and maintenance instructions) may void the warranty. A-dec warrants A-dec dental chair cylinders, both lift and tilt for ten years from the date of purchase of the chair or the cylinder. This warranty is retroactive to A-dec chair cylinders already in the field. The warranty covers chair cylinders A-dec finds to have manufacturing irregularities. Stool cylinders are covered under A-dec s one-year warranty. No other warranties as to merchantability or otherwise are made. For service information, contact your local authorized A-dec dealer. Check with local codes and the Americans with Disabilities Act (ADA) requirements for installation of this product. CAUTION U.S. Federal law restricts this device to sale by or on the order of a dentist, physician, or any other practitioner licensed by the law of the state in which he or she practices to use or order the use of this device. 16
19 Rev A 17
20 A-dec Headquarters 2601 Crestview Drive Newberg, OR USA Tel: Within USA/Canada Tel: Outside USA/Canada Fax: International Distribution Centers A-dec United Kingdom EU Authorized Representative Austin House, 11 Liberty Way Nuneaton, Warwickshire CV11 6RZ England Tel: 0800 ADECUK (233285) Within UK Tel: +44 (0) Outside UK A-dec Australia Unit Ricketty Street Mascot, NSW 2020 Australia Tel: Within Australia Tel: +61 (0) Outside Australia ÍvÈ.Ç%$È.00EÎ Rev A Copyright 2014 A-dec Inc. All rights reserved. IFUcov2
Instructions for Use. A-dec EA-30. Electric Motor System
 Instructions for Use A-dec EA-30 Electric Motor System Copyright 2012 A-dec Inc. All rights reserved. A-dec Inc. makes no warranty of any kind with regard to this material, including, but not limited to,
A-dec 300 LED Dental Light
 Instructions for Use A-dec 300 LED Dental Light Models 371L 378L A-dec 300 LED Dental Light Instructions for Use Copyright 2018 A-dec Inc. All rights reserved. A-dec Inc. makes no warranty of any kind
Assistant s Instrumentation T
 Instructions for Use Assistant s Instrumentation 85.2610.00 T Copyright 2015 A-dec Inc. All rights reserved. A-dec Inc. makes no warranty of any kind with regard to this material, including, but not limited
Instructions for Use. Cascade 2615 Cart
 Instructions for Use Cascade 2615 Cart 85.0664.00 Copyright 2016 A-dec Inc. All rights reserved. A-dec Inc. makes no warranty of any kind with regard to this material, including, but not limited to, the
Instructions for Use. A-dec 4631 Duo Delivery System and A-dec 4635 Assistant s
 Instructions for Use A-dec 4631 Duo Delivery System and A-dec 4635 Assistant s 85.2643.00 Copyright 2016 A-dec Inc. All rights reserved. A-dec Inc. makes no warranty of any kind with regard to this material,
A-dec Stools. A-dec 1601 Doctor's Stool A-dec 1621, 1622, and 1626 Assistant's Stools
 Instructions for Use -dec Stools -dec 1601 Doctor's Stool -dec 1621, 1622, and 1626 ssistant's Stools -DEC STOOLS I NSTRUCTIONS FOR USE Copyright 2009 -dec Inc. ll rights reserved. -dec Inc. makes no warranty
Instructions for use AM-25 LT AM-25 A, AM-25 A BC/RM AM-25 E, AM-25 E BC/RM AM-25, AM-25 BC/RM
 Instructions for use AM-25 LT AM-25 A, AM-25 A BC/RM AM-25 E, AM-25 E BC/RM AM-25, AM-25 BC/RM W&H Symbols WARNING! (Risk of injury) ATTENTION! (to prevent damage occurring) General explanations, without
INSTRUCTIONS FOR USE. A-dec 311 Dental Chair
 INSTRUCTIONS FOR USE A-dec 311 Dental Chair A-DEC 311 D ENTAL CHAIR I NSTRUCTIONS FOR USE Copyright 2008 A-dec Inc. All rights reserved. A-dec Inc. makes no warranty of any kind with regard to this material,
Pre-Installation Guide Performer
 Pre-Installation Guide Performer Contents Structural Requirements... 1 Dental Patient Chair Interface Requirement... 1 Utility Requirements... 1 Utility Specifications... 2 Electrical Ratings... 3 Shipping
Instructions for use. Quick couplings RQ-03, RQ-04, RQ-14, RQ-24, RQ-34
 Instructions for use Quick couplings RQ-03, RQ-04, RQ-14, RQ-24, RQ-34 Contents W&H Symbols...4 1. Introduction...5 7 2. Before use Safety notes...8 9 3. Product description...10 11 Roto Quick coupling
Instructions for use. Prosthodontic screwdriver IA-400
 Instructions for use Prosthodontic screwdriver IA-400 Contents W&H Symbols... 3 5 1. Introduction... 6 8 2. Electromagnetic compatibility (EMC)...9 3. Scope of delivery...10 4. Safety notes... 11 16 5.
Owner s Guide PERFORMER III
 Owner s Guide PERFORMER III 85.2638.00 R ALPHABETICAL EQUIVALENT TO THE NUMERAL OF THE MONTH MANUFACTURED A B C D E F G H I J K L January February March April May June July August September October November
INSTRUCTIONS FOR USE CASCADE 2615 CART AND 3175 WALL MOUNT
 INSTRUCTIONS FOR USE CASCADE 2615 CART AND 3175 WALL MOUNT 85.0664.00 R Warranty ALPHABETICAL EQUIVALENT TO THE NUMERAL OF THE MONTH MANUFACTURED A B C D E F G H I J K L January February March April May
A-dec 300 Delivery Systems
 Instructions for Use A-dec 300 Delivery Systems Models 332, 333, 334, 335, and 336 A-dec 300 Delivery Systems Instructions for Use Copyright 2017 A-dec Inc. All rights reserved. A-dec Inc. makes no warranty
Instructions for use of S5 Endo Motor
 Instructions for use of S5 Endo Motor 0413 Sendoline Symbols WARNING! (Risk of injury) ATTENTION! (to prevent damage occurring) General explanations, without risk to persons or objects Thermo washer disinfectable
A-dec 311, 411, and 511 Dental Chairs Service Reference
 A-dec,, and Dental Chairs Service Reference Copyright Regulatory Information Contents 0 A-dec Inc. All rights reserved. A-dec Inc. makes no warranty of any kind with regard to this material, including,
DECADE 1021 SOLO CHAIR
 Owner's Guide DECADE 1021 SOLO CHAIR 85-2626-00 Warranty A-dec warrants its products against defects in material or workmanship for one year from time of delivery (except for handpieces which have a warranty
A-dec 500 Delivery Systems
 Instructions for Use A-dec 500 Delivery Systems Models 532, 533, and 542 A-dec 500 Delivery Systems Instructions for Use Copyright 2016 A-dec Inc. All rights reserved. A-dec Inc. makes no warranty of any
Owner's Guide CASCADE 2671 DUO CART AND CASCADE 3171 DUO WALL-MOUNT
 Owner's Guide CASCADE 2671 DUO CART AND CASCADE 3171 DUO WALL-MOUNT 85.2641.00 ALPHABETICAL EQUIVALENT TO THE NUMERAL OF THE MONTH MANUFACTURED A B C D E F G H I J K L January February March April May
LUBRICATOR GUN INSTRUCTIONS-PARTS LIST. 10,000 psi (700 bar) Maximum Delivery Pressure. Detachable-type
 Maximum Delivery Pressure. Detachable-type") INSTRUCTIONS-PARTS LIST 306 460 INSTRUCTIONS This manual contains important warnings and information. READ AND KEEP FOR REFERENCE. Rev. E Supercedes D Detachable-type LUBRICATOR GUN 10,000 psi (700 bar)
INSTRUCTIONS-PARTS LIST 306 460 INSTRUCTIONS This manual contains important warnings and information. READ AND KEEP FOR REFERENCE. Rev. E Supercedes D Detachable-type LUBRICATOR GUN 10,000 psi (700 bar)
DECADE 1021 VAC BACK CHAIR
 Owner's Guide DECADE 1021 VAC BACK CHAIR 85-2625-00 Warranty A-dec warrants its products against defects in material or workmanship for one year from time of delivery (except for handpieces which have
INSTRUCTIONS FOR USE. Rx Only
 INSTRUCTIONS FOR USE - HOSE ASSEMBLY Rx Only Basic matrix shown. Consult the Ohio Medical website for full matrix or contact your Ohio Medical representative. The product package label contains your product
A-dec 336 Delivery System on an A-dec 411 or 511 Dental Chair INSTALLATION GUIDE
 A-dec 6 Delivery System on an A-dec 4 or 5 Dental Chair INSTALLATION GUIDE Before You Install the 6 Delivery System Install the Rigid Arm A-dec 4 Dental Chair: Follow the instructions for installing the
OPERATION AND MAINTENANCE INSTRUCTION MANUAL. AEU-17B & AEU-17BV2 Implant / Surgery Systems
 OPERATION AND MAINTENANCE INSTRUCTION MANUAL AEU-17B & AEU-17BV2 Implant / Surgery Systems TABLE OF CONTENTS: Specifications........................i Introduction.........................1 Package Contents....................1
A-dec LED Dental Light Head on a Demonstration Stand INSTALLATION GUIDE
 A-dec LED Dental Light Head on a Demonstration Stand INSTALLATION GUIDE Introduction Use this installation guide to install an A-dec LED Dental Light Retrofit Kit (28.1924.00 or 28.1925.00) on a custom
A-dec Dental Lights on an A-dec 300 Base Mount Post INSTALLATION GUIDE
 A-dec Dental Lights on an A-dec 300 Base Mount Post INSTALLATION GUIDE Before You Begin Turn off the power to the system before you begin the installation. DANGER Failure to turn off the power before you
A-dec 311 Dental Chair and Related Systems
 Pre-Installation Guide A-dec 311 Dental Chair and Related Systems A-dec 311 Dental Chair with 332 Radius -Style Delivery System and 572 Dental Light This document contains technical specifications for
Lubricator Gun: 10,000 psi (700 bar) Maximum Delivery Pressure when disconnected from Dispenser
 Maximum Delivery Pressure when disconnected from Dispenser") INSTRUCTIONS-PARTS LIST 30 455 INSTRUCTIONS This manual contains important warnings and information. READ AND KEEP FOR REFERENCE. Rev. C Supercedes B Hand-Operated Portable Grease Dispenser Buckshot Luber
INSTRUCTIONS-PARTS LIST 30 455 INSTRUCTIONS This manual contains important warnings and information. READ AND KEEP FOR REFERENCE. Rev. C Supercedes B Hand-Operated Portable Grease Dispenser Buckshot Luber
Cordless Endodontic Handpiece. Manual Revision Date: July 2005 OPERATION MANUAL
 LightSpeed EndoPAL TM Powerful and Long-Lasting Cordless Endodontic Handpiece Manual Revision Date: July 2005 OPERATION MANUAL Thank you for choosing the EndoPAL (Powerful And Long-lasting) cordless batterypowered
A-dec 200 P RE-INSTALLATION GUIDE
 A-dec 200 P RE-INSTALLATION GUIDE This document contains technical specifications for installing the A-dec 200 equipment line. Contents Structural Requirements...................................................
Operator's Manual. Storage System. Ultrasound Probe Cabinet. Manufactured by:
 Storage System Ultrasound Probe Cabinet Operator's Manual Manufactured by: CIVCO Medical Solutions 102 First Street South Kalona, IA 52247 USA 319.248.6757 / 800.445.6741 WWW.CIVCO.COM Copyright 2018 All
A-dec 351 Assistant s Instrumentation on an A-dec 311/411/511 Dental Chair INSTALLATION GUIDE
 A-dec 351 Assistant s Instrumentation on an A-dec 311/411/511 Dental Chair INSTALLATION GUIDE Contents Before You Begin.......... 2 Install the Rigid Arm....... 3 Connect the Electrical Wires and Data
OPERATION AND MAINTENANCE INSTRUCTION MANUAL. AEU-707A & AEU-707AV2 Implant / Surgery Systems
 OPERATION AND MAINTENANCE INSTRUCTION MANUAL AEU-707A & AEU-707AV2 Implant / Surgery Systems TABLE OF CONTENTS: Introduction.........................1 Package Contents....................1 Setting Up the
VANGUARD A EZ INSTALL OPERATOR S MANUAL
 Parker Hannifin Corporation Porter Instrument Division 245 Township Line Rd. P.O. Box 907 Hatfield, PA 19440-0907 USA (215) 723-4000 / fax (215) 723-5106 VANGUARD A EZ INSTALL OPERATOR S MANUAL FM-1145
Owner s Manual Supplement. Liquefied Petroleum Gas (LPG) Fuel System for 1998 GM Medium Duty Chassis (C-60/C-70) with 6.0L and 7.
 Fuel System for 1998 GM Medium Duty Chassis (C-60/C-70) with 6.0L and 7.") Owner s Manual Supplement Liquefied Petroleum Gas (LPG) Fuel System for 1998 GM Medium Duty Chassis (C-60/C-70) with 6.0L and 7.0L V8 OWNERS MANUAL SUPPLEMENT Table of Contents Refueling Your Vehicle...1
Owner s Manual Supplement Liquefied Petroleum Gas (LPG) Fuel System for 1998 GM Medium Duty Chassis (C-60/C-70) with 6.0L and 7.0L V8 OWNERS MANUAL SUPPLEMENT Table of Contents Refueling Your Vehicle...1
The information in this instruction manual is subject to modifications without prior notice and is the exclusive property of Zorzini.
 Dear Customer, Thank you for choosing a Zorzini S.p.A. product. Zorzini manway doors and manhole covers 1 are designed and manufactured according to the highest standards in regards safety, functionality
Cascade 3072 Delivery System INSTALLATION GUIDE
 Cascade 3072 Delivery System INSTALLATION GUIDE Getting Started Figure 1. Cascade 3072 Delivery System See the section below that applies to your unit. the Wall............. 1 Preference II 5512 Cabinet......................................
Power Distribution Units
 Power Distribution Units AP9562, AP9563, and AP9564 AP9562, AP9563, and AP9564 are 15- and 20-amp Rack Power Distribution Units (PDUs) that provide 120-volt power to rack-mounted equipment. AP9562, -.,
Installation Instructions
 Installation Instructions Bradley Touch Time Valve for Column Showers Table of Contents Pre-Installation Information...............2 Touch Time Valve Installation............3 Touch Time Valve Wiring Diagram........4
Podiatry Procedures Chair. For Models: Barrier-Free. User s Guide
 Podiatry Procedures Chair For Models: 646 647 Barrier-Free User s Guide Product Information (The information below is required when calling for service.) Dealer : Date of Purchase: Model / Serial Number:
SAVE THESE INSTRUCTIONS DANGER
 Contoura Back and Seat Cushions Assembly, Installation and Operating Instructions SAVE THESE INSTRUCTIONS To ensure the safe operation and use of the Contoura Back and Cushion, these instructions MUST
A-dec 371L or 571L Dental Light on an A-dec 361, 362, or 363 Support Center INSTALLATION GUIDE
 A-dec 37L or 57L Dental Light on an A-dec 36, 36, or 363 Support Center INSTALLATION GUIDE 37L 57L Before You Begin WARNING Failure to turn off or disconnect the power before you begin this procedure can
Rev ENGLISH..2
 97050840 Rev. 00 15.04 i-mmr / i-mmr L / i-mms ENGLISH..2 EN ENGLISH 1. INTENDED USE... 3 2. IMPORTANT WARNINGS... 3 3. SYMBOLS... 4 4. TECHNICAL SPECIFICATIONS... 4 5. CONNECTION TO THE POWER SUPPLY INSTRUMENT
MODEL G300 BRAKE BLEEDER
 MODEL G300 BRAKE BLEEDER Installation, Operation & Repair Parts Information Branick Industries, Inc. 4245 Main Avenue P.O. Box 1937 Fargo, North Dakota 58103 REV120716 P/N: 81-0035H THIS PAGE INTENTIONALLY
1416 Cabinet Unit. Installation Operation Maintenance Troubleshooting Version Dec/17
 Installation Operation Maintenance Troubleshooting Version Dec/17 1416 Cabinet Unit Page 1 of 16 Table of Contents Important Information... 3 Weight & Dimensions... 4 Operator s Instructions... 5 Flow
Installation Operation Maintenance Troubleshooting Version2.1. Feb/09. Led II
 Installation Operation Maintenance Troubleshooting Version2.1. Feb/09 Led II INDEX Safety Regulation 3 Components 4 User s Guide 9 Product Installation 10 Operation Method 11 Maintenance and Repair 13
Slimax LED Curing Light System
 Slimax LED Curing Light System Operators Manual Beyes Dental Canada Inc 1 TABLE OF CONTENTS SAFETY PRECAUTIONS ASSEMBLY BATTERY MODES EXPOSURE TIME ACTIVATING AND DEACTIVATING THE LIGHT BOOST AND REGULAR
A-dec 541 Delivery System and 545 Assistant s Instrumentation
 Installation Guide A-dec 541 Delivery System and 545 Assistant s Instrumentation Before You Begin A-dec 545 12 O Clock Assistant s Instrumentation The instructions are the same for installing both the
Endodontic Handpiece (GT) USER MANUAL
 USER MANUAL") Endodontic Handpiece (GT) USER MANUAL 1 USER MANUAL Read Instruction Before Use SECTION 1: General Introduction Cordless Endo Motor GT3 is a kind of endodontic micromotor to operate NI-Ti files, and it
Endodontic Handpiece (GT) USER MANUAL 1 USER MANUAL Read Instruction Before Use SECTION 1: General Introduction Cordless Endo Motor GT3 is a kind of endodontic micromotor to operate NI-Ti files, and it
TERMS OF USE TERMS AND CONDITIONS. Plumbing and Heating Products (PL-WR)
") TERMS OF USE 1. Watts pricing and product data is subject to change without notice and such changes supersede all previous versions. 2. Watts data is to be used as provided. Watts is not responsible for
TERMS OF USE 1. Watts pricing and product data is subject to change without notice and such changes supersede all previous versions. 2. Watts data is to be used as provided. Watts is not responsible for
Nilfisk-CFM SS Vapor Vacuum Instructions for Use and Spare Parts Manual
 Nilfisk-CFM SS Vapor Vacuum Instructions for Use and Spare Parts Manual Caution: This Nilfisk-CFM vacuum cleaner is not to be used in explosion hazardous areas as serious injury could result. Your new
110 Volt/12 Volt Portable Inflator
 110 Volt/12 Volt Portable Inflator Owner s Manual WARNING: Read carefully and understand all ASSEMBLY AND OPERATION INSTRUCTIONS before operating. Failure to follow the safety rules and other basic safety
NearBright Illuminated Near Vision Kit. User s Guide
 NearBright Illuminated Near Vision Kit User s Guide 2017 AMETEK, Inc. Reichert, Reichert Technologies, NearBright and Phoroptor are registered trademarks of Reichert, Inc. AMETEK is a registered trademark
Instructions for Use. Edition USA SI-1015
 Instructions for Use Edition USA SI-1015 Contents Symbols...3 7 1. Introduction... 8 9 2. Electromagnetic compatibility (EMC)...10 3. Unpacking...11 4. Equipment supplied...12 5. Safety notes...13 21 6.
Model C230 Pump Controller
 MANUAL Model C230 Earthsafe Systems, Inc. 7553 S. Madison Willowbrook, IL 60527 T: (630) 794-5100 F: (630) 794-5106 info@earthsafe.com www.earthsafe.com March 1, 2010 The information contained herein is
Tissue Master. User Manual
 Tissue Master User Manual This page left blank intentionally This manual is a guide for the use of the Omni International Tissue Master and accessories. Data herein has been verified and validated. It
SURGICAL POWER & ACCESSORIES. Rx Only PM-X00-710/PM-X IR-12.13
 SURGICAL POWER & ACCESSORIES Rx Only PM-X00-710/PM-X00-715-IR-12.13 Table of Contents Introduction Page 4 Intended Use Page 4 Warnings Page 5 Cautions Page 5 Notes Page 5 Explanation of Symbols Page 6
miconverter 18-Module Rack-Mount Power Chassis User Manual 38 Tesla, Irvine, CA USA Phone: (949) ; Fax: (949) Page 12
 ; Fax: (949) Page 12") miconverter 18-Module Rack-Mount Power Chassis User Manual Page 12 38 Tesla, Irvine, CA 92618 USA Phone: (949) 250-6510; Fax: (949) 250-6514 General and Copyright Notice This publication is protected by
miconverter 18-Module Rack-Mount Power Chassis User Manual Page 12 38 Tesla, Irvine, CA 92618 USA Phone: (949) 250-6510; Fax: (949) 250-6514 General and Copyright Notice This publication is protected by
A-dec O Clock Delivery System
 Installation Guide A-dec 500 12 O Clock Delivery System Before You Begin A-dec 545 12 O Clock Assistant s Instrumentation Before starting the installation: Check with local building and code authorities
SeeDOS Product User Manual Seed Slider
 Seed Slider Table of Contents Subject Page General Precautions... 2 Customer Responsibility... 2 Features & Specifications... 3 Description... 3 Operation... 4 Maintenance... 7 Service... 7 Parts and Accessories...
4-LED Solar-Powered Pendant Shed Light
 4-LED Solar-Powered Pendant Shed Light Owner s Manual WARNING: Read carefully and understand all ASSEMBLY AND OPERATION INSTRUCTIONS before operating. Failure to follow the safety rules and other basic
The A-dec Difference.
 A-dec 200 The A-dec Difference. The best way to discover what dentists need in a chair and delivery system is to ask. We did. And the A-dec 200 design reflects the way dental teams work, and purposefully
Instruction & Operation Manual
 Instruction & Operation Manual HSC Series Spring Check Valve Read and understand this manual prior to installing, operating or servicing this equipment This manual contains installation, operation, cleaning,
Read all instructions before installing and using. Installer: This manual must be delivered to the end user.
 Installation Instructions Vacuum / Magnet Mount Kits IMPORTANT! Read all instructions before installing and using. Installer: This manual must be delivered to the end user.! WARNING! Failure to install
Installation and Operating Manual for Tank and Equipment Cleaning Nozzles Series 5TM
 Installation and Operating Manual for Tank and Equipment Cleaning Nozzles Series 5TM 150 150 150 This instruction manual contains proprietary information which is protected by copyright laws. No part of
PUSH BUTTON KEY CABINET
 PUSH BUTTON KEY CABINET Model 95689 INSTALLATION And Operation Instructions Due to continuing improvements, actual product may differ slightly from the product described herein. 3491 Mission Oaks Blvd.,
182-LED Solar-Powered Motion Security Light. Owner s Manual
 182-LED Solar-Powered Motion Security Light Owner s Manual WARNING: Read carefully and understand all ASSEMBLY AND OPERATION INSTRUCTIONS before operating. Failure to follow the safety rules and other
Heavy Duty Four Wheeled Walker
 Heavy Duty Four Wheeled Walker Weight Capacity: 500 lbs. ITEM # W1802 Made in China 2011 ESSENTIAL MEDICAL SUPPLY, INC. Manufactured for Orlando, FL 32822 -- SAVE THESE INSTRUCTIONS -- Do not attempt to
EMB-901 Built In Fiber Optic Brushless Electric Micromotor Set Operation Manual
 High / Low Speed Handpiece for Dental EMB-901 Built In Fiber Optic Brushless Electric Micromotor Set Operation Manual Content 1.Component Instructions...03 2.Symbols...04 3.Description of Products...05
Operators Manual. Recirculating Chiller /06/08
 Operators Manual Recirculating Chiller 110-197 11/06/08 Table of Contents Section 1. General Information 1.1 Warranty 1.2 Unpacking 1.3 Package Contents 1.4 Description of the Recirculating Chiller 1.5
A-dec 570L Dental Light on a Non-DCS System INSTALLATION GUIDE
 A-dec 570L Dental Light on a Non-DCS System INSTALLATION GUIDE Non-DCS LED Dental Light 86.0350.00 Rev B Choose an Installation Guide The manual used to install the light depends on whether the system
COMMAND SERIES 410-L T L T T T L06R RS PRODUCT MANUAL
 COMMAND SERIES 40-L06 40-T09 420-L06 420-T06 420-T09 420-T5 420-L06R 420-009RS PRODUCT MANUAL TABLE OF CONTENTS COMMAND REFERENCE GUIDE INTRODUCTION Command Reference Guide 3 Physical Characteristics &
OPERATION AND MAINTENANCE INSTRUCTION MANUAL. AEU-707A & AEU-707AV2 Implant / Surgery Systems
 OPERATION AND MAINTENANCE INSTRUCTION MANUAL AEU-707A & AEU-707AV2 Implant / Surgery Systems TABLE OF CONTENTS: Introduction.........................1 Package Contents....................1 Setting Up the
GARDEN HOSE UTILITY PUMP
 GARDEN HOSE UTILITY PUMP MODEL #HPP360, HPP12V, 473707 MODEL #HPP360, 473707 MODEL #HPP12V ATTACH YOUR RECEIPT HERE Purchase Date SAFETY INFORMATION Please read and understand this entire manual before
BMRX Series ROTARY LEVEL CONTROL
 BMRX Series ROTARY LEVEL CONTROL OPERATING INSTRUCTIONS PLEASE READ CAREFULLY 925-0292 Rev C TABLE OF CONTENTS GENERAL SPECIFICATIONS... 3 SAFETY SUMMARY... 4 1.0 INTRODUCTION... 5 2.0 INSTALLATION...
portable ac/dc suction pump USER S MANUAL ITEM # 18605
 portable ac/dc suction pump USER S MANUAL ITEM # 18605 index 1 1. Safety Information...2-4 2. AC Power Source...3 3. Electrical...3-4 4. Introduction...4 5. Illustration of Important Parts...5 6. Set-Up...6
Pressure Washer Hose Reel
 Pressure Washer Hose Reel Owner s Manual WARNING: Read carefully and understand all ASSEMBLY AND OPERATION INSTRUCTIONS before operating. Failure to follow the safety rules and other basic safety precautions
AUTOMATIC SUBMERSIBLE UTILITY PUMP
 AUTOMATIC SUBMERSIBLE UTILITY PUMP Zoeller is a registered trademark of Zoeller Co. All Rights Reserved. MODEL #1043-0006 Español p. 9 ATTACH YOUR RECEIPT HERE Serial Number Purchase Date Questions, problems,
SPARKSCAN1 HIGH VOLTAGE CLAMP OPERATING MANUAL
 SPARKSCAN1 HIGH VOLTAGE CLAMP OPERATING MANUAL MOTORTECH Tools & Test Equipment for Ignition Systems P/N 01.10.019 Rev. 01/2013 Copyright Copyright 2012 MOTORTECH GmbH. All rights reserved. Distribution
Digital Apex Locator. ipex OPERATION MANUAL OM-E0285E
 Digital Apex Locator ipex OPERATION MANUAL 0197 OM-E0285E The EU directive 93/42/EEC was applied in the design and production of this medical device. Thank you for purchasing the ipex. This is apex locator.
Installation Operation Maintenance Troubleshooting Version 1, Oct/09. Palm Beach
 Installation Operation Maintenance Troubleshooting Version 1, Oct/09 1655 Palm Beach Congratulations! All of us at Summit Dental Systems want you to know that your 1655 Palm Beach Cuspidor has been built
GC-1. Roof and Gutter De-Icing Control Installation and Operating Instructions FOR EXTERIOR INSTALLATION ONLY
 GC-1 Roof and Gutter De-Icing Control Installation and Operating Instructions FOR EXTERIOR INSTALLATION ONLY GENERAL INFORMATION The GC-1 heating cable controller has been designed and manufactured for
Control Gate Valve with stepper motor actuator
 Control Gate Valve with stepper motor actuator This manual is valid for the valve ordering numbers: 64036-.E52 and 64040-.E52 The respective product identification is given on each valve in the following
CO 3-WAY PNEUMATIC VALVE INSTRUCTION MANUAL 2080
 CO 3-WAY PNEUMATIC VALVE INSTRUCTION MANUAL 2080 STI S.r.l has taken every care in collecting and verifying the documentation contained in this Instruction Manual. The information herein contained are
RemRest. Service Manual. CAUTION: USA Federal law restricts this device to sale by or on the order of a physician. P/N Rev A
 RemRest Tiers 1-3 900 Series Service Manual CAUTION: USA Federal law restricts this device to sale by or on the order of a physician. P/N 22054 Rev A Table of Contents IEC Symbols 3 SIZE 4.7" H X 8.6"
Full Length Bed Rail - Model G29
 User Manual DEALER: These instructions MUST be given to the user of the product. USER: BEFORE using this product, read this manual and save for future reference. 1 General Check all parts for shipping
OWNER'S MANUAL. Royal Sovereign International Inc. RET Desk Series
 OWNER'S MANUAL RET Desk Series Read all instructions carefully before use. For any Customer Support needs please choose the Customer Support tab on www.royalsovereign.com Royal Sovereign International
GRINNELL Model B302 and Model BN302 Grooved End Butterfly Valves with Gear Operators or Lever-Lock Operators General Description
 Technical Services -00- +-0--0 www.grinnell.com GRINNELL Model B0 and Model BN0 Grooved End Butterfly Valves with Gear Operators or Lever-Lock Operators General Description The GRINNELL Models B0 and BN0
Installation and Operation Instructions Safety Director Arrow
 Installation and Operation Instructions Safety Director Arrow! WARNING! Failure to install or use this product according to manufacturers recommendations may result in property damage, serious bodily/personal
OPERATING INSTRUCTIONS PLEASE READ CAREFULLY
 OPERATING INSTRUCTIONS PLEASE READ CAREFULLY 925-0330 Rev 0 0416 TABLE OF CONTENTS SAFETY SUMMARY... 3 SPECIFICATIONS... 4 1.0 INTRODUCTION/DESCRIPTION.... 5 2.0 LOCATION AND MOUNTING... 5 3.0 CONNECTIONS
EMISSION CONTROL WARRANTY STATEMENT
 EMISSION CONTROL WARRANTY STATEMENT YOUR WARRANTY RIGHTS AND OBLIGATIONS The California Air Resources Board, U.S. EPA and Zenith Power Products LLC (ZPP) are pleased to explain the emission control system
RECYCOIL Used Oil Tank
 RECYCOIL Used Oil Tank Owners and Users Manual *Tanks may not be exactly as shown. 198900 Rev. 5 Revised 03-12-13 LIMITED WARRANTY Westeel Division of Vicwest Corporation ( Westeel ) warrants products
Linear Actuator. Installation Manual. warranty installation parts list. Linear Actuator Installation Manual Page 1
 Linear Actuator Installation Manual warranty installation parts list January 2004 Linear Actuator Installation Manual Page 1 MA1221B12 Warranty Information Chore-Time Equipment ( Chore-Time ) warrants
Register your product and get support at Philips Sonicare DiamondClean
 Register your product and get support at www.philips.com/welcome Philips Sonicare DiamondClean 300 series 1 Important Safeguards... 3 2 What s in the box... 6 3 Before first use... 7 4 Using your Sonicare...
Model 605 Portable Aspirator
 Model 605 Portable Aspirator CAUTION: USA Federal law restricts this device to sale by or on the order of a physician. #P1000 Rev. 11/02 Table of Contents Specifications 2 Important Parts of the VacuMax
37SCENE 46SCENE 79SCENE
 Installation and Operation Instructions LED SCENE LIGHT LED SCENE LIGHT 37SCENE 46SCENE 79SCENE 37SCENE 46SCENE Introduction The 37SCENE, 46SCENE, 79SCENE LED Scene Lights are designed for the emergency
SAVE FOR CONSUMER INSTALLATION / OWNER S MANUAL. Includes: Tools: Mystic - Pull-Out Kitchen Faucet LKMY1041CR LKMY1041NK LKLFMY1041CR LKLFMY1041NK D 1
 INSTALLATION / OWNER S MANUAL Mystic - Pull-Out Kitchen Faucet LKMY1041CR LKMY1041NK LKLFMY1041CR LKLFMY1041NK Includes: D D 1 D 2 E D 3 B 1 C C 2 C 1 B B 2 B 3 A NOTE: these washers are not used on this
Power Distribution Units AP9560 & AP9561
 Power Distribution Units AP9560 & AP9561 AP9560 and AP9561 are 30-amp Rack-mount Power Distribution Units (PDUs) that provide 120-volt or 208-volt power to rack-mount equipment. AP9560. - AP9561,, 12-foot
INSTALLATION MANUAL FAST RACK LADDER SYSTEM
 TRUCK STORAGE SOLUTIONS SECURING YOUR REPUTATION INSTALLATION MANUAL FAST RACK LADDER SYSTEM MODELS ATTENTION: PLEASE READ AND UNDERSTAND ALL INSTRUCTIONS AND WARNINGS BEFORE ASSEMBLING, INSTALLING OR
Gives useful tips, recommendations and information for efficient, trouble-free use.
 User Manual DEALER: This manual MUST be given to the user of the product. USER: BEFORE using this product, read this manual and save for future reference. 1 General 1.1 Symbols Invacare Matrx Stabilite