Lifting Vehicles Safely
|
|
|
- Aron Kelly
- 5 years ago
- Views:
Transcription

1 Lifting Vehicles Safely 1
2 What you need to know before lifting a vehicle 1) What type of body construction the vehicle employs 2) The arrangement of the Engine Drivetrain Drive wheels 2
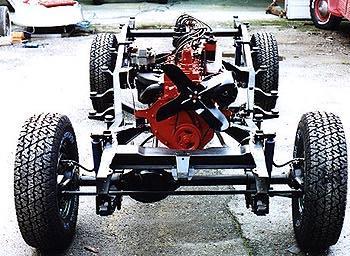
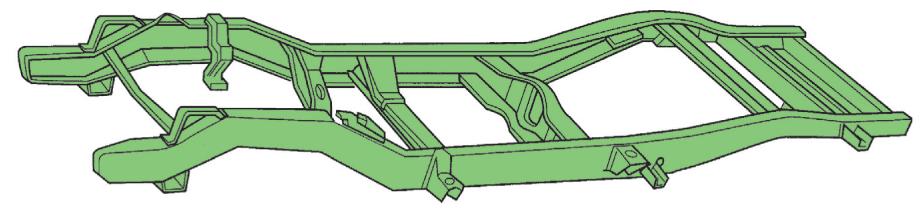
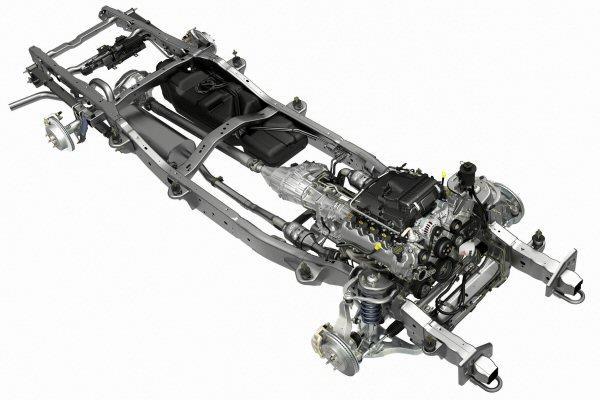
3 Body Construction 1) Body-on-frame 3

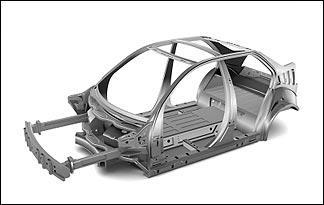
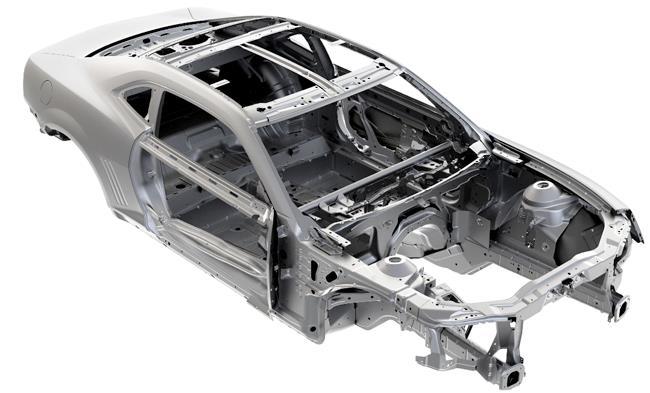
4 2) Unibody Body Construction 4

5 Drivetrain Layout 3 ways that the engine, transmission and drive wheels are arranged 5


6 rear wheel drive front wheel drive all wheel drive 6

7 Four Wheel Drive 7


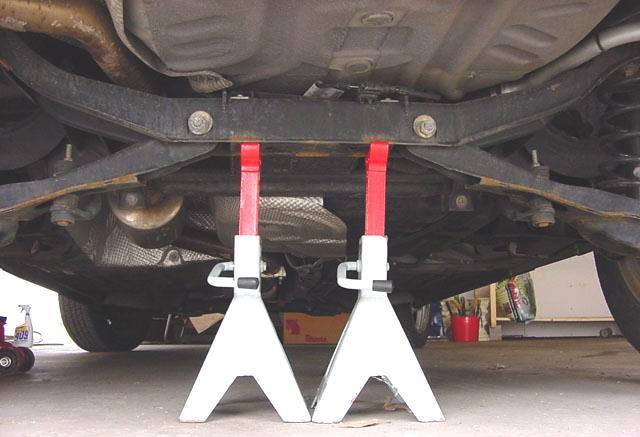
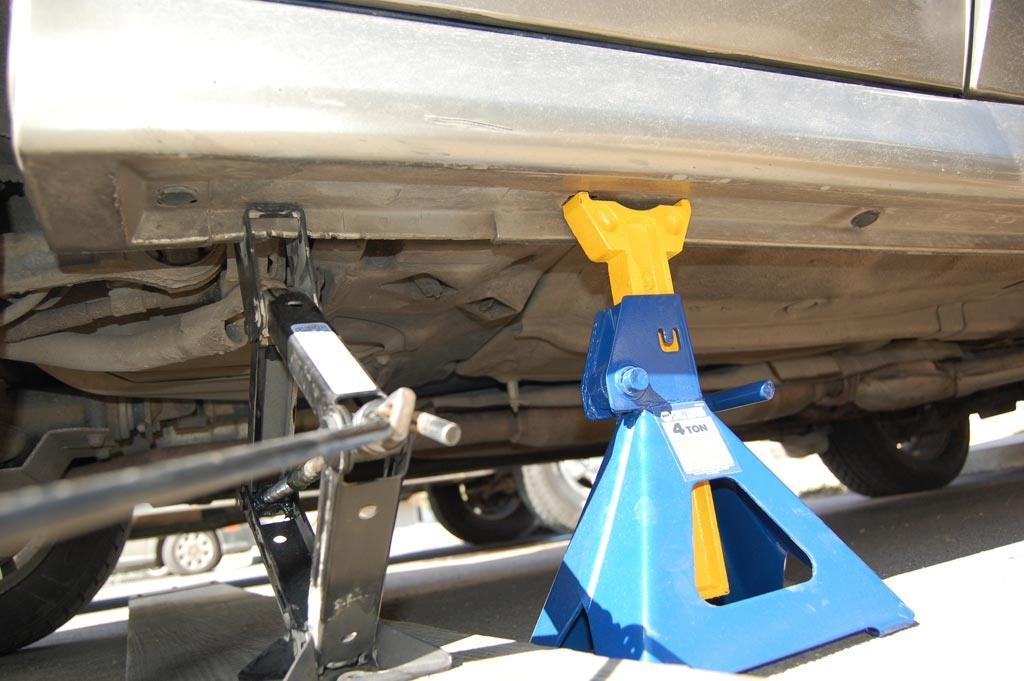
8 Using a Floor Jack A floor jack is used to LIFT a vehicle ONLY Jack stands keep the vehicle supported 8
9 9


10 Lifting a vehicle with a Hydraulic Floor Jack 1. Secure the vehicle apply the parking brake place transmission in park (automatic) or neutral (manual) place wheel chocks on each side one of the wheels which will remain on the floor (if on the 4 post place the wheel chocks on the front left tire) 10

11 Lifting Convertibles Is the car you are about to lift a convertible? If so, unlatch the top before you jack up the car! 11


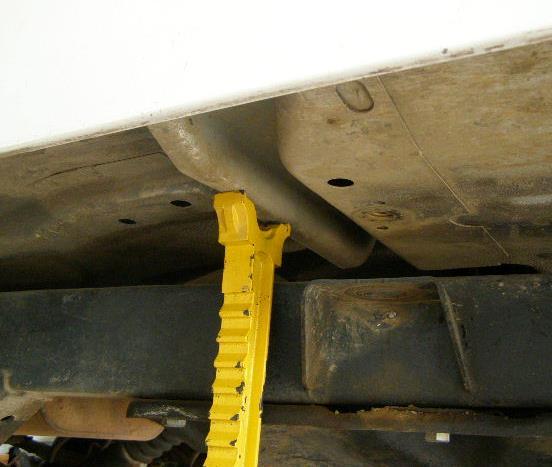
12 Jack Placement - Unibody 2. On a unibody vehicle, the jack can be placed under the crossmember 12


13 Jack Placement - Unibody 2. On a unibody vehicle, the jack can also be placed under the tow hooks/eyes rear axle beam if equipped 13


14 DO NOT place the jack under the oil pan floor muffler 14


15 DO NOT place the jack under the steering or suspension parts 15


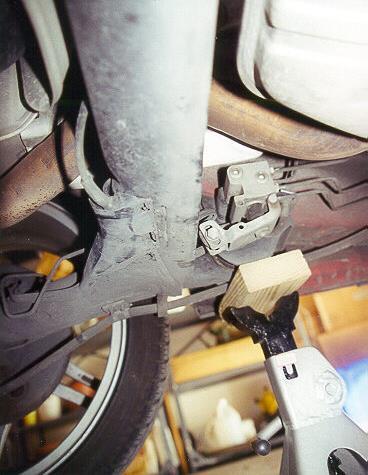
16 Placing Jack Stands 3. On unibody cars, jack stands can be placed under the rocker panel lips (pinch seems) 16
17 17


18 Lowering the car onto the jack stands 4. Lower the jack slowly & carefully! are the rocker lips rusty? if so, find an alternate spot to place the jack stands listen for strange noises! shake the car once it is on the jack stands check the jack stands again to ensure they are supporting the vehicle in the appropriate spot 18


19 Jacking up the front Lifting Body-on-Frame Vehicles Place the jack under the crossmember Jacking up the back Place the jack under the differential 19


20 Body-on-frame jack stand placement DO NOT place jack stands under the rocker lips! Jack stands should be placed under the frame & they can also be placed on the axle tubes 20
21 21
22 Lower the jack slowly & carefully! is the frame rusty? if so, find an alternate spot to place the jack stands listen for strange noises! shake the car once it is on the jack stands check the jack stands again to ensure they are supporting the vehicle in the appropriate spot Questions? 22
23 Using Automotive Hoists 23

24 Types of HOISTS In Ground 24


25 Types of HOISTS Surface mounted Symmetrical 25


26 Types of HOISTS Surface mounted A-Symmetrical 26


27 Types of HOISTS Surface mounted 4 post drive-on 27
28 Generic 2 Post Hoist Usage Guidelines ensure hoist s capacity is higher than vehicle weight be sure the vehicle is centered (front-to-back & left-to-right) automatic in park or standard in neutral adjust hoist to contact appropriate lift points refer to ALI Lifting Guide lift hoist until it just makes contact with vehicle verify hoist will contact correct lift points & re-adjust if needed raise vehicle 2-3 inches off the ground shake vehicle ensure it is stable! verify vehicle has not shifted on the hoist arms lift hoist to desired height lower vehicle onto mechanical safety locks begin working on the vehicle! when lowering vehicle: Yell coming down! 28


29 Examples of Contact Pads & Adapters 29


30 30

31 Body-on-Frame Contact Point note the use of pad extensions 31

32 Two-post Hoist Operation (Raising) Center vehicle front to back & left to right, once the vehicle is centered apply the emergency brake and follow these 8 steps to raise it: 1. Align contact pads with vehicle 2. Raise arms to first contact of vehicle 3. Verify placement of arms 4. Lift vehicle 10cm off the ground 5. Shake vehicle 6. Double check hoist arm placement 7. Raise to desired height 8. Lower onto locks Push this button to raise the hoist Push this lever to lower the hoist Yell Hoist going Up every time you lift the hoist. 32
 Raise the hoist to clear the safety mechanism 3) Ensure the area under the hoist")
 Remove and place hoist arms in proper")
33 Lowering the Two-Post Hoist 1) Make sure all people and equipment are clear and Yell Hoist going UP 2) Raise the hoist to clear the safety mechanism 3) Ensure the area under the hoist is clear of people, parts & tools and Yell Hoist Coming Down 4) Dis-engage safety lever 5) Push the lowering lever to lower the vehicle 6) Remove and place hoist arms in proper positions 33


34 Safety Stands Safety stands should be used when removing engine mounts, transmissions etc. they can also be used to stabilize the vehicle when loosening tight fasteners or when applying torque to parts during repair 34
35 Four-post Hoist Operation (Raising) 1. Center vehicle front to back & left to right on the ramps 2. Once the vehicle is centered apply the emergency brake 3. Place wheel chocks on the front left tire to make sure the vehicle will not roll 4. Yell Hoist going up 5. Raise hoist to desired height allowing all 4 locks to click 6. Lower hoist onto safety locks Push this button to raise the hoist Push this lever to lower the hoist 35
36 Lowering the Four-post Hoist 1. Yell Hoist going up 2. Raise hoist off all 4 safety locks 3. Yell Hoist Coming Down 3. Hold the lever on the right to dis-engage the safety locks 4. Push down on the lowering lever to lower the hoist to desired height (If you are not lowering it all the way to the floor you must place it on another set of safety locks) Push this button to raise the hoist Push this lever to lower the hoist Hold this lever to release the safety locks while lowering the hoist 36
37 37
38 That s it Got all that? 38
Lifting Vehicles. Description. Lesson Outcomes. Assumptions. Terminology
 Youth Explore Trades Skills Lifting Vehicles Description This Activity Plan is designed as one among many through which students will rotate in small groups. Students will learn how to safely lift and
Coupling & Uncoupling a Tractor-Trailer
 TRAINING TOOL Coupling & Uncoupling a Tractor-Trailer DRIVING THE FUTURE 2 Coupling and Uncoupling a Tractor-Trailer TRAINING TOOL Coupling a Tractor-Trailer 1 When operating articulating vehicles such
Danger: To avoid any vehicle damage, serious personal injury or death:
 Service Information Document ID: 5027339 Lifting and Jacking the Vehicle Danger: To avoid any vehicle damage, serious personal injury or death, always use the jack stands to support the vehicle when lifting
Towing and Road Service Guide For Lexus LS 600h L. Quality and Education Services AAA Automotive 1000 AAA Drive Heathrow, FL 32746
 Towing and Road Service Guide For Lexus LS 600h L Quality and Education Services AAA Automotive 1000 AAA Drive Heathrow, FL 32746 June 15, 2007 Index General Towing Information Special Precautions 3 Hybrid
 INSTALLATION INSTRUCTIONS REAR STABILIZER BAR Thank you for purchasing a quality Hellwig Product. PLEASE READ THIS INSTRUCTION SHEET COMPLETELY BEFORE STARTING YOUR INSTALLATION 1 Threaded Plate Threaded
Rusty's XJ Competition 4-Link Suspension System RK-CS10-XJ INSTALLATION INSTRUCTIONS
 Rusty's XJ Competition 4-Link Suspension System RK-CS10-XJ INSTALLATION INSTRUCTIONS Last Revised: 5/24/2017 Introduction: Rusty s recommends that this installation be performed by a certified automotive
Mercedes W123 Jack Technique
 Mercedes W123 Jack Technique Jacking up a W123 car isn't quite as straightforward as you might hope. Placement of the jack, and the stands, can seem tricky at first. Learn some helpful techniques with
FAX
 INSTALLATION INSTRUCTIONS 6299 Air Suspension Kit (pat. pending) 2009+ Dodge 1500 Pickup with Rear Coil Springs Thank you for purchasing a quality Hellwig Product. PLEASE READ THIS INSTRUCTION SHEET COMPLETELY
FORD RACING DIFFERENTIAL INSTALLATION (99-04 GT, Mach 1)
") FORD RACING DIFFERENTIAL INSTALLATION (99-04 GT, Mach 1) Time Necessary: Approximately 4 hours Tools Required: Wrenches: 8mm, 13mm, 15mm, 5.5 mm allen, 6mm allen Sockets: 5/8, 3/4 Ratchet Floor Jack Jack
FORD RACING DIFFERENTIAL INSTALLATION (99-04 GT, Mach 1) Time Necessary: Approximately 4 hours Tools Required: Wrenches: 8mm, 13mm, 15mm, 5.5 mm allen, 6mm allen Sockets: 5/8, 3/4 Ratchet Floor Jack Jack
Steering Cylinders. Remove Steering Cylinders. Disassembly and Assembly 920 & 930 WHEEL LOADER VEHICLE SYSTEMS
 Disassembly and Assembly 920 & 930 WHEEL LOADER VEHICLE SYSTEMS Steering Cylinders Remove Steering Cylinders 1. Turn the machine all of the way to the left to remove the right steering cylinder. Turn the
ALLOY USA AXLE INSTALLATION (99-04 GT, Mach 1)
") ALLOY USA AXLE INSTALLATION (99-04 GT, Mach 1) Time Necessary: Approximately 4 hours Tools Required: Wrenches: 8mm, 13mm, 15mm, 5.5 mm allen, 6mm allen Sockets: 5/8, 3/4 Ratchet Floor Jack Jack Stands
ALLOY USA AXLE INSTALLATION (99-04 GT, Mach 1) Time Necessary: Approximately 4 hours Tools Required: Wrenches: 8mm, 13mm, 15mm, 5.5 mm allen, 6mm allen Sockets: 5/8, 3/4 Ratchet Floor Jack Jack Stands
MANUAL TRANSMISSIONS. Servicing - Corvette. Transmission Model (RPO Code) Borg-Warner T56 6-Speed (M12)
 Borg-Warner T56 6-Speed (M12)") 2003-04 MANUAL TRANSMISSIONS Servicing - Corvette APPLICATION TRANSMISSION APPLICATION Application Corvette Convertible & Coupe Z06 Transmission Model (RPO Code) Borg-Warner T56 6-Speed (MM6) Borg-Warner
2003-04 MANUAL TRANSMISSIONS Servicing - Corvette APPLICATION TRANSMISSION APPLICATION Application Corvette Convertible & Coupe Z06 Transmission Model (RPO Code) Borg-Warner T56 6-Speed (MM6) Borg-Warner
Medium Heavy Vehicle Safety and Foundation 1
 Medium Heavy Vehicle Safety and Foundation Student/intern information: Name Class Vehicle used for this activity: Year Make Model Odometer VIN Learning Objective / Task Vehicle Protection and Jack and
2001 Chevrolet CORVETTE
 riveline Support Assembly Replacement (Automatic Transmission) 1 of 21 10/24/2012 8:58 PM 2001 Chevrolet CORVETTE Submodel: Engine Type: V8 Liters: 5.7 Fuel Delivery: FI Fuel: GAS Driveline Support Assembly
1501 Industrial Way N., Toms River, NJ Fax: PACKING LIST MUSTANG LONG TUBE HEADERS (M30000)
") 2/18/04 1501 Industrial Way N., Toms River, NJ 08755 732-349-2109 Fax:732-244-0867 ADVANCED - Installation requires professional-type tools and advanced automotive-service skills. If you lack experience
2/18/04 1501 Industrial Way N., Toms River, NJ 08755 732-349-2109 Fax:732-244-0867 ADVANCED - Installation requires professional-type tools and advanced automotive-service skills. If you lack experience
FAX
 INSTALLATION INSTRUCTIONS 6090 Air Suspension Kit (pat. pending) 1999-2006 Tahoe, Suburban, Avalanche, Yukon Thank you for purchasing a quality Hellwig Product. PLEASE READ THIS INSTRUCTION SHEET COMPLETELY
REAR SUSPENSION GROUP CONTENTS GENERAL DESCRIPTION TRAILING ARM ASSEMBLY REAR SUSPENSION DIAGNOSIS
 34-1 GROUP 34 CONTENTS GENERAL DESCRIPTION......... 34-2 DIAGNOSIS.. 34-3 INTRODUCTION TO DIAGNOSIS........................ 34-3 DIAGNOSIS TROUBLESHOOTING STRATEGY...... 34-3 SYMPTOM CHART...................
REAR SUSPENSION GROUP CONTENTS GENERAL INFORMATION FASTENER TIGHTENING SPECIFICATIONS TRAILING ARM...
 34-1 GROUP 34 CONTENTS GENERAL INFORMATION 34-2 FASTENER TIGHTENING SPECIFICATIONS 34-4 GENERAL SPECIFICATIONS 34-4 SERVICE SPECIFICATIONS 34-5 LUBRICANTS 34-5 DIAGNOSIS 34-6 INTRODUCTION TO DIAGNOSIS
3.5 inch A-Arm Lift Kit
 16-010 3.5 inch A-Arm Lift Kit will fit CLUB CAR PRECEDENT installation instructions included: Main Suspension Assembly 2 Spindles 2 A-Arms 2 Rear Shock Mounting Plates 2 Rear Lift Blocks 2 U-Bolts 1 2
INHIBITOR SWITCH AT-50. 5) Disconnect the inhibitor switch connector.
 Disconnect the inhibitor switch connector.") INHIBITOR SWITCH B: ADJUSTMENT 1) Shift the select lever to N range. 2) Loosen the three inhibitor switch securing bolts. 3) Insert the ST as vertical as possible into the holes in inhibitor switch lever
INHIBITOR SWITCH B: ADJUSTMENT 1) Shift the select lever to N range. 2) Loosen the three inhibitor switch securing bolts. 3) Insert the ST as vertical as possible into the holes in inhibitor switch lever
file://c:\program Files\tsocache\OFFICE_2780\SXN~us~en~file=SXNB2012.htm~gen~ref...
 Page 1 of 14 SECTION 211-02: Power Steering 1999 Explorer/Mountaineer Workshop Manual REMOVAL AND INSTALLATION Procedure revision date: 07/27/1998 Gear 5.0L Removal 1. Place the front wheels in the straight
Installation Instructions
 Installation Instructions Rear Disc Brake Conversion Kit Item # RC1001, RC1001X Applications: 64-72 A-body, 67 F-Body, 63-67 X-body with Non Staggered Shocks Thank you for choosing GPS Auto for your automotive
Super Duty Front Air Bag Installation Instructions
 2005-2010 Super Duty Front Air Bag Installation Instructions Congratulations! You have just purchased the best engineered, highest quality front air suspension kit available on the market for your 2005-2010
Installation Instructions
 Installation Instructions Rear Disc Brake Conversion Kit Item # RC4001, RC4001X Applications: Mopar 7.25, 8.25, 9.25 Axles Thank you for choosing Leed Brakes for your automotive product needs. Before you
INSTALLATION INSTRUCTIONS
 INSTALLATION INSTRUCTIONS GMT 560 (4500/5500) CREW CAB (2351A000) Link Mfg. Ltd. 223 15th St. N.E. Sioux Center, IA USA 51250-2120 The CABMATE MODEL 2351A000 fits the 2003 and later GM 4500 / 5500 crew
REAR SUSPENSION GROUP CONTENTS GENERAL DESCRIPTION REAR SUSPENSION DIAGNOSIS LOWER ARM AND TOE CONTROL ARM ASSEMBLY...
 34-1 GROUP 34 CONTENTS GENERAL DESCRIPTION........... 34-2 DIAGNOSIS.... 34-2 INTRODUCTION....................... 34-2 TROUBLESHOOTING STRATEGY........ 34-2 SYMPTOM CHART..................... 34-3 SYMPTOM
2. MEASURE VEHICLE HEIGHT. (b) Measure the vehicle height. Measurement points: C: Ground clearance of front wheel center
 Measure the vehicle height. Measurement points: C: Ground clearance of front wheel center") ADJUSTMENT If the wheel alignment has been adjusted, and if suspension or underbody components have been removed/installed or replaced, be sure to perform the following initialization procedure in order
ADJUSTMENT If the wheel alignment has been adjusted, and if suspension or underbody components have been removed/installed or replaced, be sure to perform the following initialization procedure in order
2002 F-150 Workshop Manual
 Page 1 of 8 SECTION 307-01B: Automatic Transmission 4R70W 2002 F-150 Workshop Manual REMOVAL Procedure revision date: 04/02/2003 Transmission Special Tool(s) Retainer, Torque Converter 307-346 (T97T-7902-A)
Always wear eye protection when operating power tools. Before you install this kit, block the vehicle tires to prevent the vehicle from rolling.
 Many states and municipalities have laws restricting bumper heights and vehicle lifts. Consult state and local laws to determine if the changes you intend to make to the vehicle comply with the law. 3651
5 th Wheel Air Ride Connect and Uncoupling Procedure
 5 th Wheel Air Ride Connect and Uncoupling Procedure East Coast Partners Grp 1041 Old Blush Road., Suite 200 Celebration, FL 34747 Phone 321-939-2132 / Fax 866-201-3391 sales@airsafehitches.com www.airsafehitches.com
Towing and Road Service Guide For The Lexus ES300h. Quality and Education Services AAA Automotive 1000 AAA Drive Heathrow, FL 32746
 Towing and Road Service Guide For The Lexus ES300h Quality and Education Services AAA Automotive 1000 AAA Drive Heathrow, FL 32746 September 7, 2012 1 Index General Vehicle Information Major Component
Rusty s XJ Cherokee 4.5 Spring Pack Kit RK-405SP-XJ INSTALLATION INSTRUCTIONS
 Rusty s XJ Cherokee 4.5 Spring Pack Kit RK-405SP-XJ INSTALLATION INSTRUCTIONS Last Revised: 1.10.18 Rusty s Off-Road Products Introduction: Rusty s recommends that this installation be performed by a certified
INSTALLATION INSTRUCTION 89450
 INSTALLATION INSTRUCTION 89450 Rancho Suspension System RS66450R7: Fits 2003 2013 4WD Dodge Ram 2500 / 3500 DIESEL MODELS ONLY. READ ALL INSTRUCTIONS THOROUGHLY FROM START TO FINISH BEFORE BEGINNING INSTALLATION
PowerLevel s e r i e s
 Owner s Manual Hydraulic Leveling CONTENTS Introduction Operation Control Panel Automatic Leveling Manual Leveling Retracting Jacks Remote Operation Care & Maintenance Troubleshooting Error Codes 1 2 2
INSTALLATION INSTRUCTION 88094
 INSTALLATION INSTRUCTION 88094 FOR RANCHO SUSPENSION SYSTEM RS6594B 4WD & 2WD NISSAN TITAN READ ALL INSTRUCTIONS THOROUGHLY FROM START TO FINISH BEFORE BEGINNING INSTALLATION Rev D IMPORTANT NOTES! WARNING:
B&M / INTRODUCTION
 INSTALLATION INSTRUCTIONS FOR B&M AUTOMATIC TRANSMISSIONS REPLACING GM TH350, TH400, and TH700R4 / 4L60 (not including 4L60E / electronic shift models) B&M part numbers: 102002-103005 - 107101-107104 107105-107106
PRE-INSTALLATION. INSTALLATION INSTRUCTIONS Front Ford F150 4WD 4" Suspension Lift Kit
 2015 Ford F150 4WD 4" Suspension Lift Kit PRE-INSTALLATION 2 - Knuckle (Driv/Pass) 2 - Crossmember (Front/Rear) 2 - Differential Bracket (Driv/Pass) 1 - Diff. Brace Bracket (Pass) 2 - Front Brake Line
DODGE DAKOTA 3 KIT INSTALLATION INSTRUCTIONS KIT# 60043
 DODGE DAKOTA 3 KIT INSTALLATION INSTRUCTIONS 2000-2002 KIT# 60043 Installation of a Performance Automotive Group body lift kit will change the vehicle s center of gravity and handling characteristics both
Installation Instructions
 Installation Instructions Rear Disc Brake Conversion Kit Item # RC2001, RC2001X Applications: Mopar 8-3/4 & 9-3/4 Rear Axles Thank you for choosing Leed Brakes for your automotive product needs. Before
GIANTMACH UTV & ATV 700/500 SNOW PLOW AND WINCH MANUAL
 GIANTMACH UTV & ATV 700/500 SNOW PLOW AND WINCH MANUAL TDJ-A2000 ELECTRIC WINCH INSTRUCTION MANUAL Page 1 OPRERATIONAL PRINCIPLE TDJ-A2000 electric winch is made up of 7 major parts # s. The power decreases
DODGE DAKOTA 3 BODY LIFT INSTALLATION INSTRUCTIONS KIT # 60153
 DODGE DAKOTA 3 BODY LIFT INSTALLATION INSTRUCTIONS 2003-04 KIT # 60153 Installation of a Performance Automotive Group body lift kit will change the vehicle s center of gravity and handling characteristics
INSTRUCTION MANUAL R16 - Fifth Wheel Hitch
 You can take it with you. INSTRUCTION MANUAL R16 - Fifth Wheel Hitch Product No. 30866 DEALER/INSTALLER: END USER: (1) Provide this Manual to end user. (2) Physically demonstrate hitching and unhitching
Lincoln Mark VII Air Spring Solenoid Replacement By ArtBaileyJr
 Lincoln Mark VII Air Spring Solenoid Replacement By ArtBaileyJr Removal and Installation of Air Spring Solenoid At some point, our Mark VII s will require air spring service. Most air spring service requires
Running Board Bracket Kit Ram 1500/2500/3500
 Installation Instructions I - Sheet Number LUNDRB58 Rev.A Running Board Bracket Kit 2015-16 Ram 1500/2500/3500 For proper installation and best possible fit, please read all instructions BEFORE you begin.
AIRTEK for Mack Vehicles Single to Dual Height Control Valve Conversion Kit
 Single to Dual Height Control Valve Conversion Kit SUBJECT: Kit Nos.60961-128 and 60961-129 LIT NO: 59310-030 DATE: April 2006 REVISION: A INTRODUCTION As of March 2006 all of Mack vehicles will be equipped
TECHNICAL PUBLICATION Bar Pin Alignment 340 Thru 520 Series NO: SUBJECT: Bar Pin Alignment Instructions DATE: November 1997 REVISION: C
 Bar Pin Alignment 340 Thru 520 Series NO: SUBJECT: Bar Pin Alignment Instructions DATE: November 1997 REVISION: C CONTENTS Item Subject Page 1 Introduction 2 2 Bar Pin Beam End Connection Features 2 3
DODGE RAM & 4WD 1.5 REAR COIL SPRING LIFT KIT INSTALLATION INSTRUCTIONS
 Many states and municipalities have laws restricting bumper heights and vehicle lifts. Consult state and local laws to determine if the changes you intend to make to the vehicle comply with the law. 3651
V6 Spring Belt Tensioner
 Dodgerunner s V6 Spring Belt Tensioner Installation Guide Dodgerunner 2007 The bracket consists of two pieces of 1/8" steel bolted together. The main piece is flat plate with welded-on alternator mounting
AEV30207AA Last Updated: 2/14/ Dualsport xt suspension INSTALLATION GUIDE
 AEV30207AA Last Updated: 2/14/12 2.5 Dualsport xt suspension INSTALLATION GUIDE PLEASE READ BEFORE YOU START TO GUARANTEE A QUALITY INSTALLATION, WE RECOMMEND READING THESE INSTRUCTIONS THOROUGHLY BEFORE
INSTALLATION INSTRUCTIONS 88029
 INSTALLATION INSTRUCTIONS 88029 FOR SUSPENSION SYSTEMS RS6503: JEEP WRANGLER (TJ) READ ALL INSTRUCTIONS THOROUGHLY FROM START TO FINISH BEFORE BEGINNING INSTALLATION REV F IMPORTANT NOTES! WARNING: This
07 & UP GM 1500 PICKUP 2.0 FRONT 1.0 REAR LEVELING KIT INSTALLATION
 INSTRUCTION PART NO 15265 LEVELING KIT NO 3813 07 & UP GM 1500 PICKUP 2.0 FRONT 1.0 REAR LEVELING KIT INSTALLATION READ INSTRUCTIONS/WARNINGS COMPLETELY THROUGH BEFORE STARTING. FAILURE TO ADHERE TO THE
INSTALLATION / OPERATING INSTRUCTIONS Reese Elite Series FIFTH WHEEL SLIDER HITCH
 INSTALLATION / OPERATING INSTRUCTIONS Reese Elite Series FIFTH WHEEL SLIDER HITCH DEALER/INSTALLER: (1) Provide this Manual to end user. (2) Physically demonstrate hitching and unhitching procedures in
Suspension. Table of Contents
 Suspension Table of Contents Sub-Headings Safety Notice 2 Explanation of Signal Words 2 Danger 2 2 Caution 2 Description 3 Preventive Maintenance 4 Shock Absorber 7 Visual Inspection 7 Heat Test 8 Steering
Towing and Road Service Guide For 2013 Lexus GS. Quality and Education Services AAA Automotive 1000 AAA Drive Heathrow, FL 32746
 Towing and Road Service Guide For 2013 Lexus GS Quality and Education Services AAA Automotive 1000 AAA Drive Heathrow, FL 32746 March 5, 2012 Index General Towing Information Special Precautions 1 Car
RideStar RHP Series Sliding Tandem Trailer Air Suspension System
 Maintenance Manual 14S RideStar RHP Series Sliding Tandem Trailer Air Suspension System Revised 05-14 Service Notes About This Manual This manual provides the correct lubrication, service and installation
5481 FRONT ANTI-SWAY BAR 10+ CHEVROLET CAMARO
 INSTALLATION INSTRUCTIONS 5481 FRONT ANTI-SWAY BAR 10+ CHEVROLET CAMARO CONGRATULATIONS! You were selective enough to choose a BELLTECH PRODUCT. We have spent many hours developing our line of products
Carli Suspension Front Instructions
 Carli Suspension Front Instructions 94-08 DODGE 2500-3500 4X4 SUSPENSION SYSTEM Note: Prior to installation, carefully inspect the vehicle=s steering and drive train components. Be sure to check ball joints,
AIRTEK for Volvo Vehicles Single to Dual Height Control Valve Conversion Kit
 Single to Dual Height Control Valve Conversion Kit SUBJECT: 60961-101 and 60961-102 LIT NO: 59310-026 DATE: January 2006 REVISION: A INTRODUCTION Prior to March 2005, some Volvo vehicle configurations
WATTS LINK REAR SUSPENSION KIT
 WATTS LINK REAR SUSPENSION KIT INSTALLATION MANUAL: Saleen S-Series / H-Series / Mustang GT 05-09 Model Years P/N: -8002-C6859B Saleen Performance Inc. -800-888-8945 www.saleen.com STOP IF YOU ARE NOT
INSTALLATION INSTRUCTIONS
 INSTALLATION INSTRUCTIONS ----1075 North Ave. Sanger, CA 93657-3539 toll free: 800-445-3767 web: www.belltechcorp.com---- 5001 AIRJACK AIR SPRING SUSPENSION SYSTEM C 1500 AND C-2500 Congratulations! You
18. REAR WHEEL/SUSPENSION
 18. REAR WHEEL/SUSPENSION SYSTEM COMPONENTS 182 REAR AXLE/BEARING HOLDER 187 SERVICE INFORMATION 183 REAR SHOCK ABSORBER 1816 TROUBLESHOOTING 186 SHOCK LINKAGE 1818 REAR WHEEL 187 SWINGARM 1820 181 SYSTEM
LUBRICATION AND MAINTENANCE
 WJ LUBRICATION AND MAINTENANCE 0-1 LUBRICATION AND MAINTENANCE TABLE OF CONTENTS LUBRICANTS... 1 MAINTENANCE SCHEDULES... 4 JUMP STARTING, HOISTING AND TOWING... 9 LUBRICANTS TABLE OF CONTENTS SERVICE
STREETSCRAPER INSTALL DO NOT CUT FRAME BEFORE INSTALLATION
 s Chevy 1500 Chevy S10 Dodge Dakota Ford Ranger Mitsi Nissan Isuzu Mazda STREETSCRAPER INSTALL DO NOT CUT FRAME BEFORE INSTALLATION 100% BOLT-ON add $85 & we will assemble Support support vehicle with
BALL JOINT SPACER INSTRUCTIONS PICK UP, RUNNER, T100
 BALL JOINT SPACER INSTRUCTIONS 86-95 PICK UP, 86-89 4RUNNER, T100 Support@toyteclifts.com Read all of the installation instructions prior to installation. ToyTec Lifts L.L.C. recommends that this be installed
'99-03 CHEVROLET/GMC IFS 4WD 6" SUSPENSION SYSTEM P/N INSTALLATION INSTRUCTIONS
 1/16/04 '99-03 CHEVROLET/GMC IFS 4WD 6" SUSPENSION SYSTEM P/N. 10-41099 INSTALLATION INSTRUCTIONS NOTE: Each Lift Kit and options to Lift Kits are packaged separately. Therefore, installation procedures
INSTALLATION INSTRUCTIONS FOR: RE7500 SERIES TJ EXTREME DUTY LONG ARM TRI-LINK SYSTEM INCLUDING TJ UNLIMITED
 RUBICON EXPRESS 3290 MONIER CIR., RANCHO CORDOVA, CA. 95742 916-473-4600 INSTALLATION INSTRUCTIONS FOR: RE7500 SERIES TJ EXTREME DUTY LONG ARM TRI-LINK SYSTEM INCLUDING TJ UNLIMITED Congratulations on
THE GLIDER 5th Wheel Attachment
 April 2007 APPLICATION: INSTALLATION INSTRUCTIONS MODEL NO. 70460 70046 THE GLIDER 5th Wheel Attachment For use on short bed pickup applications US Patent No. 6247720 COMPLETE PARTS LIST Part Description
LUBRICATION AND MAINTENANCE
 DN LUBRICATION AND MAINTENANCE 0-1 LUBRICATION AND MAINTENANCE TABLE OF CONTENTS LUBRICANTS... 1 MAINTENANCE SCHEDULES... 3 JUMP STARTING, TOWING AND HOISTING... 8 LUBRICANTS TABLE OF CONTENTS SERVICE
1. Remove the parcel tray. For additional information, refer to Section
 SECTION 204-02: Rear Suspension 2001 Taurus/Sable Workshop Manual REMOVAL AND INSTALLATION Procedure revision date: 06/19/2003 Strut and Spring Assembly Four Door Removal CAUTION: Suspension fasteners
Exhaust System and Catalytic Converter Dis-Assembly
 Installation Guidelines For Audi-VW ZF 5-Speed Automatic Transmission Output Flange Seal! CAUTION! Performing work on your automobile without having proper knowledge, mechanical ability or the proper tools
TAHOE/YUKON SILVERADO/SIERRA 1500 SERIES 2 FRONT LEVELING KIT INSTALLATION INSTRUCTIONS KIT# CL220PA
 This kit should only be installed on a vehicle that is in good working condition. Before you install the kit, thoroughly inspect the vehicle for corrosion or deformation of the sheet metal. If the vehicle
DODGE SuperRail Mounting Kit #0848
 DODGE SuperRail Mounting Kit #0848 #1200 Super 5 th (16K) #0800 Super 5 th (20.5K) Gross Trailer Weight (Maximum) Vertical Load Weight (Max. Pin Weight) 16,000 lbs. 4,000 lbs. Gross Trailer Weight (Maximum)
WARNING. 4. The wearing of safety glasses, footwear and personal safety clothing is compulsory.
 SECTION 18-500.00 18-500.00/ 1 WARNING 1. All Federal, State, Provincial, Municipal and company, (including Transit Authority), laws and regulations regarding vehicles must be complied with. Also, any
[Trailer is normally stored at Athens Fire Station # 2 on Congress Parkway]
![[Trailer is normally stored at Athens Fire Station # 2 on Congress Parkway]](/thumbs/77/76478902.jpg "[Trailer is normally stored at Athens Fire Station # 2 on Congress Parkway]") SOP 1.0 Trailer Pick-Up & Transport [Trailer is normally stored at Athens Fire Station # 2 on Congress Parkway] UNLOCK side door of trailer DISCONNECT power cable to trailer and place it inside trailer
SOP 1.0 Trailer Pick-Up & Transport [Trailer is normally stored at Athens Fire Station # 2 on Congress Parkway] UNLOCK side door of trailer DISCONNECT power cable to trailer and place it inside trailer
FRONT SUSPENSION GROUP CONTENTS GENERAL INFORMATION SPECIFICATIONS STRUT ASSEMBLY FRONT SUSPENSION DIAGNOSIS.
 33-1 GROUP 33 FRONT SUSPENSION CONTENTS GENERAL INFORMATION 33-2 SPECIFICATIONS 33-3 FASTENER TIGHTENING SPECIFICATIONS 33-3 GENERAL SPECIFICATIONS 33-3 SERVICE SPECIFICATIONS 33-3 LUBRICANT 33-3 DIAGNOSIS
3/19/2017 9:49 AM. Transmission Replacement. Tools Required ^ J B Cooler Quick Connect Tool ^ J Transmission Jack Adapter
 1 of 16 Transmission Replacement Tools Required ^ J 41623-B Cooler Quick Connect Tool ^ J 41160 Transmission Jack Adapter Removal Procedure 1. Remove the upper filler panel. 2. Remove the upper and lower
DODGE / RAM 1500 *** DO NOT EXCEED VEHICLE MANUFACTURER'S RECOMENDED TOWING CAPACITY ***
 6444 DODGE / RAM 500 6/8/207 OF 5 *** DO NOT EXCEED MANUFACTURER'S RECOMENDED TOWING CAPACITY *** ITEM QTY PART NUMBER 0 /2-3 x 2" 2 4 /2-3 x 3/4, GR8 3 4 CM-SP2 4 2 CM-SP6 5 4 HFN 23, GR8 6 2 CM-SP4 7
Recovery instructions
 Recovery instructions Contents Contents General... 2 Chassis lifting points General chassis lifting points... 3 Recovery/towing Preparatory work... 6 Recovery Recovery from a ditch... 8 Lifting an air
B8 5112/5162 LEVELING KIT (FRONT) RAM x4 GAS
 RAM x4 GAS") B8 5112/5162 LEVELING KIT (FRONT) 2014+ RAM 2500 4x4 GAS IMPORTANT! READ THIS FIRST! Installation of shock absorbers requires special tools and expert knowledge. Accordingly, installation of all BILSTEIN
B8 5112/5162 LEVELING KIT (FRONT) 2014+ RAM 2500 4x4 GAS IMPORTANT! READ THIS FIRST! Installation of shock absorbers requires special tools and expert knowledge. Accordingly, installation of all BILSTEIN
Detroit Speed, Inc. Rear QUADRAlink Conversion Kit Camaro/Firebird P/N:
 Detroit Speed, Inc. Rear QUADRAlink Conversion Kit 1982-92 Camaro/Firebird P/N: 041721 The Detroit Speed Inc. QUADRAlink Conversion Kit, eliminates the factory torque arm configuration. It features no-compromise
Loosen the lug nuts. 1. Remove the center cap. 2. With the weight of the vehicle on the wheels, loosen the lug nuts.
 Section 204-01B: Front Suspension 4x4 REMOVAL AND INSTALLATION 1997 F-150, F-250 Workshop Manual Wheel Hub Special Service Tool(s) Bearing Cup Replacer T80T-4000-P Seal Replacer T96T-1175-A Threaded Drawbar
RAM LIFT KIT PART# STOP! READ THIS FIRST!
 NOTE: 2014-2016 RAM 2500 4 LIFT KIT PART# 54340 STOP! READ THIS FIRST! **READ THESE ENTIRE INSTRUCTIONS BEFORE STARTING ANYTHING** or chroming, which can damage the strength and structure of the metal,
INSTALLATION INSTRUCTIONS
 2588 INSTALLATION INSTRUCTIONS 3-16 ! IMPORTANT PLEASE DON T HURT YOURSELF, YOUR KIT OR YOUR VEHICLE. TAKE A MINUTE TO READ THIS IMPORTANT INFORMATION. This kit is to be used on a pickup truck only, and
TCI Trans-Scat
 Page 1 of 5 Return to Instruction Sheet index TCI 350000 Trans-Scat Installation Instructions For TURBO HYDRAMATIC 350 This kit will allow you to reprogram your transmission to meet your driving needs
INSTALLATION INSTRUCTIONS
 214205 INSTALLATION INSTRUCTIONS 8-27-2015 REV.A PART # DESCRIPTION 7929 Lincoln Ave. Riverside, CA 92504 Phone: 951.689.ICON Fax: 951.689.1016 214205 14-UP RAM 2500 4.5 BOX KIT COMPONENTS INCLUDED (1)
INSTALLATION INSTRUCTIONS
 AUTOMOTIVE PRODUCTS, INSTALLATION INSTRUCTIONS Thrasher Board APPLICATION: 007-017 Chevy Silverado / GM Sierra / 1500-500-3500 Extended / Double / Crew Cab PART NUMBER: 8-8105, 8-81035 ITEM QUANTITY DESCRIPTION
INVENTORY OF SYSTEM COMPONENTS. Tower Max. Pull Height RACK PLATFORM OPERATION. Clearance Requirements 2 Rack Ramps 2 Loading the Vehicle 2
 OVERVIEW Grabber s PaceSetter frame rack offers the same maximum performance as Grabber s larger rack systems. Great for multi-bay shops. Fixed height of 14 from the floor rack platform 10 ton rack mounted
ASSEMBLY & OPERATION INSTRUCTION MANUAL
 Sliding Bridge Jack 3,500 lbs. Capacity ASSEMBLY & OPERATION INSTRUCTION MANUAL TABLE OF CONTENTS Specifications... 2 Description & Features... 3 Installation Instructions... 4 Safety Instructions... 4
USER S GUIDE KENDON STAND-UP MOTO LIFT. Stand-Up Lift Parts & Accessories
 Stand-Up Lift Parts & Accessories USER S GUIDE Frame Jack BLFJ107 Oil Drain Pan OD107 18" Service Tool Tray BLST18 36" Service Tool Tray BLST36 Visit us at www.kendonusa.com for product updates, new products,
LIFT Standard A-Arm Lift Kit Club Car Precedent Installation Instructions
 LIFT-563 6 Standard A-Arm Lift Kit Club Car Precedent Installation Instructions Contents of LIFT-563 Club Car Precedent Lift Kit: a (1 ea.) Front Suspension b (1 ea.) Driver Side Upper A-Arm c (1 ea.)
XJ CHEROKEE LIFT KIT
 92162300 84-01 4.5 XJ CHEROKEE LIFT KIT Thank you for choosing Rough Country for your suspension needs. Rough Country recommends a certified technician installs this system. In addition to these instructions,
Read and understand all instructions and warnings prior to installation of system and operation of vehicle.
 491 W. Garfield Ave., Coldwater, MI 49036 Phone: 517-279-2135 Web/live chat: www.bds-suspension.com E-mail: tech@bds-suspension.com Product: GM Leaf Spring Read and understand all instructions and warnings
Dodge Ram 2500/3500 Tow Kit Installation Instructions
 2003-2010 Dodge Ram 2500/3500 Tow Kit Installation Instructions Congratulations! You have just purchased the best engineered, highest quality air suspension kit available on the market for your 2003-2010
SLR WHEEL KIT P/N APPLICATION BEFORE YOU BEGIN DISCLAIMER ACCESSORY WEIGHT KIT CONTENTS. Instr Rev Page 1 of 6.
 SLR WHEEL KIT P/N 2882340 APPLICATION Slingshot BEFORE YOU BEGIN Read these instructions and check to be sure all parts and tools are accounted for. Please retain these installation instructions for future
INSTRUCTION MANUAL 16K - Fifth Wheel Hitch
 You can take it with you. INSTRUCTION MANUAL 16K - Fifth Wheel Hitch Product No. 30047 DEALER/INSTALLER: END USER: (1) Provide this Manual to end user. (2) Physically demonstrate hitching and unhitching
CHEVY / GMC BLAZER / YUKON SUBURBAN BODY LIFT INSTALLATION INSTRUCTIONS KIT # KIT #10023
 3651 N Highway 89 Chino Valley, AZ 86323 (928) 636-7080 CHEVY / GMC BLAZER / YUKON SUBURBAN BODY LIFT INSTALLATION INSTRUCTIONS 1992-1994 2 KIT #10022 1992-1994 3 KIT #10023 Before you install this kit,
INSTALLATION, OPERATION & MAINTENANCE INSTRUCTIONS
 June 2004 INSTALLATION, OPERATION & MAINTENANCE INSTRUCTIONS Please be sure that this document is given to the end user of this product. It contains many important items relating to the proper usage of
ENGINE COMPONENTS AND TESTING (CONT'D) Checking Nozzle Injection Pressure. Fuel Injector Removal And Installation (Cont'd)
 Checking Nozzle Injection Pressure. Fuel Injector Removal And Installation (Cont'd)") Fuel Injector Removal And Installation (Cont'd) Figure 70-70-9 Checking Nozzle Injection Pressure OEM064 - Injector Nozzle Tester Figure 70-70- P-5797 Remove the injector nozzle holder bolt (Item ) [Figure
Fuel Injector Removal And Installation (Cont'd) Figure 70-70-9 Checking Nozzle Injection Pressure OEM064 - Injector Nozzle Tester Figure 70-70- P-5797 Remove the injector nozzle holder bolt (Item ) [Figure
Toyota Land Cruiser / LX470 OME Suspension Installation Instructions (Preliminary)
") 700 Pine Ridge Road Golden CO 80403 Tel (303) 278 8287 1(888) 4X4 SLEE Fax (303) 278 7182 1998-07 Toyota Land Cruiser / LX470 OME Suspension Installation Instructions (Preliminary) Qty Parts Included Tools/
700 Pine Ridge Road Golden CO 80403 Tel (303) 278 8287 1(888) 4X4 SLEE Fax (303) 278 7182 1998-07 Toyota Land Cruiser / LX470 OME Suspension Installation Instructions (Preliminary) Qty Parts Included Tools/
INSTRUCTION MANUAL 16K - Fifth Wheel Hitch
 You can take it with you. INSTRUCTION MANUAL 16K - Fifth Wheel Hitch Product No. 30047 DEALER/INSTALLER: END USER: (1) Provide this Manual to end user. (2) Physically demonstrate hitching and unhitching