OWNER S MANUAL. Blizzard 150. For more information on ATV Safety contact the Ricky Power Sports, LLC Toll Free at:
|
|
|
- Job Phelps
- 5 years ago
- Views:
Transcription

1 OWNER S MANUAL Blizzard 150 For more information on ATV Safety contact the Ricky Power Sports, LLC Toll Free at: Always wear a helmet: It could save your life! Do not remove the owner s manual from this vehicle. Please obtain, review and follow provincial/municipal government acts and regulations pertaining to owning and operating an off-road vehicle. II

2 Failure to follow the age recommendations for this ATV. Failure to supervise children under 16 on ATV models intended for their use. Use by children of ATVs that are not recommended for their age can lead to severe injury or death of the child. Even though a child may be within the age group for which an ATV is recommended, he or she may not have the skills, abilities, or judgement needed to operate the ATV safely and may be involved in a serious accident. Category Y (Youth Model) ATV, An ATV of appropriate size intended for recreational use under adult supervision by an operator under age 16. Youth model ATVs can further be categorized as follows: Category Y-6+ ATV. A Category Y-6+ ATV is a youth model ATV that is intended for use by children age 6 or older Category Y-10+ ATV. A Category Y-10+ ATV is a youth model ATV that is intended for use by children age 10 or older. Category Y-12+ ATV. A Category Y-12+ ATV is a youth model ATV that is intended for use by children age 12 or older. Category T (Transitional Model) ATV. A Category T ATV is an ATV of appropriate size that is intended for recreational use by an operator age 14 or older under adult supervision, or by an operator age 16 or older. III
3 Congratulations on your purchase of the Ricky Power Sports, LLC Blizzard 150cc ATV. Your ATV is warranted to be free of manufacturing defects in material and workmanship for a period of 90 days from the date of purchase. During the warranty period Ricky Power Sports, LLC will at its option, repair, provide replacement parts or replace your Blizzard 150cc ATV at no charge. This warranty does not cover normal wear items or damage caused by neglect or misuse of the product. Engine Warranty 90 days Frame Warranty 90 days Warranty is void if: Frame is bent or broken due to abuse Wheels are bent or broken Fender bent or broken due to abuse Any sign of impact, accident, jumping, spin-outs or roll over. Ricky Power Sports, LLC is not liable for any damage claim or liability claim person or otherwise resulting from the operation of this product in any way. Should you experience a problem with your vehicle, please call the Ricky Power Sports, LLC customer service line toll free at You will be instructed how to proceed. A COPY OF THE SALES RECEIPT IS REQUIRED. Should you experience a problem with your vehicle, please call Ricky Power Sports, LLC service line toll free at You will be instructed how to proceed. A COPY OF THE SALES RECEIPT IS REQUIRED. IV
4 Operation of this ATV by children of under 16 age can be hazardous. Use by children of under 16 can lead to their severe injury or death. Children under age 16 may not have the size, strength, skill of judgment needed to operate this ATV safely. Do not allow any child under age 16 to ride this ATV. Operating this ATV after consuming alcohol or drugs can be hazardous. Alcohol or drugs could seriously affect your judgment and cause you to react more slowly. The can also affect your balance and perception. Operating this ATV after consuming alcohol or drugs can result in an accident. NEVER consume alcohol or drugs before ride this ATV. V

5 VI
6 Blizzard 150 Headlight Handle bar Taillight Front wheel Footrest Rear wheel Front shock Rear shock Seat Air filter Throttle lever Exhaust muffler Rear brake pedal Reverse gear lever VII


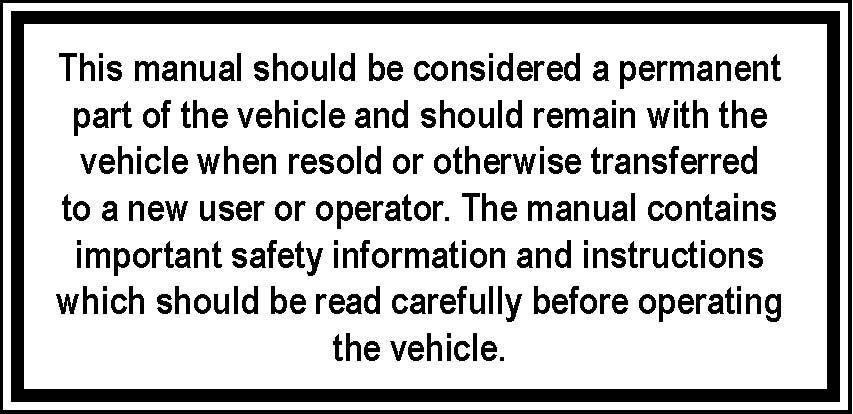
7 HOW TO READ THIS MANUAL Please read this manual and follow all instructions carefully. To emphasize the special information, the symbol and the words WARNING or CAUTION have some special meanings. Pay great attention to the messages. NOTE: Indicating special information which is to make maintenance easier or instructions clearer. WARNING and CAUTION are arranged like this: This user s manual contains important safety and maintenance information. Read it carefully before riding. Failing to follow the warnings contained in this manual could result in INJURY or DEATH. It is important that this manual remain with the vehicle when you transfer it to another user or owner. All information, illustrations, photographs and specifications contained in this manual are based on the latest product information available at the time of publication. Due to improvements or other changes, there will be some discrepancies in this manual. We reserve the right to make product changes at any time, without notice and without incurring any obligation to make the same or similar changes to the vehicle previously built or sold. VIII
8 Table of Contents NOTICE TO USERS...3 FUEL AND OIL...6 LOCATION OF LABELS AND SERIAL NUMBERS...7 HANDLEBAR & CONTROL LAYOUT...10 LEFT HANDLEBAR RIGHT HANDLEBAR...11 FUEL VALVE...12 FUEL TANK CAP...13 SEAT LOCK...14 WHAT YOU SHOULD KNOW BEFORE RIDING...15 INSPECTION BEFORE RIDING...16 REAK-IN...17 WARNINGS...19 SAFETY GEAR...20 BASIC MOVEMENT AND SHIFTING...23 STARTING THE ENGINE...23 BRAKING...25 TURNING...26 OPERATION OF HILLS...28 CLIMBING A HILL...28 DESCENDING A HILL...29 DRIVING OVER OBSTACLES...31 SKIDDING OR SLIDING...33 RIDING THROUGH WATER...34 RIDING IN COLD WEATHER...35 DRESSING FOR COLD WEATHER RIDING...36 ACCESSORY USE AND VEHICLE LOADING...38 INSPECTION AND MAINTENANCE...39 TOOLS...41 SPARK PLUG...41 VALVE INSPECTION...43 BATTERY INSTALLATION...44 ADJUSTMENT OF THROTTLE LEVER...48 IDLE SPEED ADJUSTMENT...49 FUEL HOSE...50 ENGINE OIL CHECK AND CHANGE...51 AIR CLEANER...52 DRIVE CHAIN...56 DRIVE CHAIN CLEANING AND OILING
9 TIRES...59 BRAKES...63 FRONT BRAKE ADJUSTMENT...63 REAR DISC BRAKE...64 GENERAL LUBRICATION...65 TROUBLESHOOTING...66 TRANSPORTING...68 CLEANING PROCEDURE...69 WASHING YOUR ATV...69 STORAGE PROCEDURE...70 SPECIFICATIONS...72 CIRCUIT DIAGRAM...73 EMISSION CONTROL SYSTEM WARRANTY
10 NOTICE TO USERS We believe in conservation and protection of the earth s natural resources. We encourage every vehicle owner and operator to do the same by obeying posted signs and riding only in areas designated and approved for off-road recreational use. NOTICE TO PARENTS THIS ATV IS BUILT FOR USE BY CHILDREN AGE 16 AND OLDER, BUT THE USERS MANUAL IS WRITTEN FOR ADULTS WHO WILL BE SUPERVISING THE CHILDREN, WE STRONGLY RECOMMEND, THEREFORE, THAT YOU REVIEW THIS ENTIRE MANUAL WITH YOUR CHILD AND CAREFULLY EXPLAIN THE INSTRUCTIONS, REQUIREMENTS, AND WARNINGS IT CONTAINS SO THAT YOUR CHILD CAN UNDERSTAND THEM. CHILDREN DIFFER IN SKILLS, PHYSICAL ABILITIES, AND JUDGEMENT. SOME CHILDREN MAY NOT BE ABLE TO OPERATE AN ATV SAFELY. PARENTS SHOULD SUPERVISE THEIR CHILD S USE OF THE ATV AT ALL TIMES. PARENTS SHOULD PERMIT CONTINUED USE ONLY IF THEY DETERMINE THAT THE CHILD HAS THE ABILITY TO OPERATE THE ATV SAFELY. IT IS VERY IMPORTANT THAT EVERY CHILD WHO RIDES THE ATV SHOULD COMPLETE A TRAINING COURSE. THIS ATV IS NOT A TOY AND COULD BE HAZARDOUS TO OPERATE. An ATV handles differently from other vehicles including motorcycles and cars. A collision or rollover can occur quickly, even during routine maneuvers such as turning and driving on hills or over obstacles, if you fail to take proper precautions. SEVERE INJURY OR DEATH can result if you do not follow these instructions: Read this manual and all labels carefully and follow the operating procedures described. Never operate an ATV without proper instruction. Take a training course. Beginner should receive training from a certified instructor. Contact an authorized ATV dealer about the training courses nearest you. Always follow these age recommendations: Category Y (Youth Model) ATV. An ATV of appropriate size intended for recreational use under adult supervision by an operator under age 16. Youth model ATVs can further be categorized as follows: Category Y-6+ ATV. A Category Y-6+ ATV is a youth model ATV that is intended for use by children age 6 or older Category Y-10+ ATV. A Category Y-10+ ATV is a youth model ATV that is intended for use by children age 10 or older. Category Y-12+ ATV. 3
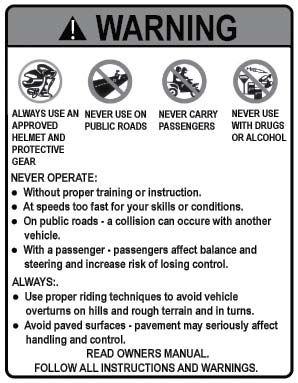
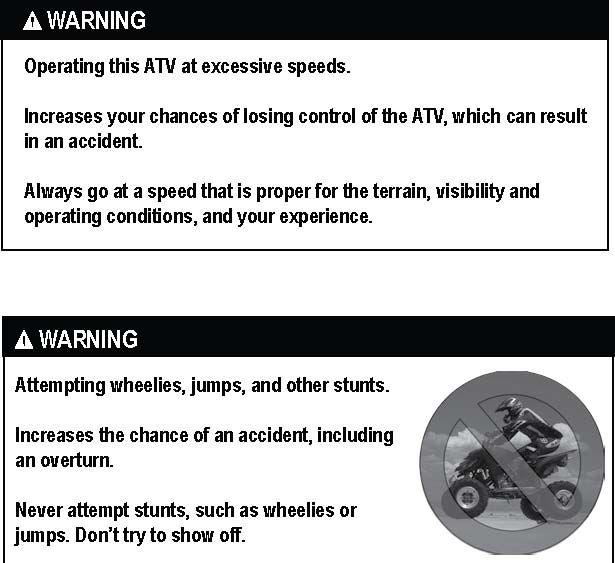
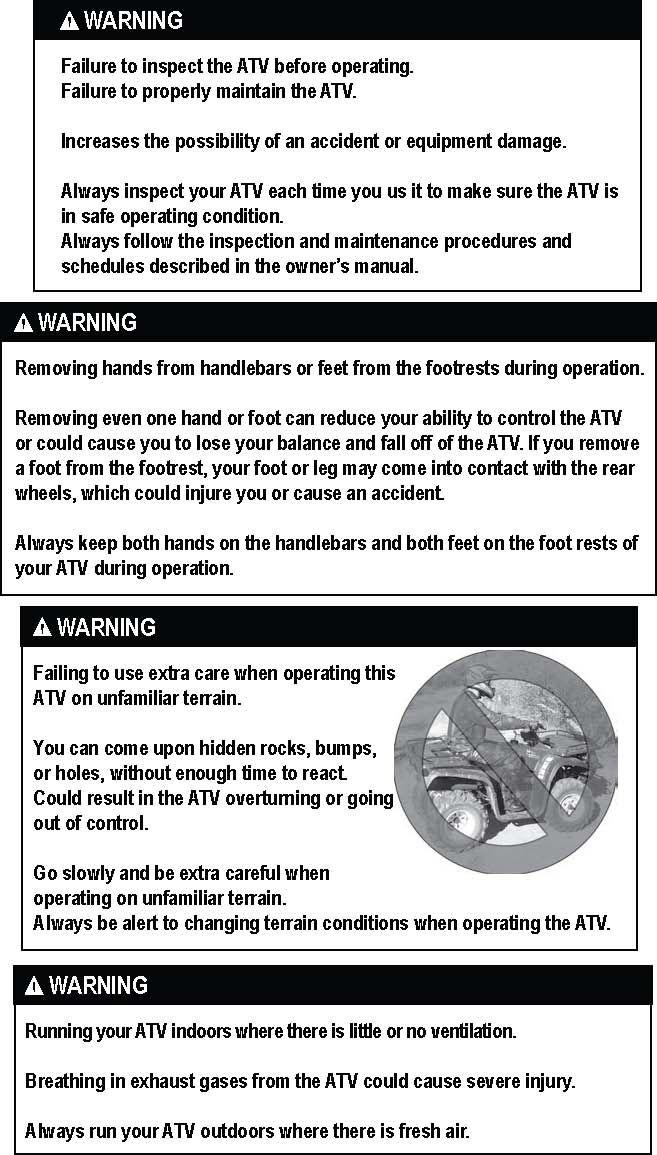
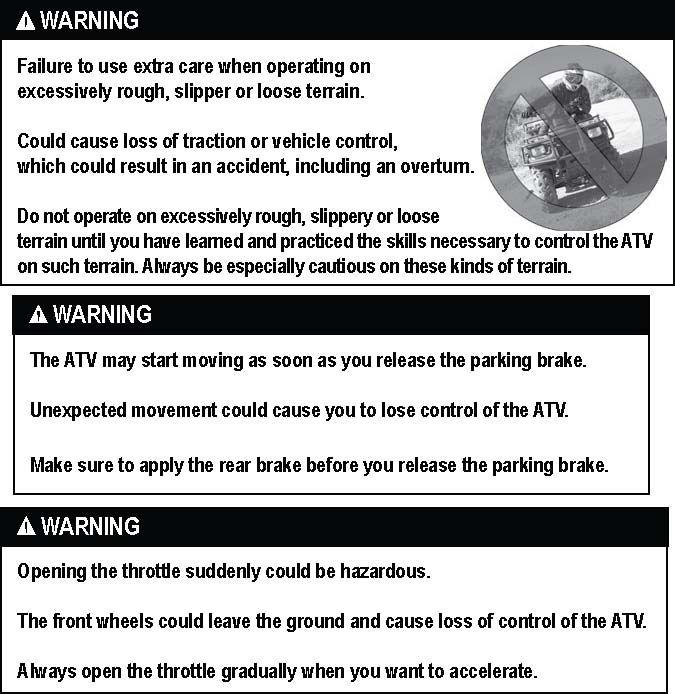
11 A Category Y-12+ ATV is a youth model ATV that is intended for use by children age 12 or older. Category T (Transitional Model) ATV. A Category T ATV is an ATV of appropriate size that is intended for recreational use by an operator age 14 or older under adult supervision, or by an operator age 16 or older. Never allow a child under age 16 to operate an ATV without adult supervision, and never allow continued use of an ATV by a child if he or she does not have the abilities to operate it safely. Never carry a passenger on an ATV. Never operate an ATV on any paved surfaces, including sidewalks, driveways, parking lots and streets. Never operate an ATV on any public street, road or highway, even dirt or gravel one. Never operate an ATV without wearing an approved motorcycle helmet that fits properly. You should also wear eye protection (goggles or face shield), gloves, boots, long-sleeved shirt or jacket, and long pants. Never consume alcohol or drugs before or while operating this ATV. Never operate this ATV at excessive speeds. Always go at a speed that improper for the terrain, visibility and operating conditions, and your experience. Never attempt wheelies, jumps, or other stunts. Always inspect your ATV each time you use it to make sure it is in safe operating condition. Always follow the inspection and maintenance procedures and schedules described in this manual. Always keep both hands on the handlebars and both feet on the footrests of the ATV during operation. Always go slowly and be extra careful when operating on unfamiliar terrain. Always be alert to changing terrain conditions when operating the ATV. Never operate on excessively rough, slippery or loose terrain until you have learned and practiced the skills necessary to control the ATV on such terrain. Always be especially cautious on these kinds of terrain. Always follow proper procedures for turning as described in this manual. Practice turning at low speed before attempt to turn at faster speed. Do not turn at excessive speeds. Never operate that ATV on hills too steep for the ATV or for your abilities. Practice on smaller hills before attempting larger hills. 4
12 Always follow proper procedures for climbing hills as described in this manual. Check the terrain carefully before you start up any hill. Never climb hills with excessively slipper or loose surfaces. Shift you weight forward. Never open the throttle suddenly or make sudden gear changes. Never go over the top of any hill at high speed. Always follow proper procedures for going down hills and for braking on hills as described in this manual. Check the terrain carefully before you start down any hill. Shift your weight backward. Never go down a hill at high speed. Avoid going down a hill at an angle that would cause the vehicle to lean sharply to one side. Go straight down the hill where possible. Always follow proper procedures for crossing the side of a hill as described in this manual. Avoid hills with excessively slippery or loose surfaces. Shift your weight to the uphill side of the ATV. Never attempt to turn the ATV around on any hill until you have mastered the turning technique described in this manual on level ground. Avoid crossing the side of a steep hill if possible. Always use proper procedures if you stall or roll backwards when climbing a hill. To avoid stalling, use proper gear and maintain a steady speed when climbing a hill. If you stall or roll backwards, follow the special procedure for braking described in this manual. Dismount on the uphill side or to a side if pointed straight uphill. Turn the ATV around and remount, following the procedure described in this manual. Always check for obstacles before operating in a new area. Never attempt to operate over large obstacles, such as large rocks or fallen trees. Always follow proper procedures when operating over obstacles as described in this manual. Always be careful when skidding or sliding. Learn to safely control skidding or sliding by practicing at low speeds and on level, smooth terrain. On extremely slippery surfaces, such as ice, go slowly and be very cautious in order to reduce the chance of skidding or sliding out of control. Never operate an ATV in fast flowing water or in water deeper than that specified in this manual. Remember that wet brakes may have reduced stopping ability. Test your brakes after leaving water. If necessary, apply brakes several times to let friction dry out the linings. Always use the size and type tires specified in this manual. Always maintain proper tire pressure as described in this manual. Never modify an ATV through improper installation or use of accessories. 5
. Do not tow a trailer.")
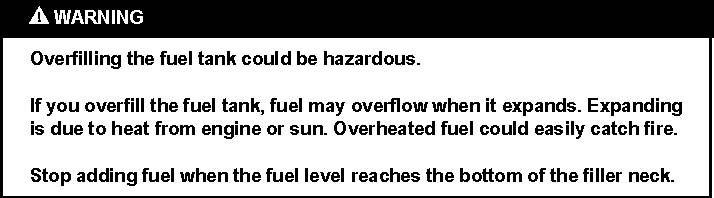
13 Never exceed the stated load capacity for an ATV. Cargo should be properly distributed and securely attached. Reduce speed and follow instructions in this manual for carrying cargo. Allow greater distance for braking. The combined weight of the rider and any accessories or cargo must never exceed the vehicle s load capacity of 220 lbs (100 kg). Do not tow a trailer. This vehicle is not designed for such use. FOR MORE INFORMATION ABOUT ATV SAFETY, call the Consumer Product Safety Commission at , or call Ricky Power Sports LLC Hotline at FUEL AND OIL FUEL The proper fuel is very important for the engine. Ensure that there is no dust or dirt, or water which has mixed in the fuel. Please use the regular unleaded gasoline with an octane of 90 or higher. Your 150cc ATV has a four-stroke engine. Please use oil as described in the chart below. By using the prescribe oil, you will realize the best lubrication for the engine. Use the chart to select a viscosity rating based on the temperature range in your area. CHECKING THE OIL Check the engine oil level prior to each use. 1. Start the engine and let it idle for a few minutes. 2. Stop the engine and put the vehicle on level ground. 6


14 3. After a few minutes remove the oil fill cap / dipstick, wipe it clean, and reinsert the dipstick without screwing it in. 4. Remove the dipstick and examine the oil level on the on the dipstick. The oil level should be between the upper and lower level marks on the dipstick. 5. If the oil falls below the lower level, add oil through the filler hole. It is very important to insure there is sufficient oil in the engine. LOCATION OF LABELS AND SERIAL NUMBERS SERIAL NUMBERS: You need to know the frame and engine serial numbers to get title documents for your ATV. You also need these numbers to help your authorized service center or RPS order parts. FRAME SERIAL # ENGINE SERIAL # LABELS: Read and follow all of the warning labels on your ATV. Make sure you understand all the labels. Keep the labels on the ATV. Do not remove them for any reason. If a label comes off or becomes difficult to read, you should get a replacement by contacting Ricky Power Sports, LLC. 7


15 8
16 9

17 HANDLEBAR & CONTROL LAYOUT LEFT HANDLE BAR a b c d e Engine Stop Switch: With this switch in the RUN position, the engine can be started. The engine will not start with this switch in the OFF position. Start Button: When the ignition key is in and turned to the ON position, the Engine Stop Switch is in the RUN position, this Button will start the engine. Rear Hydraulic Brake Apply the rear brake by squeezing the rear brake lever towards the grip. Headlight Switch This switch controls the operation of the headlights. Available positions are HI and LO. Rear Parking Brake Activate the rear parking brake by squeezing Rear brake lever c and then moving the lock plate e into position to lock Rear brake lever c into place. 10
 out of the crate.")
18 RIGHT HANDLEBAR a b c Throttle Lever This lever is controlled by the right hand thumb. The throttle Lever controls the speed of the engine, pushing the lever will increase the speed. Throttle Adjusting Screw Notice: This ATV was shipped from the factory with the throttle limit adjustment screw set to not allow the ATV to travel over 20mph (32km/h) out of the crate. Any adjustment to the screw should be done by a responsible adult, or a qualified service tech, working under the direction of the adult owner. The adjustment screw should never be adjusted to increase the speed of the ATV until the capability of the rider has been determined. Use the throttle adjusting screw to restrict maximum speed of the ATV. Adjust this limiter according to the rider s skill and experience. Adjusting procedures. 1. Loosen nut. 2. Turn the throttle adjusting screw clockwise to restrict maximum speed of the ATV. 3. Turn the throttle adjusting screw counterclockwise to increase the maximum speed of the ATV. 4. When finished, tighten the lock nut. Front Brake Lever Squeeze the front brake lever to engage the brakes on the front tires. 11


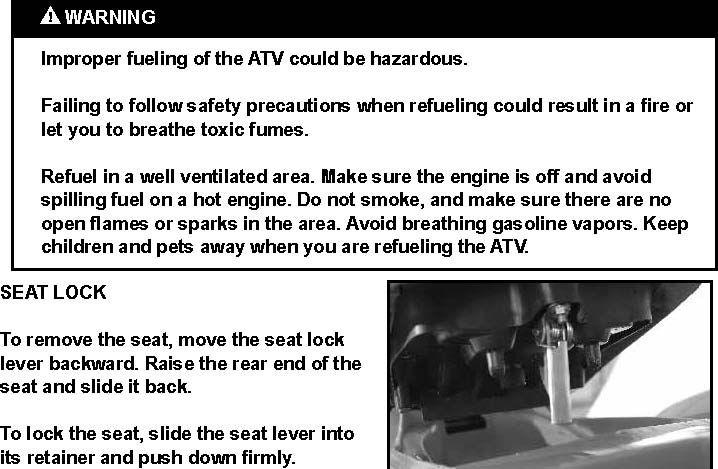
19 FUEL VALVE This valve is located beneath the fuel tank, and has three positions. ON position OFF position OFF position ON position The fuel valve set to OFF ; fuel The fuel valve set to ON ; fuel cannot flow. Use this position when can flow to the engine. The normal the engine is not running. Operating position To open the fuel tank, remove the vent tube from the cap and rotate it counterclockwise. To replace the cap, turn it clockwise and tighten it securely. Be sure to replace the vent tube as shown. 12

20 FUEL TANK CAP Fuel tank cap 13
21 14
22 WHAT YOU SHOULD KNOW BEFORE RIDING Before riding, you should read all the following information carefully. If you are properly prepared, you will have a more enjoyable ride. Before riding, you should find a good place to practice the skills. Find a flat, open area with enough space to practice the new skills. Operating this ATV without proper instruction. Beginners and inexperienced operators should complete a certified training Course offered by SVIA( You should regularly practice the skills learned in the course and the operating techniques described in this user s manual and the DVD attached. For more information about the training course, call ASI at The risk of an accident is greatly increased if the operator does not know how to operate the ATV properly in different situations and on different types of terrain. For more information about the training course, contact an authorized ATV dealer or call the Consumer Product Safety Commission at For More information on ATV Safety please contact Ricky Power sports, LLC ATV Hotline at: to make sure that it is legal to ride in the area you selected. Review the local laws and make sure you are not trespassing. Call the police if you don t know where you can ride. Protect your riding areas. When you are riding, remember to keep the terrain in good condition. Don t destroy plants, trees or other vegetation. Don t litter and don t bother wildlife. With your help, your riding area can remain open for use in the future. After you have found a good place to practice, review the control system on your ATV before riding. Learn to find these controls without looking for them, because you will not have time to look for them when you are riding. 15
23 INSPECTION BEFORE RIDING ITEM TO CHECK Steering Brakes Tires Fuel Engine stop switch Engine oil Throttle Drive chain General condition CONTENT Smoothness; No restriction of movement; No play or looseness Proper brake lever free play; enough brake force; Parking brake effectiveness Proper air pressure; Enough tread depth; No cracks, rips, or other damages Enough fuel for the intended trip; Fuel hose connected securely; No damage to fuel tank or cap; Fuel tank cap closed securely Proper operation Proper level Check the oil by inspecting the Engine Oil indicator located at the bottom of the engine. The engine oil should completely fill the view window as indicated in the picture. Add oil if the window is not completely filled. Proper free play of throttle lever; Smooth response; Quick return to idle position Proper tension; adequate lubrication; No excessive wear or damage Bolts and nuts are tight; No rattle from any parts of the engine when running; No visible evidence of damage Failing to inspect the ATV before operating could be hazardous. Failing to perform proper maintenance could also be hazardous. Failing to inspect and maintain your ATV could increase the chances of an accident or equipment damage Always inspect your ATV each time before riding, and make sure it is in a safe operating condition. Refer to the INSPECTION AND MAINTENANCE section in this manual. 16
24 Checking maintenance items when the engine is running could be hazardous. You could be severely injured if your hands or clothing get caught in moving ATV parts. Shut the engine off when performing maintenance checks, except checking the engine stop switch and throttle. BREAK-IN The first month is the most important in the life of your vehicle. Proper operation during this break-in period will be helpful for assuring maximum life and performance of your new vehicle. The following guidelines explain proper break-in procedures. Maximum Throttle Opening Recommendation During the first 10 hours of operation, you should always use less than ½throttle opening. Vary the Engine Rotating Speed Vary the engine rotating speed during the break-in period. This allows the parts to load and then unload (allowing the parts to cool). Although it is essential to place some stress on the engine components during break-in, you must be careful not to load the engine too much. Avoid Constant Low Rotating Speed Operating the engine at constant low rotating speed (light load) can cause parts to glaze and not seal properly. Allow the engine to accelerate freely without exceeding the maximum throttle limit. Allow the Engine Oil to Circulate Before Riding Allow a few minutes of idling time after warm or cold engine starting. This allows the lubricating oil to reach all critical engine components. 17
25 Observe your initial and most critical service. The initial service (break-in maintenance) is the most important service that your vehicle will receive. Observing a proper break-in operation, will help engine components seal properly. Maintenance required as part of the initial service includes proper adjustments, tightening of all bolts & nuts, and replacement of dirty oil. Timely performance of this service will help you get the best service life and performance of the engine. 18

26 WARNINGS 19

27 SAFETY GEAR A DOT approved motorcycle helmet is the most important part of your safety gear. A DOT approved motorcycle helmet can help prevent a serious head injury. Choose a helmet that fits snugly. Motorcycle dealers can help in selecting a good quality helmet which fits properly. 20
28 21
29 22
30 BASIC MOVEMENT AND SHIFTING STARTING THE ENGINE Before attempting to start the engine, make sure to follow these steps. 1. Insert the ignition key and turn it to the ON position. 2. Turn the fuel valve to ON. 3. Place the engine stop switch in the RUN position. 4. Set the parking brake. 5. Push the START button. 6. Push the throttle lever lightly. 7. Release the START button once the engine starts. Do not depress the START button for more than 5 seconds at a time. Release the starter button approximately 10 seconds before attempting to start the engine again. 8. Keep the throttle open slightly while warming up the engine. Make sure the engine is warm before attempting to ride. This ATV has an automatic clutch. Opening the throttle quickly will cause the ATV to move forward. 23
31 24


32 BRAKING To stop the ATV, please release the throttle lever and use rear brake pedal which is located on the foot board of right side. 25

33 TURNING Turning improperly ATV could go out of control, causing a collision or overturn. Always follow proper procedures for turning as described in the owner s manual. Practice turning at low speed before attempting to turn at faster speed. Do not turn at excessive speed. 26

34 To turn the ATV, the rider must use the proper technique. Because this vehicle has a solid rear axle, both rear wheels always turn at the same speed. This means that if the rear wheels are getting equal traction, the vehicle will tend to move straight ahead. This is because the rear wheels will travel the same distance. For the vehicle to turn, the outside rear wheel must travel a longer distance that the inside rear wheel. To make this happen, the rider must create less traction for the inside wheel, allowing it to skid. This allows it to travel a shorter distance than the outside wheel. This happens even though both wheels are still turning at the same speed. To turn ATV, use the following technique: Move your body weight forward and to the inside of the turn. Turn the handlebar while looking in the direction of the turn. FOR HIGHER SPEEDS OR SHARPER TURNS Use the same technique that you use when you move your body weight farther toward the inside of the turn to maintain your balance. Natural turning forces (which can push the vehicle to the outside of the turn) increase as the speed or the turn sharpness increases. This means you must lean your body farther into the turn as you go faster or turn more sharply. This prevents the vehicle from tipping over to the outside of the turn. If your ATV starts to tip while turning, lean your body farther into the turn while gradually reducing the throttle and making the turn wider, if possible. 27


35 OPERATION OF HILLS CLIMBING A HILL 28


36 To climb a hill with the ATV, follow the directions below. 1. Speed up and maintain a steady speed before reaching the top of the hill. Remember that you must ride at a steady speed all the way to the top of the hill. 2. Shift your body forward by sliding forward on the seat. Lean slightly forward. For steep hills, stand on the footrests and lean forward. 3. Maintain a steady speed while climbing the hill. 4. Slow down gradually when you reach the top of the hill. DESCENDING A HILL 29

37 To ride down a hill with the ATV, follow the instructions below. 1. Check the terrain carefully for any obstacles before you go down the hill. 2. Point the ATV straight down the hill. 3. Transfer your body to the rear by sliding back on the seat. 4. Ride down the hill slowly with the throttle released. 5. Apply the rear brake to control the speed. 6. Avoid going down a hill at an angle that would cause the vehicle to lean sharply to one side. Go straight down the hill if possible. 30

38 Stalling, rolling backwards or improperly dismounting while climbing a hill. Could result in ATV overturning. Use proper gear and maintain steady speed when climbing a hill. If you lose all forward speed: Keep weight uphill. Apply brakes. Lock parking brake, after you are stopped. If you begin rolling backwards: Keep weight uphill. Never apply the rear brake while rolling backwards. Apply the front brake. When fully stopped, apply rear brake as well, and then lock the parking brake. Dismount on uphill side or to a side if pointed straight uphill. Turn the ATV around and remount, following the procedure described in the owner s manual. DRIVING OVER OBSTACLES If you come to an obstacle that you cannot avoid, you may be able to cross over it by using the following procedure. 1. If the obstacle is in front of you, approach at walking speed. 2. Rise up slightly on the footrests. 3. Pull up on the handlebar and apply a little throttle as the front wheels reach the obstacle. 4. Lean forward and release the throttle after the front wheels are over the obstacle. Remember that some obstacles are too high for your ATV or for your abilities. If you are not sure that you can safely cross over an obstacle, back up and ride around the obstacle. 31

39 Skidding or sliding improperly. You may lose control of this ATV. You may also regain traction unexpectedly, which may cause the ATV to overturn. Learn to safely control skidding or sliding by practicing at low speeds and on level, smooth terrain. On extremely slippery surfaces, such as ice, go slowly and be very cautious in order to reduce the chance of skidding or sliding out of control. 32
40 SKIDDING OR SLIDING You may experience skidding or sliding when you are not braking. able to overcome it by using the techniques listed below. You may be If your front wheel skids: Gain front wheel traction by reducing the throttle opening and leaning your body slightly forward. If your rear wheel skids: If space permits, steer in the direction of the skid. Shift your body away from the skid slightly. Avoid using the throttle or brakes until you regain directional control of the vehicle. 33

41 RIDING THROUGH WATER You can ride the ATV through shallow water. Make sure it is not more than 10cm (4 inches) deep and is not moving fast. Choose a good place to cross before you ride through the water. Look for a spot where the banks are gently sloped on both sides and the bottom of the stream is hard. If you are unfamiliar with the area, park the ATV and inspect the stream first to find a suitable spot for crossing. When crossing, operate the ATV at a slow, steady speed. Be careful not to damage banks when crossing. 34

42 RIDING IN COLD WEATHER Pre-ride Inspection Check that the throttle and all control levers move freely. that the footrests are free of ice or snow. Make sure Move the ATV forward and backward to check that the wheels roll freely. If you cannot move the ATV, the tires may be frozen to the ground, or the brakes may be frozen to the wheels. If the tires are frozen to the ground, pour warm water around them to melt the ice. If the brakes are frozen, bring the ATV to a warmer area to thaw out the brakes. After the engine has warmed up, check the brakes. Do this inspection on level ground and do not exceed the walking speed. Be sure to check the operation of both front and rear brakes. If the brakes do not work adequately, stop riding the ATV. Bring the ATV to a warmer area to allow the brakes to thaw out. After the brakes thaw, dry them by applying them several times before riding. If the brakes do not regain full stopping power, ask your authorized service center to check them before you continue riding your ATV. Water that enters the brakes may freeze after you park your ATV. The frozen water can prevent wheels from turning or the brakes from working. After riding through water, mud, snow or slush, it is important to dry the brakes before parking the ATV. To dry the brakes, apply them several times while riding slowly. Before your next ride, be sure to do a Pre-ride inspection as described earlier in this section. 35
, the wind chill created by going just 10 mph (16km/h) makes you as cold as if you were standing still at a temperature of -9 F (-23 C).")
, and shivering.")
43 DRESSING FOR COLD WEATHER RIDING Riding in cold weather can be hazardous. At a temperature of 10 F (-12 C), the wind chill created by going just 10 mph (16km/h) makes you as cold as if you were standing still at a temperature of -9 F (-23 C). At this temperature, exposed flesh will freeze in just a few minutes. Continued exposure in the cold weather could lead to hypothermia. Hypothermia occurs when your body s inner temperature drops. Symptoms include numbness in the extremities (hands, feet, arms, and legs), and shivering. Damp clothing contributes to hypothermia because cold water on your skin will drain heat from your body s core. We strongly recommend that if you do any cold-weather riding, that you familiarize yourself with the symptoms, treatment, and prevention of hypothermia. Information is available at libraries and through government agencies. Plan your winter rides with safety and comfort in mind. Dress for the worst conditions you might encounter. Be prepared for bad weather and ATV breakdowns. Wear warm, water-resistant clothing such as thermal underwear, snowmobile suits, lined gloves and boots, and wool socks. 36


44 Practice riding your ATV in an open snow- or ice-covered area, at slow speeds, before handling out on snow- or ice-covered trails. Learn how your ATV responds to steering and braking on the type of terrain you will encounter on your ride. Your eyes may be sensitive to sunlight when you ride over snow or ice on a bright, sunny day. Snow and ice reflects more light into your eyes than dirt or grass. Tinted eye protection will reduce the amount of light reaching your eyes. On overcast days, you may find it helpful to use yellow-tinted eye protection. 37

45 ACCESSORY USE AND VEHICLE LOADING There are many types of accessories for sale. However, we cannot have direct control over their quality or suitability. We cannot test each accessory that is available. If you add the wrong accessories or misuse the vehicle with some accessories installed, it can make the ATV less safe to ride. Be cautious when choosing and installing accessories to your vehicle. Your retailer may be able to help you choose accessories and install them correctly. The guidelines below should help you to decide how to equip your ATV and how to use it correctly when you use accessories. Accessory Use and Vehicle Loading Guidelines 1. The combined weight of the rider, tools, and any accessories or cargo must never exceed the vehicle s load capacity of 220 lbs. 2. Check accessory mounting brackets and other attachments to make sure they provide a rigid non-movable mount. 3. Accessories added to the handlebar of the ATV should be as light as possible. The extra weight would cause the vehicle to be harder to steer. 4. Do not add accessories or cargo which interferes with controls or other equipment. 5. Do not carry heavy or bulky cargo. 6. Distribute cargo weight evenly between the front and rear of the vehicle as well as both sides of the vehicle. Locate cargo weight as close to the center of the vehicle if possible. 7. Secure your load well. Shifting weight can affect your ability to handle the vehicle safely. 8. Ride at slow speeds and avoid hills when carrying cargo. Carrying loads would affect the stability and handling of your ATV. 9. Allow enough stopping distance. Stopping distance increases if you carry loads. Use engine braking as much as possible. 38
46 INSPECTION AND MAINTENANCE It is very important to inspect and maintain your ATV regularly. Follow the guidelines in the chart. The intervals between periodic services in months are shown. At the end of each interval be sure to perform the maintenance listed. MAINTENANCE SCHEDULE Initial Every ITEM 1 Month/ 20 hrs 3 Month/ 50 hrs 6 Month/ 100 hrs 6 Month/ 100 hrs 1 Year/ 300 hrs Fuel Line Spark Plug 1,3 1,3 1,3 1,3 1,3 Carburetor Air Filter Element Every hours (more often in wet or dusty areas). Clean and replace if necessary. Valves Drive Chain 2,3 2,3 2,3 2,3 2,3 Battery 1,3 1,3 1,3 1,3 1,3 Nut Bolt, Fasteners Wheels Steering System Brake Oil Strainer 1,3 1,3 1,3 Wheel Bearing 2,3 2 2,3 2,3 2,3 Knuckle Steering Shaft Shafts/ = clean 2 = lubricate 3 = adjust, inspect, replace if necessary. 39


47 Center or call Ricky Power sports LLC hotline: Center. 40

48 TOOLS A tool kit is provided with your ATV. SPARK PLUG Your ATV is equipped with TORCH spark plug. To determine if the standard spark plug is in good condition, check the color of the plug s center electrode insulator after vehicle operation. A brown color indicates that the plug is correct. A white or dark insulator indicates that the engine may need adjustment, or another plug type may be needed. Consult your authorized dealer or Ricky Power Sports LLC if your plug insulator is not a light brown color. 41
49 To maintain a proper functioning spark plug, keep the plug free of carbon. Remove carbon from the plug with a wire or pin, and adjust the gap to 0.6~0.8mm for good ignition. Use a thickness gauge to check the gap. 42

50 VALVE INSPECTION REFER TO MAINTENANCE SCHEDULE IN THIS OWNER S MANUAL FOR VALVE ADJUSTMENT INSPECTION INTERVALS. Valve clearance should be: Intake: mm Exhaust: mm The engine will make excess noise if the gap is too large in air valve. If gap is too small valve operation will be hindered which could result in valve malfunction and failure. Therefore, air valve gap must be checked periodically. If you have the proper tools and are mechanically proficient, instructions on adjusting the valve clearance are given in the service manual. If assistance is needed please contact Ricky Power Sports LLC to find your local service center. 43

51 BATTERY INSTALLATION INITIAL SERVICE AND INSTALLATION OF BATTERY: Note: The following page is for vehicles with battery s containing separate electrolyte pack. Most battery s will come with the electrolyte already sealed into the battery. 44

52 Preparing the battery: Place battery on level surface. Remove sealing tape from top. (See figure 1) Take the electrolyte container out of the plastic bag. Place electrolyte container upside down with the sealed silver mouths of the electrolyte bottles in line with the six filler holes of the battery. (See figure 2) Push the container down strongly enough to break the silver seals. (See figure 3) As electrolyte starts flowing into battery, air bubbles will come up from the mouths of the plastic electrolyte bottles. Leave bottles upside down in battery holes until electrolyte is completely drained. Never leave children unattended around battery. If air bubbles cease to float to the top of the electrolyte bottles, tap lightly on top. DO NOT remove container from battery while it is draining. Never cut or pierce electrolyte container. After all the electrolyte has drained from the bottles into the battery, pull plastic electrolyte bottles gently out of the battery. Discard empty electrolyte bottles in a waste area that is inaccessible to children and animals. After filling let battery stand for at least 30 minutes before charging. This allows the electrolyte to penetrate plates for optimum 45
 How to Initially Charge the battery: 1.")
 cable to the black negative (-) pole of the battery.")
 The battery is now sealed.")
53 performance and ensures longer battery life. After 30 minutes the battery is ready for its initial charge. Place cap strip loosely over the filling holes as shown in the picture. (See figure 4) How to Initially Charge the battery: 1. Connect the red positive (+) cable to the red positive (+) pole of the battery. (See figure 5) 2. Connect the black negative (-) cable to the black negative (-) pole of the battery. (See figure 6) Note: The red positive (+) cable has a larger diameter than the black negative y cable. 3. Charging rate: Charge 0.7 Amps for 5 ~ 10 hours. After charging is complete, press down firmly with both hands to seat the caps. (Do not pound or hammer.) The battery is now sealed. (See figure 7) Install battery in the ATV and make sure it is secured properly. (See figure 8) Once battery is firmly seated in battery compartment, attach the red positive wire to the red positive terminal on the battery. (See figure 9) Then attach the black negative wire to the black negative terminal on the battery. (See figure 10) 46
54 Battery Replacement: Remove old battery. Mark which cable is connected to the positive terminal (+) and which cable is connected to the negative (-) terminal. Clean cable connectors with wire brush or sandpaper to remove oxidation. After charging, install new battery. Put dielectric grease on the battery terminals to avoid corrosion. Connect cables to the proper terminals. Positive cable to positive terminal Å and negative cable to negative terminal y. Positive (+) cable is red and larger in diameter. Negative y cable is black and smaller of the two in diameter. CONNECT NEGATIVE CABLE LAST. Torque terminal bolts to 40 in. / lbs. Place rubber pad in bottom of battery tray. Securely fasten battery to the vehicle using cover and strap. DO NOT open sealed caps to add water to battery. Always wear safety glasses and charge in a ventilated area. If battery gets hot to the touch, discontinue charging and allow battery to cool down. Do not use fast charging unless it is an emergency. At the beginning or end of charging, turn off the charger first, in order to prevent electric spark and explosion. Charge in a well ventilated area. DO NOT smoke around batteries and keep away from open flame. To avoid possibility of explosion, always connect battery cable in the order specified: RED first; BLACK last. An exploding battery can cause serious injury or death. Batteries contain sulfuric acid. Always shield eyes with protective eye wear when working around battery acid. Battery acid is poisonous and can cause severe burns. DO NOT smoke around batteries and keep away from open flame. 47
. 4. Recheck the throttle lever free distance. Readjust it if it is not within the correct limits.")

55 ADJUSTMENT OF THROTTLE LEVER To adjust the throttle lever free distance: 1. Loosen the nut (a) 2. Turn the adjuster (b) in or out to obtain the correct play. 3. Tighten the nut (a). 4. Recheck the throttle lever free distance. Readjust it if it is not within the correct limits. Operating the vehicle with an inadequate throttle lever free distance could be hazardous. Inadequate throttle lever free distance could cause engine speed to rise suddenly when you turn the handlebars. This can lead the rider to lose control. Adjust the throttle lever free distance so that engine idle speed does not rise due to handlebar movement. 48

56 IDLE SPEED ADJUSTMENT Carburetor idle speed screw on carburetor To adjust the idle speed: 1. Start the engine and warm it up. 2. Turn the throttle stop screw a in or out so that the engine idle speed is at 1700~+-100 r/min. Improper adjustment of the idle speed could be hazardous. An idle speed that is too high could cause the ATV to launch forward when you start the engine. This may cause an accident. Excessive engine wear may also result if idle speed is adjusted improperly or when the engine is not fully warmed up. Adjust the idle to the correct speed. Make sure the engine is fully warm before adjusting the engine idle speed. 49

57 FUEL HOSE Inspect the fuel hose for damage and fuel leakage. If any defects are found, the fuel hose must be replaced, call Ricky Power Sports. LLC hotline: to get EPA approved fuel hose.. ENGINE OIL The engine oil should be changed every 20 to 40 hours of operation. It should be changed more often in dirty and dusty areas. Engine oil tip stick To change oil: 1. Park the vehicle on level ground. 50


. NOTE: Approximately 1 Qt (1L) of oil is required. 1. Tighten the oil cap.")
58 ENGINE OIL CHECK AND CHANGE Engine oil tip stick Engine oil drain bolt 1. Remove the drain bolt and allow oil to drain into an approved container. 2. Re-install the drain bolt 3. Add fresh oil of the specified type (see page 13, fuel and oil). NOTE: Approximately 1 Qt (1L) of oil is required. 1. Tighten the oil cap. 2. Dispose of used oil as per governmental regulations. 51

59 AIR CLEANER The air cleaner element must be kept clean to provide good engine power. If you use your vehicle under normal, low-tension conditions, you should service the air cleaner at the intervals specified. If you ride in dusty, wet, or muddy conditions, you will need to inspect the air cleaner element much more frequently. Use the following procedures to remove the element and inspect it. Air cleaner 52

60 REMOVAL The air cleaner accumulates dust and must be cleaned periodically. If the ATV is ridden in dusty areas, the air cleaner must be cleaned at more frequent intervals than specified in the Maintenance Schedule. If the ATV is submerged in water, the air cleaner should be checked and water should be drained from the air cleaner housing before starting the engine. Please remove the screws as following photos to check air cleaner. 53
 solvent such as kerosene-not")


61 a b c d e f g Air cleaner WASHING THE ELEMENT 1. Gently wash the air cleaner in clean, non-flammable (high flash point) solvent such as kerosene-not gasoline. Allow the air cleaner to dry thoroughly before applying oil. A wet air cleaner will not fully absorb the oil. NOTE: The element should be wet but not dripping. 2. Soak the air cleaner an equivalent (gear oil: SAE 80-90) until saturated, then squeeze out the excess oil. NOTE: The element should be wet but not dripping. Twisting the air cleaner when squeezing out excess oil could damage the air cleaner. Reassemble by reversing the disassembly sequence. 54
62 55
63 DRIVE CHAIN The condition and adjustment of the drive chain should be checked before riding. Always follow the guidelines below for inspecting and servicing the chain. Failing to maintain the chain properly before each riding could be hazardous. Riding with the chain in poor condition could lead to an accident. Be sure to inspect and maintain the chain before riding, according to these guidelines. Inspecting the Drive Chain When inspecting the chain, look for the following: Loose pins Damaged rollers Dry or rusted links Kinked or binding links Excessive wear Excessively worn teeth Broken or damaged teeth Loose sprocket mounting nut(s) If you find anything wrong with the drive chain, solve the problem if you can. If necessary, consult your authorized service center. The drive chain is damaged means that the sprockets may also be damaged. Inspect the sprockets as specified below: 56

64 DRIVING CHAIN CLEAN AND OILING If you find any of these problems with your sprocket, consult Ricky Power Sports LLC or your local service center. DRIVE CHAIN CLEANING AND OILING Clean and oil the chain as the following: Steam cleaning, high-pressure washers, and certain solvents can damage the drive chain. Use only kerosene to clean the chain. Wipe it dry, and thoroughly lubricate it with SAE 30~50 motor oil. Do not use any other lubricants on the drive chain. Adjusting the Drive Chain 10~20 mm (0.39~0.79 in) The drive chain should be adjusted while all four tires are on the ground and make sure there is 10~20 mm (0.39 ~ 0.79 in) of slack, as shown above. If the vertical deflection exceeds 20mm (0.79 in), adjust the chain slack. 57

65 You can adjust the drive chain as the following: Adjust screws Adjust two screws clockwise to tighten the chain, and turn two screws counterclockwise to make sure the chain be loosen. Failing to inspect the drive chain slack before each use of the ATV could be hazardous. Too much chain slack could cause the chain to come off the sprockets, resulting in an accident or serious damage to the ATV. Inspect the drive chain slack before each use. 58

66 TIRES Any questions please consult Ricky Power Sports LLC authorized dealers. 59
 Tire Air Pressure Check the air pressure in all tires before riding. Improper air pressure would effect handling, steering response, traction, tire life and rider comfort.")
67 TIRES The ATV is equipped with low pressure tubeless tires of the size and type listed below: Front :AT19 x 7-8 Rear: AT18 x Tire Tread Condition 4.0 mm (0.16 in) Tire Air Pressure Check the air pressure in all tires before riding. Improper air pressure would effect handling, steering response, traction, tire life and rider comfort. Be sure that the tires are inflated to the pressures shown below. Tire pressure should only be 60

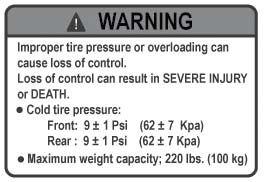
68 measured or adjusted when the tires are cold. Cold Tire Air Pressure Front Rear 9±1 psi (62±7 kpa) 9±1 psi (62±7 kpa) Overfilling the air to the tires could be hazardous. If you put too much air into the tire, may burst, and causing severe injury. Check the air pressure from time to time while inflating the tire gradually, until the specified air pressure is obtained. Tire Replacement Your ATV has low-pressure tubeless tires. Air is sealed by the contact surfaces of the inner wheel rim and the tire bead. If the inner wheel rim or tire bead is damaged, air may leak. Be extremely careful not to damage these sections when replacing tires. It is very important to use the proper tools when repairing or replacing tires in order to protect the tire bead or wheel rims. Have this work done by your authorized service center or a qualified tire repair station. When breaking the tire bead loose from the wheel, be extremely careful not to damage the inner wheel rim surface or the tire bead. 61

69 Using tires that have been installed incorrectly could be hazardous. The ATV may have unusual handling if the tires are installed incorrectly. The tires are intended to rotate in a specific direction, as indicated by the arrows on the sidewall of each tire. Install tires correctly so they rotate in the proper direction. Tubeless Tire Repair If a leak or flat tire occurs due to a puncture, the tire may be repaired using a plug type patch. If the damage is from a cut, or if the puncture cannot be repaired using a plug, the tire should be replaced. When operating your ATV in areas here transportation or service facilities are not readily available, it is strongly recommended that you bring a plug type repair kit and a tire air pump with you. 62


70 BRAKES The ATV has two front drum brakes and a rear disk brake. FRONT BRAKE ADJUSTMENT Try to move the vehicle backward and forward when the brake is applied. If the front wheels can turn, adjust the brake to lock the wheels securely. Measure the amount of free play needed to lock the brake lever, as shown in above, if necessary. The free play is about 4~6mm (0.16~0.24in). 63

71 REAR DISC BRAKE 3. After any adjustment of the brake, check again to make sure the front wheels cannot turn when the brake is applied. Rear Disk Brake 1. Inspect the disk brake for leakage. If the brake fluid leaks, the safety of riding could be affected. 2. Inspect the brake hose for cracks, and the joint for leakage. Brake fluid can be hazardous to humans and pets. Brake fluid is harmful or fatal if swallowed, and harmful if it comes in contact with your skin or eyes. Keep brake fluid away from children and pets. Call your doctor immediately if brake fluid is swallowed, and induce vomiting. Flush eyes or skin with water if brake fluid gets in eyes or comes in contact with skin. 64
72 Failure to use proper brake fluid can be hazardous. The use of any fluid except DOT4 brake fluid from a sealed container can damage the brake system and lead to an accident. Use only DOT4 brake fluid from a sealed container. of brake fluid. Never use or mix with different types GENERAL LUBRICATION Proper lubrication is important for safe, smooth operation and long life of your vehicle. Be sure that all lubrication is performed during periodic maintenance on the vehicle. Increase intervals when you use your ATV in severe conditions. Your authorized service center should do general lubrication as shown in the MAINTENANCE CHART. The authorized service center will lubricate the vehicle such as wheel bearings, swing arm bearings, steering shaft holder, cables, etc. Steering shaft holder Brake cable Drive chain Throttle cable Throttle lever 65
73 TROUBLESHOOTING This troubleshooting guide is provided to help you to find the cause of some common complaints. COMPLAINT: Engine is hard to start or does not start at all. Something is probably wrong with the fuel system or ignition system. Fuel Supplying Check 1. Make sure there is adequate fuel in the fuel tank. 2. Check that the engine stop switch is in the RUN position. 3. Check that the fuel valve is in the ON position. 4. Make sure there is enough fuel reaching the carburetor from the fuel tank. Draining fuel from the carburetor could be hazardous. Fuel could catch fire if you do not handle it properly. When draining the carburetor, be sure to shut the engine off. Do not smoke, and never drain or refuel in an area where there are open flames or sparks. Do not spill the fuel or you may create a fire hazard. Dispose of drained fuel properly. 66

74 a. Loosen the drain screw which is located under the carburetor. Drain the fuel from the carburetor into a container. b. Tighten the drain screw. c. Run the engine for a few seconds. Shut off engine. d. Loosen the drain screw and check that the carburetor is filled back up with fuel. e. If fuel is reaching the carburetor, the ignition system should be checked next. Ignition System Check 1. Remove the spark plug and reattach it to the spark plug lead. 2. Push the electric button START. Apply the rear brake lever to make sure the rear wheels are locked. If the ignition system is operating properly, a blue spark should jump across the spark plug gap. If there is no spark, take your machine to your service center. Performing the spark test improperly could be hazardous. You could get a high voltage electrical shock if you are not familiar with this procedure. Do not perform this check if you are not familiar with the procedure. Do not point the spark plug near the spark plug hole during this test. Do not do this test if you have a heart condition or wear a pacemaker. Do not perform this test is any near any open fuel containers for near fuel which has spilled on the ground, on the engine, or any part of the ATV. COMPLAINT: Engine stalls 1. Make sure there is enough fuel in the fuel tank. 2. Check to see that the spark plug is not fouled. Remove the spark plug and clean it. Replace it, if necessary. 3. Make sure the fuel valve is not clogged, and the fuel tank is not clogged, either. 4. Check the idle speed. If necessary, adjust it using a tachometer. The correct idle speed is 1700 ± 100 RPM/min. 67

75 TRANSPORTING Draining fuel from the carburetor could be hazardous. Fuel could catch fire if you do not handle it properly. When draining fuel from the carburetor, be sure to shut the engine off. Do not smoke, and never drain or refuel in an area where there are open flames or sparks. Do not spill the fuel or you may create a fire hazard. Dispose of the drained fuel properly. Failing to secure the ATV properly could be hazardous. Failing to secure the vehicle properly may result in an accident or damage to the vehicle. When transporting the ATV, lock the parking brake lever and tie down the vehicle securely with straps, rope, or some other suitable means. Use extra tie downs when you transport the vehicle in the standing position. 68
76 CLEANING PROCEDURE A thorough cleaning of your ATV is a necessary part of maintenance. It will help keep your ATV looking and performing best. Proper cleaning can also extend the life of your ATV. It is important to clean and inspect your ATV after every ride, especially if it is used in mud, brush, grass, water, salt water, or very dusty conditions The build-up of mud, brush, grass, etc. especially on the engine and exhaust system, can reduce engine cooling ability, conceal damage, or increase wear of certain parts. It is important to remove all debris during cleaning. PREPARATION FOR CLEANING Wash the ATV before any mud dries on the ATV. Block or seal the end of the exhaust pipe (muffler) using a piece of plastic wrap, cloth rag or another method to prevent water from entering engine. WASHING YOUR ATV With some care, your ATV can be washed in a similar manner to washing an automobile. 69

77 Note: Avoid spraying or allowing water to flow over the following places: Ignition switch Spark plug Fuel tank cap Carburetor Use a garden hose at low pressure to remove the majority of dirt or other debris. Hand wash your ATV with mild soap or detergent and water. Try to thoroughly remove all dirt and debris without excessive water pressure, even at remote areas such as between engine cooling fins, linkages or mounting brackets. Cloth rags, washing mitts or cleaning brushes can be used. Be careful with brushes as they may scratch plastic or painted surfaces. Rinse the ATV thoroughly with clean water. Dry all areas using a chamois or soft absorbent cloth. INSPECTION AFTER CLEANING Remove the rags or wrapping from the exhaust pipe. For extended life of your ATV, lubricate according to GENERAL LUBRICATION section. Follow the procedures in the INSPECTION BEFORE RIDING section to check your ATV for any problems that may have occurred during your last ride. STORAGE PROCEDURE If you do not use your ATV for a long time, it will need special service requiring appropriate materials, equipment and skill. For this reason, we recommend that you trust this maintenance work to your authorized service center. If you wish to service the 70

78 machine for storage yourself, follow the general guidelines below: VEHICLE Place the vehicle on level ground and wash the entire vehicle. FUEL Drain the fuel from the fuel tank by a hand pump. Drain the fuel from the carburetor by releasing the carburetor drain screw. TIRES Inflate tires to the normal pressure. EXTERNAL 1. Spray all vinyl and rubber parts with rubber protection. 2. Spray unpainted surfaces with rust preventative. 3. Coat painted surfaces with car wax. PROCEDURE FOR RETURNING TO SERVICE 1. Clean the entire vehicle. 2. Make sure that the vehicle is properly lubricated. 3. Perform the INSPECTION BEFORE RIDING as listed in this manual. 4. Start the vehicle as outlined in this manual. 71
Ricky Power Sports, LLC
 Ricky Power Sports, LLC Desert 150 Always wear a helmet: It could save your life! Do not remove the owner s manual from this vehicle. Please obtain, review and follow provincial/municipal government acts
Read this manual carefully. It contains important safety information. Children under the age of 16 should be supervised by a responsible adult.
 WD90 Read this manual carefully. It contains important safety information. Children under the age of 16 should be supervised by a responsible adult. OWNER S MANUAL Minimum Age Requirement: 10 Model: 90cc
Read this manual carefully. It contains important safety information. Children under the age of 16 should be supervised by a responsible adult.
 BA50 Read this manual carefully. It contains important safety information. Children under the age of 16 should be supervised by a responsible adult. OWNER S MANUAL Minimum Age Requirement: 6 For More information
WD400U-2 OWNER S MANUAL. Minimum Age Requirement 16
 WD400U-2 Read this manual carefully. It contains important safety information. No one under the age of 16 should operate this ATV. OWNER S MANUAL Minimum Age Requirement 16 For More information on ATV
OWNER S MANUAL. Minimum Age Requirement: 6 Maximum weight limit: 45Kg (100 lbs.) REVB Always wear a helmet; It could save your Life!
 REVB Always wear a helmet; It could save your Life!") BA49 ATV Read this manual carefully. It contains important safety information. Children under the age of 16 should be supervised by a responsible adult. OWNER S MANUAL Minimum Age Requirement: 6 Maximum
BA49 ATV Read this manual carefully. It contains important safety information. Children under the age of 16 should be supervised by a responsible adult. OWNER S MANUAL Minimum Age Requirement: 6 Maximum
Read this manual carefully. It contains important safety information. No one under the age of 16 should operate this ATV
 STR125-2 ATV Read this manual carefully. It contains important safety information. No one under the age of 16 should operate this ATV OWNER S MANUAL Minimum Age Requirement 16 REV A 070507 Always wear
OWNER S MANUAL. Minimum Age Requirement: 6
 WD50-2 Read this manual carefully. It contains important safety information. Children under the age of 16 should be supervised by a responsible adult. OWNER S MANUAL Minimum Age Requirement: 6 In the Province
NOTES FOR SAFETY OPERATOR-ONLY.
 NOTES FOR SAFETY Both the parents and their child must fully understand everything in this manual before riding. This vehicle is for OPERATOR-ONLY. This vehicle is only designed for operation on level,
Read this manual carefully. It contains important safety information. No one under the age of 16 should operate this ATV WD250U CAMO
 WD250UR / WD250U ATV Read this manual carefully. It contains important safety information. No one under the age of 16 should operate this ATV OWNER S MANUAL Minimum Age Requirement 16 WD250UR RED WD250U
OWNER S MANUAL CANYON250. Always wear a helmet; It could save your Life! Do not remove this operator s manual from this vehicle.
 OWNER S MANUAL CANYON250 Always wear a helmet; It could save your Life! Do not remove this operator s manual from this vehicle. Please obtain, review, and follow provincial / municipal government acts
Follow the Age Recommendation Adult Supervision should be present for all people under the age of 18.
 Your Kart will provide you with many years of service and pleasure. Providing you take responsibility for your own safety and understand the challenges you can meet while driving. There is much that you
ATV-50/90/100 I/II/V OWNER S MANUAL
 1 ATV-50/90/100 I/II/V OWNER S MANUAL FOREWORD May we, the manufacturer, take this opportunity to thank you for choosing our ATV to serve you. This Owner s Manual is prepared for you the details as to
MUDD-OX INC. MAX AND BUFFALO ATV OPERATOR S MANUAL MODEL YEARS DO NOT REMOVE THIS OPERATOR S MANUAL FROM THIS VEHICLE
 MUDD-OX INC. MAX AND BUFFALO ATV OPERATOR S MANUAL MODEL YEARS 1990-2015 DO NOT REMOVE THIS OPERATOR S MANUAL FROM THIS VEHICLE For parts and accessories visit www.max6x6.com 1 Your ATV can be hazardous
WARNING. The engine exhaust from this product contains chemicals known to cause cancer, birth defects or other reproductive harm.
 WARNING The engine exhaust from this product contains chemicals known to cause cancer, birth defects or other reproductive harm. We ve created a web site just for YOU! S S S S S S Check it out... Technical
ATV-320 R OWNER S MANUAL
 ATV-320 R OWNER S MANUAL FOREWORD May we, the manufacturer, take this opportunity to thank you for choosing our ATV to serve you. This Owner s Manual is prepared for you to properly operate in safety.
Light condition and operation Windshield glass condition Wiper blade condition Paint condition and corrosion Fluid leaks Door and hood lock condition
 GENERAL CHECKS Engine Compartment The following should be checked regularly: Engine oil level and condition Transmission fluid level and condition Brake fluid level Clutch fluid level Engine coolant level
OWNER S MANUAL. Always wear a helmet; It could save your Life!
 OWNER S MANUAL Tornado250 Always wear a helmet; It could save your Life! Please obtain, review, and follow provincial / municipal government acts and regulations pertaining to owning and operating an off-road
This manual should be considered a permanent part of the ATV and should remain with the ATV when it is resold.
 This manual should be considered a permanent part of the ATV and should remain with the ATV when it is resold. This publication includes the latest production information available before printing. Honda
ATV-320 S/U ATV-320SD S/U OWNER S MANUAL V
 ATV-320 S/U ATV-320SD S/U OWNER S MANUAL V1.0 2014.03.01 0 FOREWORD May we, the manufacturer, take this opportunity to thank you for choosing our ATV to serve you. This Owner s Manual is prepared for you
ALL TERRAIN VEHICLE Craftsman 300 Electric Start Engine 2 Wheel or 4-Wheel Drive Automatic Transmission Model Number:
 Operator s Manual ALL TERRAIN VEHICLE Craftsman 300 Electric Start Engine 2 Wheel or 4-Wheel Drive Automatic Transmission Model Number: 108.27807 Before operating this vehicle, the owner and each operator
QUICK REFERENCE GUIDE
 QUICK REFERENCE GUIDE www.familygokarts.com CUSTOMER SERVICE Customer Service is our top prority and checking these simple steps will help us in better serving you needs. Please remember that although
WARNING - BEFORE YOU DRIVE
 See back cover for a pre-ride checklist section 3 operation WARNING - BEFORE YOU DRIVE 1. Always perform a pre-ride inspection of the vehicle using the checklist provided on the back cover of this manual.
May we, the manufacturer, take this opportunity to thank you for choosing our ATV to serve you.
 FOREWORD May we, the manufacturer, take this opportunity to thank you for choosing our ATV to serve you. This Owner s Manual is prepared for you the details as to operate and maintenance necessarily to
WARNING. The engine exhaust from this product contains chemicals known to cause cancer, birth defects or other reproductive harm.
 WARNING The engine exhaust from this product contains chemicals known to cause cancer, birth defects or other reproductive harm. A card containing important ATV safety information should be attached to
OWNER S/OPERATOR S MANUAL
 OWNER S/OPERATOR S MANUAL No one under the age of 13 should operate this Go-Kart. No one under the age of 16 should operate this go kart without close adult supervision. Always wear a helmet it could save
YFM35RY OWNER S MANUAL WARNING. READ THIS MANUAL CAREFULLY! It contains important safety information.
 READ THIS MANUAL CAREFULLY! It contains important safety information. OWNER S MANUAL WARNING LIT-11626-22-12 YFM35RY This ATV should not be ridden by anyone under 16 years of age. 5YT-28199-16 EBU17092
MOTOX 70cc Assembly Manual
 MOTOX 70cc Assembly Manual Assembly Manual This manual should be considered a permanent part of the motorcycle and should remain if it is resold. This manual contains the latest product information available
YFS200V OWNER S MANUAL. READ THIS MANUAL CAREFULLY! It contains important safety information.
 READ THIS MANUAL CAREFULLY! It contains important safety information. OWNER S MANUAL w LIT-11626-19-14 YFS200V This ATV should not be ridden by anyone under 16 years of age. 5VM-28199-13 EBU13320 INTRODUCTION
YFZ450S OWNER S MANUAL WARNING. READ THIS MANUAL CAREFULLY! It contains important safety information.
 READ THIS MANUAL CAREFULLY! It contains important safety information. OWNER S MANUAL WARNING LIT-11626-17-11 YFZ450S This ATV should not be ridden by anyone under 16 years of age. 5TG-28199-10 EBU00776
User Manual of Bagibike Electric Bicycles
 User Manual of Bagibike Electric Bicycles Model: Bagibike B16. http://www.bagibike.com Page 1 FOREWORD The following operation manual is a guide to assist you. This manual is not a complete document on
Part 7 DO IT YOURSELF MAINTENANCE
 Part 7 DO IT YOURSELF MAINTENANCE Chapter 7 2 Engine and Chassis Checking the engine oil level Checking the engine coolant level Checking brake fluid Checking power steering fluid Checking tire pressure
MODELS 1324 & 1624 & 1824
 THE MODELS 1324 & 1624 & 1824 HYDRAULIC TRENCHERS CONGRATULATIONS! You are now the proud owner of a BARRETO trencher. Please take a moment of your time to look over the following information. Familiarize
Owner s/operator s Manual
 Water Pump MP2533E2 Owner s/operator s Manual Completely read and understand this manual before using this product. Foreword This Owner s/ Operator s Manual is designed to familiarize the operator with
YFM125GZ This A This ATV should not be ridden by anyone under 16 years of age.
 READ THIS MANUAL CAREFULLY! It contains important safety information. OWNER S MANUAL WARNING LIT--- YFMGZ This A This ATV should not be ridden by anyone under years of age. C-- EBU0 Read this manual carefully
SECTION 8 2 DO IT YOURSELF MAINTENANCE. Chassis
 DO IT YOURSELF MAINTENANCE Chassis SECTION 8 2 Checking the coolant level of the traction motor................ 184 Checking the radiator....................................... 185 Checking brake fluid........................................
DAZON Limited Warranty
 1 DAZON Limited Warranty The warranty policy applies to those cases where the new seller vehicle unloaded from its shipping container, set up and delivered by authorize dealer and under normal use and
Owner s Manual for 16 Slider
 Owner s Manual for 16 Slider This manual contains important safety, assembly, operation and maintenance information. Please read and fully understand this manual before operation. Save this manual for
Set-up Instructions BA49 ATV
 Set-up Instructions BA49 ATV Removal from crate 1. Remove cardboard carton from metal frame. 2. Remove metal crate. REVA 080707 Parts and Hardware Side panel hardware Handlebar cover Front bumper Left
BT49QT-9O3 User s Manual
 BT49QT-9O3 User s Manual Preface Thank you very much for purchasing BAOTIAN brand motorcycle of model BT49QT-9O3, which developed by BAOTIAN MOTORCYCLE INDUSTRIAL CO., LTD. And welcome to join the driver
CHASSIS CONTENTS EXTERIOR PARTS 7-1 FRONT WHEEL 7-2 FRONT BRAKE 7-6 HANDLEBARS 7-13 FRONT FORK 7-15 STEERING 7-23 REAR WHEEL 7-26 REAR BRAKE 7-30
 CHASSIS CONTENTS EXTERIOR PARTS 7- FRONT WHEEL 7-2 FRONT BRAKE 7-6 HANDLEBARS 7-3 FRONT FORK 7-5 STEERING 7-23 REAR WHEEL 7-26 REAR BRAKE 7-30 REAR SHOCK ABSORBER 7-32 SWING ARM 7-33 7 7- CHASSIS EXTERIOR
SECTION 3 STARTING AND DRIVING MR2 U
 STARTING AND DRIVING SECTION 3 Before starting the engine................................... 122 How to start the engine...................................... 122 Tips for driving in various conditions...........................
AG-HA-2500N GASOLINE GENERATOR
 AG-HA-2500N GASOLINE GENERATOR OWNER S MANUAL BEFORE OPERATING THIS EQUIPMENT PLEASE READ THESE INSTRUCTIONS CAREFULLY (I)WARNING 1. Read the operator s instruction manual. 2. Attention! Exhaust gases
Do not remove this Owner s Manual from the ATV per the agreement guidelines of the U.S. Consumer Product Safety Commission.
 Do not remove this Owner s Manual from the ATV per the agreement guidelines of the U.S. Consumer Product Safety Commission. Read this manual carefully before operating the ATV as it contains important
OWNERS MANUAL. Two Stroke Dirt Bike. Distributed by SSR Motorsports. Address: Alondra Blvd, Norwalk CA
 OWNERS MANUAL Two Stroke Dirt Bike Distributed by SSR Motorsports Address: 12825 Alondra Blvd, Norwalk CA 90650 www.ssrmotorsports.com Please note that this is a general manual. The model of the vehicle
WARNING. The engine exhaust from this product contains chemicals known to cause cancer, birth defects or other reproductive harm.
 03 The engine exhaust from this product contains chemicals known to cause cancer, birth defects or other reproductive harm. A card containing important ATV safety information should be attached to the
WARNINGS FOR TYPE II ATV
 Improper vehicle use can result in SEVERE INJURY or DEATH NEVER Operate: Without first viewing owner's manual and quick start guide. With more than one passenger. On public roads. On paved surfaces-pavement
USER AND SAFETY MANUAL
 USER AND SAFETY MANUAL HANDLE- BARS STEM COLLAR ROD SADDLE SAFETY HOOK- STRIP BRAKE SUPPORT BARS AFT TUBE FRONT TUBE SAFETY RULES SECURE THE ROD AND ATTACH SAFETY HOOK-STRIP before every ride. RIDE WHEELA
AIR BRAKES THIS SECTION IS FOR DRIVERS WHO DRIVE VEHICLES WITH AIR BRAKES
 Section 5 AIR BRAKES THIS SECTION IS FOR DRIVERS WHO DRIVE VEHICLES WITH AIR BRAKES AIR BRAKES/Section 5 SECTION 5: AIR BRAKES THIS SECTION COVERS Air Brake System Parts Dual Air Brake Systems Inspecting
OUTLAW 110 SPORTSMAN 110
 Owner's Manual for Maintenance and Safety OUTLAW 110 SPORTSMAN 110 Read this manual carefully. It contains important safety information. Adult supervision is required at all times. Operation is prohibited
610 BUSHEL MANURE SPREADER
 610 BUSHEL MANURE SPREADER RODA MANUFACTURING 1008 LOCUST ST. HULL, IA. 51239 Art s-way Manufacturing 712-439-2366 Co., Inc. Hwy 9 West - PO Box 288 WWW.RODAMFG.COM Armstrong, IA. 50514 U.S.A 2 INTRODUCTION
AIR-COOLED DIESEL GENERATOR OWNERʼS MANUAL. This manual contains important safety information. TDG2500E TDGW7000E TDG7000SE TDG4500E
 AIR-COOLED DIESEL GENERATOR OWNERʼS MANUAL This manual contains important safety information. TDG2500E TDGW7000E TDG7000SE TDG4500E TDG8000-3 TDG7000SE-3 TDG7000E TDG8000E TDGW7000SE TDG7000E3 TDGW8000E
Earth Auger MAG500 MAG500RS
 Earth Auger MAG500 MAG500RS US Owner s/operator s Manual Completely read and understand this manual before using this product. - 0 - Foreword This Owner s/ Operator s Manual is designed to familiarize
Operator Manual. The most important component is you. This operator manual. has information for. all models of series. B plus some options and
 Operator Manual This operator manual has information for all models of series B plus some options and accessories. Some of the illustrations and information may not apply to your truck. The most important
Trench Filler for Compact Utility Loaders
 Form No. 3353-608 Rev A Trench Filler for Compact Utility Loaders Model No. 22472 260000001 and Up Operator s Manual Register your product at www.toro.com Original Instructions (EN) Contents Page Introduction................................
This manual should be considered a permanent part of the ATV and should remain with the ATV when it is resold.
 This manual should be considered a permanent part of the ATV and should remain with the ATV when it is resold. This publication includes the latest production information available before printing. Honda
RASER R1/ RASER FX OWNER'S MANUAL
 RASER R1/ RASER FX OWNER'S MANUAL IMPORTANT NOTES FOR SAFE OPERATION FAILURE TO FOLLOW THE INSTRUCTIONS CONTAINED HEREIN MAY RESULT IN DAMAGE TO YOUR SCOOTER, DECREASE ENGINE LIFE, CAUSE INJURY TO YOURSELF
WARNING. Improper vehicle use can result in SEVERE INJURY or DEATH. NEVER CARRY PASSENGERS
 Improper vehicle use can result in SEVERE INJURY or DEATH. ALWAYS USE AN APPROVED HELMET AND PROTECTIVE GEAR NEVER USE ON PUBLIC ROADS NEVER CARRY PASSENGERS NEVER USE WITH DRUGS OR ALCOHOL NEVER: Operate
DO NOT RETURN TO STORE. NOTE:
 Pro Series Scooters Owner s Manual Read and understand this entire manual before allowing child to use this product! For assistance contact Razor. DO NOT RETURN TO STORE. NOTE: Illustrations are for demonstration
OWNER S/OPERATOR S MANUAL
 OWNER S/OPERATOR S MANUAL : Read this Manual, and any Supplements Carefully Before Operating Vehicle. Assembly Operation Maintenance THIS VEHICLE IS NOT DESIGNED FOR USE ON RENTAL TRACKS OR RACING XY200U
RedGum GP160 Splitter. Owner s Manual
 RedGum GP160 Splitter Owner s Manual Product Description & Intended Purpose: This Log Splitter / Wood Splitter is an outdoor product that splits wood logs for use as fuel in a fireplace or a woodstove.
 3 Protecting Your Xedos Vehicle FUEL REQUIREMENTS EMISSION CONTROL SYSTEM BEFORE DRIVING RUNNING-IN ECONOMICAL OPERATION SPECIAL DRIVING CONDITIONS LABEL INFORMATION 3-2 3-2 3-3 3-4 3-4 3-5 3-8 3-1 3-2
1.CONTENTS 1. Contents Control location Before riding Safe riding Driving Use genuine spare parts Use
 1.CONTENTS 1. Contents... 1 2. Control location... 3 3. Before riding... 4 4. Safe riding... 4 5. Driving... 5 6. Use genuine spare parts... 5 7. Use of each component... 6 Gauges... 6 Operation of ignition
YFZ450V OWNER S MANUAL. READ THIS MANUAL CAREFULLY! It contains important safety information.
 READ THIS MANUAL CAREFULLY! It contains important safety information. OWNER S MANUAL w LIT-11626-19-32 YFZ450V This ATV should not be ridden by anyone under 16 years of age. 5TG-28199-12 EBU13320 INTRODUCTION
Thule Glide Instructions
 Thule Glide Instructions A 51100988 CONTENTS 1 Introduction 1.1 Manual Intended Use 04 1.2 Carrier Intended Use 04 1.3 Specifications 04 2 Safety 2.1 Symbols and Instructions 05 2.2 General Safety Instructions
SECTION 6 3 SERVICE PROCEDURES AND SPECIFICATIONS. Chassis
 SECTION 6 3 SERVICE PROCEDURES AND SPECIFICATIONS Chassis Specifications 206 Checking brake fluid 208 Checking power steering fluid 209 Checking tire pressure 210 Rotating tires 211 Checking and replacing
KING CANADA 950W PORTABLE GENERATOR MODEL: KCG-951G INSTRUCTION MANUAL COPYRIGHT 2011 ALL RIGHTS RESERVED BY KING CANADA TOOLS INC.
 KING CANADA 950W PORTABLE GENERATOR MODEL: KCG-951G INSTRUCTION MANUAL COPYRIGHT 2011 ALL RIGHTS RESERVED BY KING CANADA TOOLS INC. WARRANTY & SERVICE INFORMATION 1-YEAR LIMITED WARRANTY FOR THIS 950W
INSPECTION/ADJUSTMENT
 3 3 INSPECTION/ADJUSTMENT SERVICE INFORMATION----------------------------------------------------------------------- 3-1 MAINTENANCE SCHEDULE-------------------------------------------------------------------
Audi R8. Ride-on Car 5F62630 OWNER S MANUAL. Keep instructions for future reference
 Audi R8 Ride-on Car 5F62630 OWNER S MANUAL Keep instructions for future reference 1 Safety The owner s manual contains assembly, use and maintenance instructions. The vehicle must be assembled by an adult
SECTION 6 3 SERVICE PROCEDURES AND SPECIFICATIONS. Chassis
 SERVICE PROCEDURES AND SPECIFICATIONS Chassis SECTION 6 3 Specifications........................................... 208 Checking brake fluid...................................... 210 Checking power steering
Electric Car User Manual
 Electric Car User Manual The owner s manual contains important safety information as well as assembly, use and maintenance instructions. The Ride-on Car must be assembled by an adult who has read and understands
Water pump Owner's Manual
 Water pump Owner's Manual Safety Precautions I. General Safeguards Please read this operation manual to have a thorough understanding of the content there before use the product. Failure to do so may lead
SECTION 7 2 DO IT YOURSELF MAINTENANCE MR2 U. Engine and Chassis
 SECTION 7 2 DO IT YOURSELF MAINTENANCE Engine and Chassis Checking the engine oil level................................. 168 Checking the engine coolant level............................ 169 Checking brake
YFM66FAV OWNER S MANUAL WARNING. READ THIS MANUAL CAREFULLY! It contains important safety information.
 READ THIS MANUAL CAREFULLY! It contains important safety information. OWNER S MANUAL WARNING LIT-11626-19-09 YFM66FAV This ATV should not be ridden by anyone under 16 years of age. 2C6-28199-10 EBU00776
PLEASE BE SAFE WHEN RIDING... ALWAYS WEAR A HELMET AND OBEY ALL LAWS!
 Powered Personal Transportation Electric Power Board Product Handbook FOR THE BLADEZ XTR Street ELECTRIC POWER BOARD Model: PB-SM1806 PLEASE BE SAFE WHEN RIDING... ALWAYS WEAR A HELMET AND OBEY ALL LAWS!
CROSSRUNNER 250 REASSEMBLY MANUAL. ATV - All Terrain Vehicle. Age Category: Adult Only riders age 16 years or older may ride this bike
 CROSSRUNNER 250 ATV - All Terrain Vehicle Age Category: Adult Only riders age 16 years or older may ride this bike REASSEMBLY MANUAL Note: This ATV was fully assembled and tested at the CROSSRUNNER factory.
1100W PORTABLE GENERATOR
 1100W PORTABLE GENERATOR MODEL NO: G1200 PART NO: 8010110 OPERATION & MAINTENANCE INSTRUCTIONS LS0312 INTRODUCTION Thank you for purchasing this CLARKE 1100W Portable Generator. Before attempting to use
Powerboard TM by Exkate
 Powerboard TM by Exkate OWNERS MANUAL Introduction to The Powerboard TM Dear Customer: Congratulations and thank you for purchasing the Powerboard TM (electric skateboard). For the greatest pleasure and
BR250/DN250 Go-Kart OWNER S MANUAL
 BR250/DN250 Go-Kart Read this manual carefully. It contains important safety information. No one under the age of 16 should operate this Go-Kart OWNER S MANUAL Minimum Age Requirement 16 REV. B 031109
Sport Scooter and Pro Model. Read and understand this entire manual before allowing child to use this product! For assistance contact Razor.
 Sport Scooter and Pro Model OWNER S MANUAL Read and understand this entire manual before allowing child to use this product! For assistance contact Razor. NOTE: Manual illustrations are for demonstration
PF-4000, PF-4010, PF-4210 MULTI-PURPOSE ENGINE
 PF-4000, PF-4010, PF-4210 MULTI-PURPOSE ENGINE Date 09-26-01 Supplier To The Outdoor Power Equipment Industry ISM, Inc. 1028 4 th Street SW Auburn, WA 98001 Phone: (253) 333-1200 Fax: (253) 333-1212 WWW.TANAKA-USA.COM
TREAD and TRACTION. Tread- The grooved surface of a tire that grips the road.
 1 NAME: HOUR: DATE: NO: Chapter 5: Natural Laws and Car Control GRAVITY- Is the force that pulls all things to Earth. UPHILL DRIVING- Gravity will decrease your car down when going uphill, unless you use
POWERSPORTS OWNER S MANUAL
 POWERSPORTS OWNER S MANUAL CT200U Recommended Age 13+ Provincial / Municipal governments have different regulations pertaining to owning and operating an off-road vehicle, learn the regulations in your
THIS VEHICLE IS FOR OFF-ROAD USE ONLY THIS VEHICLE IS NOT DESIGNED FOR USE ON RENTAL TRACKS OR RACING
 Book 1 of 2 Model 3171 Ages 13 and up 25 mph max speed Model 5210 Ages 13 and up 25 mph max speed Model 6152 Ages 13 and up 39 mph max speed Model 7151 Ages 13 and up 39 mph max speed FUN KART OPERATOR
3. INSPECTION/ADJUSTMENT
 3 3 INSPECTION/ADJUSTMENT SERVICE INFORMATION -------------------------------------------- 3-1 MAINTENANCE SCHEDULE ---------------------------------------- 3-2 FUEL LINE/FUEL FILTER -------------------------------------------
ATV Operation. Hazard Assessment and Training Briefing. Fuel. Recommended. Rules
 Page 1 of 5 and Training Briefing Welcome to the ATV Operation and Training Briefing. This document is designed to review the hazards associated with operating an ATV as well as provide detailed controls
OWNER S MANUAL POWERSPORTS HS360ATV HS400ATV. No one under the age of 16 should operate this ATV
 POWERSPORTS ORTS OWNER S MANUAL HS360ATV HS400ATV No one under the age of 16 should operate this ATV (888)-405-8725 Coleman Powersports 364 S. Smith Rd. Tempe, AZ. 85281 REV032514 Owner s Manual Owner
3. INSPECTION/ADJUSTMENT
 3 SERVICE INFORMATION...3-0 FINAL REDUCTION GEAR OIL...3-7 MAINTENANCE SCHEDULE...3-2 DRIVE BELT...3-7 FUEL FILTER...3-3 BRAKE SHOE...3-8 THROTTLE OPERATION...3-3 BRAKE ADJUSTING NUT...3-8 AIR CLEANER...3-4
OUTLAW 50. Pantone 419C. Owner's Manual for Maintenance and Safety
 Pantone 419C Owner's Manual for Maintenance and Safety OUTLAW 50 Read this manual carefully. It contains important safety information. Adult supervision is required at all times. Operation is prohibited
ATV Log Arch and Holder
 ATV Log Arch and Holder Owner s Manual WARNING: Read carefully and understand all ASSEMBLY AND OPERATION INSTRUCTIONS before operating. Failure to follow the safety rules and other basic safety precautions
Disc Brake System ( For Cross-Country)
") Technical Service Instructions General Safety Information Disc Brake System ( For Cross-Country) SI-8C60F t WARNING Please use extra caution to keep your fingers away from the rotating disc brake rotor
Technical Service Instructions General Safety Information Disc Brake System ( For Cross-Country) SI-8C60F t WARNING Please use extra caution to keep your fingers away from the rotating disc brake rotor
1000-lb Hydraulic Truck Crane
 1000-lb Hydraulic Truck Crane Owner s Manual WARNING: Read carefully and understand all ASSEMBLY AND OPERATION INSTRUCTIONS before operating. Failure to follow the safety rules and other basic safety precautions
Thule Urban Glide 1 & 2 Instructions
 Thule Urban Glide 1 & 2 Instructions B 51100987 CONTENTS 1 INTRODUCTION 1.1 Manual Intended Use 04 1.2 Carrier Intended Use 04 1.3 Specifications 04 2 SAFETY 2.1 Symbols and Instructions 05 2.2 General
read and understand this entire manual before riding! For assistance contact razor. Do not return to store.
 OWNER S MANUAL read and understand this entire manual before riding! For assistance contact razor. Do not return to store. note: manual illustrations are for demonstration purposes only. illustrations
Table of Contents. Safety symbols... 3 Assembly 6. Operation Maintenance Troubleshooting 11. Storage. 12. Notes. 13
 Table of Contents Safety symbols... 3 Assembly 6 Operation... 8 Maintenance... 10 Troubleshooting 11 Storage. 12 Notes. 13 2 Safety Information Attention; this machine can be dangerous! All operators should
WARNING. The engine exhaust from this product contains chemicals known to cause cancer, birth defects or other reproductive harm.
 The engine exhaust from this product contains chemicals known to cause cancer, birth defects or other reproductive harm. A card containing important ATV safety information should be attached to the owner
Air-Operated Waste Oil Drainer
 Air-Operated Waste Oil Drainer 20-Gallon Tank Owner s Manual WARNING: Read carefully and understand all ASSEMBLY AND OPERATION INSTRUCTIONS before operating. Failure to follow the safety rules and other
YFM7FGPW OWNER S MANUAL LIT B WARNING. READ THIS MANUAL CAREFULLY! It contains important safety information.
 READ THIS MANUAL CAREFULLY! It contains important safety information. OWNER S MANUAL WARNING LIT-11626-20-11 YFM7FGPW This ATV should not be ridden by anyone under 16 years of age. 3B4-28199-10 EBU17091
60V RECHARGEABLE LITHIUM-ION BATTERY
 60V RECHARGEABLE LITHIUM-ION BATTERY LB60A00/LB60A03/LB60A01/LB60A02 Owner s Manual TOLL-FREE HELPLINE: 1-855-345-3934 www.greenworkstools.com Read all safety rules and instructions carefully before operating
A-Type, S-Type, & Cruiser Scooters. Read and understand this entire manual before allowing child to use this product!
 A-Type, S-Type, & Cruiser Scooters OWNER S MANUAL Read and understand this entire manual before allowing child to use this product! NOTE: Manual illustrations are for demonstration purposes only. Illustrations
OWNER S/OPERATOR S MANUAL
 OWNER S/OPERATOR S MANUAL Never allow any child under the age of 16 to operate this Dirt Bike without continual adult supervision. Always wear a helmet it could save your life! Model: 125DX Provincial