Complete Reference Guide
|
|
|
- Clement Clark
- 6 years ago
- Views:
Transcription
1 TEMPUR Up Complete Reference Guide Patents pending 2013 Tempur-Pedic Management, LLC. All Rights Reserved. TUF
2 TEMPUR Up Limited Warranty for TEMPUR Up TEMPUR-PEDIC NORTH AMERICA, LLC ( TEMPUR-PEDIC ) WARRANTS THAT IT WILL, AT TEMPUR-PEDIC S OPTION, REPLACE OR REPAIR PURCHASER S TEMPUR-UP FOUNDATION IF IT IS DEFECTIVE DUE TO FAULTY WORKMANSHIP OR MATERIALS, SUBJECT TO THE LIMITATIONS DESCRIBED IN THIS WARRANTY. TEMPUR-PEDIC UNDERTAKES NO RESPONSIBILITY FOR THE QUALITY OF THE GOODS EXCEPT AS OTHERWISE PROVIDED IN THIS WARRANTY. THERE ARE NO WARRANTIES THAT EXTEND BEYOND THE DESCRIPTION ON THE FACE THEREOF. THIS WARRANTY APPLIES ONLY TO TEMPUR Up FOUNDATION. THIS MODEL MAY BE IDENTIFED BY REFERENCE TO THE SERIAL NUMBER ON THE PRODUCT. YEARS 1 THROUGH 3: FULL COVERAGE OF PARTS AND LABOR TEMPUR Up is warranted against defects in the workmanship or materials for a period of three (3) years from the warranty commencement date. During these first three years of the Warranty, the entire product is so covered, including factory supplied electronics, electrical components, drive motors and power supply components. Upon notice during the first through third year from the Warranty commencement date, Tempur-Pedic will send replacement parts to the Purchaser, at no cost, in order to replace any such defective part. In addition, Tempur-Pedic will pay all authorized labor and transportation costs associated with the repair or replacement of any parts which Tempur-Pedic determines to be defective. This three (3) year warranty shall not apply if the purchaser does not return any and all defective parts to Tempur-Pedic within 15 days of purchaser s receipt of such replacement parts furnished. Return of the Base, however, should it need to be replaced, is not required. In no instance will this Warranty cover any damage attributable to misuse or to normal wear and tear or to excessive weight placed upon the product. Nor will this Warranty cover any purchaser other than the original purchaser nor will it cover product purchased from an unauthorized third party. If you are not the original purchaser of this product, you take as is and with all faults. If you did not purchase this TEMPUR Up directly from Tempur-Pedic we will require proof of purchase from you demonstrating that you are the original purchaser and are eligible to make a valid claim under this Warranty. YEARS 4 THROUGH 5: FULL COVERAGE OF PARTS ONLY Upon notice during the years four (4) and five (5) from the warranty commencement date, Tempur-Pedic will offer replacement parts for any defective parts to the purchaser. Factory supplied electronics, electrical components, drive motors and power supply components are included. This two (2) year warranty shall not apply if purchaser does not return any and all defective parts to Tempur-Pedic within 15 days of purchaser s receipt of replacement part. Purchaser shall bear all service, transportation, labor and shipping costs related to the delivery and/or replacement of the defective part. BASE ONLY YEARS 1 THROUGH 15 WARRANTY Notwithstanding the above, Tempur-Pedic extends a 15 Year Warranty on the Base itself used in this product. Specifically, Tempur-Pedic warrants that for a full 15 years, any defect in the workmanship or the materials used in the Base itself shall be covered. The 15 year time span will be dated from the commencement of this Warranty. For purposes of this 15 Year Warranty, the Base consists of the wooden and metal structure of the and specifically excludes its cover, decking and legs, actuator lift motors, control box, remote controls, power supply, and any power supply cords. Return of the Base should it need to be replaced, is not required. A proper bed frame must provide sturdy support for both the mattress and foundation. Tempur-Pedic highly recommends either: (i) leg accessories designed for TEMPUR Up (provided by Tempur-Pedic at an additional cost) (ii) a 3 bed beam support system (provided by Tempur-Pedic at an additional cost), OR (iii) a support system of similar quality that is designed specifically to give slatted style bed frames additional structural support. For slatted style bed frames, it is incumbent upon purchaser to ensure that the frame utilized offers ample structural support for that particular slatted style frame. Failure to have a proper bed frame may invalidate the Warranty. This Warranty and other performance warranties are based on tests conducted on sets that consist of our mattresses and foundations. Tempur-Pedic foundations should be placed on a bed frame that is structurally capable of supporting the weight of the purchaser s Tempur-Pedic mattress, foundation, and user(s). IF PURCHASER USES INAPPROPRIATE BED FRAMES WITH THIS FOUNDATION, SUCH USE WILL VOID THIS WARRANTY AND ALL OTHER WARRANTIES, WHETHER EXPRESSED OR IMPLIED, INCLUDING, WITHOUT LIMITATION, THE IMPLIED WARRANTIES OF MERCHANTABILITY AND FITNESS FOR A PARTICULAR PURPOSE. Tempur-Pedic may require proof of the quality of bed frame if purchaser makes a claim under this warranty. Tempur-Pedic reserves the right to invalidate this warranty if the foundation is found to be in an unsanitary condition. The Consumer Product Safety Commission has created the Standard for the Flammability (Open Flame) of Mattress Sets in Federal Register 16 CFR Part s are specified for use with particular mattresses and therefore use outside of these specifications, should not be construed as 16 CFR Part 1633 compliant. Customer Service:
3 Warranty ADDITIONAL TERMS AND CONDITIONS In no instance will this Warranty cover any damage attributable to misuse or to normal wear and tear or to excessive weight placed upon the product. Nor will this Warranty cover any purchaser other than the original purchaser nor will it cover product purchased from an unauthorized third party. If you are not the original purchaser of this product, you take as is and with all faults. If you did not purchase this Tempur-Pedic TEMPUR Up directly from Tempur-Pedic we will require proof of purchase from you demonstrating that you are the original purchaser and eligible to make a valid claim under this Warranty. This Warranty does not include coverage for damage caused by the purchasers or by other users if the product has been used in a manner inconsistent with the operation and maintenance procedures outlined in the Complete Reference Guide, this Warranty, or any other applicable document published or approved by Tempur-Pedic. Nor does it include coverage if the product has been repaired or modified by the purchaser or by an unauthorized third party or if the product has been damaged in transit. This warranty does not apply to damage to mattresses, fabric, cables, electrical cords or items supplied by Resellers, as defined below. Contact the Reseller or other appropriate party for warranty information on these items. Nor does this Warranty apply to any unnecessary service calls, including costs for in-home service calls solely for the purpose of educating the consumer about the unit or finding an unsatisfactory power connection. In addition, if the recommended weight restrictions are not followed (Twin, Twin Long, Double, Queen, and Split/Dual CA King bases up to 650 lbs. each) this Warranty is void. Replacement parts may be new or reconditioned at Tempur-Pedic s discretion. Except for the 15 Year Warranty provided for the frame of this product, there is no warranty at all after five years, dating from commencement of this Limited Warranty. Additional Limitations on Warranty Coverage In the event a warranty claim is filed and a warranty replacement is deemed necessary, purchaser will be required to surrender the original product, including any components, to Tempur-Pedic at the time of the replacement. Return of the Base, however, should it need to be replaced, is not required. If original proof of purchase is not provided by the purchaser, Tempur-Pedic reserves the right to determine if the unit is covered, or is not covered, by this Warranty and may use the manufacturing date as the warranty commencement date. The decision to repair or to replace defective parts under this Limited Warranty shall be made by Tempur-Pedic at its option and at its sole discretion. Except for the Warranty provided for the frame of this product, there is no warranty at all after five years, dating from commencement of this Limited Warranty. TEMPUR-PEDIC SHALL NOT BE LIABLE FOR INCIDENTAL OR CONSEQUENTIAL DAMAGES RESULTING FROM THE USE OF THIS PRODUCT OR ARISING OUT OF ANY BREACH OF THIS WARRANTY. THE EXCLUSIVE REMEDY FOR BREACH OF THIS WARRANTY SHALL BE REPLACEMENT OR CREDIT TOWARDS REPLACEMENT AS SET FORTH HEREIN. THERE ARE NO EXPRESS OR IMPLIED WARRANTIES, INCLUDING IMPLIED WARRANTIES OF MERCHANTABILITY AND FITNESS FOR A PARTICULAR PURPOSE, OTHER THAN THE WARRANTY DESCRIBED ON THE FACE OF THIS LIMITED WARRANTY. Some states do not allow the exclusion or limitation of incidental or consequential damages, so the above limitation or exclusion may not apply to every purchaser. This warranty gives the purchaser specific legal rights, and the purchaser may also have other legal rights, which may vary from state to state. This Warranty is valid in all 50 states, Puerto Rico and Canada. If you the purchaser experience any problem with your TEMPUR Up during the Warranty period, please consult the troubleshooting section of your Reference Guide. If the problem persists, please contact Tempur-Pedic s Customer Service Department by calling toll-free or by sending an to customer.service@tempurpedic.com. PLEASE RETAIN THIS WARRANTY PAPERWORK AND ORIGINAL SALES RECEIPT FOR EASY FUTURE REFERENCE AND DOCUMENTATION. Repairs to or replacement of the Tempur-Pedic TEMPUR Up or its components under the terms of this Limited Warranty will apply to the original warranty period and will not serve to extend such period. This Warranty begins on the warranty commencement date which is the date of purchase for new unused products. If you did not purchase this Tempur-Pedic TEMPUR Up directly from Tempur-Pedic, proof of purchase will be required to demonstrate that you are the original purchaser and eligible to make a valid claim under this Warranty. Customer Service:
4 TEMPUR Up Table of Contents Warranty... 2 Safety Precautions... 5 Commonly asked Questions and Answers... 9 Specifications Installation Installation Instructions Pre-Delivery Procedure Delivery Procedure Joining Two s OPERATION Wired Remote Control Features Operating Instructions Special Functions Emergency Power-Down Change from Tandem System to Single System Troubleshooting Operating electronics and motors are UL-approved Customer Service:
5 Safety Precautions Safety Precautions WARNING! IMPORTANT SAFETY INSTRUCTIONS. PLEASE READ THESE INSTRUCTIONS THOROUGHLY BEFORE USING THIS PRODUCT. SAVE THESE INSTRUCTIONS! The TEMPUR Up has been designed to provide you with the reliable operation and durability you expect. This product has been inspected and tested prior to shipment. When using an electrical furnishing, basic precautions should always be followed, including the following: READ ALL INSTRUCTIONS BEFORE USING YOUR TEMPUR Up. DANGER To reduce the risk of electric shock: Always unplug this furnishing from the electrical outlet before cleaning. WARNING! To reduce the risk of burns, fire, electric shock, or injury to persons: Unplug from outlet before putting on or taking off parts. Close supervision is necessary when this furnishing is used by, or near children, invalids, or disabled persons. Use this furnishing only for its intended use as described in these instructions. Do not use attachments not recommended by the manufacturer. Never operate this furnishing if it has a damaged cord or plug, is not working properly, has been dropped or damaged, or dropped in water. Return the furnishing to a service center for examination and repair. Keep the cord away from heated surfaces. Never operate the furnishing with the air openings blocked. Keep the air openings free of lint, hair and the like. Never drop or insert any object into any opening. Do not use outdoors. Do not operate where aerosol (spray) products are being used or where oxygen is being administered. To disconnect, turn all controls to the off position, then remove plug from outlet. WARNING! Risk of Injury keep children away from extended head support (or other similar parts). WARNING! Risk of electric shock connect this furnishing to a properly grounded outlet only. See grounding instructions. GROUNDING INSTRUCTIONS This product must be grounded. If it should malfunction or breakdown, grounding provides a path of least resistance for electric current to reduce the risk of electric shock. This product is equipped with a cord having an equipment-grounding conductor and a grounding plug. The plug must be plugged into an appropriate outlet that is properly installed and grounded in accordance with all local codes and ordinances. DANGER Improper connection of the equipment-grounding conductor can result in a risk of electric shock. Check with a qualified electrician or serviceman if you are in doubt as to whether the product is properly grounded. Do not modify the plug provided with the product. If it will not fit the outlet, have a proper outlet installed by a qualified electrician. Customer Service:
6 TEMPUR Up SAVE THESE INSTRUCTIONS! GROUNDING SAFETY This product is for use on a nominal 120-volt circuit, and has a grounding plug that looks like the plug illustrated in sketch A (see figure). A temporary adapter as illustrated in sketches B and C can be used to connect this plug to a 2-pole receptacle as shown in sketch B if a properly grounded outlet is not available. The temporary adapter should be used only until a properly grounded outlet (sketch A) can be installed by a qualified electrician. The green colored rigid ear, lug, or the like extending from the adapter must be connected to a permanent ground such as a properly grounded outlet box cover. Whenever the adapter is used, it must be held in place by a metal screw. This product is for use on a circuit having a nominal rating of more than 120 volts and is factory equipped with a specific electric cord and plug to permit connection to a proper electric circuit. Make sure that the product is connected to an outlet having the same configuration as the plug. No adapter should be used with this product. If the product must be reconnected for use on a different type of electric circuit, the reconnection should be made by qualified service personnel. Unauthorized modifications could void the electrical portion of your warranty. Failure to use a properly grounded outlet for this product or modification of the plug will compromise this important grounding safety feature and may result in electric shock, electrical fire, or faulty operation of the product. FOR BEST RESULTS, The TEMPUR Up SHOULD BE PLUGGED INTO A SURGE PROTECTOR (not included). WARRANTY precaution! Do not open control box, motors or remote control (with the exception of the battery compartments). The warranty is void if these units are tampered with. Any repair or replacement of TEMPUR Up parts must be performed by an authorized service person. IN-HOME USE AND HOSPITAL DISCLAIMER Your TEMPUR Up is strictly designed for in-home use only. It is NOT designed for hospital use and is NOT designed to meet hospital standards. Do not use this bed with TENT TYPE oxygen therapy equipment or near explosive gases. WARNING! DO NOT USE NEAR PEOPLE USING OR WEARING MEDICAL DEVICES. FOR HOUSEHOLD / RESIDENTIAL USE ONLY. DO NOT USE OUTDOORS. This product conforms to UL STD 962. Customer Service:
7 Safety Precautions IMPORTANT SAFETY FEATURES Use this furnishing only for its intended use as described in these instructions. Do not use attachments not recommended by the manufacturer. If there is an overload weight condition on the head mechanism, the control unit will automatically stop the corresponding functions. Once the excess weight is removed, the control unit will automatically allow all functions to resume. Legs and locking casters are available for aftermarket purchase. In order to prevent the movement of this product with casters, all four casters should be in the locked position. This can be accomplished by pushing down the locking latch on the caster. To resume mobility of the product, lift the locking latch up. You are strongly encouraged to place rubber caster cups or carpet squares under the casters in addition to locking them in place if the product is positioned on a hard surface floor such as hardwood, tile or linoleum. Although the casters are locked and will not roll, they may slide. USER-SERVICEABLE PARTS This product is specifically designed to be maintenance-free for the user. Therefore, you are encouraged not to open any motors, alter the wiring, or adjust, modify or change the structure of the product, as it will void the warranty. SMALL CHILDREN AND PETS WARNING After the TEMPUR Up has been unboxed, immediately dispose of packaging as it can smother small children and pets. To avoid injury, children and pets should not be allowed to play on or under the bed. Children should not operate this product without adult supervision. Close supervision is necessary when this furnishing is used by, or near children, invalids, or disabled persons. SAVE THESE INSTRUCTIONS! Your TEMPUR Up has been designed to provide you with the reliable operation and durability you expect. This product has been inspected and tested prior to shipment. Service Requirements Service technicians are not responsible for moving furniture, removing headboards and footboards or any items required to perform maintenance on your TEMPUR Up. In the event the technician is unable to perform service due to lack of accessibility, the service call will be billed to the purchaser and the service will be re-scheduled. POWER RATINGS: MODEL NO: TUF-100 INPUT: AC 120V VAC, 60 Hz, 2.5 A MAX OUTPUT: DC 29V 2.5A Rated Current: 2.5A Control Accuator: 1 Customer Service:
8 TEMPUR Up PRODUCT RATINGS The lift motor in the TEMPUR Up is NOT designed for continuous use. Reliable operation and full life expectancy will be attained as long as the lift motor does not operate more than two (2) minutes over a 20-minute period, or approximately 10% duty cycle. Any attempt to circumvent or exceed this rating will shorten the life expectancy of this product and may void the warranty. The recommended weight restrictions on our TEMPUR Up s are as follows: Twin, Twin Long, Double, Queen, and Split/ Dual CA King foundations up to 650 lbs. each. This TEMPUR Up will structurally support the recommended weight distributed evenly across the the entire length of the foundation. This product is not designed to support or lift this amount of weight in the head section alone. INTENDED USAGE The electric adjustable bed should be installed with the head of the frame positioned close to a wall. NOTE: Exceeding the recommended weight restrictions could damage your TEMPUR Up and void your warranty. For best performance, you should enter and exit the TEMPUR Up while it is in the flat or fully lowered position. Customer Service:
9 Questions and Answers Commonly asked Questions and Answers What is the height of The TEMPUR Up? The TEMPUR-Up arrives ready to place within a standard bedframe. The total height will vary based on your bedframe. The height of the foundation alone is 9 inches. Where is the serial number on the TEMPUR Up? The serial number can be found in two locations of the foundation on the back of the right side of the head section (visible when the head section is raised), and on the law tag attached to the foot section. Is it possible to raise the height of the TEMPUR Up? The leg height of the TEMPUR Up can be adjusted from approximately 3 1/4 inches to approximately 12 1/4 inches with leg and caster sets available from Tempur Pedic. See the chart on page 10 for available options. Does the TEMPUR Up come with Headboard or footboard attachments? No, you cannot attach a headboard or footboard directly to the TEMPUR Up. However, you can use a freestanding bed including headboard, footboard and side rails by placing the complete TEMPUR Up within the assembled bed. The TEMPUR Up can be used in conjunction with bed slats. You should measure the inside dimensions of the assembled bed to be sure the foundation will fit. It may be easiest to assemble the bed around the foundation. One of our riser leg sets may be required in some cases. Does the unit have AC or DC motors? The lift motors used on the TEMPUR Up are DC motors. The foundation s power supply converts the AC power from the wall outlet to DC power. Who do I call for service or support if needed? Service and technical support are available by calling our dedicated customer service group at An owner s manual is included with each foundation including other information for making claims. Is an extended warranty available? No. Do I get a full warranty if I purchase a floor model? Yes. However, your warranty start date is the date of manufacture which is clearly marked on the law tag attached to the foundation (not your actual purchase date). Will the TEMPUR Up fit inside existing furniture? The TEMPUR Up is designed to fit into most freestanding beds. We always recommend you measure the inside dimensions of the assembled bed to be sure the TEMPUR Up will fit. Please refer to the specifications on page 10 for dimensions of the foundation. One of our aftermarket riser leg sets may be required in some cases. The TEMPUR Up can be used in conjunction with bed slats. What are the electrical requirements of the TEMPUR Up? During normal operation, the foundation can draw up to 2.5A of electricity from a normal AC wall outlet. Customer Service:


")

 4 Leg")
 6")
 9\"")


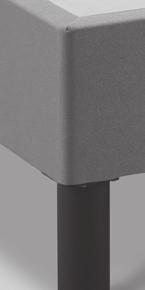


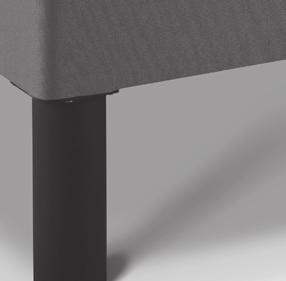
10 TEMPUR Up Specifications Bed Type A. Width B. Length Weight Twin 37 1/2" 74 1/4" 114 lb Twin Long 37 1/2" 79" 119 lb Double 53 1/4" 75" 139 lb Queen 58 1/4" 79" 151 lb Split CA King 35 3/4" 82 3/4" 118 lb 9"* * Legs and casters are optional and available as aftermarket purchases. A B 18"* 9" 54 3/4" Measurements are approximate and based on 9" riser leg kit. *Legs and casters are optional and available as aftermarket purchases. No Leg (standard) Caster Only* 4 1/2" Riser Leg* (without caster) 4 1/2" Riser Leg (with caster)* 6 1/2" Riser Leg* (without caster) 6 1/2" Riser Leg (with caster)* 9" Riser Leg* (without caster) 9" Riser Leg (with caster)* D D C D C D C D C D C D C D C C) To 0" 3 1/4" 4 1/2" 7 3/4" 6 1/2" 9 3/4" 9" 12 1/4" D) To Mattress 9" 12 1/4" 13 1/2" 16 3/4" 15 3/4" 18 3/4" 18" 21 1/4" CUsToMER service:
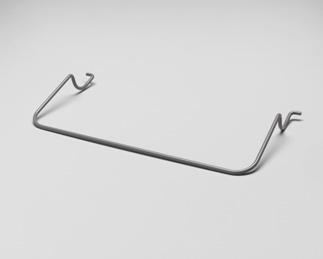
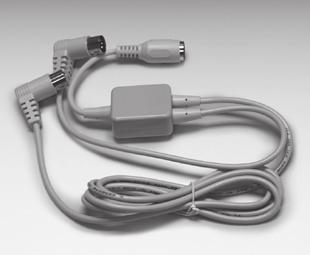


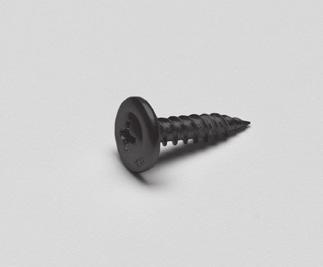

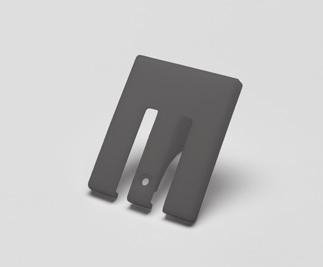


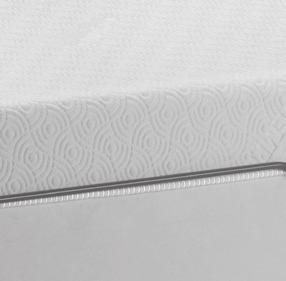


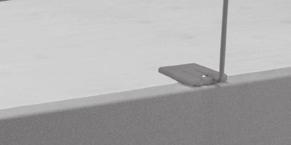
11 installation Installation Instructions *Attached to foundation for shipping. Appearance of some parts may differ from photos. Before discarding any packing materials, check the TEMPUR-Up carton and verify the following items in the parts list are included: PARTS LIST A. Wired Remote Control hardwired to bed (1) A. B. C. B. Connection Y-Cable (1) - (Only on Twin Long, and Split CA King) C. Mattress Retainer Bar (1)* D. Retainer Bar Plate (2)* E. Retainer Bar Screw (2)* F. 9-Volt Batteries (2) D. E. F. CUsToMER service:

12 TEMPUR Up Pre Delivery Procedure STEP 1 Lift carton top off box to reveal the bottom of the foundation. STEP 2 Using a power extension cord to reach the foundation, plug in the foundation s power cord. NOTE: Do not uncoil the foundation power cord which is packaged for shipment. STEP 3 Slide the cover off the battery compartment on the power supply and install the provided (2) 9-Volt Batteries (F). Replace the battery compartment cover. STEP 6 Once the warehouse test is successful and complete: Unplug the power extension cord Place the lid back on the outer carton and secure for delivery NOTE: Always keep the foundation in a flat, horizontal position during transportation and delivery. NOTE: To avoid damage to the TEMPUR-Up, always open the carton while the bed is in the flat position. STEP 4 Cut the plastic strapping on each Wired Remote Control from the foundation frame. Ensure that the wired remote is connected to the foundation. STEP 5 Power Test Procedure: Press each of the following buttons long enough to illuminate the blue LED backlight on the remote control, and watch/listen for the foundation to activate. This ensures you will be delivering a foundation that is fully functional. Test the foundation by pressing the buttons in the following sequence. 1. Head Lift 2. Flat NOTE: Only press each button long enough to hear or see the function activate on the foundation. CUsToMER service:
 9-Volt Batteries were installed into the battery compartment of the power supply.")
13 installation Delivery Procedure NOTE: Always keep the TEMPUR-Up in a flat, horizontal position during transportation and delivery. Always open the box in the flat position. STEP 4 Remove the Wired Remote Control from the frame. Verify the (2) 9-Volt Batteries were installed into the battery compartment of the power supply. STEP 1 Carefully take the foundation in the carton to the bedroom and place next to where the customer wants it set up. STEP 2 Carefully lift the TEMPUR-Up out of the shipping carton, keeping the unit topside down. For safety reasons, this should be performed by two people. NOTE: To avoid damage to the foundation, always open the carton while the bed is in the flat position. STEP 3 The products come packed in a cardboard box. Some components are also sealed in plastic film. To unpack, proceed as follows: STEP 3A Remove the cardboard and plastic film from the components. STEP 3B Check the package contents. STEP 3C Dispose of the packaging materials. STEP 3D Keep the user manual at hand for the operators. STEP 5 Connect the power cord from the power supply to the surge protector (not included). STEP 6 NOTE: Aftermarket legs and casters are available for purchase. If purchased, attach TEMPUR-Up Legs by following instructions included with accessories. NOTE: Hand tighten the legs securely to the frame. DO NOT over tighten. Make sure the legs are screwed completely into the frame. Legs that are not securely attached may become unsafe. DO NOT unscrew a leg to compensate for an uneven floor. NOTE: In order to prevent the movement of this product, all four casters should be in the locked position. CUsToMER service:


 and replace Retainer Bar Plate (D).")
 over to the topside up position.")
 off the ground before")


 on")


.")
 within a bedframe,")


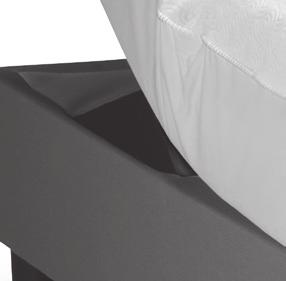
14 TEMPUR Up STEP 7 If this delivery involves dual foundations and/or split mattresses, see instructions for joining two foundations on page 15. STEP 10C Install Mattress Retainer Bar (C) and replace Retainer Bar Plate (D). STEP 8 Carefully flip the TEMPUR-Up (s) over to the topside up position. NOTE: Make sure to lift the foundation(s) off the ground before flipping over. DO NOT use legs as a leverage point to ensure they do not break. STEP 10D Tighten Retainer Bar Screw (E) with screw driver.! ATTENTION! Improper handling DO NOT lean the bed against the installed legs to flip it over. STEP 9 Route the control box cable to your preferred side of the bed. STEP 11 Place the mattress(es) on the foundation(s). STEP 10 Install the Mattress Retainer Bar (C). STEP 10A Remove Mattress Retainer Bar (C) from frame. STEP 10B Unscrew Retainer Bar Plate (D) and Retainer Bar Screw (E) from frame with screw driver (not provided). WARNING: When placing the foundation(s) within a bedframe, verify the space between the headboard cross member and the top of the mattress is no more than 3 inches. STEP 12 Ensure the power switch on the surge protector is in the on position and that it is plugged into the wall outlet. Check the system for functionality with the mattress in place. CUsToMER service:

15 Installation Instructions For Joining Two s One wired remote control and two TEMPUR Up s Assembling Split/Dual s (Frame A and Frame B) to be used together as a single King or CA King system. STEP 4 Plug in the A output of the Y-Cable into Frame A control port. Note: The use of Frame A and Frame B is for description purposes only and the beds will not actually be labeled Frame A or Frame B. NOTE: Wired Remote Control and Y-Cable are attached to underside of the TEMPUR Up for shipping. STEP 1 Carefully unplug the Wired Remote Controls from Frame A and Frame B. STEP 2 Remove both Wired Remote Controls and set aside. Place the spare remote control in a safe place for any future use. STEP 3 Remove and extend one of the provided Y-Cables from the frame. STEP 5 Plug in the B output of the Y-Cable into Frame B control port. STEP 6 Plug one of the provided Wired Remote Controls into the Control Input side of the Y-Cable. Customer Service:


 2. HEAD DOWN (HD) 3.")
16 TEMPUR Up Wired Remote Control Features READ ADVISORY INFORMATION IN THE SAFETY PRECAUTIONS SECTION OF THIS GUIDE CAREFULLY BEFORE USING THIS PRODUCT. THE POTENTIAL FOR ELECTRIC SHOCk EXISTS IF ELECTRICAL COMPONENTS ARE NOT INSTALLED OR OPERATED PROPERLY. 1. HEAD UP (HU) 2. HEAD DOWN (HD) 3. FLAT (F) CUsToMER service:


 Head Down (2) Flat (3) This function raises the Head section to the desired")
.")
 and the bed frame will automatically move to its complete flat position. STEP 1 Begin in the flat position.")

17 operation Operating Instructions To ensure safe operation of the system, please observe the following safety instructions: CAUTION: Keep children away from electrically adjustable beds and control units. There is risk of injury and electric shock. CAUTION: Unplug the power cord during a thunderstorm or if you do not intend to use the system for an extended period of time. NOTE: Do not put the remote control button-side down. NOTE: The actuators will continue moving until you release button or the maximum height is reached. MANUAL ADJUSTMENT OF HEAD CHANGING LINENS Head Up (1) Head Down (2) Flat (3) This function raises the Head section to the desired position. Press the HEAD UP button (1). Keep pressing the button until the desired height is reached. This function lowers the Head section to the desired position. Press the HEAD DOWN button (2). Keep pressing the button until the desired height is reached. Press the FLAT button (3) and the bed frame will automatically move to its complete flat position. STEP 1 Begin in the flat position. If necessary, use the FLAT button (3) to lower the Head section. STEP 2 Lower the Mattress Retainer Bar to gain access to the foot of the mattress. STEP 3 After replacing the linens make sure the Mattress Retainer Bar is raised to the upright locked position. NOTE: Ensure all obstructions are clear of the foundation s undercarriage when lifting or lowering the foundation s head section to avoid risk of pinching or damage. NOTE: Ensure that the Mattress Retainer Bar is in the upright locked position to prevent mattress slippage during operation. CUsToMER service:
18 TEMPUR Up Special Functions EMERGENCY POWER-DOWN The power-down button on the power supply unit gives the user the ability to move the bed to a flat position during power failure. SINGLE SYSTEM Press the Power-Down button on the power supply until the bed arrives at the flat position. After this procedure the two (2) 9-Volt Batteries must be changed. DANGER: Risk of pinching! NOTE: During the emergency power-down procedure the lowering speed will be reduced. TANDEM OPERATION Each foundation must be moved to the flat position separately by following the single system instructions. CHANGE FROM A TANDEM SYSTEM TO A SINGLE SYSTEM STEP 1 Disconnect both foundations from wall outlet. STEP 2 Remove connections for Y-Cable from each control port. NOTE: Store Y-Cable in a safe place for future use. NOTE: Locate spare Wired Remote Control from storage for use on second base. STEP 3 Reconnect Wired Remote Control cable to the control port of each base. After this procedure the two (2) 9-Volt Batteries of both power supplies must be changed. CUsToMER service:
19 Special Functions and Troubleshooting Troubleshooting In the event that the TEMPUR Up fails to operate properly, investigate the symptoms and possible solutions provided in the chart below: SYMPTOM Wired Remote Control backlit LED illuminates and appears to be operable but will not activate the TEMPUR Up. SOLUTION Verify that the power cord is plugged into a working, grounded electrical outlet. A grounded, electrical surge protection device is recommended. Test the outlet by plugging in another working appliance. Unplug the power cord, wait 60 seconds and plug the power cord back in to reset the electronic components. No features of the TEMPUR Up will activate. Your surge protection device and/or electrical circuit breaker may be tripped. Check both to verify. Your surge protection device and/or electrical outlet may be defective. Test the outlet by plugging in another working appliance. Head section will elevate but will not return to the horizontal (Flat) position. The TEMPUR Up may be obstructed. Elevate and check for an obstruction. Remove the obstruction. The head section may be too close to the wall. Head lift function has minor interference during operation. Make sure that you are following the duty cycle of the motors (do not operate more than 2 minutes over a 20-minute period, or approximately 10% duty cycle). Press the lift button squarely and accurately. A clicking noise is heard under the bed when raising or lowering. This is normal. The lift motor relays click when they are engaged. No action is required. Customer Service:
20 Serial Number: Write Serial Number here for future reference. For technical support or service, Questions About Your Tempur-Pedic Mattress, or to Order TEMPUR Up Accessories: or visit TEM v1
Complete Reference Guide
 Reflexion UP Foundation Complete Reference Guide Patents pending 2014 Tempur Sealy International. All Rights Reserved. 06485100 12/12/2013 Reflexion UP Foundation Limited Warranty for Reflexion UP Foundation
Complete Reference Guide
 Reflexion UP Foundation Complete Reference Guide Patents pending 2014 Sealy, Inc. All Rights Reserved. 06485100 4/16/2014 Reflexion UP Foundation Limited Warranty for Reflexion UP Foundation SEALY WARRANTS
Complete Reference Guide
 TEMPUR Ergo Plus Complete Reference Guide Patents pending 2013 Tempur-Pedic Management, LLC. All Rights Reserved. TEPL-100-01 TEMPUR-Ergo Plus LIMITED WARRANTY FOR TEMPUR Ergo Plus TEMPUR-PEDIC NORTH AMERICA,
Complete Reference Guide
 TEMPUR Ergo Plus Complete Reference Guide Patents pending 2014 Tempur-Pedic Management, LLC. All Rights Reserved. TEPL-100-03 TEMPUR-Ergo Plus LIMITED WARRANTY FOR TEMPUR ERGO PLUS TEMPUR-PEDIC NORTH AMERICA,
c EDR /11. ShipShape OWNERS MANUAL. [ power foundations ]
![c EDR /11. ShipShape OWNERS MANUAL. [ power foundations ]](/thumbs/87/96491649.jpg "c EDR /11. ShipShape OWNERS MANUAL. [ power foundations ]") 99301115-c EDR11746 4/11 ShipShape OWNERS MANUAL [ power foundations ] contents Advisory... 4 Assembly... 6 Hand Control Function... 15 Accessories... 16 Troubleshooting... 17 1-2-Lifetime Warranty...
99301115-c EDR11746 4/11 ShipShape OWNERS MANUAL [ power foundations ] contents Advisory... 4 Assembly... 6 Hand Control Function... 15 Accessories... 16 Troubleshooting... 17 1-2-Lifetime Warranty...
Adjustable Base. CONTENTS Advisory Setup and Installation Innova Wired Hand Control year Warranty 1-10
 Adjustable Base #201 Wired Owner Manual CONTENTS Advisory Setup and Installation Innova Wired Hand Control 1-2-10 year Warranty 1-10 WARNING Attention: Read the following information before using this
contents Advisory... 3 Acoustics... 4 Installation... 5 Remote Control Function... 11
 owners manual 50 contents Advisory... 3 Acoustics... 4 Installation... 5 Remote Control Function... 11 Tandem Syncing (One remote control operating both bases in tandem)... 12 Troubleshooting... 13 1-2-10
REVERIE ADJUSTABLE BED OWNER S MANUAL. Reverie Deluxe Adjustable Bed. Copyright All Rights Reserved. Manual Part No.
 REVERIE ADJUSTABLE BED OWNER S MANUAL Reverie Deluxe Adjustable Bed REV: 2-25-09 Manual Part No. A-AB-A18-WWM3-C Copyright 2009. All Rights Reserved Ascion LLC. TABLE OF CONTENTS Safety Precautions...
Reverie 3EM Wireless Power Base
 Reverie 3EM Wireless Power Base Owner s Manual and Reference Guide REV: 2016-08-03 TW Manual Part No. D1103-301-3EM Manual Part No. PT-MAN-3EM Copyright 2016. All Rights Reserved. Ascion LLC. Reverie 3EM
Reverie 3E Adjustable Foundation
 Reverie 3E Adjustable Foundation Owner s Manual and Reference Guide REV: 2014-01-14 Manual Part No. D1103-301-3E Copyright 2014. All Rights Reserved Ascion LLC. Reverie 3E Adjustable Foundation Table Of
c EDR /11 OWNERS MANUAL. [ power foundations ]
![c EDR /11 OWNERS MANUAL. [ power foundations ]](/thumbs/91/107132452.jpg "c EDR /11 OWNERS MANUAL. [ power foundations ]") 99301178-c EDR11777 4/11 OWNERS MANUAL [ power foundations ] contents Advisory... 4 Acoustics... 8 Assembly... 9 Bronze Hand Control Operation... 13 Bronze Tandem Setup (king size power foundation)...
99301178-c EDR11777 4/11 OWNERS MANUAL [ power foundations ] contents Advisory... 4 Acoustics... 8 Assembly... 9 Bronze Hand Control Operation... 13 Bronze Tandem Setup (king size power foundation)...
OWNER S MANUAL The CLASSIC Adjustable Bed Frame
 OWNER S MANUAL The CLASSIC Model Number: RI-AB1-A25-WH This product and all our bedding products are covered by one or more of the following issued and pending U.S. patents including Nos. 7448100, D657157,
User Manual. Posture+ Adjustable Base. For customer service call:
 User Manual Posture+ Adjustable Base For customer service call: 1-877-707-7533 1 IMPORTANT INFORMATION PLEASE READ THESE INSTRUCTIONS THOROUGHLY BEFORE USING THIS PRODUCT. PROPER OPERATION OF YOUR ADJUSTABLE
CONTENTS. Advisory Acoustics Installation Remote Control Function Remote Control Programming Troubleshooting...
 owners manual 100 CONTENTS Advisory... 4 Acoustics... 6 Installation... 7 Remote Control Function... 10 Remote Control Programming... 11 Troubleshooting... 15 Accessories... 16 1-2-10 Warranty... 17 If
owners manual 100 I/C-UBL
 owners manual 100 I/C-UBL contents Advisory... 4 Acoustics... 6 Installation... 7 Remote Control Function... 10 Remote Control Programming... 11 Troubleshooting... 14 Accessories... 15 1-2-10 Warranty...
adjustable base owners manual
 adjustable base owners manual leesa.com contents Parts... 3 Assembly... 4 Remote Control Function... 7 Remote Control Programming... 8 Troubleshooting... 9 Accessories... 10 Warranty... 11 Advisory...
The Sleep Number Adjustable Base Assembly instructions / Owner guide
 The Sleep Number Adjustable Base Assembly instructions / Owner guide ship-friendly packaging system quick and easy setup made in USA quality adjustable bed base 99301149-c EDR11623 8/10 CONTENTS Assembly...
OWNER S MANUAL The SUMMIT Adjustable Bed Frame
 ALL IN ONE FILE-SUMMIT_Layout 4 4/24/17 9:05 PM Page 1 OWNER S MANUAL The SUMMIT Adjustable Bed Frame Model Number: RI-ABTL-A25-PWCB3-SB-UCLK-SRC-110 Serial Number: This product and all our bedding products
k EDR /11. S cape OWNERS MANUAL. S cape Platform. Silhouette. Pro-motion. Bronze. [ power foundations ]
![k EDR /11. S cape OWNERS MANUAL. S cape Platform. Silhouette. Pro-motion. Bronze. [ power foundations ]](/thumbs/87/96491583.jpg "k EDR /11. S cape OWNERS MANUAL. S cape Platform. Silhouette. Pro-motion. Bronze. [ power foundations ]") 99300787-k EDR11739 4/11 OWNERS MANUAL S cape S cape Platform Silhouette Pro-motion Bronze [ power foundations ] contents Advisory... 3 Acoustics... 5 Installation... 6 Turnbuckle Adjustment... 18 Troubleshooting...
99300787-k EDR11739 4/11 OWNERS MANUAL S cape S cape Platform Silhouette Pro-motion Bronze [ power foundations ] contents Advisory... 3 Acoustics... 5 Installation... 6 Turnbuckle Adjustment... 18 Troubleshooting...
OWNERS MANUAL. Gold Series
 LUNAR OWNERS MANUAL Comfort Base Gold Series Contents Safety Information...3 What Is Included...6 Assembly - Base...7 Location of Controls - Remote...11 Operation - Main...11 Operation - Linking the Remote...12
Adjustable Base Assembly Instructions
 Adjustable Base Assembly Instructions Welcome and Congratulations Congratulations on your purchase of a Sleep Number bed! You re about to join the 8 million people who ve traded their innerspring mattresses
QVC Adjustable Base Assembly Instructions
 QVC Adjustable Base Assembly Instructions Welcome and Congratulations Congratulations on your purchase of a SLEEP NUMBER bed! You re about to join the more than 8 million people who ve traded their innerspring
 CUSTOMER SERVICE: 800-973-8374 Frame Assembly Instructions Headboard Installation E 1. Use the remote control to raise the head of the adjustable foundation in order to gain access to the foundation
Tech Power Base Low Profile
 Reverie 3E Tech Power Base Low Profile Owner s Manual and Reference Guide REV: 2017-1-10 Manual Part No. D1103-301-3ETLP US Manual Part No. PT-MAN-3ET-LP Copyright 2015. All Rights Reserved. Ascion LLC.
Adjustable Base Avante Garde Wireless. Owner Manual. OKIN Wireless Remote #Avante Garde Adjustable Bed Base
 OKIN Wireless Remote #Avante Garde Adjustable Bed Base Head Buttons Used to raise or lower the head of the bed base. Zero Gravity button Preprogrammed for optimum comfort and relaxation position Memory
CONTENTS. Advisory Acoustics Fabric Cleaning Information Installation Power Down Operation Underbed Light...
 owners manual 300 CONTENTS Advisory... 3 Acoustics... 5 Fabric Cleaning Information... 5 Installation... 6 Power Down Operation... 9 Underbed Light... 11 Remote Control Function... 12 Remote Control Programming...
Adjustable Base PB873 Wireless. Owner Manual. PB873 OKIN Wireless Remote Adjustable Bed Base. With OKIN Refined Control and Children Safety Lock
 PB873 OKIN Wireless Remote Adjustable Bed Base Head Buttons Used to raise or lower the head of the bed base. Zero Gravity button Preprogrammed for optimum comfort and relaxation position Memory Button
Owner S Manual. Adjustable Base # ECZ04R8Z Wireless. CONTENTS Advisory Setup and Installation Wireless Hand Control year Warranty
 higher angled bed Adjustable Base # ECZ04R8Z Wireless WHEN TWO BEDS DO NOT ALIGN: on the higher angled bed of the two, use a 19mm wrench to turn the nuts on the new LEVEL RIGHT counterclockwise to adjust
OWNERS MANUAL American Adjustables 2618 Brick Church Pike Nashville TN,
 OWNERS MANUAL Serial #: Purchased From: Date of Purchase: 2618 Brick Church Pike Nashville TN, 37207 1-855-690-6699 2017 TABLE OF CONTENTS STOP DO NOT RETURN TO STORE. DO NOT CONTACT STORE. PLEASE CALL
owners manual G-122 NWH G-122 G-122 USB Simplicity 3.0 S-cape 2.0 / S-cape LPAdjustableBases.com
 owners manual G-122 NWH G-122 G-122 USB S-cape 2.0 / S-cape + 2.0 / Simplicity 3.0 Simplicity 3.0 S-cape 2.0 / S-cape + 2.0 LPAdjustableBases.com contents Advisory... 4 Acoustics... 6 Installation...
contents Advisory... 4 Acoustics... 6 Installation... 7 Remote Control Function Remote Control Programming Power Down Operation...
 owners manual L-132 contents Advisory... 4 Acoustics... 6 Installation... 7 Remote Control Function... 14 Remote Control Programming... 15 Power Down Operation... 19 Troubleshooting... 22 Accessories...
owners manual G-122 NWH G-122 G-122 USB Simplicity 3.0 S-cape 2.0 / S-cape LPAdjustableBases.com
 owners manual G-122 NWH G-122 G-122 USB S-cape 2.0 / S-cape + 2.0 / Simplicity 3.0 Simplicity 3.0 S-cape 2.0 / S-cape + 2.0 LPAdjustableBases.com CONTENTS Advisory... 4 Acoustics... 6 Installation...
FREESTYLE Owner s Manual
 FREESTYLE Owner s Manual Contents Safety Information...2 What Is Included...5 Assembly - Base...6 Location of Controls - Remote...13 Operation - Main...14 Troubleshooting...16 Speciications...17 Technical
PRIVIA OWNER S MANUAL. The. Wireless Adjustable Bed ADJUSTABLE BEDZ TO FIT YOUR LIFE CUSTOM SLEEP. Model Number: CM-ABP-A18-WWM-L-U
 OWNER S MANUAL The PRIVIA CUSTOM SLEEP Model Number: CM-ABP-A18-WWM-L-U Wireless Adjustable Bed Serial Number: (Place your serial number here for ready reference) COPYRIGHT 2011 CUSTOMATIC CUSTOM SLEEP
CONTENTS. Advisory Acoustics Fabric Cleaning Information Installation Remote Control Function... 10
 owners manual CONTENTS Advisory... 3 Acoustics... 5 Fabric Cleaning Information... 5 Installation... 6 Remote Control Function... 10 Remote Control Programming... 11 Troubleshooting... 13 1-3-25 Warranty...
Freestyle OWNER S MANUAL. Wireless Adjustable Bed. The. Exclusively Designed by. Serial Number: Model Number:CM-ABD-A18-WWM-AC-SR
 ALL IN ONE FILE-FREESTYLE INNOVATIONS_Layout 4 8/18/15 10:22 PM Page 1 OWNER S MANUAL Exclusively Designed by TO FIT YOUR LIFE TM Model Number:CM-ABD-A18-WWM-AC-SR This product and all our bedding products
k EDR /12. Prodigy OWNERS MANUAL. English / Spanish. [ adjustable bases ]
![k EDR /12. Prodigy OWNERS MANUAL. English / Spanish. [ adjustable bases ]](/thumbs/72/66628024.jpg "k EDR /12. Prodigy OWNERS MANUAL. English / Spanish. [ adjustable bases ]") 99301078-k EDR12091 11/12 Prodigy OWNERS MANUAL English / Spanish [ adjustable bases ] CONTENTS Advisory... 3 Acoustics... 5 Installation... 6 Prodigy Remote Control Function...15 Prodigy Remote Control
99301078-k EDR12091 11/12 Prodigy OWNERS MANUAL English / Spanish [ adjustable bases ] CONTENTS Advisory... 3 Acoustics... 5 Installation... 6 Prodigy Remote Control Function...15 Prodigy Remote Control
Flex 7 Adjustable Bed Base
 TM Flex 7 Adjustable Bed Base Owner s Manual and Reference Guide Personal Comfort Flex built by: REV: 2016-07-13 TW Manual No. D1103-301-7SA Manual Part No. PT-MAN-7S-AN Copyright 2016. All Rights Reserved.
owners manual
 owners manual www.simmons.com contents Advisory... 3 Acoustics... 5 Assembly... 6 Renew + Remote Control Function... 13 Renew + Remote Control Programming... 14 Power Down Function... 18 USB Station Relocation
ADJUSTABLE BASE OWNER S MANUAL
 ADJUSTABLE BASE OWNER S MANUAL table of contents Safety Precautions and Usage Statements.... 1-2 Parts List.... 3 Base Overview....4 Quick Reference Guide....5 Installation Guide...6-8 Divided Queen Installation
ADJUSTABLE COMFORT ASSEMBLY INSTRUCTIONS
 ASSEMBLY INSTRUCTIONS ASSEMBLY INSTRUCTIONS For customer service call 1-877-707-7533 or email azcustomerservice@classicbrands.org STEP 1: Carefully open the carton and remove all boxes then lay out the
Prodigy CE. owners manual. LPAdjustableBases.com R-142
 Prodigy CE owners manual R-142 LPAdjustableBases.com CONTENTS Advisory... 4 Assembly... 6 Remote Control Function... 10 Remote Control Programming... 11 Power Down Operation... 14 Troubleshooting... 16
Flex 5 Adjustable Bed Base
 TM Flex 5 Adjustable Bed Base Owner s Manual and Reference Guide Personal Comfort Flex built by: REV: 2016-07-13 TW Manual Part No. D1103-301-5DA Copyright 2016. All Rights Reserved. Personal Comfort Flex
owners manual LPAdjustableBases.com Queen Split King
 owners manual Queen Split King LPAdjustableBases.com CONTENTS Advisory... 4 Acoustics... 6 Fabric Cleaning Information... 6 Installation... 7 Power Down Operation... 12 Remote Control Function... 14 Remote
Owner s Manual Manual Part No. D1103-Serta-MSE REV: Copyright All Rights Reserved Ascion LLC.
 Owner s Manual Manual Part No. D1103-Serta-MSE REV: 2013-10-24 Copyright 2013. All Rights Reserved Ascion LLC. Table Of Contents Safety Precautions...3 Parts List...8 Adjustable Bed Frame Assembly...9
Relaxer OWNER S MANUAL. The. Wireless Adjustable Bed CERTIFIED & APPROVED! Model Number:RI-ABD2-A18-WWM-L-SRB. Serial Number:
 OWNER S MANUAL CERTIFIED & APPROVED! Model Number:RI-ABD2-A18-WWM-L-SRB Serial Number: (Place your serial number here for ready reference) This product and all our bedding products are covered by one or
VESTA. Platinum Series. Owner s Manual
 VESTA Platinum Series Owner s Manual Contents Safety Information...2 What Is Included...5 Assembly - Base...6 Assembly - King Base...9 Operation - Main...9 Location of Controls - Remote...10 Troubleshooting...11
THE REFLEXION -7 ADJUSTABLE BASE. Owner s Manual
 THE REFLEXION -7 ADJUSTABLE BASE Owner s Manual THE REFLEXION -7 ADJUSTABLE BASE Table of Contents 2 4 6 8 10 12 13 14 16 Safety Precautions Parts List Installation Guide Advanced Feature Highlights Using
Flex 5 Adjustable Bed Base
 Flex 5 Adjustable Bed Base Owner s Manual and Reference Guide PERFORMANCE BY REV: 2017-04-10 Manual Part No. PT-MAN-4MFLX TW Part No. D1103-301-4MPC Copyright 2016. All Rights Reserved. Ascion LLC. Flex
Reverie 7T Power Base
 Reverie 7T Power Base Owner s Manual and Reference Guide REV: 2016-05-11 Manual Part No. D1103-301-7T Copyright 2016. All Rights Reserved. Ascion LLC. Reverie 7T Power Base Table of Contents Safety Precautions...3
INSTRUCTION MANUAL. 12-Station HD Shop 12V Portable Battery Charger
 INSTRUCTION MANUAL 12-Station HD Shop 12V Portable Battery Charger IMPORTANT SAFETY INSTRUCTIONS 1. SAVE THESE INSTRUCTIONS This manual contains important safety and operating instructions for your HD
Soothes every aching muscle in its path.
 Soothes every aching muscle in its path. MAX 2 Dual-Node Massager Powerful massage. Maximum relief. Merrimack, New Hampshire USA 03054 800-846-3000 Brookstone.com Table of contents Warnings and Cautions....................................................
Avante OWNER S MANUAL. The. Wireless Adjustable Bed with Advanced Leg-Lowering LOUNGE Feature CERTIFIED & APPROVED!
 with Advanced Leg-Lowering LOUNGE Feature OWNER S MANUAL CERTIFIED & APPROVED! Model Number:RI-ABF-A18-WWM-ESF-L-AC-U-CCCBR4 Serial Number: (Place your serial number here for ready reference) This product
StormPro BA Series Sump Pump
 Page 1 of 8 Marks & Meanings DANGER: Keep the pump equipment out of the reach of children! Warns that the failure to follow the directions given could cause serious risk to individuals or objects. WARNING:
owners manual LPAdjustableBases.com D-122 D-222 D-222S ENGLISH SPANISH FRENCH
 Menu owners manual D-122 D-222 D-222S ENGLISH SPANISH FRENCH LPAdjustableBases.com contents Advisory... 4 LP Sense Technology... 6 Acoustics... 8 Fabric Cleaning Information... 8 Installation... 9 D-122
Owner s Manual. Powered Dandy Lifts PLM-100, PLM100W, PLM150, PLM-150W. (See separate manual for PLM-250) Model # Serial #
 Model # Serial #") Owner s Manual Powered Dandy Lifts PLM-00, PLM00W, PLM50, PLM-50W (See separate manual for PLM-250) Model # Serial # Southworth Products Corp P.O. Box 380/Portland, Maine 0404-380 Phone 800-743-000 FAX
Owner s Manual Powered Dandy Lifts PLM-00, PLM00W, PLM50, PLM-50W (See separate manual for PLM-250) Model # Serial # Southworth Products Corp P.O. Box 380/Portland, Maine 0404-380 Phone 800-743-000 FAX
owners manual!d-122!d-222!d-222s
 Menu owners manual!d-122!d-222!d-222s!english!spanish!french LPAdjustableBases.com CONTENTS Advisory... 4 LP Sense Technology... 6 Acoustics... 8 Fabric Cleaning Information... 8 Installation... 9 D-122
SOLO VACUUM OPERATING & MAINTENANCE
 SOLO VACUUM INTRODUCTION OPERATING & MAINTENANCE INSTRUCTIONS This operator s book has important information for the use and safe operation of this machine. Read this book carefully before starting the
DC to AC Power Inverters
 Manufacturer of Dimensions TM Inverters 4467 White Bear Parkway St. Paul, MN 55110 Phone: 651-653-7000 Fax: 651-653-7600 E-mail: inverterinfo@sensata.com Web: www.dimensions.sensata.com ISO 9001:2000 Certified
DC to AC Power Inverters
 Manufacturer of Dimensions TM Inverters 4467 White Bear Parkway St. Paul, MN 55110 Phone: 651-653-7000 Fax: 651-653-7600 E-mail: inverterinfo@sensata.com Web: www.dimensions.sensata.com 121114C OWNERS
Penguin Gentoo 600B Cordless Sprayer User s Manual
 Penguin Gentoo 600B Cordless Sprayer User s Manual Please read before use. Serial Number: Date of Purchase: Distributor: LIMITED WARRANTY POLICY Masterclean Products, LLC endeavors to provide high quality
2100 Childbearing Bed OPERATIONS MANUAL. For Parts or Technical Assistance
 2100 Childbearing Bed OPERATIONS MANUAL For Parts or Technical Assistance 1 800 327 0770 Table of Contents INTRODUCTION........................................................................... 2 SPECIFICATIONS.........................................................................
Heavy-Duty Welding Fabrication Table
 Heavy-Duty Welding Fabrication Table with Fix-Up Kit Owner s Manual WARNING: Read carefully and understand all ASSEMBLY AND OPERATION INSTRUCTIONS before operating. Failure to follow the safety rules and
XPC-EBP64 External Battery Pack User & Installation Manual Xtreme Power Conversion Corporation. All rights reserved.
 XPC-EBP64 User & Installation Manual www.xpcc.com 2015. All rights reserved. (Rev 9/28/15) Table of Contents Introduction...5 Product Description...5 Extended Battery Pack Configurations...6 Safety Information...7
INSTALLATION INSTRUCTIONS, PARTS LIST AND CONFIGURATION GUIDE FOR THE CARBONATOR. Large Model No
 Please refer to the Schroeder America website (www.schroederamerica.com) for information relating to Schroeder America installation and Service Manuals, Instruction Sheets, Technical Bulletins, Service
ADI-125/750 ADI-125/1500 ADI-125/2500
 Manufacturer of Dimensions TM Inverters 4467 White Bear Parkway St. Paul, MN 55110 Phone: 651-653-7000 Fax: 651-653-7600 E-mail: inverterinfo@sensata.com Web: www.dimensions.sensata.com 121094B OWNERS
FUNNEL CAKE FRYER Instruction Manual Models: 8078 / FC-4, 8082 / FC-6, and 8090 / FC-4
 Part No. 89784 Revised: December 2005 FUNNEL CAKE FRYER Instruction Manual Models: 8078 / FC-4, 8082 / FC-6, and 8090 / FC-4 Cincinnati, OH 45241-4807 USA GAS SAFETY PRECAUTIONS INSTALLATION INSTRUCTIONS
OWNER'S MANUAL. Royal Sovereign International Inc. RET Desk Series
 OWNER'S MANUAL RET Desk Series Read all instructions carefully before use. For any Customer Support needs please choose the Customer Support tab on www.royalsovereign.com Royal Sovereign International
WF-5110R True Sine Wave Inverter
 Operator s Manual WF-5110R True Sine Wave Inverter WF-9900 Series WF-5110R ( The Inverter model number is located on the label on top of the enclosure) Distributed in the U.S.A. and Canada by ARTERRA DISTRIBUTION
Instructions for Tradewind. Please read before use. Model # Serial # Form # ADM Stowe Dr., Poway, Ca
 Instructions for 3000 Tradewind Please read before use. Model # Serial # Form # ADM-3000 4-09 13655 Stowe Dr., Poway, Ca. 92064 FRONT SWITCH 1 2 7 3 4 5 6 1. Carry Handle 2. Daisy Chain GFI Outlet 3.
AUTOMATIC SUBMERSIBLE UTILITY PUMP
 AUTOMATIC SUBMERSIBLE UTILITY PUMP Zoeller is a registered trademark of Zoeller Co. All Rights Reserved. MODEL #1043-0006 Español p. 9 ATTACH YOUR RECEIPT HERE Serial Number Purchase Date Questions, problems,
Uplift Premium Power Lifting Seat
 Uplift Premium Power Lifting Seat User Guide Read all instructions before using the Uplift Power Seat DANGER - To reduce the risk of electric shock: IMPORTANT SAFETY INSTRUCTIONS Always unplug the Uplift
150-Lb. Drywall and Panel Hoist
 150-Lb. Drywall and Panel Hoist Owner s Manual WARNING: Read carefully and understand all ASSEMBLY AND OPERATION INSTRUCTIONS before operating. Failure to follow the safety rules and other basic safety
OWNERS MANUAL JANUARY 2007 ISO
 Manufacturer of Dimensions TM Inverters 4467 White Bear Parkway St. Paul, MN 55110 Phone: 651-653-7000 Fax: 651-653-7600 E-mail: inverterinfo@sensata.com Web: www.dimensions.sensata.com 121231B OWNERS
Heavy-Duty Drywall Dolly Cart
 Heavy-Duty Drywall Dolly Cart Owner s Manual WARNING: Read carefully and understand all ASSEMBLY AND OPERATION INSTRUCTIONS before operating. Failure to follow the safety rules and other basic safety precautions
HAWK. HAWK G2 Raptor Orbital Floor Machine Dry Stripping, Scrubbing, Stripping. Operation Care Service ENTERPRISES
 HAWK ENTERPRISES HAWK G2 Raptor Orbital Floor Machine Dry Stripping, Scrubbing, Stripping Operation Care Service Ÿ HAWK ENTERPRISES 2902 Park Six Court, Elkhart, IN 46514 (574) 294-1910 (888) 289-4295
LESTRONIC II BATTERY CHARGER BUILT-IN OR PORTABLE CHARGERS
 LESTRONIC II BATTERY CHARGER BUILT-IN OR PORTABLE CHARGERS PLEASE SAVE THESE IMPORTANT SAFETY AND OPERATING INSTRUCTIONS For correct operation of the equipment, it is important to read and be familiar
StormPro BCV400 Sewage Ejector Pump
 Page 1 of 8 Marks & Meanings DANGER: Keep the pump equipment out of the reach of children! Warns that the failure to follow the directions given could cause serious risk to individuals or objects. WARNING:
ODESSA. Black Series. Owner s Manual
 ODESSA Black Series Owner s Manual Contents Safety Information...2 What Is Included...5 Assembly - Base...6 Assembly - Headboard Bracket...9 Location of Controls - Remote...11 Operation - Main...12 Troubleshooting...12
Matala. VersiFlow Series. Instruction and Maintenance Manual
 VersiFlow Series High Flow Multi-Purpose "Versatile " Pump V-3200 1/5HP 150W / Discharge 2 V-3900 1/3HP 250W / Discharge 2 V-4700 1/2HP 400W / Discharge 2 V-5600 1HP 750W / Discharge 2 Instruction and
LESTRONIC II BATTERY CHARGER MODEL 19740
 *01679* LESTRONIC II BATTERY CHARGER MODEL 19740 PLEASE SAVE THESE IMPORTANT SAFETY AND OPERATING INSTRUCTIONS For correct operation of the equipment, it is important to read and be familiar with this
BEST HOME FURNISHINGS TERMS, CONDITIONS & WARRANTIES
 BEST HOME FURNISHINGS TERMS, CONDITIONS & WARRANTIES The terms, conditions and warranties described in the following paragraphs have been developed to assure fair and equitable treatment for all our customers.
Hawk Enterprises of Elkhart THE BRUTE Owner s Manual
 Hawk Enterprises of Elkhart THE BRUTE Owner s Manual Operation Care Service COMMERICAL/INDUSTRIAL DUTY STONE RESTORATION MACHINE 13, 15, 17, 20 165 RPM 1.5 HP 180 FRAME TOTALLY ENCLOSED FAN COVERED MOTOR
US Patent 0540, 400 Other Patents Pending. Read this manual completely before assembling and riding our PET PRO-FLEX 500. Always wear a Helmet!
 US Patent 0540, 400 Other Patents Pending Read this manual completely before assembling and riding our 500 Always wear a Helmet! Priority Electric Transportation, LLC. 1007 West College Ave. #293 Santa
DUAL WIDEBAND AIR/FUEL RATIO GAUGE Product Numbers: GS-W702W_Dual, GS-C702W_Dual, GS-T702W_Dual
 Installation Instructions Tech Support: 856.768.8300 TechSupport@GlowShiftGauges.com DUAL WIDEBAND AIR/FUEL RATIO GAUGE Product Numbers: GS-W702W_Dual, GS-C702W_Dual, GS-T702W_Dual (1) Gauge (2) Controllers
MIL-24/2600Q MIL-24/3200DQ
 Manufacturer of Dimensions TM Inverters 4467 White Bear Parkway St. Paul, MN 55110 Phone: 651-653-7000 Fax: 651-653-7600 E-mail: inverterinfo@sensata.com Web: www.dimensions.sensata.com 121473B OWNER'S
50 Ft. Retractable Cord Reel
 50 Ft. Retractable Cord Reel with Triple Tap Owner s Manual WARNING: Read carefully and understand all ASSEMBLY AND OPERATION INSTRUCTIONS before operating. Failure to follow the safety rules and other
Power Lift & Recline Chair and Power Recline Only Chair
 Power Lift & Recline Chair and Power Recline Only Chair OWNER S MANUAL AND LIMITED LIFETIME WARRANTY UC540 Large Power Lift and Recline UC551 Large Power Recline Proudly Manufactured in the USA 401 Bridge
OWNERS MANUAL JANUARY 2007 ISO
 Manufacturer of Dimensions TM Inverters 4467 White Bear Parkway St. Paul, MN 55110 Phone: 651-653-7000 Fax: 651-653-7600 E-mail: inverterinfo@sensata.com Web: www.dimensions.sensata.com OWNERS MANUAL JANUARY
PC-085 Use and Care Manual
 PC-085 Use and Care Manual w w w. i n t e r h e a l t h. c o m Interactive Health, 2006 The Perfect Chair is a registered trademark of Interactive Health, Inc. No medical claims warranted or implied by
Model AS-RC3260 TV Cart. Rolling Cart for Audio Mount System & Flat Panel TVs
 Model AS-RC3260 TV Cart Rolling Cart for Audio Mount System & Flat Panel TVs GETTING STARTED Introduction Congratulations on the purchase of your new Helios AS-RC3260 Rolling Cart. For maximum benefit,
Dimensions 12/800N 12/1200N D. DC to AC Power Inverters. OWNERS MANUAL for Models: OWNERS MANUAL April ISO 9001:2000 Certified Company
 Manufacturer of Dimensions Inverters 4467 White Bear Parkway St. Paul, MN 55110 Phone: 651-653-7000 Fax: 651-653-7600 E-mail: inverterinfo@sensata.com Web: www.dimensions.sensata.com OWNERS MANUAL April
24/3000H-3PH 24/4500H-3PH 24/6000H-3PH
 Manufacturer of Dimensions TM Inverters 4467 White Bear Parkway St. Paul, MN 55110 Phone: 651-653-7000 Fax: 651-653-7600 E-mail: inverterinfo@sensata.com Web: www.dimensions.sensata.com 120015D OWNERS
Hazardous Location Direct-Drive Exhaust Fans. Operating Instructions & Parts Manual
 Operating Instructions & Parts Manual EN Hazardous Location Direct-Drive Exhaust Fans Models 10D996 thru 10D999, 10E001 thru 10E007, 10E009 thru 10E020, 32ZN53 and 32ZN54 474904 PLEASE READ AND SAVE THESE
Flex 9 Adjustable Bed Base
 Flex 9 Adjustable Bed Base Owner s Manual and Reference Guide PERFORMANCE BY REV: 2017-04-14 Manual Part No. PT-MAN-8T-FLX TW Manual Part No. D1103-301-8TPC Copyright 2016. All Rights Reserved. Ascion
Operation Care Service
 HAWK ENTERPRISES OF ELKHART, INC Standard Floor Machine Owner s Manual Operation Care Service 13 175 RPM 1.5 HP 15 175 RPM 1.5 HP 17 175 RPM 1.5 HP 20 175 RPM 1.5 HP 13 160 RPM 1.5 HP XHD 15 160 RPM 1.5
Operating Instructions & Parts Manual. 100 Watt Power Inverter. Model 54DC41A
 Operating Instructions & Parts Manual 100 Watt Power Inverter Model 54DC41A EN PLEASE READ AND SAVE THESE INSTRUCTIONS. READ CAREFULLY BEFORE ATTEMPTING TO ASSEMBLE, INSTALL, OPERATE OR MAINTAIN THE PRODUCT
MV Series Motors Operation & Parts Manual. Models M3V, M5V, M5V-US
 MV Series Motors Operation & Parts Manual Models M3V, M5V, M5V-US Introduction This manual pertains to drum pump motors MV Series. Finish Thompson, Inc. thanks you for choosing our products. We believe
Cordless Make Up Mirror WITH ILLUMINATED 1X AND 10X MAGNIFICATION PLUS NIGHT LIGHT
 Cordless Make Up Mirror WITH ILLUMINATED 1X AND 10X MAGNIFICATION PLUS NIGHT LIGHT TABLE OF CONTENTS Warnings and Cautions....1 Location of Parts and Controls....6 Installing the Batteries...8 Using the
Heavy Duty Four Wheeled Walker
 Heavy Duty Four Wheeled Walker Weight Capacity: 500 lbs. ITEM # W1802 Made in China 2011 ESSENTIAL MEDICAL SUPPLY, INC. Manufactured for Orlando, FL 32822 -- SAVE THESE INSTRUCTIONS -- Do not attempt to