INSTALLATION INSTRUCTIONS KAWASAKI MULE 610
|
|
|
- Arthur Lambert
- 5 years ago
- Views:
Transcription

1 INSTALLATION INSTRUCTIONS
2 SAFETY INSTRUCTIONS Warning: Failure to heed all safety and operating instructions and warnings regarding use of this product can result in serious bodily injury. READ PROPERLY COMPLETE ASSEMBLY INSTRUCTIONS BEFORE STARTING OF ASSEMBLY Install all parts indicated in assembly instructions. Failure to fully assemble product before use could result in personal injury. Assembly of product requires use of hand or power tools. If you are not experienced in using these types of tools, have product dealer do the install for you. Some parts contain sharp edges, wear protective gloves if necessary. Always keep your assembly area clean, uncluttered and well lit. Keep visitors and children a safe distance away from the assembly area. Visitors should wear the same safety equipment described under. 2 Never operate your UTV with the cab doors open. Failure to properly latch the doors before moving the vehicle could result in serious injury. Dress for safety. DO NOT wear loose clothing, gloves, neckties or jewelry if using power tools to assemble this product. Insert all nut covers after you finish installation. Never drive your UTV with the cab front window in open position. Failure to properly latch/lock front window before driving the vehicle could result in serious injury. For safety purposes, if the DFK Cab doors are removed, it is mandatory that the OEM Half Doors or Nets are REINSTALLED before operating vehicle.
3 MAINTENANCE AND CLEANING To clean polycarbonate surface use soapy water solution or other subtle means. Dirt and dust wash by gently water stream and swipe only with wet or damp means in the direction from top to bottom. The recommended frequency of cleaning of polycarbonate part is about 1 time per month or according to the actual degree of pollution. Do not use detergents that could scratch the surface plates. (abrasives, harsh fabrics, etc.) Do not use solvents or alkaline detergents or cleaners with ammonia (ammonium hydroxide). Do not remove the impurities from the surface of the razor blades or other sharp items. 3 Do not clean cabin when the polycarbonate plates are heated by the sun. Do not use the squeegee, it could be scratched surface plates. Do not clean the water current strength greater than 50 bar (WAP) The manufacturer is not responsible for scratching the surface in case of failure to comply with the above instructions. All bolted connections of cab must be by user at regular intervals checked and tightened.
 Uninstall the rear safety network (in green rectangle) from the roller cage.")
4 PREPARATION FOR INSTALLATION: Uninstall all additional systems from the forklift frame (work lights, rear mirrors, drink holders etc.) Uninstall the rear safety network (in green rectangle) from the roller cage. 4
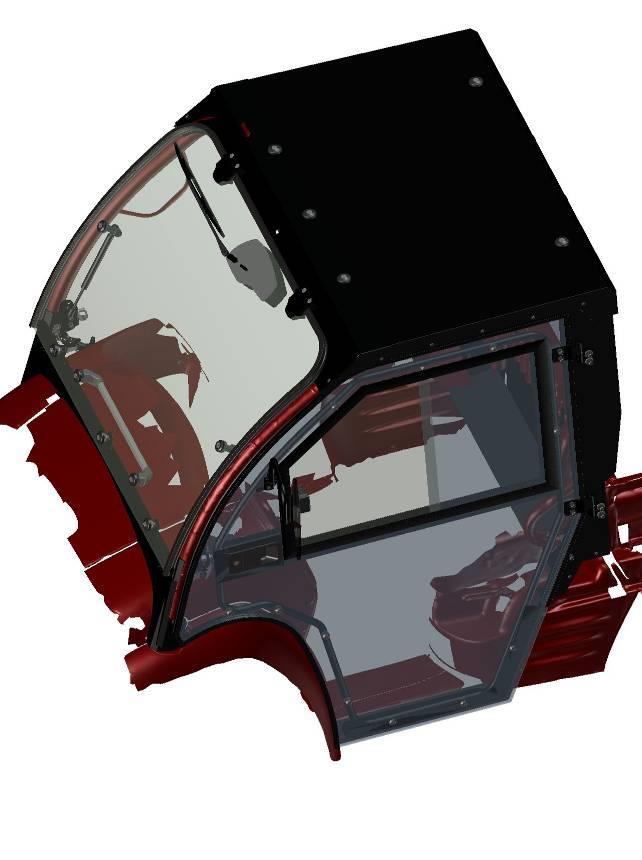
5 CAB PREVIEW 5

6 ROOF PANEL 1. Place the roof onto the UTV s roller cage and adjuct to correct position. Don t fit that now! 6

7 REAR PANEL Place the door bases onto the roller cage and insert under the roof. 7

8 Fix the door bases with the roof by screws on both sides. 8

9 Place the bottom side door base holder onto the roller cage on both sides. 9

10 Fix the holder with the door base to the roller cage by screw, washers, nut and nut covers on both sides. 10

11 Tighten the holder around the roller cage by screw, washers, nut and nut covers on both sides. 11

12 Detail view 12

13 Place the rear bottom ledge onto the UTV s body and onto the door bases. 13

14 Fix the rear ledge with the door bases by screws. 14

15 Take out the safeguard films from rear polycarbonate window. Place the window onto the door base s seals and insert the window under the roof. 15

16 Place the metal tubes between the door bases and the rear safety network holders. Fix the roof with the window and with the door bases by screws, washers, nuts and nut covers. 16

17 Place the door base upper holders onto the roller cage on correct position. 17

18 Fix the door bases with the holder and with the window by screws, washers, nuts and nut covers. 18

19 Fix the rear bottom ledge with the window by screws, washers, nuts and nut covers. Adjust the rear panel s parts to best position and tighten all screws and nuts. 19

20 Place the bottom side rear covers onto the door base and onto the rear bottom ledge on both sides. 20

21 Fix the covers with the door bases and with the bottom ledge by screws. 21

22 ROOF PANEL 2. Place the rear roof holders onto the roller cage on correct position. 22

23 Fix the roof with the roof holders to roller cage by screws, washers, nuts and nut covers. 23

24 FRONT PANEL 1. Place the hinge s washers onto the hinges and place the hinges onto the front upper ledge. 24

25 Fix the hinges with the ledge by screws, washers, nuts and nut covers. 25

26 Place the front bottom ledge onto the front glass. 26

27 Fix the front bottom ledge with the front glass by screws, washers, nuts and nut covers. Don t tighten these screws and washer very hard. 27

28 Place the front panel onto the roof and onto the roller cage. 28

29 Fix the front upper ledge with the roof by screws on both sides. 29

30 Adjust the front panel to best position. 30

31 Place the front ledge holders onto the roller cage on correct position. 31

32 Fix the roof with the front ledge and with the holders to the roller cage by screws, washers, nuts and nut covers. Now you can tighten all screws and nuts on the roof. 32

33 LEFT DOOR 1. For safety purposes, if the DFK Cab doors are removed, it is mandatory that the OEM Half Doors or Nets are REINSTALLED before operating vehicle. Place the left hinges onto the left door base. 33

34 Fix the hinges with the door base by screws, washers, nuts and nut covers. 34

35 Lubricate the hinge s pins and insert washers on the pins. Insert the left door on the hinge s pins. 35
 has to be between 4mm and 6mm.")
36 Adjust the door by door hinges to best position, no gapes between the door and UTV (yellow line). Distance between the door and roff (red line) has to be between 4mm and 6mm. Tigten the screws and nuts on hinges. 36
37 Install the door stop assembly (pin, hook, washer and nut) with the left door stop holder. 37
38 Place the left inner door stop holder and the left outer door stop holder onto the roller cage. 38

39 Place the left door stop holder on the welded screws on the inner door stop holder. 39

40 Fix the holders to the roller cage by nuts, washers and nut covers and tighten very easy. 40

41 Close the door and insert the door stop pin into the door lock. 41

42 Adjust the door stop holders to best position and tighten nuts hard. If you close the door slowly and the door stop has been adjusted correctly, you can hear clear metalic click. If you have problem with adjust the door stop, you can adjust the door hinges again. 42

43 Untighten the nuts in red circles and adjust the EPDM ledge to best position. Tighten the nuts. 43 INSTALL THE RIGHT DOOR (JUST REPEAT STEPS WITH RIGHT DOOR PARTS)

44 FRONT PANEL 2. Place the front glass stop on the inner holder s welded screws on both sides. 44

45 Fix the glass stop with the inner holder by nuts, washers and nut nut covers on both sides. 45

46 Lock the front window by the window lock and window stop and adjust the window stop to best position. Tighten window lock nuts. 46

47 Insert the gas spring on the gas spring holder on both sides. 47

48 Insert the gas spring in the gas spring holder metal and fix these by nut on both sides. 48
49 LEFT DOOR 2. Take out the screws and outer washer from the door. 49

50 Place the rear mirror onto the door. 50

51 Fix the rear mirror with the door by screws from page No.: Repeat these steps with the right door.

52 SAFETY FRAME If you need, you can install the rear safety frame onto the cab. Losen the screws under red arrows and place the network onto the rear roof. 52
.")
53 Fix the network with the roof and the door bases by screws, washers, nuts and nut covers from previous page (in green circles). Drill 2 hole ø15mm into the rear polacarbonate window in accorgance with the bottom network holder s holes (in red circles). Fix the network with the UTV s body by screws, washers and nut (included with cabine). 53 Tighten all screws and nuts on cabine correctly and insert all nut covers.
54 ELECTROINSTALLATION Overall wiring diagram (washer, wiper and switch) 54


55 Accessories for mounting the wiper, washer assembly. Switch wiper motor Washer tank holder harness The washer tank has been placed under the right UTV s seat. 55


56 Fix the washer tank with the UTV s metal body by included screw, washers and nuts. The washer tank holder is in red circle. Unistall the under-seat cover and save. 56


57 Uninstall the floor tunnel cover from the UTV s floor and save. Lead the harness branchs No.: 3 and 4 throught the tunnel from the washer tank to the front bottom dashboard. 57
.")

58 Lead the harness from the tunnel to the dashboard uppert part under the tunnel cover reinforcement (orange rectangle). Lead the harness branch No.:3 under the dashboard to left side. Lead the harness branch No.:4 under the dashboard to right side. 58


59 Cut the rectangle hole 44,9x21,7mm(red rectangle) for switch into the dashboard near the wheel (or where you need that). Connect the harness branch No.: 3 with the switch and insert the switch into the dashboard. 59


60 View on installed switch Loosen the screws on the dashboard right side and save these. 60


61 Lead the harness branch No.: 4 under the dashboard cover to the right front roller cage. Pull the harness through the hole between the dashboard and roller cage. 61
 around the roller cage to the front wiper motor.")

62 Lead the harness branch No.: 4 (green line) around the roller cage to the front wiper motor. Uninstall the wiper motor cover from the wiper motor and save that. Connect the harness branch with the wiper motor connector and connect the washer hoses with washer connector L. Install the wiper motor cover back to position. 62
 from the harness")

63 Lead the harness branchs No.: 1 and 2 (red arrows) from the harness to the UTV s battery arround original harness.. Connect the harness branch No.: 1 with battery -. 63

64 Connect the harness branch No.: 2 with original cable near battery Fill the washer liquide to the washer tank before first usage.
INSTALLATION INSTRUCTIONS KAWASAKI MULE PRO-FXT
 INSTALLATION INSTRUCTIONS SAFETY INSTRUCTIONS Warning: Failure to heed all safety and operating instructions and warnings regarding use of this product can result in serious bodily injury. READ PROPERLY
INSTALLATION & OWNER S MANUAL
 Rev. B, p. 1 of 18 INSTALLATION & OWNER S MANUAL KAWASAKI TERYX ClearView Cab p/n: 1KAWT8002CV This cab fits model years: 2014- The contents of this envelope are the property of the owner. Be sure to leave
INSTALLATION & OWNER S MANUAL
 Rev. C, p. 1 of 24 INSTALLATION & OWNER S MANUAL HONDA PIONEER 700-2 ClearView Cab p/n: 1HONP7002CV This cab fits model years up thru 2016. The contents of this envelope are the property of the owner.
INSTALLATION & OWNER S MANUAL
 Rev. C, p. 1 of 24 INSTALLATION & OWNER S MANUAL HONDA PIONEER 700-4 ClearView Cab p/n: 1HONP7004CV fits model years up thru 2017 The contents of this envelope are the property of the owner. Be sure to
INSTALLATION & OWNER S MANUAL
 Rev. D, p. 1 of 29 INSTALLATION & OWNER S MANUAL YAMAHA VIKING YXM 700 ClearView Cab p/n: 1YAMVKCV fits model years up thru 2018 (fits Yanmar Bull model years up thru 2018) The contents of this envelope
SPARE - PARTS CATALOGUE KYMCO 500I, 700I SE
 SPARE - PARTS CATALOGUE KYMCO 500I, 700I SE. CAB PREVIEW 2 3 Position Catalogue no. Description Qty 1 58S01U01S30 ROOF 1 2 58S01U01S21 REAR PANEL 1 3 58S01U01S40 LEFT DOOR 1 4 58S01U01S10 FRONT PANEL 1
Arctic Cat Wildcat Cab kit* Caution: Before using this product, read this manual and follow all safety instructions.
 Owner s Manual Model: Arctic Cat Wildcat Caution: Before using this product, read this manual and follow all safety instructions. Arctic Cat Wildcat Cab kit* Safety Instructions Kit Contents Tool Requirement
SPARE - PARTS CATALOG KAWASAKI MULE 610
 SPARE - PARTS CATALOG KAWASAKI CAB PREVIEW 2 3 Position Catalogue no. Description Qty 1 42S02U01S10 FRONT PANEL MOVABLE 1 2 42S02U01S20 REAR PANEL 1 3 42S02U01S30 ROOF 1 4 42S02U01S40 LEFT DOOR 1 FRONT
SPARE - PARTS CATALOGUE YAMAHA VIKING YXM 700
 SPARE - PARTS CATALOGUE YAMAHA VIKING YXM 700. CAB PREVIEW 2 3 Position Catalogue no. Description Qty 1 41S04U01S30 ROOF 1 2 41S04U01S20 REAR PANEL 1 3 41S04U01S40 LEFT DOOR 1 4 41S04U01S10 FRONT PANEL
2011-up Polaris RZR 800* Cab Enclosure Kit. Caution: Before using this product, read this manual and follow all safety instructions.
 Owner s Manual Model: Polaris RZR * 2011-up Polaris RZR 800* Cab Enclosure Kit Caution: Before using this product, read this manual and follow all safety instructions. Safety Instructions Kit Contents
2008~2010 Polaris RZR 800* Cab Enclosure Kit Slam latch hardware
 Owner s Manual Model: Polaris RZR * 2008~2010 Polaris RZR 800* Cab Enclosure Kit Slam latch hardware Caution: Before using this product, read this manual and follow all safety instructions. Safety Instructions
For Kioti Mechron Caution: Before using this product, read this manual and follow all safety instruction. Defender Cab Owner s Manual.
 ` Defender Cab Owner s Manual Model: Kioti Mechron 2200 Caution: Before using this product, read this manual and follow all safety instruction For Kioti Mechron 2200 Safety Instructions Kit Contents Tool
For Honda Big Red. Caution: Before using this product, read this manual and follow all safety instruction. Defender Cab Owner s Manual.
 Defender Cab Owner s Manual Model: Honda Big Red Caution: Before using this product, read this manual and follow all safety instruction For Honda Big Red Safety Instructions Kit Contents Tool Requirement
Assembly Instructions
 Assembly Instructions Part Number Description Model Approx. Assembly Time 99994-049 Cab Enclosure MULE SX 3-4 Hours WARNING Improper installation of this accessory could result in an accident causing serious
SPARE - PARTS CATALOG KAWASAKI MULE PRO-FX(DX)
") SPARE - PARTS CATALOG KAWASAKI CAB PREVIEW 2 3 FRONT PANEL 4 5 6 FRONT UPPER LEDGE HOLDER ASSEMBLY 42S05U01-10M006 7 FRONT UPPER LEDGE SIDE HOLDER ASSEMBLY 42S05U01-10M005 8 FRONT GAS SPRING HOLDER ASSEMBLY
SPARE - PARTS CATALOG KAWASAKI CAB PREVIEW 2 3 FRONT PANEL 4 5 6 FRONT UPPER LEDGE HOLDER ASSEMBLY 42S05U01-10M006 7 FRONT UPPER LEDGE SIDE HOLDER ASSEMBLY 42S05U01-10M005 8 FRONT GAS SPRING HOLDER ASSEMBLY
SPARE PARTS CATALOGUE CUSHMAN 1600 XD R KIOTI MECHRON 2210 LTEC XS 1000
 SPARE PARTS CATALOGUE CUSHMAN 1600 XD R KIOTI MECHRON 2210 LTEC XS 1000. PREVIEW CAB Positio Catalogue no. Description Qty n 1 37S02U01S30 ROOF 1 2 37S02U01S10 FRONT PANEL 1 3 37S02U01S40 LEFT DOOR 1
TOYOTA COROLLA ILLUMINATED DOOR SILLS Preparation
 Preparation Part Number: PT942-02140 Kit Contents Item # Quantity Reqd. Description 1 1 Illuminated Scuff plate, Front Right Hand 2 1 Illuminated Scuff plate, Front Left Hand 3 1 Door Scuff plate, Rear
Thank You For Choosing. INSTALLATION INSTRUCTIONS Flip Windshield for Polaris General. Seal. Need help with your installation?
 2753 Michigan Road Madison, Indiana 47250 812-574-7777 INSTALLATION INSTRUCTIONS Flip Windshield for Polaris General A Item Description Qty A Windshield 1 Seal (kit contents continue on following pages)
TOYOTA COROLLA ILLUMINATED DOOR SILLS Preparation
 Preparation Part Number: PT942-02140 Kit Contents Item # Quantity Reqd. Description 1 1 Illuminated Scuff plate, Front Right Hand 2 1 Illuminated Scuff plate, Front Left Hand 3 1 Door Scuff plate, Rear
Assembly Instructions
 Assembly Instructions Part Number Description Model Approx. Assembly Time 99994-0903 Windshield Wiper Kit Mule SX 1 Hour WARNING Improper installation of this accessory could result in an accident causing
MAZDA BT-50 (October 2011 Production Onwards) 1 & 3 PIECE HARD TONNEAU REMOTE LOCKING KIT INSTALLATION INSTRUCTIONS
 1 & 3 PIECE HARD TONNEAU REMOTE LOCKING KIT INSTALLATION INSTRUCTIONS") MAZDA BT-50 (October 0 Production Onwards) & 3 PIECE HARD TONNEAU REMOTE LOCKING KIT INSTALLATION INSTRUCTIONS Installation Time: Approx. 0 Minutes Care Instructions: Clean Tonneau Cover with a mild detergent
MAZDA BT-50 (October 0 Production Onwards) & 3 PIECE HARD TONNEAU REMOTE LOCKING KIT INSTALLATION INSTRUCTIONS Installation Time: Approx. 0 Minutes Care Instructions: Clean Tonneau Cover with a mild detergent
w w w. h d o n l i n e s h o p. d e DETACHABLE WINDSHIELD AND DOCKING HARDWARE KIT GENERAL INSTALLATION -J00325 REV Kit Number Models
 -J00 REV. 00-- DETACHABLE WINDSHIELD AND DOCKING HARDWARE KIT GENERAL Kit Number -A, 0-, -, 0-, -, - 0, -0 Models These kits fit and later FXST, FXSTB, FXSTC, and and later FXDWG Harley-Davidson model
INSTALLATION INSTRUCTIONS
 Accessory Application Publication No. INSTALLATION INSTRUCTIONS 2 PIECE FOLDING POLY WINDSCREEN (OPTICAL) P/N 0SR72-HL3-100 SXS700M4/M2 Honda Dealer: Please give a copy of these instructions to your customer.
LOOKOUT LED LIGHT BAR INSTALLATION MANUAL 7900 SERIES
 LOOKOUT LED LIGHT BAR INSTALLATION MANUAL 7900 SERIES Your purchase of a Wolo warning light is the perfect choice to compliment your vehicle. Wolo s warning lights are manufactured with the finest materials.
INSTALLATION & OWNER S MANUAL
 Rev. C, p. 1 of 18 INSTALLATION & OWNER S MANUAL KUBOTA RTV 400 CAB (Not for use on RTV 500) These instructions are for installation of the complete cab as well as the modular components. DESCRIPTION:
INSTALLATION INSTRUCTIONS
 REV 1 05/04/2017 INSTALLATION INSTRUCTIONS PART NO. 24388T PRODUCT DESCRIPTION: FRONT BUMPER REPLACEMENT APPLICATION: TOYOTA TACOMA PRODUCT SAFETY & LEGAL DISCLAIMER IMPORTANT READ ALL INSTRUCTIONS CAREFULLY
VOLKSWAGEN AMAROK 1 & 3 PIECE HARD TONNEAU REMOTE LOCKING KIT INSTALLATION INSTRUCTIONS
 VOLKSWAGEN AMAROK & PIECE HARD REMOTE LOCKING KIT INSTALLATION INSTRUCTIONS Care Instructions: Clean Tonneau Cover with a mild detergent and water solution. Do not use abrasive cleaners or solvents. Place
TOYOTA Yaris Hatchback EC REARVIEW MIRROR Preparation
 Preparation Part Number: PT374-02090 Kit Contents Item # Quantity Reqd. Description 1 1 Auto Dimming Mirror Assembly w/ shift area light 2 1 Hardware bag Hardware Bag Contents Item # Quantity Reqd. Description
1 2 " H Y D R AU L I C V E H I C L E P O S I T I O N I N G J A C K OWNER S MANUAL
 2 " H Y D R AU L I C V E H I C L E P O S I T I O N I N G J A C K OWNER S MANUAL WARNING: Read carefully and understand all INSTRUCTIONS before operating. Failure to follow the safety rules and other basic
Part Number: PT
 Preparation Part Number: PT374-02090 Kit Contents Item # Quantity Reqd. Description 1 1 Auto Dimming Mirror Assembly w/ shift area light 2 1 Hardware bag Hardware Bag Contents Item # Quantity Reqd. Description
2 line price marking gun
 2 line price marking gun Model 95878 Assembly And Operation Instructions Due to continuing improvements, actual product may differ slightly from the product described herein. 3491 Mission Oaks Blvd., Camarillo,
D40C HINGE # x Support Plate x M8 Bolt 8 x M8 Washer 6 x M6 20mm Bolts 6 x M6 Washers 19 x Screws
 HINGE # 1017 2 x Support Plate 1018 8 x M8 Bolt 8 x M8 Washer 6 x M6 20mm Bolts 6 x M6 Washers 19 x Screws 2 x Lid mount gas strut bracket 1041 2 x Self tap strut mount 1040 1 x Central Lock bracket 1510
Always refer to the manufacturers recommendations located within the literature contained within the unit packet.
 CARE AND MAINTENANCE The limited warranty and the limited warranties issued by component manufacturers require periodic service and maintenance and the owner s failure to provide this service and/or maintenance
TOYOTA RAV4/HV INTERIOR LIGHT KIT Preparation
 Preparation Part Number: PT413-42130 Kit Contents Item # Quantity Reqd. Description 1 1 Wire Harness 2 3 Hardware Bag Contents Item # Quantity Reqd. Description 1 20 Cable Tie 2 2 Scotchlok 3 2 Foam Pad
* * APPLICABLE MODELS: 2014 > Mazda 3
 PART NUMBER: 0000 8C L48 (DIO) / 0000 89 L84 (PIO) GENUINE ACCESSORIES INSTALLATION INSTRUCTIONS Rev. AAA *550-0700-000* APPLICABLE MODELS: 2014 > Mazda 3 REQUIRED COMPONENTS: ITEM QTY DESCRIPTION Usage
* * APPLICABLE MODELS: 2014 > Mazda 6
 PART NUMBER: 0000 8C H02(DIO) / 0000 89 H18(PIO) GENUINE ACCESSORIES INSTALLATION INSTRUCTIONS Rev. AAA *550-0694-000* APPLICABLE MODELS: 2014 > Mazda 6 REQUIRED COMPONENTS: ITEM QTY DESCRIPTION Usage
* * APPLICABLE MODELS: 2017 > CX-5
 PART NUMBER: 0000 8C R06(DIO) / 0000 89 R28(PIO) GENUINE ACCESSORIES INSTALLATION INSTRUCTIONS Rev. AAA *550-0681-000* APPLICABLE MODELS: 2017 > CX-5 REQUIRED COMPONENTS: ITEM QTY DESCRIPTION Usage Chart
* * APPLICABLE MODELS: 2016 > CX-3
 PART NUMBER: 0000 8C S01(DIO) / 0000 89 S07(PIO) GENUINE ACCESSORIES INSTALLATION INSTRUCTIONS Rev. AAA *550-0688-000* APPLICABLE MODELS: 2016 > CX-3 REQUIRED COMPONENTS: ITEM QTY DESCRIPTION Usage Chart
GENUINE ACCESSORIES INSTALLATION INSTRUCTIONS. ITEM QTY DESCRIPTION Usage Chart Service Part Number. 1 1 Mirror Assembly w/ Compass 1
 AUTO PART NUMBER: 0000 8C P4 (DIO)/ 0000 89 P25 (PIO) REQUIRED COMPONENTS: INSTALLATION KIT: 2 SA Harness - 2 Conductor 3 0 Wire Ties 4 Wire Cover 5 A-Pillar Tether Clip (D09W-6862) 6 3 Foam Tape 7 3 Electro-Tap(wire
INSTALLATION & OWNER S MANUAL
 Page 1 of 16 INSTALLATION & OWNER S MANUAL YAMAHA VIKING CAB KIT WITH HARD DOORS p/n: 1YAMVK fits model years 2014- (fits Yanmar Bull model years 2017-) NOTE: By design, the doors are made to not be removable!
H15P. Toyota Hilux A-DECK Dual Cab
 Toyota Hilux A-DECK Dual Cab Page 1 of 14 Fitting Instructions Part Number H15 Toyota Hilux A-DECK Dual Cab 2015+ To suit Sports Bars Check contents of kit before commencing fitment and report any discrepancies
Package Contents Part A (3) I-Beam (1) Base (2) Other parts
 I-Beam (1) Base (2) Other parts") Page 1 Installation Instructions for 81245 Adjustable Height Gantry Crane 1-Ton Capacity Table of Contents Important Safety Information pg. 2 Specific Operation Warnings pg. 2 Main Parts of Product pg.
Page 1 Installation Instructions for 81245 Adjustable Height Gantry Crane 1-Ton Capacity Table of Contents Important Safety Information pg. 2 Specific Operation Warnings pg. 2 Main Parts of Product pg.
FORD - F TOOLS CHECK LIST INSTALLATION MANUAL READ CAREFULLY BEFORE INSTALLATION FLOOR LINERS SET F ALL TYPE OF CABS
 FORD - F-250 2017 FLOOR LINERS SET F-250 2017 PART # : 1140NNTJFO23A12 LH ALL TYPE OF CABS RH NOT DESIGNED OR RECOMMENDED FOR MODELS EQUIPPED WITH VINYL FLOORING TOOLS ONLY SUPER CREW CAB PART # : 1140DNTUFO23A13
VOLKSWAGEN AMAROK MY17> 1 & 3 PIECE HARD TONNEAU REMOTE LOCKING KIT INSTALLATION INSTRUCTIONS
 VOLKSWAGEN AMAROK MY7> & PIECE HARD TONNEAU REMOTE LOCKING KIT INSTALLATION INSTRUCTIONS Care Instructions: Clean Tonneau Cover with a mild detergent and water solution. Do not use abrasive cleaners or
Parts List Continues on Next Page
 Assembly Instructions and Owner s Manual Description: Quantum Hardcoated Polycarbonate UTV Windshield, Wash n Wipe Full Size Model: Part Number: N30202 Installation Time: 60 min Polaris RZR 800, Round
C15C C15C. Page 1 of 20
 2 x Lid Front Hinge 1135 8 x M8 Bolt 8 x M8 Washer (3mm Thick) 4 x M6 Large washers 4 x M6 Spring washers 4 x M6 x 40mm Bolts 6 x M6 20mm Bolts 6 x M6 Washers 20 x Screws 2 x Lid mount gas strut bracket
INSTALLATION INSTRUCTIONS
 INSTALLATION INSTRUCTIONS Accessory HARD ROOF (3P) P/N 0SR85-HL4-1 Application SXS00M3/M3P Honda Dealer: Please give a copy of these instructions to your customer. Publication No. MII 16083 Issue Date
1533 TRUCK MOUNT. Installation Instructions for Personal Plow. Chevrolet Trailblazer GMC Envoy
 December 1, 2004 Lit. No. 64414 1533 TRUCK MOUNT Installation Instructions for Personal Plow Chevrolet Trailblazer 2002 2003 GMC Envoy 2002 2003 Read this document before installing the snowplow. See your
Safety Instructions, Installation & Operator s Manual For
 Safety Instructions, Installation & Operator s Manual For #6-3173 TWIN BAG GRASS CATCHER KIT FOR 38 YARD CRUISERS SERIES 2 MODEL YZ145382BVE IMPORTANT! THIS KIT NOT INTENDED FOR USE ON ANY SERIES OF HZ/HZS
Q15P. Mitsubishi MQ Triton Dual Cab
 Mitsubishi MQ Triton Dual Cab Page 1 of 12 Fitting Instructions Part Number Mitsubishi MQ Triton Dual Cab 2015+ To suit Sports Bars Check contents of kit before commencing fitment and report any discrepancies
SAFETY THIS PRODUCT IS FOR OFFROAD USE ONLY. ALL LIABILITY FOR INSTALLATION AND USE RESTS WITH THE OWNER.
 SAFETY Your safety and the safety of others is very important. In order to help you make informed decisions about safety, we have provided installation instructions and other information. These instructions
PERFORMANCE HOOD VENTS CONTENTS: Left Side Hood Vent (1) Right Side Hood Vent (1) Mounting Bracket, Inner (2) Mounting Bracket, Outer (2) OE Hood Temp
 Right Side Hood Vent (1) Mounting Bracket, Inner (2) Mounting Bracket, Outer (2) OE Hood Temp") CONTENTS: Left Side Hood Vent (1) Right Side Hood Vent (1) Mounting Bracket, Inner (2) Mounting Bracket, Outer (2) OE Hood Template (1) HARDWARE: Mounting Bracket, Inner X 2 Phillips Screw X 8 Mounting
CONTENTS: Left Side Hood Vent (1) Right Side Hood Vent (1) Mounting Bracket, Inner (2) Mounting Bracket, Outer (2) OE Hood Template (1) HARDWARE: Mounting Bracket, Inner X 2 Phillips Screw X 8 Mounting
READ AND FOLLOW ALL SAFETY INSTRUCTIONS SAVE THESE INSTRUCTIONS
 5 Swift Lock Ready Shape Tree (Patent Pending) Instructions IMPORTANT SAFETY INSTRUCTIONS When using electrical products, basic precautions should always be followed including the following: READ AND FOLLOW
INSTALLATION INSTRUCTIONS
 INSTALLATION INSTRUCTIONS Accessory Application 2012 CIVIC 4-DOOR Publications No. AII 45625-46263 Issue Date MAY 2011 PARTS LIST Trunk spoiler Left trunk spring (marked yellow) Template 4 Clip grommets
INSTALLATION INSTRUCTIONS
 Accessory Application Publication No. INSTALLATION INSTRUCTIONS HARD ROOF (5P) P/N 0SR85-HL4-501 SXS1000M5D/M5P MII 16083 Issue Date February 2017 Honda Dealer: Please give a copy of these instructions
1PC TONNEAU COVER INSTALLATION INSTRUCTIONS IMPORTANT
 For use in cleaning painted metal, glass and other vehicle surfaces. For external use only. Dispose of properly after use. IMPREGNATED WITH 70% ISOPROPLY ALCOHOL TC0d PC TONNEAU COVER INSTALLATION INSTRUCTIONS
1009 WIPER MOTOR COVER ASSEMBLY 1010 WIPER ARM 1011 PARALLEL WIPER ARM. WIPER BLADE mm mm mm mm 1016 WASHER BOTTLE
 WIPERS HEAVY DUTY WIPER MOTOR 999 TM.81-12v 80 degrees 1000 TM.83-12v 90 degrees 1001 TM.84-24v 90 degrees 1002 TM.86.12-12v 110 degrees WIPER MOTOR 1003 TM.64.1469-12v 90 degrees 1004 TM.64.1467-12v 90
(2) 12mm x 40mm Short Low Profile Bolt Plates. (2) Spacer Washers. (4) 12mm Plastic Retainers. Passenger/Right Front.
 12mm x 40mm Short Low Profile Bolt Plates. (2) Spacer Washers. (4) 12mm Plastic Retainers. Passenger/Right Front.") PARTS LIST: 1 Driver/Left Running Board with 1 Rubber Backing (use on SX & Limited models) 4 12mm Plastic Retainer 1 Passenger/Right Running Board with 1 Rubber 4 12mm Lock Washer Backing (use on SX &
PARTS LIST: 1 Driver/Left Running Board with 1 Rubber Backing (use on SX & Limited models) 4 12mm Plastic Retainer 1 Passenger/Right Running Board with 1 Rubber 4 12mm Lock Washer Backing (use on SX &
VOLKSWAGEN AMAROK 3 PIECE HARD TONNEAU COVER INSTALLATION INSTRUCTIONS
 VOLKSWAGEN AMAROK 3 PIECE HARD TONNEAU COVER INSTALLATION INSTRUCTIONS Care Instructions: Clean Tonneau Cover with a mild detergent and water solution. Do not use abrasive cleaners or solvents. Place these
SAFETY SENSORS FIELD OF VIEW WILL BE ALTERED WITH USE OF THE REPLACEMENT BUMPER. Injury hazard
 SAFETY Your safety and the safety of others is very important. In order to help you make informed decisions about safety, we have provided installation instructions and other information. These instructions
Flip Windshield: for Polaris Ranger 900
 INSTALLATION INSTRUCTIONS 2753 Michigan Road Madison, Indiana 47250 812-574-7777 Flip Windshield: for Polaris Ranger 900 Item A Description Windshield A Bulb Seal Read instructions and view illustrations
DETACHABLE QUARTER FAIRING AND DOCKING HARDWARE KIT
 INSTRUCTIONS -J09 REV. 0--00 Kit Numbers 7070-98 (primed kit) DETACHABLE QUARTER FAIRING AND DOCKING HARDWARE KIT General This kit is for installation on 988 and later XL, FXR and FXD model motorcycles
Maintenance Adjustments
 4 Maintenance and Adjustments Chapter Contents Cleaning the Printer and Paper Handling Accessories..... 158 Cleaning the HP Digital Copier....................... 161 Cleaning ADF and Glass............................
Vehicle Care ! WARNING: CLEANING PRODUCTS CLEANING THE EXTERIOR
 Chapter 8! WARNING: Many liquids and other substances used in vehicles are poisonous and should never be consumed and must be kept away from open wounds. These substances include antifreeze, brake fluid,
INSTALLATION INSTRUCTIONS
 PART NO. 568860T / 5688612T PRODUCT DESCRIPTION: RC3 LR SKID PLATE APPLICATION: FORD F-150 PRODUCT SAFETY & LEGAL DISCLAIMER IMPORTANT READ ALL INSTRUCTIONS CAREFULLY BEFORE INSTALLING, FAILURE TO DO SO
SAFETY. Your safety and the safety of others is very important.
 SAFETY Your safety and the safety of others is very important. In order to help you make informed decisions about safety, we have provided installation instructions and other information. These instructions
INSTALLATION & OWNER S MANUAL
 p. 1 of 13 INSTALLATION & OWNER S MANUAL Polaris Ranger 400-EV PathPro SS Cab (fits 2010 - current) (p/n: 1PRG400FS) The contents of this envelope are the property of the owner. Be sure to leave with the
Blowfish Racing, LLC 200 Old Love Point Road Stevensville, MD
 Blowfish Racing, LLC 200 Old Love Point Road Stevensville, MD 21666 steve@blowfishracing.com 410-643-1127 Next Gen Rear Tow Hook Kit, 2005-2014 Mustang - ALL Congratulations on the purchase of your Blowfish
INSTALLATION INSTRUCTIONS
 REV 3 05/13/2016 PART NO. 24373T PRODUCT DESCRIPTION: BR10 BUMPER REPLACEMENT APPLICATION: FORD F-250 & F-350 SUPER DUTY EXCLUDES MODELS WITH ADAPTIVE CRUIS CONTROL PRODUCT SAFETY & LEGAL DISCLAIMER IMPORTANT
SAFETY SENSORS FIELD OF VIEW WILL BE ALTERED WITH USE OF THE REPLACEMENT BUMPER. Injury hazard
 SAFETY Your safety and the safety of others is very important. In order to help you make informed decisions about safety, we have provided installation instructions and other information. These instructions
INSTALLATION INSTRUCTIONS
 INSTALLATION INSTRUCTIONS Accessory TWO-PIECE POLY (HARD COAT) P/N 0SR71-HL4-A00 Application SXS1000M/M3P/M5D/M5P Honda Dealer: Please give a copy of these instructions to your customer. Publication No.
GIANTMACH UTV & ATV 700/500 SNOW PLOW AND WINCH MANUAL
 GIANTMACH UTV & ATV 700/500 SNOW PLOW AND WINCH MANUAL TDJ-A2000 ELECTRIC WINCH INSTRUCTION MANUAL Page 1 OPRERATIONAL PRINCIPLE TDJ-A2000 electric winch is made up of 7 major parts # s. The power decreases
READ AND FOLLOW ALL SAFETY INSTRUCTIONS SAVE THESE INSTRUCTIONS
 7.5 Swift Lock Ready Shape Tree (Patent Pending) Instructions IMPORTANT SAFETY INSTRUCTIONS When using electrical products, basic precautions should always be followed including the following: READ AND
3PC TONNEAU COVER INSTALLATION INSTRUCTIONS. Ford Ranger/Mazda BT-50 (without bedliner)
") 3PC TONNEAU COVER INSTALLATION INSTRUCTIONS Ford Ranger/Mazda BT-50 (without bedliner) Care Instructions: Clean Tonneau Cover with a mild detergent and water solution. Do not use abrasive cleaners or solvents.
3PC TONNEAU COVER INSTALLATION INSTRUCTIONS Ford Ranger/Mazda BT-50 (without bedliner) Care Instructions: Clean Tonneau Cover with a mild detergent and water solution. Do not use abrasive cleaners or solvents.
THIS PRODUCT IS FOR PROFESSIONAL LABORATORY USE ONLY USER'S MANUAL. WELLS ENGINE UNIT 230 VOLT Product No. U905, U906, U907, U908
 DENTAL, INC. TECHNICAL BULLETIN U807-022510 5860 FLYNN CREEK ROAD READ ALL INSTRUCTIONS P.O. BOX 106 BEFORE PROCEEDING COMPTCHE, CALIFORNIA, U.S.A. 95427 SAVE THIS FOR FUTURE REFERENCE THIS PRODUCT IS
SCION tc STRUT TIE BAR Preparation
 SCION tc 2005 - STRUT TIE BAR Preparation Part Number: 00016-80440 Code: YY1 Kit Contents 1 1 DS Mount Plate 2 1 PS Mount Plate 3 1 Cross Bar 4 1 Hardware Bag Hardware Bag Contents 1 4 8mm Screws 2 4 8mm
INSTALLATION & OWNER S MANUAL
 INSTALLATION & OWNER S MANUAL This Curtis Cab is designed and manufactured for use only as reasonable weather protection. This cab is not applicable, Nor should the cab be considered as protection against
SAFETY SENSORS FIELD OF VIEW WILL BE ALTERED WITH USE OF THE REPLACEMENT BUMPER. Injury hazard
 SAFETY Your safety and the safety of others is very important. In order to help you make informed decisions about safety, we have provided installation instructions and other information. These instructions
For more information about Genuine Toyota products, visit your local Toyota dealer or visit www. toyotaownersonline.com.
 DOYOU Genuine Toyota products are designed specifically to help protect, preserve and maintain your vehicle. When you purchase genuine products, you are investing in the future of your Toyota by ensuring
SAFETY. Read and understand all safety precautions and instructions before installing this product.
 SAFETY Installation Instructions Application: 2015+ FORD F150 Your safety and the safety of others is very important. In order to help you make informed decisions about safety, we have provided installation
Wildcat System Instructions
 Wildcat System Instructions NOTE: Most steps contained in these instructions will need to be repeated on the other side of the vehicle. Prior to assembly of windshield it is necessary to establish what
Öhlins Front Fork for. Motocross and Enduro. Owner s Manual
 Öhlins Front Fork for Motocross and Enduro Owner s Manual Safety Precautions The front fork is a very important part of the vehicle and will therefore affect the stability. Read and make sure that you
SAFETY. Injury hazard
 SAFETY Your safety and the safety of others is very important. In order to help you make informed decisions about safety, we have provided installation instructions and other information. These instructions
A B 0 0 C D E 6 7 G F F H 8 9 K M O O L N I J 1
 1 2 1 5 4 3 2 2 1 6 3 8 7 1 9 4 C A B 5 0 0 D E 6 G 7 F F H 8 K 9 M O O I J L N 1 GENERAL OPERATIONAL PRECAUTIONS 1. Keep work area clean. Cluttered areas and benches invite accidents. 2. Avoid dangerous
Glazed Screens. Handling and care manual (Construction Phase) January Performance Door, Window & Panel Manufacturers
 January Performance Door, Window & Panel Manufacturers") Glazed Screens Handling and care manual (Construction Phase) January 2018 Head Office: Pacific Door Systems Ltd. 17 Meachen Street, Seaview, Lower Hutt P.O. Box 36065, Wellington Mail Centre Lower Hutt
Glazed Screens Handling and care manual (Construction Phase) January 2018 Head Office: Pacific Door Systems Ltd. 17 Meachen Street, Seaview, Lower Hutt P.O. Box 36065, Wellington Mail Centre Lower Hutt
INSTALLATION INSTRUCTIONS
 PART NO. 23100T PRODUCT DESCRIPTION: Front Winch Bumper, Center Section PRODUCT SAFETY & LEGAL DISCLAIMER IMPORTANT READ ALL INSTRUCTIONS CAREFULLY BEFORE INSTALLING, FAILURE TO DO SO MAY CAUSE PERSONAL
BODY INSTALLATION AND ADJUSTMENT...
 Subsection 01 (TABLE OF CONTENTS) TABLE OF CONTENTS 0 BODY... 09-02-1 INSTALLATION AND ADJUSTMENT... 09-02-1 HEADLAMP BEAM AIMING... 09-02-1 BULB REPLACEMENT... 09-02-1 DECAL... 09-02-2 WINDSHIELD INSTALLATION...
R-SE JK 4 DOOR Step Slider Install Instructions. *If any parts listed are missing or damages please call prior to install.
 R-SE JK 4 DOOR Step Slider Install Instructions Parts List: 1 Divers side slider assembly 1 Passenger side slider assembly 1 wiring harness 1 control box 2 spacers 2 LED lights (optional) 10 SS Button
TOYOTA PRIUS LOW-DECK CARGO TRAY Preparation
 Preparation Part Number: PT908-476 Kit Contents Cargo Tray Seat Back Cover driver side Seat Back Cover pass. side Hardware Bag Contents Additional Items Required For Installation Conflicts Vehicles with
TABLE OF CONTENTS Safe Use Checklist Registration & Recall Assistance Warnings Base Features Carrier Features Securing Child In Carrier
 TABLE OF CONTENTS Safe Use Checklist...4 Registration & Recall...5 Assistance...5 Warnings...6 Base Features Base Overview... Storage Compartment... Recline Adjustment... LATCH Removal & Storage...4 Shoulder
TOYOTA SOLARA EC REARVIEW MIRROR Section I - Installation Preparation
 Section I - Installation Preparation Part Number: PT374-33020 Section I - Installation Preparation Kit Contents Item # Quantity Reqd. Description 1 1 AD Mirror Assembly w/compass 2 1 Hardware Bag 3 1 Installation
SAFETY RULES SPECIFICATIONS READ ALL INSTRUCTIONS BEFORE OPERATING SAVE THESE INSTRUCTIONS
 READ ALL INSTRUCTIONS BEFORE OPERATING SAVE THESE INSTRUCTIONS Thank you for purchasing 7" Polisher. Before attempting to operate your new Polisher please read these instructions thoroughly. You will need
Part No Part No Product Name: Adventure System
 WARNING: DO NOT DRILL, WELD OR MODIFY TO THIS ASSEMBLY. TOOLS REQUIRED 3/16 Allen Wrench 7/32 Allen Wrench 1/2 Wrench 9/16 Wrench IMPORTANT NOTES USE ONLY THE FASTENERS SUPPLIED OR APPROVED BOLTS, LOCKNUTS,
1223 TRUCK MOUNT. Installation Instructions for Personal Plow. Ford F Ford Expedition
 April 1, 2003 Lit. No. 27423 1223 TRUCK MOUNT Installation Instructions for Personal Plow Ford F150 1997 2003 Ford Expedition 1997 2002 Read this document before installing the snowplow. See your sales
BODY INSTALLATION AND ADJUSTMENT...
 Subsection 0 (TABLE OF CONTENTS) TABLE OF CONTENTS 0 BODY... 09-0- INSTALLATION AND ADJUSTMENT... 09-0- HEADLAMP BEAM AIMING... 09-0- BULB REPLACEMENT... 09-0- DECAL... 09-0- WINDSHIELD INSTALLATION...
Parts List DAKAR PRO Brackets Part # Chevrolet Silverado /4WD
 Installation Instructions BR5 Front Bumper Replacement Part Number 24128T Ram 1500 2/4WD (Not compatible with ParkSense, Sport, Express and Rebel Models) Parts List DAKAR PRO Brackets Part # 524765 2014
Required Tools: Phillips screw driver to remove original soft top. Torx sockets are required to completely remove the original soft top hardware.
 RAMPAGE P R O D U C T S Installation Instructions Part number 1099XX, Frameless Soft Top for 2 door Jeep Wrangler JK 2007- NOTE: Installation of the top in warm weather is optimal for ease of installation.
TABLE OF CONTENTS Safe Use Checklist Registration & Recal Assistance Warnings Base Features Carrier Features Securing Child In Carrier
 TABLE OF CONTENTS Safe Use Checklist...4 Registration & Recall...5 Assistance...5 Warnings...6 Base Features Base Overview... Storage Compartment...3 Recline Adjustment...3 LATCH Removal & Storage...4
3PC TONNEAU COVER WITH SPORTS BAR INSTALLATION INSTRUCTIONS
 3PC TONNEAU COVER WITH SPORTS BAR INSTALLATION INSTRUCTIONS TC00d / Vehicle Description: NISSAN NAVARA D0 DUAL CAB 3-PIECE TONNEAU COVER PARTS LIST NO. PART NAME QTY. NO. PART NAME QTY. NO. PART NAME QTY.
Remote engine start INSTALLATION INSTRUCTIONS
 GENUINE Remote engine start INSTALLATION INSTRUCTIONS Thank you for purchasing a genuine Mazda accessory. Before removal and installation, be sure to thoroughly read these instructions. Please read the