FITTING INSTRUCTIONS
|
|
|
- Blanche Sanders
- 5 years ago
- Views:
Transcription


1 MAKING YOUR DREAMS A REALITY FITTING INSTRUCTIONS MiniRacerXtreme MRX Bodywork kits BPFS-055 and BPFS-056 for nd gen Honda MSX5SF, Grom TRANSFORM the MSX5SF GROM to the: MRX MiniRacerXtreme

2 Fitment of Bodywork Set, (GRP), MiniRacerXtreme, MSX5SF Grom (BPFS-055 and BPFS-056) Thank you for purchasing the TYGA MRX bodywork Kit. Please take a few minutes to read these instructions in order to make the fitment of this kit on your motorcycle a straight forward and easy task. It requires no special skills or tools, but reasonable mechanical competence and a decent tool kit. Always trial fit the fairing before painting to save a lot of trouble later on. This fitting instruction guide is an update of the one used for the TYGA MRX kit for the first generation MSX5 Grom. For that reason, some photos are taken from the first generation MRX kit and we have only changed photos where there are significant changes in the design of the bike which will affect the fitment of this kit. We ask you to disregard any detail differences of the bike shown in some of the photos as this does not affect the installation of the MRX kit for the second generation SF model.
")

 Lower Cowling (GRP) BPSY-00 Stay, Side Left BPSY-0 Stay, Side Right")

3 Product Name: Bodywork Set, (GRP), MiniRacerXtreme, MSX5SF Motorcycle Model: 06 onwards MSX5SF Grom Part Number: BPFS-055 BPFU-903 BPFL-903 BPFS-055 BPFU-903(p) Upper Cowling (GRP), BPSY-03 Headlight Fixing Shelf CLIP-0400 Clip, Spring M4 6 JTST-04 Bolt, Dome Head M4 X 6 WPPC-0400 Washer Plastic M4 6 JTST-065 Bolt, Dome Head M6 x 5 WPPC-0600 Washer Plastic M6 JTST-040 Bolt, Dome Head M4 x BPFL-903(p) Lower Cowling (GRP) BPSY-00 Stay, Side Left BPSY-0 Stay, Side Right BPSY-08 Lower, Left, Rear BPSY-09 Lower, Left, Rear, WPPC-0600 Washer Plastic M6 6 CLIP-0600 Clip, Spring M6 8 JTST-06 Bolt, Dome Head M6 x GHB-60 Bolt, M6 Honda
 Side Cover, Left, (GRP), JTST-06 Bolt, Domehead, M6 x")
 Side Cover, Right, (GRP), JTST-06 Bolt, Domehead, M6 x BPSY-005R Stay, Side Cover, Rear SCPH-000 Bolt.")
4 BPFT-93 BPFC-93L BPFT-93(p) Seat/Tank Cowling (GRP), BPFT-903A Inspection Cover (GRP), CLIP-0400 Clip, Spring M4 6 WPPC-0400 Washer Plastic M4 6 JTST-04 Bolt, Dome Head M4 X 6 CLIP-060 Clip, Spring M6, Special JTST-065 Bolt, Domehead, M6 x 5 JTST-060 Bolt, Domehead, M6 x 0 WPCC-0600 Bolt, Domehead, M6 x 0 None Washer Plastic M6 BPFC-93L(p) Side Cover, Left, (GRP), JTST-06 Bolt, Domehead, M6 x BPSY-005L Stay, Side Cover, Rear WPCC-0600 Washer Plastic M6 SCPH-000 Bolt. Machine Screw M6 x BPFC-93R(p) Side Cover, Right, (GRP), JTST-06 Bolt, Domehead, M6 x BPSY-005R Stay, Side Cover, Rear SCPH-000 Bolt. Machine Screw M6 x WPCC-0600 Washer Plastic M6 BPFX-943 Dash (GRP) BFFX-953 Undertray BPSP-0005 Seat Pad None Velcro Strip BPFX-93 Seat Support BPFC-93R BPFX-943 BPFX-953 BPSP-0005 BPFX-93

s")


 Upper")

 BPSY-0 Steering Stopper BPSY-075 Stay,")

5 TYMR-000 SCRE-059 TYLY-007 BPLT-005 TYLY-005 TYLY-05HB Mirrors, Pair, MiniRacerXtreme SCRE-059 Screen, Tint, SCPC-040 Bolt, Dome head, M4 X Black 8 WPCC-0400 Washer, Plastic M4 8 NTPC-0400 Nut, Plastic, M4 8 TYLY-007(p)s Meter Stay CHST-0690 Cap Head Bolt, M6x90 BPSY-0067 Bush Meter Stay MRX NTNY-0600 Nylok Nut, M6 WPSS-0600 Washer, M6 CTBL-000 Cable ties CT-00 (Black) 4 BPLT-005 Headlight 330-KW6-96 Socket, Complete, Headlight JTST-04 Bolt, Dome head, M4 X WPCC-0400 Washer, Plastic M4 6337SVS/RV Headlight bulb, Halogen TYLY-005(p) Upper Triple Clamp CHSS-085 Bolt, Caphead M8 X 5 BHST-0830 Bolt, Buttonhead M8 X 30 4 TYLY-05HB Handlebar,MiniRacerXtreme BPCC-903 Cover, Carbon), Handlebar (Set) BPSY-0 Steering Stopper BPSY-075 Stay, Silencer High Level Exhaust AK6H800ZA Tail Tidy, MSX5SF TYWH-0004 Headlight auxiliary harness BPFX-963 Tank Cover BPSY-0 BPSY-075 AK6H800ZA TYWH-0004 TYMR-000 BPFX-963


 Lower Cowling (Carbon) BPSY-00 Stay, Side Left BPSY-0 Stay,")

6 Product Name: Bodywork Set, (Carbon), MiniRacerXtreme, MSX5SF Motorcycle Model: 06 onwards MSX5SF Grom Part Number: BPFS-056 BPCU-903 BPCL-903 BPFS-056 BPCU-903(p) Upper Cowling (Carbon), BPSY-03 Headlight Fixing Shelf CLIP-0400 Clip, Spring M4 6 JTST-04 Bolt, Dome Head M4 X 6 WPPC-0400 Washer Plastic M4 6 JTST-065 Bolt, Dome Head M6 x 5 WPPC-0600 Washer Plastic M6 JTST-040 Bolt, Dome Head M4 x BPFL-903(p) Lower Cowling (Carbon) BPSY-00 Stay, Side Left BPSY-0 Stay, Side Right BPSY-08 Lower, Left, Rear BPSY-09 Lower, Left, Rear, WPPC-0600 Washer Plastic M6 6 CLIP-0600 Clip, Spring M6 8 JTST-06 Bolt, Dome Head M6 x GHB-60 Bolt, M6 Honda


 BFFX-953 Undertray BPSP-0005 Seat Pad None Velcro Strip")
7 BPCT-93 BPCC-93L BPCT-93(p) Seat/Tank Cowling (Carbon), BPFT-903A Inspection Cover (Carbon), CLIP-0400 Clip, Spring M4 6 WPPC-0400 Washer Plastic M4 6 JTST-04 Bolt, Dome Head M4 X 6 CLIP-060 Clip, Spring M6, Special JTST-065 Bolt, Domehead, M6 x 5 JTST-060 Bolt, Domehead, M6 x 0 WPCC-0600 Bolt, Domehead, M6 x 0 None Washer Plastic M6 BPCC-93L(p) Side Cover, Left, (Carbon), JTST-06 Bolt, Domehead, M6 x BPSY-005L Stay, Side Cover, Rear WPCC-0600 Washer Plastic M6 SCPH-000 Bolt. Machine Screw M6 x BPCC-93R(p) Side Cover, Right, (Carbon), JTST-06 Bolt, Domehead, M6 x BPSY-005R Stay, Side Cover, Rear SCPH-000 Bolt. Machine Screw M6 x WPCC-0600 Washer Plastic M6 BPFX-943 Dash (GRP) BFFX-953 Undertray BPSP-0005 Seat Pad None Velcro Strip BPFX-93 Seat Support BPCC-93R BPCX-943 BPFX-953 BPSP-0005 BPFX-93
8 TYMR-000 SCRE-059 TYLY-007 BPLT-005 TYLY-005 TYLY-05HB Mirrors, Pair, MiniRacerXtreme SCRE-059 Screen, Tint, SCPC-040 Bolt, Dome head, M4 X Black 8 WPCC-0400 Washer, Plastic M4 8 NTPC-0400 Nut, Plastic, M4 8 TYLY-007(p)s Meter Stay CHST-0690 Cap Head Bolt, M6x90 BPSY-0067 Bush Meter Stay MRX NTNY-0600 Nylok Nut, M6 WPSS-0600 Washer, M6 CTBL-000 Cable ties CT-00 (Black) 4 BPLT-005 Headlight 330-KW6-96 Socket, Complete, Headlight JTST-04 Bolt, Dome head, M4 X WPCC-0400 Washer, Plastic M4 6337SVS/RV Headlight bulb, Halogen TYLY-005(p) Upper Triple Clamp CHSS-085 Bolt, Caphead M8 X 5 BHST-0830 Bolt, Buttonhead M8 X 30 4 TYLY-05HB Handlebar,MiniRacerXtreme BPCC-903 Cover, Carbon), Handlebar (Set) BPSY-0 Steering Stopper BPSY-075 Stay, Silencer High Level Exhaust AK6H800ZA Tail Tidy, MSX5SF TYWH-0004 Headlight auxiliary harness BPFX-963 Tank Cover BPSY-0 BPSY-075 AK6H800ZA TYWH-0004 TYMR-000 BPFX-963


9 ) Remove seat, exhaust muffler, seat cowling, seat opening latch and rear fender. Re- move, tank shrouds, tank cover. Disconnect and remove battery, undertray and tail light. Remove headlight, instrument cluster, headlight sub harness. Remove mirrors, switch gear and controls from handlebars. Use impact driver to remove bar end weights. Remove throttle and brake from handlebars but do not disconnect them from rest of bike. Remove the handlebars and triple clamp and remove ignition lock from triple clamp. You will need a chisel to remove the security bolts holding it on. Remove the headlight stay. Now your bike should look like the photos below (a and b) a b
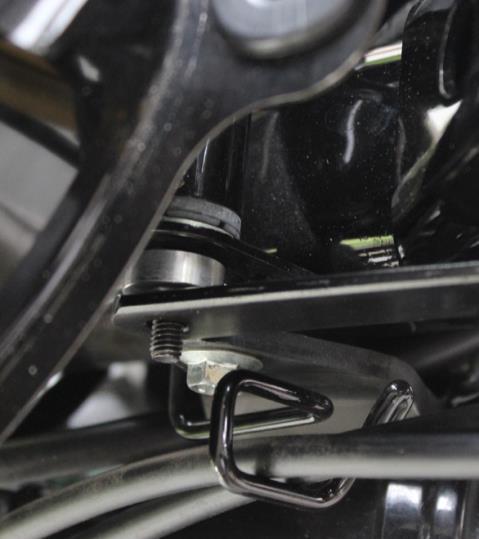
 3b Note the fork height on the TYGA MRX")

10 3) Install the ignition lock and cable stay to the triple clamp.(3a) Note the handlebars are supplied already fitted to the triple clamp. 3a Install triple clamp to the bike but do not tighten the pinch bolts Install the top triple nut and torque up to 65 Nm (3b) 3b Note the fork height on the TYGA MRX is set differently to the stock set up. The bottom triple clamp pinch bolts need to be loosened off and the forks pulled through 9 mm. so they are sitting flush with the top triple clamp face. This can be done one at time with the bike in situ. No need to jack the bike. Torque the bottom triple clamp bolts to Nm. Do the same now for the top triple clamps (3c and d)


 Reinstall the stays in the standard position holding the steering stopper in place.")
11 3c 4) 3d Install the front brake master cylinder, noting the hose is routed through the cable stay on the triple clamp. Install the clutch. Now install the small carbon tubes to both sides of the bars before installing the switch gear which locates in the holes drilled in the handlebar. Note there will be some adjustment required to the clutch and brake master so don't worry at this stage the exact rotation on the handlebars. Install the throttle, routing the cables through the cable stay. and tuck any slack into the frame. Check to see the throttle operates freely. (4a) 4a Remove the front brake stay and the horn wiring stay from the lower triple clamp temporarily. Install the steering stopper as shown in the photos (4b and 4c) Reinstall the stays in the standard position holding the steering stopper in place. Test to make sure the steering operates smoothly and no wires, cables or hoses are getting pinched or rubbing on anything they shouldn't do.
This will not be used.")


12 TYLY-0 4b 5) The next job is to install the meter stay. First, remove the front fuel tank mounting bolt. (5a)This will not be used.. 5a Install the TYGA meter stay using the hardware provided, It is adjustable to a certain degree and the default position is central and down at the front. Secure with the bolts provided. Replace the meter using the stock mounting hardware (5b and 5c) (bolts, washers and rubber bushes). Note the harness routing in the photos. Connect the harness to the stay on the right and the grey connector is attached on the stay on the right. Connect the horn wiring using the original stay if this has not been done yet.


13 5b 5d 5c
 When the original headlight is removed from the bike, remove the indicator flasher relay and associated harness.")
14 6) Headlight auxiliary harness TYWH-0004 TYWH a) Before undertaking any electrical work, disconnect the battery, and observe all other safety precautions, as documented in the owner s manual. 6b) When the original headlight is removed from the bike, remove the indicator flasher relay and associated harness. This will need to be reconnected to the main harness for correct indicator operation. The flasher unit can be connected to the upper/ meter stay with a cable tie as shown (6a)
 The labels are to assist in")


15 6a 6b) Now, familiarize yourself with the harness (6b) The labels are to assist in simple 6b connection and can be easily removed after fitting. 6c) Locate the headlight relay to the central mounting screw of the meter, facing to the left of the bike. 6c
 pull apart and connect the auxiliary")
 This has a flyout wire to power the headlight, and is fuse")
 The Hi-Lo switching of the headlight is controlled in the")
 and plug in the 6P white connector from the")
16 6d) Power is sourced from the ignition switch connector. Locate the 4P connector, (6d) pull apart and connect the auxiliary harness inline. (6d) This has a flyout wire to power the headlight, and is fuse protected from the OEM fuse box. 6d 6d 6e) The Hi-Lo switching of the headlight is controlled in the normal fashion, but you need to pull out the main harness 6P black connector (6e) and plug in the 6P white connector from the auxiliary harness. Please note that our plug is not colour coded, as can be seen in the picture.(6e) 6e 6e


17 6f) Our system requires an extra earth. The wire can be run down the meter stay and earthed to the frame using the bolt that mounts the airbox. Remove any paint from the surface prior to fitting the ring connector to ensure a good earth. Do not use the fuel tank bolts as these are rubber mounted. 6f 6g) The final connection is to illuminate the Hi beam indicator on the dash. Locate the 8P connector (6g) that formerly powered the OEM headlight. 6g 6h) Remove the tape from the wires (6h) and separate the blue wire (6h) 6h 6h
 6i 6i 6j) Re-wrap the tap, and clean up the installation with a little extra")
 Wrap any open connectors with electrical tape to isolate from the environment 6l) Now is the time to")

18 6i) Using the quick lock connector provided (6i) splice the auxiliary harness blue wire into the blue wire at the 8P connector (6i) 6i 6i 6j) Re-wrap the tap, and clean up the installation with a little extra electrical tape if necessary. 6k 6k) Wrap any open connectors with electrical tape to isolate from the environment 6l) Now is the time to check the full operation of the headlight. The 3P headlight connector on the auxiliary harness plugs directly into the 3P connector from the BPLT-005 harness. 6m) The final attack is to bundle up the wires, which can then be secured out of the way, by the provided cable ties, to the upper/meter stay.

 Next is the undertray, this mounts the same way as the original one.")
19 7) Now it is time to turn our attention to getting ready to install the tank/seat unit, but before we do that, there are a few jobs to do. The rear brake master cylinder needs to be mounted inboard of the stay. To do this, remove the bolt and bush in the reservoir. Then install again using the two washers provided. Mount it on the inside of the stay with one washer either side of the plastic tab on the reservoir. It should be tight to prevent the reservoir rotating on the mounting stay. 7 8) Next is the undertray, this mounts the same way as the original one. Note it is narrow- er and all wiring needs to be routed inboard of the frame because the TYGA seat cowling is narrower than the Honda one. Make sure the undertray is fully forward on position. Once the undertray is on place, install the tail light and the tail tidy or rear fender depending on what is being used, We recommend at this stage that lights are tested before the bodywork goes on. 8
 This has four mounting positions, but only two are used at this stage.")

20 9) Now, install the seat support. (9a) This has four mounting positions, but only two are used at this stage. First put the two clips on the frame as shown on the photo. Then bolt the seat support to the frame making sure the rear two holes line up. Do not put the rear bolts (the longer 5 mm ones) in at this stage because they are fitted through the seat cowling too. 9a 9b
 provided with this kit.")


21 0) The next thing to do is to install the HC tail tidy (0a) and high level exhaust stay (0b) provided with this kit. These are installed using the four nuts and bolts provided with the tail tidy kit. The exhaust stay is sandwiched between the rear undertray and the tailtidy by the front two mounting bolts. (0c) Refer to photos for correct installation. 0a 0a 0c 0b Tip; close the open end of the frame rails with masking tape or similar to prevent nuts from rolling into them, as they are very difficult to extricate!


 Replace the plastic tank cover on top of the steel fuel tank with the TYGA one provided.")
22 Note, the MRX body kit is provided with an exhaust stay which puts the mounting hole in the stock position for a high mount exhaust so it should be possible to mount high mount exhausts from other manufacturers. However, if you are installing a TYGA exhaust system, we have two different types of exhaust stays which are supplied with the TYGA exhaust, one type for the Maggot BPSY-075 and one type for the oval silencer. BPSY-077 BPSY-075 BPSY-077 You should use the exhaust stay provided with the TYGA exhaust kit but for reference, the Maggot version is the exact same one that is provided with the MRX kit and the stay provided with the TYGA oval silencer has the mounting hole further back on the bike for better clearance with the bodywork. ) Replace the plastic tank cover on top of the steel fuel tank with the TYGA one provided.(a) To do this, you will need to remove the fuel tank filler cap mount. Not the TYGA part is almost identical but it has the raised tabs around the ring on the top ground off for better fitment with the MRX seat/ tank panel (b) a b


23 ) The MSX5SF has two seat hooks and a helmet holder which prevent fitment of the MRX kit. To enable installation, and allow for reversing the installation at a later date, we recommend that these are just bent out the way as shown in the photo. The modification can be done with a plastic or even a rubber hammer or if not available, a block of wood and a steel hammer, using the block of wood to dampen the blows and prevent too much paint damage on the hooks. a b

 The panel needs to be moved into position from")


24 3) Now it is time to install the tank/ seat unit. Note there is a locating lug on the front inside which fits on the fuel tank.(3b) There is a strip of rubber for running along the rear edge near the tail light (3c) The panel needs to be moved into position from above and from the rear (3a) making sure that you hold the sides out to make sure that the subframe and brackets are inside the seat cowling area before it is slid into position. Note the edges of the seat cowling should be underneath the undertray. Install the inspection cover using the bolts provided. 3a 3c 3b
 Do not tighten them at this stage because some minor adjustment may be necessary later to get everything to line up.")

25 4) Next is the turn of the lower cowling. This is best done with the bike on a service stand. First, install the stays as shown in the photos (4a,b,c and d) Do not tighten them at this stage because some minor adjustment may be necessary later to get everything to line up. Note that the stays have clips in slots which offer some limited movement too. Once the stays are in place, install the lower cowling. Note that there should be even clearance all-round the engine casing cut outs and clearance with the sidestand and gear linkage. For Tyga rear sets, it is necessary to move the gear link rod to the outside of the link arm. This may be the case with other set ups but this should not affect the gear changing. 4a: Right Stay 4b: Left Stay

. Then, with the dash in position, install the last two remaining screen bolts.")
26 4c: Lower Left Stay 4d: Lower Right Stay 5) After the lower is installed, the upper cowling is next. Before mounting it to the bike, the headlight, dash and screen need installing. The windscreen is first. Install it using the top four bolts and leave the bottom two out for now (5a) Next install the headlight fixing shelf sandwiching the dash between the shelf and the mounts to hold it in place (5b). Then, with the dash in position, install the last two remaining screen bolts. The headlight can now be squeezed into position and the adjuster bolt (5c) installed on the underneath making sure not to lose the nut in the headlight slot!


27 5a 5b 5c 6) The next bit is a bit difficult and best done with the help of a friend with one person controlling each side of the upper fairing as it is slid on the front of the bike. (6a) It is best to come in low so the bottom of the fairing slides past the chrome part of the fork legs where it is narrower. Before going all the way onto the bike, connect up the headlight and the indicators if they are being used and check they work correctly. Move the fairing into position, making sure that the part which fits on the fuel tank area does not get scratched. Once in position, mount using the four positions with the tank and the four with the lower cowling ( 6c) Install the mirrors making sure they are properly tightened (6c) 6a


28 6b 6c 7) Before going any further, make sure the clutch and front brake mounts are in a good position, ideally, the brake wants to be in the highest position possible which still clears the fairing, and throttle cables which can be adjusted downwards on the adjuster nuts as they tend to touch the fairing when the handlebars are on full lock by rotating the throttle cable downwards towards the front brake lever, clearance with fairing can be obtained. Once an optimum position is found, adjust the clutch to the same rotational angle as the brake.


29 Important: Make very sure that the brake lever can be operated fully without throttle cables obstructing movement. Make sure everything moves freely lock to lock on the steering, the throttle works properly and that nothing touches the fairing. The side covers are fitted next. Before installing the side covers themselves, on the left side only is a stay, BPSY-**** that needs to be installed as shown in the photo (7a) At this stage, install it in the approx. position and be prepared to adjust later to make for a perfect location for the left side cover. The side covers themselves slide in from the rear making sure the top edge of the cover is inside the seat cowling edge. Install the rear M6 bolt first, pushing the cover for wards at the same time and only letting go one it is tight. Then tighten the other three po sitions. Note that there are some variations to the fabrication on this part of the bike so minor trimming around the frame may be required. 7a 7b

 the seat pad can then be lowered into")


30 8) The final job is the seat pad. Cut the velcro to cover the seat pad area around the inspection cover. we recommend two strips either side. Once it has been applied (8a) the seat pad can then be lowered into position (8b) Your MRX now ready to ride! 8a 8b We recommend a shakedown first to make sure everything works properly. Also, bodywork should be trial fitted before painting. it is much easier to make minor adjustments when unpainted and just the practice of doing it once will make it easier and less likely to end in paint damage when the time comes for the final installation. Note, if you are trial fitting the bodywork, once the bodywork is removed, all stays and mounting hardware needs to securely fastened into position. If you are struggling to find a good set up, please contact us and we will do our best to advise you on any problems or issues you may have.


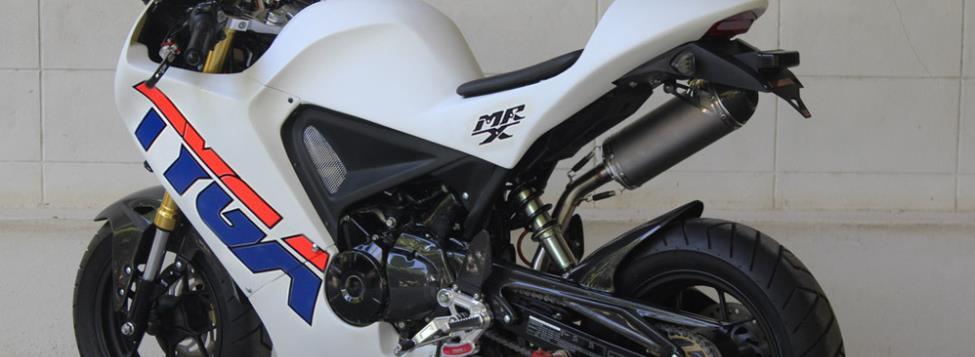
31 Some of the awesome bikes build with the first generation MRX kits by our customers around the world. Please share your pictures with us of your MRX project.
FITTING INSTRUCTIONS
 MAKING YOUR DREAMS A REALITY FITTING INSTRUCTIONS APRILIA RS50 GP Style Fairing Sets BPFS-000 (GRP, street) BPFS-00 (GRP, race) BPFS-00 (Carbon, street) Aprilia RS50 GP Fairing Fitment of Aprilia RS50
MAKING YOUR DREAMS A REALITY FITTING INSTRUCTIONS. KAWASAKI ZXR250 Ninja Style Fairing Set BPFS-0071
 MAKING YOUR DREAMS A REALITY FITTING INSTRUCTIONS KAWASAKI ZXR250 Ninja Style Fairing Set BPFS-0071 Handy Hints for fitting our fairings: 1. We recommend trial fitting of our fairings before painting.
MAKING YOUR DREAMS A REALITY FITTING INSTRUCTIONS
 MAKING YOUR DREAMS A REALITY FITTING INSTRUCTIONS Honda NC30 Two Seat, Street, BPFS-0078 Thank you for purchasing the TYGA NC30 Two Seat, Street kit. Please take a few minutes to read these instructions
Page 1. File: Motolight caliper one-piece Harley Date: 8/15/2006
 Page 1 Harley-Davidson FL Caliper Mount Installation One-piece mounting brackets You should allow about two to three hours for installation. We suggest you use a well-lighted space for installation. PLEASE
Superbike Kit
 Superbike Kit www.spieglerusa.com sales@spieglerusa.com Mounting Instructions & Safety Instructions for Honda CBR 1000 RR ABS model year 2017 - Attention Important Safety Instructions: Thank you for purchasing
Page 1. File: Motolight caliper one-piece Date: 8/14/2006
 Page 1 Caliper Mount Installation One-piece mounting brackets You should allow about two to three hours for installation. We suggest you use a well-lighted space for installation. PLEASE READ ALL THE INSTRUCTIONS.
INSTALLATION INSTRUCTIONS FOR THE MOTOR TRIKE CROSS COUNTRY / CROSS ROADS / HARD BALL RAKE KIT
 INSTALLATION INSTRUCTIONS FOR THE MOTOR TRIKE CROSS COUNTRY / CROSS ROADS / HARD BALL RAKE KIT Thank you for choosing the Motor Trike Cross Country / Cross Roads / Hard Ball rake kit. We ask that you read
INSTALLATION INSTRUCTIONS FOR THE MOTOR TRIKE GL1500 RAKE KIT
 INSTALLATION INSTRUCTIONS FOR THE MOTOR TRIKE GL1500 RAKE KIT Thank you for choosing the Motor Trike GL1500 Rake Kit. We ask that you read the directions before you start and follow them very closely.
MAKING YOUR DREAMS A REALITY FITTING INSTRUCTIONS. KTM RC series STEP KIT STAA-0024 (street) STAA-0124 ( race only)
 STAA-0124 ( race only)") MAKING YOUR DREAMS A REALITY FITTING INSTRUCTIONS KTM RC series STEP KIT STAA-0024 (street) STAA-0124 ( race only) KTM RC Series Step Kit Fitting Instructions, KTM RC Series Adjustable Step Kit STAA-0024,
MAKING YOUR DREAMS A REALITY FITTING INSTRUCTIONS KTM RC series STEP KIT STAA-0024 (street) STAA-0124 ( race only) KTM RC Series Step Kit Fitting Instructions, KTM RC Series Adjustable Step Kit STAA-0024,
INSTALLATION INSTRUCTIONS FOR THE TOMAHAWK ELECTRIC REVERSE
 INSTALLATION INSTRUCTIONS FOR THE TOMAHAWK ELECTRIC REVERSE LAST UPDATED: April 2018 Thank you for choosing the Motor Trike Electric Reverse. We ask that you read the directions before you start and follow
Yamaha Apex Moto-R Kill w/jacobson Roll-over valve Installation Instructions
 OFTRacing.com Email Scott Moto 2006-2011 Yamaha Apex Moto-R Kill w/jacobson Roll-over valve Installation Instructions Included Parts: 1 Moto-r Kill wiring harness including Pro Armor tether switch, Jacobsen
We recommend installing the TRS Racebars first as we have done
 Thanks for purchasing the 2 Front Lowering Kit for the Honda Grom (MSX125). This is a basic installation guide, and we tried to cover everything, but use your best judgment along the process. It is recommended
Tusk Pannier Racks. Instructions and information KLR
 1 Tusk Pannier Racks Instructions and information KLR650 2008 + Congratulations on your purchase of the Tusk Pannier Racks. These racks are made to handle extreme adventure riding, but work great for the
INSTALLATION INSTRUCTIONS FUEL SURGE TANK KIT
 INSTALLATION INSTRUCTIONS FUEL SURGE TANK KIT BMW E46 3-Series, Excl Convertible Document: 19-0056 Support: info@radiumauto.com Relieve fuel pressure in vehicle before beginingthe installation. Disconnect
Subaru Front Mount Intercooler Kit STI Subaru Front Mount Intercooler Kit STI
 Subaru Front Mount Intercooler Kit STI 2008-2014 715500 Subaru Front Mount Intercooler Kit STI 2008-2014 Congratulations on your purchase of the Subaru Front Mount Intercooler Kit STI 2008-2014. The following
TSS Fit Kit Installation Instructions Timbersled Snow Bike System
 TSS Fit Kit Installation Instructions Timbersled Snow Bike System Information needed before you start: Read the entire installation instructions before starting. The instruction sheet is universal for
TTR225/250 DUAL S PORT K IT I NSTALLATION I NSTRUCTIONS
 TTR225/250 DUAL S PORT K IT I NSTALLATION I NSTRUCTIONS KIT CONTENTS Inspect Your Kit Your kit will include the following items A. TTR225/250 Instructions and Wiring Diagrams Read through the entire instruction
Deuce/Ace Installation Instructions
 HARDWARE KIT: Upper Mounting Plate: 2-7/16" (11mm) X 3.5" bolts 2-7/16" flange nuts 2-2" spacers 2-7/16" trim cap mounting washers 2 - plastic trim caps TOOLS NEEDED: safety glasses wrenches 16mm or 5/8"
WARNING: the engine does not come with oil in it. Please fill the oil before starting. The 200cc hardknock requires 9/10 of a quart of oil.
 WARNING: the engine does not come with oil in it. Please fill the oil before starting. The 200cc hardknock requires 9/10 of a quart of oil. Things needed for assembly. -2 tubes of blue loc-tite. I don
B5 A4 1.8t Front Mount Intercooler Install Instructions
 B5 A4 1.8t Front Mount Intercooler Install Instructions Only work underneath your vehicle after properly supporting it with adequate jack stands on a flat surface. NEVER work under a vehicle only supported
ZX-14 Stage I Turbo Kit
 62910 Peerless Ct. Bend, OR 97701 Phone 541.385.0706 Fax 541.382.9406 ZX-14 Stage I Turbo Kit WARNING: This turbo kit is for OFF-ROAD RACING use ONLY. Advisement: These instructions are written to be comprehensive
Parts List. Please be sure to read our instructions thoroughly before attempting installation. D2/G2 Parts List. D31/G31 Parts List.
 Parts List Please be sure to read our instructions thoroughly before attempting installation. D2/G2 Parts List D31/G31 Parts List Page 2 1 Step 1: Bike Preparation Step 1: Bike Preparation There are two
Sherco Motorcycle Assembly Instructions
 Sherco Motorcycle Assembly This manual is intended to be used as an assembly guide for the Sherco 1.25 2.9 Trials Motorcycles. The motorcycle shown in the pictures is a new 2002, 2.9, the one that you
INSTALLATION INSTRUCTIONS 97 FORD EXPEDITION
 INSTALLATION INSTRUCTIONS 97 FORD EXPEDITION 1. Read the instructions completely and carefully before you begin. Check the kit for proper contents (refer to the part s list and the picture diagrams). Before
2015+ EcoBoost F150 & Raptor Intercooler Install
 2015+ EcoBoost F150 & 2017+ Raptor Intercooler Install Note: This entire job can be performed with the truck on the ground - No need to raise the vehicle. The most difficult part is removing the grille
COLD AIR INTAKE INSTALLATION INSTRUCTIONS
 COLD AIR INTAKE INSTALLATION INSTRUCTIONS # D760-0030 Fits: 2007-10 135i (E82, E88; with N54 engine) 2007-08 335i/xi (E90) 2007-10 335i (E92, E93; with N54 engine) Congratulations for being selective enough
LEXUS RC 350/RC-F ILLUMINATED DOOR SILLS Preparation
 Preparation Part Number: PT944-24150 Kit Contents Item # Quantity Reqd. Description 1 2 Inner LED Scuff 2 2 Outer Scuff 3 1 Hardware Bag Hardware Bag Contents Item # Quantity Reqd. Description 1 15 20
K T M E X C / M X C D U A L S P O R T K I T I N S T A L L A T I O N
 K T M E X C / M X C D U A L S P O R T K I T I N S T A L L A T I O N K T M D U A L S P O R T K I T I N S T A L L A T I O N KIT CONTENTS Inspect Your Kit Your kit will include the following items A. KTM
MAZDASPEED3 Intercooler Instructions
 MAZDASPEED3 Intercooler Instructions Congratulations on your purchase of the COBB Tuning Front Mount Intercooler System for your 2007-2009 Mazdaspeed3. The following instructions should assist you through
2016 HONDA 1000 Pioneer PN 3102 Turn signal / horn kit rev nc
 2016 Honda 1000 Pioneer STOP - THIS KIT IS DESIGNED SPECIFICALLY FOR 2016 HONDA 1000 PIONEER IF YOUR MACHINE IS NOT THIS MODEL DO NOT PROCEED. THIS KIT DOES NOT WORK ON THE PIONEER 500 nor 700 S. Contact
Mustang Radiator Conversion DIY. By GearHeadPeter. January 27, 2011
 1964-1966 Mustang Radiator Conversion DIY By GearHeadPeter January 27, 2011 We all know that the radiators in our cars are not the best, especially if you have done any customization to the engine, which
General Applicability: KIA Sorento. Issues Current Kit does not allow for CAN DATA remote access
 Document #730135 Created ACH 08/02/2018 Revised ACH 08/20/18 A2 General Applicability: 2018-19 KIA Sorento Issues Current Kit does not allow for CAN DATA remote access Kit Contents: Item# Component Description
INSTALLATION PROCESS: FK003D945-7 Complete Front, Rear, and Clutch A.B.S. KIT Harley Davidson FLH Touring Models
 INSTALLATION PROCESS: FK003D945-7 Complete Front, Rear, and Clutch A.B.S. KIT 2014-2017 Harley Davidson FLH Touring Models Parts List: 4 Lines 1 Brake Light Switch Adapter 7 Single banjo bolts 2 Caliper
2010 BMW S1000RR TracStar HeliBars TS mm taller (1.7 ) ~ 20mm Rear Offset (.8 ) ~ Stock Width (25 ¼ )
 ~ 20mm Rear Offset (.8 ) ~ Stock Width (25 ¼ )") WARNING: IMPROPER INSTALLATION COULD RESULT IN SERIOUS INJURY OR DEATH. HAVE A QUALIFIED MECHANIC INSTALL YOUR HELIBARS. Right Side To protect your motorcycle during installation place clean shop rags
WARNING: IMPROPER INSTALLATION COULD RESULT IN SERIOUS INJURY OR DEATH. HAVE A QUALIFIED MECHANIC INSTALL YOUR HELIBARS. Right Side To protect your motorcycle during installation place clean shop rags
HID INSTALLATION ON RST1000 Futura
 HID INSTALLATION ON RST1000 Futura Disclaimer: This is a full description of what I have done to my motorcycle. I am in no way suggesting you do as I have done by following these instructions. I have not
Wolverine Turn Signal / Horn Kit 2102
 All years Yamaha Wolverine STOP - THIS KIT IS DESIGNED SPECIFICALLY FOR ALL YEAR AND MODELS YAMAHA WOLVERINE. IF YOUR MACHINE IS NOT ONE OF THESE MODELS DO NOT PROCEED. Contact Ryco Motorsports or your
Instructions for Lynx R Fairing - KTM EXC 500 Husqvarna 501
 Instructions for Lynx R Fairing - KTM EXC 500 Husqvarna 501 Thank you for purchasing the Lynx R fairing. The kit includes the following parts : 1 x Fairing and 1x Screen 2x 16mm M6 button head screws 4x
INSTALLATION INSTRUCTIONS Horizon XP Performance Handlebar
 INSTALLATION INSTRUCTIONS Horizon XP Performance Handlebar HZ10090XP, HZ10090XP-BA (1 Mount) Gen 1 HZ10093XP, HZ10093XP-BA (1 1/4 Mount) Gen 1 HZ10096XP, HZ10096XP-BA ( 1 1/4 Mount) Gen 2 HZ10097XP, HZ10097XP-BA
Fitting instructions for Voodoo Fairing - KTM 950/990 Adventure
 Fitting instructions for Voodoo Fairing - KTM 950/990 Adventure Thank you for purchasing the Voodoo fairing. Your fairing kit comes largely completed and includes the following. 1 x Fairing 1x Screen,
R O A D S M I T H TRIKE CONVERSIONS BY THE TRIKE SHOP
 R O A D S M I T H TRIKE CONVERSIONS BY THE TRIKE SHOP Please thoroughly review the instructions before and during installation. Keep in mind that this product was designed to be installed by trained dealer
Instructions for Lynx R Fairing - KTM EXC 500 Husqvarna 501
 Instructions for Lynx R Fairing - KTM EXC 500 Husqvarna 501 Thank you for purchasing the Lynx R fairing. The kit includes the following parts : 1 x Fairing and 1x Screen 2x 16mm M6 button head bolts 4x
ST 93 RIPPER INSTALL KIT
 ST 93 RIPPER INSTALL KIT P/N 2883777;2883778;2883779 APPLICATION The Timbersled Ripper ST93 Install Kit is designed to fit all Timbersled ST90 and ST93 Ripper models. This includes; Timbersled Model No.
PRELIMINARY INSTALLATION INSTRUCTIONS PARTS LIST. Combination light switch Right fog light. 4 Self-tapping washer-screws.
 INSTALLATION INSTRUCTIONS Accessory S P/N 08V31-SCV-100D Application 2009 ELEMENT (SC) Publications No. AII 40515 Issue Date OCT 2008 PARTS LIST Combination light switch Right fog light Left fog light
INSTALLATION INSTRUCTIONS
 INSTALLATION INSTRUCTIONS Accessory Application Publications No. BII 23302 2002 MDX Issue Date PN 08U97-S3V-210 (BLACK) P/N 08U97-S3V-270 (SADDLE) NOV 2001 PARTS LIST Wood trim steering wheel 1. Make sure
2013 Road King CVO FLHRSE5 Detachable Fairing w/ Garmin Zumo 665 Installation Instructions
 2013 Road King CVO FLHRSE5 Detachable Fairing w/ Garmin Zumo 665 Installation Instructions 1 1. Turn ignition switch to on position and leave there. This will prevent alarm from going off when you disconnect
English. Fitting Instructions: Street Triple Rx, Street Triple from VIN and Street Triple R from VIN A , A and A
 English Fitting Instructions: Street Triple Rx, Street Triple from VIN 560477 and Street Triple R from VIN 560477 A968090, A968 and A9687 Thank you for choosing this Triumph genuine accessory kit. This
INSTALLATION & OWNER S MANUAL
 INSTALLATION & OWNER S MANUAL CAB INSTALLATION INSTRUCTIONS JOHN DEERE 3000 SERIES (4200/4300/4400) (4210/4310/4410) & (3120/3320/3520/3720) HARD SIDED CAB ENCLOSURE (p/n 1JD3520AS) SOFT SIDED CAB ENCLOSURE
Stand Alone Fog Lights Installation Instructions
 Tools Required: 1. Trim Removal tool or protected flat screwdriver 2. #2 Phillips Screwdriver 3. 10mm socket 4. 10mm wrench 5. 8mm or 5/16 socket 6. Adjustable Pliers 7. Electrical Tape WARNING!!! Disconnect
R O A D S M I T H TRIKE CONVERSIONS BY THE TRIKE SHOP
 R O A D S M I T H TRIKE CONVERSIONS BY THE TRIKE SHOP Please thoroughly review the instructions before and during installation. Keep in mind that this product was designed to be installed by trained dealer
1 Remove the cover from the rear storage compartment using the ignition key.
 1 Remove the cover from the rear storage compartment using the ignition key. 2Remove the seat by pulling the red lever, then lift up on the rear of the seat and pull back to release. 3Remove the front
Sherco Setup and Lubrication Guide
 Sherco Setup and This guide is designed to provide the Sherco owner with instructions on how to: Set up a new bike Clean and re-oil the air filter Change the transmission oil Change the fork oil Repack
97-02 JEEP TJ BODY LIFT KIT INSTRUCTIONS
 92RC60500 97-02 JEEP TJ BODY LIFT KIT INSTRUCTIONS Congratulations on your purchase of a new Rough Country 2 /3 Body Lift. We are committed to providing you with the best product available for the best
Slingshot Rotrex Supercharger Kit
 Slingshot Rotrex Supercharger Kit This supercharger kit improves on the Slingshot by forcing more dense air into the engine and creating more power. Installation time of the supercharger depends on you
RHINO SUSPENSION SYSTEM INSTALLATION INSTRUCTIONS
 PARTS INCLUDED: 2 FRONT UPPER A-ARMS 2 FRONT LOWER A-ARMS 2 UNI-BALL JOINTS 2 UNI-BALL JOINT STUDS 2 UNI-BALL JOINT CAPS 2 RETAINING RINGS 1 FRONT SHOCK ASSEM. 2 DELRON STEERING STOPS 2 SHOCK MOUNT SPACERS
Fitting instructions for Lynx R Fairing - KTM 690
 Fitting instructions for Lynx R Fairing - KTM 690 Thank you for purchasing the Lynx R fairing. Your fairing kit comes largely completed, with most of the fitting time involved with the attachment of your
Hayes TrailTrac Kit Installation Guidelines Polaris Rush / Pro-R / Indy
 Models: 2010-2014 Polaris Rush / Pro-R / Indy Packing List 1 Electronic Control Unit (ECU) 1 ECU Velcro, 3 inch 1 Switch face plate 1 Switch face plate adhesive 1 Switch 1 Wiring harness 1 Fully pre-filled
INSTALLATION INSTRUCTIONS
 INSTALLATION INSTRUCTIONS Accessory Application Publications No. P/N 08V31-SVA-110 2007 CIVIC 2-DOOR All33536-34848 Issue Date FEB 2007 PARTS LIST 11 Wire ties Right fog light Clip Left fog light 4 Stepped
INSTALLATION INSTRUCTIONS
 INSTALLATION INSTRUCTIONS Accessory Application Publications No. P/N 08V31-SNA-100 2008 CIVIC 4-DOOR AII 37730 Issue Date AUG 2007 PARTS LIST Fog light harness Right fog light Left fog light Sub harness
INSTALLATION INSTRUCTIONS Horizon CCR HZ13054
 INSTALLATION INSTRUCTIONS Horizon CCR HZ13054 IMPORTANT: PLEASE GIVE CUSTOMER ENCLOSED INFORMATION! Thank you for your purchase of our HeliBars. They are designed to increase your long distance comfort
VECTRIX VX-2 SERVICE MANUAL. Version 1.0/May 2011 VECTRIX, LLC
 www.vectrix.com CONTENTS SECTION A: Tools 1 Tools Needed SECTION B: Mechanical Parts 1 Front Fairing 2 Front Console Cover 3 Speedometer Cover 4 Front Vertical Panel Cover-Lower 5 Front Vertical Panel
Installation Instructions
 Installation Instructions Jeep JK Unlimited (2007 Present) Mounting Bracket and Air Line System Kit for ARB On-Board Twin Air Compressor (CKMTA12) Made in the USA Kit Contents: 1 Bracket for ARB Compressor
INSTALLATION INSTRUCTIONS
 INSTALLATION INSTRUCTIONS Accessory Application Publications No. CIVIC AII 24171 S 2- AND 4-DOOR Issue Date (DX, HX) AUG 2002 NOTE: Fog Lights cannot be installed if the vehicle is equipped with an optional
INSTALLATION INSTRUCTIONS
 INSTALLATION INSTRUCTIONS Accessory Application Publications No. S CIVIC 2 AND 4-DOOR (EX, LX) AII 24188 Issue Date AUG 2002 NOTE: Fog Lights cannot be installed if the vehicle is equipped with an optional
GENUINE PARTS INSTALLATION INSTRUCTIONS
 GENUINE PARTS INSTALLATION INSTRUCTIONS 1. 2. 3. 4. DESCRIPTION: Security Light Kit APPLICATION: Altima Coupe and Sedan (2011+) PART NUMBER: 999F4 AX008 - Universal Security Lighting Kit. KIT CONTENTS:
GL1800 TRAILER HITCH - INSTALLATION INSTRUCTIONS #GL
 GL1800 TRAILER HITCH - INSTALLATION INSTRUCTIONS #GL18007-20 Read through these instructions completely before attempting installation, lay out all pieces including the numbered hardware bags to familiarize
General Applicability: Toyota Sienna. Issues Updated CAN wire location and attachment
 Document #730145 Created ACH 10/19/2018 Revised ACH 10/26/18 A2 General Applicability: 2018-19 Toyota Sienna Issues Updated CAN wire location and attachment Kit Contents: Item# Component Description 1
Table of Contents. Bikes with 2 handlebar switches. 12-pin plug for BMW models Installation tips. 15-pin plug for older BMW models Installation tips
 Table of Contents Bikes with 2 handlebar switches SM-5 12-pin plug for BMW models Installation tips 2 3 SM-6 15-pin plug for older BMW models Installation tips Special Features & Functions 4 5 4-Way Emergency
INSTALLATION INSTRUCTIONS
 INSTALLATION INSTRUCTIONS Accessory Application Publications No. 2007 CIVIC 2-DOOR All33536-34068 Issue Date SEP 2006 PARTS LIST 11 Wire ties Right fog light Clip Left fog light 4 Stepped screws 2 Washer
Installation of Halo CCFL Rings edited by
 Installation of Halo CCFL Rings edited by www.motorcyclehidlights.com Please use the below installation as an example for your project. Installation is done on a CBR600 however the same procedure will
SHELBY GT500
 2007-2009 SHELBY GT500 Removal of Factory Unit WARNING: 1. Radiator fluid must be handled properly. Please observe local ordinances with regards to handling and disposal. 2. Allow vehicle and components
INSTALLATION INSTRUCTIONS
 INSTALLATION INSTRUCTIONS Accessory Application Publications No. All 27176-28932 2005 CR-V Issue Date S P/N 08V31-S9A-115 FEB 2005 PARTS LIST 6 Washer-bolts Left fog light 6 Spring nuts Harness bracket
INSTALLATION INSTRUCTIONS
 INSTALLATION INSTRUCTIONS 2017+ BMW R9T Racer HeliBars Replacement Triple Clamp w/built in Risers Part # HRT05126 IMPORTANT: PLEASE GIVE CUSTOMER ENCLOSED INFORMATION! Thank you for your purchase of our
Tools Required. Metric Wrench Set Screwdriver Set Metric Socket Set Pliers Heavy duty hydraulic Jack and Car Stands Box knife or similar Hacksaw WD40
 Subaru 2004+ Legacy GT & Outback XT For JDM 2.0 twinscroll turbo and USDM 2.5 turbo models Front Mount Intercooler Fitting Instructions PN# LEG-1348-000 You are now the proud owner of a highly tested and
INSTALLATION INSTRUCTIONS
 INSTALLATION INSTRUCTIONS Accessory Application Publications No. CIVIC All 30175-31616 2 AND 4-DOOR P/N 08E10-SNA-100 Issue Date DEC 2005 NOTE: The interior illumination lights cannot be installed on 2-door
INSTALLATION INSTRUCTIONS
 INSTALLATION INSTRUCTIONS Accessory Application Publications No. SYSTEM ACCORD 2-DOOR (LX/EX L4, LX V6) AII 25749 Issue Date FEB 2004 PARTS LIST Double-sided adhesive tape XM Radio Attachment Kit : P/N
OIL COOLER KIT INSTALLATION INSTRUCTIONS PART NUMBER D
 OIL COOLER KIT INSTALLATION INSTRUCTIONS PART NUMBER D570-0904 APPLICATION: 2011-2012 E90 335i/xi (N55 engine) with BMW standard bumper and with stock oil cooler Congratulations for being selective enough
COLD AIR INTAKE INSTALLATION INSTRUCTIONS
 COLD AIR INTAKE INSTALLATION INSTRUCTIONS # D760-0029 Fits: 2009-10 335i/xi (E90; with N54 engine) Congratulations for being selective enough to use a Dinan Engineering Cold Air Intake. We have spent many
RAINGEAR 1955/ 1956 Chevrolet
 RAINGEAR 1955/ 1956 Chevrolet GETTING STARTED: SOME RECOMMENDATIONS PLEASE TRY OUR WAY FIRST! Note: This system is designed with built in adjustments to fit in your car. If, as you are installing it, you
 INSTALLATION INSTRUCTIONS Accessory Application Publications No. 2010 CIVIC All 42479 2- AND 4-DOOR P/N 08E10-SNA-110 Issue Date AUG 2009 NOTE: The interior illumination lights cannot be installed on 2-door
w w w. h d o n l i n e s h o p. d e STREET SLAMMER HANDLEBAR KIT GENERAL INSTALLATION -J03363 REV Kit Number Models Kit Contents
 -J06 REV. 006-06- GENERAL Kit Number 69-0 Models STREET SLAMMER HANDLEBAR KIT Ask a Harley-Davidson dealer or refer to the latest Harley- Davidson Genuine Motor Accessories and Genuine Motor Parts catalog
Installation Instructions
 Installation Instructions Jeep JK 2-Door (2011 Present) Mounting Bracket and Air Line System Kit for ARB On-Board Twin Air Compressor (CKMTA12) Made in the USA Kit Contents: 1 Flat Bracket 1 Formed Bracket
GENUINE PARTS INSTALLATION INSTRUCTIONS
 GENUINE PARTS INSTALLATION INSTRUCTIONS 1. 2. 3. 4. DESCRIPTION: Accent light Kit APPLICATION: Infiniti JX (2013) PART NUMBER: 999F3 YY000 - Universal Accent Lighting Kit. KIT CONTENTS: Item QTY Description
RAV4 TNS310 (Traffic) Plus
 Plus") TNS310 (Traffic) Plus RHD installation instructions Model year: 005 Vehicle code: **A3***-*****W Part number TNS310 Plus: Sub wire harness No 1: 08673-64801 Sub wire harness No : 08673-64800 Part number
TNS310 (Traffic) Plus RHD installation instructions Model year: 005 Vehicle code: **A3***-*****W Part number TNS310 Plus: Sub wire harness No 1: 08673-64801 Sub wire harness No : 08673-64800 Part number
Procharger Stage II Intercooled Supercharger System (11-14 GT)
") Procharger Stage II Intercooled Supercharger System (11-14 GT) Installation Time: Approximately one day. Installed on 2012 Mustang GT 5.0/Manual Required Tools 3/8 Socket Set (Standard and Metric) 1/2
Procharger Stage II Intercooled Supercharger System (11-14 GT) Installation Time: Approximately one day. Installed on 2012 Mustang GT 5.0/Manual Required Tools 3/8 Socket Set (Standard and Metric) 1/2
INSTALLATION INSTRUCTIONS
 HIGH FLOW AIRFLOW METER INSTALLATION INSTRUCTIONS PART NUMBER D763-1600A APPLICATION: 2001-06 E46 M3 Parts List: Hose clamp 64Z (7) Plastic Rivets Air Filter Temp Sensor & Harness (2) Button Head Screws
INSTALLATION INSTRUCTIONS
 INSTALLATION INSTRUCTIONS Accessory Application Publications No. ACCORD AII 24050 4-DOOR P/N 08V31-SDA-100 Issue Date AUG 2002 NOTE: The outside temperature gauge cannot be installed in a vehicle with
C15C C15C. Page 1 of 20
 2 x Lid Front Hinge 1135 8 x M8 Bolt 8 x M8 Washer (3mm Thick) 4 x M6 Large washers 4 x M6 Spring washers 4 x M6 x 40mm Bolts 6 x M6 20mm Bolts 6 x M6 Washers 20 x Screws 2 x Lid mount gas strut bracket
Installation Instructions Z-Gate Shifter
 Installation Instructions Z-Gate Shifter Part Number 80681 1998, 2001 by B&M Racing and Performance Products The B&M Z-Gate shifter can be used in vehicles equipped with most popular three speed automatic
MAKING YOUR DREAMS A REALITY. FITTING INSTRUCTIONS APRILIA RS125 Exhaust System EXCS-0019
 MAKING YOUR DREAMS A REALITY FITTING INSTRUCTIONS APRILIA RS125 Exhaust System EXCS-0019 The TYGA Performance Aprilia RS-125 Stainless Steel chamber, when used with a TYGA silencer, offers huge saving
MOUNTAIN HORSE INSTALL KIT
 MOUNTAIN HORSE INSTALL KIT P/N 9928508 APPLICATION Installation Instructions are for all Mountain Horse TSS and TFS Installation Kits and Timbersled Mountain Horse chassis installations. The Timbersled
Fitting Instructions: Sprint ST (955i), Sprint RS & Tiger 955cc Heated Grip Kit
, Sprint RS & Tiger 955cc Heated Grip Kit") Fitting Instructions: Sprint ST (955i), Sprint RS & Tiger 955cc Heated Grip Kit This accessory kit is designed for use on Triumph Sprint ST (955i), Sprint RS & Tiger 955cc motorcycles only and should not
Fitting Instructions: Sprint ST (955i), Sprint RS & Tiger 955cc Heated Grip Kit This accessory kit is designed for use on Triumph Sprint ST (955i), Sprint RS & Tiger 955cc motorcycles only and should not
Revised 10/23/2015 Page 2 of 10
 1.Remove the gauge, side panels, hood and headlight. Remove the air box from the throttle bodies then remove the seat and gas tank. 2.Carefully remove temp sensor from air box using a small pick or screw
INSTALLATION INSTRUCTIONS
 INSTALLATION INSTRUCTIONS Document# 19-0038 2004+ Lotus Elise (Series 2) Rear Clamshell Removal Kit Safely support the vehicle. This is a two-person job. Allow 1 to 2 hours for initial disassembly. Have
INSTALLATION INSTRUCTIONS
 INSTALLATION INSTRUCTIONS Accessory Application Publication No. After 13 TRX420 All MII 15067 KIT (except 14 TRX420FA/FPA) Issue Date P/N 08T71-HR3-A20 After 13 TRX500 All (except 14 TRX500FA/FPA) September
INSTALLATION INSTRUCTIONS
 INSTALLATION INSTRUCTIONS 2004-2008 Ducati ST3/ST4 HeliBars Replacement Handlebar Risers P/N: HB2405 IMPORTANT: PLEASE GIVE CUSTOMER ENCLOSED INFORMATION! Thank you for your purchase of our HeliBars. They
TOYOTA im INTERIOR LIGHT KIT Preparation
 Preparation Part Number: PT922-12170 Kit Contents Item # Quantity Reqd. Description 1 1 Main Wire Harness 2 1 Switch 3 1 Switch Header 4 1 ECU 5 1 ECU Bracket 6 1 Hardware Kit 7 1 Instruction Card 8 1
KJ JEEP COMBINATION BULL BAR WARNING
 KJ JEEP COMBINATION BULL BAR PRODUCT NUMBER FITTING KIT NUMBER 3450120 6171962 WARNING FOR VEHICLES EQUIPPED WITH SRS AIRBAG WHEN INSTALLED IN ACCORDANCE WITH THESE INSTRUCTIONS, THE FRONT PROTECTION BAR
Trike Conversion Installation Manual. All Models
 Trike Conversion Installation Manual For Honda VTX 1300 Motorcycles All Models Revision 4 Mar. 2011 CAUTION: Failure to follow these instructions can lead to serious personal injury and/or property damage
MKV Jetta OEM Fog Installation Instructions
 Installation Procedures MKV Jetta OEM Fog This tutorial is provided as a courtesy by. Proper service and repair procedures are vital to the safe, reliable operation of all motor vehicles as well as the
Z-Gate Universal Shifter
 Installation Instructions Z-Gate Universal Shifter Fits: GM, Ford, Lincoln and Chrysler Transmissions See Application Guide for Specific Applications Part #80681 Rev 06/01/2018 WORK SAFELY! For maximum