LOUDSPEAKER OWNER'S MANUAL
|
|
|
- Ashley Johnston
- 5 years ago
- Views:
Transcription

1 CDT ARCHITECTURAL LOUDSPEAKER OWNER'S MANUAL

2 ARCHITECTURAL SPEAKERS IMPORTANT SAFETY INSTRUCTIONS 1. READ these instructions. 2. KEEP these instructions. 3. HEED all warnings. 4. FOLLOW all instructions. 5. DO NOT use this apparatus near water. 6. CLEAN ONLY with dry cloth. 7. DO NOT block any ventilation openings. Install in accordance with the manufacturer's instructions. 8. DO NOT install near any heat sources such as radiators, heat registers, stoves, or other apparatus (including amplifiers) that produce heat. 9. DO NOT defeat the safety purpose of the polarized or grounding type plug. A polarized plug has two blades with one wider than the other. A grounding type plug has two blades and a third grounding prong. The wider blade or the third prong are provided for your safety. If the provided plug does not fit into your outlet, consult an electrician for replacement of the obsolete outlet. 10. PROTECT the power cord from being walked on or pinched, particularly at plugs, convenience receptacles, and the point where they exit from the apparatus. 11. ONLY USE attachments/accessories specified by the manufacturer. 12. USE only with a cart, stand, tripod, bracket, or table specified by the manufacturer, or sold with the apparatus. When a cart is used, use caution when moving the cart/apparatus combination to avoid injury from tip-over. 13. UNPLUG this apparatus during lightning storms or when unused for long periods of time. 14. REFER all servicing to qualified service personnel. Servicing is required when the apparatus has been damaged in any way, such as power-supply cord or plug is damaged, liquid has been spilled or objects have fallen into the apparatus, the apparatus has been exposed to rain or moisture, does not operate normally, or has been dropped. This symbol indicates that there are important operating and maintenance instructions in the literature accompanying this unit. This symbol indicates that dangerous voltage constituting a risk of electric shock is present within this unit. WARNING: To reduce the risk of fire or electrical shock, do not expose this apparatus to rain or moisture. WARNING: Voltages in this equipment are hazardous to life. No user-serviceable parts inside. Refer all servicing to qualified service personnel. CAUTION: Changes or modifications not expressly approved by the manufacturer could void the user s authority to operate this device. ABOUT YOUR KLIPSCH PURCHASE Your new Klipsch architectural speakers have been designed to deliver great sound while remaining unobtrusive wherever you install them. These models feature Controlled Dispersion Technology. This allows you to point the sound as needed in a variety of installations. Any CDT is suitable for use as front, center or surround channels in audio or home theater applications, or as part of a distributed sound system. Any CDT model ending with SC is designed specifically for surround use in home theater applications. Minimum Tools Required #2 Phillips Screwdriver Wire strippers Level Stud finder Saw In-Ceiling Speaker Placement Designed to function in any drywall or drop ceiling, Klipsch in-ceiling speakers are engineered for years of performance. Minimum construction requirements call for drywall or other mounting surfaces to be at least 3/8" thick. In drop ceiling installations, typical "drop in" 2 x 4 and 2 x 2 ceiling tiles are composed of low density materials which have the potential over time to sag and vibrate audibly. To maximize the acoustic performance of your in-ceiling speakers, Klipsch recommends you replace the original mounting panel with 1/2" to 3/4" plywood or medium density fiberboard (MDF) (see above). Speaker Installation (for New Construction, skip to step #3) 1. Cut the appropriate size opening in the wall or ceiling using the template provided. If the template is not available, cutout dimensions are provided on the Klipsch website, Sizes listed are minimum. If accuracy of cut cannot be achieved, you may add 1/4" to each dimension. Be careful not to cut through any existing wiring or plumbing. Avoid compromising any fire stops between studs. 2. Run speaker wiring (18 gauge minimum) to the openings. Be sure to comply with all building codes in your area. 3. Attach the wire to the speaker using the wire s color coding or markings as a guide to maintain proper polarity.
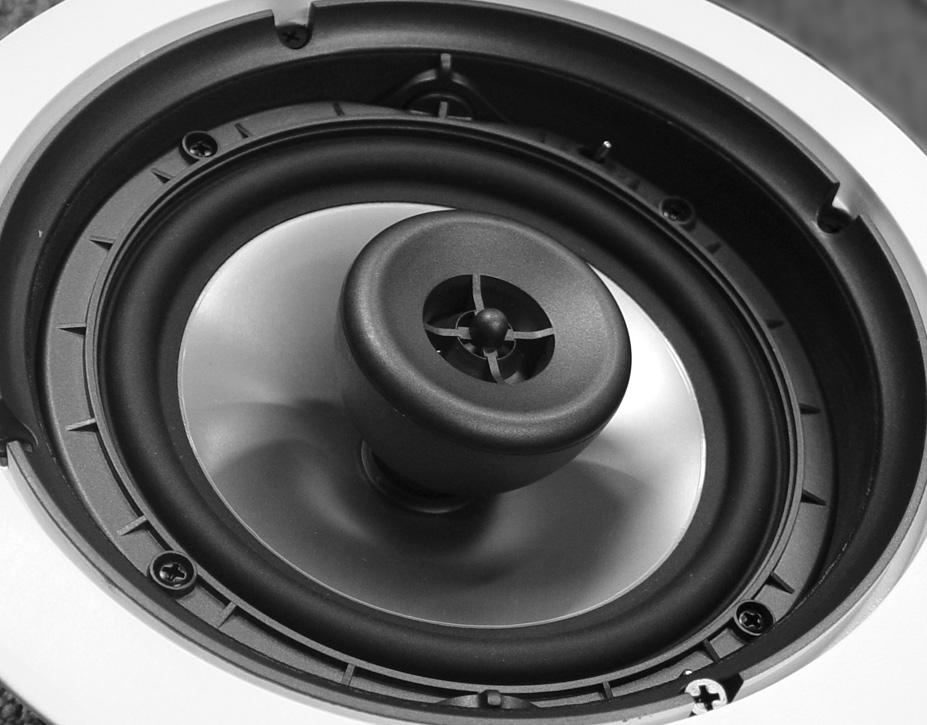
3 4. Insert the speaker assembly into the opening and attach by tightening the four Phillips screws (below). The frame s four dogs will swivel out and sandwich the wall and frame together as they are tightened. If you use a power tool to tighten these screws, please use a low torque setting. Failure to do so could result in damage to your speaker. 5. Adjust the direction of the speaker by swiveling it to the left or right as needed. If desired, you may also adjust the tilt of the speaker and gently adjust the horn to the desired angle. Do not attempt to turn the tweeter stem while adjusting the swivel tweeter. 6. At this point, you may paint the speaker grilles before attaching them to the speaker. Klipsch grilles are designed to accept most types of paint. Care should be taken to avoid excessive paint build-up in the grille perforations. 7. Press the grille into place. See back page for more illustrations. OPERATING CONTROLS Mid-Bass and Tweeter Attenuator Switch (3000 and 5000 Series) Some CDT models feature a Tweeter switch (3000 series) or both a Mid-Bass and a Tweeter switch (3000 & 5000 series) located on the front baffle. The switch allows a setting of either 0dB (normal) or 3dB in the respective frequency range. If installing in an acoustically bright room, such as a bathroom or kitchen, you may want to adjust the Tweeter level switch. If the speaker is located in a corner and produces too much bass, you may need to adjust the Mid-Bass level switch. The position of the switches should always be checked prior to attaching the grille. LIMITED LIFETIME WARRANTY FOR KLIPSCH-BRANDED IN-WALL, INCEILING AND OUTDOOR SPEAKERS Klipsch warrants to the original retail purchaser that this product is to be free from defective materials and workmanship for the life of the product, if it is properly used and maintained. If this product proves defective in either material or workmanship, Klipsch, at its option, will (a) repair the product, or (b) replace the product, at no charge for parts or labor. If the product model is no longer available and cannot be repaired effectively or replaced with an identical model, Klipsch at its sole option may replace the unit with a current model of equal or greater value. In some cases, modification to the mounting surface may be required where a new model is substituted. Klipsch assumes no responsibility or liability for such modification. To obtain a repair or replacement under the terms of this warranty, please contact our customer service group at KLIPSCH. You will be required to submit a copy of the original receipt via fax or . The receipt must reflect that you are the original purchaser, the product was bought from an authorized Klipsch retailer, and the product is still within warranty. You will be issued a return authorization number (RA#) and asked to ship the defective product, together with proof of purchase and RA#, prepaid insured to the address set forth Klipsch 137 Heampstead #278 Hope, AR Freight collect shipments will be refused. Risk of loss or damage in transit is to be borne by the purchaser. Once Klipsch receives the defective product, a repair or replacement order will be initiated. Limitations: This limited warranty does not cover failure of the product resulting from improper installation, misuse, abuse, accident, neglect, mishandling, or wear from ordinary use or environmental deterioration. This limited warranty does not cover cosmetic damage, including paint damage, or consequential damage to other components or premises which may result for any reason from the failure of the product. This limited warranty is null and void for products not used in accordance with Klipsch s instructions. This limited warranty is null and void for products with altered or missing serial numbers and for products not purchased from an authorized dealer. This limited warranty terminates if you sell or otherwise transfer this product to another party. THIS WARRANTY GIVES YOU SPECIFIC LEGAL RIGHTS, AND YOU MAY ALSO HAVE OTHER RIGHTS WHICH VARY FROM STATE TO STATE, JURISDICTION TO JURISDICTION OR COUNTRY TO COUN- TRY. KLIPSCH S RESPONSIBILITY FOR MALFUNCTIONS AND DEFECTS IN HARDWARE IS LIMITED TO REPLACEMENT OR REPAIR AS SET FORTH IN THIS WARRANTY STATEMENT. FOR CANADIAN CUSTOMERS, KLIPSCH DISCLAIMS ALL OTHER WAR- RANTIES AND CONDITIONS, EXPRESS OR IMPLIED, STATUTORY OR OTHERWISE, FOR THE PRODUCT. FOR U.S. CUSTOMERS, ALL EXPRESS AND IMPLIED WARRANTIES FOR THE PRODUCT, INCLUDING BUT NOT LIMITED TO ANY IMPLIED WARRANTIES OF MERCHANTABILITY AND FITNESS FOR A PARTICULAR PURPOSE ARE LIMITED IN TIME TO THE TERM OF THIS WARRANTY. SOME STATES, JURISDICTIONS OR COUNTRIES DO NOT ALLOW THE EXCLUSION OF CERTAIN IMPLIED WARRANTIES OR CONDITIONS,
4 ARCHITECTURAL SPEAKERS OR LIMITATIONS ON HOW LONG AN IMPLIED WARRANTY OR CONDITIONS LASTS, SO THIS LIMITATION MAY NOT APPLY TO YOU. KLIPSCH DOES NOT ACCEPT LIABILITY FOR SPECIAL, INDI- RECT, CONSEQUENTIAL OR INCIDENTAL DAMAGES, INCLUDING WITHOUT LIMITATION, ANY LIABILITY FOR THIRD PARTY CLAIMS AGAINST YOU FOR DAMAGES OR FOR PRODUCTS NOT BEING AVAILABLE FOR USE. THE MAXIMUM LIABILITY FOR WHICH KLIPSCH MAY BE RESPONSIBLE WILL BE NO MORE THAN THE AMOUNT YOU PAID FOR THE PRODUCT THAT IS THE SUBJECT OF THE CLAIM. SOME STATES, JURISDICTIONS OR COUNTRIES DO NOT ALLOW THE EXCLUSION OR LIMITATION OF SPECIAL, INDIRECT, INCIDENTAL OR CONSEQUENTIAL DAMAGES, SO THE ABOVE LIMITATION OR EXCLUSION MAY NOT APPLY TO YOU. WARRANTY OUTSIDE THE U.S. AND CANADA The Warranty on this product if it is sold to a consumer outside of the United States and Canada shall comply with applicable law. To obtain any applicable warranty service, please contact the dealer from which you purchased this product, or the distributor that supplied this product.
5 3502 Woodview Trace, Suite 200 Indianapolis, Indiana KLIPSCH
Instruction Sheet. CFRD Series. High CFM Split Rear Doors
 Instruction Sheet CFRD Series High CFM Split Rear Doors C UL R US LISTED NEW THANK YOU Thank you for purchasing the CFRD Seires High CFM Split Rear Doors. Please read these instructions thoroughly before
DSP led gaming monitor USER MANUAL
 DSP24 24 led gaming monitor USER MANUAL INPUT VOLTAGE AC 100-240V - 50/60Hz DC12V 3A POWER INDICATOR LIGHT INDICATOR No light Green light Green light flash ODE Power off Normal work statement No signal
Owner s Manual. OutCast 1.2. The Ultimate Outdoor Speaker System
 Owner s Manual OutCast 1.2 The Ultimate Outdoor Speaker System Safety Guidelines IMPORTANT SAFETY INSTRUCTIONS CAUTION: PLEASE READ THESE INSTRUCTIONS GIVEN IN THIS MANUAL AND THOSE MARKED ON THE UNIT.
Model MC4 MEDIA CONTROL by OWI
 Installation Instructions Model MC4 MEDIA CONTROL by OWI Media Control 4-Channel Mic/Line Audio Mixer in a two gang electrical box Established 1978 OWI Incorporated 17141 Kingsview Ave. Carson CA 90746
PM - Projector Mount System
 Installation Instructions PM - Projector Mount System Design Highlights -Beautiful Anodised Aluminium Finish -Complete Lead-Screw Adjustment of All Pitches of Angle -Range of Fixed and Telescopic Poles
USER MANUAL 6 Position Front Connect Rack for TD Series Modules with 16 Channel Modular Front Panel TDP
 USER MANUAL 6 Position Front Connect Rack for TD Series Modules with 16 Channel Modular Front Panel TDP Warning for Your Protection 1. Read these instructions. 2. Keep these instructions. 3. Heed all warnings.
USER MANUAL 6 Position Powered Rack for TD Series Modules TDR 01 AC
 USER MANUAL 6 Position Powered Rack for TD Series Modules TDR 01 AC Warning for Your Protection 1. Read these instructions. 2. Keep these instructions. 3. Heed all warnings. 4. Follow all instructions.
User Guide. Model No.: GDI-GFD7200
 User Guide Model No.: GDI-GFD7200 2 Important Safety Instructions and Warnings Please read before installation WARNING: CAUTION: To reduce the risk of fire or electrical shock, do not expose the product
DC IN 18V 3A. User Manual EUROPORT EPA Watt Handheld PA System with Microphone and Rechargeable Battery
 DC IN 18V 3A User Manual EUROPORT EPA40 40-Watt Handheld PA System with Microphone and Rechargeable Battery 2 EUROPORT EPA40 User Manual Table of Contents Thank you...2 Important Safety Instructions...3
THE ROCK PROFESSIONAL 2 WAY ACTIVE STUDIO MONITOR
 THE ROCK PROFESSIONAL 2 WAY ACTIVE STUDIO MONITOR Owner's manual 1 THANK YOU! Thank you for buying the Unity Audio THE ROCK, one of the most accurate 2 way active studio monitors available. We wish you
100 Watt Power Amp 50 Watts x 50 Watts Single Rack Space
 User's Manual 100 Watt Power Amp 50 Watts x 50 Watts Single Rack Space 1 Introduction Congratulations on your purchase of the Rocktron Velocity 100LTD power amplifier! The Velocity 100LTD was designed
The Rock MK II. Owner's manual PROFESSIONAL 2 WAY ACTIVE STUDIO MONITOR. v1212. v0312
 The Rock MK II PROFESSIONAL 2 WAY ACTIVE STUDIO MONITOR Owner's manual The Rock MK IIUser UserManual Manual THE ROCK 11 v1212 v0312 THANK YOU! Thank you for buying the Unity Audio THE ROCK, one of the
PVI 1800/PVI Residential/Commercial Grid-Tied Photovoltaic Inverter WARRANTY MANUAL. Subject to Change REV , Solectria Renewables
 PVI 1800/PVI 2500 WARRANTY MANUAL Residential/Commercial Grid-Tied Photovoltaic Inverter 2009, Solectria Renewables Subject to Change REV 10.09 1 Product Warranty & RMA Policy 1.1 Warranty Policy The Solectria
PVI 60KW, PVI 82KW, PVI 95KW
 PVI 60KW PVI 82KW PVI 95KW WARRANTY MANUAL Commercial, Grid-Tied Photovoltaic Inverters 2008, Solectria Renewables LLC Subject to Change DOC-020099 rev 024 1 1 Product Warranty & RMA Policy Warranty Policy
Standard Series STEREO SPEAKERS
 Standard Series STEREO SPEAKERS USER S MANUAL MODERN SOUND FOR YOUR CLASSIC www.retromanufacturing.com TABLE OF CONTENTS WELCOME 2 PRECAUTIONS 3 INSTALLATION INSTRUCTIONS 4 SPECIFICATIONS 6 LIMITED WARRANTY
Cordless Make Up Mirror WITH ILLUMINATED 1X AND 10X MAGNIFICATION PLUS NIGHT LIGHT
 Cordless Make Up Mirror WITH ILLUMINATED 1X AND 10X MAGNIFICATION PLUS NIGHT LIGHT TABLE OF CONTENTS Warnings and Cautions....1 Location of Parts and Controls....6 Installing the Batteries...8 Using the
STEREO REPLACEMENT SPEAKERS
 STEREO REPLACEMENT SPEAKERS USER S MANUAL MODERN SOUND FOR YOUR CLASSIC TABLE OF CONTENTS WELCOME 2 PRECAUTIONS 3 INSTALLATION INSTRUCTIONS 4 SPECIFICATIONS 6 LIMITED WARRANTY 7 INSTALLATION NOTES 8 The
Ultra-Thin DASH SPEAKERS
 Ultra-Thin DASH SPEAKERS USER S MANUAL MODERN SOUND FOR YOUR CLASSIC www.retromanufacturing.com TABLE OF CONTENTS WELCOME 2 PRECAUTIONS 3 INSTALLATION INSTRUCTIONS 4 SPECIFICATIONS 9 LIMITED WARRANTY 10
Model T2642 Wall Mount. Television Wall Mount with Tilt Option
 Model T2642 Wall Mount Television Wall Mount with Tilt Option Getting Started Introduction Congratulations on the purchase of your new Audio Solutions T2642 Television Wall Mount. For maximum benefit,
DWS404 DWS524 DWS654 DWS684 DWS694. DWS SERIES INSTALLATION/OWNER'S MANUAL Car Audio Speakers
 DWS404 DWS524 DWS654 DWS684 DWS694 DWS SERIES INSTALLATION/OWNER'S MANUAL Car Audio Speakers PREPARATION Safety Guidelines Thank you for purchasing the DWS Series car speakers. Although Dual has attempted
Model AS-RC3260 TV Cart. Rolling Cart for Audio Mount System & Flat Panel TVs
 Model AS-RC3260 TV Cart Rolling Cart for Audio Mount System & Flat Panel TVs GETTING STARTED Introduction Congratulations on the purchase of your new Helios AS-RC3260 Rolling Cart. For maximum benefit,
4070 Subwoofer Owners' Manual
 4070 Subwoofer Owners' Manual Introduction Contents Congratulations on purchasing this Gale 4070 subwoofer. To ensure optimum performance please read and retain this manual, then sit back, relax and enjoy!
Model FM2642 Wall Mount. Full Motion Television Wall Mount
 Model FM2642 Wall Mount Full Motion Television Wall Mount Getting Started Introduction Congratulations on the purchase of your new Audio Solutions FM2642 Television Wall Mount. For maximum benefit, please
CANARY AUDIO CA-400. Vacuum Tube MM/MC Phono Preamplifier OWNER S MANUAL. Handcrafted in California MADE IN USA
 CANARY AUDIO Vacuum Tube MM/MC Phono Preamplifier Handcrafted in California CA-400 OWNER S MANUAL MADE IN USA Dear Customer: Please allow us to take this opportunity to thank you for purchasing this CANARY
Model AS-FM64 Wall Mount. Full Motion Television Wall Mount
 Model AS-FM64 Wall Mount Full Motion Television Wall Mount Getting Started Introduction Congratulations on the purchase of your new Audio Solutions AS-FM64 Television Wall Mount. For maximum benefit, please
CANARY AUDIO. Vacuum Tube Preamplifier CA-800 OWNER S MANUAL. Handcrafted in California MADE IN USA
 CANARY AUDIO Vacuum Tube Preamplifier Handcrafted in California CA-800 OWNER S MANUAL MADE IN USA Dear Customer: Please allow us to take this opportunity to thank you for purchasing this CANARY AUDIO product.
Remote Vehicle Control System CA-150. Owner's Manual. Vehicle Security System With Remote Keyless Entry
 Remote Vehicle Control System CA-150 Owner's Manual Vehicle Security System With Remote Keyless Entry IMPORTANT NOTE: The operation of the Security and Convenience System as described in this manual is
Thermaltake Warranty / Support Information
 Thermaltake Warranty / Support Information Technical Support Thermaltake is committed to providing the highest quality, most reliable products for our valued customer. There are several ways you may contact
Installation Instructions. Model AMP3IC6. (Speaker Combination Models AMP3S61 / AMP3S62 / AMP3S64)
") Installation Instructions Model AMP3IC6 (Speaker Combination Models AMP3S61 / AMP3S62 / AMP3S64) SELF-AMPLIFIED IN-CEILING SPEAKERS (3 INPUTS/SOURCES) Established 1978 OWI Incorporated 17141 Kingsview
Installation Instructions Model AMP3IC6 (Speaker Combination Models AMP3S61 / AMP3S62 / AMP3S64) SELF-AMPLIFIED IN-CEILING SPEAKERS (3 INPUTS/SOURCES) Established 1978 OWI Incorporated 17141 Kingsview
WARRANTY POLICY. Grid-Tied Photovoltaic Inverters. Revision D. 2014, Solectria Renewables, LLC DOCIN
 WARRANTY POLICY Revision D 2014, Solectria Renewables, LLC DOCIN-070360 1 Product Warranty & RMA Policy 1. Warranty Policy Warranty Registration: It is important to have updated information about the inverter
AXS609 AXS612 AXS514 AXS SERIES. INSTALLATION/OWNER'S MANUAL Car Audio
 AXS609 AXS612 AXS514 AXS SERIES INSTALLATION/OWNER'S MANUAL Car Audio PREPARATION Safety Guidelines Thank you for purchasing the AXS Series car speakers. Although Axxera has attempted to make sure all
A100 Class D 100W Subwoofer Amplifier. User Guide VOLUME POWER BOOST
 A100 Class D 100W Subwoofer Amplifier User Guide VOLUME PHASE CROSSOVER POWER BOOST Important Safety Instructions Explanation of Graphical Symbols RISK OF ELECTRIC SHOCK DO NOT OPEN RISQUE DE CHOQUE ÉLECTRIQUE
(R86049) WARNING: To reduce the risk of injury, the user must read and understand the operator s manual before using this product.
 WARNING: To reduce the risk of injury, the user must read and understand the operator s manual before using this product.") OPERATOR S MANUAL 12 VOLT LITHIUM-ION BATTERY CHARGER 140446001 (R86049) Your charger has been engineered and manufactured to our high standards for dependability, ease of operation, and operator safety.
OPERATOR S MANUAL 12 VOLT LITHIUM-ION BATTERY CHARGER 140446001 (R86049) Your charger has been engineered and manufactured to our high standards for dependability, ease of operation, and operator safety.
CLEAR-COM ENCORE PK-7 POWER SUPPLY INSTRUCTION MANUAL
 CLEAR-COM ENCORE PK-7 POWER SUPPLY INSTRUCTION MANUAL PK-7 Power Supply Instruction Manual 2007 Vitec Group Communications Ltd. All rights reserved. Part Number 810503Z Rev. 1 Vitec Group Communications,
Air Compressor. Owner s Manual
 35 WARNING! READ AND UNDERSTAND ALL SAFETY PRECAUTIONS IN THIS MANUAL BEFORE OPERATING. FAILURE TO COMPLY WITH INSTRUCTIONS IN THIS MANUAL COULD RESULT IN PERSONAL INJURY, PROPERTY DAMAGE, AND/ OR VOIDING
14", 18" & 24" Fiberglass Turbo Fans Installation & Operator s Instruction Manual
 14", 18" & 24" Fiberglass Turbo Fans Installation & Operator s Instruction Manual 09484:09#52
9' & 12' CHALLENGER SHUFFLEBOARD TABLE ASSEMBLY INSTRUCTIONS
 9' & 12' CHALLENGER SHUFFLEBOARD TABLE ASSEMBLY INSTRUCTIONS NG1205 / NG1210 / NG1212 / NG1214 THANK YOU! Thank you for purchasing this product. We work around the clock and around the globe to ensure
A Message from the President
 A Message from the President Congratulations on purchasing an Anchor Audio sound system, the choice of thousands of satisfied customers including the White House, prestigious universities, school districts
OUTDOOR SPEAKERS OWNER S MANUAL
 OUTDOOR SPEAKERS OWNER S MANUAL UNPACKING 1. Carefully unpack the speakers. If you suspect damage from transit, report it immediately to your dealer and/or delivery service. Keep the shipping carton and
User s Manual and Operating Instructions
 User s Manual and Operating Instructions Model Numbers: CL-36-BDF-A, CL-42-BDF-A, CL-48-BDF-A E355088 READ AND SAVE THESE INSTRUCTIONS IMPORTANT: Read and understand all of the instructions in this manual
3-Channel Power Amplifier. User s Manual. Version 1 MODERN SOUND FOR YOUR CLASSIC.
 3-Channel Power Amplifier User s Manual MODERN SOUND FOR YOUR CLASSIC Version 1 www.retromanufacturing.com TABLE OF CONTENTS WELCOME 2 WHAT S IN THE BOX 3 PRECAUTIONS 4 POWER AND GROUND CONNECTIONS 6 MOUNTING
Remote Vehicle Control System. Keyless Entry and Convenience System
 1 Remote Vehicle Control System PC 6100 TM Owner's Manual Keyless Entry and Convenience System IMPORTANT NOTE: The operation of the Power Code as described in this manual is applicable to most vehicles.
TS69 TS65 TS55 TS45 TS5768 TS SERIES INSTALLATION/OWNER'S MANUAL
 TS69 TS65 TS55 TS45 TS5768 TS SERIES INSTALLATION/OWNER'S MANUAL Car Audio Speakers TS SERIES PREPARATION Getting Started Thank you for purchasing the TS Series car speakers. Although Dual has attempted
NORTHSTAR 154 BATH/SPA TV. Installation Instructions
 NORTHSTAR 154 BATH/SPA TV Installation Instructions IMPORTANT SAFETY INSTRUCTIONS Must be installed by a qualified electrician Read these instructions. Keep these instructions for future use. Install in
Interactive Whiteboard. User Guide. Before operating the unit, please read this manual thoroughly, and retain it for future reference
 User Guide Before operating the unit, please read this manual thoroughly, and retain it for future reference Notice 1. When disconnecting the display from an electrical outlet, the plug must be pulled
Users Guide for Ac-sync
 Problem solved. Users Guide for Ac-sync Thank you for choosing Anywhere Cart! The AC-SYNC is designed to sync, charge and store 1-36 ipads or tablets. Adjustable device divider bays allow fitment of any
BP1204 INSTALLATION/OWNER'S MANUAL
 BP1204 INSTALLATION/OWNER'S MANUAL BP1204 PREPARATION Getting Started Thank you for purchasing the Dual Electronics BP1204 Bandpass Subwoofer System. Although Dual has attempted to ensure the information
5-Channel Power Amplifier. User s Manual. Version 1 MODERN SOUND FOR YOUR CLASSIC.
 5-Channel Power Amplifier User s Manual MODERN SOUND FOR YOUR CLASSIC Version 1 www.retromanufacturing.com TABLE OF CONTENTS WELCOME 2 WHAT S IN THE BOX 3 PRECAUTIONS 4 POWER AND GROUND CONNECTIONS 6 MOUNTING
IMPORTANT SAFETY INSTRUCTIONS
 IMPORTANT SAFETY INSTRUCTIONS 1. Read all instructions All the safety and operating instructions should be read carefully before this Hover Hockey table can be operated or played. 2. Caution This is not
Owner s Manual. 10U Wall-Mounted SmartRack Enclosure. Model: SRW10US W. 35th Street, Chicago, IL USA
 WARRANTY REGISTRATION Register online today for a chance to win a FREE Tripp Lite product www.tripplite.com/warranty Owner s Manual 10U Wall-Mounted SmartRack Enclosure Model: SRW10US Table of Contents
02OWNER S MANUAL 06 TROUBLESHOOTING 08LIMITED WARRANTY
 02OWNER S MANUAL 06 TROUBLESHOOTING 08LIMITED WARRANTY Owner s manual Introduction Thank you for choosing Scansonic loudspeakers, we hope they will bring you many years of enjoyment. Please read this manual
Description of the Power Nozzle Accessory Kit 4
 Contents IMPORTANT SAFETY INSTRUCTIONS 2 Polarization Instructions 3 Description of the Power Nozzle Accessory Kit 4 Operating the Power Nozzle & Accessories 5 Inserting the hose Turning on the power nozzle
ELECTRIC WINE OPENER FPSTBW8225. Safety. How to use. Warranty. User Guide/ Guía del Usuario: FPSTBW8220.
 ELECTRIC WINE OPENER SACACORCHOS ELÉCTRICO User Guide/ Guía del Usuario: FPSTBW8220 FPSTBW8225 Safety Seguridad How to use Cómo usar Care & Cleaning Cuidado y Limpieza Warranty Garantía IMPORTANT SAFEGUARDS
Application Guide S-652 S-65T S-522 S-462 S-402 S-352 S-275CH S-693 S-682 S-410 S-675 AUTOSOUND S SERIES SPEAKERS
 S-402 S-352 S-275CH S-652 S-65T S-522 S-462 S-693 S-682 S-410 S-675 AUTOSOUND S SERIES SPEAKERS Application Guide Please read through this manual to familiarize yourself with your new speakers. Should
Harvil 4 Foot Air Hockey Table
 Harvil 4 Foot Air Hockey Table Thank you for your purchase of this Harvil product! We work around the clock and around the globe to ensure that Harvil products maintain the highest possible quality. However,
MicroPod Sub User manual / Bedienungsanleitung / Manual del Usario
 PODSPEAKERS by Scandyna MicroPod Sub User manual / Bedienungsanleitung / Manual del Usario CONGRATULATIONS! on the purchase of your new MicroPod Sub from Scandyna Thank you for choosing MicroPod Sub from
INSTALLATION/OWNERS MANUAL
 INSTALLATION/OWNERS MANUAL XOBP12D PREPARATION Getting Started Thank you for purchasing the Dual Electronics XOBP12D Bandpass Subwoofer System. Although Dual has attempted to make sure all of the information
OWNER'S MANUAL MYCRO 8
 OWNER'S MANUAL MYCRO 8 OWNER'S MANUAL MYCRO 8 Mycro Mycro Features Close tolerance and durable components provide increased reliability and greater output. Accurately machined birch plywood cabinets for
Installation Instructions
 1 BD DODGE CUMMINS PERFORMANCE E X H A U S T M A N I F O L D Installation Instructions Application List 1994-1998 12V 1045980 1998½-2002 24V 1045985 PLEASE READ ALL INSTRUCTIONS BEFORE INSTALLATION KIT
Woolich Racing. Bike Harness Installation Instructions Hayabusa Gen 2 (08+)
") Woolich Racing Bike Harness Installation Instructions Hayabusa Gen 2 (08+) 1) Introduction To connect your Woolich Racing product to the ECU ( Engine Control Unit or computer) in your bike you need to
Woolich Racing Bike Harness Installation Instructions Hayabusa Gen 2 (08+) 1) Introduction To connect your Woolich Racing product to the ECU ( Engine Control Unit or computer) in your bike you need to
Blue Air. Commercial Refrigeration Inc. Installation & Operation Manual Glass Door Countertop Refrigerator
 Blue Air Commercial Refrigeration Inc. Installation & Operation Manual Glass Door Countertop Refrigerator Please read this manual completely before installing or operating this unit! BAGR7 Blue Air reserves
Owner s Guide ca4054 ca4554
 PROFESSIONAL SERIES Owner s Guide ca4054 ca4554 Remote Start System IMPORTANT NOTE: The operation of the Security and Convenience System as described in this manual is applicable to most vehicles. However,
2019-ON RAM 1500 INSTALLATION INSTRUCTIONS
 2019-ON RAM 1500 INSTALLATION INSTRUCTIONS Thank you for purchasing ROCKSTARTM Splash Guard Mud Flaps. Agri-Cover, Inc. proudly manufactured these mud flaps using superior quality materials and workmanship.
Woolich Racing. Bike Harness Installation Instructions Suzuki Harness Type 4a GSX1300R (Hayabusa)
") Woolich Racing Bike Harness Installation Instructions Suzuki Harness Type 4a 2013+ GSX1300R (Hayabusa) 1) Introduction To connect your Woolich Racing product to the ECU ( Engine Control Unit or computer)
Woolich Racing Bike Harness Installation Instructions Suzuki Harness Type 4a 2013+ GSX1300R (Hayabusa) 1) Introduction To connect your Woolich Racing product to the ECU ( Engine Control Unit or computer)
Model NTX7 Series Automatic Battery Charger User s Manual Rev. 1.0 October 17, 2006
 B R A N D Model NTX7 Series Automatic Battery Charger User s Manual Rev. 1.0 October 17, 2006 For Sales, Support and Service phone: 407-331-4793 fax: 407-331-4708 website: www.xenotronix.com email: information@xenotronix.com
Owner s Guide CA 4555
 PROFESSIONAL SERIES Owner s Guide For Model: CA 4555 Vehicle Remote Start System with 2 Way Confirming Remote Control IMPORTANT NOTE: The operation of the Security and Convenience System as described in
Power. On Your Terms.
 Power. On Your Terms. 10 YEAR LIMITED WARRANTY PHI 1310 TM 1 SIMPLIPHI POWER, INC. REV102016 10 YEAR LIMITED WARRANTY: PHI 1310 TM LIMITED PRO-RATED WARRANTY COVERAGE The SimpliPhi Power PHI 1310 as supplied
10 Year Limited Warranty
 Power. On Your Terms. 10 Year Limited Warranty PHI 2.7 TM PHI 3.5 TM 60A SIMPLIPHI POWER, INC. REV020618 10 Year Limited Warranty: PHI 2.7 TM PHI 3.5 TM 60A 24V 48V Limited Pro-Rated Warranty Coverage
SENSE SERIES SPEAKERS
 SENSE SERIES SPEAKERS User Manual 2018 ADJ PRODUCTS, LLC all rights reserved. Information, specifications, diagrams, images, and instructions herein are subject to change without notice. ADJ and SENSE
Remote Vehicle Control System. Keyless Entry & Remote Start System
 1 Remote Vehicle Control System PC 7400 TM Owner's Manual Keyless Entry & Remote Start System IMPORTANT NOTE: The operation of the Power Code as described in this manual is applicable to most vehicles.
CA 5054 Owner s Guide
 PROFESSIONAL SERIES CA 5054 Owner s Guide Remote Start and Keyless Entry System IMPORTANT NOTE: The operation of the Security and Convenience System as described in this manual is applicable to most vehicles.
AAA Ultrasound training Model. Instructions and User Guide
 AAA Ultrasound training Model Instructions and User Guide 1/13/2009 Blue Phantom True Anatomy Series Use and Care Instructions Page 1/5 V1.0a Giving you the confidence only experience can offer Congratulations
User s Manual and Operating Instructions
 User s Manual and Operating Instructions Model Numbers: MAC-36-BDF, MAC-42-BDF, MAC-48-BDF PT-36-BDF, PT-42-BDF, PT-48-BDF CONSUMER: READ AND SAVE THESE INSTRUCTIONS IMPORTANT: Read and understand all
72 in / 1,83 m SWIVEL TABLE
 ITEM# 1-1-37001 72 in / 1,83 m SWIVEL TABLE 4 Great Games in 1-4 gran opciones de juego Assembly Instructions Model # 37001 www.eastpointsports.com TWO OR MORE ADULTS REQUIRED FOR ASSEMBLY IMPORTANT SAFETY
SLAB SAW SERIES PARTS LIST
 SLAB SAW SERIES PARTS LIST MODELS: HP Part# 020 HP20 Part# 02020 HP2 Part# 0202 MADE IN USA MADE IN USA Revision 09.20 Manual Part No. 6269 Caution: Read all safety and operating instructions before using
(Special designed for Duro Gas Grill BI)
") DURO FAUX STONE BASE MODEL: 780-0644A (Special designed for Duro Gas Grill 740-3003BI) Installation and User Care Guide IMPORTANT: Save for electrical inspector s use. Installer: Leave installation instructions
DURO FAUX STONE BASE MODEL: 780-0644A (Special designed for Duro Gas Grill 740-3003BI) Installation and User Care Guide IMPORTANT: Save for electrical inspector s use. Installer: Leave installation instructions
Harvil 5 Foot Air Hockey Table
 ASSEMBLY INSTRUCTIONS Harvil 5 Foot Air Hockey Table Thank you for your purchase of this Harvil product! We work around the clock and around the globe to ensure that Harvil products maintain the highest
INSTALL GUIDE Dodge/RAM 5.7L HEMI
 INSTALL GUIDE 2009-2017 Dodge/RAM 5.7L HEMI TABLE OF CONTENTS 3 GETTING STARTED 3 PARTS LIST 4 INSTALLATION INSTRUCTIONS 4 REMOVING THE STOCK INTAKE ASSEMBLY 6 INSTALLING THE AIR FILTER 7 INSTALLING THE
owner s manual 4.00-inch (100 mm) Coaxial Loudspeakers
 Coaxial Loudspeakers") owner s manual 4.00-inch (100 mm) Coaxial Loudspeakers Thank you for choosing a JL Audio Evolution C2 Coaxial Speaker System for your automotive sound system. These Evolution Speakers have been designed
owner s manual 4.00-inch (100 mm) Coaxial Loudspeakers Thank you for choosing a JL Audio Evolution C2 Coaxial Speaker System for your automotive sound system. These Evolution Speakers have been designed
Owner s Guide. ca5154
 PROFESSIONAL SERIES Owner s Guide for models: ca5154 Automatic / Manual Transmission Remote Start and Keyless Entry System IMPORTANT NOTE: The operation of the Security and Convenience System as described
Owner s Guide CA 1055
 PROFESSIONAL SERIES Owner s Guide For Model: CA 1055 Vehicle Security and Keyless Entry System IMPORTANT NOTE: The operation of the Security and Convenience System as described in this manual is applicable
Digital echo-charge. Owner s Manual. Xantrex Digital echo-charge Battery Charger
 Digital echo-charge Owner s Manual Xantrex Digital echo-charge Battery Charger INTRODUCTION The Xantrex Digital echo-charge is specially developed for charging an auxiliary battery with Freedom TM or Fleet
owner s manual 3.50-inch (90 mm) Coaxial Loudspeakers
 Coaxial Loudspeakers") owner s manual 3.50-inch (90 mm) Coaxial Loudspeakers Thank you for choosing a JL Audio Evolution C2 Coaxial Speaker System for your automotive sound system. These Evolution Speakers have been designed
owner s manual 3.50-inch (90 mm) Coaxial Loudspeakers Thank you for choosing a JL Audio Evolution C2 Coaxial Speaker System for your automotive sound system. These Evolution Speakers have been designed
Model Numbers: MAC-36-BDF, MAC-42-BDF, MAC-48-BDF CONSUMER: READ AND SAVE THESE INSTRUCTIONS
 Model Numbers: MAC-36-BDF, MAC-42-BDF, MAC-48-BDF CONSUMER: READ AND SAVE THESE INSTRUCTIONS IMPORTANT: Read and understand all of the instructions in this manual before assembling, starting, or servicing
MAVERICK 7' POOL TABLE WITH TABLE TENNIS ASSEMBLY INSTRUCTIONS
 MAVERICK 7' POOL TABLE WITH ASSEMBLY INSTRUCTIONS NG1023 THANK YOU! Thank you for purchasing this product. We work around the clock and around the globe to ensure that our products maintain the highest
ca1153 Owner s Guide
 PROFESSIONAL SERIES ca1153 Owner s Guide Vehicle Security and Keyless Entry System IMPORTANT NOTE: The operation of the Security and Convenience System as described in this manual is applicable to most
MANLEY LABORATORIES, INC. MANLEY REFERENCE JUNIOR DAC OWNER'S MANUAL 20 BIT DIGITAL TO ANALOG CONVERTER
 MANLEY LABORATORIES, INC. MANLEY REFERENCE JUNIOR DAC OWNER'S MANUAL 20 BIT DIGITAL TO ANALOG CONVERTER CONTENTS SECTION PAGE INTRODUCTION 3 MAINS CONNECTIONS 4 FRONT PANEL 5 REAR PANEL 6 OPERATIONAL NOTES
OWNER'S MANUAL ARCLINE 6
 OWNER'S MANUAL ARCLINE 6 OWNER'S MANUAL ARCLINE 6 Arcline Arcline Features Close tolerance and durable components provide increased reliability and greater output. Accurately machined multi laminate birch
Operating Instructions & Parts Manual. Oil Control Gun. Models 48UJ82, 48UJ83, 48UJ84, 48UJ85 and 48UJ86
 Operating Instructions & Parts Manual EN Oil Control Gun Models 48UJ82, 48UJ83, 48UJ84, 48UJ85 and 48UJ86 PLEASE READ AND SAVE THESE INSTRUCTIONS. READ CAREFULLY BEFORE ATTEMPTING TO ASSEMBLE, INSTALL,
Owner s Guide CA 5055
 PROFESSIONAL SERIES Owner s Guide For Model: CA 5055 Vehicle Remote Start and Keyless Entry System IMPORTANT NOTE: The operation of the Security and Convenience System as described in this manual is applicable
INSTALLATION INSTRUCTIONS SINGLE HORIZONTAL ACCESS DOOR PANTRY INSERT MANUAL
 INSTALLATION INSTRUCTIONS MODEL #88972 SINGLE HORIZONTAL ACCESS DOOR PANTRY INSERT MANUAL TABLE OF CONTENTS PAGE # INSTALLATION INSTRUCTIONS...................2 CABINET LOCATION GUIDELINES...2 REGULAR
D50 Series. Director Collection. Installation Manual D59, D57
 D50 Series Director Collection Installation Manual D59, D57 Table of Contents Introduction 1 Specifications 2 What s Included 3 Tools & Items 3 Wire Recommendation 3 Speaker Placement 4 About Speaker Wire
Adjustable Base. CONTENTS Advisory Setup and Installation Innova Wired Hand Control year Warranty 1-10
 Adjustable Base #201 Wired Owner Manual CONTENTS Advisory Setup and Installation Innova Wired Hand Control 1-2-10 year Warranty 1-10 WARNING Attention: Read the following information before using this
RENEGADE SLATE BUMPER POOL TABLE ASSEMBLY INSTRUCTIONS
 RENEGADE SLATE BUMPER POOL TABLE ASSEMBLY INSTRUCTIONS NG2404PG THANK YOU! Thank you for purchasing this product. We work around the clock and around the globe to ensure that our products maintain the
Smart Battery Charger GPC-35-MAX GPC-45-MAX GPC-55-MAX GPC-75-MAX GPC-100-MAX. Owner s Manual
 Smart Battery Charger GPC-35-MAX GPC-45-MAX GPC-55-MAX GPC-75-MAX GPC-100-MAX Owner s Manual Table of Contents Important Safety Instructions 2 Features 3 Installation Guidelines 5 Warranty 8 1.0 Important
SIDEKICK TABLETOP SOCCER ASSEMBLY INSTRUCTIONS
 SIDEKICK TABLETOP SOCCER ASSEMBLY INSTRUCTIONS NG1028T3 THANK YOU! Thank you for purchasing this product. We work around the clock and around the globe to ensure that our products maintain the highest
INVERTER HARNESS INSTALLATION FOR FREIGHTLINER CASCADIA
 FOR FREIGHTLINER CASCADIA Part #: P808 1004FC 08/05/2014 Doc 1.04 INST065 Page 1 Step 1: Unpack the plate assembly and both positive and negative cables. INSTALLATION INSTRUCTIONS Step 2: Insert the negative
Installation Instructions. Application List Dodge 24V PLEASE READ ALL INSTRUCTIONS BEFORE INSTALLATION
 1 BD DODGE CUMMINS 03-055 C O O L - I T I N T E R C O O L E R Installation Instructions Application List 2003-2006 Dodge 24V 1042510 PLEASE READ ALL INSTRUCTIONS BEFORE INSTALLATION KIT CONTENTS: Please
28BSST POWER AMPLIFIER OWNER S MANUAL UPDATED
 28BSST POWER AMPLIFIER OWNER S MANUAL UPDATED 2006-12-01 Table of Contents General Introduction Page 1 Description Installation and Ventilation Rear Panel Input Settings/Connections Page 2 Setting Input
Mini-Z. Manual. Model: ZA-21.
 Mini-Z Manual Model: ZA-21 www.drzamps.com This symbol advises the user to read all accompanying literature for safely operating the unit Important Safety Instructions 1) Read these instructions. 2) Keep