XM8100F/CP. Satellite Radio Antenna. antenna specialists. Patents Pending
|
|
|
- Nigel Gallagher
- 5 years ago
- Views:
Transcription
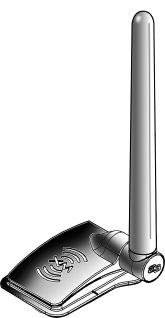


1 XM8100F/CP Satellite Radio Antenna Patents Pending antenna specialists
2 Table of Contents Pre-Installation Considerations 3 Vehicle Mounting Locations 3 Parts List 4 Installation Tips 5 Location & Glass Preparation 6, 7 Installation of Exterior Base 8-11 Installation of Interior Coupler 12, 13 Cable Routing 14 Trouble Shooting 15 Use & Care 15 2
3 Pre-Installation Considerations Important: Professional installation is highly recommended due to the complexity of electronic components within the vehicle. Check parts list. If any shortages call Antenna Specialists Customer Service (See Fig. 1, page 4) Integrity of the installation will be compromised if one or more of the following are present at the planned installation location. 1. Rain X or other commercial water repellant. 2. After market window tinting material. 3. Glass waxes. If present, remove material or select a different location before installing. Do not install On-Glass antenna on front windshield. Antenna must have an unobstructed view of the roofline, including clearance of roof racks, etc. (See Fig. 2, page 5) Identify location of installation. Verify location using Template, Glass Curvature Tool and instructions provided. Avoid locations with extremely curved glass. Receiver location cannot be more than 17 feet (via cable routing) from antenna. Check for cold weather install; the temperature must be at least 60 F. Record Serial No., Model No. and Manufacturer s Code on back cover (see Fig. 22, pg. 14 for data location) CAUTION: Cable must NOT be cut or altered in any manner as reception will be adversely affected. Recommended Vehicle Mounting Locations CAUTION: Verify trunk or other door clearance before installation. Car - rear window, hatchback, fixed side window 3
4 Installation Tools Required Supplied Template Flange Depressor Glass Curvature Tool Parts List (Supplied) Antenna Assembly (Base & Mast) Coupling Box w/cable Fakra Housings (2) Template Flange Depressor Alcohol Pads (2) Instruction Manual Silicone Packet Glass Curvature Tool Not Supplied (highly recommended) Masking Tape Tie Wraps Knife or Blade Quarter (25 coin) Mast Antenna Assembly (XMK8125) Base Coupling Box w/cable (XMK8015) Accessory Kit (XMK8100) Silicone Packet Alcohol Pads (2) Green Yellow Fakra Housings (2) Template Flange Depressor Glass Curvature Tool Instruction Manual Fig. 1 4
5 Installation Tips Professional installation recommended. Use supplied template and materials only! CAUTION: Cable must not be cut or altered in any manner, as reception will be affected. Do not install if air temperature is below 60 F. Glass Preparation: 1. Verify temperature of glass is at least 60 F. 2. Clean window area with supplied alcohol pads only! Use one pad inside and one outside. Windex or commercial cleaners should not be used, as they contain glycols which leave an oily residue on the glass. Driver visibility should not be obstructed in any manner. Use Glass Curvature Tool (Fig. 3) Mount as high on glass as possible for optimal performance. Do not install antenna over rear brake light. Following installation and performance verification, lay mast flat to window for 48 hours to assure optimum adherence to glass. Do not wash vehicle for 48 hours after installation. CAUTION: Adhesive pad will stick to the glass instantly and cannot be removed without having to replace. Be sure the positioning is correct before it touches the glass. Keep antenna at least 6 inches away from any antenna mounted nearby. Fig. 2 5


 Rain X or other water-repellant products must be removed.")


 Thoroughly clean with provided alcohol pads only (only isopropyl")
 Warm glass using a standard hairdryer.")
6 Location & Glass Preparation 1. Identify location of installation. Select a location that allows for interior headliner clearance. Allow for rear window wiper clearance if present. Using the Glass Curvature Tool, measure for low glass curvature. (Fig. 3) 2. Glass preparation: 2.a) Rain X or other water-repellant products must be removed. For removal, Soft Scrub Gel cleanser is recommended. For further information regarding removal, contact Rain-X at For removal of glass waxes, contact the manufacturer of the product (i.e. Turtle Wax ). 2.b) Thoroughly clean with provided alcohol pads only (only isopropyl alcohol can be used for rewetting of pads). 2.c) Warm glass using a standard hairdryer. CAUTION: Do not use a commercially available heat gun or other type of tool. PRESS AND FIRMLY HOLD DOWN ON DOT. USE QUARTER TO ENSURE PROPER GLASS CURVATURE. IF COIN FITS BETWEEN TOOL AND GLASS, TRY ANOTHER LOCATION. Fig. 3 6
7 3. In order for adhesive to properly adhere to exterior surface, the curvature of the glass must not be severe, for best installation. Check for curvature of glass using the tool provided. Hold tool flush against glass surface, with finger applied onto tool dot (as shown in Fig.3). Using a quarter, slide it flush along the glass surface toward the opposite end of the tool, as shown. If the quarter fits beneath the tool (Fig. 3), the curvature is too severe for optimal installation. Select different location - repeat steps. 4. Remove Caution Label from antenna base and coupler to expose coupling probes, as shown. (Fig. 4) REMOVE CAUTION LABEL PROBES MAY NEED TO BE ADJUSTED IN ORDER TO MAKE CONTACT WITH GLASS SURFACE (See Step 5 below) COUPLER ANTENNA BASE PROBE Fig Verify probes extend beyond adhesive pad surface, as shown. (Fig. 5) PROBES COUPLER ANTENNA BASE VERIFY HEIGHT AND ADJUST AS NECESSARY USING FLANGE DEPRESSOR, BEING CAREFUL NOT TO DAMAGE OR KINK PROBES. Fig. 5 7
8 Installation of Exterior Base (install before Interior C 1. Glass Preparation: Be sure glass surface is thoroughly clean, see no. 2 of Location & Glass Preparation instructions on page Template: Position exterior template side to exterior window location. Hold in place using masking tape. CAUTION: Visually check inside vehicle to be sure there are no obstructions to mount the interior coupler and cable assembly. Assure template is positioned properly. (Fig. 6) EXTERIOR WINDOW TRIM TOP DEFOGGER WIRE Correct Position Correct Position TOP DEFOGGER WIRE INCORRECT POSITION Fig. 6 INCORRECT POSITION 8


 6.")
9 oupler) 3. Completely fill each of the 8 holes with silicone (Fig. 7). Do not fill slits between holes. 4. Slowly and carefully, remove clear plastic adhesive liner from pad (Fig. 8). CAUTION: Adhesive pad will stick to glass instantly and cannot be removed without having to replace. Be sure positioning is correct before it touches the glass. SILICONE ADHESIVE 5. Antenna base must be installed as shown by inserting it inside the template perimeter. (Fig. 9) 6. Adhere antenna base starting at the top edge and working downward as shown. (Fig. 9) Fig. 8 ANTENNA BASE Fig. 7 Exterior Window Trim Fig. 9 9

 9. Carefully remove the template from exterior glass.")
10 Installation of Exterior Base (continued) 7. Using both hands, apply firm pressure to the base while raising the mast to a vertical position as shown. (Fig.10) 8. Apply firm hand pressure over entire top of antenna base surface for 60 seconds. (Fig. 11) 9. Carefully remove the template from exterior glass. Opposite side of template will be used for interior coupler installation. Fig. 10 Fig


11 10. Work the entire perimeter by applying firm pressure to the flexible seal. Important: Assure entire perimeter of seal is firmly kneaded in place using supplied flange depressor (see Fig. 12 ) around all the edges, corners and under mast pivot. SEAL PERIMETER MAST PIVOT USE FLANGE DEPRESSOR TO SEAL AREA UNDER MAST PIVOT SEAL PERIMETER Fig. 12 USE FLANGE DEPRESSOR EDGE TO FURTHER ENHANCE PERIMETER SEAL. 11. Verify proper adherence to surface by viewing from inside the vehicle. Observe any air gaps (Fig. 13), and reapply firm hand pressure over entire surface to minimize this condition. Use of Flange Depressor is recommended to seal edges. MINIMIZE AIR GAPS Fig
12 Installation of Interior Coupler 1. Glass Preparation: Be sure glass surface is thoroughly clean, see no. 2 of Location & Glass Preparation instructions on page Uncoil cable so that the weight of the cable does not pull the coupler from the window during installation. EXTERIOR BASE AS VIEWED FROM INSIDE VEHICLE Fig Position and align template to exterior base, and adhere template to window using masking tape. (Fig. 15) 4. Remove adhesive liner as shown. (Fig. 16) VIEW FROM INSIDE VEHICLE WITH TEMPLATE IN PLACE Fig. 15 Fig. 16 CAUTION adhesive pad will stick to glass instantly and cannot be removed without having to replace. Assure positioning is correct before it touches the glass. 5. Position coupler within the template and with the symbol in the upward position as shown. (Fig. 17) Fig
 7.")
 Interior Window Trim Fig. 18 Fig. 19 8.")


13 6. Adhere coupler starting at top edge and working downward as shown. (Fig. 18) 7. Apply firm hand pressure to entire outer surface of coupler for 60 seconds minimum. (Fig. 19) Interior Window Trim Fig. 18 Fig Remove template once coupler is firmly in place. 9. Work the entire perimeter by applying firm pressure to the flexible seal. (Fig. 20) ( Important: Assure entire perimeter of seal is firmly kneaded in place using supplied flange depressor (see Fig. 20) around all the edges and corners. SEAL PERIMETER SEAL PERIMETER Fig. 20 USE FLANGE DEPRESSOR EDGE TO FURTHER ENHANCE PERIMETER SEAL. 13
14 Route Cable to Tuner/Receiver CAUTION: Do not alter the cable or connectors in any manner. Performance will be compromised. 1. Do not attach plastic Fakra Housings over connectors until after the cable is routed to tuner/receiver. Once in place, these cannot be removed without damaging the Housings or connectors. 2. Use caution while routing cable through headliner to avoid damage or snagging of the cable or the pulling off of connectors. 3. Carefully remove the protective cap from connectors after routing cable. (Fig. 21) NOTE: Sony Plug & Play receivers do not require the plastic Fakra Housings to be attached for connection to receiver. CAREFULLY REMOVE OR CUT AWAY PROTECTIVE CAP USING KNIFE OR BLADE 4. Attach Fakra Housings to appropriate cable connector bodies as shown. (Fig. 22) Fig. 21 FAKRA HOUSING - CURRY YELLOW (SAT) LABEL WITH MODEL NO., SERIAL NO. & MFG CODE FAKRA HOUSING - GREEN (TER) CABLE W/WHITE STRIPE Fig. 22 Satellite Cable Connector (SAT) - Curry Yellow Fakra Housing Terrestrial Cable Connector (TER) - Green Fakra Housing 5. Attach connectors to the tuner/receiver ports. 6. Installation is complete. Enjoy the sounds of XM Satellite Radio! 14
15 Trouble Shooting PROBLEM OR ALARM POSSIBLE SOLUTION Antenna External Antenna Check Antenna No Signal No XM Display or Does Not Function Other Check Connections: Antenna Cable to tuner/receiver Tuner/receiver to radio Check Connections Check for damage to cable (flattening or pinching) Check Antenna or vehicle; may not have line of sight to XM Satellites (move vehicle away from obstructions such as buildings, etc.) Check for vertical antenna position Check Tuner/Receiver Installation Manual Call A/S Technical Support at or Provide Serial No. found on label at connector end of cable. (see Fig. 22) Use and Care Always maintain mast in a vertical position for best performance. Automatic Car Wash: To avoid antenna damage, lay mast down against the glass surface, USING BOTH HANDS FOR POSITIONING. Cold Weather Operation: Use care at and around antenna base when removing ice/snow from window. Remove ice build up from antenna base swivel area before rotating mast down for car wash or other purpose. Be aware of low clearance entries. Lay mast down against glass (two-handed positioning recommended). Do not apply wax or polish to antenna. Do not use harsh cleaning agents. Clean antenna using normal car wash detergents and wet soft cloth only. No Abrasives. Do not apply paint to color match vehicle. 15
16 Limited Warranty Antenna Specialists an Allen Telecom Company, here after referred to as Antenna Specialists, warrants, on the terms and conditions hereto set forth, all products manufactured by it to be free under normal use and service from defects in materials and workmanship for a period of one (1) year from the date of delivery to the first consumer (the Warranty Period ). Antenna Specialists obligation under this Warranty is limited to prompt repair or replacement of the product, at its option, without charge, at an authorized Antenna Specialists dealer or at the factory of Antenna Specialists in Cleveland, Ohio, when the product is returned to an authorized dealer or to the factory with all transportation charges prepaid and examination of the products shall disclose it to have been defective in the respects aforesaid during the Warranty Period. Antenna Specialists is not responsible for any labor charges other than the repair of the product at its facilities. The Warranty Period shall not be extended beyond its original term with respect to any part or parts repaired or replaced by Antenna Specialists hereunder. This Warranty Period shall not apply to any product which has been repaired or altered in any manner by anyone other than Antenna Specialists or an authorized outlet of Antenna Specialists, or if the defect, malfunction or failure of the product to conform to this Warranty was caused by damage (not resulting from defect or malfunction) while in the possession of the consumer or from unreasonable use, or from improper installation or application, or to any product which has not been maintained or used in accordance with the operating specifications set forth in Antenna Specialists written instructions. IMPLIED WARRANTIES OF MERCHANTABILITY OR FITNESS FOR ANY PARTICU- LAR PURPOSE ARE LIMITED IN DURATION TO THE WARRANTY PERIOD SPECIFIED ABOVE. UNDER NO CIRCUMSTANCES SHALL ANTENNA SPECIALISTS BE LIABLE FOR ANY CONSEQUENTIAL DAMAGES FOR BREACH OF THE WARRANTY OR OF ANY IMPLIED WARRANTY. Some states do not allow limitation on how long an implied warranty lasts, so the above limitation may not apply to you. Some states do not allow the exclusion or limitation or identical or consequential damages so the above limitation or exclusion may not apply to you. This Warranty gives you specific legal rights, and you may also have other rights which vary from state to state. Antenna Specialists neither assumes nor authorizes any person to assume for it any obligation or liability other than as herein expressly stated. MODEL NO. SERIAL NO. MFG. CODE antenna specialists Bainbridge Road Cleveland, Ohio U.S.A. tel: fax: Antenna Specialists Printed in the U.S.A. 27P9985-1
STC2 Car Kit. Installation Guide
 STC2 Car Kit Installation Guide Box Contents When you unpack your STC2 Car Kit, it should include everything as shown below: Suction Cup Mount & Screws Surface Preparation Cleaning Kit (To clean a surface
Installation Instructions / Warranty. Citterio 39115XX1
 Installation Instructions / Warranty Citterio 39115XX1 Citterio Wall-Mount Lavatory Trim 39115XX1 Technical Data Maximum incoming water pressure 145 psi Recommended incoming pressure 14.5-72 psi Recommended
Installation Instructions / Warranty
 Installation Instructions / Warranty Citterio 39136XX1 39156XX1 Citterio 39236XX1 Axor Citterio Widespread Lav Mixer 39136XX1 Axor Citterio Bidet Mixer 39236XX1 39136XX1 User instructions Turn the right
Installation Instructions
 Installation Instructions To ensure that your installation proceeds smoothly--please read these instructions carefully before you begin. P r o d u c t s Luxury Faucets and Accessories Savina Product Numbers
Installation Instructions To ensure that your installation proceeds smoothly--please read these instructions carefully before you begin.
 Single Lever Vessel Faucet Installation Instructions To ensure that your installation proceeds smoothly--please read these instructions carefully before you begin. P r o d u c t s Luxury Faucets and Accessories
Installation Instructions
 Installation Instructions Rock Crawler Roof Rack (Part # 76717) 07-Up Jeep Wrangler J/K 4Door For Technical Support/Warranty Information please call 310-762-9944 Smittybilt, 400 West Artesia Blvd, Compton,
Reach ins, Freeezers & Refrigerators Installation & Operation Manual
 Reach ins, Freeezers & Refrigerators Installation & Operation Manual BSR23 BSF23 BSR49 BSF49 BSR72 BSF72 IMPORTANT SAFETY INSTRUCTIONS (SAVE THESE INSTRUCTIONS) Visit us on the web at www.blueairinc.com
Installation Instructions / Warranty
 Installation Instructions / Warranty Axor Citterio 39133XX1 Axor Citterio 39135XX1 Axor Citterio 39233XX1 Axor Citterio 39235XX1 Axor Citterio Widespread Lavatory Faucet Axor Citterio Widespread Bidet
Installation Instructions / Warranty. Starck 10444XX XX1
 Installation Instructions / Warranty Starck 10444XX1 10454XX1 90564101 06/2005 Starck 4-Hole Roman Tub Trim 10444XX1 10454XX1 10444XX1 10454XX1 Installation Considerations This trim kit must be used with
Installation Instructions
 Installation Instructions To ensure that your installation proceeds smoothly--please read these instructions carefully before you begin. P r o d u c t s Luxury Faucets and Accessories Contemporary Floor
Lubricator Gun: 10,000 psi (700 bar) Maximum Delivery Pressure when disconnected from Dispenser
 Maximum Delivery Pressure when disconnected from Dispenser") INSTRUCTIONS-PARTS LIST 30 455 INSTRUCTIONS This manual contains important warnings and information. READ AND KEEP FOR REFERENCE. Rev. C Supercedes B Hand-Operated Portable Grease Dispenser Buckshot Luber
INSTRUCTIONS-PARTS LIST 30 455 INSTRUCTIONS This manual contains important warnings and information. READ AND KEEP FOR REFERENCE. Rev. C Supercedes B Hand-Operated Portable Grease Dispenser Buckshot Luber
Installation Instructions / Warranty
 Installation Instructions / Warranty Axor Montreux 16532XX1 Axor Montreux 16534XX1 Axor Montreux Wall-Mounted Widespread Lavatory Set 16532XX1 Cross handles 16534XX1 Lever handles 16532XX1 16534XX1 Technical
Installation Instructions / Warranty
 Installation Instructions / Warranty Axor Uno 38020XX1 Axor Uno 38025XX1 Axor Uno 38210XX1 Uno Single-control Lavatory Faucet 38020XX1 Uno Single-control Tall Lavatory Faucet 38025XX1 Uno Single-control
Installation Instructions
 Installation Instructions To ensure that your installation proceeds smoothly--please read these instructions carefully before you begin. P r o d u c t s Luxury Faucets and Accessories Savina Product Numbers
Installation Instructions / Warranty
 Installation Instructions / Warranty Hansgrohe HighArc Bar Faucets HighArc Bar Faucets These instructions cover the following models: 06688XX0 06696XX0 06699XX0 06857XX0 06980XX0 Solaris Stratos Metro
Installation Instructions / Warranty. Starck 10458XX1
 Installation Instructions / Warranty Starck 10458XX1 Axor Starck Free-Standing Tub Filler 10458XX1 Technical Specification Maximum water pressure 145 psi Recommended water pressure 14.5-72 psi Maximum
Installation Instructions Receiver Rack (Part # 7700) Universal Application
 Universal Application") NOTE: Carefully read entire instructions thoroughly before attempting to install this part. Parts Included Qty Tools Needed 2 Draw Bar 1 Ratchet Racks 2 Socket Set Curved Support Bars 2 Wrench Set Connecting
NOTE: Carefully read entire instructions thoroughly before attempting to install this part. Parts Included Qty Tools Needed 2 Draw Bar 1 Ratchet Racks 2 Socket Set Curved Support Bars 2 Wrench Set Connecting
Installation Instructions / Warranty. Axor Citterio M 34315XX1
 Installation Instructions / Warranty Axor Citterio M 34315XX1 Axor Citterio M Wall-mount Lavatory Faucet 34315XX1 Technical Information Max. flow rate Max. water pressure Recommended water pressure Recommended
UNIVERSAL CUSTOMIZABLE MUD FLAP INSTALLATION INSTRUCTIONS
 UNIVERSAL CUSTOMIZABLE MUD FLAP INSTALLATION INSTRUCTIONS Thank you for purchasing ROCKSTARTM Splash Guard Mud Flaps. Agri-Cover, Inc. proudly manufactured these mud flaps using superior quality materials
Installation Instructions / Warranty. Interaktiv
 Installation Instructions / Warranty Interaktiv 06646000 4-Hole Roman Tub Rough 06646000 Recommended operating pressure 45-80 psi Recommended hot water temperature 120 o - 140 o F* Flow rate - valves approx.
LUBRICATOR GUN INSTRUCTIONS-PARTS LIST. 10,000 psi (700 bar) Maximum Delivery Pressure. Detachable-type
 Maximum Delivery Pressure. Detachable-type") INSTRUCTIONS-PARTS LIST 306 460 INSTRUCTIONS This manual contains important warnings and information. READ AND KEEP FOR REFERENCE. Rev. E Supercedes D Detachable-type LUBRICATOR GUN 10,000 psi (700 bar)
INSTRUCTIONS-PARTS LIST 306 460 INSTRUCTIONS This manual contains important warnings and information. READ AND KEEP FOR REFERENCE. Rev. E Supercedes D Detachable-type LUBRICATOR GUN 10,000 psi (700 bar)
Installation Instructions / Warranty
 Installation Instructions / Warranty 13550181 Rough, Two-Hole Thermostatic Roman Tub 13550181 min 4 3/8 max 18 3/4 2 3/16 2 3/16 Technical Specification Operating pressure: max. 145 psi Recommended operating
INSTALLATION INSTRUCTIONS
 INSTALLATION INSTRUCTIONS Thank you for purchasing VANISH Roll-Up Cover. Agri-Cover, Inc. proudly manufactured this cover using superior quality materials and workmanship. With proper care, your cover
Installation Instructions / Warranty
 Installation Instructions / Warranty Axor Citterio 39144XX1 Axor Citterio 39148XX1 Axor Citterio Wall Mount Lav Mixer with Cross Handles 39144XX1 Axor Citterio Wall Mount Lav Mixer with Lever Handles 39148XX1
Installation Instructions / Warranty
 Installation Instructions / Warranty Citterio 27831XXX Terrano 27834XXX Carlton Phoenix 27835XXX Axor Citterio Wallbar Set 27831XXX Axor Terrano Wallbar Set 27834XXX Axor Carlton / Phoenix Wallbar Set
Installation Instructions / Warranty. Starck Semi-Pro
 Installation Instructions / Warranty Starck Semi-Pro 10820001 Starck Semi-Pro 10820XX1 2 Technical Data Operating pressure: max. 145 psi Recommended operating pressure:14.5-75 psi Test pressure: 232 psi
Installation Instructions / Warranty. Starck 10456XX1
 Installation Instructions / Warranty Starck 10456XX1 90550101 01/2005 Starck free-standing tub filler trim 10456XX1 Technical Specification Maximum water pressure 145 psi Recommended water pressure 14.5-72
Installation Instructions / Warranty
 Installation Instructions / Warranty 06090xx0 06091xx0 06092xx0 06093xx0 06094xx0 06095xx0 06096xx0 06099xx0 06097xx0 06098xx0 06589xx0 06592xx0 06593xx0 06596xx0 06600xx0 06594xx0 06595xx0 06598xx0 06866xx0
Installation Instructions / Warranty. Raindance Allrounder 28110XX1 Wall Outlet Adapter with Hose Connection 28108XX1
 Installation Instructions / Warranty Raindance Allrounder 28110XX1 Wall Outlet Adapter with Hose Connection 28108XX1 Raindance Allrounder 28110XX1 Technical Data Max. flow rate of showerhead 2.5 gpm Determining
CSA CERTIFIED Conforms to UL 507
 Installation tion Instructions Please read and save these instructions! TURBO/MAXX12 Volt All Weather RV Ventilator Fans P/N 00-965001 Deluxe Model 1200T WITH THERMOSTAT P/N 00-965007 Standard Model 3550
Pressure Roller with 24-inch Fixed Extension - For application of architectural paints and coatings -
 Instructions Important Safety Instructions Read all warnings and instructions in this manual. Save these instructions. 311082D Pressure Roller with 24-inch Fixed Extension - For application of architectural
PACIFICA Shower Cabin Installation Instructions
 PACIFICA Shower Cabin Installation Instructions IMPORTANT Please read carefully the following instructions before installing your shower cabin. If you have any questions on this shower cabin installation
HONDA RIDGELINE INSTALLATION INSTRUCTIONS. (866) RETRACTABLE TRUCK BED COVERS TABLE OF CONTENTS SWH2-1610
 RETRACTABLE TRUCK BED COVERS TABLE OF CONTENTS SWH2-1610") RETRACTABLE TRUCK BED COVERS HONDA RIDGELINE INSTALLATION INSTRUCTIONS TABLE OF CONTENTS SWH2-1610 (866) 338-3697 www.paceedwards.com Pace Edwards Company 2400 Commercial Blvd. Centralia WA 98531 Tools
RETRACTABLE TRUCK BED COVERS HONDA RIDGELINE INSTALLATION INSTRUCTIONS TABLE OF CONTENTS SWH2-1610 (866) 338-3697 www.paceedwards.com Pace Edwards Company 2400 Commercial Blvd. Centralia WA 98531 Tools
Installation Instructions / Warranty
 Installation Instructions / Warranty Metris 31436XX1 Talis 32313XX1 Focus 31732XX1 Metris 31446XX1 Talis 32314XX1 Focus 31733XX1 Trim, 3- and 4-Hole Roman Tub Sets 3-Hole 4-Hole Metris 31436001 31446001
I N S T A L L A T I O N G U I D E
 I N S T A L L A T I O N G U I D E APPLICATION AMP Part # Chevrolet Silverado1500 / GMC Sierra 1500 - Crew Cab 2014-2015 77154-01A Chevrolet Silverado 2500/3500 - Crew Cab 2015 77154-01A (Gas Only) GMC
RAM BOX INSTALLATION SHEET
 RAM BOX INSTALLATION SHEET Any damaged or missing parts? Parts will be shipped to you directly. Call 844-779-8986 Mon - Fri 8:30 am - 7 pm EST or email support@bakindustries.com 6.5 bed Front (cab) 5.5
Dual Phase Extraction Inlet. Patent No Installation Manual. P/N Rev
 Patent No. 6520259 Installation Manual P/N 95232 Rev 6-16-11 Table of Contents ing Extraction Inlets track changing water levels to maintain optimum performance 1.Component Identification Page 1 2. How
Installation Instructions SRC Over-Size Tire Carrier Jeep Wrangler/Unlimited Part # 2743
 NOTE: Carefully read instructions entirely before assembling/installing this product. Parts Included Qty Parts Included Qty Tire Carrier 1 8 x 70mm Hex Bolt 4 Brake Light Bracket 1 8mm Flat Washer 4 Tire
Installation Instructions / Warranty. Interaktiv 06438XXX
 Installation Instructions / Warranty Interaktiv 06438XXX Interaktiv Hose Pull-Out Set 06438XXX Technical Specification Maximum mounting surface thickness 1 1/2" Hole size in mounting surface 1 1/2" Protection
Installation Instructions Supertop for Truck
 Installation Instructions Supertop for Truck Vehicle Application: Ford F-150 Regular / Super Cab 2004 2011 (6.5 ft.) Part Number: 76305 US Patent 6827391 www.bestop.com - We re here to help! Visit our
PART NUMBER: MINI Cooper S L4-1.6L SEE * NOTE
 Equipped with AEM Dryflow Filter No Oil Required! INSTALLATION INSTRUCTIONS PART NUMBER: 21-699 2007-2010 MINI Cooper S L4-1.6L SEE * NOTE * NOTE: Legal in California only for racing vehicles which may
Blue Air. Commercial Refrigeration Inc. Installation & Operation Manual Chef Bases
 Blue Air Commercial Refrigeration Inc. Installation & Operation Manual Chef Bases Please read this manual completely before installing or operating this unit! BACB53 BACB71 BACB74 BACB83 BACB86 BACB96
Star Mini Phantom. Interior Undercover Mini LED Light. PATENTS D530,029 and D632,421. ULB9LDC Series (Lineum LED Dual Color)
") Star Mini Phantom Interior Undercover Mini LED Light PATENTS D530,029 and D632,421 ULB9LDC Series (Lineum LED Dual Color) IMPORTANT: Please read all of the following instructions before installing your
Star Mini Phantom Interior Undercover Mini LED Light PATENTS D530,029 and D632,421 ULB9LDC Series (Lineum LED Dual Color) IMPORTANT: Please read all of the following instructions before installing your
Installation Instructions / Warranty
 Installation Instructions / Warranty 3-Hole Roman Tub Rough 3-Hole Roman Tub Trim Kits 3-Hole Roman Tub Rough 06607000 Technical Information Recommended water pressure 45-80 psi Max. water pressure 145
Installation Instructions / Warranty
 Installation Instructions / Warranty FIX FIT STOP Montreux 16882XX1 Montreux 16883XX1 Carlton 17882XX1 Carlton 17883XX1 Starck 10882XX1 Phoenix 17982XX1 Phoenix 17983XX1 Steel 35882801 Terrano 37882XX1
Installation Instructions / Warranty
 Installation Instructions / Warranty Terrano Showerhead 28485XX1 Steel Showerhead 28484801 Arco/Starck/Steel/Uno Air Showerhead 28494XX1 Terrano Shower Arm 27448XX1 Phoenix Showerhead 28487XX1 Citterio
Installation Instructions / Warranty
 Installation Instructions / Warranty Allegro Gourmet 06460XX0 Allegro 06461XX0 Allegro Kitchen Faucet 06461XX0 Allegro Gourmet Kitchen Faucet 06460XX0 06460XX0 06461XX0 Product Specifications: Hole size
Installation Instructions Supertop for Truck
 Installation Instructions Supertop for Truck Vehicle Application: Ford F-150 5.5 Ft. Styleside 2004 and newer Part Number: 76309 www.bestop.com - We re here to help! Visit our web site and click on Ask
Installation Instructions Soft Top Replacement Hardware, Wrangler
 Installation Instructions Soft Top Replacement Hardware, 87-95 Wrangler IMPORTANT NOTICE: Carefully read instructions before attempting to install this product. Rampage is in no way responsible for any
Installation Instructions / Warranty. Trio Stop
 Installation Instructions / Warranty Trio Stop 15980181 Trio Stop three way diverter 15980181 Installation 2 2 1 Spare parts 1 Service kit 25917000 2 Extension set 1 1 2 96241000 Note: A deep socket 24
INSTALLATION INSTRUCTIONS
 INSTALLATION INSTRUCTIONS Thank you for purchasing ACCESS Original Roll-Up Cover. Agri-Cover, Inc. proudly manufactured this cover using superior quality materials and workmanship. With proper care, your
Installation Instructions / Warranty. Axor Citterio 39835XX1
 Installation Instructions / Warranty Axor Citterio 39835XX1 Axor Citterio Kitchen Faucet 39835XX1 Technical Data Operating pressure: max. 145 psi Recommended operating pressure: 14.5-72 psi Test pressure:
Vehicle Installation Kit
 CLCK Vehicle Installation Kit DISP CAT POWER JUMP MEMO BAND MENU 1 2 3 4 5 6 7 8 9 0 Vehicle Installation Guide CLCK 1 Dear Customer Congratulations on your purchase of the world s finest brand in the
Installation Instructions / Warranty. Axor Citterio 39840XX1
 Installation Instructions / Warranty Axor Citterio 39840XX1 Axor Citterio Semi-Pro Kitchen Faucet 39840XX1 Do not allow the hot and cold supply hoses to twist, or reduced flow will result. Technical Information
JAMP-660SG15-CVO. Installation Instructions. ROKKER XXR 660w RMS Dual-Amplifier Kit For Harley CVO Street Glide
 ROKKER XXR 660w RMS Dual-Amplifier Kit For 2015-2018 Harley CVO Street Glide # JAMP-660SG15-CVO 2017 J&M Corporation. All rights reserved. 9/17 Installation Instructions Product Description This is the
Viking Use/Installation Guide
 Viking Use/Installation Guide Viking Range Corporation 111 Front Street Greenwood, Mississippi 38930 USA (662) 455-1200 For product information, call 1-888-VIKING1 (845-4641) or visit the Viking Web site
Installation Instructions / Warranty. PuraVida 15937XX1
 Installation Instructions / Warranty PuraVida 15937XX1 Installation Considerations For best results, Hansgrohe recommends that this unit be installed by a licensed, professional plumber. Please read over
Cleaning & Sanitizing Instructions
 VCT-50 with Optional Stand VCT-30 with Optional Stand VCT-15 with Optional Stand VCT SERIES STACKABLE TEA DISPENSERS Cleaning & Sanitizing Instructions DAILY CLEANING/SANITIZATION STACKABLE TEA DISPENSERS
3-5 Hours Professional installation recommended
 INSTALLATION GUIDE APPLICATION MODEL YR PART # Toyota Tundra Double Cab * 2007-2017 76137-01A Toyota Tundra CrewMax 2007-2017 76137-01A Toyota Sequoia * 2008-2017 76137-01A *Modification required to running
Read all instructions before installing and using. Installer: This manual must be delivered to the end user.
 Installation Instructions Vacuum / Magnet Mount Kits IMPORTANT! Read all instructions before installing and using. Installer: This manual must be delivered to the end user.! WARNING! Failure to install
Installation & Operation Manual Chef Base
 Installation & Operation Manual Chef Base Please read this manual completely before installing or operating this unit! BACB53 BACB53M BACB71 BACB71M BACB74 BACB74M BACB83 BACB83M BACB86 BACB86M BACB96
Installation Instructions / Warranty
 Installation Instructions / Warranty Interaktiv Retroaktiv 4-Hole Roman Tub Trim Interaktiv & Retroaktiv 4-Hole Roman Tub Trim These instructions cover the following trim kits: Interaktiv Solaris Stratos
Installation Instructions Sunrider for Hardtop
 Installation Instructions Sunrider for Hardtop Installation Instructions Sunrider for Hardtop Vehicle Application: Jeep Wrangler / Wrangler Unlimited 2007- current Part Number 52450 Installation Tips Before
SHUTTLE. Vehicle Installation Guide JCKFM B 1 of 14. Revision A: Inserted PNP2 3/24/04.
 SHUTTLE Vehicle Installation Guide JCKFM1 Revision A: Inserted PNP2 3/24/04. 1 of 14 Revision B: Changed cradle and shuttle connector and image 4-27-04. Congratulations You are one step closer to experiencing
37SCENE 46SCENE 79SCENE
 Installation and Operation Instructions LED SCENE LIGHT LED SCENE LIGHT 37SCENE 46SCENE 79SCENE 37SCENE 46SCENE Introduction The 37SCENE, 46SCENE, 79SCENE LED Scene Lights are designed for the emergency
Pro Shot Grease Dispense Valve
 Instructions Parts List Pro Shot Grease Dispense Valve 309032J For high pressure grease dispense. 8000 psi (55 MPa, 552 bar) Maximum Working Pressure Model No. 242055, Series B, 1/4 npt Fluid Inlet Model
Make sure the rail is clamped square as shown. Start at the front, and place the first clamp approx 6 to 9 inches back.
 INSTALLATION SHEET Any damaged or missing parts? Parts will be shipped to you directly. Call 844-779-8986 Mon - Fri 5:30 am - 4 pm Pacific Time TOOLS RECOMMENDED 9/16 Wrench or socket 7/8 Drill bit & drill
Installation Instructions For: Suzuki Samurai, All Years Part Number: TM
 Installation Instructions For: Suzuki Samurai, All Years Part Number: 51761 TM Patent Pending WARNING This product is designed to enhance the appearance of the vehicle and to shield the occupants from
INSTALLATION AND OPERATION MANUAL
 INSTALLATION AND OPERATION MANUAL Models S120U & S240U Read all instructions before assembling or using the SunHeater system. Retain this manual for future use. TABLE OF CONTENTS Important Safety Information...2
5 Gallon Tall Tea Dispenser 3 Gallon Tall Tea Dispenser TALL TEA DISPENSERS. Cleaning & Sanitizing Instructions
 5 Gallon Tall Tea Dispenser 3 Gallon Tall Tea Dispenser TALL TEA DISPENSERS Cleaning & Sanitizing Instructions DAILY CLEANING/SANITIZATION TALL TEA DISPENSERS DO NOT KEEP BREWED BEVERAGES OVERNIGHT CLEANING
Low Profile Service Jack
 Low Profile Service Jack Operating Instructions & Parts Manual Model Number JSA200LCX Capacity 2 Ton MAC TOOLS INC. 2005 505 N. Cleveland Ave. Suite 200 Westerville, OH 43082 Printed in PRC Save these
INSTALLATION INSTRUCTIONS AND OWNER S MANUAL
 INSTALLATION INSTRUCTIONS AND OWNER S MANUAL Thank you for purchasing the AlloyCover from WeatherTech. Manufactured with pride using superior quality materials and workmanship. With proper care, your cover
Air Curtain. Installation, Operating and Maintenance Instructions
 Installation, Operating and Maintenance Instructions Save this manual for future reference. Air Curtain Model Numbers: ES026, ES036, ES042, ES048, ES060, ES072 READ THIS OWNER S MANUAL CAREFULLY BEFORE
KidWalk KidWalk II Dynamic Mobility System
 OWNER S MANUAL KidWalk KidWalk II Dynamic Mobility System Manufactured By Prime Engineering A Division of Axiom Industries, Inc. Supplier Info 70111KWOM 2 TABLE OF CONTENTS This owner s manual is organized
!"" #$% "!&' ( ( ) *
 *") !"" #$% "!&' (( ) * FunPop CART Assembly Manual Model # 2689 CARTS Part No. 59411 Revised: FEB 2009 Cincinnati, OH 45241-4807 USA INSTALLATION INSTRUCTIONS Checking Shipment Unpack all cartons and check
!"" #$% "!&' (( ) * FunPop CART Assembly Manual Model # 2689 CARTS Part No. 59411 Revised: FEB 2009 Cincinnati, OH 45241-4807 USA INSTALLATION INSTRUCTIONS Checking Shipment Unpack all cartons and check
Installation Instructions To ensure that your installation proceeds smoothly--please read these instructions carefully before you begin.
 Installation Instructions To ensure that your installation proceeds smoothly--please read these instructions carefully before you begin. P r o d u c t s Luxury Faucets and Accessories Stoic Product Numbers
Installation Instructions / Warranty
 Installation Instructions / Warranty FIX FIT STOP Starck 10882XX1 Montreux 16882XX1 Carlton 17882XX1 Carlton 17883XX1 Phoenix 17982XX1 Phoenix 17983XX1 Steel 35882801 Allegroh 36882XX1 Terrano 37882XX1
Star Mini Phantom. Interior Undercover Mini LED Light. PATENTS D530,029 and D632,421. ULB9E Series
 Star Mini Phantom Interior Undercover Mini LED Light PATENTS D530,029 and D632,421 ULB9E Series IMPORTANT: Please read all of the following instructions before installing your new light. CAUTION: Please
CPL 100 Owner's Manual
 BY CPL 100 Owner's Manual Keyless Entry Upgrade Security System IMPORTANT NOTE: The operation of the Security and Convenience System as described in this manual is applicable to most vehicles. However,
Intelligent Electronic Safe
 Operation & Installation Guide 1036616 / 1036617 / 1036618 Intelligent Electronic Safe Please do not keep emergency keys in your safe! MANUAL # M08-0566-155041 Index / Proper Use of Your Safe INDEX Proper
2-3 Hours Professional installation recommended
 INSTALLATION GUIDE APPLICATION AMP Part # Chevrolet Silverado1500 / GMC Sierra 1500 - Double Cab * 2014-18 78154-01A Chevrolet Silverado1500 / GMC Sierra 1500- Crew Cab 2014-18 78154-01A Chevrolet Silverado
Mechanical Filter Box Kit
 Mechanical Filter Box Kit REMINDER CALL 1-888-755-4497 BEFORE RETURNING TO STORE. MODEL #MFBX500P Questions, problems, missing parts? Before returning to your retailer, call our customer service department
3-5 Hours Professional installation recommended
 INSTALLATION GUIDE APPLICATION LENGTH MODEL YR PART # Nissan Titan / Titan XD - Crew Cab 72 2016-2018 76120-01A Nissan Titan / Titan XD - King Cab 62 2017-2018 76120-01A Nissan Titan / Titan XD - Single
Installation Instructions / Warranty
 Installation Instructions / Warranty Terrano 37410XX1 Uno 38410XX1 Phoenix / Carlton 17420XX1 Citterio 39410XX1 Steel 35412801 Starck 10410XX1 Axor Tub Spouts 90973301 11/2004 Axor Tub Spouts Terrano 37410XX1
START HERE BEFORE YOU BEGIN STEP 2
 PROFESSIONAL INSTALL RECOMMENDED 2007-2013 CHEVROLET SILVERADO 1500 / 2007-2013 GMC SIERRA 1500 PART#: Z332051 / Z332051-KIT-C FRONT ROOF LED LIGHT MOUNTS Parts included (1) - Driver Side Roof Mount Upright
INSTALLATION INSTRUCTIONS PART NUMBER: CHEVROLET Camaro V8-6.2L
 Equipped with AEM Dryflow Filter No Oil Required! INSTALLATION INSTRUCTIONS PART NUMBER: 21-8029 2010-2013 CHEVROLET Camaro V8-6.2L LEGAL IN CALIFORNIA ONLY FOR RACING VEHICLES WHICH MAY NEVER BE USED,
SAFETY WARNING Please read these before operating your Sky Vector
 www.megatech.com Entire contents Megatech 2002 Congratulations! You have just purchased the EASIEST plane to fly in the world! Learning to fly has never been so fun! Get ready to hand launch into gravity-defying
Installation / Warranty
 Installation / Warranty Starck 101XX1 115XX1 115XX1 15XX1 Steel 50801 Allegroh 615XX1 15XX1 16XX1 5XX1 1104XX1 1105XX1 1114XX1 1115XX1 Starck 101XX1 115XX1 115XX1 15XX1 Allegroh 615XX1 15XX1 16XX1 5XX1
INSTALLATION & OWNER S MANUAL
 Rev. L p. 1 of 16 INSTALLATION & OWNER S MANUAL V4262 CAMO (SOFT SIDED) CAB KIT INSTALLATION & OWNER S MANUAL The contents of this envelope are the property of the owner. Be sure to leave with the owner
INSTALLATION INSTRUCTIONS
 INSTALLATION INSTRUCTIONS Thank you for purchasing TONNOSPORT Roll-Up Cover. Agri-Cover, Inc. proudly manufactured this cover using superior quality materials and workmanship. With proper care, your cover
INSTRUCTIONS PARTS LIST This manual contains important warnings and information. READ AND RETAIN FOR REFERENCE
 INSTRUCTIONS PARTS LIST 308 493 This manual contains important warnings and information. READ AND RETAIN FOR REFERENCE Rev. A Second Gun Hose Kit 100 psi (6.9 bar) Maximum Working Pressure These kits include
* APPLICATION MODELS VARY. WE RECOMMEND TO VERIFY FITMENT BEFORE BEGINNING INSTALLATION PROCESS.
 Parts included (1) Main Grille Polished - Part #6214760 OR Black - Part #6214761 Hardware included (8) - #8 x 3/4 Black Screws (8) - #8 Flat Nuts (3) Push Nut Retainer Clips START HERE PLEASE READ AND
Tank Monitor. Instruction manual DTM01. Tank Monitor
 EN Tank Monitor Instruction manual DTM01 Tank Monitor 1 2 3 1 2 4 3 2 1 4 2 Notes on using the manual Table of contents EN 1 Notes on using the manual 3 2 General safety instructions 3 3 Intended use 4
UltraGroove Electric
 UltraGroove Electric Electric Retractable Tonneau Covers INSTALLATION INSTRUCTIONS CHEVROLET SILVERADO/SIERRA TABLE OF CONTENTS (800) 338-3697 www.paceedwards.com Pace Edwards Company 2400 Commercial Blvd.
Installation Instructions / Warranty
 Installation Instructions / Warranty Croma C 75 06127XX0 Croma C 75 06126XX0 Commercial 06397XX0 Croma C 75 2-Jet Showerhead 06126XX0 Croma C 75 2-Jet Handshower 06127XX0 Hansgrohe Commercial Showerhead
INSTALLATION INSTRUCTIONS AND OWNER S MANUAL
 INSTALLATION INSTRUCTIONS AND OWNER S MANUAL Thank you for purchasing the AlloyCover from WeatherTech. Manufactured with pride using superior quality materials and workmanship. With proper care, your cover
INSTALLATION INSTRUCTIONS
 Equipped with AEM Dryflow Filter No Oil Required! INSTALLATION INSTRUCTIONS PART NUMBER: 21-8029 2011-2010 CHEVROLET Camaro V8-6.2L SEE * NOTE * NOTE: Legal in California only for racing vehicles which
INSTALLATION GUIDE. AMP RESEARCH TECH SUPPORT (Press 2) Monday - Friday, 6:00 AM - 5:00 PM PST
 Monday - Friday, 6:00 AM - 5:00 PM PST") INSTALLATION GUIDE APPLICATION AMP Part # Jeep Wrangler Unlimited (JK) 2007 up 75121-01A 2-Door INSTALLATION TIME 3-5 Hours Professional installation recommended SKILL LEVEL 1 2 3 = Experienced TOOLS REQUIRED
INSTALLATION GUIDE APPLICATION AMP Part # Jeep Wrangler Unlimited (JK) 2007 up 75121-01A 2-Door INSTALLATION TIME 3-5 Hours Professional installation recommended SKILL LEVEL 1 2 3 = Experienced TOOLS REQUIRED
CMD-4000 SERIES REV. A 4+ FUNCTION REMOTE CONTROL DOOR LATCH OPENER SYSTEM INTRODUCTION
 CMD-4000 SERIES REV. A 4+ FUNCTION REMOTE CONTROL DOOR LATCH OPENER SYSTEM INTRODUCTION Thank you for purchasing the CMD-4000 series Remote Control Door Latch Opener System from Dakota Digital, Inc. This,
3-5 Hours Professional installation recommended
 I N S T A L L A T I O N G U I D E APPLICATION LENGTH MODEL YR PART # Chevrolet Colorado / GMC Canyon - Crew Cab 72 2015-2016 76153-01A Chevrolet Colorado / GMC Canyon - Extended Cab 65 2015-2016 76153-01A