Unpacking and preparation Mounting the lifting hanger before use Lifting sling Swing kit...
|
|
|
- Lindsey James
- 5 years ago
- Views:
Transcription
1
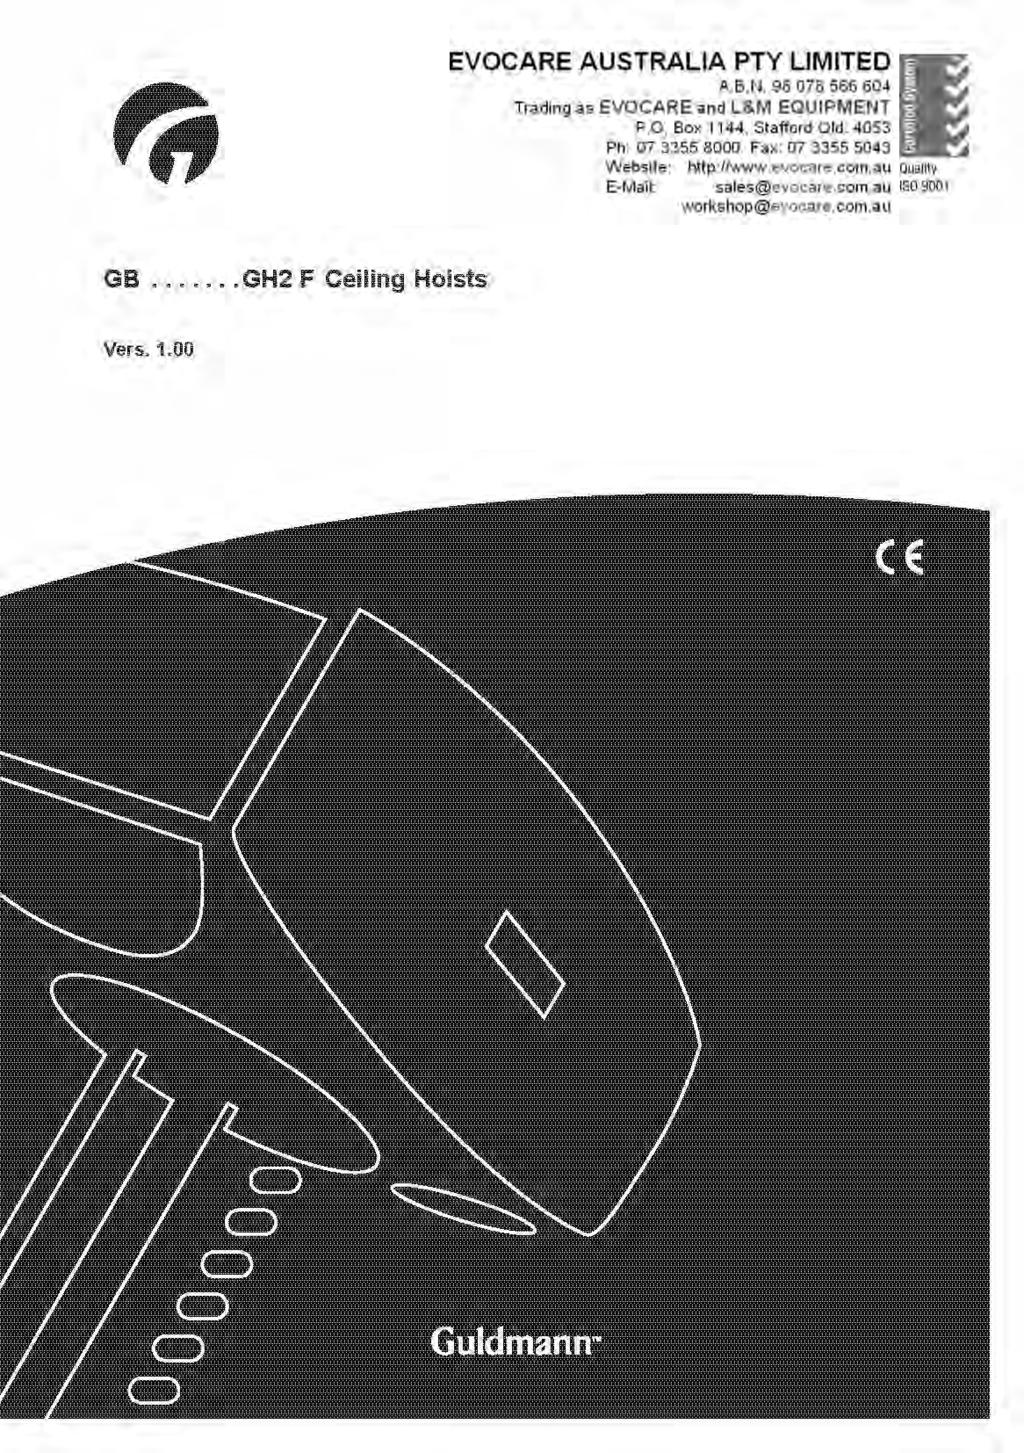
2 GH2 F Ceiling Hoists Hoist numbers: 12xxxx - xxxx Purpose and use Manufacturer Purpose Important/precautions Load limits on your GH2 F system Unpacking and preparation Mounting the lifting hanger before use Lifting sling Swing kit Before the hoist can be used Power supply Description of functions Pictograms Example of a serial number label Audio signals Indicator lamps Operation Installation Deinstallation Lock, Travelling trolley for GH2 F Lifting and lowering Transport/running in the rail system Safety functions Safety functions, installation/deinstallation Installation lock Explanation of labels Charging/connection
3 Accessories Transport trolley for GH2 F Lifting accessories, rail components, and infra-red remote control Transport Maintenance and storage Service and lifetime Service inspection Service inspection, GH2 F Service inspection, travelling trolley for GH2 F Trouble-shooting FAQ s Technical specifications
4 1.00 Purpose and use 1.01 Manufacturer V. Guldmann A/S Graham Bells Vej 21-23A DK-8200 Århus N Denmark Tel Fax Purpose GH2 F is a flexible hoist that covers the need for lifting and moving people at hospitals, nursing homes, institutions, swimming pools, riding schools, and in private homes. The flexibility of GH2 F lies in the fact that it can be rapidly and easily with the least manual handling transferred from one rail system to another. Installing it on and deinstalling it from a rail system is partially automated and is carried out without the use of tools or other assistive technology. GH2 F with lifting accessories is transported and stored in a specially designed transport trolley. Preconditions The preconditions for using the GH2 F hoist are that: The staff who operate this assistive technology/equipment have received training. The instruction offered by Guldmann to all customer groups in connection with the purchase of a ceiling-mounted hoist has been received. The carer pays close attention to the well-being of the person being lifted. The hoist is used in rail systems approved and tested in accordance with Guldmann s stipulations. Installation and testing of rail systems should only be performed by Guldmann-approved engineers. The hoist is only used with a Guldmann lifting hanger or with another suitable lifting hanger (point 2.01). The hoist is only used with a Guldmann lifting sling or other suitable slings (point 3.0) Important/precautions Read the instructions carefully before using the GH2 F hoist. The maximum loads of 200 kg/440 lbs. and 250 kg/550 lbs. respectively must never be exceeded. GH2 F may only be used to lift people. The red emergency stop and emergency lowering strap must be adjusted to the user s reach. GH2 F must not be used where there is a risk of water being sprayed directly onto it. 4
5 If GH2 F fails while in use, it should not be used further, and the local Guldmann Service Team must be contacted for repair. If GH2 F is used where the distance between the rail system and the floor exceeds three metres (or 118 ), the lifting strap must be extended with an extension strap. GH2 F is controlled by a microprocessor PC Board, which may be damaged by static electricity if touched without the necessary precautions. See point Thus, the electronics should be looked after be qualified technicians, only Load limits on your GH2 F system Read the labels which indicate the maximum load limits of the components. The component which has the lowest load limit, e.g. the lifting hanger, the lifting sling, or other equipment, determines the maximum load limit of the entire system. The maximum load limit must not be exceeded. Please note that the load limit may change when different components are used on a daily basis, e.g. lifting hangers, lifting slings Unpacking and preparation Visual check of GH2 F If it appears that GH2 F has been damaged when you unpack it, it must not be used until it has been checked by a qualified 1 person or by the Guldmann Service Team. Contents of the boxes GH2 F hoist module 1. GH2 F (1) 2. Hand control (2) 3. Charger 4. Manual 2 3 Travelling trolley for GH2 F 1. Travelling trolley for GH2 F (3) 2. Manual 3. Label for rail system Transport trolley for GH2 F (4) 1. Handle 2. Underframe 3. Bag for sling 4. Two holders for X lifting hanger 5. Nuts and bolts 6. Manual 5 4
6 2.01 Mounting the lifting hanger before use Lifting hangers made by other manufacturers Guldmann shall not be liable for faults or accidents that occur as a result of using a lifting hanger made by other manufacturers. If you are in doubt about the choice or use of lifting hanger, please contact your supplier. Strap with snap hook Use lifting hanger type 21X87 or the X lifting hanger type when using GH2 F with a snap hook. The snap hook is sewn onto the strap and cannot be removed. Please note Bath chairs, bath stretchers, and horizontal stretchers must be attached to the snap hook. Strap attachment Use lifting hanger type 21X70 or Horizontal Lifter Type BS when using GH2 F with strap attachment. Mount the lifting hanger as illustrated. Loosen the pointed screws (2). Release the axle journal (3). Mount the lifting strap (1) on the lifting hanger (4). Introduce the axle journal again (3). Use a 1.5 mm Allen key to tighten the pointed screws
7 3.00 Lifting sling A lifting sling with four to six lifting straps designed for mounting on hooks with a minimum diameter of 8 mm (approx. 1/2 inch), should be used when using a Guldmann lifting hanger. Slings made by other manufacturers Guldmann shall not be liable for faults or accidents that occur as a result of using a lifting sling made by other manufacturers. If you are in doubt about the choice or use of lifting sling, please contact your supplier. Guldmann shall not be liable for faults or accidents due to incorrect use of the lifting sling, or for reasons of inadequate attention on the part of the carer or user. Working with GH2 F hoist It is only necessary to pay attention to the user s functional level and the carer s technique, as the GH2 F makes no particular demands on space or power consumption and runs smoothly in the rail system. The user should only be lifted just clear of the underlying surface and should be moved at this height. Attaching the lifting sling Attach the hooks that face the user to the upper set of straps (from the back). Attach the lowermost set of straps (from the legs) to the hooks that face away from the user. Lifting to and from sitting position When lifting a user from e.g. a wheelchair, move GH2 F towards the person to be lifted. The lifting hanger should be at the height of the user s chest and should not be moved further in over the user than to mid-thigh position. Place the lifting hanger parallel to the user s shoulders. Place the lifting sling behind the user s back between the back rest of the chair, for example, and the user. The centre band of the lifting string should follow the user s spine. As for the sling types Active, the strap showing the size of the sling should be opposite the spine. Lead the leg straps along the outer side of the user s shins and beneath the thighs between the hollow of the knees and the hip joints. Cross the leg straps over each other in front of the user. All four lifting straps are now ready to be attached to the lifting hanger. Now attach the lifting sling to the lifting hanger. 7
8 Lifting to and from a lying position in bed Place the lifting hanger centrally above the person to be lifted. Place the lifting hanger parallel to the user s shoulders. Turn the user on to his/her side. The lifting high back sling should be placed so that its top is at the same height as the top of the user s head. Lay the sling over the user so that the centre band follows the user s spine. Turn the user on to his/her back and pull out the remaining part of the lifting sling. Place the leg straps beneath the user s thighs and cross them over each other. All four lifting straps are now ready to be attached and the lifting sling can now be mounted on the lifting hanger. It is an advantage to elevate the head of the bed so that the user is sitting up Swing kit A swing kit must not be used in conjunction with GH2 F Before the hoist can be used Battery connection Attach the four-pole plug in accordance with the enclosed instructions. The measures regarding ESD-safety are valid in this connection. See point Emergency stop device The emergency stop device must be reset to zero in order to connect power to the product. To do this, push the contact arm, to which the red emergency stop band is fastened, towards the product until it clicks Power supply GH2 F is equipped with batteries that require regular recharging. The charger supplied must always be used. Safety in connection with static electricity (ESD) Service technicians and installers must use an ESD-safety package consisting of a mat, a ground wire, and a bracelet. The technician/installer connects the mat to a grounding point, for instance a radiator or a water pipe. He must then put on the bracelet and connect it to the mat. If the technician is using a ladder, it is important that the mat is placed on the step on which he is standing. If it is not possible to find a grounding point, the mat and the bracelet must be used as a minimum. Only then is it allowed to work with the PC Board or components where it is possible to come into contact with the PC Board. 8
9 5.00 Description of functions The information panel on GH2 F seen from the floor Pictograms Charging indicator Emergency Emergency stop lowering Installation/ Lift/Lower Direction UP Direction DOWN Deinstallation (See point 6.00) (See point 6.00) (See point 6.00) (See point 6.00) Type B in accordance with EN Read instructions before use 9
10 5.02 Example of a serial number label see variants of GH2 F ceiling hoists under point Audio signals Short, consecutive audio signals GH2 F s installation function has been activated. Long, continuous audio signal The installation/deinstallation sequence has been interrupted or completed Indicator lamps The colours and functions for GH2 F are as described below. Green The green circle of lamps on the bottom of the hoist will blink if the batteries are running low the GH2 F will then have only a certain number of lifts/ installations/deinstallations left, and the batteries must be recharged. On: Blinking: Off: The hoist is active The batteries are running low and must be recharged The hoist is switched off Yellow When GH2 F is being recharged, the yellow charging indicator on its information face is illuminated. The indicator lamp flashes while the batteries are being recharged. On: The lamp will light up briefly when connected to the charger, irrespective of the state of the battery. This indicates that there is a correct connection between GH2 F and the charger. On/blinking: The hoist is being recharged Off: The hoist has been fully charged The lamp will also be off when the charger is not connected. 10
11 6.00 Operation Hand control The hand control for GH2 F is used to control the following functions: 1. Installing and deinstalling the lifting module 2. Lifting and lowering a person 3. GH2 F is charged with the help of the DC connection on the hand control, (point 9.0). 24V DC 11
12 6.01 Installation Preparation, installation Place the transport trolley containing GH2 F vertically beneath the travelling trolley in the rail system. Check that there are no obstacles of any kind between GH2 F and the travelling trolley. 1. Attach the travelling trolley s anchor with cord to the locking mechanism on the top of GH2 F (point 8.02) 2. Choose the function Installation with the help of the switch at the bottom of the hand control ( ) 3. Installation is begun by briefly activating the toggle switch on the hand control, direction UP 4. Installation has been completed when GH2 F is automatically locked in the travelling trolley( ) 5. Move the switch at the bottom of the hand control to position to complete installation We recommend steering/guiding GH2 F with the hanger so that it is free from the transport trolley during installation The GH2 F lifting module must not be allowed to swing from side to side during installation 6.02 Deinstallation Where applicable, remove the lifting sling from the lifting hanger. Place the transport trolley beneath the travelling trolley in the rail system. Check that there are no obstacles of any kind between GH2 F and the transport trolley. 12
13 1. Lift the strap with the hanger towards the end stop on GH2 F 2. Choose the function deinstallation with the help of the switch at the bottom of the hand control ( ) 3. Deinstallation is begun by briefly activating the toggle switch on the hand control, direction DOWN 4. Deinstallation has been completed when GH2 F is on the transport trolley and the movement of the cord has stopped ( ) 5. Release the travelling trolley s anchor with cord from the locking mechanism on the top of GH2 F (point 8.02) 6. Move the switch at the bottom of the hand control to position We recommend steering/guiding GH2 F with the hanger into position on the transport trolley during deinstallation. Please note All deinstallation must be begun by briefly moving GH2 F (1-2 seconds) in an upward direction. It is not possible to begin the installation and/or deinstallation sequence for GH2 F when the load on the lifting strap exceeds the standard weight of the lifting hanger, e.g. if a person is sitting in the lifting sling. For the same reason a bath chair, a bath stretcher, Horizontal Hoist BS, and the cross lifting hanger must be removed before installing/deinstalling GH2 F. The installation/deinstallation function will be switched off if the 24V DC plug on the charger is connected to the hand control (point 9.00). The installation/deinstallation function will be switched off if the emergency stop/emergency lowering function is activated (point 4.00/8.00). 13
14 6.03 Lock, Travelling trolley for GH2 F The locking mechanism/clutch on the travelling trolley is automatic and changes between a locked and an unlocked state. It changes states each time it is activated. Avoid unnecessary contact with the lock. Contact the Guldmann Service Team if it appears that the lock may be damaged Lifting and lowering 1. Check that the switch at the bottom of the hand control is placed in position 2. Lifting/lowering of a person is begun by activating the toggle switch, direction UP or direction DOWN Pressing a button on the hand control automatically switches on the GH2 F hoist. The GH2 F hoist will automatically switch off after approximately ten minutes when not in use. Note There must be a load on GH2 F corresponding to the weight of a Guldmann lifting hanger before the lowering function will work. The lifting/lowering function will be switched off if the 24V DC plug of the charger is connected to the hand control (point 9.00). The lifting/lowering function will be switched off if the emergency stop/emergency lowering system is activated (point 4.00/8.00) Transport/running in the rail system The carer must push GH2 F manually in the rail system. Note GH2 F must not be exposed to cold or heat shock, so a cold lifting module should never be taken into a warm bathroom or similar. 14
15 8.00 Safety functions WARNING! The emergency stop and emergency lowering functions should be used only in an emergency. If, contrary to expectation, it becomes necessary to use the emergency functions, the fault must be located and remedied before using GH2 F again. Please contact your supplier. EMC If electromagnetic or other influences occur between this product and other products, these products must not be used together. The function of the emergency strap If GH2 F fails to stop/respond to the hand control when it is in use, pull the red strap lightly to deactivate all functions except the emergency lowering function. GH2 F will not function when the emergency stop has been activated. Pulling the red strap will activate the following functions: 1st pull: Emergency stop 2nd pull: Emergency lowering (requires a constant, light pull). Emergency stop If GH2 F fails to stop/respond to the hand control when it is in use, pull the red strap lightly to deactivate all functions except the emergency lowering function. GH2 F will not function when the emergency stop has been activated. The emergency stop s contact arm must be pushed in manually before GH2 F is ready for use again. After deactivation of the emergency stop, press the UP or DOWN toggle switch on the hand control twice. the first time to reset the PC Board (only lifting/lowering functions), the second time to activate the required function. Emergency lowering If GH2 F breaks down, the electrical emergency lowering device can be used to lower the user safely. The emergency lowering device is operated by a constant pull on the red strap which is also used to activate the emergency stop. If the red strap is not pulled continuously, the emergency lowering function will be replaced by an emergency stop. It will therefore not be possible to activate GH2 F in any other way. 15
16 8.01 Safety functions, installation/deinstallation Installation/deinstallation The installation/deinstallation sequence can be interrupted with the hand control at any time: 1. Press (again) UP to interrupt the installation/deinstallation sequence 2. Press (again) DOWN to interrupt the installation/deinstallation sequence 3. Move the switch at the bottom of the hand control back to position to interrupt the installation/deinstallation sequence The installation sequence will be automatically interrupted if GH2 F meets an obstacle/resistance ( 5-10 kg) while being moved to the travelling trolley in the rail system, for instance when blocked by a foreign body during installation. If this happens, GH2 F will stop briefly and then move freely in the direction of the travelling trolley. Resuming installation/deinstallation When the obstacle has been removed, the installation or deinstallation sequence can be resumed, cf. point 6.01, installation, step 3. Note The installation/deinstallation sequence can also be interrupted with the help of the emergency stop/emergency lowering function, or if the 24V DC plug on the charger is connected to the hand control (point 9.0). Activation of the emergency stop results in an interruption of the installation/ deinstallation sequence Activation of the emergency lowering results in an interruption of the installation/deinstallation sequence Connection of the 24V DC plug of the charger results in an interruption of the installation/deinstallation sequence 16
17 8.02 Installation lock It is a condition for carrying out installation and deinstallation that the anchor is attached to GH2 F. The anchor is attached/released with the help of the push button on the top of GH2 F (1). Important/precaution The installation lock may only be operated/released when GH2 F has been deinstalled and placed on a firm surface, e.g. the transport trolley for GH2 F. The deinstallation sequence must have been completed before the installation lock is released. This means that the movement of the cord must have stopped and the installation motor must be inactive. Attachment to the installation lock Push in the button (1) Attach the anchor with the cord from the travelling trolley Release the button and check that it returns fully to its original position 1 2 Releasing the installation lock Wait for deinstallation to end and until GH2 F has been placed on a firm surface, such as the transport trolley for GH2 F Push in the button (1) Release the anchor with cord from GH2 F Place the anchor with cord at a suitable height beneath the travelling trolley. Installation protection There is a sensor/switch on top of GH2 F, which has a safety function (2). The hand control will be switched off when the sensor/switch is activated. Avoid unnecessary contact with the sensor. Contact the Guldmann Service Team if it appears that the sensor has been damaged. 17
18 8.03 Explanation of labels Type B In accordance with EN Warning Before use, cleaning, and service, read the user s instructions and technical documentation. Description of strap safety device, lifting/lowering function Overloading the hoist, pulling the strap crookedly, or if the strap is twisted, the strap safety device will be activated, and GH2 F will be deactivated. If the yellow mark on the strap is visible, do not lift with maximum load Charging/connection Recharge the GH2 F hoist with the accompanying charging unit. Recharge GH2 F every night, or when not in use. This is the best way to maintain the batteries and ensure as long a lifetime as possible. A pre-installed male plug on the connection side, appropriate for the mains system in the country in question, will protect the charger against incorrect use. Connect the spiral wire to the hand control in the place indicated by the 24V DC label (1). The colour and function of the charger are as described below: Green On: Ready/standby Orange On: Recharging 1 Storing the charger The charger should be stored on the transport trolley for GH2 F (point 10.01). Note Recharging will be stopped automatically when activating the emergency stop/emergency lowering system. Hand control switches will be switched off when connecting the charger DC plug. Recharging should never be carried out in a damp room/bathroom. GH2 F cannot be recharged via the rail system. 18
19 10.00 Accessories Transport trolley for GH2 F The transport trolley is used to transport and store GH2 F with lifting accessories. There is a specially sewn bag at the bottom of the transport trolley to store lifting slings, the GH2 F charger, and the manual. The bag can hold up to three lifting slings, depending on the type in question. Attach the charger with self-adhesive Velcro to the rear, upper inside of the bag. Keep the wires of the charger in the pockets placed immediately below the suspension point of the charger. The X lifting hanger can be hung from the hooks at the front of the transport trolley. Remove the lifting strap from the X lifting hanger before installation/deinstallation. The bag can be removed and washed if it is dirty. Follow the washing instructions on the bag. If necessary, contact your supplier to order a new bag if the old one is worn or damaged. Note We recommend lifting the lifting strap/lifting hanger towards the end stop on GH2 F before placing it on the transport trolley. This will protect the lifting strap against unnecessary wear during transport and while stored on the transport trolley Lifting accessories, rail components, and infra-red remote control Guldmann ABC lifting sling and lifting hangers Order a special brochure from the distributor, manufacturer, or at Extension strap Use an extension strap where the distance between the lower edge of the rail system and the floor exceeds 3150 mm (124 inches). If the distance is 3500 mm (138 inches), for example, a 500 mm (20 inches) extension strap is available at your local supplier s. Switch tracks, manual and electrical Switch tracks are used to change the direction of travel in rail systems. Manual switch tracks are activated by pulling the cord attached to them. The direction of travel will change and GH2 F will move to the side from which the cord was pulled. Electrical switch tracks are activated by pressing the switch suspended from them. (See point 7.0). 19
20 Safety The product is mechanically protected against derailment and jamming. Turntable The turntable is used in rail systems where the hoist needs to run in several directions. GH2 F is powered into the centre of the turntable. By pressing the switch, the turntable rotates 90. Press again, and the turntable returns to its first position. Safety The product is mechanically protected against derailment and jamming. Combi-locks, manual and electrical The combi-lock is used when a single-track rail system is linked up to a room-covering rail system, or when tow room-covering rail systems need linking. The combi-lock ensures that the two systems are locked together in situations such as transfer from a single-track rail system in a bedroom to a room-covering system in a bathroom. The combi-lock is available in manual or electrical models and activated either by pressing the switch or by pulling the cord. Safety The product is mechanically protected against derailment and jamming. Infra-red remote control Switch tracks, turntables, and combi-locks can be supplied with a receiver for IR remote control. 20
21 11.00 Transport Guldmann recommends that GH2 F is always transported and stored in its original packaging. Explanation of the symbols on GH2 F packaging C F 30 70% hPa GH2 F should be stored at temperatures between -10 and +40 Celsius/14 to 104 degrees F. GH2 F should be stored at a relative humidity between 30 and 70%. GH2 F should be stored at an atmospheric pressure between 700 and 1060 hpa Maintenance and storage Cleaning Clean the GH2 F hoist with a damp cloth and standard household detergent. Never clean GH2 F with strong acid, base or alcohol. Never clean GH2 F in an autoclave. Storage The GH2 F hoist should be stored in a dry room with a maximum humidity of 70%. The hoist should be stored with the emergency stop activated to consumption of battery power. For long-term storage, remove the four-pole plug with white, black, red, and yellow connection leads. The measures regarding ESD-safety are valid in this connection. See point How to prevent and avoid corrosion If GH2 F is mainly to be used in corrosive surroundings, such as swimming pools, it should be ordered with special corrosion-preventive surface treatment. It is an advantage to remove GH2 F from the travelling trolley and rail system when not in use and, if possible, to remove it from the corrosive surroundings. Daily maintenance Check the lifting sling and lifting straps for wear and damage before using the hoist. Do not use the lifting sling if it is damaged or defective. Do not use GH2 F if the lifting straps are damaged or defective. Check the cord on the travelling trolley for wear and damage before each installation of GH2 F. Do not use GH2 F if the cord on the travelling trolley is damaged, defective, or shows clear signs of wear. Contact your supplier to order a new sling, a replacement for the lifting strap, and/or a replacement cord for the travelling trolley. 21
22 Lifting straps and cords for the travelling trolley must be replaced by the Guldmann Service Team or by a qualified service fitter in accordance with Guldmann s instructions. Disposal of GH2 F, including batteries Local and national regulations for environmentally responsible recycling must be observed. Batteries should always be taken to approved recycling points Service and lifetime Lifetime GH2 F has an expected lifetime of ten years provided that the service inspections mentioned under point are observed. Replacing components Batteries, printed circuit boards, lifting straps, and the locking and winding mechanism on the travelling trolley must be replaced by the Guldmann Service Team or by a qualified service fitter in accordance with Guldmann s instructions Service inspection According to the international standard EN/ISO Hoist for the transfer of disabled persons - Requirements and test methods a safety inspection of the GH2 F must be performed at least one a year. GH2 F and the Travelling trolley for GH2 F must be inspected by a qualified service fitter or by the Guldmann Service Team. Guldmann offers a service agreement for GH2 F in connection with these inspections. The service inspection includes a written report specifying what has been inspected and replaced. Worn or defective components must be replaced by new components from Guldmann. Spare parts drawings and lists can be ordered from the manufacturer or distributor Service inspection, GH2 F 1. Visual control of the hoist Check for wear, irregularities, or other types of damage to the hoist. 2. Testing the product as in normal use Check all hoist functions with and without loads Check that the emergency stop functions Check that the emergency lowering device functions Check that the green indicator lamps light up when the hoist is activated Check that the yellow charging indicator lights up when the hoist is being recharged Check that the functions of the hand control are switched off when the sensor on top of GH2 F is activated 22
23 3. Remove cover/screen 4. Checking the electrical state of the hoist Check batteries for: Input/voltage Output/voltage Check electrical functions and signals Check the wiring circuits for faults or defects Check the cable lead-ins Check the power supply, plugs, etc. 5. Checking the mechanical state of the hoist Clean to remove dirt and other impurities Inspect and evaluate the condition of vital parts Replace defective and worn parts Check and tighten all moving parts Lubricate the product Apply silicone oil to the surface of the product if necessary 6. Replace cover/screen 7. Go through the checkpoints under item 2 again to make sure that. everything functions 8. Have new problems arisen or been found under item 7? If new problems have arisen, return to item 3 If there are no new problems, the inspection has been completed 9. When a service inspection including service work or exchange of components has taken place, the final check should comprise a weight test with the product s nominal load Service inspection, travelling trolley for GH2 F Deinstall GH2 F and put it on the transport trolley before service inspections of the Travelling trolley for GH2 F are carried out. 1. Visual control of the trolley Check for wear, irregularities, or other types of damage to the hoist 2. Remove cover/screen Clean the trolley to remove dirt and other impurities Inspect and evaluate vital parts Every second year or after 2000 installations: Dismantle the complete locking and winding mechanism Install new, complete Quick lock (spare part) 3. Replace cover/screen 4. Adjust the length of the cord in relation to the height of the rail 23
24 5. Carry out installation and deinstallation of GH2 F Check all product functions 6. Have new problems arisen or been found under item 5? If new problems have arisen, return to item 2 If there are no new problems, the service inspection has been completed 7. When a service inspection including service work or exchange of components has taken place, the final check should comprise a weight test with the product s nominal load Trouble-shooting GH2 F lifting/lowering functions fail to respond when the hand control s up/ down keys are pressed. Check that the emergency stop/emergency lowering device have not been activated Check that power is supplied to the hoist Check that the charger is not connected to the hand control Is the product installed in the travelling trolley/rail system? If NO Contact the Guldmann Service Team The hand control may be defective If YES Contact the Guldmann Service Team GH2 F may have been incorrectly installed The green lamp on GH2 F blinks after it has been connected to. the charger 1. Check that the yellow charging indicator lights up when GH2 F is connected to the charger 2. Check that the charger is correctly connected to the hand control 3. Check that the power supply is switched on 4. Contact the Guldmann Service Team FAQ s Can GH2 F be installed/deinstalled while a person is sitting in the lifting sling? No GH2 F measures the load on the lifting strap before installation/ deinstallation. If the load exceeds the weight of the lifting hanger, the sequence for installation/deinstallation cannot be activated. Find more FAQ s at 24
25 14.00 Technical specifications A 595 mm / 23.5 B 300 mm / 11.5 C 222 mm / 8.5 D 320 mm / 12.5 E, min. 82 mm / 3.5 F, min. 530 mm / 20.5 G 1850 mm / 73 Depth of hoist 197 mm / 7.5 A B C G D F E GH2 F Lifting capacity, max kg / 440 lbs. Max. number of lifts in a series at 85 kg/1000 mm / 72 at 187 lbs./39 36 at 200 kg/1000 mm / 36 at 440 lbs./39 Lifting speed: 85 kg / 187 lbs. load mm/min / 66 /min 200 kg / 440 lbs. load mm/min / 47 /min max. 5 kg / 11 lbs. load mm/min. / 130 /min (Dual speed) GH2 F HD Lifting capacity, max kg550 lbs. Max. number of lifts in a series at 85 kg/1000 mm / 72 at 187 lbs./39 28 at 250 kg/1000 mm / 28 at 550 lbs./39 Lifting speed: 85 kg / 187 lbs. load mm/min / 66 /min 250 kg / 550 lbs. load mm/min / 40 /min max. 5 kg / 11 lbs. load mm/min. / 130 /min (Dual speed) GH2 F/GH2 F HD Weight: Lifting module kg / 21.5 lbs. Lifting module including travelling trolley kg / 24 lbs. Lifting hanger min. 2.0 kg / 4.5 lbs. Sound level in accordance with 3746: Lifting motor db(a) Imperviousness protection: Lifting module, travelling trolley, and hand control IP20 Positive action switch, lifting module IP67 Microswitch in hand control IP67 25
26 Electrical specifications Power supply V DC Output charger VA Voltage supply, charger V Power consumption A at full load Max. power absorption VA Charging time hours (max. 8 hours) Lead acid batteries, sealed, maintenance-free x 12 V Rechargeable batteries order number Safety functions Safety cut off for strap approx. 45 longitudinally approx. 10 transversely Battery protection at too low voltage Switches off when voltage goes below 17 V Periodic load, lifting motor (operation/pause)... Dynamic supervision (15/85) Travelling trolley for GH2 F/GH2 F HD B A 98 mm / 3.5 B 166 mm / 6.5 C*, max mm / 110 D, min. 650 mm / 25.5 D, max. 750 mm / 29.5 Depth of travelling trolley 84 mm / 3 *Cord length C adapted to height of rail during installation A C D Max. load kg / 550 lbs. Floor Weight: Travelling trolley (with the exclusion of lifting modules GH2 F/GH2 F HD) kg / 2.5 lbs. Transport trolley for GH2 F/GH2 F HD B A 1005 mm / 39.5 B 735 mm / 29 Depth of transport trolley 485 mm / 19 Capacity, bag slings Weight: Trolley including bag kg / 23 lbs. 26 A
27 15.00 EC declaration of conformity EC-DECLARATION OF CONFORMITY Manufacturer V. Guldmann A/S Graham Bells Vej 21-23A DK-8200 Aarhus N EAN country code: 57 EAN distribution No.: Phone Fax Representative Company Address Country Phone Hereby declare that Product GH2 F & GH2 F HD incl. lifting hanger, suspension and charging system Type No. XXXXXX-YYYY-ZZZZ x) x) XXXXXX: Reference No. of the product, YYYY: Serial No. of the product in the production year, ZZZZ: Production year was manufactured in conformity with the provisions in: EN 10535: Hoists for the transfer of disabled persons - requirements and test methods EN :1990 Medical electrical equipment - + A1: 1993 Part 1-1: General requirements for safety + A2: A12: 1993 EN : Medical electrical equipment - Part 1: General requirements for safety - 2: Collateral standard: Electromagnetic compatibility according to the Council Directive 93/42/EEC of 14 June 1993 Place and day of issue Product responsible 27 Skejby Technical Manager

28
US... GH2 F Ceiling Hoists. Vers. 1.01
 US....... GH2 F Ceiling Hoists Vers. 1.01 GH2 F Ceiling Hoists Hoist numbers: 12xxxx - xxxx 1.00......... Purpose and use............................................. 4 1.01......... Manufacturer..................................................
Purpose and use Manufacturer... 3
 GH2 Ceiling Hoists Hoist numbers: 120001 xxxx 1.00......... Purpose and use.............................................. 3 1.01........ Manufacturer.................................................. 3
GB/US... GH2 Ceiling Hoists
 GB/US.... GH2 Ceiling Hoists GH2 Ceiling Hoists Hoist numbers: 120001 - xxxx 1.00......... Purpose and use.............................................. 3 1.01........ Manufacturer..................................................
GB/US... GH1 F Ceiling Hoist. Vers. 3.00
 GB/US.... GH1 F Ceiling Hoist Vers. 3.00 GH1 F Ceiling Hoist Hoist numbers: 554192-175 kg 554125-205 kg 554126-255 kg 1.00......... Purpose and use.............................................. 4 1.01.........
GB... Guldmann mobile lifter
 GB....... Guldmann mobile lifter Guldmann mobile lifter Item nos: 11220-xxx 11230-xxx 11240-xxx 1.00......... Purpose and Use.............................................. 3 1.01......... Manufacturer..................................................
GB/US...GH1 Ceiling Hoist. Vers. 3.00
 GB/US...GH1 Ceiling Hoist Vers. 3.00 1 GH1 Ceiling Hoist Item no. 552xxx 1.00...Purpose and use...3 1.01...Manufacturer...3 1.02...Purpose...3 1.03...Important/Precautions...3 1.04...Load limits on GH1
GB/US... GH3/GH3+ Ceiling Hoist. Vers. 2.00
 GB/US GH3/GH3+ Ceiling Hoist Vers 200 GH3 Lifting modules, version type nomenclature Guldmann hoist type Product line Load in kg Number of lifting straps Number of lifting motors Number of horizontal
GB/US... LP11 lifting platform. Vers. 6.00
 GB/US... LP11 lifting platform Vers. 6.00 LP11 Item no.: 13011 1.00.... Purpose and use.... 3 1.01...Manufacturer...3 1.02...Purpose and use...3 1.03...Important/warnings...3 1.04...Unpacking and preparation...3
GB/US...GH1/GH1 Q Ceiling Hoist. Vers
 GB/US...GH1/GH1 Q Ceiling Hoist Vers. 10.00 1 GH1/GH1 Q Ceiling Hoist 1.00...Purpose and use...3 1.01...Manufacturer...3 1.02...Purpose...3 1.03...Important/Precautions...3 1.04...Load limits on GH1 system...4
GB/US... GL5 mobile lifter. User manual - vers. 1.00
 GB/US... GL5 mobile lifter User manual - vers. 1.00 GL5 mobile lifter Item nos: 5550xx 1.00.... Manufacturer... 3 2.00.... Intended use.... 3 2.01...Where to use GL5...3 2.02...Warning...4 2.03...Important...4
GB... GH drive motor for traverse rail, hybrid. Appendix to GH3 manual Item No Vers. 1.00
 GB....... GH drive motor for traverse rail, hybrid Appendix to GH3 manual Item No. 550216 Vers. 1.00 GB GH drive motor for traverse rail, hybrid Item no. 552674 GH drive motor for traverse rail, hybrid
Pallas/150. Stand-aid lifter. User instruction. Important - information. This user instruction must be read before the Pallas 150 is used.
 Pallas/150 Stand-aid lifter User instruction Important - information This user instruction must be read before the Pallas 150 is used. This user instruction is intended for technicians, installers, therapists
All-in-One Hoist User Manual , , ,
 All-in-One Hoist User Manual 25-20010, 25-20020, 25-20030 25-20040, 25-20050 PDF 5946 Nov-2010 General about the hoist Index General about the hoist 3 Operation Operating instructions 4 Battery charging
GB/US... GLS5 Active lifter. User manual - vers. 4.00
 GB/US... GLS5 Active lifter User manual - vers. 4.00 GLS5 Active lifter Item nos: 556-xxx 1.00.... Manufacturer... 3 2.00.... Intended use.... 3 2.01...Where to use GLS5...3 3.00.... Definitions... 4 4.00....
Overhead lift Roomer 5200
 USER S MANUAL Overhead lift Roomer 5200 The Roomer 5200 offers you the unique ability to lift and move a patient from one room to another. The lift is equipped with two belts. When transferring from room
AQUATEC R / AQUATEC F / AQUATEC XL. Bathlift Operating instructions
 AQUATEC R / AQUATEC F / AQUATEC XL Bathlift Operating instructions 1 2 3 4 5 6 7 8 9 10 11 Contents 1 General instructions................. 3 1.1 Introduction......................... 3 1.2 Proper use.........................
GB/US... GL5 mobile lifter. User manual - vers. 5.00
 GB/US... GL5 mobile lifter User manual - vers. 5.00 GL5 mobile lifter Item nos: 5550xx 1.00.... Manufacturer... 3 2.00.... Intended use.... 3 2.01...Where to use GL5...3 2.02...Warning...4 2.03...Important...5
GB/US... GH3 Twin Ceiling Hoist. Vers. 7.00
 GB/US... GH3 Twin Ceiling Hoist Vers. 7.00 1 GH3 Lifting modules, version type nomenclature Guldmann hoist type Product line Load in kg Number of lifting straps Number of lifting motors Number of horizontal
GB/US... GH3/GH3+ Ceiling Hoist
 GB/US... GH3/GH3+ Ceiling Hoist Manual vers. 7.00 23W1 1 GH3 Lifting modules, version type nomenclature Guldmann hoist type Product line Load in kg Number of lifting straps Number of lifting motors Number
GB/US... Free-standing room-covering rail system, adjustable. User manual - vers. 1.00
 GB/US... Free-standing room-covering rail system, adjustable User manual - vers. 1.00 Free-standing room-covering rail system, adjustable Item no: 554729 557968 1.00.... Purpose and use.... 3 1.01...Manufacturer...3
Yesterday s challenge Today s solution. User Manual. innova.uk.com
 Yesterday s challenge Today s solution User Manual innova.uk.com Contents 2 www.innova.uk.com Contents Contents 1. Purpose & Use 1.1 Introduction 4 1.2 Who are Innova? 5 1.3 Unpacking & preparation 6 1.4
Liko M220 / Liko M230
 Liko M220 / Liko M230 Instruction Guide English 7EN150106-04 2012-03-06 Applies to the following models: Liko M220 Prod. no. 2050010 Liko M230 Prod. no. 2050015 Liko M230 Product Description Liko M220
Molift Mover 300. EN - User manual. BM06101 Rev. F
 Molift Mover 300 EN - User manual BM06101 Rev. F 2016-06-01 English Manual Content Molift Mover 300...2 Lifter components...2 About Molift Mover 300...2 General...3 Declaration of conformity...3 Conditions
Molift Quick Raiser 205
 Molift Quick Raiser 205 EN - User manual BM13001 Rev. C 2018-01-08 English Manual Content Molift Quick Raiser 205...2 Lifter components...2 About Molift Quick Raiser 205...2 General...3 Declaration of
Molift Mover 180. EN - User manual. BM08101 Rev. D
 Molift Mover 180 EN - User manual BM08101 Rev. D 2016-04-01 English manual Content Molift Mover 180...2 Lifter components...2 About Molift Mover 180...2 General...3 Declaration of conformity...3 Conditions
Turner PRO. User manual. BM61099 Rev B
 Turner PRO User manual BM6099 Rev B 06-09- Contents User manual - English - 4 Bruksanvisning - Svenska - 8 Brukermanual - Norsk - Brugsvejledning - Dansk - 6 Käyttöohje - Suomi - 0 Gebrauchsanweisung
Molift Partner 255. EN - User manual. BM03101 Rev. L
 Molift Partner 255 EN - User manual BM03101 Rev. L 2016-06-14 English Manual Content Molift Partner 255...2 Lifter components...2 About Molift Partner 255...2 General...3 Declaration of conformity...3
User Guide: OT200 Compact Ceiling Hoist
 User Guide: OT200 Compact Ceiling Hoist OpeMed (Europe) Ltd www.opemed.net +44 (0)1252 758858 January 2017 Ref 1120 OT200 Compact Ceiling Hoist User Manual Index Page 1 OT200 Compact Ceiling Hoist Manual
Yesterday s challenge Today s solution. User Manual. innova.uk.com
 Yesterday s challenge Today s solution User Manual innova.uk.com Contents 2 www.innova.uk.com Contents Contents 1. Purpose & Use 1.1 Introduction 4 1.2 About the manufacturer 5 1.3 Unpacking & preparation
Molift Mover 205. EN - User manual. BM05101 Rev. L
 Molift Mover 205 EN - User manual BM05101 Rev. L 2016-04-01 English Manual Content Molift Mover 205...2 Lifter components...2 About Molift Mover 205...2 General...3 Declaration of conformity...3 Conditions
Free Standing Track. Owner s Manual. Use and Care Trouble Shooting
 Free Standing Track Owner s Manual Use and Care Trouble Shooting VANCARE, INC. 1515 1ST STREET, AURORA, NE 68818 T (800) 694-4525 F (402) 694-3994 info@vancare.com www.vancare.com Table of Contents Free
GB/US... GLS5 Active lifter. User manual - vers. 8.00
 GB/US... GLS5 Active lifter User manual - vers. 8.00 GLS5 Active lifter Item nos: 556-xxx 1.00.... Manufacturer... 3 2.00.... Intended use.... 3 2.01...Where to use GLS5...3 3.00.... Definitions... 4 4.00....
INSTRUCTION MANUAL MAGNA RAIL
 R ENGLISH NR. 148293 00 INSTRUCTION MANUAL MAGNA RAIL 1999-05-01 List of contents Declaration of conformity, CE Delivery check Mounting instruction (rail, trolley units) Mounting instruction (exhaust pipe,
GB/US... LP7 & LP7+ Lifting platform. Vers. 1.00
 GB/US... LP7 & LP7+ Lifting platform Vers. 1.00 LP7 & LP7+ Item numbers: LP7: 5582-xx LP7+: 5583-xx 1.00... Purpose and use.... 3 1.01...Manufaturer...3 1.02...Purpose and use...3 1.03...Important/warnings...4
Owners Manual Unilift
 Owners Manual Unilift Contents Chapter Page Introduction 2 Safety Advise 3 Warranty 4 Using the Unilift 5 Fitting the Sling 6 Lifting and lowering 7 Emergency Controls 8 Battery and Charging Systems 9
GL5 GLS5. Floor Lifters
 GL5 GLS5 Floor Lifters GL5 mobile lifter The GL5 mobile lifters are the floorbased alternatives to the ceiling mounted lifting solutions offered in the Guldmann range of products. We have been listening
Lift-N-Glide Manual. Lifter Serial Number: Lift Mast Serial Number: Intermediate Member Serial No:
 Lift-N-Glide Lift-N-Glide Manual 1 Lifter Serial Number: Lift Mast Serial Number: Intermediate Member Serial No: 2 TABLE OF CONTENTS 1 Introduction... 3 2 Safety... 4 3 Warranty... 4 3.1 Warranty... 4
Instruction manual. RP800 - HYDRAULIC actuator, load 150Kg. RP815 - LINAK actuator, load 150Kg
 HYDRAULIC patient lift RP800 - HYDRAULIC actuator, load 150Kg MA RP800_805_806_ 807_810_811_815 02 A_12-2010 Electric patient lifts RP805 - LINAK actuator, load 150Kg RP806 - HIWIN actuator, load 150Kg
User s Instruction Manual Rise IIIS Hoisting Shower-, Commode- & Care Chair w. Tilting Seat
 User s Instruction Manual Rise IIIS Hoisting Shower-, Commode- & Care Chair w. Tilting Seat 12C10S, English September 2012 User s Instruction Manual Rise IIIS Hoisting Shower-, Commode- & Care Chair w.
Battery Charger. Series EASY Charger. User s manual
 Battery Charger Series EASY Charger User s manual 1 Warranty RIPEnergy is not manufacturer of these units. All technical information s, data s and dimensions rely on information s given by the manufacturer.
c-go 24V/6A 24V/8A 24V/12A
 c-go 24V/6A 24V/8A 24V/12A Battery charger GB Instruction manual 1 Index 1. Product description... 2 2. Safety advices... 3 3. Quick start guide... 4 4. Operation... 4 5. Problem solving... 6 6. Specifications...
Viking M / Viking L / Viking XL
 Viking M / Viking L / Viking XL Instruction Guide English 7EN137106 Rev. 3 Applies to the following models: Viking M Prod. No. 2040035 Viking L Prod. No. 2040034 Viking XL Prod. No. 2040033 (Viking M)
EZ Way Shower Trolleys
 EZ Way Shower Trolleys 2000/3000 Operator s Instructions EZ Way, Inc. PO Box 89 Clarinda, IA 51632 1-800-627-8940 www.ezlifts.com Form 2-207 Rev. 12/14/11 The EZ Way Shower trolley is unique with its side-mounted
GARDENA. N FIN P E I DK S NL F GB D
 GARDENA AccuCut 400 Li Art. 8840 D Betriebsanleitung Operating Instructions F Mode d emploi Coupe bordures NL Instructies voor gebruik S Bruksanvisning freeetrim DK Brugsanvisning freeetrim I Istruzioni
EASY CHARGE Waterproof portable Battery Charger
 EASY CHARGE Waterproof portable Battery Charger 1.1 AND 4.3 AMP MODELS EN NL, DE, FR, ES, IT USER S MANUAL WWW.MASTERVOLT.COM/EASYCHARGE-PORTABLE 10000009117/04 2 EN / EasyCharge 1.1 and 4.3 Amp - User
Battery Charger Series EASY Charger
 Battery Charger Series EASY Charger User s manual 1 Warranty RIPEnergy is not manufacturer of these units. All technical information s, data s and dimensions rely on information s given by the manufacturer.
RehabCare Avnvej 10 DK-7400 Herning
 RehabCare Avnvej 10 DK-7400 Herning www.rehab-care.dk 1. Contents Operating Manual for ErGo BaSi 1000-1500 1. Contents... 2 1. Introduction... 3 2. Unpacking... 3 3. General Safety Regulations... 4 4.
GB/US... LP1 Lifting platform. Vers. 6.00
 GB/US... LP1 Lifting platform Vers. 6.00 1 LP1 Lifting platform Item number: 13015-xxx 1.00.... Purpose and Use... 3 1.01...Manufacturer...3 1.02...Purpose and Use...3 1.03...Important/Warnings...4 1.04...Unpacking
Viking L. Product Description. Instruction Guide
 Viking L Instruction Guide English 7EN136102-02 2009-07-06 Applies to the following model: Viking L Prod. No. 2040004 Product Description Viking L is a mobile lift that has been specially developed for
TR 2000/3000. Operating manual. Shower Trolleys. Hygiene Equipment Designed for People
 Operating manual Always study this manual carefully before operating the Shower Trolley. Operating instructions and recommended maintenance procedures are explained in the following pages. Only qualified
LIFT-O-FLEX Series (19000, 19500) Manual
 Manual") LIFT-O-FLEX 19000 SERIES LIFT-O-FLEX 19000 Series (19000, 19500) Manual 1 Lifter Serial Number: Lift Mast Serial Number: Intermediate Member Serial No: Power Pack Serial No: 2 TABLE OF CONTENTS 1 Introduction...
LIFT-O-FLEX 19000 SERIES LIFT-O-FLEX 19000 Series (19000, 19500) Manual 1 Lifter Serial Number: Lift Mast Serial Number: Intermediate Member Serial No: Power Pack Serial No: 2 TABLE OF CONTENTS 1 Introduction...
Guldmann planning guide
 V. Guldmann A/S Graham Bells Vej 21-23A DK-8200 Aarhus N, Denmark Tel. +45 8741 3100 Fax +45 8741 3131 E-mail info@guldmann.com www.guldmann.com CBR No. 27 70 67 46 Guldmann planning guide Our intention
16 37 TM INTEGRATED RADIO CONTROL INSTRUCTION MANUAL
 16-37 TM IRC Instruction Manual (99903542) 16 37 TM INTEGRATED RADIO CONTROL INSTRUCTION MANUAL 01.01 2007 IOWA MOLD TOOLING CO., INC. GARNER, IA 50438 1. Introduction... 2 2. The Components of the IRC-System...
PE51 HURLEY 3 STATION METAL SWING SET OWNER'S MANUAL
 PE51 HURLEY 3 STATION METAL SWING SET OWNER'S MANUAL WARNING! The disassembled product may contain small parts which pose a choking hazard to children under 3. IMPORTANT: This product may contain sharp
Installing instruction Power-restraining FB33 March 2005
 Installing ROLTEC restraining system for vehicles, model FB33 for ROLTEC Vision electric wheelchair Table of contents General - - - - - - - - - - - - - - - - - - - - - - - - - - page 1 Included in the
Entering and exiting Footplate Assistance exiting the chair Resting... 6
 U S E R M A N U A L UK CONTENTS INTRODUCTION........................................................... 5 1.0. USER MANUAL... 5 1.1. BEFORE OPERATION... 5 1.1.1. Entering and exiting... 5 1.1.2. Footplate...
Armon Edero. User manual
 User manual Armon Edero Foreword.... 2 Symbols used 2 Intended use.... 2 About the Armon Edero... 2 Mounting options of the Edero 2 Braces. 3 How to set up the Armon Edero.. 3 How to attach the brace to
1.3. Unpacking the chair... 4
 u s e r m a n u a l contents 1.0. introduction...................................................... 3 1.1. safety.............................................................. 3 1.2. warranty..........................................................
Multirall 200. Product Description. Instruction Guide
 Multirall 200 Instruction Guide English 7EN125103 rev. 6 2013-11-22 Applies to the following model: Multirall 200 Prod. No. 3130001 Product Description Multirall 200 is a flexible overhead lift with a
PCBL 1610/ 1810 DE LUXE POWER WHEELCHAIR USER'S MANUAL Edition
 PCBL 1610/ 1810 DE LUXE POWER WHEELCHAIR USER'S MANUAL Edition 08.2010 mdh sp. z o.o. 90-349 Łódź, ul tymienieckiego 22/24 tel. (+48) 42 212 32 08 fax: (+48) 42 674 04 99 www.mdh.pl export@mdh.pl 1 TABLE
PCBL 1600/1800 POWER WHEELCHAIR MODERN USER'S MANUAL Edition
 PCBL 1600/1800 POWER WHEELCHAIR MODERN USER'S MANUAL Edition 09.2013 mdh sp. z o.o. 90-349 Łódź, ul. Tymienieckiego 22/24 tel. (+48) 42 212 32 08 fax: (+48) 42 674 04 99 www.mdh.pl viteacare@mdh.pl 1 TABLE
Visual inspection Inspect lift functions regularly. Check to ensure that material is free from damage.
 MiniLift200 Manual The MiniLift200 is an electrically powered stand-up lifter for people with impaired mobility and strength and who are unable to stand up unassisted. The MiniLift200 is designed for indoor
KeContact P20. User manual
 KeContact P20 User manual Comments to this manual In this manual you will find warnings against possible dangerous situations. The used symbols apply to the following meanings:!! WARNING! Indicates a potentially
User s Manual. Automatic Switch-Mode Battery Charger
 User s Manual Automatic Switch-Mode Battery Charger IMPORTANT Read, understand, and follow these safety rules and operating instructions before using this battery charger. Only authorized and trained service
OPERATOR SHAFT-120. Installation and Operating Manual CONTENTS GENERAL INFORMATION SAFETY INSTRUCTIONS OPERATOR UNIT OPERATOR INSTALLATION
 OPERATOR CONTENTS GENERAL INFORMATION SAFETY INSTRUCTIONS OPERATOR UNIT OPERATOR INSTALLATION ELECTRICAL CONNECTIONS ADJUSTMENT OF EXTREME POSITIONS OPERATOR PROGRAMMING RELEASE OPERATION MAINTENANCE TROUBLE
Ropox Shower & Changing Bed
 Ropox Shower & Changing Bed Pre-install / install guide General information Product information It is important to read this manual before mounting and daily use. Product : Ropox Shower & Changing Bed,
contents OPERATOR Maintenance SHAFT-120 Installation and Operating Manual DoorHan, 2012
 OPERATOR contents General Information Safety instructions Operator unit operator Installation Electrical Connections adjustment of extreme positions operator programming Release operation Maintenance Trouble
Likorall 242/243/250. Product Description. Instruction Guide. Likorall 243 ES. Likorall 243, 250. Likorall 242 R2R
 Likorall 242/243/250 Instruction Guide English 7EN120115-03 2011-06-30 Applies to the following models: Likorall 242 S Prod. no. 3122009-3122010 Likorall 242 ES Prod. no. 3122005-3122006 Likorall 242 S
Multirall 200. Prod. No
 English Instruction Guide 7EN125103-01 2007-05-11 Multirall 200 Prod. No. 3130001 Multirall is a versatile new type of overhead lift with many different applications. Multirall can easily be moved between
Smart Battery Charger
 BATTERY CHARGER Smart Battery Charger Model No. WSC-1215 (SB) WSC-1230 (SB) WSC-2408 WSC-2415 Manual Please read this manual carefully before installing and starting up this device. Figure 1 WSC-1215SB
There are three main types of Guldmann ceiling hoists to choose from:
 Ceiling hoist systems Your choice There are three main types of Guldmann ceiling hoists to choose from: Permanently installed systems GH3 or GH1 Identify the needs: How many lifts are needed each day?
PrioVino Premier. Translation of Original Operating Instructions. Status: August First edition January 2018 / PrioVino GmbH
 PrioVino Premier Translation of Original Operating Instructions Status: August 2018 First edition January 2018 / PrioVino GmbH Reprint even in extracts only upon written permission by PrioVino GmbH (ISO
DIGITAL BATTERY TORQUE WRENCH (BC-RAD SELECT) USER GUIDE
 USER GUIDE") DIGITAL BATTERY TORQUE WRENCH (BC-RAD SELECT) USER GUIDE W.CHRISTIE (INDUSTRIAL) LTD CHRISTIE HOUSE, MEADOWBANK ROAD, ROTHERHAM, SOUTH YORKSHIRE, S61 2NF, UK T: +44(0)1709 550088 F: +44(0)1709 550030 E:
DIGITAL BATTERY TORQUE WRENCH (BC-RAD SELECT) USER GUIDE W.CHRISTIE (INDUSTRIAL) LTD CHRISTIE HOUSE, MEADOWBANK ROAD, ROTHERHAM, SOUTH YORKSHIRE, S61 2NF, UK T: +44(0)1709 550088 F: +44(0)1709 550030 E:
Eva450EE. Functional inspection. Always read the manual. SystemRoMedic TM. Manual - English
 Eva450EE Manual - English 1 3 4 5 6 7 2 13 11 12 9 1. Boom 2. Mast 3. Handlebar 4. Battery pack 5. Emergency stop 6. Control box 7. Motor for base-width adjustment 8. Rear castors with brakes 9. SlingBar
Marlin Bath Lift BLM-8200 WARNING! Read ALL instructions before using this product!
 Marlin Bath Lift BLM-8200 www.inspiredbydrive.com WARNING! Read ALL instructions before using this product! PRODUCT DESCRIPTIONS Your Marlin Bath Lift has been built to the highest standards of quality
Sinewave Inverters. SWING 150VA and 300VA. User s manual
 Sinewave Inverters SWING 150VA and 300VA User s manual 1 Warranty RIPEnergy is not manufacturer of these units. All technical information s, data s and dimension s rely on information s given by the manufacturer.
The Guldmann approach
 Products Time to care Guldmann is the expert at providing safe, comfortable and efficient ways to lift, move and position people in a wide range of different environments. Our prime objective is to make
Operating instructions ErgoPack 600 E
 Operating instructions ErgoPack 600 E Operation of the device is only permitted if the operating instructions have been carefully read and understood before use! Declaration of conformity EU declaration
adopts a holistic approach to patient transfers and is organized in four categories: transfer, positioning, support and lifting.
 Manual - English 1 3 4 5 6 7 2 13 11 12 9 1. Boom 2. Mast 3. Handlebar 4. Battery pack 5. Emergency stop 6. Control box 7. Motor for base-width adjustment 8. Rear castors with brakes 9. SlingBar with safety
Kidwalk Seating System User Instructions
 Kidwalk Seating System User Instructions The Kidwalk has been designed as a posturally supportive mobility system that moves with the child giving them the freedom to move and walk while keeping their
INSTRUCTIONS AND WARRANTY FOR THE STAND AID MODEL 1501 STAND AID SERIAL #
 MAKERS OF STAND AID, PTA, FREEDOM CHAIR STAND AID MODEL 1501 PO BOX 386 Sheldon, IA 51201 1-800-831-8580 1-712-324-2153 (In Iowa) Fax: 712-324-5210 www.stand-aid.com INSTRUCTIONS AND WARRANTY FOR THE STAND
Smart 110 with built-in flashlight for 6 240Ah lead-acid batteries
 USER GUIDE Battery Charger Smart 110 with built-in flashlight for 6 240Ah lead-acid batteries Please read this user guide carefully before using the charger Use protective eyewear when handling batteries
SERVICE MANUAL
 SERVICE MANUAL 2017-02 DECLARATION OF CONFORMITY The manufacturer Neatech.it Via A. de Curtis 4/A, 80040, Cercola (NA), Italy declares that the cushion Peezy (reference code: S211) satisfies the requirements
Multi-Mover Charger for model L25
 Multi-Mover Charger for model L25 Important safety instruction. Keep these instructions. This manual contains important instructions for the safety of the user and the operation of the device. 1. SYMBOLS
SGA-440 by Prism Medical
 SGA-440 by Prism Medical Introduction... 2 Overview... 2 Components of the Sit to Stand Lift... 3 Component List... 4 Specifications... 5 Cautions... 6 Assembly Instruction... 7 Operation Charging......12
FORWARD-FACING USER MANUAL ECE R GROUP WEIGHT AGE kg 9m-4y
 FORWARD-FACING USER MANUAL ECE R44 04 GROUP WEIGHT AGE 1 9-18 kg 9m-4y 1 ! Thank you for choosing BeSafe izi Comfort. BeSafe has developed this seat with much care, to protect your child during the next
INSTRUCTION MANUAL. Pacific Self-locking Beam Trolleys Pacific Adjustable Angle Clamps Pacific Top Girder Clamps
 INSTRUCTION MANUAL Pacific Self-locking Beam Trolleys Pacific Adjustable Angle Clamps Pacific Top Girder Clamps IMPORTANT Please read this instruction manual before using these products. This manual contains
Contents. Important Read the manual carefully before using the cycle and save it for future use MONARK EXERCISE AB, Vansbro, Sweden
 Manual 881 E Contents Monark Exercise AB... 4 Product Information... 5 Facts... 5 Serial number... 5 Operating Instruction... 6 Workload device... 6 Computer specifications... 7 Calibration... 8 Troubleshooting
ASSIST & TRANSIT. osd USER MANUAL TABLE OF CONTENTS
 osd ASSIST & TRANSIT USER MANUAL TABLE OF CONTENTS 1. Key Specifications 2. List of Components 3. Assembly & Use 4. Troubleshooting 5. Care & Maintenance 6. Warnings 7. Warranty 8. Compliance. Service
EASY CHARGE Weather-resistant fixed mount Battery Charger
 EASY CHARGE Weather-resistant fixed mount Battery Charger 6 AMP AND 10 AMP MODELS EN NL, DE, FR, ES, IT USER S MANUAL WWW.MASTERVOLT.COM/EASYCHARGE 10000009118/01 2 EN / EasyCharge 6 and 10 Amp - User
Graduate 150 Scholar 175 Master 200
 Instruction Manual for Graduate 150 Scholar 175 Master 200 Contents Unihoist Ltd Electric and Hydraulic illustrations..... 2-3 Introduction.. 4 Assembly and commissioning instructions... 5-6 Safety precautions....
1-50 KVA SINGLE-PHASE SERVO REGULATOR INSTRUCTIONS FOR USE SERVO SINGLE-PHASE VOLTAGE REGULATOR
 1-50 KVA SINGLE-PHASE SERVO REGULATOR INSTRUCTIONS FOR USE SERVO SINGLE-PHASE VOLTAGE REGULATOR I Important Notice! Thank you for preferring us. Your product has been designed to protect your sensitive
Operating instructions 1 4 Mode d emploi 5 8 Instrucciones de uso 9 13 Manual de instruções 15 18
 *336376* 336376 SFC 7/18 USA CDN E P Operating instructions 1 4 Mode d emploi 5 8 Instrucciones de uso 9 13 Manual de instruções 15 18 R 1 2 UL Listed to U.S. and Canadian safety standards C US LISTED
AquaLift Bath Lift System MODEL #8100
 AquaLift Bath Lift System MODEL #8100 Thank you for Choosing Columbia! Your AquaLift Bath Lift has been built to the highest standards of quality to ensure years of superior service. Please take the time
USER MANUAL. Automatic Lifting Magnet LI V1.2. Ixtur Oy, Varespellontie 6, FI-21500, KAARINA, FINLAND
 USER MANUAL Automatic Lifting Magnet LI-120 2014 V1.2 Ixtur Oy, Varespellontie 6, FI-21500, KAARINA, FINLAND www.ixtur.com e n g l i s h 1 Table Of Contents Introduction - Safety Guidelines and Warnings
Maxi Sky 600, Maxi Sky 600 ECS. Instructions for Use
 Maxi Sky 600, Maxi Sky 600 ECS Instructions for Use 001.14150.33.EN rev. 8 April 2011 BHM Medical Inc. 2010 ArjoHuntleigh products are patented or patent pending. Patent information is available by contacting
OPERATOR. Molift Mover 180. Etac AS Etac Supply Gjøvik Hadelandveien 2 N Gjøvik
 OPERATOR manual Molift Mover 180 Etac AS Etac Supply Gjøvik Hadelandveien 2 N - 2816 Gjøvik BM08101 Molift MOVER 180 English - Rev B 05-2013 Innhold About Molift Mover 180...3 Declaration of conformity...
Instructions for use Shower stretcher Marina
 Instructions for use Shower stretcher Marina Important: Read these instructions carefully before using the Marina! Date of first use User Name Address Manufactured by: Lopital Nederland B.V. Laarakkerweg
Vacuum Circuit-Breakers, Type HVX kv, of cassette design, cassette with motor drive
 Vacuum Circuit-Breakers, Type HVX 12 24 kv, of cassette design, cassette with motor drive Operating Instructions No. 531 321, Edition 09/00 Table of Contents 1 General 4 1.1 Operating Conditions 4 2 Design,
ELECTRIC LIFTING HOIST
 ELECTRIC LIFTING HOIST COMPLIES TO AS 1418 STANDARDS KP1201 125/250KG KP1202 400/800KG ED 2 / JULY / 15 TYPE 2 1 Table of Contents 1 Know Your Product...2 Electric Lifting Hoist Safety Instructions...3