C5 Corvette M/T Differential Strut Installation Instructions
|
|
|
- Basil Whitehead
- 5 years ago
- Views:
Transcription


1 1 P a g e 6930B Derek Dr. Fort Wayne, IN Phone: Fax: C5 Corvette M/T Differential Strut Installation Instructions Application: C5 Corvette with M/T using a 2 or 3 rib case with any gear ratio and 2.5 or 3 exhaust. Thank you for purchasing the HPE Differential Strut for the C5 Corvette! This product was successfully engineered by HPE to solve the problem of differential case fracture and/or transmission output shaft housing breakage caused by inherent driveline stresses present during high performance street driving, road racing, or drag racing. This kit increases the strength of that vulnerable attachment point of the transmission-to-differential to reduce the likelihood of fracture in that area causing complete trans/diff failure. The entire kit only weighs approx. 21 lbs. (about 3.5 gallons of gas) and is engineered to spread the stress loading during hard acceleration over a greater area of the driveline architecture. Kit Design Features: This design counteracts the natural upward "wrap-up" action of the IRS driveline during hard acceleration by tying the transmission and differential together via adjustable strut rods. These steel strut rods provide a pre-load against this destructive wrap-up action that causes differential case fracture at the trans/diff mounting flange. I n some severe cases, this fracture can also destroy the transmission output shaft. The installation of this product provides added rigidity to the entire Corvette drivetrain as a whole, while the steel perimeter brackets mounted to the transmission and differential cases act as case "girdles that provide additional strength in those areas. These steel "girdle" brackets spread the driveline shock loads over a greater surface area; therefore decreasing differential mounting flange cracks, decreasing case distortion, and increasing driveline durability. The differential bracket cross-strut rod counteracts any possible deflection between them by tying them together side-to-side. Each one of the four strut rods are secured to the trans/diff brackets via heavy duty heim joints at both ends, where each rod is independently adjustable to set a pre-load of the entire assembly at all 4 corners. Kit Packing List 3-piece differential girdle bracket set 2-piece Trans bell housing bracket set 4-piece main strut rod set 4-piece right hand thread heim joint set with lock nuts 4-piece left hand thread heim joint set with lock nuts 1-piece cross-strut rod Trans bracket mounting bolts/&washers Differential bracket mounting bolts/washers Cross strut rod bolts/washers 2 aluminum heim joint spacers Detailed installation instructions
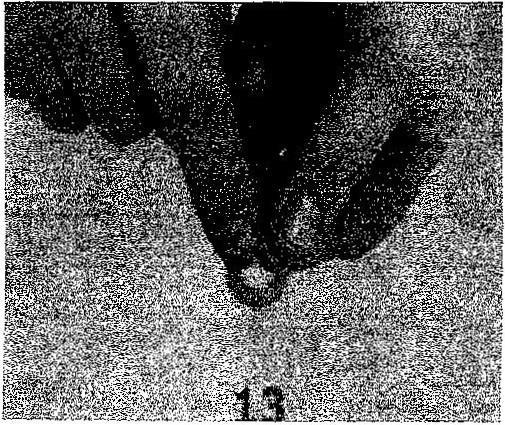
2 2 P a g e BEFORE YOU BEGIN- Please follow these Instructions closely when installing this product and if you have any questions at all during the install, please call HPE to speak with someone who can answer the question for you. Also, be sure to support the vehicle evenly and safely with heavy-duty jack stands or a commercial vehicle lift before attempting this modification. If you do not feel you are mechanically inclined enough to perform, this Installation, please consult your local GM Service Technician or a trusted independent technician that's qualified to do the job. Finally, make sure the vehicle s battery is completely disconnected before attempting to install this product. Installation time is 4-5 hours on average. Vehicle Disassembly/Preparation: 1. Locate the rear transverse mounted mono-leaf spring that's located in the rear sub-frame area. (Fig. 1) 2. Locate the rear ride height adjustment nuts on each end of each spring and count how many threads are showing at its current adjustment. Write this information down, as you will need it for re-installation later. (Fig.2) 3. Release the spring tension slowly by using a support jack under one side of the spring at a time, loosening and removing the adjustment nut until the thru bolt can be completely removed. Gently and slowly lower the jack until all of the tension has been completely removed from the spring end until it's relaxed. Do the same procedure for both sides. (Fig. 3) 4. Remove the two upper and two lower anti-sway bar mounting strap fasteners on each side of the sub-frame and lower the anti-sway bar out of your way for now by swinging it down. (Fig. 4) 5. Remove the bolts that secure the over-axle pipes to the main center section of the exhaust system. (Fig. 5) 6. Remove the muffler assy. from each side of the vehicle completely to allow for maximum clearance when installing the differential strut. (Fig. 6) 7. Locate the four rear sub-frame mounting nuts that secure the sub-frame to the vehicle chassis and loosen all four of them until 1 thread is showing on the end of the stud. This step will drop the rear sub-frame down approx. one inch to allow for maximum clearance when installing the differential strut. (Fig. 7 & 8) *The vehicle ready for the differential strut installation. Transmission Bracket Installation on Transmission/Torque Tube Flange: *These installation procedures were completed on a sample transmission/differential assembly located outside of vehicle to better illustrate fitment procedures and to provide concise photos. 1. Locate passenger side of transmission mounting flange where it attaches to the torque tube and remove the four O.E. bolts. You will discard these O.E. fasteners. (Fig. 9) 2. Remove the main wiring harness retaining clip from the stud on the upper mounting bolt and drill the original mounting hole out to 3/8" for re-installation with new differential strut bracket bolt. (Fig. 10) 3. Locate 24 large washers that are supplied in the kit and separate them into 8 stacks of 3 each. These will be used as spacers between the differential strut transmission bracket and the O.E. transmission flange. (Fig. 11) 4. Using an adhesive of your choice, secure the 3-washer pack together as shown: (Fig. 12 & 13) 5. Set them aside to dry for installation later. (Fig. 14) 6. Place 1 washer on the transmission bracket mounting bolt, pass it though the bracket, then through the washer pack and finally install the pre-assembled bracket onto the transmission mounting flange. The final order of assembly for the transmission brackets should be: Supplied mounting bolt-washer-bracket-washer packtransmission mounting flange. Tighten these bolts to 35 ft. lbs. (Fig. 15 & 16) 7. Perform steps 1-6 for the driver side of the transmission. (Fig. 17) *The differential strut bracket installation for the transmission flange and it should look like this: (Fig. 18 & 19) Differential Strut Bracket Installation on Differential Housing: 1. Locate the NVH suppression counterweight on the driver side of the differential and remove it temporally. (Fig. 20 & 21) 2. Starting with the passenger side, remove all the O.E. differential cover bolts except for the lower two at the 6 'oclock position near the lower "ear" tab on the cover. Discard the O.E. bolts you ve removed. (Fig. 22) 3. Install the passenger side differential bracket as shown using the supplied bolts in the kit, making sure to use a supplied washer under the head of the bolt. Torque the differential bracket bolts to 20 ft. lbs. (Fig. 23) 4. The Installation of the differential bracket on the passenger side should now look like this: (Fig. 24) 5. Now go to the driver side of the differential and remove the two lower O.E. differential cover bolts located in the 6 and 8 o'clock positions. You will discard these O.E. bolts. (Fig. 25) 6. Install the left lower differential strut bracket onto the driver side differential cover as shown and torque to 20 ft. lbs. (Fig. 26) 7. Remove the remaining differential cover side bolts from the driver side cover and discard. (Fig. 27) 8. Install the left upper differential strut bracket onto the driver side cover as shown using the supplied bolts in the kit making sure to use a supplied washer under the head of the bolt. Torque the differential bracket bolts to 20 ft. lbs. (Fig. 28) 9. The installation of the differential brackets on the driver side should now look like this: (Fig. 29) 10. Re-install the NVH suppression counterweight back onto the left side of the differential cover as shown and torque to 25 ft. lbs. (Fig. 30) a. Install the differential bracket cross-rod (shortest of the five rods) between the two main upper
3 3 P a g e differential brackets as shown using the supplied Y4 x 20 bolts in the kit, making sure to use the supplied washer under the head of the bolt. (Fig. 31) b. Once you have the differential cross strut rod located and are getting ready to install, make sure you place a washer under the head of the bolt as shown and also place a washer between the inside of the differential bracket and cross strut rod to be used as a spacer. The order should be like this: bolt-then-washer-then-differential bracket-then-washer-then-cross strut rod. 13. Torque each end to 12 ft. lbs. and all of the brackets, including the cross-rod. Now fully installed on the differential it should look like this when finished: (Fig. 32) *You should now have the differential strut mounting brackets securely mounted onto the differential case at this time. Strut Rod Installation: 1. Locate the four main strut rods in your kit. You'll notice that two are of equal length and the other two are not. The two that are equal in length are the right & left, TOP strut rods, the next is shorter in length is for the PASSENGER SIDE and the shortest strut rod is for the DRIVER SIDE. (Fig. 33) 2. Your kit has 4 left hand thread heim joints with matching jam nuts and 4 right handed thread heim joints with matching jam nuts. Install the appropriate jam nut onto the heim joint stud and screw it all the way on until the nut bottoms out on the stud as shown. Do this procedure for all eight heim joints and studs until they look like this: (Fig. 34) 3. Each main strut rod has a right handed and a left handed thread machined into the ends of it for which you'll screw the appropriate heim joint stud into equally on both ends. (fig. 35 & 36) 4. Position all 4 main strut rods on your workbench so the machined rings around the rod are all on one end. These rings dictate which end is to face "rearward" or towards the rear of the car when they are installed. 5. Locate one upper, long, main strut rod and the second to the shortest lower main strut rod for the passenger side and put these next to each other. Locate the other upper, long, main strut rod and the shortest main strut rod for the driver side and put these two together. (Fig. 38 & 39) 6. Be sure each strut rod is installed with the ring towards the rear of the car to insure proper installation. *FAILURE TO FOLLOW THIS STEP ACCURATELY **WILL**LEAD TO DIFFERENTIAL FAILURE!!! 7. Install 6-3/8-24x1 bolts in the threaded holes and 2 3/8-16x1.75 bolts, spacers, and nuts. - The 2 longest bolts are to be used in tandem with the provided aluminum spacers to secure the 2 rear Heim joints of the upper strut rod ends onto the differential bracket mounting holes as shown. Torque to 30 ft. lbs. (fig. 42 & 43) - The 4 intermediate length bolts are to be used to secure the 4 front heim joints of all the strut rod ends onto the two transmission bracket mounting holes as shown. Torque to 30 ft. lbs. (fig. 45 & 46) 8. -The 2 shortest length bolts are to be used to secure the rear lower heim joints of the 2 lower strut rod ends onto each respective side of the differential brackets as shown. Torque to 30 ft. lbs. (fig. 47 & 48) 9. Make sure all 8 heim joints are adjusted evenly out of the out of the 8 strut rod ends as shown. *IF THEY ARE NOT, YOU THEY WILL BIND WHEN PRE-LOADED AND THE DIFFERENTIAL STRUT KIT WILL NOT BE ADJUSTED PROPERLY, LEADING TO DIFFERENTIAL FAILURE. DO **NOT** NOT SKIP THIS CRITICAL STEP!!! (FIG. 49 & 50) 10. *You should now have the entire differential strut kit brackets, strut rods, and mounting hardware securely mounted onto the differential/ transmission cases at this time and it should look like this: (FIG ) Strut Rod Pre-Load Adjustment: Please follow the pre-load adjustment instructions EXACTLY as we describe here to avoid any possible diff/trans damage with this products Installation! 1. Adjust the pre-load on all the main strut rods to a static ZERO-lash by turning each rod clockwise by 2. HAND until just snug then stop, making sure they are PULLING THEMSELVES TOGETHER as you tighten them. 3. The proper adj. sequence is- Driver-upper first, Pass-upper second, driver-lower third, pass-lower last. 4. After ZERO-lash is completed, tighten each respective main strut rod, in sequence, in ¼ turn increments until 1 full turn on each rod is reached and lock down with the jam nut on each heim joint stud. (fig.54) 5. Follow this step for all four main strut rods, in the previously described sequence. 6. DO NOT adjust preload rods tighter than 1 full turn past ZERO-lash or differential damage/gear whine WILL occur. Once ZERO-lash has been completed for each rod, DO NOT try to tighten rods even further past ZERO-lash as you proceed through the tightening sequence, even though the next rod in the preload sequence will "FEEL" loose before your adjustment sequence is complete. These steps are absolutely critical!! *You should now have the HPE Differential Strut completely installed and adjusted properly on your Corvette! Congratulations!!


4 4 P a g e Chassis Reassembly: 1. Follow the reverse pattern of outlined disassembly to re-assemble your vehicle successfully, paying particular attention to installing the adjustment nuts on the rear leaf spring with the same number of threads showing before you started. You should have written this number down to refer back to as outlined in the disassembly procedures.


5 5 Page


6 6 Page


7 7 P a g e

8 8 Page
C6 Corvette M/T Differential Strut Installation Instructions
 1 P a g e 6930B Derek Dr. Fort Wayne, IN 46803 Phone: 260-245-0352 Fax: 260-245-0358 www.hoosierperformanceengineering.com C6 Corvette M/T Differential Strut Installation Instructions Application: 2005-2008
'99-03 CHEVROLET/GMC IFS 4WD 6" SUSPENSION SYSTEM P/N INSTALLATION INSTRUCTIONS
 1/16/04 '99-03 CHEVROLET/GMC IFS 4WD 6" SUSPENSION SYSTEM P/N. 10-41099 INSTALLATION INSTRUCTIONS NOTE: Each Lift Kit and options to Lift Kits are packaged separately. Therefore, installation procedures
Cobra IRS Aluminum Differential Bushings (MMIRSB-40.2)
") 3430 Sacramento Dr., Unit D San Luis Obispo, CA 93401 Telephone: 805/544-8748 Fax: 805/544-8645 www.maximummotorsports.com Cobra IRS Aluminum Differential Bushings (MMIRSB-40.2) The MM front differential
3430 Sacramento Dr., Unit D San Luis Obispo, CA 93401 Telephone: 805/544-8748 Fax: 805/544-8645 www.maximummotorsports.com Cobra IRS Aluminum Differential Bushings (MMIRSB-40.2) The MM front differential
3 Dualsport rear suspension ram truck 2500 AIR RIDE. AEV30262AA Last Updated: 07/11/17 INSTALLATION GUIDE
 3 Dualsport rear suspension ram truck 2500 AIR RIDE AEV30262AA Last Updated: 07/11/17 INSTALLATION GUIDE PLEASE READ BEFORE YOU START TO GUARANTEE A QUALITY INSTALLATION, WE RECOMMEND READING THESE INSTRUCTIONS
Installation Instructions. 6 Basic System FTS21060BK / FTS21061BK / FTS21042BK GM 2WD C1500 P/U ONLY
 Installation Instructions 6 Basic System FTS21060BK / FTS21061BK / FTS21042BK 2007-13 GM 2WD C1500 P/U ONLY 2007-13 GM 1500 Truck Basic System FTS21060BK / FTS21061BK / FTS21042BK 2007-13 GM 2WD C1500
1 M-3000-H4 F150 4X4 Lowering Kit
 READ INSTRUCTIONS COMPLETELY THROUGH BEFORE STARTING. IT IS RECOMMENDED THAT INSTALLATION BE DONE BY A QUALIFIED MECHANIC. REPLACE ALL STOCK PARTS THAT ARE DAMAGED OR WORN. ALWAYS WEAR EYE PROTECTION.
Installation Instructions
 Instructions Created by an: 2007-Present Toyota Tundra LRT Leveling Lift Kit - 4WD by Low Range Off-Road (SKU# LR-LRTundra) Instructions also apply to 2WD Kits. Installation Instructions Revised 7-11-17
»Product» Safety Warning
 #C1210 Installation Instructions 2007-2008 Chevy/GM 1500 2/4wd 2" Lift Kit Read and understand all instructions and warnings prior to installation of product and operation of vehicle. Zone Offroad Products
For Technical Assistance, call Competition Engineering's Tech Line at (203) , 8:30am-5:00pm Eastern Time COMPETITION ENGINEERING
 , 8:30am-5:00pm Eastern Time COMPETITION ENGINEERING") INSTALLATION INSTRUCTIONS C2099 SLIDE-A-LINK The Slide-A-Link by Competition Engineering is designed for use in Stock Eliminator and Bracket Racing vehicles. The rigid front mount assembly clamps around
INSTALLATION INSTRUCTIONS C2099 SLIDE-A-LINK The Slide-A-Link by Competition Engineering is designed for use in Stock Eliminator and Bracket Racing vehicles. The rigid front mount assembly clamps around
'88-'00 CHEVROLET/GMC IFS 4WD(8LUG) OLD BODY STYLE 6" SUSPENSION SYSTEM P/N
 OLD BODY STYLE 6 SUSPENSION SYSTEM P/N") 4/10/13 '88-'00 CHEVROLET/GMC IFS 4WD(8LUG) OLD BODY STYLE 6" SUSPENSION SYSTEM P/N. 10-41888 INSTALLATION INSTRUCTIONS APPLICATION WARNING: Applicable for hub mounted ABS sensor models only. Not for 1992-94
4/10/13 '88-'00 CHEVROLET/GMC IFS 4WD(8LUG) OLD BODY STYLE 6" SUSPENSION SYSTEM P/N. 10-41888 INSTALLATION INSTRUCTIONS APPLICATION WARNING: Applicable for hub mounted ABS sensor models only. Not for 1992-94
ADJUSTABLE ANTI-ROLL BAR INSTALLATION INSTRUCTIONS PART NUMBER D PARTS LIST
 ADJUSTABLE ANTI-ROLL BAR INSTALLATION INSTRUCTIONS PART NUMBER D120-0580 DESCRIPTION: Front 28mm; 3-hole adjustable APPLICATION: 2014-16 F22 228i/M235i 2015-16 F23 228i/M235i Convertible 2013-16 F30 320i
AEV30308AA Last Updated: 05/31/18. 4 DUALSPORT sc SUSPENSION system for RAM 1500 air ride standard and rebel INSTALLATION GUIDE
 AEV30308AA Last Updated: 05/31/18 4 DUALSPORT sc SUSPENSION system for RAM 1500 air ride standard and rebel INSTALLATION GUIDE PLEASE READ BEFORE YOU START TO GUARANTEE A QUALITY INSTALLATION, WE RECOMMEND
»Product» Safety Warning
 #F2622 Installation Instructions 1997-2003 Ford F-150 4WD 6" Suspension System Read and understand all instructions and warnings prior to installation of product and operation of vehicle. Zone Offroad
DRIVE AXLES. Differentials & Axle Shafts - Corvette
 DESCRIPTION & OPERATION 1998-99 DRIVE AXLES Differentials & Axle Shafts - Corvette A Getrag 625 model differential is used on both the automatic and manual transmissions. Differential carrier and case
Nissan Titan 6 Front & 4 Rear Suspension Kit
 92187500 Thank you for choosing Rough Country for all your suspension needs. Nissan Titan 6 Front & 4 Rear Suspension Kit Rough Country recommends a certified technician install this system. In addition
Installation Instructions for Teraflex 2.5 Inch Lift Kit with Shocks (2010 Jeep Wrangler Unlimited)
") Installation Instructions for Teraflex 2.5 Inch Lift Kit with Shocks (2010 Jeep Wrangler Unlimited) Installation Time: 6 Hours Tools Required: Floor Jack Jack Stands Ratchet Torque Wrench 15mm Socket 15mm
Installation Instructions for Teraflex 2.5 Inch Lift Kit with Shocks (2010 Jeep Wrangler Unlimited) Installation Time: 6 Hours Tools Required: Floor Jack Jack Stands Ratchet Torque Wrench 15mm Socket 15mm
INSTALLATION INSTRUCTIONS
 INSTALLATION INSTRUCTIONS --1075 North Ave. Sanger, CA 93657-3539 local: 559-875-0222 fax: 559-876-2259 toll free: 800-445-3767-- 6522 REAR AXLE FLIP & SHACKLE KIT 07-UP CHEVROLET 1500 REGULAR CAB ONLY
INSTALLATION INSTRUCTIONS Cherokee / Grand Cherokee 3" Value Flex Lifts
 INSTALLATION INSTRUCTIONS Cherokee / Grand Cherokee 3" Value Flex Lifts Before beginning the installation, read these instructions and the enclosed driver s WARNING NOTICE thoroughly and completely. Also
INSTALLATION INSTRUCTIONS P/N S: C2091 & C2093 SLIDE-A-LINK
 INSTALLATION INSTRUCTIONS P/N S: C2091 & C2093 SLIDE-A-LINK The Slide-A-Link by Competition Engineering is designed for use in Stock Eliminator and Bracket Racing vehicles. The rigid front mount assembly
ACE 325/570 2 Lift Kit
 ACE 325/570 2 Lift Kit Polaris Ace 325/570 2014+ Part #: 5101244 Rev. 082316 491 W. Garfield Ave., Coldwater, MI 49036. Phone: 517-278-7768 E-mail: sales-rtpro@sporttruckusainc.com SAFETY WARNING RT Pro
Installation Instructions
 Instructions Created by an: Revised 7-11-17 LRT 2005-2017 3/1 Leveling/ Lift Kit for Toyota Tacoma by Low Range Off-Road (SKU# LR-LRTACO) Installation Instructions Suggested Tools: CAUTION: Safety glasses
2013+ DODGE RAM LIFT KIT PART# STOP! READ THIS FIRST!
 NOTE: 2013+ DODGE RAM 3500 8 LIFT KIT PART# 54324 STOP! READ THIS FIRST! **READ THESE ENTIRE INSTRUCTIONS BEFORE STARTING ANYTHING** or chroming, which can damage the strength and structure of the metal,
This 6 suspension system was developed for 37x12.50x17 tire on an after market wheel w/ 4.5 back spacing.
 Thank you for choosing Rough Country for your suspension needs. 921560200C *1560BAG4* 1560BAG4 2017 F250 6 4-LINK SUSPENSION KIT Rough Country recommends a certified technician installs this system. In
AEV30213AF Last Updated: 05/24/18. jk wrangler dualsport sc suspension right hand drive INSTALLATION GUIDE
 AEV30213AF Last Updated: 05/24/18 jk wrangler 3.5 4.5 dualsport sc suspension right hand drive INSTALLATION GUIDE PLEASE READ BEFORE YOU START TO GUARANTEE A QUALITY INSTALLATION, WE RECOMMEND READING
»Product» Safety Warning
 #F2402 & F2602 Installation Instructions 2004-2008 Ford F-150 4wd 4-6" Lift System Read and understand all instructions and warnings prior to installation of product and operation of vehicle. Zone Offroad
INSTALLATION INSTRUCTIONS CHEVY C-10 4-Link Rear End
 INSTALLATION INSTRUCTIONS 73-87 CHEVY C-10 4-Link Rear End Please read these instructions completely before starting your installation. Assemble suspension on vehicle before powder-coating to ensure proper
Read and understand all instructions and warnings prior to installation of system and operation of vehicle.
 102 S. Michigan Ave., Coldwater, MI 49036 Phone: 517-279-2135 Web/live chat: www.bds-suspension.com E-mail: tech@bds-suspension.com Part#: 014450 Product: 4.5" Suspension System Application: 1987-1995
4, 6 Suspension System. Ford F250/350 4WD Part#: ,
 Part#: 013411, 013611 4, 6 Suspension System Ford F250/350 4WD 2005-2007 Rev. 071917 491 W. Garfield Ave., Coldwater, MI 49036. Phone: 517-279-2135 E-mail: tech-bds@sporttruckusainc.com Read And Understand
Scion Tc Rear Endlink Installation Instructions
 Scion Tc Rear Endlink Installation Instructions Tools needed: 14mm sized box wrench 15mm sized box wrench Ramps Creeper Rag 14mm Socket Set Ruler Step 1: Back your tc onto the ramps. Note- It is imperative
Nissan Titan 4 Front & 2 Rear Suspension Kit
 92187400 Nissan Titan 4 Front & 2 Rear Suspension Kit Thank you for choosing Rough Country for all your suspension needs. Rough Country recommends a certified technician install this system. In addition
»Product» Safety Warning
 D2201 Installation Instructions 2012-2014 Dodge Ram 1500 4WD 2" Adventure Series Suspension System Read and understand all instructions and warnings prior to installation of product and operation of vehicle.
84-01 Jeep XJ Cherokee ZJ Grand Cherokee 3" Suspension Lift Installation Instructions
 www.skyjacker.com 84-01 Jeep XJ Cherokee 93-98 ZJ Grand Cherokee 3" Suspension Lift Installation Instructions Before beginning the installation, read these instructions and the enclosed driver s WARNING
»Product» Safety Warning
 C2402, C2602 Installation Instructions 2007-2013 Chevy 1/2 Ton 2wd Pickup 4.5", 6.5" Suspension System Read and understand all instructions and warnings prior to installation of product and operation of
INSTALLATION GUIDE. 2.0 Spacer. suspension system. AEV30211AE Last Updated: 11/06/14
 AEV30211AE Last Updated: 11/06/14 2.0 Spacer suspension system INSTALLATION GUIDE PLEASE READ BEFORE YOU START TO GUARANTEE A QUALITY INSTALLATION, WE RECOMMEND READING THESE INSTRUCTIONS THOROUGHLY BEFORE
HP10251 KIT. Chevrolet Silverado WD / 4WD * GMC Sierra WD / 4WD * 1.5" / 2.25" Leveling Kit L6401_REV3_ECN1-1963
 HP10251 KIT Chevrolet Silverado 1500 2WD / 4WD * GMC Sierra 1500 2WD / 4WD * 1.5" / 2.25" Leveling Kit *See PacPro Application Guide for proper fitment _REV3_ECN1-1963 KIT CONTENT A B C KIT CONTENTS A
»Product» Safety Warning
 RBP-LK305-60 Installation Instructions 1999-2004 Ford Super Duty F-250/350 4wd 6" Suspension Lift Read and understand all instructions and warnings prior to installation of product and operation of vehicle.
Part # Mustang Complete CoilOver Kit
 Front Components: Part # 12100109 67-70 Mustang Complete CoilOver Kit 1 12103509 Non Adjustable Front CoilOvers 1 12102899 Lower StrongArms 1 12103699 Upper StrongArms Rear Components: 1 12106509 Non Adjustable
INSTALLATION INSTRUCTION 88094
 INSTALLATION INSTRUCTION 88094 FOR RANCHO SUSPENSION SYSTEM RS6594B 4WD & 2WD NISSAN TITAN READ ALL INSTRUCTIONS THOROUGHLY FROM START TO FINISH BEFORE BEGINNING INSTALLATION Rev D IMPORTANT NOTES! WARNING:
2010 Camaro SS/V Underbody Brace Installation Instructions
 2010 Camaro SS/V6 20104 Underbody Brace Installation Instructions Thank you for your purchase of this Hotchkis Performance product. Your Underbody Brace set was designed with the performance and durability
COMPETITION ENGINEERING. 80 Carter Drive P.O. Box 1470 Guilford, CT Phone: (203) Fax: (203)
 Fax: (203)") INSTALLATION INSTRUCTIONS P/N S: C2090 & C2092 SLIDE-A-LINK The Slide-A-Link by Competition Engineering is designed for use in Stock Eliminator and Bracket Racing vehicles. The rigid front mount assembly
INSTALLATION INSTRUCTIONS P/N S: C2090 & C2092 SLIDE-A-LINK The Slide-A-Link by Competition Engineering is designed for use in Stock Eliminator and Bracket Racing vehicles. The rigid front mount assembly
Chrysler A-Body Tubular A-Arms Installation Instructions A-ARM INSTALLATION
 1967-1976 Dodge Demon 1112 67-72 Chrysler A-Body Tubular A-Arms Installation Instructions Thank you for your purchase of this Hotchkis Performance product. Your A-Arm set was designed with the performance
Front Suspension 2015 E-Series REMOVAL AND INSTALLATION Procedure revision date: 08/11/2014. Axle
 204-01 Front Suspension 2015 E-Series REMOVAL AND INSTALLATION Procedure revision date: 08/11/2014 Axle 1 N620604 Axle pivot nut 2 N806859 Axle pivot bolt 3 3007 LH/ 3006 RH LH/ 3006 RH Axle Removal NOTICE:
»Product» Safety Warning
 C1351 Installation Instructions 2014 Chevy/GMC, ½ Ton, 2/4wd 3.5" Combo Kit Read and understand all instructions and warnings prior to installation of product and operation of vehicle. Zone Offroad Products
READ AND UNDERSTAND ALL INSTRUCTIONS AND WARNINGS PRIOR TO INSTALLATION OF SYSTEM AND OPERATION OF VEHICLE.
 #012456, #012457 Installation Instructions Add-A-Leaf Kit Dodge 3/4 Ton Pickup 4WD READ AND UNDERSTAND ALL INSTRUCTIONS AND WARNINGS PRIOR TO INSTALLATION OF SYSTEM AND OPERATION OF VEHICLE. SAFETY WARNING
»Product» Safety Warning
 D1401 Installation Instructions 2013 Ram 3500, 2014 Ram 2500 4.5" Radius Arm Suspension Lift Read and understand all instructions and warnings prior to installation of product and operation of vehicle.
Superlift Leveling System / 6 Upgrade System for 2004 and Newer Ford F-150 4WD INSTALLATION INSTRUCTIONS
 FORM #9905.02-032907 PRINTED IN U.S.A. PAGE 1 OF 7 INTRODUCTION Superlift 0.5-2 Leveling System / 6 Upgrade System for 2004 and Newer Ford F-150 4WD INSTALLATION INSTRUCTIONS Installation requires a professional
»Product» Safety Warning
 Zone C2350 Installation Instructions 2007-2013 Chevy 1500 3.5" Lift Read and understand all instructions and warnings prior to installation of product and operation of vehicle. Zone Offroad Products recommends
SCION xb LOWERING SPRINGS Preparation
 Preparation Part Number: PTR07-52080 Kit Contents Item # Quantity Reqd. Description 1 2 Front Springs 2 2 Rear Springs 3 1 Instruction Form Hardware Bag Contents Item # Quantity Reqd. Description 1 2 3
2010 Current Ford Raptor Lower Control Arm Installation Instructions
 PREPARATION 2010 Current Ford Raptor Lower Control Arm Installation Instructions 1. Disconnect the negative terminal on the battery. Park the vehicle on level ground and set the emergency brake. 2. We
R O A D S M I T H TRIKE CONVERSIONS BY THE TRIKE SHOP
 R O A D S M I T H TRIKE CONVERSIONS BY THE TRIKE SHOP Please thoroughly review the instructions before and during installation. Keep in mind that this product was designed to be installed by trained dealer
Read and understand all instructions and warnings prior to installation of system and operation of vehicle.
 491 W. Garfield Ave., Coldwater, MI 49036 Phone: 517-279-2135 Web/live chat: www.bds-suspension.com E-mail: tech@bds-suspension.com Part#: 014444 Product: 4.5" Suspension System Application: Jeep Cherokee
*NOTE* The following suspension system will not work with heavy duty axle housings as pictured below.
 1964 ½ - 1970 Ford Mustang Triangulated 4-Link Suspension Installation Instructions Tech Line: 1-855-693-1259 www.totalcostinvolved.com Read and understand these instructions before starting any work!
PPM-8023 / PPM-8043 JEEP JK SYNERGY STAGE 3 SUSPENSION SYSTEM Version 1
 SYNERGY MFG. 870 INDUSTRIAL WAY, SAN LUIS OBISPO, CA (805) 242-0397 PPM-8023 / PPM-8043 JEEP JK SYNERGY STAGE 3 SUSPENSION SYSTEM Version 1 GENERAL NOTES: These instructions are also available on our website;
GM B-Body Street Grip
 Part # 11015010/11015110-1955-1957 GM B-Body StreetGrip Front Components 11019590 Delrin Control Arm Bushings 90003041 Tall Upper Balljoint 11012350/11012351 Front Dual Rate CoilSprings 22159847 Front
R O A D S M I T H TRIKE CONVERSIONS BY THE TRIKE SHOP
 R O A D S M I T H TRIKE CONVERSIONS BY THE TRIKE SHOP Please thoroughly review the instructions before and during installation. Keep in mind that this product was designed to be installed by trained dealer
05-07 F250 6 SUSPENSION KIT
 92159300 Stabilizer Drop Brackets Track Bar Bracket Control Arm Bracket Brake Line Drop Bracket Sway Bar Link Ext. Hardware Bags Pitman Arm 6111 Add-a-leaf 6578 3 Block and U-Bolt Kit 05-07 F250 6 SUSPENSION
Ford F150/Raptor & F150 Lower Control Arm Installation Instructions
 2009-2010 Ford F150/Raptor & 2015-2017 F150 Lower Control Arm Installation Instructions PREPARATION 1. Disconnect the negative terminal on the battery. Park the vehicle on level ground and set the emergency
2014+ DODGE RAM LIFT KIT PART# STOP! READ THIS FIRST!
 NOTE: 2014+ DODGE RAM 2500 8 LIFT KIT PART# 54320 STOP! READ THIS FIRST! **READ THESE ENTIRE INSTRUCTIONS BEFORE STARTING ANYTHING** or chroming, which can damage the strength and structure of the metal,
Installation Procedure GR40 S197 SLA Front Suspension System (Does not include Aluminum Spindle and Hub Instructions)
") Installation Procedure GR40 S197 SLA Front Suspension System (Does not include Aluminum Spindle and Hub Instructions) Please take the time and read these instructions first! The GR40 S197 system is designed
Installation Procedure GR40 S197 SLA Front Suspension System (Does not include Aluminum Spindle and Hub Instructions) Please take the time and read these instructions first! The GR40 S197 system is designed
8" 4-LINK SUSPENSION SYSTEM. Ford Super Duty 4WD Part#:
 Part#: 013813 8" 4-LINK SUSPENSION SYSTEM Ford Super Duty 4WD 2011-2016 Rev. 051817 491 W. Garfield Ave., Coldwater, MI 49036. Phone: 517-279-2135 E-mail: tech-bds@sporttruckusainc.com Read And Understand
COLD AIR INTAKE INSTALLATION INSTRUCTIONS. # D Fits: E92 328i & xdrive PARTS LIST
 COLD AIR INTAKE INSTALLATION INSTRUCTIONS # D760-9001 Fits: 2007-13 E92 328i & xdrive PARTS LIST (1) Intake Snorkel (1) Flex Tube (1) Brake Scoop Assy (1) Front Grill (1) Filter (1) Hardware Kit (2) Edge
»Product» Safety Warning
 J1400, J1401 Installation Instructions 1997-2006 Jeep TJ 4 Suspension Lift Read and understand all instructions and warnings prior to installation of product and operation of vehicle. Zone Offroad Products
*1611BAG2* 1611BAG2 92PERF1611
 *1611BAG2* 1611BAG2 92PERF1611 97-06 JEEP TJ 2 1/2 X-SERIES SUSPENSION KIT Thank you for choosing Rough Country for your suspension needs. Rough Country recommends a certified technician installs this
Part # Chevy Level 2 Air Suspension Package One Piece Frame
 350 S. St. Charles St. Jasper, In. 47546 Ph. 812.482.2932 Fax 812.634.6632 www.ridetech.com Part # 11020299 55-57 Chevy Level 2 Air Suspension Package One Piece Frame Front Components: 1 11013001 Master
DODGE OFF ROAD T-STYLE STEERING KIT INSTALLATION INSTRUCTIONS
 Dodge Off Road, LLC Specializing in Dodge Ram Solid-Axle 4x4 Suspension and Steering for Off Road Applications 855.9009.DOR sales@dodgeoffroad.com dodgeoffroad.com DODGE OFF ROAD T-STYLE STEERING KIT INSTALLATION
HOW TO INSTALL COIL-OVERS
 HOW TO INSTALL COIL-OVERS DISCLAIMER: ALL installation information and recommendations made in these articles are for our customers to use at their own risk. Godspeed Project does not make any representations
COMPETITION ENGINEERING. 80 Carter Drive P.O. Box 1470 Guilford, CT Phone: (203) Fax: (203)
 Fax: (203)") INSTALLATION INSTRUCTIONS P/N: C2094 SLIDE-A-LINK The Slide-A-Link by Competition Engineering is designed for use in Stock Eliminator and Bracket Racing vehicles. The rigid front mount assembly clamps
INSTALLATION INSTRUCTIONS P/N: C2094 SLIDE-A-LINK The Slide-A-Link by Competition Engineering is designed for use in Stock Eliminator and Bracket Racing vehicles. The rigid front mount assembly clamps
Part # Chevy Rear AirBar (One Piece Frame)
") 350 S. St. Charles St. Jasper, In. 47546 Ph. 812.482.2932 Fax 812.634.6632 www.ridetech.com Part # 11027199 55-57 Chevy Rear AirBar (One Piece Frame) Components: 1 90000160 Driver side lower axle bracket
350 S. St. Charles St. Jasper, In. 47546 Ph. 812.482.2932 Fax 812.634.6632 www.ridetech.com Part # 11027199 55-57 Chevy Rear AirBar (One Piece Frame) Components: 1 90000160 Driver side lower axle bracket
INSTALLATION INSTRUCTIONS 88518
 INSTALLATION INSTRUCTIONS 88518 For Rancho Suspension Systems RS6518: 2009 FORD F-150 4WD READ ALL INSTRUCTIONS THOROUGHLY FROM START TO FINISH BEFORE BEGINNING INSTALLATION Rev A IMPORTANT NOTES! WARNING:
2013+ DODGE RAM " Kit PART# STOP! READ THIS FIRST!
 NOTE: 2013+ DODGE RAM 3500 4" Kit PART# 54346 STOP! READ THIS FIRST! **READ THESE ENTIRE INSTRUCTIONS BEFORE STARTING ANYTHING** or chroming, which can damage the strength and structure of the metal, any
INSTALLATION INSTRUCTIONS Progress Technology Rear Anti-Sway Bar Honda Civic Part # No Revision (7/20/16)
") INSTALLATION INSTRUCTIONS Progress Technology Rear Anti-Sway Bar Honda Civic 96-00 Part # 62.1042 No Revision (7/20/16) WHO SHOULD INSTALL THIS PRODUCT? Progress Technology products should only be installed
INSTALLATION INSTRUCTIONS Progress Technology Rear Anti-Sway Bar Honda Civic 96-00 Part # 62.1042 No Revision (7/20/16) WHO SHOULD INSTALL THIS PRODUCT? Progress Technology products should only be installed
*1274BAG9* 1274BAG GM 4-6 SUSPENSION KIT N2.0. Thank you for choosing Rough Country for your suspension needs A
 92127400A 88-98 GM 4-6 SUSPENSION KIT N2.0 Thank you for choosing Rough Country for your suspension needs. *1274BAG9* 1274BAG9 Rough Country recommends a certified technician installs this system. In addition
»Product» Safety Warning
 C2453/C2653 Installation Instructions 2014-2016 Chevy/GMC 1500 2WD 4.5"/6.5" Suspension Systems Read and understand all instructions and warnings prior to installation of product and operation of vehicle.
Part # Mustang Complete CoilOver Kit
 Front Components: 1 12103509 Front CoilOvers 1 12102899 Lower StrongArms 1 12103699 Upper StrongArms 350 S. St. Charles St. Jasper, In. 47546 Ph. 812.482.2932 Fax 812.634.6632 www.ridetech.com Part # 12100109
Class 8.8 Class MM 18ft/lbs 23 ft/lbs 10MM 32ft/lbs 45ft/lbs 12MM 55ft/lbs 75ft/lbs 14MM 85ft/lbs 120ft/lbs
 92190500 Jeep Grand Cherokee 93-98 ZJ 4 Longarm Thank you for choosing Rough Country for all your suspension needs. Rough Country recommends a certified technician install this system. In addition to these
RIGID SERIES REAR BUMPER RB-F-100-JK, RB-F-101-JK, RB-F-102-JK, RB-F-103-JK RB-F-100-JKA, RB-F-101-JKA, RB-F-102-JKA, RB-F-103-JKA
 RIGID SERIES REAR BUMPER RB-F-100-JK, RB-F-101-JK, RB-F-102-JK, RB-F-103-JK RB-F-100-JKA, RB-F-101-JKA, RB-F-102-JKA, RB-F-103-JKA PARTS LIST QTY DESCRIPTION QTY DESCRIPTION 1 Rear Bumper 1 1'' Washer
07 & UP GM 1500 PICKUP 2.0 FRONT 1.0 REAR LEVELING KIT INSTALLATION
 INSTRUCTION PART NO 15265 LEVELING KIT NO 3813 07 & UP GM 1500 PICKUP 2.0 FRONT 1.0 REAR LEVELING KIT INSTALLATION READ INSTRUCTIONS/WARNINGS COMPLETELY THROUGH BEFORE STARTING. FAILURE TO ADHERE TO THE
Super Duty Front Air Bag Installation Instructions
 2005-2010 Super Duty Front Air Bag Installation Instructions Congratulations! You have just purchased the best engineered, highest quality front air suspension kit available on the market for your 2005-2010
05-07 F /2 SUSPENSION KIT
 92147900 05-07 F250 4 1/2 SUSPENSION KIT Thank you for choosing Rough Country for your suspension needs. Rough Country recommends a certified technician installs this system. In addition to these instructions,
INSTALLATION INSTRUCTIONS
 INSTALLATION INSTRUCTIONS 6612/6616 & 6614/6618 REAR AXLE FLIP-KIT 1999-UP CHEVROLET SILVERADO/GMC SIERRA 1500 Congratulations! You were selective enough to choose a BELLTECH PRODUCT. We have spent many
HP10253 KIT Ford F-150 2WD / 4WD 2" Leveling Kit
 HP10253 KIT 2004-2017 Ford F-150 2WD / 4WD 2" Leveling Kit KIT CONTENT A B C KIT CONTENTS A Upper Strut Spacer (2) B M10 x 1.5 Flange Nut (6) C M10 x 1.5 x 40 mm Socket Head Cap Screw (6) Make sure all
INSTALLATION INSTRUCTIONS
 INSTALLATION INSTRUCTIONS 2005-2012 Nissan Xterra/Frontier / Pathfinder PART NUMBERS: NP17500, NP17525, NP17550 FRONTIER PARTS & CORRESPONDING HARDWARE LIST XTERRA PATHFINDER ABOVE LISTED 1/2 Metal Lock
R O A D S M I T H TRIKE CONVERSIONS BY THE TRIKE SHOP
 R O A D S M I T H TRIKE CONVERSIONS BY THE TRIKE SHOP Please thoroughly review the instructions before and during installation. Keep in mind that this product was designed to be installed by trained dealer
5.5 Gas & 6 Diesel Radius Arm Suspension System. Dodge Ram WD Pickup Dodge Ram WD Pickup
 Part#: 012610 5.5 Gas & 6 Diesel Radius Arm Suspension System Dodge Ram 3500 4WD Pickup 2013-17 Dodge Ram 2500 4WD Pickup 2014-17 491 W. Garfield Ave., Coldwater, MI 49036. Phone: 517-279-2135 Web: www.bds-suspension.com.
PPM-8022 / PPM-8042 JEEP JK STAGE 2 SYNERGY SUSPENSION SYSTEM Version 1
 POLY PERFORMANCE MFG. 870 INDUSTRIAL WAY, SAN LUIS OBISPO, CA (805) 242-0397 PPM-8022 / PPM-8042 JEEP JK STAGE 2 SYNERGY SUSPENSION SYSTEM Version 1 GENERAL NOTES: These instructions are also available
Installation Instructions
 Important Parts Installation Instructions INSTALLATION REQUIRES WELDING by a qualified welder or metal fabricator. Weld-on installation is strongly recommended for maximum strength and reinforcement of
»Product» Safety Warning
 F2634 Installation Instructions 2015 Ford F150 4WD 4-6" Suspension Systems Read and understand all instructions and warnings prior to installation of product and operation of vehicle. Zone Offroad Products
JEEP JK 6 2 DR X-SERIES SUSPENSION KIT
 921684X00 Thank you for choosing Rough Country for your suspension needs. JEEP JK 6 2 DR X-SERIES SUSPENSION KIT Rough Country recommends a certified technician install this system. In addition to these
»Product» Safety Warning
 RBP-LK343-60, RBP-LK343-60FS RBP-LK343-40, RBP-LK343-40FS Installation Instructions 2015-2017 Ford F150 4WD 4-6" Suspension Systems Read and understand all instructions and warnings prior to installation
»Product» Safety Warning
 F2650 Installation Instructions 2017-18 Ford F150 4WD 4-6" Suspension Systems Read and understand all instructions and warnings prior to installation of product and operation of vehicle. Zone Offroad Products
97-06 JEEP TJ/LJ LONG ARM UPGRADE KIT
 921663U00 97-06 JEEP TJ/LJ LONG ARM UPGRADE KIT Thank you for choosing Rough Country for your suspension needs. This kit is an upgrade kit only. This kit includes frame mounting points and adjustable long
RAM LIFT KIT PART# STOP! READ THIS FIRST!
 NOTE: 2014-2016 RAM 2500 4 LIFT KIT PART# 54340 STOP! READ THIS FIRST! **READ THESE ENTIRE INSTRUCTIONS BEFORE STARTING ANYTHING** or chroming, which can damage the strength and structure of the metal,
AEV30243AK Last Updated: 05/01/18. 3 Dualsport front suspension ram truck 2500/3500 INSTALLATION GUIDE
 AEV30243AK Last Updated: 05/01/18 3 Dualsport front suspension ram truck 2500/3500 INSTALLATION GUIDE PLEASE READ BEFORE YOU START TO GUARANTEE A QUALITY INSTALLATION, WE RECOMMEND READING THESE INSTRUCTIONS
Commander SUSPENSION SYSTEM INSTALLATION INSTRUCTIONS
 PARTS INCLUDED: 2 - FRONT UPPER A-ARMS 2 - FRONT LOWER A-ARMS 4 - COTTER PINS 2-12MM JAM NUTS 2 - TIE ROD EXTENDERS 8- FLANGED DELRON BUSHINGS 4- DELRON CASTER SPACERS 6 - GREASE FITTINGS 3 - BEARING REMOVAL
Part # Chevy Level 3 Street Challenge Package Two Piece Frame
 350 S. St. Charles St. Jasper, In. 47546 Ph. 812.482.2932 Fax 812.634.6632 www.ridetech.com Part # 11030399 55-57 Chevy Level 3 Street Challenge Package Two Piece Frame Front Components: 1 11013002 Master
1/2 Ton Tahoe/Suburban/Yukon/Avalanche 4wd Part #: Rev
 Rear Coil Spring Kit 1/2 Ton Tahoe/Suburban/Yukon/Avalanche 4wd 00-06 Part #: 021608 Rev. 040116 491 W. Garfield Ave., Coldwater, MI 49036. Phone: 517-279-2135 Web/live chat: www.bds-suspension.com. E-mail:
READ AND UNDERSTAND ALL INSTRUCTIONS AND WARNINGS PRIOR TO INSTALLATION OF SYSTEM AND OPERATION OF VEHICLE.
 #021700, 021701 7 Suspension System 2000-2004 Chevy/GMC 1500 2wd Extended Cab w/ Front Coil Springs READ AND UNDERSTAND ALL INSTRUCTIONS AND WARNINGS PRIOR TO INSTALLATION OF SYSTEM AND OPERATION OF VEHICLE.
INSTALLATION INSTRUCTIONS FOR: RE DOOR JK WRANGLER RE DOOR JK WRANGLER 3.5 STANDARD SUSPENSION SYSTEM
 RUBICON MANUFACTURING INC. 3290 MONIER CIR., RANCHO CORDOVA, CA. 95742 916-473-4600 INSTALLATION INSTRUCTIONS FOR: RE7122 2 DOOR JK WRANGLER RE7142 4 DOOR JK WRANGLER 3.5 STANDARD SUSPENSION SYSTEM Safety
05-07 F250 6 SUSPENSION KIT
 92158000 05-07 F250 6 SUSPENSION KIT Thank you for choosing Rough Country for your suspension needs. Rough Country recommends a certified technician installs this system. In addition to these instructions,
Victory CrossRoads CrossCountry CrossCountry Tour HardBall
 by Trike Conversion Kit Victory CrossRoads CrossCountry CrossCountry Tour HardBall Installation Instructions Revised 3-2018 California Sidecar Parts & Technical Support 434.263.8866 Table of Contents: