OIL COOLER INSTALLATION GUIDE. Fits Models: RF-1 Touring Models Revised 12.15
|
|
|
- Henry Preston
- 5 years ago
- Views:
Transcription


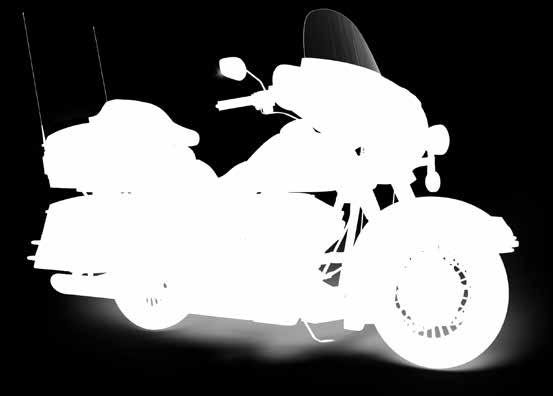
1 OIL COOLER INSTALLATION GUIDE Fits Models: RF-1 Touring Models Revised 12.15
2 Welcome To UltraCool Oil Cooling Systems Thank you for making UltraCool your oil cooling system of choice. We hope you will find our installation guide helpful in your installation process. If you need more assistance please call Larry in out Tech Dept at or him at Thank You, UltraCool Tools Required: Before we get started let s go over the tools that You will need to complete this installation. 5/32 Allen wrench 2 11/16 Open end wrench 7/16 Open end wrench Ratchet with 3/8 Drive Extension with 3/8 Drive 1 Socket Oil filter wrench Torque wrench Check your Lbs. Bike lift Nice to have Oil can 7/16 Allen driver (for step 2) Torx #27 Power drill 5/16 Drill bit Wire strippers Crimper NOTE: Instructions are illustrated and explained from a rider s point of view. 2 Oil Cooler Installation Guide ultracoolfl.com

3 Kit Contents forrf B. A. C. D. E. H. F. G. I. J. K. L. M. A. Complete Oil Cooler Assembly B. Complete Oil Adapter C. Mounting Bracket D. Oil Line RFB-107-BK E. Oil Line RFB-106-BK Small Parts Bag F. Indicator Light G. Wiring Harness H. Test Jumper I. Tie Straps J. Thread Locker K. Fitting Wrench L. Adapter Key M. Threaded Adapter ultracoolfl.com Oil Cooler Installation Guide 3
4 Step 1 Remove Oil Filter Remove oil filter and clean up any oil and dirt. All surfaces must be oil and dirt free. Step 2 Remove Old Cooler If you have a cooler on your bike you will need to remove it and all parts associated with it. Remove 7/16 Allen adapter in the center of adapter and it will come off. You will need to install a threaded adapter from your parts bag. Add 3 drops of thread locker to threaded adapter and install to center filter hole. Torque to Ft Lbs, Inch Lbs Step 3 (88 Ci Engine s Only) Adapter Key Installation Older 88 Ci engines need to install the adapter key. To install, remove the 7/8 threaded adapter in oil filter mount. Place key tab in bottom galley. Make sure the key sits against center filter mount. Locate threaded adapter and add 3 drops of thread locker and torque to: Torque to Ft Lbs, Inch Lbs Step 4 Oil Adapter Installation Locate the oil adapter and take it to a clean Surface. Using a 5/32 Allen driver remove the 6 bolts form the front as shown. Watch out for small washers! Note there are (4) 1 1/8 and (2) ¾ bolts and (6) washers. C B A 4 Oil Cooler Installation Guide ultracoolfl.com
5 Step 5 Install Plate C Notice that parts of the adapter are marked A-B-C. Take part C and look on the back, there are two alignment cams. Place part C over the oil filter mount in the 11:00 position. Now take the 1 nut and add a few drops of thread locker to it, and tighten to threaded adapter on oil filter mount. Torque to Ft Lbs, Inch Lbs Step 6 Plate ( A ) and Gasket Install Locate parts A and B of the oil adapter, (2) ¾ bolts and the washers. Screw the bolts in the top as shown. This will hold the gasket in place. Now hand start to Plate (C). Use a 5/32 Allen Wrench for the bottom and hand tighten. Get the (4) 1 1/8 along the bottom and hand tight. *Use Blue Thread Locker on Bolts* Step 7 Torque Oil Adapter Now all of the bolts and washers are installed and hand tight. Use a torque wrench and set it to 5 Ft Lbs or 60 Inch Lbs and tighten in a star pattern as shown. Go to for more installation help. ultracoolfl.com Oil Cooler Installation Guide 5
6 Step 8 Install Mounting Bracket Locate mounting bracket and remove 2 7/16 Nuts from voltage regulator. Lift regulator off of frame, and install Bracket between frame and regulator. Leave the RIGHT NUT LOOSE for ground wire in Step 11 Step 9 Install Hose RFB-106 to Cooler IMPORTANT: Make sure to OIL all fittings! Locate cooler assembly and remove cover. Locate oil lines and make note of fittings. Locate oil line RFB-106 and hand start straight fitting to LEFT side fitting on cooler core as shown. Now use 11/16 wrench on fitting and one 11/16 Wrench on cooler core as a backup and tighten. Step 10 Install Hose RFB-107 to Cooler Locate oil line RFB-107 and oil fittings. Hand start 45 degree fitting to RIGHT side Fitting on cooler core. Use one 11/16 wrench on fitting one 11/16 wrench on cooler core as a back up wrench. Now tighten. 6 Oil Cooler Installation Guide ultracoolfl.com
7 Step 11 Cooler on Mounting Bracket Place cooler with oil lines attached on mounting bracket. Use one cover bolt to hold cooler to mounting bracket as shown. Connect ground wire from fans to RIGHT Nut on regulator and tighten. Step 12 Oil Line to Adapter # RFB-107 Note: Oil Adapter has a feed and return Locate oil line RFB-107 and run lines behind mounting bracket and come up between engine and frame by shift arm to return fitting on oil adapter. Use fitting tool and start to make small turns. Make sure it goes on nice and easy, then tighten with tools. A Step 13 Oil Line to Adapter# RFB-106 Locate oil line RFB-106 and run line next to other line and up to feed on oil adapter. Hand start to feed fitting, use fitting tool and start to make small turns. Make sure the fitting goes on nice and easy, then tighten with tools. A ultracoolfl.com Oil Cooler Installation Guide 7
8 Step 14 Split Hose Notice in the oil line bag there are 2 pieces of Split rubber hose. Now that your oil lines are attached, look for Rubbing on stator wire or frame. Use a supplied tie strap to hold it in place. This is a must! Step 15 Remove Fairing Remove fairing by using a #27 torx. Remove 7 torx as shown and set aside. Step 16 Wiring Harness Locate wiring harness in the parts bag. (A) Plug female spades from harness to male spades on thermal switch, any side as shown below. (B) Plug female bullet from harness to male bullet from fans as shown. (C) Look in headlight wiring harness for a orange/ white wire with a male spade. Connect to female spade (C) on harness. This is your power connection. 8 Oil Cooler Installation Guide ultracoolfl.com
9 Step 17 Secure Harness Secure harness to frame tubes and under fairing with tie straps supplied. Make sure it s a clean job. Step 18 Indicator Light (Optional) The indicator light let s you know when your fans are running Indicator Light Installation Find a good spot on you dash you like. Look on the fairing side and make sure there are no obstructions. Drills 5/16 hole Remove nut from back of light Feed wires thru hole from dash side Replace nut and washer and tighten Red Wire Locate red wire from light Measure red wire to female bullet on harness (D) Cut, strip and attach male bullet to red wire, Connect to female bullet on harness (D) Black Wire Locate black wire from light Measure to ground (around radio) *see shop manual* Cut, Strip and attach ring tongue to black wire Attach to ground Make sure all the wires are secure with tie straps Do a clean job For more help on LED Installation go to: UltraCoolfl.com Click on FLH Watch our Video Installation Series Installation Steps ultracoolfl.com Oil Cooler Installation Guide 9
10 Step 19 Test Electrical Connections Locate the test jumper in your parts bag. Unplug harness from thermal switch (A). Plug jumper into harness on any side. Turn on bike ignition. Fans and LED should run. Step 20 Check List Install Fairing Connect Headlight Check Hose s (tight) Install Oil Filter Clean up any Oil Start Engine and Check Oil You are good to go Congratulations! NOTE: Now go for a good ride and warm up your engine and oil to 210 degrees. It takes approximately 10 miles to warm up to that point. Don t let your engine idle in your driveway as this will not get your oil hot. 10 Oil Cooler Installation Guide ultracoolfl.com
11 Notes ultracoolfl.com Oil Cooler Installation Guide 11
12 1851 Airway Drive, Suite C, Hollister, CA TOLL-FREE: Direct: Fax: Web: ultracoolfl.com DISCLAIMER WARNING: Could cause damage when installed on lowered, large front fender and tire, non- maintained or modified suspensions. ULTRACOOL, INC is not liable or responsible whatsoever for any claims for damages or injury subsequent to improper installation or modification of our products. *Intended for stock Motorcycles WARRANTY One year parts only from date of purchase Warranty registration must be completed in full and received within 45 days of purchase to validate warranty Copy of sales receipt must accompany warranty form Warranties are non-transferrable Patent #
Installation Guide. Fits Models: RF-2 Touring Models 2009-Present. Revised 12.15
 Oil Cooler Installation Guide Fits Models: RF-2 Touring Models 2009-Present Revised 12.15 Welcome To UltraCool Oil Cooling Systems Thank you for making UltraCool your oil cooling system of choice. We hope
OIL COOLER INSTALLATION GUIDE ULTRACOOL, INC. Web:
 ULTRACOOL, INC 68 South Rainbow Drive Bldg #10 Dayton, NV 89403 OIL COOLER Touring INSTALLATION GUIDE Models 1994-2008 2.0 Version - Includes Trikes 'Call for fitment on earlier models Direct: (775)-241-9155
INSTALLATION FORK MOUNTED DRIVING LIGHTS 5008
 5008 PARTS INCLUDED 1 Right Fork Mount Assembly 1 Left Fork Mount Assembly 2 H3 Driving Light Assemblies 1 12-Pin Wiring Adapter 1 Hardware Kit for Fork Mount Driving Lights, Including: 6 5/16-18 Nylock
***THE OWNER'S MANUAL MUST BE GIVEN TO THE END USE CUSTOMER AFTER COMPLETING THE INSTALLATION.***
 INSTALLATION INSTRUCTIONS FOR THE MOTOR TRIKE HARLEY MECHANICAL REVERSE 1999-2006 FIVE SPEED FLH LAST UPDATED: OCTOBER 2011 AS THE INSTALLER OF THIS MECHANICAL REVERSE, YOU MUST BECOME FAMILIAR WITH PROPER
INSTALLATION. Note: Not all of the included parts will be used during this installation. -cont.-
 Driving Lights for Road Glide 5007 Fits: 98-up Road Glide PartS Included 1 Right Light Assembly 1 Left Light Assembly 1 Right Mounting Bracket 1 Left Mounting Bracket 1 Hardware Kit Including: 2 Narrow
INSTALLATION. DRIVING LIGHTS for FLHT/FLHX/FLHR 5005
 DRIVING LIGHTS for FLHT/FLHX/FLHR 5005 PARTS INCLUDED 1 Right Driving Light Assembly 1 Left Driving Light Assembly 1 Right Driving Light Bracket 1 Left Driving Light Bracket 4 Driving Light Bracket Plugs
6945 (12v) 6944 (24V) installation instructions
 6944 (24V) installation instructions") 6945 (12v) 6944 (24V) installation instructions included: tools needed: Cordless drill Breezeeasy Fan Mounting brackets 1/4 Drill Bit 10mm Socket Hardware Pack 10mm Wrench Fuse Assembly Wire Stripper Crimper
6945 (12v) 6944 (24V) installation instructions included: tools needed: Cordless drill Breezeeasy Fan Mounting brackets 1/4 Drill Bit 10mm Socket Hardware Pack 10mm Wrench Fuse Assembly Wire Stripper Crimper
I N S TA L L AT I O N
 I N S TA L L AT I O N 5008 fits: H-D: '80-Up Electra glide, tour glide, road king, road glide or street glide PartS Included 1 Right Fork Mount Assembly 1 Left Fork Mount Assembly 2 H3 Driving Light Assemblies
Installation Instructions
 Installation Instructions Jeep JK Unlimited (2007 Present) Mounting Bracket and Air Line System Kit for ARB On-Board Twin Air Compressor (CKMTA12) Made in the USA Kit Contents: 1 Bracket for ARB Compressor
2017 Current Ford Raptor HoneyBadger Rear Bumper Installation Instructions
 2017 Current Ford Raptor HoneyBadger Rear Bumper Installation Instructions PREPARATION 1. Disconnect the negative terminal on the battery. Park the vehicle on level ground and set the emergency brake.
INSTALLATION BLIND SPOT TURN SIGNAL MIRRORS 1457
 BLIND SPOT TURN SIGNAL MIRRORS 1457 PARTS INCLUDED 2 Blind Spot Turn Signal Mirror Assemblies 1 Wire Harness Kit Including: 2 Wiring Harness (four pin) 1 Adapter Harness (six pin) 2 3-Pin Female Connectors
Track Rocker Installation Instructions
 Track Rocker Installation Instructions For Installing Painless Part Numbers: 58103: 8-Switch Customizable Track Rocker Switch Panel w/ Flanged Mount 58106: 6-Switch Customizable Track Rocker Switch Panel
Fig A ADDICTIVE DESERT DESIGNS. Preparation: Removal: Release these clips
 Preparation: Disconnect the negative battery terminal. Park the vehicle on level ground and set the emergency brake. We recommend reading through the installation instructions in whole before performing
INSTALLATION MANUAL
 INSTALLATION MANUAL 2563000 Parts List 1 Carrier weldment 2 Support arm assembly 1 Third brake light assembly 1 Light extension bracket 1 Spare tire adjustment plate 1 Spare tire mount plate 1 Female spade
Installation Instructions for Key Switch SNOWRATOR
 2017 Installation Instructions for Key Switch SNOWRATOR We appreciate your purchase of L.T. Rich s Product. Please read carefully before Operating or detaching. AES L.T.RICH 6/15/2017 SHIPPING CONTENTS...
Tusk Pannier Racks. Instructions and information KLR
 1 Tusk Pannier Racks Instructions and information KLR650 2008 + Congratulations on your purchase of the Tusk Pannier Racks. These racks are made to handle extreme adventure riding, but work great for the
Step 1: Parts List and Bike Preparation
 Step 1: Parts List and Bike Preparation Please be sure to read our instructions thoroughly before attempting installation. Check Parts list supplied with your kit to be sure all parts are handy. If something
SUT-250-S (These instructions are used for SUT-250-SCLC also)
") SUT-250-S (These instructions are used for SUT-250-SCLC also) Torque wrench, carpenters square, wire cutters, Phillips screwdriver, 7/16, 9/16, and 3/4 combination wrenches, ratchet, 9/16, 3/4, 13/16,
SUT-250-S (These instructions are used for SUT-250-SCLC also) Torque wrench, carpenters square, wire cutters, Phillips screwdriver, 7/16, 9/16, and 3/4 combination wrenches, ratchet, 9/16, 3/4, 13/16,
INSTALLATION LIGHTED CURVED LAY DOWN LICENSE PLATE MOUNT 3166
 INSTALLATION LIGHTED CURVED LAY DOWN LICENSE PLATE MOUNT 3166 PARTS INCLUDED 1 Lighted Curved Lay Down License Plate Assembly 1 Hardware Kit Including: 6 Cable Ties 1 Dielectric Grease Pack 1 1 x 8 Tape
Fig A ADDICTIVE DESERT DESIGNS. Preparation: Removal:
 Preparation: Disconnect the negative battery terminal. Park the vehicle on level ground and set the emergency brake. We recommend reading through the installation instructions in whole before performing
TTR225/250 DUAL S PORT K IT I NSTALLATION I NSTRUCTIONS
 TTR225/250 DUAL S PORT K IT I NSTALLATION I NSTRUCTIONS KIT CONTENTS Inspect Your Kit Your kit will include the following items A. TTR225/250 Instructions and Wiring Diagrams Read through the entire instruction
LED Driving Light Set For 2014 & Newer Can-Am Spyder RT # CA006-RT
 LED Driving Light Set For 2014 & Newer Can-Am Spyder RT # CA006-RT 1. Lay-out and familiarize yourself with the components supplied with this set. 2. Remove the left mirror by pulling firmly outward on
OIL COOLER KIT INSTALLATION INSTRUCTIONS PART NUMBER D E92 335i/xi (N55 engine) with M-Technic bumper and without stock oil cooler
 with M-Technic bumper and without stock oil cooler") OIL COOLER KIT INSTALLATION INSTRUCTIONS PART NUMBER D570-0925 APPLICATION 2011-12 E92 335i/xi (N55 engine) with M-Technic bumper and without stock oil cooler Congratulations for being selective enough
OIL COOLER KIT INSTALLATION INSTRUCTIONS PART NUMBER D570-0925 APPLICATION 2011-12 E92 335i/xi (N55 engine) with M-Technic bumper and without stock oil cooler Congratulations for being selective enough
INSTALLATION INSTRUCTIONS
 INSTALLATION INSTRUCTIONS Part# 22-2719 Complete Mounting System for Dual Viair Compressors For the most up-to-date instructions please visit www.updownair.com www.updownair.com 833-226-4863 I M P O R
Shotgun Single Barrel HPFP install guide
 Shotgun Single Barrel HPFP install guide Thank you for your purchase of the VTT Shotgun Single Barrel HPFP upgrade! First thing to do when you open your box is to make sure all parts are in their respective
Installation Instructions
 Installation Instructions Jeep JK 2-Door (2011 Present) Mounting Bracket and Air Line System Kit for ARB On-Board Twin Air Compressor (CKMTA12) Made in the USA Kit Contents: 1 Flat Bracket 1 Formed Bracket
Trail Rocker Installation
 Trail Rocker Installation Instructions 4, 6, or 8 - Switch Customizable Trail Rocker Switch Panel w/ Flanged Mount For Installing Painless Part Number: 57103, 57106, & 57109 Manual #90636 Painless Performance
For electronically controlled E4OD and 4R100 automatic transmissions ** READ ALL INSTRUCTIONS BEFORE INSTALLATION **
 26 August 2005 Ford PressureLoc #1060380 1 BD Ford PressureLoc Installation Manual For electronically controlled E4OD and 4R100 automatic transmissions Part#: 1060380 ** READ ALL INSTRUCTIONS BEFORE INSTALLATION
INSTALLATION INSTRUCTIONS FOR THE TOMAHAWK ELECTRIC REVERSE
 INSTALLATION INSTRUCTIONS FOR THE TOMAHAWK ELECTRIC REVERSE LAST UPDATED: April 2018 Thank you for choosing the Motor Trike Electric Reverse. We ask that you read the directions before you start and follow
INSTALLATION INSTRUCTIONS
 Rear Vision System Aftermarket and Factory 5.0, 8.4 and 6.1 MyGig Touch Screen Display (Factory Display requires Chrysler/Dodge dealer to activate) 2009 Current* Dodge Ram (Kit part number 1009-6503) *NOTE:
R O A D S M I T H TRIKE CONVERSIONS BY THE TRIKE SHOP
 R O A D S M I T H TRIKE CONVERSIONS BY THE TRIKE SHOP Please thoroughly review the instructions before and during installation. Keep in mind that this product was designed to be installed by trained dealer
JEEP JL 2018 License Plate Relocation Bracket
 921105340 JEEP JL 2018 License Plate Relocation Bracket Thank you for choosing Rough Country for all your vehicle needs. Please read instructions before beginning installation. Check the kit hardware against
INSTRUCTIONS FLHT 1998 AND LATER MODELS RADIO/CD KIT 1WARNING -J02911 REV General. Installation. Outer Fairing Removal
 MPH CERTIFIED HARLEY-DAVIDSON UNLOCK RPMx00 HARLEY-DAVIDSON INSTRUCTIONS REV. 5--0 Kit Numbers 760-0A (Domestic) and 769-0A (HDI) General FLHT 998 AND LATER MODELS RADIO/CD KIT This radio kit fits 998
Single Barrel Shotgun HPFP Install Guide
 Single Barrel Shotgun HPFP Install Guide Thank you for purchasing the VTT Single Barrel Shotgun HPFP upgrade kit! PLEASE READ THE ENTIRE GUIDE BEFORE BEGINNING INSTALLATION! The first thing you should
INSTALLATION INSTRUCTIONS
 Dual Camera Blind Spot Monitoring System w/multi-camera Switcher (Kit # 9002-2904) Please read thoroughly before starting installation and check that kit contents are complete. Items Included in the Kit:
INSTALLATION INSTRUCTIONS
 9002-6513 Rear Vision System W/ Zoom Aftermarket and Factory 8.4 Touch Screen Display (Factory Display requires Chrysler/Dodge dealer to activate) 2009 2012 RAM (Part B) 2013 Current RAM (Part A) NOTE:
INSTALLATION. Note: Not all parts will be used in the installation of this product. -cont.-
 5005 Fits: 06-up FLHX, 04-up Screamin Eagle Ultra Classic Electra Glide & Screamin Eagle Electra Glide Classic, '97-up FLHT, FLHTC, FLHTCU, FLHR PartS Included 1 Right Driving Light Assembly 1 Left Driving
Triumph Trophy SE Dash Mounted Accessory Shelf. Owner s / Installation Manual
 Triumph Trophy SE Dash Mounted Accessory Shelf Triumph Trophy SE Dash Mounted Accessory Shelf Congratulations on your purchase of the Triumph Trophy SE Dash Mounted Accessory Shelf. When properly mounted,
Amp & Speaker Upgrade Install Instructions for Batwing Fairing
 Amp & Speaker Upgrade Install Instructions for Batwing Fairing Tools Needed: 1/2 inch Socket Wire Cutters 7/16 inch Socket Wire Strippers 10 mm Socket Phillips Screwdriver 1/2 inch Ratchet Wrench T25 Torx
INSTALLATION INSTRUCTIONS
 INSTALLATION INSTRUCTIONS Part # 751-FP2600 IMPORTANT INFORMATION This Jagg oil cooler must be installed following these instructions. Read the easy-to-follow instructions fully prior to starting the installation
This kit is equipped with the Injen Ea nanofiber dry filters, Ea nanofiber filters do not require oil.
 This kit is equipped with the Injen Ea nanofiber dry filters, Ea nanofiber filters do not require oil. Part Number SP1126 2011 BMW E82 135i E90 335i (N55) L6 3.0L (turbo) 1-2 piece TUNED air intake system
advanced FLOW engineering Instruction Manual P/N: &
 advanced FLOW engineering Instruction Manual P/N: 46-70031 & 46-70032 Make: Dodge Model: 2500/3500 Year: 94-02 Engine: L6-5.9L (td) Cummins Make: Dodge Model: 2500/3500 Year: 94-02 Engine: V8-5.9L & V10-8.0L
INSTALLATION CONSTELLATION DRIVING LIGHTS 5009
 INSTALLATION CONSTELLATION DRIVING LIGHTS 5009 PARTS INCLUDED 1 Right Driving Light with Turn Signals 1 Left Driving Light with Turn Signals 1 Installation Component Kit Including: 8 Insulated Male Spades
Accessory Fuse Block. Please read this entire manual before proceeding with installation.
 Accessory Fuse Block Please read this entire manual before proceeding with installation. Kit Components: (1) Fuse Block Assembly (1) Harness (1) Positive power cable (1) Negative power cable (5) Pigtails
INSTALLATION. DRIVING LIGHTS for FLHT/FLHX/FLHR BLACK. THANK YOU FOR CHOOSING KϋRYAKYN!
 THANK YOU FOR CHOOSING KϋRYAKYN! PROTECT YOURSELF AND OTHERS FROM POSSIBLE INJURY AND PROPERTY DAMAGE OR LOSS. PAY CLOSE ATTENTION TO ALL INSTRUCTIONS, WARNINGS, CAUTIONS, AND NOTICES REGARDING THE, USE,
OIL COOLER KIT INSTALLATION INSTRUCTIONS PART NUMBER D E92 335is (N54 engine) with BMW M-Technic bumper and with stock oil cooler
 with BMW M-Technic bumper and with stock oil cooler") OIL COOLER KIT INSTALLATION INSTRUCTIONS PART NUMBER D570-0923 APPLICATION: 2011 E92 335is (N54 engine) with BMW M-Technic bumper and with stock oil cooler Congratulations for being selective enough to
OIL COOLER KIT INSTALLATION INSTRUCTIONS PART NUMBER D570-0923 APPLICATION: 2011 E92 335is (N54 engine) with BMW M-Technic bumper and with stock oil cooler Congratulations for being selective enough to
HID INSTALLATION ON RST1000 Futura
 HID INSTALLATION ON RST1000 Futura Disclaimer: This is a full description of what I have done to my motorcycle. I am in no way suggesting you do as I have done by following these instructions. I have not
A Division of Thiessen Products, Inc.
 The JIMS FORCEFLOW CYLINDER HEAD COOLER is designed for Twin Cam Models 1999 to present. Also fits all JIMS Twin Cam Race Engines. NOTE: These instructions show the installation of this product on a 2012
Installation Instructions
 Instructions Created by an: 2005+ Toyota Tacoma BTB Front Coilovers by Low Range Off Road SKU# TAC-SP-05CO-BTB-650 Diff Drop Kit (SKU# LR-2GDDK) Instructions included Installation Instructions Revised
INSTALLATION INSTRUCTIONS
 INSTALLATION INSTRUCTIONS Part # 751-FP2500 IMPORTANT INFORMATION This Jagg oil cooler must be installed following these instructions. Read the easy-to-follow instructions fully prior to starting the installation
INSTALLATION INSTRUCTIONS Part# , , ,
 INSTALLATION INSTRUCTIONS Part# 20-0218, 22-0318, 20-0118, 22-0219 20-0218 - 4 Tire On Board Air Delivery System and Dual Compressed Air System Includes ARB CKMTA12 Compressor 20-0118 - 2017 FORD RAPTOR
ELECTRICAL SYSTEM UPGRADE
 NEW CONTROLLER & ELECTRICAL SYSTEM UPGRADE FOR DAIRY TECH, INCORPORATED 10, 30 & 60G PASTEURIZERS Parts to Include 2 Wire ties (Nuts) 2 sticky wire mount pads Large Rubber Grommet (for bottom of electric
Installation Manual (Harley Touring)
") Installation Manual (Harley Touring) Glenda LED Light Kit (Dimmable) Patent Pending The Clearwater Company 2546 Mercantile Dr. Ste B Rancho Cordova, CA 95742 P:916.852.7029 F:916.852.9410 www.clearwaterlights.com
Installation Manual (Harley Touring) Glenda LED Light Kit (Dimmable) Patent Pending The Clearwater Company 2546 Mercantile Dr. Ste B Rancho Cordova, CA 95742 P:916.852.7029 F:916.852.9410 www.clearwaterlights.com
INSTALLATION CONSTELLATION DRIVING LIGHTS 5009
 INSTALLATION CONSTELLATION DRIVING LIGHTS 5009 PARTS INCLUDED 1 Right Driving Light with Turn Signals 1 Left Driving Light with Turn Signals 1 Installation Component Kit Including: 8 Insulated Male Spades
OIL COOLER KIT INSTALLATION INSTRUCTIONS PART NUMBER D
 OIL COOLER KIT INSTALLATION INSTRUCTIONS PART NUMBER D570-0907 APPLICATION: 2011-12 E90 335i/xi (N55 engine) with BMW M-Technic bumper and without stock oil cooler Congratulations for being selective enough
Amp & Speaker Upgrade Install Instructions for Victory Cross Country
 Amp & Speaker Upgrade Install Instructions for Victory Cross Country Tools Needed: 13mm Socket 4mm Ball Head Allen Socket 5mm Allen Wrench 10mm Wrench Wire Cutters Wire Strippers Phillips Screwdriver Pocket
FENDER ELIMINATOR. Remove axle nut, slide out axle, and drop rear tire away from the fender. (Picture 1)
") TRIUMPH BOBBER Remove axle nut, slide out axle, and drop rear tire away from the fender. (Picture ) Remove () tail light bolts. (Picture ) Unplug stock connectors and remove from underneath the fender.
TRIUMPH BOBBER Remove axle nut, slide out axle, and drop rear tire away from the fender. (Picture ) Remove () tail light bolts. (Picture ) Unplug stock connectors and remove from underneath the fender.
DODGE RAM 24V 5.9L CUMMINS
 DODGE RAM 24V 5.9L CUMMINS DODGE RAM 24V 5.9L CUMMINS TABLE OF CONTENTS SECTION 1 Preparing the Installation 1 SECTION 2 Boost Gauge Installation 2 SECTION Pyrometer/EGT Gauge Installation 4 SECTION 4
Installation of Auto Meter Cobalt Boost/Vacuum Gauge:
 Installation of Auto Meter Cobalt Boost/Vacuum Gauge: Fitment: All 79-14 models. This installation was completed on a 2004 Mustang GT, and should be identical for all 1999-2004 model Mustangs. Time needed:
Parts List. Please be sure to read our instructions thoroughly before attempting installation. D2/G2 Parts List. D31/G31 Parts List.
 Parts List Please be sure to read our instructions thoroughly before attempting installation. D2/G2 Parts List D31/G31 Parts List Page 2 1 Step 1: Bike Preparation Step 1: Bike Preparation There are two
baker drivetrain speedometer recalibration unit instructions
 baker drivetrain 2007-2009 speedometer recalibration unit instructions baker drivetrain - www.bakerdrivetrain.com - 1-877-640-2004 table of contents: 2) Table of Contents 3-4) Wiring Diagrams 5) Recalibration
INSTALLATION INSTRUCTIONS FUEL SURGE TANK KIT
 INSTALLATION INSTRUCTIONS FUEL SURGE TANK KIT BMW E46 3-Series, Excl Convertible Document: 19-0056 Support: info@radiumauto.com Relieve fuel pressure in vehicle before beginingthe installation. Disconnect
OIL COOLER KIT INSTALLATION INSTRUCTIONS PART NUMBER D E92 335i/xi (N55 engine) with BMW Standard bumper and with stock oil cooler
 with BMW Standard bumper and with stock oil cooler") OIL COOLER KIT INSTALLATION INSTRUCTIONS PART NUMBER D570-0924 APPLICATION: 2011-12 E92 335i/xi (N55 engine) with BMW Standard bumper and with stock oil cooler Congratulations for being selective enough
OIL COOLER KIT INSTALLATION INSTRUCTIONS PART NUMBER D570-0924 APPLICATION: 2011-12 E92 335i/xi (N55 engine) with BMW Standard bumper and with stock oil cooler Congratulations for being selective enough
OIL COOLER KIT INSTALLATION INSTRUCTIONS PART NUMBER D
 OIL COOLER KIT INSTALLATION INSTRUCTIONS PART NUMBER D570-0904 APPLICATION: 2011-2012 E90 335i/xi (N55 engine) with BMW standard bumper and with stock oil cooler Congratulations for being selective enough
Installation Guide 2016 Kawasaki ZX10-R Exhaust Kit
 Installation Guide 2016 Kawasaki ZX10-R Exhaust Kit!! THIS PRODUCT IS DESIGNED FOR USE IN CLOSED COURSE RACING AND IS NOT INTENDED FOR HIGHWAY USE!! Congratulations on the purchase of your new TaylorMade
REV 200SG Kit-RM. High Performance Front Speaker Kit with 200 Watt Amplifier. installation Manual
 REV 200SG Kit-RM High Performance Front Speaker Kit with 200 Watt Amplifier For Use Use On On 1998-2013 rushmore Ultra Classics platform And Tri-Glides models installation Manual Thank you for choosing
Installation MKIV Headlight Housings with Fog Lamps (Procedures apply to both MKIV Jetta and Golf)
") Page 1 This tutorial is provided as a courtesy by ECS Tuning. Service Procedure Installation Proper service and repair procedures are vital to the safe, reliable operation of all motor vehicles as well
Page 1 This tutorial is provided as a courtesy by ECS Tuning. Service Procedure Installation Proper service and repair procedures are vital to the safe, reliable operation of all motor vehicles as well
Fig A. Addictive Desert Designs. Preparation: Removal:
 Preparation: Disconnect the negative battery terminal. Park the vehicle on level ground and set the emergency brake. We recommend reading through the installation instructions in whole before performing
Installation Instructions
 Steering kit for Samurai Cross Over Steering Kits (SKU# SST-SSOTS) Installation Instructions CAUTION: Safety glasses should be worn at all times when working with vehicles and related tools and equipment.
Installation Guide BMW S1000RR Full Exhaust System
 Installation Guide 2015-2016 BMW S1000RR Full Exhaust System!! THIS PRODUCT IS DESIGNED FOR USE IN CLOSED COURSE RACING AND IS NOT INTENDED FOR HIGHWAY USE!! Congratulations on the purchase of your new
UNIVERSAL GAUGE WIRE HARNESS
 2650-1797-00 UNIVERSAL GAUGE WIRE HARNESS For Installing Auto Meter Electric Speedometer, Tachometer, And Short Sweep Electric Oil Pressure, Water Temperature, Fuel Level, and Volt Meter Gauges. This harness
Tools needed: Here is a pic of the shift kit I used. It is a Transgo brand and as you can see, it just a bag full of springs and one valve.
 Before installing a shift kit, be sure the transmission is in good operating order. If your transmission is making noises, slipping, shifting bad or the fluid looks brown or smells burnt, take the transmission
Fig A ADDICTIVE DESERT DESIGNS. Preparation: Removal:
 Preparation: Disconnect the negative battery terminal. Park the vehicle on level ground and set the emergency brake. We recommend reading through the installation instructions in whole before performing
Installation Guide GSXR 600/750 Full-Exhaust Kit
 Installation Guide 2011-2015 GSXR 600/750 Full-Exhaust Kit!! THIS PRODUCT IS DESIGNED FOR USE IN CLOSED COURSE RACING AND IS NOT INTENDED FOR HIGHWAY USE!! Congratulations on the purchase of your new TaylorMade
INSTALLATION INSTRUCTIONS
 THANK YOU FOR CHOOSING KURYAKYN! Protect yourself and others from possible injury and property damage or loss. Pay close attention to all instructions, warnings, cautions, and notices regarding the installation,
30140 F5 Dual Fan Controller
 30140 F5 Dual Fan Controller 1 2501 Ludelle Street Fort Worth, Texas 76105 817-244-6212 Phone 817-244-4024 Fax 888-350-6588 Sales 800-423-9696 Tech E-mail: painless@painlessperformance.com Web: www.painlessperformance.com
INSTALLATION INSTRUCTIONS
 INSTALLATION INSTRUCTIONS Part# 22-7810 Add On Kit for Your ADS System Contents: Complete Install Kit for Your ARB CKMTA12V Compressor For the most up-to-date instructions please visit www.updownair.com
INSTALLATION PROCESS: FK003D945-7 Complete Front, Rear, and Clutch A.B.S. KIT Harley Davidson FLH Touring Models
 INSTALLATION PROCESS: FK003D945-7 Complete Front, Rear, and Clutch A.B.S. KIT 2014-2017 Harley Davidson FLH Touring Models Parts List: 4 Lines 1 Brake Light Switch Adapter 7 Single banjo bolts 2 Caliper
Installation Guide Kawasaki ZX10R Exhaust Kit
 Installation Guide 2011-2015 Kawasaki ZX10R Exhaust Kit!! THIS PRODUCT IS DESIGNED FOR USE IN Congratulations on the purchase of your new TaylorMade underbelly exhaust kit for your CLOSED 2011 Kawasaki
LGT-306L / LB Club Car Precedent LED Light Bar Bumper Kit Installation Instructions
 LGT-306L / LB Club Car Precedent LED Light Bar Bumper Kit Installation Instructions Caution: Please read through the instructions carefully. Before starting this project, remove the system s positive and
baker+1 oil Pan installation
 Installation Instructions over view baker+1 oil Pan installation V.2-29-08 FEATURES: 2 piece Billet Aircraft Grade 6061-T6 Aluminum Reduces engine oil temperature by 10 degrees on an 80 degree day. Multiple
Shotgun Double Barrel HPFP install guide
 Shotgun Double Barrel HPFP install guide Thank you for your purchase of the VTT Shotgun Double Barrel HPFP upgrade! First thing to do when you open your box is to make sure all parts are in their respective
Instruction Manual. What s In The Box? D4 LED Light Kit DNL.D Kit Contents DENALIELECTRONICS.COM
 Instruction Manual Instruction Rev00 Thank you for choosing DENALI We know you would rather be riding your bike than wrenching on it, so we go the extra mile to make sure our instructions are clear and
INSTALLATION INSTRUCTIONS
 Toyota 24-pin Dual Camera Blind Spot Monitoring System (Kit # 9002-2911) Please read thoroughly before starting installation and check that kit contents are complete. Items Included in the Kit: 2 Adjustable
Suzuki Samurai Coated Stainless Steel Braided Brake Lines (SKU# SB-BL) Installation Instructions
 Installation Instructions") Suzuki Samurai Coated Stainless Steel Braided Brake Lines (SKU# SB-BL) Installation Instructions SUZUKI SAMURAI FRONT BRAKE LINES SUZUKI SAMURAI REAR BRAKE LINES Notice: After completing this installation
Suzuki Samurai Coated Stainless Steel Braided Brake Lines (SKU# SB-BL) Installation Instructions SUZUKI SAMURAI FRONT BRAKE LINES SUZUKI SAMURAI REAR BRAKE LINES Notice: After completing this installation
R O A D S M I T H TRIKE CONVERSIONS BY THE TRIKE SHOP
 R O A D S M I T H TRIKE CONVERSIONS BY THE TRIKE SHOP Please thoroughly review the instructions before and during installation. Keep in mind that this product was designed to be installed by trained dealer
Trail Rocker Installation
 Trail Rocker Installation Instructions Customizable Trail Rocker Control System For Installing Painless Part Number: 57100 Manual #90616 Painless Performance Products recommends you, the installer, read
Turner M50 Manifold Adapter Install. April 26, 2012
 April 26, 2012 Models: 1996-99 E36 328i/M3; 1997-98 E39 528i, 1997-98 Z3 2.8, 1998-2000 MZ3 S52 Product(s): Turner M50 Manifold Adapter Kit Subject: Installation Guidelines and Tips This guide will aid
Retro it Steering Column
 Retro it Steering Column INSTALLATION INSTRUCTIONS for 1976-86 CJ5 & CJ7 FOR PART NUMBER S: 1520800010, 1520800020, 1520800051, 1526800010, 1526800020, 1526800051 S I NCE 1986 Instruction # 8000000010
Classic Light Bar Mustang
 Classic Light Bar 2005-2012 Mustang Note: Read installation instructions before starting. Component List: 1 Light Bar Part #110000 1 Driver Side Bracket w/set Screw Part #115003 1 Passenger Side Bracket
advanced FLOW engineering Instruction Manual P/N: E Make: FORD Model: SUPER DUTY F-250/350 Year: Engine: V8-6.7L (td) POWER STROKE
 POWER STROKE") advanced FLOW engineering Instruction Manual P/N: 51-81872-E Make: FORD Model: SUPER DUTY F-250/350 Year: 2011-2016 Engine: V8-6.7L (td) POWER STROKE Please read the entire instruction manual before proceeding.
advanced FLOW engineering Instruction Manual P/N: 51-81872-E Make: FORD Model: SUPER DUTY F-250/350 Year: 2011-2016 Engine: V8-6.7L (td) POWER STROKE Please read the entire instruction manual before proceeding.
OIL COOLER KIT INSTALLATION INSTRUCTIONS PART NUMBER D E92/E93 335i/xi with stock oil cooler
 OIL COOLER KIT INSTALLATION INSTRUCTIONS PART NUMBER D570-0920 APPLICATION 2007-10 E92/E93 335i/xi with stock oil cooler Congratulations for being selective enough to use a Dinan Engineering Oil Cooler
97-06 JEEP TJ/LJ LONG ARM UPGRADE KIT
 921663U00 97-06 JEEP TJ/LJ LONG ARM UPGRADE KIT Thank you for choosing Rough Country for your suspension needs. This kit is an upgrade kit only. This kit includes frame mounting points and adjustable long
BAKER CRUISE DRIVE TOP COVER BAKER 1.5 OIL PAN
 BAKER BAKER CRUISE 1.5 DRIVE OIL TOP PAN COVER PN: BD-1.5B Wrinkle Black Highlighted Pan Assembly BD-1.5CVO Granite Highlighted Pan Assembly CVO Models BD-1.5P Show Polished Pan Assembly BD-1.5C Chrome
RZ3-5K Polaris RZR XP 1000 & 900 Kicker 5 Speaker Audio Kit
 PO H PWER PO 5 O KIT I E D U A S A TS S I R LA R Z R R O SP pg 2 pg 9 pg 13 pg 25 pg 29 Disassembly, Wire and Amplifier Plate Installation Glovebox Subwoofer Installation Kick Panel Speakers Installation
INSTALLATION INSTRUCTIONS
 REV 3 05/13/2016 INSTALLATION INSTRUCTIONS PART NO. 702002T PRODUCT DESCRIPTION: REAR INNER FENDER LINER APPLICATION: JEEP WRANGLER / WRANGLER UNLIMITED PRODUCT SAFETY & LEGAL DISCLAIMER IMPORTANT READ
nca NCA 450-RM installation Manual For Use On Rushmore platform bikes 200 Watt 4-Channel Amplifier
 nca NCA 450-RM 200 Watt 4-Channel Amplifier For Use On Rushmore platform bikes installation Manual Thank you for choosing the Hogtunes NCA 450-RM Amplifier for 2014+ Rushmore Platform Bikes. Since positive
Installation Instructions
 Instructions Created by an: 2007-Present Toyota Tundra LRT Leveling Lift Kit - 4WD by Low Range Off-Road (SKU# LR-LRTundra) Instructions also apply to 2WD Kits. Installation Instructions Revised 7-11-17
ELECTRIC BICYCLE OWNER S MANUAL.
 ELECTRIC BICYCLE OWNER S MANUAL www.gowattson.com Hello. 1 Assembly. 2 Overview. 2 Step One: Removing the Front Basket. 3 Step Two: Mounting the Handlebars & Display. 4 Step Three: Replacing the Front
Installation Instructions
 Instructions Created by an: Suzuki Samurai Roof Rack Kit for Hard Top, Tin Top by Low Range Off Road (SKU# SEB-RRTT) Installation Instructions CAUTION: Safety glasses should be worn at all times when working