INSTALLATION PREPARATION
|
|
|
- Shanon Banks
- 5 years ago
- Views:
Transcription
1
2 INSTALLATION PREPARATION PARTS SUPPLIED PARTS SUPPLIED Before installing your new Humminbird fishfinder, please ensure the following parts are included in the box: Fishfinder Transducer with 20 (6m) of cable and mounting hardware kit Mounting system and mounting hardware kit 6 (2m) power cable Publications kit It any of these items is missing, call our Customer Support Hotline. ACCESSORIES Humminbird offers a wide assortment of accessories that complement and expand the capability of your new fishfinder. These accessories are designed with the same high standards and are backed by the same one-year warranty. The Humminbird Accessory catalog included with your unit contains descriptions of the many accessories available and ordering information. All Humminbird accessories are available through your full-service Humminbird dealer or factory direct through our number listed in the Customer Support section. INSTALLATION OVERVIEW Your Humminbird fishfinder consists of two primary components to install: the control head and the transducer. The control head contains the sonar transmit and receive circuitry, as well as the user controls and display. It should be installed in a location that provides access to the controls and visibility while in use. The control head mounts on a quick disconnect mounting system that swivels and tilts providing flexibility for viewing from almost anywhere on the boat. The transducer converts electrical energy from the transmitter into mechanical pulses or sound waves. The transducer also receives the reflected sound waves and converts them back into electrical signals for display on the control head. It should be installed in contact with the surface of the water in an area that has smooth waterflow- usually on the transom of the boat. There are several mounting options for the transducer. Review the following section to determine the method that works for you and your boat.


3 INSTALLATION PREPARATION INSTALLATION OVERVIEW Determining How to Mount the Transducer Your Humminbird fishfinder includes a standard transducer. This transducer can be mounted on the transom of the boat or bonded to the inside of a fiberglass hull boat. The transom installation, which is the most widely used, places the transducer on the outside of the boat hull. This technique produces the least signal loss, and provides a way to adjust the transducer after installation. The mounting hardware included is designed to protect both the boat and the transducer should the boat strike debris in the water or when trailering. As an alternative to transom mounting, it is possible on many fiberglass-hulled boats to glue the transducer on the inside of the boat hull. Since fiberglass has similar sonar characteristics as water, the sonar signal can pass through the boat hull with minimal loss. The hull of the boat must be single layer construction (not double-hulled) Also, any air trapped in the lamination of the fiberglass would prevent the sonar signal from passing through. Inside the hull installations require no holes be drilled into the boat and through experimentation, high-speed operation comparable to transom mounting can be achieved. Two-part slow cure epoxy (not included) is required to glue the transducer in place.
4 INSTALLATION PREPARATION ALTERNATE MOUNTING METHODS ALTERNATE TRANSDUCERS AND MOUNTING METHODS Your Humminbird fishfinder comes with everything necessary for installation and operation on most boats. However, there are several situations which may require a different type of transducer. Inboard boats, wood or metal hulls, and sail boats create unique transducer mounting needs Alternate transducers and mounting methods are detailed below. Portable Mounting The standard transducer can be adapted for portable installations with a portable mounting kit available from Humminbird. This accessory adapts your transducer to a suction cup mount for temporary installation on the boat hull or other surface. Trolling Motor Mounting The standard transducer can also be adapted to mount on most trolling motors using a different accessory kit. This accessory includes a bracket and hose clamp that allows mounting the transducer to the body of most trolling motors. Thru-Hull Mounting Thru-hull transducers install through a hole drilled in the hull of the boat. Larger boats or boats with inboard motors create turbulence that make transom mounting ineffective. Also, hulls that are very thick or are double layered, or made from materials such as wood or metal, (which do not conduct sonar signals) make inside the hull mounting inadvisable. Thru-hull mounting may require the use of a fairing block to level the transducer with the waterline. Also, since special tools and knowledge may be required to perform this type of installation, it is best to refer to a qualified marine technician.
5 INSTALLATION PREPARATION TRANSDUCER EXCHANGE TRANSDUCER EXCHANGE Other transducers are available as replacements for the standard transducer. You may exchange your new and unassembled transducer for another type by returning it to the address listed in Customer Support. Some transducers may have additional cost. Refer to the Accessory catalog or call Customer Support for information. BEGINNING INSTALLATION Now that you have determined the transducer mounting method you can begin installation of your new Humminbird fishfinder. The installation guide included on the next few pages provides detailed step by step instructions for installation of the control head and transducer. For transom mount transducer installations you will need the mounting template included with your manual. In addition to the parts included you need the following for installation and operation: A powered hand drill and various drill bits Philips and flat-head screwdrivers A ruler or measuring tape Pen or pencil 12 volt power source (your boat s battery) A 1-amp fuse A fuse holder (if you are wiring directly to the boat s battery) Silicone sealant (for sealing drilled holes) 2-part, slow-cure epoxy (for inside the hull transducer installations)
6 INSTALLATION TRANSOM INSTALLATION Do not begin this transducer installation until you read the Installation Preparation in the Operation Guide. This chapter contains information critical to the correct installation of your transducer. Due to the wide variety of boat hulls, only general instructions are presented in the installation guide. Each boat hull represents a unique set of requirements that should be evaluated prior to installation. TRANSOM INSTALLATION Step One - Determine Where to Mount the Transducer Begin the transducer installation by determining where on the transom to install the transducer. Consider the following to find the best location: It is very important to locate the transducer in an area which is relatively free of turbulent water, As a boat moves through the water, turbulence is generated by the weight of the boat, and the thrust of the propeller(s). This turbulent water is normally confined to areas immediately aft of ribs, strakes or rows of rivets on the bottom of the boat, and in the immediate area of the propeller(s) (Figure 1). On outboard or inboard/outboard boats it is best to stay at least 15 (40cm) to the side of the propeller(s). If possible, viewing the transom of the boat while the boat is moving will provide the best means of locating turbulence free water. If maximum high-speed operation is a high priority, this is the recommended method. If this is not possible, select a location on the transom where the hull forward of this location is smooth, flat, and free of protrusions or ribs. The transducer when mounted should point straight down. The design of the transducer will accommodate a wide range of deadrises and remain ported straight down (Figure 2). On boats with stepped hulls, it may be possible to mount the transducer on the step. Never mount the transducer on the transom behind a step, as this area of the transom will not be in contact with the water at high speed (Figure 3).
7 INSTALLATION TRANSOM INSTALLATION If the propeller(s) is (are) forward of the transom, it may be impossible to find an area clear from turbulence, and a different mounting technique or transducer type should be considered. Step Two - Drill the Mounting Holes 1. Remove the mounting template from the front of the Operations Manual. 2. Hold the template on the transom of the boat in the location where the transducer will be installed (Figure 4). Align the template vertically, ensuring the lower edge of the transom meets with the bottom corner of the template. 3. Using a pencil or punch, mark the two mounting holes shown on the template onto the transom. Do not mark or drill any other holes at this time. 4. Using a 5/32 (4mm) bit drill the two holes to a depth of approximately 1" (3cm). On fiberglass hulls, it is best to start with a smaller bit and use progressively larger drill bits to reduce the chance of chipping or flaking the outer coating. Step Three - Assemble the Transducer 1. Attach the Pivot to the transducer body as shown in Figure 5, using the #8 3/8 (9mm) long allen headed pivot screw, the headed pin, the two flat washers, and the two toothed lock washers. Note: The toothed lock washers must be positioned between the transducer and the pivot ears. The flat washers must be positioned to the outside at the pivot ears. 2. Using the AIlen wrenches provided, loosely tighten the pivot screw (Figure 6). Do not completely tighten the assembly at this time, so the pivot angle can be adjusted later. 3. Insert the pivot/transducer assembly into the mounting bracket as shown in Figure 7. Do not snap the assembly closed.
8
9 INSTALLATION TRANSOM INSTALLATION Step Four - Mount the Transducer to the Transom 1. Apply silicone sealant to the mounting holes drilled into the transom. 2. Align the transducer assembly with the drilled holes in the transom (Figure 8). 3. Use either a flat head screwdriver, a 5/16" (8mm) hex driver, or a 5/16" (8mm) socket to mount the assembly. Using the two #10 1 (25mm) long slotted hex head screws, mount the transducer assembly to the transom as shown. Do not fully tighten the mounting screws in order to vertically adjust the transducer. Snap the pivot down into place. Step Five - Adjust the Running Position of the Transducer The bracket allows height and tilt adjustment, the pivot screws allow angular adjustment. Initially, adjust the transducer as described in the following paragraphs. Further adjustment may be necessary to refine the instillation after high speed testing. 1. First adjust the pivot angle of the transducer body so its length is parallel with the length of hull of the boat. Then pivot the transducer down so the rear is about 1/4 inch (6mm) lower than the front (Figure 9). 2. Fully tighten the two pivot screws using the Allen wrenches. It may be necessary to retighten the pivot screws after the initial use as the plastics may still be seating to the lock washers. 3. Adjust the height of the assembly so the face of the transducer is 3/16" (4.5mm) beneath the lower edge of the transom (Figure 10). Mark the position of the mounting bracket on the transom with a pencil. 4. Force the pivot to the up position to gain access to the mounting screws. Assure the transducer location has not changed, then fully tighten the two mounting screws (Figure 11). Snap the pivot back down. Confirm the pivot angle has not changed. Note: A third screw location is provided for the
10 mounting bracket. Drill this hole and install the screw after final testing and adjustments have been completed.
11 INSTALLATION TRANSOM INSTALLATION Step Six - Route the Cable There are several ways to route the transducer cable to the to the area where the control head will be installed. The most common procedure routes the cable through the transom into the boat. Inside the boat there is often a channel or conduit used for other wiring that the cable can be routed along. Do not cut or shorten the transducer cable and try not to damage the cable insulation. Route the cable as far as practical from the VHF radio antenna cables or tachometer cable to reduce the possibility of interference. If the cable is too short, extension cables are available to extend the transducer cable up to a total of 50' (15 m). Call Humminbird Customer Support for more information. Follow these steps to route the cable through the transom: 1. Drill a 5/8 (16mm) hole above the water line. Route the cable through the hole. 2. Fill the hole with silicone sealant. 3. Place the escutcheon plate over the hole and attach with the two #8 x 5/8 (16mm) screws. 4. Secure the cable by attaching the cable camp to the transom using a #8 x 5/8 (16mm) screw. Note: The transducer will pivot up to 90 degrees in the bracket. Allow enough slack in the cable for this movement. It is best to route the cable to the side of the transducer so the cable will not be damaged by the transducer during movement.
12 INSTALLATION INSIDE THE HULL INSTALLATION INSIDE THE HULL INSTALLATION Inside the hull installation requires the mount system and control head be installed and operational. See Installing the Control Head for instruction on installing the unit. Inside the hull mounting generally produces good results in single thickness fiberglass-hulled boats. Humminbird cannot guarantee depth performance when transmitting and receiving through the hull of the boat since some signal loss occurs. The amount of loss depends on hull construction and thickness, and the installation. This installation requires slow-cure two-part epoxy. Do not use silicone or any other soft adhesive to install the transducer, as this material reduces the sensitivity of the unit. Five minute epoxy has a tendency to cure before all the air bubbles can be purged. Step One - Determine the Mounting Location Begin the transducer installation by determining where inside the hull to install the transducer. Consider the following to find the best location: Observe the outside of the boat hull to find the areas that are mostly free from turbulent water. Avoid ribs, strakes, and other protrusions as these create turbulence (Figure 14). As a general rule, the faster the boat can travel the further aft and closer to the centerline of the hull the transducer has to be located to remain in contact with the water at high speeds. Step Two - Test the Mounting Location There is no opportunity for adjustment after the transducer glued in place. Therefore, it is best to perform a trial installation on inside the hull transducers first, and run the boat at high speeds to determine the best mounting area. 1. At the identified mounting location, lay the transducer body face down with the pointed end towards the bow. 2. Fill the hull with enough water to submerge the transducer body. Use a sand filled bag or other heavy object to hold the transducer in position.
13 The transducer cannot transmit through air. The water purges any air from between the transducer and the hull and fills any voids in the coarse fiberglass surface.
14 INSTALLATION INSIDE THE HULL INSTALLATION 3. Power up the Control Head. 4. Run the boat at various speeds and water depths while observing the screen on the Control Head. If the unit functions well at low speeds but begins to skip or miss the bottom at higher speeds, the transducer needs to be moved. If depth performance is required, test the fishfinder in water at the desired depth. Test different locations in the hull until the optimum performance is achieved. Step Three - Permanently Mount the Transducer 1. Once the mounting location is determined, mark the position of the transducer. 2. Remove the water from inside the hull and thoroughly dry the mounting surface. If the surface is excessively rough, it may be necessary to sand the area to provide a smooth mounting surface. Ensure the mounting area is clear and dry. 3. Mix an ample quantity of two-part slow-cure epoxy slowly and thoroughly. Avoid trapping air bubbles. 4. Coat the face of the transducer and the inside of the hull (Figure 16). 5. Press the transducer into place with a slight twisting motion to purge any trapped air from underneath, keeping the pointed end of the transducer body pointed forward (Figure 17). Note: Proper operation requires the pointed end of the transducer body to face towards the bow. 6. Weight the transducer so it does not move while the epoxy is curing. When the epoxy cures, no water is necessary inside the hull. Neither water, spilled gasoline, or oil will affect the performance of the transducer.
15 INSTALLATION CONTROL HEAD INSTALLATION CONTROL HEAD INSTALLATION Step One - Determine Where to Mount Begin the installation by determining where to mount the control head. Consider the following to determine best location: The cables for power, transducer and temp/speed accessories (if applicable) should be installed first and must reach the mounting location. Extension cables are available. There are two ways to route the cables to the unit: through a hole in the mounting surface underneath the mounting bracket or from a hole outside the mounting bracket. Routing the cables down under the mount provides maximum weather protection; however this is not always feasible if the area under the fishfinder is inaccessible. In this case, route the cables through a hole at another location and cover with the supplied hole cover. The mounting surface should be adequately supported to protect the fishfinder from excessive wave shock and vibration, and provide visibility while in operation. The mounting area should allow sufficient room for the unit to pivot and swivel freely, and for easy removal and installation (Figures 18-19). Step Two - Connect the Power Cable to the Boat A 6 (2m) long power cable is included to supply power to the fishfinder. You may shorten or lengthen the cable using 18 gauge multi-stranded copper wire. CAUTION: Some boats have 24 or 36 volt electric systems. Be sure your unit is connected to a 12 VDC power supply. The Power can be connected to the boat's electrical system at two places: a fuse panel, usually located near the console, or directly to the battery. If a fuse terminal is available, use crimp-on type electrical connectors (not included) that match the terminal on the fuse panel. Attach the black wire to ground, and the red wire to 12 VDC power (Figure 20). Be sure to use a one amp
16 fuse in the connection. If you must wire the control head directly to a battery, be sure to install an inline fuse holder
17 INSTALLATION CONTROL HEAD INSTALLATION and one amp fuse (not included) for the protection of the unit (Figure 21). Humminbird is not responsible for over voltage or over current failures. In order to minimize the potential for interference with other marine electronics a separate power source (such as a second battery) may be necessary. Step Three - Drill the Mounting Holes 1. Set the mounting bracket in place on the mounting surface. Mark the four mounting screw locations with a pencil or punch. 2. Set the mounting bracket aside, and drill the four mounting screw holes using a 9/64 (3.6mm) bit. Step Four - Run the Cables 1. If the cables must pass through a hole underneath the mounting surface, mark and drill a 1 (25mm) hole centered between the four mounting holes (Figure 22). Note: if the cables must pass through the mounting surface at a different location, drill the 1" (25mm) hole at that location and pass the cables through from underneath. Also, you must break out the tabs on the rear of the mounting base using needle nose pliers (Figures 24-25). 2. Insert all cables through the 1 (25mm) hole from beneath the mounting surface. 3. Pass the cables through the grommet (if the cable hole is underneath the mounting bracket) then press the grommet in place around the cables and into the 1 (25mm) hole. 4. Pass the cables through the mounting base, out the top of the mounting bracket. 5. Place the mounting bracket on the mounting surface aligned with the drilled holes. Insert the four flathead wood screws into the mounting holes and tighten fully (Figure 23).
18 Optional: If the cables pass outside the mounting bracket, install the hole cover over the hole and fasten in place using the two #8 x 7/8 (22mm) wood screws (Figure 24).
19 INSTALLATION CONTROL HEAD INSTALLATION Step Five - Assembling the Connector Holder 1. Insert the cable connectors into the connector holder. The cable connectors are labeled, and there are corresponding labels on the connector holder (Figure 26). The slots for the connectors are keyed to prevent reverse installation, so do not force the connector into the holder. 2. Carefully pull the excess cable from beneath the mounting surface so the connector holder aligns with the mounting holes on the front of the mounting bracket (Figure 27). 3. Snap the support plate to the rear of the connector holder (Figure 28). 4. Insert the connector holder into place and use the two #6-32 x ¾ (9mm) screws to fasten it to the mounting bracket (Figure 28). 5. Install the control head by sliding it onto the mounting bracket until it is fully seated. To remove the unit simply depress the latch on the rear of the unit and lift (Figure 29). Your Humminbird is now ready for operation.
20 INSTALLATION TEST THE INSTALLATION TEST THE INSTALLATION Testing should be performed with the boat in the water, however you can initially confirm basic operation with the boat trailered. Press POWER once to turn the unit on. There will be an audible chirp when any button is pressed to confirm the button press. If the unit does not power-up, ensure the unit is fully seated on the mount and that power is available. The first screen provides four options: Start-up, Options, Simulator, and Diagnostic. A message at the bottom of the screen indicates the transducer connection. If no transducer is detected (or one is not connected), the message will indicate this and the unit will go into simulator after the initial screen times out. Note: the transducer must be submerged in water for reliable transducer detection. If a transducer is detected, the unit will enter Start Up or normal operation unless you choose another option. If you do not press any button before the timer reaches 0, the normal operation screen is displayed. If the boat is in water, sonar data appears. If the bottom is visible on screen with a digital depth readout, the unit is working properly. Ensure the boat is in water greater than 2 but less than the depth capability of the unit and the transducer is fully submerged. Remember the sonar signal cannot pass through air. If the unit is working properly gradually increase the boat speed to test highspeed performance. If the unit-functions well at low speeds but begins to skip or miss the bottom at higher speeds, the transducer requires adjustment. Refer to the appropriate transducer installation section for more detail. Note: it is often necessary to make several incremental transducer adjustments before optimum high-speed performance is achieved. Important: For Transom Mount transducer installations, install the third mounting screw after the final transducer adjustments. Humminbird 3 Humminbird Lane Eufaula, Alabama 36027

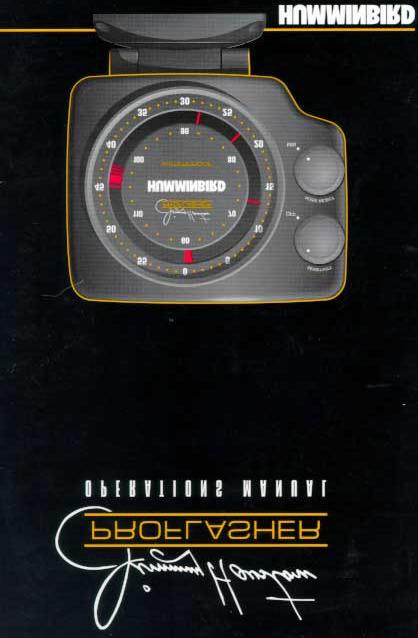
21 TESTING THE INSTALLATION After installing your Pro Flasher and transducer, you are ready to test the installation. Testing should be performed on the water, since that is the best way to confirm your transducer's performance. With your boat in the water, turn the Sensitivity / OnOff control clockwise. You should hear the disk start to spin and see an area of light at the "0" line on the dial, and another at the number corresponding to the depth of the water. Turning the Sensitivity control further clockwise increases the sensitivity of the unit so smaller returns will be displayed. Increase your boat speed to ensure that the transducer remains in contact with turbulence-free water at higher boat speeds. All Humminbird depthsounders are designed to work at speeds of 70 MPH or more, however use caution when operating any boat at high speed. High-speed testing does not apply to portable or trolling motor mounted transducers. If the Pro Flasher fails to display a bottom return at high speed, first ensure that the depth of the water is not in excess of the unit's capability. Also, ensure that the unit is fully seated on the mount, and the cable connectors are correct. (The label on the cable connector matches the label on the connector holder). If no light appears when the Power/ Sensitivity control is turned on, the power cable or fuse terminal may be the problem. If the unit obviously powers up but no bottom information is seen on the display, the transducer is most likely the problem. If the Pro Flasher operates well at idle or slow speeds, but loses the bottom at higher speeds, the transducer is losing intimate contact with the water at higher speeds. If your transducer is transom mounted, adjusting the running angle or depth of the transducer may solve the problem. Several test runs and transducer adjustments may be necessary to optimize transducer performance. Warning: Due to the "manual" control operation of the Pro Flasher, interference with sonar products using 200 KHz Frequency is likely.
22 USING THE PRO FLASHER The Pro Flasher differs from LCD depthsounders in two important ways: Operation of the unit is completely manual. Adjustment of the sensitivity and noise reject controls, and interpretation of the information displayed is entirely up to the user. Also, there is no history retained on-screen. Information displayed is in the form of instantaneous flashes of light on the dial - targets beneath your boat will appear on-screen for only as long as they are reflecting the sonar signal. As with any sonar product, the best way to learn to use the Pro Flasher is to operate in a familiar area and study the information presented on the display. As you gain experience with the unit you will be able to quickly analyze the underwater situation, and understand the conditions that lead to more productive fishing. The Pro Flasher uses a super-bright LED light source to indicate sonar returns. Since the display is naturally "light emitting", it is ideal for use at night or in low- light situations. The rubber lens hood prevents washout in even the brightest sunlight. As with all Humminbird products, all moving parts are ruggedized for tough shock and vibration endurance, and special components allow the Pro Flasher to operate at temperatures more extreme than you are likely to encounter. Your Pro Flasher may be used on an existing Wide Eye, Wide View or Wide Vision mounting base. Once mounted it will automatically sense and use the 200 KHz 16 element of the dual beam transducer. The Pro Flasher mounting base can only be used with the Pro Flasher unit. CONTROLS The Pro Flasher uses two simple controls to vary the display of sonar information: Sensitivity/On-Off, and Noise Reject. The Sensitivity/On-Off control serves as both the power switch for the unit as well as the variable sensitivity control. This is very similar to the volume control on a radio. Increasing the sensitivity is similar to turning up the volume. Adjustment of the Sensitivity control is largely a matter of personal taste and experience. Lower sensitivity settings will present a clean display with only large returns such as the bottom visible on-screen. Higher sensitivity settings will display progressively smaller signal returns, at the expense of cluttering the display with information. The depth of the water will affect the sensitivity setting you choose. Shallow water requires a lower setting, while deeper water requires a higher setting since some of the sonar signal will be absorbed or deflected. Also, the water condition- clear, murky, salt, fresh, etc. will affect the amount of sensitivity required. The other control is the Noise Reject. Adjustment of this control is not normally necessary in the operation of your Pro Flasher. The variable noise reject feature allows you to filter out electrical interference caused by the boat motor and other electronic devices on your boat. Noise is normally seen in the form of concentric light patterns that slowly revolve around the dial. If noise is present, you can reduce it's effect on the Pro Flasher by turning the Noise

23 Reject control slowly clockwise until it is filtered out. If no noise is detected, the control should be left in the "MIN" position. WHAT YOU SEE ON THE DISPLAY A "Zero" line is always present on the dial. This indicates that the unit is transmitting a signal. Any additional light displayed indicates a reflected sonar signal. This could be the bottom or any object between the surface and the bottom. The depth of the water is determined by comparing the leading edge of the bottom return to the number on the appropriate scale (inside or outside ring). The width of the bottom return and any surrounding flashes of light can give the user insight into texture, hardness, ground cover, etc. Generally, a wider bottom return indicates a soft bottom. Soft sand and mud tend to allow the sonar signal to penetrate until there is sufficient density to reflect the signal. The result is a wider return signal display. Part of the signal bounces back immediately from the surface of the bottom, part of the signal penetrates slightly. A hard bottom is generally displayed as a narrow return. All of the signal is reflected off the surface of the bottom simultaneously, so the returned signal arrives intact. Terrain variation within the area of coverage will spread out the bottom representation. It may be difficult to differentiate a hard sloping bottom from a flat soft bottom.


24 Broken but continuously displayed signals near the bottom return indicate vegetation or ground cover. It is often possible to see a "second return" from the bottom. This is usually seen in shallower water when the sensitivity is adjusted higher than normal. The sonar signal is transmitted downward from the boat and is reflected from the bottom back up. As the Pro Flasher senses this returned signal, it is displayed onscreen. The returned signal however is again reflected off the surface of the water and then the bottom giving a faint "second return" from the bottom. A second return is always exactly twice the depth and much weaker than that of the original return, so it is easy to spot on the dial. Fish are easy to differentiate on the Pro Flasher because they are usually only displayed briefly. Only a stationary fish directly under a stationary boat will continue to reflect the sonar signal.


25 A thermocline is the horizontal boundary where significant water temperature differences exist. When a thermocline exists, it will often tend to reflect sonar signals and is therefore visible on the display. The thermocline is identifiable because it usually exists over a broad area, and as a result will appear more continuous than returns from fish.
26 When operating the Pro Flasher in depths over 60', the bottom return will continue to rotate beyond the "zero" line on the dial. When the depth is over 60', the returned signal will relate to the numbers printed on the inside of the dial. You may notice that increased sensitivity is necessary due to the signal loss in deeper water. The Pro Flasher will easily track the bottom to depths up to 120'. MAINTAINENCE Your Humminbird Pro Flasher depthsounder is designed to provide you with years of trouble-free operation with virtually no maintenance. Follow the simple procedures below to ensure that your Pro Flasher continues to deliver top performance. If the unit comes into contact with salt spray, simply wipe the affected surfaces with a cloth dampened in fresh water. When cleaning the protective lens, use a chamois and non-abrasive cleaner. Do not wipe while dirt or grease is on the lens. Be careful to avoid scratching the lens. If your boat remains in the water for long periods of time, algae and other marine growth can reduce the effectiveness of the transducer. Periodically clean the face of the transducer with liquid detergent. Pivoting the transducer up in the bracket may allow better access for inspection or cleaning. If your boat remains out of the water for a long period of time, it may take some time to wet the transducer when returned to the water. Small air bubbles can cling to the surface of the transducer and interfere with proper operation. These bubbles will dissipate with time, or you may wipe the face of the transducer with your fingers after the transducer is in the water. Never leave your Pro Flasher unit in a closed car or trunk - the extremely high temperatures generated in hot weather can damage the electronics.
27 Do not attempt to repair the Pro Flasher yourself. There are no user serviceable parts inside, and special tools and techniques are required for reassembly to ensure the waterproof integrity of the housing. Repairs should be performed only by authorized Humminbird technicians. Many requests for repair received by Humminbird involve units that do not actually need repair. If you have trouble with your Pro Flasher, consult the following troubleshooting guide before contacting Humminbird. 1. Nothing happens when I turn the unit on. Check the power cable connection and fuse. Be sure the power cable is properly connected - red lead to 12 VDC positive, black lead to negative. Often a fuse can appear to be good when in fact it is not. Check the fuse with a tester, or replace it if in doubt. Ensure that the Pro Flasher unit is fully seated on the mount, and the latch is engaged. The electrical connections to the unit are not made until the unit is securely seated. 2. There multiple flashes at regular intervals. Check the Sensitivity control, if the control is on maximum sensitivity turn the control counterclockwise until you get an accurate reading. 3. Unusual or no readings are occurring. The signal that is reflected back to the transducer from the bottom, or fish, must be strong enough to produce a good clear flash on the dial. Weak flashes or no flashes indicates one of the following: -The Sensitivity control is turned too far counter clockwise. -You are positioned above deep decayed vegeta tion such trees or kelp. -You are in water over 120 feet deep. To Correct this problem adjust the Sensitivity control, moving it clockwise toward the maximum setting. 4. I get gaps in the reading at high speeds. Your transducer requires adjustment. If the transducer is transom mounted, there are two adjustments available to you - height, and running angle. Make small adjustments and run the boat at high speed to determine the effect. It may take several tries to optimize high speed operation. 5. The bottom reading disappears during a hard turn. This is normal as the transducer comes out of the water, and will correct itself when the turn is complete. 6. My unit loses power at high speeds. Your Humminbird Wide unit has an over-voltage protection which turns the unit off when input voltage exceeds 17 volts DC. Some outboard motors do not effectively regulate output voltage
28 and can produce electrical output in excess of 17 volts at higher engine speeds. Installation of an external voltage limiting device will prevent this from occurring.
PIRANHA I & 2 INSTALL GUIDE
 TOP Use 5/32" drill bit DO NOT LET DEADRISE INTERSECT THIS LINE PLACE EITHER CORNER ON DEADRISE ANGLE PIRANHA I & 2 INSTALL GUIDE Two components need to be installed on the boat: the transducer and the
PIRANHA I & 2 INSTALL GUIDE
 PIRANHA I & 2 INSTALL GUIDE Two components need to be installed on the boat: the transducer and the control head. The control head displays sonar information, the transducer sends and receives sonar signals
INSTALLATION PREPARATION
 PARTS SUPPLIED INSTALLATION PREPARATION PARTS SUPPLIED Before installing your new Humminbird fishsinder, please ensure the following parts are included in the box: Fishfinder Transducer with 20 (6m) of
INSTALLATION PREPARATION
 INSTALLATION PREPARATION PARTS SUPPLIED PARTS SUPPLIED Before installing your new Humminbird fishfinder, please ensure the following parts are included in the box: Fishfinder Transducer with 20 (6m) of
PIRANHA 5 INSTALLATION GUIDE
 PIRANHA 5 INSTALLATION GUIDE Two components need to be installed on the boat: the transducer and the control head. The control head displays sonar information, the transducer sends and receives sonar signals
HDR 650 Installation and Operations Manual _A
 HDR 650 Installation and Operations Manual 531874-3_A Thank You! Thank you for choosing Humminbird, America's #1 name in fishfinders. Humminbird has built its reputation by designing and manufacturing
High Speed Impact-Release Transom Mount Transducer. Installation Overview. Installation
 1 Installation Overview Following are instructions for the installation of this accessory. Before you start the installation, we encourage you to read these instructions carefully in order to get the full
High Speed Impact-Release Transom Mount Transducer. Installation Overview. Installation
 1 Installation Overview Before you start the installation, we encourage you to read these instructions carefully in order to get the full benefit from your Humminbird accessory. Transom Mounted Transducer
1. Testing the Transducer Prior to Installation
 1 Overview Before you start installation, we encourage you to read these instructions carefully in order to get the full benefit from your Humminbird accessory. Thru-Hull Installation NOTE: This type of
NX Combi Transducer. Installation and Operation Manual English
 NX Combi Transducer Installation and Operation Manual Start pack 3 1 Start pack 3 Edition: April 2007 2 Start pack 3 1 Registration... 3 2 Installation... 4 3 Mounting of Transom transducer... 4 3.1 Applications...
UltraSystem Series II INSTALLATION MANUAL PARTNERED WITH
 UltraSystem Series II INSTALLATION MANUAL PARTNERED WITH CONTENTS Important information. page 1 Planning the installation. page 2 Transducer positioning. page 3-7 Transducer installation. page 8-10 Control
Trolling Motor 360 Imaging Installation Guide _B
 Trolling Motor 360 Imaging Installation Guide 532178-2_B Thank You! Thank you for choosing Humminbird, the #1 name in marine electronics. Humminbird has built its reputation by designing and manufacturing
Owner s Manual And Guide To Installation
 Owner s Manual And Guide To Installation < # > TABLE OF CONTENTS 1 How to Use...3 1.1 Control Keypad...3 1.2 Mounting Hardware...4 1.3 Auto Launch Details...5 1.4 Trailering with the SWITCHBLADE...6 1.5
OWNER S GUIDE & INSTALLATION INSTRUCTIONS
 17-247-03 rev. 06 08/23/17 OWNER S GUIDE & INSTALLATION INSTRUCTIONS Transom-Mount with Integrated Release racket Depth Transducer or TRIDUCER Multisensor Models: P66, P66S Smart Sensor Patents apply to
OWNER S GUIDE & INSTALLATION INSTRUCTIONS
 OWNER S GUIDE & INSTALLATION INSTRUCTIONS Sealcast and Cast Resin Transducers Record the information found on the tag for future reference. Part No. Date Frequency khz with Airmar Fairings Models: M155,
TABLE OF CONTENTS. 1 How to Use Control gauge and Rocker Switch Mounting Hardware... 3
 1 TABLE OF CONTENTS 1 How to Use.... 3 1.1 Control gauge and Rocker Switch... 3 1.2 Mounting Hardware.... 3 1.3Trailering with the SWITCHBLADE... 4 1.4 Maintaining your SWITCHBLADE... 4 2 INSTALLATION
Electric Trolling Motor
 Electric Trolling Motor L Series User s Manual Please read and retain this manual before using product REACH RoHS TABLE OF CONTENTS Contents GENERAL INFORMATION 4 SPECIFICATIONS 4 WIRING AND BATTERY RECOMMENDATIONS
HOW - TO WIRING & LIGHTING
 HOW - TO WIRING & LIGHTING Tool And Material Checklist Test Light Service Manual Penetrating Oil Long-Nose Pliers T-Square or Right Angle Screwdriver Black Electrical Tape Fuses Fuse Puller Cloth or Paper
Digital Depth Sounder Display Installation and Operation Manual IMPORTANT
 DF1120S Digital Depth Sounder Display Installation and Operation Manual WARNING!!!! This depth sounder is an indicator of the water depth underneath the vessel; NOT A DEPICTION OF THE DEPTH AHEAD OF THE
channel damage the internal components and the weight may break the internal wiring or flexible strip.
 YOU MAY NEED End cap Power adaptor Connector pin Splicing pin Connector Silicone glue Pliers Power converter Converter + surge protector Heat shrink Aluminium channel Heat gun NT cutter IMPORTANT NOTES
Stay-IN-Play with Panic Stop Braking
 INSTALLATION INSTRUCTIONS TOWED VEHICLE BRAKING SYSTEM Stay-IN-Play with Panic Stop Braking SMI Manufacturing, Inc. P.O. Box 14040 Evansville, IN 47728 1-800-893-3763 www.smibrake.com SIP0906 Model SIP0603
Back-Up Sensor System
 Back-Up Sensor System Model No.: PKC0RE Owner s Manual and Warranty Information OFF ON 0.4m/1.3ft 0.6m/2.0ft 1.0m/3.3ft 1.2m/4.0ft 1.5m/5.0ft LEFT RIGHT Read these instructions completely before using
OWNER S GUIDE & INSTALLATION INSTRUCTIONS
 OWNER S GUIDE & INSTALLATION INSTRUCTIONS IMPORTANT: Please read the instructions completely before proceeding with the installation. These instructions supersede any other instructions in your instrument
Installation. minnkot amot or s.com
 Installation minnkot amot or s.com INSTALLATION Your Talon comes complete with the items listed below. Please take a moment to familiarize yourself with the parts list and tools needed prior to starting
LINDGREN-PITMAN General Maintenance of Lindgren-Pitman Hydraulic Systems & Equipment
 LINDGREN-PITMAN General Maintenance of Lindgren-Pitman Hydraulic Systems & Equipment Page 1 Lindgren-Pitman hydraulic driven equipment is designed to give long reliable service with a minimum of repairs
Owner s Manual. Dual Station Operation. DS41 Digital Depth Sounder
 DS41 Digital Depth Sounder Owner s Manual Standard 2 Inch Installation Dual Station Operation NMEA Repeater Reads in Feet Fathoms or Meters Adjustable Prop or Surface Offset Shallow and Deep alarms Dual
Installation Manual TWM Performance Short Shifter Cobalt SS/SC, SS/TC, HHR SS, Ion Redline and Saab 9-3
 Page 1 Installation Manual TWM Performance Short Shifter Cobalt SS/SC, SS/TC, HHR SS, Ion Redline and Saab 9-3 Please Note: It is preferable to park on a flat surface, as you will have to engage and disengage
GPS AutoSteer System Installation Manual
 GPS AutoSteer System Installation Manual Supported Vehicles Case IH Vehicles Case 2577 Combines Case 2588 Combines Accuguide Ready PN: 602-0233-01-A LEGAL DISCLAIMER Note: Read and follow ALL instructions
Maintenance and Repair
 Maintenance and Repair WARNING ALWAYS shut off the engine, remove key from ignition, make sure the engine is cool, and disconnect the spark plug and positive battery terminal from the battery before cleaning,
Transom or Optional Trolling-motor Mount
 OWNER S GUIDE & INSTALLATION INSTRUCTIONS Transom or Optional Trolling-motor Mount CHIRP or Adjustable Wide-beam Transducer Record the information found on the cable tag for future reference. Part No.
Panoptix PS21-TR. Installation Instructions. Important Safety Information. Registering Your Device
 Panoptix PS21-TR Installation Instructions Important Safety Information WARNING See the Important Safety and Product Information guide in the chartplotter or fishfinder product box for product warnings
Introduction Warning Suggested Field Equipment and Supplies Contents of Kit Section 1: Building the Boat Stand...
 TM INSTRUCTION MANUAL Overall Length...................... 61 1 /2" Hull Length......................... 55" Beam............................ 14 3 /4" Weight.......................... 14.5 lb Speed..........................
Condor Manual. Corporation
 Condor Manual Corporation PREFACE IMPORTANT, PLEASE READ CAREFULLY Thank you for your purchase with Amico Accessories Inc. This unit is designed for long lasting performance, providing the end user complies
Service Manual Air Tech Second Stage
 Service Manual Air Tech Second Stage Copyright 2002, Cressi-sub Revised 3/2002 2 Air Tech Second Stage Service Manual Contents BEFORE STARTING... 3 DISASSEMBLY... 3 PARTS CLEANING AND LUBRICATION... 9
Suzuki Electronic Speed Sensor
 Suzuki Electronic Speed Sensor Installation Instructions This instruction sheet tells how to install your Speed sensor and connect it to a NMEA 2000 network using Suzuki Modular Instrument System (SMIS)
Fully Automatic Bilge Pump INSTRUCTION MANUAL
 Fully Automatic Bilge Pump INSTRUCTION MANUAL Purpose of this manual The purpose of this manual is to provide necessary information for product installation, operation and maintenance. CAUTION: Read this
Backup Sensors User s Information CR-V
 Backup Sensors User s Information CR-V Contents Introduction... 3 Important Information... 4 How the Backup Sensors Work... 5 Limitations... 8 Operation... 10 Daily Inspection... 12 Caring for the Backup
NX Tri Ducer. Installation and Operation Manual English
 NX Tri Ducer Installation and Operation Manual NX TRI-Ducer 1 NX TRI-Ducer Edition: April 2007 2 NX TRI-Ducer Mounting instruction Tri-transducer 1 General... 3 1.1 Tools and Materials... 3 1.2 Pre-Installation
(Refer to qualified personnel)
") 3875 Cypress Drive Petaluma, CA 94954 800.228.2555 +1.707.773.1100 Fax 707.773.1180 www.gcx.com Installation Guide VHM-P (Non-Locking) and VHM-PL (Locking) Variable Height Arm (Slide-Above-Arm Configuration)
3875 Cypress Drive Petaluma, CA 94954 800.228.2555 +1.707.773.1100 Fax 707.773.1180 www.gcx.com Installation Guide VHM-P (Non-Locking) and VHM-PL (Locking) Variable Height Arm (Slide-Above-Arm Configuration)
BEAMER MODEL VDC Spotlight with joystick control panel MODEL VDC Spot/flood light with joystick control panel
 formerly a marinco.com product 502-2 installation & 503-2 instructions 502-2 24 VDC Spotlight with joystick control panel 502-3 24 VDC Spot/flood light with joystick control panel BEAMER MODEL 502-2 24
TOYOTA TUNDRA COLD AIR INTAKE Preparation SEQUOIA
 Preparation SEQUOIA 2008 - Part Number: PTR03-34070 (5.7L) PTR03-34072 (4.7L) Kit Contents: 5.7L Item # Quantity Reqd. Description 1 1 Lid: Air Filter 2 1 Inlet Pipe: 5.7L 3 1 Air Filter: TRD Conical 4
LINDGREN-PITMAN General Maintenance of Lindgren-Pitman Hydraulic Systems & Equipment
 LINDGREN-PITMAN General Maintenance of Lindgren-Pitman Hydraulic Systems & Equipment Page 1 Lindgren Pitman hydraulic driven equipment is designed to give long reliable service with a minimum of repairs
Congratulations on your purchase of your new Ultra-SoniTec Antifouling System! Ultra-SoniTec Antifouling System! Ultra-SoniTec Advanced Ultrasonic
 Congratulations on your purchase of your new Ultra-SoniTec Antifouling System! Ultra-SoniTec Antifouling System! Ultra-SoniTec Advanced Ultrasonic Antifouling Systems are designed algae and other sea growth.
User Manual and Parts List. P/n:
 User Manual and Parts List P/n: 017821 General Safety symbols: WARNING! If used incorrectly the machine can cause injury. Please read the Operator s Manual thoroughly making sure you understand how to
SR MARINER SELF POWERED KNOTMETERS
 SR MARINER SELF POWERED KNOTMETERS INSTALLATION INSTRUCTIONS Congratulations in choosing a high performance marine instrument and welcome to the growing family of SR Mariner product owners. Since our establishment
OWNER S GUIDE & INSTALLATION INSTRUCTIONS
 OWNER S GUIDE & INSTALLATION INSTRUCTIONS 17-572-01 rev.03 07/24/18 Thru-Hull: Retractable with Valve Ultrasonic Speed & Temperature Smart Sensor Models: UST800, UST850 Follow the precautions below for
Installation Instructions QUICKSILVER CONSOLE SHIFTER Fits: Chevelle / El Camino
 WORK SAFELY! For maximum safety, perform this installation on a clean, level surface and with the engine turned off. Place blocks or wedges in front of and behind both rear wheels to prevent movement in
UltraSystem Series II INSTALLATION MANUAL
 UltraSystem Series II INSTALLATION MANUAL Manual ref: 02-12-2013 CONTENTS Important information. page 1 Planning the installation. page 2 Transducer positioning. page 3-7 Transducer installation. page
Instructions for 2-row monitoring only
 Installation Instructions for CaseIH cotton picker models: Instructions for 2-row monitoring only CAUTION: Ensure the model numbers shown above correspond to the machine model. If you receive the incorrect
VHM-P (Non-Locking) Variable Height Arm with VESA Mounting Plate for 75 x 75mm or 100 x 100mm applications
 Variable Height Arm with VESA Mounting Plate for 75 x 75mm or 100 x 100mm applications") 3875 Cypress Drive Petaluma, CA 94954 800.228.2555 +1.707.773.1100 Fax 707.773.1180 www.gcx.com VHM-P (Non-Locking) Variable Height Arm with VESA Mounting Plate for 75 x 75mm or 100 x 100mm applications
3875 Cypress Drive Petaluma, CA 94954 800.228.2555 +1.707.773.1100 Fax 707.773.1180 www.gcx.com VHM-P (Non-Locking) Variable Height Arm with VESA Mounting Plate for 75 x 75mm or 100 x 100mm applications
Installation Manual TWM Performance Short Shift Kit Stage 1 and Stage 2 MazdaSpeed 6
 Page 1 Installation Manual TWM Performance Short Shift Kit Stage 1 and Stage 2 MazdaSpeed 6 Please Note: It is preferable to park on a flat surface, as you will have to engage and disengage the hand brake
ThermoLite 110W-330W Solar Panel Installation Instructions
 ThermoLite 110W-330W Solar Panel Installation Instructions INSTALL APPLICATIONS SUPPORTED BY THIS GUIDE: 1. Trailer Roof Top Mounted 2. Bus Roof Top Mounted 3. Tractor Fairing Mounted 40W and 110W Replacement
SR MARINER DIGITAL KNOTMETER INSTALLATION INSTRUCTIONS
 SR MARINER DIGITAL KNOTMETER INSTALLATION INSTRUCTIONS Congratulations in choosing a high performance marine instrument and welcome to the growing family of SR Mariner product owners. Since our establishment
R O A D S M I T H TRIKE CONVERSIONS BY THE TRIKE SHOP
 R O A D S M I T H TRIKE CONVERSIONS BY THE TRIKE SHOP Please thoroughly review the instructions before and during installation. Keep in mind that this product was designed to be installed by trained dealer
Backup Sensors Owner s Manual
 1ODYSSEY Backup Sensors Owner s Manual 2004 American Honda Motor Co., Inc. - All Rights Reserved. Contents Introduction... 3 Important Information... 4 How the Backup Sensors Work... 5 Limitations... 8
Owner and Operating Manual for
 Owner and Operating Manual for 120VAC Manual Control 12VDC Solar Battery Manual Control 120VAC Remote Control 12VDC Solar Battery Remote Control GEN2 Remote Versions Only Boat Lifts Please read this manual
CALIFORNIA TRIMMER MOWER MAINTENANCE MANUAL
 CALIFORNIA TRIMMER MOWER MAINTENANCE MANUAL 2 Table of Contents Section 1: General Information Page Handle Assembly Instructions 4 Maintenance All Models 6 Oil Change Procedures All Models 9 Height Adjustment
Pub X57 TX. Fish-finding & Depth Sounding Sonar. Installation and Operation Instructions
 Pub. 988-0151-441 www.lowrance.com X57 TX Fish-finding & Depth Sounding Sonar Installation and Operation Instructions Copyright 2006 Lowrance Electronics, Inc. All rights reserved. No part of this manual
Automatic Roof Hatch Opener
 Automatic Roof Hatch Opener Installation Guide REQUIRED TOOLS (These tools are required to complete the installation) Cordless Drill 1/8 1/4 Drill Bits 1/8 Pin Punch #2 Philips Bit Rachet Sharpie Hammer
ETF-600 Sensor Operated Lavatory Faucet
 INSTALLATION INSTRUCTIONS OPTIMA SYSTEMS SENSOR OPERATED LAVATORY FAUCET ETF-600 I.I. Code No. 0816318 ETF-600 Sensor Operated Lavatory Faucet Includes Instructions for Installation of Optional Back Checks
U L T I M A T E R A D A R / L A S E R D E F E N S E S Y S T E M
 S m a r t e r Q u i e t e r M o r e A c c u r a t e U L T I M A T E R A D A R / L A S E R D E F E N S E S Y S T E M Installation Manual PASSPORT 9500ci Comes Complete Front Radar Receiver Miniature weatherproof
OWNER S MANUAL EVOLUTION 3500, 4500, 5500, & 8500 SERIES PUMPS
 OWNER S MANUAL EVOLUTION 3500, 4500, 5500, & 8500 SERIES PUMPS IMPORTANT SAFETY INSTRUCTIONS When installing and using this electrical equipment, basic safety precautions should always be followed, including
32 lbs / 38 lbs TROLLING MOTOR
 32 lbs / 38 lbs TROLLING MOTOR MODEL: 90000 / 90001 OPERATOR'S MANUAL TOLL-FREE HELPLINE: 1 866 523-5218 IMPORTANT: READ THIS MANUAL CAREFULLY BEFORE OPERATNG YOUR NEW TM DURAMAXX TROLLING MOTOR. RETAIN
VHM-P (Non-Locking) and VHM-PL (Locking) Variable Height Arm with Slide-In Mounting Plate
 and VHM-PL (Locking) Variable Height Arm with Slide-In Mounting Plate") 3875 Cypress Drive Petaluma, CA 94954 800.228.2555 +1.707.773.1100 Fax 707.773.1180 www.gcx.com VHM-P (Non-Locking) and VHM-PL (Locking) Variable Height Arm with Slide-In Mounting Plate (Refer to qualified
3875 Cypress Drive Petaluma, CA 94954 800.228.2555 +1.707.773.1100 Fax 707.773.1180 www.gcx.com VHM-P (Non-Locking) and VHM-PL (Locking) Variable Height Arm with Slide-In Mounting Plate (Refer to qualified
Ground Effects, P/N: (V6), (V8)
, (V8)") , P/N: 92248596 (V6), 92248560 (V8) 3. Open trunk and remove 3 scrivets per side. Retain. Remove LH and RH tail lamp access cover. Retain. Refer to Figure 1. NOTE: Installation is made easier with the
, P/N: 92248596 (V6), 92248560 (V8) 3. Open trunk and remove 3 scrivets per side. Retain. Remove LH and RH tail lamp access cover. Retain. Refer to Figure 1. NOTE: Installation is made easier with the
Part Number Rev. B. Unit housing Hex nuts. Unit Rubber seal Hex bolts. Hex bolts. Hex nuts. Figure 1
 Installing the Flush Mount Kit Use this kit to flush mount a GPSMAP 500 series unit into a flat panel. Select an appropriately sized location for the unit. Use the Flush Mount Template provided to determine
Instructions for 2-row monitoring only
 Installation Instructions for CaseIH cotton picker models: Instructions for 2-row monitoring only Ensure the model numbers shown above correspond to the machine model. If you receive the incorrect installation
User s Manual. Automatic Switch-Mode Battery Charger
 User s Manual Automatic Switch-Mode Battery Charger IMPORTANT Read, understand, and follow these safety rules and operating instructions before using this battery charger. Only authorized and trained service
INSTALLATION INSTRUCTIONS
 INSTALLATION INSTRUCTIONS Models: 7105 & 7105TK Dodge Ram 1500 ('02 Current) Ram 2500 & 3500 '03 - Current with stock manual mirrors. IF YOU DO NOT CURRENTLY HAVE MANUAL MIRRORS, THE WRONG SET HAS BEEN
SIGNETMARINE. Livewell Bait Pump Alarm. No Dead Bait.
 B A I T WAT C H SIGNETMARINE Livewell Bait Pump Alarm No Dead Bait. The SIGNETMARINE BaitWatch System alerts you to a livewell pump problem before your fishing trip turns into one. The loud alarm and dual-color
Go-ped ESR750 / ESR750EX Rear Brake Installation Instructions
 Go-ped ESR750 / ESR750EX Rear Brake Installation Instructions This kit provides all the parts you need to install a rear brake on your ESR750 or ESR750EX. It will not work on an ESR Sport, or other Go-ped
ULTRASONIC ANTIFOULING SYSTEM INSTALLATION MANUAL
 ULTRASONIC ANTIFOULING SYSTEM YS-5600 YS-5602 INSTALLATION MANUAL Page 1 DISCLAIMER This product needs to be correctly installed in a confined space i.e. in the bottom or bilge of a boat. There may be
X47 and X47EX. Installation and Operation Instructions. Fish-finding & Depth Sounding Sonars. Pub
 Pub. 988-0105-941 www.lowrance.com X47 and X47EX Fish-finding & Depth Sounding Sonars Installation and Operation Instructions Copyright 2002 Lowrance Electronics, Inc. All rights reserved. Lowrance is
Backup Sensors User s Information CR-V
 Backup Sensors User s Information CR-V Contents Introduction... 3 Important Information... 4 How the Backup Sensors Work... 5 Limitations... 8 Operation... 10 Daily Inspection... 12 Caring for the Backup
LOOKOUT LED LIGHT BAR INSTALLATION MANUAL 7900 SERIES
 LOOKOUT LED LIGHT BAR INSTALLATION MANUAL 7900 SERIES Your purchase of a Wolo warning light is the perfect choice to compliment your vehicle. Wolo s warning lights are manufactured with the finest materials.
Installation and User Manual. with RAIN SENSOR.
 with RAIN SENSOR www.solarsmartopener.com Revision..0 TABLE OF CONTENTS Features In The Box Further Items Required Basic Operation Solar Panel and Operator Installation Operator Installation Solar Panel
INSTALLATION INSTRUCTIONS
 INSTALLATION INSTRUCTIONS BIG ROTOR / CALIPER RELOCATION REAR KIT SUM-BK1423 1999-2009 GM 1/2 Ton Trucks & SUVs Thank you for choosing SUMMIT RACING for your braking needs. Pleases take the time to read
INSTALLATION INSTRUCTIONS
 INSTALLATION INSTRUCTIONS BIG ROTOR / CALIPER RELOCATION FRONT KITS SUM-BK1422, BK1423, BK1424 1999-2006 GM 1/2 Ton Trucks & SUVs Thank you for choosing SUMMIT RACING for your braking needs. Pleases take
Automotive: Lightbars
 ENGINEERING COMPANY INC. 51 Winthrop Road Chester, Connecticut 06412-0684 Phone: (860) 526-9504 Fax: (860) 526-4078 Internet: www.whelen.com Sales e-mail: autosale@whelen.com Canadian Sales e-mail: canadiansales@whelen.com
FOR New Electric Kit and Remote Control Installation
 Installation Manual COMMAND-10 REMOTE AND COMMAND STATION FOR New Electric Kit and Remote Control Installation Use these in place of the rocker switch and solenoid section of instructions in your roll
TRIM AND TILT TABLE OF CONTENTS TRIM AND TILT
 TRIM AND TILT TABLE OF CONTENTS SERVICE CHART................................................................... 326 SYSTEM DESCRIPTION............................................................. 328
INSTALLATION MANUAL. Power-Pole Blade Edition Shallow Water Anchor. Installation Instructions
 INSTALLATION MANUAL Power-Pole Blade Edition Shallow Water Anchor Installation Instructions CAUTION: Read this instruction manual carefully. Become familiar with the controls and know how to operate the
BASIC TROUBLE SHOOTING (PERFECTPASS FOR MECHANICAL ENGINES) How PerfectPass Works
 How PerfectPass Works") BASIC TROUBLE SHOOTING (PERFECTPASS FOR MECHANICAL ENGINES) How PerfectPass Works Through the in-dash display the driver sets the desired boat speed or engine RPM depending upon which mode of operation
BASIC TROUBLE SHOOTING (PERFECTPASS FOR MECHANICAL ENGINES) How PerfectPass Works Through the in-dash display the driver sets the desired boat speed or engine RPM depending upon which mode of operation
2-row and All-row systems included.
 Ag Leader Technology Cotton Picker Installation Installation Instructions for John Deere cotton picker models: 2-row and All-row systems included. IMPORTANT: Ensure the model numbers shown above correspond
STOP. Broadcast Spreader. Operator's Manual. Model No Safety Assembly Operation Maintenance Parts
 Operator's Manual STOP Broadcast Spreader Model No. 486.2400 DO NOT RETURN TO STORE For Missing Parts or Assembly Questions Call 1-866-56-8388 CAUTION: Before using this product, read this manual and follow
3875 Cypress Drive Petaluma, CA Fax
 3875 Cypress Drive Petaluma, CA 94954 800.228.2555 +1.707.773.1100 Fax 707.773.1180 www.gcx.com VHM-P (Non-Locking) Variable Height Arm with Fixed Angle Front End for Flat Panel / Keyboard Bracket (L Brackets
Bluefin Led Underwater lights.
 Bluefin Led Underwater lights. P24 Single/Dual and Colourchange Installation manual. Thank you for choosing Bluefin LED underwater lights, our products have been designed and tested rigorously to ensure
GM TRUCK BACKUP CAMERA INSTALLATION
 GM TRUCK 07-13 BACKUP CAMERA INSTALLATION Thank you for your purchase! These instructions are intended for the do-it-yourselfer who decides to install the camera without professional assistance. Keep in
Stainless Steel Outboard Motor Brackets - Installation and Operating Instructions Models T10054 and T10055
 USER MANUAL OUTBOARD MOTOR BRACKETS Stainless Steel Outboard Motor Brackets - Installation and Operating Instructions Models T10054 and T10055 CAUTION Do not exceed the bracket s HP or weight limits. Read
Remove the 3-11mm nuts holding mirror on. Don t drop the nuts!
 2005-2012 Ford Mustang Puddle Lamp Kit Parts List: Quantity: Tool List: LED Lamps 2 Flat head screwdriver Seals 2 Ratchet & Socket set OR Nuts 2 Adjustable Wrench Wiring harness 1 Drill & 11/16 th bit
INSTALLATION & OWNER S MANUAL
 p. 1 of 13 INSTALLATION & OWNER S MANUAL Polaris Ranger 400-EV PathPro SS Cab (fits 2010 - current) (p/n: 1PRG400FS) The contents of this envelope are the property of the owner. Be sure to leave with the
WINDSHIELD WIPERS AND WASHERS
 JA WINDSHIELD WIPERS AND WASHERS 8K - 1 WINDSHIELD WIPERS AND WASHERS CONTENTS page GENERAL INFORMATION MULTI-FUNCTION SWITCH... 1 WINDSHIELD WASHERS... 2 DESCRIPTION AND OPERATION WINDSHIELD WASHERS...
Alliance Towel Dispensing System. Operation Manual
 Alliance Towel Dispensing System Operation Manual Alliance Towel Dispensing System Table of Contents Safety Information... page 2 Mounting Instructions... page 3 Towel Loading Instructions... page 7 Settings...
INSTALLATION INSTRUCTIONS
 INSTALLATION INSTRUCTIONS FRONT DISC BRAKE CONVERSION KITS A148-9 & A148-15 1949-54 Chevy Trucks Thank you for choosing STAINLESS STEEL BRAKES CORPORATION for your braking needs. Please take the time to
GPS AutoSteer System Installation Manual
 GPS AutoSteer System Installation Manual Supported Vehicles Case IH Combines 7010 7120 8010 8120 AFX 8010 9120 PN: 602-0283-01-A LEGAL DISCLAIMER Note: Read and follow ALL instructions in this manual carefully
 OWNERS MANUAL www.prodriveoutboards.com PO Box 949 129 S Main St. Loreauville, LA PH#: 337-229-0034 FAX#: 337-229-2302 1 TO THE OWNER Thank you for purchasing a Pro-Drive Shallow Water Outboard. Your unit
Page 1. File: Motolight caliper one-piece Date: 8/14/2006
 Page 1 Caliper Mount Installation One-piece mounting brackets You should allow about two to three hours for installation. We suggest you use a well-lighted space for installation. PLEASE READ ALL THE INSTRUCTIONS.
Wireless Remote System RC-12v & 24v Standard RF Remote Control System INSTALLATION MANUAL AND OWNERS GUIDE Table of Contents:
 Wireless Remote System RC-12v & 24v Standard RF Remote Control System INSTALLATION MANUAL AND OWNERS GUIDE Table of Contents: Page: 1 Important Safety Instructions/Overview. Pages: 2 Quick Reference Specifications.
S-SERIES PUBLIC USE OPERATING INSTRUCTIONS
 -PRINT- II. T S-SERIES PUBLIC USE OPERATING INSTRUCTIONS -TABLE OF CONTENTS- his chapter contains safety precautions, daily safety check instructions, control and indicator descriptions and operating instructions
INSTALLATION INSTRUCTIONS
 INSTALLATION INSTRUCTIONS REAR DISC BRAKE CONVERSION KITS A112, A112-1 & A112-93 1979-93 FORD MUSTANG with 7.5" & 8.8" AXLES Thank you for choosing STAINLESS STEEL BRAKES CORPORATION for your braking needs.