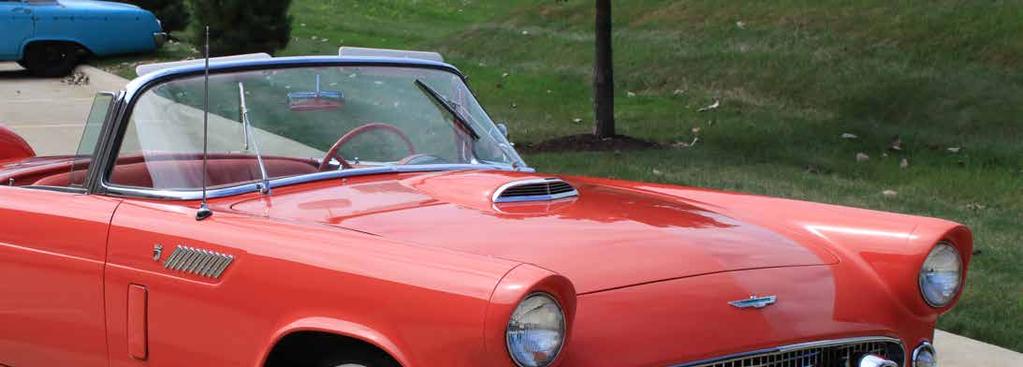
Flaming River Ind. 800 Poertner Dr Berea, OH Thunderbird Rack and Pinion Conversion Kit
|
|
|
- Hope Peters
- 5 years ago
- Views:
Transcription


1 Flaming River Ind. 800 Poertner Dr Berea, OH Thunderbird Rack and Pinion Conversion Kit
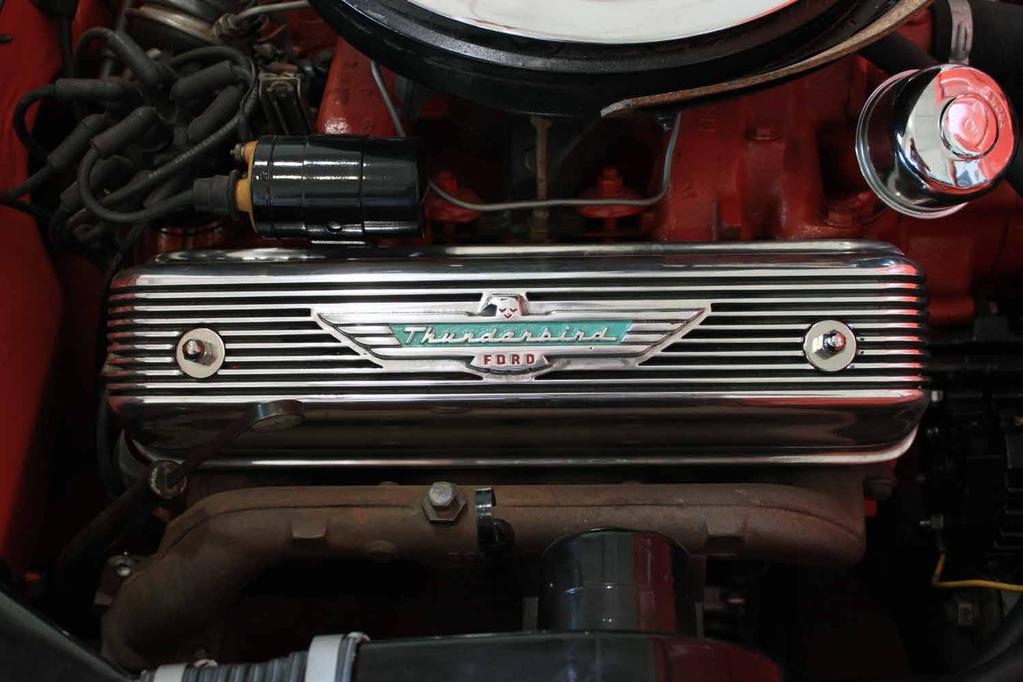
2 Thunderbird Rack & Pinion System Note: For safety, disconnect battery cables and ensure that the vehicle is properly supported by jack stands. Before painting or powder coating of the cradle, we recommend that you pre-fit the entire system to ensure proper fitment for your application. Electrical System Verification... pg 3 Removal of Factory Steering... pg 4 Inventory...pg 5-6 Installation of: Rack and Cradle...pg 7-8 Flaming River Tilt Column...pg 9-10 Electrical System Notes... pg 10 Universal Joint and Steering Shaft Installation... pg 11 Original Steering Wheel Installation...pg Aftermarket Steering Wheel Installation... pg 13 Power Steering Pump Installation...pg Original Steering Wheel Template... pg 16 Power Steering Bleeding Procedure... pg 17 WARRANTY DISCLAIMER: Flaming River s Limited Warranty Flaming River warrants its products to be free from defects in material and workmanship for a period of one (1) year after the date of purchase, except that: All steering columns are warranted for a period of three (3) years from the date of purchase. The Big Switch (part number FR1005) is warranted for a period of three (3) years from the date of purchase, provided that it is not mounted with a steel bracket and provided further that it is adequately protected from environmental conditions. All electrical products other than the Big Switch are warranted for a period of ninety (90) days from the date of purchase. Flaming River s warranty liability is limited to the replacement of defective products. Flaming River is not liable for any labor costs associated with any warranty claim, or for any incidental or consequential damages. Improper installation, abuse, racing, and/or modification of the products voids this warranty. No warranty of merchantability or fitness for a particular purpose is made by Flaming River with respect to any of its products. Warnings and Recommendations It is the customer s responsibility to determine the suitability of a given Flaming River product for the customer s uses. Likewise, it is the customer s responsibility to install a Flaming River product. Contact the vehicle manufacturer whenever installing a switch to confirm the appropriateness of using such a switch and the recommended placement of the switch on the vehicle. Use qualified chassis specialists for the installation of all steering related components. Be aware that the installation of certain Flaming River products may adversely impact a manufacturer s warranty with respect to certain vehicles and other manufactured goods. Flaming River will repair or replace any product found to be defective in material or workmanship. Improper installation, abuse, racing and/or modification VOID WARRANTY. Flaming River is not responsible for any labor costs associated with any warranty. Flaming River Industries

 Before disassembly, measure from zirc to zirc on the outer tie rod ends. Write this dimension down for future reference.")
3 Color Verification To Be Completed Before Disassembly Before disconnecting the turn signal connector, verify the factory wiring colors and turn signal operation. The use of a wiring diagram is recommended. This will be used when connecting the new Flaming River Steering Column. Brake Light Switch Right Rear Turn Signal Left Rear Turn Signal Turn Signal Power Hazard Power Right Front Turn Signal Left Front Turn Signal Horn Original System Removal 1) For safety, disconnect your battery. 2) Before disassembly, measure from zirc to zirc on the outer tie rod ends. Write this dimension down for future reference. Factory Pivot Points Before disassembly measure from zirc to zirc on the outer tie rod ends 3) Disconnect the wiring at the bottom of the steering gear housing and at the steering column under the dash. 4) Remove the horn ring from the steering wheel, and then using a wheel puller remove the steering wheel from the column. Flaming River Industries
 Slide the steering column off the steering box shaft and remove from the car.")
 Remove the bolts that hold the steering box to the frame, and then remove the box from the car.")
4 Original System Removal 5) Remove the bolts retaining the column dash mounting bracket and floor mounting plate. 6) Slide the steering column off the steering box shaft and remove from the car. Dash Mounting Bracket Make sure you retain OE dash mount and bezel for installation of Flaming River Column 7) Remove the sector shaft arm nut, then using a pitman arm puller, remove the pitman arm from the steering box. Sector Shaft Arm Nut Pitman Arm 8) Remove the bolts that hold the steering box to the frame, and then remove the box from the car. 9) Remove the bolts that hold the idler arm bracket to the frame, the outer tie rod ends from the spindle arms, then remove the steering linkage from the car. Flaming River Industries


5 Item No. Part No. Description Qty Power/Manual Kit Hardware Kit Power Rack & Cradle Assembly 1 Power Kit Only 3 BK10200 Support Bearing Bracket Bent 1 4 FR1810 Support Bearing 1 5 FR1612 Power Steering Pump Bracket Assembly 1 Power Kit Only 6 FR1614 Power Steering Reservoir 1 Power Kit Only 7 FRPMPSB-V Power Steering Pump with V-Belt Pulley 1 Power Kit Only 8 FR314PB1 L-Shaped T-bird P/S Pump Bracket 1 Power Kit Only 9 FR314PB2 9 T-Bird P/S Pump Bracket 1 Power Kit Only 10 FR314PB3 Small T-Bird P/S pump Bracket 1 Power Kit Only 11 FR1714DD 3/4-36 x 1 DD Universal Joint 1 12 FR1715DD 3/4-36 x 3/4 DD Universal Joint 1 13 FR1789P FR Power x 3/4 DD Universal Joint 1 Power Kit Only 14 FR Splined Shaft 1 15 FR DD Shaft 1 16 FR20118 Wiring Adapter 1 17 FRHRN2 Horn Relay 1 18 FR314-CSPC T-Bird Column Spacer 1 (Installed on Column) Column Varies with Part Number Ordered FR TBSS In kit FR314KT2PL FR SS In kit FR314KT1PL FR TB In kit FR314KT2 FR In kit FR314KT Thunderbird Cradle and Shaft Assembly Power Flaming River Industries

 Column Varies with Part Number Ordered FR20005-28TBSS In kit FR314KT2PL FR20005-28SS In")
6 Item No. Part No. Description Qty Power/Manual Kit Hardware Kit Manual Rack & Cradle Assembly 1 Manual Kit Only 3 BK10200 Support Bearing Bracket Bent 1 4 FR1810 Support Bearing 1 5 FR1714DD 3/4-36 x 1 DD Universal Joint 1 6 FR1715DD 3/4-36 x 3/4 DD Universal Joint 1 7 FR1709DD 9/16-26 x 3/4 DD Universal Joint 1 Manual Kit Only 8 FR Splined Shaft 1 9 FR DD Shaft 1 10 FR20118 Wiring Adapter 1 11 FRHRN2 Horn Relay 1 12 FR314-CSPC T-Bird Column Spacer 1 (Installed on Column) Column Varies with Part Number Ordered FR TBSS In kit FR314KT2PL FR SS In kit FR314KT1PL FR TB In kit FR314KT2 FR In kit FR314KT Thunderbird Cradle and Shaft Assembly Manual Flaming River Industries
 7/16 bolts on the drivers side using the original holes from the steering gear box.")
 To install the Flaming River rack and travel bar system, position the rack into place and install the rack to the cradle using the mounting")
7 Flaming River Rack and Pinion Installation 1) Install the rack and pinion mounting cradle by sliding it into place between the frame rails. Using the new hardware, install the three (3) 7/16 bolts on the drivers side using the original holes from the steering gear box. On the passenger side use the two (2) 3/8 bolts where the idler arm was mounted. Tighten the 7/16 bolts and nuts to ft lbs. and the 3/8 bolts and nuts to ft lbs. Driver Side Mounting Passenger Side Mounting 2) To install the Flaming River rack and travel bar system, position the rack into place and install the rack to the cradle using the mounting brackets provided. (Already installed on Cradle Kit) Rack & Pinion Mounting Brackets Flaming River Industries


8 Flaming River Rack and Pinion Installation 3) Install the OEM adjuster sleeves and outer tie rod ends onto the new Flaming River inner tie rod ends. Flaming River Inner Tie Rod End OEM Adjusting Sleeve OEM Outer Tie Rod End 4) Make sure that your wheels are centered, then install the outer tie rods into the spindle arms and tighten the castle nuts to 30-40ft lbs. Make sure to install the cotter pins through the castle nut and tie rod end and bend the tabs over. Castle Nut and Cotter Pin Shown Here Rack & Cradle Installed In Car Flaming River Industries


9 Flaming River Tilt Column Installation 1) Install the original dash bezel and column mounting bracket over the new split ring spacer onto the new Flaming River Tilt Column. OEM Dash Bezel OEM Column Dash Mount 2) Ensure the column is straight by rotating the turn signal arm to the 9 o clock position. Column Shown installed with Turn Signal arm at the 9 o clock Position Use OEM Dash Bezel Flaming River Industries


10 Flaming River Tilt Column Installation 3) Install original floor mount onto steering column. Note: A new floor mount is not provided with this kit, one will need to be fabricated or the original modified to fit the new column. 4) Place the column under the dash and tighten the mounting screws that were removed earlier. Original Floor Mount Connecting the Electric System Column shown installed with original steering wheel Wiring Circuit Vehicle Wiring Pin Location Column Wiring Brake Light Switch Right Rear Turn Signal Left Rear Turn Signal Turn Signal Power Hazard Power Right Front Turn Signal Left Front Turn Signal Horn Green Orange/Blue Green/Orange Blue Not Available White/Blue Green/White Yellow/Green P N M L K J H G White Dark Green Yellow Purple Brown Dark Blue Light Blue Black A B C D E F G H J K L M N P Black Lt. Blue Blue Brown Purple Yellow Green White Flaming River Industries
 Using a 3/4 wooden dowel rod, mock up the steering shaft to obtain the correct shaft lengths and u-joint angle.")
 Remove the shafts and using a 1/4 drill bit, dimple each mark left by the set screws. 5) Re-install the shafts and u-joints using a red thread locker on the set screw threads.")
11 Universal Joint Installation 1) Install the support bearing bracket onto the rear cradle mounting bolt. Note: The angle of this bracket is set for most applications. Some adjustment may be required to obtain the correct u-joint alignment. 2) Using a 3/4 wooden dowel rod, mock up the steering shaft to obtain the correct shaft lengths and u-joint angle. 3) Once the correct shaft lengths are obtained, install shafts and u-joints\snugging down each set screw so that it leaves a mark in the shaft. Dimple 4) Remove the shafts and using a 1/4 drill bit, dimple each mark left by the set screws. 5) Re-install the shafts and u-joints using a red thread locker on the set screw threads. Tighten each set screw to 25 ft lbs. and then tighten all jam nuts securely. ** We recommend that you regularly inspect the u-joint set screws for tightness.** Flaming River Industries
 Remove the three (3) flat head screws that retain the horn mechanism to the steering wheel. 2) Take the horn button disk and drill a small hole.")
12 Original Steering Wheel Installation Note: When installing the original steering wheel onto the Flaming River Tilt Column, the original wheel must be modified for the horn and the turn signal cancellation to work correctly. 1) Remove the three (3) flat head screws that retain the horn mechanism to the steering wheel. 2) Take the horn button disk and drill a small hole. Using a 6-32 tap, thread the hole. 3) Fasten the new spade connector to the horn disk using a 6-32 screw that is provided. Reinstall the horn mechanism to the horn ring. 4) Hold the steering wheel in the straight ahead position and place the template located on page 17 onto the center of the steering wheel. 5) Center punch the hole shown on the template that is approximately at the 10:30 position and drill a 3/8 diameter hole. 6) Place the steering wheel onto the new Flaming River column making sure to run the horn contact wire though the steering wheel. 7) Connect the horn contact wire to the spade connector that was installed on the horn button and secure the horn button to the steering wheel. Flaming River Industries
 Make sure that front wheels are centered and straight.")
 3) Place the steering wheel adapter on the column ensuring that one wheel mounting hole is in the 12 o clock position.")
 Install the horn contact kit (part FR20120HN) into the canceling cam stem. (Follow instructions with kit).")
 Next place horn button through retaining ring so that horn button is locked into place. 8) Run wire from horn contact kit to terminal on back of horn button.")
13 Original Steering Wheel Installation (Cont.) Horn Contact Wire New Canceling Cam Hole Original Steering Wheel Shown Installed on Flaming River Tilt Steering Column. Aftermarket Steering Wheel Installation 1) Make sure that front wheels are centered and straight. 2) Position the canceling cam so that it is in between the 10 and 11 o clock position. ( figure A ) 3) Place the steering wheel adapter on the column ensuring that one wheel mounting hole is in the 12 o clock position. (see figure B ) 4) Tighten the 7/8 center nut until the wheel adapter has approximately 1/16 inch between the adapter and the column shroud. 5) Install the horn contact kit (part FR20120HN) into the canceling cam stem. (Follow instructions with kit). 6) Place horn button retaining ring, flange facing down, through center hole of steering wheel. 7) Next place horn button through retaining ring so that horn button is locked into place. 8) Run wire from horn contact kit to terminal on back of horn button. If horn button has two terminals on back run a wire from the second terminal to the adapter itself to complete ground. (See Fig. C) 9) Mount steering wheel to adapter using screws provided with adapter. 10) If wheel has a center pad, mount it to wheel using appropriate fasteners. 11) Reconnect battery 12 O clock Position Aftermarket Steering Wheel Shown Installed on Flaming River Tilt Steering Column. Flaming River Industries
14 Power Steering Pump Installation 1) On the driver s side exhaust manifold, remove the front mounting bolt. Using the bolt that was removed install bracket #1 and snug the bolt. 2) Remove the bolt from the timing chain cover and then install bracket #3 and snug the bolt. 3) Mount the power steering pump onto the steel pump bracket assembly and mount the assembly to bracket #1 & #3 using the bolts provided in the kit. 4) Mount bracket #4 to the top water pump bolt. 5) Install the turn buckle assembly from bracket #4 to the power steering pump. 6) Tighten all the mounting bolts. 7) Mount the power steering reservoir above the power steering pump to ensure proper feeding of power steering fluid. 8) Install your power steering lines according to installation instructions provided with the line kit. (FR1610 Stainless Braided Hose Kit not included, but recommended for installation) TURN BUCKLE STEEL PUMP BRACKET ASSEMBLY FRONT OF ENGINE ITEM NO. QTY. PART NO. DESCRIPTION BRACKET, MOUNT PUMP-MOTOR SB BRACKET, MOUNT PUMP PS HEIM JOINT, END ROD 3/8-24 RH HEIM JOINT, END ROD 3/8-24 LH SPACER, ADJ 0.62 X 2.52 W/ 3/8-24 RH-LH WASHER, FLAT 0.39 X 0.62 X BOLT, M8 X 1.25 X 20 HEX HD GR WASHER, FLAT 0.32 X 0.47 X NUT, 3/8-24 JAM LH NUT, 3/8-24 JAM RH WASHER, FLAT 0.32 X 0.57 X SCREW, 5/16 X.75 HEX HD GR BOLT-3/8-16X1.25 SCREW, 3/8-16 X 1.25 HEX HD 14 1 LOCKWASH-3/8 WASHER, LOCK SPLIT 3/ NUT-3/8-16 NYLOCK LOCK NUT 3/ WASH-3/8 3/8 FLAT WASHER GRADE 8 EQU 17 1 FR314PB1 WLDMT, BRKT PUMP T-BIRD 18 1 FR314PB2 WLDMT, BRKT PUMP T-BIRD 19 1 FR314PB3 BRKT, PUMP T-BIRD 20 1 REFERENCE PUMP W/ V-BELT PULLEY ON See Facing Page for Visual Reference Flaming River Industries
 19 9 3 7 (qty3) 6 15 (qty2) 2 1 13 (qty3) 14")


15 Power Steering Pump Installation (qty3) (qty3) 6 15 (qty2) (qty3) (qty2) 11 (qty2) Flaming River Industries

16 Flaming River Industries
17 Template for Installing Original Steering Wheel (Template Actual Size) Remove page and attach to steering wheel during installation 12 O CLOCK DRILL A 3/8 HOLE HERE IN THE O.E. STEERING COLUMN 12 O CLOCK Flaming River Industries
18 NOTES Flaming River Industries
")
 Return Port Cradle")


19 FR1610 Hose Kit Routing Reservoir Supply Port Return Port Pressure Port Supply Hose 5/8 OD (1/2 ID) Pressure Hose 3/8 OD (1/4 ID) Power Steering Pump Return Hose 3/8 OD (1/4 ID) Return Port Cradle Assembly* *Cradle assembly shown is for representation purposes only If not using our hose kit, we recommend purchasing the FR1632 Pressure and Return fittings kit. If you have any questions regarding connecting alternate hose kit to Flaming River Cradle Assembly, please call Flaming River Industries
20 Flaming River Ind. 800 Poertner Dr Berea, OH
Flaming River Ind. 800 Poertner Dr Berea, OH Impala Rack and Pinion Conversion Kit
 Flaming River Ind. 800 Poertner Dr Berea, OH 44017 800-648-8022 58-64 Impala Rack and Pinion Conversion Kit For safety, disconnect battery cables and ensure that vehicle is properly supported by jack stands.
Flaming River Ind. 800 Poertner Dr Berea, OH Chevelle/ El Camino Rack and Pinion Conversion Kit
 Flaming River Ind. 800 Poertner Dr Berea, OH 44017 800-648-8022 64-67 Chevelle/ El Camino Rack and Pinion Conversion Kit For safety, disconnect battery cables and ensure that vehicle is properly supported
Flaming River Ind. 800 Poertner Dr Berea, OH Impala/Caprice Rack and Pinion Conversion Kit
 Flaming River Ind. 800 Poertner Dr Berea, OH 44017 800-648-8022 65-66 Impala/Caprice Rack and Pinion Conversion Kit For safety, disconnect battery cables and ensure that vehicle is properly supported by
Flaming River Ind. 800 Poertner Dr Berea, OH Mustang Rack and Pinion Conversion Kit
 Flaming River Ind. 800 Poertner Dr Berea, OH 44017 800-648-8022 65-70 Mustang Rack and Pinion Conversion Kit Mustang Rack & Pinion System Note: For safety, disconnect battery cables and ensure that the
Flaming River Ind. 800 Poertner Dr Berea, OH Comet/Falcon Rack and Pinion Conversion Kit
 Flaming River Ind. 800 Poertner Dr Berea, OH 44017 800-648-8022 60-65 Comet/Falcon Rack and Pinion Conversion Kit For safety, disconnect battery cables and ensure that vehicle is properly supported by
Flaming River Ind. 800 Poertner Dr Berea, OH Camaro Rack and Pinion Conversion Kit
 Flaming River Ind. 800 Poertner Dr Berea, OH 44017 800-648-8022 67-69 Camaro Rack and Pinion Conversion Kit For safety, disconnect battery cables and ensure that vehicle is properly supported by jack stands.
65-70 Mustang. Rack and Pinion Conversion Kit
 65-70 Mustang Rack and Pinion Conversion Kit Mustang Rack & Pinion System Note: For safety, disconnect battery cables and ensure that the vehicle is properly supported by jack stands. Before painting or
Flaming River Ind. 800 Poertner Dr Berea, OH Chevy C-10 Rack and Pinion Conversion Kit
 Flaming River Ind. 800 Poertner Dr Berea, OH 44017 800-648-8022 67-72 Chevy C-10 Rack and Pinion Conversion Kit For safety, disconnect battery cables and ensure that vehicle is properly supported by jack
Flaming River Ind. 800 Poertner Dr Berea, OH Chevelle/El Camino Rack and Pinion Conversion Kit
 Flaming River Ind. 800 Poertner Dr Berea, OH 44017 800-648-8022 68-72 Chevelle/El Camino Rack and Pinion Conversion Kit For safety, disconnect battery cables and ensure that vehicle is properly supported
64-67 Chevelle. Power Rack & Pinion Cradle Kit
 64-67 Chevelle Power Rack & Pinion Cradle Kit 64-67 Chevelle Note: For safety disconnect battery cables and ensure that the vehicle is properly supported by jack stands. Before painting or powder coating
58-62 Impala. Rack & Pinion Cradle Kit
 58-62 Impala Rack & Pinion Cradle Kit 58-62 Impala Note: For safety disconnect battery cables and ensure that the vehicle is properly supported by jack stands. Before painting or powder coating of the
68-72 Chevelle/El Camino. Rack and Pinion Conversion Kit
 68-72 Chevelle/El Camino Rack and Pinion Conversion Kit For safety, disconnect battery cables and ensure that vehicle is properly supported by jack stands. NOTE: Hoses (FR16) Pump Mounting Brackets (FR1612
73-87 Chevy C-10 Rack and Pinion Conversion Kit
 73-87 Chevy C-10 Rack and Pinion Conversion Kit For safety, disconnect battery cables and ensure that vehicle is properly supported by jack stands. NOTE: Power Steering Line Kit (FR1610) is sold separately
INDEX. NOTE: Part number ES381RL Camaro Outer Tie Rod Ends must be used with this rack and pinion kit.
 INDEX NOTE: Before beginning you must first measure the width of your front end from LEFT outer tie rod end zirc to the RIGHT outer tie rod end zirc to determine the overall width of your front end. Write
Electro Wizard Battery Disconnect Switch
 TM Electro Wizard Battery Disconnect Switch FR1051 Mounting Diagram Positive disconnection, 12V GROUNDED SOLENOID (power supply coil negative) FR1051 Technical Specifications Positive disconnection, 12V
Index. Page Number Section
 S H O C K S Index Page Number Section 1-4 GM Front Coil Over Installation 5-7 Front Smooth Body Shock Installation 7-8 Rear Smooth Body Shock Installation 8-11 Custom Coil Over Installation 12 Tuning and
Ford Torino Small Block Rack Kit Instructions
 1968-69 Ford Torino Small Block Rack Kit Instructions 8012290-01 Unisteer offers a limited warranty against all manufacturer defects of their kits and supplied parts. Unisteer will not honor any warranty
Flaming River Ind. 800 Poertner Dr Berea, OH FR1057 Watch Dog Automatic Battery Disconnect Switch
 Flaming River Ind. 800 Poertner Dr Berea, OH 44017 800-648-8022 FR1057 Watch Dog Automatic Battery Disconnect Switch Table of Contents Introduction...pg 3 Mounting and Dimensions...pg 4 Mechanical Fixation...pg
Ford Full-Size Rack & Pinion Kit Instructions #
 1949-1951 Ford Full-Size Rack & Pinion Kit Instructions # 8011660 Unisteer offers a limited warranty against all manufacturer defects of their kits and supplied parts. Unisteer will not honor any warranty
Ford Fairlane Rack & Pinion Kit Instructions #
 1963-1965 Ford Fairlane Rack & Pinion Kit Instructions # 8011570 Unisteer offers a limited warranty against all manufacturer defects of their kits and supplied parts. Unisteer will not honor any warranty
G-Body Rack & Pinion Kit Instructions
 1977-82 G-Body Rack & Pinion Kit Instructions 8012400-01 Unisteer offers a limited warranty against all manufacturer defects of their kits and supplied parts. Unisteer will not honor any warranty on any
Tilt Steering Column Instruction Sheet
 Tilt Steering Column Instruction Sheet PLEASE READ BEFORE YOU BEGIN TO INSTALL COLUMN Flaming River all new parts pledge. The best in the business and a three-year warranty. Flaming River tilt steering
INSTALLATION INSTRUCTIONS QA1 P/N x400, x500, x600, x400, x500, x F100 Front Coil-over Suspension System
 INSTALLATION INSTRUCTIONS QA1 P/N 52620-x400, 52620-x500, 52620-x600, 52621-x400, 52621-x500, 52621-x600 65-72 F100 Front Coil-over Suspension System TOOLS AND SUPPLIES REQUIRED Floor Jack Two (2) Jack
*USE ONLY POWER STEERING FLUID IN SYSTEM. DO NOT USE ATF. YOU MUST USE THE SUPPLIED HEADERS, MODIFY EXHAUST PIPES, AND WELD FLANGES.
 1949-1951 Ford Full-Size Rack & Pinion Kit Instructions # 8011660 Full refund will NOT be granted to any kits that are damaged, scratched, or altered in any fashion. *USE ONLY POWER STEERING FLUID IN SYSTEM.
60-72 Chevrolet C10 Power Rack & Pinion Kit Instructions # , , &
 60-72 Chevrolet C10 Power Rack & Pinion Kit Instructions # 8011740-01, 8011900-01, & 8011920-01 Unisteer offers a limited warranty against all manufacturer defects of their kits and supplied parts. Unisteer
Part # Description Qty Inspected By Rack & Pinion Pump Kit Remote Reservoir Line Kit Shaft Kit
 58-62 Corvette Power Rack & Pinion Kit Instructions # 8011530 Unisteer offers a limited warranty against all manufacturer defects of their kits and supplied parts. Unisteer will not honor any warranty
SPECIAL TOOLS REQUIRED:
 INSTALLATION INSTRUCTIONS FOR 2010-15 TOYOTA 4RUNNER WITH XREAS SUSPENSION 3 SUSPENSION LIFT KIT PART NUMBER 432X WARNING!!! READ AND UNDERSTAND ALL INSTRUCTIONS BEFORE PROCEEDING. MAKE SURE THAT YOU HAVE
WARNING!!! READ AND UNDERSTAND ALL INSTRUCTIONS BEFORE PROCEEDING. MAKE SURE THAT YOU HAVE ALL TOOLS AND PARTS BEFORE BEGINNING THE INSTALLATION.
 INSTALLATION INSTRUCTIONS FOR 2007-2015 JEEP JK 3 SUSPENSION LIFT SYSTEM PART NUMBER 587 WARNING!!! READ AND UNDERSTAND ALL INSTRUCTIONS BEFORE PROCEEDING. MAKE SURE THAT YOU HAVE ALL TOOLS AND PARTS BEFORE
FRONT DRIVELINE MODIFICATION MAY BE NECESSARY!!!!
 INSTALLATION INSTRUCTIONS FOR 2009 DODGE 2500/3500 4WD & 1500 Mega Cab 6 SUSPENSION SYSTEM PART NUMBER 7206 Requires the following parts (sold separately) for a complete installation: Front Coil Spring
58-62 Corvette Manual Rack & Pinion Kit Instructions #
 58-62 Corvette Manual Rack & Pinion Kit Instructions # 8001550 Unisteer offers a limited warranty against all manufacturer defects of their kits and supplied parts. Unisteer will not honor any warranty
PARTS LIST INCLUDED IN KIT TORQUE SPECIFICATIONS PRODUCT SAFETY LABEL MUST BE INSTALLED INSIDE CAB IN PLAIN VIEW OF ALL OCCUPANTS.
 INSTALLATION INSTRUCTIONS FOR 2010-15 TOYOTA 4RUNNER SR5 AND SPORT (Non-Air Leveling & Non-X-REAS) AND FOR 2010-14 TOYOTA FJ CRUISER 2WD & 4WD 3 SUSPENSION LIFT KIT PART NUMBER 432 WARNING!!! READ AND
Steeroids Installa on Instruc ons Part Number(s): Mustang
: Mustang") Parts and finishes may vary from those shown. 1 PRESSURE HOSE 1 PASSENGER S BRACKET 1 RETURN HOSE FASTENERS Part Number(s): 84510-84569 1965-1970 Mustang 1 RACK AND PINION WITH 2 CLAMPS 1 TIE ROD BRACKET
Parts and finishes may vary from those shown. 1 PRESSURE HOSE 1 PASSENGER S BRACKET 1 RETURN HOSE FASTENERS Part Number(s): 84510-84569 1965-1970 Mustang 1 RACK AND PINION WITH 2 CLAMPS 1 TIE ROD BRACKET
INSTALLATION INSTRUCTIONS FOR 2016 TOYOTA TACOMA 4 X 4 AND PRE RUNNER 3 SUSPENSION LIFT KIT PART NUMBER
 INSTALLATION INSTRUCTIONS FOR 2016 TOYOTA TACOMA 4 X 4 AND PRE RUNNER 3 SUSPENSION LIFT KIT PART NUMBER 427 WARNING!!! READ AND UNDERSTAND ALL INSTRUCTIONS BEFORE PROCEEDING. MAKE SURE THAT YOU HAVE ALL
Installation Instructions
 Installation Instructions Jeep TJ Long Arm Suspension System 1997-2002 JEEP TJ 4WD 6 1997-2002 JEEP TJ 4WD FTS24002 & BK / FTS24003 & BK / FTS44002 & BK PARTS LIST FTS24002BK Jeep TJ 6' Box Kit 1 FTS24003BK
67-70 Cougar Rack Kit Instructions # &
 67-70 Cougar Rack Kit Instructions # 8011950-01 & 8011940-01 Unisteer offers a limited warranty against all manufacturer defects of their kits and supplied parts. Unisteer will not honor any warranty on
67-69 Camaro / Nova Power Rack & Pinion # ,
 67-69 Camaro / 68-74 Nova Power Rack & Pinion # 8010540-01, 8010540-02 Unisteer offers a limited warranty against all manufacturer defects of their kits and supplied parts. Unisteer will not honor any
INSTALLATION MANUAL TOYOTA TUNDRA 5 SUSPENSION SYSTEM PART # 55905
 PART NUMBER : 55905 1999 2003 TOYOTA TUNDRA 5 SUSPENSION SYSTEM PARTS LIST: Part # Description Qty. 55900-01 Driver Side Spindle 1 55900-02 Passenger Side Spindle 1 55905-03 Rear brake proportioning valve
WARNING!!! READ AND UNDERSTAND ALL INSTRUCTIONS BEFORE PROCEEDING. MAKE SURE THAT YOU HAVE ALL TOOLS AND PARTS BEFORE BEGINNING THE INSTALLATION.
 INSTALLATION INSTRUCTIONS FOR 2005-2015 TOYOTA TACOMA 4 X 4 AND PRERUNNER, 2003-2015 4RUNNER, 2007-2014 FJ CRUISER 1.5" FRONT LEVELING KIT PART NUMBER 415 WARNING!!! READ AND UNDERSTAND ALL INSTRUCTIONS
TRANS-AM POWER RACK AND PINION INSTALLATION INSTRUCTION MANUAL
 1970-81 TRANS-AM POWER RACK AND PINION INSTALLATION INSTRUCTION MANUAL 8011160-01 & 8011110-01 Unisteer offers a limited warranty against all manufacturer defects of their kits and supplied parts. Unisteer
INSTALLATION INSTRUCTIONS FOR FORD 4WD SUPER DUTY F COIL SPRING SUSPENSION SYSTEM
 INSTALLATION INSTRUCTIONS FOR 2008-10 FORD 4WD SUPER DUTY F250-350 6 COIL SPRING SUSPENSION SYSTEM Requires the following parts (sold separately) for a complete installation: KIT PART NUMBER (6860) REQUIRES
INSTALLATION MANUAL TOYOTA TACOMA 5 SUSPENSION SYSTEM PART # 54900
 PART NUMBER : 54900 1996 2004 TOYOTA TACOMA 5 SUSPENSION SYSTEM PARTS LIST: Part # Description Qty. 55900-01 Driver Side Spindle 1 55900-02 Passenger Side Spindle 1 54900-01 Rear brake proportioning valve
INSTALLATION INSTRUCTIONS FOR FORD 4WD SUPER DUTY F /2 COIL SPRING SUSPENSION SYSTEM
 INSTALLATION INSTRUCTIONS FOR 2005-07 FORD 4WD SUPER DUTY F250-350 4 1/2 COIL SPRING SUSPENSION SYSTEM Requires the following parts (sold separately) for a complete installation: KIT PART NUMBER (6345
(WILL NOT FIT VEHICLES WITH X-REAS SUSPENSION)
") 2003-2016 TOYOTA 4RUNNER/2007-2014 FJ CRUISER 4WD INSTRUCTIONS 3 SUSPENSION LIFT KIT P/N 40021 (WILL NOT FIT VEHICLES WITH X-REAS SUSPENSION) WARNING!!!! PRODUCT SAFETY LABEL MUST BE INSTALLED INSIDE THE
2003-2016 TOYOTA 4RUNNER/2007-2014 FJ CRUISER 4WD INSTRUCTIONS 3 SUSPENSION LIFT KIT P/N 40021 (WILL NOT FIT VEHICLES WITH X-REAS SUSPENSION) WARNING!!!! PRODUCT SAFETY LABEL MUST BE INSTALLED INSIDE THE
3.5 Oval Bull Bar. Part No. B1508S/B READ INSTRUCTIONS CAREFULLY BEFORE STARTING INSTALLATION
 ` 3.5 Oval Bull Bar Part No. B1508S/B Fits: 2005-2014 Toyota Tacoma REMOVE CONTENTS FROM BOX. VERIFY ALL PARTS ARE PRESENT. 60-180 min Cutting Not Required Drilling Not Required support@trailfx.com READ
Technical Support Line: (952) Hanover Ave. Lakeville, MN
 Hanover Ave. Lakeville, MN") Technical Support Line: (952) 985-5675 Email: Sales@QA1.net 21730 Hanover Ave. Lakeville, MN 55044 www.qa1.net INSTALLATION INSTRUCTIONS QA1 1967-1979 Mopar A-Body Rear 6 link Conversion System QA1 p/n
Technical Support Line: (952) 985-5675 Email: Sales@QA1.net 21730 Hanover Ave. Lakeville, MN 55044 www.qa1.net INSTALLATION INSTRUCTIONS QA1 1967-1979 Mopar A-Body Rear 6 link Conversion System QA1 p/n
,
 UNISTEER Performance Products 67-69 Camaro/ 68-74Nova Power Rack & Pinion 8010540-01, 8010540-02 (OPTIONAL -02 CHROME KIT SHOWN ABOVE) ALTHOUGH THIS KIT IS FAIRLY SIMPLE TO INSTALL SOME MODIFICATIONS ARE
DODGE DIESEL KIT DODGE DIESEL KIT
 69120 2009-2013 DODGE 2500 8 DIESEL KIT 2009-2012 DODGE 3500 8 DIESEL KIT Heavy Duty Long Arm Construction For Superior Ride Quality And Travel Lower Arms Constructed Of 1.75 DOM Tubing W/ Urethane Bushing
JOHN DEERE 9970 COTTON PICKERS
 PARTS CATALOG FOR Mud Hog System II Rear Wheel Drive FOR JOHN DEERE 9970 COTTON PICKERS Mud Hog Model Numbers Tread Center OEM Aftermarket JD40005 JD47655 82, 90, 94, 106 TUTHILL Drive Systems 9098 West
B190 8 H.P. Lawn Vacuum (1995) Page 1 of 22 Chute Assembly
 Page 1 of 22 Chute Assembly") 245-315B190 8 H.P. Lawn Vacuum (1995) Page 1 of 22 Chute Assembly 245-315B190 8 H.P. Lawn Vacuum (1995) Page 2 of 22 Chute Assembly Ref # Part Number Qty S/P/F Description 1 681-0068 1 S CHUTE ASSEMBLY
245-315B190 8 H.P. Lawn Vacuum (1995) Page 1 of 22 Chute Assembly 245-315B190 8 H.P. Lawn Vacuum (1995) Page 2 of 22 Chute Assembly Ref # Part Number Qty S/P/F Description 1 681-0068 1 S CHUTE ASSEMBLY
*66130BAG BAG JEEP TJ 4 / 6 X-SERIES SUSPENSION KIT
 921661300 97-06 JEEP TJ 4 / 6 X-SERIES SUSPENSION KIT Thank you for choosing Rough Country for your suspension needs. *66130BAG1 66130BAG1 Rough Country recommends a certified technician to install this
Tools, Equipment and Supplies Needed:
 153-162 DISC BRAKE/DUAL MASTER CYLINDER CONVERSION Please take the time to read the enclosed instructions carefully. If you have any questions, call our Product Assistance personnel for clarifi cation.
Front HD Bumper. Part No. FHDB003TI. PARTS LIST: Qty Part Description Qty Part Description
 ` HD Bumper Part No. FHDB003TI Fits: 2015-2016 Chevrolet Silverado 2500/3500 ASSISTANCE IS RECOMMENDED. REMOVE CONTENTS FROM BOX. VERIFY ALL PARTS ARE PRESENT. 60-180 min Cutting Not Required Drilling
FRONT DRIVELINE MODIFICATION MAY BE NECESSARY!!!!
 DODGE 2500/3500 4WD 4.5 SUSPENSION SYSTEM Requires the following parts (sold separately) for a complete installation: Front Coil Spring Box depending on Gas or Diesel/V0: Gas (Hemi) P/N 7004GS Diesel/V0
Installation Notes: #86000-R Race Series +3.5 L/T Kit
 159 North Maple St. Unit J, CORONA CA 92880 P. 951-737-9682 F. 951-737-9006 WWW.CHAOSFAB.COM Installation Notes: #86000-R Race Series +3.5 L/T Kit Factory manual is recommended for removal and re-installation
2. Remove front wheels.
 1 PARTS DIAGRAM 2 Installation Instructions: (PASSENGER SIDE) 1. Place jack under center of RUV front end and lift until front wheels clear the ground. Be careful to support the RUV properly so that it
JEEP WRANGLER INSTALLATION INSTRUCTIONS KIT SUM
 1986-1995 JEEP WRANGLER INSTALLATION INSTRUCTIONS KIT SUM-7893300 Installation of a body lift will change the center of gravity and the handling characteristics of the vehicle. Because of the higher center
RHINO SUSPENSION SYSTEM INSTALLATION INSTRUCTIONS
 PARTS INCLUDED: 2 FRONT UPPER A-ARMS 2 FRONT LOWER A-ARMS 2 UNI-BALL JOINTS 2 UNI-BALL JOINT STUDS 2 UNI-BALL JOINT CAPS 2 RETAINING RINGS 1 FRONT SHOCK ASSEM. 2 DELRON STEERING STOPS 2 SHOCK MOUNT SPACERS
22004 INSTALLATION INSTRUCTIONS INSTALLATION 07-UP JEEP JK 2/4 DOOR REAR COILOVER CONVERSION SYSTEM COMPONENTS INCLUDED HARDWARE INCLUDED
 7929 Lincoln Ave. Riverside, CA 92504 Phone: 951.689.ICON Fax: 951.689.1016 PART # 22004 22004 INSTALLATION INSTRUCTIONS DESCRIPTION 10-13-2015 REV.B 07-UP JEEP JK 2/4 DOOR REAR COILOVER CONVERSION SYSTEM
WHEEL DRIVE GM S-SERIES TRUCKS & SUV S ( 82-95) & ( 96-04) &
 & ( 96-04) &") 1982-2004 2-WHEEL DRIVE GM S-SERIES TRUCKS & SUV S ( 82-95) 8000990-01 & 8000990-02 ( 96-04) 8001020-01 & 8001020-02 Unisteer offers a limited warranty against all manufacturer defects of their kits and
1982-2004 2-WHEEL DRIVE GM S-SERIES TRUCKS & SUV S ( 82-95) 8000990-01 & 8000990-02 ( 96-04) 8001020-01 & 8001020-02 Unisteer offers a limited warranty against all manufacturer defects of their kits and
Detroit Speed, Inc. C2/C3 SpeedRay Front Suspension Corvette P/N: &
 Detroit Speed, Inc. C2/C3 SpeedRay Front Suspension 1963-82 Corvette P/N: 032072 & 032073 The Detroit Speed Inc. Corvette SpeedRay front suspension improves handling and ride quality by utilizing Detroit
Installation Instructions **THIS RAIL MOUNTING KIT USES 11 BOLTS**
 Installation Instructions CUSTOM QUICK INSTALL MOUNTING KIT FORD SUPER DUTY Part Numbers: 50074 WARNING:Under no circumstances do we recommend exceeding the towing vehicle manufacturers recommended vehicle
INSTALLATION INSTRUCTIONS *When referring to left and right positions during the installation process, it is from the seated position*
 1 PARTS DIAGRAMS 2 3 4 INSTALLATION INSTRUCTIONS *When referring to left and right positions during the installation process, it is from the seated position* FRONT LIFT INSTALLATION 1. Place a jack under
97-06 JEEP TJ 4 / 6 X-SERIES SUSPENSION KIT
 921661X00 97-06 JEEP TJ 4 / 6 X-SERIES SUSPENSION KIT Thank you for choosing Rough Country for your suspension needs. Rough Country recommends a certified technician to install this system. In addition
Verify, and adjust if necessary, centering of Rack and Pinion before installing.
 Verify, and adjust if necessary, centering of before installing. measurement 1: face of Tie Rod End inside of 1. Measure distance from inside of Rack and Pinion to face of Tie Rod End. 2. Measure distance
INSTALLATION INSTRUCTIONS FOR FORD 4WD SUPER DUTY 2-1/2 SUSPENSION SYSTEM
 INSTALLATION INSTRUCTIONS FOR 1999-2004 FORD 4WD SUPER DUTY 2-1/2 SUSPENSION SYSTEM Requires the following parts for a complete installation: Front Leaf Springs P/N 60SD25 Vehicle specific Box Kit depending
INSTALLATION INSTRUCTIONS QA1 P/N R , R , R R , R , R F100 Rear Coil-over Conversion System
 INSTALLATION INSTRUCTIONS QA1 P/N R120-170, R120-200, R120-250 R220-170, R220-200, R220-250 65-72 F100 Rear Coil-over Conversion System TOOLS AND SUPPLIES REQUIRED Floor Jack Two (2) Jack Stands Drill
Installation Instructions
 Equipment Required: Fastener Kit: F Wrenches: 15/16, 15/16 Crowfoot Adaptor Drill Bits: 1/4 Other Tools: Drill, Reciprocating saw Optional, Raise Bed: 18mm socket, 15 extension As an option you can loosen
4331 EUCALYPTUS AVE. ~~ CHINO, CA Fax FORD F-250/350 SUPER DUTY 4WD FTS RADIUS ARM BOX KIT
 4331 EUCALYPTUS AVE. ~~ CHINO, CA 91710 909-597-7800 Fax 909-597-7185 2005-2007 FORD F-250/350 SUPER DUTY 4WD FTS22099 10 RADIUS ARM BOX KIT 4331 EUCALYPTUS AVE. ~~ CHINO, CA 91710 909-597-7800 Fax 909-597-7185
NOTE: LIFETIME PRODUCT WARRANTY
 Carli Suspension: 422 Jenks Circle, Corona, CA 92880 Tech Support: (714) 532-2798 CS-DPT25-6-03-D CS-DPT25-10-D CS-DPT25-6-10-D-12MM CS-DPT25-6-12-D CS-DPT25-6-12-D-12MM NOTE: Please review the product
Equipped with AEM Dryflow Filter No Oil Required! INSTALLATION INSTRUCTIONS PART NUMBER:
 Equipped with AEM Dryflow Filter No Oil Required! INSTALLATION INSTRUCTIONS PART NUMBER:21-8125 2011-2012 Ford F150 V8 5.0L * NOTE: Legal in California only for racing vehicles which may never be used
Read and understand all instructions and warnings prior to installation of system and operation of vehicle.
 491 W. Garfield Ave., Coldwater, MI 49036 Phone: 517-279-2135 Web/live chat: www.bds-suspension.com E-mail: tech@bds-suspension.com Part#: 013001 Product: Front Box Kit Application: Ford F-100/F-150 &
3.5" Oval Bull Bar. Part No. B1519S/B. PARTS LIST: Qty Part Description Qty Part Description
 ` 3.5" Oval Bull Bar Part No. B1519S/B Fits: 2017 Ford F250/350/450/550 Super Duty THE BULL BAR MAY INTERFERES WITH PARKING SENSORS, PROXIMITY SENSORS AND CRUISE CONTROL SENSORS. REMOVE CONTENTS FROM BOX.
Part # GM F-Body Front TruTurn System GM F-Body TruTurn System. Table of contents. Installation Instructions
 Part # 1119599-190-191 GM F-Body Front TruTurn System Recommended Tools 190-191 GM F-Body TruTurn System Installation Table of contents Page... Included components Page... Upper Control Arm Components
Part # WD Jeep Wrangler TJ Stage I 3 to 4 Lift Now Manufactured With Chromolly Arms PRO COMP SUSPENSION. Suspension Systems that Work!
 2360 Boswell Road Chula Vista, CA 91914 Phone 619.216.1444 Fax 619.216.1474 E-Mail tech@explorerprocomp.com PRO COMP SUSPENSION Suspension Systems that Work! Part # 55495 97-2002 4WD Jeep Wrangler TJ Stage
UNISTEER Performance Products
 UNISTEER Performance Products 1960-65 FALCON MANUAL RACK AND PINION INSTALLATION INSTRUCTION MANUAL 8001050-01 & 8001050-02 Thank you for purchasing Unisteer Performance Products for your 1960-65 Falcon/Comet.
DISC BRAKE/DUAL MASTER CYLINDER CONVERSION. Tools, Equipment and Supplies Needed:
 Please take the time to read the enclosed instructions carefully. If you have any questions, call our Product Assistance personnel for clarification. It is important to note that these instructions contain
Installation Instructions
 Retrofit Steering Column Installation Instructions for 1968-69 Mustangs For # s 1300644010, 1300644020, 1300644051, 1300645010, 1300645020, 1300645051 www.ididitinc.com 610 S. Maumee St., Tecumseh, MI
NOTE: LIFETIME PRODUCT WARRANTY
 Carli Suspension: 422 Jenks Circle, Corona, CA 92880 Tech Support: (714) 532-2798 CS-DD30-6-03-D CS-DD30-6-10-D CS-DD30-6-10-D-12MM CS-DD30-6-12-D CS-DD30-6-12-D-12MM NOTE: Please review the product instructions
INSTALLATION INSTRUCTIONS
 Equipped with AEM Dryflow Filter No Oil Required! INSTALLATION INSTRUCTIONS PART NUMBER: 21-8304 1991-1995 JEEP Wrangler L4-2.5L C.A.R.B. E.O. # D-670 * NOTE: Legal in California only for racing vehicles
PARTS CATALOG FOR. Mud Hog Rear Wheel Drive FOR. MF 9540/9550/9560, CAT 540C/550C/560C, Gleaner A540/A560, Fendt 6450R/9480R COMBINES
 PARTS CATALOG FOR Mud Hog Rear Wheel Drive FOR MF 9540/9550/9560, CAT 540C/550C/560C, Gleaner A540/A560, Fendt 6450R/9480R COMBINES Mud Hog Model Number: AG9896 A Product of Tuthill Drive Systems P.O.
Suspension System RS66102B
 890 Rev A Suspension System RS660B ( SPORT SYSTEM) 0 JEEP MODELS EQUIPED WITH 3.6L V6 ENGINE NEED EXHAUST MODIFYCATION KIT RS70003. OR REPLACEMENT FRONT DRIVESHAFT (DRIVESHAFT / EXHAUST CLERANCE ISSUE).
Installation Instructions
 Equipment Required: Installation Instructions Fastener Kit: F Wrenches: 15/16, 10 mm Drill Bits: 1/4 Other Tools: Drill, Reciprocating Saw 9464/9474 HIDE-A-GOOSE HITCH All Fasteners Typical, Both Sides
FORD F-250/350 SUPER DUTY 4 WHEEL DRIVE FTS22197BK 6 COIL OVER CONVERSION SYSTEM FTS22196BK 8 COIL OVER CONVERSION SYSTEM
 2000-2004 FORD F-250/350 SUPER DUTY 4 WHEEL DRIVE FTS22197BK 6 COIL OVER CONVERSION SYSTEM FTS22196BK 8 COIL OVER CONVERSION SYSTEM 4331 EUCALYPTUS AVE. ~~ CHINO, CA 91710 909-597-7800 Fax 909-597-7185
UNISTEER Performance Products
 UNISTEER Performance Products 1965-Early 1967 Manual Mustang Install Manual 8001110-01 & 8001120-01 *ALTHOUGH THIS KIT IS FAIRLY SIMPLE TO INSTALL, SOME MODIFICATIONS MAYBE NECESSARY. *BEFORE STARTING
FTS22100BK 10 RADIUS ARM BOX KIT
 4331 EUCALYPTUS AVE. ~~ CHINO, CA 91710 909-597-7800 Fax 909-597-7185 2008-16 FORD F-250/350 SUPER DUTY 4WD FTS22100BK 10 RADIUS ARM BOX KIT 4331 EUCALYPTUS AVE. ~~ CHINO, CA 91710 909-597-7800 Fax 909-597-7185
FTS22100BK 10 RADIUS ARM BOX KIT
 4331 EUCALYPTUS AVE. ~~ CHINO, CA 91710 909-597-7800 Fax 909-597-7185 2008 FORD F-250/350 SUPER DUTY 4WD FTS22100BK 10 RADIUS ARM BOX KIT 4331 EUCALYPTUS AVE. ~~ CHINO, CA 91710 909-597-7800 Fax 909-597-7185
4 Radius Arm Suspension System. Dodge Ram WD Power Wagon Part#:
 Part#: 012402 4 Radius Arm Suspension System Dodge Ram 2500 4WD Power Wagon 2014-18 491 W. Garfield Ave., Coldwater, MI 49036. Phone: 517-279-2135 Web: www.bds-suspension.com. E-mail: tech-bds@sporttruckusa.com
This 6 suspension system was developed for 37x12.50x17 tire on an after market wheel w/ 4.5 back spacing.
 Thank you for choosing Rough Country for your suspension needs. 921560200C *1560BAG4* 1560BAG4 2017 F250 6 4-LINK SUSPENSION KIT Rough Country recommends a certified technician installs this system. In
CHEVY / GMC 1500HD / 2500HD 2WD 8 LUG 7 BASIC KIT
 85101 2000-2010 CHEVY / GMC 1500HD / 2500HD 2WD 8 LUG 7 BASIC KIT C8510-4 MAIN BOX KIT W/ HARDWARE 1) FRONT X MEMBER 1) REAR X MEMBER 2) TORSION BAR DROPS 1) LEFT BUMP STOP 1) RIGHT BUMP STOP 2) SWAY BAR
Detroit Speed, Inc. Electric Headlight Door Kit Corvette P/N: &
 Detroit Speed, Inc. Electric Headlight Door Kit 1968-82 Corvette P/N: 122006 & 122007 The Detroit Speed Inc. Electric Headlight Door Kit replaces the stock vacuum actuated system on all 1968-82 Corvettes.
Part # Mustang Tru-Turn Suspension Package
 350 S. St. Charles St. Jasper, In. 47546 Ph. 812.482.2932 Fax 812.634.6632 www.ridetech.com Part # 12099599 64-66 Mustang Tru-Turn Suspension Package Front Components: 1 12093699 Upper Strong Arms 1 12092899
JEEP JK 6 2 DR X-SERIES SUSPENSION KIT
 921684X00 Thank you for choosing Rough Country for your suspension needs. JEEP JK 6 2 DR X-SERIES SUSPENSION KIT Rough Country recommends a certified technician install this system. In addition to these
Installation Instructions
 Equipment Required: Fastener Kit: F Wrenches: 3/4, 15/16, 13mm Drill Bits: 1/4, some older models a 1/2 Other Tools: Drill, Saber Saw 5/8 Fasteners From Hitch Fastener Kit Installation Instructions GOOSENECK
DODGE / RAM 1500 *** DO NOT EXCEED VEHICLE MANUFACTURER'S RECOMENDED TOWING CAPACITY ***
 6444 DODGE / RAM 500 6/8/207 OF 5 *** DO NOT EXCEED MANUFACTURER'S RECOMENDED TOWING CAPACITY *** ITEM QTY PART NUMBER 0 /2-3 x 2" 2 4 /2-3 x 3/4, GR8 3 4 CM-SP2 4 2 CM-SP6 5 4 HFN 23, GR8 6 2 CM-SP4 7
*1550BAG5* 1550BAG F & 6 SUSPENSION LIFT KIT C. Thank you for choosing Rough Country for your suspension needs.
 Thank you for choosing Rough Country for your suspension needs. 921550200C *1550BAG5* 1550BAG5 2017 F250 4.5 & 6 SUSPENSION LIFT KIT Rough Country recommends a certified technician installs this system.
RANGER 900 POWER STEERING KIT
 RANGER 900 POWER STEERING KIT P/N 2880083 APPLICATION MY14 AND NEWER RANGER XP 900 MODELS IMPORTANT It is strongly recommended that this kit be installed by an authorized Polaris dealer. NOTE Use of this
05 12 TOYOTA TACOMA 2WD
 MAXTRAC SUSPENSION 4030 E LEAVERTON CT ANAHEIM, CA 92807 714 630 0363 WWW.MAXTRACSUSPENSION.COM SALES@MAXTRACSUSPENSION.COM PRODUCT: PARTS LIST K756864 6" LIFT KIT 05 12 TOYOTA TACOMA 2WD QTY SPINDLE,
JK 2-Door 2 Stretch Kit Instructions
 1 JK 2-Door 2 Stretch Kit Instructions www.teraflex.com Kit #1257100 Important Notes: Prior to beginning this or any installation read these instructions to familiarize yourself with the required steps
Equipped with AEM Dryflow Filter No Oil Required! INSTALLATION INSTRUCTIONS PART NUMBER: DS (Plastic Intake Tube)
") Equipped with AEM Dryflow Filter No Oil Required! INSTALLATION INSTRUCTIONS PART NUMBER:21-8126DS (Plastic Intake Tube) 2011-2014 Ford F150 V6 3.5L ECOBOOST C.A.R.B. E.O. D-670-19 AEM Induction Systems
Equipped with AEM Dryflow Filter No Oil Required! INSTALLATION INSTRUCTIONS PART NUMBER:21-8126DS (Plastic Intake Tube) 2011-2014 Ford F150 V6 3.5L ECOBOOST C.A.R.B. E.O. D-670-19 AEM Induction Systems
FTS22077BK 6 & 8 RADIUS ARM BOX KIT
 4331 EUCALYPTUS AVE. ~~ CHINO, CA 91710 909-597-7800 Fax 909-597-7185 2008-10 FORD F-250/350 SUPER DUTY 4WD FTS22077BK 6 & 8 RADIUS ARM BOX KIT 4331 EUCALYPTUS AVE. ~~ CHINO, CA 91710 909-597-7800 Fax