Breezy Relax Instruction & Safety Manual
|
|
|
- Sheila Lee
- 5 years ago
- Views:
Transcription
1 Breezy Relax Instruction & Safety Manual Please read this manual before operation, for maintenance instructions and safe usage The enabling power of applied knowledge
2 Breezy Relax Instruction & Safety Manual 1
3 Foreword We are very happy that you have decided in favour of a high-quality Unicare Health product. This user s manual will provide numerous tips and ideas so that your wheelchair can become a trustworthy and reliable partner in your life. Maintaining CLOSE TIES to our customers means a lot to us at Unicare Health. We thus like to keep you up-to-date about new and current developments at our company. Close customer ties also mean fast service when you need replacement parts or accessories or just have a question about your wheelchair and with as little red tape as possible. We want you to be satisfi ed with our products and service. Unicare Health has thus been consistently working at continuously develop its products. For this reason, changes can occur in our palette of products with regard to form, technology and equipment. Consequently, no claims can be construed from the data or pictures contained in this user s manual. We at Unicare Health have been awarded the ISO-9001 certifi cate, which affi rms the quality of our products at every stage, from R & D to production. Please contact your local, authorised Unicare Health customer service, if you have any questions concerning the use, maintenance or safety of your wheelchair. In the case that there is no authorised dealer in your area, or you have any questions, you can contact us either in writing or by telephone: Unicare Health 29 Alexandra Place Bentley WA 6102 T F info@unicarehealth.com.au 2
4 Breezy Relax Instruction & Safety Manual Contents Foreword about wheelchairs Safety Tips 4 Overview 8 Handling 9 Options Tipping tubes 9 Brakes 10 Footrest and footrest interlock 11 Standard fl ip-up footrest 11 Angle-adjustable footboard 12 Headrest 12 Seat height adjustment 12 Wheelbase extension 13 Adjustable back height 14 Hemi Armrest 15 Adjustable Push Handles 15 Lap Belt Instruction 15 Anti-Tio Tubes 18 Comfort Seat 18 Crutch Holder 19 Tray 19 Tyres and Mounting 19 Assembly Instructions 20 3
5 Safety Tips The engineering and construction of this wheelchair have been designed to provide maximum safety. International safety standards currently in force have either been fulfi lled or exceeded. Nevertheless, users may put themselves at risk by improperly using their wheelchairs. For your own safety, the following rules must absolutely be observed. Unprofessional or erroneous adaptation or adjustment work could increase the risk of accidents. As a wheelchair user, you are also part of the daily traffi c on the streets and we would like to remind you that you are thus also subject to any and all traffi c laws. For this reason, you should always wear light clothing in the dark as much as possible, so that you can be seen more easily and make sure that the refl ectors are not covered. Be careful during your fi rst ride in this wheelchair. Get to know your wheelchair. Test what effect changing the centre of gravity would have on the behaviour of your wheelchair. Practice using your wheelchair on level ground, as well as going uphill and downhill. The wheel locks are not intended to brake your wheelchair. They are only there to ensure that your wheelchair does not begin rolling unintentionally. When you stop on uneven ground, you should always use the wheel locks. Always set both wheel locks, otherwise your wheelchair could tip over. The wheel locks have not been designed to be used as brakes. Always make use of lifts or use ramps. If these are not available, you can reach your destination with the aid of two attendants. They should grip the wheelchair at securely mounted parts. If your wheelchair is equipped with anti-tip tubes, these should be folded away. The wheelchair should never be lifted with an occupant, it should only be pushed. Before each use, the following should be checked: Quick-release axles on the rear wheels Velcro on seats and backrests Tyres, tyre pressure and wheel locks Wheel locks will not function properly if tyre pressure is too low or the gap between tyres and wheel locks is too large. The maximum user weight is 140 kg. The wheelchair should be used exclusively to convey one person at a time in the seat. Any other use beyond this limit is in violation of safety regulations. It is advised that users should not sit in the wheelchair while riding in any and all means of transportation! Only permanently installed seats and seat belts will offer suffi cient protection in hazardous situations. When vehicles are in motion, unoccupied wheelchairs should be secured using appropriate means. 4
6 Breezy Relax Instruction & Safety Manual Before changing any of the adjustments of this wheelchair, it is important to read the corresponding section of the user s instructions. It is possible that potholes or uneven ground could cause this wheelchair to tip over, especially when riding uphill or downhill. When riding over a step or up an incline frontally, the body should be leaning forward. Definition of purpose: The manual wheelchair is designed for all users, who require a high degree of support to sit upright for any length of time. This is made possible by the ergonomic, shaped backrests/back padding as well as the adjustability of the seating unit (seat angle, backrest angle, seat depth). The wheelchair can be used indoors as well as outdoors on dry, relatively smooth surfaces. It should not be used in heavy rain, or on snow-covered, slippy surfaces. Safety notes Attention: Wheelchair surfaces, frame parts as well as padding can reach a temperature of > 41, if they are left in the sun for a long period of time. Transportability Transportability of wheelchairs and users in vehicles A wheelchair secured in a vehicle will not provide the equivalent level of safety and security of a vehicle seating system. It is always recommended that the user transfers to the vehicle seating. It is recognised that this is not always practical for the user to be transferred and in these circumstances where the user must be transported whilst in the wheelchair the following advice should be followed. 1. Confi rm that the vehicle is suitably equipped to transport a passenger in a wheelchair and has access that is suitable for your wheelchair type. 2. Lomax Mobility Ltd recommends: a) That the wheelchair be secured by a 4-part (webbing) Tie Down Restraint system, conforming to ISO These restraints generally comprise of 4 individual straps that are attached to each corner of the wheelchair b) That the occupant should be restrained independently of the wheelchair by a lap and diagonal safety belt, conforming to ISO This is similar to a car seat belt that comes across the user s shoulder and around the waist. c) Any part of the wheelchair accessories such as kerb climbers) that can easily be detached should be removed and stored in the vehicle luggage compartment during transportation. d) The wheelchair should always be transported in the forward facing direction. e) Suffi cient space should be available around the wheelchair to enable clear access to attach, tighten and release the wheelchair and occupant tie down restraints and safety belts. f) If other passengers in the vehicle are provided with a headrest the wheelchair user should be provided with a headrest that is suitable for use with the wheelchair in transportation. 5
7 g) The tie-down restraints should be fi tted to the main frame of the wheelchair as indicated in the diagram on the following page, and not to any attachments or accessories, e.g. not around the spokes of wheels, brakes or footrests. h) The tie down restraints should be attached as close as possible at an angle of 45 degrees and tightened securely in accordance with the manufacturer s instructions. i) Pelvic restraint, posture belts or lap belts supplied with the wheelchair should always be used in addition to, but never as a substitute for the approved passenger restraint belts. j) The safety of the user during transportation depends upon the diligence of the person securing the tie-down restraints and they should have received appropriate instructions and/or training in their use. The wheelchair should be restrained with 4-point tie down webbing straps, with non-adjustable front straps and adjustable rear straps, which typically use Karabiner clips/s hooks and tongue and buckle attachments. The attachment points to the chair are the 4 tie down brackets (2 in the front and 2 in the rear). The straps are fi tted around the brackets (See illustration on following page). The tie down symbol on the wheelchair frame indicates the position of the wheelchair restraint straps. The straps are then tensioned after the front straps have been fi tted to secure the wheelchair. The wheelchair must be facing forward and the manual brakes fi rmly applied. The wheelchair occupant should be secured using a 3-point double inertia reel belt. It is recommended that a lap/pelvic belt similar to the example shown previously in the section headed seat belts, be used in conjunction with the vehicle occupant restraints. The seat/pelvic belt should never be used in place of the occupant lap and diagonal belt when travelling in a vehicle. 6


8 Breezy Relax Instruction & Safety Manual Transportability positioning of wheelchair tie down restraints on wheelchair View on the left shows a self-propelling wheelchair secured with front and rear wheelchair tie down restraints. Positioning of the restraint straps is shown in more detail below. Position of the front wheelchair tie down restraint and the tie down label The position is the same for both the self-propelling and the attendant push wheelchairs. Position of the rear wheelchair tie down restraint and the tie down label on the self-propelling wheelchair and the attendant push wheelchairs. 7

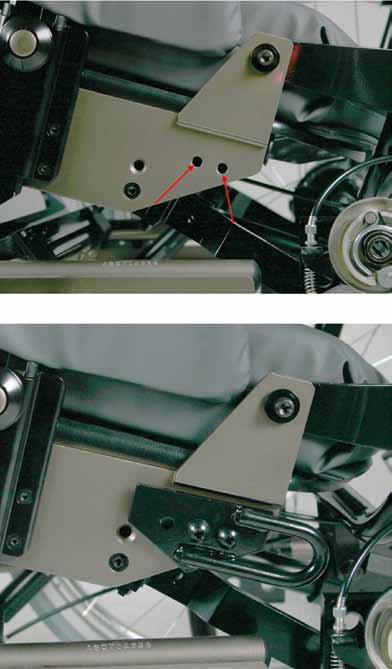
9 Overview 4.1 We at Unicare Health have been awarded the ISO-9001 certifi cate, which affi rms the quality of our products at every stage, from R & D to production. This products meet the requirements in accordance with EC guidelines. Options or accessories shown are available at extra cost. 1 1 Wheelchair: 1. Push handles 2. Backrest 3. Sideguard 4. Seat sling 5. Footrests 6. Castor 7. Castor adapter 8. Castor fork 9. Quick-release axle 10. Brakes 11. Handrim 12. Rear wheel
. Then fold the backrest forwards. Risk of injury the backrest must be secured/held before releasing it.")
10 Breezy Relax Instruction & Safety Manual Handling The backrest can be swung forwards to enable transportation. First remove the safety splint. Secure the backrest so that it cannot accidentally fall and pull the release knob (1). Then fold the backrest forwards. Risk of injury the backrest must be secured/held before releasing it. To get the backrest back into the upright position, fold the backrest up and engage the bracket. Risk of injury you must make sure that the backrest is correctly clicked into the bracket! Quick-release axles on rear wheel The rear wheels are fi tted with a quick-release axle. The wheels can be removed and put back on without using tools. To remove a wheel, simply depress the quickrelease button (1) and pull the rear wheel off. Hold the quick-release button on the axle depressed when putting the wheel back on. Release the button to lock the wheel in place. The quickrelease button must spring back to its original position. Options - Tipping Tubes 7.1 Step tubes are used by attendants to tip a wheelchair over an obstacle. Simply step on the tube to push a wheelchair, for example, over a curb or step. 9
. To release the wheel, pull the levers backwards.")
.")
 Drum brakes permit safe and convenient braking for an attendant. They can also be applied with the aid of a locking lever (1). The locking lever must snap audibly into place.")
11 Option - Brakes Wheel locks (7.10.2) The wheelchair is equipped with two wheel locks. The wheel locks are applied directly against the tyres. To engage, press both wheel lock levers forward against the stops (Fig. 10.1). To release the wheel, pull the levers backwards. Braking power will decrease with: Worn tyre tread Tyre pressure that is too low Wet wheels Improperly adjusted wheel locks The wheel locks have not been designed to be used as brakes. When moving, do not operate the wheel locks. Always use the handrims for braking. Make sure that the gap between the wheel locks and the tyres complies with the given specifi cations (Fig. 10.2). To readjust, loosen screw (1) and set the appropriate gap. Tighten screw again (see the page on torque). After each adjustment of the rear wheels, check the brake setting and if necessary, readjust. Drum brakes (7.13) Drum brakes permit safe and convenient braking for an attendant. They can also be applied with the aid of a locking lever (1). The locking lever must snap audibly into place. Performance of the drum brakes is not dependant on the air pressure inside the tyres. The wheelchair cannot be pushed when the drum brakes are set. Drum brakes should only be adjusted by authorised dealers. 10
.")

12 Breezy Relax Instruction & Safety Manual Footrests Footrest and footrest interlock (7.23.1) The footrest can be swung outwards. When fi tting the footrests these are installed in the swungaway position. Then simply turn them inwards until the interlock engages (1). To remove the footrests, use the lever (2) and swing the footrest outwards and lift off. Check that the footrest is correctly engaged. The footrests are not designed to be used to lift or carry the wheelchairs with an occupant. Standard flip-up footrest (7.24.1) To flip up: Take the load off the footrest and release the hand wheel (1). Pull the footrest upwards and set the desire height. Secure at the desired height by tightening the hand wheel. To lower: Take the load off the footrest by lifting the lower leg and release the interlock with the hand wheel (1). In this way you can swing the footrest downwards. As soon as you have reached the desired position, secure the interlock with the hand wheel. You can set the lower leg length by releasing the screws (2), this is infi nitely adjustable. Risk of injury! When moving the footrest up or down, do not put your fi ngers in the adjusting mechanism between the moving parts of the footrest. The footrests are not designed to be used to lift or carry the wheelchairs with an occupant. 11
 and set the desired angle. Then tighten the screw. By loosening the screw (1) the footboard can be adjusted both forwards and backwards.")
 and push the calf pad into the relevant position.")
 and set the desired height.")
 the headrest can be pushed sideways. Tighten screws again (see the page on torque). Options - Seat height adjustment 7.51.")
13 Options - Angle Adjustable Footboard 7.22 The footboard can be fl ipped up to make it easier to transfer to/from the chair. It can be adjusted to alter the angle to the ground. Loosen screw (1) and set the desired angle. Then tighten the screw. By loosening the screw (1) the footboard can be adjusted both forwards and backwards. Make sure that after any adjustment work, all screws are tightened correctly (see the page on torque). Ensure that you maintain the minimum gap to the fl oor (2.5 cm). While making the adjustment, there must be no load on the footboard! Calf pads can be width and depth adjusted. To do this, release the screws (1) and push the calf pad into the relevant position. After making the adjustment, all screws must be correctly tightened. By pushing the calf pad on the footrest tube, you can set the height. Options - Headrest 7.35 The headrest can be raised, moved sideward and moved horizontally both forwards and backwards. Height adjustment: Pull the release knob (1) and set the desired height. Make sure that the release knob is always correctly engaged. Horizontal adjustment: Open the release lever (2), set the desired position and pull the release lever fi rmly again. Side adjustment: After loosening the screws (3) the headrest can be pushed sideways. Tighten screws again (see the page on torque). Options - Seat height adjustment Seat height can be adjusted by changing the position of the castors and rear wheels (see table 1) as well as by using the seating unit. To make the adjustment the 4 screws (4) must be loosened and the seating unit must be screwed into the new position (A, B). After making the adjustment, all screws must be correctly tightened (see the page on torque). 12


14 Breezy Relax Instruction & Safety Manual Seat Height Castor Fixing Castor Rear Wheel Fixing Rear Wheel Seat unit 41cm A 43cm B 45cm A 45cm A 47cm B 47cm B 47.5cm A 49.5cm B 50cm A 52cm B Abduction wedge By loosening the screw (1) the abduction wedge can be adjusted heightwise and by loosening the screws (2, 3) it can be adjusted depth-wise or removed. Options - Wheelbase Extension 7.56 The larger the wheelbase, the less likely the wheelchair is to tip over. The rear wheel is fi tted in the most rear position to extend the wheelbase. Make sure that after any adjustment work, all screws are tightened correctly (see the page on torque). Wheel locks must be adjusted to suit the new position! With built-in frame extension, the stability of the wheelchair and the drive characteristics can be improved. By loosening the screws (1) the frame can be lengthened. Make sure that after any adjustment work, all screws are tightened correctly (see the page on torque). The chassis frame must not be pulled out longer than the seat frame. 13
. Adjustable backrest height (7.77.")
 The angle, depth and height of the side pads can be adjusted and they can also be swung-away or removed. Depth adjustment: Loosen the screw (1) and put the pad into its new position.")
15 Options - Backrest Height Comfort backrest (7.77) The Comfort backrest will allow you to sit for long periods of time, with side support. To remove it, pull it upwards and forwards. The cushion is held by Velcro and can also be removed. The cover can be washed (see the instructions on the cushion). Adjustable backrest height (7.77.4) The backrest height can be adjusted to various positions by releasing the 4 clamp screws (1). Then tighten the clamp screws again (see the page on torque). Side pads (7.77.5) The angle, depth and height of the side pads can be adjusted and they can also be swung-away or removed. Depth adjustment: Loosen the screw (1) and put the pad into its new position. Tighten the screw. Angle adjustment: Push the pad upwards, put the pad at the desired angle and then let go of it again. It will automatically click into place. This is how you swing the pad away. Height adjustment: Loosen the screw (2) and put the bracket into the desired position. If there is not suffi cient adjustment, the pad can also be fi tted into a new position on the bracket. Then tighten the screws. Adjustable back angle (8-40 /50 ) (7.79) By pulling the lever (1) the backrest is released and can be put into the desired position. When you let go, the backrest is automatically fi xed in the new position. CAUTION: The angle-adjustable backrest may only be used with anti-tip tubes. The gap between the anti-tip tubes and the ground must be a maximum of 2,5 cm. CAUTION: To ensure the correct function of the cables, these must never be taut. CAUTION: There is a risk of injury when you adjusting the backrest. CAUTION: Never adjust the backrest if the wheelchair is on a slope. 14
 and adjust the armrest (2) to the desired height. Always check that the armrests are correctly engaged.")


 makes it possible to adjust the height of the push handles (2) to suit your individual needs. Then tighten the hand wheel.")
16 Breezy Relax Instruction & Safety Manual Options - Height adjustable sideguard The armrest can be height-adjusted or removed as follows. Push the knob (1) and adjust the armrest (2) to the desired height. Always check that the armrests are correctly engaged. You can set the armrest depth after releasing the hand wheel (3). Afterwards, tighten the hand wheel. Neither the sideguards nor the armrests are to be used for lifting or carrying the wheelchair. Hemi armrest The hemi armrest can be adjusted both in length and angle. You can adjust the length by pushing the armrest after having loosened the 2 rotary screws (1). To adjust the angle, hold the knob 2 pushed down and then turn the armrest to the desired height and then release the knob. Options - Adjustable Push Handles 7.90 These handles are secured with pins to prevent them from sliding out accidentally. Opening the hand wheel (1) makes it possible to adjust the height of the push handles (2) to suit your individual needs. Then tighten the hand wheel. The handwheel must always be tightened, to avoid the push handles becoming loose when being transported. Only pull the push handle so far out that the setting screws grip on the slots. Options Lap belt instructions Note: Lap belts are fi tted as positional aids, and are not suitable as transportation restraints. Step 1 Positioning belt kit. The Positioning belt kit contains, one positioning belt, three tri glide buckles and two cable ties. 15


17 Step 2 To assemble the positioning belt. Take the positioning belt strap and thread through the tri-glide. Repeat on both ends of positioning belt. Step 3 To fi t the positioning belt to the chair. Take the positioning belt strap and wrap around back post. Step 4 Thread the positioning belt back through the tri-glide to form a loop around the back post. Thread positioning strap through tri-glide as shown in step 5. Step 5 To secure the positioning belt to the chair. Take one of the cable ties supplied and thread through the positioning belt strap. Then wrap around the frame and fasten together. DO NOT over tighten positioning belt. Repeat steps 3-5 with both ends of positioning belt. Step 6 To adjust the positioning belt use the tri-glide buckles and the fastening buckle. Step 7 The positioning belt should be adjusted so the fastening buckle is situated in the middle of the pelvis. Step 8 The positioning belt should be adjusted so a hand can be placed between the user and the belt. 16

 and are free from any obstruction or adverse wear.")

18 Breezy Relax Instruction & Safety Manual The positioning belt can be used on the Quickie RXS, Quickie 2, Breezy SLTL and Quickie 2 Millennium wheelchairs. Quickie 2 Millenium Quickie SL / TL Quickie RXS Quickie 2 Advice to client The positioning belt must only be fi tted by an approved Unicare Health dealer / agent. The positioning belt should only be adjusted by a professional, or a Unicare Health approved dealer / agent. The positioning belt must be checked on a daily basis to ensure they are adjusted correctly (see step 7) and are free from any obstruction or adverse wear. Unicare Health does not encourage the transportation of any person in a vehicle using this positioning belt as a method of restraint. Please see Unicare Health transit booklet for further advice on transportation. Maintenance: Check lap belt, and securing components, at regular intervals for any sign of frays, or damage. Replace if necessary. NOTE: The lap belt should be adjusted to suit the end user as detailed above. Unicare Health recommend that the length and fi t of the belt be checked on a regular basis to reduce the risk of the end user inadvertently re-adjusting the belt to an excessive length. 17
 prevent a wheelchair from tipping over backwards. By pulling the interlock (2), the anti-tip tube can be height adjusted. There should be a gap of 2,5 cm to the fl oor.")
 The Comfort seat allows you to be seated for a long period of time, because of the anatomical, shaped seat plate and anatomically shaped cushions.")
 After loosening the screws (1), you can set the seat depth to the desired position. Then tighten the screws again (see the page on torque).")
19 Options - Anti-tip tubes (7.93.1) The anti-tip tubes (1) provide additional safety for inexperienced users when they are still learning how to operate their wheelchairs. Anti-tip tubes (1) prevent a wheelchair from tipping over backwards. By pulling the interlock (2), the anti-tip tube can be height adjusted. There should be a gap of 2,5 cm to the fl oor. To go up or down a step (e.g. kerb) the anti-tip tubes must be swung upwards, to prevent them from touching the ground. Options - Comfort Seat ( ) The Comfort seat allows you to be seated for a long period of time, because of the anatomical, shaped seat plate and anatomically shaped cushions. The cushion is held by Velcro and can also be removed. The cover can be washed (see the instructions on the cushion). Seat depth ( ) After loosening the screws (1), you can set the seat depth to the desired position. Then tighten the screws again (see the page on torque). The maximum seat depth (see marking and endstop) must not be exceeded. Seat width adjustment ( ) You can extend the width of the seat of your wheelchair by removing the upholstery (1). Adjustable seat angle (2-20 ) (7.79) By pulling the lever the seat is released and can be put into the desired position. When you let go, the seat is automatically fi xed in the new position. CAUTION: The angle-adjustable seat may only be used with anti-tip tubes. The gap between the anti-tip tubes and the ground must be a maximum of 2.5 cm. CAUTION: To ensure the correct function of the cables, these must never be taut. CAUTION: There is a danger of trapping your fi ngers when you adjusting the seat. CAUTION: Never adjust the seat angle if the wheelchair is on a slope. 18


20 Breezy Relax Instruction & Safety Manual Options - Crutch holder (7.110) The crutch holder permits crutches to be transported directly on the wheelchair. The crutch holder has a Velcro loop to fasten crutches or other walking aids. Never try to use or remove the crutches or other aids while moving. Options - Tray (7.111) The tray provides a fl at surface for most activities. Before using a tray, it fi rst has to be adjusted to the width of the seat by an authorized dealer. The user must be sitting in the wheelchair whilst this adjustment is made. Tyres and Mounting (8.1) Always make sure that you maintain the correct tyre pressure, as this can have an effect on the performance of the wheelchair. If the tyre pressure is too low, rolling resistance will increase, requiring more effort to move the chair forward. Low tyre pressure also has a negative impact on manoeuvrability. If the tyre pressure is to high, the tyre could burst. The correct tyre pressure for a given tyre is printed on the surface of the tyre. Tyres can be mounted/repaired in the same way as for an ordinary bicycle tyre. Before fi tting a new inner tube, you should always make sure that the base of the rim and inner wall of the tyre are free of foreign objects. Check the tyre pressure after mounting or repairing a tyre. It is critical to your safety and to the wheelchair s performance that regulation air pressure be maintained and that tyres are in good condition. Trouble Shooting Wheelchair pulls to one side (9.1) Check tyre pressure Check to make sure that the wheel turns easily (bearings, axle) Check angles of castors Check to make sure both castors are making proper contact with the ground Castors begin to wobble (9.2) Check angles of castors Check to make sure all bolts are secure; tighten if necessary (see the page on torque) Check to make sure both castors are making proper contact with the ground. Wheelchair squeaks and rattles (9.6) Check to make sure all bolts are secure; tighten if necessary (see the page on torque) Apply small amount of oil to moving parts 19

21 Assembly Instructions Breezy Relax 20

22 Breezy Relax Instruction & Safety Manual 21
23 22
24 PO Box 82 Bentley WA 6982 T F info@unicarehealth.com.au Authorised Distributor
USER MANUAL PRODUCT CODE: WC CareCo (UK) Ltd, Hubert Road, Brentwood, Essex, CM14 4JE PAGE 1
 Ltd, Hubert Road, Brentwood, Essex, CM14 4JE PAGE 1") by USER MANUAL PRODUCT CODE: WC01059 CareCo (UK) Ltd, Hubert Road, Brentwood, Essex, CM14 4JE PAGE 1 CONTENTS 1. INTRODUCTION 2. IDENTIFICATION OF PARTS 3. SAFETY REGULATIONS 4. SAFETY WARNINGS 5. USER
by USER MANUAL PRODUCT CODE: WC01059 CareCo (UK) Ltd, Hubert Road, Brentwood, Essex, CM14 4JE PAGE 1 CONTENTS 1. INTRODUCTION 2. IDENTIFICATION OF PARTS 3. SAFETY REGULATIONS 4. SAFETY WARNINGS 5. USER
ENIGMA SUPER DELUXE WHEELCHAIR
 1. CONTENTS 1. Contents 2. Introduction 3. Parts Description 4. Adjustment Features 5. Folding Back Mechanism 6. Disassembly and Folding 7. Using the Stepper Tube 8. Brake Operation 9. Lap Belt Operation
ENIGMA STEEL WHEELCHAIR RANGE OWNER S MANUAL. Steel Wheelchair Range Owners Manual (Z10999 Rev F) Page 1 of 20
 Page 1 of 20") ENIGMA STEEL WHEELCHAIR RANGE OWNER S MANUAL Steel Wheelchair Range Owners Manual (Z10999 Rev F) Page 1 of 20 1. CONTENTS 1. Contents 2. Introduction 3. Parts Description 4. Brake Operation 5. Leg Rest
ENIGMA STEEL WHEELCHAIR RANGE OWNER S MANUAL Steel Wheelchair Range Owners Manual (Z10999 Rev F) Page 1 of 20 1. CONTENTS 1. Contents 2. Introduction 3. Parts Description 4. Brake Operation 5. Leg Rest
Enigma Travel Chair and Lightweight Aluminium Wheelchair Owner s Handbook
 Enigma Travel Chair and Lightweight Aluminium Wheelchair Owner s Handbook Please read this manual before operation for maintenance instructions and safe usage of this wheelchair. Introduction The Enigma
User manual. Rigid frame wheelchairs, English 74591C
 User manual Rigid frame wheelchairs, English 74591C 13-08-15 Contents Page Explanation of symbols Car transport... 2 Handling... 3 Sitting comfort... 4-5 Transfer... 6 Handling technique... 7 Troubleshooting
MINOS GLOBAL ALU User Manual
 MINOS GLOBAL ALU User Manual Think Global Introduction Thank you for choosing a MINOS wheelchair. Our company is young but we have broad experience in the sector. The wheelchair you have just bought is
contents parts description 1/2 FOLD MECHANISM
 contents 1. Contents 2. Introduction 3. Parts Description 4. Adjustment Features i. Rear Wheels ii. Upholstery Tension iii. Brake Adjustments iv. Leg Rest Adjustment 5. Folding Back Mechanism 6. Disassembly
USER MANUAL. CareCo (UK) Ltd, Hubert Road, Brentwood, Essex, CM14 4JE PAGE 1 PRODUCT CODE WC01060.BLU
 Ltd, Hubert Road, Brentwood, Essex, CM14 4JE PAGE 1 PRODUCT CODE WC01060.BLU") by USER MANUAL PRODUCT CODE WC01060.BLU PAGE 1 CareCo (UK) Ltd, Hubert Road, Brentwood, Essex, CM14 4JE INFORMATION Thank you for purchasing a wheelchair from I-GO. This I-GO wheelchair has been designed
by USER MANUAL PRODUCT CODE WC01060.BLU PAGE 1 CareCo (UK) Ltd, Hubert Road, Brentwood, Essex, CM14 4JE INFORMATION Thank you for purchasing a wheelchair from I-GO. This I-GO wheelchair has been designed
contents parts description BRAKE LEVER 1/2 FOLD BACK MECHANISM ARM REST SIDE PANELS 24" WHEEL & HANDRIM LEG REST FRONT CASTOR STEPPER TUBE
 contents 1. Contents 2. Introduction 3. Parts Description 4. Leg Rest Operation 5. Folding Back Mechanism 6. Disassembly and Folding 7. Using the Stepper Tube 8. Brake Operation 9. Operation and Propulsion
RX/ RXS. Owner s Manual
 RX/ RXS Owner s Manual 47 RX/RXS RX/RXS Height adjustable armrests illustrated How to use this manual We at Sunrise Medical want you to get the best out of your Quickie RX/RXS wheelchair. This Owner s
Wheelchair Walker, Trekker Instruction & Safety Manual
 Wheelchair Walker, Trekker Instruction & Safety Manual Please read this manual before operation, for maintenance instructions and safe usage The enabling power of applied knowledge Wheelchair Walker, Trekker
Expedition Wheelchair.
 Expedition Wheelchair www.drivedevilbiss.co.uk Expedition Wheelchair Owner s Handbook (Page 1) Contents 1. Contents 2. Introduction 3. Parts Description 4. Leg Rest Operation 5. Folding Back Mechanism
Transit Wheelchair. user guide. Profiled grip attendant handles. Padded seat and backrest. Lift up, padded armrests. Park brakes
 Transit Wheelchair Profiled grip attendant handles Padded seat and backrest Lift up, padded armrests Park brakes Pneumatic 12 (305 mm) rear wheels Solid 7 (180 mm) front wheels Detachable, swing away footrests
WHEELBASE USER MANUAL
 WHEELBASE USER MANUAL Please read these instructions carefully before setting up and using the NEO Wheelbase 1 Southwest Seating & Rehab Ltd. Introduction The NEO wheelbase is specially designed to accept
Owner s Manual. Transport / Companion Wheelchairs M4TV M2TF M2TC M2TL HEALTH PRODUCTS, INC.
 Owner s Manual M4TV M2TF Transport / Companion Wheelchairs M2TL M2TC HEALTH PRODUCTS, INC. INTRODUCTION Congratulations on the purchase of your new companion chair. Please read this introduction with your
Usage of GTM 1 and GTM HAMMER VARIO
 USER'S MANUAL TABLE OF CONTENTS Usage of GTM 1 and GTM HAMMER VARIO 3 Basic information 3 Appendix 1 4 Description of construction 5 Safe handling of GTM 1 5 Stability and Balance 6 Curbs 6 Stairways 7
Phoenix Buggy User Instructions
 Phoenix Buggy User Instructions Issued 1 st March 2015 Introduction Welcome to the Phoenix Buggy User Guide. The Phoenix Buggy has been designed to provide a robust, transportable mobility solution for
Mighty Mack Wheeled Walker
 Mighty Mack Wheeled Walker Handle with lever brake Backrest Handle height adjustment knob Brake cable Extra wide padded seat Shopping basket Side brace 7 inch (180 mm) wheels user guide Prior to use please
LIGHTWEIGHT TRANSPORT CHAIR ECTR 01 Assembly and Operating Instructions
 LIGHTWEIGHT TRANSPORT CHAIR ECTR 01 Assembly and Operating Instructions Page 1 of 12 INTRODUCTION Thank you for purchasing LIGHTWEIGHT TRANSPORT CHAIR. This model has been designed to help you gain independence
INSTRUCTIONS FOR INSTRUCTIONS FOR USE USE Bambino panthera panthera
 INSTRUCTIONS FOR USE Bambino panthera Contents Intended use s 2 Adaptation s 3 Maintenance s 8 Safety s 9 Crash test s 11 Intended use The Panthera Bambino wheelchair is designed for children who need
Lightweight Aluminium Wheelchair
 Lightweight Aluminium Wheelchair User Manual Contents 1. Contents 2. Introduction 3. Parts Description 4. Leg Rest Operation 5. Folding Back Mechanism 6. Disassembly and Folding 7. Using the Stepper Tube
Breezy EC Transport Wheelchair
 B r e e z y E C Tr a n s p o r t W h e e l c h a i r Breezy EC Transport Wheelchair O w n e r s M a n u a l READ BEFORE USE REVIEW THIS MANUAL Before using this chair you, and each person who may assist
The Bike with Bite. Directions for use Notice D Utilisation Manual De Usario Gebruikershandleiding
 The Bike with Bite Directions for use Notice D Utilisation Manual De Usario Gebruikershandleiding Introduction (1.2) Dear Customer, We are delighted that you have chosen this top quality QUICKIE product.
and USER MANUAL PRODUCT CODES SELF PROPELLED WC01061 TRANSIT WC02059 CareCo (UK) Ltd, Hubert Road, Brentwood, Essex, CM14 4JE PAGE 1
 Ltd, Hubert Road, Brentwood, Essex, CM14 4JE PAGE 1") and by USER MANUAL PRODUCT CODES SELF PROPELLED WC01061 TRANSIT WC02059 PAGE 1 CareCo (UK) Ltd, Hubert Road, Brentwood, Essex, CM14 4JE INFORMATION Thank you for purchasing a wheelchair from I-GO. This
and by USER MANUAL PRODUCT CODES SELF PROPELLED WC01061 TRANSIT WC02059 PAGE 1 CareCo (UK) Ltd, Hubert Road, Brentwood, Essex, CM14 4JE INFORMATION Thank you for purchasing a wheelchair from I-GO. This
Sovereign Wheelchair Instructions for Use. > Issue 1
 Sovereign Wheelchair Instructions for Use > Issue 1 Instructions for Use Contents 1 Important Safety Information...4 1.1 Safety in Vehicles...6 2 Indications / contraindications...7 3 Purpose...7 4 Scope
Wallaby Wheelchair. Item #s: WB1200-2GFR, WB1400-2GJB. Accessories WB ELR - Elevating Leg Rests WB Headrest Extension STDS833N - Anti-Tippers
 by Wallaby Wheelchair Item #s: WB1200-2GFR, WB1400-2GJB Accessories WB ELR - Elevating Leg Rests WB 8021 - Headrest Extension STDS833N - Anti-Tippers EU Authorized Representative Drive Medical LTD Introduction
Wheelchair Safety, Maintenance and Operations Guide
 Wheelchair Safety, Maintenance and Operations Guide Back Arm Seat Tire Cross brace Axle Foot rest Hand rim Caster Index Page Introduction 3 Knowing equipment and be organised 3 Opening a wheelchair 4 Closing
Manual Wheelchair. User Manual. Breezy 300 P19132
 Manual Wheelchair User Manual Breezy 300 P932 2 BREEZY 300 Wheelchair Components We at SUNRISE MEDICAL have been awarded the ISO-900certificate, which affirms the quality of our products at every stage,
Invacare Action 3 Junior
 Invacare Action 3 Junior en Pediatric wheelchair User Manual This manual MUST be given to the user of the product. BEFORE using this product, read this manual and save for future reference. 2018 Invacare
Alrick 7000 Series Nursing Bed Instruction & Safety Manual
 Alrick 7000 Series Nursing Bed Instruction & Safety Manual Please read this manual before operation, for maintenance instructions and safe usage The enabling power of applied knowledge 1 Alrick 7000 Series
AluLite. Travel Chair. OWNERS HANDBOOK. Product Code: WC02048
 AluLite Travel Chair Product Code: WC02048 OWNERS HANDBOOK www.careco.co.uk Your CareCo AluLite Travel Chair 1 2 3 4 6 5 9 7 8 List of Parts 1. Push Handle 2. Half-Folding Back Mechanism 3. Arm-rest 4.
2 in 1 Rollator and Transit Chair M58203
 User Instructions 2 in 1 Rollator and Transit Chair M58203 Maximum Safe Working Load Please ensure these Instructions are fully read and understood before using this equipment. Retain these instructions
Etac Cross 5 and Cross 5 XL
 Etac Cross 5 and Cross 5 XL The new generation wheelchair with the optimum prerequisites for delivering comfort and excellent manoeuvrability. Etac Cross 5 when every little detail makes a big difference
i IMPORTANT! The installation instructions contained in this manual should only be carried out by a qualified technician. INSTALLATION/USER MANUAL
 i IMPORTANT The installation instructions contained in this manual should only be carried out by a qualified technician. INSTALLATION/USER MANUAL i IMPORTANT TRANSPORTING THE CLIENT WITHIN A WHEELCHAIR
Tandem User Instructions
 Tandem User Instructions Issued 1 st November 2014 Tandem Buggy We designed the tandem buggy to enable families who have a disabled child and another younger child to enjoy the freedom they deserve. The
Owners Manual POWER PLUS MOBILITY OUR PRODUCTS WILL MOVE YOU
 Owners Manual POWER PLUS MOBILITY OUR PRODUCTS WILL MOVE YOU At Power Plus Mobility, we care! Thank you for choosing a wheelchair from Power Plus Mobility Inc. We are always improving in our ways to serve
Euro Lightweight Wheeled Walker
 Euro Lightweight Wheeled Walker Handle with lever brake Backrest Brake cable Handle height adjustment button Removable shopping bag 8 inch (200 mm) wheels Cane holder user guide Prior to use please read
Tri-Wheel Wheeled Walker
 Tri-Wheel Wheeled Walker Handle with lever brake Brake cable Handle height adjustment knob Removable basket and tray Large vinyl bag 8 inch (203 mm) wheels user guide Prior to use please read all instructions.
Lightweight Travel Chair
 Lightweight Travel Chair User Manual contents 1. Contents 2. Parts Description 3. Legrest Adjustment 4. Disassembly and Storage 5. Half-Folding Back Mechanism 6. Using the Stepper Tube 7. Using the Lap
Push Down Wheeled Walker
 Push Down Wheeled Walker Push down hand grip Handle height adjustment knob Backrest Padded seat with concealed pouch Side brace Bag with shopping basket inside Push down brake stopper 6 inch (150 mm) wheels
Operator s Manual. Single Hand Manual Drive Wheelchair
 Operator s Manual Single Hand Manual Drive Wheelchair Jordan R. Smith Kayla Gosse Leah McElhaney Team #5 Project for Client: Danielle Giroux Client Contact Information: Dave and Suzanne Giroux 53 Charlotte
Invacare Action 2 NG. Medium active wheelchair User Manual
 Invacare Action 2 NG en Medium active wheelchair User Manual This manual MUST be given to the user of the product. BEFORE using this product, read this manual and save for future reference. 2016 Invacare
Apollo Tilt Wheelchair 18" and 20" Instruction Manual
 Apollo Tilt Wheelchair 18" and 20" Instruction Manual Table of Contents Contents Table of Contents... 2 Introduction... 3 Warning... 4 Safety Guidelines... 5 Parts of the Tilt Wheelchair... 6 Setup & Operation...
Etac Prio. A comfort wheelchair with unique innovations.
 Etac Prio A comfort wheelchair with unique innovations. Etac Prio dynamic comfort By changing seat and back angles and adjusting the elevating leg supports, you can vary body position and pressure points,
YOU AND/OR YOUR ATTENDANT MUST READ AND FULLY UNDERSTAND THIS MANUAL BEFORE USE.
 YOU AND/OR YOUR ATTENDANT MUST READ AND FULLY UNDERSTAND THIS MANUAL BEFORE USE. General Information You have just purchased a wheelchair from Van Os Medical UK Ltd. We want to thank you for your confidence
Invacare. Manual. English
 Invacare Manual English Invacare Rea B Every effort has been made to ensure that the contents of this publication are updated at the time of printing. s part of the ongoing improvement of the products,
ASSIST & TRANSIT. osd USER MANUAL TABLE OF CONTENTS
 osd ASSIST & TRANSIT USER MANUAL TABLE OF CONTENTS 1. Key Specifications 2. List of Components 3. Assembly & Use 4. Troubleshooting 5. Care & Maintenance 6. Warnings 7. Warranty 8. Compliance. Service
WHEELCHAIR USER MANUAL
 WHEELCHAIR USER MANUAL Congratulations on the purchase of your new Sonic Wheelchair! The advanced design of the Sonic ensures many years of enhanced trouble-free mobility. Correct use improves your mobility
Adult Manual Wheelchairs. Etac Cross 5 Active. Creating stability for activity
 Adult Manual Wheelchairs Etac Cross 5 Active Creating stability for activity Etac Cross 5 Active - Creating stability for activity Etac Cross 5 Active is the perfect choice for the active wheelchair user
Nimbo Lightweight Posterior Posture Walker
 Nimbo Lightweight Posterior Posture Walker Assembly & Operating Instructions with optional Forearm Platforms with optional Pelvic Stabiliser Please read these instructions carefully before assembling or
WHEELED WALKER OWNER S HANDBOOK
 CONTENTS 1. Contents 2. Introduction 3. Parts Description 4. Personal Safety 5. Adjustments for Comfort 6. Transportation & Assembly 7. Care and Maintenance 8. Brake Operation 9. Assembling the Walker
Accessories brochure
 Accessories brochure NEW The Invacare Rea Passive range, with its tilt and recline chairs is compatible with a wide variety of accessories, giving users the opportunity to achieve an optimal fit, and greater
USER MANUAL Edition
 USER MANUAL Edition 2 2014 CONTENTS Safety guidelines Transportation Unfolding and folding Tilt in space operation Seat depth and pelvic support adjustment Footrest adjustment Fitting optional accessories
ASSIST & TRANSIT. osd USER MANUAL TABLE OF CONTENTS
 osd ASSIST & TRANSIT USER MANUAL TABLE OF CONTENTS 1. Key Specifications 2. List of Components 3. Assembly & Use 4. Troubleshooting 5. Care & Maintenance 6. Warnings 7. Warranty 8. Compliance 9. Service
WHEELCHAIRS / PANTHERA U2
 WHEELCHAIRS / PANTHERA U2 149K Strovolou Avenue, Strovolos, Nicosia, 2048, Cyprus T: +357 22250115, F: +357 22250116, M: +357 70008830 www.abletools.com.cy info@abletools.com.cy Manual S2 S2 Swing U2 U2
XXL-Rehab Minimaxx Folding Wheelchair
 user manual user manual user manual user manual user manual user manual L-Rehab Minimaxx Folding Wheelchair Strongly engineered and functionally designed exclusively for bariatric users! Push handle Back
Height adjustable footplates, equipped with nylon heel loops. Standard with maintenance free PU front (7 ) and rear wheels (24 ).
 and rear wheels (24 ).") Excel G-lite + Compact foldable aluminium wheelchair Perfect for taking with you wherever you go due to its light transport weight and compact size. Comfortable back upholstery. Height adjustable comfortable
Excel G-lite + Compact foldable aluminium wheelchair Perfect for taking with you wherever you go due to its light transport weight and compact size. Comfortable back upholstery. Height adjustable comfortable
Instruction Manual UK
 Instruction Manual UK Product: Monterey2 child booster seat Model: 15000 Mfg. by: DIONO Unit D Ventura House Ventura Park Road Tamworth Staffs B78 3LZ UK CUSTOMER SERVICE Tel: 0845.300.9071 Email: dionouk@diono.com
WHEELCHAIRS / PANTHERA MICRO
 WHEELCHAIRS / PANTHERA MICRO 149K Strovolou Avenue, Strovolos, Nicosia, 2048, Cyprus T: +357 22250115, F: +357 22250116, M: +357 70008830 www.abletools.com.cy info@abletools.com.cy User Manual Bambino
Petite Wheeled Walker
 Petite Wheeled Walker Handle with lever brake Brake cable Handle height adjustment knob Backrest Padded seat with concealed pouch Bag with shopping basket inside Side brace 6 inch (150 mm) wheels user
Child Safety ! WARNING: GENERAL SAFETY INFORMATION
 Child Safety GENERAL SAFETY INFORMATION Jaguar Cars Limited strongly recommends that at all times children should be carried in the rear seats.! WARNING: Children must be restrained by a child safety restraint
Compact Easy Rollator M66739
 User Instructions Compact Easy Rollator M66739 Maximum Safe Working Load 21st 135kg Please ensure these Instructions are fully read and understood before using this equipment. Retain these instructions
motivation Product Summary
 The Moti-Start Portable Supportive Seat is a locally size adjustable supportive chair. It is intended for use by infants who need extra postural support. It comes semi-assembled and is easy to transport
Breezy 250. Strong and durable... Good looks... Complete range of models and accessories... Great warranty and after-sales service...
 Breezy 250 Breezy 250 Strong and durable... Good looks... Complete range of models and accessories... Great warranty and after-sales service... Breezy 250 shown with non-standard options Strong and durable
Rifton Activity Chair R840 & R850 Product Manual
 Rifton Activity Chair R840 & R850 Product Manual R840 Rifton Activity Chair Standard Base R850 Rifton Activity Chair Hi/Lo Base Contents Check your order 4 Warnings and important information 5 Recommended
Invacare Action 3 NG. Medium active wheelchair User Manual
 Invacare Action 3 NG en Medium active wheelchair User Manual This manual MUST be given to the user of the product. BEFORE using this product, read this manual and save for future reference. 2016 Invacare
IMPORTANT. Please read these instructions carefully Before using your wheelchair. Please read Page 8 before using the Tilt In Space facility
 USER MANUAL For TILT and FOLD WHEELCHAIR GAS STRUT MODEL IMPORTANT Please read these instructions carefully Before using your wheelchair Please read Page 8 before using the Tilt In Space facility Authorised.
SERVICE MANUAL SEDEO PRO+ VERSION
 SERVICE MANUAL EN SEDEO PRO+ VERSION - 05 Sedeo Pro+ 05 Handicare All rights reserved. The information provided herein may not be reproduced and/or published in any form, by print, photo print, microfi
Nurmi Neo. Instructions for Use... 27
 Nurmi Neo Instructions for Use... 27 Instructions for Use for Nurmi Neo Table of Contents Page 1 General Information...28 1.1 Preface...28 1.2 Intended Use...28 1.3 Liability...28 1.4 CE Conformity...29
QUICKIE 5 R Quick Guide. IMPORTANT! Read all Warnings and Instructions contained in the complete Owner s Manual prior to using this product.
 QUICKIE 5 R Quick Guide IMPORTANT! Read all Warnings and Instructions contained in the complete Owner s Manual prior to using this product. Backrest Upholstery Back Canes Tire Seat Sling Handrim Angle-Adjustable
Owner s Manual. Bariatric Manual Wheelchairs. Specializing in Bariatric Patient Aids
 Owner s Manual Bariatric Manual Wheelchairs 700 LB CAPACITY XL Series Wheelchair by ConvaQuip Specializing in Bariatric Patient Aids P.O. Box 3417 * Abilene, TX 79604 U.S.A. Toll 800/637-8436 * FAX 325/677-7217
Operating instructions Service booklet
 MOBILITY MADE SIMPLE! Operating instructions SPEEDY 4all & 4you & 4teen Operating instructions Service booklet SPEEDY 4all & 4you SPEEDY 4all EVO & 4you EVO SPEEDY 4teen 0 Contents 1 Preface... 5 2 Legend...
Aluminium 4-Wheeled Rollator/ Occassional Transport Chair VP184 Range Usage and Maintenance Instructions
 Aluminium 4-Wheeled Rollator/ Occassional Transport Chair VP184 Range Usage and Maintenance Instructions This file is available to view and download as a PDF at www.aidapt.co.uk. Sight impaired customers
Operators Manual. Customized Tilt-in-Space Wheelchair for Abby Miller. By: Katie Guineau, Julia Olczyk, Ben Marcus Team 11
 Operators Manual Customized Tilt-in-Space Wheelchair for Abby Miller By: Katie Guineau, Julia Olczyk, Ben Marcus Team 11 Abby Miller and the Miller Family Clinton, Illinois julie_miller.1367@yahoo.com
Thank you for purchasing a Rogue wheelchair! Please do not use this wheelchair without first reading this entire manual. BEFORE riding, you should be
 Thank you for purchasing a Rogue wheelchair! Please do not use this wheelchair without first reading this entire manual. BEFORE riding, you should be trained in the safe use of this chair by an Assistive
The Esteem Steel Self Propel Wheelchair Instructions
 The Page 1 Instructions for Steel Self propel Wheelchair Fold down back lever Arm release pull Fold away armrest lever Quick release wheels Brake lever Footrest Pegs Footrest adjustment bolt Footrest It
expandable booster Instruction Manual US Version
 expandable booster Instruction Manual US Version product: monterey XT expandable booster model series: 108000 mfg. by: Diono US 14810 Puyallup Street E Suite 200 Sumner, WA 98390 Customer Care Tel: 1 855
CONVERTIBLE CAR SEAT ISOFIX COMPATIBLE Birth to 4 years (approx)
") CONVERTIBLE CAR SEAT ISOFIX COMPATIBLE Birth to 4 years (approx) REARWARD FACING Birth to 2-3 years (approx) Series No. BS7200A-i20133 FORWARD FACING 12 months to 4 years (approx) IMPORTANT: KEEP THIS
CONVERTIBLE CAR SEAT ISOFIX COMPATIBLE Birth to 4 years (approx) REARWARD FACING Birth to 2-3 years (approx) Series No. BS7200A-i20133 FORWARD FACING 12 months to 4 years (approx) IMPORTANT: KEEP THIS
Rumba & Directions for use P Rumba Modular
 Rumba & Directions for use P19108 Rumba Modular User Information Intended use power wheel chairs: Power wheelchairs are exclusively for a user who is unable to walk or has limited mobility, for their own
SWINGBO Plus System - Wheelchair for kids & adolescents User manual
 SWINGBO Plus System - Wheelchair for kids & adolescents User manual - Partnering together to mobilise kids User manual SWINGBO Plus System-wheelchair for kids & adolescents Content: 1 Common Information
EC Declaration of Conformity
 EC Declaration of Conformity The undersigned, representing the following manufacturer: Org.no. 556618-9006, 314 93 HYLTEBRUK SWEDEN hereby declares that the product Easywheel part No. series: VH2100 VH2130
RECARO Monza Nova 2 Reha / RECARO Monza Nova 2 Seatfix Reha
 RECARO Monza Nova 2 Reha / RECARO Monza Nova 2 Seatfix Reha Group II III Instructions for assembly and use of the Reha version (supplement) RECARO Monza Nova 2 Reha / RECARO Monza Nova 2 Seatfix Reha 1
Invacare Action 3 NG. Medium active wheelchair User Manual
 Invacare Action 3 NG en Medium active wheelchair User Manual This manual MUST be given to the user of the product. BEFORE using this product, read this manual and save for future reference. 2017 Invacare
INSTRUCTION MANUAL STANDING WHEELCHAIR. KARMAN HEALTHCARE INC. City of Industry, CA
 INSTRUCTION MANUAL STANDING WHEELCHAIR KARMAN HEALTHCARE INC. City of Industry, CA 91748 www.karmanhealthcare.com **Karman Healthcare Inc. Recommends Patient Seek Physicians Counsel Before Purchase TABLE
Advancement Chair. R901, R902, & R903 Product Manual
 Advancement Chair R901, R902, & R903 Product Manual Contents Warnings and Important Information 3 Recommended Use 4 User and Item Dimensions 4 Assembly and Adjustment Information 5 Maintenance 14 Cleaning
Operating instructions. TRAVELER Easy-running, folding wheelchair
 Operating instructions TRAVELER Easy-running, folding wheelchair subject to EC Directive 93/42/EWG for Medical Devices Printed in Germany 07/2010 Contents 1. Scope of delivery...1 1.1 Before initial use...2
ICHAIR MC With seat lift CODE kg + 10 kg additional load. Authorised client weight 160 kg + 10 kg additional load ISO-CRASH TESTED
 ICHAIR MC3 1.612 Authorised client weight 160 kg + 10 kg additional load With seat lift CODE 27 140 kg + 10 kg additional load ISO-CRASH TESTED Service-friendly Simple battery maintenance thanks to pull-out
motivation Product Summary
 The Moti-Go Wheeled Supportive Seating is a locally size adjustable supportive wheelchair. It is intended for use by children and small adults who need extra postural support in combination with mobility.
Invacare Action 1 NG Range MAINTENANCE AND ADJUSTMENT
 Invacare Action 1 NG Range MAINTENANCE AND ADJUSTMENT Action1 NG Range 1 December 2010 TABLE OF CONTENTS TABLE OF CONTENTS SECTION 1 TROUBLESHOOTING A N D M A I N T E N A N C E.....4 Troubleshooting.....4
RECARO Monza Nova 2 Reha
 RECARO Monza Nova 2 Reha Group II III Instructions for assembly and use of the Reha version (supplement) RECARO Monza Nova 2 Reha / RECARO Monza Nova 2 Seatfix Reha 1a 1b 2a 2b 3a 3b 4a 4b 5a 5b 5c 5d
Quick Release Mounting Hardware
 Mounting Hardware USER MANUAL Quick Release Mounting Hardware Stealth s User Manual and Maintenance Guide for ADI s Quick Release Mounting Hardware Customer Satisfaction 1.0 Stealth Products strives for
Dealer Stamp. Rollator (R6 and R8) Assembly & Operating Instructions
 Assembly & Operating Instructions") The manufacturer reserves the right to alter without notice any weights, measurements or other technical data shown in this manual. All figures, measurements and capacities shown in this manual are approximate
The manufacturer reserves the right to alter without notice any weights, measurements or other technical data shown in this manual. All figures, measurements and capacities shown in this manual are approximate
INSTRUCTIONS FOR USE Suitable for children weighing 15kg to 36kg
 2-in-1 BOOSTER CAR SEAT INSTRUCTIONS FOR USE Suitable for children weighing 15kg to 36kg Notice 1. This is a Universal child restraint. It is approved to the EU Regulation No. 44, 04 series of amendments,
OWNER S MANUAL. Manufactured & Distributed by. Transfer Wheelchair
 OWNER S MANUAL & warranty Transfer Wheelchair Providing Patient Comfort Preventing Injury to caregivers Improving Nurse/Caregivers working environment Manufactured & Distributed by world s first transfer
TEST REPORT FOR: Product Design Group Inc. Elevation Manual Wheelchair 115 kg, 253 lb
 TEST REPORT FOR: Product Design Group Inc. Elevation Manual Wheelchair 115 kg, 253 lb REFERENCED DOCUMENTS ISO7176-1:1999, ISO7176-3:2003, ISO7176-5:2008, ISO7176-7:1998, ISO7176-8:1998, ISO7176-13:1989
IMPORTANT. Please read these instructions carefully Before using your wheelchair. Please read Page 8 before using the Tilt in Space facility
 USER MANUAL For TILT and FOLD WHEELCHAIR GAS STRUT MODEL IMPORTANT Please read these instructions carefully Before using your wheelchair Please read Page 8 before using the Tilt in Space facility Authorised.
Service Manual. Contents
 Contents General... Introduction Spare parts and adaptations Fastening with hexagon socket bolts Torque Checks Identifying and repairing faults Frame... 6 Rear frame 7 Front frame 7 Retaining lever 7 Seat...
MANUAL & POWERED WHEELCHAIRS TRANSPORTATION & TIE-DOWN INFORMATION. Tie-Down Point
 MANUAL & POWERED WHEELCHAIRS TRANSPORTATION & TIE-DOWN INFORMATION Tie-Down Point This information is intended to be an easy reference to transportation for all users of R Healthcare Wheelchairs. Within
SUPRA Active-Wheelchair for kids & adolescents
 SUPRA Active-Wheelchair for kids & adolescents - partnering together to mobilise kids User Manual for SUPRA Active-Wheelchair for kids & adolescents content page 1 Common information 1.1 Preface 2 1.2
SWISS INTERNATIONAL AIR LINES LTD.
 Gerald Simonds Healthcare Ltd. 9 March Place Gatehouse Way Aylesbury Bucks HP19 8UA TECHNICAL INFORMATION MANUAL WITH ILLUSTRATED PARTS LIST FOR THE ON-BOARD WHEELCHAIR Part No. 2520502SWR For: SWISS INTERNATIONAL