Model 16UB Underbin Conveyor Owner/Operator s Manual
|
|
|
- Emil Hood
- 6 years ago
- Views:
Transcription

1 Model 16UB Underbin Conveyor Owner/Operator s Manual OM-16UB-0514 PRINTED IN U.S.A.
2 Table of Contents Table of Contents INTRODUCTION...3 WARRANTY...4 SAFETY...5 ASSEMBLY OF CONVEYOR INSTALLING SAFETY SIGNS OPERATION MAINTENANCE TROUBLESHOOTING PARTS SUB ASSEMBLY TAIL END ASSEMBLY DRIVE END ASSEMBLY GENERAL DIMENSIONS SPECIFICATIONS BOLT TORQUE Personnel operating or working around this equipment should read this manual. This manual must be delivered with equipment to its owner. Failure to read this manual and its safety instructions is a misuse of the equipment. Any misuse of the equipment may void the warranty. 2
3 Introduction Introduction Thank you for purchasing your new Model 16UB conveyor from KSi Conveyors. We are pleased to have you as a customer, and hope you will enjoy many years of productive service from our products and staff. Please read and understand this manual before operating the equipment. Pay special attention to the safety information to protect yourself from harm. If you need information beyond what can be found in the manual, please give our friendly staff a call at 888 KSI-CONV. KSi SAFETY Replace missing guards and shields FREE OF CHARGE! KSi Conveyors are built to provide many years of dependable service to our customers through durable craftsmanship. One of the most important aspects of KSi engineering is SAFETY 1st design throughout all product lines. At KSi safety is NO ACCIDENT! That is why KSi is implementing its SAFETY 1st program. Should you ever need guards, shields, safety decals or owner/ operator manuals, simply contact KSi and we will supply you with them FREE OF CHARGE! If you need any of the above listed safety items or have safety questions, please contact KSi: 454 N State Route 49 Cissna Park IL Ph: ST General Information A. KSi reserves the right to improve its product whenever possible and practical to do so. We reserve the right to change, improve and modify products at any time without obligation to make changes, improvements and modifications on equipment previously sold. B. When receiving merchandise, it is important to check the quantity of parts and their descriptions with the packing list enclosed with each package. All claims for freight damage or shortage must be made with the consignee within ten (10) days from the date of the occurrence of freight damage. The consignee should accept the shipment after noting the damage or loss. C. KSi does not make any guarantees on self cleanout or the cross contamination of seed of any kind for their conveyors, Manual cleanout will be required. 3
4 Introduction 4


5 Safety TIPS FOR SAFE OPERATION OF KSI CONVEYORS This Safety Alert symbol means ATTENTION BECOME ALERT! YOUR SAFETY IS INVOLVED The Safety Alert symbol identifies important safety messages on KSI conveyors and in the manual. When you see this symbol, be alert to the possibility of personal injury or death. Follow the instructions in the safety message. Why is SAFETY important? The Three Best Reasons Accidents Disable and Kill Accidents Cost $$ Accidents Can be Avoided SIGNAL WORDS: NOTE THE USE OF SIGNAL WORDS DANGER, WARNING AND CAUTION WITH THE SAFETY MESSAGES. THE APPRO- PRIATE SIGNAL WORD FOR EACH MESSAGE HAS BEEN SE- LECTED USING THE FOLLOWING GUIDELINES: DANGER - WARNING - CAUTION - Indicates an imminently hazardous situation that, if not avoided, will result in death or serious injury. This signal word is to be limited to the most extreme situations, typically for machine components that, for functional purposes, cannot be guarded. Indicates a potentially hazardous situation that, if not avoided, could result in death or serious injury, and includes hazards that exposed when guards are removed. It may also be used to alert against unsafe practices. Indicates a potentially hazardous situation that, if not avoided, may result in minor or moderate injury. It may also be used to alert against unsafe practices. 5
6 Safety 1. General Safety Statements. A. KSi s principal concern is your safety and the safety of others associated with grain handling equipment. We want to keep you as a customer. This manual is to help you understand safe operating procedures and some problems which may be encountered by the operator and other personnel. B. As the owner and/or operator it is your responsibility to know what requirements, hazards and precautions exist, and to inform all personnel associated with the equipment or are in the area. Safety precautions may be required from the personnel. Avoid any alteration to the equipment. Such alterations may produce a very dangerous situation, where serious injury or death may occur. C. This equipment shall be installed in accordance with the current installation codes and applicable regulations which should be carefully followed in all cases. Authorities having jurisdiction should be consulted before installations are made. D. Untrained operators subject themselves and other to serious injury or death. NEVER ALLOW untrained personnel to operate this equipment. E. Keep children and other unqualified personnel out of the working area at all times. F. NEVER start equipment until ALL persons are clear of the work area. G. Be sure ALL operators are adequately rested and prepared to perform all functions of operating this equipment. H. Keep hair, loose clothing, and shoestrings away from rotating and moving parts. Never wear loose fitting clothing when working around conveyors. I. NEVER allow any person intoxicated or under the influence of drugs or alcohol to operate the equipment. 6
7 Safety 1. General Safety Statements (cont.) J. NEVER allow anyone inside a bin, truck, or wagon which is being unloaded by a conveyor. Flowing grain can trap and suffocate in seconds. K. Make sure someone is nearby who is aware of the proper shutdown sequence in event of an accident or emergency. L. NEVER work alone. M. ALWAYS think before acting. NEVER act impulsively around the equipment. N. Make sure ALL equipment is locked in position before operating. O. Keep hands and feet away from the conveyor intake and other moving parts. P. NEVER attempt to assist machinery operation or to remove trash from the equipment while in operation. Q. NEVER drive, stand, or walk under the equipment. R. Use caution not to hit the conveyor when positioning the load. S. Use ample overhead lighting after sunset to light the work area. T. ALWAYS lockout ALL power to the equipment when finished unloading the bin. U. Keep the area around intake free of obstacles such as electrical cords, blocks, etc. that might trip workers. 7
8 Safety 2. Emergency Shutdown Sequence. See Emergency Shutdown on page 20 under the operation section. A pinch point is any place on the equipment which can injure the operator. 3. Pinch Points. A. Components of this equipment have sharp edges which can scrape and/or cut an operator. B. A moving conveyor can sever an operator s limb or even kill. 4. Shields and Guards. A. Always keep all shields and guards in place during operation. B. Missing shields for guards can be replaced for free by contacting KSi. A pinch point is BEWARE any place on OF the equipment ELECTRICAL which can HAZARDS injure the operator. Electricity can kill! Use extreme caution around electrical components. Have your electric company check the transformer and lead wires to be sure they are large enough to handle the additional load of the motor. Electrical wiring should be done by a qualified electrician and all components shall comply with applicable provisions of National Fire Protection Association Standard NFPA No. 70, American National Standard Inst. ANSI-C1 or with the requirements of the authority of having local jurisdiction. KSi assumes no responsibility for the electrical wiring used with this machine. KSi will not be liable for failure of the equipment due to poor or improper electrical power installation. Wires which are too small deliver insufficient voltage causing the motor to overload or burn out. Improper or inadequate wiring can kill or cause fires. All electrical devices used on this machine shall be arranged to operate in a fail safe manner, that is, if power failure or failure of device occurs, a hazardous condition must not result. This means, the machine must not restart by itself after a power failure etc. when power returns. A means to lock out power must be provided at time of installation to prevent inadver 8

9 5. Personal Protective Equipment- P..P.E. Safety A. The proper personal protective equipment should be worn at all time. B. Always wear safety glasses when in the work area C. Proper footwear should be worn during the installation process, as well as any maintenance functions. D. It is recommended to wear protective gloves during the installation process, as well as any maintenance functions. It is recommended to wear them also when removing any covers. E. The operator should never wear jewelry. F. Loose fitting clothes should not be worn around moving parts on conveyors or equipment. Any clothing that becomes loosened should be tucked in tightly G. Loose or dangling shoe strings should be tucked in. H. Long hair should be tied up and/or back. 9
10 Safety 6. Operator Qualifications. A. The User/Operator must be competent and experienced to operate the equipment. Anyone who works around conveyors must have good common sense in order to be qualified. These persons must also know and meet all other qualifications, such as: 1. Any person who has not read and/or does not understand all operation and safety procedures is not qualified to operate any conveyor systems. 2. Certain regulations apply to personnel operating power machinery. Personnel under the age of 18 years may not operate power machinery, including conveyors. It is your responsibility, as owner and/or supervisor, to know what these regulations are in your area or situation. 3. Unqualified or incompetent persons are to remain out of the work area. 4. O.S.H.A. (Occupational Safety & Health Administration) regulations state: At the time of initial assignment, and at least annually thereafter, the employer shall instruct every employee in the safe operation and servicing of all equipment with which the employee is, or will be, involved. (Federal Occupational Safety & Health Standards for Agriculture. Subpart D, Section (a) (6). B. As a requirement of OSHA, it is necessary for the employer to train the employee in the safe operating and safety procedures for this conveyor. We included this sign-off sheet for your convenience and personal record keeping. All unqualified persons are to stay out of the work area at all times. It is recommended that another qualified person who knows the shutdown procedure is in the are in an event of an emergency. A person who has not read this manual and understands all operating and safety instructions is not qualified to operate this machine. Date Employee s name (printed) Employee s Signature


 4. Connect sections together using fasteners provided.")

11 Installation Installing the Conveyor under Bins 1. Handle the conveyor in sections no longer than 30 ft. Position two floor jacks on the concrete surface near the bins. 2. Using a forklift, carefully handle one section at a time and lower onto the floor jacks. Steady the section on the jacks at all times, or it may easily fall off. 3. With three people, roll the jacks under the bins to the approximate location and place the section on blocks. Do this for each section. (see Fig. 1) 4. Connect sections together using fasteners provided. This may require some disassembly of covers and pans to gain access to bolt holes. (see Fig. 2) Fig Mount transitions on bin hopper outlets. Punch out existing slots on the sides on the slide gate housing (Fig. 3), and insert the self tapping screws with large washers into the transition. (see Fig. 4) Fig. 2 Fig. 3 Fig. 4 11
12 Installation 6. Position conveyor discharge in desired location. Raise the unit until the covers are against the transitions. Center the conveyor side to side. Using a black marker, trace the perimeter of each transition. (see Fig. 5) 7. Lower conveyor and position where cutout areas are accessible. Cut rectangular holes that are larger than the markings to allow clearance. Holes can be cut using a drill and sawzall, or plasma cutter, if available. (see Fig. 6) 8. Insert all of the rectangular transition adapter plates (one for each bin). Raise the conveyor up until the rectangular holes are against the tapered sides of the transitions. Fig Some of the top cover bolts will be under the adapter plates. Remove these bolts. Drill the holes on through the adapter plates. (see Fig. 7) Re-assemble the bolts. Drill four holes at the corners of the adapter plates and fasten with bolts and nuts provided. 10. Caulk around the transition joint and across the ends of the adapter plates. (see Fig. 8) Roll caulking may need to be used for the sides of the transition. Fig. 6 Fig. 7 Fig. 8 12
13 Installation 6. Position conveyor discharge in desired location. Raise the unit until the covers are against the transitions. Center the conveyor side to side. Using a black marker, trace the perimeter of each transition. (see Fig. 5) 7. Lower conveyor and position where cutout areas are accessible. Cut rectangular holes that are larger than the markings to allow clearance. Holes can be cut using a drill and sawzall, or plasma cutter, if available. (see Fig. 6) 8. Insert all of the rectangular transition adapter plates (one for each bin). Raise the conveyor up until the rectangular holes are against the tapered sides of the transitions. Fig Some of the top cover bolts will be under the adapter plates. Remove these bolts. Drill the holes on through the adapter plates. (see Fig. 7) Re-assemble the bolts. Drill four holes at the corners of the adapter plates and fasten with bolts and nuts provided. 10. Caulk around the transition joint and across the ends of the adapter plates. (see Fig. 8) Roll caulking may need to be used for the sides of the transition. Fig. 6 Fig. 7 Fig. 8 13
 7.")
 8.")

 Re-assemble the bolts. Drill four holes at the corners of the adapter plates and fasten with bolts and nuts provided. 10.")
14 Installation 6. Position conveyor discharge in desired location. Raise the unit until the covers are against the transitions. Center the conveyor side to side. Using a black marker, trace the perimeter of each transition. (see Fig. 5) 7. Lower conveyor and position where cutout areas are accessible. Cut rectangular holes that are larger than the markings to allow clearance. Holes can be cut using a drill and sawzall, or plasma cutter, if available. (see Fig. 6) 8. Insert all of the rectangular transition adapter plates (one for each bin). Raise the conveyor up until the rectangular holes are against the tapered sides of the transitions. Fig Some of the top cover bolts will be under the adapter plates. Remove these bolts. Drill the holes on through the adapter plates. (see Fig. 7) Re-assemble the bolts. Drill four holes at the corners of the adapter plates and fasten with bolts and nuts provided. 10. Caulk around the transition joint and across the ends of the adapter plates. (see Fig. 8) Roll caulking may need to be used for the sides of the transition. Fig. 6 Fig. 7 Fig. 8 14

15 Installation Installing the Conveyor Supports 1. Conveyor supports should be installed on a firm concrete base at approximately 10 ft intervals. The Drive End As and the Tail End As should have a support under them. 2. The top of the support should be chosen based on the height of the conveyor from the base. The all-thread rod should have at least 6 inches of penetration into the tubing. 3. Assemble jam nuts and support feet. Drill holes and anchor the feet to securely to the base. (see Fig. 14) Fig


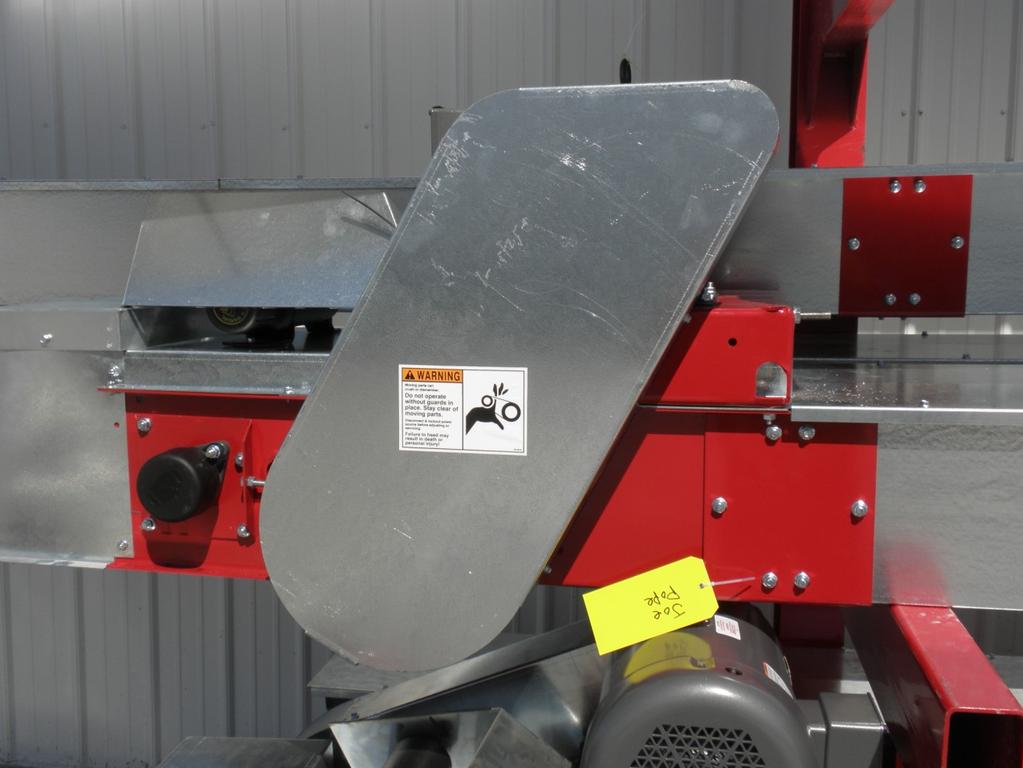
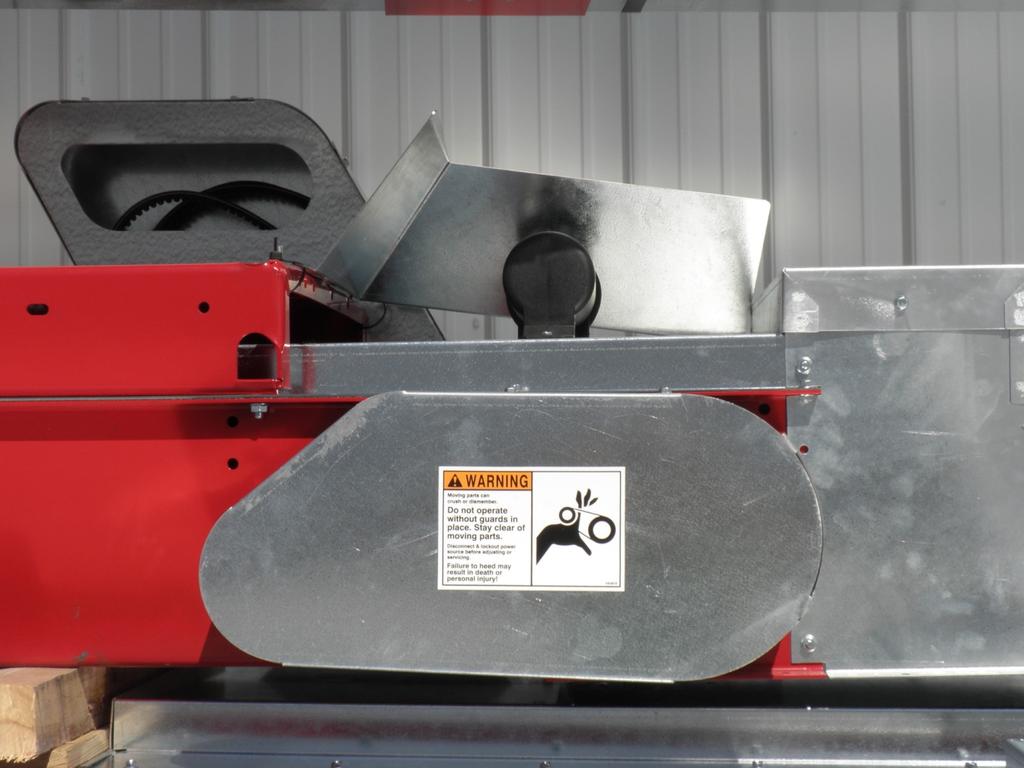
16 Installing Safety Signs Installing Safety Signs The Safety Decals listed below are included with the conveyor, the following pages show the location of the decals on the conveyor. Inspect all decals and replace any that are worn, illegible, or missing. Contact your dealer or the factory to order replacement decals. 1. Install safety signs near the discharge end as shown. KS-0008 KS


17 Installing Safety Signs KS-0017 KS

18 Installing Safety Signs KS

19 Installing Safety Signs KS
20 1. Operation Recommendations. A. One person must be in a position to monitor the operation of the conveyor at ALL times. That person should visually inspect the conveyor before and during operation and be alert to any un usual vibrations, noises, and loosening of any fasteners. Operation B. For smoother startups, keep the conveyor from starting totally full. This will also ensure efficient operation. C. In cold weather, run empty conveyor for five minutes to warm up belt. Otherwise, do not operate the conveyor empty for long periods of time. D. You must break-in the conveyor when it is new and at the beginning of each season. Refer to step 3 for instructions.. E. Make sure the drive end is empty before shutting down the conveyor. Do not stop or start the conveyor under load because the belt has a tendency to slip on the drive pulley, especially if the belt and tube have not become well polished. 2. Emergency Shutdown. IMPORTANT: Do not restart the conveyor when it is loaded. This may damage the conveyor. A. If you have to immediately shutdown the conveyor under load, be sure to disconnect and lockout the power source. B. Remove as much grain as possible from the hopper and the conveyor before restarting. C. Never attempt to restart the conveyor when it is full. D. When as much grain as possible has been cleared from the hopper and the conveyor, reconnect the power source and clear the remaining grain gradually. Be certain to close ALL clean-out and inspection doors in the main conveyor hopper before operating. The operator should not add power before viewing the entire work area and checking that ALL personnel are clear of the designated work area. The operator should be alert to any unusual vibrations or noises that might indicate the need for service or repair during the initial startup and break-in period. The operator should regulate the grain flow to the main conveyor by controlling the amount of grain fed into the hopper. Avoid plugging the main conveyor by overfeeding the hopper. Be certain that all safety shields and devices remain in place during operation. Ensure that hands, feet, and clothing are kept away from moving parts. Stop the motor and lockout the power source whenever the equipment must be serviced or adjusted. 20
21 Operation 3. Startup and Break-In A. Any conveyor that is new or has set idle for a season needs to go through a break-in period. B. Run the conveyor at partial capacity until several hundred bushels of grain have been conveyed and the belt and tube are polished. C. Retighten belt to restore original belt tension. 21


22 Maintenance 1. Conveyor Belt Adjustment NEVER perform maintenance on the conveyor unless all safety shields are in place. Replace any that are damaged or lost. Do not clean, adjust, or lubricate any part of the machine while it is in operation. Belt tension and tracking will need periodic adjustment. Follow the guidelines under Tracking the Belt to make adjustments. 2. Conveyor Belt Care A. It is recommended that the conveyor belt be washed off and the tail end be cleaned out at the end of the season. This will help prevent material residue from building up and causing damage to the belt. B. In order for water to drain from the conveyor belt, the splice must be parked on the top side of the circuit. To obtain this condition, open the door at the tail end. Run the conveyor until the belt splice appears. Turn off the conveyor immediately. The splice will now be on the top side. 22
23 3. Drive Belts Maintenance Cont. Maintenance Inspect the V-belts on the drive system at the beginning and end of each season. If cracks or wear are evident, replace the belts. Belt tension will need periodic adjustment. 4. Lubrication. A. Bearings (25 Hr Interval) 1. Lubricate bearings on belt drive/idler rollers. B. Use a good quality lithium soap base E.P. grease meeting the N.L.G.I. #2 specifications and containing no more than 1% molybdenum disulfide to lubricate all fittings (Example: Shell super duty or equivalent.) 23
24 Troubleshooting Problem Possible Cause Solution 1. The conveyor is vibrating. A. Damage can occur to the A1. It may be necessary to belting, causing a noise. Damage usually is caused from foreign material being run through the conveyor. remove the belting for inspection. B. The belt is not tracking in the Bl. Track the belt. center of the conveyor. 2. Capacity is too low. A. There may not be enough A1. Make sure the intake has not grain reaching the conveyor. bridged over, restricting flow. The belt needs to be covered to achieve maximum capacity. B. Conveyor belt is moving too B1. Check the belt speed. Low slow. capacity will result from speeds slower than recommended. B2. Belt needs tightening. 3. The conveyor plugs. A. The conveyor may be A1. Decrease the amount of jamming because too much grain is reaching the conveyor. grain the conveyor is gathering. B. The grain may be wet. B1. If wet grain or other hard to move materials is being conveyed, reduce the amount of grain being fed into hopper. B2. On electric drive unit check motor wiring or a higher hp motor is needed. C. The conveyor may be jammed C1. Remove any foreign material with foreign material. in the conveyor. D. The discharge end may be D1. Unplug any plugs at the plugged. discharge end of the conveyor. E. Pulley has spun out and E1. Cut and resplice the belt, burned the belt in two. An additional piece of belting may be required. E2. Tighten and retrack the belt. 24
25 Troubleshooting Problem Possible Cause Solution 4. Belt is slipping A. Belt tension too low. A1. Tension belt to 23 ft-lbs. or loose. on the adjustment bolts. B. Belt is extremely dirty. B1. Clean traction side of belt. 5. Belt is rubbing A. Belt misaligned. A1. Align belt so its tracks side of housing. center of idle and drive rollers. 25
26 This page is intentionally left blank 26
27 Parts How to Order Parts 1. Refer to the proper layout view for the area of the machine. 2. Find illustration of the part to be ordered. 3. Note the ITEM number in the balloon point to the part. 4. On the parts list, find the ITEM number listed in the table. 5. Find the Quantity, Part Number, and Description associated with the ITEM number for use when placing your order. Paint For matching red paint, use Diamond Vogel IB5588, or equivalent paint. Order supplies from KSi Conveyors 454 N State Route 49 Cissna Park, IL Phone: Abbreviations used in Parts List As. Assembly Bkt. Bracket No. Number Itm. Item Qty. Quantity RH Right hand side LH Left hand side AR -As required( e.g. bulk belt) (part numbers for stainless conveyors are as shown in illustrations but with XXXXX-8X designation) 27
28 Parts 16UB16 MAIN CONVEYOR 28
29 Parts ITM QTY PART NO. NAME CONNECTOR JACK PLATE AS TAIL END GROUP DRIVE END GROUP (15 HP+) DRIVE END GROUP ( HP) MAIN BOX, 4' MAIN BOX, 8' PAN, 8' PAN, 4' TOP COVER, 8' TOP COVER, 4' BIN TRANSITION (16") (NUMEROUS OPTONS) SUPPORT AS PLATE, TRANSITION (NUMEROUS OPTIONS) THREADED ROD, 3/4 * BELT, 16" RUBBER CRESCENT TOP LACING KIT (LACING, RETAINERS, SPLICE) 32" BELT LACING RETAINER CLIP 16" LACING PIN LACING TOOL * NOTE: ITEM NOT SHOWN 29
30 Parts TAIL END SUBASSEMBLY 30
31 Parts ITM QTY PART NO. NAME PLATE, BEARING COVER, HOOD TAIL BOX AS UB TRANSITION HOOD ASSY BKT AS, SLIDE COVER, TOP (IDLER END) BOTTOM COVER COVER, 1 1/4" BEARING BEARING, 1-1/4" 2 BOLT FLANGE NUT, SQUARE (5/8) DRUM, IDLER (5") SCREW, TENSIONING (5/8") 31
32 Parts (7.5-10HP) (15HP+) DRIVE END SUBASSEMBLY 32
33 Parts ITM QTY QTY PART NO. NAME PLATE AS, BEARING (LH) PLATE AS, BEARING (RH) UB FLAP ANGLE, 16UB COVER, HOOD UB TRANSITION DRIVE BOX AS COVER, TOP (DRIVE END) MOTOR MOUNT CHAIN SHIELD CHAIN SHIELD AS HOOD AS., 16UB SPECIAL BELT SHIELD BELTGUARD COUNTERSHAFT TENSIONER, BELT DEFLECTOR, 16UB UNDERBIN COVER, 1 1/4" BEARING BEARING, 1-1/4" 2 BOLT FLANGE MOTOR, 7.5 HP 1PH MOTOR, 7.5 HP 3PH MOTOR, 10HP 1PH MOTOR, 10HP 3PH MOTOR, 15HP 1PH MOTOR, 15HP 3PH MOTOR, 20 HP, 3PH BUSHING, 1.25" KEY (1 1/4 SHAFT) TAP BOLT (3/8 X 5) SPROCKET, IDLER (#60/11) SPROCKET, DRIVE (#60/16) SPROCKET, DRIVE (#60/32) DRUM AS. (5"), LAGGED V-BELT,,BX V-BELT,BX PULLEY,2B X 4 SH PULLEY,3B X 4 SH PULLEY,2B X PULLEY,3B X UBCHAIROLLER CHAIN (60) * BUSHING, 1 3/8" TAPER * BUSHING, SH X 1 5/8" * ITEM NOT SHOWN 33
34 General Dimensions GENERAL DIMENSIONS SHOWN WITH ONE 4 FT AND ONE 8 FT SECTION 34
35 Specifications Specifications 1. Capacity A. The capacities of conveyors varies greatly under varying conditions. The following factors play a role in the performance of the conveyor: Speed of belt Moisture content Amounts of foreign matter Methods of feeding Different materials B. Under normal conditions, capacity is bu/hr. 2. Length Ranges from 16 ft to 124 ft 3. Drive Unit For conveyors ft, 7.5 hp electric motor ft, 10 hp electric motor 66-90ft, 15 hp electric motor ft, 20 hp electric motor 4. Belt Width: 16 in. Surface: Textured Material: Rubber 5. Speed Standard belt speed is 376 FPM (feet per minute). 35
36 Bolt torque specifications Bold Torque Specifications Proper torquing of bolts, cap screws, studs, and nuts is very important when assembling or installing any component on a machine. The chart below lists bolt torques for most popular sizes of bolts. The chart also applies to tightening studs or tightening nuts. Refer to the chart whenever a bolt must be tightened on a machine. Two columns of figures are shown for each type of bolt, dry and lubricated. The dry column would cover bolts as the come from the package or bolts with no external lubrication applied. The second column covers bolts externally lubricated with oil, white lead, anti-seize, graphite, etc. This column should also be used to tighten bolts that are being loctite applied. Grade 8 Grade 5 Diameter No. Threads Dry Torque Lub. Torque Dry Torque Lub. Torque lbf-ft N-m lbf-ft N-m lbf-ft N-m lbf-ft N-m / lbf-ft N-m lbf-ft N-m lbf-ft N-m lbf-ft N-m 5/ / / / / / / / , /8-7 1,280 1, , , /4-7 1,820 2,467 1,360 1,844 1,120 1, , /8-6 2,380 3,227 1,780 2,413 1,460 1,979 1,100 1, /2-6 3,160 4,284 2,360 3,200 1,940 2,630 1,460 1,979 36
Model Model Cleated Belt Seed Conveyor Operator/Parts Manual
 Model 1610-17-21 Cleated Belt Seed Conveyor Operator/Parts Manual OM-1610-17-21-1217 PRINTED IN U.S.A. Table of Contents Table of Contents INTRODUCTION... 3 WARRANTY... 4 SAFETY... 5 ASSEMBLY OF CONVEYOR
Model Model Cleated Belt Truck Conveyor Operator/Parts Manual (SN and Later)
") Model 120819-22 Cleated Belt Truck Conveyor Operator/Parts Manual (SN 13196 and Later) OM-1208-19-22-TC-0818 PRINTED IN U.S.A. Table of Contents Table of Contents INTRODUCTION...3 WARRANTY...4 SAFETY...5
Model 120819-22 Cleated Belt Truck Conveyor Operator/Parts Manual (SN 13196 and Later) OM-1208-19-22-TC-0818 PRINTED IN U.S.A. Table of Contents Table of Contents INTRODUCTION...3 WARRANTY...4 SAFETY...5
Model SCT. Model SCT Honda Drive Operator/Parts Manual
 Model 120832SCT Honda Drive Operator/Parts Manual OM-1208SCT-1217 PRINTED IN U.S.A. Table of Contents Table of Contents INTRODUCTION...3 WARRANTY...4 SAFETY...5 ASSEMBLY OF CONVEYOR BELT... 11 INSTALLATION...
4" Utility and Bulk Tank Auger
 4" Utility and Bulk Tank Auger Operation and Assembly Instructions PNEG-195 Date: 12-06-10 PNEG-195 2 PNEG-195 4" Utility and Bulk Tank Auger Table of Contents Contents Chapter 1 Introduction...4 Receiving
Commercial Bin Well Control Rod Kits and Rack and Pinion Controls. Assembly Manual PNEG-790. Date: PNEG-790
 Commercial Bin Well Control Rod Kits and Rack and Pinion Controls Assembly Manual PNEG-790 Date: 07-18-14 PNEG-790 Control Rod Kits Diameter Part # Diameter Part # 24' GCP24000 68'-69' GCP68000 27' GCP27000
Flip - Up Conveyor. for 10" BeltVeyors OWNER'S MANUAL (12/00)
") Flip - Up Conveyor for 10" BeltVeyors OWNER'S MANUAL 19023100 (12/00) Table of Contents Warranty Information............................ Inside Front Cover Operator Qualifications........................................
Flip - Up Conveyor for 10" BeltVeyors OWNER'S MANUAL 19023100 (12/00) Table of Contents Warranty Information............................ Inside Front Cover Operator Qualifications........................................
Twin Screw Undercar Conveyor
 Twin Screw Undercar Conveyor Owner s Manual #19015700 05-00 Table of Contents Operator Qualifications...................................... 1 Safety.................................................. 2-4
Outload Trough Roller Conveyor
 Outload Trough Roller Conveyor OWNER'S MANUAL 00003400 (8/99) Table of Contents Warranty Information.............................. Inside Front Cover Operator Qualifications / Sign Off Sheet..............................
Model _LP. Model LOW PROFILE CONVEYOR Operator/Part s Manual
 Model 161237 LOW PROFILE CONVEYOR Operator/Part s Manual OM-161237LP-0616 PRINTED IN U.S.A. Table of Contents Table of Contents INTRODUCTION... 3 WARRANTY... 4 SAFETY... 5 ASSEMBLY OF CONVEYOR BELT...
Model 1612SA. Model 1612 SWINGAWAY Operator/Parts Manual (Serial # & Later)
") Model 1612 SWINGAWAY Operator/Parts Manual (Serial # 20615 & Later) OM-1612SA-0117 PRINTED IN U.S.A. Table of Contents Table of Contents INTRODUCTION...3 WARRANTY...6 SAFETY...7 ASSEMBLY OF CONVEYOR BELT...
Model 1612 SWINGAWAY Operator/Parts Manual (Serial # 20615 & Later) OM-1612SA-0117 PRINTED IN U.S.A. Table of Contents Table of Contents INTRODUCTION...3 WARRANTY...6 SAFETY...7 ASSEMBLY OF CONVEYOR BELT...
6", 8" and 10" Utility and Bulk Tank Auger
 6", 8" and 10" Utility and Bulk Tank Auger Assembly and Operation Manual PNEG-1435 Version: 2.0 Date: 12-23-15 PNEG-1435 This manual is valid for the Bulk Tank and Utility Auger catalog numbers in the
Ladder, Safety Cage and Platform Assembly for GSI Hopper Tanks. Installation Manual PNEG Date: PNEG-1451
 Ladder, Safety Cage and Platform Assembly for GSI Hopper Tanks Installation Manual PNEG-1451 Date: 03-17-11 PNEG-1451 2 PNEG-1451 Ladder, Safety Cage and Platform for Hopper Tanks Table of Contents Contents
Field Loader OWNER S MANUAL # (02-01)
") Field Loader OWNER S MANUAL #03240900 (02-01) Table of Contents Warranty Information...................... Inside Front Cover Operator Qualifications / Sign Off Sheet..................... 1 Safety Instructions....................................
Field Loader OWNER S MANUAL #03240900 (02-01) Table of Contents Warranty Information...................... Inside Front Cover Operator Qualifications / Sign Off Sheet..................... 1 Safety Instructions....................................
ATEX - 12" and 16" X Series Sweep
 ATEX - 12" and 16" X Series Sweep Installation Manual - Original Instructions PNEG-1857AX Version: 5.0 Date: 06-27-16 PNEG-1857AX Model Number of My Sweep: Date Delivered: Date Installed: NOTE: The manufacturer
Patriot Pivot Track Closer TM Owners Manual
 Patriot Pivot Track Closer TM Owners Manual Manufactured by Minden Machine Shop Inc. 1302 K Road Minden NE 68959 1-800 264-6587 Patriot Pivot Track Closer Serial # Date of Purchase TABLE OF CONTENTS TABLE
Operator s Manual and Assembly
 Operator s Manual and Assembly Published: Mar 24, 2017 Manual Part No. AH02-00-MAN Gatco Manufacturing Inc. www.gatcomfg.com Location: 2524 South Service Road West, Swift Current, SK, Canada Mail: Box
610 BUSHEL MANURE SPREADER
 610 BUSHEL MANURE SPREADER RODA MANUFACTURING 1008 LOCUST ST. HULL, IA. 51239 Art s-way Manufacturing 712-439-2366 Co., Inc. Hwy 9 West - PO Box 288 WWW.RODAMFG.COM Armstrong, IA. 50514 U.S.A 2 INTRODUCTION
MK AUGERS POWER SWING KIT ASSEMBLY & OPERATION MANUAL
 MK AUGERS POWER SWING KIT ASSEMBLY & OPERATION MANUAL Read this manual before using product. Failure to follow instructions and safety precautions can result in serious injury, death, or property damage.
TRUSS KITS FOR SPOUTING Installation Manual
 TRUSS KITS FOR SPOUTING Installation Manual LAMBTON CONVEYOR LIMITED 102 Arnold Street Wallaceburg, ON N8A 3P4 Canada Telephone: (519) 695-2316 Telephone: (519) 627-8228 ONE SOURCE ONE SOLUTION Toll free:
Commercial Drive Unit for 10"-12" 25 Bin Unloader
 Commercial Drive Unit for 10"-12" 25 Bin Unloader Assembly and Operation Manual PNEG-2035 Version: 1.0 Date: 09-22-15 PNEG-2035 All information, illustrations, photos and specifications in this manual
6", 8", 10" and 12" Horizontal Drive Units
 6", 8", 10" and 12" Horizontal Drive Units Assembly and Operation Manual PNEG-1429 Version: 2.0 Date: 12-17-15 PNEG-1429 All information, illustrations, photos, and specifications in this manual are based
25 BUSHEL MANURE SPREADER
 25 BUSHEL MANURE SPREADER RODA MANUFACTURING 338 MAIN ST. HULL, IA. 51239 Art s-way Manufacturing 712-439-2366 Co., Inc. Hwy 9 West - PO Box 288 WWW.RODAMFG.COM Armstrong, IA. 50514 U.S.A 2 INTRODUCTION
CALF SHELTER 6, 12, 15, 18, & 24 MODELS ASSEMBLY MANUAL
 CALF SHELTER 6, 12, 15, 18, & 24 MODELS ASSEMBLY MANUAL Read this manual before using product. Failure to follow instructions and safety precautions can result in serious injury, death, or property damage.
GROUNDSMASTER. 52 Recycler. for 120 Traction Unit. Model No & UP. Operator s Manual
 FORM NO. 8-980 Rev A GROUNDSMASTER 5 Recycler for 0 Traction Unit Model No. 077 79000 & UP Operator s Manual IMPORTANT: Read this manual carefully. It contains information about your safety and the safety
4" UTILITY GRAIN AUGERS
 4" UTILITY GRAIN AUGERS OPERATION & ASSEMBLY MANUAL Read this manual before using product. Failure to follow instructions and safety precautions can result in serious injury, death, or property damage.
Heavy Duty Drive Unit for 8''-10'' and 10"-12" 25 Bin Unloader
 Heavy Duty Drive Unit for 8''-10'' and 10"-12" 25 Bin Unloader Assembly and Operation Manual PNEG-2035 Version: 1.1 Date: 11-24-16 PNEG-2035 All information, illustrations, photos and specifications in
Jib Crane for Bucket Elevators. Installation and Operation Manual PNEG Date: Version: 2.0 PNEG-1783
 Jib Crane for Bucket Elevators Installation and Operation Manual PNEG-1783 Version: 2.0 Date: 11-25-15 PNEG-1783 42" Pulley with 14 x 22 and 14 x 26 Trunking 48" Pulley with 14 x 26 Trunking All information,
ProLine. 44 Mower. for 120 Traction Unit. Model No & Up. Operator s Manual
 FORM NO. 9 ProLine Mower for 0 Traction Unit Model No. 05 99000 & Up Operator s Manual IMPORTANT: Read this manual carefully. It contains information about your safety and the safety of others. Also become
SIP Direct Drive Oil-Lube Air Compressors - Operating & Maintenance Instructions
 SIP Direct Drive Oil-Lube Air Compressors - Operating & Maintenance Instructions Please read and fully understand the instructions in this manual before operation. Keep this manual safe for future reference.
160 & 240 Seed Tender
 160 & 240 Seed Tender OWNER'S MANUAL #17993700 (2007) Table of Contents Warranty Information... Inside Front Cover Operator Qualifications................ 1 Safety........................... 2-6 Operation,
CALL TOLL FREE FAX:
 ADAMS FERTILIZER EQUIPMENT BUCKET ELEVATOR PARTS MANUAL CALL TOLL FREE -800-643-466 870-946-494 FAX: 870-946-4396 WEBSITE: www.adamsfertequip.com EMAIL: adams@adamsfertequip.com Belt Overlap Assembly Nylon
SCALE HOPPER & LEG EXT. Scale hopper Leg Extension Kits Operator/Parts Manual
 Scale hopper Leg Extension Kits Operator/Parts Manual OM-72100-LEGEXT-0317 PRINTED IN U.S.A. Table of Contents Table of Contents PARTS...3 Personnel operating or working around this equipment should read
Sawhorse with Chainsaw Holder
 Sawhorse with Chainsaw Holder Owner s Manual Chainsaw not included. WARNING: Read carefully and understand all ASSEMBLY AND OPERATION INSTRUCTIONS before operating. Failure to follow the safety rules and
Package Contents Part A (3) I-Beam (1) Base (2) Other parts
 I-Beam (1) Base (2) Other parts") Page 1 Installation Instructions for 81245 Adjustable Height Gantry Crane 1-Ton Capacity Table of Contents Important Safety Information pg. 2 Specific Operation Warnings pg. 2 Main Parts of Product pg.
Page 1 Installation Instructions for 81245 Adjustable Height Gantry Crane 1-Ton Capacity Table of Contents Important Safety Information pg. 2 Specific Operation Warnings pg. 2 Main Parts of Product pg.
Operator's Manual. VC-60 & VC-60 Plus Harper Industries, Inc. 7/03 Part No
 Operator's Manual VC-60 & VC-60 Plus 2003 Harper Industries, Inc. 7/03 Part No. 970066 Thank you for purchasing a Harper/Goossen Verti-Cutter. As with all Harper/Goossen products, the Harper/Goossen Verti-Cutter
E Q U I P M E N T 1302 K ROAD MINDEN, NE
 Snout Cone 2018 DISTRIBUTED BY E Q U I P M E N T 1302 K ROAD MINDEN, NE 68959 1-800-264-6587 WWW.PATRIOTEQUIP.COM SAFETY AND OPERATION RULES...3 SAFETY ALERT SYMBOL...4 LIGHTING AND MARKING...4 SAFETY
1000-lb Hydraulic Truck Crane
 1000-lb Hydraulic Truck Crane Owner s Manual WARNING: Read carefully and understand all ASSEMBLY AND OPERATION INSTRUCTIONS before operating. Failure to follow the safety rules and other basic safety precautions
Heavy-Duty Welding Fabrication Table
 Heavy-Duty Welding Fabrication Table with Fix-Up Kit Owner s Manual WARNING: Read carefully and understand all ASSEMBLY AND OPERATION INSTRUCTIONS before operating. Failure to follow the safety rules and
Seed Box Tote OWNER'S MANUAL # (2007)
") Seed Box Tote OWNER'S MANUAL #17392200 (2007) Table of Contents Warranty Information................ 1 Operator Qualifications............... 2 Safety and Warnings................ 3-6 Fuel Valve.........................
Seed Box Tote OWNER'S MANUAL #17392200 (2007) Table of Contents Warranty Information................ 1 Operator Qualifications............... 2 Safety and Warnings................ 3-6 Fuel Valve.........................
LOG CHOP. Hydraulic Wood Guillotine. Owners Illustrated Instruction Book & Parts List
 LOG CHOP Hydraulic Wood Guillotine Owners Illustrated Instruction Book & Parts List Grovebury Road, Leighton Buzzard, Bedfordshire. LU7 4UX. UK. Tel:01525 375157. Fax:01525 385222. Email: enquires@brownsagricultural.co.uk
Bulk Feeder Model nd Edition
 Bulk Feeder Model 858 2 nd Edition MAN066 November 2005 2005 Bulk Feeders are manufactured by AMADAS Industries. You can find us on the Web at: www.amadas.com or e-mail us at: amadas@amadas.com You can
4/3/2012 8E000024,Rev C Combine Grain Tank Extension Tip-Up Kit CIH250MX FITS CASE IH 5088 W/ 24 MANUAL FOLDING EXTENSION PANELS OPERATOR / ASSEMBLY M
 4/3/2012 8E000024,Rev C Combine Grain Tank Extension Tip-Up Kit CIH250MX FITS CASE IH 5088 W/ 24 MANUAL FOLDING EXTENSION PANELS OPERATOR / ASSEMBLY MANUAL PLACE IN COMBINE CAB AFTER ASSEMBLY FOR FUTURE
Electric Chainsaw Sharpener With Bar Mount
 Electric Chainsaw Sharpener With Bar Mount Owner s Manual WARNING: Read carefully and understand all ASSEMBLY AND OPERATION INSTRUCTIONS before operating. Failure to follow the safety rules and other basic
4400-Lb. Capacity Pallet Jack
 Read carefully and understand all ASSEMBLY AND OPERATION INSTRUCTIONS before operating. Failure to follow the safety rules and other basic safety precautions may result in serious personal injury. Item#
Wheel Horse. 44 Snowthrower. for 5xi Lawn and Garden Tractors. Model No & Up. Operator s Manual
 FORM NO. 8 Rev A Wheel Horse Snowthrower for 5xi Lawn and Garden Tractors Model No. 7966 890050 & Up Operator s Manual IMPORTANT: Read this manual, and your tractor manual, carefully. They contain information
A1062 & A1072 AUGER ASSEMBLY MANUAL. Read & understand all instructions pertaining to this auger prior to use!
 A1062 & A1072 AUGER ASSEMBLY MANUAL Read & understand all instructions pertaining to this auger prior to use! Safety Alert Watch for this ALERT Symbol. It identifies potential hazards to Personal SAFETY
2000-lb Hand Winch Truck Crane
 2000-lb Hand Winch Truck Crane Owner s Manual WARNING: Read carefully and understand all ASSEMBLY AND OPERATION INSTRUCTIONS before operating. Failure to follow the safety rules and other basic safety
Log Splitter. Owner/Operator Manual. Models HCWP1-26
 Log Splitter Owner/Operator Manual Models HCWP1-26 SAFETY..........................2 SAFETY WARNING SYMBOL.........3 SAFETY RULES.................. 4-5 SPECIFICATIONS................. 6 CONTROLS AND FEATURES.......
LOG SPLITTER. Heavy Duty PTO Driven. Owners Illustrated Instruction Book & Parts List
 LOG SPLITTER Heavy Duty PTO Driven Owners Illustrated Instruction Book & Parts List Grovebury Road, Leighton Buzzard, Bedfordshire. LU7 4UX. UK. Tel:01525 375157. Fax:01525 385222. Email: enquires@brownsagricultural.co.uk
Adjustable Steel Welding Table
 Adjustable Steel Welding Table Owner s Manual WARNING: Read carefully and understand all ASSEMBLY AND OPERATION INSTRUCTIONS before operating. Failure to follow the safety rules and other basic safety
Hydraulic Drum Transporter
 Hydraulic Drum Transporter Owner s Manual WARNING: Read carefully and understand all ASSEMBLY AND OPERATION INSTRUCTIONS before operating. Failure to follow the safety rules and other basic safety precautions
3-Pt. Quick Hitch. Owner s Manual
 3-Pt. Quick Hitch Owner s Manual WARNING: Read carefully and understand all ASSEMBLY AND OPERATION INSTRUCTIONS before operating. Failure to follow the safety rules and other basic safety precautions may
DIAMONDBACK/EDGE GRASS COLLECTION SYSTEM PARTS & OPERATORS MANUAL
 DIAMONDBACK/EDGE GRASS COLLECTION SYSTEM PARTS & OPERATORS MANUAL GRASS CATCHER W/WEIGHT: TUBE KIT: BLOWER KIT: 48 5101305 632093 632078 52 5101305 542119 632074 60 632086 542120 632081 3 WORLDLAWN POWER
OWNER S & OPERATOR S MANUAL
 HYDRAULIC GROUND WHEEL DRIVE for 8, 10, 12 & 13 SWING AWAY HOPPER OWNER S & OPERATOR S MANUAL Effective September 14, 2009 Publication No. 1032025 MODEL NO S. 8-800440G 10-100440G 12-120440G* 12-120450G**
Angle Grinder Holder
 Angle Grinder Holder Owner s Manual WARNING: Read carefully and understand all ASSEMBLY AND OPERATION INSTRUCTIONS before operating. Failure to follow the safety rules and other basic safety precautions
DEBRIS BLOWER 2700 OPERATOR S MANUAL. Debris Blower
 DEBRIS BLOWER 2700 OPERATOR S MANUAL 6-2015 Thank you for purchasing a Harper. As with all Harper products, the has been developed through tough design and testing procedures to produce a top quality
2000 lb Adjustable Gantry Crane
 2000 lb Adjustable Gantry Crane Owner s Manual WARNING: Read carefully and understand all ASSEMBLY AND OPERATION INSTRUCTIONS before operating. Failure to follow the safety rules and other basic safety
TUG HD BELT CLAMP. Safety and Operation Manual WARNING
 TUG HD BELT CLAMP Safety and Operation Manual WARNING Improper use of this tool can result in serious bodily injury! This manual contains important information about product function and safety. Please
LKS300/LKS450 OPERATOR S MANUAL
 LKS300/LKS450 OPERATOR S MANUAL SAFETY RULES SHIFTA 300/450 Conveyor DANGER Failure to obey the instructions and safety rules in this manual will result in death or serious injury. Do Not Operate Unless:
ELEVATING UNDERCAR CONVEYOR 12" & 16" FLUSH - TYPE
 ELEVATING UNDERCAR CONVEYOR 12" & 16" FLUSH - TYPE OWNER'S MANUAL 19013200 (10/97) Contents Introduction.................................... 1 Warnings...................................... 1 Statement
Patriot Pivot Track Closer TM
 Patriot Pivot Track Closer TM Owners Manual Three Bar and Four Bar Models Three Bar Model Shown Manufactured by Minden Machine Shop Inc. 1302 K Road Minden NE 68959 1-800 264-6587 Patriot Pivot Track Closer
Drive Over- Pit. Belt Accelerator & Multi-Purpose Belt Loader OWNER'S MANUAL (08/08)
") Drive Over- Pit Belt Accelerator & Multi-Purpose Belt Loader OWNER'S MANUAL 00028100 (08/08) Belt Accelerator & Multi-Purpose Belt Loader Table of Contents Warranty Information................. Inside
Drive Over- Pit Belt Accelerator & Multi-Purpose Belt Loader OWNER'S MANUAL 00028100 (08/08) Belt Accelerator & Multi-Purpose Belt Loader Table of Contents Warranty Information................. Inside
DEBRIS BLOWER 3600 OPERATOR S MANUAL. Debris Blower
 DEBRIS BLOWER 3600 OPERATOR S MANUAL 9-208 Thank you for purchasing a Harper. As with all Harper products, the has been developed through tough design and testing procedures to produce a top quality machine.
110 Volt/12 Volt Portable Inflator
 110 Volt/12 Volt Portable Inflator Owner s Manual WARNING: Read carefully and understand all ASSEMBLY AND OPERATION INSTRUCTIONS before operating. Failure to follow the safety rules and other basic safety
Operating and Assembly Manual
 Model 1080 Operating and Assembly Manual Midwest Equipment Manufacturing, Inc. 5225 Serum Plant Road Thorntown, IN 46071 08-02-16 SAFETY RULES Remember, any power equipment can cause injury if operated
1000 lb. Adjustable Gantry Crane
 1000 lb. Adjustable Gantry Crane Owner s Manual WARNING: Read carefully and understand all ASSEMBLY AND OPERATION INSTRUCTIONS before operating. Failure to follow the safety rules and other basic safety
Part Number Mini Linear Lift Assembly Installation & Operator s Instruction Manual
 Part Number 39644 Mini Linear Lift Assembly Installation & Operator s Instruction Manual April 1999 MV1505C Chore-Time Warranty Mini Linear Lift Assembly Manual Chore-Time Warranty Chore-Time Equipment
Maintenance and Repair
 Maintenance and Repair WARNING ALWAYS shut off the engine, remove key from ignition, make sure the engine is cool, and disconnect the spark plug and positive battery terminal from the battery before cleaning,
IMPORTANT INSTRUCTIONS FOR OPERATION & MAINTENANCE OF
 IMPORTANT INSTRUCTIONS FOR OPERATION & MAINTENANCE OF CONVEYORS EASIKIT 300 EASIKIT 450 EASIKIT 600, 900, 1200 & 1500 The manufacturer does not accept responsibility for any loss, damage to other equipment,
Hydraulic Furniture Movers
 Hydraulic Furniture Movers Owner s Manual WARNING: Read carefully and understand all ASSEMBLY AND OPERATION INSTRUCTIONS before operating. Failure to follow the safety rules and other basic safety precautions
GRASS CATCHER PART S & OPERATORS MANUAL
 GRASS CATCHER PART S & OPERATORS MANUAL WORLDLAWN POWER EQUIPMENT, INC. WORLDLAWN.COM 2415 ASHLAND AVE BEATRICE, NE 68310 800-267-4255 FAX 402-223-4103 2 3 4 OPERATORS MANUAL This catcher manual is for
Operators manual Bumpa 8 metre 110v Bumpa 10 metre 110v
 Operators manual Bumpa 8 metre 110v Bumpa 10 metre 110v SAFETY RULES Mk3 Bumpa Conveyor Danger Failure to obey the instructions and safety rules in this manual will result in death or serious injury. Do
12 D100 SWEEP OWNERS MANUAL
 12 D100 SWEEP OWNERS MANUAL IMPORTANT: Read before using! 2002 Kingbird Avenue P.O. Box 8 George, IA. 51237 (712) 475-3301 Toll Free 1-888-SUDENGA FAX (721) 475-3320 www.sudenga.com OM-BU3523 J22AM CAUTION
Z Master. 62 Mower. for Z Master Z 255 Traction Unit. Model No & UP. Operator s Manual
 FORM NO. 9 88 Z Master 6 Mower for Z Master Z 55 Traction Unit Model No. 7408 89000 & UP Operator s Manual IMPORTANT: Read this manual carefully. It contains information about your safety and the safety
Kushlan Products, Inc. !IMPORTANT! Read Me First!
 Kushlan Products, Inc.!IMPORTANT! Read Me First! Thank you for purchasing this Kushlan Product. We hope you will enjoy using it for many years. Be sure to keep your box and all packing material in case
Combine Grain Tank Extension Tip-Up Kit CIH MZ315C FITS CASE IH 7120, 7230, 7240 w/ POWER FOLD COVER & 24 PANELS OPERATOR / ASSEMBLY MANUAL
 5/6/2016 8E000048,Rev AA Combine Grain Tank Extension Tip-Up Kit CIH MZ315C FITS CASE IH 7120, 7230, 7240 w/ POWER FOLD COVER & 24 PANELS OPERATOR / ASSEMBLY MANUAL PLACE IN COMBINE CAB AFTER ASSEMBLY
READ AND SAVE THESE INSTRUCTIONS. High Velocity Restaurant-Duty Utility Set Belt Driven for Roof Mounting
 READ AND SAVE THESE INSTRUCTIONS INSTALLATION, OPERATING INSTRUCTIONS & PARTS MANUAL High Velocity Restaurant-Duty Utility Set Belt Driven for Roof Mounting Electrical wiring and connections should be
Two-Stage Snow Blower For 4WD Pick Up Trucks. Operator s Manual
 Two-Stage Snow Blower For 4WD Pick Up Trucks Operator s Manual Distrubuted by: Metal Fabricating LLC P.O. Box 831 Brodheadsville, PA 18322 Phone: 570-992-9989 SnowVac.com WARRANTY POLICY Metal Fabricating
KING COBRA/CALIBER GRASS COLLECTION SYSTEM PARTS & OPERATORS MANUAL
 KING COBRA/CALIBER GRASS COLLECTION SYSTEM PARTS & OPERATORS MANUAL GRASS CATCHER W/WEIGHTS: TUBE KITS: BLOWER KITS: 52 542128 52 542119 5101002 60 542129 60 542120 5101003 2 WORLDLAWN POWER EQUIPMENT
Combine Grain Tank Extension Tip-Up Kit CIH MZ315P Fits Case IH 7120, 7230, 7240 w/ 24 POWER FOLDING EXTENSION PANELS
 10/6/2016 8E00006,Rev AB Combine Grain Tank Extension Tip-Up Kit CIH MZ315P Fits Case IH 70, 7230, 720 w/ 2 POWER FOLDING EXTENSION PANELS OPERATOR / assembly MANUAL PLACE IN COMBINE CAB AFTER ASSEMBLY
Heavy-Duty Drywall Dolly Cart
 Heavy-Duty Drywall Dolly Cart Owner s Manual WARNING: Read carefully and understand all ASSEMBLY AND OPERATION INSTRUCTIONS before operating. Failure to follow the safety rules and other basic safety precautions
14", 18" & 24" Fiberglass Turbo Fans Installation & Operator s Instruction Manual
 14", 18" & 24" Fiberglass Turbo Fans Installation & Operator s Instruction Manual 09484:09#52
Part Name/Description Part Number Quantity Instruction Kit Metalfor Flow Sensor
 NOTE: Indented items indicate parts included in an assembly listed above Part Name/Description Part Number Quantity Instruction Kit Metalfor 4101091 1 Flow Sensor 4001356 1 Deflector plate 2000612-1 1
Combine Grain Tank Extension Tip-Up Kit CIH MZ315C Fits Case IH 7120, 7230, 7240 w/ POWER FOLD COVER & 24 PANELS
 9/22/2016 8E000048,Rev AB Combine Grain Tank Extension Tip-Up Kit CIH MZ315C Fits Case IH 7120, 7230, 7240 w/ POWER FOLD COVER & 24 PANELS OPERATOR / assembly MANUAL PLACE IN COMBINE CAB AFTER ASSEMBLY
Combine Grain Tank Extension Tip-Up Kit CIH MX410P Fits Case IH 8240, 9240 w/ 410 bu. POWER FOLD Extension
 10/25/2017 8E000050,Rev AB Combine Grain Tank Extension Tip-Up Kit CIH MX410P Fits Case IH 8240, 9240 w/ 410 bu. POWER FOLD Extension OPERATOR / assembly MANUAL PLACE IN COMBINE CAB AFTER ASSEMBLY FOR
Hydraulic Immediate Need Power Pack
 Safety, Operation, and Maintenance Manual WARNING Improper use of this tool can result in serious bodily injury This manual contains important information about product function and safety. Please read
16 Inch Surface Cleaner
 16 Inch Surface Cleaner Owner s Manual WARNING: Read and understand all instructions, warnings, and cautions before using this product. Failure to follow the instructions, warnings, and cautions may result
84in. Driveway Drag. Owner s Manual
 84in. Driveway Drag Owner s Manual WARNING: Read carefully and understand all ASSEMBLY AND OPERATION INSTRUCTIONS before operating. Failure to follow the safety rules and other basic safety precautions
Hydraulic Bead Breaker Kit
 Hydraulic Bead Breaker Kit Owner s Manual WARNING: Read carefully and understand all ASSEMBLY AND OPERATION INSTRUCTIONS before operating. Failure to follow the safety rules and other basic safety precautions
Transfer. Portable Grain Belt Conveyor Operator s Manual. This manual applies to: 1500 Series: WCX1515LP. Original Instructions
 Transfer Portable Grain Belt Conveyor Operator s Manual This manual applies to: 1500 Series: WCX1515LP Original Instructions Read this manual before using product. Failure to follow instructions and safety
4400-Lb. Cargo Trolley
 4400-Lb. Cargo Trolley Owner s Manual WARNING: Read carefully and understand all ASSEMBLY AND OPERATION INSTRUCTIONS before operating. Failure to follow the safety rules and other basic safety precautions
READ AND SAVE THESE INSTRUCTIONS. Centrifugal Downblast Exhaust Fan Belt Driven for Roof & Wall Mounting
 READ AND SAVE THESE INSTRUCTIONS INSTALLATION, OPERATING INSTRUCTIONS & PARTS MANUAL Centrifugal Downblast Exhaust Fan Belt Driven for Roof & Wall Mounting Electrical wiring and connections should be done
Safety, Operation, & Maintenance Manual Douglas CBM Cross Belt Magnetic Separator
 Safety, Operation, & Maintenance Manual Douglas CBM Cross Belt Magnetic Separator Warning: This manual must be read, understood, and followed by anyone that installs, operates, and maintains this product.
North Dakota State University Grounds Maintenance Equipment
 North Dakota State University Grounds Maintenance Equipment I. Introduction Grounds maintenance equipment is an important part of the work activities on NDSU campus. They can make grounds maintenance jobs
BEFORE YOU START!! Read the safety messages on the implement as shown in your manual. Observe the rules of safety and common sense!
 To the Owner/Operator/Dealer All implements with moving parts are potentially hazardous. There is no substitute for a cautious, safe-minded operator who recognizes the potential hazards and follows reasonable
T832 T842 ELECTRIC MOTOR OPTION ASSEMBLY MANUAL. Read & understand all instructions pertaining to this option prior to use!
 T832 T842 ELECTRIC MOTOR OPTION ASSEMBLY MANUAL Read & understand all instructions pertaining to this option prior to use! Safety Alert Watch for this ALERT Symbol. It identifies potential hazards to Personal
Airflo MANUFACTURING CO., INC.
 Airflo MANUFACTURING CO., INC. 365 UPPER OAKWOOD AVE, ELMIRA NY 14903 PHONE: 607-733-8284 / FAX: 607-733-0587 OPERATOR & PARTS MANUAL PSV-8L ELECTRIC SPREADER Visit our website at www.air-flo.com Contents
55-Gallon Drum Cradle
 55-Gallon Drum Cradle Owner s Manual WARNING: Read carefully and understand all ASSEMBLY AND OPERATION INSTRUCTIONS before operating. Failure to follow the safety rules and other basic safety precautions
Model 858-RH. Operating and Assembly Manual. Palmor Products Inc Serum Plant Road Thorntown, IN 46071
 Model 5-RH Operating and Assembly Manual Palmor Products Inc. 55 Serum Plant Road Thorntown, IN 6071 3/31/015 SAFETY RULES Remember, any power equipment can cause injury if operated improperly or if the
Operators manual Hoddi 6 metre 110v Bumpa 8 metre 110v Bumpa 10 metre 110v
 Operators manual Hoddi 6 metre 110v Bumpa 8 metre 110v Bumpa 10 metre 110v SAFETY RULES Mk3 Bumpa Conveyor Danger Failure to obey the instructions and safety rules in this manual will result in death or