AMXDmax Advanced Mission Extender Device
|
|
|
- Beverly Gordon
- 5 years ago
- Views:
Transcription

1 AMXDmax Advanced Mission Extender Device User & Maintenance Guide Omni Medical Systems
2 Warranty Warranty Omni warrants its system to the original purchaser, against defects in material and workmanship for a period of one year from the date of original purchase. Omni will, at our option, replace or repair defective parts without charge. Omni will, replace or repair any part found to be defective upon inspection by Omni. The purchaser will be responsible for freight to Omni. Omni will be responsible for freight, via UPS Ground, to purchaser after repairs. This warranty does not apply in the event of misuse or abuse or failure by the user to maintain the system in accordance with Omni instructions or as a result of unauthorized alteration or repairs. Damage occurring during transit is not covered by this warranty. No other warranty expressed or implied shall apply and in no event shall Omni be liable for consequential economic damage or consequential damage to property. Omni Medical Systems Disclaimer Buyer assumes all risk and liability whatsoever from the installation and use of Omni products. Omni products are sold as bodily fluid collection and storage devices and should not be relied upon as protection from bodily fluids exposure to the body, clothing or other items such as flight deck. Omni assumes no liability for injury, loss, incidental or consequential damages in the event of an accident. 2
3 Table of Contents Warranty 2 Important Safety Information 4 Components 5 Control Unit Kit 6 Control Unit 7 Charger 8 Battery 9 Male Cup 10 Female Pad 11 Collection Bag 12 Undergarments 13 Male System Overview 14 Female System Overview 15 Charging the System 16 Donning the Male System 17 Donning the Female System 19 Prepping the System 20 Male Operating Instructions 21 Female Operating Instructions 22 After Flight 23 Care, Maintenance and Storage 24 Troubleshooting 25 Technical Specifications 26 Reordering 27 3
4 Important Safety Information Before using the AMXDmax System in a mission setting, familiarize yourself with the components and operation of the system. Practice using the AMXDmax in a chair or flight simulator before using it in an aircraft. 1. Always follow instructions when operating the device. 2. The batteries must be fully recharged at least once every 12 months. 3. The batteries must be left in fully charged state when they are not going to be used for more than 2 months. 4. Do not submerge Control Unit under water. 5. Do not use liquid cleaners (bleach, vinegar, alcohol, ammonia, etc.) or aerosol cleaners. Clean using a warm water (or a solution of 3% hydrogen peroxide) and a damp cloth. 6. Use only the type of power supply provided with the AMXDmax System. 7. Do not attempt to service this product yourself, as opening or removing covers may damage the device and void your warranty. 8. Refer all servicing to qualified Omni Medical Systems service personnel. 9. Refer all servicing to Omni Medical Systems service personnel under the following conditions: When the power-supply cord or plug is damaged. If the product does not operate normally contact product dealer. If the product has been dropped or damaged in any way. When the product exhibits a distinct change in performance. 10. All servicing should be done by an Omni certified service technician. Unauthorized component substitutions may result in fire, electric shock, or other hazards. 11. This product should be kept away from heat sources such as radiators, heat registers, stoves, or other products that produce heat. 4


5 System Components Control Unit Kit Collection Bag Undergarments Male Cup Female Pad 5

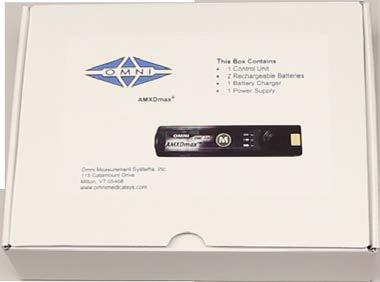
6 Control Unit Kit Kit Contents 1 Control Unit 1 Charger 2 Battery Packs 1 Wall Power Adaptor 1 User Manual 1 USB Flash Drive The USB Flash Drive contains: Manual PDF Instructional Video Marketing Video AMDXmax Presentation PDF Battery & Charger Power Supply USB Flash Drive Control Unit & Battery User Manual GSA: CSK DOD: CSK-2 M/F 6


7 Control Unit Male Unit Female Unit Hose Valves Sensor Pins Pad Air Valve Bag Release Air Pressure Regulator Module (APRM) Battery Status Indicator Lights Manual M Push Button The Control Unit is used with the Male Cup or Female Pad, Undergarment, and Collection Bag to provide aircrew with an automated, non-invasive, in-flight, bladder relief system. Battery Release Latch GSA: SCU-10 DOD: SCU-10-2 M/F 7

8 Charger The battery charger only for use with the AMXDmax recharegreable battery packs. It must only be used with the supplied power supply which has an input range of AC V 50/60Hz. Battery Status Indicator Light Battery status indicator lights A solid GREEN light indicates that the battery is charged A flashing YELLOW light indicates that the battery is charging A flashing RED light indicates that the battery needs service 8 DOD: RBP-ECU


9 Batteries DO NOT submerge batteries in water. DO NOT leave batteries discharged. Standard Rechargeable Battery Fully charged: The 520 battery lasts for up to 12 hours for Male system The 620 battery lasts for up to 12 hours for Female system Long Term Storage: Battery must be fully recharged and left charged every 12 months. 2 batteries come standard with the Control Unit Kit, providing up to 24 hours of fight time. GSA: SCU-RBP DOD: SCU-RBP-2 GSA: SCU-RBP DOD: SCU-RBP-2-2 Optional 9V Battery Pack Sold Seperately Battery pack that uses disposable 9V Lithium batteries. Capacity is 2 times that of the standard rechargeable battery DO NOT use the 9V Battery Pack with the battery charger 9 GSA: SCU-ABP DOD: SCU-ABP-2


10 Male Cup The Male Cup is safe, sanitary, and fits like a flexible althletic cup. The non-invasive, urethane cup has an integrated urine sensor for automatic operation. The soft foam ring provides a comfortable fit against the body. The cup is reusable, at the user s discretion, for up to 20 flights or 30 days with proper cleaning. Fire Retardent Nomex Hose Covering Polyurethane Cup Medical-Grade Latex-Free Soft Foam Ring Medical Grade Latex-Free Urine Sensors Nomex Covered Hose 12/ 18 /24 Velcro Loop Hose Connector 10 GSA: SCU-RBP-VA DOD: IMC-2-2

11 Female Pad The Female Pad is safe, sanitary, and shaped to fit like a female sanitary pad. The non-invasive pad has an integrated urine sensor for automatic operation. The pad inflates to provide a leak proof seal between the pad and the body. It has a soft, non-woven fabric cover to provide comfort. The pad is reusable, at the user s discretion, for up to 5 flights or 15 days with proper cleaning. Fabric Cover Soft, Non-Woven for Comfort Fire Retardent Nomex Hose Covering Leak Proof, Inflatable Seal Nomex Covered Hose 12/ 18 /24 Adhesive Strip Urine Sensors for Automatic Operation GSA: SCU-ABP-VA DOD: IFP-15/


12 Male Cup w/removable Hose The F-35 Male Cup has a slimmer profile than the standard cup, as well as a removable hose which attaches to the bottom of the cup. It is designed for optimal use in all aircraft, including aircraft with the 5-point harness. The cup is reusable, at the user s discretion, for up to 20 flights or 30 days with proper cleaning. Polyurethane Cup Medical-Grade Latex-Free Soft Foam Ring Medical Grade Latex-Free Nomex Covered Hose 12/ 18 /24 Hose Connector GSA: SCU-RBP-B DOD: IMCR-2-2 GSA: SCU-ABP-B DOD: RHA-21B-2-12,18,24 Urine Sensors 12


13 Through Suit Connector IMMERSION CHEM/BIO FLIGHT SUIT Interior A TSC Compatible hose attaches to the interior of the TSC port, which provides a 360 swivel connection. Exterior The TSC Hose connects to the external TSC port, and then to the AMXDmax Control Unit and Bag for use. It features a fail-safe quick disconnect. 13


14 Collection Bag The Collection Chamber Unit (Bag) is manufactured from durable, medical-grade urethane. It has a standard capacity of 1200mL. While not reccomended, in an emegency it can withstand up to 2200mL. Control Unit Connection Clip Air Vent Odor Proof Hydro Block Filled with 2.2L Drainage Valve Clockwize to tighten Filled with 1.2L DO NOT OVERFILL THE COLLECTION BAG The Collection Bag has a 1000 ml over-capacity emergency factor GSA: CCU-10 DOD: CB-10-2-RU 14


15 Undergarment The undergarments are used to hold the Cup or Pad in place. They should be sized for a snug fit. They are made out of 100% cotton and are machine washable. Male Undergarment Velcro Strip GSA: MG-1/2 DOD: MG-1/2 Female Undergarment Velcro Strip 15 GSA: FG-1/2 DOD: FG-1/2


16 Male System Overview The Male System consists of the Male Cup, Control Unit, and Collection Bag, and are connected together as demonstrated. These are the only compnents required on a mission. Additional batteries and bags may be taken as needed. Control Unit Release Button Battery Indicators Manual M button Control Unit Hose Connector Nomex Covered Hose 12/ 18 /24 Collection Bag. Capacity: 1.2 L Replace as needed depending on User s requirements Male Cup Replace as needed depending on user s requirements Drainage Valve Close before use 16


17 Female System Overview The Female System consists of the Female Pad, Control Unit, and Collection Bag, and are connected together as demonstrated. These are the only compnents required on a mission. Additional batteries and bags may be taken as needed. Female Pad Replace as needed depending on user s requirements Pad Inflation Module for Female Pads only Battery Indicators Manual M button Control Unit Nomex Covered Hose 12 /18 /24 Collection Bag. Capacity: 1.2 L Replace as needed depending on User s requirements Drainage Valve Close before use 17


18 Charging the System The battery pack must be charged prior to the first use. It make take up to 2.5 hours. Connect a Rechargeable Battery to the Charger. Connect the cord from the Power Supply to the Charger A solid GREEN light indicates that the battery is charged A flashing YELLOW light indicates that the battery is charging 18 A flashing RED light indicates that the battery is completely discharged. If it does not change to yellow after an hour, the battery may need service.


19 Donning the Male System Feed the hose of the Male Cup through the hole in the inside cup pocket and out through the front of the undergarment. Insert the Male Cup into the cup pocket on the inside of the Undegarment. Align the foam ring with the large hole inside the Undergarment. Fasten the pocket shut with the Velcro strip. Attach the hose to the front of the undegarment using the Velcro loop. The Cup may also be inserted into the Undergarment while being worn 19


20 Donning the Male System After the cup has been placed into the boxerbriefs, insert the Male Anatomy through the foam ring of the cup while donning the boxerbriefs. The boxerbriefs should be a comfortable, snug fit to properly hold the Male Cup in place. Ensure that the hose can be retrieved through the bottom zipper after donning flight gear. After entering the aircraft, but before securing the harness, retrieve the hose and zip the flight suit to capture the hose. Ensure that the hose is not kinked, crimped or pinched. Once seated in aircraft, adjust the cup for comfort and ensure that the tip of the cup is down and between the legs. 20


21 Donning the Male System (Removable Hose) Attach Hose Attach the black cup connector. Ensure that the hose snaps securely in place. Rotate hose for desired location. Insert Cup Place the cup into the garment pocket and insert the male anatomy through the foam ring. Secure the pocket. Position Hose The hose exits the garment at the bottom, and can be positioned as desired. Alignment Flaps If necessary, the alignment flaps can be cut off and discarded to provide a more comfortable fit. Connect to System Leave hose accessible via garment zipper or other access point. Connect to AMXDmax Control Unit and Bag for use. Depending on which provides a better fit, future supplies can be ordered with or without flaps as desired. 21
 of the")

 When used with a TSC enabled garment, the device can")

22 Through Suit Connector Connect to TSC If using the cup with a TSC enabled garment, attach the White end of the TSC Compatible Hose to the inside (white side) of the TSC port. Connect TSC to System Connect the TSC Hose to the external TSC port, and then to the AMXDmax Control Unit and Bag for use. Through Suit Connector (TSC) When used with a TSC enabled garment, the device can easily connect and disconnect from the suit, without the need to unzip, providing the ultimate in discrete operation. Environmentally Sealed With the Through Suit Connector (TSC), the system is fully selfcontained and environmentally sealed, perfect for CBRN ensembles and immersion suits. 22

23 Donning the Female System Prior to use, locate the gold sensor in the Female Pad. When seated in the ejection seat, the Center Gold Sensor MUST BE located at the lowest point. The location of the sensor is critical for the AMXDmax System to function properly. * It is very important that this be determined on the ground, prior to flight. Place the Female Pad into the undergarment with the hose in the front and to the right. Use the adhesive strip located on the underside of the Female Pad to secure it to the undergarment. Attach the Hose to Velcro strip on the front of the Female Undergarment. Ensure that the hose can be retrieved through the bottom zipper after donning flight gear. After entering the aircraft, but before securing the harness, retrieve the hose and zip the flight suit to capture the hose. Ensure that the hose is not kinked, crimped or pinched. See picture at bottom of Page 18 for reference. Once seated in aircraft, adjust the pad for comfort and ensure that the sensor is at the lowest point of aircraft seat. 23


24 Prepping the System Press the M push button for 1 second and release to display the battery charge status. Reccomended to start mission with fully charged battery. CHARGE CHARGE 100%-80% 80%-20% Below 20% 0% Male Female Slide the Control Unit onto the Collection Bag clip. There will be an audible click when the connection is made. The AMXDmax with battery weighs less than 4 oz, and is considered man or woman wearable. Roll the Control Unit up in the Collection Bag and store in an available pocket that is accessible durring flight. 24


25 Male System Operation The Male System is designed to allow the user the option of connecting the Cup Hose to the Control Unit at the begining of flight and remain connected for the mission duration. Alternatively, the user may remove it from storage and connect it each time he needs to relieve his bladder. To connect the Cup Hose to the Control Unit: Align hose connector with clip and slide it into place. When connected, there will be an audible click, and the control unit will beep twice. When the user begins to relieve his bladder, the sensors in the Male Cup automatically detect urine and activate the Control Unit pump, transfering the urine from the cup and into the Collection Bag, keeping the user dry. At the end of mission, pinch the sides of the hose connector and slide it away from the Control Unit. 25


26 Female System Operation The Female System is designed to allow the user to connect the Pad Hose to the Control Unit prior to bladder relief. Once connected, the Pad will take approximately 30 seconds to inflate, creating a leak proof seal. Once inflated, the system will automatically activate when the user relieves her bladder. To connect the Pad Hose to the Control Unit: Align Air Hose Connector with clip and slide into place. When the user begins to relieve her bladder, the sensors in the Female Pad automatically detect urine and activate the Control Unit pump, transfering the urine from the pad and into the Collection Bag, keeping the user dry. When connected, there will be an audible click, and the control unit will beep twice. The Female Pad will inflate, taking approximately 30 seconds to complete. After using, pinch the sides of the hose connector and slide it away from the Control Unit to deflate pad. 26


")

27 After Mission Male Female To remove the Control Unit from the Bag, press the release button and slide the unit away from the clip. Remove battery from control unit and recharge. Drain collection bag. Either dispose of Collection Bag and Male Cup or Female Pad, or clean for reuse. See Care and Maintenence (pg 24) for Cleaning instructions, or visit to view the AMXDmax Instructional Video 27
28 Care, Maintenance and Storage WARNING: NEVER SUBMERGE THE ENTIRE CONTROL DEVICE Cleaning 1. Attach all three components (Control Unit, Cup and Bag) of the AMXDmax system together. 2. Fill Male Cup or Female Pad with warm water OR a solution of 3% Hydrogen Peroxide. The Control Unit should turn on automatically. If the system does not automatically turn on, press and hold the M button. Repeat this process twice. 3. Once all the water is pumped out of the Cup or Pad and into the Bag, move the Bag around to rinse it on the inside. 4. Open the drainage valve and empty the bag. 5. REMEMBER TO CLOSE THE VALVE AFTER DRAINING. 6. Submerge the connector end of the Control Unit in into warm water. DO NOT submerge past the release button. 7. Press and hold the M push button for 5 seconds, then remove the Control Unit from the water and hold the button for an additional 5 seconds to dry out the Control Unit pump. 8. DO NOT USE BLEACH, VINEGER, OR HEAVY DETERGENTS. Storage 1. Short Term Storage: Always fully recharge batteries before storing. 2. Long Term Storage: The batteries must be recharged and left fully charged every 12 months. 3. Always store the AMXDmax Control Unit in a dry place with temperatures between 0F and 150F (4-38 C). 4. Keep the AMXDmax system away from heat, humidity or harmful chemicals and avoid long term exposure to sunlight. Maintenance Tips Omni recommends that the Male Cup, Female Pad, Control Unit, and Bag are cleaned daily to maintain their functionality. Disposal The Male Cup, Female Pad, and Collection Bag can be disposed of in any trash receptacle. 28
29 Troubleshooting Having trouble? Try these simple tips, us at or call 1 (802) The Control Unit does not start 1. Check that the battery is charged by pressing the M button. 2. The unit should beep twice and flash battery status indicator lights. 3. If the Control Unit does not emit an audible beep or does not display a green light, remove the battery and replace with a charged battery. 4. If the battery fails to charge, please contact an Omni Medical Systems service technician. The Control Unit doesn t automatically start pumping Disconnect and re-connect the Male Cup or Female Pad connector to the Control Unit. 2. The Control Unit should beep twice. 3. If the Control Unit does not emit an audible beep, press and hold the M button to activate the pump. If the user needs to manually operate the pump by pushing the M button, this indicates the cup or pad is not automatically sensing urine, and needs to be replaced. 4. If the battery status indicator shows that the battery is charged and the Control Unit fails to start pumping, please contact an Omni service technician. The charger indicator light is not working 1. Check that power supply is plugged in and is securely connected to the charger. 2. Remove and connect the rechargeable battery to the charger. 3. If the charger indicator light is not lit, please contact an Omni service technician. 29
30 Technical Specifications Control Unit Device Specifications Flow rate 1.5 ± 0.1 LPM ( 10F to 122F) 1.2 ± 0.1 LPM (above 122F) Operation 12 Relief Cycles on one battery charge Environmental Specifications Power 7.6V DC, 750mA Weight 3 oz. Dimensions 5 L X 1.2 W X 1 H Maximum Noise Level 65 db at 1 meter Rechargeable Battery Device Specifications Chemistry Lithium Polymer Voltage 7.2V Capacity 350 mah Charge Cycles 500 Storage See page 24 Environmental Specifications Weight Dimensions 1 oz. 2.4 L X 1.2 W X 0.5 H Charger for Lithium Polymer Battery Device Specifications Battery Chemistry Lithium Polymer Charging Voltage 8.4 V Charging Current 350 ma Charging Time 2.5 hours Dimensions 2.3 L X 1.2 w X.5 H Wall Pack Input ~ VAC (50/60Hz), 0.30A Output ~ 12V DC, 500mA 30
31 Reordering The AMXDmax is available direct from: Omni Medical Systems GSA GSA - VA Contract Number: V797P- 4055B GSA PTN MFG & DOD PTN PRODUCT NAME CSK CSK CSK-A (Specify Male) CSK-A (Specify Female) 31 MALE STARTER KIT FEMALE STARTER KIT SCU-RBP-VA IMCR-2 COLLECTION UNIT (Male Cup) SCU-ABP-VA IFPR-15-1&2 IFPR-16-1&2 COLLECTION UNIT (Female Pad) CCU-10 CB-10-A COLLECTION CHAMBER UNIT (Bag) MG-1 MG-2 FG-1 FG-2 MG-1 MG-2 FG-1 FG-2 MALE GARMENT (Size 1 / Size 2) FEMALE GARMENT (Size 1 / Size 2) SCU-RBP SCU-RBP-A BATTERY PACK RECHARGEABLE SCU-ABP SCU-ABP-A BATTERY PACK DISPOSABLE Contractor: Omni Measurement Systems, Inc. CAGE CODE: 1UW92 Sales contact: Sales@OmniMedicalSys.com TO ORDER: Phone: Fax: Visit our website at to download and review the AMXDmax PowerPoint presenation, introduction & instructional video, Users Manual, and component datasheets.
32 To re-order supplies please contact: Omni Medical Systems 808 Hercules Drive Colchester, VT Phone: 1(802) Fax: 1(802) Rev
Cordless Sweeper. OWNER S MANUAL Model: CFT Volt DC. Made Exclusively for ALDI Inc. Batavia, IL.,
 Cordless Sweeper OWNER S MANUAL Model: CFT25 4.8 Volt DC Made Exclusively for ALDI Inc. Batavia, IL., 60510-1477 CFT25 ONE (1) YEAR LIMITED WARRANTY This product is warranted to be free from defects in
HDE36B BATTERY POWERED CRIMP TOOL
 Description The HDE36B Battery Powered Crimp Tool is a hand held, self contained crimp tool intended to crimp copper and aluminum cable with DMC HD36 dies. KEEP THIS MANUAL Important Safety Information
USER GUIDE EMERGENCY JUMP STARTER PORTABLE POWER SUPPLY INTELLIBOOST ULTRA RG600 12V 600A REV 1.16B
 WWW.RUGGEDGEEK.COM USER GUIDE EMERGENCY JUMP STARTER PORTABLE POWER SUPPLY INTELLIBOOST ULTRA RG600 12V 600A REV 1.16B IMPORTANT THE RG600 IS AN EMERGENCY TOOL AND SHOULD BE KEPT FULLY CHARGED, IN CASE
Sentinel Enteral Feeding Pump. Model: S-1000-SI. Operating Manual
 Sentinel Enteral Feeding Pump Model: S-1000-SI Operating Manual CONTENTS 1. Introduction.. 2 2. Control Panel 5 3. Operating Instructions.. 6 4. Indicators and Alarms.. 9 5. Maintenance.. 10 6. Troubleshooting
AC / 65 W M PLEASE READ BEFORE OPERATING THIS EQUIPMENT.
 AC / 65 W M 5V AX 11 PLEASE READ BEFORE OPERATING THIS EQUIPMENT. TABLE OF CONTENTS 1 2-10 6-8 11 11 12 14-15 AC / 65 W M 5V AX 11 Included Items Operating Instructions Troubleshooting Guide Maintenance
OPERATING INSTRUCTIONS
 OPERATING INSTRUCTIONS HALO BOLT 57720 Powerful, compact and easy to use, the HALO BOLT can safely jump start your car. In addition, you can use it to charge your phone, tablet or other electronic devices!
AFE8B BATTERY POWERED CRIMP TOOL
 Description The AFE8B Battery Powered Crimp Tool is a hand held, self contained crimp tool intended to crimp machined contacts onto copper and aluminum cable. KEEP THIS MANUAL Important Safety Information
ME310B BATTERY POWERED CRIMP TOOL
 Description The ME310B Battery Powered Crimp Tool is a hand held, self contained crimp tool intended to crimp machined contacts onto copper and aluminum cable. KEEP THIS MANUAL Important Safety Information
Uplift Power Seat Users Guide
 Safety Precautions 1. Use the Uplift Power Seat only in armchairs or sofas with at least one armrest for optimum stability when sitting or rising. 2. Uplift Power Seat is not intended for use in rocking
1 AMP CURRENT SOURCE
 1 AMP CURRENT SOURCE CS-2000-U CS-2000-E USER MANUAL BC BIOMEDICAL CS-2000 SERIES TABLE OF CONTENTS WARNINGS, CAUTIONS, NOTICES... ii DESCRIPTION... 1 LAYOUT... 2 OPERATION... 4 TESTING... 6 MANUAL REVISIONS...
Parts missing or damaged? Questions? Toll-free Helpline
 INSTRUCTION MANUAL Multi-Charger 054-3107-2 Parts missing or damaged? Questions? Toll-free Helpline 1-800-689-9928 Important: Carefully read this Instruction Manual before using this tool. Pay close attention
USER S GUIDE 2880 SERIES. 3 Safety Instructions. Product View. Assembly 4-5. Operation. Maintenance and Care. Troubleshooting.
 USER S GUIDE 2880 SERIES 3 Safety Instructions 4 Product View 4-5 Assembly 5 Operation 6 Maintenance and Care 7 Troubleshooting 7 Replacement Parts 8 Warranty Thanks for buying a BISSELL Perfect Sweep
BATTERY CHARGER INSTRUCTION MANUAL. model no. ACG112CL
 model no. ACG112CL BATTERY CHARGER IMPORTANT: Please read this manual carefully before running this battery charger and save it for reference INSTRUCTION MANUAL 3 TABLE OF CONTENTS Technical specifications
USER'S GUIDE 9151 SERIES V
 USER'S GUIDE 9151 SERIES 220-240 V 2 Thank You 3 Safety Instructions 4 Product View 4-5 Assembly 5 Operations 6 Maintenance and Care 7 Troubleshooting 7 Replacement Parts 8 Warranty 8 Consumer Care Thanks
Owner's Manual. For latest instructions please go to
 mycharge name and logo are registered trademarks of RFA Brands. 2012-2013 RFA Brands. All Rights Reserved. Patent Pending. Made in China. IB-RFAM0237 Owner's Manual For latest instructions please go to
Memory Foam Massaging Bath Pillow with Wireless Remote Control
 Memory Foam Massaging Bath Pillow with Wireless Remote Control Instruction For Use and Warranty Information Model AB225 Memory Foam Massaging Bath Pillow with Wireless Remote Control Memory Foam Pillow
Submersible Pond Pump with UV 800 Gallons Per Hour
 Submersible Pond Pump with UV 800 Gallons Per Hour REMINDER CALL 1-888-755-6750 BEFORE RETURNING TO STORE. PACKAGE CONTENTS ITEM #PP800UV Questions, problems, missing parts? Before returning to your retailer,
Installation Instructions Seat Cover, Rear Kit WARNING. Support. We re here to help! Go to and click Contact Us.
 Installation Instructions Seat Cover, Rear Kit Vehicle Application: Wrangler Unlimited 008-0 Part Number 98 Installation Tips Read and follow, precisely, all installation instructions provided when installing
Uplift Premium Power Lifting Seat
 Uplift Premium Power Lifting Seat User Guide Read all instructions before using the Uplift Power Seat DANGER - To reduce the risk of electric shock: IMPORTANT SAFETY INSTRUCTIONS Always unplug the Uplift
PLS SLD. Laser Detector PACIFIC LASER SYSTEMS. For use with your PLS pulsed laser alignment tool. The Professional Standard
 PLS SLD Laser Detector For use with your PLS pulsed laser alignment tool. 9 PACIFIC LASER SYSTEMS The Professional Standard GENERAL DESCRIPTION IMPORTANT: YOUR PLS SLD DETECTOR IS DESIGNED FOR USE WITH
Owner's Manual. For latest instructions please go to
 mycharge name and logo are registered trademarks of RFA Brands. 2012-2013 RFA Brands. All Rights Reserved. Patent Pending. Made in China. IB-RFAM0232 Owner's Manual For latest instructions please go to
AeraMax Pro AM IV. Please read these instructions before use. Do not discard: keep for future reference.
 AeraMax Pro AM IV Please read these instructions before use. Do not discard: keep for future reference. ENGLISH AeraMax PRO Air Quality Control System: AM IV SAFETY INSTRUCTIONS/WARNING Thank you for purchasing
Lemania/EnergyFlo Start booster X7
 Lemania/EnergyFlo Start booster X7 User Manual Always follow basic safety precautions and wear appropriate safety equipment when using electrical appliances and batteries. Read all instructions carefully.
HDE36 BATTERY POWERED CRIMP TOOL
 Description The HDE36 Battery Powered Crimp Tool is a hand held, self contained crimp tool intended to crimp copper and aluminum cable with DMC HD36 dies. Important Safety Information Safety Safety is
HXE4B BATTERY POWERED CRIMP TOOL
 Description The HXE4B Battery Powered Crimp Tool is a hand held, self contained crimp tool intended to crimp copper and aluminum cable with DMC Y dies. Safety Safety is essential in the use and maintenance
Drip-n-Gro Dual Top Feed Drip System Instruction Manual
 Notes: Hydrogardening Bucket Systems Drip-n-Gro Dual Top Feed Drip System Instruction Manual 1 Square = 1 Foot Exclusively distributed by: Exclusively distributed by: www.sunlightsupply.com www.flo-n-gro.net
ATD Gallon Pressurized Oil Drain Owner s Manual
 ATD-5203 30 Gallon Pressurized Oil Drain Owner s Manual TECHNICAL SPECIFICATIONS Model: ATD-5203 Capacity: 30 Gallon Drain Funnel Working Height: 47.25 to 70.5 Drain Funnel Diameter: 15.75 Plastic Tray:
Chair-Check II User Manual
 Chair-Check II User Manual 0163-437-H Reducing the Risk of Falls Through Innovative Technology Since 1978 1-800-523-7956 www.bedcheck.com 2008 The Stanley Works All Rights Reserved Bed-Check, Chair-Check,
SUBMERSIBLE MINI-PUMP
 SUBMERSIBLE MINI-PUMP Model 41287 Set up And Operating Instructions Diagrams within this manual may not be drawn proportionally. Due to continuing improvements, actual product may differ slightly from
Owner's Manual. For latest instructions please go to
 mycharge name and logo are registered trademarks of RFA Brands. 2012-2013 RFA Brands. All Rights Reserved. Patent Pending. Made in China. IB-MYC0600 Owner's Manual For latest instructions please go to
Model NTX7 Series Automatic Battery Charger User s Manual Rev. 1.0 October 17, 2006
 B R A N D Model NTX7 Series Automatic Battery Charger User s Manual Rev. 1.0 October 17, 2006 For Sales, Support and Service phone: 407-331-4793 fax: 407-331-4708 website: www.xenotronix.com email: information@xenotronix.com
Sun In One 2.5 Watt Solar Portable Device Charger
 Sun In One 2.5 Watt Solar Portable Device Charger MODEL#: SIO2 5 500 Philadelphia Pike Wilmington, DE 19809 1-877-280-9473 www.suninone.com Table of Contents WARNING (Choking hazard Small Parts)... 2 INCLUDES...
Tissue Master. User Manual
 Tissue Master User Manual This page left blank intentionally This manual is a guide for the use of the Omni International Tissue Master and accessories. Data herein has been verified and validated. It
***Please follow instructions for ease of installation and correct fit.***
 RAMPAGE P R O D U C T S Installation Instructions Part number 1094XX Frameless Soft Top for Jeep Wrangler YJ 1992-1995 with Half Doors NOTE: Installation of the top in warm weather is optimal for ease
Container Fountain Kit with LED Light
 Container Fountain Kit with LED Light REMINDER CALL 1-888-755-6750 BEFORE RETURNING TO STORE. PACKAGE CONTENTS Questions, problems, missing parts? Before returning to your retailer, call our customer service
Gives useful tips, recommendations and information for efficient, trouble-free use.
 User Manual DEALER: This manual MUST be given to the user of the product. USER: BEFORE using this product, read this manual and save for future reference. 1 General 1.1 Symbols Invacare Matrx Stabilite
EK1240KL Battery-powered Crimping Tool
 OPERATION MANUAL GATOR EK1240KL Battery-powered Crimping Tool Read and understand all of the instructions and safety information in this manual before operating or servicing this tool. Register this product
OWNER S MANUAL TOLL-FREE HELPLINE: (Monday - Friday / 8am - 4:30pm CST)
") LITHIUM ION BATTERY OWNER S MANUAL TOLL-FREE HELPLINE: 1-877-572-7278 (Monday - Friday / 8am - 4:30pm CST) READ ALL SAFETY RULES AND INSTRUCTIONS CAREFULLY BEFORE OPERATING STRIKEMASTER LITHIUM 40v BATTERY
LITHIUM ION BATTERY OWNER S MANUAL TOLL-FREE HELPLINE: 1-877-572-7278 (Monday - Friday / 8am - 4:30pm CST) READ ALL SAFETY RULES AND INSTRUCTIONS CAREFULLY BEFORE OPERATING STRIKEMASTER LITHIUM 40v BATTERY
18VDC ESB6-X Series Cordless Screwdrivers Operation Manual
 18VDC ESB6-X Series Cordless Screwdrivers Screwdriver Models : ESB6-X3.5, ESB6-X3.5F, ESB6-X5F ESB6-X6, ESB6-X9, ESB6-X12 CAUTION - Please read, understand, and follow all operating and safety instructions
CYCLONE PocketMax PP-1000 Compact Battery Pack for Portable Flashes. User Manual
 CYCLONE PocketMax PP-1000 Compact Battery Pack for Portable Flashes User Manual Thank you for choosing Bolt. The PocketMax battery pack will provide up to 1,000 flashes at full power and boost the recycle
18VDC ESB6 Series Cordless Screwdrivers Operation Manual
 18VDC ESB6 Series Cordless Screwdrivers Screwdriver Models : ESB6-8, ESB6-12, ESB6-15, ESB6-22 CAUTION - Please read, understand, and follow all operating and safety instructions in this manual before
Operating Instructions
 Operating Instructions Contents Introduction 1 Operating Instructions 2-7 Storing/Handling/Cleaning 7 Safety Precautions 7-8 Specifications 9 FCC Compliance Statement 9-10 Limited Warranty 10-11 Contact
Jumpbox Model SP-12V1500-JB1
 FLEET PRO 1500D Jumpbox Model SP-12V1500-JB1 Questions, missing parts, problems? Before returning to your retailer, send us a message through our Contact Us page on Starkpower.com ONE YEAR LIMITED WARRANTY
ABRD - AMXDmax Bladder Relief System Testing and Trials
 ABRD - AMXDmax Bladder Relief System Testing and Trials Ken Hurd (MSEE), Director R & D, Omni Medical Systems, Inc. ABRD Advanced Bladder Relief Device AMXD Advanced Mission Extender Device AMXDmax Advanced
Required Tools: Phillips screw driver to remove original soft top. Torx sockets are required to completely remove the original soft top hardware.
 RAMPAGE P R O D U C T S Installation Instructions Part number 1099XX, Frameless Soft Top for 2 door Jeep Wrangler JK 2007- NOTE: Installation of the top in warm weather is optimal for ease of installation.
CYCLONE DR Bolt PP-400DR Dual Outlet Power Pack with Removable Battery
 Inspiration strikes CYCLONE DR Bolt PP-400DR Dual Outlet Power Pack with Removable Battery User s Manual Copyright 2013 Gradus Group. Bolt and other names of Bolt products are trademarks of Gradus Group.
User Manual. Invacare Matrx Flovair. Models ITFM and ITFG. 1 General
 User Manual DEALER: This manual MUST be given to the user of the product. USER: BEFORE using this product, read this manual and save for future reference. 1 General Invacare Matrx Flovair Models ITFM and
MULTI-FUNCTION JUMP STARTER
 MULTI-FUNCTION JUMP STARTER FEATURES 1. Flashlight 2. Jump Start Port 3. LED Power indicator 4. USB Output 5. Power button 6. Charging port 7. Car battery clamp 8. Home charger&car charger 9. Portable
Inspiration strikes PP-310 CYCLONE BATTERY PACK. User s Manual
 Inspiration strikes PP-310 CYCLONE BATTERY PACK User s Manual Copyright 2013 Gradus Group Bolt and other names of Bolt products are trademarks of Gradus Group. Other product and corporate names mentioned
COMMAND SERIES 410-L T L T T T L06R RS PRODUCT MANUAL
 COMMAND SERIES 40-L06 40-T09 420-L06 420-T06 420-T09 420-T5 420-L06R 420-009RS PRODUCT MANUAL TABLE OF CONTENTS COMMAND REFERENCE GUIDE INTRODUCTION Command Reference Guide 3 Physical Characteristics &
SPECIALTY TOP CO. STC. INSTALLATION INSTRUCTIONS TOYOTA FAST TRAC Z TOP Toyota FJ PART #222-31X 82 1/8" 82 1/8"
 STC INSTALLATION INSTRUCTIONS TOYOTA FAST TRAC Z TOP Toyota FJ-40 1963-1983 PART #222-31X SPECIALTY TOP CO. Thank you for purchasing Specialty's Convertible Top for your Toyota. It has been designed for
OPERATING MANUAL 18V Ni-Cd Battery Pack
 OPERATING MANUAL 18V Ni-Cd Battery Pack 054-3105-6 Toll-free Helpline : 1-800-689-9928 IMPORTANT : Read this Operating Manual carefully before using the charger. Pay close attention to all Safety Instructions,
Duo Charger. for Digital Camera and Camcorder Batteries. Owner's Manual. Please read before using this equipment.
 Duo Charger for Digital Camera and Camcorder Batteries Owner's Manual Please read before using this equipment. Thank you for purchasing the Watson Duo Charger. Browse through this manual for instructions
(R86049) WARNING: To reduce the risk of injury, the user must read and understand the operator s manual before using this product.
 WARNING: To reduce the risk of injury, the user must read and understand the operator s manual before using this product.") OPERATOR S MANUAL 12 VOLT LITHIUM-ION BATTERY CHARGER 140446001 (R86049) Your charger has been engineered and manufactured to our high standards for dependability, ease of operation, and operator safety.
OPERATOR S MANUAL 12 VOLT LITHIUM-ION BATTERY CHARGER 140446001 (R86049) Your charger has been engineered and manufactured to our high standards for dependability, ease of operation, and operator safety.
Single Unit Rapid Charger FOR RECHARGEABLE TWO-WAY RADIO BATTERIES
 Single Unit Rapid Charger FOR RECHARGEABLE TWO-WAY RADIO BATTERIES Model: TWC1 1 Introduction Thank you for purchasing an ENDURA TWC1, Single Unit Rapid Charger. This high quality product is designed for
60V RECHARGEABLE LITHIUM-ION BATTERY
 60V RECHARGEABLE LITHIUM-ION BATTERY LB60A00/LB60A03/LB60A01/LB60A02 Owner s Manual TOLL-FREE HELPLINE: 1-855-345-3934 www.greenworkstools.com Read all safety rules and instructions carefully before operating
CYCLONE X Bolt PP-600 Power Pack for Portable Flashes
 Inspiration strikes CYCLONE X Bolt PP-600 Power Pack for Portable Flashes User s Manual Copyright 2013 Gradus Group. Bolt and other names of Bolt products are trademarks of Gradus Group. Other product
INSTRUCTION MANUAL. BatteryMINDer. Model SCC515 Maintenance Charger- Solar Controller for use with 5 Watt and 15 Watt Solar Panels
 INSTRUCTION MANUAL Model Maintenance Charger- Solar Controller for use with 5 Watt and 15 Watt Solar Panels OVERVIEW... 2 MOUNTING INSTRUCTIONS... 3 BATTERY CONDITION INDICATOR (BCI)... 5 TESTING BATTERY...
LED-6200T 144 LED VARIABLE COLOR ON-CAMERA LIGHT USER MANUAL
 LED-6200T 144 LED VARIABLE COLOR ON-CAMERA LIGHT USER MANUAL LED-6200T INTRODUCTION Thank you for choosing the Genaray LED-6200T On-Camera Light. This product will provide you with powerful, portable and
Stainless Steel Kick Bucket and Stand
 INSTRUCTION MANUAL Stainless Steel Kick Bucket and Stand Assembly, Operation and Cleaning Instructions Read and understand all of the instructions and safety information in this manual before operating
ABOT4001 REV1 BATTERY POWERED CRIMP TOOL
 Figure 1 Description The ABOT4001 rev1 is a handheld Battery Powered Crimp tool. It uses dies engineered to meet the requirements of the AS22520/40-01 and is intended to crimp insulated terminals, splices,
Single Unit Rapid Charger FOR RECHARGEABLE TWO-WAY RADIO BATTERIES
 Single Unit Rapid Charger FOR RECHARGEABLE TWO-WAY RADIO BATTERIES User Manual Desktop Models: EC1 / EC1-V2 In-Vehicle Models: EC1M / EC1M-V2 ENDURA EC1 / EC1M CHARGERS Table of Contents Topic Introduction
DMG100 Digital Micron Gauge Limited Warranty DMG100 DMG100 Digital Micron Gauge USA CANADA COPYRIGHT 2011 UEi
 99 Washington Street Melrose, MA 02176 Phone 781-665-1400 Toll Free 1-800-517-8431 Visit us at www.testequipmentdepot.com DMG100 Digital Micron Gauge Parts Diagram 2 LCD Display Item A B C Main Numeric
Nature Power Inverters. True Sinewave Inverter Modified Sinewave Inverter. Owner s Manual
 Version 1.1 Version 2 Nature Power Inverters True Sinewave Inverter Modified Sinewave Inverter Owner s Manual!!!!!!!!!!! 38304 38204 For safe and optimum performance, the Power Inverter must be used properly.
Owner's Manual. mycharge name and logo are registered trademarks of RFA Brands RFA Brands. All Rights Reserved. Patent Pending.
 REGISTER Your Product At: www.mycharge.com Your valuable input regarding this product will help us create the products you will want in the future. PLEASE TAKE A MOMENT NOW mycharge name and logo are registered
Installation Instructions Sailcloth Replace-a-top with Tinted Windows
 INSTALLATION TIME Installation Instructions Sailcloth Replace-a-top with Tinted Windows SKILL LEVEL Upper Door Skins not included Vehicle Application Jeep Wrangler (JK) 2 Door 2007 2009 Part Number: 79136
Four-Position Gang Charger for SAFEMTX Li-ION Battery Packs
 Four-Position Gang Charger for SAFEMTX Li-ION Battery Packs (P/N 10067285) Instruction Manual " WARNING THIS MANUAL MUST BE CAREFULLY READ BY ALL INDIVIDUALS WHO HAVE OR WILL HAVE THE RESPONSIBILITY FOR
SRK12KX Battery-powered Crimping Tool
 OPERATION MANUAL Serial Number SRK12KX Battery-powered Crimping Tool Read and understand all of the instructions and safety information in this manual before operating or servicing this tool. 52080066
V2700Z OWNER S GUIDE.
 V2700Z OWNER S GUIDE IMPORTANT SAFETY INSTRUCTIONS For Household Use Only READ ALL INSTRUCTIONS BEFORE USING YOUR SHARK CORDLESS FLOOR AND CARPET SWEEPER. WHEN USING YOUR SHARK CORDLESS FLOOR AND CARPET
Back-Up Sensor System
 Back-Up Sensor System Model No.: PKC0RE Owner s Manual and Warranty Information OFF ON 0.4m/1.3ft 0.6m/2.0ft 1.0m/3.3ft 1.2m/4.0ft 1.5m/5.0ft LEFT RIGHT Read these instructions completely before using
Specifications. Important Safety Information
 Specifications Gauge Range 0-30 IN. of mercury (in Hg) 0-760 torr Important Safety Information WARNING! READ AND UNDERSTAND ALL INSTRUCTIONS Failure to follow instructions listed below may result in serious
Convertible Top Installation Instructions
 Convertible Top Installation Instructions For: 1995-1998 Geo Tracker & Suzuki Sidekick Part Number: 51364 Parts List Top, Soft (1) Window (1) Quater Window, Rt. (1) Quarter Window, Lt. (1) WARNING This
4-Hour. Rapid Charger. for AA/AAA NiMH & NiCd Rechargeable Batteries. Owner's Manual
 4-Hour Rapid Charger for AA/AAA NiMH & NiCd Rechargeable Batteries Owner's Manual Thank you for purchasing the Watson 4-Hour Rapid Battery Charger. Be sure to read this manual and note the precautions
Installation Instructions Cable Top Twill Replace-a-top with Tinted Windows
 Installation Instructions Cable Top Twill Replace-a-top with Tinted Windows Vehicle Application Jeep Wrangler (JK) 2 Door 2011 and newer Part Number: 79846 Will fi t 54722 Upper Door Skins not included
Harvil 5 Foot Air Hockey Table
 ASSEMBLY INSTRUCTIONS Harvil 5 Foot Air Hockey Table Thank you for your purchase of this Harvil product! We work around the clock and around the globe to ensure that Harvil products maintain the highest
Operating Instructions & Parts Manual. Portable Power Supply & Jump Starter ! WARNING
 Operating Instructions & Parts Manual Portable Power Supply & Jump Starter Model 80600, 80600R Capacity 6,000 mah US Patent No. 6,531,789 B1 US Patent No. 7,498,798 B2! This is the safety alert symbol.
DMG200. Digital Micron Gauge. 99 Washington Street Melrose, MA Phone Toll Free
 DMG200 Digital Micron Gauge 99 Washington Street Melrose, MA 02176 Phone 781-665-1400 Toll Free 1-800-517-8431 Visit us at www.testequipmentdepot.com Parts Diagram 2 LCD Display Item A B C Main Numeric
Cargo Cover. Installation Instructions. For: Wrangler Part Number: Installation Tips WARNING
 Cargo Cover Installation Instructions For: Wrangler 1997-2002 Part Number: 41825 Note: This kit is designed to be installed on vehicles equipped with a Production Soft Top Only. WARNING This product is
Owner's Manual. Rapid Charger. 4-Hour. Port USB Charger. and Portable Power Pack. for AA/AAA Ni-MH & Ni-Cd Rechargeable Batteries
 4-Hour Port USB Charger Rapid Charger and Portable Power Pack for AA/AAA Ni-MH & Ni-Cd Rechargeable Batteries Owner's Manual Please read before using this equipment. Thank you for purchasing the Watson
P OWER CUBE PLEASE READ BEFORE OPERATING THIS EQUIPMENT. Powerful Universal Portable Charger T M
 P OWER CUBE T M Powerful Universal Portable Charger PLEASE READ BEFORE OPERATING THIS EQUIPMENT HALO POWER CUBE Thank you for choosing HALO. The Power Cube is the best of both worlds. It combines the on-the-go
Single Unit Rapid Charger FOR IN-VEHICLE USE
 Single Unit Rapid Charger FOR IN-VEHICLE USE User Manual MODEL TWC1M 1 Introduction Thank you for purchasing an ENDURA TWC1M, Single Unit Rapid Charger. This high quality product is designed for charging
Owner s Manual & Safety Instructions
 Owner s Manual & Safety Instructions Save This Manual Keep this manual for the safety warnings and precautions, assembly, operating, inspection, maintenance and cleaning procedures. Write the product s
Installation Instructions Cable Top Twill Replace-a-top with Tinted Windows
 Installation Instructions Cable Top Twill Replace-a-top with Tinted Windows Vehicle Application Jeep Wrangler Unlimited (JK) 4 Door 2011 and newer Part Number: 79847 Will fi t 54723 Upper Door Skins not
Active Controlled Cooling System
 Active Controlled Cooling System April 2011 3267 Progress Dr Orlando, FL 32826 www.apecor.com Preliminary www.apecor.com Table of Contents General Information... 3 Safety... 3 Introduction... 3 What s
MULTI-CHARGER FOR 12 TO 18V NI-CD OR LI-ION BATTERIES
 MULTI-CHARGER FOR 12 TO 18V NI-CD OR LI-ION BATTERIES 054-3169-4 Owner s Manual Input: Output: Optimum charging temperature: Battery types: Charging times: Weight: PRODUCT SPECIFICATIONS 120 V, 60 Hz 18V
Remove 4 circled pins. Route wiring along dashed line. Remove the 2 9mm nuts and black retaining plate that secure extractor.
 2015 Ford Mustang Turn Signal Hood Kit Parts List: Quantity: Tool List: Bracket & pre-installed lamp 2 Flat head screwdriver Wiring harness 1 Phillips screwdriver PB-3660 Parts Bag 1 Ratchet & Socket set
Installation Instructions Trektop NX
 Installation Instructions Trektop NX Vehicle Application: Jeep Wrangler (JK) 2 Door 2007 Current Part Number: 56822 www.bestop.com - We re here to help! Visit our web site and click on Ask a Question.
Twelve Unit Rapid Charger
 Twelve Unit Rapid Charger FOR RECHARGEABLE LMR BATTERIES User Manual Model TWC12M ENDURA TWC12M Table of Contents Topic Page Introduction 1 Important 2 Caution 2-3 Features 4-5 Replacing A Charging Pod
PLEASE READ BEFORE RETURNING THIS PRODUCT FOR ANY REASON.
 MOBILE COOLER CART INSTRUCTION MANUAL CATALOG NUMBER BCC20W Thank you for choosing BLACK+DECKER! PLEASE READ BEFORE RETURNING THIS PRODUCT FOR ANY REASON. If you have a question or experience a problem
25 GALLON PORTABLE OIL LIFT
 25 GALLON PORTABLE OIL LIFT Model 92859 SET UP AND OPERATING INSTRUCTIONS Diagrams within this manual may not be drawn proportionally. Due to continuing improvements, actual product may differ slightly
Premium Pond Pump 330 Gallons Per Hour
 Premium Pond 330 Gallons Per Hour REMINDER CALL 1-888-755-4497 BEFORE RETURNING TO STORE. MODEL #PDP330 Questions, problems, missing parts? Before returning to your retailer, call our customer service
Fastback Top Installation Instructions and Owner s Manual
 Fastback Top Installation Instructions and Owner s Manual MODEL: Suzuki Samurai 1985-1989 PART NUMBER Congratulations on your purchasing decision. Bestop designed the Convertible Top to give you years
LED-6200T 144 LED VARIABLE COLOR ON-CAMERA LIGHT USER MANUAL
 LED-6200T 144 LED VARIABLE COLOR ON-CAMERA LIGHT USER MANUAL LED-6200T Introduction Thank you for choosing the Genaray LED-6200T On-Camera Light. This product will provide you with powerful, portable and
Installation Instructions Fabric Replacement Top with Tinted Side
 Installation Instructions Fabric Replacement Top with Tinted Side and Rear Windows Upper Door Skins not included Vehicle Application Jeep Wrangler Unlimited TJ 2004 2006 Part Number: 79140 www.bestop.com
Ford Mustang V6 OEM-Style Fog Light Kit Parts List: Quantity: Tool List:
 2015-2017 Ford Mustang V6 OEM-Style Fog Light Kit Parts List: Quantity: Tool List: LED Foglights/ Bezels 2 Flat head & Phillips screwdriver (if you ordered part#3600) Ratchet & Socket set OR Wiring harness
Natural Fiber Planter Fountain
 Natural iber Planter ountain REMINDER CALL 1-888-755-5641 BEORE RETURNING TO STORE. PACKAGE CONTENTS Questions, problems, missing parts? Before returning to your retailer, call our customer service department
For Jacket Models: 9JKPPSSBL, 9JLPPSSBL, 9JKPPFLBL, 9JLPPFLBL & Vest Models: 9VEPPFLBL, 9VEPPFLBL
 USER MANUAL For Jacket Models: 9JKPPSSBL, 9JLPPSSBL, 9JKPPFLBL, 9JLPPFLBL & Vest Models: 9VEPPFLBL, 9VEPPFLBL IMPORTANT : Please read these instructions upon receipt of this product to ensure the safe
Submersible Waterfall Pump 1200 Gallons Per Hour
 ITEM # LL1200 Submersible Waterfall Pump 1200 Gallons Per Hour REMINDER CALL 1-888-412-6001 EFORE RETURNING TO STORE. PACKAGE CONTENTS Questions, problems, missing parts? efore returning to your retailer,
LIGHTBOLT MAX EXTENDABLE WORK LIGHT INSTRUCTION MANUAL. Model No. 4063
 LIGHTBOLT MAX EXTENDABLE WORK LIGHT Model No. 4063 INSTRUCTION MANUAL MobilePower, LLC. Miami, FL www.mobilepower-us.com Customer Support: (800) 708-8550 customerservice@mobilepower-us.com BEFORE YOU USE
Remote Vehicle Control System. Keyless Entry & Remote Start System
 1 Remote Vehicle Control System PC 7400 TM Owner's Manual Keyless Entry & Remote Start System IMPORTANT NOTE: The operation of the Power Code as described in this manual is applicable to most vehicles.