denotes information that, if not followed, can cause damage to your shock or lead to serious injury or death.
|
|
|
- Job Daniel
- 5 years ago
- Views:
Transcription
1
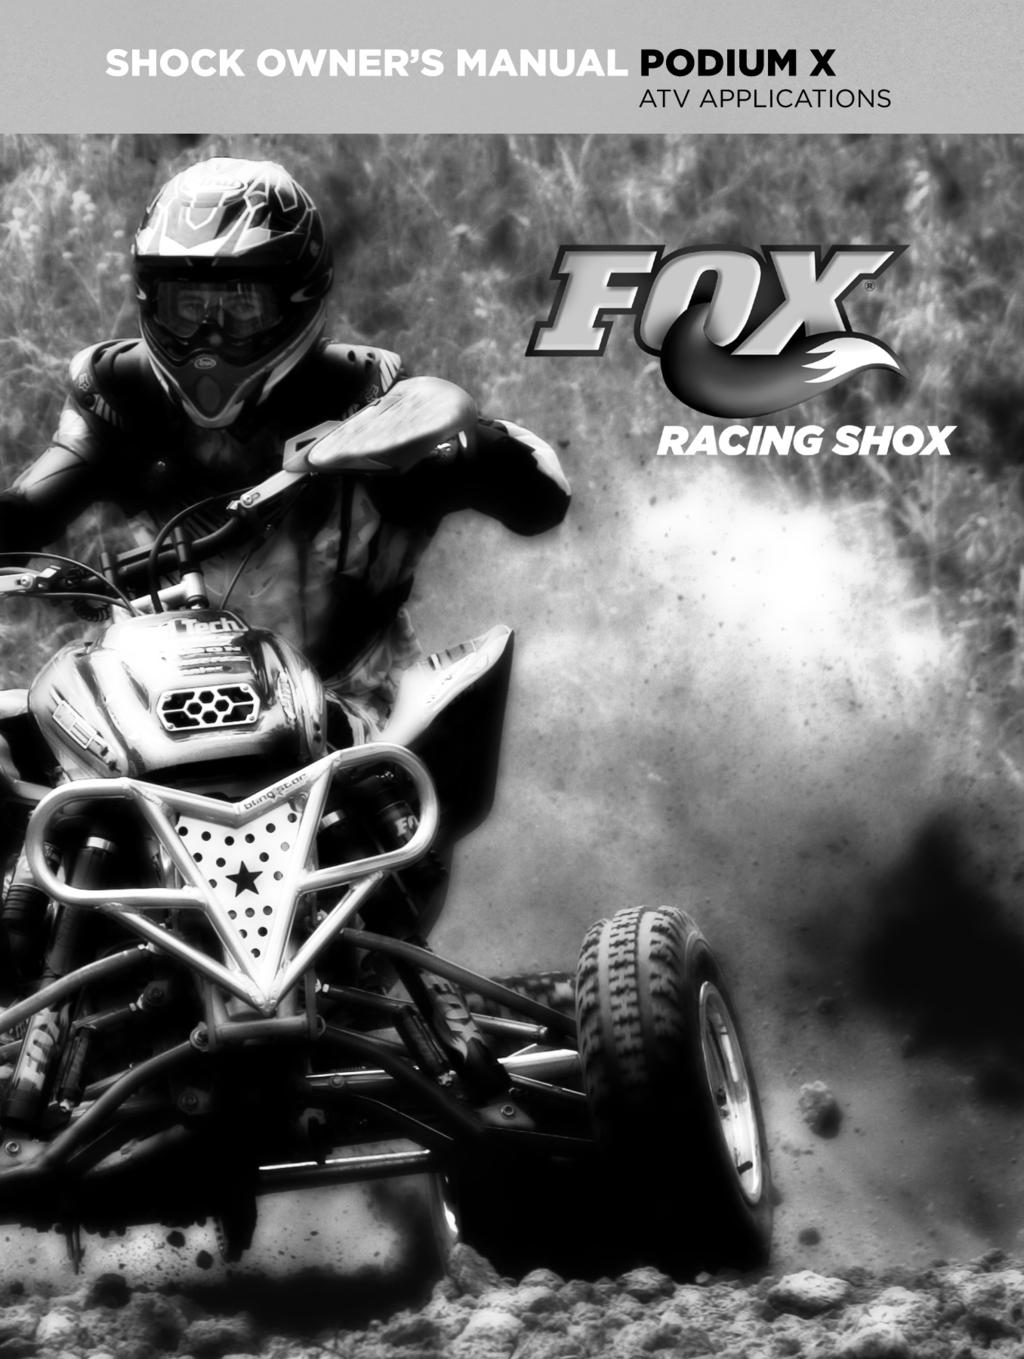
2 Table of Contents congratulations! Consumer Safety understanding the podium x reading the spring rate spring orientation changing springs (single spring) changing springs (dual spring) mounting the podium x mounting the reservoir setting up the podium x measuring and setting sag adjusting spring preload (single and dual spring) adjusting spring crossover (dual spring only) TUNING the podium x general guidelines tuning recommendations spring force crossover point REBOUND DAMPING COMPRESSION DAMPING inspecting and maintaining the podium x Shock rebuild quick setup checklist tuning notes QUICK REFERENCE guide notice: the ATV s pictured in this manual may or may not resemble your actual ATV. in any case, the procedures outlined will correctly enable you to set up, mount and tune the fox podium x on your particular model. denotes information that, if not followed, can cause damage to your shock or lead to serious injury or death. denotes information that may not be obvious, or that can help the rider out with a difficult situation.

3 PODIUM X features > Lightweight > Race-proven oil damping system > External rebound damping adjuster > External compression damping adjuster > 100% rebuildable and revalveable > 1-year factory limited warranty > Spherical bearing ends > 90-day valving guarantee upper eyelet shock body preload ring tender coil spring compression adjuster crossover ring reservoir thrust washer spring coupler hose main coil spring shaft bottom-out bumper thrust washer spring retainer rebound adjuster lower eyelet/clevis mount (clevis shown) single-spring version also available
4 congratulations! Thank you for choosing FOX PODIUM X for your ATV. In doing so, you have chosen the finest suspension shock in the world. FOX Racing Shox products are designed, tested and manufactured by the finest professionals in the industry in Santa Cruz County, California, USA. As a consumer and supporter of FOX Racing Shox products, you need to be aware of the importance of setting up your shock correctly to ensure maximum performance. This manual provides step-by-step instructions of how to setup and maintain your shock. It is a good idea to keep your receipts with this manual, and refer to it for service and warranty issues. This manual does not contain step-by-step detailed service instructions for a reason: FOX recommends that detailed service be performed by FOX Racing Shox or a qualified suspension professional. Consumer Safety Riding an ATV can be dangerous and can result in death or serious injury. Take your responsibility to yourself and others seriously, and heed the following safety tips: > Keep your ATV and suspension system in optimal working condition. > Wear protective clothing, eye protection and always fasten your helmet before you ride. > Know and ride within your limits. The PODIUM X shock contains a nitrogen charge. The charged portion of the shock should only be opened by a FOX Racing Shox technician or a qualified suspension professional. Opening a nitrogen pressurized shock can be dangerous and can result in serious injury or death. P/N: podium x shock owner s manual
5 understanding the podium x Your PODIUM X shock absorber sets the industry standard for performance and durability. The PODIUM X has external compression and rebound damping adjusters, as well as spring preload and crossover location adjustments. The PODIUM X contains a high strength 2-inch bore steel body, and a 5/8 chrome damper shaft that is super finished for low-stiction and long steel life. The springs that come on your PODIUM X are customized for your weight, riding style and terrain. Compression Adjuster IFP Hose & Fittings (Hose not shown) Oil Damping Piston & Valving Bottom-Out Bumper cross-section of podium x Your PODIUM X shock will either be fitted with dual springs or a single spring, depending on your make of swing-arm and linkage. Different swing-arm and linkage combinations require different spring characteristics to work well. A single spring shock has a linear spring rate throughout the shock travel. Ride height (sag) adjustments are made by adjusting the spring preload. 2
6 A dual spring shock has a main spring (long) and a tender spring (short), which combine to give a softer initial spring rate with a stiffer spring rate deep into travel. The vehicle ride-height (sag) adjustments are made by varying spring preload, the same as the single spring shock (see adjusting the spring preload on page 12). The shock bottoming resistance can be tuned by adjusting the spring crossover. The spring crossover is the point in the shock travel where the spring rate increases; the default setting is 55% of total shock travel. For information on changing your spring crossover, refer to adjusting the spring crossover on page 13. Single Spring Dual Spring Spring Force Spring Crossover Point (Typically 55% of Total Travel) Shock Compression P/N: podium x shock owner s manual


7 reading the spring rate The spring rate is printed directly on the shock spring. The spring above is 8 in free length, has a 2.25 ID and a 300 lbs/in spring rate. spring orientation When placing the spring(s) back on the shock body, it is important that the components are assembled in the correct order, especially on the dual-spring model (see picture below). 2.5 I.D. THRUST CROSSOVER WASHER RING SPRING COUPLER 2.25 I.D. THRUST WASHER PRELOAD RING TENDER COIL SPRING COUPLER GUIDE MAIN COIL SPRING SPRING RETAINER
8 changing springs (single spring) step 1 step 2 Loosen the pinch bolt on the spring preload ring and unthread until the spring freely moves up and down on the shock body. Lift up the spring and remove the spring retainer. Some models may require an automotive spring compressor to help to compress the spring and remove the spring retainer. If in doubt, please send your shock to an authorized repair center or qualified suspension professional. step 3 Slide the spring and thrust washers off the shock body over the shaft end (eyelet/clevis end). step 4 Orient the new spring correctly and slide it onto the shock body. step 5 Place the spring retainer back on the shock and under the spring ensuring that the open slot on the spring retainer rests on the flat part of the spring end. step 6 Tighten the preload ring approximately four (4) turns to take up any free play of the spring against the retainer and preload ring. step 7 Adjust preload according to the adjusting spring preload on page 12. P/N: podium x shock owner s manual 5
9 changing springs (dual spring) step 1 step 2 Loosen the pinch bolt and spring preload ring until the springs freely move up and down on the body. Lift up the spring and remove the spring retainer. Some models may require an automotive spring compressor to help to compress the spring and remove the spring retainer. If in doubt, please send your shock to an authorized repair center or qualified suspension professional. step 3 Slide the main spring, spring coupler, tender spring and thrust washers off the shock body over the shaft end (eyelet/clevis end), taking care to note the order and orientation of the components. step 4 Orient the new spring(s) correctly (see SPRING ORIENTATION on page 4) and slide the spring assembly onto the body. Take special care to ensure that the preload ring is not on upside-down. (The tender spring should fit snuggly over the preload ring.) step 5 Place the spring retainer back on the shock and under the spring ensuring that the open slot on the spring retainer rests on the flat part of the spring end (see spring orientation on page 4). step 6 Tighten the preload ring approximately four (4) turns to take up any free play of the spring against the retainer and preload ring. step 7 Adjust preload according to the adjusting spring preload on page 12. 6
10 mounting the podium x Refer to your ATV s owner s manual for the specific tools required for your ATV brand. shock fitment should only be conducted when the ATV is COLD. Do not attempt to fit the shock to a ATV that has been running or has a hot engine or exhaust. If you must change the shock on a hot ATV, be sure to use gloves and protective equipment. step 1 step 2 step 3 Place the ATV on a workstand. As applicable, remove the seat, side panels, silencer, and subframe/airbox from your ATV. Refer to your ATV s owner s manual for specific information on accessing your rear shock mount. Remove upper and lower shock mounting hardware and any linkage components that are required. Remove the stock shock. Keep the stock nuts, bolts, washers, etc., as you will need these when mounting the PODIUM X. take note of the orientation and widths of the stock mounting hardware, such as upper & lower eyelets or clevis mounts. this will help when installing the podium x shock and its accompanying reducer & o-ring set. step 4 Install the PODIUM X, ensuring that the upper reducers and o-rings are in the correct position (see drawing below). reference the enclosed setup sheet for shock orientation and mounting the reservoir. step 5 Install upper and lower shock mounting hardware and appropriate linkage components, and torque according to the specifications listed in your ATV s owner s manual. P/N: podium x shock owner s manual 7
11 if your specific application utilizes a lower clevis mount, a small drop of blue loctite on the thread is recommended during installation. step 6 step 7 Re-install seat, side panels, silencer, subframe/airbox, etc., on your ATV. Mount the reservoir and set rider sag on the PODIUM X as indicated in the following sections. mounting the reservoir reference the SUPPLEMENTAL setup sheet for shock orientation and mounting the reservoir. Pay careful attention to the routing notes/pictures in the supplemental setup sheet. Care should be taken to make sure the hose does not contact hot exhaust components or any moving suspension parts. If necessary, use cable ties to hold the hose in place. Excessive heat and vibration will damage the hose and its plastic covering. Avoid sharp bends in the hose this may cause damage and result in hose failure. Do not allow the hose fittings to touch any part of the frame. This will cause damage to the fitting and frame due to engine vibration. 8

12 setting up the podium x measuring and setting sag To get the best performance out of your PODIUM X, it is necessary to adjust the vehicle ride-height or sag. Sag is how much the shock compresses, or sags, when you sit on your ATV. As a general rule, your vehicle s sag should be 35% 45% of full wheel travel. There are many factors that will influence your sag setting and ride height preference, including tire diameter, terrain and riding style. Use the following procedure to accurately measure and set the correct ride-height (sag) for your ATV: set the front and rear ride height (sag) simultaneously. step 1 step 2 step 3 Position the bike on a flat surface and clear of any obstacles. Place pieces of cardboard under each wheel. As the suspension is compressed, the front wheels move outward. This is called scrub. Placing the cardboard under the wheels allows the suspension to move more freely. While wearing your normal riding gear, mount the ATV and stand in your normal standing riding position, feet in your natural riding position on the foot-pegs, with both hands on the bars. (note the cardboard under the wheels) P/N: podium x shock owner s manual


13 step 4 Aggressively bounce up and down on the quad several times and allow the quad to settle. due to the nature of high-pressure seals in air shocks, the shocks may require an initial compression stroke to fully lubricate internal sliding surfaces to allow for smooth operation. this is most apparent after the atv has been sitting for a while. step 5 Gently assume a seated position. step 6 Have a friend push down on the front end of the vehicle. While the suspension is compressed, turn the bars back and forth. Turn the bars back straight and have the friend release the front suspension. 10
. If your vehicle has a skid plate, measure to the bottom of that.")

14 step 7 While still seated on ATV, have a friend measure the vertical distance from the ground plane to the chassis, under the footpegs (rear frame height) and the distance from the ground plane to the chassis at the front engine mount (front frame height). If your vehicle has a skid plate, measure to the bottom of that. measuring the front frame height just under the front motor mount measuring the rear frame height just in front of the foot peg step 8 The rear frame height should be between 7-8 for moto-x use, 8-9 for cross-country use. The front frame height should be approximately 1/4-1/2 higher than the rear. If your ATV is sitting too low in the rear, increase the PODIUM X spring preload [See adjusting spring preload (single and dual spring) on the next page], and repeat all the steps above until the desired sag is reached. P/N: podium x shock owner s manual
15 adjusting spring preload (single and dual spring) step 1 step 2 step 3 Using a 4mm hex key, loosen the pinch-bolt on the preload ring. a) Turn the preload ring clockwise (when viewed from above) to increase the preload. b) Turn the preload ring anti-clockwise (when viewed from above) to decrease the preload. Once you have reached the desired setting, torque the pinch-bolt to lock the ring. If you are adjusting the spring preload with the shock not mounted on the ATV, be sure to turn the preload ring a whole number of complete turns, maintaining the same angular orientation. This will ensure that you will still be able to access the pinch-bolt when the shock is installed on the ATV. If you adjust your spring preload you will need to adjust your crossover ring location also (Dual spring ONLY) to maintain the same crossover point. See the section ADJUSTING SPRING Crossover on page 13 for details. Do not set the spring preload at more than 3/8. Excessive spring preload may result in coil-bind, which could potentially be damaging to the shock and springs. If you require more than 3/8 pre-load to reach the desired sag point, you will need to exchange the spring(s) for a higher rate. Please contact Fox Racing Shox. 12
16 adjusting spring crossover (dual spring only) The spring crossover point is an important tuning parameter (shocks with dual springs only). A softer initial spring rate offers improved traction and hook-up (corner speed and acceleration) while a higher spring rate deep into travel helps to resist bottoming on jump landings. As a rough guideline, the spring crossover point should be as deep into travel as possible without experiencing excessive bottoming. The crossover point is defined as a percentage of the total shock travel. The factory setting for spring crossover point is 55%. This means, for example, that for a 5 travel shock the crossover point is at 2.75 (5.0 x 0.55) into the shock travel. In order to calculate your spring crossover ring placement, you need to know four important pieces of information: i) Shock travel (metal-to-metal - inches) - measure BEFORE installation. ii) Main Spring Rate (lb/in) marked on spring (see changing the springs). iii) Tender Spring Rate (lb/in) marked on spring (see changing the springs). iv) Desired crossover point (as a percentage). The shock travel is the exposed length of the shaft (including the bumpstop) when the shock is fully extended. It may be easiest to measure before you install the shock. PODIUM X ATV shocks are manufactured in 0.1 travel increments. therefore, your shock travel will be 4.7, 4.8 or 4.9 inches. Some shocks use external spacers below the bump-stop to limit travel. Do not include the spacer length as part of the travel. the crossover point is a tunable parameter. it should be between 45% to 65%. P/N: podium x shock owner s manual

17 To set the crossover point: step 1 Set the spring preload as described in adjusting the spring preload on page 12. step 2 Once you have established the correct preload, mount the ATV on a stand to keep the rear wheels off the ground. The shock should be fully extended. step 3 step 4 SPRING CORRECTION FACTOR Tender Spring Rate (lb/in) Using a 2.5mm hex key, loosen the set screw retaining the crossover ring. Determine the spring correction factor using the following table: Main Spring Rate (lb/in)


18 step 5 Use the following formula to calculate crossover ring placement: Example: Crossover Ring Placement = Shaft Travel (in.) x Crossover Point x spring correction factor A 5.2 travel shock with 375 lb/in main spring and 800 lb/in tender spring. The crossover point is set at 55%. From the table above, the spring correction factor is From the above formula, the crossover ring placement value is = 5.2 x 0.55 x = inches in the above example, 55% is written as step 6 Adjust the crossover ring (as shown below) so that its distance from the spring coupler is equal to the crossover ring placement value calculated in step 5. CROSSOVER RING LOCATION step 7 Remove the ATV from the stand. you may need a small, flexible ruler or measuring device to accurately determine the crossover ring location. another useful way of measuring is to count the threads on the body (the thread pitch on the body is 14 threads per inch). if you know the crossover ring location, multiply by 14 to get the number of threads between the spring coupler and crossover ring. in the example above, inches = x 14 = 12.8 threads. P/N: podium x shock owner s manual 5
19 applying excessive torque to the crossover ring set screw will result in deformation of the shock body and crossover ring. This set screw only needs very light (two-finger) torque. changing the spring preload, tender or main spring free-length or rate will mean that you need to reset the crossover ring placement. TUNING the podium x general guidelines Go out and ride. Tune your senses to what the ATV s rear end is doing. Sometimes you know the ATV isn t handling quite right but, for example, it may be hard to tell whether the problem is too little rebound damping or too much compression damping. Sometimes the difference in feel is subtle. Some of the distinctions are minute. If the damping doesn t seem quite right, make your best guess as to what change will help, then try it. If handling doesn t improve, make another change in the opposite direction. Keep experimenting like this until the ride feels best. It is common practice for riders to test shock absorber damping by pushing down on the back of the ATV and observe the shock response. This test is useful, but very limited. You should be aware that this test only involves low-speed damping action. It will tell you nothing about shock response at medium and high shaft speeds. tuning recommendations The percentage change in damping when going from one click to the next click is fairly small. This is so you can really fine tune your shock. A one click change is hard to notice. Therefore, FOX recommends making changes of two clicks at a time. For example, if after testing you feel compression is too soft, try a two-click change (clockwise on compression adjuster). If that feels just right, then you ve got it. On the other hand, if that now feels a little too stiff, then you ve got it bracketed ; go back one click (counterclockwise) and it should now feel just right. These recommendations apply to both rebound and compression damping. 16
20 if you want to know your current setting, both adjusters should be baselined by turning them clockwise and counting the number of clicks until the adjuster lightly bottoms. Do not overtighten. compression and rebound adjustment settings are counted as clicks out from full in, or clockwise, position. spring force At this point you have set the sag of your vehicle by adjusting the preload ring. Consequently, your spring force should be near its optimal setting. If you feel that the rear of the vehicle is too low as you are riding, increase preload; if the vehicle is too high, decrease preload. never increase preload more than 3/8. if you need more spring force, you will need to go to the next higher spring rate. after the preload ring engages the spring, turn the preload ring clockwise one turn. if the preload ring needs to turned counterclockwise from this point to achieve proper spring force, you will need to obtain a lower rate spring. crossover point The crossover point should be between 45% and 65%; the default setting is 55%. If you want increased bottoming resistance, decrease the crossover point (towards 45%). If you are not bottoming and want decreased bottoming resistance, increase the crossover point (towards 65%). Important note: setting a crossover point outside of the recommended range (45% - 65%) may result in spring coil-bind and damage to the shock and/or springs. If you feel that you are crashing through your available travel too quickly on big bumps, try decreasing the crossover point; conversely, if you feel that you are not fully utilizing your available travel, try increasing the crossover point. applying excessive torque to the crossover ring set screw will result in deformation of the shock body and crossover ring. This set screw only needs very light (two-finger) torque. P/N: podium x shock owner s manual 7

 is located on the shaft end of the shock, and is adjusted using a screwdriver. For slower rebound, use a screwdriver to turn the adjuster screw clockwise.")
21 REBOUND DAMPING Rebound damping controls the rate at which the shock returns after it has been compressed. The proper rebound setting is a personal preference, and changes with rider weight, riding style and conditions. A rule of thumb is that rebound should be as fast as possible without kicking back and pushing the rider off the saddle. The rebound screw (see picture on right) is located on the shaft end of the shock, and is adjusted using a screwdriver. For slower rebound, use a screwdriver to turn the adjuster screw clockwise. For faster rebound, use a screwdriver to turn the adjuster screw counterclockwise. rebound damping Troubleshooting REBOUND ADJUSTER SCREW Symptom - Bucking - Tops out too hard - Packing in repetitive bumps - Chatter Remedy Set slower rebound Set faster rebound Symptoms of Too Much Rebound Damping Rear end tends to washout or slideout on hard-packed sweeper turns with small bumps, especially on off-camber washboard turns. Rear end skips too much when braking on washboard sections and does not develop good braking power. Poor rear wheel traction when accelerating over small repetitive bumps (washboard) sections. Rear end gets harsh and hard to control when hitting series of medium or large rolling bumps at high speed. First few bumps in the series don t seem bad, but after that the rear end gets harsh and starts jumping around. too much damping prevents the wheel from extending quickly enough before hitting the next bump (packing). after the fifth or sixth bump, you may have minimal travel left. 18


22 Symptoms of Too Little Rebound Damping These symptoms are similar to the ones in the previous section: tendency to slideout on washboard turns and poor braking over washboard sections. The critical difference in this case is that the back of the ATV is bouncing up and down too much, whereas with too much damping it had poor traction. Too much kicking up especially when braking on downhill sections with small bumps or washboard surface. Rear end kicks up when hitting large rolling-type bumps at high speeds. Kick-up is especially noticeable on steep downhills with deep rolling bumps. Also, the rear end of the ATV may kick up after landing a jump. the shock will extend too quickly if there is not enough damping to control the spring extension force. Tuning suggestion: Once you are comfortable riding the ATV and would like to fine tune the rebound damping setting, find a table-top jump that you can hit consistently and safely, landing as flat as possible. As a general rule you want as little rebound damping as possible so that the suspension returns quickly, but still enough rebound damping that the rear of the ATV does not oscillate upon landing. The rear of your ATV should return quickly to ride-height and then remain still. If the rear suspension continues to oscillate several times after landing, try increasing rebound damping (slower). If the suspension does not oscillate after landing, try decreasing rebound damping (faster). This procedure should allow you to close in (or bracket) on the desired rebound damping setting. COMPRESSION DAMPING Compression damping controls the rate at which the shock compresses when it encounters a bump. The proper compression setting is a personal preference and changes with rider weight, riding style and conditions. The compression adjuster knob (see picture on right) is located on the reservoir. For more compression, turn the compression adjuster knob clockwise. For less compression, turn the compression adjuster knob counterclockwise. P/N: podium x shock owner s manual COMPRESSION ADJUSTER KNOB
23 compression damping Troubleshooting Symptom Remedy - Rigid, harsh ride Set less compression - Bottoms-out easily Set more compression Symptoms of Too Much Compression Damping The rear end is harsh over small bumps. Shock seems to stay almost rigid instead of absorbing bumps. Especially noticeable on downhill bumps. The rear end is harsh at high speeds over large or medium square-edged bumps. The shock stays too rigid and does not use enough travel to absorb bumps. The shock rarely or never seems to bottom-out, even off the biggest jumps. Symptoms of Too Little Compression Damping Shock bottoms-out on medium-sized bumps and the bottom of deep smooth gullies, or rising portions of deep rolling sand whoops. At high speed the rear end takes medium square-edged bumps smoothly, but bottoms out too easily on larger bumps. Bottoms out too easily off jumps and at high speeds over large square-edged bumps, kicking up the rear end violently. 20
24 maintaining the podium x Proper inspection and maintenance procedures are crucial to maintaining the high performance and durability of your PODIUM X shock. Proper inspection and maintenance now prevent headaches and equipment failure later, not to mention lackluster performance at the races and your absence from the podium. You should clean your PODIUM X before and after every ride for optimal performance. Use a mild detergent and rag to clean off any and all debris from your shock. Be sure to clean the area located under the bottom-out bumper as well. Avoid using a pressure washer directly on the shock as this can drive dirt past the seals. Along with properly cleaning your shock, you should also inspect the following areas before every ride. Consult the shock picture on the next page for the location of each inspection location: #1: Check the reducers and o-rings for excessive wear or damage. #2: Check the reservoir for any signs of damage. #3: Check the piston shaft for any signs of leakage or damage. #4: Check the spring and shock body for any signs of damage. #1 & #5: Check the ATV s and the shock s mounting points and make sure all bolts are properly fastened. your podium x shock is charged with nitrogen. special equipment is necessary to access and alter the nitrogen charge. P/N: podium x shock owner s manual 21

25 Shock rebuild Just as the oil in your engine breaks down with time and must be replaced, the oil in your PODIUM X shock must be serviced periodically. The service interval depends on how frequently and severely the ATV is ridden. As a guideline, if you race hard every weekend you may want to change the oil in your shock at least once during the season. Otherwise, it is generally recommended to service the shock in the off-season. FOX Racing Shox or an Authorized Factory Service Center can perform this procedure. shock rebuild requires specialized tools for disassembly and re-assembly. It is essential that this service be performed by FOX Racing Shox or a qualified professional shock technician. the following items are required: items required Item Part Number PODIUM X Rebuild Kit FOX Light Racing Oil #1 #4 #2 #3 22 #5
26 quick setup checklist FOX recommends that you read and understand this manual COMPLETELY before installing your new FOX PODIUM X shock and riding your ATV. For operator safety, please follow this important checklist as an absolute minimum BEFORE riding your ATV: Mounting of the PODIUM X: Correct reducers, o-rings, bolts and torque settings. Hose routing and adequate clearance to frame and exhaust. Remote reservoir correctly positioned and secured. See pages 7-8 for more detail. Adjusting the spring preload to give the correct front and rear ride-height (sag): Sitting on the vehicle, the front ground-to-frame clearance should be 1/4 to 1/2 inch higher than the rear ground-to-frame clearance; for moto-x the rear ground clearance should be 7-8 inches; for cross-country, the rear ground clearance should be 8-9 inches. Do NOT exceed 3/8-inch preload on the PODIUM X shock excessive preload will coil-bind the spring(s) and may cause damage and/or injury. Dual spring shocks should have the correct crossover ring location, such that the crossover occurs at between 45% - 65% of full travel. Incorrect crossover ring location will coil-bind the spring(s) and may cause damage and/or injury. See pages 12 for more detail. Setting the external REBOUND adjuster: Turn the rebound adjuster fully closed (clockwise) and open the adjuster the correct number of clicks counterclockwise. Check the setup sheet supplied with your shock(s) for the correct number of clicks. See pages for more detail. Setting the external COMPRESSION adjuster: Turn the compression adjuster fully closed (clockwise) and open the adjuster the correct number of clicks counterclockwise. Check the setup sheet supplied with your shock(s) for correct number of clicks. See pages for more detail. P/N: podium x shock owner s manual 23
27 tuning notes: 24
28 P/N: podium x shock owner s manual 25
29 QUICK REFERENCE guide PODIUM X terms used Suspension > Compression: downward travel of the suspension. Actions that move the endpoints of the shock closer together. > Compression damping: oil damping resistance felt when trying to compress the shock. > Emulsion shock: shock without an IFP (Internal Floating Piston) separating the oil and nitrogen. > Frame clearance: distance between the frame and other moving parts, like the shock. > Negative travel: distance the suspension or shock extends from the static ride height. Also referred to as free sag. > Preload: initial force on the spring. Preload is used to adjust rider sag. > Ride height: with the rider on the bike, the basic stance of the bike. Usually measured from the ground to some point on the bike frame. > Rebound: force required to extend the shock or suspension. Can also refer to the extending action of the suspension. > Rebound damping: oil damping resistance that controls the rate at which the shock extends after being compressed. > Rider sag: amount the shock compresses with the rider sitting on the ATV in a normal riding position. > Free sag: amount that the ATV sits into travel. Usually measured from the ground to a point on the frame, or as shock stroke, and without a rider on the ATV. > Spring rate: force required to compress a spring one inch. Measured in lb/in. or Kg/mm. > Stroke: amount of shock travel. > Travel: total amount the shock compresses, as measured from eye-to-eye. > Valving: refers to the combination of shims or damping valves on the piston face used to achieve a specific ride characteristic. > Wheel travel: distance the wheel moves when the suspension is cycled through its full travel. riding > Bottoming: vehicle has bottomed-out when the suspension reaches the limit of its travel and stops further downward motion. > Bucking: kicking motion on a rider after a bump or jump landing. > Chatter: small bumps similar to braking bumps prior to a corner or berm. Often refers to the harshness felt when riding over small, closely spaced bumps. > Fading: slow loss of shock damping usually due to heat. > Packing: when the shock does not return quickly enough to adequately absorb the next bump in a repetitive bump sequence. > Spiking: sharp impact cause by a square-edge bump. > Squat: when the rear of the vehicle sits down either due to weight transfer or driveline forces. > Stiction: initial force that needs to be overcome to start the suspension stroke. > Topping-out: when the suspension is fully extended. service intervals > Before every ride: Wipe mud and debris off shock exterior > Monthly: Clean and inspect your shock. > Annually: Clean and inspect your shock. See the MAINTAINING THE PODIUM X section on page 21 of this manual. > Every ride season: Shock rebuild by a FOX Certified Technician or FOX Racing Shox tools & supplies > PODIUM X Rebuild Kit > FOX Light Racing Oil contact info FOX Racing Shox 130 Hangar Way Watsonville, CA 95076, USA Phone: North America: FOX.SHOX ( ) Fax: atv@foxracingshox.com /Website: Business hours: Monday Friday 8 a.m. 5 p.m. PST method of payment & shipping Visa, MasterCard, Cashier's Check FOX Racing Shox uses UPS Ground Service within the USA. disclaimer FOX Racing Shox is not responsible for any damages to you or others arising from riding, transporting, or other use of your PODIUM X shock. In the event that your shock breaks or malfunctions, FOX Racing Shox shall have no liability beyond the repair or replacement of your shock pursuant to the terms outlined in the warranty provisions of this manual. warranty policy The factory warranty period for your shock is one year (two years for countries in the EU) from the original date of purchase of the shock or ATV. A copy of the original purchase receipt must accompany any shock being considered for warranty service. Warranty is at the full discretion of FOX Racing Shox and will cover only defective materials and workmanship. Warranty duration and laws may vary from state to state and/or country to country. Parts, components and assemblies subject to normal wear and tear are not covered under this warranty. FOX Racing Shox reserves the right to all final warranty or non-warranty decisions.
30 valving guarantee If it is determined that a PODIUM X requires a valving change within the first 90 days of ownership, FOX will perform the re-valve at no charge for the original consumer. The consumer is required to follow the Service Policy procedure below and is responsible for all shipping costs to and from FOX Racing Shox. Unless otherwise specified, FOX Racing Shox will return ship the shock(s) via UPS Ground Service. service policy > FOX Racing Shox offers 5-business day turnaround, which may vary. > Obtain an RA (Return Authorization) number and shipping address from FOX Racing Shox at 800.FOX. SHOX. Outside the USA, contact the appropriate International Service Center. > Mark the RA number and Return Address clearly on the outside of the package and send to FOX Racing Shox (see Contact Info above) or your International Service Center with shipping charges pre-paid by the sender. > Proof-of-purchase is required for warranty consideration. > Include a description of the problem, ATV information (manufacturer, year and model), type of FOX product and return address with daytime phone number. specific exclusions from warranty > Parts replaced due to normal wear and tear and/or routine maintenance > Parts subject to normal wear and tear and/or routine maintenance > Bushings > Seals (after the 90-day seal warranty period expires) > Suspension fluids > Crash damage general exclusions from warranty > Installation of parts or accessories not qualitatively equivalent to genuine FOX Racing Shox parts. > Abnormal strain, neglect, abuse and/or misuse > Accident and/or collision damage > Modification of original parts > Lack of proper maintenance > Shipping damages or loss (purchase of full value shipping insurance is recommended) > Damage to interior or exterior caused by rocks, crashes or improper installation > Oil changes or service not performed by FOX Racing Shox or an Authorized Service Center

31
denotes information that, if not followed, can cause damage to your shock or lead to serious injury or death.
 notice: the motorcycles pictured in this manual may or may not resemble your actual motorcycle. in any case, the procedures outlined will correctly enable you to set up, mount and tune the fox podium x
ATV 2.0 PODIUM RC2 FACTORY SERIES OWNER S MANUAL
 ATV 2.0 PODIUM RC2 FACTORY SERIES OWNER S MANUAL CONTENTS CONGRATULATIONS... 3 CONSUMER SAFTEY... 3 UNDERSTAND THE ATV 2.0 PODIUM RC2... 4 INSTALLING YOUR SHOCK... 5 MEASURING AND SETTING RIDER SAG...
SHOCK OWNER S MANUAL PODIUM RC3
 SHOCK OWNER S MANUAL PODIUM RC3 body end CAP eyelet (spherical bearing & reducer) L.S.C (Low-Speed compression adjuster) 24 clicks / baseline 12 clicks out B.O.C. (BOTTOM-OUT CONTROL) 24 clicks / baseline
denotes information that, if not followed, can cause damage to your shock or lead to serious injury or death.
 Table of Contents congratulations!............................................. 1 Consumer Safety.............................................. 1 understanding the float x evol.............................
AFTERMARKET SHOCK FLOAT 3 EVOL R FACTORY SERIES OWNER S MANUAL
 2.5 PODIUM-X AFTERMARKET SHOCK FLOAT 3, MANUAL OWNER S FLOAT 3 EVOL R FACTORY SERIES OWNER S MANUAL CONTENTS CONGRATULATIONS... 3 CONSUMER SAFTEY... 3 UNDERSTAND THE FLOAT 3, EVOL R... 4 FOX PUMP... 5
FLOAT 3 EVOL RC2 FACTORY SERIES OWNERS MANUAL
 FLOAT 3 EVOL RC2 FACTORY SERIES OWNERS MANUAL Contents CONGRATULATIONS... 3 CONSUMER SAFETY... 3 UNDERSTANDING THE FLOAT 3 EVOL RC2... 4 FOX PUMP... 5 OPTIONS... 5 ADJUSTABLE PROGRESSIVE DUAL-STAGE AIR
FLOAT 3 EVOL, R, RC, RC2 FACTORY SERIES AFTERMARKET SHOCK OWNER S MANUAL
 FLOAT 3 EVOL, R, RC, RC2 FACTORY SERIES OWNERS MANUAL 2.5 PODIUM-X AFTERMARKET SHOCK OWNER S MANUAL CONTENTS CONGRATULATIONS... 3 CONSUMER SAFETY... 3 UNDERSTANDING THE FLOAT 3 EVOL SERIES... 4 FOX PUMP...
1.5 PODIUM C PERFORMANCE SERIES OWNERS MANUAL
 1.5 PODIUM C PERFORMANCE SERIES OWNERS MANUAL Contents CONGRATULATIONS...3 CONSUMER SAFETY...3 UNDERSTANDING THE 1.5 PODIUM C...4 READING THE SPRING RATE...5 LOW SPEED COMPRESSION ADJUSTER (LSC)...5 INSTALLING
AFTERMARKET SHOCK FLOAT 3 EVOL FACTORY SERIES OWNER S MANUAL
 2.5 PODIUM-X AFTERMARKET SHOCK FLOAT 3 EVOL RC2 OWNER S MANUAL FACTORY SERIES OWNER S MANUAL CONTENTS CONGRATULATIONS... 3 CONSUMER SAFTEY... 3 UNDERSTAND THE FLOAT 3 EVOL RC2... 4 FOX PUMP... 5 AVAILABLE
Shock Absorber Rebuild Manual
 Shock Absorber Rebuild Manual Model PODIUM RC3 FOX RACING SHOX 130 Hangar Way, Watsonville, CA 95076 PHONE 800.369.7469 FAX 831.768.7026 Email: psservicemw@ridefox.com Website: www.ridefox.com Disclaimer
FLOAT 3 EVOL FACTORY SERIES OWNERS MANUAL
 FLOAT 3 EVOL FACTORY SERIES OWNERS MANUAL Contents CONGRATULATIONS... 3 CONSUMER SAFETY... 3 UNDERSTANDING THE FLOAT 3 EVOL... 4 FOX PUMP... 5 OPTIONS... 5 ADJUSTABLE PROGRESSIVE DUAL-STAGE AIR SPRING...
FOX Racing Shox. Setup Manual MOTORCYCLE
 FOX Racing Shox Setup Manual MOTORCYCLE Introduction Thank you for choosing FOX Racing Shox for your motorcycle. In doing so, you have chosen the number one shock absorber in the industry! All FOX Racing
2002 Rear Shock Owners Manual
 2002 Rear Shock Owners Manual FLOAT - FLOAT R - FLOAT L - FLOAT RL Vanilla - Vanilla R - Vanilla RL - Vanilla RC FOX RACING SHOX 130 Hangar Way, Watsonville, CA 95076 831.768.1100 FAX 831.768.9342 E-Mail:
INSTALLATION GUIDE DIRECT-REPLACEMENT
 DIRECT-REPLACEMENT INSTALLATION GUIDE TITAN (04+) 883-06-120-2.5 Factory Series Coil-Over Reservoir - Adjustable 883-02-120-2.5 Factory Series Coil-Over Reservoir 983-02-053-2.0 Performance Series Coil-Over
INSTALLATION GUIDE DIRECT-REPLACEMENT
 DIRECT-REPLACEMENT INSTALLATION GUIDE TACOMA (95-04) / 4 RUNNER (96-02) 985-02-003-2.0 Performance Series IFP Coil-Over 883-02-024-2.5 IFP Coil-Over Kit 883-02-023-2.5 IFP Coil-Over Long Travel Kit 880-02-410-2.5
INSTALLATION GUIDE DIRECT-REPLACEMENT
 DIRECT-REPLACEMENT INSTALLATION GUIDE CHEVY/GMC (07+) 883-06-040-2.5 Factory Series Coil-Over Reservoir - Adjustable 883-02-040-2.5 Factory Series Coil-Over Reservoir 880-06-525-2.5 Factory Series Coil-Over
INSTALLATION GUIDE DIRECT-REPLACEMENT
 DIRECT-REPLACEMENT INSTALLATION GUIDE TACOMA (05+) 880-06-376-2.5 Factory Series Coil-Over Reservoir - Adjustable 880-06-418-2.5 Factory Series Coil-Over Reservoir - Adjustable 880-02-376-2.5 Factory Series
coil-over shocks ToyoTa Tundra (00-06)
") direct-replacement coil-over shocks installation guide Toyota tundra (00-06) 2.0 Performance Series IFP coil-over: 985-02-005 2.5 IFP coil-over Kit: 883-02-026 2.5 IFP coil-over Long Travel Kit: 883-02-027
direct-replacement coil-over shocks installation guide Toyota tundra (00-06) 2.0 Performance Series IFP coil-over: 985-02-005 2.5 IFP coil-over Kit: 883-02-026 2.5 IFP coil-over Long Travel Kit: 883-02-027
INSTALLATION GUIDE DIRECT-REPLACEMENT
 DIRECT-REPLACEMENT INSTALLATION GUIDE TUNDRA (07+) 985-02-004: 2.0 Performacne Series Coil-over IFP 883-02-021: 2.5 Factory Series Coil-over IFP 880-02-367: 2.5 Factory Series Coil-over Reservoir 880-06-367:
coil-over shocks Tundra (07+)
") direct-replacement coil-over shocks installation guide Tundra (07+) 2.0 Performance Series IFP coil-over: 985-02-004 2.5 IFP coil-over Kit: 883-02-021 2.5 Reservoir coil-over Kit: 880-02-367 INSTALLATION
direct-replacement coil-over shocks installation guide Tundra (07+) 2.0 Performance Series IFP coil-over: 985-02-004 2.5 IFP coil-over Kit: 883-02-021 2.5 Reservoir coil-over Kit: 880-02-367 INSTALLATION
FORD F-150 (09+) 2.0 Performance Series IFP coil-over kit: IFP coil-over kit: Reservoir coil-over kit:
 2.0 Performance Series IFP coil-over kit: IFP coil-over kit: Reservoir coil-over kit:") direct-replacement coil-over shocks installation guide FORD F-150 (09+) 2.0 Performance Series IFP coil-over kit: 985-02-006 2.5 IFP coil-over kit: 883-02-029 2.5 Reservoir coil-over kit: 880-02-634 INSTALLATION
direct-replacement coil-over shocks installation guide FORD F-150 (09+) 2.0 Performance Series IFP coil-over kit: 985-02-006 2.5 IFP coil-over kit: 883-02-029 2.5 Reservoir coil-over kit: 880-02-634 INSTALLATION
INSTALLATION GUIDE DIRECT-REPLACEMENT
 DIRECT-REPLACEMENT INSTALLATION GUIDE FORD T6 RANGER (12+) 983-02-085-2.0 Performance Series Coil-Over IFP 883-02-093-2.5 Factory Series Coil-Over Reservoir 883-06-093-2.5 Factory Series Coil-Over Reservoir
coil-over shocks ToyoTa Tundra (00-06)
") direct-replacement coil-over shocks installation guide Toyota tundra (00-06) 985-02-005-2.0 Performance Series IFP Coil-Over 883-02-026-2.5 IFP Coil-Over Kit 883-02-027-2.5 IFP Coil-Over Long Travel Kit
direct-replacement coil-over shocks installation guide Toyota tundra (00-06) 985-02-005-2.0 Performance Series IFP Coil-Over 883-02-026-2.5 IFP Coil-Over Kit 883-02-027-2.5 IFP Coil-Over Long Travel Kit
Cane Creek Double Barrel Instructions
 Cane Creek Double Barrel Instructions Congratulations on your purchase of the Cane Creek Double Barrel rear shock. Developed in partnership with Öhlins Racing, the Double Barrel brings revolutionary suspension
TOO TECH RACING SET-UP INSTRUCTIONS (For Non Twin Chamber Showa & KYB)
") TOO TECH RACING SET-UP INSTRUCTIONS (For Non Twin Chamber Showa & KYB) STEP 1: Measure suspension "Race Sag". (Most important adjustment there is) First: Put the bike on a center stand and release the
TOO TECH RACING SET-UP INSTRUCTIONS (For Non Twin Chamber Showa & KYB) STEP 1: Measure suspension "Race Sag". (Most important adjustment there is) First: Put the bike on a center stand and release the
INSTALLATION GUIDE DIRECT-REPLACEMENT
 DIRECT-REPLACEMENT INSTALLATION GUIDE FJ CRUISER (10+) 4RUNNER (10+) 883-06-111-2.5 Factory Series Coil-Over Reservoir - Adjustable 883-02-111-2.5 Factory Series Coil-Over Reservoir 880-02-361-2.5 Factory
MXZ RC-P and MXZ R User manual
 MXZ RC-P and MXZ R User manual 1 CONGRATULATION Your specialized motorcycle is outfitted with YASUSU shock in suspension system. YASUSU shock absorbers are designed, tested and manufactured by the professional
INSTALLATION GUIDE BUMP STOP KIT
 BUMP STOP KIT INSTALLATION GUIDE JEEP WRANGLER JK BUMP STOP KIT (07+) 883-02-128-2.0 Factory Series Bump Stop Kit 1.95 883-02-129-2.0 Factory Series Bump Stop Kit 2.45 JEEP WRANGLER JK BUMP STOP KIT (07+)
DODGE RAM 1500 (06+) Performance Series IFP Coil-Over Factory Series Reservoir Coil-Over Kit
 Performance Series IFP Coil-Over Factory Series Reservoir Coil-Over Kit") direct-replacement coil-over shocks installation guide DODGE RAM 1500 (06+) 983-02-050-2.0 Performance Series IFP Coil-Over 883-02-080-2.5 Factory Series Reservoir Coil-Over Kit INSTALLATION guide DODGE
direct-replacement coil-over shocks installation guide DODGE RAM 1500 (06+) 983-02-050-2.0 Performance Series IFP Coil-Over 883-02-080-2.5 Factory Series Reservoir Coil-Over Kit INSTALLATION guide DODGE
coil-over shocks Titan (04+) Performance Series IFP Coil-Over
 Performance Series IFP Coil-Over") direct-replacement coil-over shocks installation guide Titan (04+) 983-02-053-2.0 Performance Series IFP Coil-Over INSTALLATION guide Titan (04+) 2.0 Performance Series IFP Coil-Over 983-02-053 *FOX s
direct-replacement coil-over shocks installation guide Titan (04+) 983-02-053-2.0 Performance Series IFP Coil-Over INSTALLATION guide Titan (04+) 2.0 Performance Series IFP Coil-Over 983-02-053 *FOX s
TABLE OF CONTENTS. All Contents... 5 Pump Performance, Lightweight, Durability... 6 Adjustable Progressive Air Spring... 7
 TABLE OF CONTENTS INTRODUCTION... 2 GENERAL INFORMATION Contact Info... 2 Business Hours... 2 Method Of Shipping... 2 Methods Of Payment... 2 Service / Warranty... 2 Valving Guarantee... 2 Warranty Policy...
Welcome to Elka Suspension!
 O W N E R S M A N U A L Honda XR/CRF50 Model 1585-M, De Coulomb Boucherville, Quebec, Canada J4B 8J7 Phone: 450-655-4855 1-800-557-0552 Fax: 450-655-2821 info@elkasuspension.com www.elkasuspension.com
Shock Absorber Rebuild Manual
 Shock Absorber Rebuild Manual Model PODIUM X FOX RACING SHOX 130 Hangar Way, Watsonville, CA 95076 PHONE 800.369.7469 ext. 7647 FAX 831.768.7026 Email: info@foxracingshox.com Website: www.foxracingshox.com
Sus Sus R Petrol Petrol R Owner's Manual
 2007 SPINNER Rear Shock Sus Sus R Petrol Petrol R Owner's Manual Setup, tuning and maintenance of your Spinner Rear Shock Congratulations on getting a bike with Spinner suspension. To ensure the best performance
Air Shock Manual. Version DynAccess Ltd. 520 Evans St. Suite 8. Bethlehem PA 18015
 Air Shock Manual Version 141117 DynAccess Ltd 520 Evans St. Suite 8 Bethlehem PA 18015 1 Table of Contents 1. Overview p. 3 2. Adjusting the Shock p. 5 2.1 Adjusting Air Pressure in Chamber 1 p. 5 2.2
Owner s Manual DV-22 / DV-28
 Owner s Manual DV-22 / DV-28 MM-20AR/ MM-22AR ST-8AR/ ST-8RC/ ST-12RC BURNER-AR/ BURNER-RC/ BURNER-RLC INTRODUCTION Dear Customer, Congratulations! You have purchased the best suspension shock absorber
Please read this manual carefully as it contains important information about the proper installation, use, care and maintenance of your shock.
 USER S MANUAL Congratulations on your purchase of this X-Fusion shock absorber. As a manufacturer and designer of innovative, high-end cycling products, our reputation for quality and performance is built
Thank you for purchasing our product
 SPINNER is a brand of KOGEE CORP. Model List FORK Aeris /Grind Air/Spinner 300 Air/Spinner 320 Air/Cargo Air Thank you for purchasing our product IN CASE OF MISSING OR BROKEN PARTS, PLEASE CONTACT PLACE
Öhlins Shock Absorber. TTX22M Universal. Owner s Manual
 Öhlins Shock Absorber TTXM Universal Owner s Manual Öhlins Headquarters Upplands Väsby, Sweden Öhlins Racing AB - The Story It was the 970 s, a young man named Kenth Öhlin spent most of his spare time
QUICK REFERENCE GUIDE
 QUICK REFERENCE GUIDE terms used > Travel: the total amount the shock compresses, as measured from eye-to-eye. > Sag: amount the shock compresses with the rider sitting on the bike in a normal riding position.
STX22Air AM Goldline. Owner s Manual/ Mounting Instructions
 Kit Contents Description Part No Pcs Shock absorber STXAir Before installing this product, read this manual. The shock absorber is an important part of your bicycle and will affect the stability. Please
Spring manual V3.1 ENGLISH
 Spring manual V3.1 ENGLISH HYPERPRO TOOLS, used in this manual: Tool Description Part no. A, B, C Cartridge fork spring removal tool kit HP-T01 D Big Piston Fork end cap socket 45mm HP-T102 E Big Piston
Shock manual V3.1 ENGLISH
 Shock manual V3.1 ENGLISH 2 Shock manual v3.1 INDEX Page Hyperpro Shock Overview 4 Maintenance 5 Rear Shock unit, removal and installation M1 Mono shock (& Telelever front) 6 M2 Twin shock 6 M3 Link system
RXF36 Coil. Front Fork. Owner s Manual/ Mounting Instructions
 Kit Contents Description Part No Pcs Front Fork RXF36 Coil 1 Before installing this product, read this manual. The front fork is an important part of your bicycle and will affect the stability. Please
INSTRUCTION MANUAL DB COIL DB AIR
 2 INSTRUCTION MANUAL DB COIL DB AIR TABLE OF CONTENTS 1 2 Safety 3 Product Anatomy Chart - DBcoil 4 Product Highlights - DBcoil 5 Installation - DBcoil 6 Frame and Clearance - DBcoil 7 Spring Selection
QA1 MOD Series Shock Installation and Quick Tuning Guide
 QA1 MOD Series Shock Installation and Quick Tuning Guide 9919-237 Rev. 10092018 Introduction Congratulations on your purchase of QA1 s double adjustable MOD Series shocks with low-speed bleed adjustment!
Index. Page Number Section
 S H O C K S Index Page Number Section 1-4 GM Front Coil Over Installation 5-7 Front Smooth Body Shock Installation 7-8 Rear Smooth Body Shock Installation 8-11 Custom Coil Over Installation 12 Tuning and
Detroit Speed, Inc. QUADRA Link Rear Suspension Camaro/Firebird P/N:
 Detroit Speed, Inc. QUADRA Link Rear Suspension 1967-1969 Camaro/Firebird P/N: 041703 Figure 1 Item Component Quantity 1 Upper Link Front Pocket-Left 1 2 Upper Link Front Pocket-Right 1 3 Upper Shock Crossmember
RXF34/RXF36. Front Fork. Owner s Manual/ Mounting Instructions
 Kit Contents Description Part No Pcs Front Fork RXF34/ RXF36 1 Before installing this product, read this manual. The front fork is an important part of your bicycle and will affect the stability. Please
Ksport ADJUSTABLE COILOVER SYSTEM NEED HELP?
 Ksport ADJUSTABLE COILOVER SYSTEM Thank you for joining the group of enthusiasts around the world that use Ksport suspension systems on their vehicles to maximize vehicle performance. Please keep in mind
STX22Air. Shock absorber for Specialized Enduro, Stumpjumper, Rhyme and Levo. Owner s Manual/ Mounting Instructions
 Kit Contents Description Part No Pcs Shock absorber STXAir Before installing this product, read this manual. The shock absorber is an important part of your bicycle and will affect the stability. Please
Motorcycle Suspension, How They Work, Install and Set Up
 Motorcycle Suspension, How They Work, Install and Set Up Presenters: Klaus Huenecke and Duane Kerzic of Wilbers USA Time: Place: Audience: Beginner to Advanced Street Riders who want to know more about
TABLE OF CONTENTS. Introduction Shock Basics & Terminology General Maintenance... 5 XTC NRS AC/All Conditions Warp DS...
 Version 1.2 TABLE OF CONTENTS Introduction... 2 Shock Basics & Terminology... 3 General Maintenance... 5 XTC NRS... 6 AC/All Conditions... 8 Warp DS... 12 Protege/Cypress DS/MTX 250 DS... 15 Prodigy/Prodigy
RXF34/RXF36. Front Fork. Owner s Manual/ Mounting Instructions
 Kit Contents Description Part No Pcs RXF34 29 Air TTX22 FG341x 1512 1 120/140/160 mm RXF36 29 Air TTX22 FG361x 171x 1 120/140/150/160 mm RXF36 29 Air STX22 FG361x 1731 1 150/160 mm RXF36 27.5 Air TTX22
SANTA CRUZ BICYCLES MY18 Nomad Suspension Setup
 SANTA CRUZ BICYCLES MY18 Nomad Suspension Setup Copyright Santa Cruz Bicycles 2017 TABLE OF CONTENTS SAFETY INSTRUCTIONS... 3 SAG SETUP...3 AIR SPRING FORKS...3 AIR SHOCKS...3 COIL SHOCKS...4 FORK SETUP...
HIGH RISE POWER ANGLE KIT
 HIGH RISE POWER ANGLE KIT P/N 33-0100 OWNER S MANUAL Application HIGH RISE PUSH TUBE 33-0000 & 34-0000 ATTENTION DEALER: CUSTOMER MUST RECEIVE A COPY OF THIS MANUAL AT THE TIME OF SALE. Before you begin,
Detroit Speed, Inc. QUADRA Link Rear Suspension Camaro/Firebird P/N:
 Detroit Speed, Inc. QUADRA Link Rear Suspension 1967-1969 Camaro/Firebird P/N: 041703 The Detroit Speed Inc., QUADRA Link rear suspension system is a great way to upgrade from an original leaf spring rear
ADJUSTABLE SUSPENSION SYSTEM
 ADJUSTABLE SUSPENSION SYSTEM YELLOWSPEED RACING CO., LTD. Tel: +886-4-2406-6262 Fax: +886-4-2406-7171 www.yellow-speed.com info@yellow-speed.com Thank you for purchasing a YELLOWSPEED high performance
CALL SELEX or ( ) Or visit our website at
 Or visit our website at") SELEX RACING SUSPENSION Adjustable Coilover System Installation Instroction Thank you for joining the group of enthusiasts that use SELEX Suspension systems on their vehicles to maximize vehicle performance.
SELEX RACING SUSPENSION Adjustable Coilover System Installation Instroction Thank you for joining the group of enthusiasts that use SELEX Suspension systems on their vehicles to maximize vehicle performance.
page 3 SCRATCH COIL 9, SCRATCH COIL 7
 SCRATCH SUSPENSION SETUP GUIDE page 2 SCRATCH Air 8, Scratch AIR 6 page 3 SCRATCH COIL 9, SCRATCH COIL 7 page 4 Coil fork setup page 5 Coil SHOCK setup Suspension Setup Guide (Scratch 9, Scratch 7) Bike
K2 Smart Fork Owner s Manual Addendum
 K2 Smart Fork Owner s Manual Addendum K2 Bike 19215 Vashon Hwy SW Vashon, WA 98070 INTRODUCTION Congratulations and thank you for purchasing the best performing, most technologically advanced suspension
After Installing an Öhlins Shock Absorber/Front Fork
 Checkpoint Öhlins After Installing an Öhlins Shock Absorber/Front Fork Note! All motorcycles are designed with a suspension geometry that includes height and fork angle. Changing components (for example
Automotive Shock Absorbers TTX46CS/ TTX36. Owner s Manual
 Automotive Shock Absorbers TTX46CS/ TTX36 Owner s Manual Introduction Öhlins Racing AB - The Story It was the 1970 s, a young man named Kenth Öhlin spent most of his spare time pursuing his favourite sport:
Improves Traction and Lateral G s
 Tuesday, February 14, 2012 New Product Release: Griggs/VariShock Improves Traction and Lateral G s Double-Adjustable Ultra-Light Coil-Over Shock Absorbers Available NOW!! Can be used on any high performance
RZR 900 spring/shock installation
 RZR 900 spring/shock installation Thank you for purchasing the Shock Therapy Dual Rate Spring Kit for your RZR 900. Your item list: 2 Front upper coil springs, 2 Front lower coil springs, 2 Rear upper
Front Suspension. Setup and Tuning Guide
 Front Suspension Setup and Tuning Guide GEN.00000000005623 GEN0000000000000 Rev A 2015 SRAM, 2018 SRAM, LLC LLC Table of Contents Introduction... 4 Set Sag...5 Dampers... 6 Air Springs - Solo Air, DebonAir,
Basic Information. Öhlins Shock Absorber. Owner s Manual
 Basic Information Öhlins Shock Absorber Owner s Manual Introduction Öhlins Racing AB - The Story It was the 1970 s, a young man named Kenth Öhlin spent most of his spare time pursuing his favourite sport:
ALL MOUNT UNIVERSAL ATV PLOW MOUNT KIT P/N ASSEMBLY / OWNERS MANUAL. Application PLOW PUSH FRAME NO , or
 ALL MOUNT UNIVERSAL ATV PLOW MOUNT KIT P/N 15-0050 ASSEMBLY / OWNERS MANUAL Application PLOW PUSH FRAME NO. 15-0070, 33-0000 or 33-0070 Before you begin, please read these instructions and check to be
Introduction.. pg.4. Basic Terms & Shock Setup Overview.. pg.6. General Maintenance. pg.9. Coil Shock Setup pg.10. Setting and Adjusting Sag... pg.
 TABLE OF CONTENTS Introduction.. pg.4 Basic Terms & Shock Setup Overview.. pg.6 General Maintenance. pg.9 Coil Shock Setup pg.10 Setting and Adjusting Sag.... pg.12 Suspension Settings Glory.... pg.13
manual Shock 03_ A5 _E :39 Uhr Seite 2 CONTENT
 manual Shock 03_ A5 _E 17.06.2004 12:39 Uhr Seite 2 CONTENT > Traction Control-Functions P. 02 > Picture of the Genius Shock and Remote Control Lever P. 03 > Basic Set-Up of the Remote Control P. 04 >
1999 HEADSHOK SUPER FATTY M AND P-BONE TM M OWNER S MANUAL
 1999 HEADSHOK SUPER FATTY M AND P-BONE TM M OWNER S MANUAL Congratulations and thanks for your purchase of a HeadShok suspension fork. You have invested in a suspension system which features long travel,
DUAL SUSPENSION USER S MANUAL
 DUAL SUSPENSION USER S MANUAL 2018.April TABLE OF CONTENTS INTRODUCTION 3 BASIC TERMS & SHOCK SETUP OVERVIEW 3 TERMS 3 SETUP 3 SAG 4 REBOUND DAMPING 4 PEDAL PLATFORM 4 GENERAL MAINTENANCE 4 FRONT SUSPENSION
SCOTT BICYCLES OWNERS MANUAL Content
 manual Shock 03_ A5 _E 30.09.2003 14:59 Uhr Seite 2 SCOTT BICYCLES The basic set-up of the Scott Genius Shock is easy and can be done within a few minutes. The Scott Genius Shock should be adjusted exactly
OWNERS MANUAL 650B. A Division Of
 OWNERS MANUAL 650B A Division Of Mountain Racing Products, Inc 580 N. Westgate Dr. Grand Junction, CO 81505 USA 1.970.241.3518 www.whitebrotherscycling.com TABLE OF CONTENTS SAFETY...PAGE 2 INTRODUCTION...PAGE
SUSPENSION SETUP GUIDE
 For your Pivot suspension equipped bike to pedal and descend at its best, it is important to tune the suspension properly. Use this guide to familiarize yourself with the Pivot suspension setup procedures
Detroit Speed, Inc. QUADRA Link Rear Suspension Chevy II P/N:
 Detroit Speed, Inc. QUADRA Link Rear Suspension 1962-1967 Chevy II P/N: 041707 Detroit Speed, Inc. QUADRAlink is a great way to upgrade from original leaf spring suspension. Unlike our competitors, Detroit
GM WD P/U 6-LUG, AND ½ TON SUV S (CLASSIC BODY) W/ TORSION BARS SUSPENSION LIFT KIT KIT# TM106
 W/ TORSION BARS SUSPENSION LIFT KIT KIT# TM106") GM 1500 4WD P/U 6-LUG, AND ½ TON SUV S (CLASSIC BODY) W/ TORSION BARS SUSPENSION LIFT KIT 1988 2011 KIT# TM106 Installation of a Trail Master suspension lift kit will change the vehicle s center of gravity
GM 1500 4WD P/U 6-LUG, AND ½ TON SUV S (CLASSIC BODY) W/ TORSION BARS SUSPENSION LIFT KIT 1988 2011 KIT# TM106 Installation of a Trail Master suspension lift kit will change the vehicle s center of gravity
Model year 2014 USER MANUAL
 Model year 2014 USER MANUAL WARRANTY Terms and conditions BOS MTB offers warranty on its products on the following terms: BOS MTB guarantees to the original purchaser that the BOS product for which they
JEEP CHEROKEE (ZJ) 2 POLY SPACER KIT KIT# TM & TM
 2 POLY SPACER KIT KIT# TM & TM") 400 W. Artesia Blvd. Fax: (310) 747-3912 Compton, CA 90220 Ph: (877) 695-7812 www.trailmastersuspension.com JEEP CHEROKEE (ZJ) 2 POLY SPACER KIT 93-98 KIT# TM3820-40010 & TM3820-40013 Installation of a
400 W. Artesia Blvd. Fax: (310) 747-3912 Compton, CA 90220 Ph: (877) 695-7812 www.trailmastersuspension.com JEEP CHEROKEE (ZJ) 2 POLY SPACER KIT 93-98 KIT# TM3820-40010 & TM3820-40013 Installation of a
Technical Support Line: (952) Fax Line: (952) Hanover Ave. Lakeville, MN
 Fax Line: (952) Hanover Ave. Lakeville, MN") Technical Support Line: (952) 985-5675 Fax Line: (952) 985-5679 21730 Hanover Ave. Lakeville, MN 55044 www.qa1.net ASSEMBLY INSTRUCTIONS QA1 Quad Adjust Shocks QA1 P/N D4x01 READ ALL INSTRUCTIONS CAREFULLY
Technical Support Line: (952) 985-5675 Fax Line: (952) 985-5679 21730 Hanover Ave. Lakeville, MN 55044 www.qa1.net ASSEMBLY INSTRUCTIONS QA1 Quad Adjust Shocks QA1 P/N D4x01 READ ALL INSTRUCTIONS CAREFULLY
Model List. Odesa Mag Odesa Tridium EnRoute Manx Grind Grind OS SPINNER 300 Eagle. Owner's Manual
 Model List Odesa Mag Odesa Tridium EnRoute Manx Grind Grind OS SPINNER 300 Eagle Owner's Manual Setup, tuning and maintenance of your Spinner Suspension Fork Congratulations on getting a bike with Spinner
SUSPENSION SETUP GUIDE
 For your Pivot suspension equipped bike to pedal and descend at its best, it is important to tune the suspension properly. Use this guide to familiarize yourself with the Pivot suspension setup procedures
TABLE OF CONTENTS. Frames Technical Data & Features
 TABLE OF CONTENTS Dual Suspension Frame Overview........................ 2 Introduction.................................... 3 Basic Terms & Shock Setup Overview...................... 4 Suspension SAG Recommendation
Öhlins Shock Absorber for Automotive TTX36. Owner s Manual
 Öhlins Shock Absorber for Automotive TTX36 Owner s Manual Introduction Öhlins Racing AB - The Story It was the 1970 s, a young man named Kenth Öhlin spent most of his spare time pursuing his favourite
Table of Contents Safety Warning Information
 SUSPENSION FORK INSTRUCTION MANUAL 2 Table of Contents 04... Safety Warning Information 05... Tools Needed 06... Fork Features Overview 07... Crown Race Installation/Steer Tube Cutting 08... Star Nut/Stem
Model List. Odesa Mag Odesa Tridium EnRoute Manx Grind Grind OS SPINNER 300 Eagle. Owner's Manual
 Model List Odesa Mag Odesa Tridium EnRoute Manx Grind Grind OS SPINNER 300 Eagle Owner's Manual Setup, tuning and maintenance of your Spinner Suspension Fork Congratulations on getting a bike with Spinner
Wren Inverted Suspension Forks with Keyed Stanchions and TwinAir System
 Owner s Manual Wren Inverted Suspension Forks with Keyed Stanchions and TwinAir System Congratulations You have just purchased a Wren Inverted Suspension Fork. The culmination of years of design, testing
VariShock QuickSet 2 Coil-Over Installation and Tuning Guide
 VariShock QuickSet 2 Coil-Over Installation and Tuning Guide Part Number Qty. Description Various 2 Coil-Over Shock with Threaded Body (pair) 899-002-200 2 Lower Coil-Over Spring Seat 899-002-201 2 Upper
Öhlins Shock Absorber for MX & Enduro TTX44. Owner s Manual
 Öhlins Shock Absorber for MX & Enduro TTX44 Owner s Manual Introduction Öhlins Racing AB - The Story It was the 1970 s, a young man named Kenth Öhlin spent most of his spare time pursuing his favourite
UPPER TRAILING ARM REMOVAL
 #1204 MUSTANG UPPER TRAILING ARMS Thank you for your purchase. Please call us at (562) 907-7757 if you have any questions regarding your Hotchkis Performance products. Visit us online @ www.hotchkis.net
SANTA CRUZ BICYCLES MY18 Hightower Suspension Setup
 SANTA CRUZ BICYCLES MY18 Hightower Suspension Setup Copyright Santa Cruz Bicycles 2017 TABLE OF CONTENTS SAFETY INSTRUCTIONS... 3 SAG SETUP...3 AIR SPRING FORKS...3 AIR SHOCKS...3 FORK SETUP... 4 FOX 36
WARRANTY INFORMATION AMERICAN MADE MANITOU SUSPENSION
 AMERICAN MADE MANITOU SUSPENSION CONGRATULATIONS ON CHOOSING THE LATEST IN SUSPENSION TECHNOLOGY AVAILABLE, A 2003 MANITOU DORADO FORK BUILT IN THE USA. This DORADO fork is fully assembled and is ready
 .1..2..3..4..5..6..7..8..9..10. MANITOU SUSPENSION FORKS CONGRATULATIONS ON CHOOSING A 2003 MANITOU SIX FORK. This Manitou SIX fork is fully assembled and ready to be installed onto your bicycle. It comes
OWNERS MANUAL HEADSHOK FORKS
 OWNERS MANUAL HEADSHOK FORKS 1998 HEADSHOK MOTO FR INSTRUCTIONS The HeadShok Moto FR combines the versatility of a triple-clamp fork with the superior stiction-free performance of all the HeadShok forks.
Öhlins Front Fork Pressurized Cartridge Kit. FKR 100-Series. Owner s Manual
 Öhlins Front Fork Pressurized Cartridge Kit FKR 100-Series Owner s Manual Öhlins Headquarters Upplands Väsby, Sweden Öhlins Racing AB - The Story It was the 1970 s, a young man named Kenth Öhlin spent
PN# Dodge RAM Cummins 2500/3500 4WD (Except PowerWagon) Steering Box Brace Kit PRO COMP SUSPENSION. Suspension Systems that Work!
 Steering Box Brace Kit PRO COMP SUSPENSION. Suspension Systems that Work!") 2360 Boswell Road Chula Vista, CA 91914 Phone 619.216.1444 Fax 619.216.1474 E-Mail tech@explorerprocomp.com PRO COMP SUSPENSION Suspension Systems that Work! PN# 61239 2003-2008 Dodge RAM Cummins 2500/3500
2360 Boswell Road Chula Vista, CA 91914 Phone 619.216.1444 Fax 619.216.1474 E-Mail tech@explorerprocomp.com PRO COMP SUSPENSION Suspension Systems that Work! PN# 61239 2003-2008 Dodge RAM Cummins 2500/3500
C5/C6 Level 3 Coilover
 Part # 11510311-1998-2013 C5/C6 Level 3 CoilOver System Front Components: 11513111 Front Coilovers Recommended Tools Rear Components: 11516111 Rear Coilover Miscellaneous Components: 85000000 Spanner Wrench
 FORK- 2014 32 FLOAT 27.5 Travel 3.9 in./100 mm 4.7 in./120 mm 5.1 in./130 mm 5.5 in./140 mm 5.9 in./150 mm Features/Adjustments Factory FIT icd; 100; Kashima coated upper tubes, 1-1/8 straight or 1.5 tapered
Installation Instructions Mustang Air Suspension. Part # Mustang Air Suspension System.
 Part # 12120298-1979-1989 Mustang Air Suspension System Recommended Tools Front Components: 12122401 Front ShockWave Strut Rear Components: 12125401 RearShockWave 12125899 Rear Lower StrongArms 12126699
Installation Guide 2016 Kawasaki ZX10-R Exhaust Kit
 Installation Guide 2016 Kawasaki ZX10-R Exhaust Kit!! THIS PRODUCT IS DESIGNED FOR USE IN CLOSED COURSE RACING AND IS NOT INTENDED FOR HIGHWAY USE!! Congratulations on the purchase of your new TaylorMade