PATENT PENDING PLEASE DO NOT DISCARD THIS MANUAL! KEEP FOR FUTURE REFERENCE AND TRAINING
|
|
|
- Norman Payne
- 5 years ago
- Views:
Transcription


1 OWNER S OPERATING & MAINTENANCE MANUAL PATENT PENDING PLEASE DO NOT DISCARD THIS MANUAL! KEEP FOR FUTURE REFERENCE AND TRAINING

2 TABLE OF CONTENTS IMPORTANT SAFETY INFORMATION ASSEMBLY INSTRUCTIONS ATTENDANT OPERATING INSTRUCTIONS OCCUPANT OPERATING INSTRUCTIONS GENERAL MAINTENANCE SPECIFICATIONS...14 AUGUSTINE CHAIR OPTIONS...15 CONTACT & WARRANTY INFORMATION......BACK COVER Winco assumes no responsibility for damage or injury caused by the improper assembly, installation, use or maintenance of this product. IMPORTANT! PLEASE READ THIS ENTIRE MANUAL BEFORE USING RECLINER. DO NOT INSTALL, MAINTAIN OR OPERATE THIS EQUIPMENT WITHOUT READING AND FOLLOWING THIS MANUAL. OTHERWISE INJURY AND/ OR DAMAGE MAY RESULT. THE INFORMATION CONTAINED IN THIS MANUAL IS SUBJECT TO CHANGE WITHOUT NOTICE. PHOTOS ARE REPRESENTATIVE OF THE PRODUCT AND MAY VARY SLIGHTLY FROM ACTUAL PRODUCTION MODELS. SAVE THESE INSTRUCTIONS FOR FUTURE REFERENCE! NO PART OF THIS MANUAL MAY BE DUPLICATED IN ANY FORM WITHOUT THE PRIOR WRITTEN CONSENT OF WINCO MFG, LLC. UNAUTHORIZED DUPLICATION MAY RESULT IN CIVIL PROSECUTION TO THE MAXIMUM EXTENT ALLOWED BY LAW. Products with the following markings are intended for commercial use only. SYMBOLS FOLLOW INSTRUCTIONS DC VOLTAGE TYPE B APPLIED PART GENERAL WARNING SIGN CENTRAL-LOCKING BRAKE PINCH POINT WARNING SIGN
3 IMPORTANT - PLEASE READ FOR PRODUCTS WITH POWERED OPTIONS (Heat, Massage, etc...) IMPORTANT SAFETY INSTRUCTIONS - SAVE THESE INSTRUCTIONS (Read all instructions before using this product.) When using an electrical appliance, basic precautions should always be followed, including the following: DANGER - To reduce the risk of electric shock always unplug this product from the electrical outlet before cleaning, maintenance or servicing. 1. Unplug this product from the electrical outlet when not in use.. Supervision should be provided when using this product. 3. Use this product only for its intended use as described in this manual. 4. Do not use attachments not recommended by the manufacturer. 5. Never operate this product if it has a damaged cord or plug, if it is not working properly, if it has been dropped or damaged, or dropped into water, contact an authorized Winco service center for instructions. 6. DO NOT carry or pull this product by power supply cord or use the cord as a handle. 7. Keep the cord away from heated surfaces. 8. Do not use outdoors. 9. To disconnect, turn all controls to the "off" position, then remove plug from outlet. Pull plug only to remove cord. 10. Clean switch with a damp cloth only Warranty will be VOID if liquid is introduced into switch mechanism. 11. Extension cords are not recommended. 1. DO NOT roll recliner or other equipment over cord. 13. Recliner comes with a grounded three prong plug. If the plug does not fi t into the outlet, contact a certifi ed electrician to install the proper outlet. DO NOT MODIFY THE PLUG IN ANY WAY. 14. Keep children away from extended foot support (or other similar parts). DANGER: i. Never insert pins, or attach other metallic fasteners into/onto any part of this chair. ii. Do not use this product if the covering shows signs of deterioration, such as checking, blistering, or cracking. iii. KEEP DRY - Do not operate in a wet or moist condition or environment. i. Long term, continuous exposure to heat may cause burns. It is recommended that skin in contact with heated area be checked for redness and blistering during long term usage. Do not use on an infant, invalid or incapacitated person. Do not use on insensitive skin or on a person with poor blood circulation. If you are uncertain if you should use this product, please consult your physician about the use of heat and massage. ii. Do Not Crush/Pinch heating elements or wiring. Connect this product to a properly grounded outlet only. 3
4 IMPORTANT - PLEASE READ BASIC SAFETY PRECAUTIONS: 1. READ AND FOLLOW ALL DIRECTIONS.. NEVER STAND on slide-out foot support foot support is not a step; INJURY MAY OCCUR. 3. DO NOT put hands, feet, or clothing into any openings when changing positions on recliner. Attendant MUST confirm that users arms, legs, hands and feet are clear while changing recliner positions or SERIOUS INJURY MAY OCCUR. 4. Lock casters at all times, except when moving chair. 5. STAY CLEAR of the recliner mechanisms when operating chair. 6. DO NOT use recliner for transporting in or with ANY type of vehicle or trailer. Winco recliners have not been tested or approved for use by an occupant in any type of vehicle or trailer. 7. NEVER use the chair arms or backrest, or tables as a seat; SERIOUS INJURY OR DAMAGE MAY OCCUR. 8. Periodically check the tightness of all nuts, bolts and screws. 9. Immediately REMOVE FROM SERVICE any recliner with broken recline mechanisms, torn upholstery, and/or other mechanical or visible damage. 10. USE ONLY WINCO AUTHORIZED REPLACEMENT PARTS. 11. NEVER EXCEED the recommended weight capacity. 1. This chair is NOT intended nor suitable for patient transport. 4


 1 5 IMPORTANT: Keep objects and persons clear of the chair before performing step.")
5 PREPARATION: ASSEMBLY INSTRUCTIONS 1. Carefully examine your product for any damage. Inspect all components. IF DAMAGE IS EVIDENT, REFUSE SHIPMENT, & CONTACT FREIGHT CARRIER OR WINCO IMMEDIATELY.. Remove all packaging material that was secured for shipping. 3. Carefully remove the product from the carton. 4. Save all boxes and packaging material until after you have assembled your product and have verified that all components are functioning properly. REAR BRAKE ASSEMBLY INSTRUCTIONS: This chair is shipped with the central-locking casters in the LOCKED position. To assemble the REAR central-lock lever: 1. Loosen thumb screw and slide the lever (A) onto the "HEX" portion of the bar.. Tighten thumb screw (B). 3. Lift UP on the lever to UNLOCK the central-locking casters. BACK ASSEMBLY INSTRUCTIONS: 1. Lock casters by pushing down the central-lock lever located at the rear of chair. (See Lock/Unlock Casters pg.7) 1 5 IMPORTANT: Keep objects and persons clear of the chair before performing step.. Pull one of the recline levers (A), located on either side of the chair, until fully extended to bring the recline mechanism (B) into its upright position. NOTE: Legrest is spring loaded and will be rapidly released into the recline position when recline lever is pulled. 3. Release the recline lever and push legrest in, to its stored position. A
.")
.")

 is aligned with the middle hole of 5 6.")

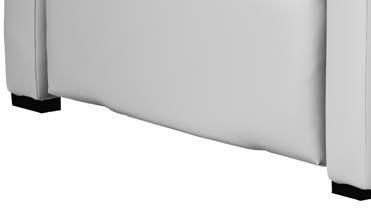
6 BACK ASSEMBLY INSTRUCTIONS: ASSEMBLY INSTRUCTIONS 4. Hold the rear apron up, exposing the mounting brackets (A). Lift the upholstered back by its sides while aligning the mounting brackets with the recline mechanism (B). 4 Keep hands clear of connection points or injury may occur IMPORTANT: We recommend two people be used for step 4 Be careful not to tear or puncture vinyl. 5. Slide the back onto the recline mechanism until the middle hole of the mounting bracket (A) is aligned with the middle hole of the recline mechanism (B) Install knobs (A) (tethered to back) and tighten to a secure fit Ensure that the rear apron rests OVER the rear brace of chair. IMPORTANT: Test to ensure the back has been properly installed by pulling up on the back. The back should remain securely in place. 7 6

. Lever will return to the unlocked position.")
 3.")
7 ATTENDANT OPERATING INSTRUCTIONS CASTER OPERATION: Lock/Unlock This chair features two types of casters, rigid and central-locking. 1 The front two casters are rigid casters. They are NOT designed to swivel in order to facilitate stable straight steering. The rear two casters are central-locking casters. They are designed to swivel 360. When central-lock is engaged, caster wheels will NOT roll and caster will NOT swivel. From the REAR of chair 1. TO LOCK REAR CASTERS: Press down on central-lock lever (A). Lever will lock into position.. TO UNLOCK REAR CASTERS: Lift up with foot on central-lock lever (A). Lever will return to the unlocked position. Ensure central locking brake is engaged at all times, particularly BEFORE seating an occupant in chair, and when occupant is exiting the chair. Never operate brakes without proper footwear. "Closed toe" shoes are recommended for operation of brake mechanism. From the FRONT of chair (OPTIONAL FEATURE) 3. TO LOCK REAR CASTERS: Push in on the side of the central-lock lever labeled "UNLOCKED" (3A). Lever will lock into position & "LOCKED" will be visible (4A) TO UNLOCK REAR CASTERS: Push in on the side of the centrallock lever labeled "LOCKED" (4A). Lever will lock into position & "UNLOCKED" will be visible (3A). IMPORTANT: Push "UNLOCKED" to LOCK Push "LOCKED" to UNLOCK The visible label indicates the current state of the chair casters. 4 Ensure central locking brake is engaged at all times, particularly BEFORE seating an occupant in chair, and when occupant is exiting the chair. Never operate brakes without proper footwear. "Closed toe" shoes are recommended for operation of brake mechanism. 7

 to maintain position.")

8 ATTENDANT OPERATING INSTRUCTIONS RECLINE CHAIR FROM ATTENDANT POSITION: Attendant should be positioned on the RIGHT or LEFT side of chair 1. While occupant is seated in the chair, use one hand to operate the recline lever, located on either side of chair, to activate the legrest into its raised position. 1 A. To operate the infinite back positioning, after occupant's feet have been raised, use one hand to operate the recline lever (A) and the other hand to push on the upholstered back (B) until desired position or maximum recline has been reached. Release recline lever (A) to maintain position. IMPORTANT: Do NOT force the back of chair up or down without fully extending either of the two recline levers, this can damage the chair. A RETURN CHAIR UPRIGHT FROM ATTENDANT POSITION: Attendant should be positioned on the RIGHT or LEFT side of chair 1 A 1. While occupant is reclined in the chair, attendant should use one hand to operate the recline lever (A), located on either side of chair, while using the other hand to pull up on back (B). Release the recline lever (A) once the back has fully returned to the upright position.. Attendant should use one hand to push down on the legrest (A) until it locks into its stored position. NOTE: The recline lever does NOT have to be used to return legrest to its stored position. Attendant should NOT use foot to return the legrest to it's stored position. Damage to mechanism and upholstery may occur. 8

.")

, then press down on the front of the seat until it locks into position (B).")
9 ATTENDANT OPERATING INSTRUCTIONS SIDE-TABLE OPERATION: 1. TO RAISE TABLE: Grasp center of table and gently lift into place. Side-table will lock into place with an audible "click" once fully extended. DO NOT lean or sit on side tables. DO NOT use table for support or assistance when exiting or entering the chair. Keep hands and objects clear of the moving parts of the table mechanism. 1 IMPORTANT: Side-tables have been rated for a MAXIMUM weight capacity of 0 lbs. (9.0 kg). TO STORE: Lift up on the lever located under the side-table and lower to its stored position. Keep hands and objects clear of the moving parts of the table mechanism. SEAT REMOVAL AND REPLACEMENT: TO REMOVE THE SEAT: 1. Fully recline the chair back. (See previous page for instruction.). Pull up on the front of the seat until it releases (A), then pull seat out away from the front of the chair (B). Seat is tethered to chair frame. Do not forcefully pull on seat Chairs equipped with heat and massage: DO NOT attempt to unplug wires. UNPLUG power cord from power source BEFORE seat removal, cleaning, or servicing of chair. ENSURE all wiring for seat is clear of all moving parts of the mechanism before, during, and after re-installation of seat. TO INSTALL THE SEAT: 3. With the chair back fully reclined, slide the upholstered seat along mechanism until it stops (A), then press down on the front of the seat until it locks into position (B). 3 IMPORTANT: Ensure the side aprons of the seat are positioned outside of mechanism and do NOT interfere with seat installation. 4. Verify the seat has been correctly installed by carefully pulling up on the front and back of the seat. Seat should be secure and not move. 9 Attendant should NOT attempt to seat an occupant after seat has been re-installed without first verifying the seat has been installed correctly or serious injury may occur.
, located on either side of chair, to activate the legrest into the recline position. 1 A.")
 when you have achieved the desired angle to lock the back into position. DO NOT push or pull legrest to maneuver chair. DO NOT stand or sit on the legrest.")

10 OCCUPANT OPERATING INSTRUCTIONS RECLINE WHILE IN THE SEATED POSITION: 1. While seated in the chair, pull back on either of the recline levers (A), located on either side of chair, to activate the legrest into the recline position. 1 A. To operate the infinite back positioning, pull back on the recline lever and adjust the upholstered back angle by pushing back with your body until desired angle has been reached. Release recline lever (A) when you have achieved the desired angle to lock the back into position. DO NOT push or pull legrest to maneuver chair. DO NOT stand or sit on the legrest. DO NOT place hands, legs, or feet under seat, mid-ottoman, or legrest. Stay clear of recline mechanism when operating chair. RETURN TO THE SEATED POSITION: 1. To return the back to the full upright position pull back on either of the recline levers while sitting upright in the chair. Release the recline lever once the back has fully returned to the upright position. 1 A A. Press down on the legrest with legs/feet until it locks into place. NOTE: The recline lever does NOT have to be used to return legrest to its stored position. 10
 HEAT MASSAGE OR HEAT ONLY Heating: (Heating elements are located in the seat & back of chair) Push HEAT button - See indicator light on switch 3")

11 OCCUPANT OPERATING INSTRUCTIONS OPTIONAL HEAT & MASSAGE OPERATION: Control is located on the inside of right arm of chair. (Right is determined - as if sitting in the chair) HEAT MASSAGE OR HEAT ONLY Heating: (Heating elements are located in the seat & back of chair) Push HEAT button - See indicator light on switch 3 Lights = High Heat / Bright Light Lights = Medium Heat / Med Light 1 Lights = Low Heat / Dim Light No Light = HEAT OFF Allow 5-8 minutes for back and seat to warm to desired setting. Heat will automatically shut off after approximately 60 minutes. (Timer resets each time switch is pressed) Massage option: (The massage option uses 4 separate motors located in the backrest of the chair. Two in the lower backrest, and two in the middle (upper) backrest. Push MASSAGE button 1X = Lower Back / Low Intensity X = Lower Back / High Intensity 3X = Upper & Lower Back / Low Intensity 4X = Upper & Lower Back / High Intensity 5X = Alternating Upper & Lower Back 6X = MASSAGE OFF Massage will automatically shut off after approximately 15 minutes. (Timer resets each time switch is pressed) TROUBLESHOOTING: With system disconnected from power source, use a DAMP CLOTH ONLY to clean switch, wiring or power pack (located under seat frame). If there is no heat or massage or flashing light on the switch - check power cord connections to wall outlet AND connection of power cord to power pack unit under chair. If switch displays a flashing light; Disconnect from wall, check all accessible wire connectors under chair for possible loose connections, then re-plug into wall and test again. If system still does not work contact Winco customer service: CORD STORAGE: (Models with Heat-HT or Heat & Massage-HM) To prevent tripping on cord, damage to cord, or damage to recliner, the power cord should be coiled and stored in the "Hook & Loop" fastener provided BEFORE moving chair or whenever heat & massage is not in use. 11
.")
 Seat is tethered to chair frame. Do not forcefully pull on seat.")


12 GAS SPRING RELEASE ADJUSTMENT: GENERAL MAINTENANCE If recline levers fail to operate properly, adjust the gas spring using the instructions below. 3A 1. Recline back of chair. (See pg. 8 "Recline Chair From Attendant Position"). Return legrest to stored position. 3. Remove the seat (A) and position as shown (B). (See pg. 9 "Seat Removal") Seat is tethered to chair frame. Do not forcefully pull on seat. Chairs equipped with heat and massage: 3B UNPLUG power cord from power source BEFORE removing seat, cleaning, cleaning or servicing chair. Chairs equipped with heat and massage - DO NOT attempt to unplug wires. ENSURE all wiring for seat is clear of all moving parts of the mechanism before, during, and after re-installation of seat. 4. Locate the gas spring and loosen the nut on the gas spring using an 11/16" wrench Remove the opposite end of gas spring by removing the cotter & clevis pin. 5 Proceed to step 6 or 7 depending on the necessary adjustment. IMPORTANT: DO NOT allow button on end of cylinder to depress while performing this task. 1
 half (1/) of a revolution (or 180 ). Chair reclines without the use of recline levers: 7.")
 and push back on the chair back (B) to check for proper adjustment.")
13 GENERAL MAINTENANCE GAS SPRING RELEASE ADJUSTMENT: (continued) Chair will not recline: If chair will NOT recline when left or right recline levers are pulled, rotate the gas spring clockwise (A) half (1/) of a revolution (or 180 ). Chair reclines without the use of recline levers: 7. If the chair reclines without the use of recline levers, rotate the gas spring counter-clockwise (B) half (1/) of a revolution (or 180 ). 8. After adjustment; Replace Clevis Pin and Bow-Tie Cotter Pin. 9. Pull the recline lever (A) and push back on the chair back (B) to check for proper adjustment. Repeat above steps as needed until correct release action is achieved. Then TIGHTEN HEX NUT (that you loosened in step 5). IMPORTANT: Make sure all bow tie cotter pins are securely inserted in all clevis pins. 9 A Failure to securely insert the bow tie cotter pins into the clevis pin could cause the clevis pins to fall out and result in injury, or damage to the chair. GENERAL CARE & CLEANING: REGULARLY lubricate pivot points on the recline mechanism with a lubricant approved by your facility. Periodically position the chair back into full recline position to keep the gas cylinder lubricated. Periodically inspect tightness of all screws, bolts, and nuts. Winco furnishings are built to provide durable reliable service when properly cared for. In general all of our products should be 1) Cleaned ) Rinsed 3) Allowed to air dry. It is important to note that disinfecting a product is not the same as cleaning the product. Disinfectants alone will not provide adequate cleaning, they do not have grease or oil cutting properties to remove grime or hair and skin oils. Over time, the appearance and feel and performance of your upholstery may diminish if not cleaned properly CLEANING: Remove grime, hair and body oils; Your furnishings should be cleaned with mild soap & water solution and a damp cloth on a regular basis (especially where skin & hair make contact with upholstery). Avoid harsh detergents or chemicals that could damage the upholstery or finish of your recliner. If the furnishing is disinfected with chemicals or bleach, it MUST be wiped off using only clean water on a damp cloth and then be allowed to air dry. Failure to rinse upholstery with clean water can result in a build-up of residues over time that can dry out the upholstery and cause changes to the look and feel of the upholstery and eventually can lead to cracking. When seat is removed, use caution cleaning in and around mechanisms. Keep hands clear of pinch points & metal edges or injury may occur. Disconnect power (Chairs w/ HM or HT option) when cleaning chair. Please refer to the PERMABLOK or other instruction tags that may have come with your furnishings for complete care and cleaning instructions. Retain information on tag for future use. FOR FURTHER CLEANING INFORMATION on standard Winco vinyls VISIT:


.....5.")


...45.")

14 AUGUSTINE RECLINER SPECIFICATIONS Seat Height " Specifications Back Height Above Seat...8.5" Seat Width (arm to arm) " Seat Depth " Overall Height " Weight...181lbs. Overall Width " (With OPTIONAL Trays Up) " Overall Length...40" Overall Length Reclined...76" Maximum Weight Capacity lbs. 14


15 AUGUSTINE RECLINER OPTIONS Heat & Massage HM...Heat & Massage HT...Heat ONLY FACTORY INSTALLED ONLY IV Pole & Attachment IV... IV Pole & Attachment Side-Table Available on LEFT, RIGHT, or BOTH sides Accessory Holder Available on LEFT, RIGHT, or BOTH sides Central Front Brake BE...Central Front Brake 15
16 LIMITED WARRANTY TERMS Winco Mfg., LLC. warrants this product to be free of manufacturer s defects in material and workmanship, provided that the product is used according to normal operating conditions and proper maintenance intended by manufacturer. This warranty is available only to the original retail purchaser, is non-transferable and commences on the date of retail sale; proof of purchase required. LIMITED ONE YEAR COMPLETE PRODUCT WARRANTY: Winco Mfg., LLC warrants the complete product for one (1) year. At Winco Mfg., LLC. sole discretion, it may repair or replace any components freight free that are found to be defective during the fi rst year. Winco Mfg., LLC. shall not be liable for any labor, or any other costs incurred as a result of or in conjunction with a warranty claim. LIMITED THREE YEAR WARRANTY: Winco Mfg., LLC warrants recliner mechanisms, electrical components, vinyl panels and Vinyl on upholstered parts [from cracking or delaminating], pressurized gas springs, and casters, when new, for a period of three (3) years. At Winco Mfg., LLC. s sole discretion, it may repair or replace components found to be defective. Winco Mfg., LLC. shall not be liable for any labor, shipping or any other costs incurred as a result of, or in conjunction with, a warranty claim. LIMITED LIFETIME FRAME WARRANTY: Winco Mfg., LLC warrants steel and aluminum base frames for all products, when new, for the lifetime of the original purchaser. This limited warranty does not apply to paint/fi nish or any components attached to the frame such as; upholstery, foam, casters, mechanisms or related parts that are covered under above warranties. Winco Mfg., LLC shall not be liable for any labor, shipping or any other costs incurred as a result of or in conjunction with a warranty claim. The purchaser s exclusive remedy under this warranty shall be limited to such repair or replacement of defective components at Winco Mfg., LLC sole discretion. For warranty service, contact the dealer that the product was originally purchased from or Winco Mfg., LLC directly. EXCLUSIONS There are no other warranties, conditions, representations or guarantees, express or implied, made or intended by Winco Mfg., LLC and all other warranties, conditions, representations or guarantees including any warranties, conditions, representations or guarantees under any Sale of Good Act or Like legislation or statute is hereby expressly excluded. Any and all other implied warranties shall not extend beyond the duration of the express warranty. Liability for incidental or consequential damages is excluded to the extent permitted by law. Some states do not allow the exclusion or limitation so the above limitation or exclusion may not apply to you. This warranty gives you specific legal rights. In addition you may also have other rights, which vary from state to state. GENERAL PROVISIONS No warranty herein contained or set out shall apply when damage or repair is caused by any of the following: 1. Damage in transit.. Accident, alteration, abuse or misuse of product i.e., exceeding weight capacities, applying inordinate pressure to footrest/leg rest, use in Mental Health facilities like institutions or, any unintended use of the product or use in unintended environments (i.e. outdoor, showers, MRI rooms, etc..) 3. Fire, water damage, theft, war, riot, hostility, acts of God. Examples contained in this list are not to be construed as all-inclusive. Design, appearance, parts, & construction are subject to change without notice.
PATENT PENDING PLEASE DO NOT DISCARD THIS MANUAL! KEEP FOR FUTURE REFERENCE AND TRAINING
 OWNER S OPERATING & MAINTENANCE MANUAL PATENT PENDING PLEASE DO NOT DISCARD THIS MANUAL! KEEP FOR FUTURE REFERENCE AND TRAINING TABLE OF CONTENTS IMPORTANT SAFETY INFORMATION... 3-4 ASSEMBLY INSTRUCTIONS......
OWNERS OPERATING & MAINTENANCE MANUAL PLEASE DO NOT DISCARD THIS MANUAL! KEEP IT FOR FUTURE REFERENCE AND TRAINING.
 AUGUSTINE TREATMENT RECLINER OWNERS OPERATING & MAINTENANCE MANUAL PLEASE DO NOT DISCARD THIS MANUAL! KEEP IT FOR FUTURE REFERENCE AND TRAINING. TABLE OF CONTENTS IMPORTANT SAFETY INFORMATION... 3-5 ASSEMBLY
OWNER S OPERATING & MAINTENANCE MANUAL
 OWNER S OPERATING & MAINTENANCE MANUAL Model 6Y48-39-00-00-00-D6 Shown PLEASE DO NOT DISCARD THIS MANUAL! KEEP FOR FUTURE REFERENCE AND TRAINING TABLE OF CONTENTS TABLE OF CONTENTS... INTENDED USE STATEMENT...3
OWNER S OPERATING & MAINTENANCE MANUAL
 OWNER S OPERATING & MAINTENANCE MANUAL Care Cliner & XL Care Cliner (6530 Shown) Drop-Arm & XL Drop-Arm Care Cliner (6550 Shown) Designer Care Cliner (6710 Shown) Elite & XL Elite Care Cliner (6910 Shown)
Heavy Duty Four Wheeled Walker
 Heavy Duty Four Wheeled Walker Weight Capacity: 500 lbs. ITEM # W1802 Made in China 2011 ESSENTIAL MEDICAL SUPPLY, INC. Manufactured for Orlando, FL 32822 -- SAVE THESE INSTRUCTIONS -- Do not attempt to
Apollo Tilt Wheelchair 18" and 20" Instruction Manual
 Apollo Tilt Wheelchair 18" and 20" Instruction Manual Table of Contents Contents Table of Contents... 2 Introduction... 3 Warning... 4 Safety Guidelines... 5 Parts of the Tilt Wheelchair... 6 Setup & Operation...
OUTDOOR TABLE TENNIS TABLE ASSEMBLY INSTRUCTIONS
 OUTDOOR TABLE TENNIS TABLE ASSEMBLY INSTRUCTIONS Please Do Not Hesitate to Contact Our Consumer Hotline at 800-759-0977 with Any Questions That May Arise During Assembly or Use of This Product! NG2336P
USER MANUAL. Tides La Mer Treatment Table Rev A 3/28/19. *all tables shown with optional accessories and/or finishes
 USER MANUAL Tides La Mer Treatment Table *all tables shown with optional accessories and/or finishes 1-400-0041 Rev A 3/28/19 Living Earth Crafts 2019, All Rights Reserved Legal Notice The information
Installation Instructions To ensure that your installation proceeds smoothly--please read these instructions carefully before you begin.
 Single Lever Vessel Faucet Installation Instructions To ensure that your installation proceeds smoothly--please read these instructions carefully before you begin. P r o d u c t s Luxury Faucets and Accessories
Breezy EC Transport Wheelchair
 B r e e z y E C Tr a n s p o r t W h e e l c h a i r Breezy EC Transport Wheelchair O w n e r s M a n u a l READ BEFORE USE REVIEW THIS MANUAL Before using this chair you, and each person who may assist
OPERATION and SERVICE MANUAL EC TRANS. CHAIR
 OPERATION and SERVICE MANUAL EC TRANS. CHAIR MODEL 900EC THE SERIAL NUMBER WILL BE FOUND ON THE LOWER FRAME AT THE HEAD END. RECORD THE NUMBER BELOW: SERIAL NUMBER: DATE OF PURCHASE ConvaQuip Ind., Inc.
Owner s Manual. Bariatric Manual Wheelchairs. Specializing in Bariatric Patient Aids
 Owner s Manual Bariatric Manual Wheelchairs 700 LB CAPACITY XL Series Wheelchair by ConvaQuip Specializing in Bariatric Patient Aids P.O. Box 3417 * Abilene, TX 79604 U.S.A. Toll 800/637-8436 * FAX 325/677-7217
SAVE THESE INSTRUCTIONS DANGER
 Contoura Back and Seat Cushions Assembly, Installation and Operating Instructions SAVE THESE INSTRUCTIONS To ensure the safe operation and use of the Contoura Back and Cushion, these instructions MUST
Fitting Instruction for EZI-GRIP Bike Rack
 Fitting Instruction for EZI-GRIP Bike Rack Congratulations on purchasing Ezi-Grip to carry your valued bicycles. We are sure you will get many years of enjoyable use from your Ezi-Grip Bike Rack. These
Mighty Mack Wheeled Walker
 Mighty Mack Wheeled Walker Handle with lever brake Backrest Handle height adjustment knob Brake cable Extra wide padded seat Shopping basket Side brace 7 inch (180 mm) wheels user guide Prior to use please
Installation & Operators Manual
 Installation & Operators Manual Model Serial Number Purchase Date 2007-2008 SegVator, LLC Patent Pending All Rights Reserved Important Safety Information Make sure the vehicle has a properly installed
Installation Instructions
 Installation Instructions To ensure that your installation proceeds smoothly--please read these instructions carefully before you begin. P r o d u c t s Luxury Faucets and Accessories Savina Product Numbers
Stealth Power i-tilt
 Power Tilts OWNERS MANUAL Stealth Power i-tilt User Manual and Maintenance Guide for Stealth s i-tilt Customer Satisfaction 1.0 Stealth Products strives for 100% customer satisfaction. Your complete satisfaction
Owner s Guide ca4054 ca4554
 PROFESSIONAL SERIES Owner s Guide ca4054 ca4554 Remote Start System IMPORTANT NOTE: The operation of the Security and Convenience System as described in this manual is applicable to most vehicles. However,
USER MANUAL. EC+ Extra Care Bariatric Trauma Stretcher Model ConvaQuip Ind., Inc. P.O. Box 3417 Abilene, TX
 USER MANUAL EC+ Extra Care Bariatric Trauma Stretcher Model 1600 ConvaQuip Ind., Inc. P.O. Box 3417 Abilene, TX 79604 www.convaquip.com Table of Contents Parts Locator 3 Safety Notes 5 Weight Limit 6
Transit Wheelchair. user guide. Profiled grip attendant handles. Padded seat and backrest. Lift up, padded armrests. Park brakes
 Transit Wheelchair Profiled grip attendant handles Padded seat and backrest Lift up, padded armrests Park brakes Pneumatic 12 (305 mm) rear wheels Solid 7 (180 mm) front wheels Detachable, swing away footrests
Tri-Wheel Wheeled Walker
 Tri-Wheel Wheeled Walker Handle with lever brake Brake cable Handle height adjustment knob Removable basket and tray Large vinyl bag 8 inch (203 mm) wheels user guide Prior to use please read all instructions.
Euro Lightweight Wheeled Walker
 Euro Lightweight Wheeled Walker Handle with lever brake Backrest Brake cable Handle height adjustment button Removable shopping bag 8 inch (200 mm) wheels Cane holder user guide Prior to use please read
Owner s Manual. Transport / Companion Wheelchairs M4TV M2TF M2TC M2TL HEALTH PRODUCTS, INC.
 Owner s Manual M4TV M2TF Transport / Companion Wheelchairs M2TL M2TC HEALTH PRODUCTS, INC. INTRODUCTION Congratulations on the purchase of your new companion chair. Please read this introduction with your
MLS KICK-OFF TABLETOP SOCCER TABLE ASSEMBLY INSTRUCTIONS
 MLS KICK-OFF TABLETOP SOCCER TABLE ASSEMBLY INSTRUCTIONS NGD1028 1 THANK YOU! Thank you for your purchase of this Harvil product. We work around the clock and around the globe to ensure that Harvil products
Installation / Operation Instructions Sunnex ORION Series Exam Lights
 Installation / Operation Instructions Sunnex ORION Series Exam Lights OR-120 OR-127 OR-220 OR-227 Models: OR-300 OR-400 OR-500 OR-600 1. APPLICATIONS The Sunnex ORION Series light was designed specifically
25 GALLON PORTABLE OIL LIFT
 25 GALLON PORTABLE OIL LIFT Model 92859 SET UP AND OPERATING INSTRUCTIONS Diagrams within this manual may not be drawn proportionally. Due to continuing improvements, actual product may differ slightly
Harvil 4 Foot Air Hockey Table
 Harvil 4 Foot Air Hockey Table Thank you for your purchase of this Harvil product! We work around the clock and around the globe to ensure that Harvil products maintain the highest possible quality. However,
Gives useful tips, recommendations and information for efficient, trouble-free use.
 User Manual DEALER: This manual MUST be given to the user of the product. USER: BEFORE using this product, read this manual and save for future reference. 1 General 1.1 Symbols Invacare Matrx Stabilite
Cordless Sweeper. OWNER S MANUAL Model: CFT Volt DC. Made Exclusively for ALDI Inc. Batavia, IL.,
 Cordless Sweeper OWNER S MANUAL Model: CFT25 4.8 Volt DC Made Exclusively for ALDI Inc. Batavia, IL., 60510-1477 CFT25 ONE (1) YEAR LIMITED WARRANTY This product is warranted to be free from defects in
Roller Door Operator
 INSTALLATION INSTRUCTIONS AND OWNERS MANUAL Roller Door Operator IMPORTANT PLEASE READ THESE INSTRUCTIONS CAREFULLY PRIOR TO COMMENCING THE INSTALLATION OF THE OPERATOR UNIT CAUTION This Automatic Opener
User Manual. Invacare Matrx Flovair. Models ITFM and ITFG. 1 General
 User Manual DEALER: This manual MUST be given to the user of the product. USER: BEFORE using this product, read this manual and save for future reference. 1 General Invacare Matrx Flovair Models ITFM and
Thank you for purchasing a 911EP GALAXY Light Bar! Every light bar is carefully inspected for defects prior to shipment.
 OWNER S MANUAL Safety First Thank you for purchasing a 911EP GALAXY Light Bar! Every light bar is carefully inspected for defects prior to shipment. Questions or Concerns? 911EP wants to quickly resolve
Adjustable Angled Incline Conveyor Owners Manual with Operating Instructions
 Adjustable Angled Incline Conveyor Owners Manual with Operating Instructions Revision 012211 Table of Contents Basic Conveyor Features 3 Getting Started 4 Setting Up the Incline Conveyor 5 Belt Removal
2 Piece Soft Door Installation Instructions
 2 Piece Soft Door Installation Instructions For: Wrangler/TJ (1997-on) Part Number: 51789 Note: Use of this product will eliminate the factory side mirrors and requires the removal of the entry light bulbs.
REACH USER MANUAL USER: READ THIS MANUAL BEFORE USING THIS DEPENDENT MOBILITY BASE AND SAVE FOR FUTURE REFERENCE
 USER MANUAL CHAIR PROVIDER: THIS MANUAL MUST BE GIVEN TO THE USER OF THIS DEPENDENT MOBILITY BASE USER: READ THIS MANUAL BEFORE USING THIS DEPENDENT MOBILITY BASE AND SAVE FOR FUTURE REFERENCE Revision
55-Gallon Drum Cradle
 55-Gallon Drum Cradle Owner s Manual WARNING: Read carefully and understand all ASSEMBLY AND OPERATION INSTRUCTIONS before operating. Failure to follow the safety rules and other basic safety precautions
VICTORY TABLE TENNIS TABLE ASSEMBLY INSTRUCTIONS
 VICTORY TABLE TENNIS TABLE ASSEMBLY INSTRUCTIONS NG2322 THANK YOU! Thank you for your purchase of our product. We work around the clock and around the globe to ensure that our products maintain the highest
Level One Electric Vehicle Charging Station Wall Mount Product Guide
 Level One Electric Vehicle Charging Station Wall Mount Product Guide Model # WU-120 ShorePower Technologies 2351 NW York St. Portland, OR 98664 503-892-7345 info@shorepower.com www.shorepower.com 2 Table
User Manual. Posture+ Adjustable Base. For customer service call:
 User Manual Posture+ Adjustable Base For customer service call: 1-877-707-7533 1 IMPORTANT INFORMATION PLEASE READ THESE INSTRUCTIONS THOROUGHLY BEFORE USING THIS PRODUCT. PROPER OPERATION OF YOUR ADJUSTABLE
Level One Electric Vehicle Charging Station FREE STANDING Product Guide
 Level One Electric Vehicle Charging Station FREE STANDING Product Guide Model # SC2-120 Shorepower Technologies 2351 NW York St. Portland, OR 98664 503-892-7345 info@shorepower.com www.shorepower.com 2
1250 LB. CAPACITY MECHANICAL WHEEL DOLLY
 1250 LB. CAPACITY MECHANICAL WHEEL DOLLY 67287 SET-UP AND OPERATING INSTRUCTIONS Visit our website at: http://www.harborfreight.com Read this material before using this product. Failure to do so can result
Installation Instructions Seat Covers, Front Kit WARNING. Installation Tips. Installation Time. Tools. Skill Level
 Installation Instructions Seat Covers, Front Kit Vehicle Application: Wrangler 2DR, Wrangler Unlimited 2013-2017 Part Number 29283 Installation Tips Read and follow, precisely, all installation instructions
Adjustable Base. CONTENTS Advisory Setup and Installation Innova Wired Hand Control year Warranty 1-10
 Adjustable Base #201 Wired Owner Manual CONTENTS Advisory Setup and Installation Innova Wired Hand Control 1-2-10 year Warranty 1-10 WARNING Attention: Read the following information before using this
Letter to the Customer
 OWNER S MANUAL INTRODUCTION The following information is for general maintenance and operation of the Quattro collection. Contact your local dealer or Hussey Seating Company Customer Service for more detailed
Operating and Maintenance Instruction Manual. Evolution Air Bath System
 Operating and Maintenance Instruction Manual Evolution Air Bath System T h a n k y o u fo r c h o o s i n g A m e r i c a n S t a n d a rd ATTENTION INSTALLER: Please deliver this manual to homeowner.
SKILL ATTACK PITCHING MACHINE PATENTS APPLIED FOR INSTRUCTION MANUAL. Includes: OPERATION SETUP USE & CARE SERVICE
 VOLLEYBALL SKILL ATTACK PITCHING MACHINE PATENTS APPLIED FOR INSTRUCTION MANUAL Includes: OPERATION SETUP USE & CARE SERVICE REV083115 Sports Attack, LLC. 800-717-4251 sportsattack.com WARRANTY STATEMENT
ANTHEM. Sofa with Drop-Down Table ASSEMBLY & GENERAL USE GUIDE
 ANTHEM Sofa with Drop-Down Table ASSEMBLY & GENERAL USE GUIDE 2216 Rev. 5-23-2018 Table of Contents What s Inside the Box Step 1: Connect the Power Headrest Cables Step 2: Attach the Backrests to the Seat
Magician Comfy. Owner s Manual
 Magician Comfy Owner s Manual Table Of Contents Introduction...................................... 2 Safety Precautions................................ 3 Assembly........................................4-9
Installation Instructions
 Installation Instructions To ensure that your installation proceeds smoothly--please read these instructions carefully before you begin. P r o d u c t s Luxury Faucets and Accessories Savina Product Numbers
CA 5054 Owner s Guide
 PROFESSIONAL SERIES CA 5054 Owner s Guide Remote Start and Keyless Entry System IMPORTANT NOTE: The operation of the Security and Convenience System as described in this manual is applicable to most vehicles.
Owners Manual. LifeGuard Power Lift Model # Rev. 2/1/13
 Owners Manual LifeGuard Power Lift Model #100287 Rev. 2/1/13 Table of Contents 1. ASSEMBLY INSTRUCTIONS 3-5 A. Lift Assembly 3 B. Setup 3 1. Clinch Pin Location Drawings 4 2. Down Tube and Seat Assembly
Tiller Lock Assembly
 2 1 4 1 2 4 1 2 4 1 7 6 7 8 Positioning Pin Assembly 1 Positioning Pin 2 Spring Black Knob 5 4 1 2 2 1 Tiller Lock Assembly 1 2 4 Threaded Rod Rotating Rod Spring Flat Washer 5 6 7 8 C Type Plastic Washer
Owner s Guide CA 4555
 PROFESSIONAL SERIES Owner s Guide For Model: CA 4555 Vehicle Remote Start System with 2 Way Confirming Remote Control IMPORTANT NOTE: The operation of the Security and Convenience System as described in
LifeGuardLift. LifeGuard Power Lift Model #100287A OWNERS MANUAL. Rev: 2/14/11
 LifeGuardLift OWNERS MANUAL LifeGuard Power Lift Model #100287A Rev: 2/14/11 Table of Contents 1. ASSEMBLY INSTRUCTIONS A. Lift Assembly B. Setup C. Disassembly 2. CONTROL SYSTEM A. Batteries B. Battery
Fabric Replacement Top and Doors with Tinted Side and Rear Curtains Installation Instructions
 Fabric Replacement Top and Doors with Tinted Side and Rear Curtains Installation Instructions For: Wrangler/TJ 1997-2002 Part Number: 51124 www.bestop.com DO NOT INSTALL THIS PRODUCT ON ANY VEHICLE OTHER
Push Down Wheeled Walker
 Push Down Wheeled Walker Push down hand grip Handle height adjustment knob Backrest Padded seat with concealed pouch Side brace Bag with shopping basket inside Push down brake stopper 6 inch (150 mm) wheels
DISC BRAKE CALIPER TOOL SET
 DISC BRAKE CALIPER TOOL SET 40732 ASSEMBLY AND OPERATING INSTRUCTIONS Diagrams within this manual may not be drawn proportionally. Due to continuing improvements, actual product may differ slightly from
1000-LB. MOTORCYCLE LIFT TABLE OWNER S MANUAL
 1000-LB. MOTORCYCLE LIFT TABLE OWNER S MANUAL WARNING: Read carefully and understand all ASSEMBLY AND OPERATION INSTRUCTIONS before operating. Failure to follow the safety rules and other basic safety
MARCY WEIGHT BENCH WM-367. Model WM-367. Retain This Manual for Reference OWNER'S MANUAL
 NOTE: Please read all instructions carefully before using this product Table of Contents Safety Notice Hardware Identifier Assembly Instruction Parts List MARCY WEIGHT BENCH WM-367 Warranty Ordering Parts
Uplift Premium Power Lifting Seat
 Uplift Premium Power Lifting Seat User Guide Read all instructions before using the Uplift Power Seat DANGER - To reduce the risk of electric shock: IMPORTANT SAFETY INSTRUCTIONS Always unplug the Uplift
Prime Engineering GRANSTAND II
 OWNER S MANUAL PRODUCT PHOTO PARTS LIST ASSEMBLY INSTRUCTIONS FITTING & ADJUSTING DAILY USAGE ACCESSORIES MAINTENANCE WARRANTY Prime Engineering GRANSTAND II Manufactured By Prime Engineering A Division
HAND CONTROL REFERENCE GUIDE
 HAND CONTROL REFERENCE GUIDE NOTE: This quick reference guide offers basic hand control functions, general care instructions, basic assembly information, warranty information, and weight capacity information
OWNER S MANUAL & Assembly Instructions
 OWNER S MANUAL & Assembly Instructions EWT- Olympic Plate Tree L2 X W 2 X H1 EWT-_Rev0 Revision Date -27-12 Table of Contents DANGER, WARNING, & CAUTION LABELS INFORMATION...Page - IMPORTANT SAFETY INSTRUCTIONS...Page
INSTALLATION INSTRUCTIONS AND OWNER S MANUAL
 INSTALLATION INSTRUCTIONS AND OWNER S MANUAL Thank you for purchasing the AlloyCover from WeatherTech. Manufactured with pride using superior quality materials and workmanship. With proper care, your cover
2000-LB. ENGINE STAND
 2000-LB. ENGINE STAND WARNING: Read carefully and understand all ASSEMBLY AND OPERATION INSTRUCTIONS before operating. Failure to follow the safety rules and other basic safety precautions may result in
PATRIOT INSTRUCTION MANUAL FMGRID-16, FMGRID-24, FMGRID-30 ELECTRIC GRIDDLES
 INSTRUCTION MANUAL FMGRID-16, FMGRID-24, FMGRID-30 ELECTRIC GRIDDLES This manual contains importatant information regarding your Patriot unit. Please read this manual thoroughly prior to equipment set-up,
Owner s Guide CA 5055
 PROFESSIONAL SERIES Owner s Guide For Model: CA 5055 Vehicle Remote Start and Keyless Entry System IMPORTANT NOTE: The operation of the Security and Convenience System as described in this manual is applicable
Installation Instructions Twill Replace-a-top
 Installation Instructions Twill Replace-a-top Upper Door Skins Not Included Vehicle Application Jeep Wrangler TJ 2003-2006 Tinted Glass Windows Part Number: 79841 www.bestop.com - We re here to help! Visit
BX4330 Acclaim Tow Bar Operator Manual & Installation Instructions
 Please visit www.blueox.com for the latest version of these installation instructions. BX4330 Operator Manual & Installation Instructions Serial Number (5,000 lb) 2 Inch Coupler 292-2205 Rev L Page 1 of
Petite Wheeled Walker
 Petite Wheeled Walker Handle with lever brake Brake cable Handle height adjustment knob Backrest Padded seat with concealed pouch Bag with shopping basket inside Side brace 6 inch (150 mm) wheels user
3000-Lb. Vehicle Positioning Jacks. Owner s Manual
 3000-Lb. Vehicle Positioning Jacks Owner s Manual WARNING: Read carefully and understand all ASSEMBLY AND OPERATION INSTRUCTIONS before operating. Failure to follow the safety rules and other basic safety
ATD Gallon Pressurized Oil Drain Owner s Manual
 ATD-5203 30 Gallon Pressurized Oil Drain Owner s Manual TECHNICAL SPECIFICATIONS Model: ATD-5203 Capacity: 30 Gallon Drain Funnel Working Height: 47.25 to 70.5 Drain Funnel Diameter: 15.75 Plastic Tray:
expandable booster Instruction Manual US Version
 expandable booster Instruction Manual US Version product: monterey XT expandable booster model series: 108000 mfg. by: Diono US 14810 Puyallup Street E Suite 200 Sumner, WA 98390 Customer Care Tel: 1 855
Owner s Guide. ca5154
 PROFESSIONAL SERIES Owner s Guide for models: ca5154 Automatic / Manual Transmission Remote Start and Keyless Entry System IMPORTANT NOTE: The operation of the Security and Convenience System as described
Installation Instructions TrailMax II Fixed Rear Seat
 Installation Instructions TrailMax II Fixed Rear Vehicle Application Jeep CJ5s, CJ7s and Wranglers 1955 1995 Part Number: 39437 www.bestop.com - We re here to help! Visit our web site and click on Ask
Installation Instructions
 Installation Instructions To ensure that your installation proceeds smoothly--please read these instructions carefully before you begin. P r o d u c t s Luxury Faucets and Accessories Contemporary Floor
DELUXE OLYMPIC BENCH EVE Model EVE Retain This Manual for Reference OWNER'S MANUAL
 NOTE: Please read all instructions carefully before using this product Table of Contents Safety Notice Hardware Identifier Assembly Instruction Parts List Warranty DELUXE OLYMPIC BENCH EVE-1000 Ordering
EVERLAST SMITH BENCH EVE-890. Model EVE-890. Retain This Manual for Reference OWNER'S MANUAL
 NOTE: Please read all instructions carefully before using this product Table of Contents Safety Notice Hardware Pack Assembly Instruction Parts List Warranty Ordering Parts EVERLAST SMITH BENCH EVE-890
ONE AND TWO STEP STEP STOOLS
 INSTRUCTION MANUAL ONE AND TWO STEP STEP STOOLS Usage and Maintenance Read and understand all of the instructions and safety information in this manual before operating this product. MAN-049 REV A 2018
UniLink Elbow Support Hardware
 Upper Extremities OWNER MANUAL UniLink Elbow Support Hardware UniLink Elbow Hardware Owner s Manual Customer Satisfaction 1.0 Stealth Products strives for 100% customer satisfaction. Your complete satisfaction
Model AS-RC3260 TV Cart. Rolling Cart for Audio Mount System & Flat Panel TVs
 Model AS-RC3260 TV Cart Rolling Cart for Audio Mount System & Flat Panel TVs GETTING STARTED Introduction Congratulations on the purchase of your new Helios AS-RC3260 Rolling Cart. For maximum benefit,
Installation Instructions
 Installation Instructions Trektop Doors not included Vehicle Application Jeep Wrangler Unlimited 2007 2011 Part Number: 56805 www.bestop.com - We re here to help! Visit our web site and click on Ask a
c EDR /11. ShipShape OWNERS MANUAL. [ power foundations ]
![c EDR /11. ShipShape OWNERS MANUAL. [ power foundations ]](/thumbs/87/96491649.jpg "c EDR /11. ShipShape OWNERS MANUAL. [ power foundations ]") 99301115-c EDR11746 4/11 ShipShape OWNERS MANUAL [ power foundations ] contents Advisory... 4 Assembly... 6 Hand Control Function... 15 Accessories... 16 Troubleshooting... 17 1-2-Lifetime Warranty...
99301115-c EDR11746 4/11 ShipShape OWNERS MANUAL [ power foundations ] contents Advisory... 4 Assembly... 6 Hand Control Function... 15 Accessories... 16 Troubleshooting... 17 1-2-Lifetime Warranty...
Installation Instructions HOSS Hardtop Cart Only
 Installation Instructions HOSS Hardtop Cart Only Hardtop Organized Storage System Application: Hard Top Storage System Part Number: 42804 www.bestop.com - We re here to help! Visit our web site and click
ASSEMBLY & OPERATION MANUAL. CDVK2 Power Tower RECORD SERIAL NUMBER HERE
 ASSEMBLY & OPERATION MANUAL CDVK2 Power Tower RECORD SERIAL NUMBER HERE www.inspirefitness.net by Health In Motion LLC Feb. 2011 TABLE OF CONTENTS Section Description.. Page Instructions.. 1 Tools Required
SUBMERSIBLE MINI-PUMP
 SUBMERSIBLE MINI-PUMP Model 41287 Set up And Operating Instructions Diagrams within this manual may not be drawn proportionally. Due to continuing improvements, actual product may differ slightly from
EVERLAST EVE-840 WEIGHT BENCH
 NOTE: Please read all instructions carefully before using this product Table of Contents Safety Notice Hardware Pack Assembly Instruction EVERLAST EVE-840 WEIGHT BENCH Exploded Diagram Parts List Warranty
INSTALLATION INSTRUCTIONS AND OWNER S MANUAL
 INSTALLATION INSTRUCTIONS AND OWNER S MANUAL Thank you for purchasing the AlloyCover from WeatherTech. Manufactured with pride using superior quality materials and workmanship. With proper care, your cover
Installation Instructions Trektop
 Installation Instructions Trektop Vehicle Application Jeep Wrangler (JK) Unlimited 2007 Current Part Number: 56805 www.bestop.com - We re here to help! Visit our web site and click on Ask a Question. Click
Installation Instructions To ensure that your installation proceeds smoothly--please read these instructions carefully before you begin.
 Installation Instructions To ensure that your installation proceeds smoothly--please read these instructions carefully before you begin. P r o d u c t s Luxury Faucets and Accessories Stoic Product Numbers
SPECIALTY TOP CO. STC INSTALLATION INSTRUCTIONS BRONCO ZIPPER FASTTRAC TOP PART # BRONCO
 STC INSTALLATION INSTRUCTIONS BRONCO ZIPPER FASTTRAC TOP PART #331-310 BRONCO 1966-1977 SPECIALTY TOP CO. Thank you for purchasing Specialty's Convertible Top for your Bronco. It has been designed for
QUICKIE 5 R Quick Guide. IMPORTANT! Read all Warnings and Instructions contained in the complete Owner s Manual prior to using this product.
 QUICKIE 5 R Quick Guide IMPORTANT! Read all Warnings and Instructions contained in the complete Owner s Manual prior to using this product. Backrest Upholstery Back Canes Tire Seat Sling Handrim Angle-Adjustable
PLAYOFF 48" FOOSBALL TABLE ASSEMBLY INSTRUCTIONS
 PLAYOFF 48" FOOSBALL TABLE ASSEMBLY INSTRUCTIONS NG1031F THANK YOU! Thank you for purchasing this product. We work around the clock and around the globe to ensure that our products maintain the highest
RESTWELL RISE & RECLINE ARMCHAIRS OWNER S HANDBOOK PARTS DESCRIPTION
 RESTWELL RISE & RECLINE ARMCHAIRS OWNER S HANDBOOK CONTENTS 1. Introduction 2. Parts Description 3. Personal Safety 4. Installation Instructions 5. Backrest Removal 6. Operating Instructions and Guidelines
Submersible Pond Pump with UV 800 Gallons Per Hour
 Submersible Pond Pump with UV 800 Gallons Per Hour REMINDER CALL 1-888-755-6750 BEFORE RETURNING TO STORE. PACKAGE CONTENTS ITEM #PP800UV Questions, problems, missing parts? Before returning to your retailer,
Installation Instructions Twill Replace-a-top
 Installation Instructions Twill Replace-a-top Upper Door Skins Not Included Vehicle Application Jeep Wrangler TJ 1997-2006 Tinted Glass Windows Part Number: 79841 www.bestop.com - We re here to help! Visit
IV STANDS. Assembly, Usage and Maintenance INSTRUCTION MANUAL
 INSTRUCTION MANUAL IV STANDS Assembly, Usage and Maintenance Read and understand all of the instructions and safety information in this manual before operating this product. MAN-045 REV A 2018 MAC Medical,
Installation Instructions TrailMax II Classic Low Back Seat
 Installation Instructions TrailMax II Classic Low Back Seat Vehicle Application All Jeep CJ5s, CJ7s and Wranglers 1976 2002 Part Number: 39429 1997 2002 Vehicles must use Adapter Bracket Part Number 51256.
INSTALLATION MANUAL. Max. PRISM BACK (Ultra) (TrueFitt) (Air) innovative seating and mobility solutions
 (TrueFitt) (Air) innovative seating and mobility solutions") the Max maximum positioning back PRISM BACK (Ultra) (TrueFitt) (Air) innovative seating and mobility solutions CANADA Future Mobility Healthcare Inc. 3223 Orlando Drive Mississauga, ON L4V 1C5 905 671-1661
the Max maximum positioning back PRISM BACK (Ultra) (TrueFitt) (Air) innovative seating and mobility solutions CANADA Future Mobility Healthcare Inc. 3223 Orlando Drive Mississauga, ON L4V 1C5 905 671-1661