Owner s Instruction and Safety Manual. child trailer. Burley Cub. Push. Burley Cub model shown
|
|
|
- Bernadette Black
- 5 years ago
- Views:
Transcription
1 Owner s Instruction and Safety Manual child trailer Burley Cub Push Burley Cub model shown Stroll Bike
2 Contents Owner s Instruction and Safety Manual Burley Cub 3 Introduction 3 Safety Guidelines 3 Parts Bag Contents 3 Tools Required 4 Installing and Using Parking Brake 4 Opening and Closing Your Trailer 5 Attaching the Seat 5 Installing Wheels 6 Installing Tow Bar 6 Installing Handle Bar and Roll Bar 7 Mounting Lights 7 Installing Cover 7 Installing Safety Flag 8 Installing Seat Pads 8 Installing Shoulder Harness Pads & Crotch Strap Pads 8 Using Seat Harness 9 Using Seat Recliner 9 Hitching Trailer to Your Bicycle 10 Safety Checklists 10 Maintenance and Storage 10 Replacement Parts List 11 Replacement Parts Diagram 12 Warranty
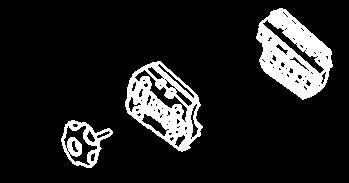
3 Congratulations! Your Burley trailer is the leading choice of refined bicycle trailer owners worldwide. Every effort has been made to ensure your purchase is a top-quality, thoroughly-tested design, ready to provide many years and miles of happy, safe trailering. Please go to or contact us at burley@burley.com to register your warranty information. IMPORTANT IT IS VERY IMPORTANT FOR YOU TO FAMILIARIZE YOURSELF WITH YOUR BURLEY BY READING THIS ENTIRE MANUAL BEFORE USE. IF YOU HAVE ANY QUESTIONS, PLEASE CONTACT YOUR AUTHORIZED BURLEY DEALER OR VISIT Introduction Once you ve done the initial assembly and read the safety guidelines, you re ready to go! Before trailering, be sure you have the safety harness, seat belt, tow bar, trailer wheels and hitch securely attached. Note: Any reference to left or right is made in direction of travel, as if you were standing behind the trailer, looking forward. Safety Guidelines WARNING BICYCLING WITH A TRAILER, AND BICYCLING IN GENERAL, CAN BE HAZARDOUS. FAILURE TO OBSERVE ANY OF THE SAFETY GUIDELINES IN THIS MANUAL COULD RESULT IN AN ACCIDENT AND SERIOUS INJURY OR DEATH. 1. Inspect and maintain your bicycle and trailer regularly. See Safety Checklists on page Because of the trailer s additional weight, a bicycle pulling a trailer is heavier and less responsive. Avoid sudden swerving, rocks and curbs. Experiment with the loaded trailer in an uncongested area until you become familiar with it. 3. The total weight limit for the trailer, children and/or cargo is 100 lbs (40 kg by law in Europe). Load children and/or cargo securely in the center of the trailer, forward of the axle and as low as possible. 4. The trailer seat is intended for 1 or 2 children who are old enough to wear a helmet, sit upright without physical support, and with adequate neck strength to hold their heads upright while trailering, unless using Burleyapproved infant accessory seat. A physician should evaluate anyone who is of questionable developmental age for trailering. Note: Go to to see Burley s line of infant seats and adapters for younger children. 5. The maximum age for passengers is 6 years. Never carry children whose seated height (with helmet) exceeds 4 inches (100mm) below the internal roll bar. 6. Fasten the seat belt and shoulder harnesses so that each child is held securely. Seat a single child in the center. Periodically check the placement of the shoulder straps, especially on sleeping children. 7. Make sure children cannot put a finger into the wheel spokes. 8. Instruct children not to bounce or lean, as a weight shift could cause the trailer to tip over. 9. To protect children from flying debris, always use your cover. Never leave children unattended. Check children frequently, especially during hot or cold weather. 10. Observe recommended speed limits: a maximum of 15 mph (24 km/h) on smooth, straight roads and 5 mph (8 km/h) or less when turning or on uneven roads. 11. Set your parking brake before removing your children or cargo. 12. Never pull your trailer with a motorized vehicle. 13. The cyclist and passengers must wear helmets. 14. Only use factory-supplied wheels, with the tires inflated to the pressure recommended on the tire side wall. Check pressure before each use. Do not use higher-pressure or knobby tires. 15. Clamp the hitch securely to the bicycle frame, and check for a tight attachment before each ride. 16. Use the safety flag. 17. Do not make alterations to the trailer. Contact your Authorized Burley Dealer or go to for replacement of any damaged, worn-out or missing parts. 18. Do not use your trailer on icy roads or when inclement weather makes cycling hazardous. 19. The use of a mirror on your bicycle is recommended. 20. For emergencies, breakdowns or flat tires, pull completely off the road and move your children to a safe area before doing repairs. Parts Bag Contents: (1) Burley Owner s Instruction and Safety Manual (1) Hitch (1) Red light/bracket/batteries (1) Clear light/bracket/batteries (1) Brake assembly (3) spring washers, (3) 5mm screws, (3) large flat washers (2) Handle bar receiver sets: (2) handle bar receiver pairs, (2) knobs, (4) lock nuts Tools Required: (1) No. 2 Phillips screwdriver (1) 5mm hex key wrench (1) 13mm open end wrench B U R L E Y C U B O W N E R S I N S T R U C T I O N A N D S A F E T Y M A N U A L 3
4 WARNING TRAILERS CAN TIP OVER, CAUSING DAMAGE TO TRAILER AND SERIOUS INJURY TO PASSENGERS. AVOID CAUSES OF TIP OVER, ESPECIALLY: CHILDREN LEANING OR BOUNCING HITTING POTHOLES, CURBS, OTHER ROAD OBSTRUCTIONS TAKING TURNS TOO FAST SUDDEN SWERVING IMPROPER WHEEL INSTALLATION OR TIRE INFLATION 1 Brake Released Brake Engaged 5 6 Screws/Spring Washers/Flat Washers Installing and Using Parking Brake Center Post 1. Tilt trailer onto its nose and lean it against a wall. 2. Place brake assembly s center post in hole #3 in bucket bottom. Handle grip must clear bucket. Let brake arms hang down. Hold center post and screw it into place. Figure 1 3. Place a spring washer and fender washer on each mounting screw. From inside of bucket, loosely thread screw/spring washer/flat washer stack through hole and into brake assembly center post. Do not tighten at this point. 4. Line up brake assembly arms with outer holes #1 and #6, and using screw/spring washer/flat washers, fasten them from inside of bucket. 5. Using one tool on inside of bucket and one on outside, tighten screws firmly until spring washers are fully flattened between screw heads and flat washers. To prevent brake return spring from distorting, use care when tightening left screw. 6. Engage parking brake by pushing handle to the right. Exercise caution when disengaging brake, as it may spring to the left. FIGURE 1: Rear underside of trailer FIGURE 2 Rear Front Opening and Closing Your Trailer 1. Rotate front tube upward and rear tube back until they meet on plastic saddles. Figure 2 2. Rotate frame locks and snap onto rear tube. Figure 3 3. To close trailer, unclip seat buckles on back of seat and reverse opening process. Plastic Saddles To view a video clip of Opening and Closing Your Trailer go to: WARNING CHECK THAT THE FRAME LOCKS ARE PROPERLY ENGAGED BEFORE USING THE TRAILER. FAILURE TO DO SO CAN RESULT IN SERIOUS INJURY. Frame Locks FIGURE 3 4 B U R L E Y C U B O W N E R S I N S T R U C T I O N A N D S A F E T Y M A N U A L


5 Attaching the Seat 1. Behind seat, fasten buckle sections together on upper and lower straps and adjust as needed. Photo 1 2. Before closing trailer, unfasten buckles behind seat. Photo 1 IMPORTANT ALWAYS KEEP SEAT ATTACHMENTS FASTENED WHILE TRAILERING. Upper Frame Tube Upper and Lower Strap Buckles Installing Wheels 1. Push rubber button on outside of wheel hub. 2. Fully insert axle into axle receiver and release button. Photo 2 3. Pull firmly on wheel to check that axle is fully seated. 4. Verify that tires are inflated to pressure marked on tire side wall. WARNING MAKE SURE WHEELS ARE HELD SECURELY, WITH WHEEL AXLE ASSEMBLY FULLY INSERTED INTO TRAILER RECEIVER. YOU SHOULD NOT BE ABLE TO ROCK OR SHIFT WHEELS. IMPROPERLY INSTALLED WHEELS CAN FALL OFF, CAUSING AN ACCIDENT OR SERIOUS INJURY. photo 1: Back of Cub seat shown photo 2 Button B U R L E Y C U B O W N E R S I N S T R U C T I O N A N D S A F E T Y M A N U A L 5


6 Installing Tow Bar 1. Slide tow bar through both tow bar mounts on LEFT side. Figure 4 2. Match rear tow bar hole with rear mount hole. 3. Slide tow bar lock pin through rear holes and rotate pin toward rear. 4. Insert retaining pin through front tow bar holes, and lock hoop securely. Front Tow Bar Hole Lock Pin WARNING NEVER OPERATE TRAILER WITHOUT RETAINING PIN LOCKED IN PLACE. AN UNLOCKED TOW BAR CAN LOOSEN OR DETACH, CAUSING AN ACCIDENT RESULTING IN SERIOUS INJURY. Figure 4: Side view of trailer Retaining Pin Rear Tow Bar Mount Trailer Rear Installing Handle Bar and Roll Bar 1. Install inner handle bar receivers and roll bar with narrow end of receiver toward trailer rear and curved roll bar front extending above trailer body. Photo 3 and Figure 5 2. Using provided hex key wrench, secure with screws and lock nuts as shown. 3. Match outer to inner receiver sections and insert knobs. 4. From rear, slide handle bar into lower handle bar receivers and tighten knobs securely. To change height position, flip handle bar over. Photo 4 PHOTO 3: Inner Receiver Front of Trailer Screws Lock Nuts Rear Assembly Frame Handle Bar Knob Inner Handle Bar Receiver Roll Bar Outer Handle Bar Receiver figure 5: Roll bar installtion Handle Bar Tighten Knob PHOTO 4: Tighten knob clockwise 6 B U R L E Y C U B O W N E R S I N S T R U C T I O N A N D S A F E T Y M A N U A L


7 Mounting Lights Note: Clear light is mounted facing foward, on side closest to traffic. Red light is mounted facing rear, on side closest to traffic. Front of Trailer Roll Bar Red Light 1. Remove clips and screws from back of lights. 2. Using screws, fasten brackets and lights together. 3. Mount clear light/bracket diagonally on front of roll bar and red light/bracket on rear of roll bar, both on side closest to traffic. Photo 5 Clear Light PHOTO 5 Installing Cover 1. At top of trailer frame, fit openings on cover sides around handle bar receivers. Fasten small buckle sections together. Adjust as needed. Photo 6 2. On trailer sides, join buckle sections on rear cover corners to buckle sections below side windows. 3. On trailer front, slip D-rings on front cover corners over hooked corners of tow bar mounts. Trailer Front Opening Handlebar Mount Buckle PHOTO 6 Installing Safety Flag Insert flag pole into hole in top of LEFT handle bar receiver. Photo 7 Inserting flag pole in handlebar receiver IMPORTANT DO NOT USE TRAILER WITHOUT SAFETY FLAG. PHOTO 7 B U R L E Y C U B O W N E R S I N S T R U C T I O N A N D S A F E T Y M A N U A L 7
8 Installing Seat Pads Match hook and loop fastening strips on trailer seat to strips on back of seat pads. Installing Shoulder Harness Pads and Crotch Strap Pads Insert shoulder straps through loops on shoulder harness pads, with straps oriented so that FLAT sides of strap buckles face each other. Slide crotch strap through crotch strap pad. Using Seat Harness One Passenger: Note: In two-passenger trailers, use inner shoulder straps and middle crotch strap. 1. Place child in center of seat. 2. Snap shoulder straps into Y-buckle, with buckle positioned at child s sternum. Adjust straps so that child cannot move too far forward in seat. 3. Fasten and adjust lap belt snugly. Figure 6 IMPORTANT SINGLE PASSENGER MUST BE SEATED IN CENTER POSITION. Harness Pads Lap Belt Figure 6 Two passengers: Note: For two children, use both shoulder harnesses and two outer crotch straps. 1. Seat first child on one side of seat. Harness Pads Harness Pads 2. Snap shoulder straps into Y-buckle, with buckle positioned at child s sternum. Adjust straps so that child cannot move too far forward in seat. 3. Repeat for second child. 4. Fasten and adjust lap belts snugly. To remove children, release lap belts and harness buckles. Figure 7 WARNING ALWAYS SECURE CHILDREN WITH HARNESS AND LAP BELT BEFORE USE. ONLY USE THIS SEAT IF YOUR CHILD IS CAPABLE OF SITTING UPRIGHT ALONE. FAILURE TO DO SO COULD RESULT IN ACCIDENT AND SERIOUS INJURY OR DEATH. Outer Crotch Strap Figure 7 Lap Belts Outer Crotch Strap 8 B U R L E Y C U B O W N E R S I N S T R U C T I O N A N D S A F E T Y M A N U A L


9 Note: For taller children, the seat harness can be adjusted by moving the buckles on the shoulder strap webbing into the helmet pocket area, above the horizontal elastic. Photo 8 IMPORTANT DO NOT SLIDE SHOULDER STRAP ASSEMBLIES ABOVE WEBBING STOPS. For Taller Children Helmet Pocket Area Using Seat Recliner For added comfort when children are sleeping, make the following adjustments to recline seat: For Shorter Children Horizontal Elastic 1. Loosen tension on lower horizontal strap on seat back. 2. Loosen tension on helmet pocket straps on upper back of seat. Photo 9 3. To return seat to upright position, reverse steps 1 & 2, and make sure upper seat strap is also tightened securely. photo 8 Hitching Trailer to Your Bicycle Note: The Burley Forged Standard Hitch is used for bicycles with either nutted axles Figure 8 or quick release assemblies. Figures 9 & Remove axle nut or rear quick release lever assembly from bike. 2. Match hole on flat side of hitch upper arm to left (nonchain ring side) rear dropout hole, and place hitch flat against the dropout. 3. Loosely reassemble axle nut or quick release assembly through hitch, dropout and wheel. Racks, bags, or fittings should not interfere with hitch. 4. Slide flex connector between hitch side arms, and match holes. 5. Open retaining pin and insert through hitch and flex connector holes from above. Close retaining pin. 6. Tighten axle nut or tighten and close quick release lever, with lever pointing to rear of bike. A properly adjusted quick release lever should leave an imprint on your palm when the lever is rotated to the closed position. Verify that hitch is secure and cannot be rotated by hand. 7. Wrap safety strap twice around inside of chain stay. Fasten hook to D-ring on underside of tow bar end. Figure To remove trailer from bicycle, unfasten clip from D-ring and remove retaining pin. photo 9 Nut Hitch Figure 8: Nutted axle assembly Safety strap wrapped twice around chainstay Loosen for reclining Hitch Upper Arm Tighten to return seat to upright poisition Quick Release Hitch Nut Figure 9: Quick release assembly Quick Release Lever WARNING Retaining Pin QUICK RELEASE LEVER MUST BE IN CLOSED POSITION AND HITCH SAFETY STRAP PROPERLY INSTALLED. NUTTED AXLES MUST BE TIGHTENED SECURELY. HITCH MUST NOT INTERFERE WITH RACKS, BAGS OR FITTINGS. INSPECT HITCH AND TOW BAR FREQUENTLY FOR DAMAGE OR LOOSE FASTENERS. DAMAGED OR IMPROPERLY INSTALLED HITCHES OR INTERFERING PARTS CAN CAUSE ACCIDENTS RESULTING IN SERIOUS INJURY. Figure 10 Flex Connector Hook fastened to D-ring under tow bar B U R L E Y C U B O W N E R S I N S T R U C T I O N A N D S A F E T Y M A N U A L 9
10 Safety Checklists Check Before Each Ride: Wheels tightly and securely attached Tires inflated to recommended pressure on tire side wall Hitch properly secured with safety strap in place Tow bar locked securely in place Maximum load 100 lbs (40 kg by law in Europe) Bicycle safety check, especially brakes and tires Helmet for passengers and cyclist Safety flag in place All seat straps properly attached Children properly secured with harnesses and lap belt Monthly Checklist: Inspect tow bar, hitch, frame tubing, flex connector and hardware for damage Inspect tires for wear and cracks Inspect wheels for trueness and cracks Inspect wheel bearings for wear Inspect fabric parts for rips, abrasion, or missing or damaged hardware Contact your Authorized Burley Dealer for replacement of any damaged or worn-out parts Maintenance and Storage Hitch and Tow Bar Maintenance Store trailer indoors if possible. Do not use or store trailer at temperatures below 32 F (0 C), as hitch flex connector can become brittle and possibly break, causing an accident resulting in serious injury. Fabric Care Hand wash fabric parts with mild soap or detergent and warm water. For heavy soiling, use a nylon bristle brush. Do not use bleach. Line-dry trailer cover. Polyester fabric will eventually fade, especially when exposed to direct sunlight. Wipe dry (to help avoid mildew) and store out of direct sunlight in a dry, well ventilated area, or use a Burley Trailer Storage Cover to protect your trailer. Clean windows with a damp soft cloth. Cover window may crack if trailer is stored below 32 F (0 C). Replace any damaged parts Cub Replacement Parts and Diagram Diagram # Cub Part # Description Warranty Forged Standard Hitch lifetime Safety Flag 1 year Handle Bar Clamp Kit 5 years Handle Assembly w/tether lifetime Pad Set (2 seat pads, 2 pair of harness pads & 2 crotch pads) 1 year Shoulder Safety Strap (Set of 2) 1 year Seat (NOT SHOWN) 1 year Side Panels/Rear with Windows (NOT SHOWN) 1 year Sunshade Cover 1 year Tow Bar Receiver Kit, Left (tow bar receiver, bolts, nuts) lifetime R Tow Bar Receiver Kit, Right (tow bar receiver, bolts, nuts) (NOT SHOWN) Tow Bar Assembly (tow bar, safety strap, flex connector) lifetime lifetime - tow bar 5 years - flex connector/ safety strap Frame Assembly, Front (tube, frame locks, hinges) lifetime Frame Assembly, Rear (tube, saddles, hinges) lifetime Wheel (with push button, axle, tire, reflectors) (SOLD INDIVIDUALLY) 3 years Brake Assembly lifetime External Roll Bar (available ONLY in Europe) lifetime Suspension Elastomer (Set of 2) 5 years Swing Arm Assembly Kit lifetime Flex Connector w/ Safety Strap for Square Tow Bar 5 years Recommended Accessories Stroller Kit Storage Cover Baby Snuggler Handle Bar Console Alternative Hitches Soft Suspension Kit Please go to for updated product parts list, diagrams and available accessories 10 B U R L E Y C U B O W N E R S I N S T R U C T I O N A N D S A F E T Y M A N U A L


11 B U R L E Y C U B O W N E R S I N S T R U C T I O N A N D S A F E T Y M A N U A L 11
12 Burley Trailer Limited Warranty Burley trailers are warranted from date of purchase against defects in materials and workmanship under normal use and service. Burley will repair or replace parts it determines to be defective as follows: fabric parts for one year, plastic parts for five years and durable frame parts for the lifetime of the trailer. The Burley trailer owner must present the trailer for repair at place of purchase, with an original sales receipt or similar proof of purchase. This warranty applies only to the original owner and is nontransferable. Burley can not be responsible for failure due to improper assembly, modification of parts or instructions, neglect, abuse, accident, and/or normal wear. The warranty does not cover any trailer used for rental, competition, or commercial use. Burley neither assumes nor authorizes any person to assume any other liability in connection with this Burley product, and there are no oral agreements or warranties collateral to or affecting this agreement. This warranty gives you specific rights. You may also have other rights which vary by state or country. B U R L E Y D E S I G N 4020 Stewart Rd. Eugene, OR PH FAX burley@burley.com : burley.com Copyright 2008 by Burley Design LLC. Burley is a registered trademark of Burley Design LLC Manual Cub Trailer r2 : RTFM : Rev 09.08
Owner s Instruction and Safety Manual. child trailer. Burley Honey Bee
 Owner s Instruction and Safety Manual child trailer Burley Honey Bee Stroll Bike Contents Owner s Instruction and Safety Manual Burley Honey Bee 3 Introduction 3 Safety Guidelines 3 Parts Bag Contents
child trailer Burley Bee and Honey Bee Owner s Instruction and Safety Manual Designed For One Or Two Children Burley Bee model shown Honey Bee
 child trailer Burley Bee and Honey Bee Owner s Instruction and Safety Manual Designed For One Or Two Children Honey Bee Burley Bee model shown child trailer Burley Bee and Honey Bee Owner s Instruction
Owner s Instruction and Safety Manual. child trailer. Burley d lite, Encore and Solo. Burley d lite model shown. Stroll Bike Ski Jog
 Owner s Instruction and Safety Manual child trailer Burley d lite, Encore and Solo Burley d lite model shown Stroll Bike Ski Jog Contents Owner s Instruction and Safety Manual Burley d lite, Encore and
child trailer Burley d lite, Encore, Solo and LE Tiger d lite Owner s Instruction and Safety Manual Designed For One Or Two Children (Optional)
") Burley d lite, Encore, Solo and LE Tiger d lite Owner s Instruction and Safety Manual child trailer Designed For One Or Two Children (Optional) (Optional) (Optional) child trailer Burley d lite, Encore,
Burley d lite, Encore, Solo and LE Tiger d lite Owner s Instruction and Safety Manual child trailer Designed For One Or Two Children (Optional) (Optional) (Optional) child trailer Burley d lite, Encore,
Owner s Instruction and Safety Manual. pet trailer. Burley Tail Wagon. Burley Tail Wagon model shown (Stroller Kit and Kickstand are Sold Separately)
") Owner s Instruction and Safety Manual pet trailer Burley Tail Wagon Burley Tail Wagon model shown (Stroller Kit and Kickstand are Sold Separately) Stroll Bike Contents Owner s Instruction and Safety Manual
Owner s Instruction and Safety Manual pet trailer Burley Tail Wagon Burley Tail Wagon model shown (Stroller Kit and Kickstand are Sold Separately) Stroll Bike Contents Owner s Instruction and Safety Manual
Owner s Instruction and Safety Manual. cargo. Nomad and Flatbed
 Owner s Instruction and Safety Manual cargo Nomad and Flatbed Bike Ski Contents Owner s Instruction and Safety Manual Burley Nomad and Flatbed 3 Introduction 3 Safety Guidelines 3 Tool List 4 Attaching
NOMAD FLATBED. Owner s Instruction and Safety Manual
 NOMAD FLATBED Owner s Instruction and Safety Manual Congratulations! Your Burley trailer is the leading choice of discriminating bicycle trailer owners worldwide. Every effort has been made to ensure your
d LITE LADY BUG SOLO ENCORE CUB BEE
 d LITE LADY BUG SOLO ENCORE CUB BEE Owner s Instruction and Safety Manual Congratulations! Your Burley trailer is the leading choice of discriminating bicycle trailer owners worldwide. Every effort has
BURLEY JOGGER. Owner s Instruction and Safety Manual. Burley Jogger Limited Warranty
 Burley Jogger Limited Warranty Burley will repair or replace parts it determines to be defective as follows: fabric parts for one year and durable parts for five years. The owner of a Burley Jogger must
Owner s Instructions and Safety Manual. Double-Double series. Performance Bicycle Trailers
 Owner s Instructions and Safety Manual Double-Double series TM Performance Bicycle Trailers Contents 1. Trailer Components 2. Tow Bar and Hitch Components 3. Assembling Your Trailer 4. Attaching the Wheels
stroller kit Burley Stroller Kit Owner s Instruction and Safety Manual For D Lite, Solo, Encore, Cub, Honeybee, and Tailwagon
 stroller kit Burley Stroller Kit Owner s Instruction and Safety Manual For D Lite, Solo, Encore, Cub, Honeybee, and Tailwagon Congratulations! By purchasing the Burley Stroller Kit, you ve increased the
MODEL SST1 JOGGER/BIKE TRAILER. Owner s Manual should be kept for future reference
 PRODUCT REGISTRATION: MAKE SURE TO REGISTER YOUR PURCHASE AT http://allensportsusa.com/about/product-registration TO QUALIFY FOR PRODUCT WARRANTY AND TO RECEIVE IMPORTANT PRODUCT NOTIFICATIONS 1 MODEL
Spirit Trailer with stroller attachment
 Spirit Trailer with stroller attachment User s Manual This manual contains safety, assembly, use and maintenance instructions. Read these instructions carefully before use and keep them for future reference.
Rocket. Two Seat Bicycle Trailer. Model Number ACIS99ROCKTBLU
 Rocket Two Seat Bicycle Trailer Model Number ACIS99ROCKTBLU User s Manual This manual contains safety, assembly, use and maintenance instructions. Read these instructions carefully before use and keep
POD. Assembly Instructions.
 POD Assembly Instructions Read these instructions carefully before use and keep them for future reference. Your child s safety may be affected if you do not follow these instructions. www.babyjogger.com
Single Seat Bicycle Trailer
 Single Seat Bicycle Trailer User s Manual This manual contains safety, assembly, use and maintenance instructions. Read these instructions carefully before use and keep them for future reference. Your
Owner s Instructions and Safety Manual. Switcharoo series. Performance Bicycle Trailers
 Owner s Instructions and Safety Manual Switcharoo series TM Performance Bicycle Trailers Contents 1. Trailer Components 2. Tow Bar and Hitch Components 3. Assembling Your Trailer 4. Attaching the Wheels
Quick N EZ. Two Seat Bicycle Trailer with Stroller Attachment
 Quick N EZ Two Seat Bicycle Trailer with Stroller Attachment User s Manual This manual contains safety, assembly, use and maintenance instructions. Read these instructions carefully before use and keep
Owner s Instructions and Safety Manual. Montalban Trailer 4 Bike Trailer with Jogger Conversion
 Owner s Instructions and Safety Manual Montalban Trailer 4 Bike Trailer with Jogger Conversion Contents 1. Trailer Components 2. Assembling Your Trailer 3. Attaching the Tow Arm 4. Attaching the Trailer
Single Seat Trailer. Owner s manual and safety instructions
 Single Seat Trailer Owner s manual and safety instructions Owner s Manual Every effort has been made to ensure your trailer is of top quality and proven safe design, ready to provide you with many years
Two Seat Bicycle Trailer
 Two Seat Bicycle Trailer User s Manual This manual contains safety, assembly, use and maintenance instructions. Read these instructions carefully before use and keep them for future reference. Your child
2 IN 1 TRAILER/STROLLER - PTDD
 I N S T R U C T I O N S D A T E : 1 9-1 - 2 0 1 7 2 IN 1 TRAILER/STROLLER - PTDD COMPONENTI - TRAILER COMPONENTS 1. all weather cover 2. tow bar and hitch connector 3. tow bar receiver 4. removable handlebar
MODEL AST202 BIKE TRAILER. Owner s Manual should be kept for future reference
 INSTRUCTIONAL PRODUCT REGISTRATION: MAKE SURE TO REGISTER YOUR PURCHASE AT http://allensportsusa.com/about/product-registration TO QUALIFY FOR PRODUCT WARRANTY AND TO RECEIVE IMPORTANT PRODUCT NOTIFICATIONS
Owner s Manual Read and keep this manual. Patents World Wide
 Owner s Manual Read and keep this manual. Patents World Wide S & S Industries, Inc., Sarasota, FL, USA www.trail-gator.com Copyright 2006 All Rights Reserved The following manual is provided to assist
Lumina TWO SEAT BICYCLE TRAILER WITH STROLLER ATTACHMENT
 Lumina TWO SEAT BICYCLE TRAILER WITH STROLLER ATTACHMENT Owner s Manual This manual contains safety, assembly, use and maintenance instructions. Read these instructions carefully before use and keep them
MODEL XLT-X2 BIKE TRAILER. Owner s Manual should be kept for future reference
 1 MODEL XLT-X2 BIKE TRAILER Owner s Manual should be kept for future reference 1. Completely read and understand Owner s Manual before assembling or operating this product. 2. This product should be assembled
Thule Glide Instructions
 Thule Glide Instructions A 51100988 CONTENTS 1 Introduction 1.1 Manual Intended Use 04 1.2 Carrier Intended Use 04 1.3 Specifications 04 2 Safety 2.1 Symbols and Instructions 05 2.2 General Safety Instructions
Thule Urban Glide 1 & 2 Instructions
 Thule Urban Glide 1 & 2 Instructions B 51100987 CONTENTS 1 INTRODUCTION 1.1 Manual Intended Use 04 1.2 Carrier Intended Use 04 1.3 Specifications 04 2 SAFETY 2.1 Symbols and Instructions 05 2.2 General
PART NUMBER: E361SAJ400
 A KIT CONTENTS: Do not use this product with hitch extenders. PIVOT BOLT (1X) PIVOT WASHER (2X) PIVOT NUT (1X) HITCH BOLT (1X) LOCK WASHER (1X) WASHER(1X) SAFETY CLIP (1X) STRAP (6X) BASE (1X) LOCKING
ATTENTION: Please read this instruction before mounting and using. Disregarding the directions in this manual can cause damage or injury.
 Dual Function Trailer Manual ATTENTION: Please read this instruction before mounting and using. Disregarding the directions in this manual can cause damage or injury. 1 Model no. BT-1228SDU-S Before you
Pet Bicycle Trailer/Jogger. Owner s Manual & Instructions
 Pet Bicycle Trailer/Jogger Owner s Manual & Instructions Congratulations on your purchase of the Pet Bicycle Trailer/Jogger. Please read through this manual and following the instructions before and during
Thule Chariot Chinook 1 & 2 Instructions
 Thule Chariot Chinook 1 & 2 Instructions B 51100968 CONTENTS 1 Introduction 1.0 Introduction 3 1.1 Manual Intended Use 4 1.2 Carrier Intended Use 4 1.3 Specifications 4 2 SAFETY 2.1 Symbols and Instructions
DO NOT USE THIS PRODUCT WITH HITCH EXTENDERS. FOR YOUR DOUBLEDOWN ACE 4 (SHOWN) SAFETY
 SAFETY") DO NOT USE THIS PRODUCT WITH HITCH EXTENDERS. Use only Yakima adapters with this product. Do not use any other brand tongue adapter. DOUBLEDOWN ACE 4 (SHOWN) FOR YOUR SAFETY WARRANTY REGISTRATION ON-LINE
DO NOT USE THIS PRODUCT WITH HITCH EXTENDERS. Use only Yakima adapters with this product. Do not use any other brand tongue adapter. DOUBLEDOWN ACE 4 (SHOWN) FOR YOUR SAFETY WARRANTY REGISTRATION ON-LINE
Instruction Manual UK
 Instruction Manual UK Product: Monterey2 child booster seat Model: 15000 Mfg. by: DIONO Unit D Ventura House Ventura Park Road Tamworth Staffs B78 3LZ UK CUSTOMER SERVICE Tel: 0845.300.9071 Email: dionouk@diono.com
Assembly Instructions. Advance Mobility. Freedom. Important, Keep for Future Reference
 Assembly Instructions Advance Mobility Freedom Important, Keep for Future Reference For the sake of your precious cargo, please read these warnings before using your Push Chair. Frame Important, keep this
Child Restraint Owner s Manual READ THIS MANUAL. D265353C CAR SEAT
 CAR SEAT Child Restraint Owner s Manual READ THIS MANUAL. Do not install or use this child restraint until you read and understand the instructions in this manual. FAILURE TO PROPERLY USE THIS CHILD RESTRAINT
BICYCLE BABY TRAILER & JOGGER
 BICYCLE BABY TRAILER & JOGGER Please read these instructions before attempting to construct your newly purchased trailer. DO NOT RETURN THIS TRAILER TO THE PLACE OF PURCHASE If you should experience a
IMPORTANT! KEEP INSTRUCTIONS FOR FUTURE REFERENCE.
 T1838 IMPORTANT! KEEP INSTRUCTIONS FOR FUTURE REFERENCE. www.fisher-price.com.au Consumer Information WARNING Prevent serious injury or death from falls or sliding out: Always use the restraint system
INSTALLATION INSTRUCTIONS AND OWNER S MANUAL
 INSTALLATION INSTRUCTIONS AND OWNER S MANUAL Thank you for purchasing the AlloyCover from WeatherTech. Manufactured with pride using superior quality materials and workmanship. With proper care, your cover
TABLE OF CONTENTS Safe Use Checklist Registration & Recal Assistance Warnings Base Features Carrier Features Securing Child In Carrier
 TABLE OF CONTENTS Safe Use Checklist...4 Registration & Recall...5 Assistance...5 Warnings...6 Base Features Base Overview... Storage Compartment...3 Recline Adjustment...3 LATCH Removal & Storage...4
Instruction Manual. Avoid injury or death - Read and understand this manual! Para instrucciones en Español, llamar al:
 Instruction Manual Para instrucciones en Español, llamar al: 1-800-837-4044 www.centuryproducts.com PM-1663AB 6/01 Avoid injury or death - Read and understand this manual! TABLE OF CONTENTS Instruction
Fitting Instruction for EZI-GRIP Bike Rack
 Fitting Instruction for EZI-GRIP Bike Rack Congratulations on purchasing Ezi-Grip to carry your valued bicycles. We are sure you will get many years of enjoyable use from your Ezi-Grip Bike Rack. These
SwingDaddy 4. Important warning. For use with 2" hitch only. Do not use with a hitch extender. Safety Warranty Registration on-line YAKIMA.
 SwingDaddy 4 For Your Safety Warranty Registration on-line YAKIMA.com WHEEL STRAP (12X) purchase separately: HitchSki Carries up to 6 pr. skis or 4 snow boards. Part #8002418 SWING BOLT (1X) See at www.yakima.com
AGE RECOMMENDATIONS: We do not recommend that children under 8 weeks old be placed in the stroller seat. For jogging and off road use, we recommend th
 Revolution owner s manualal (800) 893-2447 www.bobgear.com email- info@bobgear.com Ph: (208) 375-5171 Fax: (208) 375-5172, BOB Trailers, Inc. 5475 Gage St. Boise, ID 83706 BOB is a company that produces
Thule Chariot Cheetah XT 1 & 2 Instructions
 Thule Chariot Cheetah XT 1 & 2 Instructions A5.160916_GB CONTENTS 1 INTRODUCTION 1.0 Thank You 03 1.1 Manual Intended Use 04 1.2 Carrier Intended Use 04 1.3 Specifications 04 2 PARTS DESCRIP TION 2.0 Included
MODEL XLT-X2 BIKE TRAILER. Owner s Manual should be kept for future reference
 PRODUCT REGISTRATION: MAKE SURE TO REGISTER YOUR PURCHASE AT http://allensportsusa.com/about/product-registration TO QUALIFY FOR PRODUCT WARRANTY AND TO RECEIVE IMPORTANT PRODUCT NOTIFICATIONS MODEL XLT-X2
TAKE TIME SPORT UTILITY STROLLER DUALLIE IRONMAN DUALLIE. ENGLISH Owner s Instruction Manual
 BOB Trailers, Inc. (800) 893-2447 www.bobgear.com 13501 South Ridge Drive, Charlotte, North Carolina 28273 ENGLISH Owner s Instruction Manual SPORT UTILITY STROLLER DUALLIE IRONMAN DUALLIE TAKE TIME READ
DO NOT USE THIS PRODUCT WITH HITCH EXTENDERS. USE ONLY YAKIMA ADAPTERS WITH THIS PRODUCT. DO NOT USE ANY OTHER BRAND TONGUE ADAPTER.
 FlipSide 4 DO NOT USE THIS PRODUCT WITH HITCH EXTENDERS. USE ONLY YAKIMA ADAPTERS WITH THIS PRODUCT. DO NOT USE ANY OTHER BRAND TONGUE ADAPTER. For Your Safety Warranty Registration on-line YAKIMA.com
Booster Car Seat User Guide
 Booster Car Seat User Guide For future use, STORE USER GUIDE in location on bottom of base. IS0133.E 2015 Artsana USA, Inc. If you have any problems with your Chicco Booster Seat, or any questions regarding
(H) TOUR VANTAGE STROLLER ASSEMBLY INSTRUCTIONS ADULT ASSEMBLY REQUIRED. Styles and colors may vary
 TOUR VANTAGE STROLLER ASSEMBLY INSTRUCTIONS ADULT ASSEMBLY REQUIRED. Styles and colors may vary") TOUR VANTAGE STROLLER ASSEMBLY INSTRUCTIONS ADULT ASSEMBLY REQUIRED Styles and colors may vary IMPORTANT: Read all instructions before assembly and use of the stroller Keep the instructions for future
TOUR VANTAGE STROLLER ASSEMBLY INSTRUCTIONS ADULT ASSEMBLY REQUIRED Styles and colors may vary IMPORTANT: Read all instructions before assembly and use of the stroller Keep the instructions for future
Thule Chariot Cougar 1 & 2 Instructions
 Thule Chariot Cougar 1 & 2 Instructions D 51100468 CONTENTS 1 Introduction 1.0 Thank You 03 1.1 Manual Intended Use 04 1.2 Carrier Intended Use 04 1.3 Specifications 04 2 Parts Description 2.0 Included
expandable booster Instruction Manual US Version
 expandable booster Instruction Manual US Version product: monterey XT expandable booster model series: 108000 mfg. by: Diono US 14810 Puyallup Street E Suite 200 Sumner, WA 98390 Customer Care Tel: 1 855
STOP. 44" High Speed Sweeper. Operator's Manual. Model No Safety Assembly Operation Maintenance Parts
 Operator's Manual STOP 44" High Speed Sweeper Model No. 486.029 DO NOT RETURN TO STORE For Missing Parts or Assembly Questions Call 1-866-576-8388 CAUTION: Before using this product, read this manual and
expandable booster Instruction Manual US Version
 expandable booster Instruction Manual US Version product: monterey expandable booster model series: 15000 mfg. by: Diono LLC 14810 Puyallup Avenue Sumner, WA 98390 Customer Care Tel: 1 (855) 463-4666 us.diono.com
Instruction Manual. Canada English Version
 Instruction Manual Canada English Version Product: Monterey child booster seat Model: 15000 Mfg. by: Diono Canada, ULC 50 Northland Road, Suite 400 Waterloo, Ontario N2V 1N3 Customer Service Tel: 519-725-1700
BACKREST, SEAT & SISSYBAR BAG BR 3400
 BACKREST, SEAT & SISSYBAR BAG BR 00 FEATURES OF THE BACKREST, SEAT & SISSYBAR BAG: Two mounting systems included - a seat harness or adjustable sissy bar strap system easily attaches bag to your motorcycle
INSTALLATION INSTRUCTIONS
 INSTALLATION INSTRUCTIONS Thank you for purchasing a LOMAX TM Hard Tri-Fold or Professional Series Cover. Agri-Cover, Inc. proudly manufactured this cover using superior quality materials and workmanship.
***Please follow instructions for ease of installation and correct fit.***
 RAMPAGE P R O D U C T S Installation Instructions Part number 1094XX Frameless Soft Top for Jeep Wrangler YJ 1992-1995 with Half Doors NOTE: Installation of the top in warm weather is optimal for ease
BANANA PEEL OWNER'S GUIDE # /98 $1.00
 BANANA PEEL OWNER'S GUIDE #1880 /98 $1.00 ILLUSTRATED PARTS BREAKDOWN ITEM PARJff DESCRIPTION QTY. ITEM PART# DESCRIPTION 1. 19171 SCREW #10-3 X 3/8 RHMS. 1863 FENDER B/P 3 3. 18306 FENDER B/P BRACE.
TABLE OF CONTENTS Safe Use Checklist Registration & Recall Assistance Warnings Base Features Carrier Features Securing Child In Carrier
 TABLE OF CONTENTS Safe Use Checklist...4 Registration & Recall...5 Assistance...5 Warnings...6 Base Features Base Overview... Storage Compartment... Recline Adjustment... LATCH Removal & Storage...4 Shoulder
Lift N Go [Model 210] Electric Carrier For use with power chairs & scooters Installation Guide & Owners Manual
![Lift N Go [Model 210] Electric Carrier For use with power chairs & scooters Installation Guide & Owners Manual](/thumbs/74/70316262.jpg "Lift N Go [Model 210] Electric Carrier For use with power chairs & scooters Installation Guide & Owners Manual") 203 Matzinger Road Toledo, OH 43612 Phone: 1-800-541-3213 Fax: (419) 478-4425 www.wheelchaircarrier.com E-mail: admin@wheelchaircarrier.com Lift N Go [Model 210] Electric Carrier For use with power chairs
203 Matzinger Road Toledo, OH 43612 Phone: 1-800-541-3213 Fax: (419) 478-4425 www.wheelchaircarrier.com E-mail: admin@wheelchaircarrier.com Lift N Go [Model 210] Electric Carrier For use with power chairs
Columbia Car Seat. User Guide. IMPORTANT Please retain this User Guide for future reference. Conforms to ECE R44.03 Universal
 Columbia Car Seat User Guide Conforms to ECE R44.03 Universal IMPORTANT Please retain this User Guide for future reference EXTREME HAZARD: Parents should not under any circumstances use this child restraint
AFFIX TM Booster Seat. Owner s Manual PD202326A 5/12
 AFFIX TM Booster Seat Owner s Manual READ THIS MANUAL. Do not install or use this car seat until you read and understand the instructions in this manual. FAILURE TO PROPERLY USE THIS CAR SEAT INCREASES
SPECIALTY TOP CO. STC. INSTALLATION INSTRUCTIONS TOYOTA FAST TRAC Z TOP Toyota FJ PART #222-31X 82 1/8" 82 1/8"
 STC INSTALLATION INSTRUCTIONS TOYOTA FAST TRAC Z TOP Toyota FJ-40 1963-1983 PART #222-31X SPECIALTY TOP CO. Thank you for purchasing Specialty's Convertible Top for your Toyota. It has been designed for
Designed around your life
 Designed around your life IMPORTANT! KEEP THESE INSTRUCTIONS FOR FUTURE REFERENCE: READ CAREFULLY Contents Product Information Product Registration Recall Information Warranty 5 Contact 5 Child Usage Requirements
Installation Instructions I - Sheet Number I-TVR-01 Rev. A
 Installation Instructions I - Sheet Number I-TVR-01 Rev. A TrailView Soft Top For proper installation and best possible fit, please read all instructions BEFORE you begin. For technical assistance or to
This Booster seat is NOT for use on Aircrafts Meets or exceeds all applicable requirements of Federal Motor Vehicle Safety Standard 213 WARNING!
 R Fits Children Between Backless Booster Weight is: 40-100 lbs (18-45 kg) Height is: 40-57 in. (101-145 cm) Age is: At least four years old Belt-Positioning Booster Car Seat Instruction Manual This Booster
booster seat Instruction Manual US Version US-02_US_EN_Solana_Manual_ indd 1
 booster seat Instruction Manual US Version 32010-US-02_US_EN_Solana_Manual_07062016.indd 1 WARNING! Death or SERIOUS INJURY can occur. Failure to follow all written instructions and product labels can
CHAINGUARD REGAL ST COLOR
 DESOTO/ REGAL HAULER PARTS LIST Item Part # Description QTY Item Part # Description QTY 1 11871 REFLECTOR KIT TRIKE 1 32 11764 FENDER BRACE 24" MWT 1 2 12199 SCREW #14 x 3/4 4 33 12176 NUT5/16-24 HEX 2
Quick Release Lever In Fully Open Position. Adjusting Nut. Fig. 2. Rear wheel quick release with lever in open position.
 tracking instructions MA0501 (800) 893-2447 www.bobgear.com email- info@bobgear.com Phone: (805) 541-2554 Fax: (805) 543-8464, BOB Trailers, Inc. 3641 Sacramento Dr. #3 San Luis Obispo, California 93401
GoFitTM. Booster Car Seat User Guide. in location on bottom of base. IS0147.2E Artsana USA, Inc.
 GoFitTM Booster Car Seat User Guide For future use, STORE USER GUIDE in location on bottom of base. IS047.2E 207 Artsana USA, Inc. www.chiccousa.com TABLE OF CONTENTS If you have any problems with your
NAUTILUS 65/NAUTILUS 65 CHILD RESTRAINT/BOOSTER SEAT
 NAUTILUS 65/NAUTILUS 65 CHILD RESTRAINT/BOOSTER SEAT Do not install or use this child restraint until you read and understand the instructions in this manual. FAILURE TO PROPERLY USE THIS CHILD RESTRAINT
CHAINGUARD REGAL ST COLOR
 DESOTO/ REGAL HAULER PARTS LIST Item Part # Description QTY Item Part # Description QTY 1 11871 REFLECTOR KIT TRIKE 1 32 11762 FENDER BRACE 20" MWT 1 2 12199 SCREW #14 x 3/4 4 11764 FENDER BRACE 24" MWT
INSTALLATION INSTRUCTIONS
 INSTALLATION INSTRUCTIONS Thank you for purchasing VANISH Roll-Up Cover. Agri-Cover, Inc. proudly manufactured this cover using superior quality materials and workmanship. With proper care, your cover
INSTALLATION INSTRUCTIONS
 INSTALLATION INSTRUCTIONS Thank you for purchasing TONNOSPORT Roll-Up Cover. Agri-Cover, Inc. proudly manufactured this cover using superior quality materials and workmanship. With proper care, your cover
Required Tools: Phillips screw driver to remove original soft top. Torx sockets are required to completely remove the original soft top hardware.
 RAMPAGE P R O D U C T S Installation Instructions Part number 1099XX, Frameless Soft Top for 2 door Jeep Wrangler JK 2007- NOTE: Installation of the top in warm weather is optimal for ease of installation.
PREMIUM HITCH MOUNT PLATFORM BIKE CARRIER
 model no. 040-96-2 PREMIUM HITCH MOUNT PLTFORM BIKE CRRIER NOTE: Read instructions carefully before installation. Refer to assembly instructions and ensure the bike carrier is installed correctly. Keep
Booster Car Seat. User Guide. in location on bottom of base. IS0174E_ Artsana USA, Inc. 01/19
 Booster Car Seat User Guide For future use, STORE USER GUIDE in location on bottom of base. IS0174E_03 2019 Artsana USA, Inc. 01/19 www.chiccousa.com TABLE OF CONTENTS If you have any problems with your
OnBoard Drum Major Podium
 Assembly and Owner s Manual OnBoard Drum Major Podium CONTENTS CONTENTS................................................................................. 1 SAFETY...................................................................................
ASSEMBLY INSTRUCTIONS / OWNERS MANUAL AIR BIKE AB-1
 AIR BIKE AB- ASSEMBLY INSTRUCTIONS / OWNERS MANUAL IMPORTANT : READ ALL ASSEMBLY INSTRUCTIONS AND SAFETY PRECAUTIONS BEFORE USING THIS PRODUCT. REFERENCE ALL SAFETY GUIDELINES AND WARNING LABELS. RETAIN
PART NUMBER: E361SAJ302
 : A KIT CONTENTS: designed for forks with safety tabs. Forks with SafetyTabs 2X NOTICE: YOU MAY HEAR AN INCREASED LEVEL OF WIND NOISE OR WIND RUSH SOUND AS A RESULT OF INSTALLING THIS RACK ON YOUR VEHICLE.
Hollywood Racks Assembly & installation instructions for models:
 Hollywood Racks Assembly & installation instructions for models: HR1400Y (4 bike), HR1450Y (2 bike), HR1475Y, 1450Y-E & 1455Y-E (E bikes) For use on 2 hitches only. Do not use a 1 ¼ -2 hitch adapter. Maximum
Instruction Manual ENGLISH
 Instruction Manual ENGLISH WARNING! Death or SERIOUS INJURY can occur. Failure to follow all written instructions and product labels can result in death or serious injury in a crash. Carefully read and
GoFitTM. Booster Car Seat User Guide. in location on bottom of base. IS0147E_ Artsana USA, Inc. 01/19
 GoFitTM Booster Car Seat User Guide For future use, STORE USER GUIDE in location on bottom of base. IS047E_04 209 Artsana USA, Inc. 0/9 www.chiccousa.com TABLE OF CONTENTS If you have any problems with
IS0018.7E 2014 Artsana USA, Inc.
 IS008.7E 04 Artsana USA, Inc. TABLE OF CONTENTS Safe Use Checklist...4 Registration & Recall...5 Assistance...5 Warnings...6 Base Features Base Overview... Storage Compartment...3 Recline Adjustment...3
EZ Carrier 3. Owner s Manual. Keep instructions for future reference
 EZ Carrier vv Owner s Manual Keep instructions for future reference Introduction The EZ Carrier provides all the flexibility you may need to transport your mobility scooter. The features include: The capability
Assembly Instructions
 www.rockymounts.com TandemMount R4 Installation Manual Guidelines/Restrictions: - This carrier is intended for Thule rectangular and Yakima round bars only. - Bicycles must be equipped with quick release
SNUGRIDE SNUGLOCK 35 PLATINUM SNUGRIDE SNUGLOCK 35 PLATINUM XT
 SNUGRIDE SNUGLOCK 35 PLATINUM SNUGRIDE SNUGLOCK 35 PLATINUM XT Do not install or use this child restraint until you read and understand the instructions in this manual. FAILURE TO PROPERLY USE THIS CHILD
SNUGRIDE 30 INFANT CAR SEAT
 SNUGRIDE 30 INFANT CAR SEAT Read This Instruction Manual Do not install or use this child restraint until you read and understand the instructions in this manual. FAILURE TO PROPERLY USE THIS CHILD RESTRAINT
JK HD Skid Plate for Rear Falcon Shocks
 1 JK HD Skid Plate for Rear Falcon Shocks Kit # 36-07-01-300 Important Notes: Prior to beginning this or any installation read these instructions to familiarize yourself with the required steps and evaluate
Bimini Top, Bimini Top Plus for Jeep Wrangler (YJ) Vehicles Items #141031XX and #143031XX
 Vehicles Items #141031XX and #143031XX") MT_YJ_BIMINI_INST_LTR_6.qxp_Layout 1 4/20/17 4:21 PM Page 1 Installation Instructions Bimini Top, Bimini Top Plus for 1987-1995 Jeep Wrangler (YJ) Vehicles Items #141031XX and #143031XX Bimini Top Plus
MT_YJ_BIMINI_INST_LTR_6.qxp_Layout 1 4/20/17 4:21 PM Page 1 Installation Instructions Bimini Top, Bimini Top Plus for 1987-1995 Jeep Wrangler (YJ) Vehicles Items #141031XX and #143031XX Bimini Top Plus
TeraFlex TJ Single Rate S/T Sway Bar
 1 Kit #1743610 (0-3 Lift) #1743615 (4-6 Lift) TeraFlex TJ Single Rate S/T Sway Bar www.teraflex.com Important Notes: Prior to beginning this or any installation read these instructions to familiarize yourself
Installation Instructions
 Installation Instructions TrailView Soft Top Important Safety Information For proper installation and best possible fit, please read all instructions BEFORE you begin. Periodically check all components
Installation Instructions Supertop NX Twill
 Installation Instructions Supertop NX Twill Vehicle Application: Jeep Wrangler Unlimited 2007 Current Part Number: 54823 www.bestop.com - We re here to help! Visit our web site and click on Ask a Question.
JK CARGO STORAGE RACK
 1 JK CARGO STORAGE RACK #4820020 Important Notes: Prior to beginning this or any installation read these instructions to familiarize yourself with the required steps and evaluate if you are experienced
XChange Seat Service and Maintenance Guide
 XChange Seat Service and Maintenance Guide Table Of Contents Page General Information... 1 Registration Information... 1 Seat Cushion Latch... 2 Lap Shoulder Belt Replacement... 2 Sliding Buckles Replacement...
Breezy EC Transport Wheelchair
 B r e e z y E C Tr a n s p o r t W h e e l c h a i r Breezy EC Transport Wheelchair O w n e r s M a n u a l READ BEFORE USE REVIEW THIS MANUAL Before using this chair you, and each person who may assist
READ THIS MANUAL. Child Restraint/Booster Seat Owner s Manual
 READ THIS MANUAL Do not install or use this child restraint until you read and understand the instructions in this manual. FAILURE TO PROPERLY USE THIS CHILD RESTRAINT INCREASES THE RISK OF SERIOUS INJURY
SUN SHADE. Owner's Manual. Model No Safety Assembly Operation Maintenance Parts
 Owner's Manual SUN SHADE Model No. 48.2422 CAUTION: Before using this product, read this manual and follow all Safety Rules and Operating Instructions. IMPORTANT: For Missing Parts or Assembly Questions
MODEL CS-41. instructions IMPORTANT: KEEP THIS INSTRUCTION BOOKLET IN THE PLACE PROVIDED ON THE CHILD RESTRAINT
 MODEL CS-41 instructions IMPORTANT: KEEP THIS INSTRUCTION BOOKLET IN THE PLACE PROVIDED ON THE CHILD RESTRAINT Smart Design Please keep this Instruction Booklet in the storage area under the seat for future