Edition Notes. Edition Notes. Trademarks CHAUVET, the Chauvet logo and Maverick MK2 Wash are registered trademarks or trademarks
|
|
|
- Nathan Elliott
- 5 years ago
- Views:
Transcription


1 User Manual
2 Edition Notes Edition Notes The Maverick MK2 Wash User Manual Rev. 2 covers the description, safety precautions, installation, programming, operation, and maintenance of the Maverick MK2 Wash. Chauvet released this edition of the Maverick MK2 Wash User Manual in Trademarks CHAUVET, the Chauvet logo and Maverick MK2 Wash are registered trademarks or trademarks of Chauvet & Sons, LLC. (d/b/a Chauvet and Chauvet Lighting) in the United States and other countries. Other company and product names and logos referred to herein may be trademarks of their respective companies. Copyright Notice The works of authorship contained in this manual, including, but not limited to, all design, text and images are owned by Chauvet. Copyright 2016 Chauvet & Sons, LLC. All rights reserved. Electronically published by Chauvet in the United States of America. Manual Use Chauvet authorizes its customers to download and print this manual for professional information purposes only. Chauvet expressly prohibits the usage, copy, storage, distribution, modification, or printing of this manual or its content for any other purpose without written consent from Chauvet. Document Printing Intended Audience For better results, print this document in color, on letter size paper (8.5 x 11 in), double-sided. If using A4 paper (210 x 297 mm), configure your printer to scale the content accordingly. Any person in charge of installing, operating, and/or maintaining this product should completely read through the guide that shipped with the product, as well as this manual, before installing, operating, or maintaining this product. Disclaimer Chauvet believes that the information contained in this manual is accurate in all respects. However, Chauvet assumes no responsibility and specifically disclaims any and all liability to any party for any loss, damage or disruption caused by any errors or omissions in this document, whether such errors or omissions result from negligence, accident or any other cause. Chauvet reserves the right to revise the content of this document without any obligation to notify any person or company of such revision, however, Chauvet has no obligation to make, and does not commit to make, any such revisions. Document Revision The Maverick MK2 Wash User Manual Rev. 2 is the current edition of this manual. Go to for the latest version. Maverick MK2 Wash User Manual Rev. 2
3 Table of Contents Table of Contents 1. Before You Begin... 1 What Is Included... 1 Claims... 1 Manual Conventions... 1 Symbols... 1 Product At A Glance... 1 Safety Notes... 2 Expected LED Lifespan Introduction... 3 Description... 3 Features... 3 Overview... 3 Dimensions Setup... 5 AC Power... 5 AC Plug... 5 Fuse Replacement... 5 Power Linking... 5 Mounting... 6 Orientation... 6 Signal Connections... 7 Art-Net Connection... 7 sacn Connection... 7 Kling-Net Connection Touchscreen Control Panel... 8 Control Panel Description... 8 Menu Map... 8 Protocol Configuration Single Control Single Control Protocol Single Control Personality Single Control Start Address Single Control Universe Dual Control Dual Control Movement Dual Control Movement Protocol Dual Control Movement Personality Dual Control Movement Start Address Dual Control Movement Universe Dual Control Pixel Dual Control Pixel Protocol Dual Control Pixel Personality Dual Control Pixel Start Address Dual Control Pixel Universe Zones for Pixel control DMX Values Tour Mode (146 Channel) Tour Mode (146 Channel) Tour Mode (146 Channel) Tour Mode (146 Channel) Tour Mode (146 Channel) Single Control Values Maverick MK2 Wash User Manual Rev. 2 -i-
4 Table of Contents Advanced Mode (122-channel) Standard Mode (68-channel) Basic Mode (20-channel) Dual Control Movement Values Advanced Movement Mode (26-channel) Standard Movement Mode (20-channel) Basic Movement Mode (8-channel) Dual Control Pixel Values Advanced Pixel Mode (96-channel) Standard Pixel Mode (48-channel) Basic Pixel Mode (36-channel) Operating Settings Configuration Home Screen Test Mode Auto Test Manual Test Setup Network Settings Ethernet To DMX IP Mode IP Address Subnet Mask Pan/Tilt Orientation Zoom Orientation Display Orientation Pan/Tilt Angle Range Blackout on Pan/Tilt Movement Touchscreen Calibration Touchscreen Lock Lock Screen Swap Pan and Tilt Pan/Tilt Speed WDMX Reset Backlight Timer Loss of Data Fan Speed Color Mixing Mode Dimmer Curve Dimmer Speed Color Balance Reset Functions Factory Reset System Information Offset Mode Firmware Update Technical Information Product Maintenance Technical Specifications Returns Contact Us ii- Maverick MK2 Wash User Manual Rev. 2
5 Before You Begin 1. BEFORE YOU BEGIN What Is Included Claims Maverick MK2 Wash Seetronic Powerkon power cord 2 Omega brackets with mounting hardware Warranty card Quick Reference Guide Carefully unpack the product immediately and check the box to make sure all the parts are in the package and are in good condition. If the box or the contents (the product and included accessories) appear damaged from shipping or show signs of mishandling, notify the carrier immediately, not Chauvet. Failure to report damage to the carrier immediately may invalidate your claim. In addition, keep the box and contents for inspection. For other issues, such as missing components or parts, damage not related to shipping, or concealed damage, file a claim with Chauvet within 7 days of delivery. Manual Conventions Convention Meaning A range of values in the text 50/60 A set of mutually exclusive values in the text <SET> A button on the product s control panel Settings A product function or a menu option ON A unique value to be entered or selected in a menu Symbols Symbols Meaning Critical installation, configuration, or operation information. Failure to comply with this information may cause the product not to work, damage third-party equipment, or cause harm to the operator. Important installation or configuration information. Failure to comply with this information may keep the product from working. Useful information. Product At A Glance The term DMX used throughout this manual refers to the USITT DMX512-A digital data transmission protocol. Use on Dimmer x Auto Programs x Outdoor Use x Auto-Ranging Power Supply P Master/Slave x Replaceable Fuse P DMX P User-Serviceable x Maverick MK2 Wash User Manual Rev. 2-1-
6 Before You Begin Safety Notes Read all the following Safety Notes before working with this product. These notes include important information about the installation, usage, and maintenance of this product. This product contains no user-serviceable parts. Any reference to servicing in this User Manual will only apply to properly trained Chauvet certified technicians. Do not open the housing or attempt any repairs. All applicable local codes and regulations apply to proper installation of this product. Personal Safety Avoid direct eye exposure to the light source while the product is on. Always disconnect this product from its power source before servicing. Always connect this product to a grounded circuit to avoid the risk of electrocution. Do not touch this product s housing during operation because it may be very hot. Mounting And Rigging This product is not intended for permanent installation. This product is for indoor use only! To prevent risk of fire or shock, do not expose this product to rain or moisture. (IP20) CAUTION: When transferring product from extreme temperature environments, (e.g., cold truck to warm humid ballroom) condensation may form on the internal electronics of the product. To avoid causing a failure, allow product to fully acclimate to the surrounding environment before connecting it to power. Mount this product in a location with adequate ventilation, at least 20 in (50 cm) from adjacent surfaces. Make sure there are no flammable materials close to this product while it is operating. When hanging this product, always secure to a fastening device using a safety cable. Never carry the product by the power cord or any moving part. Power And Wiring Make sure the power cord is not crimped or damaged. Always make sure you are connecting this product to the proper voltage in accordance with the specifications in this manual or on the product s specification label. To eliminate unnecessary wear and improve its lifespan, during periods of non-use completely disconnect the product from power via breaker or by unplugging it. Never connect this product to a dimmer pack or rheostat. Make sure to replace the fuse with another of the same type and rating. Never disconnect this product by pulling or tugging on the power cable. Do not operate this product if you see damage on the housing, lenses, or cables. Have the damaged parts replaced by an authorized technician at once. Do not cover the ventilation slots when operating to avoid internal overheating. The maximum ambient temperature is 113 F (45 C). Do not operate this product at a higher temperature. In case of a serious operating problem, stop using this product immediately! If your Chauvet product requires service, contact Chauvet Technical Support. Expected LED Lifespan LEDs gradually decline in brightness over time, mostly because of heat. Packaged in clusters, LEDs exhibit higher operating temperatures than in ideal, single-led conditions. For this reason, using clustered LEDs at their fullest intensity significantly reduces the LEDs lifespan. Under normal conditions, this lifespan can be 40,000 to 50,000 hours. If extending this lifespan is vital, lower the operating temperature by improving the ventilation around the product and reducing the ambient temperature to an optimal operating range. In addition, limiting the overall projection intensity may also help to extend the LEDs lifespan. -2- Maverick MK2 Wash User Manual Rev. 2

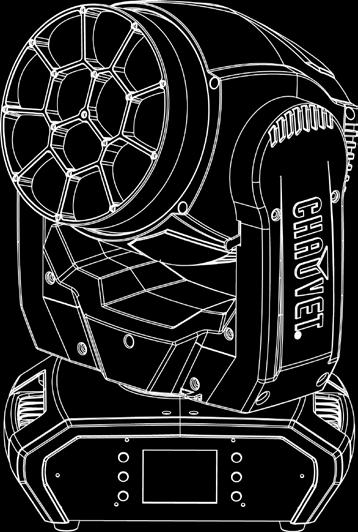
7 Introduction 2. INTRODUCTION Description Overview Features The Maverick MK2 Wash is a fully featured moving head product equipped with 12 quad-color RGBW 40-watt LEDs. Maverick MK2 Wash is a powerful wash product that features smooth pan and tilt operation, a 7 to 49 zoom range, and a unique lens system that gives you an even, professionally combined color wash. The Maverick MK2 Wash runs on Art-Net, sacn, Kling- Net, DMX, and WDMX protocols, and can be controlled with lighting consoles or media servers, providing the ultimate in flexible control integration options. Convert TCP/IP protocols in to DMX output for shorter cable runs. 12 RGBW 40 W LEDs Zoom from a narrow 7 to a wide 49. Up to 19,000 lux at 5 meters Ultra-fast pan/tilt movement Control options include Art-Net, sacn, Kling-Net, DMX, and WDMX Seetronic Powerkon in and out ports Amphenol XLRnet through ports DMX 3- and 5-pin in and out ports Built-in TCP/IP to DMX converter Built-in web server for remote diagnostics and firmware upgrades Front View Yoke Rear Panel 5-pin DMX In/Out Ethernet LED Indicators Antenna 3-pin DMX In/Out Amphenol XLRnet Through Ports Seetronic Powerkon In Fuse- Holder Seetronic Powerkon Out Handle (x2) Rubber Foot (x4) Touchscreen Display Menu Buttons Maverick MK2 Wash User Manual Rev. 2-3-
8 Introduction Dimensions in 323 mm 9.17 in 233 mm 9.21 in 234 mm 8.12 in 206 mm in 258 mm in 419 mm in 283 mm in 471 mm 4.42 in 112 mm 12.2 in 310 mm 8.84 in 225 mm -4- Maverick MK2 Wash User Manual Rev. 2
9 Setup 3. SETUP AC Power Each Maverick MK2 Wash has an auto-ranging power supply that works with an input voltage range of 100 to 240 VAC, 50/60 Hz. To determine the power requirements for each Maverick MK2 Wash, refer to the label affixed to the product. You can also refer to the Technical Specifications chart in this manual. The listed current rating indicates the maximum current draw during normal operation. For more information, you may download Sizing Circuit Breakers from the Chauvet website: Always connect this product to a protected circuit with an appropriate electrical ground to avoid the risk of electrocution or fire. Never connect this product to a rheostat (variable resistor) or dimmer circuit, even if the rheostat or dimmer channel serves only as a 0 to 100% switch. To eliminate unnecessary wear and improve its lifespan, during periods of non-use completely disconnect the product from power via breaker or by unplugging it. AC Plug The Maverick MK2 Wash comes with a power input cord terminated with a Seetronic Powerkon connector on one end and an Edison plug on the other end (U.S. market). If the power input cord that came with your product has no plug, or if you need to change the Edison plug, use the table below to wire the new plug. Connection Wire (U.S.) Wire (Europe) Screw Color AC Live Black Brown Yellow or Brass AC Neutral White Blue Silver AC Ground Green/Yellow Green/Yellow Green Fuse Replacement Power Linking Power Linking Diagram 1. Disconnect this product from the power outlet. 2. Using a flat-head screwdriver, unscrew the fuse holder cap from the housing. 3. Remove the blown fuse and replace with another fuse of the same type and rating (F 10 A, 250 V). 4. Screw the fuse holder cap back in place and reconnect power. Make sure to disconnect the product s power cord before replacing a blown fuse. Always replace the blown fuse with another of the same type and rating. The Maverick MK2 Wash supports power linking. You can power link up to 2 products at 120 V; up to 4 at 208 V; or up to 5 at 230 V. This product comes with a power input cord. Power linking cables are available from Chauvet for purchase. Power Source 1 st Product 2 nd Product 3 rd Product Additional Products Maverick MK2 Wash User Manual Rev. 2-5-

10 Setup Mounting Orientation Mounting Diagram Before mounting this product, read and follow the Safety Notes. For our CHAUVET Professional line of mounting clamps, go to Always mount this product in a safe position and make sure there is adequate room for ventilation, configuration, and maintenance. The Maverick MK2 Wash can be suspended upright or upside down using the 2 Omega brackets included, or it can be placed on its rubber feet on a flat level surface. Chauvet recommends using the following general guidelines when mounting this product: When selecting an installation location, consider easy access to this product for operation, programming adjustments, and routine maintenance. The product is not intended for permanent installation. Make sure to mount this product away from any flammable material as indicated in the Safety Notes. Never mount in places where rain, high humidity, extreme temperature changes, or restricted ventilation may affect the product. If hanging this product, make sure that the mounting location can support the product s weight. See the Technical Specifications for the weight-bearing requirements of this product. When hanging this product, always secure to a fastening device using a safety cable. For our CHAUVET Professional line of safety cables, go to When mounting the product on the floor, make sure that the product and cables are away from people and vehicles. Place the Maverick MK2 Wash so that it can move freely without hitting anything or anybody. Leave enough slack on the cabled to prevent tension and pull on the plugs. Mounting Clamp Omega Bracket Safety Cable Rubber Feet (x4) Overhead Mounting Floor Mounting -6- Maverick MK2 Wash User Manual Rev. 2

11 Setup Signal Connections Art-Net Connection sacn Connection Kling-Net Connection The Maverick MK2 Wash can receive DMX, Art-Net, sacn, or Kling-Net signal. The Maverick MK2 Wash has 2 Neutrik ethercon through ports, and 3- and 5-pin DMX in and out ports. For more information about DMX, read the DMX primer at: Art-Net is an Ethernet protocol that uses TCP/IP which transfers a large amount of DMX512 data using an Neutrik ethercon RJ45 connection over a large network. An Art-Net protocol document is available from Art-Net designed by and copyright Artistic Licence Holdings Ltd. Also known as ANSI E1.31, streaming ACN is an Ethernet protocol that uses the layering and formatting of Architecture for Control Networks to transport DMX512 data over IP or any other ACN compatible network. ACN is maintained by the Professional Lighting and Sound Association (PLASA). Kling-Net is a network protocol that allows auto configuration of display devices using a Neutrik ethercon RJ45 Ethernet connection. Refer to the ArKaos software manual for detailed instructions on programming this product. ArKaos Kling-Net does not support the pan and tilt functions, and must be paired with another protocol for full functionality with the Maverick MK2 Wash. Switch or Router (such as the NET-Switch from CHAUVET Professional) Connection Diagram Maverick MK2 Wash Computer/Controller (running Art-Net, sacn, or Kling-Net protocol) To other Art-Net, sacn, or Kling-Net Devices The three LED indicators in between the Amphenol XLRnet ports indicate a connection to a network and activity on that network. They do not indicate whether or not the Maverick MK2 Wash is receiving a signal from a controller. Maverick MK2 Wash User Manual Rev. 2-7-
12 4. OPERATION Touchscreen Control Panel The Maverick MK2 Wash has a touchscreen display as well as 6 control buttons. Navigate the menu structure by pressing the buttons, touching the images of the buttons on the sides of the display, or touching the desired menu option on the display directly. The touchscreen can be locked and calibrated through the Setup options in the menu. (see Touchscreen Calibration and Touchscreen Lock) Control Panel Description Button < > (<UP>) < > (<MENU>) < > (<DOWN>) < > (<LEFT>) < > (<ENTER>) < > (<RIGHT>) Function Navigates upwards through the menu list or increases the numeric value when in a function Exits from the current menu or function Navigates downwards through the menu list or decreases the numeric value when in a function Navigates leftwards through the menu list Enables the currently displayed menu or sets the currently selected value into the selected function Navigates rightwards through the menu list Menu Map Main Level Programming Levels Description Basic Standard Sets the DMX personality, from Personality Basic (20CH), Standard (68CH), DMX Advanced Advanced (122CH) or Tour (146CH) Tour Start Address Sets the DMX starting address Basic Standard Sets the Art-Net personality, from Personality Basic (20CH), Standard (68CH), Advanced ArtNet Advanced (122CH) or Tour (146CH) Tour Start Address Sets the Art-Net starting address Control Settings Single Control sacn WDMX Universe Sets the Art-Net universe Basic Sets the sacn personality, from Standard Personality Basic (20CH), Standard (68CH), Advanced Advanced (122CH) or Tour (146CH) Tour Start Address Sets the sacn starting address Universe Sets the sacn universe Basic Sets the WDMX personality, from Standard Personality Basic (20CH), Standard (68CH), Advanced Advanced (122CH) or Tour (146CH) Tour Start Address Sets the WDMX starting address -8- Maverick MK2 Wash User Manual Rev. 2
13 Main Level Programming Levels Description Basic Sets the DMX personality, from DMX Personality Standard Basic (8CH), Standard (20CH), Advanced or Advanced (26CH) Start Address Sets the DMX starting address Basic Sets the Art-Net personality, Personality Standard from Basic (8CH), Standard Movement ArtNet Advanced (20CH), or Advanced (26CH) Start Address Sets the Art-Net starting address Universe Sets the Art-Net universe Basic Sets the sacn personality, from Personality Standard Basic (8CH), Standard (20CH), sacn Advanced or Advanced (26CH) Start Address Sets the sacn starting address Universe Sets the sacn universe Control Basic Settings Dual Control Sets the DMX personality, from Personality Standard Basic (36CH), Standard (48CH), (cont.) DMX Advanced or Advanced (96CH) Start Address Sets the DMX starting address Basic Sets the Art-Net personality, Personality Standard from Basic (36CH), Standard ArtNet Advanced (48CH), or Advanced (96CH) Pixels Start Address Sets the Art-Net starting address Universe Sets the Art-Net universe Basic Sets the sacn personality, from Personality Standard Basic (36CH), Standard (48CH), sacn Advanced or Advanced (96CH) Start Address Sets the sacn starting address Universe Sets the sacn universe KlingNet Personality Basic Sets the Kling-Net personality, from Standard Basic (36CH) or Standard (48CH) In Dual Control mode, the Movement Protocol and the pixel protocol cannot be the same. Maverick MK2 Wash User Manual Rev. 2-9-
14 Main Level Programming Levels Description Auto test Auto test all functions Pan Tilt P/T Speed Red Green Blue White CTC Color Test Mode Manually control and test all settings Manual test Pattern through the control panel LED Macro LED Ma. Speed LED Ma. Fade Background Background Dim. Dimmer Shutter Function Zoom Ethernet To DMX NO Do not convert ethernet in to DMX out YES Convert ethernet in to DMX out Manual Manually set IP address Network Settings IP Mode DHCP Network sets IP address Static Product sets IP address IP _. _. _. _ Set IP address in Manual mode SubMask _. _. _. _ Set Subnet Mask in Manual mode Pan Reverse NO Normal pan YES Reversed pan Tilt Reverse NO Normal tilt YES Reversed tilt Zoom Reverse NO Normal zoom YES Reversed zoom NO Normal display Setup Screen Reverse YES Inverted display AUTO Automatic display orientation pan range Pan Angle pan range pan range tilt range Tilt Angle tilt range tilt range BL. O. P/T Move NO Do not black out while panning/tilting YES Black out while panning/tilting Calibration NO Keep current settings YES Calibrate touchscreen Touchscreen Lock NO Display responds to touch YES Display does not respond to touch Lock Screen NO Locks the buttons and touchscreen. YES Passcode to unlock: Maverick MK2 Wash User Manual Rev. 2
15 Main Level Programming Levels Description Swap XY NO Do not swap pan and tilt YES Swap pan and tilt XY Mode Slow Slow panning and tilting Fast Fast panning and tilting WDMX Reset NO Do not reset WDMX YES Reset WDMX 30S Display turns off after 30 seconds Backlight Timer 1M Display turns off after 1 minute 5M Display turns off after 5 minutes ON Display stays on at all times Hold last signal received at signal Hold Loss of Data loss Close Black out the product at signal loss Fan speed set according to product Auto temperature Fans Full Fan speed at highest setting ECO Quiet running mode Additive color mixing (0=0, RGBW 255=100%) Setup C Mixing Mode Subtractive color mixing (0=100%, (cont.) CMY 255=0) Linear Dimmer Curve Square I Squa SCurve Set the dimmer curve Dimmer Speed Smooth Fast Set the dimmer speed Red Sets red LED maximum value Color Balance Green Sets green LED maximum value Blue Sets blue LED maximum value White Sets white LED maximum value Pan NO YES Reset Function Tilt NO Reset individual functions or all YES functions from start-up All NO YES Factory Settings NO YES Reset to factory default settings Maverick MK2 Wash User Manual Rev
16 Main Level Programming Levels Description Ver V_ Shows firmware version Running Mode _ Shows current running mode Address _ Shows current starting address Fixture Information Temperature Shows current product temperature in C Fixture Hours _ Shows number of hours product has been powered on IP _. _. _. _ Shows current IP address SubMask _. _. _. _ Shows current Subnet Mask MAC..... Shows current MAC address Fan Information Head Fan1 Speed Head Fan2 Speed Shows speed of head fans in rpm Error Information No Error!* Shows any errors, or No Error! Frequency Pan Pan Fine Tilt Tilt Fine CTC Sys Info Color Pattern LED Macro LED Ma. Speed LED Ma. Fade Background Channel Information Background Dim. Shows all current values from input Bg. Dim. Fine _ signals, Dimmer Dimmer Fine Shutter Zoom Functions Red (main, 1 12) Red Fine (main, 1 12) Green (main, 1 12) Green Fine (main, 1 12) Blue (main, 1 12) Blue Fine (main, 1 12) White (main, 1 12) White Fine (main, 1 12) -12- Maverick MK2 Wash User Manual Rev. 2
17 Protocol Configuration Single Control Single Control Protocol Single Control Personality The Maverick MK2 Wash can be set to respond to DMX, WDMX, Art-Net, sacn, Kling-Net, or a combination of those protocols. The protocol configuration must be set for the product to respond correctly to the controller(s). See the Menu Map for more information. In Single Control mode, the Maverick MK2 Wash is controlled by a single protocol input. Choose from DMX, Art-Net, sacn, or WDMX. In this mode, the three personalities available are Basic (20 channels), Standard (68 channels), and Advanced (122 channels). To select the Single Control protocol, follow the instructions below: 1. Press <MENU> repeatedly until the Home Screen shows on the display. Press <ENTER>. 2. Use <UP>, <DOWN>, <LEFT>, or <RIGHT> to select Control Settings, or touch the display where it says Control Settings. 3. If using the buttons instead of the touchscreen, press <ENTER>. 4. Use <UP> or <DOWN> to select Single Control, or touch the display where it says Single Control. 5. If using the buttons instead of the touchscreen, press <ENTER>. 6. Use <UP> or <DOWN> to select from DMX, ArtNet, sacn, or WDMX, or touch the display where it says the desired protocol option. 7. If using the buttons instead of the touchscreen, press <ENTER>. To select the Single Control personality, set the Protocol, then do the following: 1. Use <UP> or <DOWN> to select Personality, or touch the display where it says Personality. 2. If using the buttons instead of the touchscreen, press <ENTER>. 3. Use <UP>, <DOWN>, <LEFT>, or <RIGHT> to select from Basic (20-channel), Standard (68- channel), or Advanced (122-channel), or touch the display where it says the desired personality. 4. If using the buttons instead of the touchscreen, press <ENTER>. For WDMX control, ensure the antenna is raised and there are no obstructions between the controller and the product. See WDMX Reset for troubleshooting information. Single Control To set the starting address of the Single Control mode, set the Protocol, then follow the instructions Start Address below: Single Control Universe Use <UP> or <DOWN> to select Start Address, or touch the display where it says Start Address. If using the buttons instead of the touchscreen, press <ENTER>. Enter the starting address ( ) with one of the following methods: Type the address number using the number pad that shows on the touchscreen display. or Using the buttons (or the button icons on the sides of the display), a. Use <LEFT> or <RIGHT> to select the digit to be altered. b. Use <UP> or <DOWN> to increase or decrease the number value of that digit. c. Repeat until the address is set as desired. 4. Press <ENTER>. To set the Universe address of the Single Control mode when using Art-Net or sacn, set the Protocol to ArtNet or sacn, then do the following: 1. Use <UP> or <DOWN> to select Universe, or touch the display where it says Universe. 2. If using the buttons instead of the touchscreen, press <ENTER>. 3. Enter the universe address (0 254 for ArtNet, for sacn) with one of the following methods: Type the universe number using the number pad that shows on the touchscreen display. or Using the buttons (or the button icons on the sides of the display), 4. a. Use <LEFT> or <RIGHT> to select the digit to be altered. b. Use <UP> or <DOWN> to increase or decrease the number value of that digit. c. Repeat until the universe is set as desired. Press <ENTER>. Maverick MK2 Wash User Manual Rev
18 Dual Control Dual Control Movement Dual Control Movement Protocol Dual Control Movement Personality Dual Control Movement Start Address Dual Control Movement Universe In Dual Control mode, the Maverick MK2 Wash is controlled by two protocol inputs. One controls the movement of the yoke and zoom, as well as the dimmers and shutter, while the other controls the individual LED output. The Movement protocol controls the movement of the yoke and zoom, as well as the dimmers and shutter. Choose from DMX, Art-Net, or sacn. In this mode, the three personalities available are Basic (8 channels), Standard (20 channels), and Advanced (26 channels). To select the Dual Control Movement protocol, follow the instructions below: 1. Press <MENU> repeatedly until the Home Screen shows on the display. Press <ENTER>. 2. Use <UP>, <DOWN>, <LEFT>, or <RIGHT> to select Control Settings, or touch the display where it says Control Settings. 3. If using the buttons instead of the touchscreen, press <ENTER>. 4. Use <UP> or <DOWN> to select Dual Control, or touch the display where it says Dual Control. 5. If using the buttons instead of the touchscreen, press <ENTER>. 6. Use <UP> or <DOWN> to select Movement, or touch the display where it says Movement. 7. If using the buttons instead of the touchscreen, press <ENTER>. 8. Use <UP>, <DOWN>, <LEFT>, or <RIGHT> to select from DMX, ArtNet, or sacn, or touch the display where it says the desired protocol option. 9. If using the buttons instead of the touchscreen, press <ENTER>. To select the Dual Control Movement personality, set the Protocol, then do the following: 1. Use <UP> or <DOWN> to select Personality, or touch the display where it says Personality. 2. If using the buttons instead of the touchscreen, press <ENTER>. 3. Use <UP>, <DOWN>, <LEFT>, or <RIGHT> to select from Basic (8-channel), Standard (20- channel), or Advanced (26-channel), or touch the display where it says the desired personality. 4. If using the buttons instead of the touchscreen, press <ENTER>. To set the starting address of the Dual Control Movement mode, set the Protocol, then follow the instructions below: 1. Use <UP> or <DOWN> to select Start Address, or touch the display where it says Start Address. 2. If using the buttons instead of the touchscreen, press <ENTER>. 3. Enter the starting address ( ) with one of the following methods: Type the address number using the number pad that shows on the touchscreen display. or Using the buttons (or the button icons on the sides of the display), a. Use <LEFT> or <RIGHT> to select the digit to be altered. b. Use <UP> or <DOWN> to increase or decrease the number value of that digit. c. Repeat until the address is set as desired. 4. Press <ENTER>. To set the Universe address of the Dual Control Movement mode when using Art-Net or sacn, set the Protocol to ArtNet or sacn, then do the following: 1. Use <UP> or <DOWN> to select Universe, or touch the display where it says Universe. 2. If using the buttons instead of the touchscreen, press <ENTER>. 3. Enter the universe address (0 254 for ArtNet, for sacn) with one of the following methods: Type the universe number using the number pad that shows on the touchscreen display. or Using the buttons (or the button icons on the sides of the display), 4. a. Use <LEFT> or <RIGHT> to select the digit to be altered. b. Use <UP> or <DOWN> to increase or decrease the number value of that digit. c. Repeat until the universe is set as desired. Press <ENTER> Maverick MK2 Wash User Manual Rev. 2
19 Dual Control The Pixel protocol controls the individual output of the LEDs. Choose from DMX, Art-Net, sacn, Pixel or Kling-Net. In this mode, the three personalities available are Basic (36 channels), Standard (48 Dual Control Pixel Protocol Dual Control Pixel Personality channels), and Advanced (96 channels). To select the Dual Control Pixel protocol, follow the instructions below: 1. Press <MENU> repeatedly until the Home Screen shows on the display. Press <ENTER>. 2. Use <UP>, <DOWN>, <LEFT>, or <RIGHT> to select Control Settings, or touch the display where it says Control Settings. 3. If using the buttons instead of the touchscreen, press <ENTER>. 4. Use <UP> or <DOWN> to select Dual Control, or touch the display where it says Dual Control. 5. If using the buttons instead of the touchscreen, press <ENTER>. 6. Use <UP> or <DOWN> to select Pixel, or touch the display where it says Pixel. 7. If using the buttons instead of the touchscreen, press <ENTER>. 8. Use <UP>, <DOWN>, <LEFT>, or <RIGHT> to select from DMX, ArtNet, sacn, or KlingNet, or touch the display where it says the desired protocol option. 9. If using the buttons instead of the touchscreen, press <ENTER>. To select the Dual Control Pixel personality, set the Protocol, then do the following: 1. Use <UP> or <DOWN> to select Personality, or touch the display where it says Personality. 2. If using the buttons instead of the touchscreen, press <ENTER>. 3. Use <UP>, <DOWN>, <LEFT>, or <RIGHT> to select from Basic (36-channel), Standard (48- channel), or Advanced (96-channel), or touch the display where it says the desired personality. 4. If using the buttons instead of the touchscreen, press <ENTER>. Kling-Net can only be assigned the Basic and Standard personalities. Dual Control Pixel To set the starting address of the Dual Control Pixel mode, set the Protocol, then follow the Start Address instructions below: 1. Use <UP> or <DOWN> to select Start Address, or touch the display where it says Start Address. 2. If using the buttons instead of the touchscreen, press <ENTER>. 3. Enter the starting address ( ) with one of the following methods: Type the address number using the number pad that shows on the touchscreen display. or Using the buttons (or the button icons on the sides of the display), a. Use <LEFT> or <RIGHT> to select the digit to be altered. b. Use <UP> or <DOWN> to increase or decrease the number value of that digit. c. Repeat until the address is set as desired. 4. Press <ENTER>. Dual Control Pixel To set the Universe address of the Dual Control Pixel mode when using Art-Net or sacn, set the Universe Protocol to ArtNet or sacn, then do the following: 1. Use <UP> or <DOWN> to select Universe, or touch the display where it says Universe. 2. If using the buttons instead of the touchscreen, press <ENTER>. 3. Enter the universe address (0 254 for ArtNet, for sacn) with one of the following methods: Type the universe number using the number pad that shows on the touchscreen display. or Using the buttons (or the button icons on the sides of the display), a. Use <LEFT> or <RIGHT> to select the digit to be altered. b. Use <UP> or <DOWN> to increase or decrease the number value of that digit. c. Repeat until the universe is set as desired. 4. Press <ENTER>. Maverick MK2 Wash User Manual Rev
 8 9 LED Macro / Auto")
20 Zones for Pixel control DMX Values Tour Mode (146 Channel) Channel Function Value Percent/Setting 1 Pan % 2 Pan Fine % 3 Tilt % 4 Tilt Fine % 5 CTC 000 No Function Color Temperature 19000K 2700K 6 Color 000 No Function Color Macros 7 Virtual Gobo/ Patterns No function On/Off presets (Indexed) 8 9 LED Macro / Auto Program LED Macro / Auto Program Speed No function LED macros Auto programs Fast to slow 128 Hold Slow to fast 10 LED built-in delay Fast to slow 000 No function white 2700K(R=156 G=118 B=0 W=63) white 3200K(R=156 G=141 B=5 W=89) white 4200K(R=156 G=141 B=14 W=255) white 5600K(R=156 G=207 B=54 W=255) white 8000K(R=130 G=255 B=96 W=255) 011 blue R=0 G=0 B=255 W= R=0 G+ B=255 W=0 049 cyan R=0 G=255 B=255 W= R=0 G=255 B- W=0 11 Background Color 087 green R=0 G=255 B=0 W= R+ G=255 B=0 W=0 125 yellow R=255 G=255 B=0 W= R=255 G- B=0 W=0 163 red R=255 G=0 B=0 W= R=255 G=0 B+ W=0 201 magenta R=255 G=0 B=255 W= R+ G=0 B=255 W=0 239 blue R=0 G=0 B=255 W= Color change, fast to slow Color jump, fast to slow -16- Maverick MK2 Wash User Manual Rev. 2
21 Tour Mode (146 Channel) Channel Function Value Percent/Setting 12 BC Dimmer % 13 BC Fine Dimmer % 14 Main Dimmer % 15 Fine Main Dimmer % Off On Strobe 1, fast to slow On Strobe 2 (Fast on, slow off) fast to slow On Strobe 3 (Slow on, fast off) fast to slow On Strobe 4 (Random) fast to slow On 16 Shutter Strobe 5 (Random fast on, slow off) fast to slow On Strobe 6 (Random slow on, fast off) fast to slow On Strobe 7 (Pulse) fast to slow On Strobe 8 (Random pulse) fast to slow On Strobe 9 (Fade in, fade out) fast to slow On Strobe 10 (Random pulse) fast to slow On 17 Zoom Narrow to wide No function Pan/tilt blackout No function (reserved for future use) RGBW color mixing mode (additive) CMY color mixing mode (subtractive) No function (reserved for future use) Pan reset Tilt reset Zoom reset 18 Control No function (reserved for future use) Reset all No function (reserved for future use) Pan/tilt speed fast Pan/tilt speed slow Fan mode slow Fan mode full Fan mode auto Dimmer mode fast Dimmer mode slow No function (reserved for future use) 19 R (C) Main % 20 R (C) Main Fine % 21 G (M) Main % 22 G (M) Main Fine % 23 B (Y) Main % 24 B (Y)Main Fine % 25 W Main % 26 W Main Fine % 27 Dimmer % Maverick MK2 Wash User Manual Rev
22 Tour Mode (146 Channel) Channel Function Value Percent/Setting 28 Dimmer 1 Fine % 29 R (C) % 30 R (C) 1 Fine % 31 G (M) % 32 G (M) 1 Fine % 33 B (Y) % 34 B (Y)1 Fine % 35 W % 36 W 1 Fine % 37 Dimmer % 38 Dimmer 2 Fine % 39 R (C) % 40 R (C) 2 Fine % 41 G (M) % 42 G (M) 2 Fine % 43 B (Y) % 44 B (Y)2 Fine % 45 W % 46 W 2 Fine % 47 Dimmer % 48 Dimmer 2 Fine % 49 R (C) % 50 R (C) 2 Fine % 51 G (M) % 52 G (M) 2 Fine % 53 B (Y) % 54 B (Y)2 Fine % 55 W % 56 W 2 Fine % 57 Dimmer % 58 Dimmer 2 Fine % 59 R (C) % 60 R (C) 2 Fine % 61 G (M) % 62 G (M) 2 Fine % 63 B (Y) % 64 B (Y)2 Fine % 65 W % 66 W 2 Fine % 67 Dimmer % 68 Dimmer 2 Fine % 69 R (C) % 70 R (C) 2 Fine % 71 G (M) % 72 G (M) 2 Fine % 73 B (Y) % 74 B (Y)2 Fine % 75 W % 76 W 2 Fine % 77 Dimmer % 78 Dimmer 2 Fine % 79 R (C) % 80 R (C) 2 Fine % 81 G (M) % -18- Maverick MK2 Wash User Manual Rev. 2
23 Tour Mode (146 Channel) Channel Function Value Percent/Setting 82 G (M) 2 Fine % 83 B (Y) % 84 B (Y)2 Fine % 85 W % 86 W 2 Fine % 87 Dimmer % 88 Dimmer 2 Fine % 89 R (C) % 90 R (C) 2 Fine % 91 G (M) % 92 G (M) 2 Fine % 93 B (Y) % 94 B (Y)2 Fine % 95 W % 96 W 2 Fine % 97 Dimmer % 98 Dimmer 2 Fine % 99 R (C) % 100 R (C) 2 Fine % 101 G (M) % 102 G (M) 2 Fine % 103 B (Y) % 104 B (Y)2 Fine % 105 W % 106 W 2 Fine % 107 Dimmer % 108 Dimmer 2 Fine % 109 R (C) % 110 R (C) 2 Fine % 111 G (M) % 112 G (M) 2 Fine % 113 B (Y) % 114 B (Y)2 Fine % 115 W % 116 W 2 Fine % 117 Dimmer % 118 Dimmer 2 Fine % 119 R (C) % 120 R (C) 2 Fine % 121 G (M) % 122 G (M) 2 Fine % 123 B (Y) % 124 B (Y)2 Fine % 125 W % 126 W 2 Fine % 127 Dimmer % 128 Dimmer 2 Fine % 129 R (C) % 130 R (C) 2 Fine % 131 G (M) % 132 G (M) 2 Fine % 133 B (Y) % 134 B (Y)2 Fine % Maverick MK2 Wash User Manual Rev
24 Tour Mode (146 Channel) Single Control Values Advanced Mode (122-channel) Channel Function Value Percent/Setting 135 W % 136 W 2 Fine % 137 Dimmer % 138 Dimmer 12 Fine % 139 R (C) % 140 R (C) 12 Fine % 141 G (M) % 142 G (M) 12 Fine % 143 B (Y) % 144 B (Y) 12 Fine % 145 W % 146 W 12 Fine % Channel Function Value Percent/Settings 1 Pan % 2 Fine Pan % 3 Tilt % 4 Fine Tilt % 5 CTC 000 No function Color temperature 1900K to 2700K 6 Color Macro 000 No function Color macros 7 On/Off Preset No function On/Off presets No function LED Macro/Auto LED macros Program Auto programs Fast to slow LED Macro/Auto 128 Hold Program Speed Slow to fast 10 LED Macro Fade Fast to slow 11 Background Color 000 No function Macro Background color macros 12 Background Dimmer % 13 Background Fine Dimmer % 14 Main Dimmer % 15 Main Fine Dimmer % -20- Maverick MK2 Wash User Manual Rev. 2
25 Advanced Mode (122-channel cont.) Channel Function Value Percent/Settings Off On Strobe 1, fast to slow On Strobe 2 (Fast on, slow off), fast to slow On Strobe 3 (Slow on, fast off), fast to slow On Strobe 4 (Random), fast to slow On 16 Shutter Strobe 5 (Random fast on, slow off), fast to slow On Strobe 6 (Random slow on, fast off), fast to slow On Strobe 7 (Pulse), fast to slow On Strobe 8 (Random pulse), fast to slow On Strobe 9 (Fade in, fade out), fast to slow On Strobe 10 (Random pulse), fast to slow On 17 Zoom Wide to narrow No function Pan/tilt blackout No function (reserved for future use) RGBW color mixing mode (additive) CMY color mixing mode (subtractive) No function (reserved for future use) Pan reset Tilt reset Zoom reset 18 Control No function (reserved for future use) Reset all No function (reserved for future use) Pan/tilt speed fast Pan/tilt speed slow Fan mode slow Fan mode full Fan mode auto Dimmer mode fast Dimmer mode slow No function (reserved for future use) Maverick MK2 Wash User Manual Rev
26 Advanced Mode (122-channel cont.) Channel Function Value Percent/Settings 19 Main Red RGBW mode: 0 100% / CMY mode: 100% 0 20 Main Red Fine RGBW mode: 0 100% / CMY mode: 100% 0 21 Main Green RGBW mode: 0 100% / CMY mode: 100% 0 22 Main Green Fine RGBW mode: 0 100% / CMY mode: 100% 0 23 Main Blue RGBW mode: 0 100% / CMY mode: 100% 0 24 Main Blue Fine RGBW mode: 0 100% / CMY mode: 100% 0 25 Main White RGBW mode: 0 100% / CMY mode: 100% 0 26 Main White Fine RGBW mode: 0 100% / CMY mode: 100% 0 27 Red RGBW mode: 0 100% / CMY mode: 100% 0 28 Red Fine RGBW mode: 0 100% / CMY mode: 100% 0 29 Green RGBW mode: 0 100% / CMY mode: 100% 0 30 Green Fine RGBW mode: 0 100% / CMY mode: 100% 0 31 Blue RGBW mode: 0 100% / CMY mode: 100% 0 32 Blue Fine RGBW mode: 0 100% / CMY mode: 100% 0 33 White RGBW mode: 0 100% / CMY mode: 100% 0 34 White Fine RGBW mode: 0 100% / CMY mode: 100% 0 35 Red RGBW mode: 0 100% / CMY mode: 100% 0 36 Red Fine RGBW mode: 0 100% / CMY mode: 100% 0 37 Green RGBW mode: 0 100% / CMY mode: 100% 0 38 Green Fine RGBW mode: 0 100% / CMY mode: 100% 0 39 Blue RGBW mode: 0 100% / CMY mode: 100% 0 40 Blue Fine RGBW mode: 0 100% / CMY mode: 100% 0 41 White RGBW mode: 0 100% / CMY mode: 100% 0 42 White Fine RGBW mode: 0 100% / CMY mode: 100% 0 43 Red RGBW mode: 0 100% / CMY mode: 100% 0 44 Red Fine RGBW mode: 0 100% / CMY mode: 100% 0 45 Green RGBW mode: 0 100% / CMY mode: 100% 0 46 Green Fine RGBW mode: 0 100% / CMY mode: 100% 0 47 Blue RGBW mode: 0 100% / CMY mode: 100% 0 48 Blue Fine RGBW mode: 0 100% / CMY mode: 100% 0 49 White RGBW mode: 0 100% / CMY mode: 100% 0 50 White Fine RGBW mode: 0 100% / CMY mode: 100% 0 51 Red RGBW mode: 0 100% / CMY mode: 100% 0 52 Red Fine RGBW mode: 0 100% / CMY mode: 100% 0 53 Green RGBW mode: 0 100% / CMY mode: 100% 0 54 Green Fine RGBW mode: 0 100% / CMY mode: 100% 0 55 Blue RGBW mode: 0 100% / CMY mode: 100% 0 56 Blue Fine RGBW mode: 0 100% / CMY mode: 100% 0 57 White RGBW mode: 0 100% / CMY mode: 100% 0 58 White Fine RGBW mode: 0 100% / CMY mode: 100% 0 59 Red RGBW mode: 0 100% / CMY mode: 100% 0 60 Red Fine RGBW mode: 0 100% / CMY mode: 100% 0 61 Green RGBW mode: 0 100% / CMY mode: 100% 0 62 Green Fine RGBW mode: 0 100% / CMY mode: 100% 0 63 Blue RGBW mode: 0 100% / CMY mode: 100% 0 64 Blue Fine RGBW mode: 0 100% / CMY mode: 100% 0 65 White RGBW mode: 0 100% / CMY mode: 100% 0 66 White Fine RGBW mode: 0 100% / CMY mode: 100% Maverick MK2 Wash User Manual Rev. 2
27 Advanced Mode (122-channel cont.) Channel Function Value Percent/Settings 67 Red RGBW mode: 0 100% / CMY mode: 100% 0 68 Red Fine RGBW mode: 0 100% / CMY mode: 100% 0 69 Green RGBW mode: 0 100% / CMY mode: 100% 0 70 Green Fine RGBW mode: 0 100% / CMY mode: 100% 0 71 Blue RGBW mode: 0 100% / CMY mode: 100% 0 72 Blue Fine RGBW mode: 0 100% / CMY mode: 100% 0 73 White RGBW mode: 0 100% / CMY mode: 100% 0 74 White Fine RGBW mode: 0 100% / CMY mode: 100% 0 75 Red RGBW mode: 0 100% / CMY mode: 100% 0 76 Red Fine RGBW mode: 0 100% / CMY mode: 100% 0 77 Green RGBW mode: 0 100% / CMY mode: 100% 0 78 Green Fine RGBW mode: 0 100% / CMY mode: 100% 0 79 Blue RGBW mode: 0 100% / CMY mode: 100% 0 80 Blue Fine RGBW mode: 0 100% / CMY mode: 100% 0 81 White RGBW mode: 0 100% / CMY mode: 100% 0 82 White Fine RGBW mode: 0 100% / CMY mode: 100% 0 83 Red RGBW mode: 0 100% / CMY mode: 100% 0 84 Red Fine RGBW mode: 0 100% / CMY mode: 100% 0 85 Green RGBW mode: 0 100% / CMY mode: 100% 0 86 Green Fine RGBW mode: 0 100% / CMY mode: 100% 0 87 Blue RGBW mode: 0 100% / CMY mode: 100% 0 88 Blue Fine RGBW mode: 0 100% / CMY mode: 100% 0 89 White RGBW mode: 0 100% / CMY mode: 100% 0 90 White Fine RGBW mode: 0 100% / CMY mode: 100% 0 91 Red RGBW mode: 0 100% / CMY mode: 100% 0 92 Red Fine RGBW mode: 0 100% / CMY mode: 100% 0 93 Green RGBW mode: 0 100% / CMY mode: 100% 0 94 Green Fine RGBW mode: 0 100% / CMY mode: 100% 0 95 Blue RGBW mode: 0 100% / CMY mode: 100% 0 96 Blue Fine RGBW mode: 0 100% / CMY mode: 100% 0 97 White RGBW mode: 0 100% / CMY mode: 100% 0 98 White Fine RGBW mode: 0 100% / CMY mode: 100% 0 99 Red RGBW mode: 0 100% / CMY mode: 100% Red Fine RGBW mode: 0 100% / CMY mode: 100% Green RGBW mode: 0 100% / CMY mode: 100% Green Fine RGBW mode: 0 100% / CMY mode: 100% Blue RGBW mode: 0 100% / CMY mode: 100% Blue Fine RGBW mode: 0 100% / CMY mode: 100% White RGBW mode: 0 100% / CMY mode: 100% White Fine RGBW mode: 0 100% / CMY mode: 100% Red RGBW mode: 0 100% / CMY mode: 100% Red Fine RGBW mode: 0 100% / CMY mode: 100% Green RGBW mode: 0 100% / CMY mode: 100% Green Fine RGBW mode: 0 100% / CMY mode: 100% Blue RGBW mode: 0 100% / CMY mode: 100% Blue Fine RGBW mode: 0 100% / CMY mode: 100% White RGBW mode: 0 100% / CMY mode: 100% White Fine RGBW mode: 0 100% / CMY mode: 100% 0 Maverick MK2 Wash User Manual Rev
28 Advanced Mode (122-channel cont.) Standard Mode (68-channel) Channel Function Value Percent/Settings 115 Red RGBW mode: 0 100% / CMY mode: 100% Red Fine RGBW mode: 0 100% / CMY mode: 100% Green RGBW mode: 0 100% / CMY mode: 100% Green Fine RGBW mode: 0 100% / CMY mode: 100% Blue RGBW mode: 0 100% / CMY mode: 100% Blue Fine RGBW mode: 0 100% / CMY mode: 100% White RGBW mode: 0 100% / CMY mode: 100% White Fine RGBW mode: 0 100% / CMY mode: 100% 0 Channel Function Value Percent/Settings 1 Pan % 2 Fine Pan % 3 Tilt % 4 Fine Tilt % 5 CTC 000 No function Color temperature 1900K to 2700K 6 Color Macro 000 No function Color macros 7 On/Off Preset No function On/Off presets 8 9 LED Macro/Auto Program LED Macro/Auto Program Speed No function LED macros Auto programs Fast to slow 128 Hold Slow to fast 10 LED Macro Fade Fast to slow 11 Background Color Macro 000 No function Background color macros 12 Background Dimmer % 13 Main Dimmer % -24- Maverick MK2 Wash User Manual Rev. 2
29 Standard Mode (68-channel cont.) Channel Function Value Percent/Settings Off On Strobe 1, fast to slow On Strobe 2 (Fast on, slow off), fast to slow On Strobe 3 (Slow on, fast off), fast to slow On Strobe 4 (Random), fast to slow On 14 Shutter Strobe 5 (Random fast on, slow off), fast to slow On Strobe 6 (Random slow on, fast off), fast to slow On Strobe 7 (Pulse), fast to slow On Strobe 8 (Random pulse), fast to slow On Strobe 9 (Fade in, fade out), fast to slow On Strobe 10 (Random pulse), fast to slow On 15 Zoom Wide to narrow No function Pan/tilt blackout No function (reserved for future use) RGBW color mixing mode (additive) CMY color mixing mode (subtractive) No function (reserved for future use) Pan reset Tilt reset Zoom reset 16 Control No function (reserved for future use) Reset all No function (reserved for future use) Pan/tilt speed fast Pan/tilt speed slow Fan mode slow Fan mode full Fan mode auto Dimmer mode fast Dimmer mode slow No function (reserved for future use) Maverick MK2 Wash User Manual Rev
30 Standard Mode (68-channel cont.) Channel Function Value Percent/Settings 17 Main Red RGBW mode: 0 100% / CMY mode: 100% 0 18 Main Green RGBW mode: 0 100% / CMY mode: 100% 0 19 Main Blue RGBW mode: 0 100% / CMY mode: 100% 0 20 Main White RGBW mode: 0 100% / CMY mode: 100% 0 21 Red RGBW mode: 0 100% / CMY mode: 100% 0 22 Green RGBW mode: 0 100% / CMY mode: 100% 0 23 Blue RGBW mode: 0 100% / CMY mode: 100% 0 24 White RGBW mode: 0 100% / CMY mode: 100% 0 25 Red RGBW mode: 0 100% / CMY mode: 100% 0 26 Green RGBW mode: 0 100% / CMY mode: 100% 0 27 Blue RGBW mode: 0 100% / CMY mode: 100% 0 28 White RGBW mode: 0 100% / CMY mode: 100% 0 29 Red RGBW mode: 0 100% / CMY mode: 100% 0 30 Green RGBW mode: 0 100% / CMY mode: 100% 0 31 Blue RGBW mode: 0 100% / CMY mode: 100% 0 32 White RGBW mode: 0 100% / CMY mode: 100% 0 33 Red RGBW mode: 0 100% / CMY mode: 100% 0 34 Green RGBW mode: 0 100% / CMY mode: 100% 0 35 Blue RGBW mode: 0 100% / CMY mode: 100% 0 36 White RGBW mode: 0 100% / CMY mode: 100% 0 37 Red RGBW mode: 0 100% / CMY mode: 100% 0 38 Green RGBW mode: 0 100% / CMY mode: 100% 0 39 Blue RGBW mode: 0 100% / CMY mode: 100% 0 40 White RGBW mode: 0 100% / CMY mode: 100% 0 41 Red RGBW mode: 0 100% / CMY mode: 100% 0 42 Green RGBW mode: 0 100% / CMY mode: 100% 0 43 Blue RGBW mode: 0 100% / CMY mode: 100% 0 44 White RGBW mode: 0 100% / CMY mode: 100% 0 45 Red RGBW mode: 0 100% / CMY mode: 100% 0 46 Green RGBW mode: 0 100% / CMY mode: 100% 0 47 Blue RGBW mode: 0 100% / CMY mode: 100% 0 48 White RGBW mode: 0 100% / CMY mode: 100% 0 49 Red RGBW mode: 0 100% / CMY mode: 100% 0 50 Green RGBW mode: 0 100% / CMY mode: 100% 0 51 Blue RGBW mode: 0 100% / CMY mode: 100% 0 52 White RGBW mode: 0 100% / CMY mode: 100% 0 53 Red RGBW mode: 0 100% / CMY mode: 100% 0 54 Green RGBW mode: 0 100% / CMY mode: 100% 0 55 Blue RGBW mode: 0 100% / CMY mode: 100% 0 56 White RGBW mode: 0 100% / CMY mode: 100% 0 57 Red RGBW mode: 0 100% / CMY mode: 100% 0 58 Green RGBW mode: 0 100% / CMY mode: 100% 0 59 Blue RGBW mode: 0 100% / CMY mode: 100% 0 60 White RGBW mode: 0 100% / CMY mode: 100% 0 61 Red RGBW mode: 0 100% / CMY mode: 100% 0 62 Green RGBW mode: 0 100% / CMY mode: 100% 0 63 Blue RGBW mode: 0 100% / CMY mode: 100% 0 64 White RGBW mode: 0 100% / CMY mode: 100% Maverick MK2 Wash User Manual Rev. 2
31 Standard Mode (68-channel cont.) Basic Mode (20-channel) Channel Function Value Percent/Settings 65 Red RGBW mode: 0 100% / CMY mode: 100% 0 66 Green RGBW mode: 0 100% / CMY mode: 100% 0 67 Blue RGBW mode: 0 100% / CMY mode: 100% 0 68 White RGBW mode: 0 100% / CMY mode: 100% 0 Channel Function Value Percent/Settings 1 Pan % 2 Fine Pan % 3 Tilt % 4 Fine Tilt % 5 CTC 000 No function Color temperature 1900K to 2700K 6 Color Macro 000 No function Color macros 7 On/Off Preset No function On/Off presets 8 9 LED Macro/Auto Program LED Macro/Auto Program Speed No function LED macros Auto programs Fast to slow 128 Hold Slow to fast 10 LED Macro Fade Fast to slow 11 Background Color Macro 000 No function Background color macros 12 Background Dimmer % 13 Main Dimmer % Off On Strobe 1, fast to slow On Strobe 2 (Fast on, slow off), fast to slow On Strobe 3 (Slow on, fast off), fast to slow On Strobe 4 (Random), fast to slow On 14 Shutter Strobe 5 (Random fast on, slow off), fast to slow On Strobe 6 (Random slow on, fast off), fast to slow On Strobe 7 (Pulse), fast to slow On Strobe 8 (Random pulse), fast to slow On Strobe 9 (Fade in, fade out), fast to slow On Strobe 10 (Random pulse), fast to slow On 15 Zoom Wide to narrow Maverick MK2 Wash User Manual Rev
32 Basic Mode (20-channel cont.) Channel Function Value Percent/Settings No function Pan/tilt blackout No function (reserved for future use) RGBW color mixing mode (additive) CMY color mixing mode (subtractive) No function (reserved for future use) Pan reset Tilt reset Zoom reset 16 Control No function (reserved for future use) Reset all No function (reserved for future use) Pan/tilt speed fast Pan/tilt speed slow Fan mode slow Fan mode full Fan mode auto Dimmer mode fast Dimmer mode slow No function (reserved for future use) 17 Main Red RGBW mode: 0 100% / CMY mode: 100% 0 18 Main Green RGBW mode: 0 100% / CMY mode: 100% 0 19 Main Blue RGBW mode: 0 100% / CMY mode: 100% 0 20 Main White RGBW mode: 0 100% / CMY mode: 100% 0 Dual Control Movement Values Advanced Movement Mode (26-channel) Channel Function Value Percent/Settings 1 Pan % 2 Fine Pan % 3 Tilt % 4 Fine Tilt % 5 CTC 000 No function Color temperature 1900K to 2700K 6 Color Macro 000 No function Color macros 7 On/Off Preset No function On/Off presets No function LED Macro/Auto LED macros Program Auto programs Fast to slow LED Macro/Auto 128 Hold Program Speed Slow to fast 10 LED Macro Fade Fast to slow 11 Background Color 000 No function Macro Background color macros 12 Background Dimmer % 13 Background Fine Dimmer % 14 Main Dimmer % 15 Main Fine Dimmer % -28- Maverick MK2 Wash User Manual Rev. 2
33 Advanced Movement Mode (26-channel cont.) Channel Function Value Percent/Settings Off On Strobe 1, fast to slow On Strobe 2 (Fast on, slow off), fast to slow On Strobe 3 (Slow on, fast off), fast to slow On Strobe 4 (Random), fast to slow On 16 Shutter Strobe 5 (Random fast on, slow off), fast to slow On Strobe 6 (Random slow on, fast off), fast to slow On Strobe 7 (Pulse), fast to slow On Strobe 8 (Random pulse), fast to slow On Strobe 9 (Fade in, fade out), fast to slow On Strobe 10 (Random pulse), fast to slow On 17 Zoom Wide to narrow No function Pan/tilt blackout No function (reserved for future use) RGBW color mixing mode (additive) CMY color mixing mode (subtractive) No function (reserved for future use) Pan reset Tilt reset Zoom reset 18 Control No function (reserved for future use) Reset all No function (reserved for future use) Pan/tilt speed fast Pan/tilt speed slow Fan mode slow Fan mode full Fan mode auto Dimmer mode fast Dimmer mode slow No function (reserved for future use) 19 Main Red RGBW mode: 0 100% / CMY mode: 100% 0 20 Main Red Fine RGBW mode: 0 100% / CMY mode: 100% 0 21 Main Green RGBW mode: 0 100% / CMY mode: 100% 0 22 Main Green Fine RGBW mode: 0 100% / CMY mode: 100% 0 23 Main Blue RGBW mode: 0 100% / CMY mode: 100% 0 24 Main Blue Fine RGBW mode: 0 100% / CMY mode: 100% 0 25 Main White RGBW mode: 0 100% / CMY mode: 100% 0 26 Main White Fine RGBW mode: 0 100% / CMY mode: 100% 0 Maverick MK2 Wash User Manual Rev
34 Standard Movement Mode (20-channel) Channel Function Value Percent/Settings 1 Pan % 2 Fine Pan % 3 Tilt % 4 Fine Tilt % 5 CTC 000 No function Color temperature 1900K to 2700K 6 Color Macro 000 No function Color macros 7 On/Off Preset No function On/Off presets 8 9 LED Macro/Auto Program LED Macro/Auto Program Speed No function LED macros Auto programs Fast to slow 128 Hold Slow to fast 10 LED Macro Fade Fast to slow 11 Background Color Macro 000 No function Background color macros 12 Background Dimmer % 13 Main Dimmer % Off On Strobe 1, fast to slow On Strobe 2 (Fast on, slow off), fast to slow On Strobe 3 (Slow on, fast off), fast to slow On Strobe 4 (Random), fast to slow On 14 Shutter Strobe 5 (Random fast on, slow off), fast to slow On Strobe 6 (Random slow on, fast off), fast to slow On Strobe 7 (Pulse), fast to slow On Strobe 8 (Random pulse), fast to slow On Strobe 9 (Fade in, fade out), fast to slow On Strobe 10 (Random pulse), fast to slow On 15 Zoom Wide to narrow -30- Maverick MK2 Wash User Manual Rev. 2
35 Standard Movement Mode (20-channel cont.) Channel Function Value Percent/Settings No function Pan/tilt blackout No function (reserved for future use) RGBW color mixing mode (additive) CMY color mixing mode (subtractive) No function (reserved for future use) Pan reset Tilt reset Zoom reset 16 Control No function (reserved for future use) Reset all No function (reserved for future use) Pan/tilt speed fast Pan/tilt speed slow Fan mode slow Fan mode full Fan mode auto Dimmer mode fast Dimmer mode slow No function (reserved for future use) 17 Main Red RGBW mode: 0 100% / CMY mode: 100% 0 18 Main Green RGBW mode: 0 100% / CMY mode: 100% 0 19 Main Blue RGBW mode: 0 100% / CMY mode: 100% 0 20 Main White RGBW mode: 0 100% / CMY mode: 100% 0 Maverick MK2 Wash User Manual Rev
36 Basic Movement Mode (8-channel) Channel Function Value Percent/Settings 1 Pan % 2 Fine Pan % 3 Tilt % 4 Fine Tilt % 5 Main Dimmer % Off On Strobe 1, fast to slow On Strobe 2 (Fast on, slow off), fast to slow On Strobe 3 (Slow on, fast off), fast to slow On Strobe 4 (Random), fast to slow On 6 Shutter Strobe 5 (Random fast on, slow off), fast to slow On Strobe 6 (Random slow on, fast off), fast to slow On Strobe 7 (Pulse), fast to slow On Strobe 8 (Random pulse), fast to slow On Strobe 9 (Fade in, fade out), fast to slow On Strobe 10 (Random pulse), fast to slow On 7 Zoom Wide to narrow No function Pan/tilt blackout No function (reserved for future use) RGBW color mixing mode (additive) CMY color mixing mode (subtractive) No function (reserved for future use) Pan reset Tilt reset Zoom reset 8 Control No function (reserved for future use) Reset all No function (reserved for future use) Pan/tilt speed fast Pan/tilt speed slow Fan mode slow Fan mode full Fan mode auto Dimmer mode fast Dimmer mode slow No function (reserved for future use) -32- Maverick MK2 Wash User Manual Rev. 2
37 Dual Control Pixel Values Advanced Pixel Mode (96-channel) Channel Function Value Percent/Settings 1 Red RGBW mode: 0 100% / CMY mode: 100% 0 2 Red Fine RGBW mode: 0 100% / CMY mode: 100% 0 3 Green RGBW mode: 0 100% / CMY mode: 100% 0 4 Green Fine RGBW mode: 0 100% / CMY mode: 100% 0 5 Blue RGBW mode: 0 100% / CMY mode: 100% 0 6 Blue Fine RGBW mode: 0 100% / CMY mode: 100% 0 7 White RGBW mode: 0 100% / CMY mode: 100% 0 8 White Fine RGBW mode: 0 100% / CMY mode: 100% 0 9 Red RGBW mode: 0 100% / CMY mode: 100% 0 10 Red Fine RGBW mode: 0 100% / CMY mode: 100% 0 11 Green RGBW mode: 0 100% / CMY mode: 100% 0 12 Green Fine RGBW mode: 0 100% / CMY mode: 100% 0 13 Blue RGBW mode: 0 100% / CMY mode: 100% 0 14 Blue Fine RGBW mode: 0 100% / CMY mode: 100% 0 15 White RGBW mode: 0 100% / CMY mode: 100% 0 16 White Fine RGBW mode: 0 100% / CMY mode: 100% 0 17 Red RGBW mode: 0 100% / CMY mode: 100% 0 18 Red Fine RGBW mode: 0 100% / CMY mode: 100% 0 19 Green RGBW mode: 0 100% / CMY mode: 100% 0 20 Green Fine RGBW mode: 0 100% / CMY mode: 100% 0 21 Blue RGBW mode: 0 100% / CMY mode: 100% 0 22 Blue Fine RGBW mode: 0 100% / CMY mode: 100% 0 23 White RGBW mode: 0 100% / CMY mode: 100% 0 24 White Fine RGBW mode: 0 100% / CMY mode: 100% 0 25 Red RGBW mode: 0 100% / CMY mode: 100% 0 26 Red Fine RGBW mode: 0 100% / CMY mode: 100% 0 27 Green RGBW mode: 0 100% / CMY mode: 100% 0 28 Green Fine RGBW mode: 0 100% / CMY mode: 100% 0 29 Blue RGBW mode: 0 100% / CMY mode: 100% 0 30 Blue Fine RGBW mode: 0 100% / CMY mode: 100% 0 31 White RGBW mode: 0 100% / CMY mode: 100% 0 32 White Fine RGBW mode: 0 100% / CMY mode: 100% 0 33 Red RGBW mode: 0 100% / CMY mode: 100% 0 34 Red Fine RGBW mode: 0 100% / CMY mode: 100% 0 35 Green RGBW mode: 0 100% / CMY mode: 100% 0 36 Green Fine RGBW mode: 0 100% / CMY mode: 100% 0 37 Blue RGBW mode: 0 100% / CMY mode: 100% 0 38 Blue Fine RGBW mode: 0 100% / CMY mode: 100% 0 39 White RGBW mode: 0 100% / CMY mode: 100% 0 40 White Fine RGBW mode: 0 100% / CMY mode: 100% 0 41 Red RGBW mode: 0 100% / CMY mode: 100% 0 42 Red Fine RGBW mode: 0 100% / CMY mode: 100% 0 43 Green RGBW mode: 0 100% / CMY mode: 100% 0 44 Green Fine RGBW mode: 0 100% / CMY mode: 100% 0 45 Blue RGBW mode: 0 100% / CMY mode: 100% 0 46 Blue Fine RGBW mode: 0 100% / CMY mode: 100% 0 47 White RGBW mode: 0 100% / CMY mode: 100% 0 48 White Fine RGBW mode: 0 100% / CMY mode: 100% 0 Maverick MK2 Wash User Manual Rev
38 Advanced Pixel Mode (96-channel cont.) Channel Function Value Percent/Settings 49 Red RGBW mode: 0 100% / CMY mode: 100% 0 50 Red Fine RGBW mode: 0 100% / CMY mode: 100% 0 51 Green RGBW mode: 0 100% / CMY mode: 100% 0 52 Green Fine RGBW mode: 0 100% / CMY mode: 100% 0 53 Blue RGBW mode: 0 100% / CMY mode: 100% 0 54 Blue Fine RGBW mode: 0 100% / CMY mode: 100% 0 55 White RGBW mode: 0 100% / CMY mode: 100% 0 56 White Fine RGBW mode: 0 100% / CMY mode: 100% 0 57 Red RGBW mode: 0 100% / CMY mode: 100% 0 58 Red Fine RGBW mode: 0 100% / CMY mode: 100% 0 59 Green RGBW mode: 0 100% / CMY mode: 100% 0 60 Green Fine RGBW mode: 0 100% / CMY mode: 100% 0 61 Blue RGBW mode: 0 100% / CMY mode: 100% 0 62 Blue Fine RGBW mode: 0 100% / CMY mode: 100% 0 63 White RGBW mode: 0 100% / CMY mode: 100% 0 64 White Fine RGBW mode: 0 100% / CMY mode: 100% 0 65 Red RGBW mode: 0 100% / CMY mode: 100% 0 66 Red Fine RGBW mode: 0 100% / CMY mode: 100% 0 67 Green RGBW mode: 0 100% / CMY mode: 100% 0 68 Green Fine RGBW mode: 0 100% / CMY mode: 100% 0 69 Blue RGBW mode: 0 100% / CMY mode: 100% 0 70 Blue Fine RGBW mode: 0 100% / CMY mode: 100% 0 71 White RGBW mode: 0 100% / CMY mode: 100% 0 72 White Fine RGBW mode: 0 100% / CMY mode: 100% 0 73 Red RGBW mode: 0 100% / CMY mode: 100% 0 74 Red Fine RGBW mode: 0 100% / CMY mode: 100% 0 75 Green RGBW mode: 0 100% / CMY mode: 100% 0 76 Green Fine RGBW mode: 0 100% / CMY mode: 100% 0 77 Blue RGBW mode: 0 100% / CMY mode: 100% 0 78 Blue Fine RGBW mode: 0 100% / CMY mode: 100% 0 79 White RGBW mode: 0 100% / CMY mode: 100% 0 80 White Fine RGBW mode: 0 100% / CMY mode: 100% 0 81 Red RGBW mode: 0 100% / CMY mode: 100% 0 82 Red Fine RGBW mode: 0 100% / CMY mode: 100% 0 83 Green RGBW mode: 0 100% / CMY mode: 100% 0 84 Green Fine RGBW mode: 0 100% / CMY mode: 100% 0 85 Blue RGBW mode: 0 100% / CMY mode: 100% 0 86 Blue Fine RGBW mode: 0 100% / CMY mode: 100% 0 87 White RGBW mode: 0 100% / CMY mode: 100% 0 88 White Fine RGBW mode: 0 100% / CMY mode: 100% 0 89 Red RGBW mode: 0 100% / CMY mode: 100% 0 90 Red Fine RGBW mode: 0 100% / CMY mode: 100% 0 91 Green RGBW mode: 0 100% / CMY mode: 100% 0 92 Green Fine RGBW mode: 0 100% / CMY mode: 100% 0 93 Blue RGBW mode: 0 100% / CMY mode: 100% 0 94 Blue Fine RGBW mode: 0 100% / CMY mode: 100% 0 95 White RGBW mode: 0 100% / CMY mode: 100% 0 96 White Fine RGBW mode: 0 100% / CMY mode: 100% Maverick MK2 Wash User Manual Rev. 2
39 Standard Pixel Mode (48-channel) Channel Function Value Percent/Settings 1 Red RGBW mode: 0 100% / CMY mode: 100% 0 2 Green RGBW mode: 0 100% / CMY mode: 100% 0 3 Blue RGBW mode: 0 100% / CMY mode: 100% 0 4 White RGBW mode: 0 100% / CMY mode: 100% 0 5 Red RGBW mode: 0 100% / CMY mode: 100% 0 6 Green RGBW mode: 0 100% / CMY mode: 100% 0 7 Blue RGBW mode: 0 100% / CMY mode: 100% 0 8 White RGBW mode: 0 100% / CMY mode: 100% 0 9 Red RGBW mode: 0 100% / CMY mode: 100% 0 10 Green RGBW mode: 0 100% / CMY mode: 100% 0 11 Blue RGBW mode: 0 100% / CMY mode: 100% 0 12 White RGBW mode: 0 100% / CMY mode: 100% 0 13 Red RGBW mode: 0 100% / CMY mode: 100% 0 14 Green RGBW mode: 0 100% / CMY mode: 100% 0 15 Blue RGBW mode: 0 100% / CMY mode: 100% 0 16 White RGBW mode: 0 100% / CMY mode: 100% 0 17 Red RGBW mode: 0 100% / CMY mode: 100% 0 18 Green RGBW mode: 0 100% / CMY mode: 100% 0 19 Blue RGBW mode: 0 100% / CMY mode: 100% 0 20 White RGBW mode: 0 100% / CMY mode: 100% 0 21 Red RGBW mode: 0 100% / CMY mode: 100% 0 22 Green RGBW mode: 0 100% / CMY mode: 100% 0 23 Blue RGBW mode: 0 100% / CMY mode: 100% 0 24 White RGBW mode: 0 100% / CMY mode: 100% 0 25 Red RGBW mode: 0 100% / CMY mode: 100% 0 26 Green RGBW mode: 0 100% / CMY mode: 100% 0 27 Blue RGBW mode: 0 100% / CMY mode: 100% 0 28 White RGBW mode: 0 100% / CMY mode: 100% 0 29 Red RGBW mode: 0 100% / CMY mode: 100% 0 30 Green RGBW mode: 0 100% / CMY mode: 100% 0 31 Blue RGBW mode: 0 100% / CMY mode: 100% 0 32 White RGBW mode: 0 100% / CMY mode: 100% 0 33 Red RGBW mode: 0 100% / CMY mode: 100% 0 34 Green RGBW mode: 0 100% / CMY mode: 100% 0 35 Blue RGBW mode: 0 100% / CMY mode: 100% 0 36 White RGBW mode: 0 100% / CMY mode: 100% 0 37 Red RGBW mode: 0 100% / CMY mode: 100% 0 38 Green RGBW mode: 0 100% / CMY mode: 100% 0 39 Blue RGBW mode: 0 100% / CMY mode: 100% 0 40 White RGBW mode: 0 100% / CMY mode: 100% 0 41 Red RGBW mode: 0 100% / CMY mode: 100% 0 42 Green RGBW mode: 0 100% / CMY mode: 100% 0 43 Blue RGBW mode: 0 100% / CMY mode: 100% 0 44 White RGBW mode: 0 100% / CMY mode: 100% 0 45 Red RGBW mode: 0 100% / CMY mode: 100% 0 46 Green RGBW mode: 0 100% / CMY mode: 100% 0 47 Blue RGBW mode: 0 100% / CMY mode: 100% 0 48 White RGBW mode: 0 100% / CMY mode: 100% 0 Maverick MK2 Wash User Manual Rev
40 Basic Pixel Mode (36-channel) Channel Function Value Percent/Settings 1 Red RGBW mode: 0 100% / CMY mode: 100% 0 2 Green RGBW mode: 0 100% / CMY mode: 100% 0 3 Blue RGBW mode: 0 100% / CMY mode: 100% 0 4 Red RGBW mode: 0 100% / CMY mode: 100% 0 5 Green RGBW mode: 0 100% / CMY mode: 100% 0 6 Blue RGBW mode: 0 100% / CMY mode: 100% 0 7 Red RGBW mode: 0 100% / CMY mode: 100% 0 8 Green RGBW mode: 0 100% / CMY mode: 100% 0 9 Blue RGBW mode: 0 100% / CMY mode: 100% 0 10 Red RGBW mode: 0 100% / CMY mode: 100% 0 11 Green RGBW mode: 0 100% / CMY mode: 100% 0 12 Blue RGBW mode: 0 100% / CMY mode: 100% 0 13 Red RGBW mode: 0 100% / CMY mode: 100% 0 14 Green RGBW mode: 0 100% / CMY mode: 100% 0 15 Blue RGBW mode: 0 100% / CMY mode: 100% 0 16 Red RGBW mode: 0 100% / CMY mode: 100% 0 17 Green RGBW mode: 0 100% / CMY mode: 100% 0 18 Blue RGBW mode: 0 100% / CMY mode: 100% 0 19 Red RGBW mode: 0 100% / CMY mode: 100% 0 20 Green RGBW mode: 0 100% / CMY mode: 100% 0 21 Blue RGBW mode: 0 100% / CMY mode: 100% 0 22 Red RGBW mode: 0 100% / CMY mode: 100% 0 23 Green RGBW mode: 0 100% / CMY mode: 100% 0 24 Blue RGBW mode: 0 100% / CMY mode: 100% 0 25 Red RGBW mode: 0 100% / CMY mode: 100% 0 26 Green RGBW mode: 0 100% / CMY mode: 100% 0 27 Blue RGBW mode: 0 100% / CMY mode: 100% 0 28 Red RGBW mode: 0 100% / CMY mode: 100% 0 29 Green RGBW mode: 0 100% / CMY mode: 100% 0 30 Blue RGBW mode: 0 100% / CMY mode: 100% 0 31 Red RGBW mode: 0 100% / CMY mode: 100% 0 32 Green RGBW mode: 0 100% / CMY mode: 100% 0 33 Blue RGBW mode: 0 100% / CMY mode: 100% 0 34 Red RGBW mode: 0 100% / CMY mode: 100% 0 35 Green RGBW mode: 0 100% / CMY mode: 100% 0 36 Blue RGBW mode: 0 100% / CMY mode: 100% Maverick MK2 Wash User Manual Rev. 2
41 Operating Settings Configuration Home Screen The Maverick MK2 Wash has a home screen that shows the current control protocols, personalities, starting addresses, IP addresses, and universes. To see the home screen, press <MENU> repeatedly until it shows on the display. From the home screen, touch any of the displayed control settings to immediately jump to that part of the menu, such as the personality, starting address, or universe, or press <ENTER> to reach the main menu. Test Mode Auto Test To perform an auto test of the Maverick MK2 Wash functions, follow the instructions below: Setup Press <MENU> repeatedly until the Home Screen shows on the display. Press <ENTER>. Use <UP>, <DOWN>, <LEFT>, or <RIGHT> to select Test Mode, or touch the display where it says Test Mode. If using the buttons instead of the touchscreen, press <ENTER>. Use <UP> or <DOWN> to select Auto test, or touch the display where it says Auto test. Press <ENTER>. Manual Test To test the functions of the product manually, do the following: Network Settings Press <MENU> repeatedly until the Home Screen shows on the display. Press <ENTER>. Use <UP>, <DOWN>, <LEFT>, or <RIGHT> to select Test Mode, or touch the display where it says Test Mode. If using the buttons instead of the touchscreen, press <ENTER>. Use <UP> or <DOWN> to select Manual test, or touch the display where it says Manual test. If using the buttons instead of the touchscreen, press <ENTER>. Use <UP> or <DOWN> to select the function to test, from Pan, Tilt, P/S Speed, Red, Green, Blue, White, CTC, Color, Pattern, LED Macro, LED Ma. Speed, LED Ma. Fade, Background, Background Dim., Dimmer, Shutter, Function, or Zoom, or touch the display where it says the desired function. If using the buttons instead of the touchscreen, press <ENTER>. Change the value of the tested function with one of the following methods: Type the desired value using the number pad that shows on the touchscreen display. or Use <UP>, <RIGHT>, <DOWN>, or <LEFT> to increase or decrease the value. Press <ENTER>. To reach the Setup menu, follow the instructions below: 1. Press <MENU> repeatedly until the Home Screen shows on the display. Press <ENTER>. 2. Use <UP>, <DOWN>, <LEFT>, or <RIGHT> to select Setup, or touch the display where it says Setup. If using the buttons instead of the touchscreen, press <ENTER>. Ethernet To DMX The Maverick MK2 Wash can convert a single Ethernet input signal to a single DMX output signal. To activate or deactivate the Ethernet to DMX function, do the following: 1. Navigate to the Setup menu. 2. Use <UP> or <DOWN> to select Network Settings, or touch the display where it says Network Settings. 3. If using the buttons instead of the touchscreen, press <ENTER>. 4. Use <UP> or <DOWN> to select Ethernet To DMX, or touch the display where it says Ethernet To DMX. 5. If using the buttons instead of the touchscreen, press <ENTER>. 6. Use <UP>, <DOWN>, <LEFT>, or <RIGHT> to select NO (deactivate) or YES (activate), or touch the display where it says the desired setting. 7. Press <ENTER>. Maverick MK2 Wash User Manual Rev
42 IP Mode The IP address of the Maverick MK2 Wash can be set manually, by the network, or to a pre-set static address specific to each product. To set the IP Mode, follow the instructions below: 1. Navigate to the Setup menu. 2. Use <UP> or <DOWN> to select Network Settings, or touch the display where it says Network Settings. 3. If using the buttons instead of the touchscreen, press <ENTER>. 4. Use <UP> or <DOWN> to select IP Mode, or touch the display where it says IP Mode. 5. If using the buttons instead of the touchscreen, press <ENTER>. 6. Use <UP>, <DOWN>, <LEFT>, or <RIGHT> to select from: Manual (set the IP address with the control panel), DHCP (the network sets the IP address), or Static (a pre-set address specific to each product), or touch the display where it says the desired mode. 7. Press <ENTER>. IP Address In Manual IP Mode, the IP address must be assigned through the product menu. To set the IP address in Manual IP Mode, do the following: 1. Navigate to the Setup menu. 2. Use <UP> or <DOWN> to select Network Settings, or touch the display where it says Network Settings. 3. If using the buttons instead of the touchscreen, press <ENTER>. 4. Use <UP> or <DOWN> to select IP, or touch the display where it says IP. 5. If using the buttons instead of the touchscreen, press <ENTER>. 6. Set the IP address (from to ) with one of the following methods: Through the touchscreen: a. Touch the display where it shows the byte (set of three numbers) to be changed. b. Use the number pad on the display to enter the desired number. c. Repeat until the IP address is set as desired. With the buttons: a. Use <LEFT> or <RIGHT> to select the byte (set of three numbers) to be changed). b. Use <UP> or <DOWN> to increase or decrease the value. c. Repeat until the IP address is set as desired. 7. Press <ENTER>. Subnet Mask In Manual IP Mode, the Subnet Mask must be assigned through the product menu. To set the Subnet Mask in Manual IP Mode, do the following: 1. Navigate to the Setup menu. 2. Use <UP> or <DOWN> to select Network Settings, or touch the display where it says Network Settings. 3. If using the buttons instead of the touchscreen, press <ENTER>. 4. Use <UP> or <DOWN> to select SubMask, or touch the display where it says SubMask. 5. If using the buttons instead of the touchscreen, press <ENTER>. 6. Set the Subnet Mask (from to ) with one of the following methods. Through the touchscreen: a. Touch the display where it shows the byte (set of three numbers) to be changed. b. Use the number pad on the display to enter the desired number. c. Repeat until the Subnet Mask is set as desired. With the buttons: a. Use <LEFT> or <RIGHT> to select the byte (set of three numbers) to be changed). b. Use <UP> or <DOWN> to increase or decrease the value. c. Repeat until the Subnet Mask is set as desired. 7. Press <ENTER>. In DHCP or Static IP Mode, the IP and SubMask menu settings have no effect on the product Maverick MK2 Wash User Manual Rev. 2
43 Pan/Tilt Orientation Zoom Orientation Display Orientation Pan/Tilt Angle Range Blackout on Pan/Tilt Movement Touchscreen Calibration To set whether the pan or tilt orientation is normal or inverted: 1. Navigate to the Setup menu. 2. Use <UP> or <DOWN> to select Pan Reverse or Tilt Reverse, or touch the display where it says the desired setting. 3. If using the buttons instead of the touchscreen, press <ENTER>. 4. Use <UP>, <DOWN>, <LEFT>, or <RIGHT> to select NO (normal orientation) or YES (inverted orientation), or touch the display where it says the desired option. 5. Press <ENTER>. To set whether the zoom goes from wide to narrow or from narrow to wide, follow the instructions below: 1. Navigate to the Setup menu. 2. Use <UP> or <DOWN> to select Zoom Reverse, or touch the display where it says Zoom Reverse. 3. If using the buttons instead of the touchscreen, press <ENTER>. 4. Use <UP>, <DOWN>, <LEFT>, or <RIGHT> to select NO (wide to narrow) or YES (narrow to wide) or touch the display where it says the desired option. 5. Press <ENTER>. To set which way the display faces, do the following: 1. Navigate to the Setup menu. 2. Use <UP> or <DOWN> to select Screen Reverse, or touch the display where it says Screen Reverse. 3. If using the buttons instead of the touchscreen, press <ENTER>. 4. Use <UP>, <DOWN>, <LEFT>, or <RIGHT> to select NO (display is normal), YES (display is inverted), or AUTO (the display automatically detects which way the product is facing and orients itself accordingly), or touch the display where it says the desired option. 5. Press <ENTER>. To set the range of motion the pan or tilt is permitted: 1. Navigate to the Setup menu. 2. Use <UP> or <DOWN> to select Pan Angle or Tilt Angle, or touch the display where it says the desired setting. 3. If using the buttons instead of the touchscreen, press <ENTER>. 4. Use <UP>, <DOWN>, <LEFT>, or <RIGHT> to select 540 (540 ), 360 or 270 (360 or 270 for pan or tilt respectively) or 180 (180 ), or touch the display where it says the desired option. 5. Press <ENTER>. To set whether the product will black out during pan or tilt movement, follow the instructions below: 1. Navigate to the Setup menu. 2. Use <UP> or <DOWN> to select BL. O. P/T Move, or touch the display where it says BL. O. P/T Move. 3. If using the buttons instead of the touchscreen, press <ENTER>. 4. Use <UP>, <DOWN>, <LEFT>, or <RIGHT> to select NO (do not black out) or YES (black out during movement), or touch the display where it says the desired option. 5. Press <ENTER>. If the touchscreen is not responding correctly, it may need to be calibrated. To do so: 1. Navigate to the Setup menu. 2. Use <UP> or <DOWN> to select Calibration, or touch the display where it says Calibration. 3. If using the buttons instead of the touchscreen, press <ENTER>. 4. Use <UP>, <DOWN>, <LEFT>, or <RIGHT> to select NO (do not calibrate) or YES (calibrate), or touch the display where it says the desired option. 5. Press <ENTER>. 6. Follow the instructions, touching the points as they appear on the display. Maverick MK2 Wash User Manual Rev
44 Touchscreen Lock To lock or unlock the touchscreen for the control panel, do the following: 1. Navigate to the Setup menu. 2. Use <UP> or <DOWN> to select Touchscreen Lock, or touch the display where it says Touchscreen Lock. 3. If using the buttons instead of the touchscreen, press <ENTER>. 4. Use <UP>, <DOWN>, <LEFT>, or <RIGHT> to select NO (display will respond to touch) or YES (display will not respond to touch), or touch the display where it says the desired option. 5. Press <ENTER>. Lock Screen To completely lock or unlock the control panel, follow the instructions below: Swap Pan and Tilt 1. Navigate to the Setup menu. 2. Use <UP> or <DOWN> to select Lock Screen, or touch the display where it says Lock Screen. 3. If using the buttons instead of the touchscreen, press <ENTER>. 4. Use <UP>, <DOWN>, <LEFT>, or <RIGHT> to select NO (control panel will not lock) or YES (control panel will require a passcode to access), or touch the display where it says the desired option. 5. Press <ENTER>. To access the control panel when it has been locked: 1. Press <MENU>. 2. Enter the passcode 0920 using one of the following methods: Through the touchscreen: use the number pad on the screen to enter With the buttons: a. Use <DOWN> to select the number to be changed. b. Use <UP> to increase the value. c. Repeat until 0920 has been entered. 3. Press <ENTER>. To switch the pan and tilt functions so that what normally controls the pan controls the tilt and what normally controls the tilt controls the pan, do the following: 1. Navigate to the Setup menu. 2. Use <UP> or <DOWN> to select Swap XY, or touch the display where it says Swap XY. 3. If using the buttons instead of the touchscreen, press <ENTER>. 4. Use <UP>, <DOWN>, <LEFT>, or <RIGHT> to select NO (normal pan and tilt) or YES (pan controls tilt, tilt controls pan), or touch the display where it says the desired option. 5. Press <ENTER>. Pan/Tilt Speed To set the maximum speed of the pan and tilt: Navigate to the Setup menu. Use <UP> or <DOWN> to select XY Mode, or touch the display where it says XY Mode. If using the buttons instead of the touchscreen, press <ENTER>. Use <UP>, <DOWN>, <LEFT>, or <RIGHT> to select Slow or Fast, or touch the display where it says the desired option. Press <ENTER>. WDMX Reset To reset the WDMX connection from the Maverick MK2 Wash, do the following: 1. Navigate to the Setup menu. 2. Use <UP> or <DOWN> to select WDMX Reset, or touch the display where it says WDMX Reset. 3. If using the buttons instead of the touchscreen, press <ENTER>. 4. Use <UP>, <DOWN>, <LEFT>, or <RIGHT> to select NO (do not reset connection) or YES (reset the connection), or touch the display where it says the desired option. 5. Press <ENTER> Maverick MK2 Wash User Manual Rev. 2
45 Backlight Timer To set the amount of time after inactivity before the display backlight turns off: Navigate to the Setup menu. Use <UP> or <DOWN> to select Backlight Timer, or touch the display where it says Backlight Timer. If using the buttons instead of the touchscreen, press <ENTER>. Use <UP>, <DOWN>, <LEFT>, or <RIGHT> to select 30S (after 30 seconds of inactivity), 1M (after 1 minute of inactivity), 5M (after 5 minutes of inactivity), or ON (does not turn off), or touch the display where it says the desired option. Press <ENTER>. Loss of Data In case of an input signal being lost in any way, the Maverick MK2 Wash will respond in one of two ways. the product will either hold the last signal received, or black out all LED output. To set which way the product responds, follow the instructions below: 1. Navigate to the Setup menu. 2. Use <UP> or <DOWN> to select Loss of Data, or touch the display where it says Loss of Data. 3. If using the buttons instead of the touchscreen, press <ENTER>. 4. Use <UP>, <DOWN>, <LEFT>, or <RIGHT> to select Hold (hold last signal received) or Close (black out all LED output), or touch the display where it says the desired option. 5. Press <ENTER>. Fan Speed To set the speed of the fans, do the following: Color Mixing Mode 1. Navigate to the Setup menu. 2. Use <UP> or <DOWN> to select Fans, or touch the display where it says Fans. 3. If using the buttons instead of the touchscreen, press <ENTER>. 4. Use <UP>, <DOWN>, <LEFT>, or <RIGHT> to select Auto (fan speed set according to product temperature), Full (maximum speed), or ECO (quiet fans mode), or touch the display where it says the desired option. 5. Press <ENTER>. The Maverick MK2 Wash has an additive color mixing mode, and a subtractive color mixing mode. In the additive color mixing mode, a value of 000 on a color LED channel gives zero output, and a value of 255 on that channel gives full output. In the subtractive color mixing mode, a value of 000 on a color LED channel gives full output, and a value of 255 on that channel gives zero output. To set the color mixing mode: Navigate to the Setup menu. Use <UP> or <DOWN> to select C Mixing Mode, or touch the display where it says C Mixing Mode. If using the buttons instead of the touchscreen, press <ENTER>. Use <UP>, <DOWN>, <LEFT>, or <RIGHT> to select RGBW (additive color mixing), or CMY (subtractive color mixing), or touch the display where it says the desired option. Press <ENTER>. Dimmer Curve To set the dimmer curve, follow the instructions below: Navigate to the Setup menu. Use <UP> or <DOWN> to select Dimmer Curve, or touch the display where it says Dimmer Curve. If using the buttons instead of the touchscreen, press <ENTER>. Use <UP>, <DOWN>, <LEFT>, or <RIGHT> to select Linear, Square, I Squa, or SCurve, or touch the display where it says the desired option. Press <ENTER>. Dimmer Speed To set the dimmer speed, do the following: 1. Navigate to the Setup menu. 2. Use <UP> or <DOWN> to select Dimmer Speed, or touch the display where it says Dimmer Speed. 3. If using the buttons instead of the touchscreen, press <ENTER>. 4. Use <UP>, <DOWN>, <LEFT>, or <RIGHT> to select Smooth or Fast, or touch the display where it says the desired option. 5. Press <ENTER>. Maverick MK2 Wash User Manual Rev
46 Color Balance To set the maximum values of a given color in the mix, follow the instructions below: Reset Functions 1. Navigate to the Setup menu. 2. Use <UP> or <DOWN> to select Color Balance, or touch the display where it says Color Balance. 3. If using the buttons instead of the touchscreen, press <ENTER>. 4. Use <UP> or <DOWN>, to select the color value to be changed, from Red, Green, Blue, or White, or touch the display where it says the desired option. 5. If using the buttons instead of the touchscreen, press <ENTER>. 6. Set the color value with one of the following methods: Type the desired value using the number pad that shows on the touchscreen display. or Use <UP>, <RIGHT>, <DOWN>, or <LEFT> to increase or decrease the value. 7. Press <ENTER>. 8. Repeat steps 4 7 until color balance is set as desired. To reset the pan, tilt, or all functions as if from startup: 1. Navigate to the Setup menu. 2. Use <UP> or <DOWN> to select Reset Function, or touch the display where it says Reset Function. 3. If using the buttons instead of the touchscreen, press <ENTER>. 4. Use <UP> or <DOWN> to select the function to reset, from Pan, Tilt, or All, or touch the display where it says the desired option. 5. If using the buttons instead of the touchscreen, press <ENTER>. 6. Use <UP>, <DOWN>, <LEFT>, or <RIGHT> to select from NO (do not reset) or YES (reset), or touch the display where it says the desired option. 7. Press <ENTER>. Factory Reset To restore the Maverick MK2 Wash to factory default settings, do the following: Navigate to the Setup menu. Use <UP> or <DOWN> to select Factory Settings, or touch the display where it says Factory Settings. If using the buttons instead of the touchscreen, press <ENTER>. Use <UP>, <DOWN>, <LEFT>, or <RIGHT> to select NO (do not reset) or YES (reset to factory settings), or touch the display where it says the desired option. Press <ENTER>. System Information All information about the current status of the Maverick MK2 Wash is available through the product s Sys Info menu. To view this information, follow the instructions below: 1. Press <MENU> repeatedly until the Home Screen shows on the display. Press <ENTER>. 2. Use <UP>, <DOWN>, <LEFT>, or <RIGHT> to select Sys Info, or touch the display where it says Sys Info. 3. If using the buttons instead of the touchscreen, press <ENTER>. 4. Use <UP> or <DOWN> to select from Fixture Information (shows firmware version, running mode, starting address, etc.), Fan Information (shows speed of the head fans in rpm), Error Information (shows any errors or No Error!), or Channel Information (shows the current value of all signal input channels) or touch the display where it says the desired option. 5. Press <ENTER>. 6. Use <UP> or <DOWN> to scroll through the information Maverick MK2 Wash User Manual Rev. 2
47 Offset Mode The Offset mode provides fine adjustments for the home position of all the moving parts in the optical path as well as the pan and tilt movements. This way, when in their home position, the moving parts do not show any border or reduce the light output. 1. Starting from the Main Level screen, press and hold <MENU> until the passcode screen appears. 2. Enter the passcode 2323 using one of the following methods: Through the touchscreen: use the number pad on the screen to enter With the buttons: a. Use <DOWN> to select the number to be changed. b. Use <UP> to increase the value. c. Repeat until 2323 has been entered. 3. Press <ENTER>. This brings you into the Zero Adjust menu screen. PAN To adjust the starting point of the pan motor, follow the instructions below: 1. Use <UP> or <DOWN> to select PAN. 2. Press <ENTER>. 3. Use <UP> or <DOWN> to increase or decrease the starting value, from Press <ENTER>. TILT To adjust the starting point of the tilt motor, do the following: 1. Use <UP> or <DOWN> to select TILT. 2. Press <ENTER>. 3. Use <UP> or <DOWN> to increase or decrease the starting value, from Press <ENTER>. ZOOM To adjust the starting point of the zoom motor, follow the instructions below: 1. Use <UP> or <DOWN> to select ZOOM. 2. Press <ENTER>. 3. Use <UP> or <DOWN> to increase or decrease the starting value, from Press <ENTER>. MAC Address To assign the fourth, fifth, or sixth digit of the MAC address, do the following: 1. Use <UP> or <DOWN> to select MAC4, MAC5, or MAC6. 2. Press <ENTER>. 3. Use <UP> or <DOWN> to increase or decrease the value, from Press <ENTER>. Maverick MK2 Wash User Manual Rev

48 Firmware Update 5. FIRMWARE UPDATE The following steps apply to the Windows 7 operating system: Step Connect the Maverick MK2 Wash to a computer with an ethernet cable. Verify the network with the Maverick MK2 Wash is connected to the computer. Step Set the control protocol on the Maverick MK2 Wash to ArtNet in Single Control mode. (See Single Control Protocol) Set the IP Mode to Static. (See IP Mode) Step 3 On the computer, open the Network and Sharing Center (through the Start Menu, the Control Panel, or the Network icon on the right side of the Taskbar). Step 4 Select the network that the product is connected to by clicking the blue text that corresponds to that network on the right side of the window Maverick MK2 Wash User Manual Rev. 2


49 Firmware Update Step 5 Click Properties on the Status window that pops up. Step 6 On the Properties window: 1. Click on Internet Protocol Version 4 (TCP/IPv4) to select it. 2. Click Properties. Step 7 On the TCP/IPv4 Properties window: 1. Select Use the following IP address: 2. Type into the IP address bar. 3. Press <Tab> on your keyboard. The Subnet mask bar should automatically populate as If not, then enter it manually. 4. Ignore the Default gateway bar. Maverick MK2 Wash User Manual Rev

50 Firmware Update Step View the Home Screen on the Maverick MK2 Wash. (see Home Screen) Open the internet browser on the computer. Enter the IP address from the Maverick MK2 Wash display into the URL bar of the internet browser. (For example, if the display of the product reads , enter into the URL bar of the internet browser.) Step 9 On the Welcome screen: 1. Enter admin as both the User Name and Password. No capital letters. 2. Press Log In on the screen, or <Enter> on the keyboard. If the user name and password do not work, reset the product to factory defaults. (see Factory Reset) Step 10 On the page that appears, click Upgrade. Step 11 Find the latest Firmware Upgrade on the website at ck-mk2-wash under DOWNLOADS. Step Click Choose File on the Maverick MK2 Wash Upgrade page. 2. In the File Explorer window that pops up, select the Firmware Upgrade file from the website and click Open. 3. Click Upload File. A Downloading message will appear on the product s display. Once the product finishes installing the firmware, it will reset. Do NOT turn the product off during this process. Step 13 On the Maverick MK2 Wash, verify the firmware has been updated by navigating to Sys Info (System Information) and checking that the version number matches the name of the file on the computer. Step 15 Disconnect the Maverick MK2 Wash from the computer. The firmware update is complete. The examples shown are for illustrative purposes Maverick MK2 Wash User Manual Rev. 2
Quick Reference Guide. English EN Español ES Français FR Nederlands NL
 Quick Reference Guide English EN Español ES Français FR Nederlands NL Rogue R1 FX-B QRG EN About This The Rogue R1 FX-B Quick Reference Guide (QRG) has basic product information such as connection, mounting,
Bubble Machine. User Manual
 Bubble Machine User Manual TABLE OF CONTENTS 1. Before You Begin... 3 What Is Included... 3 Unpacking Instructions... 3 Claims... 3 Text Conventions... 3 Icons... 3 Document Information... 3 Product at
Bubble King. User Manual
 Bubble King User Manual TABLE OF CONTENTS 1. Before You Begin... 3 What Is Included... 3 Unpacking Instructions... 3 Claims... 3 Text Conventions... 3 Icons... 3 Document Information... 3 Product at a
TABLE OF CONTENTS. Page 2 of 12 DataStream 4 User Manual Rev. 2
 User Manual TABLE OF CONTENTS 1. Before you Begin... 3 What Is Included... 3 Unpacking Instructions... 3 Claims... 3 Text Conventions... 3 Symbols... 3 Disclaimer... 3 Product at a Glance... 4 Safety Notes...
User Manual. Snapshot. Use on Dimmer. Outdoor Use. Sound Activated DMX 512. Master/Slave. 115/230V Power Switch. Replaceable Fuse.
 Snapshot Use on Dimmer Outdoor Use Sound Activated DMX 512 Master/Slave 115/230V Power Switch Replaceable Fuse User Serviceable Duty Cycle User Manual 3000 N 29 th Ct, Hollywood, FL 33020 U.S.A. (800)
Snapshot. Use on Dimmer Outdoor Use Sound-Activated DMX Master/Slave 120 V/230 V Switchable Replaceable Fuse User-Serviceable.
 Snapshot Use on Dimmer Outdoor Use Sound-Activated DMX Master/Slave 120 V/230 V Switchable Replaceable Fuse User-Serviceable User Manual TABLE OF CONTENTS 1. BEFORE YOU BEGIN... 3 WHAT IS INCLUDED... 3
Snapshot LX5 USER MANUAL. OK on Dimmer Outdoor OK Sound Activated DMX512 Master/Slave 115V/230V Switch Replaceable Fuse User Serviceable Duty Cycle
 LX5 Snapshot OK on Dimmer Outdoor OK Sound Activated DMX512 Master/Slave 115V/230V Switch Replaceable Fuse User Serviceable Duty Cycle USER MANUAL Chauvet, 5200 NW 108th Avenue, Sunrise, FL 33351 U.S.A.
LED Pinspot 2. Snapshot. User Manual
 LED Pinspot 2 Snapshot Use on Dimmer Outdoor Use Sound-Activated DMX Master/Slave Auto-ranging Power Supply Replaceable Fuse User-Serviceable User Manual 5200 NW 108th Avenue, Sunrise, FL 33351 U.S.A.
LED Pinspot 2. Snapshot. User Manual
 LED Pinspot 2 Snapshot Use on Dimmer Outdoor Use Sound Activated DMX Master/Slave Auto-ranging Power Supply Replaceable Fuse User Serviceable Duty Cycle User Manual 3000 N 29 th Ct, Hollywood, FL 33020
Snapshot. User Manual BOB LED
 BOB LED Snapshot Use on Dimmer Outdoor OK Sound Activated DMX512 Master/Slave Autoswitching Power Supply Replaceable Fuse User Serviceable Duty Cycle User Manual 5200 NW 108th Avenue, Sunrise, FL 33351
Snapshot LX10 USER MANUAL. OK on Dimmer Outdoor OK Sound Activated DMX512 Master/Slave 115V/230V Switch Replaceable Fuse User Serviceable Duty Cycle
 LX10 Snapshot OK on Dimmer Outdoor OK Sound Activated DMX512 Master/Slave 115V/230V Switch Replaceable Fuse User Serviceable Duty Cycle USER MANUAL Chauvet, 3000 N 29 th Ct, Hollywood, FL 33020 U.S.A.
1. Before You Begin What Is Included... 3 Unpacking Instructions Claims Product at a Glance... 3 Safety Instructions...
 User Manual TABLE OF CONTENTS 1. Before You Begin... 3 What Is Included... 3 Unpacking Instructions... 3 Claims... 3 Product at a Glance... 3 Safety Instructions... 4 2. Introduction... 5 Product Overview...
FL-2R MOVING HEAD 120W
 FL-2R MOVING HEAD 120W USER MANUAL Ver1.0 Table of contents 1. Preface 1.1 Packing list 1.2 Unpacking instructions 1.3 AC Power 1.4 Safety instructions 2. Introduction 2.1 Features 2.2 DMX channel 3. Setup
TABLE OF CONTENTS 1. BEFORE YOU BEGIN...
 User Manual TABLE OF CONTENTS 1. BEFORE YOU BEGIN... 3 What is Included... 3 Unpacking Instructions... 3 Product at a Glance... 3 Safety Instructions... 4 2. INTRODUCTION... 5 Product Overview... 5 Product
LED NEUTRON 4 x QUAD COLOUR LED LIGHT EFFECT
 TECHNICAL SPECIFICATION: Voltage : 230Vac, 50Hz Power Consumption: 60W LED Type : 4 x 4-in-1 Quad LED Fuse: F3A RGBW LED Power: 4 x 10W Quad LED LED Lifespan: 10,000hrs DMX Channels: 6 or 21 Dimensions
Elektralite LED Pro Line Pancake USER MANUAL (Version 2)
") Elektralite LED Pro Line Pancake USER MANUAL (Version 2) ElektraLED (a division of Group One), 70, Sea Lane, Farmingdale, NY11735, U.S.A. T. +1 (516)-249-3662. F. +1 (516)-249-8870 WWW.ELEKTRALED.COM 1.
Elektralite LED Pro Line Pancake USER MANUAL (Version 2) ElektraLED (a division of Group One), 70, Sea Lane, Farmingdale, NY11735, U.S.A. T. +1 (516)-249-3662. F. +1 (516)-249-8870 WWW.ELEKTRALED.COM 1.
Snapshot Ok on Dimmer Outdoor OK Sound Activated DMX512 Master/Slave 115V/230V Switch Replaceable Fuse User Serviceable Duty Cycle
 SX Scope Snapshot Ok on Dimmer Outdoor OK Sound Activated DMX512 Master/Slave 115V/230V Switch Replaceable Fuse User Serviceable Duty Cycle USER MANUAL Chauvet, 3000 N 29 th Ct, Hollywood, FL 33020 U.S.A.
Compact LED profile with zoom
 Compact LED profile with zoom 2 11 TABLE OF CONTENTS SAFETY / GENERAL INSTRUCTIONS INTRODUCTION Features Specifications OVERVIEW Rear view Top view MOUNTING CONTROL MENU OVERVIEW Control Panel Function
CH-158 Color Bank 8 USER MANUAL
 CH-158 Color Bank 8 USER MANUAL CHAUVET, 3000 N 29 th Ct, Hollywood, FL 33020 U.S.A (800) 762-1084 (954) 929-1115 FAX (954) 929-5560 www.chauvetlighting.com TABLE OF CONTENT BEFORE YOU BEGIN... 3 WHAT
1. Before you Begin Introduction Setup Operation Technical Information Returns...12
 User Manual TABLE OF CONTENTS 1. Before you Begin... 3 What is Included... 3 Unpacking Instructions... 3 Claims... 3 Text Conventions... 3 Icons... 3 Document Information... 3 Product at a Glance... 4
Robin 800 LEDWash - DMX chart
 Robin 800 LEDWash - DMX chart Version 1.1 Mode/Channel 1 2 3 4 5 6 Value Function Type of control 1 1 1 1 1 1 Pan (8 bit) Pan movement by 450 2 2 2 2 2 2 Pan Fine (16 bit) Fine control of pan movement
Robin 100 LEDBeam - DMX chart
 Robin 100 LEDBeam - DMX chart Version 1.2 Mode/Channel 1 2 3 4 5 6 Value Function Type of control 1 1 1 1 1 1 Pan (8 bit) Pan movement by 450 2 2 2 2 2 2 Pan Fine (16 bit) Fine control of pan movement
Snapshot. Hurricane 1300 USER MANUAL F-1300
 Hurricane 1300 F-1300 Snapshot OK on Dimmer Outdoor OK Sound Activated DMX512 Master/Slave 115V/230V Switch Replaceable Fuse User Serviceable Duty Cycle USER MANUAL 3000 N 29 th Ct, Hollywood, FL 33020
C.fm Page 1 Thursday, February 21, :28 AM Raptor user manual
 Raptor user manual 1 mounting bracket 2 swivel lock 3 clamp hole 4 lamp access screws 5 air vents 6 AC input & main fuse 7 cooling fan Thank you for selecting the Martin Raptor. This Martin lighting fixture
DMX protocol. Robin DLX Spot - DMX protocol - version 1.3
 protocol Robin DLX Spot - protocol - version 1.3 Mode/channel 1 1 1 Pan 0-255 Pan movement by 540 proportional 2 2 * Pan Fine 0-255 Fine of pan movement proportional 3 3 2 Tilt 0-255 Tilt movement by 280
MOVING HEAD. User manual CAUTION!
 TM MOVING HEAD OBY-3 User manual CAUTION! contents Features Description of the appearance Inspection. Safety instructions Lamp Installation Rigging Connection with the mains Linking Instruction for gobo
Horizontal movement (PAN) Vertical movement (TILT) PAN/TILT speed. PAN/TILT function. Shutter, strobe function. Shutter, strobe
 Vertical movement (TILT) PAN/TILT speed. PAN/TILT function. Shutter, strobe function. Shutter, strobe") The colors, color- and gobo-wheel positions of the following DMX protocol are arranged as shown in the graphic. DMX protocol St. 28 Ch. Mode/Channel Value Feature Ex. 29 Ch. Ba. 1 8bit 19 Ch. Ba. 2 16bit
The colors, color- and gobo-wheel positions of the following DMX protocol are arranged as shown in the graphic. DMX protocol St. 28 Ch. Mode/Channel Value Feature Ex. 29 Ch. Ba. 1 8bit 19 Ch. Ba. 2 16bit
ECO Spot 2500 User Manual
 ECO Spot 2500 User Manual Thank you for choosing an ECO Spot 2500 Profile Spot. The projector part is based on a modified ETC Source Four and most of the available standard Source Four equipment, such
ECO Spot 2500 User Manual
 ECO Spot 2500 User Manual Thank you for choosing an ECO Spot 2500 Profile Spot. The projector part is based on a modified ETC Source Four and most of the available standard Source Four equipment, such
D.fm Page 1 Wednesday, March 5, :21 PM Raptor user manual
 Raptor user manual 1 mounting bracket 2 swivel lock 3 clamp hole 4 lamp access screws 5 air vents 2001-2002 Martin Professional A/S, Denmark. All rights reserved. No part of this manual may be reproduced,
QTFX-F1, QTFX-F2 FLAME EFFECT
 QTFX-F1, QTFX-F2 FLAME EFFECT Item ref: 160.470UK, 160.471UK User Manual Version 2.1 Introduction Really heat up your party with this mesmerising flame effect. Reaching up to a height of 1.5m, the silk
Robin 600 LEDWash - DMX chart
 Robin 600 LEDWash - DMX chart Version 1.7 Mode/Channel 1 2 3 4 5 6 1 1 1 1 1 1 2 2 2 2 2 2 3 3 3 3 3 3 4 4 4 4 4 4 5 5 5 5 5 5 6 6 6 6 6 6-7 7 - - - - 8 - - - - - 9 8 - - - - 10 - - - - - 11 9 - - - -
Pure Spot 120LED USER MANUAL.
 Pure Spot 120LED USER MANUAL www.bsl-lighting.com Table of contents 1. Safety instructions... 3 2. Operating determination... 4 3. Fixture exterior view... 5 4. Installation... 6 4.1 Connection to the
Robin 300 LEDWash - DMX chart
 Robin 300 LEDWash - DMX chart Version 1.0 Mode/Channel 1 2 3 4 5 1 1 1 1 1 2 2 2 2 2 3 3 3 3 3 4 4 4 4 4 5 5 5 5 5 6 6 6 6 6-7 7 - - - 8 - - - - 9 8 - - - 10 - - - - 11 9 - - - 12 - - - - 13 10 - - - 14
LED Twister II. User manual UK Version 1.0
 LED Twister II User manual 152.624UK Version 1.0 LED DUOPLEX: For indoor use only CAUTION! Please read this manual carefully before operating! Pay special attention to Sections 3 & 5 of this document.
USER MANUAL PAR56 LED PAR CANS
 USER MANUAL PAR56 LED PAR CANS 153.766 / 153.769 Slimline PAR64 LED Par can For indoor use only Caution! Please read this manual carefully before operating! Damage caused by misuse is not covered by the
PATT Light source 7x 30 RGBW multichips. Effects 550 mm parabolic aluminium reflector with high reflectivity coating
 PATT 2017 Extending the ROBE series of retro style lighting, PATT 2017 is LED driven environmentally conscious and can be a playfully colorful or adaptable tungsten white-like eyecandy effect for the stage
Snapshot. SkyScan 4000 USER MANUAL
 SkyScan 4000 Snapshot OK on Dimmer For Use in Dry Outdoor Location For Use in Wet Outdoor Location Sound Activated DMX512 Master/Slave 115V/230V Switch Replaceable Fuse Duty Cycle USER MANUAL 3000 N 29
USER MANUAL LUX-LD30W LED MOVING HEAD
 USER MANUAL LUX-LD30W LED MOVING HEAD LUX-LD30W LED MOVING HEAD For indoor use only Caution! Please read this manual carefully before operating! Damage caused by misuse is not covered by the warranty!
Installation and Programming Manual Part: Building Network Interface Card Product: 4100ES
 Installation and Programming Manual Part: Building Network Interface Card 4100-6047 Product: 4100ES Cautions and Warnings READ AND SAVE THESE INSTRUCTIONS- Follow the instructions in this installation
VK280 FLX MOVING HEAD
 VK280 FLX MOVING HEAD Rev 2.01 USER MANUAL FOR YOUR OWN SAFETY, PLEASE READ THIS USER MANUAL CAREFULLY BEFORE YOU INITALLY START This device has left our premises in absolutely perfect condition. In order
User Manual JS-ICON. 624 ARCH Dimmer Rack. JOHNSON SYSTEMS INC. Spring
 User Manual JS-ICON 624 ARCH Dimmer Rack JOHNSON SYSTEMS INC. Spring 2007 2002161 Table of Contents JS-ICON 624 DMX JS-ICON 624 CC 6-2.4kW Dimming Strip JS-ICON 624 ND 6-2.4kW Relay Strip Introduction...3
Measurements are expressed in millimeters.
 T-Rex user manual Measurements are expressed in millimeters. 1 Lamp access 2 Focus adjustment 3 Mounting bracket 4 Swivel locks 5 Clamp hole 6 Air vent 190 285 7 AC input & main fuse 8 Microphone 490 164
OBY-5. User manual MOVING HEAD CAUTION!
 TM MOVING HEAD OBY-5 User manual CAUTION! contents Features Description of the appearance Inspection. Safety instructions Lamp Installation Rigging Connection with the mains Linking Instruction for gobo
P/N Wheeler. user manual
 P/N 35000068 Wheeler user manual 1998, 1999 Martin Professional A/S, Denmark. All rights reserved. No part of this manual may be reproduced, in any form or by any means, without permission in writing from
FL 1000 XT C DMX. User manual
 FL 1000 XT C DMX LED light generators with DMX controlled colour or twinkle wheel. Dual light generators with both color and twinkle. All units with DMX controlled dimming 0100%. User manual Item no.:
Instruction Manual. User Manual. From Software Version.87
 Instruction Manual User Manual From Software Version.87 GT-1 Instruction Manual Revision 0.6, Applies from firmware version.87 July, 2017 The GT-1 and this instruction manual are intended for use by experienced
Instruction Manual. User Manual. From Software Version 0.78
 Instruction Manual User Manual From Software Version 0.78 GT-1 Instruction Manual Revision 0.5, Applies from firmware version.78 June, 2017 The GT-1 and this instruction manual are intended for use by
TPART 1 PRODUCT SPECIFICATIONS...1.
 7 APPENDIX 7. MAINTENANCE 7 7 No. Item Name 4 5 6 7 8 9 0 4 5 6 7 8 9 0 4 5 6 7 8 9 0 4 5 6 Hanger Wireless Receiver Top cover Fix board of wireless Receiver. Lens. Plastic cover for fixing lens. Plastic
TROUBLESHOOTING GENERAL SOFTWARE UPLOAD. Troubleshooting 1
 TROUBLESHOOTING GENERAL FIXTURE DOES NOT RESET Blown fuse: LEDs on the printed circuit board light up to indicate the power supplies are working. Check / replace the fuses on the circuit board if one or
minipointe Light source Osram Sirius HRI 140 W RO Light output lm, m Zoom range 3 fixed beam
 minipointe MiniPointe is a tiny agile air cutter specifically designed to produce sharp beam and aerial effects especially in venues constrained by size. Striking bright 0 parallel beams with glowing colours
Operation Manual. Mega 4Bank DMX Universal
 Operation Manual Mega 4Bank DMX Universal Part No. 3100078 Rev A 11-18-2014 System CFX-9604 CFX-7204 8ft Mega 4Bank Fixture 6ft Mega 4Bank Fixture MTP-K81 Kino 81 Mount w/ Junior Pin (28mm) X19-25M Mega
Lighting BRINGING IMAGINATION TO LIGHT PHX 250 LED ZOOM PROFILE SPOT SUMMARY FEATURES Degree Zoom Lens Degree Zoom Lens
 PHX 250 LED ZOOM PROFILE SPOT SUMMARY The 15-30 and 30-50 PHX LED ellipsoidals are state of the art luminaires in function, style, and efficiency. These ellipsoidals have been designed and engineered with
SAVE THESE INSTRUCTIONS
 READ AND FOLLOW ALL SAFETY INSTRUCTIONS! SAVE THESE INSTRUCTIONS AND DELIVER TO OWNER AFTER INSTALLATION IMPORTANT SAFEGUARDS When using electrical equipment, basic safety precautions should always be
Lighting BRINGING IMAGINATION TO LIGHT PHX LED ZOOM PROFILE SPOT SUMMARY FEATURES Degree Zoom Lens Degree Zoom Lens
 SUMMARY The 15-30 and 30-55 PHX LED ellipsoidals are state of the art luminaires in function, style, and efficiency. These ellipsoidals have been designed and engineered with a number of innovative details
Please Read Over This Manual Before Operating The Light Fixture
 USER MANUAL Please Read Over This Manual Before Operating The Light Fixture ABLE OF CONTENTS TPART PRODUCT SPECIFICATIONS... 7 APPENDIX 7. MAINTENANCE.--TECHNICAL SPECIFICATIONS....--DIMENSIONS....-- SAFETY
FiberSource Q150. user manual P/N
 FiberSource Q150 user manual P/N 510260 1997, 1998 Martin Professional A/S, Denmark. All rights reserved. No part of this manual may be reproduced, in any form or by any means, without permission in writing
nual k Voltage Stabilizer N) manual New Brunswick Voltage Stabilizer Operating manual
 manual New Brunswick Voltage Stabilizer Operating manual") nual k Voltage Stabilizer N) manual New Brunswick Voltage Stabilizer Operating manual Copyright Copyright 2014 Eppendorf AG, Germany. No part of this publication may be reproduced without the prior permission
nual k Voltage Stabilizer N) manual New Brunswick Voltage Stabilizer Operating manual Copyright Copyright 2014 Eppendorf AG, Germany. No part of this publication may be reproduced without the prior permission
Compressor Duty Motor - 1 HP. Model 40132
 Compressor Duty Motor - 1 HP Model 40132 Assembly and Operating Instructions 3491 Mission Oaks Blvd., Camarillo, CA 93011 Visit our web site at http://www.harborfreight.com Copyright 2002 by Harbor Freight
SpaceTracer 2000 CMY ORDERCODE 40961
 SpaceTracer 2000 CMY ORDERCODE 40961 Congratulations! You have bought a great, innovative product from Showtec. The Showtec SpaceTracer 2000 CMY brings excitement to any venue. Whether you want simple
Control Microcomputer
 4.0 Control channels Control Microcomputer Channel Function Ch1 Pan MSB Pan Coarse Ch2 Pan LSB Pan Fine Ch3 Tilt MSB Tilt Coarse Ch4 Tilt LSB Tilt Fine Description Ch5 Colour Selection of 8 colours and
Cordless Sweeper. OWNER S MANUAL Model: CFT Volt DC. Made Exclusively for ALDI Inc. Batavia, IL.,
 Cordless Sweeper OWNER S MANUAL Model: CFT25 4.8 Volt DC Made Exclusively for ALDI Inc. Batavia, IL., 60510-1477 CFT25 ONE (1) YEAR LIMITED WARRANTY This product is warranted to be free from defects in
Ultraviolet Fluorescent Lighting Fixtures WF-EM2B, WF-EM4B WF-EM2M, WF-EM4M WF-EM22D, WF-EM4D WF-EM2R, WF-EM4R WF-EMMIM
 Operation Manual Ultraviolet Fluorescent Lighting Fixtures WF-EM2B, WF-EM4B WF-EM2M, WF-EM4M WF-EM22D, WF-EM4D WF-EM2R, WF-EM4R WF-EMMIM Table of Contents Specifications 3 General 3 DMX Units 3 Remote
EVOS M5000 Imaging System
 EVOS M5000 Imaging System Pub. No. MAN0017783 Doc. Part No. 710208 Rev. A.0 Note: For safety and biohazard guidelines, see the Safety appendix in the EVOS M5000 Imaging System User Guide (Pub. No. MAN0017563).
Asymmetrical Installation Instructions. Components: i2cove Asymmetrical LED Light Fixtures. 12 [305mm] [918mm] 48.
![Asymmetrical Installation Instructions. Components: i2cove Asymmetrical LED Light Fixtures. 12 [305mm] [918mm] 48.](/thumbs/77/74625192.jpg "Asymmetrical Installation Instructions. Components: i2cove Asymmetrical LED Light Fixtures. 12 [305mm] [918mm] 48.") support@i2systems.com www.i2systems.com Electrical Specifications PARAMETER Input Power VALUE 8 Watts* / Ft Input Voltage 120-277V AC, 50/60 Hz Max. Fixture Run Length LED Color (CCT) 8 Watts: 120VAC:
support@i2systems.com www.i2systems.com Electrical Specifications PARAMETER Input Power VALUE 8 Watts* / Ft Input Voltage 120-277V AC, 50/60 Hz Max. Fixture Run Length LED Color (CCT) 8 Watts: 120VAC:
HyperFlex 12G.
 HyperFlex 12G USER MANUAL www.venuelightingeffects.com Table of contents Introduction...2 safety precautions...3 UNIT OVERVIEW...4 rigging the fixtures...4 Lamp Installation/Replacement...5 gobo Selection
230VAC Power Inverter 400W Owner s Manual
 400W 230VAC Power Inverter 400W Owner s Manual For safe and optimum performance, the Enerdrive epower Inverter must be used properly. Carefully read and follow all instructions and guidelines in this manual
User Manual Back-UPS BX650CI-MS 230 Vac with AVR
 User Manual Back-UPS BX650CI-MS 230 Vac with AVR Overview Safety and General Information Inspect the package contents upon receipt. Notify the carrier and dealer if there is any damage. Read the Safety
B-RAD Select USER MANUAL TABLE OF CONTENTS
 TABLE OF CONTENTS TABLE OF CONTENTS... 1 MANUAL REVISION HISTORY... 2 IMPORTANT SAFETY NOTICE... 3 1.0 General Information... 5 1.1 System Components... 5 1.2 Specifications... 5 1.2.1 Torque Ranges...
Dimensions. All dimensions are in millimeters. Min c-c 550
 MAC TW1 user manual Dimensions All dimensions are in millimeters 272 121 121 735 362 709 619 464 19 41 143 454 Min c-c 550 270 270 535 2006 Martin Professional A/S, Denmark. All rights reserved. No part
A99-14CRG (P/N: 41034G-02) Four Bay Charging Unit USER MANUAL 19545P-98 (03-14) 2014 DAVID CLARK COMPANY INCORPORATED
 Four Bay Charging Unit USER MANUAL 19545P-98 (03-14) 2014 DAVID CLARK COMPANY INCORPORATED") A99-14CRG (P/N: 41034G-02) Four Bay Charging Unit USER MANUAL 19545P-98 (03-14) 2014 DAVID CLARK COMPANY INCORPORATED Cautions and Warnings READ AND SAVE THESE INSTRUCTIONS. Follow the instructions in
A99-14CRG (P/N: 41034G-02) Four Bay Charging Unit USER MANUAL 19545P-98 (03-14) 2014 DAVID CLARK COMPANY INCORPORATED Cautions and Warnings READ AND SAVE THESE INSTRUCTIONS. Follow the instructions in
Operation Manual. Select/DMX 4Bank
 Operation Manual Select/DMX 4Bank Part No. 3100053 Rev A 4-28-2011 System CFX-4804 CFX-2404 4ft 4Bank Fixture 2ft 4Bank Fixture MTP-KL41 Kino 41L Mount w/ 3/8 Pin (10mm) X16-25 4Bank Extension, 25ft BAL-455-120
UV8 & UV90 SERIES INSTALLATION INSTRUCTIONS
 UV8 & UV90 SERIES INSTALLATION INSTRUCTIONS Important THIS SHEET CONTAINS IMPORTANT SAFETY INSTRUCTIONS. SAVE THESE INSTRUCTIONS. Warning This product must be installed in accordance with National Electrical
Rain+Birdt. Simple To Set Timer (SST) Setup & Operation Instructions. English RAIN BIRD ( ) or visit
 Setup & Operation Instructions. English RAIN BIRD ( ) or visit") Rain+Birdt Simple To Set r (SST) Setup & Operation Instructions English Installation...2 Tools and Supplies Needed...2 Step 1. Mount r...2 Step 2. Connect Power...2 Indoor r...2 Outdoor r...2 Step 3. Connect
Rain+Birdt Simple To Set r (SST) Setup & Operation Instructions English Installation...2 Tools and Supplies Needed...2 Step 1. Mount r...2 Step 2. Connect Power...2 Indoor r...2 Outdoor r...2 Step 3. Connect
 OPERATING MANUAL: L/S VARIABLE-SPEED MODULAR DRIVES Model Nos. Pump Drive 07559-00 with Pump Head 07516-00 07559-00 07559-05 07559-10 07559-15 A-1299-7331 Edition 01 (US & Canada only) Toll Free 1-800-MASTERFLEX
PACKAGE LIST CONTENT. User Manual 1 GIMBAL STABILIZER 1 MICRO USB CABLE 1
 CONTENT Package List...1 Disclaimer and Warning...2 Safety Operation Guidelines...4 USB Connection...7 Mounting Camera, Checking Balance...9 Panel Introduction...10 Operating Mode...11 Changing Orientation...12
Nature Power Inverters. True Sinewave Inverter Modified Sinewave Inverter. Owner s Manual
 Version 1.1 Version 2 Nature Power Inverters True Sinewave Inverter Modified Sinewave Inverter Owner s Manual!!!!!!!!!!! 38304 38204 For safe and optimum performance, the Power Inverter must be used properly.
Operating Instructions For The X-Seal Manual Thermal Sealer
 Operating Instructions For The X-Seal Manual Thermal Sealer Version 1 Release 1 May 2009 FluidX Ltd. FluidX Ltd. Monks Heath Hall, Chelford Road, Nether Alderley, Cheshire, SK10 4SY, UK. T: +44(0) 1625
V1.0. Showven Technologies Co.,Ltd.
 V1.0 Showven Technologies Co.,Ltd. SONICBOOM TM SMOKEJET USER MANUAL Foreword Thanks for choosing SHOWVEN SONICBOOM TM SMOKEJET. Please read following manual carefully and completely before operating this
MAC 700 Profile user manual
 MAC 700 Profile user manual Dimensions All measurements are expressed in millimeters 255 120 120 645 365 636 515 390 14 30 143 450 Min. c/c 520 270 270 505 2005-2009 Martin Professional A/S, Denmark. All
NANOPAC-300 & 500 Power Supply. Instruction manual NANOPAC-300 & NANOPAC-500
 NANOPAC-300 & 500 Power Supply Instruction manual NANOPAC-300 & NANOPAC-500 Version 01C Feb 5th, 2014 1 Packing list NANOPAC-300 or 500-1x NANOPAC-300 Power Supply or NANOPAC-500-1x Power Cord - 1x Instruction
RAY 7R MOVING BEAM USER MANUAL
 RAY 7R MOVING BEAM USER MANUAL TABLE OF CONTENTS 1Summary 3 Product Introduction 3 Content List 3 2. Safety Information 3 Safety notes 3 Safety instructions 4 3. Product diagram 5 4. Features 5 Installation
IVTM Installation Manual
 Integrated Vehicle Tire Pressure Monitoring IVTM Installation Manual 2nd edition Copyright WABCO 2006 Vehicle Control Systems An American Standard Company The right of amendment is reserved Version 002/06.06(us)
User Manual. Solar Charge Controller 3KW
 User Manual Solar Charge Controller 3KW 1 CONTENTS 1 ABOUT THIS MANUAL... 3 1.1 Purpose... 3 1.2 Scope... 3 1.3 SAFETY INSTRUCTIONS... 3 2 INTRODUCTION... 4 2.1 Features... 4 2.2 Product Overview... 5
Dynojet Research, Inc. All Rights Reserved. Optical RPM Sensor Installation Guide.
 1993-2001 Dynojet Research, Inc. All Rights Reserved.. This manual is copyrighted by Dynojet Research, Inc., hereafter referred to as Dynojet, and all rights are reserved. This manual, as well as the software
INSTALLATION AND OPERATION MANUAL FOR MCH-GPS17 GPS Compass and Ambient Temperature Gauge. NUTS (x3) 1 +12V TEMP SENSOR
 1 +12V TEMP SENSOR") KIT INCLUDES: INSTALLATION AND OPERATION MANUAL FOR MCH-GPS17 GPS Compass and Ambient Temperature Gauge MCH-GPS17 GAUGE (x1) SWITCH (x1) MANUAL (x1) NUTS (x3) GAUGE FEATURES: WIRE TIES (x6) 2 3 1 +12V
KIT INCLUDES: INSTALLATION AND OPERATION MANUAL FOR MCH-GPS17 GPS Compass and Ambient Temperature Gauge MCH-GPS17 GAUGE (x1) SWITCH (x1) MANUAL (x1) NUTS (x3) GAUGE FEATURES: WIRE TIES (x6) 2 3 1 +12V
DMR 3005 WM ONE ZONE WIRELESS DIMMER RECEIVER
 E363518 DMR 3005 WM ONE ZONE WIRELESS DIMMER RECEIVER 20725 NE. 16 AVE. #A-33 MIAMI, FLORIDA 33179 Tel: (305) 652-2599 Fax: (305) 650-8812 www.lumiron.com Email: sales@lumiron.com 1 Benefits and Features
MoistureMatch A next generation grain tester
 MoistureMatch A next generation grain tester A next generation moisture tester incorporating new and unique technology. Finally, a portable tester that will more accurately match and track with the commercial
Operator's Manual. Storage System. Ultrasound Probe Cabinet. Manufactured by:
 Storage System Ultrasound Probe Cabinet Operator's Manual Manufactured by: CIVCO Medical Solutions 102 First Street South Kalona, IA 52247 USA 319.248.6757 / 800.445.6741 WWW.CIVCO.COM Copyright 2018 All
MODEL MCL-3212 SPEEDOMETER/TACHOMETER for 2012 up Dyna and Softail with 4 gauge
 MODEL MCL-3212 SPEEDOMETER/TACHOMETER for 2012 up Dyna and Softail with 4 gauge IMPORTANT NOTE! This gauge has an odometer preset option that is only available one time in the first 100 miles (160km) of
Extended Battery Cabinet for Nfinity
 POWER PROTECTION Extended Battery Cabinet for Nfinity USER MANUAL TABLE OF CONTENTS IMPORTANT SAFETY INSTRUCTIONS................................... 1 ELECTROMAGNETIC COMPATIBILITY.......................................
Power Inverter 400 MW Owner s Manual
 Power Inverter 400 MW 1204 Owner s Manual For safe and optimum performance, the Power Inverter must be used properly. Carefully read and follow all instructions and guidelines in this manual and give special
MAGPOWR Spyder-Plus-S1 Tension Control
 MAGPOWR TENSION CONTROL MAGPOWR Spyder-Plus-S1 Tension Control Instruction Manual Figure 1 EN MI 850A351 1 A COPYRIGHT All of the information herein is the exclusive proprietary property of Maxcess International,
SOS SERIES SOS1 SOS2. Spares On Site Battery Cabinet Installation Guide rEV3
 Atlantic Battery Systems 1065 Market Street Paterson, NJ 07513 Phone: (800) 875-0073 Fax: (973) 523-2344 sales@atbatsys.com www.atbatsys.com SOS1 SOS2 SOS SERIES Spares On Site Battery Cabinet Installation
PRODUCT MANUAL Onyx 2 Zone In-Wall Wireless LED Dimmer and Receiver
 Product Description Main Functions: Control Up to 2 Zones Independently Wireless Control for Quick and Easy Installation Touch Sensitive Dark Glass Surface 50 Foot Wireless Range Soft Touch On/Off Memory
Installation Guide Smart-UPS On-Line SRT1000/1500 UXI-NCLI, SRT1000/1500 UXI-LI, Tower/Rack-Mount
 Installation Guide Smart-UPS On-Line SRT1000/1500 UXI-NCLI, SRT1000/1500 UXI-LI, Tower/Rack-Mount Important Safety Messages Read the instructions carefully to become familiar with the equipment before
INW Panel Meter Reading an INW PT12 Sensor
 INW Panel Meter Reading an INW PT12 Sensor PROUDLY MADE IN THE USA ISO 9001:2008 Certified Company Table of Contents Introduction...5 What is an INW Panel Meter for an INW PT12 Smart Sensor?...5 Initial
Model LA 4400 Time Delay OFF Controller
 ISIMET LA Series Model LA 4400 Time Delay OFF Controller Installation, Operation and Maintenance Manual Application: The Time Delay OFF Controller with integral 24-hr. programmable time clock operates
Product Innovation Award winner Architectural/Flood lighting. Exterior 400 Range. Exterior 400 Range
 Product Innovation Award winner Architectural/Flood lighting Exterior 00 Range Exterior 00 Range Exterior 00 Range TM The ultimate toolbox for energy-efficient outdoor lighting designs, the Exterior 00
MODEL MCL /8 SPEEDOMETER/TACHOMETER for 2004 up
 MODEL MCL-3204 3-3/8 SPEEDOMETER/TACHOMETER for 2004 up IMPORTANT NOTE! This gauge has an odometer preset option that is only available one time in the first 100 miles (160km) of operation. See Odometer