CUL INVERTER/CHARGER OWNER'S MANUAL
|
|
|
- June Bailey
- 6 years ago
- Views:
Transcription
1
2 Table of Contents Section 1 Introduction...1 Section 2 Installing the CUL... 4 Section 3 Installing the IFM1 Interface Module...6 Section 4-- Installing the Inverter & Charger Remote Panels... 8 Section 5 Inverter & Charger Remote Panel Operation... 9 Section 6 Operating the CUL Inverter/Charger Section 7 Troubleshooting Section 8 GFCI Test Record Warranty List of Figures Figure 1 System Diagram... 2 Figure 2 Federal Specification KKK-A-1822D Diagram... 7 Figure 3 1FM I Module Remote Wiring... 8 Icon Legend Note Warning VANNER INC Reynolds Drive, Hilliard, Ohio AC POWER Tel (614) Fax (614) CUL--OWNERS MANUAL c Copyright 1996, Vanner, Inc. OM/A96283 REV. B ii

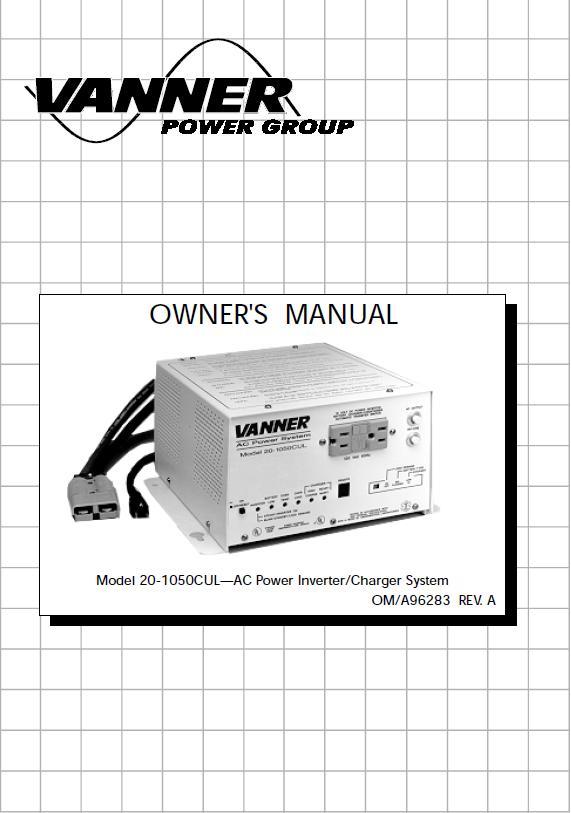
3 Section 1: Introduction Thank you for purchasing a Vanner CUL Power Inverter/Battery Charger for your emergency vehicle. We are confident you will be satisfied with its performance. Vanner products are designed and manufactured by skilled professionals using the highest standards in workmanship, guaranteeing excellent performance and reliability for your emergency vehicle. With minimum maintenance and care, you can expect years of trouble-free service from your Vanner product. The CUL is a 12 VDC to 120 VAC inverter with a built-in battery charger/conditioner and transfer relay. This unit is equipped with an AC line cord for connecting AC input power (shore/utility power) and a receptacle with a Ground Fault Circuit Interrupter (GFCI) for AC output. This enables you to plug AC loads directly into the inverter. The DC cables have quick connectors to facilitate installation and pre-wiring of emergency vehicles. 1
4 FUNCTIONALITY Inverter The CUL converts battery power to 1050 Watts of 120 VAC modified sine wave power to operate vital emergency vehicle equipment. The unit is easily connected to the positive and negative posts of a battery system with appropriate fusing, and when turned on produces 120 VAC True RMS power. WARNING Battery input cables The inverter also has an energy-saving feature called Load Demand. With this feature the must be connected to inverter output is pulsed significantly reducing the current draw from the battery until a the battery demand is made on its output. Continuous output of 120 VAC resumes when a load greater than 5 with proper polarity to avoid damaging the inverter. Watts is applied. The load demand feature can be disabled with the Setup Switch on the front panel. A built-in transfer relay switches the AC output receptacle from the inverter to the AC input when the unit senses AC input from the shore/utility power. NOTE If the battery is fully charged at the time AC input is applied, the unit will go directly into Ready/ Maintenance mode. Battery Charger The CUL Battery Charger's superior design incorporates a multi-stage charger. This design enables the unit to automatically charge batteries, maintaining the battery's integrity and reducing the likelihood of premature failure. High Charge Mode While in the High Charge mode, the unit continuously charges at a constant current of 55 Amps (high setting) for large battery banks, or 15.0 Amps (low setting) for small battery banks (such as two group 31 batteries). The unit will charge until the battery cells reach 14.2 VDC for flooded batteries. or 19.1 VDC for gel batteries. The unit then supplies a fixed voltage until the battery is fully charged. Ready/Maintenance Mode The charger automatically enters the Ready/Maintenance mode, maintaining the battery's proper voltage of 13.2 VDC for flooded batteries or 13.6 VDC for gel batteries. This Ready/Maintenance mode is designed to eliminate gassing (overcharging), helping to extend the life of the battery. A Setup Switch is located on the front panel for selecting the type of battery (Flooded Lead Acid or Gel Lead Acid), the battery charger output current (High/Low), and Load Demand(On/Off). 2
5 Specifications Inverter Output at 120 VAC RMS (Continuous Power Rating) Surge Capacity at 120 VAC (3 sec) Input Voltage, VDC (Deep Cycle Battery Recommended) CUL 1050 Watts 2100 Watts 12 VDC, Nominal Output Voltage 120 VAC ± 5% DC Current Draw (Battery) OFF Load Demand (waiting)* Full ON at No Load 10.5 VDC min., 16.0 VDC max Amps Typical 0.09 Amps Typical 0.7 Amps Typical Full ON with Load Approx. AC Load Watts 10 or AC Load Amps x 12 Frequency 60 Hz ± 0.1% Output Wave Form Battery Charger Charging Capacity* Modified Sine Wave 55 Amps (High) 15.0 Amps (Low) Input Voltage 120 VAC ± 10% Input Current Bulk Voltage* Float Voltage* Bypass Transfer Output Current, GFCI Outlet** Other Specifications AC Input Termination AC Output Termination Ambient Temperature Cooling Air Chassis Dimensions Weight 8.0 Amps 14.2 VDC (flooded), 14.1 VDC (gel) 13.2 VDC (flooded), 13.6 V (gel) 12 Amps Hardwire Box, or 3ft. Line Cord Duplex GFCI Receptacle -20 to +110 F, -29 to C Fan Cooled, 30 cfm Aluminum W x 5.94 H x D 22 lbs *Determined by Setup Switch setting on front panel. **Note: If GFCI trips and the inverter is in load demand mode the GFCI may not reset until you toggle inverter off and back on and then you will have 5 seconds to reset GFCI before unit goes back into load demand again or you can disable load demand via dipswitch, if available. 3
6 WARNING Battery input cables must be connected to the battery with proper polarity to avoid damaging the inverter. Section 2: Installing the CUL Unpacking the Inverter Inspect the shipping container and equipment for loose or damaged parts. If any damage is found, immediately notify the freight carrier. Installing the Inverter Step 1: Turn the inverter OFF/disconnect power to the wiring harness. Make sure power to the vehicle wiring harness is disconnected. Verify that the inverter is turned OFF by checking that the ON-OFF/RESET Inverter Switch is in the OFF-RESET position. (The button should NOT be pushed in.) D C C a b l e L e n g t h Size Maximum 2AWG 12ft. 1/0 AWG 20 ft. Note Step 2: Select a location for the unit. An ideal installation location has the following characteristics: Close to the battery (within six feet using #2 AWG wire) Protected from the weather Protected from the weather Air enters by the fan at the rear of the unit, and exits through the sides of the unit. For maximum unit performance, avoid recirculating the same hot air through the unit. Step 3: Route DC input cables. Route the negative and positive DC input cables from the inverter (through the quick connector) to the battery. If required, protect cables where they contact hard, sharp edges. Step 4: Install inline fuse. Install an inline Bussman ANN 125 or equivalent fuse (Vanner p/n fuse and fuse holder) in the red, positive DC input cable between the battery and inverter, within 18 in. of the battery or DC wiring bus system. Step 5: Connect bonding lug. Use a AWG #8 or larger copper conductor to connect the chassis bonding lug to the vehicle chassis and/or earth ground. 4
7 WARNING Battery input cables must be connected to the battery with proper polarity to avoid damaging the inverter. Step 6: Connect the inverter to the battery. Connect the black, negative DC input cable from the quick connector to the battery negative (-) terminal. This battery negative terminal is usually where the battery negative connects to the engine block or frame. Connect the red, positive DC input cable from the quick connector to the in/line fuse near the battery positive (+) terminal. This battery terminal is usually connected to the DC electrical system at the load side of the Battery disconnect Switch. Step 7: Select Load Demand option. Select Load Demand option if desired, using the proper switch position on the front panel Setup Switch. With Load demand ON, the inverter conserves battery energy and operates only when a load greater than 5 Watts is applied. Step 8: Select battery type. The charger is capable of charging both gel and flooded lead acid batteries. Select the battery type using the Setup Switch on the front panel. WARNING Improper Battery Type Switch setting may damage batteries. Step 9: Select the charging rate. In the high position the charge is 55 Amps. In the low position the output is 15.0 Amps. We recommend the low position as the best selection when two (group 31 or smaller) batteries are used. Charging at too high of a rate for a given battery will damage the batteries. Step 10: Connect the AC loads. Connect the AC loads to the inverter GFCI receptacle. Any time AC power is applied to the AC input (shore/utility power), it will pass through this GFCI receptacle. Step 11: Verify installation. Verify all connections are tight and secure for maximum performance. Inverter LED Displays Inverter Light Action Description Steady Green Light. Inverter is On and operating Single Blink Green Light Inverter circuit is Off. Shore power is On and supplying AC power to the AC loads. The inverter will turn On and supply the load if shore power is lost. Double Blink Green Light Inverter circuit is Off. Shore power is Off. The inverter is waiting for a load greater than 5 watts to be turned on. Battery Low Light Action Description Solid red Inverter is On and the battery is almost too low to operate the inverter. Blinking Red The inverter is Off. The battery voltage dropped below 10.5 volts DC and the inverter shut itself Off. Once shut off, the batteries must be recharged. Then, the inverter On/Off switch must be cycled to reset the unit. 5
8 Inverter LED Displays cont. Overtemp Light Action Description Solid red The unit is Off. The unit has turned itself Off because the power MOSFET's are operating too hot. This can be caused by operating an AC load which is too large for the inverter, or lack of ventilation. When the unit cools the inverter will start operating again. Overload Light Action Description Blinking Red The inverter is On but it is overloaded. Reduce the AC load quickly or the inverter will shut off due to the overload condition. Charger High Charge Solid red Light Action Blinking Yellow The inverter is Off. An overload has occurred and the inverter has shut off to protect itself. Once shut off, the inverter On/Off switch must be cycled to reset the unit. Description The charger is operating. The batteries were low and in need of a charge. The charger is in the process of charging the batteries to the bulk voltage. The charging current is limited based on the position of the Charger High/ Low switch. Charger Ready/Mainten ance Light Action Solid Green Description The charger is operating. The batteries are near full charge and the charger is in the maintenance mode. In this mode, the charger is holding the batteries at the float voltage. The charging current is limited based on the position of the Charger High/Low switch. Section 3: Installing the IFM1 Interface Module This section describes the installation of the optional Vanner Model IFM 1 Interface Module. Refer to the information provided in the IFM 1 Interface Module Owner's Manual for information on installing the inverter and interface module in a vehicle rewired or retrofitted for the C UL. If you are installing a new CUL unit, you will need the interface module only if you are using the inverter or charger status panels (p/n D06638 or D06639), Remote Switch (pin D06781), or if you need to use the inverter lockout feature. NOTE Refer to the IFM1 manual for Pin identification and description. Installing the IFM1 Interface Module Step 1: Mount the Interface Module. Mount the interface module in the vehicle's existing 12 V electrical system wiring harness with #8 screws. Select a physical orientation best suited for your application environment; however, it must be close to the inverter as the interface cable is 2 ft. in length. Additionally, the unit should not be installed with pin connections facing upward. Step 2: Connect the inverter to the Interface Module. Install the 2 ft. interface cable by plugging it into the remote RJ-11 connector on the CUL, and the J1 connector on the IFM1 Interface Module. 6
9 Step 3: Connect the Battery Disconnect Switch. Connect the +12 V lead from the Module Disconnect Switch circuit to the inverter lockout Pin 1 (ignition switch or battery disconnect switch). The +12 V lead from the Battery Disconnect Switch must be fused with an inline fuse or circuit breaker of 2 Amps or less. See Figure 3. Step 4: Wire the Remote Switch (p/n D06781) to Pins 2 through 5. Red to Pin 2, Black to Pin 3, Green to Pins 4 and 5. If no remote switch is used, two jumpers must be installed. The first jumper connects Pin 2 to Pin 3, the second jumper connects Pin 4 to Pin 5. See Figure 3. Step 5: Connect the Inverter Remote Status Display Panel (Optional). Connect the gray, green, and red wires from the inverter panel, through the OEM harness, to the IFM1 Module, Pins 6 (grey), 7 (green) and 8 (red). Step 6: Connect the Charger Remote Display Status Panel (Optional). Connect the brown, white, and black wires from the charger panel, through the OEM harness, to the IFM1 Module, Pins 9 (brown), 10 (white) and 11 (black) 7
10 Section 4: Installing the Inverter and Charger Remote Status Display Panels Both the inverter and charger Remote Status Display Panels contain a red and green LED indicator. On the inverter status panel, the green indicator light signifies the unit is ON or in the Standby mode. On the charger status panel, the green light indicates the presence of shore power or that the battery is being maintained at its current level. For both the inverter and charger, the red, Fault LED indicator shows problems such as over temperature, output overload, or low battery. The panels have a sealed overlay which mounts easily on a flat surface, Each panel is equipped with a 12-in. pigtail harness for easy installation. The following installation procedure applies to both the inverter and charger panels: Step 1: Select a location for the panel. Identify the desired location for the inverter and charger panels. NOTE When the remote charge indicator panel is installed to the outside of the vehicle, the status panel should be sealed with RTV. Step 2: Identify wires for installation. Identify the gray, green, and red wires on the inverter panel and vehicle's electrical system. Identify the brown, white, and black wires on the charger panel and the vehicle's electrical system. Step 3: Splice and arrange wires. Splice together like-colored wires from the vehicle's electrical system to the status panel using an insulated butt splice or equivalent. Carefully arrange the wires such that the panel mounts flush against the surface to which it is mounted. Step 4: Secure panels to surface. Mount the panels using #8 screws through the four holes in the panel 8
11 Section 5: Inverter and Charger Status Panel Operation Two LEDs on the front of the Remote Status Display Panels indicate the status of the inverter and charger. The status indicated by these LED displays is directly related to the status indicated by the LEDs on the front of the inverter and charger. Inverter Led Light Action Description Steady Green Light Inverter is operational. Single Blink-Green Light Double Blink-Green Light Inverter is not being used. Shore power is applied to load. Inverter will Activate when shore power is unavailable. Inverter is on in the Load Demand mode and is waiting for AC load to be turned ON. Inverter Fault LED Light Action Description Red Light Unit shutdown* Check the inverter's front panel LEDs for reason of shutdown: Low Battery, Overload, or Overtemp. *Refer to the Troubleshooting section of this manual for fault diagnostic information. Charger LED Light Action Description Blinking Green Light Steady Green Light AC (shore/utility power) is present and battery charger is in the High Charge (Bulk) mode. AC (shore/utility power) is present and the battery charger is in the Maintenance (Float) mode. Charge Fault LED Light Action Description Red Light Unit shutdown* Check the inverter's front panel LEDs for reason of shutdown: Low Battery, Overload, or Overtemp. *Refer to the Troubleshooting section of this manual for fault diagnostic information. 9
12 Section 6: Operating the CUL Inverter/Charger Use the following instructions to operate the CUL Inverter. Step 1: Install the CUL unit. Completely install the inverter and charger using the instructions provided in Section 2 of this manual. Step 2: Start the vehicle. Turn the Battery Disconnect Switch on and start the vehicle. NOTE Throughout this manual, shore/utility power is referred to as AC input power. Step 3: Turn switches on. Turn on the Module Disconnect Switch and the Inverter Remote Switch. Step 4: Apply shore power to the CUL/Ambulance shore line connection. After shore power has been connected one of the Charger LEDs will light or flash. Push the ON-OFF/RESET Inverter Switch to the ON position. The inverter lamp will flash, indicating that the inverter is standing by. Step 5: Verify Power. Apply an AC load, such as a shop light or drill. The AC load is run directly from shore/ utility power. Step 6: Observe the inverter operation. Remove the shore line connection from the emergency vehicle. The unit will automatically switch to Inverter mode and operate the AC load using battery power. When shore power is restored, the unit examines the AC inp ut for five seconds and then switches the loads back to run directly from AC/shore power. With the ON-OFF/RESET Switch in the ON position, a double flash of the ON light indicates the load demand is turned ON and the load is less than 5 Watts. 10
13 Section 7: Troubleshooting the CUL The following are the most common questions heard by Vanner service professionals. If your situation does not apply to the following categories, please contact your local Vanner Incorporated Service Center. Vanner Incorporated Customer Service: AC-POWER SYMPTOM SOLUTION SYMPTOM SOLUTION SYMPTOM SOLUTION SYMPTOM SOLUTION The LEDs on the front panel blink in sequence. It is normal for this to occure if the inverter switch is On when the DC input is connected to the unit. If the DC is already connected and the LEDs blink in sequence then the DC input is dipping in voltage. Check for poor connections in the DC wiring, bad battery, or a heavy DC load. ON lamp does not light steadily after pushing in the ON-OFF/RESET Inverter Switch. Lamp flashes when utility power is present. Lamp flashes in Load Demand Waiting mode. Check/Reset GFCI on the receptacle.** Check battery connections if utility power is OFF. Check DC fuses if utility power is OFF. ON lamp fully illuminates. AC load does not run. Check and reset circuit breaker and GFCI receptacle**. Verify AC load and cord are in proper condition. BATTERY LOW lamp illuminates when AC load is applied. Check battery connections. Check battery condition. Recharge battery if voltage is less than 10.5 VDC. Check the vehicle's alternator charging system for proper operation. SYMPTOM SOLUTION SYMPTOM SOLUTION OVERTEMP lamp illuminates. Something has caused the unit to overheat. Check for obstruction of air flow to the cooling fan or from ventilation holes. Verify AC load is within unit s rated capacity. OVERLOAD lamp illuminates with AC load applied. Verify AC load is within unit s rated surge and continuous capacity. SYMPTOM SOLUTION DC fuse blows when connecting DC input cables. Check for reverse polarity: red cable to battery positive (+), black cable to battery negative (-). The unit may be damaged and require repair service. **Note: If GFCI trips and the inverter is in load demand mode the GFCI may not reset until you toggle inverter off and back on and then you will have 5 seconds to reset GFCI before unit goes back into load demand again or you can disable load demand via dipswitch, if available. 11
14 Section 8: GFCI Test Record For maximum protection against electrical shock hazard, operate the Test Switch on the Ground Fault Circuit Interrupter at least once a month. ENTER YEAR JAN FEB MAR APR MAY JUNE JULY AUG SEPT OCT NOV DEC 20_ 12
15 Limited Warranty 1. Vanner Inc., warrants that this product is free from defects in materials and workmanship for a period of one (1) year from its date of shipment from Vanner's factory. 2. This warranty does not cover defects caused by misuse, neglect, accident, reversed polarity, unauthorized repairs, and/or replacements. 3. All warranties of merchantability and fitness for a particular purpose; written or oral, express or implied, shall extend only for a period of one (1) year. There are no other warranties which extend beyond those described on the face of this warranty. 4. Vanner does not undertake responsibility to any purchaser of its product for any undertaking, representation, or warranty made by any dealers or distributors selling its products beyond herein expressed. 5. Vanner does not assume responsibility for incidental or consequential damages, including, but not limited to responsibility for loss of use of this product, loss of time, inconvenience, expense for telephone calls, shipping expense, loss or damage to property, or loss of revenue. 6. Vanner reserves the right to repair, replace, or allow credit for any material returned under this warranty. Any damage caused by the customer will be charged or deducted from the allowance. 7. All warranty work will be performed at Vanner's factory, or authorized repair facility. Products shall be delivered to Vanner's facility, freight prepaid. Products repaired under warranty, or replacement parts or products will be returned, F.O.B. Vanner factory. Vanner Inc Reynolds Drive Hilliard, Ohio Tel (614) Fax (614) Specifications Subject to Change Copyright 1996, Vanner Inc. Printed in the USA OM/A96283 REV B 8/
BRAVO Inverter/Battery Charger. Table of Contents
 BRAVO 1050 Inverter/Battery Charger Table of Contents Introduction... 2 General Description... 2 Specifications... 3 Installation: Hardwire Units... 4 Operation: Hardwire Units... 5-6 Installation: GFCI
LifeStar Ambulance Inverter
 LifeStar Ambulance Inverter Model 20-1050CUL-DC 20-1000TUL-DC LifeStar - 1 - Table of Contents Table of Contents... 2 Section 1 : General Installation Diagram... 3 Section 2 : Introduction... 4 Section
VLT SERIES. True Sine Wave AC Power Inverter. Owner s Manual. Owner s Manual D Rev.B
 Owner s Manual VLT SERIES True Sine Wave AC Power Inverter 60Hz Models VLT12-600 VLT12-1000 VLT12-1500 VLT24-600 VLT24-1000 VLT24-1500 VLT48-1000 VLT48-1500 50Hz Models VLTE12-600 VLTE12-1000 VLTE12-1500
WF-5110R True Sine Wave Inverter
 Operator s Manual WF-5110R True Sine Wave Inverter WF-9900 Series WF-5110R ( The Inverter model number is located on the label on top of the enclosure) Distributed in the U.S.A. and Canada by ARTERRA DISTRIBUTION
Go Power! Manual. GP-1750HD Inverter GP-2500 Inverter
 Go Power! Manual GP-1750HD Inverter GP-2500 Inverter Go Power! Electric Inc. PO Box 6033 Victoria, BC V8P 5L4 Tel: 866-247-6527 Fax: 866-607-6527 Email: info@gpelectric.com Table of Contents 1. INTRODUCTION...
WF-5110R True Sine Wave Inverter
 Operator s Manual WF-5110R True Sine Wave Inverter WF-9900 Series WF-5110R ( The Inverter model number is located on the label on top of the enclosure) Distributed in the U.S.A. and Canada by ARTERRA DISTRIBUTION
Pure Sine Wave Inverter GP-HS1500. Owner s Manual
 Pure Sine Wave Inverter GP-HS1500 Owner s Manual 2 Table of Contents Introduction 3 Specifications 4 Name and Main Function 5 Installation 7 Operation 9 Operating Limits 13 Troubleshooting 13 Maintenance
GP-1000 Inverter. Go Power! Electric Inc. PO Box 6033 Victoria, BC V8P 5L4 Tel: Fax:
 Go Power! Manual GP-1000 Inverter Go Power! Electric Inc. PO Box 6033 Victoria, BC V8P 5L4 Tel: 866-247-6527 Fax: 866-607-6527 Email: info@gpelectric.com Table of Contents 1. INTRODUCTION 3 2. SPECIFICATIONS
IQC IQC IQC
 IQ SERIES Industrial Quasi Sine Wave AC Power Inverter Models IQ12-2600 IQ12-3600 IQC12-2600 IQC12-3600 IQC24-3600 Owners Manual IQ SERIES OWNERS MANUAL 1/0 Wire Minimum 1/0 Wire Minimum Typical Static
IV. PROOF OF PURCHASE: A warranty claim must be accompanied by proof of the date of purchase.
 PD9100 / 9200 SERIES POWER CONVERTER OWNERS MANUAL PROGRESSIVE DYNAMICS, INC. POWER CONVERTER LIMITED WARRANTY I. LIMITED WARRANTY: Progressive Dynamics, Inc. warrants its power converter to be free from
DC to AC Power Inverters
 Manufacturer of Dimensions TM Inverters 4467 White Bear Parkway St. Paul, MN 55110 Phone: 651-653-7000 Fax: 651-653-7600 E-mail: inverterinfo@sensata.com Web: www.dimensions.sensata.com ISO 9001:2000 Certified
Go Power! Manual. GP-SW1500 Inverter. Table of Contents. Go Power! Electric Inc. PO Box 6033 Victoria, BC V8P 5L4
 Table of Contents 1. INTRODUCTION... 3 Go Power! Manual GP-SW1500 Inverter 2. SPECIFICATIONS... 3 3. NAME AND MAIN FUNCTION... 3 4. INSTALLATION... 5 5. OPERATION... 7 6. OPERATING LIMITS... 9 7. TROUBLESHOOTING...
DC to AC Power Inverters
 Manufacturer of Dimensions TM Inverters 4467 White Bear Parkway St. Paul, MN 55110 Phone: 651-653-7000 Fax: 651-653-7600 E-mail: inverterinfo@sensata.com Web: www.dimensions.sensata.com 121114C OWNERS
WF-5100 Series True Sine Wave Inverters
 Operator s Manual WF-5100 Series True Sine Wave Inverters WF-9900 Series WF-5118 WF-5120 ( The Inverter model number is located on the label on top of the enclosure) Distributed in the U.S.A. and Canada
Dimensions 12/800N 12/1200N D. DC to AC Power Inverters. OWNERS MANUAL for Models: OWNERS MANUAL April ISO 9001:2000 Certified Company
 Manufacturer of Dimensions Inverters 4467 White Bear Parkway St. Paul, MN 55110 Phone: 651-653-7000 Fax: 651-653-7600 E-mail: inverterinfo@sensata.com Web: www.dimensions.sensata.com OWNERS MANUAL April
1000 Watt Pure Sine Wave Power Inverter, Users Manual
 WF-5100 Series 1000 Watt Pure Sine Wave Power Inverter, Users Manual Distributed in the USA and Canada by Arterra Distribution 2021 Aeroplex Drive North. Elkhart, IN. 46514 Phone: 877-294-8997, Fax: 547-294-8698
GSL Electronics Modified Sine Wave Power Inverters
 GSL Electronics Modified Sine Wave Power Inverters Congratulations on choosing one of our Modified Sine Wave Inverters for your application. There are 6 models in the range, which will meet most of your
Power InverterTM Watt. Continuous. User's Manual. WAGAN Corp. Limited Warranty Registration Form. Item no
 WAGAN Corp. Limited Warranty Registration Form All WAGAN Corporation products are warranted to the original purchaser of this product. Warranty Duration: This product is warranted to the original purchaser
OWNERS MANUAL JANUARY 2007 ISO
 Manufacturer of Dimensions TM Inverters 4467 White Bear Parkway St. Paul, MN 55110 Phone: 651-653-7000 Fax: 651-653-7600 E-mail: inverterinfo@sensata.com Web: www.dimensions.sensata.com 121231B OWNERS
ADI-125/750 ADI-125/1500 ADI-125/2500
 Manufacturer of Dimensions TM Inverters 4467 White Bear Parkway St. Paul, MN 55110 Phone: 651-653-7000 Fax: 651-653-7600 E-mail: inverterinfo@sensata.com Web: www.dimensions.sensata.com 121094B OWNERS
Table of Contents 文管中心 發行章
 ST600-XXX Series Pure Sine Wave Power Inverter User s Manual Table of Contents 1. Important Safety Instructions 1-1 General Safety Precautions 1 1-2 Battery Precautions. 1 2. Basic Descriptions 2-1 Mechanical
MIL-24/2600Q MIL-24/3200DQ
 Manufacturer of Dimensions TM Inverters 4467 White Bear Parkway St. Paul, MN 55110 Phone: 651-653-7000 Fax: 651-653-7600 E-mail: inverterinfo@sensata.com Web: www.dimensions.sensata.com 121473B OWNER'S
1200+ WITH LVD (LOW VOLTAGE DISCONNECT) USER GUIDE
 USER GUIDE") 1200+ WITH LVD (LOW VOLTAGE DISCONNECT) USER GUIDE INST045 Doc 2.00 CONTENTS General Information...2 Operating Environment...6 Features...7 Installation Instructions...8 Inverter Ground and Remote Sense
1200+ WITH LVD (LOW VOLTAGE DISCONNECT) USER GUIDE INST045 Doc 2.00 CONTENTS General Information...2 Operating Environment...6 Features...7 Installation Instructions...8 Inverter Ground and Remote Sense
Nature Power Inverters. True Sinewave Inverter Modified Sinewave Inverter. Owner s Manual
 Version 1.1 Version 2 Nature Power Inverters True Sinewave Inverter Modified Sinewave Inverter Owner s Manual!!!!!!!!!!! 38304 38204 For safe and optimum performance, the Power Inverter must be used properly.
OWNERS MANUAL JANUARY 2007 ISO
 Manufacturer of Dimensions TM Inverters 4467 White Bear Parkway St. Paul, MN 55110 Phone: 651-653-7000 Fax: 651-653-7600 E-mail: inverterinfo@sensata.com Web: www.dimensions.sensata.com OWNERS MANUAL JANUARY
WARNINGS, CAUTIONS AND NOTES
 Welcome Please read this manual thoroughly before installing and operating your new Power Bright Power Inverter. This manual contains information you need to obtain the performance required for your application.
Power Inverter 400 MW Owner s Manual
 Power Inverter 400 MW 1204 Owner s Manual For safe and optimum performance, the Power Inverter must be used properly. Carefully read and follow all instructions and guidelines in this manual and give special
Section 1 Introduction... 1
 VANNER INCORPORATED Corporate Office: 4282 Reynolds Drive Hilliard, Ohio 43026 Tel (614) 771-2718 Fax (614)771-4904 1-800- AC POWER BRAVO 1800- OWNER S MANUAL 9/00 Copyright 2000, Vanner, Inc. OM/D96523
24/3000H-3PH 24/4500H-3PH 24/6000H-3PH
 Manufacturer of Dimensions TM Inverters 4467 White Bear Parkway St. Paul, MN 55110 Phone: 651-653-7000 Fax: 651-653-7600 E-mail: inverterinfo@sensata.com Web: www.dimensions.sensata.com 120015D OWNERS
70-Series Power Management System. With Internal Electronic Monitor
 Owner s Manual VANNGuard 70Series Power Management System With Internal Electronic Monitor Table of Contents Introduction. 3 Specifications.. 4 Theory of Operation... 5 Typical Applications...... 8 Installation
S150,S300 Series Pure Sine Wave Inverter User s Manual
 S150,S300 Series Pure Sine Wave Inverter User s Manual List of contents 1. Important Safety Instructions 3 1-1 General Safety Precautions 3 1-2 Precautions When Working With Batteries.. 3 2. Features...
V 2.0 DC TO AC POWER INVERTER PWRINV500012W PWRINV500024W PWRINV500036W PWRINV500048W. Instruction Manual
 DC TO AC POWER INVERTER PWRINV500012W PWRINV500024W PWRINV500036W PWRINV500048W Instruction Manual Introduction The AIMS Power 5000 Watt series inverters are the most advanced line of mobile DC to AC power
Smart Battery Charger GPC-35-MAX GPC-45-MAX GPC-55-MAX GPC-75-MAX GPC-100-MAX. Owner s Manual
 Smart Battery Charger GPC-35-MAX GPC-45-MAX GPC-55-MAX GPC-75-MAX GPC-100-MAX Owner s Manual Table of Contents Important Safety Instructions 2 Features 3 Installation Guidelines 5 Warranty 8 1.0 Important
Art. No. EC-315. Art. No. EC-330. Art. No. EC-340 SWITCH-MODE BATTTERY CHARGER CONTENTS IMPORTANT SAFETY PRECAUTIONS... 2
 SWITCH-MODE BATTTERY CHARGER CONTENTS IMPORTANT SAFETY PRECAUTIONS... 2 DESCRIPTION AND FEATURES... 3 CHARGING STAGES... 4 Art. No. EC-315 Art. No. EC-330 Art. No. EC-340 PROTECTIONS... 5 INSTALLATION...
DC TO AC POWER INVERTER
 DC TO AC POWER INVERTER 12V / 24V / 48Vdc Input 115V / 230Vac Output 150W ~ 6000W Output cont. L-Series User Manual Before install and use your Inverter, read the User Manual and safety instructions. Cooler
1200+ WITH LVD (LOW VOLTAGE DISCONNECT) V1.00 OWNERS MANUAL
 V1.00 OWNERS MANUAL") 1200+ WITH LVD (LOW VOLTAGE DISCONNECT) V1.00 1 1200+ WITH LVD V1.00 OWNERS MANUAL CONTENTS General Information... 2 Operating Environment... 5 Features... 6 Installation Instructions... 7 Inverter Ground
1200+ WITH LVD (LOW VOLTAGE DISCONNECT) V1.00 1 1200+ WITH LVD V1.00 OWNERS MANUAL CONTENTS General Information... 2 Operating Environment... 5 Features... 6 Installation Instructions... 7 Inverter Ground
Pure Sine Wave Inverter Charger
 Pure Sine Wave Inverter Charger Renogy 1000W 2000W Pure Sine Wave Inverter Charger Manual 2775 E. Philadelphia St., Ontario, CA 91761 1-800-330-8678 Version 1.6 1 Important Safety Instructions Please save
Infinitybox Express Road Race Car Kit Installation Guide
 Table of Contents Infinitybox Express Road Race Car Kit Installation Guide Overview... 2 Warnings... 3 J1939 POWERCELL Technical Details... 4 IOX Input/Output Module Technical Details... 4 Kit Contents...
Pure Sine Wave Inverter User Manual
 48-3000RM 2U 19, 2 Post Rack Mount & 4 Post Open Frame Cabinet Mount Pure Sine Wave Inverter User Manual Newmar PO Box 1306 Newport Beach, CA 92663 www.poweringthenetwork.com Tel: 714-751-0488 M-483000RM
1250W 12VDC PowerVerter Ambulance/EMS Inverter/Charger with 2 Hospital Grade Outlets
 1250W 12VDC PowerVerter Ambulance/EMS Inverter/Charger with 2 Hospital Grade Outlets MODEL NUMBER: EMS1250UL Highlights 12V DC or 120VAC input; 120V AC output; 2 NEMA 5-15R hospital-grade outlets 1250
Operator Manual For use with WFCO ULTRA III Deckmount Converter WF-9800 Series (model number located on the cover of the unit)
") Operator Manual For use with WFCO ULTRA III Deckmount Converter WF-9800 Series (model number located on the cover of the unit) Distributed in the U.S.A. and Canada by ARTERRA DISTRIBUTION Warranty Service
Operator Manual For use with WFCO ULTRA III Deckmount Converter WF-9800 Series (model number located on the cover of the unit) Distributed in the U.S.A. and Canada by ARTERRA DISTRIBUTION Warranty Service
MD10. Engine Controller. Installation and User Manual for the MD10 Engine Controller. Full Version
 MD10 Engine Controller Installation and User Manual for the MD10 Engine Controller. Full Version File: MartinMD10rev1.4.doc May 16, 2002 2 READ MANUAL BEFORE INSTALLING UNIT Receipt of shipment and warranty
Digital echo-charge. Owner s Manual. Xantrex Digital echo-charge Battery Charger
 Digital echo-charge Owner s Manual Xantrex Digital echo-charge Battery Charger INTRODUCTION The Xantrex Digital echo-charge is specially developed for charging an auxiliary battery with Freedom TM or Fleet
The Power of Reliability INSTRUCTION MANUAL
 The Power of Reliability INSTRUCTION MANUAL SAFETY & WARNINGS Read this manual carefully and understand all Warnings and Cautions before connections are made to the Inverter. If unsure about any aspects
1200+ WITH TIMER V1.00 OWNERS MANUAL
 1200+ WITH TIMER V1.00 1 1200+ WITH TIMER V1.00 OWNERS MANUAL CONTENTS General Information... 2 Operating Environment... 5 Features... 6 Installation Instructions... 7 Inverter Ground and Remote Sense
REDI-LINE. Rugged, Reliable, DC to AC Power Conversion ELECTRIC GENERATORS USER'S GUIDE. KARAM A.L.
 REDI-LINE ELECTRIC GENERATORS USER'S GUIDE Rugged, Reliable, DC to AC Power Conversion KARAM A.L. www.alternatorstarter.com 1-888-515-2726 REDI-LINE ELECTRIC GENERATOR MODEL INPUT ACTUAL OUTPUT ACTUAL
230VAC Power Inverter 400W Owner s Manual
 400W 230VAC Power Inverter 400W Owner s Manual For safe and optimum performance, the Enerdrive epower Inverter must be used properly. Carefully read and follow all instructions and guidelines in this manual
HE1U 1248 BMS High Efficiency 1U AC to DC Power Supply Owners Guide SPECIFICATIONS
 HE1U 1248 BMS High Efficiency 1U AC to DC Power Supply Owners Guide (These instructions are intended for use by a technician familiar with electronic products) Integrated Smart Charger Integrated Low Voltage
O W N E R ' S M A N U A L
 1500 Watt DC to AC Power Inverter C o n v e r t s 1 2 V D C B a t t e r y P o w e r t o 1 1 0 V A C H o m e P o w e r O W N E R ' S M A N U A L SAVE THESE INSTRUCTIONS The recommended source of power is
Nature Power Inverters. Modified Sinewave 1000w/1500w True Sinewave 1000w/2000w. Owner s Manual
 V1.1 Nature Power Inverters Modified Sinewave 1000w/1500w True Sinewave 1000w/2000w Owner s Manual Modified Sinewave Series True Sinewave Series For safe and optimum performance, the Power Inverter must
model ps600 Address all communications and shipments to: FEDERAL SIGNAL CORPORATION
 MODEL: PS600 HZ: 60 A model ps600 installation and service manual for federal model ps600 FEDERAL SIGNAL CORPORATION POWER SUPPLY VOLTS: SERIES: 120VAC FEDERAL SIGNAL CORPORATION UNIVERSITY PARK, IL. U.S.A.
LC BATTERY CHARGER OPERATION & MAINTENANCE GUIDE
 LC BATTERY CHARGER OPERATION & MAINTENANCE GUIDE SENS part number: 101194 Document revision: D DCN number: 105128 Date: 3/23/2006 1840 Industrial Circle Longmont, CO 80501 Fax: 303-678-7504 Tel: 303-678-7500
DC to AC Power Inverter Pure Sine Wave Output. Owner s Manual. Models: 12LP10 12LP10H 12LP10R
 DC to AC Power Inverter Pure Sine Wave Output Owner s Manual Models: 12LP10 12LP10H 12LP10R INTRODUCTION Thank you for purchasing a Magnum-Dimensions Inverter from Sensata Technologies! We think that you
RU BMS Power Supply and Battery Management System Owners Guide
 RU2-4012- BMS Power Supply and Battery Management System Owners Guide (These instructions are intended for use by a technician familiar with electronic products) RU2-4012- BMS is a continuous duty power
Airpax Dimensions, Inc.
 Airpax Dimensions, Inc. 4467 White Bear Parkway (651) 653-7000 St. Paul, MN 55110-7626 Fax (651) 653-7600 121177B OWNERS MANUAL JANUARY 2007 Airpax Dimensions, Inc. Uninterruptible Power System OWNERS
MODEL NUMBER: APS2012
 Position a 400A fuse link less than 18 in. from the battery in the positive line to protect against highcurrent draw that may occur during inverter failure. 2000W PowerVerter APS 12VDC 120V Inverter/Charger
PureSine 150/300 Pure Sine Wave Inverter User s Manual
 PureSine 150/300 Pure Sine Wave Inverter User s Manual 1. Important Safety Instructions WARNING! Before you install and use your Inverter, please read and follow these safety instructions. 1-1. General
CLEAN POWER TM CPS Series Operator s Manual
 12 Test Equipment CLEAN POWER TM CPS Series Operator s Manual Power Supply / Maintenance Charger for 12 Volt Systems The CPS series of power supplies / maintenance chargers are the ultimate in supplying
Go Power! Manual. GP-Smart Charger
 Go Power! Manual GP-Smart Charger Go Power! Electric Inc. PO Box 6033 Victoria, BC V8P 5L4 Toll Free Tel: 866-247-6527 Toll Free Fax: 866-607-6527 Email: info@gpelectric.com Table of Contents 1. IMPORTANT
AC CONVERTER / BATTERY CHARGER
 AC CONVERTER / BATTERY CHARGER User s Manual MODEL #: CON120AC12/24VDC Listed to UL 458 and CSA 22.2 NO. 107.1 Standards Contents INTRODUCTION... 3 Important Safety Instructions... 3 1. General Description...
HPP1 MK6-15A/20A R00 Owners Manual
 J Wolmarans Page 1 2018/10/23 Page 1 of 7 TABLE OF CONTENTS Page 1 Introduction...2 2 Model...2 3 Safety warnings...2 4 Contents...2 5 Features...2 6 Installation...3 6.1 Mounting the unit:...3 6.2 Connecting
This file was converted to PDF format. If you are interested in a Microsoft PowerPoint formatted file send a request to:
 This file was converted to PDF format. If you are interested in a Microsoft PowerPoint formatted file send a request to: pm_eps@nmci.usmc.mil TABLE OF CONTENTS Published by the Program Manager, Expeditionary
INSTRUCTION MANUAL. 12-Station HD Shop 12V Portable Battery Charger
 INSTRUCTION MANUAL 12-Station HD Shop 12V Portable Battery Charger IMPORTANT SAFETY INSTRUCTIONS 1. SAVE THESE INSTRUCTIONS This manual contains important safety and operating instructions for your HD
3000W APS X Series 24VDC 230V Inverter/Charger with Pure Sine-Wave Output, Hardwired
 3000W APS X Series 24VDC 230V Inverter/Charger with Pure Sine-Wave Output, Hardwired MODEL NUMBER: APSX3024SW Highlights Delivers pure sine-wave 230V AC power from AC or DC source 3000W continuous output
PHOTO VOLTAIC CHARGE MODULE MULTI POINT TRACKING
 FEATURES Multi Point Tracking (MPT)/ Pulse Width Modulation (PWM) is a six stage solar charge controller. Drop-in PWM replacement for the PVCM-25D two stage solar charge controller. Works with the PVDM4-LC,
2400W APS INT Series 24VDC 230V Inverter/Charger with Auto-Transfer Switching, Hardwired
 2400W APS INT Series 24VDC 230V Inverter/Charger with Auto-Transfer Switching, Hardwired MODEL NUMBER: APSINT2424 Highlights Delivers clean 230V AC power from AC or DC power source 2400W continuous output
Installation and Operation Manual. Dual Battery Charging Solar Controller. for RVs, Caravans, and Boats. Ratings. Rated Solar Current 25 Amps
 SUNSAVER DUO TM Installation and Operation Manual. Dual Battery Charging Solar Controller for RVs, Caravans, and Boats.. Ratings Nominal Voltage 12 Volts Rated Solar Current 25 Amps 1098 Washington Crossing
HPP1 MK5 Owner s Manual
 J Wolmarans Page 1 2017/03/07 Page 1 of 10 TABLE OF CONTENTS Page 1 Introduction...2 2 Models...2 3 Safety warnings...3 4 Features...3 5 Contents...3 6 Installation...3 6.1 Mounting the unit:...3 6.2 Connecting
1250W APS X Series 12VDC 230V Inverter/Charger with Auto Transfer Switching, 2 C13 Outlets
 1250W APS X Series 12VDC 230V Inverter/Charger with Auto Transfer Switching, 2 C13 Outlets MODEL NUMBER: APSX1250 Highlights Delivers clean 230V AC power from AC or DC power source 1250W continuous output
MODEL NUMBER: APS2424
 Position a 300A fuse link less than 18 in. from the battery in the positive line to protect against highcurrent draw that may occur during inverter failure. 2400W PowerVerter APS 24VDC 120V Inverter/Charger
Battery Equalizer. Table of Contents Introduction. 2. Specifications.. 3. Theory of Operation Typical Applications... 5
 Owners Manual 9$ '11* XD :,U7G/ Battery Equalizer 6$H0U7L H0V8 Table of Contents Introduction. 2 Specifications.. 3 Theory of Operation... 4 Typical Applications...... 5 Installation Instructions.....
APOLLO Gate Operators, Inc.
 APOLLO Gate Operators, Inc. Model BA12 12 VOLT DC BARRIER ARM OPERATOR INSTALLATION MANUAL 0707 CONTENTS IMPORTANT SAFETY INSTRUCTIONS... 3 Applications... 4 Pre-Installation Checklist... 5 Operator Installation...
MODEL NUMBER: APS2448UL
 Position a 100A fuse link less than 18 in. from the battery in the positive line to protect against highcurrent draw that may occur during inverter failure. 2400W PowerVerter APS 48VDC 120V Inverter/Charger
StartSentry. UCS-80Kj and UCS-80KjC. Ultra Capacitor. Table of Contents
 StartSentry UCS-80Kj and UCS-80KjC Ultra Capacitor Table of Contents Introduction...2 General Description...2 Safety Precautions...3 Specifications...4 Mounting Requirements...5 Typical Transit Bus Wiring...5
AUTOMATIC BATTERY CHARGER
 AUTOMATIC BATTERY CHARGER SAMLEX AMERICA. MODELS SEC - 1215A SEC - 1230A SEC - 2415A OWNER S MANUAL Please read this manual before operating your charger CONTENTS IMPORTANT SAFETY PRECAUTIONS... 2 DESCRIPTION
AUTO CHARGE D2 MODEL #: AUTOMATIC TRIPLE OUTPUT BATTERY CHARGER INSTRUCTION MANUAL
 INSTRUCTION MANUAL AUTO CHARGE D2 AUTOMATIC TRIPLE OUTPUT BATTERY CHARGER Designed Specifically for Vehicles with DDEC ENGINES MODEL #: 091-74-12 INPUT: 120 Volt, 60 Hz, 8 Amps OUTPUT VEHICLE BATTERY 1
IQS300 Series Quasi-Sine Inverter. Installation & Operation Manual
 IQS300 Series Quasi-Sine Inverter Installation & Operation Manual INTRODUCTION State of the Art MOSFET technology coupled with unique Soft-Start circuitry guarantees reliable operation. The ON-OFF switch
DC TO AC POWER INVERTER PWRIC150012W INSTRUCTION MANUAL
 DC TO AC POWER INVERTER PWRIC150012W INSTRUCTION MANUAL SAVE THIS MANUAL You will need the manual for the safety warnings and precautions, assembly instructions, operating and maintenance procedures, parts
DC AC POWER INVERTER. LIV 10 / LIV 20 / LIV 30 User Manual
 DC AC POWER INVERTER LIV 10 / LIV 20 / LIV 30 User Manual Save This Manual Please read this manual carefully prior to storage, installation, wiring, operation and maintenance of the Power Inverter. This
MODEL NUMBER: APS3636VR
 Position a 300A fuse link less than 18 in. from the battery in the positive line to protect against highcurrent draw that may occur during inverter failure. 3600W PowerVerter APS 36VDC 120V Inverter/Charger
THE DLS SERIES BATTERY CHARGING POWER CONVERSION
 THE DLS SERIES IOTA s DLS Series Battery Chargers and Power Converters provide reliable AC/DC power conversion for a variety of application needs. With a record of proven performance throughout several
Special Specification 6058 Battery Back-Up System for Signal Cabinets
 Special Specification Battery Back-Up System for Signal Cabinets 1. DESCRIPTION 2. DEFINITIONS Install a Battery Back-Up System (BBU System) for traffic signals that will provide reliable emergency power
Operator Manual For use with WFCO ULTRA III Power Center Model WF-8712P and WF-8725P
 Operator Manual For use with WFCO ULTRA III Power Center Model WF-8712P and WF-8725P Distributed in the U.S.A. and Canada by Arterra Distribution Sales (574) 294-8997 Warranty Service (877) 294-8997 Fax
BZ Products Inc. U.S.A.
 BZ Products Inc. U.S.A. Model MPPT 150/50 Installation Instructions Thank you for choosing BZ Products MPPT 150/50. Made entirely in the USA, operation of this unit is fully automatic, and works in conjunction
WITH TRAKSTAR TM MPPT TECHNOLOGY. Installation and Operation Manual. Model: SS-MPPT-15L
 SUNSAVER MPPT TM WITH TRAKSTAR TM MPPT TECHNOLOGY Installation and Operation Manual MAXIMUM POWER POINT TRACKING Model: SS-MPPT-15L 1098 Washington Crossing Road Washington Crossing, PA 18977 USA www.morningstarcorp.com
AUTO CHARGE D PUMP PLUS
 INSTRUCTION MANUAL AUTO CHARGE D PUMP PLUS AUTOMATIC DUAL OUTPUT BATTERY CHARGER Designed Specifically for Vehicles with DDEC ENGINES MODEL #: 091-9-DPP INPUT: 120 Volt, 60 Hz, 8 Amps OUTPUT VEHICLE BATTERY:
600 Amp Battery Jumper with Air Compressor
 Item #2509 600 Amp Battery Jumper with Air Compressor User s manual- Read these instructions before using the unit Features Front LED Worklight Worklight Switch USB Power Ports and on/off Switch 12V DC
USER MANUAL FOR 2000 WATTS POWER INVERTER USER S MANUAL--Read before operating this equipment
 USER MANUAL FOR 2000 WATTS POWER INVERTER Your 2000 watts power inverter converts 12-volt vehicle battery power into 230 volts of AC power. You can use the inverter in your vehicle to operate many types
CMD-4000 SERIES REV. A 4+ FUNCTION REMOTE CONTROL DOOR LATCH OPENER SYSTEM INTRODUCTION
 CMD-4000 SERIES REV. A 4+ FUNCTION REMOTE CONTROL DOOR LATCH OPENER SYSTEM INTRODUCTION Thank you for purchasing the CMD-4000 series Remote Control Door Latch Opener System from Dakota Digital, Inc. This,
PROwatt 150 DC to AC Power Inverter. Owner s Guide
 PROwatt 150 DC to AC Power Inverter Owner s Guide About Xantrex Xantrex Technology Inc. is a world-leading supplier of advanced power electronics and controls with products from 50 watts mobile units to
750W PowerVerter RV Inverter/Charger with Hardwire Input/Output
 750W PowerVerter RV Inverter/Charger with Hardwire Input/Output MODEL NUMBER: RV750ULHW Highlights 12V DC or 120V AC input; 120V AC output (hardwired) 750 watts continuous, 1125 watts OverPower and 1500
Manual Installation & Operation
 Manual Installation & Operation Model: NCxxLxx 12A or 30A Solid State Solar Charging Regulator and 12A Load Controller. 231 Patent #: 5,642,030 Applies Page 1 Warnings When Installing, connect grounds,
The Traveler Series: Wanderer
 The Traveler Series: Wanderer RENOGY 30A PWM Charge Controller Manual 2775 E. Philadelphia St., Ontario, CA 91761 1-800-330-8678 1 Version: 2.3 Important Safety Instructions Please save these instructions.
INSTRUCTION MANUAL CAUTION
 FILE: IM_091-128-12E-40-115 Rev B., 2-16-2006 INSTRUCTION MANUAL AUTO CHARGE ODY q AUTOMATIC BATTERY CHARGER MODEL #091-128-12E-40-115 for ODYSSEY AGM BATTERIES CAUTION This charger is calibrated to the
This document describes:
 Thank you for purchasing this product from ERM. We appreciate your interest in our unique product line as we try to offer our customers an alternative to today s traditional products. This programmable
Intelligent Charging System Series
 R Intelligent Charging System Series OWNER S MANUAL ON BOARD BATTERY CHARGERS Models Amperage No. Of Banks Volts 16061 s 1 Bank 12 16102 6,s 2 Banks 12 or 24 16153 6,6,s 3 Banks 12 or 24 or 36 16202 10,10
J1939 POWERCELL Setup and Configuration Guide Universal Switch Interface
 Table of Contents J1939 POWERCELL Setup and Configuration Guide Universal Switch Interface Overview... 2 Warnings... 3 J1939 POWERCELL Technical Details... 4 POWERCELL Installation Steps... 5 Mounting
Installation Instructions & Users Manual
 Installation Instructions & Users Manual UTILITY/ BUILDING INPUT 120 VAC ( OPTION) 15-20A N L CONTROL BOARD G SECURITY LIGHTING POWER SUPPLY (OPTION) CHARGER- POWER SUPPLY ASSBY XFMR (OPTION) CBM MODEL
Operating Instructions for Your Cobra 300 Watt POWER INVERTER M ODEL CPI 300. Nothing comes close to a Cobra
 Operating Instructions for Your Cobra 300 Watt POWER INVERTER M ODEL CPI 300 Nothing comes close to a Cobra 00 300 Watt POWER INVERTER MODEL CPI 300 Congratulations Thank you for purchasing the CPI 300
Cruising Charger Series OWNER S MANUAL
 R Cruising Charger Series OWNER S MANUAL ON BOARD BATTERY CHARGERS Models DC Amperage No. Of Banks Volts 2614A 5,10 Amps 2 Bank 12/12 2614A-230 2621A 5,5,10 Amps 3 Banks 12/12/12 2621A-230 2622A 10,10