Installation 40/90 Instructions
|
|
|
- Milo Matthews
- 5 years ago
- Views:
Transcription

")

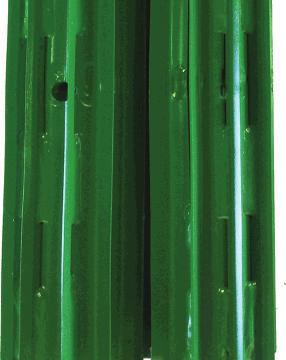
1 (309) Trash Reduction/Decomposition Kit Installation 40/90 Instructions r Thank you fo purchasing n Calmer Cor Head duce products to re s lem residue prob. at your farm Calmer Corn Heads Weekday 8-5pm-Office (309) After Hours/Weekends-Marion s cell (309) Patent # 7,886,510, 8,171,708, 8,220,237, 8,464,505 and Patent Pending Components


")
 Hydraulic Left")

 48")
 6 Tooth Drive")
 Manual Left")


 Chopper")

2 The Complete Calmer Trash Reduction and Decomposition Kit Includes per row; A B C D E E A B C D E E F F F F G G G G Hydraulic Kit Manual Kit Your reference for Right and Left is as you are sitting in the combine looking at the corn head or A-(1) Left Calmer BT Chopper B-(1) Right Calmer BT Chopper C-(1) Hydraulic Left Stripper Plate D-(1) Manual Right Stripper Plate E-(2) 9 Tooth Idler Sprockets F-(2) 48 Standard Gathering Chains G-(2) 6 Tooth Drive Sprockets A-(1) Left Calmer BT Chopper B-(1) Right Calmer BT Chopper C-(1) Manual Left Stripper Plate D-(1) Manual Right Stripper Plate E-(2) 9 Tooth Idler Sprockets F-(2) 48 Pitch Gathering Chains G-(2) 6 Tooth Drive Sprockets J J Lower Idler Spring Washer K K- Hex Bit Socket I H- Weed Knives L L- (4) Hex Bolts M M- (2) Chopper Continuous Roll Pins I- Anti-Hariball Insert
3 Table of Contents Page Disassembly 3-4 Pinion Timing 4 Step 1 - Installing CALMER BT CHOPPER 5-6 and Weed Knives Only Tighten to 85 ft-lbs Step 2 - Installing Stripper Plates / Adjustments 7 Step 3 - Installing Anti-Hairball Insert 8 Step 3 - Installing 6 Tooth Drive and 9 Tooth Idlers 9-10 Helpful Corn Head Adjustments Oil Bath Settings 14 Calmer Plastic Paddles for Down Corn 15 2 (309)


4 Disassembly 1. Remove the corn head dividers and hoods. Attach the corn head to your combine in accordance with the instructions in the manufacturer s owner manual and lock the lift cylinders in the raised position. Lock cylinder securely in place. 2. Clean gathering chain tightener area with compressed air. Lubricate the John Deere 8 tooth gatherer chain drive sprocket shafts and gathering chain tightener threads with a penetrating type lubricant. 3. Release gathering chain tension. Turn Nut A until it is against the leg of the idler supportstrap. Remove gathering chain and idler 4. Remove the snap ring from the 8-tooth gathering chain drive sprocket shaft. 5. Remove the Factory gathering chain drive sprocket. If the sprocket is rusted to the shaft apply heat to the upper portion of the hub. 6. Remove idler blocks 7. Remove chain guards Idler Bracket support leg ^ ^ Nut A 8. Remove stripper plates 9. Remove weed knives 10. Remove stalk rolls Figure1.d. a. Tapered & Straight fl uted Stalk Rolls - Consult your JD dealer for use of special hydraulic puller. b) Pixall Removal Pixalls have a threaded doughnut inside of the nose cone. By using a fi ne thread bolt (1 x9 ) this will create its own self- pulling system when screwed into the nose cone. c) JD Knife Rolls Shells unbolt from stub shaft and remove stub shaft. (309)


5 For easy removal of roll pin, use an air hammer chisel with a roll pin punch. 11. Clean rust from Pinion Shafts and Lubricate. Check for leaks and replace seals. 12. Inspect gathering chain drive shaft and bushing for wear. 13. Check seals on Gathering Shafts and Pinions for leakage replace as necessary. Check Pinion Timing Before beginning assembly steps, check the timing by making sure the pinions are exactly 90 degrees from each other.(place bolts in each roll pin hole to see more clearly) CORRECT NOT CORRECT If the timing is not correct; loosen housing bolts and lift barrell 1/2. Rotate one shaft 180 degrees for proper timing. To Correct The Problem; -leave the gear box on the corn head -remove the stalk rolls -clean around the stalk roll housing -remove stalk roll housing bolts, and frame mounting bolts -raise the stalk roll housing high enough to rotate the pinion 180 degrees then set back down -install bolts, check for exact roll pins placement at 90 degrees -re-install stalk rolls, and check for correct intermesh Then clamp knife roll rear donut onto gearbox shaft with the allen head bolts (2 per knife roll), using the Hexbit socket provided. 4 Continuous Roll Pin (309)

 3.")


6 Step 1 - Install CALMER BT CHOPPER Rolls are marked on the spiral Left and Right Your reference for Right and Left is as you are sitting in the combine looking at the corn head. Install as a set - As packaged from Calmers. CAUTION: Bt Choppers are extremely sharp, make sure you are wearing the enclosed gloves during installation, and handle with extreme care. 1. Apply any anti-seize substance on the front 3 of the shaft. This will make removal of knife rolls easier in the future when checking seals on gearboxes. 2. Slide Calmer BT Choppers onto gearbox shaft. (See Figure 1, pg 6) 3. Install the provided continuous roll pins into knife roll allowing for equal recession on each side, securing knife roll to gearbox shaft. 4. Insert socket head bolts into each countersunk hole. NOTE-Hand start the bolts on the countersink side of the Stalk Roll. Start both bolts at the same time (front and back) ONLY Torque to 85 ft-lbs. (7/16 bolt) we recommend medium grade lock tight (blue) on the bolts (See Figure 1, pg 6) 5. After installation, if your stalk roll fl utes contact each other, and do not intermesh correctly, then the gearbox has probably been re-worked. The pinions are not correctly timed. The roll pin holes in the pinions need to be exactly 90 degrees from each other (Not almost 90 degrees, see pg 4). The pinions have an odd number of teeth on them, and are most likely 180 degrees out. To correct the problem see page 4. (309)

7 DANGER: Never make any adjustments on the corn head when the equipment is in operation. Be sure corn head is securely blocked, combine is turned off, and parking brake is engaged before attempting any adjustments. Stripper Plate Clearance 6. Check the clearance between the Calmer BT Chopper and the Calmer beveled stripper plate. Shim the row unit if there is no clearance. CALMER WEED KNIVES. ATTENTION! To prevent possible damage to knife rolls; 7. CALMER Weed Knives Need to be Set to a 1/4 gap. (See Figure 2 below) NOTE-If using JD Weed Knives, only JD straight weed knives can be used, and may need modifi cation. Maintain 1/4 gap between the knife weed knife. This is measured from the tip of longest blade to the rear edge. -Repeat above steps to attach the remaining knife rolls Anti-Seize Figure 1 CALMER Weed Knives Need to be Set with a 1/4 gap. Figure 2 6 (309)

8 Step 2 - Install Stripper Plates / Adjustments 1. In 2003 we did side-by side testing on stripper plate gap settings in Illinois. Hard Surfaced Beveled edge Manual Adjust Hydraulic Adjust Testing Period - October 5 through October 18. Hybrid - Pioneer 33P67 Yield Range bushel/acre Moisture % Time of Day - 1:00-4:00 # of Kill Stops - 13 Data on header loss and trash intake were both recorded and evaluated simultaniously. The following is my recommendation for stripper gap adjustment. Adjustment: Starting Recommendation 1. Manual Plates For 200 Bushel/acre corn Down Corn open wider 1 1/4 at bottom - 1 3/8 at top Large Ears = bushels/acre corn. 1 3/16 at bottom, 1 1/4 top Medium Sized Ears = bushels/acre corn. 1 1/8 at bottom, 1 3/16 top bushels/acre corn. 1 at bottom, 1 1/16 top Small Ears/Seed Corn = 0-90 bushels/acre corn.7/8 at bottom, 15/16 top 2. Hydraulic Plates- There has been some improper adjustments in this area in the past, so I want to give you my thoughts on what I think is proper adjustment for hydraulic plates. a. First fi nd center of the row (fi ll plug and center of the open windows of the stalk rolls). The center of the stripping tunnel should be directly above the center of the stock rolls. If the stripping tunnel is not centered over the stalk rolls we are shifting the corn stalk to one side, and my data indicates that trash intake scores will go up. b. Move hydraulic plate to the closed position. c. Now move hydraulic plate open until it is 1/2 the desired gap from the center line of the row, d. Next move the manual plate in until the desire gap is achieved- make sure the gap is 1/8 narrower at the front. e. Once the stripper plates are at the desired gap, then mark indicator on frame for future reference. This is the ideal spot for 200 bushel corn. 7


9 Hairball At The Ski Jump- This is a term that I use to describe the mass of corn stalks that gathers and hair pins at the top of the stripping tunnel on a damp morning or rainy day. PROBLEM Gaps at the end of the stripping tunnel SOLUTION In wet conditions debris (hair ball) is caught INSTRUCTIONS Anti-hairball insert Manual Plates 1-Disconnect Battery! Weld enclosed anti-hairball insert, to top plate of Gearbox and fi ll in any gap 1 Hydraulic Plates Tac weld both manual plates to 2-Tac weld ONLY manual plate to anti-hairball insert anti-hairball insert. Hydraulic plate 3-Grind insert fl ush with deck plate must be able to move 3-Grind insert fl ush with deck plate 8 (309)


 It is necessary to make sure you have, or that you get the greasable collar (JD part")
10 Step 3 - Install Calmer 6 Tooth Drive Sprocket, 9 Tooth Idler, and Gathering Chain Assembly 1. Remove gathering chain guides during installation. A. On the fi rst and last rows only, after careful angle iron removal, move in 1/2 inch and reweld for hood supports. B. 40 series only- Remove angle iron (see picture 1 in gathering chain drive sprocket area. 2. Inspect chain guides for chain wear. (You can use a Mig Welder to fi ll the valleys) A. Inspect Idler Blocks for chain wear. 1. Idler blocks- the wear tracks in an Idler block can be fi lled in with a mig welder and ground smooth if you wish to rebuild them 1 remove O ring Lock Washer Install bolt, then O ring, then 9 tooth idler, then collar, and then the nut. NOTE: The Calmer idlers are greasable- Lube once a day or every 10 hours! (just 1 or 2 pumps) It is necessary to make sure you have, or that you get the greasable collar (JD part #AH204016), the O ring (JD part #R375R), and a longer bolt (JD part #10H1082). (See picture at left to see parts needed) Do not over grease and force O ring to break. (309)


.")


11 Gathering Chain Tighteners- Gathering Chain Tighteners occasionally lock up. This is caused when the spring vibrates and augers itself into the hole between the bolt and the fl at strap. This can be fi xed by adding a second washer (enclosed) at the bottom of the pipe spacer identical to the washer that is currently at the top of the pipe spacer. Apply Never Seize or lubricate the bolt threads for future adjustment. Remove Idler Bolt & add lower pipe spacer washer as shown in the below photo. This will eliminate Idler lock up. Gathering Chain Tightener 3. Newer 90 Series corn heads with hydraulic plates (1997 and up). Remove lower snap rings to achieve required height. Make sure this does not make the chain run too high on the chain guard. Pictures #1 and #2 show the addition of a washer to shim up the chain guard to keep it from pushing the chain down. 4. Oil the gathering chain drive shaft. Install enclosed washer here leaving about 2 spring wire widths Low Idler Spring Washer / chain tightener washer 5. Place the gathering chain around the idler sprocket. 6. Insert the 6-tooth sprocket in the chain at the drive end. picture #3 Some farmers get concerned that the tighter wrap on the 6-Tooth sprocket might cause excessive wear on the top end of the chain guard. Calmer s response to this is that there might be some initial wear, but the rollers on the gathering chain will eventually run on the chain guard, and keep it from wearing any more. Calmer s use to run 5-Tooth at the top, and haven t had any trouble with excessive wear. 10 (309)
12 7. Lug Timing: For Standing Corn- time the gathering chain lugs so the lugs are staggered. For Down Corn- With 9-tooth idlers, time the lugs so they are almost horizontally opposed from each other. Adding plastic paddles will also help in harvesting down corn. See page Replace the top snap ring on the shaft. Ensure the snap ring is properly seated on the hex shaft. 9. Reinstall gathering chain guides (Adjust the top of the gathering Chain guides as far away from the center of the row unit as possible.) 10. Tighten the gatherer chain tightener until there is 3/16 clearance between pipe spacer and washer. Re-lube threads with grease for future adjustment. 11. Using reverser, operate corn head slowly then start and run at slow speeds...gradually increase speed up to full speed. Helpful Corn Head Adjustments & Modifications Sieve Adjustments for Corn- I personally dis-agree with the Owner s manual suggested settings. Bottom Shoe Sieve = Wide Open! Please try this 1 round Top Chaffer Sieve = Close until grain tank cleans Reason- In corn there is no part of the corn kernel that needs to be rethreshed! There is also no part of the corn cob that should fall below the top sieve. In soybeans there are unthreshed pods that need to return for a second pass through the threshing unit, and that is the only time that the bottom sieve should be tighter than the top sieve. Results- 1. More Capacity. 2. More Air to Top Sieve. 3. Less Seperator Loss. 4. Less Cracks in Dry Corn. 5. Less Grinding in Wet Corn 6. Less Plugging of Return Elevator in Wet Corn. (309)


13 Helpful Corn Head Adjustments & Modifications Corn Head Angle should be between 23 and 25 degrees for optimum performance in both standing and lodged corn. Put the combine on a level surface then lower the corn head until the row unit frame is 2-inches off the ground. Place a magnetic protractor on the stripper plate and read the angle. If the angle is too steep, pull the top of the corn head toward the combine or push the bottom out or a combination of both. Protractor Equivalent Gathering Chain Speed to Match Ground Speed- To calibrate RPM s, attach the included orange paddle to a lug on a center gathering chain. Raise corn head, put combine in park, engage threshing motor to full speed. Count revolutions for 1 minute. Adjust variable speed accordingly. 27 RPM s = 2 MPH 40 RPM s = 3 MPH 54 RPM s = 4 MPH 67 RPM s = 5 MPH Problem/Solutions; Problem-Stalks are wrapping. Solution-Install anti-hairball inserts Problem-Driving over corn stalks in twin rows, popcorn, or extremely dry conditions. Solution-A. Put on Calmer stock rolls with revolving windows and recheck gathering chain speed. B. Recheck oil bath settings and feeder house jack shaft speeds. If this is not successful, increase gathering chain speed by removing the 6 tooth driver and 9 tooth idler and replacing with the factory 12 (309)

 Cross auger height adjustment 1 3/4 between flighting and tray Reducing Ear Toss- 1.")


14 Cross Auger Flighting- Cross auger should be vertically adjusted to have 1 ¾ clearance between auger fl ighting and tray at the tightest point. This signifi cantly reduces ear slicing which is a cause of cracked kernels in the grain tank. (You may need to increase the length of the slots in the end plate bearing hanger to allow for this adjustment. When you turn on end rows there should be a layer of ears between fl ighting and tray) Cross auger height adjustment 1 3/4 between flighting and tray Reducing Ear Toss- 1. Cross auger should be horizontally adjusted rearward as close to the feeder house chain and rear stripper as possible. This will improve the transfer of material from cross auger to the feeder house chain, thus reducing ear toss. 2. Adding Half Links to lengthen the feeder house chain will move it closer to the auger. 3. We suggest staying on the (fast setting) big sprocket for feeder chain speed when harvesting corn to decrease ear toss. It is located on the lower right-hand side of the feederhouse. 4. Feeder house ear tossing may increase due to the lack of trash intake Series Only - Using a 64-tooth sprocket on the cross auger instead of the factory 54-tooth will slow the auger down and help reduce ear toss. (JD Part # AH145940) This is for 40 series and some older 90 series corn heads. This sprocket uses a #50 roller chain. The new 90 series corn head cross augers come from the factory already slowed down with a 52-tooth sprocket that uses #60 roller chain. Use Reverse Flighting on 30 Foot Split Cross Augers Some older 12-row, 30-inch corn heads used rubber fl aps and no fl ighting. The performance of that auger was poor. Other John Deere split cross augers had no reverse fl ighting near the bearing hanger. The short section of reverse fl ighting can be purchased from John Deere (right hand part #H206301, left hand part #H206302) and welded on see photo left. (309)
, and the little sprocket on the front (driven).")
15 We DO NOT recommend using any rubber paddles. I would recommend that you fi ll any holes in the tray and grind them fl ush. This will stop loss of kernels and kernel damage. Oil Bath Settings- The corn head should have the oil bath in overdrive, the big sprocket on the back (driver), and the little sprocket on the front (driven). Corn Head Gear Ratios; Standing Corn: RPM on variable speed. As stated before, we suggest staying on the (fast setting) sprocket for feeder chain speed when harvesting 1-Must have heavy duty reverser (8 row or above you know because it has a fi nned aluminum cooler (recommended by John Deere)). 2-Only use full synthetic oil in the reverser. 3-There are 2 grease fi ttings on the reverser. These need to be placed at the 12 o clock and 2 o clock positions. Put 12 pumps of grease in the 12 o clock and only 2 pumps of grease in the 2 o clock. Never over grease!!! 4-Once you start up the machine (at idle) you need to run variable speed up and down (2x) to lubricate prior to Harvest. Down Corn: RPM on variable. Case combine Non variable Speed 40/90 Corn Head Gear Ratios; Driver; 22 Driven Driver; 25 Driven Driver ; 22 Driven Driver; 25 Driven Driver; 18 Driven Driver; 18 Driven 14 (309)


16 Adjusting Slip Clutch Adjustment According To JD Owner Manual- Slip clutches protect the corn head drives. Each row unit drive and auger drive have a slip clutch. All slip clutches are properly adjusted at the factory. The only time slip clutches will require adjusting is when they are disassembled for service. The length of the row unit slip clutch spring (A), when correctly adjusted, must be 68 mm (2-11/16-in.). The auger drive slip clutch is non-adjustable. IMPORTANT: Do not tighten nuts to the point where the clutch will not slip. Compress the two jam nuts to compress the spring washer. Torque to 75 N-m (55lb-ft) Grease thrust washer but do not grease clutch facings. A Gear Box Lube- Check gear case lubricant level at inspection plugs. Lubricant must be approximately 38 mm (1 ½ ) from the top of the inspection hole. Fill to approximate level using grease fi tting on bottom of gear case with John Deere corn head grease. Do not over-fi ll, Air is needed for heat expansion. (Use type 0 [zero] extreme pressure lubricant). NOTE-Green corn head on red combine-34 on the back (Drive), and 22 on the front (driven) (309)
.")


17 Calmer Corn Head Plastic Paddles For Down Corn Follow the instructions for assembly of plastic gathering chain paddles and attach to every other lug on each gathering chain. (one orange paddle is used on the row left of the feeder house in front on the buddy seat for calibrating corn head speeds). 1- Place paddles on an open vise. The paddle on the left goes on the left gathering chain and the paddle on the right, the right gathering chain. See picture 1 2- Install and hammer two round headed carriage bolts into 1 each paddle, making sure that bolt shoulders are seated in paddles. Repeat for remaining paddles and bolts. Be careful not to damage threads. See picture 1 3- Suspend a pipe between 2 ladders and hang chains over pipe as shown in photo at lower right hand corner. This can be helpful when installing paddles to chain. 4- Install left-hand paddles on every other lug of the left Gathering chain. Secure with two lock nuts and tighten until car- 2 riage head depresses in plastic paddle. We use a standard 6 point 7/16, 3/8 drive socket with a 3 extension to install and tighten nuts. Installing the nut next to the chain fi rst, will speed alignment and assembly. See picture 2 3- Install right-hand paddles on every other lug of the right gathering chain. Secure with two lock nuts and tighten until 3 carriage head depresses in plastic paddle. We use a standard 6 point 7/16, 3/8 drive socket with a 3 extension to install and tighten nuts. Installing the nut next to the chain fi rst, will speed alignment and assembly. See picture 3 16 (309)
18 Maintenance Record (309)
19 Maintenance Record 18 (309)

20 Calmer Corn Heads P.O. Box 9 Alpha, IL (309) fax (309) Patent/ Patent Pending. Any replications of this concept or its instruction manual are strictly prohibited without the expressed written consent of Calmer Corn Heads, Inc. Calmer Corn Heads Trash Reduction/Decomposition Kit Warranty- Except as specifi ed below, the Calmer Corn Head one (1) year from date of purchase warranty covers all defects in material and workmanship. The following are not covered: damage caused by accident, misuse, abuse, product modifi cation or neglect; damage from failure to follow instructions contained in the instruction manual; damage resulting from the performance of repairs by someone not authorized by Calmer Corn Heads; damage caused by installation of parts that do not conform to Calmer Corn Head specifi cations; components not used for their intended purpose; any claims based on misrepresentations by the seller; products sold on an as-is or fi nal sale basis; or the cost of installing, removing, or reinstalling the unit. Calmer Corn Heads liability is limited to the repair or replacement, at our option, of any defective product and shall not include incidental or consequential damages. Calmer Corn Heads reserves the right to replace a discontinued model with a comparable model. Any replacement units or parts may be new or rebuilt. TO OBTAIN WARRANTY SERVICE Please call printed September 30th, 2014
 Farmer Invented. Farmer Tested. Farmer Proven. Calmer BT Chopper/Residue Management Upgrade Kit Installation Manual Case-IH* 2200 & 2400 Series and NH* 96c, 98c, and 996 Series Corn Heads Thank you for
C/M Replacement Poly Row Dividers For JD 90 Series 30 inch Cornheads 30 Inch Center Dividers Only NEW AND IMPROVED POLY SNOUT
 To Order Call: 1-800-658-4568 11 C/M Replacement Poly Row Dividers For JD 90 Series 30 inch Cornheads 30 Inch Center Dividers Only NEW AND IMPROVED POLY SNOUT EXACT REPLACEMENT FOR 30 INCH CENTER DIVIDER
CALIFORNIA TRIMMER MOWER MAINTENANCE MANUAL
 CALIFORNIA TRIMMER MOWER MAINTENANCE MANUAL 2 Table of Contents Section 1: General Information Page Handle Assembly Instructions 4 Maintenance All Models 6 Oil Change Procedures All Models 9 Height Adjustment
INSTALLATION GUIDE Bolt-On Drag-Race Strut Clip Chevy II
 INSTALLATION GUIDE 7702 Bolt-On Drag-Race Strut Clip 1962-67 Chevy II Description: STRUT CLIP 4130 BOLT ON 62-67 CHEVY II, INCLUDES 4130 ROUND TUBE FRAME CLIP, DOUBLE-ADJUSTABLE STRUTS, ADJUSTABLE-HEIGHT
60 Series Combines By
 Sloan Implement Combine Quick Guide 60 Series Combines By Call Center help line # 217-693-6209 Table of Contents 1. Cover 2. Table of Contents 3. Hydro Handle 4. Armrest Button I.D. 17. Header Calibration
S-Series Combine and Front End Equipment Optimization
 S-Series Combine and Front End Equipment Optimization Ready To Harvest for Wheat John Deere Harvester Works Contents Preface.2 Combine/FEE Bundle Recommendations. 3/4 Draper Inspection and adjustments.
Part Name/Description Part No
 Parts List for Combine Note: Indented items indicate parts included in an assembly listed above Quantity by Model Part Name/Description Part No. 4425 4435 Instruction Kit JD 4425-4435 2005100-2 1 1 Moisture
Instruction Kit Gleaner K2, K3, F2, F Flow Sensor K2-F
 Parts List for Combine NOTE: Indented items indicate parts included In an assembly listed above. Quantity by Model Part Name/Description Part No. K2 F2 Instruction Kit 2005300-1 1 1 Flow Sensor K2-F2 2000292
S-Series Combine and Front End Equipment Optimization
 S-Series Combine and Front End Equipment Optimization Ready To Harvest for Canola John Deere Harvester Works 0 Contents Preface..2 S-Series Combine Field Installed Bundles.... 3 Header Field installed
PFadvantage MF 6850/6855; Ideal 9080/9090
 MF 6850/6855; Ideal 9080/9090 Note: Indented items indicate parts included in an Quantity by Model assembly listed above MF Ideal Part Name/Description Part Number 6850 6855 9080 9090 Instruction Kit MF
Flow Sensor Deflector Deflector
 Parts List of Combine Kit Note: Indented items indicate parts included Quantity by Model in an assembly listed above Early Models* 9 9 9 4 5 6 0 0 0 Part Name/Description Part No. 0 0 0 Instruction Kit
Fertilizer Feed Shaft Speed. Fertilizer Drive Settings. Cleaning Fertilizer Box
 69 Fertilizer Feed Shaft Speed Speed is determined by sprocket combinations. There are three (3) different speeds available in the fertilizer gear box along with six (6) speeds on the drive ends of the
2014 Axial Combine Settings Guide
 2014 Axial Combine Settings Guide 1 DROPPING WINDROW SPREADING DISCHARGE DROPPING WINDROW SPREADING DISCHARGE DROPPING WINDROW SPREADING DISCHARGE Header Size DROPPING WINDROW SPREADING DISCHARGE DROPPING
DRIVE AXLE Volvo 960 DESCRIPTION & OPERATION AXLE IDENTIFICATION DRIVE AXLES Volvo Differentials & Axle Shafts
 DRIVE AXLE 1994 Volvo 960 1994 DRIVE AXLES Volvo Differentials & Axle Shafts 960 DESCRIPTION & OPERATION All 960 station wagon models use type 1041 rear axle assembly. All 960 4-door models use type 1045
TABLE OF CONTENTS DESCRIPTION. Safety Instructions & Safety Sign Locations Operating Instructions Assembly Instructions...
 TABLE OF CONTENTS DESCRIPTION PAGE Warranty... 1 Safety Instructions & Safety Sign Locations... 2 Operating Instructions... 3 Assembly Instructions... 5 500 & 600 Snowblower Drawings... 8 500 & 600 Snowblower
PFadvantage JD 3300/4400/6600/7700; 4420
 Ag Leader Technology Combine Installation JD 33//66/77; 2 Note: Indented items indicate parts included Quantity by Model in an assembly listed above Early Late Part Name/Description Part Number 3 3 6 6
Ag Leader Technology. Parts List for Combine MF , 8780, White 9700
 Parts List for Combine Quantity by Model Note: Indented items indicate parts included W in an assembly listed above 8 8 8 8 H 5 5 5 7 I 6 7 9 8 T Part Name/Description Part No. 0 0 0 0 E Instruction Kit
LoMax 205 CASE & 3:1 GEAR SET. Manufactured by JB CONVERSIONS, INC. Phone: Installation Instructions for the GM NP205 Transfer Case
 LoMax 205 CASE & 3:1 GEAR SET Part No. 2800 Instruction Rev: 2007.08.16 Manufactured by JB CONVERSIONS, INC. Phone: Installation Instructions for the GM NP205 Transfer Case Kit Components: 1. (1) 42x25
Lankota, INC. LAN AR100. Adapts Older Model Row Crop Heads To Newer 50 & 60 Series Combines. Installation Instructions
 Lankota, INC. LAN AR100 Adapts Older Model Row Crop Heads To Newer 50 & 60 Series Combines Installation Instructions Kit LAN-AR100 Lankota is the trademark of Lankota, Inc. 1 LAN AR100 Parts break down
WARRANTY REGISTRATION AND POLICY
 WARRANTY REGISTRATION AND POLICY Buhler Manufacturing products are warranted for a period of twelve (12) months from original date of purchase, by original purchaser, to be free from defects in material
Sync-Row for MONOSEM Twin-Row. Setting the Twin-Row Stagger INSURE THESE VALUES ARE CORRECT FOR YOUR TWIN ROW PLANTER
 Sync-Row for MONOSEM Twin-Row TIMING CHART 30" ROW SPACING Chart for Adjustable Metering Sprocket INSURE THESE VALUES ARE CORRECT FOR YOUR TWIN ROW PLANTER Crop Corn Number of Seed Disk Cells (holes) 18
$1.00 FOR THE TQIO/RCIO
 $1.00 FOR THE TQIO/RCIO m mm HDBBYSHOP Champion Jay Halsey has an impressive track record. One of Jay's advantages is a whisper smooth tranny thanks to his dad, Jim. Now you can build a Halsey transmission!
Twin Master Combine. Threshing Cylinder Section 1. Threshing Cylinder ( ) Threshing Cylinder (2009 Present)...
 Threshing Cylinder (2009 Present)...") Threshing Cylinder Section 1 Threshing Cylinder (2006 2008)... 2-8 Threshing Cylinder (2009 Present)... 9-15 Return to this page by clicking the upper right corner of any page in this section. Revised
Threshing Cylinder Section 1 Threshing Cylinder (2006 2008)... 2-8 Threshing Cylinder (2009 Present)... 9-15 Return to this page by clicking the upper right corner of any page in this section. Revised
Transmission Overhaul Procedures-Bench Service
 How to Assemble the Lower Reverse Idler Gear Assembly Special Instructions In 1996 Eaton changed the reverse idler system design. In the nut design, the reverse idler bearing was lubricated through a hole
HORSTMAN GREASED LIGHTNING CLUTCH
 HORSTMAN GREASED LIGHTNING CLUTCH Horstman s Greased Lightning (GL) clutch is designed for ultra high performance, and requires expert setup and a serious commitment to maintenance. Warning!!! 1. Clutch
A1062 & A1072 AUGER ASSEMBLY MANUAL. Read & understand all instructions pertaining to this auger prior to use!
 A1062 & A1072 AUGER ASSEMBLY MANUAL Read & understand all instructions pertaining to this auger prior to use! Safety Alert Watch for this ALERT Symbol. It identifies potential hazards to Personal SAFETY
Lexion 570R/575R, 580R/585R, 590R/595R
 Note: Indented items indicate parts included in an assembly listed above Quantity by Model 2006+ All Years Part Name/Description Part Number 570R 575R 580R 585R Instruction Kit Lexion 570/580/590 2005500-5
Lower Adjuster Small Black Header Sensor Reversed
 Parts List for Combine Quantity by Model Early Late Early Late Note: Indented items indicate parts included M M M M M M in an assembly listed above F F F F F F 7 7 8 8 8 8 5 6 5 5 6 6 Part Name/Description
Service Manual. Bolens 683 Series Box Frame Tractor IMPORTANT: READ SAFETY RULES AND INSTRUCTIONS CAREFULLY
 Service Manual Bolens 683 Series Box Frame Tractor IMPORTANT: READ SAFETY RULES AND INSTRUCTIONS CAREFULLY This Service Manual is not a substitute for the Operator s Manual. You must read, understand and
VW & Audi TDI CR140 ECO KIT Installation Guide
 VW & Audi TDI CR140 ECO KIT Installation Guide This guide is to help you install your new Rawtek DPF, EGR & Adblue Delete Exhaust ECO Kit on your (2009-2014) VW / Audi with 2.0l CR140 Diesel Engine. Note:
Crestline Dampening System. Installation Instructions. A.B. Dick 350, 360, 375 Single & Dual Lever Machines. X /01 Rev-A
 Crestline Dampening System Installation Instructions A.B. Dick 350, 360, 375 Single & Dual Lever Machines X88-20 01/01 Rev-A GENERAL INFORMATION ATTENTION CRESTLINE DAMPENER OWNER! Accel Graphic Systems
FLAGSHIP combines. flagship combines. track kits
 FLAGSHIP combines 7010 / 8010 / 7120 / 8120 / 9120 series track kits TRACK KITS Application: 7010-9120 Axial-Flow Combines Product Features & Comparisons to Competition Up to 20 mph travel speeds lower
Two-Stage Snow Blower For 4WD Pick Up Trucks. Operator s Manual
 Two-Stage Snow Blower For 4WD Pick Up Trucks Operator s Manual Distrubuted by: Metal Fabricating LLC P.O. Box 831 Brodheadsville, PA 18322 Phone: 570-992-9989 SnowVac.com WARRANTY POLICY Metal Fabricating
Part Name/Description Part Number Quantity Instruction Kit Metalfor Flow Sensor
 NOTE: Indented items indicate parts included in an assembly listed above Part Name/Description Part Number Quantity Instruction Kit Metalfor 4101091 1 Flow Sensor 4001356 1 Deflector plate 2000612-1 1
*These high quality chains have solid rollers and solid pins.
 Cornhead Parts *These high quality chains have solid rollers and solid pins. Agco-Gleaner & Challenger Cornhead Parts ADA100 ADA400 ADA500 Gathering chain, fits 2A, 3E, C240, older heads 62A-53-C7-8. Replaces
GROUNDSMASTER. 52 Recycler. for 120 Traction Unit. Model No & UP. Operator s Manual
 FORM NO. 8-980 Rev A GROUNDSMASTER 5 Recycler for 0 Traction Unit Model No. 077 79000 & UP Operator s Manual IMPORTANT: Read this manual carefully. It contains information about your safety and the safety
Fertilizer Feed Shaft Speed. Fertilizer Drive Settings. Cleaning Fertilizer Box
 Fertilizer Feed Shaft Speed Speed is determined by sprocket combinations. There are three (3) different speeds available in the fertilizer gear box along with six (6) speeds on the drive ends of the drill.
Custom Corn Heads. Jan
 1 Custom Corn Heads Phone: 800-658-4568 605-772-4164 Fax: 605-772-4132 Website: www.clarkemachine.com E Mail-dave@clarkemachine.com PO Box 694 23303 435th Ave. Howard SD 57349 2017 Jan 2 Statement of Policies
Main Frame (1,676 MM (5-1/2 FT.) Hay Pickup)
 Hay Pickup)") Main Frame (,676 MM (5-/2 FT.) Hay Pickup) 2 E34250 STRIPPER 2-3000 AUGER E66297 ANGLE 2 300- AUGER, (SUB FOR E34496) (SUB E9572) E9572 ANGLE 2 AUGER E6905 TUBE 59400-86 Pickup Heads Strippers (,676 MM
Main Frame (,676 MM (5-/2 FT.) Hay Pickup) 2 E34250 STRIPPER 2-3000 AUGER E66297 ANGLE 2 300- AUGER, (SUB FOR E34496) (SUB E9572) E9572 ANGLE 2 AUGER E6905 TUBE 59400-86 Pickup Heads Strippers (,676 MM
DRAGO. Corn Header Manual f HEADSIGHT.COM
 DRAGO Corn Header Manual 09020801f HEADSIGHT.COM 574.546.5022 About Headsight Headsight Contact Info Headsight, Inc. 4845 3B Road Bremen, IN 46506 Phone: 574-546-5022 Fax: 574-546-5760 Email: info@headsight.com
4" Oval Nerf Bar. Part No. A1003S/B. PARTS LIST: Qty Part Description Qty Part Description
 ` 4" Oval Nerf Bar Part No. A1003S/B Fits: 2007 - Current Chevrolet Silverado 1500/2500/3500 Crew Cab 2007 - Current GMC Sierra 1500/2500/3500 Crew Cab REMOVE CONTENTS FROM BOX. VERIFY ALL PARTS ARE PRESENT.
Visit Our Our Our Web Site at:
 Visit Our Our Our Web Site at: ww w ww w w w w. l o c k f o rr r m e r r r. c o m 711 OGDEN AVENUE, LISLE, ILLINOIS 60532-1399 Phone (630) 964-8000 Fax (630) 964-5685 09-1998 Operator tor s manual 20 Gauge
CHEVROLET TAHOE/DENALI/AVALANCHE/YUKON/ SILVERADO/SIERRA 2007+
 CHEVROLET TAHOE/DENALI/AVALANCHE/YUKON/ SILVERADO/SIERRA 2007+ INSTALLATION INTRODUCTION 1. REMOVING THE FENDER AND DOORS FROM THE A-PILLAR AND DISCONNECTING THE WIRE HARNESS @ THE DOOR JAM 2. REMOVING
Installation Instructions Supertop for Truck
 Installation Instructions Supertop for Truck Vehicle Application: Toyota Tacoma Double Cab 2005 - Current (5 ft.) Part Number: 76308 US Patent 6827391 www.bestop.com - We re here to help! Visit our web
S-Series Combine and Front End Equipment Optimization
 S-Series Combine and Front End Equipment Optimization Ready To Harvest Yield Accuracy John Deere Harvester Works Preface This information is intended to help you understand how the Yield Monitor /Mapping
Safety - Installation and Operation:
 4x4 or 4x2 Instructions EZGO Electric Cars Thank you for purchasing your 4x4 or 4x2 conversion kit. Safety at all times whether during installation or operation is utmost importance. Before After!!!!!!!!!!!!!!
20 Gauge Super-Speed. shoprpmachine
 Operator tor s s manual 20 Gauge Super-Speed 1 WARRANTY Our guarantee on the products we manufacture is limited to repair or replacement without charge, of any part found to be defective in materials or
COMBINE HEADER INSPECTION REPORT
 COMBINE HEADER INSPECTION REPORT Personalized For: Owner Name: Address: City, State, ZIP Code: City, Province, Postal Code: Job Number: Date: Grain Header Size and Model: Grain Header Serial Number: Corn
Harrow Option Item Part No. Description Item Part No. Description
 Harrow Option Item Part No. Description 1 959288 Bolt Plate 2 334458 HHCS 1/2" x 6" Gr 5 330142 Lock washer ½" 330134 Hex nut ½" 3 959254 Harrow Arm Mount 4 151050 Bushing 5 336321 HHCS 5/8" x 2 1/4" Gr
POST HOLE DIGGER. Operation, Service & Parts Manual For Models D20 & D40. FORM: D20_40DigRev.QXD
 POST HOLE DIGGER Operation, Service & Parts Manual For Models D20 & D40 FORM: D20_40DigRev.QXD September 2006 Revised August 2009 TABLE OF CONTENTS Introduction.............................1 Preparation..............................2
MF 9690, 9790, Challenger 660, 670
 Ag Leader Technology Parts List Note: Indented items indicate parts included in an assembly listed above Quantity by Model Part Name/Description Part No. MF 9690 MF 9790 Challenger 660 Challenger 670 Instruction
SECTION 5B MANUAL TRANSMISSION TABLE OF CONTENTS
 SECTION 5B MANUAL TRANSMISSION TABLE OF CONTENTS General Description and Operation... 5B-2 Shift Lever... 5B-2 Transmission Assembly... 5B-2 Specifications... 5B-3 Diagnostic Information and Procedures...
Index. Page Number Section
 S H O C K S Index Page Number Section 1-4 GM Front Coil Over Installation 5-7 Front Smooth Body Shock Installation 7-8 Rear Smooth Body Shock Installation 8-11 Custom Coil Over Installation 12 Tuning and
Installation Guide CLAAS Lexion Combines with 9 inch Elevators
 Installation Guide CLAAS Lexion Combines with 9 inch Elevators 955614_01 4/17 1 Table of Contents System Overview 3 Quick Start Guide 4 Flow Sensor Installation 5 Hydraulic Elevator Adjustment Kit Installation
Installation Instructions Supertop for Truck
 Installation Instructions Supertop for Truck Vehicle Application: Ford F-150 5.5 Ft. Styleside 2004 and newer Part Number: 76309 www.bestop.com - We re here to help! Visit our web site and click on Ask
Model 4360 Teardown and Reassembly Instructions
 Clean the outside surface of the transaxle. Place the shifter in neutral position. Remove detent cover screw (item 3), detent cover (item 4), detent springs (item 5), and detent balls (item 6). Use a magnet
GM G-BODY LSD INSTALLATION
 GM G-BODY 1979-1987 LSD INSTALLATION INSTALLATION INTRODUCTION 1. REMOVING THE FENDER AND DOORS FROM THE A-PILLAR AND DISCONNECTING THE WIRE HARNESS @ THE DOOR JAM 2. REMOVING THE EXISTING DOOR HINGES
C Series Corn Header. Operator's Manual. The harvesting specialists Revision A
 C Series Corn Header Operator's Manual 214901 Revision A The harvesting specialists. INTRODUCTION INTRODUCTION Dear Customer, The following is some useful information provided to help ensure efficient
Installation Instructions Supertop for Truck
 Installation Instructions Supertop for Truck US Patent 6827391 Vehicle Application: Toyota Tacoma Double Cab 2005-2011 (5 ft.) Part Number: 76308 INSTALLATION TIME SKILL LEVEL 1-1/2 Hours 2 - Moderately
Read this entire manual before operation begins.
 Read this entire manual before operation begins. Record below the following information which is located on the serial number data plate. Serial No. Model No. Date of Installation Contents Specifications.............
Installation Instructions COMPETITION/PLUS SHIFTER Ford Mustang MT82 6-Speed Manual Transmission Catalog#
 Installation Instructions COMPETITION/PLUS SHIFTER 2015-2017 Ford Mustang MT82 6-Speed Manual Transmission Catalog# 3916037 Rev. 00 WORK SAFELY! For maximum safety, perform this installation on a clean,
5000 SERIES STALK DEVASTATOR CORN STALK ROLLER
 5000 SERIES STALK DEVASTATOR CORN STALK ROLLER *PATENTED* 5000-025A, 5000-026A, 5000-027A, 5000-028A, 5000-034A John Deere Model Corn Heads (606C, 643, 693, 706C, 608C, 843, 893, 708C, 612C, 612FC Folding,
TIN KNOCKER FOURPLEX CLEAT FORMER INSTRUCTIONS & PARTS DIAGRAM
 TIN KNOCKER FOURPLEX CLEAT FORMER INSTRUCTIONS & PARTS DIAGRAM Sheet Metal Equipment Sales Inc. Dean P. O'Connell, President Green Bay, Wisconsin Phone - (90)-66-9966 Fax - (90)-66-9969 Website: www.sheetmetalequip.com
OWNER S GUIDE 8A DURALIFT II 13,200 LB. CAPACITY. Link Mfg. Ltd th St. N.E. Sioux Center, IA USA
 OWNER S GUIDE 8A000715 DURALIFT II 13,200 LB. CAPACITY Link Mfg. Ltd. 223 15th St. N.E. Sioux Center, IA USA 51250-2120 www.linkmfg.com QUESTIONS? CALL CUSTOMER SERVICE 1-800-222-6283 DEALER / INSTALLER:
Max IV Rear Axle Replacement For models after Serial Number and all rear splined axle replacements.
 Max IV Rear Axle Replacement For models after Serial Number 19089 and all rear splined axle replacements. 10/8/03 Max IV Snap Ring Rear Axle replacement.doc Tools required: 9/16 Wrench 6 Extension Steel
S.I. Distributing Inc.
 S.I. Distributing Inc. Successful Innovations for Agriculture Since 1979 White 9000 Series Keeton Installation When installing the Keeton Universal Bracket on a White 9000 Series Planter, please use the
2. Remove front wheels.
 1 PARTS DIAGRAM 2 Installation Instructions: (PASSENGER SIDE) 1. Place jack under center of RUV front end and lift until front wheels clear the ground. Be careful to support the RUV properly so that it
TABLE OF CONTENTS. Warranty Disclaimers Delivery Checklist After Sale Checklist Safety Set Up... 8
 TABLE OF CONTENTS Pickett Equipment Warranty... 2 Warranty Disclaimers... 3 Delivery Checklist... 4 After Sale Checklist... 4 Safety... 5-7 Set Up... 8 Machine Adjustments and Operation... 9 Maintenance
WARRANTY REGISTRATION AND POLICY
 WARRANTY REGISTRATION AND POLICY Buhler Manufacturing products are warranted for a period of twelve (12) months from original date of purchase, by original purchaser, to be free from defects in material
AllCropHarvester.com. New/New Old Stock List as of 03/04/2016
 AllCropHarvester.com New/New Old Stock List as of 03/04/2016 If your part is not listed, please contact us. We may be able to get it, and/or have it as a used part. Contact us for prices not listed/used.
Installation instructions
 Installation instructions Akrapovič Exhaust System: Slip-On for the Aprilia RSV4 *504732* www.akrapovic.com www.akrapovic.com Congratulations on purchasing an Akrapovič exhaust system. Please read the
B DUAL DRUM SANDER
 OWNER S MANUAL B2022-25 DUAL DRUM SANDER INDEX GENERAL SAFETY INSTRUCTIONS Page 3 Specifications Page 4 Features Page 5 Assembly Instructions Initial Assembly Page 6 Installing Abrasives Page 7 Adjusting
TUFF TORQ TRANSAXLE. Tuff Torq Hydrostatic Transaxle. Transaxle Removal Tuff Torq
 Tuff Torq Hydrostatic Transaxle Internal Service 3. Disconnect the cotter pin and the washer to the brake rod (Figure 63). Internal service information is contained in the Tuff Torq KGIA Transaxle Service
4331 EUCALYPTUS AVE. CHINO, CA
 www.fabtechmotorsports.com 4331 EUCALYPTUS AVE. CHINO, CA. 91710 PHONE 909-597-7800 FAX 909-597-7185 2000-2001 DODGE RAM 1500 4 WHEEL DRIVE 1994-2001 DODGE RAM 2500 4 WHEEL DRIVE FTS3420 5 1/2 LIFT BOX
Adjustable Angled Incline Conveyor Owners Manual with Operating Instructions
 Adjustable Angled Incline Conveyor Owners Manual with Operating Instructions Revision 012211 Table of Contents Basic Conveyor Features 3 Getting Started 4 Setting Up the Incline Conveyor 5 Belt Removal
99-04 GT. Hellion Power Systems Mustang GT Kit Instructions
 Hellion Power Systems 99-04 Mustang GT Kit Instructions Part 1 Hellion recommends that the front suspension system be installed either by trained professionals or by 5.Remove rack bolts K-Member Installation
PM25 & PM35 GRINDER MIXER ILLUSTRATED PARTS LIST
 PM25 & PM35 GRINDER MIXER ILLUSTRATED PARTS LIST Art s-way Manufacturing Co., Inc. 485140 1100 TO THE OWNER Congratulations on the purchase of your new Art s-way grinder mixer. You have selected a top
HURST COMP/PLUS SHIFTER 2015 Ford Mustang (Getrag MT82 six-speed manual transmission) Catalog # by Hurst Performance
 Catalog # by Hurst Performance") FORM 159 0205 07/15 HURST COMP/PLUS SHIFTER 2015 Ford Mustang (Getrag MT82 six-speed manual transmission) Catalog #391 0205 2015 by Hurst Performance Thank you for purchasing the Hurst Comp/Plus Shifter.
FORM 159 0205 07/15 HURST COMP/PLUS SHIFTER 2015 Ford Mustang (Getrag MT82 six-speed manual transmission) Catalog #391 0205 2015 by Hurst Performance Thank you for purchasing the Hurst Comp/Plus Shifter.
WARNING: the engine does not come with oil in it. Please fill the oil before starting. The 200cc hardknock requires 9/10 of a quart of oil.
 WARNING: the engine does not come with oil in it. Please fill the oil before starting. The 200cc hardknock requires 9/10 of a quart of oil. Things needed for assembly. -2 tubes of blue loc-tite. I don
Mopar 8 3/4 & 9 3/4 (Dana) Installation Instructions Rear Disc Conversion
 Installation Instructions Rear Disc Conversion") Mopar 8 3/4 & 9 3/4 (Dana) Installation Instructions Rear Disc Conversion This kit is for either Mopar 8 ¾ or Mopar 9 ¾ (Dana). This kit is designed to work with axles with either GM 5 x 4.75 Bolt Pattern
Mopar 8 3/4 & 9 3/4 (Dana) Installation Instructions Rear Disc Conversion This kit is for either Mopar 8 ¾ or Mopar 9 ¾ (Dana). This kit is designed to work with axles with either GM 5 x 4.75 Bolt Pattern
BELT DRIVE SYSTEM TROUBLESHOOTING CHART CAUSES CORRECTIVE ACTION ENGINE RUNS BUT PADDLES DO NOT TURN
 ELT DRIVE SYSTEM TROULESHOOTING HRT USES ORRETIVE TION ENGINE RUNS UT PDDLES DO NOT TURN elt jumps off the drive pulleys. Inspect the belt for damage. Replace belt if needed. heck belt alignment. Idler
Installation instructions
 Installation instructions Akrapovič Exhaust System Optional Header for the BMW R ninet * 504335* www.akrapovic.com www.akrapovic.com Congratulations on purchasing an Akrapovič exhaust system. Please read
MANUAL TRANSAXLE Return to Main Table of Contents
 MANUAL TRANSAXLE Return to Main Table of Contents GENERAL... 2 MANUAL TRANSAXLE CONTROL... 12 SHIFT LEVER ASSEMBLY... 14 MANUAL TRANSAXLE... 15 MANUAL TRANSAXLE ASSEMBLY... 17 FIFTH SPEED SYNCHRONIZER
TRANSMISSION 6.7 GENERAL HOME. See Figure The transmission is a five-speed constantmesh type housed in an extension of the crankcase.
 TRANSMISSION 6.7 GENERAL See Figure 6-46. The transmission is a five-speed constantmesh type housed in an extension of the crankcase. b06x6x Neutral st Gear Mainshaft Mainshaft 4 5 4 5 Countershaft Out
DRIVE AXLE Nissan 240SX DESCRIPTION & OPERATION AXLE RATIO & IDENTIFICATION AXLE SHAFT & BEARING R & I DRIVE SHAFT R & I
 DRIVE AXLE 1990 Nissan 240SX 1990 DRIVE AXLES Rear Axle - R200 240SX, 300ZX DESCRIPTION & OPERATION The axle assembly is a hypoid type gear with integral carrier housing. The pinion bearing preload adjustment
Installation Manual TWM Performance Short Shifter Cobalt SS/SC, SS/TC, HHR SS, Ion Redline and Saab 9-3
 Page 1 Installation Manual TWM Performance Short Shifter Cobalt SS/SC, SS/TC, HHR SS, Ion Redline and Saab 9-3 Please Note: It is preferable to park on a flat surface, as you will have to engage and disengage
Installation Manual ZJ Long Arm Upgrade kit Jeep Grand Cherokee Last Revision No.: 1/30/12 PN
 Thank you for purchasing a Clayton Off Road suspension. Please check to make sure you have all necessary parts before you start your install. 4804010 ZJ 93-95 Long Arm Upgrade Kit 1200010 4 Link Axle Truss
Land Cruiser FJ80 and FZJ80 Double Swingout Rear Bumper Installation Instructions PRELIMINARY
 Land Cruiser FJ80 and FZJ80 Double Swingout Rear Bumper Installation Instructions Fits 1991-1997 80 Series Land Cruiser / Lexus LX450 PRELIMINARY Thank you for purchasing a Rear Bumper for your Land Cruiser.
Thanks for Ordering The Honda VLX Adjustable Lowering Kit from READ THIS BEFORE UNPACKING YOUR KIT!
 Thanks for Ordering The Honda VLX Adjustable Lowering Kit from READ THIS BEFORE UNPACKING YOUR KIT! This instruction booklet contains detailed steps for installing the Adjustable Lowering kit on your Honda
Maintenance and Repair
 Maintenance and Repair WARNING ALWAYS shut off the engine, remove key from ignition, make sure the engine is cool, and disconnect the spark plug and positive battery terminal from the battery before cleaning,
Installation Instructions Supertop for Truck
 Installation Instructions Supertop for Truck Vehicle Application: Ford F-150 Regular / Super Cab 2004 2011 (6.5 ft.) Part Number: 76305 US Patent 6827391 www.bestop.com - We re here to help! Visit our
GERINGHOFF. Corn Header Manual f HEADSIGHT.COM
 GERINGHOFF Corn Header Manual 09020701f HEADSIGHT.COM 574.546.5022 About Headsight Headsight Contact Info Headsight, Inc. 4845 3B Road Bremen, IN 46506 Phone: 574-546-5022 Fax: 574-546-5760 Email: info@headsight.com
ADDRESSABLE DISCONNECT TOOL MODEL DE MANUAL
 Pg. 1 of 77 ADDRESSABLE DISCONNECT TOOL MODEL DE MANUAL REVISION HISTORY AUTHOR REVISED SECTION/PARAGRAPH REV RELEASED Gary Floyd Final Draft 0 03/31/17 Draft and Archived/Obsolete revisions are not to
Installation instructions
 Installation instructions Akrapovič Exhaust System: Slip-On for the Porsche Cayenne Turbo (type 958) Porsche Cayenne Turbo S (type 958) Porsche Cayenne S (type 958) Porsche Cayenne Diesel (type 958) Porsche
Valtek Auxiliary Handwheels and Limit Stops
 Valtek Auxiliary s and Limit Stops Table of Contents Page 1 General information 2 Installation 2 Side-mounted handwheels, size 25 and 50 (linear actuators) 3 Side-mounted handwheels, size 100 and 200 (linear
Hub Stands -- VERSION 5.0
 Hub Stands -- VERSION 5.0 Thanks for choosing our Alignment Hub Stands for your chassis setup needs. We hope you'll find them as handy, accurate, and easy to use as we do! Each stand has a max capacity
Installation Instructions
 Equipment Required: Fastener Kit: F Wrenches: 3/4, 15/16, 10mm, 18mm Drill Bits: 1/4 Other Tools: Drill, Reciprocating saw 9465/9475 HIDE-A-GOOSE HITCH INSTALLATION All Fasteners Typical, Both Sides WARNING:
Package Contents Before you begin, verify the package contents to ensure all items are included.
 Out the BACK fertilizer disc mounting instructions *Patent Pending* John Deere, Kinze, and White Planters (Read Instructions Completely before Beginning Installation) DANGER: when storing or working on
ProLine. 44 Mower. for 120 Traction Unit. Model No & Up. Operator s Manual
 FORM NO. 9 ProLine Mower for 0 Traction Unit Model No. 05 99000 & Up Operator s Manual IMPORTANT: Read this manual carefully. It contains information about your safety and the safety of others. Also become
White Industries ENO Eccentric Rear Hub Instructions
 White Industries ENO Eccentric Rear Hub Instructions Tools required: 4mm allen/hex wrench, 19mm open end wrench, 9mm open end wrench or bench vise, ENO Eccentric Axle Tool or 10mm socket, bearing puller