Installation Instructions COMPETITION/PLUS SHIFTER Ford Mustang MT82 6-Speed Manual Transmission Catalog#
|
|
|
- Phoebe Campbell
- 5 years ago
- Views:
Transcription


1 Installation Instructions COMPETITION/PLUS SHIFTER Ford Mustang MT82 6-Speed Manual Transmission Catalog# Rev. 00 WORK SAFELY! For maximum safety, perform this installation on a clean, level surface and with the engine turned off. Place blocks or wedges in front of and behind both rear wheels to prevent movement in either direction. CAUTION: To avoid any possibility of bodily injury or damage to vehicle, do not attempt installation until you are confident that the vehicle is safely secured and will not move. IMPORTANT Please compare the contents of the package against the parts list below to ensure that you have all necessary components before beginning the removal and disassembly of your factory shifter. Contact customer service with and questions regarding packaged components. Because this a relatively complex installation please refer to our website for a detailed installation video that is available on YouTube. PARTS Chrome Upper Stick Classic Hurst White Knob Lower Stick Shift Rod Trigger Rod Reverse Lock-Out Collar Cotter Pin 1/4" Flat Washer 3/8 Lock Washer (2) Guide Nut Spring Bracket Spring Technical Support (707) shifters.com


 Fiber")

 544")


2 Parts (cont.) Spring Retaining Screw 8-32 Set Screw Link Bushing Jam Nut 3/8 Washer Rear Mount 3/8-24 Cap Screw 3/8-24 Guide Screw Pivot Bolt 1/4"-20 Screw Link (2) 1/4" Shoulder Screw 1/4 Disc Spring 1/4" Flange Bearing Lock Nut Swivel Link 3/16 Shoulder Screw 8/32 Lock Nut Tie Wrap #8 Washer 3/16 Disc Spring Nylon Set Screw (2) Fiber Washer Nylon Washer Technical Support (707) SHIFTERS.com


 4mm")


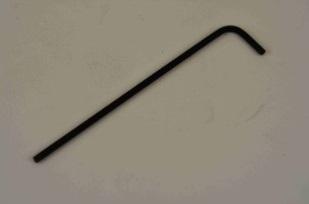
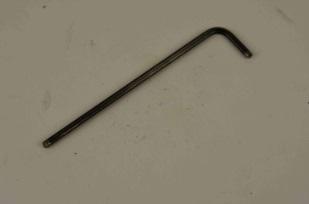

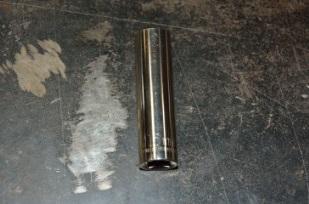

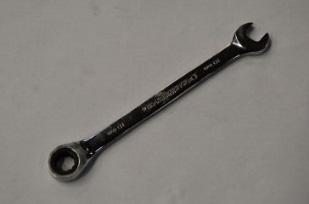

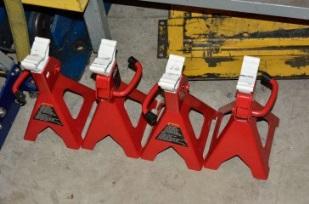

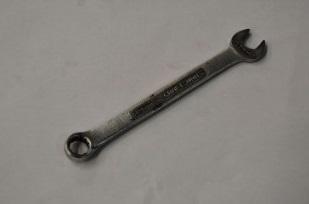
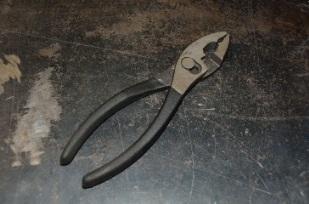

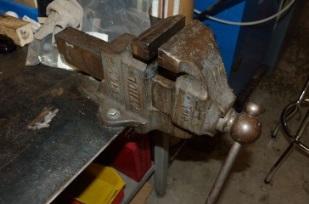
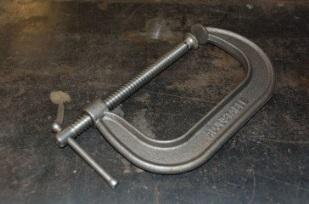
3 TOOLS Plastic Trim Remover (2) Pry Tool) 4mm Punch Hammer T-20 Torx Driver 18mm Socket Breaker Bar ¼ Drive Ratchet 10mm Sockets Extension Universal Joint 13mm Socket 11/32 Wrench 1/8 Allen Wrench Craft Knife 7/32 Wrench Phillips Screwdriver 5/64 Allen Wrench 3/32 Allen Wrench Torque Wrench (20-80 ft.lbs) 15mm Socket 7mm Socket Jack Jack Stands 10mm Wrench 10mm Ratchet Wrench Disc Grinder Plastic Hammer Pliers Vise C-Clamp Technical Support (707) SHIFTERS.com
 3/8 Drive Ratchet 3/4\"")


 screws")

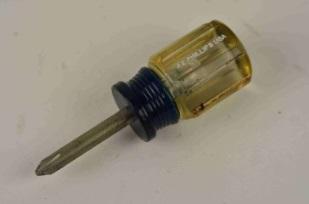
4 Tools (cont.) 3/8 Drive Ratchet 3/4" Socket 7/16 Socket Side Cutters Disassembly 1. Unscrew the shift knob. (counter-clockwise to remove.) 2. Remove the front driver side and passenger side panels from the center console. Tool: Plastic Trim Remover 3. Remove the two (2) screws from both sides of the console. Tools: 7mm Socket, Extension, Ratchet Technical Support (707) SHIFTERS.com


5 4. Remove the center console. Start by lifting up the rear and work your way up to the front. Tool: Plastic Trim Remover x 2 5. Unplug the harness from the console. Set the console aside. 6. Unsnap the shift boot bezel from the console. Lift from the top to release the top clips and then use the pry tool to un-clip the rest. Now you can remove the center console. Tool: Plastic Trim Remover 7. Remove the leather boot. There are three clips holding the boot to the reverse lock out sleeve, use a screw driver to pry one clip at a time while pulling up on the boot. Set boot aside for reinstallation later. Technical Support (707) SHIFTERS.com


6 8. Remove the white plastic washer and black O-ring. Then remove the spring retaining roll pin followed by the spring. Tools: 4mm Punch, Hammer 9. Remove the retaining screw and then remove the factory reverse lockout sleeve. Tool: T20 Torx Driver 10. Lift the vehicle. Support the vehicle with Jackstands if working with a floor jack. 11. Although this step is not required it makes for ease of removal and installation. Support the mid-section of the exhaust. Loosen the nuts at the two exhaust connections just behind the transmission. Move the system to the rear and let the system hang in place. Tools: 15mm socket Technical Support (707) SHIFTERS.com

 18mm bolts securing the front end of the driveshaft to the transmission. IMPORTANT: Make an alignment mark between the Flex Coupling and the transmission flange.")
7 12. Support the transmission. Tools: transmission stand or floor jack 13. Remove the four (4) 18mm bolts securing the transmission to the frame. Lower the rear of the transmission. Support the rear with a transmission stand if you have the vehicle supported with a lift; support the rear with a floor jack if you have the vehicle supported with jack stands. Tools: Breaker Bar, 18mm Socket, Ratchet, Extension 14. Remove the three (3) 15mm bolts securing the crossmember to the transmission. Tools: Breaker Bar, 15mm Socket, Ratchet 15. Remove the three (3) 18mm bolts securing the front end of the driveshaft to the transmission. IMPORTANT: Make an alignment mark between the Flex Coupling and the transmission flange. You must re-install the driveshaft in the same position as it was removed. Tools: 18mm Socket, Ratchet Technical Support (707) SHIFTERS.com

 10mm hex nuts that mount the rear of the shifter to the transmission tunnel.")

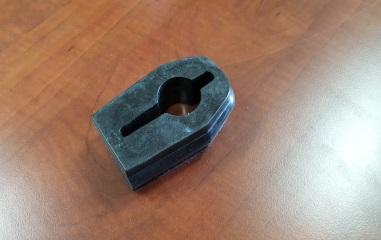
8 16. Remove the center bearing bolts. Tools: 13mm Socket, Ratchet 17. Once the center bearing bolts have been removed, you can pull the driveshaft back and lower the front end of the driveshaft. Allow the driveshaft to rest on top of the exhaust. 18. Remove the two (2) 10mm hex nuts that mount the rear of the shifter to the transmission tunnel. Tools: 10mm Deep Socket, Universal Adapter, Extension(s), 1/4 Drive Ratchet 19. Remove the bolt attaching the shifter housing to the transmission. Tools: a 10mm ratchet wrench makes for ease of removal. Remove the bolt from the side of the transmission. You may have to pull down on the transmission to allow the screw to clear the tunnel. Technical Support (707) SHIFTERS.com


9 20. Remove the shift linkage bolt. Tools: 13mm Socket, 3/8 Drive Ratchet 21. The photo to the right is a close up of the bolt removed from the shift linkage. Note that the bolt is only partially threaded at the top. This is being mentioned so you don t spend too much time trying to loosen a bolt that is already completely loose. After it is completely loose, it will need to be pulled free. 22. The shifter housing assembly can now be removed and set on a clean working surface. 23. Remove the rubber boot from the shifter housing. Technical Support (707) SHIFTERS.com


10 24. Remove the (4) 10mm bolts securing the bottom plate to the shifter housing. Tools: 10MM Socket 25. Remove the bottom Plate. Take care when removing the bottom plate, there is a rubber gasket that will be reused. 26. This is a photo of what the internal components of the shifter look like. 27. Remove the shift rod from the shifter housing. Technical Support (707) SHIFTERS.com


11 28. Remove the two rubber bushings from the shift rod. Set them aside, they will be reused. 29. The factory shift rod has to be removed and replaced with the new supplied shift rod. 30. The best way to do this is to grind off the end with the smaller diameter head. Once the head has been ground off, use a punch and a hammer to remove the pin from the assembly. Discard the pin. A new pin is included in the kit. Tools: Disc Grinder, Punch, Hammer 31. The photo to the right shows the bolt removed and the two parts separated. Technical Support (707) SHIFTERS.com


12 32. Remove the two (2) bushings and the rubber boot from the old shift rod, being careful not to damage them as they will be re-used. Tools: Punch, Hammer 33. Remove the shifter retaining plate from the bottom of the shifter housing. Tools: 10mm Socket, Extension, Ratchet 34. Remove the shifter from the housing and disassemble. Use a set of pliers to pry the small pivot cup off of the small pivot ball. The larger pivot cup can be removed by hand. The large pivot cup, the screws and the plate will be re-used. Tool: Pliers 35. Apply Grease to the factory pivot cup. Technical Support (707) SHIFTERS.com


 544 4761 13 www.")
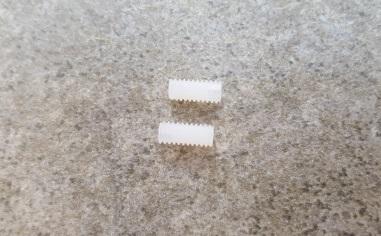
13 36. Apply grease to the new lower stick pivot ball. 37. Insert the supplied lower stick into the large pivot cup as shown. 38. Install the factory plate. 39. Install the 3/16 sleeve bearing into the swivel link Technical Support (707) SHIFTERS.com


14 40. An easy way to install this is to add some lube to the sleeve bearing, use a pair of pliers to square up the bearing to the hole on the swivel link and squeeze the bearing down into position. Tools: Pliers 41. Once the sleeve bearing is flush, scrap any plastic that may have mushroomed over with a razor knife. 42. Add grease to both sides of the swivel and insert the swivel into the stick. Slip a disc spring and a nylon washer onto the shoulder screw. Slide the 3/16 shoulder screw through the stick and the swivel. Secure the parts together with a 8-32 lock nut. NOTE: Add a drop of Loctite to the thread of the shoulder screw prior to install. 43. Apply grease to flange bushing and insert into swivel, one (1) on each side, as shown in the photo on the right. Technical Support (707) SHIFTERS.com


15 44. Add grease to the links, and then insert a link on each side of the swivel as shown in the photo to the right. 45. This is how it should look after following step 35 through Add grease to flanged bushing. Insert a flanged bushing to each side of the links, to semi-secure the links to the shifter. 47. Add grease to the new shift rod and place it between the links. Ensure that the serrated portion of the shift handle faces the right side of the shift rod as shown. Technical Support (707) SHIFTERS.com


16 48. Insert a 1/4 disc spring onto the 1/4 shoulder screw and slide it through one end of the links. Once the screw is through to the other side, add another 1/4 disc spring, and then a #10 washer. Secure it together with a nyloc nut. This is important: You may need to adjust the tension between the nut and screw. You want to be able to rotate the links between the shift rod, but it should be stiff. It should take some effort to rotate. The shifter will not function properly if it is loose. Tools: 3/32 Allen Wrench, 3/8 Wrench NOTE: add a drop of Loctite to the thread of the shoulder screw prior to install. 49. Slide on the factory rubber boot 50. Add grease and install the factory linkage bushings into the end of the shift rod 51. Grease the new shift rod. Install the factory bushings onto the shift rod. Technical Support (707) SHIFTERS.com


 10mm bolts if the gasket was torn during removal add some RTV in order to proper seal it.")
17 52. Install the lower stick assembly into the shifter housing. Bolt the factory plate back into position. Tools: 10mm Socket 53. Once the factory plate is bolted into position rotate the stick assembly and align the factory rubber bushings into positon as shown 54. Pay careful attention to the orientation of the stick prior to install. The lower stick has two faces. One face is flat while the other face has serrations that will mate with the upper chrome stick, which also has serrations. The face with the serrations should be facing the passenger side once installed. 55. Reinstall the bottom plate with the (4) 10mm bolts if the gasket was torn during removal add some RTV in order to proper seal it. Tools: 10mm Socket, Extension, Ratchet. Technical Support (707) SHIFTERS.com


18 56. Insert the end of the shift rod into the shift linkage. Add grease to the pivot bolt and slide it through the linkage. Apply Loctite to a 1/4-20 bolt and secure it with a washer. Tools: 3/4 Socket, Ratchet, 7/16 Socket 57. Install the new polyurethane bushing supplied with the kit. 58. Insert it into the bracket clip. You will need to form the clip bracket around the new bushing to make it easier for install. The holes need to be 4.21 inches apart to be re-installed. It will be improbable that you will get it to hold at 4.21 inches apart, but try to get it close to 4.21 inches as possible. You will rely on a pair of channel locks to compress the assembly during install. 59. Install the shifter assembly into the vehicle. Technical Support (707) SHIFTERS.com


19 60. Install the shift linkage bolt. Tools: 13mm Socket, 3/8 Drive Ratchet 61. Install the shifter assembly onto the transmission. Tools: 10mm Wrench, 10mm Ratcheting Wrench 62. You can use a pair of pliers to squeeze the housing in order to align the holes to the studs on the vehicle. Tools: Pliers, 10mm Socket, Extension, Ratchet 63. Slip the front end of the driveshaft back into the transmission. Align the Driveshaft Flex Coupling to the transmission flange. Technical Support (707) SHIFTERS.com


20 64. Re-install the bearing support. Torque bolts to 35ft.lbs. Tools: 13mm Socket, Extension, Universal Adapter, Ratchet, Torque Wrench 65. Re-install the front end of the driveshaft. Do not forget to align the driveshaft flex coupling to the transmission flange prior to inserting the bolts. Torque bolts to 81ft.lbs Tools: 18mm Socket, Ratchet, Torque Wrench 66. Re-install the crossmember to the transmission. Torque bolts to 76 ft. lbs. Tools: 15mm Socket, Ratchet, Torque Wrench 67. Re-install the crossmember to the frame. Torque bolts to 46ft.lbs. Tools: 18mm Socket, Ratchet, Torque Wrench Technical Support (707) SHIFTERS.com


21 68. Reattach the exhaust system Tools: 15mm Socket 69. Remove the support stand. 70. Lower the vehicle. 71. Install the Upper Chrome Stick and Spring Bracket. The 3/8 guide screw will be inserted and installed into the bottom hole of the stick along with a 3/8 lockwasher and a 3/8 washer. Tool: 7/32 Allen Wrench Technical Support (707) SHIFTERS.com


22 72. Insert the Trigger Rod into the Reverse Lockout Collar. 73. Insert the cotter pin through the hole in the Trigger Rod. Bend each leg of the cotter pin 90 degrees and cut excess material. The photo to the right is a bottom view of the assembly. Please note the orientation of the cotter pin and the approx. length of the legs. Tools: Needle Nose Pliers, Wire Cutters 74. Align the Trigger Rod so that the top is perpendicular to the opening in the Reverse Lockout Collar. While maintaining the alignment, pull up on the Trigger Rod so that it is at its highest position within the Reverse Lockout Collar and secure it in position with the steel set screw. NOTE: Add a drop of Loctite to threads of set screw to prevent set screw from backing out. Tool: 5/64 Allen Wrench 75. Thread one of the supplied nylon set screws into the upper hole on the left side of the block. Screw it in until it just begins to protrude into the slotted center opening. Technical Support (707) SHIFTERS.com


23 76. Add grease to the inside of the Reverse Lockout Collar. Slip the Reverse Lockout Collar over the sticks. Insert the 3/8 full threaded screw into the top hole of the stick along with a 3/8 lockwasher and tighten screw. Tool: 7/32 Allen Wrench 77. Install the extension spring to the Reverse Lockout Collar with the supplied Spring Retaining Screw. Tool: Philips Screwdriver 78. Insert the other end of the spring onto the Spring Bracket tab. 79. Add grease to the Lockout Collar where it rides against the guide nut. Add a drop of Loctite to the internal threads of the guide nut and install onto the end of the upper screw. Test the Reverse Lockout Collar for proper function. Pull up on the trigger rod and release. The collar should spring back to its lowered position. guide nut fiber washer Tools: 5/8 Socket, Ratchet Technical Support (707) SHIFTERS.com


24 80. Use an allen wrench to adjust the nylon set screw that was installed in step 75. Adjust as necessary to reduce side to side play and get the block to slide up and down freely. Once it s adjusted properly insert a second nylon set screw and tighten against the first to lock in place. 81. To prevent premature wear to the Reverse Lockout Collar, apply grease to the shifter reverse block and lock-out collar where the two will contact during shifts to 1st / 2nd gear. 82. Install the rubber boot over shifter assembly. The top lip should go over the bottom groove of the Reverse Lockout Collar. The bottom lip should seal around the base of the shifter casting. 83. Re-install the console. NOTE: Do not forget to re-connect the harness. The vehicle will not start if the harness is not reconnected. Technical Support (707) SHIFTERS.com


25 84. The factory shift boot must be modified to fit the Hurst Shifter. The collar must be removed from the boot by carefully trimming the shift boot away from the collar. Tool: Craft Knife 85. Install the shift boot over the shifter and secure the shift boot as shown in the picture to the right with the supplied tie wrap. Cut excess material from tie wrap. Tool: Side cutters 86. Snap the shift boot bezel into the console. 87. Screw the jam nut down onto the upper stick threads. Technical Support (707) SHIFTERS.com


 screws on both sides of the console. Tool: 7mm Socket, Extension, Ratchet 90.")

26 88. Install the shift knob onto the stick. Align the logo on the shift knob accordingly and tighten the jam nut up against the knob. A few drops of Loctite will help prevent the knob from loosening. CAUTION! Over tightening the knob down onto the stick will eventually cause the knob to crack. ALLOW LOCTITE TO DRY. Tool: 9/16 Wrench 89. Re-install the two (2) screws on both sides of the console. Tool: 7mm Socket, Extension, Ratchet 90. Re-install the front driver side and passenger side panels from the center console. 91. Start the engine. Go through all the gears several times to confirm the shifter has been installed correctly. Ensure that each gear can be engaged smoothly and fully. Correct any problems before operating vehicle. Enjoy! Technical Support (707) SHIFTERS.com
27 Technical Service IMPORTANT: RETAIN THESE INSTRUCTIONS FOR FUTURE REFERENCE A highly trained technical service department is maintained by Hurst Performance to answer your technical questions, provide additional product information and offer various recommendations. Technical service calls, correspondence, and warranty questions should be directed to: Hurst Performance Products (707) Technical Support (707) SHIFTERS.com
HURST COMP/PLUS SHIFTER 2015 Ford Mustang (Getrag MT82 six-speed manual transmission) Catalog # by Hurst Performance
 Catalog # by Hurst Performance") FORM 159 0205 07/15 HURST COMP/PLUS SHIFTER 2015 Ford Mustang (Getrag MT82 six-speed manual transmission) Catalog #391 0205 2015 by Hurst Performance Thank you for purchasing the Hurst Comp/Plus Shifter.
FORM 159 0205 07/15 HURST COMP/PLUS SHIFTER 2015 Ford Mustang (Getrag MT82 six-speed manual transmission) Catalog #391 0205 2015 by Hurst Performance Thank you for purchasing the Hurst Comp/Plus Shifter.
Installation Instructions INDY SHIFTER Fits: Mustang Fastback & Convertible with MT-82 Transmission Catalog #
 Installation Instructions INDY SHIFTER Fits: 2015-2018 Mustang Fastback & Convertible with MT-82 Transmission Catalog # 3916036 Watch our installation video on YouTube WORK SAFELY! For maximum safety,
Chrome Upper Stick. Catalog# product too your PARTS
 Installation Instructionss HURST COMPETITION/PLUS SHIFTER 2011-2014 Ford Mustang Getrag MT82 6-Speed Manual Transmission Catalog# 3916039 02/14/17 WORK SAFELY! For maximum safety, perform this installation
Installation Instructions HURST COMPETITION AND BILLET/PLUS SHIFTER Mustang w/5-speed Manual Transmission (GT only)
") Installation Instructions HURST COMPETITION AND BILLET/PLUS SHIFTER 2005-2010 Mustang w/5-speed Manual Transmission (GT only) Catalog# 3915201 WORK SAFELY! For maximum safety, perform this installation
Installation Instructions HURST COMPETITION AND BILLET/PLUS SHIFTER 2005-2010 Mustang w/5-speed Manual Transmission (GT only) Catalog# 3915201 WORK SAFELY! For maximum safety, perform this installation
Installation Instructions BILLET/PLUS PISTOL-GRIP SHIFTER Fits: 2016 Camaro V6 with Manual Transmission Catalog #
 Installation Instructions BILLET/PLUS PISTOL-GRIP SHIFTER Fits: 2016 Camaro V6 with Manual Transmission Catalog # 3916034 WORK SAFELY! For maximum safety, perform this installation on a clean, level surface
Installation Instructions HURST BILLET COMPETITION/PLUS SHIFTER Dodge Challenger
 Installation Instructions HURST BILLET COMPETITION/PLUS SHIFTER 2009-2015 Dodge Challenger Catalog #3916020 WORK SAFELY! For maximum safety, perform this installation on a clean, level surface and with
Z-Gate Universal Shifter
 Installation Instructions Z-Gate Universal Shifter Fits: GM, Ford, Lincoln and Chrysler Transmissions See Application Guide for Specific Applications Part #80681 Rev 06/01/2018 WORK SAFELY! For maximum
PARTS TOOLS. Set Screw. Washer (2) Blue Bushing (2) Black Bushing (2) B&M Short Throw Shifter. Jam Nut Grease. Retaining Ring (2) Insert (2)
 Blue Bushing (2) Black Bushing (2) B&M Short Throw Shifter. Jam Nut Grease. Retaining Ring (2) Insert (2)") Installation Instructions SHORT THROW SHIFTER Fits: Porsche Boxter, Boxter S, 911, 996 Cayman & Cayman S models See Application Guide for specific year ranges and engine sizes Catalog # 45135 WORK SAFELY!
Installation Instructions SHORT THROW SHIFTER Fits: Porsche Boxter, Boxter S, 911, 996 Cayman & Cayman S models See Application Guide for specific year ranges and engine sizes Catalog # 45135 WORK SAFELY!
Installation Manual TWM Performance Kia Forte Short Shifter
 Installation Manual TWM Performance Kia Forte 2009+ Short Shifter Begin the installation by parking on a flat surface, as you will have to engage and disengage the hand brake and shift from gears to neutral.
PRO RATCHET UNIVERSAL SHIFTER
 Installation Instructions PRO RATCHET UNIVERSAL SHIFTER Fits: GM, Ford and Chryslers w/automatic Transmission See Application Guide for Specific Vehicles Catalog # 80842 WORK SAFELY! For maximum safety,
Installation Instructions PISTOL GRIP HANDLE Fits: Dodge Challenger and Charger w/ Automatic Transmission Catalog #
 Installation Instructions PISTOL GRIP HANDLE Fits: 2015-2018 Dodge Challenger and Charger w/ Automatic Transmission Catalog # 5380437 WORK SAFELY! For maximum safety, perform this installation on a clean,
Installation Instructions QUICKSILVER CONSOLE SHIFTER Fits: Chevelle / El Camino
 WORK SAFELY! For maximum safety, perform this installation on a clean, level surface and with the engine turned off. Place blocks or wedges in front of and behind both rear wheels to prevent movement in
IPSCO STS (Short Throw Shifter) Installation Instructions Dodge Viper WARNING
 Installation Instructions Dodge Viper WARNING") WARNING Modification of your vehicle with the parts identified above may alter its stock performance; the buyer hereby expressly assumes all risks associated with any such modification. DISCLAIMER OF WARRANTY
WARNING Modification of your vehicle with the parts identified above may alter its stock performance; the buyer hereby expressly assumes all risks associated with any such modification. DISCLAIMER OF WARRANTY
Installation Manual TWM Performance Short Shifter Cobalt SS/SC, SS/TC, HHR SS, Ion Redline and Saab 9-3
 Page 1 Installation Manual TWM Performance Short Shifter Cobalt SS/SC, SS/TC, HHR SS, Ion Redline and Saab 9-3 Please Note: It is preferable to park on a flat surface, as you will have to engage and disengage
Installation Instructions Z-Gate Shifter
 Installation Instructions Z-Gate Shifter Part Number 80681 1998, 2001 by B&M Racing and Performance Products The B&M Z-Gate shifter can be used in vehicles equipped with most popular three speed automatic
Steeda S550 Mustang Street Short Throw Shift Lever Installation Instructions For Part:
 Steeda S550 Mustang Street Short Throw Shift Lever Installation Instructions For Part: 555-7316 Tools required 1. 7mm socket 2. 10mm socket 3. Small flathead screwdriver 4. T20 torx bit or driver 5. Vise
Installation Instructions HURST COMP STICK KIT Dodge Challenger (with AUTO-STICK)
") Installation Instructions HURST COMP STICK KIT 2008-2012 Dodge Challenger (with AUTO-STICK) 1590402 REV01 08/17/15 Catalog# 538 0402 & 538 0403 2009, 2015 Hurst Performance WORK SAFELY! For maximum safety,
Installation Instructions HURST COMP STICK KIT 2008-2012 Dodge Challenger (with AUTO-STICK) 1590402 REV01 08/17/15 Catalog# 538 0402 & 538 0403 2009, 2015 Hurst Performance WORK SAFELY! For maximum safety,
Installation Instructions PRO RIPPER SHIFTER Fits: Ford Mustang w/t-5, T-5 w/od and T-45 Transmission Catalog # 45070
 WORK SAFELY! For maximum safety, perform this installation on a clean, level surface and with the engine turned off. Place blocks or wedges in front of and behind both rear wheels to prevent movement in
Installation Instructions. QuickSilver Shifter. Fits: GM, Ford, Chrysler Transmissions See Application Guide for Specific Applications Part # 80683
 Installation Instructions QuickSilver Shifter Fits: GM, Ford, Chrysler Transmissions See Application Guide for Specific Applications Part # 80683 WORK SAFELY! For maximum safety, perform this installation
Photo 1. Shift pattern gate plate
 Installation Instructions MAGNUM GRIP STREET BANDIT SHIFTER Fits: GM, Chrysler, and Ford Automatic Transmissions See Application Guide for Specific Vehicles Catalog # 81050 WORK SAFELY! For maximum safety,
Technical Support (707)
") Installation Instructions UNIMATIC SHIFTER Fits: GM, Powerglide, Ford and Chrysler Transmissions See Application Guide for Specific Vehicles Catalog # 80775 WORK SAFELY! For maximum safety, perform this
Installation Instructions UNIMATIC SHIFTER Fits: GM, Powerglide, Ford and Chrysler Transmissions See Application Guide for Specific Vehicles Catalog # 80775 WORK SAFELY! For maximum safety, perform this
Steeda S550 MT-82 Tri-Ax Race Short Throw Shifter Installation Instructions For Parts: ,
 Steeda S550 MT-82 Tri-Ax Race Short Throw Shifter Installation Instructions For Parts: 555-7317, 555-7318 Tools required 1. 7mm socket 2. 10mm socket 3. 13mm socket 4. 15mm socket 5. 18mm socket 6. 3/8
Subaru 5-Speed Double Adjustable Short Throw Shifter
 Subaru 5-Speed Double Adjustable Short Throw Shifter 1999+ Subaru Impreza 5-Speed 2004-2005 Subaru Forester XT 5-Speed Congratulations on your purchase of the COBB Tuning Double Adjustable Short Throw
Steeda S550 Mustang Street Short Throw Shift Lever Installation Instructions: &
 Steeda S550 Mustang Street Short Throw Shift Lever Installation Instructions: 555-7316 & 555-7322 Tools required 1. 7mm socket 2. 10mm socket 3. Small flathead screwdriver 4. T20 torx bit or driver 5.
Installation Instructions Hammer Shifter Fits: GM, Ford, Chrysler Transmissions See Application Guide for Specific Applications Part # 80885
 Installation Instructions Hammer Shifter Fits: GM, Ford, Chrysler Transmissions See Application Guide for Specific Applications Part # 80885 WORK SAFELY! For maximum safety, perform this installation on
PARTS B&M Billet Knob B&M Billet Insert. O-Ring. Reverse Lockout Plate. Isolator. Nylon Slide Assy and Jam nut. Printed in the U.S.A.
 Installation Instructions Precision Sport Shifter 2000 and up VW GOLF IV, JETTA IV (including GLI 6-spd), GTI, CABRIO, BEETLE, R32 (including 4-motion) 2000 and up Audi A3 1.8L and 1.9L Turbo Diesel, 1999-2002
Installation Manual TWM Performance Short Shifter Nissan 350Z, 370Z Infiniti G35, G37
 Installation Manual TWM Performance Short Shifter Nissan 350Z, 370Z Infiniti G35, G37 It is preferable to park on a flat surface, as you will have to engage and disengage the hand brake and shift from
Installation Manual TWM Performance Short Shifter Subaru STi 2008+
 - 1 - Installation Manual TWM Performance Short Shifter Subaru STi 2008+ Please Note: It is preferable to park on a flat surface, as you will have to engage and disengage the hand brake and shift from
C6 (includingg Z06) Catalog # 45034
 Catalog # 45034") Installation Instructionss Precision Sport Shifter Fits: 2008-20133 Corvette C6 (includingg Z06) Catalog # 45034 WORK SAFELY! For maximum safety, perform this installation on a clean, level surface and
Installation Instructionss Precision Sport Shifter Fits: 2008-20133 Corvette C6 (includingg Z06) Catalog # 45034 WORK SAFELY! For maximum safety, perform this installation on a clean, level surface and
Stealth Pro Ratchet Shifter
 Installation Instructions Stealth Pro Ratchet Shifter Part Number 81120 & 81121 (see www.bmracing.com for the latest technical product information) 2010, 2006 by B&M Racing and Performance Products The
Hurst Billet Competition Plus Shifter - TR-3650 (05-10 GT) Installed in: 2010 Ford Mustang GT
 Installed in: 2010 Ford Mustang GT") Tools Required: Socket Ratchet 10 mm Wrench/Socket 10 mm Deep Socket 13 mm Wrench/Socket Socket Extension Flat Head Screw Driver WD-40 Hurst Billet Competition Plus Shifter - TR-3650 (05-10 GT) Installed
Tools Required: Socket Ratchet 10 mm Wrench/Socket 10 mm Deep Socket 13 mm Wrench/Socket Socket Extension Flat Head Screw Driver WD-40 Hurst Billet Competition Plus Shifter - TR-3650 (05-10 GT) Installed
Technical Support (707)
") Installation Instructions CONSOLE MEGASHIFTER Fits: 1982-1992 Camaro & Firebird w/automatic Transmission *except 1988-1992 Firebird Formula Model Catalog # 80692 WORK SAFELY! For maximum safety, perform
Installation Instructions CONSOLE MEGASHIFTER Fits: 1982-1992 Camaro & Firebird w/automatic Transmission *except 1988-1992 Firebird Formula Model Catalog # 80692 WORK SAFELY! For maximum safety, perform
DISASSEMBLY We suggest the vehicle be allowed to cool for an hour or two before you begin since you will be working around the exhaust system.
 Installation Instructions Short Throw Shifter Fits: 1984-2006 BMW 3 Series E30, E36 & E46 1987-2006 BMW 3 Series M3 & 1996-2002 BMW 5 Series Catalog # 45126 WORK SAFELY! For maximum safety, perform this
M-7210-Z3 Focus Short-Throw Shifter (fits 2000-April 2002) INSTALLATION INSTRUCTIONS
 INSTALLATION INSTRUCTIONS") Please visit www.fordracingparts.com for the most current instruction information!!! PLEASE READ ALL OF THE FOLLOWING INSTRUCTIONS CAREFULLY PRIOR TO INSTALLATION. AT ANY TIME YOU DO NOT UNDERSTAND THE
Please visit www.fordracingparts.com for the most current instruction information!!! PLEASE READ ALL OF THE FOLLOWING INSTRUCTIONS CAREFULLY PRIOR TO INSTALLATION. AT ANY TIME YOU DO NOT UNDERSTAND THE
Installation Manual TWM Performance Short throw shifter 2001 and up Hyundai Accent
 Installation Manual TWM Performance Short throw shifter 2001 and up Hyundai Accent 1. Place the vehicle on a flat surface with blocks in front and behind the wheels preventing unwanted movement. The car
Short Shifter Installation Instructions For Miata, 6-speed Manual Transmission
 Short Shifter Installation Instructions For 2006-15 Miata, 6-speed Manual Transmission PART# 994-060 Required tools: 10mm deep socket Long extension Ratchet Small flathead screwdriver Phillips-head screwdriver
Hurst VMATIC3 INSTALLATION
 FORM 159 8530 07/12 Hurst VMATIC3 3-Speed & 4-Speed Automatic Shifter Catalog #3838530 2012 by Hurst Performance The Hurst Vmatic3 shifter can be used in vehicles equipped with most popular three speed
HURST COMP HARDDRIVE STICK KIT 2010 and up Mustang V6 & GT (with automatic transmission)
") HURST COMP HARDDRIVE STICK KIT 2010 and up Mustang V6 & GT (with automatic transmission) Catalog #538 0421, #538 0422, #538 0423, & #538 0424 2012 & 2011 by Hurst Perfomance FORM 159 0421 05/12 Thank you
HURST COMP HARDDRIVE STICK KIT 2010 and up Mustang V6 & GT (with automatic transmission) Catalog #538 0421, #538 0422, #538 0423, & #538 0424 2012 & 2011 by Hurst Perfomance FORM 159 0421 05/12 Thank you
TCI FastGate Shifter Installation Instructions
 151 INDUSTRIAL DRIVE ASHLAND, MISSISSIPPI 38603 http://www.tciauto.com TELEPHONE: 662-224-8972 FAX LINE: 662-224-8255 E-MAIL: tech@tciauto.com TCI 616541 FastGate Shifter Installation Instructions The
Installation Instructions Console Megashifter
 Installation Instructions Console Megashifter 1968-1969 Camaro Part Number 81035 This B&M Megashifter is designed to fit in the console of a 1968-1969 Chevrolet Camaro. In 1968, these vehicles were equipped
Installation Instructions Street Bandit Shifter
 Installation Instructions Street Bandit Shifter Part Number 80797 (see www.bmracing.com for the latest technical product information) 2006, 2000 by B&M Racing and Performance Products The B&M Street Bandit
Installation Instructions
 Preparing your vehicle to install your brake system upgrade 1. Rack the vehicle. 2. If you don t have a rack, then you must take extra safety precautions. 3. Choose a firmly packed and level ground to
Installation Instructions
 Installation Instructions Magnum Grip Pro Stick Shifter including CARBON FIBER models (see www.bmracing.com for the latest fitment applications and model years) Part # s 81040,81041, 81043, & 81044 2010,
Installation Instructions StarShifter
 Installation Instructions StarShifter Part Number 80675 2000 by B&M Racing & Performance Products LLC The B&M StarShifter can be used in vehicles equipped with most popular three speed automatic transmissions.
Installation Instructions HURST STAGE 1 SPRING KIT Chevrolet Camaro SS Fits: Coupe and Convertible Catalog #
 Installation Instructions HURST STAGE 1 SPRING KIT 2016-2017 Chevrolet Camaro SS Fits: Coupe and Convertible Catalog # 6130001 WORK SAFELY: Installation of any Hurst Spring Kit should be performed ONLY
Installation Instructions Short Throw Shifter
 Installation Instructions Short Throw Shifter 2000-2001 Audi TT 1.8L Turbo Including FWD and AWD (Quattro) Part Number 45146 2003,2001 by B&M Racing and Performance Products LLC This B&M Short Throw Shifter
Installation Instructions for the EVO3 Height-Adjustable Ultimate Short Shifter. for F80 M3 and F82 M4
 Installation Instructions for the EVO3 Height-Adjustable Ultimate Short Shifter for 2013+ F80 M3 and F82 M4 part number USSF80 Thank you for purchasing the Ultimate Shift Kit. Please read these directions
Installation Instructions Pro Stick Shifter
 Installation Instructions Pro Stick Shifter Part Number 80701, 80702 & 80706 2012, 2010, 2008, 2001, 1998 by B&M Racing and Performance Products The B&M Pro Stick shifter #80701 and #80706 comes equipped
Installation Instructions QUICKSILVER SHIFTER Fits: Chevrolet Camaro Pontiac Firebird Catalog # 80688
 Installation Instructions QUICKSILVER SHIFTER Fits: 1973-1981 Chevrolet Camaro 1970-1981 Pontiac Firebird Catalog # 80688 WORK SAFELY! For maximum safety, perform this installation on a clean, level surface
Installation Manual TWM Performance Short Shift Kit 2003 And Up Saturn Ion
 Installation Manual TWM Performance Short Shift Kit 2003 And Up Saturn Ion It s preferable to park on a flat surface, as you may have to engage and disengage the hand brake and shift from gears to neutral.
IPSCO STS (Short Throw Shifter) Installation Instructions (GEN II) Dodge Viper WARNING
 Installation Instructions (GEN II) Dodge Viper WARNING") WARNING Modification of your vehicle with the parts identified above may alter its stock performance; the buyer hereby expressly assumes all risks associated with any such modification. DISCLAIMER OF WARRANTY
WARNING Modification of your vehicle with the parts identified above may alter its stock performance; the buyer hereby expressly assumes all risks associated with any such modification. DISCLAIMER OF WARRANTY
Installation Instructions Short Throw Shifter
 Installation Instructions Short Throw Shifter 1996-1999 VW Golf VR6 1998-1999 VW eetle 1998-1999 VW Jetta/ora VR6 Part Number 45106 2001 by &M Racing and Performance Products LLC This &M Short Throw Shifter
Short Shifter Installation Instructions Miata 6-Speed manual
 Tools required: 10mm deep socket long extension ratchet small flathead screwdriver phillips-head screwdriver Short Shifter Installation Instructions 2006-14 Miata 6-Speed manual IMPORTANT NOTE: This shifter
Installation Manual TWM Performance Short Shifter 2008 Mitsubishi Lancer
 Page 1 Installation Manual TWM Performance Short Shifter 2008 Mitsubishi Lancer Please Note: It is preferable to park on a flat surface, as you will have to engage and disengage the hand brake and shift
Installation Instructions Unimatic Shifter
 Installation Instructions Unimatic Shifter Universal Shifter for Automatic Transmissions Part Number 80775 2010, 2000 by B&M Racing & Performance Products The B&M Unimatic is a universal shifter that will
Installation Instructions Right Hand Drive Megashifter
 Installation Instructions Right Hand Drive Megashifter Part Number 80685 1995, 2001, 2006, 2010 by B&M Racing & Performance Products The B&M Right Hand Drive Megashifter is designed specifically for vehicles
Light Truck MegaShifter
 Installation Instructions Light Truck MegaShifter The B&M Light Truck Megashifter shifter is designed to be used in most light trucks equipped with most popular three speed or four speed automatic transmissions.
Chevrolet Cobalt Short Shifter Installation Manual
 Chevrolet Cobalt Short Shifter Installation Manual Pull shift boot down on the shifter shaft. Pull up on the shift knob to remove it. It requires some force. Remove the ebrake console, shifter console
Installation Instructions Megashifter
 Installation Instructions Megashifter The B&M Megashifter shifter can be used in vehicles equipped with most popular three speed or four speed automatic transmissions. Your B&M Megashifter comes equipped
Installation Manual TWM Performance Short Shifter Subaru Forester up to 2005
 - 1 - Installation Manual TWM Performance Short Shifter Subaru Forester up to 2005 Please Note: It is preferable to park on a flat surface, as you will have to engage and disengage the hand brake and shift
Installation Manual TWM Performance Short Shift Kit Stage 1 and Stage 2 MazdaSpeed 6
 Page 1 Installation Manual TWM Performance Short Shift Kit Stage 1 and Stage 2 MazdaSpeed 6 Please Note: It is preferable to park on a flat surface, as you will have to engage and disengage the hand brake
Installation Instructions QUARTER STICK Fits: 2 Speed (Powerglide) or 3 Speed (Turbo-Hydramatic)
 or 3 Speed (Turbo-Hydramatic)") Installation Instructions QUARTER STICK Fits: 2 Speed (Powerglide) or 3 Speed (Turbo-Hydramatic) Catalog# 3160020 WORK SAFELY! For maximum safety, perform this installation on a clean, level surface and
Installation Instructions QUARTER STICK Fits: 2 Speed (Powerglide) or 3 Speed (Turbo-Hydramatic) Catalog# 3160020 WORK SAFELY! For maximum safety, perform this installation on a clean, level surface and
Installation Manual TWM Performance Short Shift Kit Estimated Installation Time: Tools required:
 Page 1 Installation Manual TWM Performance Short Shift Kit 1993-2001 Nissan Altima 1991-2001 Infiniti G20 1991-2001 Nissan Sentra- 200SX 1991-1993 Nissan NX 1986-1989 Nissan Stanza 1995-2001 Nissan Maxima
Hayes TrailTrac Kit Installation Guidelines Polaris Rush / Pro-R / Indy
 Models: 2010-2014 Polaris Rush / Pro-R / Indy Packing List 1 Electronic Control Unit (ECU) 1 ECU Velcro, 3 inch 1 Switch face plate 1 Switch face plate adhesive 1 Switch 1 Wiring harness 1 Fully pre-filled
Detroit Speed, Inc. Electric Headlight Door Kit Corvette P/N: &
 Detroit Speed, Inc. Electric Headlight Door Kit 1968-82 Corvette P/N: 122006 & 122007 The Detroit Speed Inc. Electric Headlight Door Kit replaces the stock vacuum actuated system on all 1968-82 Corvettes.
Installation Instructions Unimatic Shifter
 Installation Instructions Unimatic Shifter Universal Shifter for Automatic Transmissions Part Number 80775 2000 by B&M Racing & Performance Products LLC The B&M Unimatic is a universal shifter that will
INSTALLATION INSTRUCTION 88146
 INSTALLATION INSTRUCTION 88146 Rev H FOR RANCHO SUSPENSION SYSTEM RS6547: 4WD SUBURBAN/YUKON XL, 4WD TAHOE/YUKON, & 4WD AVALANCHE READ ALL INSTRUCTIONS THOROUGHLY FROM START TO FINISH BEFORE BEGINNING
Mustang Short Throw Sport Shifter (All 83 - Early 01 & V6 T-5/T-45 Transmission) - Installation Instructions
 - Installation Instructions") Mustang Short Throw Sport Shifter (All 83 - Early 01 & 01-04 V6 T-5/T-45 Transmission) - Installation Instructions The below installation instructions work for the following products: Mustang Short Throw
Mustang Short Throw Sport Shifter (All 83 - Early 01 & 01-04 V6 T-5/T-45 Transmission) - Installation Instructions The below installation instructions work for the following products: Mustang Short Throw
INSTALLATION INSTRUCTIONS C-VS-2000-DUR-1 20 VEHICLE SPECIFIC CONSOLE for 2018 Dodge Durango with Standard Shifter
 INSTALLATION INSTRUCTIONS C-VS-2000-DUR-1 20 VEHICLE SPECIFIC CONSOLE for 2018 Dodge Durango with Standard Shifter TOOLS REQUIRED: Phillips Screw Driver T-20 Torx bit Standard Socket set 9/64 Allen wrench
Installation Instructions for the EVO3 Height-Adjustable Ultimate Short Shifter
 Installation Instructions for the EVO3 Height-Adjustable Ultimate Short Shifter for 1992-2005 325, 323, 318 and 1986-1994 525, 528, 535, 540 5-speed models only. (part number USSE3 and USSE5) Thank you
Installation Manual TWM Performance Toyota GT86 / Scion FRS / Subaru BRZ Direct Replacement Short Shifter
 Installation Manual TWM Performance Toyota GT86 / Scion FRS / Subaru BRZ Direct Replacement Short Shifter Begin the installation by parking on a flat surface, place wooden blocks in front or behind the
Printed in the U.S.A.
 Installation Instructions Hammer Shifter Part No. 80885 & 80887 2010, 2006, 2005, 2004, 1999 by B&M Racing and Performance Products (Visit www.bmracing.com for additional products and product information)
95-97 Toyota Tercel & Paseo Short Throw Shifter Installation Manual
 95-97 Toyota Tercel & 92-97 Paseo Short Throw Shifter Installation Manual Estimated Installation Time: 40-60 Minutes Tools Required: -Philips head screwdriver and flat head screwdriver -Bench vise -10mm,
Installation Instructions Transpak Fits: GM Turbo-Hydramatic 400, Turbo-Hydramatic 375 and M40 Automatic Transmission Catalog # 20228
 Installation Instructions Transpak Fits: 1965-1987 GM Turbo-Hydramatic 400, Turbo-Hydramatic 375 and M40 Automatic Transmission Catalog # 20228 WORK SAFELY! For maximum safety, perform this installation
WRANGLER TJ INSTALLATION INSTRUCTIONS Kit #: TJ251K/KN/KST/KSTN TJ401K/KN/KST/KSTN
 WRANGLER TJ INSTALLATION INSTRUCTIONS Kit #: TJ251K/KN/KST/KSTN TJ401K/KN/KST/KSTN Before beginning the installation, read these instructions and the enclosed driver s WARNING NOTICE thoroughly and completely.
Detroit Speed, Inc. Electric Headlight Door Kit Corvette P/N: &
 Detroit Speed, Inc. Electric Headlight Door Kit 1968-82 Corvette P/N: 122006 & 122007 The Detroit Speed Inc. Electric Headlight Door Kit replaces the stock vacuum actuated system on all 1968-82 Corvettes.
CorkSport ort Mazda 3 Adjustable Shifter Mazdaspeed 3, Mazda 3 6-speed and Mazda3 SkyActiv 6-speed
 Part # Axl-6-963 CorkSport ort Mazda 3 Adjustable Shifter 2010-2013 Mazdaspeed 3, 2010-2013 Mazda 3 6-speed and 2012-2013 Mazda3 SkyActiv 6-speed Pre-Installation Notes: The CorkSport Adjustable Short
WARNING! THIS SHIFTER IS FOR RACING USE ONLY. NOT FOR STREET USE!
 Installation Instructions Quarter Stick Shifter Fits: GM Powerglide w/forward or reverse valve body. Also fits: TH250, TH350, TH375 and TH400 Auto transmissions w/reverse valve body. Catalog# 3162020 WORK
2015 Mustang Lightbar (All Models) CDC#
 CDC#") 2015 Mustang Lightbar (All Models) CDC# 1511-7000-01 Components: 1 CDC Lightbar Note: READ instructions before starting installation!!! CDC Part# Driver side bracket 0511-6001-05 Passenger side bracket
2015 Mustang Lightbar (All Models) CDC# 1511-7000-01 Components: 1 CDC Lightbar Note: READ instructions before starting installation!!! CDC Part# Driver side bracket 0511-6001-05 Passenger side bracket
Barton Short Throw Shifter 11/12 V6, GT Mustang:
 Barton Short Throw Shifter 11/12 V6, GT Mustang: Tools Required: 10mm deep socket Socket wrench 10 extension for socket wrench Jack Jack stand Small piece of wood Small hook tool (recommended) *can be
1984 Dodge W250 PICKUP
 1984 Dodge W250 PICKUP Submodel: Engine Type: V8 Liters: 5.2 Fuel Delivery: CARB Fuel: GAS Dana 44 MODELS THROUGH 1984 2. Raise and safely support the vehicle, then remove the wheel hub and bearings as
1. Remove the stock linkage and the stock column shift lever by driving the pin out.
 Installation Instructions lndy Pickup 3-Speed Shifter Fits 1963-Later GM & Ford 2WD Pick Up w/ Ford, Saginaw, Muncie, and Tremec Transmissions Catalog # 5010016 WORK SAFELY! For maximum safety, perform
TJ 231/241 CABLE SHIFTER
 KIT CONSISTS OF: # Qty Part No. Description P.O. Box 247, 4320 Aerotech Center Way PAGE 1 OF 10 Page Rev. Date: 08-29-16 1 1 300474 WASHER-RUBBER YOKE SEAL 32 SPLINE 2 1 300476 NUT- 7/8"-20 FLANGE LOCKNUT
INSTALLATION INSTRUCTIONS 89551
 INSTALLATION INSTRUCTIONS 89551 For Rancho Suspension System RS66551B: Ford F250, F350 Super Duty 4x4 DIESEL ONLY (Single Rear Wheels Only With or Without Auxiliary Spring). (WILL NOT WORK ON GAS ENGINES
97-06 Jeep Wrangler TJ Installation Instructions Kit #: TJ251K-SVX / TJ253K-SVX TJ401K-SVX / TJ403K-SVX
 www.skyjacker.com 97-06 Jeep Wrangler TJ Installation Instructions Kit #: TJ251K-SVX / TJ253K-SVX TJ401K-SVX / TJ403K-SVX Before beginning the installation, read these instructions and the enclosed driver
HURST COMP STICK KIT 2008 and up DODGE CHALLENGER (with AUTO-STICK) Catalog # &
 Catalog # &") FORM 159 0402 03/09 HURST COMP STICK KIT 2008 and up DODGE CHALLENGER (with AUTO-STICK) Catalog #538 0402 & 538 0403 2009 by Hurst Perfomance Thank you for purchasing the Hurst Comp Stick Kit for your
FORM 159 0402 03/09 HURST COMP STICK KIT 2008 and up DODGE CHALLENGER (with AUTO-STICK) Catalog #538 0402 & 538 0403 2009 by Hurst Perfomance Thank you for purchasing the Hurst Comp Stick Kit for your
Do not have any open flame or heat sources close to the installation
 March 6, 2017 IS# 791 Page 1 of 16 Thank you for purchasing a Transfer Flow, Inc. 50-gallon replacement fuel system for your 2011-16 Ford diesel short bed pickup. This system will fit any 2x4 or 4x4 crew
INSTALLATION INSTRUCTION 88088
 INSTALLATION INSTRUCTION 88088 For Rancho Suspension Systems RS6588 & RS6589: FORD F-150 READ ALL INSTRUCTIONS THOROUGHLY FROM START TO FINISH BEFORE BEGINNING INSTALLATION Rev B IMPORTANT NOTES! WARNING:
Installation Manual TWM Performance Short Shift Kit 2006 and up Toyota Yaris
 Installation Manual TWM Performance Short Shift Kit 2006 and up Toyota Yaris 1. Unscrew the shift knob by rotating counter clockwise. 2. Remove the carpet or mat at the bottom of the cup holder at the
INSTALLATION INSTRUCTIONS 88029
 INSTALLATION INSTRUCTIONS 88029 FOR SUSPENSION SYSTEMS RS6503: JEEP WRANGLER (TJ) READ ALL INSTRUCTIONS THOROUGHLY FROM START TO FINISH BEFORE BEGINNING INSTALLATION REV F IMPORTANT NOTES! WARNING: This
TCI Trans-Scat
 Page 1 of 5 Return to Instruction Sheet index TCI 400000 Trans-Scat Turbo Hydramatic 400-1965-Up This kit will allow you to re-program your transmission valve body. This kit will give you firm positive
INSTALL INSTRUCTIONS C-VS-1500-DUR-1 15 VEHICLE SPECIFIC CONSOLE for Dodge Durango with OEM Center Shifter
 INSTALL INSTRUCTIONS C-VS-1500-DUR-1 15 VEHICLE SPECIFIC CONSOLE for 2011-2013 Dodge Durango with OEM Center Shifter TOOLS NEEDED: Phillips Screw Driver Standard Socket set Metric Socket set 90 Phillips
Raingear Mustang Windshield Wiper System Installation Instructions E F A
 Raingear 1965-1966 Mustang Windshield Wiper System Installation Instructions J I H J G E F A D K 2 speed switch B C L Intermittent switch Please try our way first. This system is designed to fit in your
WRANGLER TJ INSTALLATION INSTRUCTIONS
 WRANGLER TJ INSTALLATION INSTRUCTIONS 1997-02 Models Kit# TJ251K/TJ401K 2003-06 Models Kit# TJ253K/TJ403K Before beginning the installation, read these instructions and the enclosed driver s WARNING NOTICE
Commander SUSPENSION SYSTEM INSTALLATION INSTRUCTIONS
 PARTS INCLUDED: 2 - FRONT UPPER A-ARMS 2 - FRONT LOWER A-ARMS 4 - COTTER PINS 2-12MM JAM NUTS 2 - TIE ROD EXTENDERS 8- FLANGED DELRON BUSHINGS 4- DELRON CASTER SPACERS 6 - GREASE FITTINGS 3 - BEARING REMOVAL
97-06 Jeep TJ Wrangler Installation Instructions Models Kit# TJ251K/TJ401K-SX -DX 03 Models Kit# TJ253K/TJ403K-SX -DX
 97-06 Jeep TJ Wrangler Installation Instructions 97-02 Models Kit# TJ251K/TJ401K-SX -DX 03 Models Kit# TJ253K/TJ403K-SX -DX Before beginning the installation, read these instructions and the enclosed driver
Installation Instructions Sport Shifter
 The B&M Sport Shifter can be used in vehicles equipped with most popular three speed or four speed automatic transmissions. It is equipped with neutral safety and backup light switches, transmission brackets
97-02 JEEP TJ BODY LIFT KIT INSTRUCTIONS
 92RC60500 97-02 JEEP TJ BODY LIFT KIT INSTRUCTIONS Congratulations on your purchase of a new Rough Country 2 /3 Body Lift. We are committed to providing you with the best product available for the best
INSTALLATION INSTRUCTIONS
 INSTALLATION INSTRUCTIONS --1075 North Ave. Sanger, CA 93657-3539 local: 559-875-0222 fax: 559-876-2259 toll free: 800-445-3767-- 2505 Lowering Spindle Assembly Installation Instructions ½ TON SILVERADO
INSTALLATION INSTRUCTIONS 88511
 INSTALLATION INSTRUCTIONS 88511 For Suspension System RS6511: Ford Super Duty Requires coil spring kit RS80117 or RS80119 for a complete installation READ ALL INSTRUCTIONS THOROUGHLY FROM START TO FINISH