MARTIN XHD Tensioners
|
|
|
- Logan Randall
- 6 years ago
- Views:
Transcription
1 MARTIN XHD Tensioners Go to MARTIN XHD Tensioners web page Operator s Manual M3512
2 Important MARTIN ENGINEERING HEREBY DISCLAIMS ANY LIABILITY FOR: DAMAGE DUE TO CONTAMINATION OF THE MATERIAL; USER S FAILURE TO INSPECT, MAINTAIN AND TAKE REASONABLE CARE OF THE EQUIPMENT; INJURIES OR DAMAGE RESULTING FROM USE OR APPLICATION OF THIS PRODUCT CONTRARY TO INSTRUCTIONS AND SPECIFICATIONS CONTAINED HEREIN. MARTIN ENGINEERING S LIABILITY SHALL BE LIMITED TO REPAIR OR REPLACEMENT OF EQUIPMENT SHOWN TO BE DEFECTIVE. Observe all safety rules given herein along with owner and Government standards and regulations. Know and understand lockout/tagout procedures as defined by American National Standards Institute (ANSI) z , American National Standard for Personnel Protection - Lockout/Tagout of Energy Sources - Minimum Safety Requirements and Occupational Safety and Health Administration (OSHA) Federal Register, Part IV, 29 CFR Part 1910, Control of Hazardous Energy Source (Lockout/Tagout); Final Rule. The following symbols may be used in this manual: DANGER! Danger: Immediate hazards that will result in severe personal injury or death.! WARNING Warning: Hazards or unsafe practices that could result in personal injury.! CAUTION Caution: Hazards or unsafe practices that could result in product or property damages. IMPORTANT Important: Instructions that must be followed to ensure proper installation/operation of equipment. NOTE Note: General statements to assist the reader.
3 Section Table of Contents List of Figures and Tables ii Introduction General Installations without chutework References Materials required Safety Before Installing Tensioner Installing Tensioner Installing mounting plates Installing belt cleaner Installing MARTIN XHD Spring Tensioner Assembly Tensioning belt cleaner Installing MARTIN XHD Air Tensioner Assembly After Installing Belt Cleaner and Tensioner Weekly Maintenance Troubleshooting Part Numbers Page Table of Contents Martin Engineering M /10 i MARTIN XHD Tensioners
4 List of Figures/Tables List of Figures Figure Title Page 1 Air Tensioner Installation Air Tensioner Mounting Dimensions Air Cylinder Schematic (dual tensioners) MARTIN XHD Spring Tensioner Assembly, P/N Dual MARTIN XHD Spring Tensioner Assembly, P/N MARTIN XHD Air Tensioner, P/N Dual MARTIN XHD Air Tensioner P/N R Pinch Point Warning Label, P/N Conveyor Products Warning Label, P/N MARTIN XHD Spring Tensioner Label (Pre-Cleaner), P/N P MARTIN XHD Spring Tensioner Label (Dual Pre-Cleaner), P/N P MARTIN XHD Air Tensioner Pressure Label, P/N List of Tables Table Title Page I Recommended Pressure for Air Tensioner Martin Engineering M /10 ii MARTIN XHD Tensioners
5 Introduction General To introduce product back into the product flow, a Pre-Cleaner is installed on the face of the head pulley. On a dual cleaner system, the Secondary Cleaner is installed immediately following the Pre-Cleaner to remove stubborn material left on the conveyor belt. If a Pre-Cleaner cannot be used because of space limitations, the Secondary Cleaner is installed alone. If the materialhandling process or product could be affected by contamination from the use of these belt cleaners, the user is responsible for taking the necessary steps to prevent contamination. Consult Martin Engineering or a representative for alternate belt cleaners or belt cleaner locations to use where contamination may be an issue. Introduction Installations without chutework These procedures were written for equipment that is being installed on enclosed pulley chutework. If the pulley is not enclosed, the equipment should be installed using the best available field resources and methods to ensure that the critical dimensions are followed for proper installation. Belt cleaner inspection access References If the belt cleaner is installed on enclosed pulley chutework, a MARTIN Inspection Door should be installed. MARTIN Inspection Doors are available from Martin Engineering or a representative. See Part Numbers for a list of MARTIN Inspection Doors and part numbers. The following documents are referenced in this manual: American National Standards Institute (ANSI) z , American National Standard for Personnel Protection - Lockout/Tagout of Energy Sources - Minimum Safety Requirements, American National Standards Institute Inc., 1430 Broadway, New York, NY Federal Register, Volume 54, Number 169, Part IV, 29 CFR Part 1910, Control of Hazardous Energy Source (Lockout/Tagout); Final Rule, Department of Labor, Occupational Safety and Health Administration (OSHA), 32nd Floor, Room 3244, 230 South Dearborn Street, Chicago, IL Martin Engineering M /10 1 MARTIN XHD Tensioners
6 Introduction Safety All safety rules defined in the above documents and all owner/employer safety rules must be strictly followed when working on the belt cleaner.! DANGER Do not touch or go near the conveyor belt or conveyor accessories when the belt is running. Your body or clothing can get caught and you can be pulled into the conveyor, resulting in severe injury or death.! DANGER Before installing, servicing, or adjusting the belt cleaner, turn off and lock out/tag out all energy sources to the conveyor and conveyor accessories according to ANSI standards. Failure to do so could result in serious injury or death.! DANGER If this equipment will be installed in an enclosed area, test the gas level or dust content before using a cutting torch or welding. Using a torch or welding in an area with gas or dust may cause an explosion resulting in serious injury or death.! WARNING Before using a cutting torch or welding the chute wall, cover the conveyor belt with a fire retardant cover. Failure to do so can allow the belt to catch fire. WARNING! Remove all tools from the installation area and conveyor belt before turning on the conveyor. Failure to do so can cause serious injury to personnel or damage to the belt and conveyor. WARNING! Mainframe with blade can be heavy and may require two people to lift. Attempting to lift the belt cleaner without assistance could result in injury. Martin Engineering M /10 2 MARTIN XHD Tensioners
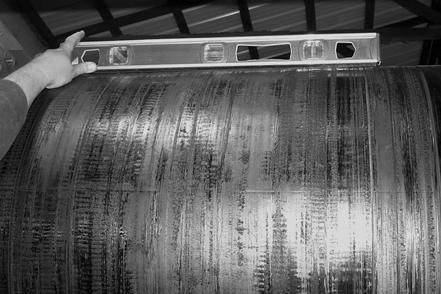
7 Before Installing Tensioner IMPORTANT The delivery service is responsible for damage occurring in transit. Martin Engineering CANNOT enter claims for damages. Contact your transportation agent for more information. 1. Inspect shipping container for damage. Report damage to delivery service immediately and fill out delivery service s claim form. Keep any damaged goods subject to examination. 2. Remove tensioner assembly from shipping container. 3. If anything is missing contact Martin Engineering or a representative. Before Installation WARNING! Before installing equipment, turn off and lock out/ tag out all energy sources to the conveyor and conveyor accessories according to ANSI standards. Failure to do so could result in serious injury or death. 4. Turn off and lock out/tag out energy source according to ANSI standards (see References ).! DANGER If this equipment will be installed in an enclosed area, test the gas level or dust content before using a cutting torch or welding. Using a torch or welding in an area with gas or dust may cause an explosion resulting in serious injury or death. 5. If using a cutting torch or welding, test atmosphere for gas level or dust content. Cover conveyor belt with fire retardant cover. IMPORTANT Center the belt cleaner blades to clean an area narrower than the conveyor belt width. This allows for side-to-side movement of the belt and prevents damage to the belt edge. NOTE The chute wall that the tensioner will be located on is referred to as the operator side. The other side of the chute is referred to as the far side. (If installing dual tensioners, side that is most accessible is operator side. ) 6. Determine which side of chute is easiest to access. Locate the tensioner on the most accessible chute wall. Martin Engineering M /10 3 MARTIN XHD Tensioners


8 Installation Installing Tensioner Installing mounting plates 1 Martin Engineering M /10 4 MARTIN XHD Tensioners


 Inside chute Martin")
9 2 Installation NOTE Tensioner may be bolted or welded to chute wall. Martin Engineering recommends bolting for ease of maintenance and accessibility. 3 Operator side (Spring Tensioner) Operator side (Air Tensioner) Inside chute Martin Engineering M /10 5 MARTIN XHD Tensioners


10 Installation 4 Inside chute 5 For dual tensioners, repeat steps 3 and 4 on far side as shown. For single tensioner, install far side mount plate. Martin Engineering M /10 6 MARTIN XHD Tensioners

.")

11 Installing belt cleaner NOTE Locate cleaner according to belt cleaner operator s manual (see References ). 1 Installation Martin Engineering M /10 7 MARTIN XHD Tensioners


12 Installation 2 3 Far side and operator side Martin Engineering M /10 8 MARTIN XHD Tensioners


13 4 A A Installation A = A 5 A A A = A Martin Engineering M /10 9 MARTIN XHD Tensioners


14 Installation Installing MARTIN XHD Spring Tensioner Assembly 1 Determine the direction to install the lever arm on the tensioner depending on the belt direction, as shown below. Then install the lever arm assembly as required for your application. XHD Pre-Cleaner Left side operation XHD Pre-Cleaner Right side operation 2 Disassemble MARTIN XHD Spring Tensioner. Martin Engineering M /10 10 MARTIN XHD Tensioners


15 NOTE This procedure shows installation for left side operation. 3 Installation 4 Martin Engineering M /10 11 MARTIN XHD Tensioners
")


16 Installation 4 (cont) Martin Engineering M /10 12 MARTIN XHD Tensioners


17 5 A Installation A = A A Martin Engineering M /10 13 MARTIN XHD Tensioners


18 Installation 6 For dual tensioners, repeat steps 3 through 5 on far side. For single tensioner: Far side Martin Engineering M /10 14 MARTIN XHD Tensioners


19 Tensioning belt cleaner 1 Installation IMPORTANT Do at the same time. 2 Martin Engineering M /10 15 MARTIN XHD Tensioners


20 Installation 3 Set screw, then nut 4 5 Lock together. 6 For dual tensioners, repeat steps 1 through 6 on far side. Martin Engineering M /10 16 MARTIN XHD Tensioners


21 7 Installation Martin Engineering M /10 17 MARTIN XHD Tensioners
22 Installation Installing MARTIN XHD Air Tensioner Assembly 1. Slide force arm weldment (C) onto operator side mainframe end weldment (D). Tighten set screws (A) to secure onto mainframe end weldment. 2. Slide force arm weldment tight against shock bushing (B) to retract end weldment. Tighten square head set screws on telescoping mainframe weldment. 3. Remove cotter pin (F) and clevis pin (G) from force arm. 4. Place air cylinder (H) on force arm and secure with clevis pin (G) and cotter pin (F). 5. Place mount bracket (E) on air cylinder and secure with clevis pin (K) and cotter pin (J). A E J K B D C H F G Figure 1. Air Tensioner Installation Martin Engineering M /10 18 MARTIN XHD Tensioners
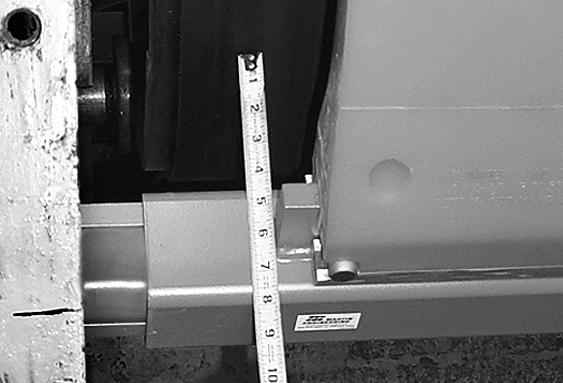
23 M H L Installation 6.00 (152) C (364) 1.00 (25) min (127) max. Figure 2. Air Tensioner Mounting Dimensions 6. Make sure the distance between the mainframe vertical center line and the force arm clevis pin vertical center line is between 1 and 5 in. (25 and 127 mm) as shown in Figure Push force arm (C) toward air cylinder (H) until sewn rod boot (L) retracts and the distance between the clevis pins on the cylinder measures 15-1/8 in. (364 mm). 8. Mark location of cylinder mount bracket holes on chute wall. 9. Remove clevis pin (K) and cotter pin (J). Remove mount bracket. NOTE For easier maintenance, Martin Engineering recommends bolting rather than welding mount bracket to chute wall. 10. Bolt or weld cylinder mount bracket to chute wall as follows: a. If bolting mount bracket to chute wall, do the following: (1) Drill or cut four 9/16-in. holes in operator side chute wall. Remove burrs and sharp edges. (2) Install mount bracket on chute wall with four hex head cap screws, flat washers, compression washers, and hex nuts (M). b. If welding mount bracket to chute wall, do the following: (1) Position mount bracket on chute wall so that four mounting holes line up with four holes marked on chute wall. (2) Weld mount bracket onto chute wall. Skip weld around entire mount bracket surface contacting chute wall. 11. Install air cylinder onto mount bracket and secure with clevis pin and cotter pin. Martin Engineering M /10 19 MARTIN XHD Tensioners
24 Installation B A C D E 1 4 F G 3 2 A. B. C. D. 1/2-in. NPTL air line Filtered plant air (100 psi [7 bar] min.) Lockout valve Check valve E. F. G. Pressure regulator 3-way valve Air cylinders Ports 1-4 Figure 3. Air Cylinder Schematic (dual tensioners)! CAUTION Do not use nitrogen in air tensioner. Nitrogen can dry out rubber seals and damage tensioner. Use only filtered air. 12. Install air line to air tensioner as shown in Figure 3. IMPORTANT If dual air tensioners are used, make sure you install air line into same port location on far side cylinder as on operator side cylinder. a. Install air line from port 1 on 3-way valve into one of two ports on air cylinder (G). If dual air tensioners are used, run air line through mainframe to far side air cylinder. b. Install air line from port 2 on 3-way valve into unused port on air cylinder. If dual air tensioners are used, run air line through mainframe to far side air cylinder.! CAUTION Do not apply pressures greater than those recommended in Table I. Higher pressures can damage conveyor belt or cleaner, and blades will wear faster. 13. Apply air pressure to air tensioner(s) according to Table I. Martin Engineering M /10 20 MARTIN XHD Tensioners
25 Table I. Recommended Pressure for Air Tensioner Belt Width In. (mm) Pre-Cleaner Air Pressure psi (bar) Secondary Cleaner 18 ( ) 18 (1.24) 25 (1.72) 24 ( ) 19 (1.31) 25 (1.72) 30 ( ) 26 (1.79) 37 (2.55) 36 ( ) 32 (2.21) 50 (3.45) 42 ( ) 38 (2.62) 62 (4.27) 48 ( ) 31 (2.14)* 31 (2.14)* 54 ( ) 31 (2.14)* 38 (2.62)* 60 ( ) 40 (2.76)* 44 (3.03)* 66 ( ) 40 (2.76)* 44 (3.03)* 72 ( ) 45 (3.10)* 50 (3.45)* 84 ( ) 53 (3.65)* 62 (4.27)* 96 ( ) 62 (4.27)* 68 (4.69)* 102 ( (4.62)* 74 (5.10)* 108 ( ) 71 (4.90)* 81 (5.58)* 120 ( ) 76 (5.24)* 87 (6.00)* * Per Tensioner. Dual Tensioners required. Installation Martin Engineering M /10 21 MARTIN XHD Tensioners
 on outside chute wall visible to belt cleaner operator. WARNING!")
26 After Installation After Installing Belt Cleaner and Tensioner 1. Thoroughly wipe chute wall clean above tensioner. 2. Place Conveyor Products Warning Label (P/N 23395) on outside chute wall visible to belt cleaner operator. WARNING! Failure to remove tools from installation area and conveyor belt before turning on energy source can cause serious injury to personnel and damage to belt.! DANGER Do not touch or go near conveyor belt or conveyor accessories when conveyor belt is running. Body or clothing can get caught and pull body into conveyor belt, causing severe injury or death. 3. Turn on conveyor belt for 1 hour, then turn off. DANGER! Before installing, servicing, or adjusting the belt cleaner/ tensioner, turn off and lock out/tag out all energy sources to the conveyor and conveyor accessories according to ANSI standards. Failure to do so could result in serious injury or death. 4. Make sure all fasteners are tight. Tighten if necessary. 5. Make sure cleaner is not changing belt line. If it is, install belt support ahead of blade-to-belt contact point (Secondary Cleaner). 6. Inspect belt cleaner for the following: Wear. (A small amount of break-in wear may be found. This will stop once blades wear to conveyor belt contour.) Material buildup. (No material between blades and return side of conveyor belt should be found.) 7. If wear, material buildup, or some other problem exists, see Troubleshooting. Martin Engineering M /10 22 MARTIN XHD Tensioners
27 Weekly Maintenance IMPORTANT Read entire section before beginning work. NOTE Maintenance inspection should be performed no less than weekly. Some applications may require more frequent maintenance inspections. Maintenance! DANGER Before installing, servicing, or adjusting the belt cleaner/ tensioner, turn off and lock out/tag out all energy sources to the conveyor and conveyor accessories according to ANSI standards. Failure to do so could result in serious injury or death. 1. Remove any material from belt cleaner. 2. Make sure all fasteners are tight. Tighten if necessary. 3. Check tension on cleaner. Re-tension if necessary. 4. Wipe all labels clean. If labels are not readable, contact Martin Engineering or a representative for replacements. 5. Check blades for excessive wear. Replace if necessary. 6. Remove equipment from service if there is any indication it is not functioning properly. Call Martin Engineering or a representative for assistance. Do NOT return equipment to operation until the cause of the problem has been identified and corrected. WARNING! Failure to remove tools from installation area and conveyor belt before turning on energy source can cause serious injury to personnel and damage to belt. 7. Remove all tools from maintenance area. DANGER! Do not touch or go near conveyor belt or conveyor accessories when conveyor belt is running. Body or clothing can get caught and pull body into conveyor belt, causing severe injury or death. 8. Start conveyor belt. Martin Engineering M /10 23 MARTIN XHD Tensioners
28 Troubleshooting Troubleshooting Symptom Insufficient cleaning and carryback. Noise or vibration. High blade wear rate. Unusual wear or damage to blades. Bent or broken mainframe or support frame due to blade slipping through. Corrosion or chemical degradation. Corrective Action Tension of cleaner on belt is set too low or too high. Increase or decrease tensioner setting. Blades are worn. Check blades and replace if necessary. Tension is not sufficient or is set too high. Correct tension as necessary. If this does not correct problem, blade urethane may not match application. Contact Martin Engineering or representative. Tension of cleaner on belt is set too high. Reduce tensioner setting. Check belt splice(s) and repair as necessary. If blades are worn to or past the wear line, replace blades. If blades are not worn, check mainframe location. Blade urethane may not match application. Contact Martin Engineering or representative. NOTE Conveyor equipment such as conveyor belt cleaners are subject to a wide variety of bulk materials characteristics and often have to perform under extreme operating or environmental conditions. It is not possible to predict all circumstances that may require troubleshooting. Contact Martin Engineering or a representative if you are experiencing problems other than those listed in the Troubleshooting chart above. Do not return the equipment to operation until the problem has been identified and corrected. Installation checklist If after taking the corrective actions suggested under Troubleshooting you are still experiencing problems, check for the following: Installation Checklist Pre-Cleaner mainframe is proper distance from belt surface on both ends of mainframe. Pre-Cleaner blade tip is at or below horizontal center line of pulley and does not lie in path of material flow. Secondary Cleaner blade tip is 1 in. (25 mm) past vertical center line of pulley. Secondary Cleaner is not changing belt line. Blades are centered on belt. Martin Engineering M /10 24 MARTIN XHD Tensioners
29 Part Numbers MARTIN XHD Spring Tensioners This section provides product names and corresponding part numbers for MARTIN XHD Spring and Air Tensioner assemblies and related equipment. Please reference part numbers when ordering parts: MARTIN XHD Spring Tensioner Assembly: P/N See Figure 4. Dual MARTIN XHD Spring Tensioner Assembly: P/N See Figure 5. Part Numbers MARTIN XHD Air Tensioners MARTIN XHD Air Tensioner Assembly: P/N See Figure 6. Dual MARTIN XHD Air Tensioner Assembly: P/N R. See Figure 7. Mounts and brackets MARTIN XHD Flange Hanger Mount Assembly: P/N SL. Martin Engineering M /10 25 MARTIN XHD Tensioners
30 Part Numbers Chute Wall Figure 4. MARTIN XHD Spring Tensioner Assembly, P/N Martin Engineering M /10 26 MARTIN XHD Tensioners
31 Item Description Part No. Qty 1 Mount Plate Weldment Shock Ring Nylon Bushing Lever Arm Weldment Rod Weldment with SS Rod Tensioning Gauge Bushing Spring Cover Mount Spring Die 2.00 x Washer Flat 1 Regular ZP Nut Hex 1-5 Acme ZP Washer Flat 1-1/4 Narrow ZP Hairpin Cotter 0.18 x 3.56 ZP Mounting Hardware Kit XHD Farside Mount Weldment Locking Collar Screw SHS 1/2-13 NC x Label Pinch Point Warning (NS) Tube Clear (NS) Clamp Hose 2.06 Min. x 3.00 Max (NS) Cap Tube (NS) Spring Cover (NS) Label Martin Products Fig. 9 Label Conveyor Products Warning Fig. 10 Label XHD Spring Tension Pre-Cleaner P1 1 NS Manual Operator s M Part Numbers NS = Not Shown Martin Engineering M /10 27 MARTIN XHD Tensioners
32 Part Numbers Chute Wall Figure 5. Dual MARTIN XHD Spring Tensioner Assembly, P/N Item Description Part No. Qty 1 Mount Plate Weldment Shock Ring Nylon Bushing Lever Arm Weldment Rod Weldment with SS Rod Tensioning Gauge Bushing Spring Cover Mount Spring Die 2.00 x Washer Flat 1 Regular ZP Nut Hex 1-5 Acme ZP Washer Flat 1-1/4 Narrow ZP Hairpin Cotter 0.18 x 3.56 ZP Mounting Hardware Kit Screw SHS 1/2-13 NC x Label Martin Products (NS) Tube Clear (NS) Clamp Hose 2.06 Min. x 3.00 Max (NS) Cap Tube (NS) Spring Cover Fig. 8 Label Pinch Point Warning Fig. 9 Label Conveyor Products Warning Fig. 11 Label XHD Spring Tension Pre-Cleaner P2 2 NS Manual Operator s M NS = Not Shown Martin Engineering M /10 28 MARTIN XHD Tensioners
33 Part Numbers Figure 6. MARTIN XHD Air Tensioner, P/N Item Description Part no. Qty 1 Mount bracket weldment Screw HHC 1/2-13NC x Washer flat 1/ Washer compression 1/ Nut hex 1/2-13NC Cylinder air 3.25 bore x 5.00 stroke Boot sewn rod Clevis piston rod Clamp worm drive Mount plate weldment Bushing nylon Bushing shock Screw square head set 1/2-13NC x Force arm weldment Hub locking (NS) Label MARTIN Products (NS) Operator s Manual M Fig. 9 Conveyor Products Warning Label Fig. 14 XHD Air Tensioner Pressure Label NS = Not Shown Martin Engineering M /10 29 MARTIN XHD Tensioners
34 Part Numbers Figure 7. Dual MARTIN XHD Air Tensioner, P/N R Item Description Part no. Qty 1 Bracket weldment mount Cylinder air 3.25 bore x 5.00 stroke Clamp worm drive Boot sewn rod Plate mount weldment Bushing shock Screw SHS 1/2-13NC x 1 SS Clevis rod piston Arm force weldment Bushing Nylon Screw HHC 1/2-13 NC x Washer flat 1/ Nut hex 1/2-1/3 NC Washer compression 1/ (NS) Label MARTIN Products (NS) Manual Operator s M Fig. 9 Conveyor Products Warning Label Fig. 14 XHD Air Tensioner Pressure Label NS = Not Shown Martin Engineering M /10 30 MARTIN XHD Tensioners
35 !! ADVERTENCIA! WARNING Part Numbers Pinch point! Usted se puede pellizcar! Label P/N Figure 8. Pinch Point Warning Label, P/N 30528! ADVERTENCIA! WARNING Lock out and/or tag out all energy sources to conveyor system and loading system before performing any work on conveyor or conveyor accessories. Failure to do so could result in severe injury or death. Cierre y/o rotule todas las fuentes de energía al sistema transportador y al sistema de carga antes de realizar cualquier trabajo en el transportador o sus accesorios. El no hacerlo puede resultar en heridas serias o muerte. Label P/N Figure 9. Conveyor Products Warning Label, P/N Martin Engineering M /10 31 MARTIN XHD Tensioners
36 Part Numbers Tensioning Gauge For Pre-Cleaner Start with blades touching belt, then turn nuts and compress spring on rod until bottom of washer is aligned with your belt width (inches) or Label P/N P1 Figure 10. MARTIN XHD Spring Tensioner Label (Pre-Cleaner), P/N P1 Tensioning Gauge For Dual Pre-Cleaner Start with blades touching belt, then turn nuts and compress spring on rod until bottom of washer is aligned with your belt width (inches) Label P/N P or Figure 11. MARTIN XHD Spring Tensioner Label (Dual Pre-Cleaner), P/N P2 Martin Engineering M /10 32 MARTIN XHD Tensioners
37 Recommended Pressure for Air Tensioner Belt Width In. (mm) Pre-Cleaner Air Pressure psi (bar) Secondary Cleaner 18 ( ) 18 (1.24) 25 (1.72) 24 ( ) 19 (1.31) 25 (1.72) 30 ( ) 26 (1.79) 37 (2.55) 36 ( ) 32 (2.21) 50 (3.45) 42 ( ) 38 (2.62) 62 (4.27) 48 ( ) 31 (2.14)* 31 (2.14)* 54 ( ) 31 (2.14)* 38 (2.62)* 60 ( ) 40 (2.76)* 44 (3.03)* 66 ( ) 40 (2.76)* 44 (3.03)* 72 ( ) 45 (3.10)* 50 (3.45)* 84 ( ) 53 (3.65)* 62 (4.27)* 96 ( ) 62 (4.27)* 68 (4.69)* 102 ( (4.62)* 74 (5.10)* 108 ( ) 71 (4.90)* 81 (5.58)* 120 ( ) 76 (5.24)* 87 (6.00)* * Per Tensioner. Dual Tensioners required. Part Numbers Figure 12. MARTIN XHD Air Tensioner Pressure Label, P/N Martin Engineering M /10 33 MARTIN XHD Tensioners
38 Notes
39 Any product, process, or technology described here may be the subject of intellectual property rights reserved by Martin Engineering Company. Trademarks or service marks designated with the symbol are registered with the U.S. Patent and Trademark Office and may be proprietary in one or more countries or regions. Other trademarks and service marks belonging to Martin Engineering Company in the United States and/or other countries or regions may be designated with the TM and SM symbols. Brands, trademarks, and names of other parties, who may or may not be affiliated with, connected to, or endorsed by Martin Engineering Company, are identified wherever possible. Additional information regarding Martin Engineering Company s intellectual property can be obtained at
40 We Make Your Bulk Materials Handling Cleaner, Safer and More Productive Through Personalized Performance. Form No. M / , 2010 MARTIN ENGINEERING COMPANY. All rights reserved. One Martin Place Neponset, IL USA or FAX:
Martin SQC2S Square Mainframe Tensioners
 Martin SQC2S Square Mainframe Tensioners Go to Martin SQC2S Square Mainframe Tensioners web page Operator s Manual M3815 Important MARTIN ENGINEERING HEREBY DISCLAIMS ANY LIABILITY FOR: DAMAGE DUE TO CONTAMINATION
PIT VIPER Belt Cleaner
 MARTIN PIT VIPER Belt Cleaner Go to MARTIN PIT VIPER Belt Cleaner web page Operator s Manual M3735 Important MARTIN ENGINEERING HEREBY DISCLAIMS ANY LIABILITY FOR: DAMAGE DUE TO CONTAMINATION OF THE MATERIAL;
Martin QC1 Cleaner XHD with Metal Tipped Blade
 Martin QC1 Cleaner XHD with Metal Tipped Blade Go to Martin QC1 Cleaner XHD with Metal Tipped Blade web page Operator s Manual M3722 Important MARTIN ENGINEERING HEREBY DISCLAIMS ANY LIABILITY FOR: DAMAGE
Martin Tensioners HD Max and XHD
 Martin Tensioners HD Max and XHD Go to Martin Tensioners HD Max and XHD web page Operator s Manual M3512 Important MARTIN ENGINEERING HEREBY DISCLAIMS ANY LIABILITY FOR: DAMAGE DUE TO CONTAMINATION OF
MARTIN DURT TRACKER RSV Belt Cleaner
 MARTIN DURT TRACKER RSV Belt Cleaner Go to MARTIN DURT TRACKER RSV Belt Cleaner web page Operator s Manual M3168 Important MARTIN ENGINEERING HEREBY DISCLAIMS ANY LIABILITY FOR: DAMAGE DUE TO CONTAMINATION
Martin QC2 Cleaner. Go to Martin QC2 Cleaner web page. Operator s Manual M3429
 Martin QC2 Cleaner Go to Martin QC2 Cleaner web page Operator s Manual M3429 Important MARTIN ENGINEERING HEREBY DISCLAIMS ANY LIABILITY FOR: DAMAGE DUE TO CONTAMINATION OF THE MATERIAL; USER S FAILURE
Martin O2 Cleaner. Go to Martin O2 Cleaner web page. Operator s Manual M3702
 Martin O2 Cleaner Go to Martin O2 Cleaner web page Operator s Manual M3702 Important MARTIN ENGINEERING HEREBY DISCLAIMS ANY LIABILITY FOR: DAMAGE DUE TO CONTAMINATION OF THE MATERIAL; USER S FAILURE TO
MARTIN TWIST Tensioner
 MARTIN TWIST Tensioner Go to MARTIN TWIST Tensioner web page Operator s Manual M3837 Important MARTIN ENGINEERING HEREBY DISCLAIMS ANY LIABILITY FOR: DAMAGE DUE TO CONTAMINATION OF THE MATERIAL; USER S
MARTIN Return Roller. Go to MARTIN Return Roller web page. Operator s Manual M3796
 MARTIN Return Roller Go to MARTIN Return Roller web page Operator s Manual M3796 Important MARTIN ENGINEERING HEREBY DISCLAIMS ANY LIABILITY FOR: DAMAGE DUE TO CONTAMINATION OF THE MATERIAL; USER S FAILURE
Martin Twist Tensioner
 Martin Twist Tensioner Operator s Manual M3296 Important MARTIN ENGINEERING HEREBY DISCLAIMS ANY LIABILITY FOR: DAMAGE DUE TO CONTAMINATION OF THE MATERIAL; USER S FAILURE TO INSPECT, MAINTAIN AND TAKE
MARTIN Chevron Belt Cleaners
 MARTIN Chevron Belt Cleaners Go to MARTIN Chevron Belt Cleaners web page Operator s Manual M3266 Important MARTIN ENGINEERING HEREBY DISCLAIMS ANY LIABILITY FOR: DAMAGE DUE TO CONTAMINATION OF THE MATERIAL;
Martin Chevron Cleaner
 Martin Chevron Cleaner Go to Martin Chevron Cleaner web page Operator s Manual M3266 Important MARTIN ENGINEERING HEREBY DISCLAIMS ANY LIABILITY FOR: DAMAGE DUE TO CONTAMINATION OF THE MATERIAL; USER S
Martin Spring & Air Tensioners
 Martin Spring & Air Tensioners Go to Martin Spring & Air Tensioners web page Operator s Manual M3263 Important MARTIN ENGINEERING HEREBY DISCLAIMS ANY LIABILITY FOR: DAMAGE DUE TO CONTAMINATION OF THE
EVO Impact Cradle. Go to EVO Impact Cradle web page. Operator s Manual M3785
 EVO Impact Cradle Go to EVO Impact Cradle web page Operator s Manual M3785 Important MARTIN ENGINEERING HEREBY DISCLAIMS ANY LIABILITY FOR: DAMAGE DUE TO CONTAMINATION OF THE MATERIAL; USER S FAILURE TO
MARTIN QC #1 Heavy-Duty Belt Cleaner
 MARTIN QC #1 Heavy-Duty Belt Cleaner Go to MARTIN QC #1 Heavy-Duty Belt Cleaner web page Operator s Manual M3618 Important MARTIN ENGINEERING HEREBY DISCLAIMS ANY LIABILITY FOR: DAMAGE DUE TO CONTAMINATION
Martin Trac-Mount Impact Cradle
 Martin Trac-Mount Impact Cradle Go to Martin Trac-Mount Impact Cradle web page Operator s Manual M3220 Important MARTIN ENGINEERING HEREBY DISCLAIMS ANY LIABILITY FOR: DAMAGE DUE TO CONTAMINATION OF THE
Martin QC1 Pre-Cleaner with Metal Tipped Blade
 Martin QC1 Pre-Cleaner with Metal Tipped Blade Go to Martin QC1 Pre-Cleaner with Metal Tipped Blade web page Operator s Manual M3814 Important MARTIN ENGINEERING HEREBY DISCLAIMS ANY LIABILITY FOR: DAMAGE
MARTIN TRAC-MOUNT Impact Cradle
 MARTIN TRAC-MOUNT Impact Cradle Go to MARTIN TRAC_MOUNT Impact Cradle web page Operator s Manual M3220 Important MARTIN ENGINEERING HEREBY DISCLAIMS ANY LIABILITY FOR: DAMAGE DUE TO CONTAMINATION OF THE
Martin Impact Cradles LD and MD
 Martin Impact Cradles LD and MD Go to Martin Impact Cradles LD and MD web page Operator s Manual M3493 Important MARTIN ENGINEERING HEREBY DISCLAIMS ANY LIABILITY FOR: DAMAGE DUE TO CONTAMINATION OF THE
Martin Twist Tensioner
 Martin Twist Tensioner Go to Martin Twist Tensioner web page Operator s Manual M3837 Important MARTIN ENGINEERING HEREBY DISCLAIMS ANY LIABILITY FOR: DAMAGE DUE TO CONTAMINATION OF THE MATERIAL; USER S
MARTIN SAF-2 & MARTIN SQC2 Square Mainframe Belt Cleaner
 MARTIN SAF-2 & MARTIN SQC2 Square Mainframe Belt Cleaner Go to MARTIN SAF-2 Belt Cleaner web page Go to MARTIN SQC2 Square Mainframe Belt Cleaner web page Operator s Manual M3820 Important MARTIN ENGINEERING
Mandrel Belt Cleaner Mount
 MARTIN Mandrel Belt Cleaner Mount Go to MARTIN Mandrel Belt Cleaner Mount web page Operator s Manual M3336 Important MARTIN ENGINEERING HEREBY DISCLAIMS ANY LIABILITY FOR: DAMAGE DUE TO CONTAMINATION OF
Martin Compact Cleaner
 Martin Compact Cleaner Go to Martin Compact Cleaner web page Operator s Manual M3400 Important MARTIN ENGINEERING HEREBY DISCLAIMS ANY LIABILITY FOR: DAMAGE DUE TO CONTAMINATION OF THE MATERIAL; USER S
EVO Slider Cradle. Go to EVO Slider Cradle web page. Operator s Manual M3786
 EVO Slider Cradle Go to EVO Slider Cradle web page Operator s Manual M3786 Important MARTIN ENGINEERING HEREBY DISCLAIMS ANY LIABILITY FOR: DAMAGE DUE TO CONTAMINATION OF THE MATERIAL; USER S FAILURE TO
SHD Belt Cleaner and Tensioner
 MARTIN SHD Belt Cleaner and Tensioner Go to MARTIN SHD Belt Cleaner and Tensioner web page Operator s Manual M3427 Important MARTIN ENGINEERING HEREBY DISCLAIMS ANY LIABILITY FOR: DAMAGE DUE TO CONTAMINATION
MARTIN GUARDABELT Light-Duty/Medium-Duty Impact Cradles
 MARTIN GUARDABELT Light-Duty/Medium-Duty Impact Cradles Go to MARTIN GUARDABELT Light-Duty/Medium-Duty Impact Cradles web page Operator s Manual M3493 Important MARTIN ENGINEERING HEREBY DISCLAIMS ANY
Martin Slider Cradle. Go to Martin Slider Cradle web page. Operator s Manual M3596
 Martin Slider Cradle Go to Martin Slider Cradle web page Operator s Manual M3596 Important MARTIN ENGINEERING HEREBY DISCLAIMS ANY LIABILITY FOR: DAMAGE DUE TO CONTAMINATION OF THE MATERIAL; USER S FAILURE
DT2H Extra Heavy-Duty Secondary Belt Cleaner
 MARTIN DT2H Extra Heavy-Duty Secondary Belt Cleaner Go to MARTIN DT2H Extra Heavy-Duty Secondary Belt Cleaner web page Operator s Manual M3699 Important MARTIN ENGINEERING HEREBY DISCLAIMS ANY LIABILITY
Martin Food Grade Cleaner and Tensioners
 Martin Food Grade Cleaner and Tensioners Go to Martin Food Grade Cleaner and Tensioners web page Operator s Manual M3215 Important MARTIN ENGINEERING HEREBY DISCLAIMS ANY LIABILITY FOR: DAMAGE DUE TO CONTAMINATION
EVO High Speed Roller Cradle
 EVO High Speed Roller Cradle Go to EVO High Speed Roller Cradle web page Operator s Manual M3968 Important MARTIN ENGINEERING HEREBY DISCLAIMS ANY LIABILITY FOR: DAMAGE DUE TO CONTAMINATION OF THE MATERIAL;
Martin PV Cleaner. Go to Martin PV Cleaner web page. Operator s Manual M3735
 Martin PV Cleaner Go to Martin PV Cleaner web page Operator s Manual M3735 Important MARTIN ENGINEERING HEREBY DISCLAIMS ANY LIABILITY FOR: DAMAGE DUE TO CONTAMINATION OF THE MATERIAL; USER S FAILURE TO
Martin Food Grade Cleaner and Tensioners
 Martin Food Grade Cleaner and Tensioners Go to Martin Food Grade Cleaner and Tensioners web page Operator s Manual M3215 Important MARTIN ENGINEERING HEREBY DISCLAIMS ANY LIABILITY FOR: DAMAGE DUE TO CONTAMINATION
Martin QB1 Cleaner HD
 Martin QB1 Cleaner HD Go to Martin QB1 Cleaner HD web page Operator s Manual M4022 Important MARTIN ENGINEERING HEREBY DISCLAIMS ANY LIABILITY FOR: DAMAGE DUE TO CONTAMINATION OF THE MATERIAL; USER S FAILURE
Martin Vibrating Dribble Chute
 Martin Vibrating Dribble Chute Go to Martin Vibrating Dribble Chute web page Operator s Manual M3232 Important MARTIN ENGINEERING HEREBY DISCLAIMS ANY LIABILITY FOR: DAMAGE DUE TO CONTAMINATION OF THE
Martin QC1 Cleaner HD
 Martin QC1 Cleaner HD Go to Martin QC1 Cleaner HD web page Operator s Manual M3618 Important MARTIN ENGINEERING HEREBY DISCLAIMS ANY LIABILITY FOR: DAMAGE DUE TO CONTAMINATION OF THE MATERIAL; USER S FAILURE
Martin SHD Cleaner & Tensioner
 Martin SHD Cleaner & Tensioner Go to Martin SHD Cleaner & Tensioner web page Operator s Manual M3427 Important MARTIN ENGINEERING HEREBY DISCLAIMS ANY LIABILITY FOR: DAMAGE DUE TO CONTAMINATION OF THE
Martin ZHD Cleaner & Tensioners
 Martin ZHD Cleaner & Tensioners Go to Martin ZHD Cleaner & Tensioners web page Operator s Manual M3542 Important MARTIN ENGINEERING HEREBY DISCLAIMS ANY LIABILITY FOR: DAMAGE DUE TO CONTAMINATION OF THE
Martin Gate Jack Opener
 Martin Gate Jack Opener Go to Martin Gate Jack Opener web page Operator s Manual M3203 Important MARTIN ENGINEERING HEREBY DISCLAIMS ANY LIABILITY FOR: DAMAGE DUE TO CONTAMINATION OF THE MATERIAL; USER
Martin Tracker. Go to Martin Tracker web page. Operator s Manual M3625
 Martin Tracker Go to Martin Tracker web page Operator s Manual M3625 Important MARTIN ENGINEERING HEREBY DISCLAIMS ANY LIABILITY FOR: DAMAGE DUE TO CONTAMINATION OF THE MATERIAL; USER S FAILURE TO INSPECT,
Cougar DC Truck Vibrators
 Cougar DC Truck Vibrators Go to Cougar DC Truck Vibrators web page Operator s Manual M3952 Important MARTIN ENGINEERING HEREBY DISCLAIMS ANY LIABILITY FOR: DAMAGE DUE TO CONTAMINATION OF THE MATERIAL;
Martin Roll Generator
 Martin Roll Generator Operator s Manual M4062 Important MARTIN ENGINEERING HEREBY DISCLAIMS ANY LIABILITY FOR: DAMAGE DUE TO CONTAMINATION OF THE MATERIAL; USER S FAILURE TO INSPECT, MAINTAIN AND TAKE
Martin Tornado Retrofit Valve
 Martin Tornado Retrofit Valve Go to Martin Tornado Retrofit Valve web page Martin Tornado Retrofit Valves Retrofit Internal and External Valve Air Cannons Internal Valve Air Cannon External Valve Air Cannon
Cougar B Series Electric Vibrators 3 Frame
 Cougar B Series Electric Vibrators 3 Frame Go to Cougar B Series Electric Vibrators web page Operator s Manual M3929 Important MARTIN ENGINEERING HEREBY DISCLAIMS ANY LIABILITY FOR: DAMAGE DUE TO CONTAMINATION
BIG BLASTER XHV Air Cannon Retrofit with MARTIN TORNADO Exhaust Valve
 BIG BLASTER XHV Air Cannon Retrofit with MARTIN TORNADO Exhaust Valve Go to BIG BLASTER XHV Air Cannon Retrofit with MARTIN TORNADO Exhaust Valve web page MARTIN TORNADO Exhaust Valves Retrofit Internal
Cougar B Series Electric Vibrators 4 Frame
 Cougar B Series Electric Vibrators 4 Frame Go to Cougar B Series Electric Vibrators web page Operator s Manual M3930 Important MARTIN ENGINEERING HEREBY DISCLAIMS ANY LIABILITY FOR: DAMAGE DUE TO CONTAMINATION
Martin Air Cannon Maintenance Instructions
 Martin Air Cannon Maintenance Instructions Go to Martin Air Cannon Maintenance Instructions web page Martin Hurricane Air Cannon Martin Tornado Air Cannon Operator s Manual M3747 Important MARTIN ENGINEERING
MARTIN Sonic Horns. Go to MARTIN Sonic Horns web page. Operator s Manual M3829
 MARTIN Sonic Horns Go to MARTIN Sonic Horns web page Operator s Manual M3829 Important MARTIN ENGINEERING HEREBY DISCLAIMS ANY LIABILITY FOR: DAMAGE DUE TO CONTAMINATION OF THE MATERIAL; USER S FAILURE
Cougar THD Vibrators. Go to Cougar THD Vibrators web page. Operator s Manual M4020
 Cougar THD Vibrators Go to Cougar THD Vibrators web page Operator s Manual M4020 Important MARTIN ENGINEERING HEREBY DISCLAIMS ANY LIABILITY FOR: DAMAGE DUE TO CONTAMINATION OF THE MATERIAL; USER S FAILURE
Cougar D and U Series Electric Vibrators
 Cougar D and U Series Electric Vibrators Go to Cougar D and U Series Electric Vibrators web page Operator s Manual M3933 Important MARTIN ENGINEERING HEREBY DISCLAIMS ANY LIABILITY FOR: DAMAGE DUE TO CONTAMINATION
Cougar P-Series Piston Vibrators
 Cougar P-Series Piston Vibrators Go to Cougar P-Series Piston Vibrators web page Operator s Manual M3156 Important MARTIN ENGINEERING HEREBY DISCLAIMS ANY LIABILITY FOR: DAMAGE DUE TO CONTAMINATION OF
BIG BLASTER Air Cannon Maintenance Instructions
 BIG BLASTER Air Cannon Maintenance Instructions Go to BIG BLASTER Air Cannon Maintenance Instructions web page BIG BLASTER HURRICANE Air Cannon BIG BLASTER XHV Air Cannon with MARTIN TORNADO Exhaust Valve
Martin Inspection Door
 Martin Inspection Door Go to Martin Inspection Door web page Operator s Manual M3891 Important MARTIN ENGINEERING HEREBY DISCLAIMS ANY LIABILITY FOR: DAMAGE DUE TO CONTAMINATION OF THE MATERIAL; USER S
MARTIN Air-Supported Conveyor System
 MARTIN Air-Supported Conveyor System Go to MARTIN Air-Supported Conveyor System web page Operator s Manual M3574 Important MARTIN ENGINEERING HEREBY DISCLAIMS ANY LIABILITY FOR: DAMAGE DUE TO CONTAMINATION
Martin Inspection Door
 Martin Inspection Door Go to Martin Inspection Door web page Operator s Manual M3891 Important MARTIN ENGINEERING HEREBY DISCLAIMS ANY LIABILITY FOR: DAMAGE DUE TO CONTAMINATION OF THE MATERIAL; USER S
Martin Screen Vibrators
 Martin Screen Vibrators Go to Martin Screen Vibrators web page Operator s Manual M3536 Important MARTIN ENGINEERING HEREBY DISCLAIMS ANY LIABILITY FOR: DAMAGE DUE TO CONTAMINATION OF THE MATERIAL; USER
Cougar Thumper Series Timed Impactors and PV Series Piston Vibrators
 Cougar Thumper Series Timed Impactors and PV Series Piston Vibrators Go to Cougar Thumper Series Timed Impactors and PV Series Piston Vibrators web page Operator s Manual M3422 Important MRTIN ENGINEERING
Martin Electric Vibrators
 Martin Electric Vibrators Go to Martin Electric Vibrators web page Operator s Manual M3910 Important MARTIN ENGINEERING HEREBY DISCLAIMS ANY LIABILITY FOR: DAMAGE DUE TO CONTAMINATION OF THE MATERIAL;
Martin Conveyor Guard Installation Instructions
 Martin Conveyor Guard Installation Instructions! DANGER Before installing, servicing, or adjusting the conveyor equipment, turn off and lock out/tag out all energy sources to the conveyor and conveyor
BIG BLASTER XHV Air Cannon
 BIG BLASTER XHV Air Cannon Go to BIG BLASTER XHV Air Cannon web page Operator s Manual M3404 Important MARTIN ENGINEERING HEREBY DISCLAIMS ANY LIABILITY FOR: DAMAGE DUE TO CONTAMINATION OF THE MATERIAL;
Figure 1. Locating Vibrators and Reinforcing Beams on Hoppers. Table I. Reinforcement Channel Selection CAUTION
 Vibrolator Ball Vibrator Installation Instructions! DANGER Before installing equipment, turn off and lock out/tag out all energy sources to the hopper, conveyor, and/or conveyor accessories according to
Boot-Lift Railcar Connector
 Boot-Lift Railcar Connector Go to Boot-Lift Railcar Connector web page Serial Number Boot Pattern Number Operator s Manual M3198 Important MARTIN ENGINEERING HEREBY DISCLAIMS ANY LIABILITY FOR: DAMAGE
Martin MMX, MIX, & MVX Electric Vibrators
 Martin MMX, MIX, & MVX Electric Vibrators Go to Martin MMX, MIX, & MVX Electric Vibrators web page Operator s Manual M3882 Important MARTIN ENGINEERING HEREBY DISCLAIMS ANY LIABILITY FOR: DAMAGE DUE TO
Martin Tornado Air Cannon
 Martin Tornado Air Cannon Go to Martin Tornado Air Cannon web page Operator s Manual M3754 Important MARTIN ENGINEERING HEREBY DISCLAIMS ANY LIABILITY FOR: DAMAGE DUE TO CONTAMINATION OF THE MATERIAL;
BIG BLASTER XHV Air Cannon Retrofit Kit Installation Instructions
 BIG BLASTER XHV Air Cannon Retrofit Kit Installation Instructions Warranty disclaimer Martin Engineering s warranty for this product is limited to the item or items manufactured by Martin Engineering that
Martin Tornado Air Cannon
 Martin Tornado Air Cannon Operator s Manual M3754 Important MARTIN ENGINEERING HEREBY DISCLAIMS ANY LIABILITY FOR: DAMAGE DUE TO CONTAMINATION OF THE MATERIAL; USER S FAILURE TO INSPECT, MAINTAIN AND TAKE
Martin Hurricane Air Cannon & Martin Multi Valve Air Cannon
 Martin Hurricane Air Cannon & Martin Multi Valve Air Cannon Go to Martin Hurricane Air Cannon web page Go to Martin Multi Valve Air Cannon web page Martin Multi Valve Air Cannon 70L 150L 35L Operator s
Martin Hurricane Air Cannon & Martin Multi Valve Air Cannon
 Martin Hurricane Air Cannon & Martin Multi Valve Air Cannon Martin Multi Valve Air Cannon 70L 150L 35L Operator s Manual M3737 Important MARTIN ENGINEERING HEREBY DISCLAIMS ANY LIABILITY FOR: DAMAGE DUE
BIG BLASTER TYPHOON Air Cannon
 BIG BLASTER TYPHOON Air Cannon Go to BIG BLASTER TYPHOON Air Cannon web page 70 L 150 L 35 L Operator s Manual M3813 Important MARTIN ENGINEERING HEREBY DISCLAIMS ANY LIABILITY FOR: DAMAGE DUE TO CONTAMINATION
Martin Air Cleaner. Operator s Manual M3918
 Martin Air Cleaner Operator s Manual M3918 Section Table of Contents List of Figures............................................................ ii Introduction..............................................................
InLine Standard Secondary Belt Cleaner
 InLine Standard Secondary Belt Cleaner Installation Operations Manual Revision Description of Change Changed By Date A Added Final Checklist AS 28/5/07 B Updated Melbourne Address & Removed SA Address
ERASER MDP. INSTALLATION GUIDE LIB-CP-MDP Rev. 2. Conveyor Belt Cleaning System
 INSTALLATION GUIDE LIB-CP-MDP-03-01 Rev. 2 ERASER MDP Conveyor Belt Cleaning System 520 9th Street Gwinn, MI 49841 Phone: 800.991.2746 Fax: 906.226.9779 www.argonics.com ERASER MDP Conveyor Belt Cleaning
Safety, Operation & Maintenance Manual
 Safety, Operation & Maintenance Manual Douglas Titan IBA Adjustable Impact Bed Warning: This manual must be read, understood, and followed by anyone that installs, operates, and maintains this product.
AET48 Owner s Manual. TOW AERATOR Owner s Manual AET48 Beginning Serial #: Replacement Parts
 Tine Row Kit Complete tine row set for replacement of one complete row of tines. Includes mounting plates, spacer, and all hardware. TOW AERATOR Owner s Manual AET48 Beginning Serial #: 0206001 Tine Kit
10 & 20 TON UTILITY PRESS
 10 & 20 TON UTILITY PRESS OWNERS MANUAL BENCH AND FLOOR MODEL PRESSES 10 & 20 Ton single acting manual hydraulic press FOR YOUR OWN SAFETY AND OPTIMUM OPERATION READ INSTRUCTION MANUAL BEFORE OPERATING
ERASER SHD. INSTALLATION GUIDE LIB-CP-SHD Rev. 2. Conveyor Belt Cleaning System
 INSTALLATION GUIDE LIB-CP-SHD-03-01 Rev. 2 ERASER SHD Conveyor Belt Cleaning System 520 9th Street Gwinn, MI 49841 Phone: 800.991.2746 Fax: 906.226.9779 www.argonics.com ERASER SHD Installation Tools Required
INSTRUCTIONS AND PARTS LIST FOR MODEL 25H HAND-OPERATED HYDRAULIC PRESS
 INSTRUCTIONS AND PARTS LIST FOR MODEL 25H HAND-OPERATED HYDRAULIC PRESS SETTING UP THE PRESS FOR OPERATION For shipping convenience, the gauge, pump handle, hoist crank, screw nose and base angles were
Installation and Operation Manual
 1645 Lemonwood Dr. Santa Paula, CA 93060 USA Toll Free: 1 (800) 253-2363 Tel: 1 (805) 933-9970 rangerproducts.com Ranger Floor Jack Installation and Operation Manual Manual Revision B July 2017 Manual
INSTRUCTIONS AND PARTS LIST FOR MODEL 125H & 150H HAND-OPERATED HYDRAULIC PRESS
 INSTRUCTIONS AND PARTS LIST FOR MODEL 125H & 150H HAND-OPERATED HYDRAULIC PRESS SETTING UP THE PRESS FOR OPERATION For shipping convenience, the gauge, pump handle, hoist crank, screw nose and base angles
INSTALLATION AND INSTRUCTIONAL MANUAL ELECTRIC V-BOX MATERIAL SPREADERS
 0050-00-00 07-06-00 Contents SAFETY... MOUNTING INSTRUCTION... -5 ELECTRICAL CONTROL INSTRUCTION... 6-9 V-BOX PARTS DIAGRAMS AND LISTINGS... 0-5 SPINNER PARTS DIAGRAMS AND LISTINGS... 6-0 DRIVE SHAFT,
OPERATOR S MANUAL FABRIC 3-BAG GRASS CATCHER PART NO PRINTED 8/2012 PRINTED IN USA
 OPERATOR S MANUAL FABRIC -BAG GRASS CATCHER Models: GC-STC-V This manual contains the operating instructions and safety information for your Scag mower accessory. Reading this manual can provide you with
ELEVATING UNDERCAR CONVEYOR 12" & 16" FLUSH - TYPE
 ELEVATING UNDERCAR CONVEYOR 12" & 16" FLUSH - TYPE OWNER'S MANUAL 19013200 (10/97) Contents Introduction.................................... 1 Warnings...................................... 1 Statement
accidents which arise due to nonobservance and the safety information herein.
 2000LB WINCH Model: 7247 CALIFORNIA PROPOSITION 65 WARNING: You can create dust when you cut, sand, drill or grind materials such as wood, paint, metal, concrete, cement, or other masonry. This dust often
Instruction Manual. ATV Manual Plow Lift
 Instruction Manual ATV Manual Plow Lift Manual Conventions This manual uses the following symbols to help differentiate between different kinds of information. The safety symbol is used with a key word
NBC, TGW Nitta Belt Welding Instructions. NBC Full Welding Instruction with Nitta Blue Urethane Belt
 NBC, TGW Nitta Belt Welding Instructions NBC Full Welding Instruction with Nitta Blue Urethane Belt P/N: 1207439 Date: 12/11/2018 CONTENTS INTRODUCTION... 3 PURPOSE... 3 SCOPE... 3 TGW SAFETY INFORMATION...
L Rev. 10/04. CSI Midland/Gunite Automatic Brake Adjuster Service Manual
 L30006 Rev. 10/04 CSI Midland/Gunite Automatic Brake Adjuster Service Manual TABLE OF CONTENTS Overview...3 Installation Procedures...4 Brake Adjustment...10 Installation Procedures...11 Brake Adjustment...13
RETROFIT INSTALLATION
 RETROFIT INSTALLATION Installation Instructions C0013536 Pallet Grip Q Series Semi-Automatic Machines Manufacture Date before July, 2010 1 RETROFIT INSTALLATION Table of Contents 1.0 Introduction... 3
Quiet Collector. Model No & Up
 FORM NO. -0 Quiet Collector Model No. 79-990000 & Up Operator s Manual IMPORTANT: Read this manual, and your tractor manual, carefully. They contain information about your safety and the safety of others.
RolsplicerTM. Maintenance Manual And Illustrated Parts List
 RolsplicerTM Maintenance Manual And Illustrated Parts List List of Illustrations Figure Page. Rolsplicer 3 2. Roller Adjustment 4 3. Rolsplicer 6 4. Lid Hold Down Assembly 8 5. Automatic Lid Speed Adjustment
201B Series Belted Portable Drum Rollers Operator s Manual for Morse Belted Portable Drum Rollers
 Contents Page Receiving Procedures.................... 1 Warranty............................. 1 Safety Information..................... 1-2 Machine Description................... 3 Options.............................
LAD-EZ Series Portable Warehouse Ladders, 6-12 Steps Assembly Manual
 Rev. 3/3/07 LAD-EZ (6- STEPS), MANUAL Vestil Manufacturing Corp. 999 North Wayne Street, P.O. Box 507, Angola, IN 46703 Telephone: (60) 665-7586 -or- Toll Free (800) 348-0868 Fax: (60) 665-339 www.vestilmfg.com
PRODIGY & PRO PLUS Skid Steer Snowplows
 Western Products, PO Box 245038, Milwaukee, WI 53224-9538 www.westernplows.com June 15, 2017 Lit. No. 78552, Rev. 01 PRODIGY & PRO PLUS Skid Steer Snowplows PRODIGY Blade Assembly 57700 PRO PLUS Blade
LAD-series Portable Warehouse Ladders, 6-12 Steps Instruction Manual
 Rev. 3/3/07 LAD (6- STEPS), MANUAL VESTIL MANUFACTURING CORP. 999 North Wayne Street, P.O. Box 507, Angola, IN 46703 Telephone: (60) 665-7586 -or- Toll Free (800) 348-0868 Fax: (60) 665-339 www.vestilmfg.com
PAGE DESCRIPTION REF. NO.
 TABLE OF CONTENTS PAGE DESCRIPTION REF. NO. - CONTENTS PAGE... CE-077 1 CRANE SAFETY AND HAZARDS... CE-044 2 OPERATING INSTRUCTIONS... CE-039 3 DIMENSIONS AND CAPACITIES... CE-020 4 ASSEMBLY PAGE 1 UNPACKING...
Subsea PowerDrill. User s Manual. E.H. Wachs Part No MAN Rev , April Revision History: Original September 2008 Rev.
 User s Manual E.H. Wachs 600 Knightsbridge Parkway Lincolnshire, IL 60069 www.wachsco.com E.H. Wachs Part No. 08-018-MAN Rev. 1-0409, April 2009 Revision History: Original September 2008 Rev. 1 April 2009
CCP2-FLR1-21_ flange-rod operating mechanism
 Installation manual 3A3747 Rev A Contents Description Page General information 1 Required tools 2 Hardware contents 2 Installation and adjustment 2-6 Flange drilling pattern 7 HAZARD OF ELECTRIC SHOCK,
201 Series Portable Drum Rotators Operator s Manual for Morse Portable Drum Rotators
 Contents Page Receiving Procedures.................... 1 Warranty............................. 1 Safety Information..................... 1-2 Machine Description................... 3 Options.............................
Operating Instructions & Parts Manual
 Fuel Tank Adapter Operating Instructions & Parts Manual Model ATD-7470 Capacity 80 lbs. This is the safety alert symbol. It is used to alert you to potential personal injury hazards. Obey all safety messages
Wallace Tri-Adjustable Gantry Cranes Square Tube Assembly Instructions
 Wallace Tri-Adjustable Gantry Cranes Square Tube Assembly Instructions For any additional information, Please call 1- S 1. Read and understand instructions before using this gantry. 2. Inspect gantry thoroughly
INSTALLATION INSTRUCTIONS SKID PLATE FRONT MOUNTING KIT Part Number: Application: Polaris Ranger 400, 500, 800 HO
 INSTALLATION INSTRUCTIONS SKID PLATE FRONT MOUNTING KIT Part Number: 90812 Application: 2012+ Polaris Ranger 400, 500, 800 HO GENERAL SAFETY PRECAUTIONS Your safety, and the safety of others, is very important.
Operator s Manual. Go Galvanized! YOU'RE ALWAYS AHEAD...WITH A MODERN BEHIND.
 SUMMER 2008 rock & landscape rake Operator s Manual 003-7445 003-7450 003-7460 003-7440 003-7445 003-7450 YOU'RE ALWAYS AHEAD...WITH A MODERN BEHIND. P.O. Box 790 Beaumont, Tx 77704 409.833.2665 1.800.231.8198