Installation JETTA manual: Parrot MKi + Parrot CK3100 range JETTA
|
|
|
- Darcy Day
- 6 years ago
- Views:
Transcription


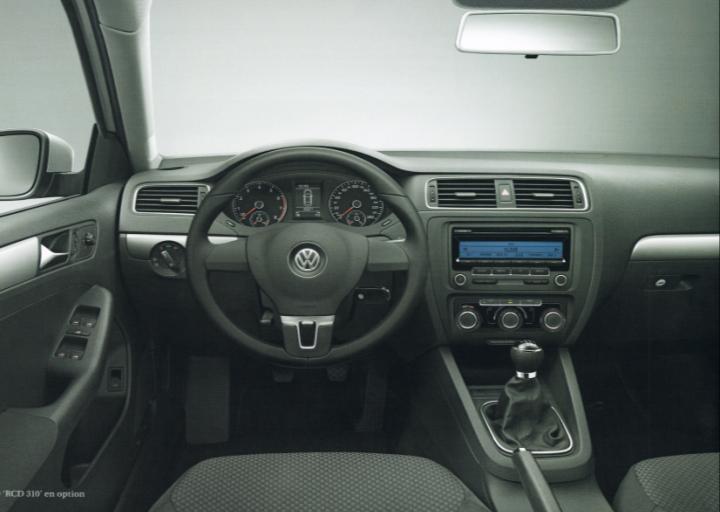
1 Installation JETTA manual: Parrot MKi + Parrot CK3100 range JETTA This The VOLKSWAGEN sheet is designed JETTA to marque help you and with VOLKSWAGEN the installation logo are of a the Parrot property product of the and VOLKSWAGEN is purely for France information. Group s.a Any or VOLKSWAGEN installation performed AG. in compliance This document with is the only instructions valid for the appearing vehicle model in this JETTA document year 2011, is done excluding under the all sole other responsibility models in the of same the installer, range and who excluding is entirely later responsible for modifications the quality made of the to installation. the vehicle All by rights the manufacturer. reserved Copyright 2011 PARROT SA RCS PARIS May not be reproduced without the authorisation The Parrot brand of Parrot name SA. and Pictures logos are for the information exclusive property only. of Parrot SA.


2 Fitting time / Main features Disassembly 30min NO +IGN Mounting kit 30min NO ISO Reassembly 30min YES UNIKA Testing 15min FRONT LOUDSPEAKER TEL mode Total 1h45min ALL MUSIC mode CK range Tools -TORX screwdriver Plastic trim removal tools - Cutting pliers FACOM / BOJO - Crimping pliers - Multimeter or Test lamp - Wire tie - Electrical tape mm flat terminal and round male terminal MKi range Accessories required Kram ref. Dealer ref. CK range YY 138 CABL 2 MKi range YY 138 CABL 2 Photos for illustration purposes Updating "Please contact your wholesaler to purchase accessories. A list of wholesalers is available at " To get the most out of your hands-free kit we recommend that you update your software regularly. The update procedure can be found at
3 Disassembly


4 Disassembly 1 / Release the panel by inserting the plastic trim tools underneath. Remove screws 1 and Unclip the cabin light and Using the plastic trim tools, disconnect it. unclip the vanity light from the left-hand side Using the plastic trim tools, unclip the car stereo and air conditioning surround. Unplug the airbag indicator connector. Remove screws 3, 4, 5 and 6 around the car stereo. Disconnect the connector and the aerial cables.


5 Disassembly 2 / Remove screws 7, 8, 9 and 10 around the air conditioning control unit, then remove it without disconnecting it. Unclip the fusebox cover from the bottom Using the plastic trim tools, unclip the side panel of the dashboard on the driver's side. Unclip the cover plate running up the side of the driver's door. 12 Remove the driver's side door seal.


. 3 Connect the +IGN using a male round terminal to the blue wire of the 84942")
6 Finding an ACC wire 1 2 Using a guide, feed an electric wire from under the steering wheel to the air conditioning control housing. Feed the wire to the left into the fusebox housing. Fit a 1.5 mm terminal and insert it into one of the small fuse slots on the side of the box (using a multimeter, check that the +12V supply is indeed controlled by the ignition key). 3 Connect the +IGN using a male round terminal to the blue wire of the adapter in front of the fuse holder or on the red wire of the or YY138CABL2 adapter.

 in the")


7 Wiring the microphone 1 / Using a guide, feed the cable from the windscreen to the cabin light. Glue the bracket (supplied) in the centre of the cover which connects the rain sensor after degreasing. 4 Using a guide, feed the cable Using a guide, feed the cable from the cabin light to the from the courtesy light to the courtesy light. driver's side door. 5 6 Slide the cable along the driver's door pillar while replacing the door seal. Feed the cable from the driver's side of the dashboard.
8 Wiring the microphone 2 / 2 7 Using a guide, feed the cable under the steering wheel towards the air conditioning unit control housing.


9 Feeding the accessory cable 1 2 Using a guide, feed the cable in the top part of the glove compartment through to the air conditioning control unit housing. Make sure that the cable is long enough.

10 Fitting the hands-free system 1 / 2 1 Connect the adaptor to the original connector and connect all of the wires to the blue box as shown in the diagram below. Test the assembly before completing fitting and then slide everything behind the air conditioning control unit. Direct adaptor cable


11 Fitting the hands-free system 2 / 2 2 3! Slide the cable into one of the recesses in the radio frame. ATTENTION: When reassembling take great care not to cut the wire with the radio fixings. 3 After degreasing the right-hand side of the speedo surround, affix the mounting supplied. 12
.")
12 Testing Before refitting the system, switch the kit on using the ignition (or by starting the car). By pushing the central knob of the remote control, check: 1 - that the menu is displayed on the screen (language or ipod etc). 2 - that the radio system is muted when the kit is in use (click in the blue box). 3 - that the sound through all speakers is properly muted. 4 - that there is sound through the front speakers for spoken menus. 5 - then turn off the ignition, verify that the kit turns off and that the message goodbye is displayed on the screen (otherwise reverse the fuses on the kit power supply harness). 6 - pair a telephone with the kit and make a call (check that both the microphone and the kit are working).
13 Reassembly Refit the system using the following procedure: 1 - refit the panel next to the dashboard 2 - refit the panel on the left-hand side of the dashboard 3 - replace the fusebox cover 4 - reconnect and refit the cabin light (screws 1 and 2) 5 - refit the cabin light panel 6 - refit the courtesy light 7 - refit the 4 screws (7, 8, 9 and 10) for the air conditioning control unit 8 reconnect the adaptor and the aerials behind the car stereo and slip them inside the housing (make sure that you do not trap and cut any screen wires) 9 - refit the 4 screws (3, 4, 5 and 6) for the car stereo 10 - refit the radio and air conditioning surrounds 11 - retest to check that the system is working correctly
Installation manual: CK3100 range TRANSPORTER T5
 Installation manual: TRANSPORTER Parrot MKi + T5 Parrot CK3100 range TRANSPORTER T5 This The VOLKSWAGEN sheet is designed TRANSPORTER to help you T5 with marque the and installation VOLKSWAGEN of a Parrot
LOGAN. Installation manual: Parrot MKi + Parrot CK3100 range LOGAN
 Installation manual: Parrot MKi + Parrot CK3100 range LOGAN This The brand sheet name is designed DACIA LOGAN to help and you the with DACIA the installation logo are the of property a Parrot of product
Installation manual: CK3100 range C3 PICASSO
 Installation manual: Parrot C3 PICASSO MKi + Parrot CK3100 range C3 PICASSO This The brand sheet name is designed CITROËN to help C3 PICASSO you with and the the installation CITROËN logo of a are Parrot
Installation manual: Parrot MKi + Parrot CK3100 range C4 PICASSO C4 PICASSO
 Installation manual: Parrot MKi + Parrot CK3100 range C4 PICASSO C4 PICASSO This The brand sheet name is designed CITROËN to help C4 PICASSO you with and the the installation CITROËN logo of a are Parrot
Installation instructions, accessories - Volvo Navigation System, widescreen
 S60 Section Group Weight(Kg/Pounds) Year Month 3 39 2001 04 S60 2001, S60 2002 Page 1 of 21 Page 2 of 21 Required tools A0000162 A0000161 A0801178 M8802509 M3903563 Page 3 of 21 M3903565 M8503983 Page
BMW 7 Series (E38) Installation Guide StealthOne Version 1.6
 Installation Guide StealthOne Version 1.6") BMW 7 Series (E38) Installation Guide StealthOne Version 1.6 Copyright Fontana Enterprises, 2008 All rights reserved. Product Information Copyright Copyright Fontana Enterprises 2008 All rights reserved.
BMW 7 Series (E38) Installation Guide StealthOne Version 1.6 Copyright Fontana Enterprises, 2008 All rights reserved. Product Information Copyright Copyright Fontana Enterprises 2008 All rights reserved.
Saab 9-3 4D/5D M page 3 Saab 9-5 M page 17
 SCdefault 900 Monteringsanvisning SITdefault MONTERINGSNVISNING INSTLLTION INSTRUCTIONS MONTGENLEITUNG INSTRUCTIONS DE MONTGE Saab 9-3 4D/5D M03-............................... page 3...................................
Installing Nokia Advanced Car Kit (CK-7W)
") Job Aid: Advanced Car Kit 1 Installing Nokia Advanced Car Kit (CK-7W) Remember that only a qualified professional may install or repair mobile phone equipment. Before starting with any installation work,
Job Aid: Advanced Car Kit 1 Installing Nokia Advanced Car Kit (CK-7W) Remember that only a qualified professional may install or repair mobile phone equipment. Before starting with any installation work,
BMW 3Series (E46) Installation Guide StealthOne Version 1.6
 Installation Guide StealthOne Version 1.6") BMW 3Series (E46) Installation Guide StealthOne Version 1.6 Copyright Fontana Enterprises, 2008 All rights reserved. Product Information Copyright Copyright Fontana Enterprises, 2008 All rights reserved.
BMW 3Series (E46) Installation Guide StealthOne Version 1.6 Copyright Fontana Enterprises, 2008 All rights reserved. Product Information Copyright Copyright Fontana Enterprises, 2008 All rights reserved.
Parts and Accessories Installation Instructions
 Parts and Accessories Installation Instructions Installation kit, sound module MINI (R5) Cooper S (R53) Left-hand drive (LHD) Not suitable for vehicles with option SA 69 (navigation system with on-board
Installation instructions, accessories RTI S80
 Installation instructions, accessories Instruction No 8685714 Version 1.0 5 Part. No. RTI S80 Volvo Car Corporation RTI S80-8685714 - V1.0 Page 1 / 25 Equipment A0000161 A0000162 A0801178 D8802049 Page
394: Handsfree, Bluetooth Handsfree, Bluetooth
 394: Handsfree, Bluetooth S80 (07-), 2008, B8444S, TF-80SC AWD, L.H.D, YV1AH852881073834, 073834 4/1/2013 PRINT 394: Handsfree, Bluetooth Handsfree, Bluetooth Installation instruction: 31310098 INTRODUCTION
VAG Instrument Cluster Reset Cable ADC219
 VAG Instrument Cluster Reset Cable ADC219 User Guide V1.1 Introduction Thank you for your purchase. ADC219 VAG cable connects to the AD pro tester and the vehicle s OBD port and is specifically used in
Remote control your Mercedes. climate KeylessGo Installation Manual
 Remote control your Mercedes climate KeylessGo Installation Manual Contents 3 Getting Started 5 Installation Instructions 8 Testing the Installation Warranty and Return Policy Please find more information
B. Land Rover Range Rover
 99-9402B INSTALLATION INSTRUCTIONS KIT FEATURES ISO DIN radio provision with pocket ISO DDIN radio provision Painted black KIT COMPONENTS A) Radio trim panel B) Radio brackets C) Radio bracket adapters
B. TABLE OF CONTENTS Dash Disassembly...2 Kit Preparation...3 Kit Assembly...4 Axxess Interface Installation...5 Final Assembly...
 95-9317B INSTALLATION INSTRUCTIONS BMW 3 & 4 Series* (with NBT idrive, without MOST Amp) 2014-2016 F30, F31, F32, F33, F34, F36, F80, F82, F83 Visit MetraOnline.com for more detailed information about
B. Land Rover LR Visit MetraOnline.com for more detailed information about the product and up-to-date vehicle specific applications
 95-9405B INSTALLATION INSTRUCTIONS Land Rover LR4 2010-2016 Visit MetraOnline.com for more detailed information about the product and up-to-date vehicle specific applications KIT FEATURES ISO DDIN radio
Fitting Instructions
 Tow-Pro Wiring Kit Fitting Instructions Suitable for: Toyota Hilux / Fortuner Accessory Kit Estimated Fitting Time: 90 Minutes FI807 Page 0 of Issue: Date: /08/08 08 General Notes Safety Notes Suitable
Parts and Accessories Installation Instructions
 Parts and Accessories Installation Instructions R 1 3 5 2 4 F 38 0213 B Basic retrofit kit for hands-free facility for upgrading various mobile phones BMW 7 Series (E38) LHD without telephone preparation
Corolla TNS600. RHD installation instructions. Model year: 2004 Vehicle code: **E12*R-****W
 Corolla RHD installation instructions Model year: 2004 Vehicle code: **E12*R-****W Part number: Navigation System PZ 445-00331-00 Clusterpanel 55406-02070-B0 Manual ref. no: AIM 000 767-0 PRECAUTIONS PLEASE
RAV4 TNS310 (Traffic) Plus
 Plus") TNS310 (Traffic) Plus RHD installation instructions Model year: 005 Vehicle code: **A3***-*****W Part number TNS310 Plus: Sub wire harness No 1: 08673-64801 Sub wire harness No : 08673-64800 Part number
TNS310 (Traffic) Plus RHD installation instructions Model year: 005 Vehicle code: **A3***-*****W Part number TNS310 Plus: Sub wire harness No 1: 08673-64801 Sub wire harness No : 08673-64800 Part number
INSTALLATION INSTRUCTIONS
 INSTALLATION INSTRUCTIONS Accessory Application Publications No. AUTOMATIC AII 27160 2005 CR-V Issue Date ATTACHMENT KIT SEP 2004 PARTS LIST Automatic Day/Night Mirror Attachment Kit (sold separately)
CVO - with ipod Amp & Speaker Upgrade Install Instructions for Batwing Fairing
 CVO - with ipod Amp & Speaker Upgrade Install Instructions for Batwing Fairing Tools Needed: 1/2 inch Socket Wire Cutters 7/16 inch Socket Wire Strippers 5/16 inch Socket Phillips Screwdriver 1/2 inch
Amp & Speaker Upgrade Install Instructions for Batwing Fairing
 Amp & Speaker Upgrade Install Instructions for Batwing Fairing Tools Needed: 1/2 inch Socket Wire Cutters 7/16 inch Socket Wire Strippers 10 mm Socket Phillips Screwdriver 1/2 inch Ratchet Wrench T25 Torx
Parts and Accessories. Installation Instructions.
 Parts and Accessories. Installation Instructions. Universal charger/hands-free kit retrofit BMW 3 Series Saloon (E 90) These installation instructions are only valid for cars with SA 606 (Business navigation
Chevrolet Camaro 2010-up S-LC
 INSTALLATION INSTRUCTIONS FOR PART 99-10S-LC APPLICATIONS Chevrolet Camaro 2010-up 99-10S-LC KIT FEATURES DIN and DDIN head unit provision Painted silver to match factory dash AXXESS Interface included
Installation Guide. Highway 300Di
 Installation Guide Highway 300Di Kit List The following items are included in the Highway 300Di kit as standard: Highway 300Di Controller Highway 300Di Main Unit Highway 300Di Controller bracket with captive
Reverse Camera Installation Instructions
 Reverse Camera Installation Instructions XUV500 Issue: 1-01/03/2013 Page 1 of 12 Fitting Time: 45 Minutes Parts Supplied: Reverse Camera Wiring Harness Tools and Materials Flat Blade Screw driver Phillips
Removing and installing the dash panel
 Стр. 1 из 6 Removing and installing the dash panel Removing: WARNING Disconnect battery earth strap Electrical System Rep. Gr.27. Removing the centre console Chapter. Remove the steering wheel Chapter.
TOYOTA SOLARA CONVERTIBLE XM SATELLITE RADIO Preparation. Part Number: Mounting Kit PT
 Preparation Part Number: Mounting Kit PT546-06061 Tuner Assy 86180-0W030 Tuner Assy Kit Contents (86180-0W030) 1 1 Tuner Assy, Stereo Component Mounting Kit Contents (PT546-06061) 1 Ground Cable 1 1 Wire,
Fitting Instructions
 Tow-Pro Wiring Kit Fitting Instructions Holder Colorado / Colorado 7 Accessory Kit Estimated Fitting Time: 0 Minutes FI7 Page 0 of General Notes Read through the fitting instructions before installation
SSUTAYU15. Designed for 2015 and newer Chevrolet Tahoe/Suburban and GMC Yukon/Yukon XL vehicles
 SSUTAYU15 Designed for 2015 and newer Chevrolet Tahoe/Suburban and GMC Yukon/Yukon XL vehicles Subwoofer Assembly Subwoofer Harness Subwoofer Power Harness 2018 Stillwater Designs SSUTAYU15-20180313 Wire
GROM Interface Installation into Nissan and Infiniti cars using NIS2 vehicle specific harness
 GROM Interface Installation into Nissan and Infiniti cars using NIS2 vehicle specific harness Tools needed 1. The wire crimp tool 2. Panel trim removal tool (optional) 3. Philips screwdriver Picture 1:
B. TABLE OF CONTENTS Dash Disassembly...2 Kit Preparation...3 Kit Assembly...4 Axxess Interface Installation...5 Final Assembly...
 95-9322B INSTALLATION INSTRUCTIONS BMW X5 (with MOST Amp) 2007-2013 Visit MetraOnline.com for more detailed information about the product and up-to-date vehicle specific applications KIT FEATURES ISO DDIN
INSTALLATION INSTRUCTIONS
 INSTALLATION INSTRUCTIONS Accessory Application 2011 CR-Z Publications No. AII 43553 Issue Date AUG 2010 PARTS LIST Attachment Kit P/N 08V03-SZT-100 Automatic day/night mirror harness Automatic Day/Night
Installation and Users Guide. Plain-Talk. MINI Bluetooth kit with Steering Wheel Controls. Version 2.1
 Installation and Users Guide MINI Bluetooth kit with Steering Wheel Controls Version 2.1 Plain-Talk This product covers all Mini Cooper vehicles as follows: 03/2002-2006 Model Year Mini Cooper and Cooper
Audi. Installation Instructions. Bluetooth Gateway M1000-C-BT1-AUD1. Version 1.1
 Audi Installation Instructions Version 1.1 Bluetooth Gateway M1000-C-BT1-AUD1 Kit Contents: Bluetooth ECU Microphone Vehicle Interface Loom Operating Manual Tools/Ancillaries Required: Panel Removal tools
PART NUMBER: H630SXC001. Kit Contents: A. Amplifier with Bracket (1) D. Badge (2) with push nuts (4)
 D. Badge (2) with push nuts (4)") Kit Contents: A. Amplifier with Bracket (1) D. Badge (2) with push nuts (4) E. Clip B. Interface / Power Harness (1) C. Cable tie (8) F. Mounting Nuts (2) G. Replacement Front Speaker (2) H. Badge mounting
Kit Contents: A. Amplifier with Bracket (1) D. Badge (2) with push nuts (4) E. Clip B. Interface / Power Harness (1) C. Cable tie (8) F. Mounting Nuts (2) G. Replacement Front Speaker (2) H. Badge mounting
SCION xb HEADREST DVD RSE Section I Installation Preparation. Part Number: PT
 Section I Installation Preparation Part Number: PT900-52080 Kit Contents Item # Quantity Reqd. Description 1 2 DVD Headrest Unit 2 2 Headrest Extension Cables 3 1 Audio Interface Module 4 1 Audio Interface
Installation instructions, accessories. Subwoofer
 Installation instructions, accessories Instruction No 9162298 Version 1.0 5 Part. No. Subwoofer Volvo Car Corporation Subwoofer - 9162298 - V1.0 Page 1 / 24 Equipment A0000162 A0801178 A0000161 R8802817
INSTALLATION INSTRUCTIONS
 INSTALLATION INSTRUCTIONS Accessory Application 2015 CR-Z Publications No. VERSION 1 Issue Date SEP 2014 PARTS LIST Attachment Kit P/N 08V03-SZT-100A Automatic Day/Night Mirror Kit P/N 08V03-TA0-100A Automatic
INSTALLATION GUIDE AV7900 Dual Multimedia Headrest Replacement System
 INSTALLATION GUIDE AV7900 Dual Multimedia Headrest Replacement System NOTICE OF INTENDED INSTALLATION AND USE AV7900 VIDEO PRODUCTS ARE NOT INTENDED FOR VIEWING BY THE DRIVER, AND ARE TO BE INSTALLED ONLY
HOW TO FIT A KEYLESS ENTRY SYSTEM
 HOW TO FIT A KEYLESS ENTRY SYSTEM THE KITS ARE WIDELY AVAILABLE TO BUY FROM THE INTERNET AND OTHER GOOD STOCKISTS HERE IS AN IDEA OF WHAT YOU SHOULD RECIEVE IN YOUR KIT. PLUS WIRING DIAGRAM PLUS WIRING
Previa (RHD) - MMC PZ425-R PART NUMBER INSTALLATION INSTRUCTIONS TOYOTA NAVIGATION SYSTEM. (Production date 05/03)
 - MMC PZ425-R PART NUMBER INSTALLATION INSTRUCTIONS TOYOTA NAVIGATION SYSTEM. (Production date 05/03)") TOYOTA NAVIGATION SYSTEM Previa (RHD) - MMC INSTALLATION INSTRUCTIONS PART NUMBER NAVIGATION KIT 08545-52800 MOUNTING BRACKET FOR **R*R (Production date 05/0) PZ425-R0261-60 Manual ref. n NRR/W-0-0 TOYOTA
TOYOTA NAVIGATION SYSTEM Previa (RHD) - MMC INSTALLATION INSTRUCTIONS PART NUMBER NAVIGATION KIT 08545-52800 MOUNTING BRACKET FOR **R*R (Production date 05/0) PZ425-R0261-60 Manual ref. n NRR/W-0-0 TOYOTA
Accessory Kit Estimated Fitting Time: 120 Minutes (Prado) Estimated Fitting Time: 140 Minutes (Kluger)
 Estimated Fitting Time: 140 Minutes (Kluger)") Tow-Pro Wiring Kit - Toyota Kluger / Prado Accessory Kit Estimated Fitting Time: 0 Minutes (Prado) Estimated Fitting Time: 0 Minutes (Kluger) FI99 Page 0 of Issue: Date: 0/0/0 0 General Notes Read through
Tow-Pro Wiring Kit - Toyota Kluger / Prado Accessory Kit Estimated Fitting Time: 0 Minutes (Prado) Estimated Fitting Time: 0 Minutes (Kluger) FI99 Page 0 of Issue: Date: 0/0/0 0 General Notes Read through
CH. Ford Explorer (with 4.2 screen)
") 99-5847CH INSTALLATION INSTRUCTIONS Ford Explorer (with 4.2 screen) 2011-2015 KIT FEATURES ISO DIN radio provision with pocket ISO DDIN radio provision Touchscreen display for climate and personalization
99-5847CH INSTALLATION INSTRUCTIONS Ford Explorer (with 4.2 screen) 2011-2015 KIT FEATURES ISO DIN radio provision with pocket ISO DDIN radio provision Touchscreen display for climate and personalization
Nissan Pathfinder (without NAV) (with color screen) HG
 (with color screen) HG") Installation instructions for part 99-7627HG Nissan Pathfinder 2013-2016 (without NAV) (with color screen) 99-7627HG KIT FEATURES ISO DIN radio provision with pocket ISO DDIN radio provision Painted to
Installation instructions for part 99-7627HG Nissan Pathfinder 2013-2016 (without NAV) (with color screen) 99-7627HG KIT FEATURES ISO DIN radio provision with pocket ISO DDIN radio provision Painted to
LEXUS CT 200h ILLUMINATED DOOR SILLS Preparation
 Preparation Part Number: PT922-89100 Kit Contents Item # Quantity Req'd. Description 1 1 Door Sill, Front Right Hand 2 1 Door Sill, Front Left Hand 3 1 Door Sill, Rear Right Hand 4 1 Door Sill, Rear Left
WARNING WARNING WARNING. English Quick start guide CAUTION CAUTION. Installation Precautions
 English Quick start guide Symbol Identification This manual uses symbols and icons to indicate safety precautions and concerns during the installation procedure. Be sure to carefully read and understand
PART NUMBER: H630SSJ000. Kit Contents: A. Amplifier with Bracket (1) D. Badge (2) with push nuts (4)
 D. Badge (2) with push nuts (4)") Kit Contents: A. Amplifier with Bracket (1) D. Badge (2) with push nuts (4) E. Clip B. Harness (1) C. Cable tie (8) F. Mounting Hardware (2) G. Replacement Speaker (2) H. HVAC Duct extension (2) IMPORTANT:
Kit Contents: A. Amplifier with Bracket (1) D. Badge (2) with push nuts (4) E. Clip B. Harness (1) C. Cable tie (8) F. Mounting Hardware (2) G. Replacement Speaker (2) H. HVAC Duct extension (2) IMPORTANT:
* * Inside Toyota Avalon. Tools Required IMPORTANT
 Revision 08/02/16 2013- Toyota Avalon IMPORTANT Before starting, compare items on your invoice with items received. Carefully check through packaging material. If any item is missing, please call Crutchfield
USB and ipod Music interface
 Installation instructions, accessories Instruction No 30775542 Version 1.2 Part. No. USB and ipod Music interface Volvo Car Corporation USB and ipod Music interface- 30775542 - V1.2 Page 1 / 16 Equipment
INSTALLATION INSTRUCTIONS
 INSTALLATION INSTRUCTIONS Accessory REMOTE ENGINE STARTER SYSTEM Application 2010 CIVIC 4-DOOR Publications No. AII 42460 Issue Date AUG 2009 PARTS LIST Remote Engine Starter Unit Kit P/N 08E91-E22-100B
Parts and AccessoriesInstallation Instructions
 MOTOROLA Parts and AccessoriesInstallation Instructions 36 9 Z Retrofit hands-free kit for Motorola mobile phones Series V5 / V369 / V3688 BMW Z3 (E 36/7) roadster and coupé The installation time is approx.
INSTALLATION INSTRUCTIONS
 INSTALLATION INSTRUCTIONS Accessory NIGHT Application CR-V Publications No. AII 32951 Issue Date SEP 2006 PARTS LIST Automatic Day/Night Mirror Attachment Kit P/N 08V03-SWA-100 Harness cover set Automatic
INSTALLATION INSTRUCTIONS
 INSTALLATION INSTRUCTIONS Accessory Application Publications No. AII 23092 KIT CR-V P/N 08A55-S9A-100 Issue Date NOV 2001 PARTS LIST 2 Tweeters INSTALLATION Customer Information: The information in this
PRELIMINARY INSTALLATION INSTRUCTIONS. Remote Engine Starter Attachment Kit P/N 08E92-SNA-100B
 INSTALLATION INSTRUCTIONS Accessory Application Publications No. REMOTE ENGINE STARTER SYSTEM 2008 CIVIC 2-DOOR AII 38215 Issue Date OCT 2007 PARTS LIST Remote Engine Starter Unit Kit P/N 08E91-E22-100B
SCION tc Navigation System Preparation. Part Number: PT
 Preparation Part Number: PT611-21111 Kit Contents Item # Quantity Reqd. Description 1 1 Navigation System 2 1 GPS Antenna 3 1 Bluetooth Antenna 4 1 Wire Harness (Reverse / Park Brake) 5 1 RCA Relay Cable
Installation Guide. Before Starting. Package Contents. Cautions On Installation. English
 Before Starting Car battery. This set is exclusively for use in cars with a negative ground, V power supply.. Read these instructions carefully.. Be sure to disconnect the battery terminal before starting.
INSTALLATION INSTRUCTIONS
 INSTALLATION INSTRUCTIONS Accessory Application 2014 CR-V Publications No. AII 49958 Issue Date JULY 2013 PARTS LIST Attachment Kit P/N 08V03-T0A-100 Automatic day/night mirror harness Automatic Day/Night
by B6 Boost Volkswagen -> (46) Golf & Jetta V (13) Passat B6 (11) Passat B5.5 (4) Phaeton (8) Eurovan (7) Touareg (3) Audi
 Golf & Jetta V (13) Passat B6 (11) Passat B5.5 (4) Phaeton (8) Eurovan (7) Touareg (3) Audi") 1 of 10 Top» Volkswagen» Passat B6» European Cup Holder DIY Installations European Cup Holder by B6 Boost Volkswagen -> (46) Golf & Jetta V (13) Passat B6 (11) Passat B5.5 (4) Phaeton (8) Eurovan (7) Touareg
1 of 10 Top» Volkswagen» Passat B6» European Cup Holder DIY Installations European Cup Holder by B6 Boost Volkswagen -> (46) Golf & Jetta V (13) Passat B6 (11) Passat B5.5 (4) Phaeton (8) Eurovan (7) Touareg
INSTALLATION INSTRUCTIONS
 INSTALLATION INSTRUCTIONS Accessory Application Publications No. AUTOMATIC WITH COMPASS 2006 CIVIC HYBRID AII 30315-32247 Issue Date MAY 2006 PARTS LIST Automatic Day/Night Mirror With Compass P/N 08V03-SDA-100B
SCdefault. 900 Installation instructions
 SCdefault 900 Installation instructions SITdefault Airbag replacement harness MONTERINGSANVISNING INSTALLATION INSTRUCTIONS MONTAGEANLEITUNG INSTRUCTIONS DE MONTAGE Accessories Part No. Group Date Instruction
GENUINE PARTS INSTALLATION INSTRUCTIONS
 GENUINE PARTS INSTALLATION INSTRUCTIONS 1. 2. 3. 4. DESCRIPTION: APPLICATION: PART NUMBER: KIT CONTENTS: Accent light Kit Pathfinder 999F3 XZ000 - Accent Lighting Kit. Item QTY Description Service Part
TOYOTA Matrix XM SATELLITE RADIO Preparation
 Preparation Part Number: Mounting Kit PT546-12080 Tuner Assembly 86180-0W031 (Music Only) Tuner Assembly PT546-00090 (Music Plus Data) NOTE: Part number of this accessory may not be the same as the part
Mercedes Benz SLK Class
 INSTALLATION INSTRUCTIONS FOR PART 99-8713 KIT FEATURES DIN radio provision with pocket ISO radio provision with pocket Double DIN radio provision APPLICATIONS See application list inside Mercedes Benz
TOYOTA PRIUS 2004 TVIP V2 (GBS ADD ON) Section I Installation Preparation
 Section I Installation Preparation") Section I Installation Preparation Part Number: 08586 47840 Section I Installation Preparation Kit Contents Item # Quantity Reqd. Description 1 1 Wire Harness 2 1 3 1 ECU Mounting Bracket Hardware Bag
Section I Installation Preparation Part Number: 08586 47840 Section I Installation Preparation Kit Contents Item # Quantity Reqd. Description 1 1 Wire Harness 2 1 3 1 ECU Mounting Bracket Hardware Bag
Chrysler Multi-kit TABLE OF CONTENTS Dash Disassembly...2 Kit Assembly
 99-650345 INSTALLATION INSTRUCTIONS Chrysler Multi-kit 1998-2010 INTRODUCTION This instruction booklet will cover (3) different kits, yet carry the same applications and dash disassembly. After dash disassembly
B. TABLE OF CONTENTS Dash Disassembly Kit Preparation...4 Kit Assembly...5 Axxess Interface Installation...6 Final Assembly...
 95-9324B INSTALLATION INSTRUCTIONS KIT FEATURES ISO DDIN radio provision Includes all necessary data interfaces, wiring harnesses, and antenna adapter, for a complete installation Includes components necessary
INSTALLATION INSTRUCTIONS
 INSTALLATION INSTRUCTIONS Accessory Application 2012 CIVIC 2 AND 4-DOOR Publications No. AII 45605 Issue Date APR 2011 PARTS LIST Attachment Kit P/N 08V03-TR0-100 Automatic day/night mirror harness Automatic
INSTALLATION INSTRUCTIONS
 INSTALLATION INSTRUCTIONS Accessory Application 2013 ACCORD 2 AND 4-DOOR Publications No. AII 13003 Issue Date AUG 2012 PARTS LIST Attachment Kit P/N 08V03-T2A-100 Automatic day/night mirror harness Operating
Hiace TNS600. LHD installation instructions. Model year: 2006 Vehicle code: KLH**L-**M**W
 Hiace TNS600 LHD installation instructions Model year: 2006 Vehicle code: KLH**L-**M**W Part number: Navigationssystem PZ 445-00331-00 W2DIN Conversion Kit PZ 425-H0211-60 Manual ref. no: AIM 000 759-0
INSTALLATION INSTRUCTIONS FOR PART APPLICATIONS. Mazda For Models With Manual Climate Controls TOOLS REQUIRED:
 INSTALLATION INSTRUCTIONS FOR PART 99-7509 APPLICATIONS Mazda 5 2006-2007 For Models With Manual Climate Controls 99-7509 KIT FEATURES Painted To Match Factory Dash DIN Radio Provision with Pocket ISO
spec.dock BMW 5-Series e60 v.2 Installation Instructions
 Thank you for your purchase of a spec.dock ipod solution for your vehicle. Audio connections may vary according to your particular setup. 2point5 recommends having your spec.dock integrated by a certified
INSTALLATION INSTRUCTIONS JEEP 2011-UP JK SECURITY FULL CONSOLE #274
 INSTALLATION INSTRUCTIONS JEEP 2011-UP JK SECURITY FULL CONSOLE #274 PARTS CHECKLIST Tuffy Console #9 Left Front Mounting Bracket #10 Right Front Mounting Bracket #11 Electronics mounting bracket #12 Divider
INSTALLATION INSTRUCTIONS
 INSTALLATION INSTRUCTIONS Accessory REMOTE CONTROL Application 2008 CR-V Publications No. AII 35843-38422 Issue Date DEC 2007 PARTS LIST Caution label Remote Engine Starter Kit P/N 08E91-E22-100B Transmitter
INSTALLATION INSTRUCTIONS
 INSTALLATION INSTRUCTIONS Accessory Application Publications No. in- ENTERTAINMENT SYSTEM 2004 TSX BII 24811 Issue Date APRIL 2003 PARTS LIST Attachment Kit P/N 08B23-SDA-101A Monitor bracket harness FM
CH. Ford Edge (with 4.2 screen)
") 99-5848CH INSTALLATION INSTRUCTIONS Ford Edge (with 4.2 screen) 2011-2014 KIT FEATURES ISO DIN radio provision with pocket ISO DDIN radio provision Touchscreen display for climate and personalization features
99-5848CH INSTALLATION INSTRUCTIONS Ford Edge (with 4.2 screen) 2011-2014 KIT FEATURES ISO DIN radio provision with pocket ISO DDIN radio provision Touchscreen display for climate and personalization features
Installation supplement for. European Integrated Systems, Ltd. Enhanced BMW Bluetooth Interface. Table of Contents
 Table of Contents 1. Introduction 2. BMW Microphone Installation 3. ULF Module and Harness Installation 4. Configuration/Setup 5. Warranty/Disclaimer Information Installation supplement for European Integrated
TOYOTA PRIUS C FOG LIGHT
 TOYOTA PRIUS C 2012 - FOG LIGHT Part Number: 00016-47160 Accessory Code: LF10 Conflicts NONE Kit Contents Item # Quantity Reqd. Description 1 2 Fog Lamps 2 2 Fog Lamp s bezels 3 1 Switch Assembly 4 1 Fog
VSM V-COUNT II are registered trademark of APEXS, Inc.
 Applied Expert Systems Inc. (APEXS, Inc.). 2003.All rights reserved VSM V-COUNT Vehicle Speed Sensor (VSS) Installation Guide VSM V-COUNT II are registered trademark of APEXS, Inc. VSS Installation Guide
BMW Parts and Accessories Installation Instructions
 BMW Parts and Accessories Installation Instructions 46 77 B BMW subwoofer module retrofit kit BMW 3 Series compact (E 46/5) LHD Technical and electrical knowledge required Installation time approx. 1.5-2.5
This harness kit includes: Civic harness (2003 to 2005) Installing the Hybrid ReVolt Universal grid charger in a First Gen Civic ( )
 Installing the Hybrid ReVolt Universal grid charger in a First Gen Civic ( )") Installing the Hybrid ReVolt Universal grid charger in a First Gen Civic (2003-2005) This harness kit includes: Civic harness (2003 to 2005) (a) 1 HV warning label (c) 1 charger connector cover (e) 4 #6
Installing the Hybrid ReVolt Universal grid charger in a First Gen Civic (2003-2005) This harness kit includes: Civic harness (2003 to 2005) (a) 1 HV warning label (c) 1 charger connector cover (e) 4 #6
For additional technical tips, please visit
 NOTICE OF INTENDED INSTALLATION AND USE THE ROSEN MULTI-MEDIA NAVIGATION SYSTEMS CONTAIN AN INTERNAL VIDEO PLAYER, WHICH IS NOT INTENDED FOR VIEWING BY THE DRIVER. THE VIDEO PLAYER IS DISABLED WHEN THE
TOYOTA TACOMA XM SATELLITE RADIO Preparation
 Preparation Part Number: Mounting Kit PT546-35090 Tuner Assembly 8680-0W03 NOTE: Part number of this accessory may not be the same as the part number shown. Tuner Assembly Kit Contents (8680-0W03) Item
Chevy Equinox / GMC Terrain 2013-up (with color display) G
 G") INSTALLATION INSTRUCTIONS FOR PART 99-3308G Chevy Equinox / GMC Terrain 2013-up (with color display) 99-3308G KIT FEATURES ISO DIN radio provision with pocket ISO DDIN radio provision Painted gray to match
INSTALLATION INSTRUCTIONS FOR PART 99-3308G Chevy Equinox / GMC Terrain 2013-up (with color display) 99-3308G KIT FEATURES ISO DIN radio provision with pocket ISO DDIN radio provision Painted gray to match
INSTALLATION INSTRUCTIONS
 INSTALLATION INSTRUCTIONS Accessory REMOTE CONTROL Application 2014 TSX (L4) Publications No. BII 50198 Issue Date SEPT 2013 PARTS LIST Remote Engine Starter Unit Kit P/N 08E91-TK4-200A Fuse label Transmitter
Harley-Davidson Street Glide, Electra Glide, Ultra and Limited models 2014-up
 INSTALLATION INSTRUCTIONS FOR PART 99-9700 APPLICATIONS Harley-Davidson Street Glide, Electra Glide, Ultra and Limited models 2014-up 99-9700 KIT FEATURES ISO DIN radio provision Included interface and
Radio/Navigation. TravelPilot RNS 150. Installation instructions
 Radio/Navigation TravelPilot RNS 150 Installation instructions Installation instructions 3. Installing the antenna Connect the antenna wiring to the enclosed bracket(see Fig. 5). 3.1 Radio antenna In pre-equipped
Installation instructions, accessories
 Volvo Car Corporation Göteborg, Sweden Installation instructions, accessories S60/V70 (00-)/V70XC (01-)/S80/XC90 Section Group Weight (Kg/Pounds) Year Month 8 89 2002 06 Tow bar wiring, 13-pin M3702161
2010-Up Prius HB Navigation speedlock override installation guide.
 2010-Up Prius HB Navigation speedlock override installation guide. Dash disassembly Dash disassembly are the same for 2010, 2011, and 2012 Prius Hatch Back. The following is a 2010 Prius III. Remove the
INSTALLATION INSTRUCTIONS
 Rear Vision System Aftermarket and Factory 5.0, 8.4 and 6.1 MyGig Touch Screen Display (Factory Display requires Chrysler/Dodge dealer to activate) 2009 Current* Dodge Ram (Kit part number 1009-6503) *NOTE:
SCION TC HANDS FREE BLU LOGIC Preparation
 SCION TC 2008- HANDS FREE BLU LOGIC Preparation Part #: PT923-00099 Conflicts: JBL Audio NOTE: Part number of this accessory may not be the same as the part number shown. Kit Contents: For kits manufactured
For additional technical tips, please visit
 NOTICE OF INTENDED INSTALLATION AND USE THE ROSEN MULTI-MEDIA NAVIGATION SYSTEMS CONTAIN AN INTERNAL VIDEO PLAYER, WHICH IS NOT INTENDED FOR VIEWING BY THE DRIVER. THE VIDEO PLAYER IS DISABLED WHEN THE
Saab 9-5 5D. 900 Monteringsanvisning MONTERINGSANVISNING INSTALLATION INSTRUCTIONS MONTAGEANLEITUNG INSTRUCTIONS DE MONTAGE.
 SCdefault 900 Monteringsanvisning SITdefault 12 V socket in luggage compartment MONTERINGSANVISNING INSTALLATION INSTRUCTIONS MONTAGEANLEITUNG INSTRUCTIONS DE MONTAGE Accessories Part No. Group Date Instruction
Acura TSX 2009-up CH
 INSTALLATION INSTRUCTIONS FOR PART KIT FEATURES ISO Double DIN radio provision Painted charcoal gray APPLICATIONS Acura TSX 2009-up Table of Contents Acura TSX 2009-up...2-5 Kit Assembly ISO Double DIN
7 Trim and upholstery
 7 Trim and upholstery 71A BODY INTERNAL TRIM 72A SIDE OPENING ELEMENT TRIM 73A NON-SIDE OPENING ELEMENTS TRIM 75A FRONT SEAT FRAMES AND MECHANISMS X79 NOVEMBER 2009 EDITION ANGLAISE "The repair procedures
TOYOTA PRIUS C FOG LIGHT (Halogen & LED)
") TOYOTA PRIUS C 2012-14 FOG LIGHT (Halogen & LED) Part Number: TPC-312 / TPC-812 Kit Contents Item # Quantity Reqd. Description 1 2 Fog Lamps 2 2 Bezels 3 1 Switch Assembly 4 1 Fog Light Operation guide
TOYOTA PRIUS C 2012-14 FOG LIGHT (Halogen & LED) Part Number: TPC-312 / TPC-812 Kit Contents Item # Quantity Reqd. Description 1 2 Fog Lamps 2 2 Bezels 3 1 Switch Assembly 4 1 Fog Light Operation guide
B. Ford F-150 (with 4.2 screen)
") 99-5846B INSTALLATION INSTRUCTIONS KIT FEATURES ISO DIN radio provision with pocket ISO DDIN radio provision Touchscreen display for climate and personalization features Integrated hazard button and passenger
99-5846B INSTALLATION INSTRUCTIONS KIT FEATURES ISO DIN radio provision with pocket ISO DDIN radio provision Touchscreen display for climate and personalization features Integrated hazard button and passenger