Speedometer Repair & Lube Pt.1
|
|
|
- Hannah Sutton
- 6 years ago
- Views:
Transcription

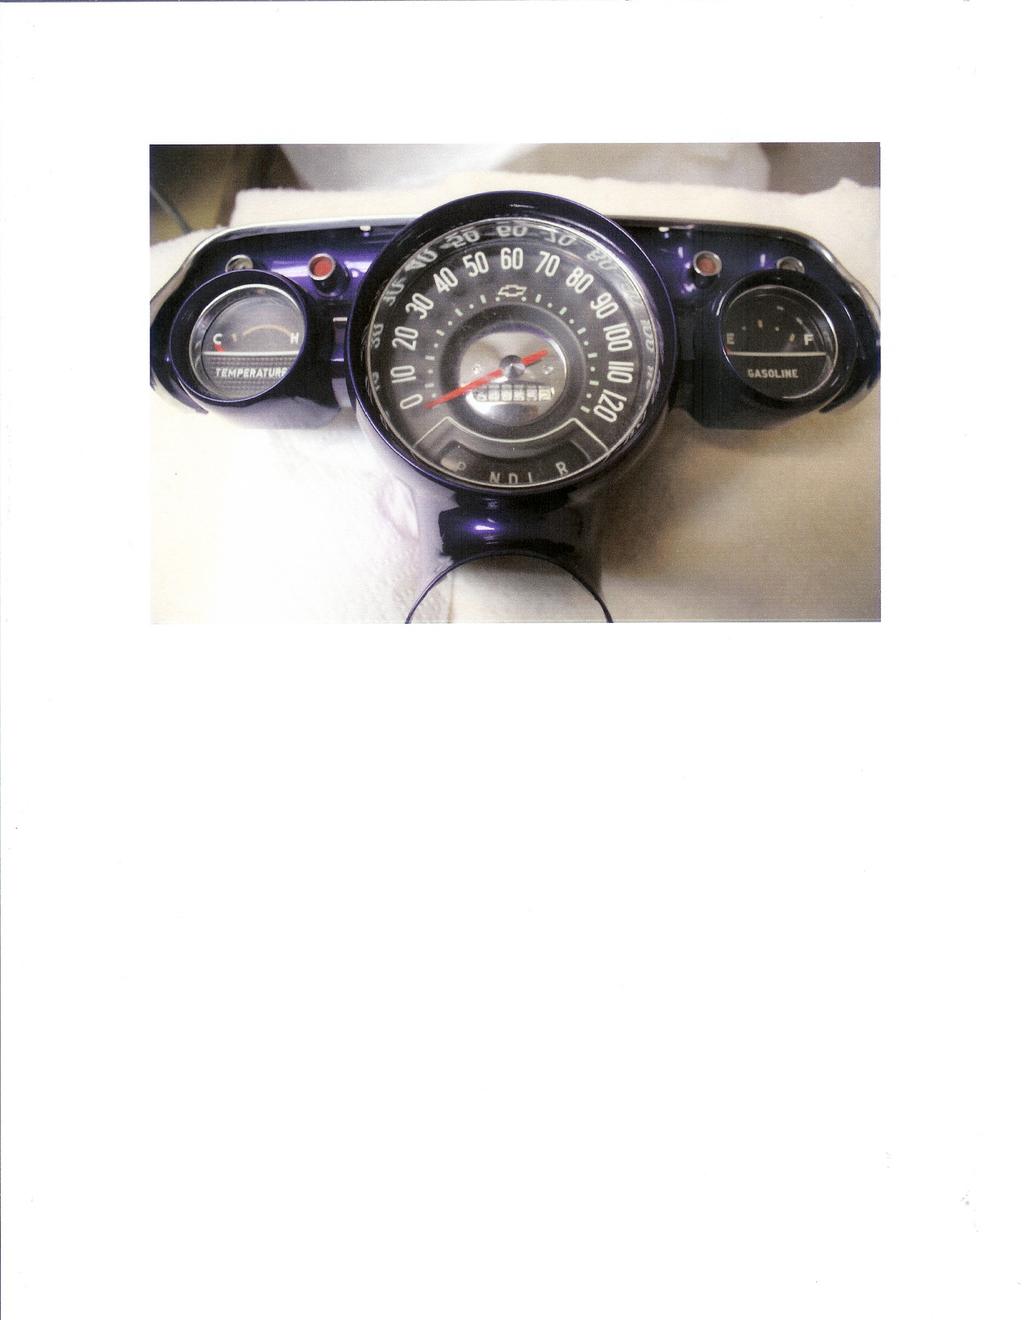
1 Speedometer Repair & Lube Pt.1 1. Begin disassembly on a clean area approximately 2' by 3' so you have plenty of room to layout parts as you disassemble them. I use a piece of white or light colored paper to do this on so no parts get lost. If you do this where.there might be a chance of a breeze, TAPE DOWN the paper or apply weights to keep from losing parts. Lay all parts aside in the order you remove them. 2. Take note of where the needle is pointing when the face is in a vertical position. It should be covering.the long white line at the bottom of the face. Tum the Brass drive assembly a couple oftimes COUNTERCLOCKWISE as view from the back to make sure the needle drops back to the lower long line. Remove the needle by carefully pulling and turning the needle to the LEFT at the same time. Be sure to hold onto the chrome center of the needle as the needle portion is very fragile. It should come off fairly easy. If it doesn't come off right away STOP and turn the unit face down. Take a small amount ofpb Blaster or some other penetrating lube and carefully apply a couple of drops to the needle shaft visible behind the black face and let it run down the shaft to the needle. If you have to do this take a 10 minute break to let it soak then try again. When the needle is off you have what looks like this: r If you need to paint the needle do it now so it has time to dry before reassembly. t.,,:rj ~\

2 5. Using a small flat screwdriver, remove the screws holding the chrome center and the black face..-- ",..- /l Turn the main head over to match the next picture. m 8. 'ilm ills

3 p~ - Speedometer 1. Inthis picture you will notice the small brass clip in the upper left comer. It holds the odometer assembly to the head. Also take note of the 5 forks at the bottom of the odometer assembly and how they are slipped over the small flange. Remove the clip carefully as it may want to fly off somewhere, then slide the odometer assembly to the left releasing the shaft on the right and lifting slightly slide back to the right releasing the assembly. Set aside carefully so as not to disturb the mileage. I forgot to check the depth of field on the next photo but it sort of shows the forks that slip over the flange Position the head as in the next picture and remove the two screws in the lower comers holding the front bearing assembly. There should be a VERY small washer on the front side of the shaft that fits down in the well of the bearing.

4 ..-!It'.. I ",: Ii 0 IIIt'f, f 5. - j

5 6. 7. From this point on you must treat the needle armature and the shell it fits into as one unit or you could ruin the return spring. This spring is carefully calibrated when manufactured to apply tynsion to the armature as the rotating magnets work against it. Remove the two screws holding the shell to the head and remove the assembly from the head by GRASPING THE NEEDLE SHAFT RIGHT NEXT TO THE SHELL so they do not separate. After you get the shell assembly off you can lay it down as in the next picture In the above picture you will see the rear bearing that is usually the culprit for causing a buzzing or otherwise noisy speedometer. Also shown is the driving magnet that spins with the cable. 10. In the next picture you can see the rest of the odometer drive mechanism which is a series of worm gear drives. These can be taken out, cleaned and lubed with light grease and reassembled. You can also put a couple of drops of light oil on the inside of the main bearing at the base of the magnet while spinning the shaft. Also with a pry out the brass cup on the back by the threaded fitting and remove the wick and add a couple of drops of oil then reassemble.

6 'Pew-+- "3 ",., 01'... 1:.;. II ;;
7 3. Now it's time to final lube and reassembly. I usually turn the head unit with the magnet shaft up and put a drop of light oil in the bearing cup. It is really Aar-d to get a small amount in there so I take the comer of a paper towel and blot it to get most back out just so when it is spinning it isn't slinging oil all over everything. 4. After lubing the rear bearing it's time to reassemble. Make sure the first odometer gear is in place, carefully set the needle and shell assembly in place rememberingto keep the parts from separating. Tightenthe two screws. I. like to spin the rear shaft counterclockwise after every step just to make sure the previous step didn't cause any binding. Also before going any further make sure the needle armature stop is on the correct side of the shell stop. (refer to the picture in step 11)midway between the edge of the shell and the center shaft. 5. You will notice the shaft is very loose in the shell center as there is not a bearing at this location. Apply a small drop of oil to the needle shaft right at the shoulder where the needle attaches. Make sure the odometer shaft is in place and attach the front bearing plate. It will only fit one way. 6. If you have new decals to refresh the numbers on the odometer this is the time to do it before reassembly of the odometer. 7. Now take the odometer assembly and line up all the forked pieces and assemble to the head making sure all the forks are fitted to the flange. Slide the shaft to engage the gear and attach the brass clip. If you had the tiny washer that fits on the front of the needle shaft install it now. 8. You may want to dust the black face before installing and also polish the chrome center cap. Attach with the two screws. 9. Very carefully set the needle on the shaft at about the second long bar up from the lower left position. Before pushing it all the way on, turn the shaft from the back to verify it moves up when you turn the shaft. (If it doesn't, you are turning the wrong way or you missed a step somewhere. Back up until it works.) As you push on the needle from the center, carefully twist left until the needle lines up with the fust long white line on the face. Keep spinning the shaft after every adjustment just to make sure it drops back to the line. You can now make sure the needle doesn't hit the face by carefully moving the needle by pushing on the shorter bottom part. If it touches the face anywhere you can gently lift on the end of the needle with the blade of a flat screwdriver. JUST DON"T BREAK IT OFF. I don't know ifthey are reproduced or not. to. You should now have a silent speedometer when reinstalled. Don't forget to lube the cable before you attach it to the back of the head.
8
*Some speedometers have these additional electronic connections. If yours does, then remove the smaller slotted screws shown.
 www.odometergears.com 1981-1985 240 Cable-Driven Speedometers (NOT for 1986 and later electronic units) http://www.davebarton.com/240-odometer-repair.html For this set of instructions below, I will not
Rear End Installation and Bearing Kit - 8.8in (86-12 V8; V6)
") Rear End Installation and Bearing Kit - 8.8in (86-12 V8; 11-13 V6) Tools Required: Jack Stands 5 Floor Jack 2 Oil Pans 1 Wheel Blocks 2 Differential Oil 3 qts Friction Modifier 3 bottles Tube of Black
Rear End Installation and Bearing Kit - 8.8in (86-12 V8; 11-13 V6) Tools Required: Jack Stands 5 Floor Jack 2 Oil Pans 1 Wheel Blocks 2 Differential Oil 3 qts Friction Modifier 3 bottles Tube of Black
Firehawk Second Stage Regulator Fire Service
 Firehawk Second Stage Regulator Fire Service MAINTENANCE AND REPAIR TAL 1701 (L) Rev. 2 MSA 2017 Prnt. Spec. 10000005389(I) Mat. 10147454 Doc. 10147454 TAL 1701 (L) Rev. 2-10147454 2 NON-CBRN FIREHAWK
G.A.S. M54 DISA Repair Kit D.I.Y. Instructions
 Home BMW Solutions Porsche Solutions DIY Tech Engine Services Dyno Services Machining About G.A.S. Contact G.A.S. M54 DISA Repair Kit D.I.Y. Instructions The installation of the German Auto Solutions DISA
Mityvac MV8000 O-ring Replacement
 A vacuum pump must be air tight in order to operate. A leak in your vacuum pump will potentially complicate the diagnosis of vacuum systems or make bleeding automotive fluids more difficult. Learn to replace
BEW engine timing belt replacement procedure from MOGolf (as demonstrated on a 2004 Jetta).
.") BEW engine timing belt replacement procedure from MOGolf (as demonstrated on a 2004 Jetta). Based on the procedure published by Volkswagen, but modified for the "average" shadetree mechanic. Some special
BEW engine timing belt replacement procedure from MOGolf (as demonstrated on a 2004 Jetta). Based on the procedure published by Volkswagen, but modified for the "average" shadetree mechanic. Some special
M52tu-M54 VANOS Assembly & Timing Using G.A.S. Professional Cam Tool Kit
 Home BMW Solutions Porsche Solutions DIY Tech Engine Services Dyno Services Machining About Contact Store Tool Rental M52tu-M54 VANOS Assembly & Timing Using G.A.S. Professional Cam Tool Kit This procedure
TCI Trans-Scat
 Page 1 of 5 Return to Instruction Sheet index TCI 400000 Trans-Scat Turbo Hydramatic 400-1965-Up This kit will allow you to re-program your transmission valve body. This kit will give you firm positive
CALDERA 10E Spur Gear Change
 CALDERA 10E Spur Gear Change www.thirdcoastrc.com ebay handle - little*oak Click Below to Visit our Ebay Store EBAY STORE (Please take a moment and bookmark my website, ebay store, and save me as an ebay
 www.odometergears.com Mercedes-Benz Mechanical Odometer Repair This how to can be used for all mechanical repairs as the only difference will be the removal of the instrument cluster. http://www.dieselgiant.com/repairyourodometer.htm
Jazzy Engineering Aux-in Accessory for 2005/06 Subaru WRX, Outback Sport & Impreza Radios Installation Instructions
 Jazzy Engineering Aux-in Accessory for 2005/06 Subaru WRX, Outback Sport & Impreza Radios Installation Instructions First check that your package includes everything listed below for proper installation.
LJ20 Distributor - Disassembly Inspection Repair
 LJ20 Distributor - Disassembly Inspection Repair Old Codger New To Old Suzuki Jeeps The odometer on this 1972 LJ20 indicated the distributor had less than 10,000 miles of wear but during that time it had
How to Repair and Calibrate a Stuck Speedometer
 How to Repair and Calibrate a Stuck Speedometer Warning: I do not recommend doing this unless you have a steady hand. It is easy to fudge and damage a delicate spring that will put and end to the repair.
PremAire Cadet Escape Respirator: Second Stage Regulator
 PremAire Cadet Escape Respirator: Second Stage Regulator MAINTENANCE AND REPAIR MSA 115 (L) Rev. 1 MSA 2011 Prnt. Spec. 10000005389(I) Mat. 10110430 Doc. 10110430 Item P/N Description 1 697453 O-ring,
Instructions for 4616 KYB shock rebuild and valve installation:
 The goals of any suspension builder should be the same. That is to precisely build suspension in a repeatable, and efficient manner. All components must be modified so as to not threaten long-term component
Installation Guide for the Extreme Short Shaft Kit
 INSTALLATION GUIDE Tera Manufacturing, Inc. 5251 South Commerce Dr. Murray, Utah 84107 Phone/801.288.2585 Fax/801.713.2313 www.teraflex.biz Installation Guide for the Extreme Short Shaft Kit Part #004444400
Installation Instructions COMPETITION/PLUS SHIFTER Ford Mustang MT82 6-Speed Manual Transmission Catalog#
 Installation Instructions COMPETITION/PLUS SHIFTER 2015-2017 Ford Mustang MT82 6-Speed Manual Transmission Catalog# 3916037 Rev. 00 WORK SAFELY! For maximum safety, perform this installation on a clean,
Team Z Motorsports. K-Member installation instructions
 Team Z Motorsports K-Member installation instructions Parts Included: 1-Tubular K-Member Needed Items-Solid Steering Shaft Offset Steering Rack Bushings Optional-Heavy Duty Bolt Kit Tubular Front Lower
Multistrada (MTS) Tank Installation Notes. Tools Required. Phase 1: Remove Fairings. Phase 2: Remove Fuel Tank
 Tank Installation Notes. Tools Required. Phase 1: Remove Fairings. Phase 2: Remove Fuel Tank") The California Cycleworks MTS tank provides an aftermarket alternative to the OEM nylon fuel tanks as used on aircooled Desmodue Ducati Multistrada 1100, 1000, and 620 models. This fuel tank is NOT for
The California Cycleworks MTS tank provides an aftermarket alternative to the OEM nylon fuel tanks as used on aircooled Desmodue Ducati Multistrada 1100, 1000, and 620 models. This fuel tank is NOT for
Firehawk Responder Second Stage Regulator
 Firehawk Responder Second Stage Regulator MAINTENANCE AND REPAIR MSA 511 (L) Rev. 4 MSA 2015 Prnt. Spec. 10000005389(I) Mat. 10096394 Doc. 10096394 Replacement Kits and Overhaul Kit P/N Description Firehawk
Suzuki GS1000G fork seal replacement
 Suzuki GS1000G fork seal replacement Before you start you require: 1) To read workshop service manual for your model 2) Socket allen key M8 3) Torque wrench 4) Special tool to hold inner, make your own,
Written By: Andrew Optimus Goldberg
 Remove the battery from your iphone 5. Written By: Andrew Optimus Goldberg ifixit CC BY-NC-SA www.ifixit.com Page 1 of 17 INTRODUCTION Bring life back to your iphone 5 with a new battery. If your battery
Installation Instructions INDY SHIFTER Fits: Mustang Fastback & Convertible with MT-82 Transmission Catalog #
 Installation Instructions INDY SHIFTER Fits: 2015-2018 Mustang Fastback & Convertible with MT-82 Transmission Catalog # 3916036 Watch our installation video on YouTube WORK SAFELY! For maximum safety,
Fitting Instructions For The TDV6 EGR Blanking Kit To A 2006 Model Discovery 3 TDV6 GHSE
 Part Number DA1112 Fitting Instructions For The TDV6 EGR Blanking Kit To A 2006 Model Discovery 3 TDV6 GHSE You do this modification at your own risk. Britpart won t be held responsible for what is written
Z-Truck (Vertical Moving) Z-truck Flag. Y-Truck (Horizontal Moving) FIGURE 1: VIEW OF THE Z-TRUCK. Flexshaft Assembly
 Z-truck Flag. Y-Truck (Horizontal Moving) FIGURE 1: VIEW OF THE Z-TRUCK. Flexshaft Assembly") Checking and Replacing the AC Motor To remove and replace the AC Motor you will need the following tools: #2 Phillips screwdriver (magnetic tip preferred) Removing the AC Motor 1. Ready the machine by
Checking and Replacing the AC Motor To remove and replace the AC Motor you will need the following tools: #2 Phillips screwdriver (magnetic tip preferred) Removing the AC Motor 1. Ready the machine by
70001 and Clutch Rebuild Instructions
 70001 and 70010 Clutch Rebuild Instructions Brinn, Incorporated 1615 Tech Drive Bay City, MI 48706 Telephone 989.686.8920 Fax 989.686.6520 www.brinninc.com Notice Use these instructions if you only want
Hypertech Inline Speedometer Calibrator Module Installation Instructions PN Chevrolet Silverado
 Hypertech Inline Speedometer Calibrator Module Installation Instructions PN 730124-2017 Chevrolet Silverado This installation manual shows an example installation on a 2017 Chevrolet 1500. The installation
By Mark Schutzer NMRA National Convention, Sacramento, CA July 2011 Copies of this presentation can be found at
 Troubleshooting and dr Repairing i Brass Steam Locomotives By Mark Schutzer NMRA National Convention, Sacramento, CA July 2011 Copies of this presentation can be found at http://www.markschutzer.com Clinic
TH400 STREETFIGHTER SERIES VALVE BODY MANUAL/AUTO VALVE BODY INSTALLATION INSTRUCTIONS
 1 INSTRUCTIONS TH400 STREETFIGHTER SERIES VALVE BODY 1965-87 MANUAL/AUTO VALVE BODY INSTALLATION INSTRUCTIONS TCI 222400 TCI 222400 ALLOWS AUTOMATIC SHIFT FEATURES IN THE DRIVE POSITION Thank you for choosing
Written By: Andrew Optimus Goldberg
 Remove the logic board from your iphone 5 Written By: Andrew Optimus Goldberg ifixit CC BY-NC-SA www.ifixit.com Page 1 of 27 INTRODUCTION Resurrect your iphone 5 with a new logic board. TOOLS: P2 Pentalobe
Written By: Sam Lionheart
 iphone 5s Front Panel Replacement Replace the cracked or broken screen on your iphone 5s. Written By: Sam Lionheart ifixit CC BY-NC-SA www.ifixit.com Page 1 of 33 INTRODUCTION For an easier repair, use
Last Revision: 30JN THRU 1979 C3 CORVETTE STANDARD (NON-ADJUSTABLE) STEERING COLUMN DISASSEMBLY & REPAIR INSTRUCTIONS PAPER #2
 STEERING COLUMN DISASSEMBLY & REPAIR INSTRUCTIONS PAPER #2") Last Revision: 30JN2007 1969 THRU 1979 C3 CORVETTE STANDARD (NON-ADJUSTABLE) STEERING COLUMN DISASSEMBLY & REPAIR INSTRUCTIONS PAPER #2 Disassembly and Repair Instructions Addressed in this Paper Degree
Last Revision: 30JN2007 1969 THRU 1979 C3 CORVETTE STANDARD (NON-ADJUSTABLE) STEERING COLUMN DISASSEMBLY & REPAIR INSTRUCTIONS PAPER #2 Disassembly and Repair Instructions Addressed in this Paper Degree
Adjusting Carbs For Re-Jetting (Procedure written for an Intruder 1500 LC) NEWLY UPDATED: APRIL 2003
 NEWLY UPDATED: APRIL 2003") SECTION ONE: Get Prepared - Tools Adjusting Carbs For Re-Jetting (Procedure written for an Intruder 1500 LC) NEWLY UPDATED: APRIL 2003 Courtesy of: Half-Crazy Get a manual impact driver (the kind you hit
SECTION ONE: Get Prepared - Tools Adjusting Carbs For Re-Jetting (Procedure written for an Intruder 1500 LC) NEWLY UPDATED: APRIL 2003 Courtesy of: Half-Crazy Get a manual impact driver (the kind you hit
iphone 5s Front Panel Replacement
 iphone 5s Front Panel Replacement Replace the cracked or broken screen on your iphone 5s. Note: DIY at your own risk. New beginner must be careful, screens got problems mostly due to wrong installation
Troubleshooting and Repairing Brass Steam Locomotives
 Troubleshooting and Repairing Brass Steam Locomotives By Mark Schutzer PCR Regional Convention, Concord, CA May 2005 Copies of this presentation can be found at http://www.markschutzer.com Clinic Overviews
Merkur Scorpio Odometer Repair Instructions
 www.odometergears.com Merkur Scorpio Odometer Repair Instructions http://www.bitsprings.com/gearinst.pdf Please read through these instructions completely once before proceeding. It is important to understand
Luminator Low-Rise Headlight. Designed and built by Radioflyer Innovations
 Luminator Low-Rise Headlight system for C5 Corvette Designed and built by Radioflyer Innovations 1 Tools Required Phillips head screwdriver Flathead screwdriver Torx 15 screwdriver Torx 20 screwdriver
Ford Ranger and Mazda Pickup Odometer Worm Gear Replacement
 www.odometergears.com Ford Ranger and Mazda Pickup Odometer Worm Gear Replacement http://www.therangerstation.com/magazine/fall2008/odometer_worm_gear.htm ****************************************************************************************************
Be sure to read and go over all pages before you start your installation
 Yamaha Gen-2 V-MaxV Holeshot Superbike Bars Installation Guide Pre-Installation Note Be sure to read and go over all pages before you start your installation Preparation for Installation A) It is recommended
Installation Instructions Jeep CJ-7
 Retrofit Steering Column Installation Instructions 1976-86 Jeep CJ-7 For Part # s 1520800010, 152800020, 1520800051 www.ididitinc.com 610 S. Maumee St., Tecumseh, MI 49286 (517) 424-0577 (517) 424-7293
How to remove and replace the Foonf/Fllo fabric
 How to remove and replace the Foonf/Fllo fabric Remove Headrest Locate the Troubleshooting Tool behind the manual on the back of the car seat, as shown in Figure 1. Raise Headrest to highest position by
rings used in the TuckAway Electric Monitor (#3352)
") STYLE 3352 O-Ring Ring Replacement Guide The following tools & materials are required for disassembly & servicing of the O-rings rings used in the (#3352) 5/64 Allen wrench 7/64 Allen wrench* 3/16 Allen
STYLE 3352 O-Ring Ring Replacement Guide The following tools & materials are required for disassembly & servicing of the O-rings rings used in the (#3352) 5/64 Allen wrench 7/64 Allen wrench* 3/16 Allen
Wheel Bearing Replacement Passat TDI
 Rear Bearing/hub assembly replacement This is a fairly straight forward process. Pictures are not necessary for most of this procedure for a person with skills to do this repair. Anyone who thinks they
3.2 quarts Pennzoil Synchromesh transmission fluid (optional, but recommended)
") List of tools and materials: Floor jack, jack stands, and car ramps 3/8 drive ratchet, with long and medium extensions 3/8 drive swivel 3/8 breaker bar / cheater bar 7/8 combo wrench 8mm, 10mm, 13mm, 15mm,
List of tools and materials: Floor jack, jack stands, and car ramps 3/8 drive ratchet, with long and medium extensions 3/8 drive swivel 3/8 breaker bar / cheater bar 7/8 combo wrench 8mm, 10mm, 13mm, 15mm,
INSTALLATION INSTRUCTIONS REPAIR SEAL KIT Survivor 35
 INSTALLATION INSTRUCTIONS REPAIR SEAL KIT Survivor 35 PURPOSES OF THE KIT Over time, the dynamic seals and O-rings in the PowerSurvivor-35 and Survivor-35 will wear. The Repair Seal Kit contains the major
HURST COMP/PLUS SHIFTER 2015 Ford Mustang (Getrag MT82 six-speed manual transmission) Catalog # by Hurst Performance
 Catalog # by Hurst Performance") FORM 159 0205 07/15 HURST COMP/PLUS SHIFTER 2015 Ford Mustang (Getrag MT82 six-speed manual transmission) Catalog #391 0205 2015 by Hurst Performance Thank you for purchasing the Hurst Comp/Plus Shifter.
FORM 159 0205 07/15 HURST COMP/PLUS SHIFTER 2015 Ford Mustang (Getrag MT82 six-speed manual transmission) Catalog #391 0205 2015 by Hurst Performance Thank you for purchasing the Hurst Comp/Plus Shifter.
Blue Jay Rodless Cylinder BC MS. Track Repair Manual 1996 & 2012 THE EASTMAN EASTMAN. All End Caps Black for Models
 EASTMAN 1996 & 2012 THE EASTMAN Blue Jay Rodless Cylinder BC-40224-MS Track Repair Manual All End Caps Black for 1996-2012 Models IMPORTANT Disconnect this equipment from pneumatic pressure lines before
Commander SUSPENSION SYSTEM INSTALLATION INSTRUCTIONS
 PARTS INCLUDED: 2 - FRONT UPPER A-ARMS 2 - FRONT LOWER A-ARMS 4 - COTTER PINS 2-12MM JAM NUTS 2 - TIE ROD EXTENDERS 8- FLANGED DELRON BUSHINGS 4- DELRON CASTER SPACERS 6 - GREASE FITTINGS 3 - BEARING REMOVAL
Trouble Shooting Guide for Hubbell Systems
 Trouble Shooting Guide for Hubbell Systems NOTE: Hubbell Special Products discontinued operations in 2008, so there is a very limited number of repair parts available for motor repair. In some ways, this
Polaris 340 & ATV Power Module Training and Troubleshooting Guide
 Polaris 340 & ATV Power Module Training and Troubleshooting Guide Summary: This guide is intended as a training tool for the mechanical evaluation and troubleshooting of a 340 or ATV power module only.
Written By: Sam Lionheart
 iphone 5c Speaker Replacement Use this guide to replace the speaker assembly in your iphone 5c. Written By: Sam Lionheart ifixit CC BY-NC-SA www.ifixit.com Page 1 of 18 INTRODUCTION Replace a broken speaker
iphone 5s Upper Component Cable Replacement
 iphone 5s Upper Component Cable Replacement Use this guide to replace the upper component cable containing the flash, microphone and sleep/power button cable. Written By: Sam Lionheart ifixit CC BY-NC-SA
SECOND STAGE REGULATOR
 SECOND STAGE REGULATOR TAL 7012 (L) Rev. 1 MSA 2007 Prnt. Spec. 10000005389 (I) Mat. 10064393 Doc. 10064393 Firehawk Second Stage Regulator Assembly Second Stage w/hose Ass'y Push-To-Connect 10033170 24"
DIY: Repairing/Replacing the Timing Chain Tensioner
 DIY: Repairing/Replacing the Timing Chain Tensioner By Saki GT - February 8, 2012 [youtube=http://www.youtube.com/watch?v=24cil5_9yvq] The above video is an example of how a bad Timing Chain Tensioner
Written By: Sam Lionheart
 iphone 5s Battery Replacement Replace the battery in your iphone 5s. Written By: Sam Lionheart ifixit CC BY-NC-SA www.ifixit.com Page 1 of 23 INTRODUCTION Use this guide to bring life back to your iphone
CLUTCH-04, Clutch Master Cylinder Replacement
 CLUTCH-04, Clutch Master Cylinder Replacement Introduction This procedure details replacement of the clutch master cylinder on 944s and 968s. Terry Jenner did a great job with this procedure. He wrote
Moddit. How to Install an OS Giken Differential into a
 Moddit How to Install an OS Giken Differential into a Subaru BRZ This guide goes over the steps necessary to remove and install the OS Giken Limited Slip Differential into a Subaru BRZ. This guide may
Fluid-O-Tech ROTOFLOW ROTARY VANE PUMP REBUILD MANUAL
 Fluid-O-Tech PUMP TECHNOLOGY AT ITS BEST WWW.FLUID-O-TECH.COM Office: 161 Atwater St., Plantsville, CT 06479 Phone: (860) 276-9270 Fax: (860) 620-0193 ROTOFLOW ROTARY VANE PUMP REBUILD MANUAL 08/09 Ed.,
How to Fix the Altitude Clutch Problem in the Meade DS Mount By John Zimmerman September 2005
 How to Fix the Altitude Clutch Problem in the Meade DS Mount By John Zimmerman September 2005 Note: I claim no personal credit for the solution described here. Other DSX owners, whose real names I do not
Toyota Tacoma Winch Mount Bumper Installation Instructions Tools Required: Transmission cooler relocation brackets Torque Wrench
 2016-2017 Toyota Tacoma Winch Mount Bumper Installation Instructions Tools Required: Items Included: Small flat head screw driver Winch Mount Ratchet, 10mm, 12mm, 14mm, 17mm & Skid Plate 19mm sockets Transmission
Throttle Positioning Sensor & Throttle Body Synchronization Suzuki TL1000s By CJ s Garage march 2016
 Throttle Positioning Sensor & Throttle Body Synchronization Suzuki TL1000s 97 01 By CJ s Garage march 2016 Throttle positioning sensor & Throttle body synchronization Bike condition: Tappet clearance should
Installing the Wireless Charging upgrade kit in a 2018 XT5 (Platinum version)
") Installing the Wireless Charging upgrade kit in a 2018 XT5 (Platinum version) September 2, 2018 Tools needed: Wireless charger upgrade kit Plastic trim tools 7 mm nut driver Background: I purchased the
Installing the Wireless Charging upgrade kit in a 2018 XT5 (Platinum version) September 2, 2018 Tools needed: Wireless charger upgrade kit Plastic trim tools 7 mm nut driver Background: I purchased the
Porsche 911 Gear and Pod Odometer Repair
 www.odometergears.com Porsche 911 Gear and Pod Odometer Repair http://efinnegan.com/porsche/repair%20maintenance%20and%20miscellaneous%20info/odometer-rebuild.htm http://p-car.com/diy/odometer/ *************************************************************************************************
Written By: Sam Lionheart
 iphone SE Battery Replacement Replace the battery in your iphone SE. Written By: Sam Lionheart ifixit CC BY-NC-SA www.ifixit.com Page 1 of 24 INTRODUCTION Use this guide to bring life back to an iphone
Door Panel Removal & Window Stop Adjustment
 Door Panel Removal & Window Stop Adjustment By: Jeff Wolford Disclaimer: This is simply an article of how I fixed my car. I m not responsible if you break, scratch, or mess up anything following my example.
Hawk Brake Pads ( Mustang GT/V6 Rear Pair)
") Hawk Brake Pads (1994-2004 Mustang GT/V6 Rear Pair) The below installation instructions work for the following products: Hawk HPS Brake Pads (1994-2004 Mustang GT/V6 Rear Pair) Hawk Performance Ceramic
Hawk Brake Pads (1994-2004 Mustang GT/V6 Rear Pair) The below installation instructions work for the following products: Hawk HPS Brake Pads (1994-2004 Mustang GT/V6 Rear Pair) Hawk Performance Ceramic
1986 Rear Disk Brake Upgrade. All hard lines mounted to the rear axle with mounting screws. 1/4" fittings
 1986 Rear Disk Brake Upgrade Being well prepared for a project of this size is the key to success. I thought I was well prepared by doing a lot of research and getting all of the required parts before
Stack Racing 70mm Throttle Body for Ford Mustang 5.0 (GT, Cobra)
") Stack Racing 70mm Throttle Body for 1994-1995 Ford Mustang 5.0 (GT, Cobra) Installation Time: Approximately 1 hour Tools Required: Flat head screwdriver Phillips head screwdriver ¼ or 3/8 ratchet 6-9 extension
Stack Racing 70mm Throttle Body for 1994-1995 Ford Mustang 5.0 (GT, Cobra) Installation Time: Approximately 1 hour Tools Required: Flat head screwdriver Phillips head screwdriver ¼ or 3/8 ratchet 6-9 extension
Wagner Brake Pressure Differential Valve Rebuild
 Home Wagner Brake Rebuild Sun, 05/30/2010-11:17am SAH This document describes how to rebuild the Wagner brake pressure differential valve (sometimes called a "distribution block") and front disk brake
This LED flashtube kit covers models 400, 404, 500, 504, 600, 680 & 506.
 L.E.D. INSTRUCTIONS I D T S O T U B I R M O C R Y N A P Kit contains: This LED flashtube kit covers models 400, 404, 500, 504, 600, 680 & 506. For the power supply: 1-LED power supply circuit board, 2
1967 (Late) CORVETTE STANDARD (NON-ADJUSTABLE) STEERING COLUMN DISASSEMBLY & REPAIR INSTRUCTIONS PAPER #2
 CORVETTE STANDARD (NON-ADJUSTABLE) STEERING COLUMN DISASSEMBLY & REPAIR INSTRUCTIONS PAPER #2") Last Revision: 03SE2012 1967 (Late) - 1968 CORVETTE STANDARD (NON-ADJUSTABLE) STEERING COLUMN DISASSEMBLY & REPAIR INSTRUCTIONS PAPER #2 Disassembly and Repair Instructions Addressed in this Paper Degree
Last Revision: 03SE2012 1967 (Late) - 1968 CORVETTE STANDARD (NON-ADJUSTABLE) STEERING COLUMN DISASSEMBLY & REPAIR INSTRUCTIONS PAPER #2 Disassembly and Repair Instructions Addressed in this Paper Degree
Ford F-150 Speaker Replacement Instructions
 Ford F-150 Speaker Replacement Instructions This article was downloaded from http://www.fordf150.net Be sure to go there to view and download the other how-to articles. Thanks to John Meyer for contributing
Kodak 750H Carousel Projector Repair
 Kodak 750H Carousel Projector Repair An AT YOUR OWN RISK PROJECT by Klaus Wolter, Rev B, 3-26-2016 Here I documen the repair of my 750H carousel. A common problem with this projector, and all of the projectors
Written By: Arthur Shi
 iphone 5 Speaker Enclosure Replacement Remove the speaker enclosure from the bottom of your iphone 5 Written By: Arthur Shi ifixit CC BY-NC-SA www.ifixit.com Page 1 of 17 INTRODUCTION Bring back the beats
TCI Trans-Scat
 Page 1 of 5 Return to Instruction Sheet index TCI 350000 Trans-Scat Installation Instructions For TURBO HYDRAMATIC 350 This kit will allow you to reprogram your transmission to meet your driving needs
Конференция "Обменяемся опытом. Нива" NIVA-FAQ. undefined
 NIVA-FAQ Gearbox removal By Volodjushka NOVELTIES FAQ THE SITEMAP SEARCH ON THE SITE Конференция "Обменяемся опытом. Нива" NIVA-FAQ undefined Works in the motor compartment Remove the battery negative
Special Note About The JDM High Performance Water Pump:
 Page 1 of 30 JDM Engineering, Inc. home Call Us! 732-780- 0770 back to Installation Instructions Electric Fan Upgrade Kit Electric Fan Wiring Diagram Thank you for your purchase of the JDM Engineering
Shock Tower Brace Installation Instructions Mazda Miata
 If your MX5 did not come with a shock tower brace from the factory, a cowl reinforcement plate, part number 910-891, must be installed to fit this strut bar. Directions to install the cowl reinforcement
Presented at GMC Motorhomes International Fall Convention 9/28/06. By Richard Sowers
 Presented at GMC Motorhomes International Fall Convention 9/28/06 By Richard Sowers Tools needed to work on the column In addition to the normal tools for such a job as this, some special ones are required:
Mustang Short Throw Sport Shifter (All 83 - Early 01 & V6 T-5/T-45 Transmission) - Installation Instructions
 - Installation Instructions") Mustang Short Throw Sport Shifter (All 83 - Early 01 & 01-04 V6 T-5/T-45 Transmission) - Installation Instructions The below installation instructions work for the following products: Mustang Short Throw
Mustang Short Throw Sport Shifter (All 83 - Early 01 & 01-04 V6 T-5/T-45 Transmission) - Installation Instructions The below installation instructions work for the following products: Mustang Short Throw
BMW 528i E39 Sunroof Repair
 These instructions will help guide you through the repair process for broken sunroof control rails on an E39 chassis. Before I get started, I want to give a shout-out to a couple people who also posted
MacBook Unibody Model A1278 LVDS Display Cable Replacement
 MacBook Unibody Model A1278 LVDS Display Cable Replacement Replace the LVDS display cable in your MacBook Unibody Model A1278. Written By: Walter Galan ifixit CC BY-NC-SA www.ifixit.com Page 1 of 28 INTRODUCTION
Owner smanual. Banks Ram-Air Intake System Chevrolet 6.6L Duramax Turbo-Diesel Pickups. with Installation Instructions
 Owner smanual with Installation Instructions Banks Ram-Air Intake System 2001-2005 Chevrolet 6.6L Duramax Turbo-Diesel Pickups THIS MANUAL IS FOR USE WITH KITS 42132, 42135 Gale Banks Engineering 546 Duggan
Torqueflite Trans-Scat Kit
 TCI 220000 Torqueflite Trans-Scat Kit This kit can be installed in a few hours by carefully following directions. Read all instructions first to familiarize yourself with the parts and procedures. Work
Service Manual Air Plus Second Stage
 Service Manual Air Plus Second Stage Includes XS Series Second Stage Copyright 2002, Cressi-sub Revised 3/2002 2 Air Plus Second Stage Service Manual Contents BEFORE STARTING... 3 DISASSEMBLY... 3 PARTS
How I installed new brake pads on my i with Sport Package (should be fine for other E39 s) By Robert B.
 By Robert B.") How I installed new brake pads on my 1999 528i with Sport Package (should be fine for other E39 s) How I installed new brake pads on my 1999 528i with Sport Package (should be fine for other E39 s) By
How I installed new brake pads on my 1999 528i with Sport Package (should be fine for other E39 s) How I installed new brake pads on my 1999 528i with Sport Package (should be fine for other E39 s) By
 This document provides instructions for removing and installing a Front Wheel / Rotor on a Ducati Superbike. The torque values used are for the 748/916/996 from 1994 to 2001 and may be applicable for later
INSTALLATION INSTRUCTIONS
 INSTALLATION INSTRUCTIONS Contents Description: Auto-Dimming Rearview Mirror with Compass Part Number: 990B0-35007 Applications: SX4 Hatchback, 2007- SX4 Sedan, 2008- Installation Time:.5 HRS Ref. Part
Celestron CGE Mount PEC Improvement
 Celestron CGE Mount PEC Improvement By Mike Dodd, May 26, 2006 Introduction The Celestron CGE is an excellent mid-range telescope mount. It is solidly-built, has a payload capacity of 65 pounds, and uses
X-Street STR Viper Motor Replacement
 X-Street STR Viper Motor Replacement This guide will involve the replacement of the motor that drives the X-Street SRT Viper. Escrito por: slcombs ifixit CC BY-NC-SA es.ifixit.com Página 1 de 11 INTRODUCCIÓN
All the injectors have a bracket holding them in place, un screw them, they are pretty tight so make sure not to strip them with a 8mm allen bit.
 All the injectors have a bracket holding them in place, un screw them, they are pretty tight so make sure not to strip them with a 8mm allen bit. To pop them out once the injector is loose give them a
Return to Instruction Sheet index TCI Installation Instructions for Turbo Hydramatic 350C & 250C
 Page 1 of 6 Return to Instruction Sheet index TCI 326300 Installation Instructions for Turbo Hydramatic 350C & 250C NOTE: This kit was not intended for installation in transmissions that are in poor general
2003 CR-V - A/T Shift Cable Replacement-Print Preview
 Page 1 of 7 2003 CR-V - A/T Shift Cable Replacement 1. Raise the front of the vehicle, or lift the vehicle up, and make sure it is securely supported. 2. Remove the driver's dashboard lower cover, and
Retrofit Steering Column
 Retrofit Steering Column INSTALLATION INSTRUCTIONS for 1965-66 Ford Trucks FOR PART NUMBER S: 1170825010, 1170825020, 1170825051 www.ididit.com 610 S. Maumee St., Tecumseh, MI 49286 PH: (517) 424-0577
Owner smanual. Banks Ram-Air Intake System Chevrolet 6.6L Duramax Turbo-Diesel Pickups. with Installation Instructions
 Owner smanual with Installation Instructions Banks Ram-Air Intake System 2001-2005 Chevrolet 6.6L Duramax Turbo-Diesel Pickups THIS MANUAL IS FOR USE WITH KITS 42132, 42135, 42132-D, 42135-D Gale Banks
Thank you for purchasing the Blackstone Models K-27!
 Operations Manual Thank you for purchasing the Blackstone Models K-27! Before your Mudhen whistles off, we want to tell you about a few things that will enhance your operating experience and ensure that
OVER THE KNUCKLE 1-TON STEERING INSTALLATION INSTRUCTIONS
 OVER THE KNUCKLE 1-TON STEERING INSTALLATION INSTRUCTIONS TOOLS NEEDED Grinder with cutoff wheel, sawzall, cutting torches, or a plasma cutter Welder (for optional sway bar mounts) Hand drill with a ½
MacBook Pro 13" Unibody Mid 2009 LCD Replacement
 MacBook Pro 13" Unibody Mid 2009 LCD Replacement Written By: Walter Galan ifixit CC BY-NC-SA www.ifixit.com Page 1 of 25 INTRODUCTION Save money by replacing just the LCD rather than the whole display
CARE AND FEEDING OF YOUR XJ GAS CAP
 CARE AND FEEDING OF YOUR XJ GAS CAP Do you smell gas even when the cap is latched shut? Does your tank not want to drain even with the petcock set to prime? Does your key not want to turn in the lock?
Rolls Royce Jaeger 20 x? Odometer Gear Replacement This is not an exact how to for this speedometer but the instructions are very similar
 www.odometergears.com Rolls Royce Jaeger 20 x? Odometer Gear Replacement This is not an exact how to for this speedometer but the instructions are very similar This is a combination of several different